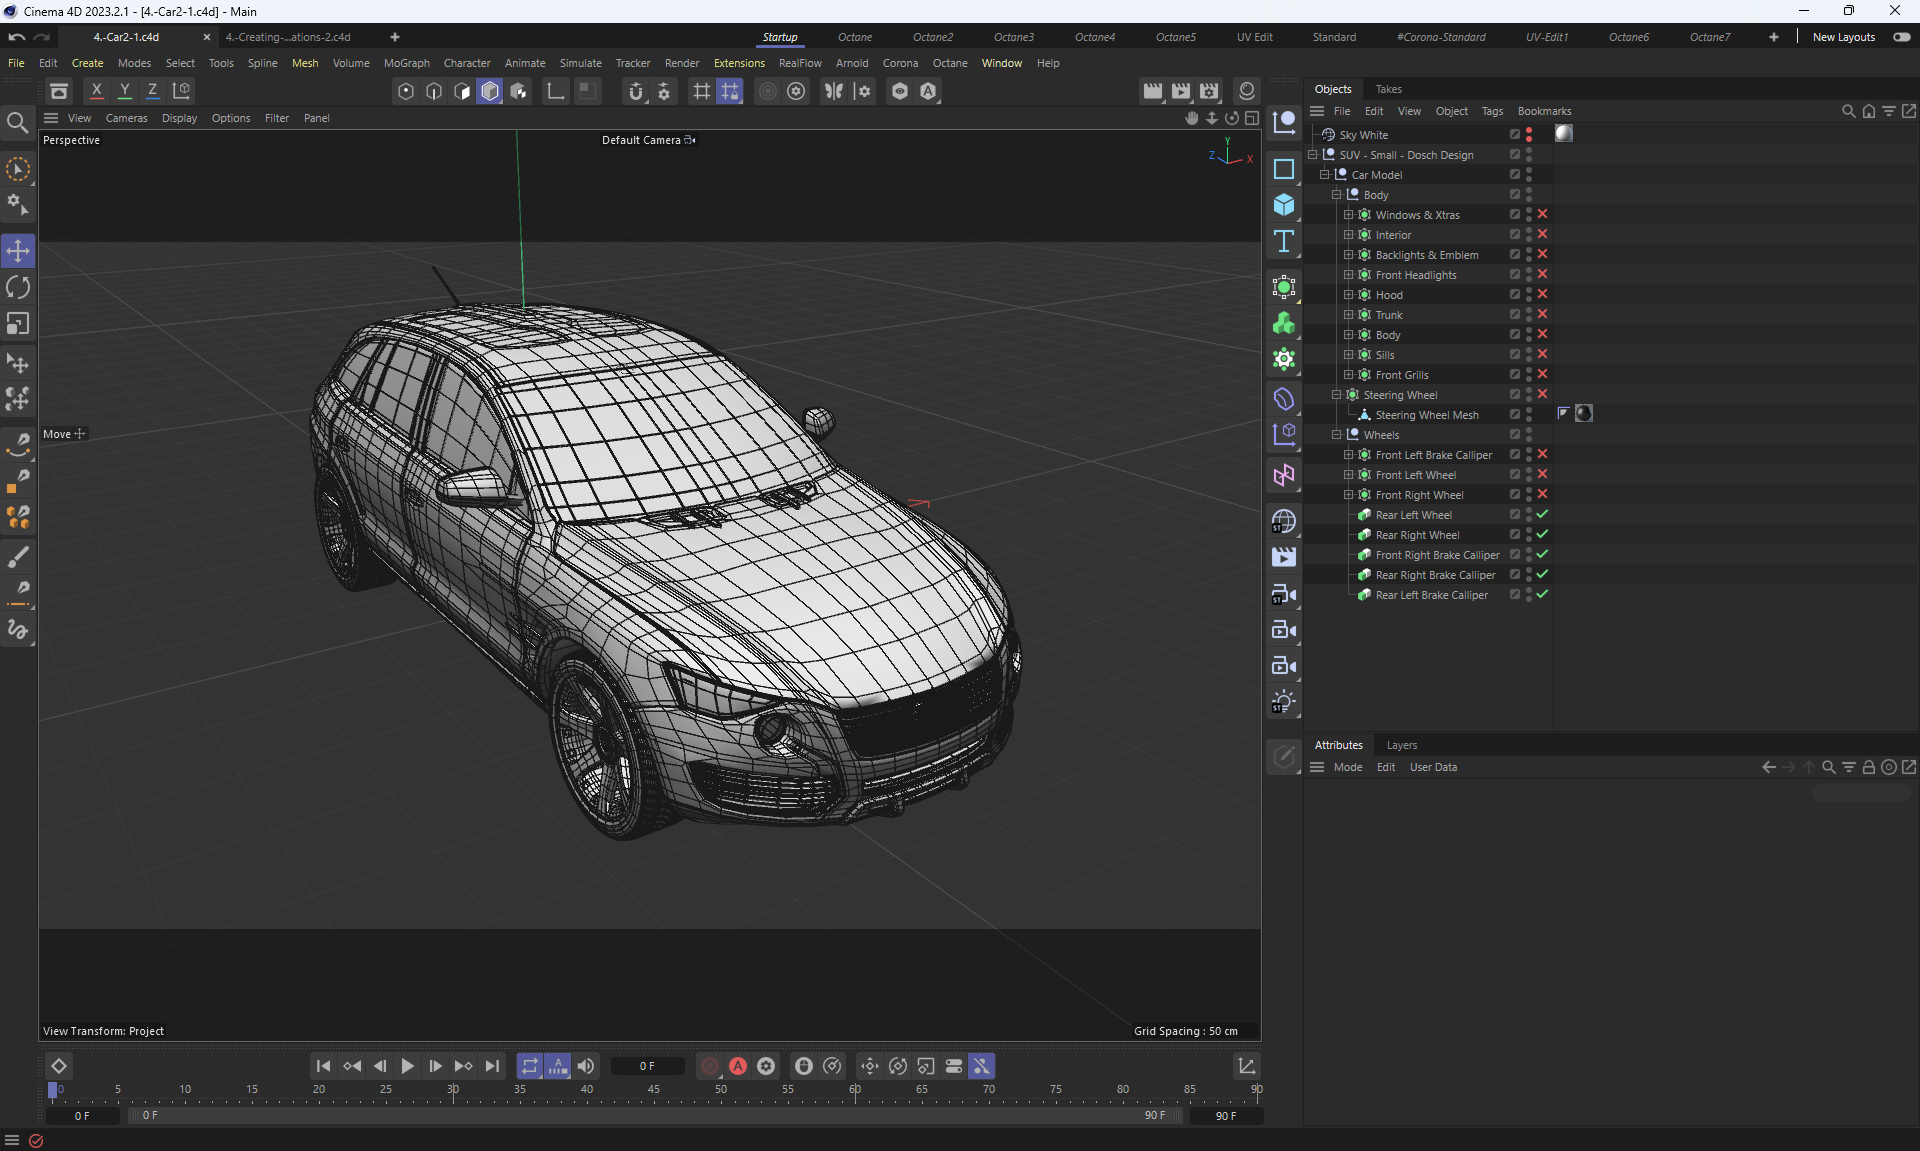
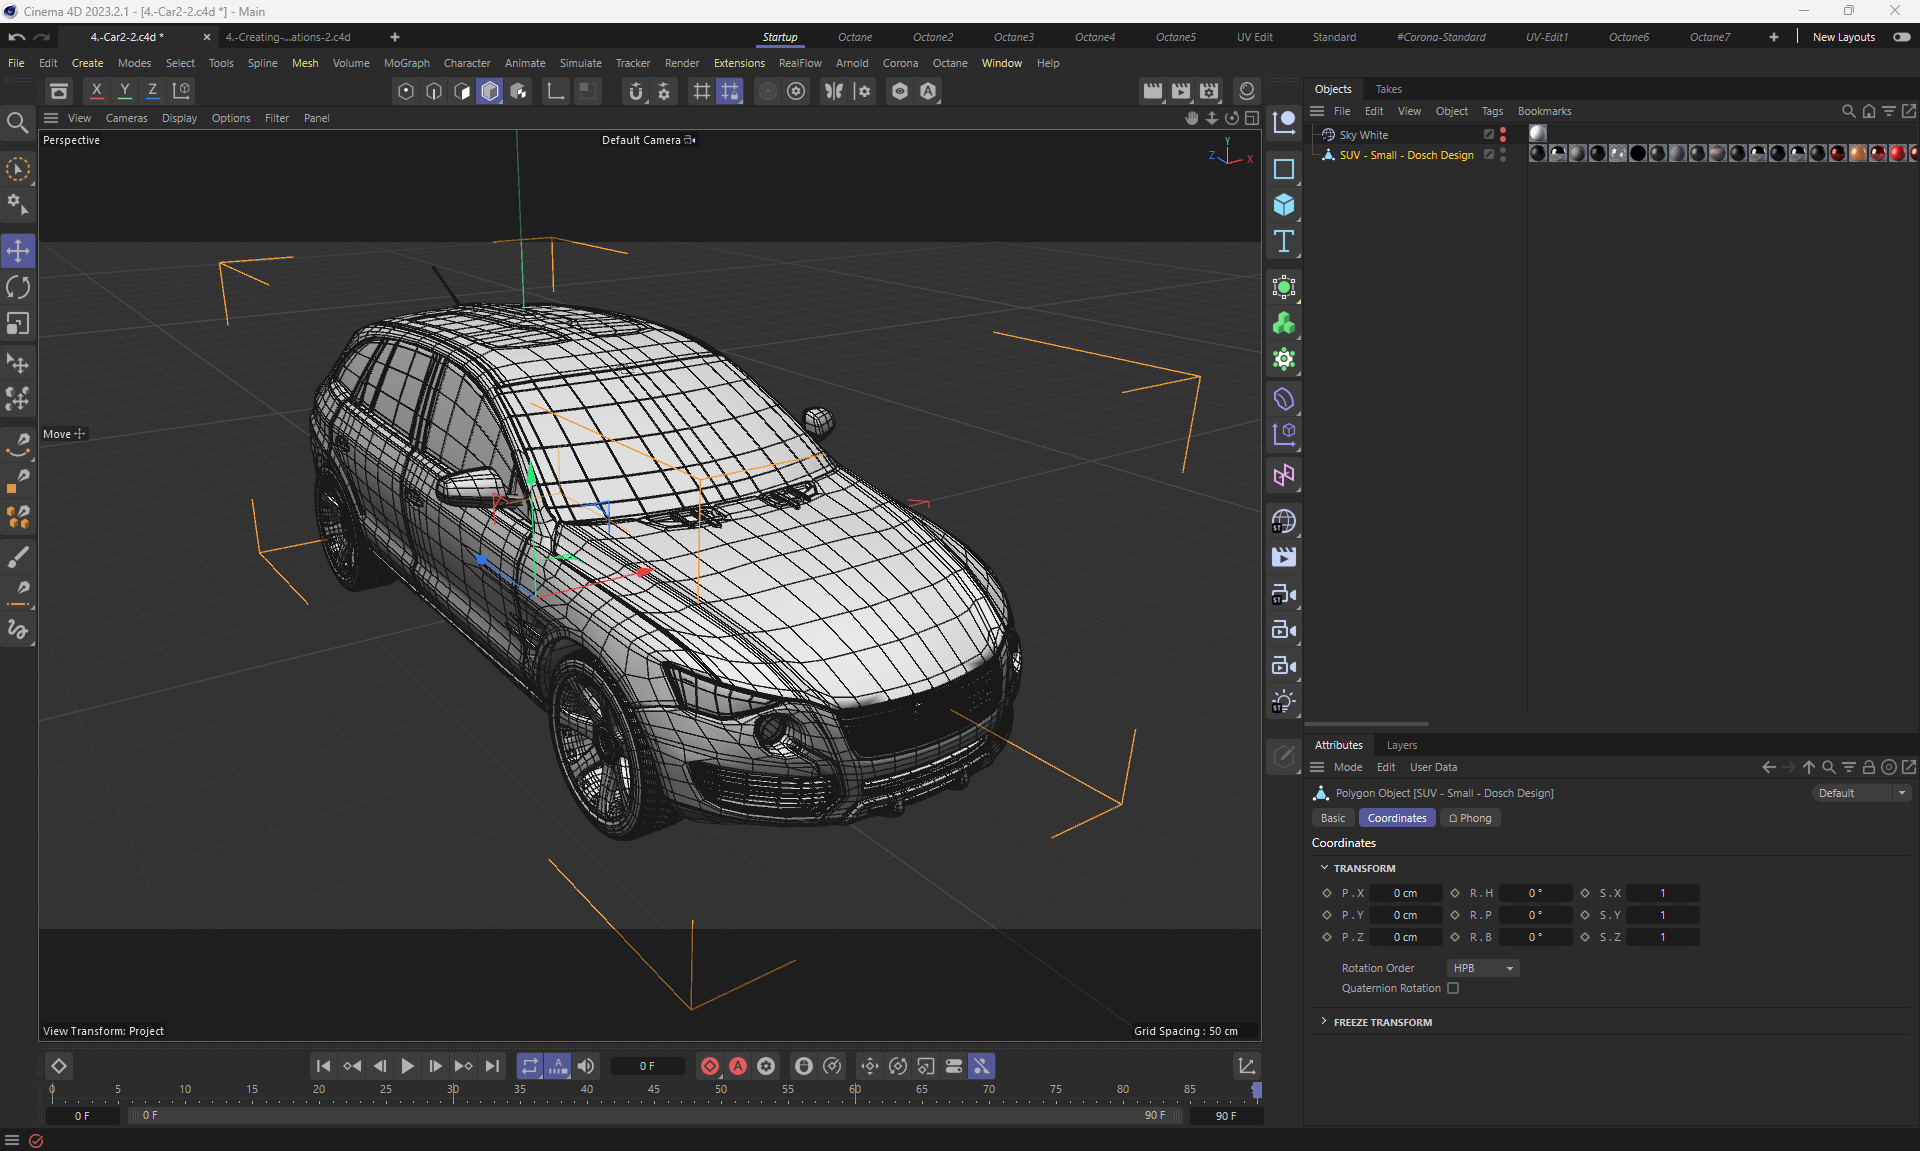
Cinema 4D

I am learning Cinema 4D, studying this course Супер Cinema 4D Pro - Cinema 4D course for advanced users
link
Download course: torrent link
The course consists of 125 lessons with a duration of over 51 hours. There are some basic source materials.
I have completed 8 parts of the course out of 10.
This advanced course covers a large amount of knowledge in Cinema 4D, I am gradually learning all the lessons.
It takes a lot of time to master all the information, you need to pause the video, analyze and independently perform the lessons according to the author and test. I study various nuances, go through them according to the author, I understand, but I can't remember everything. To master this knowledge, you have to study in portions with breaks to comprehend everything.
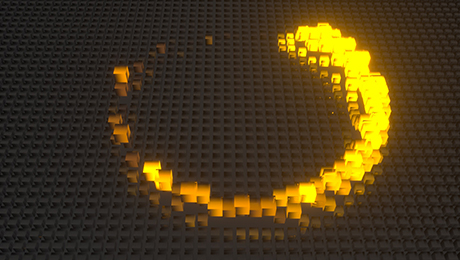
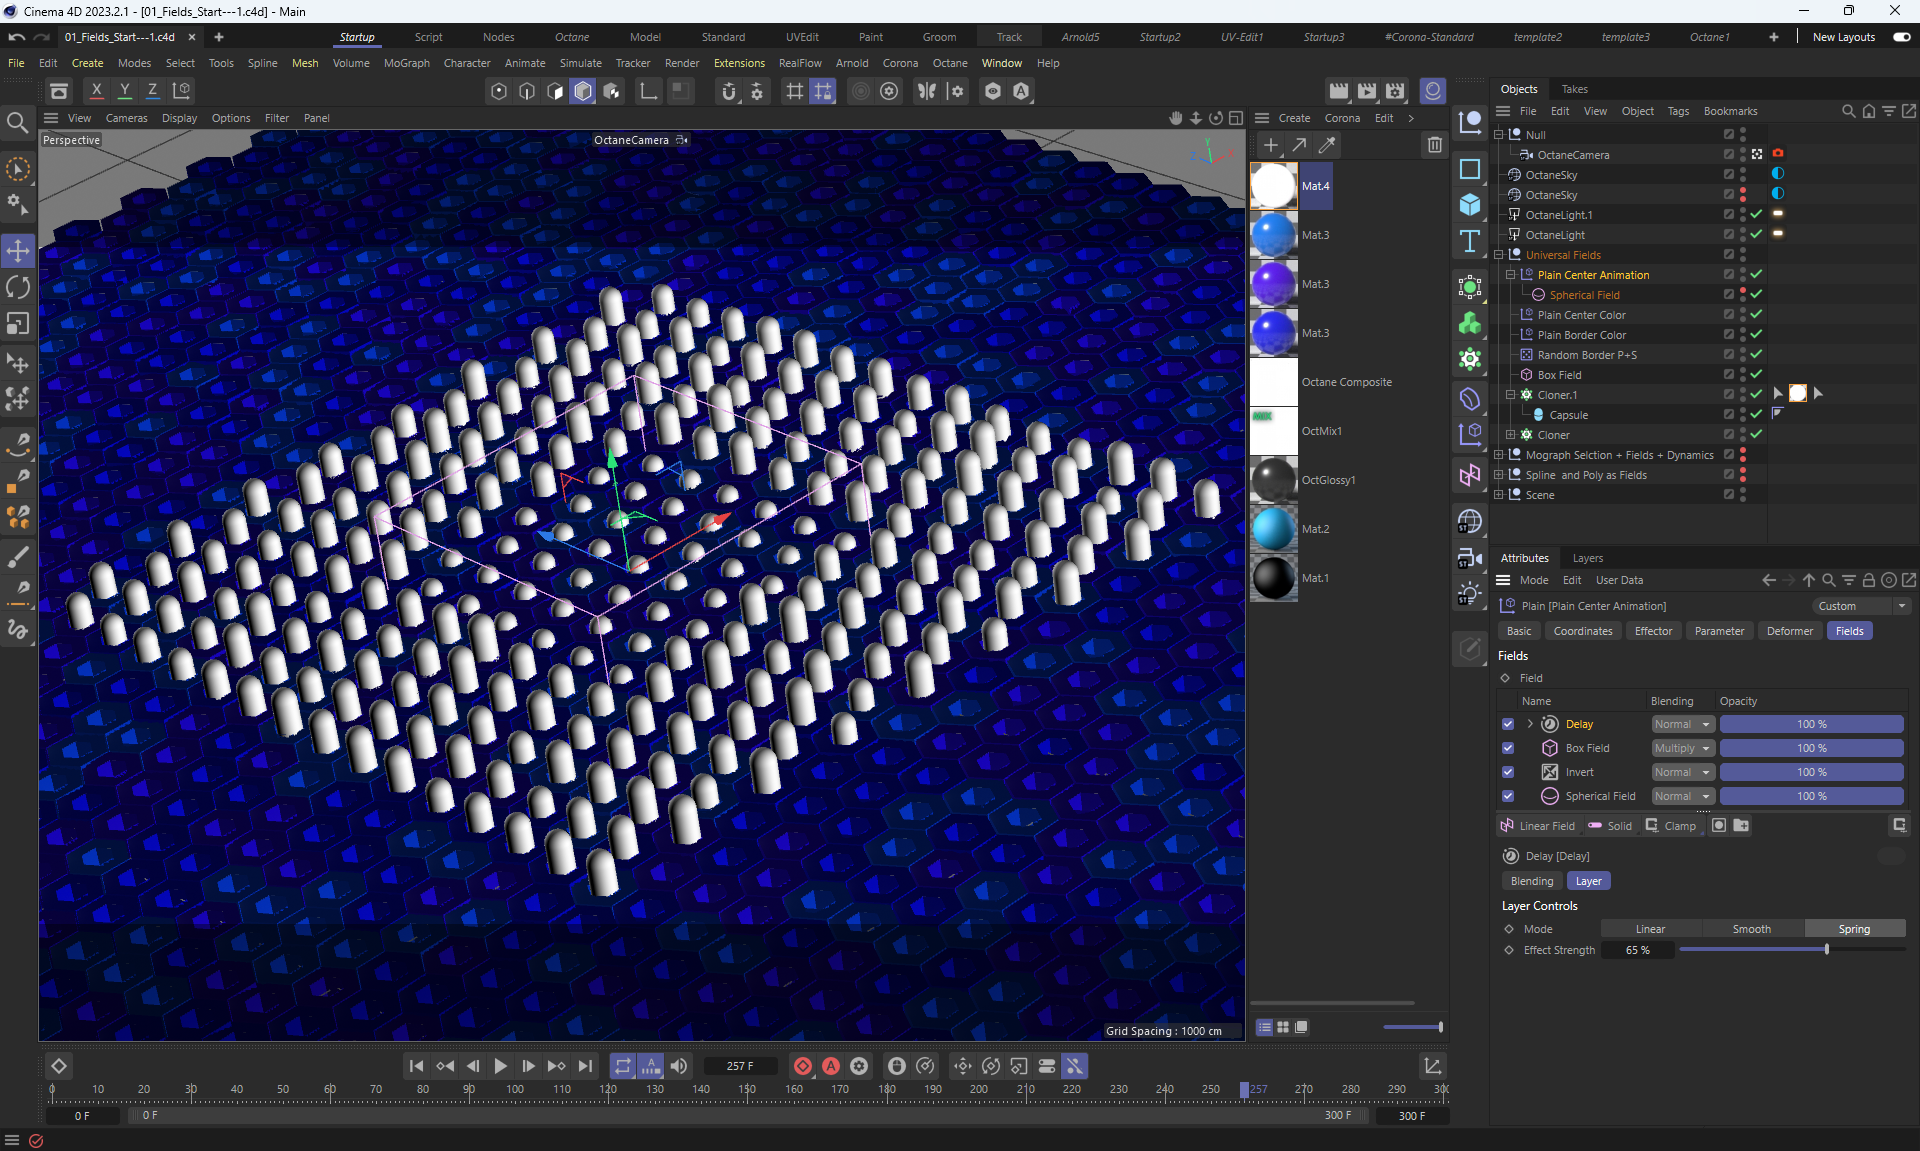
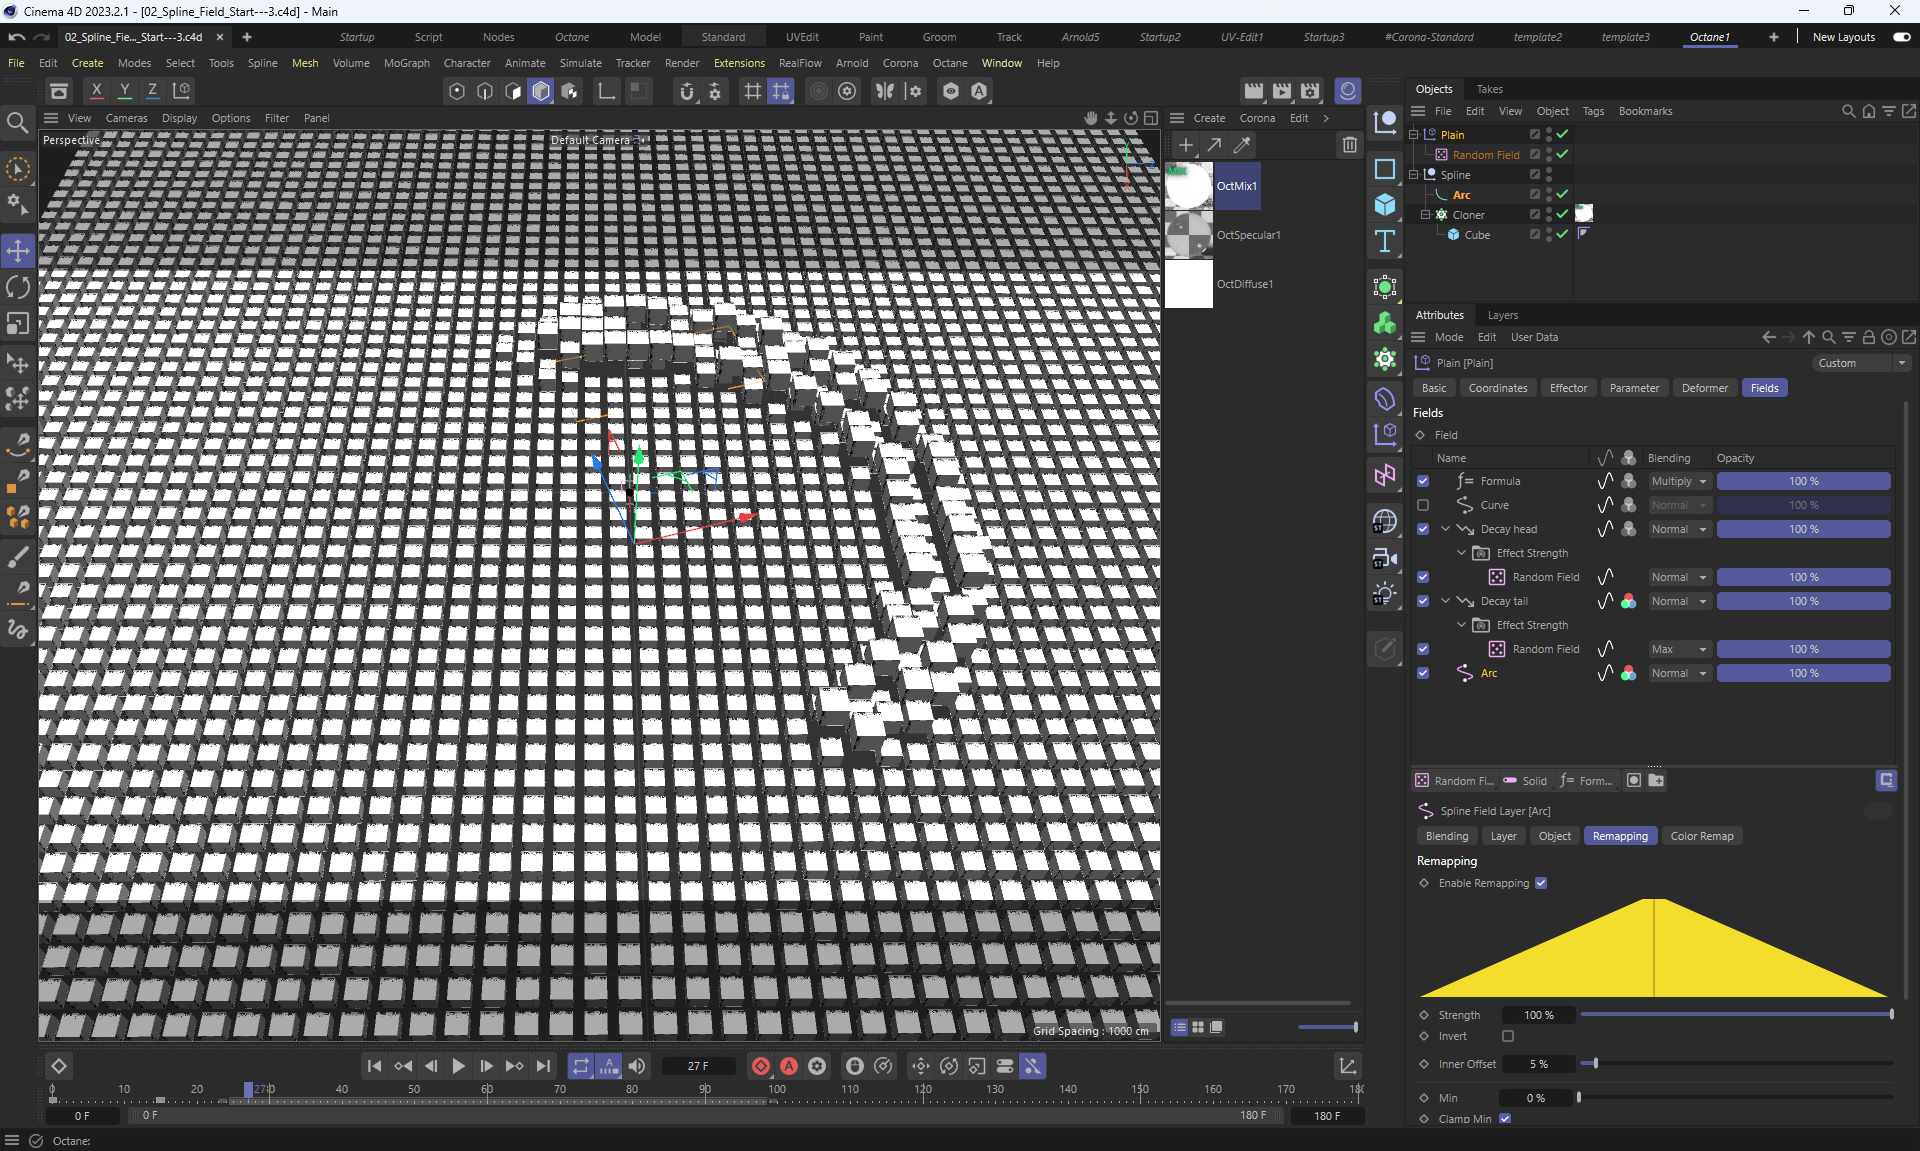
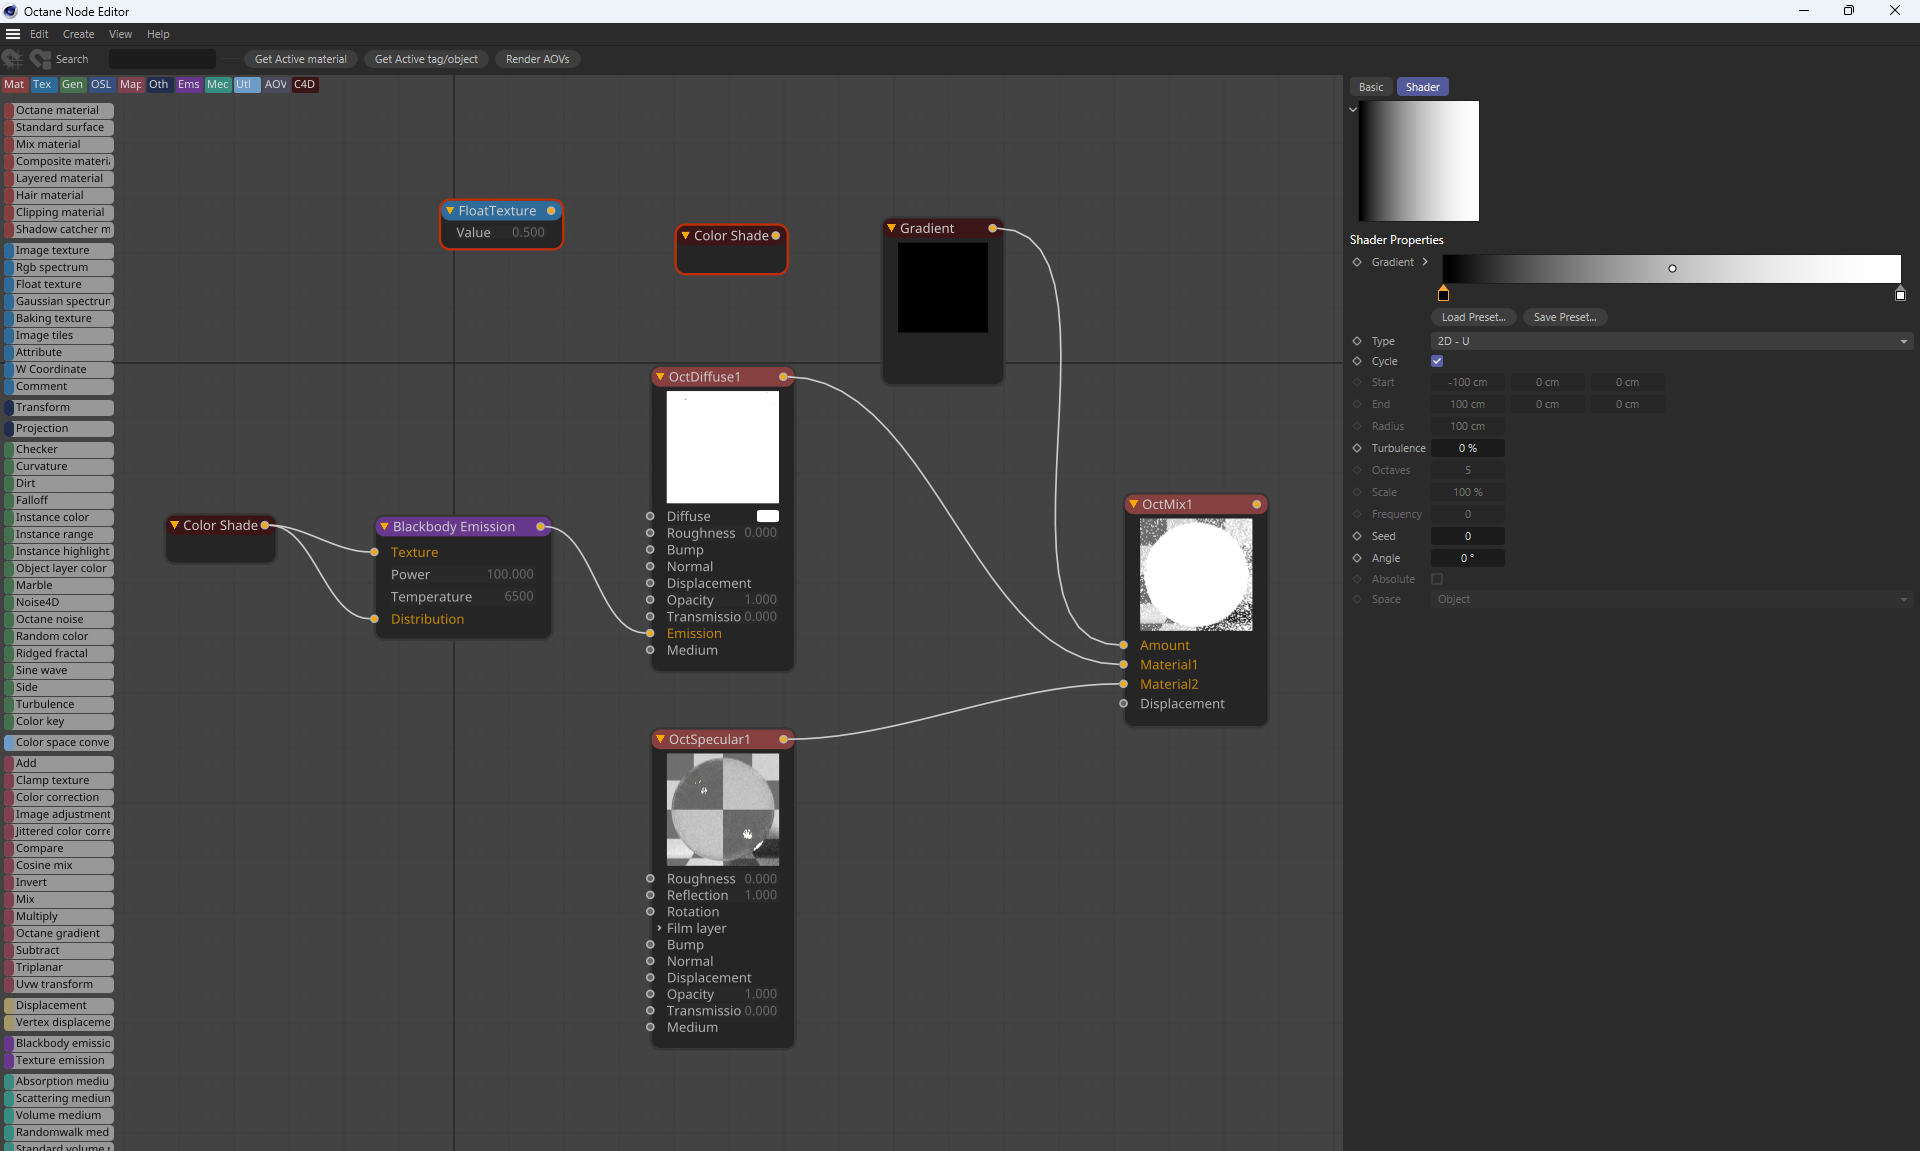
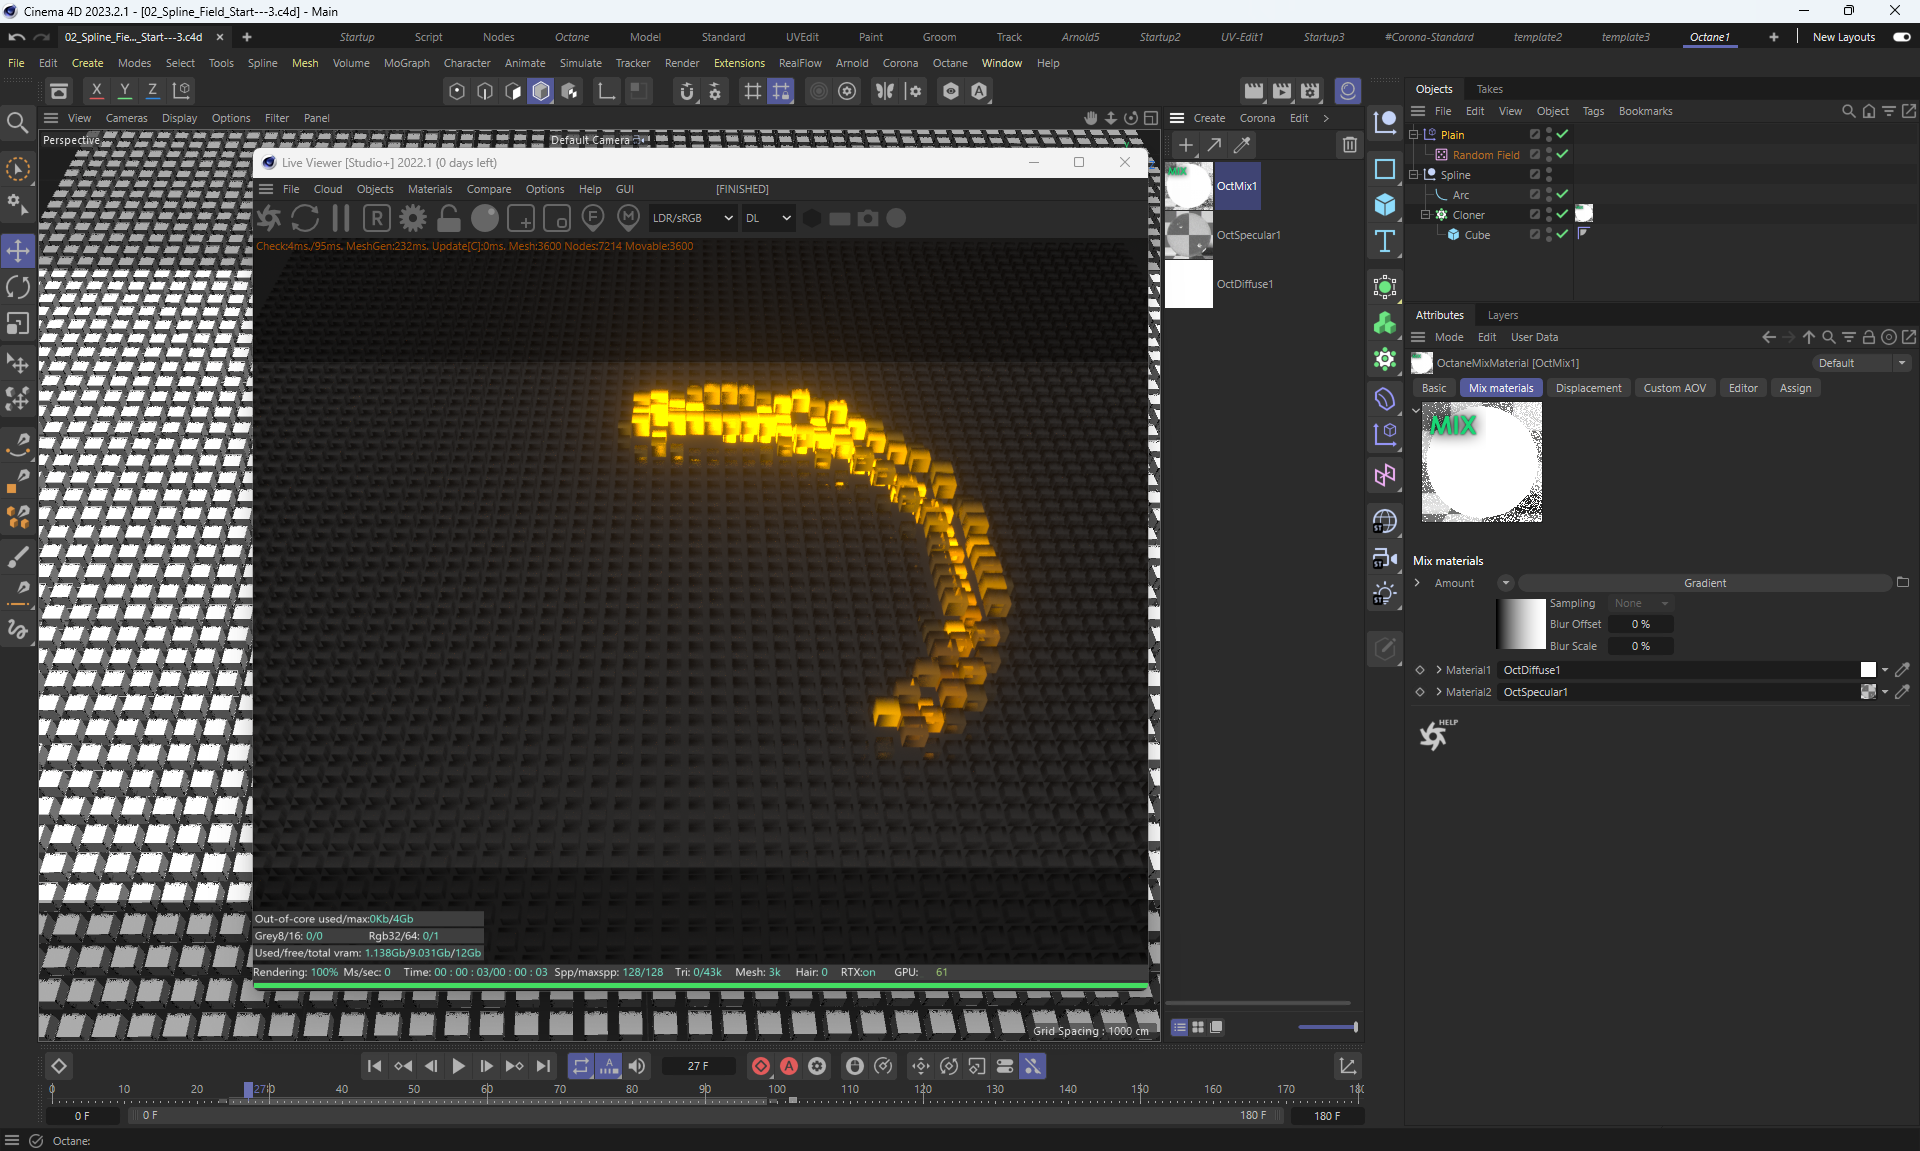
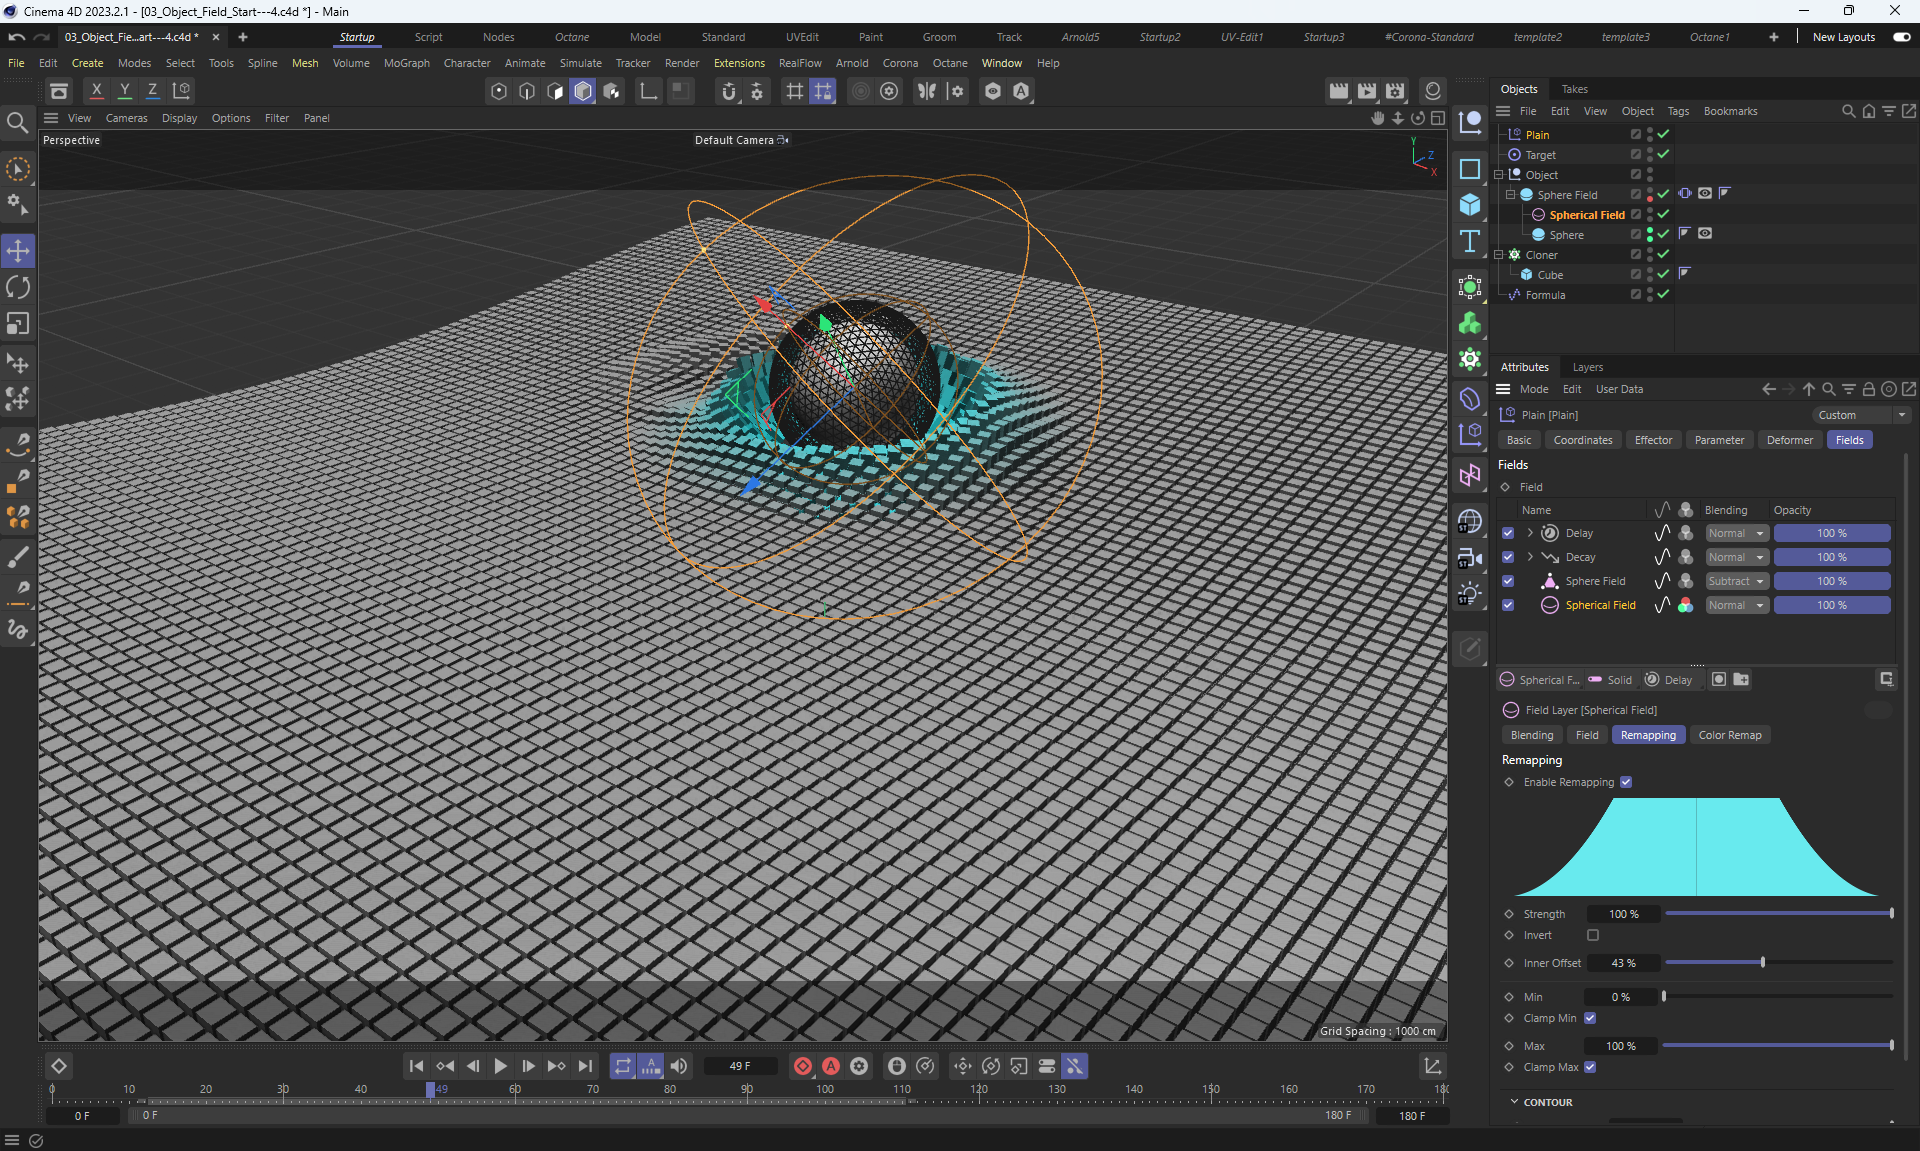
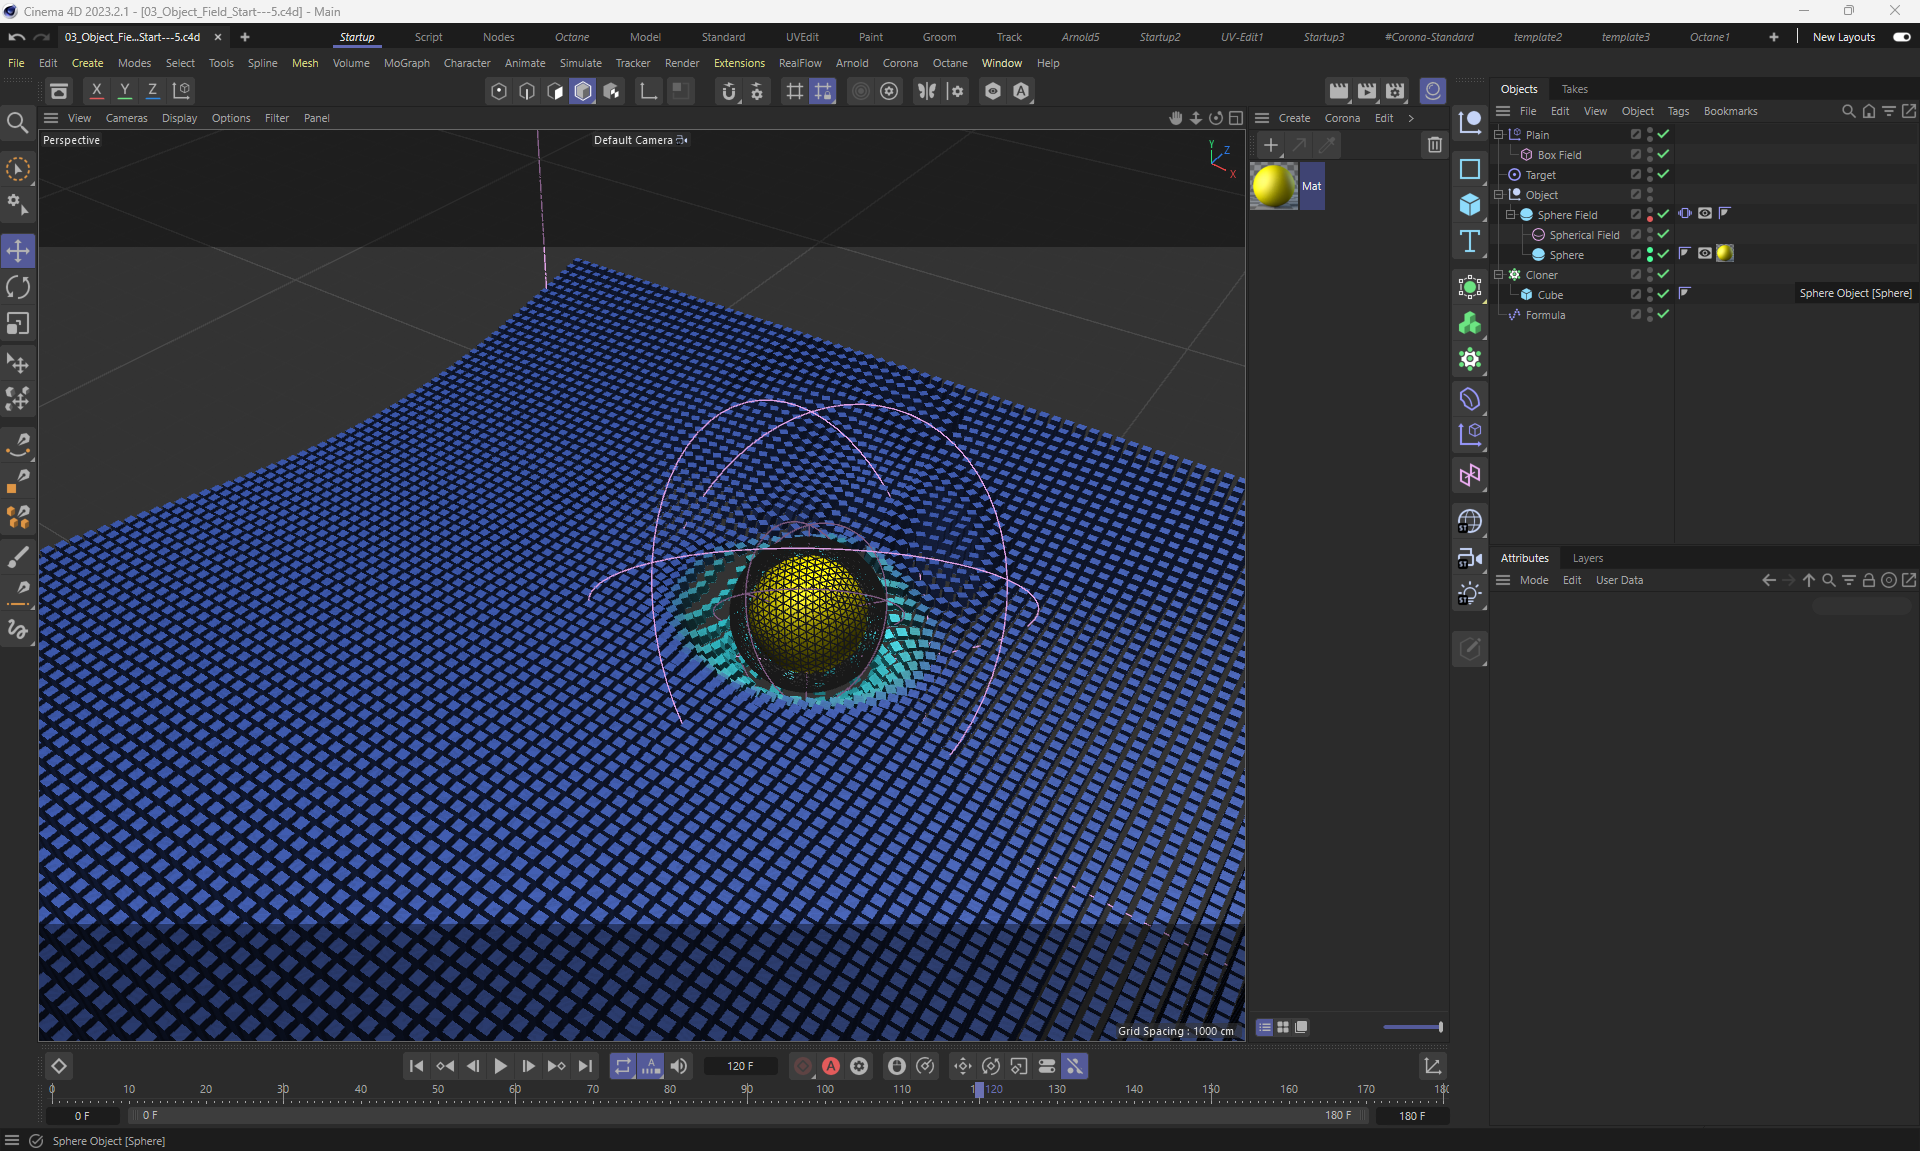
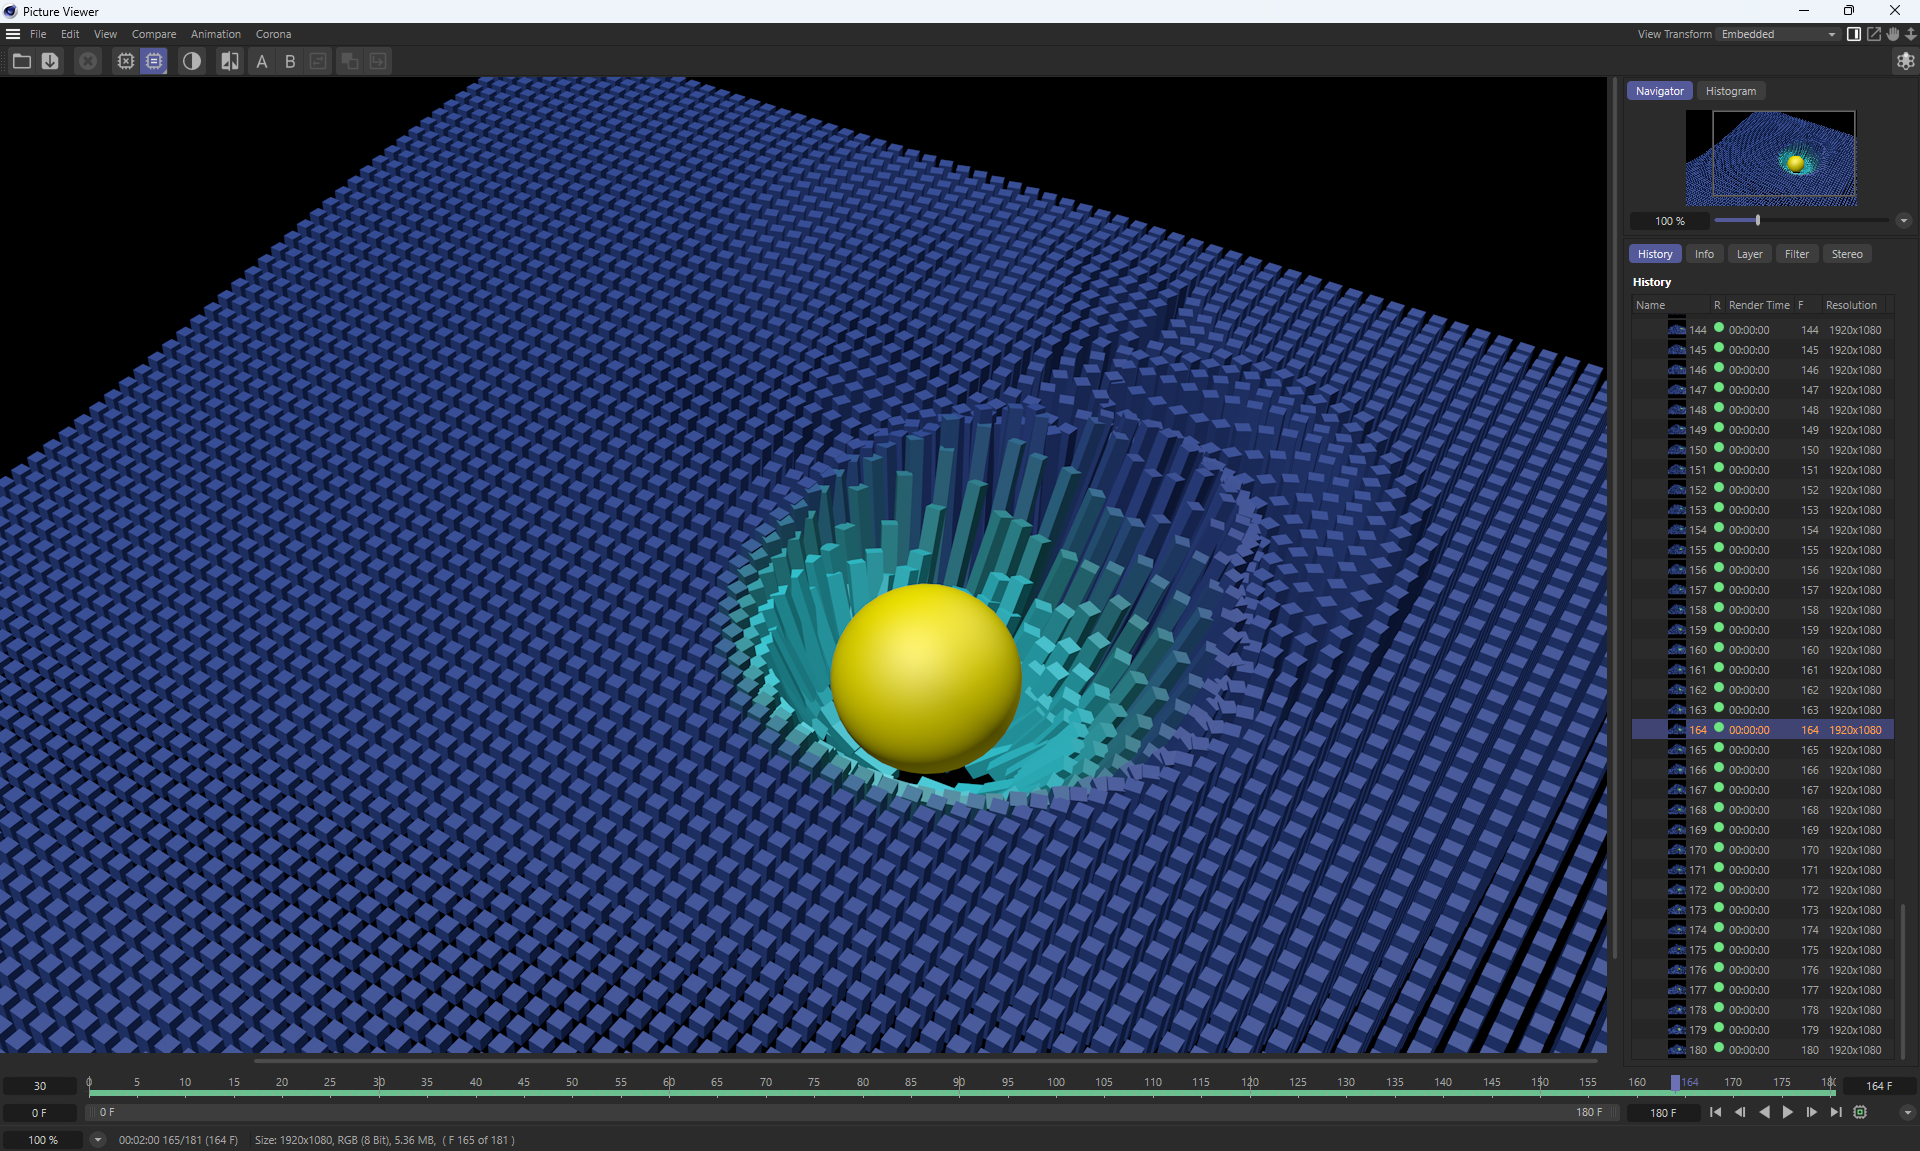
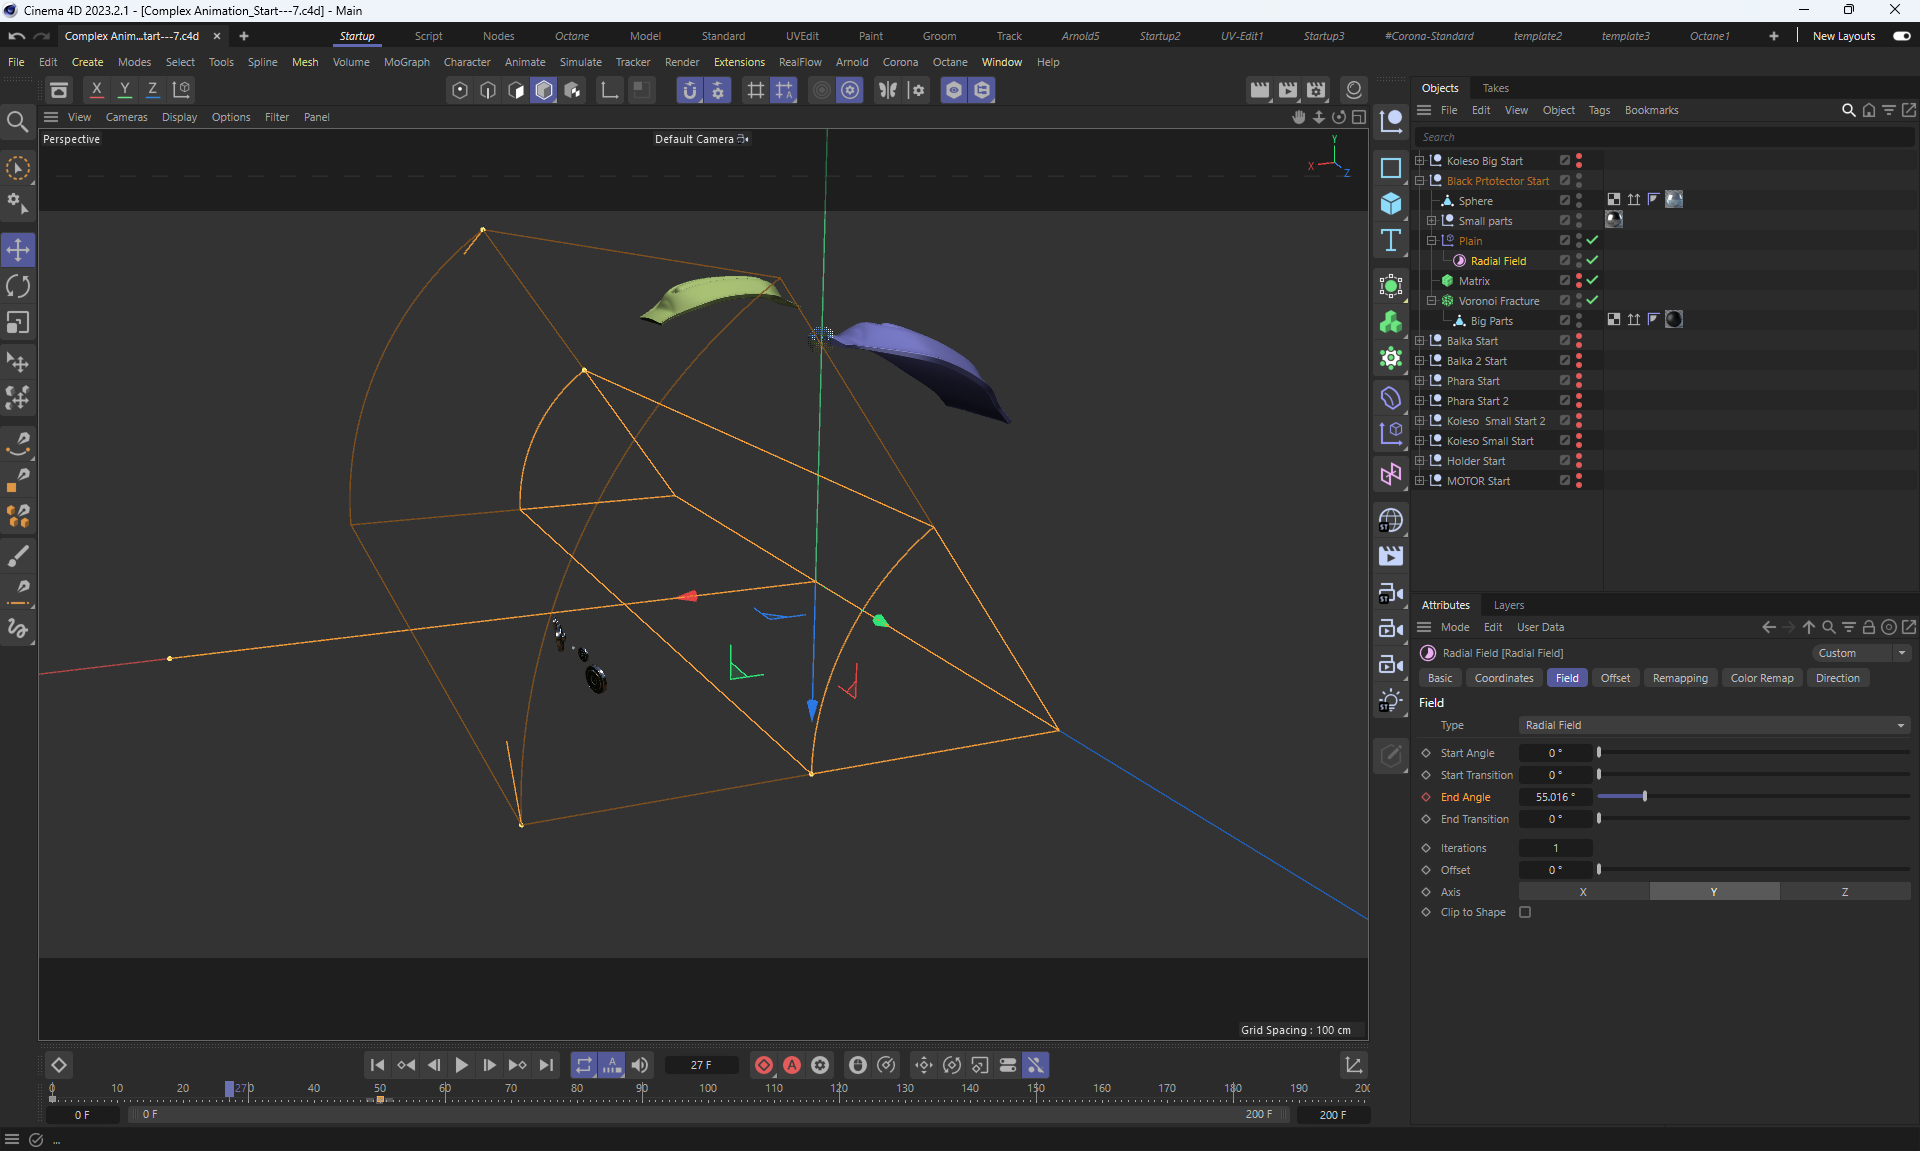
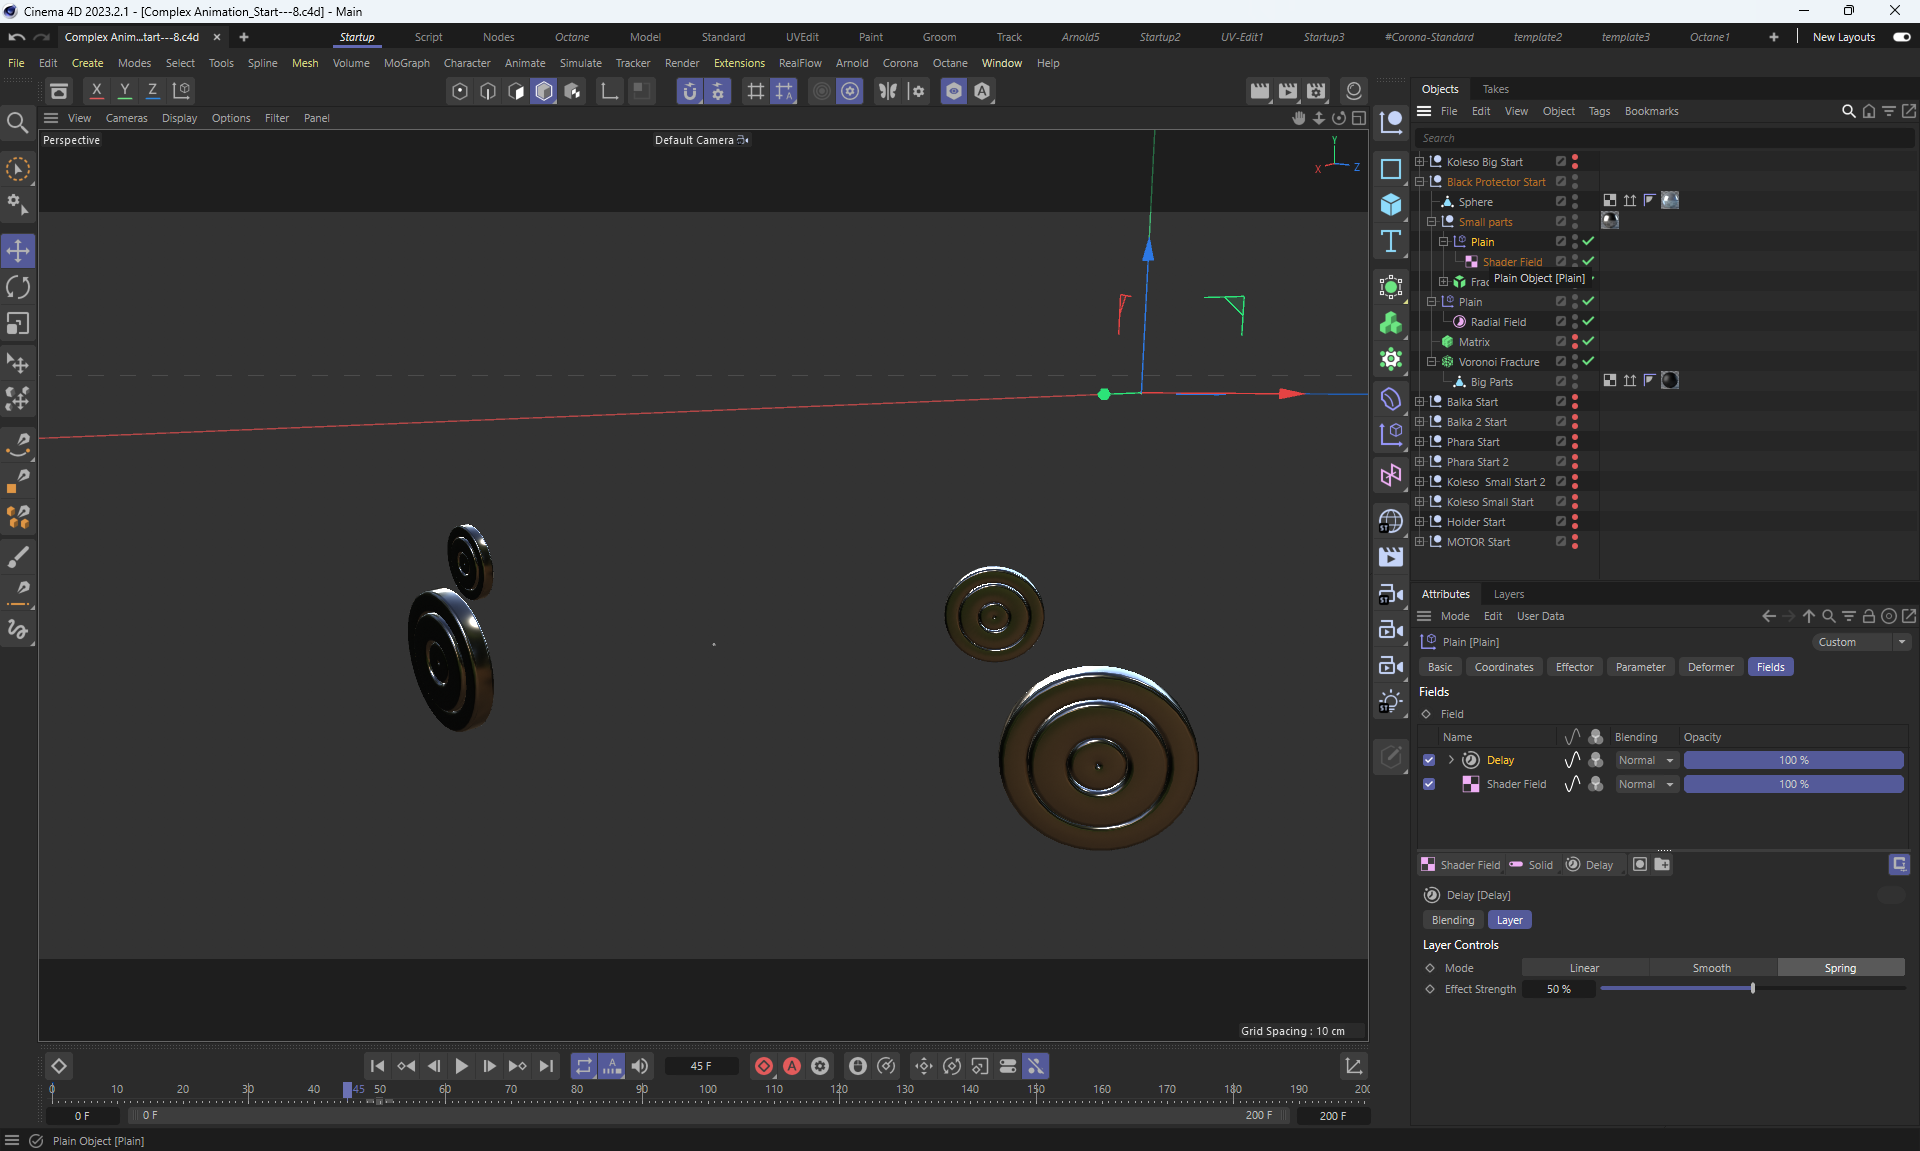
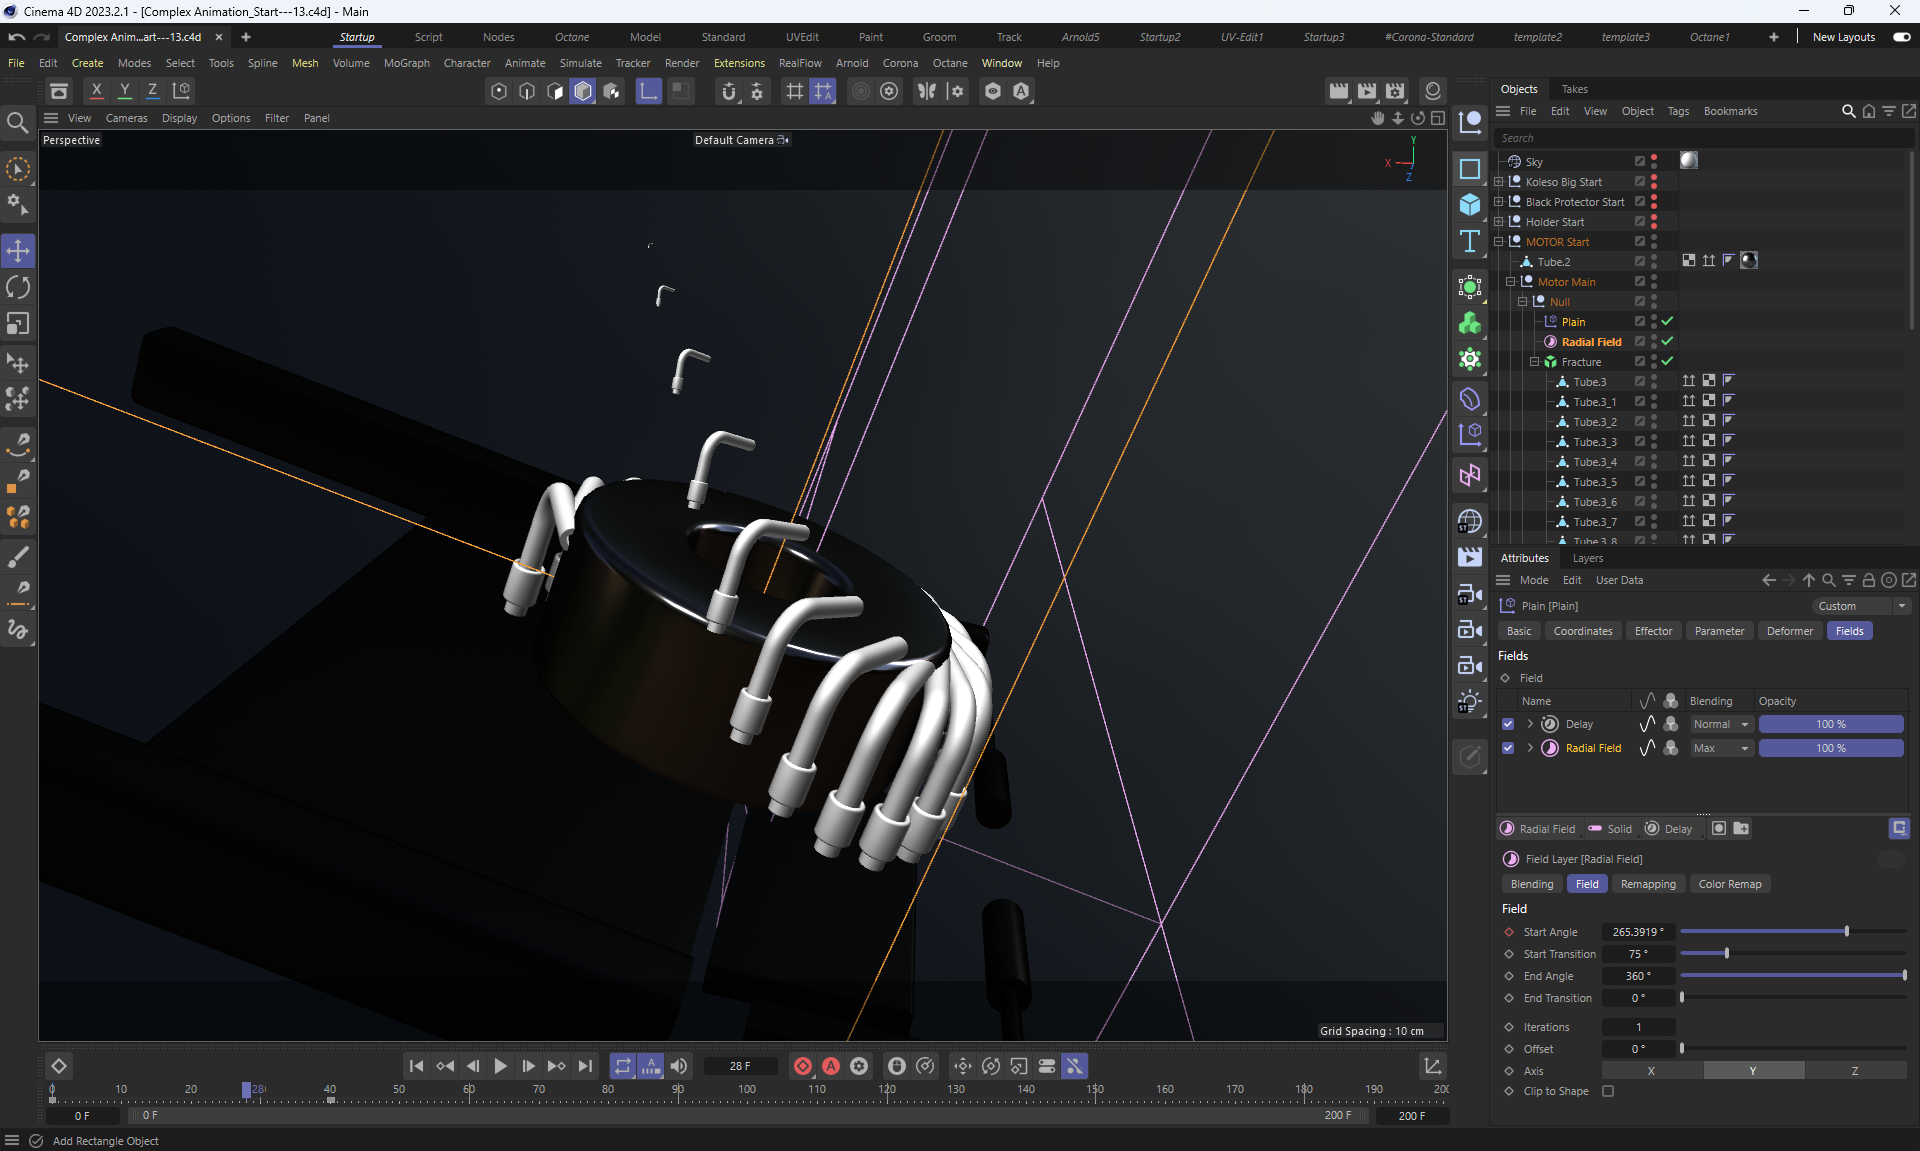
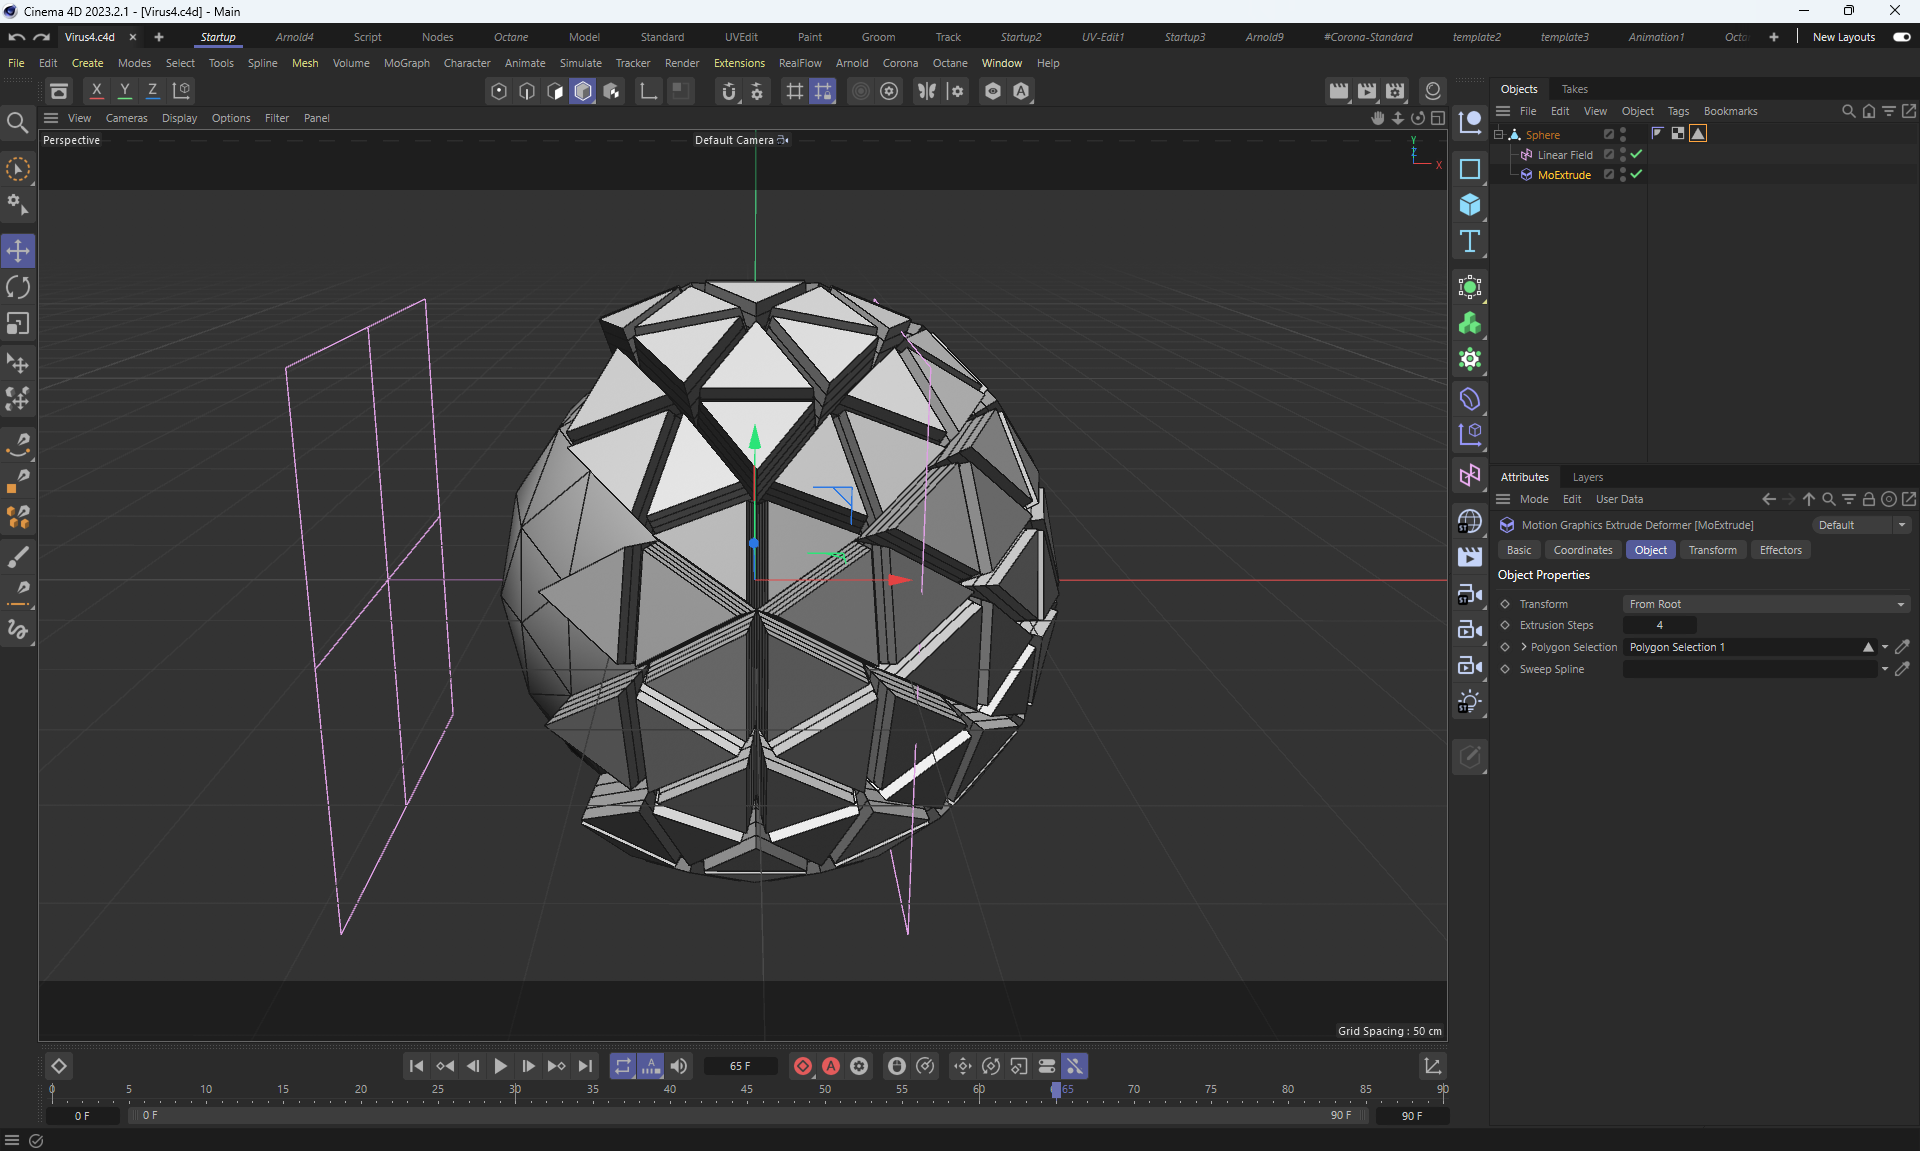
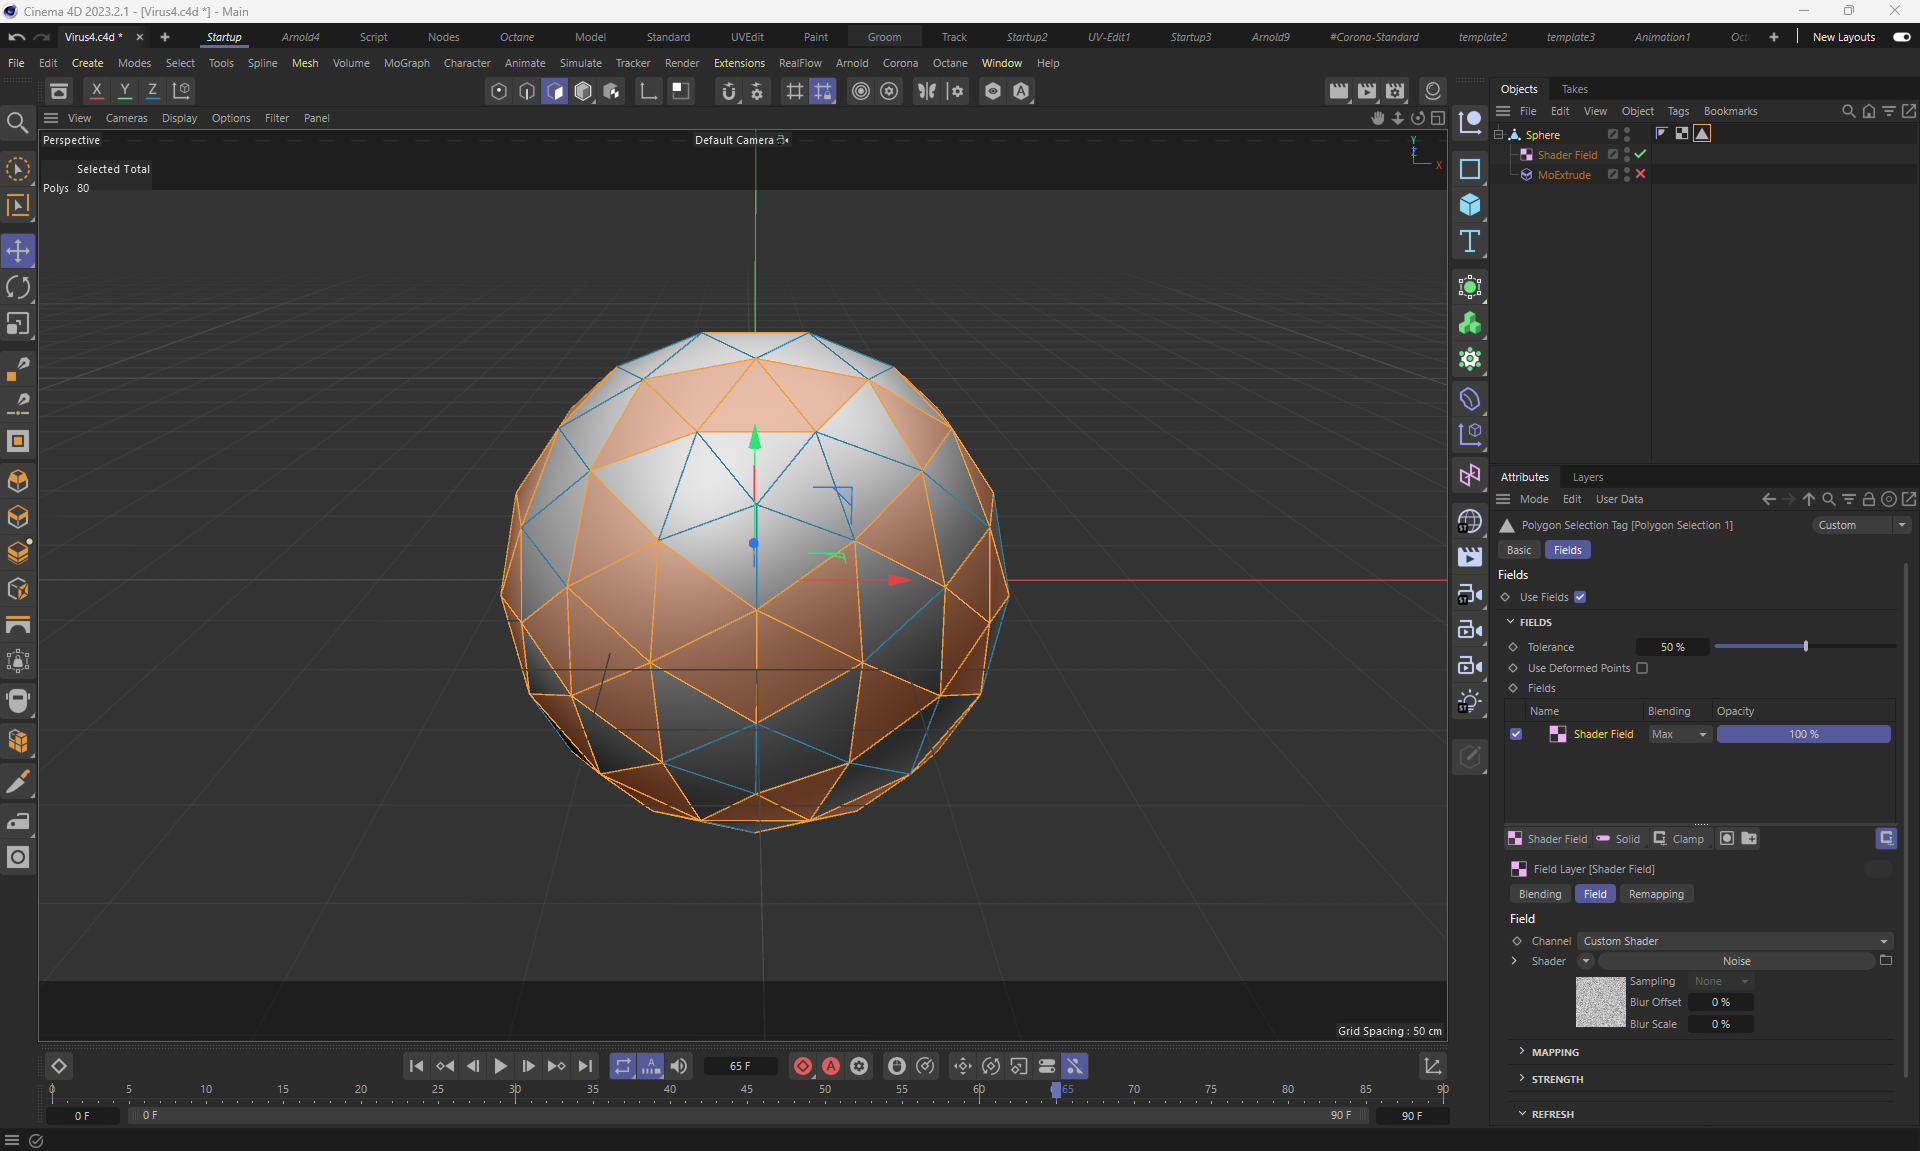
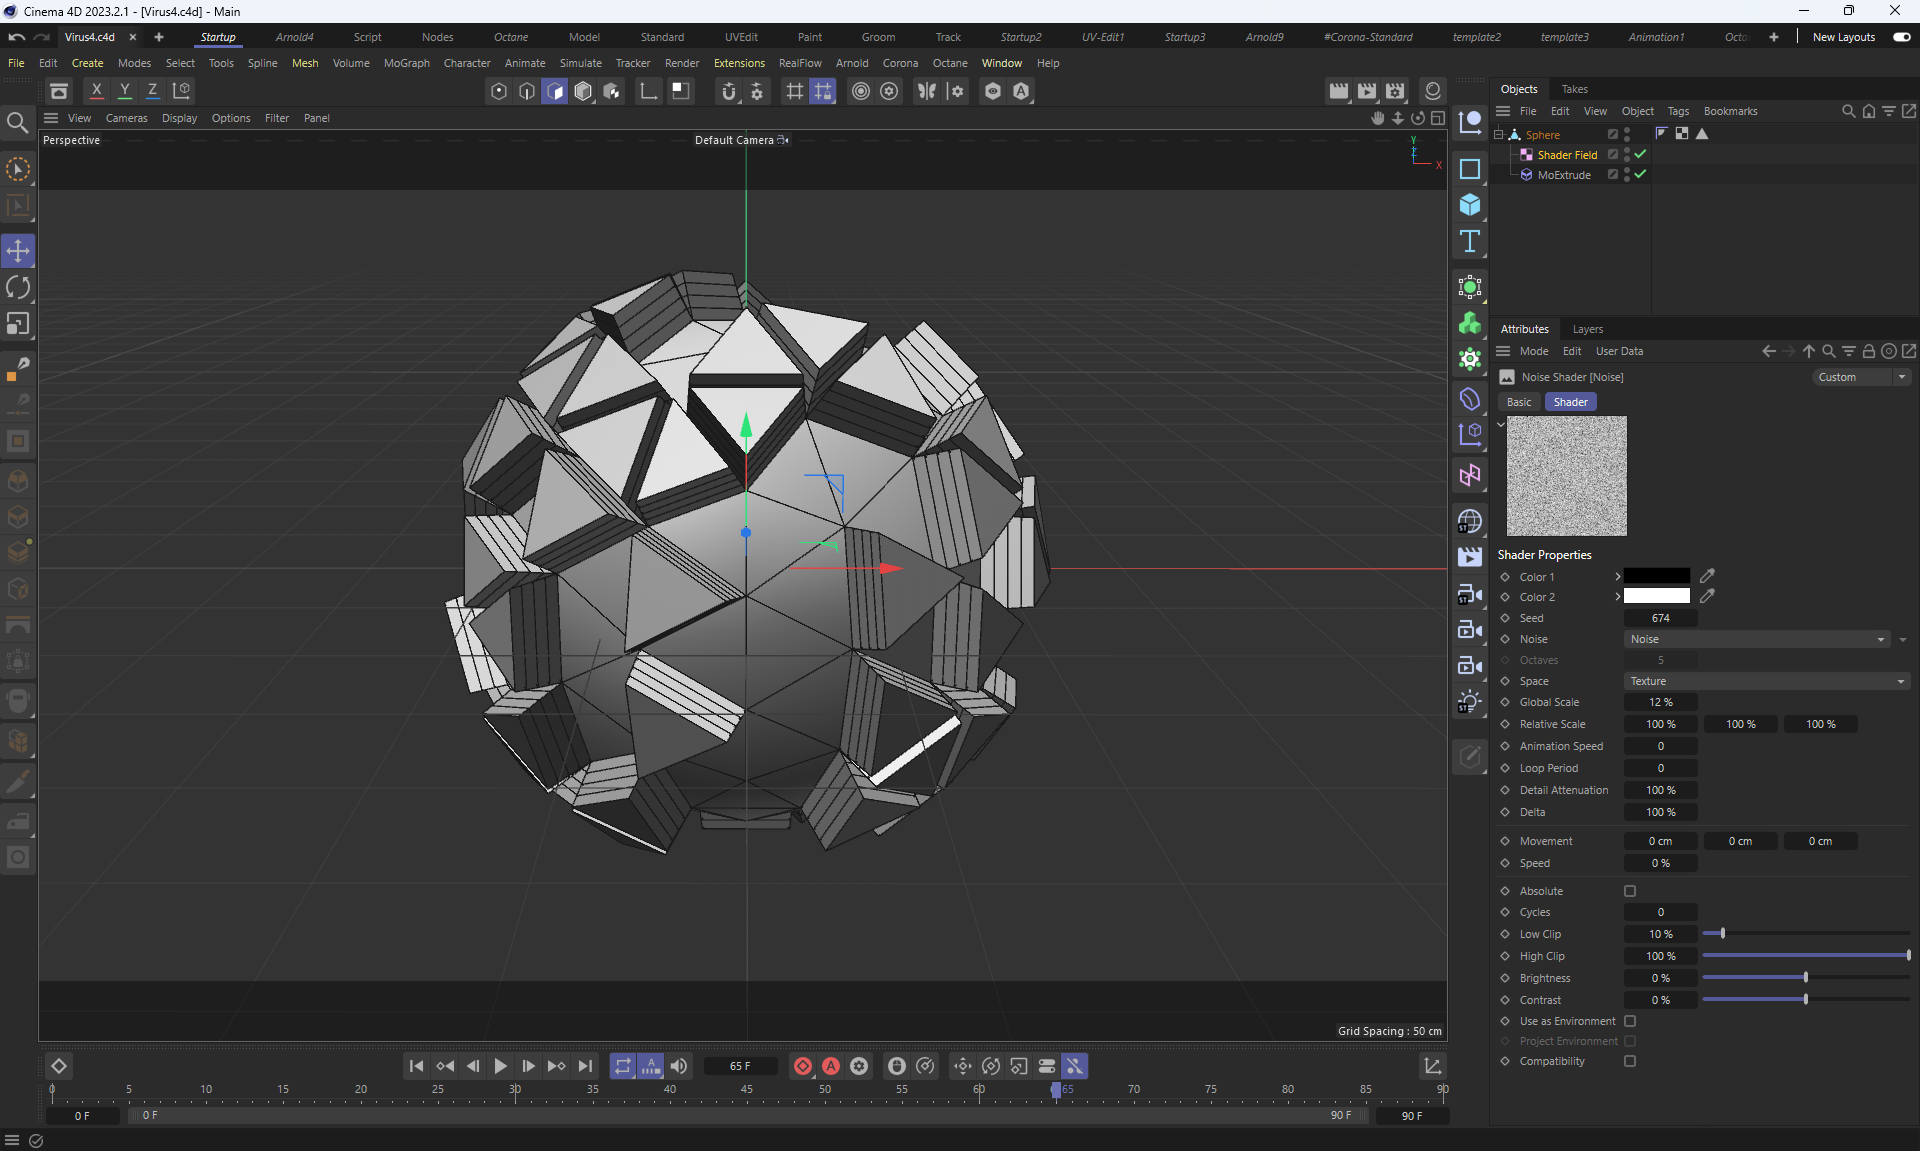
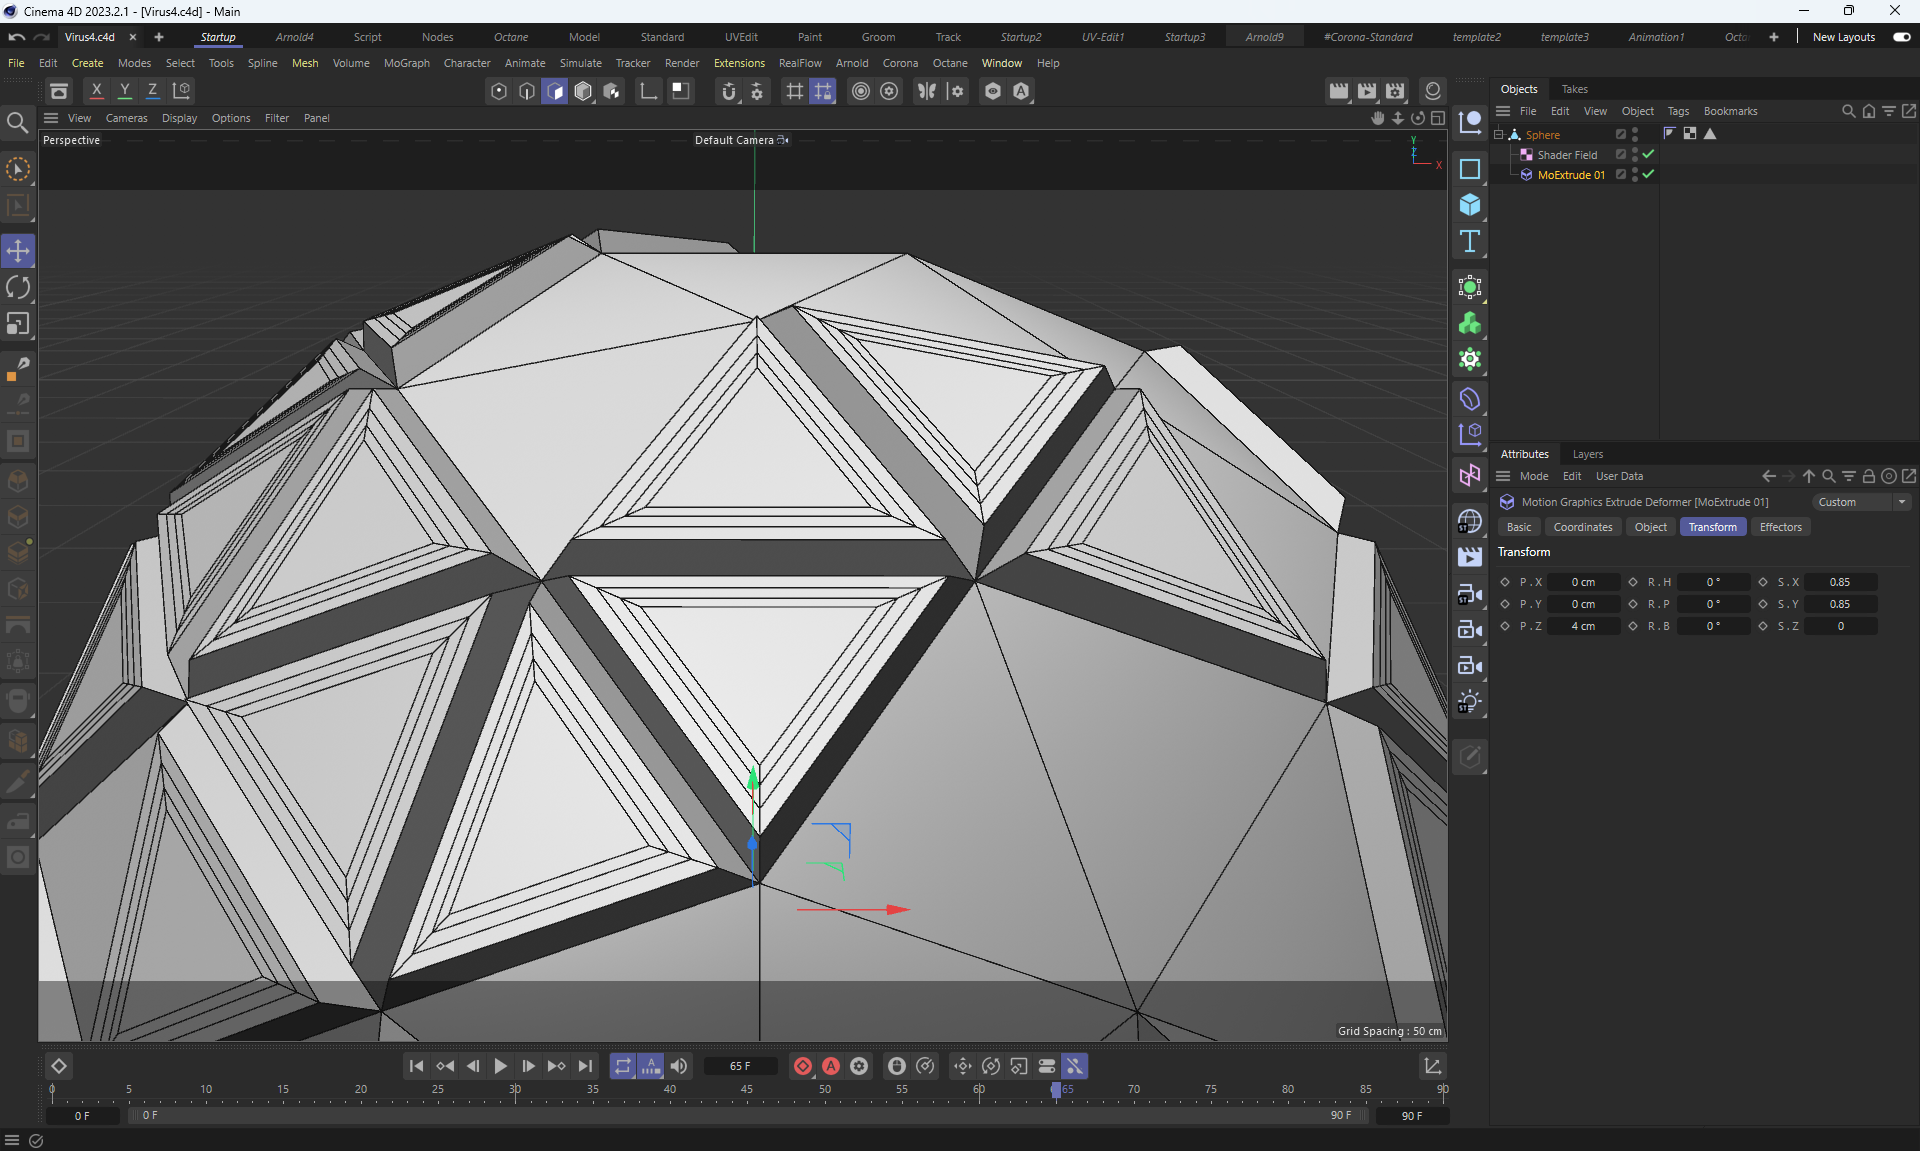
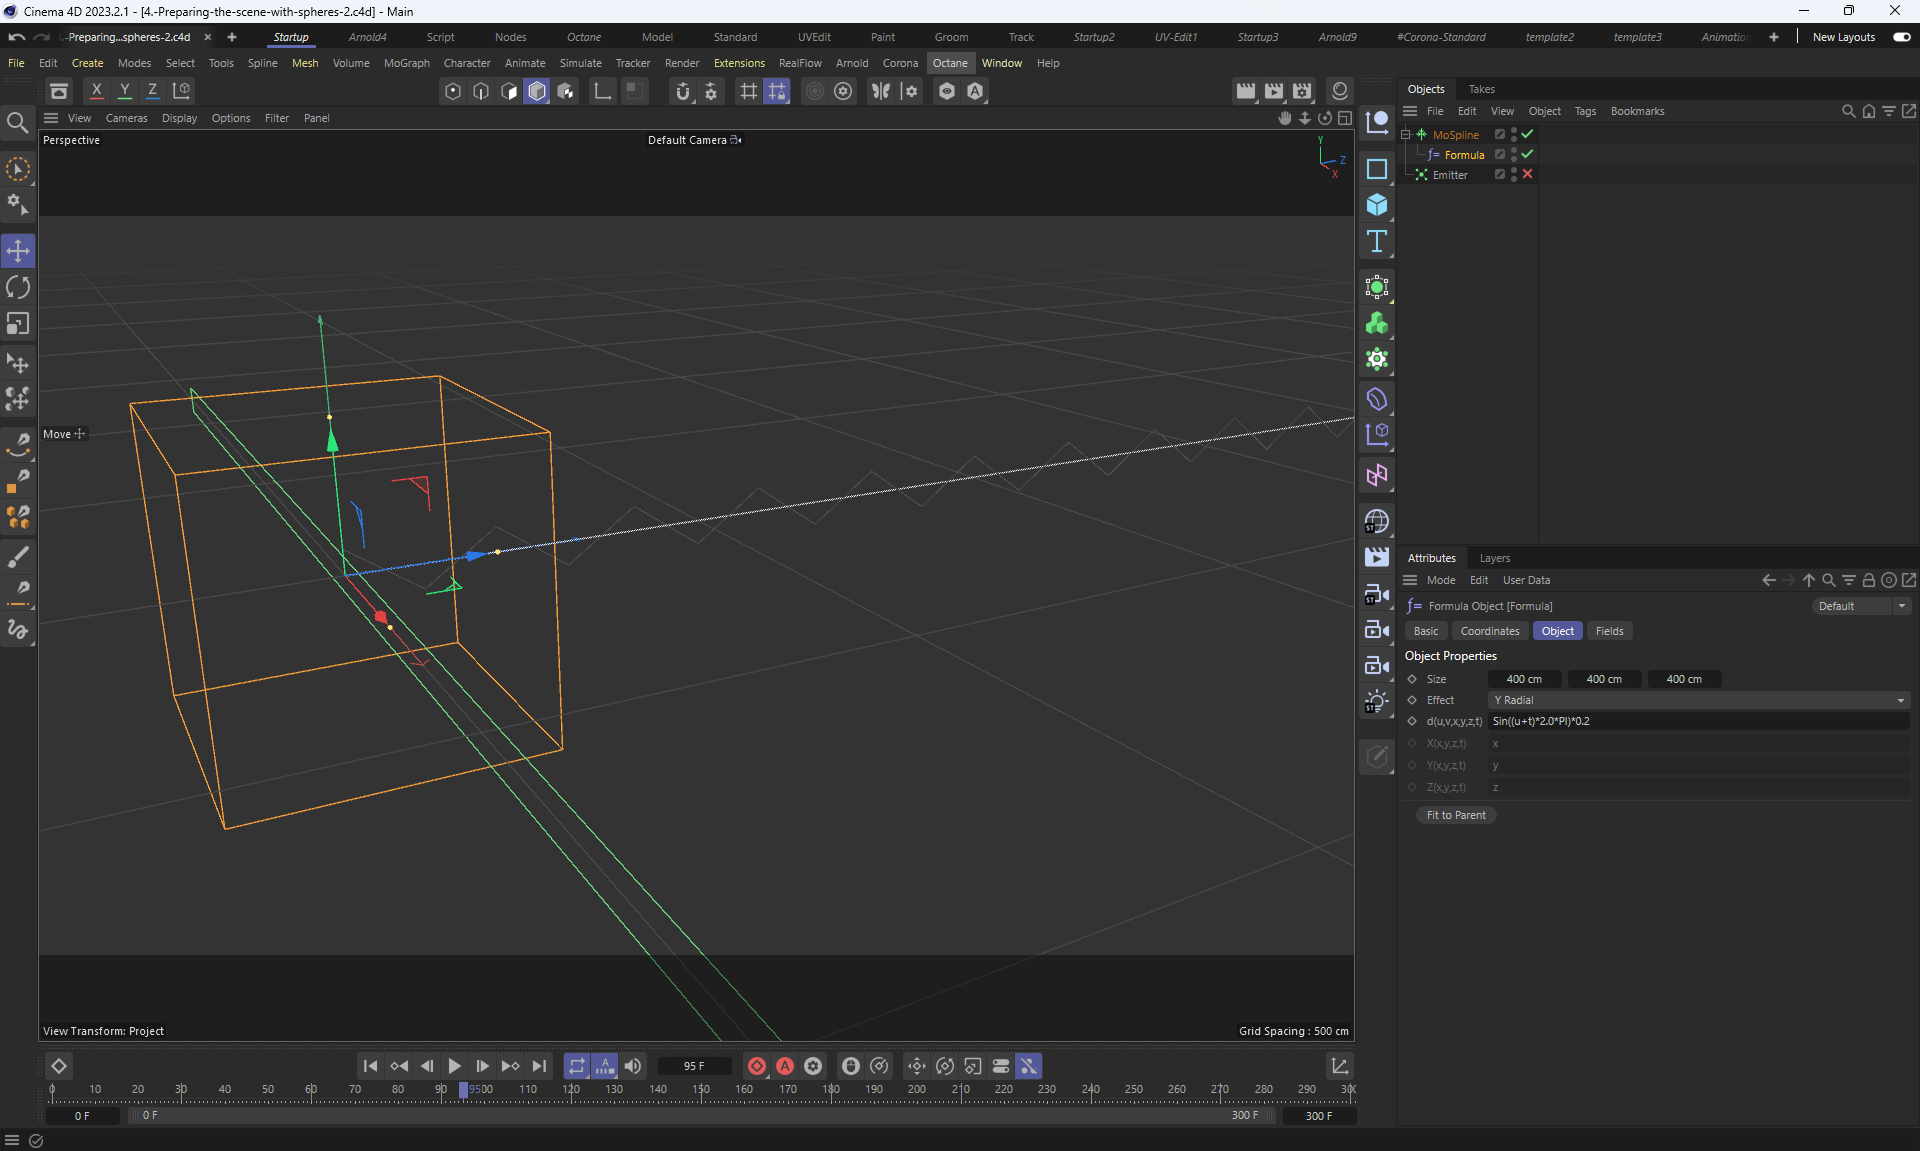
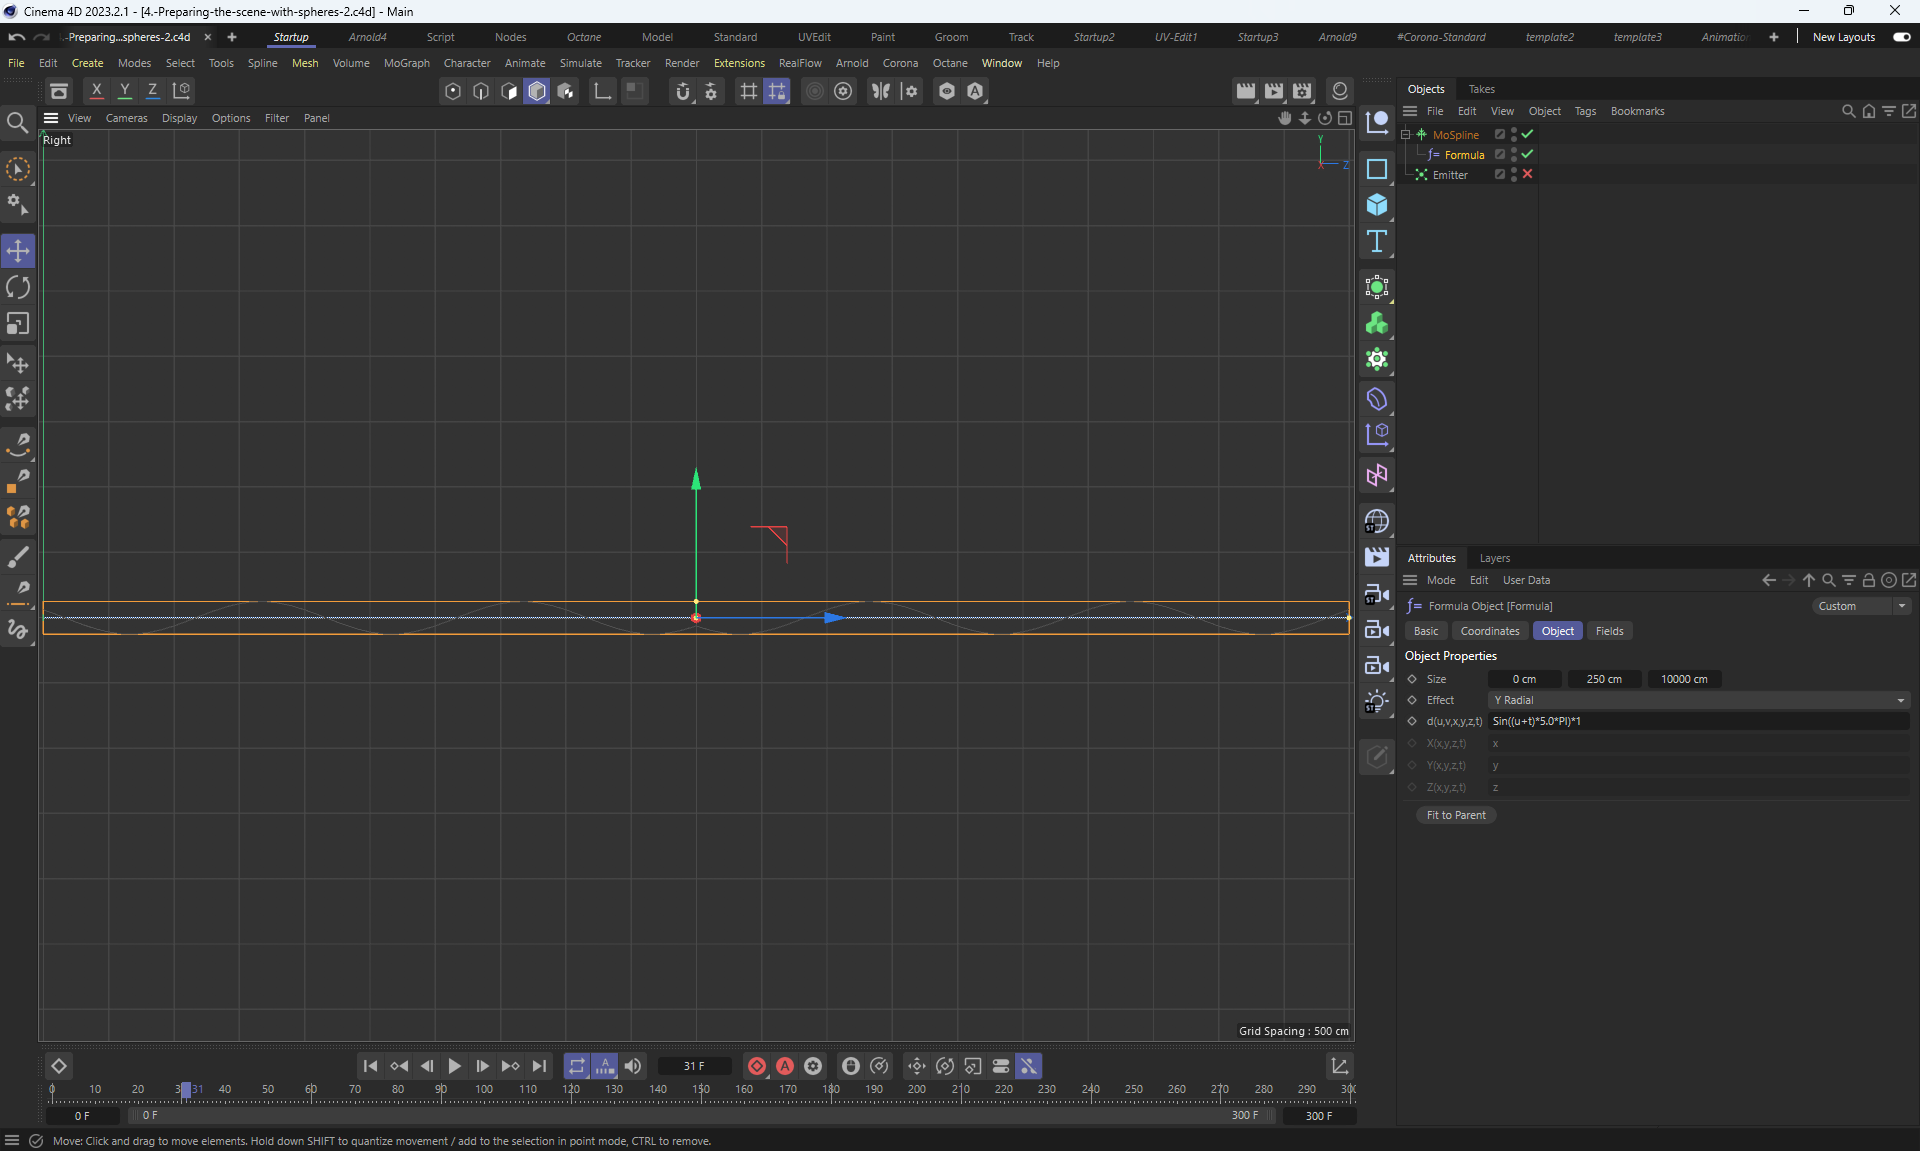
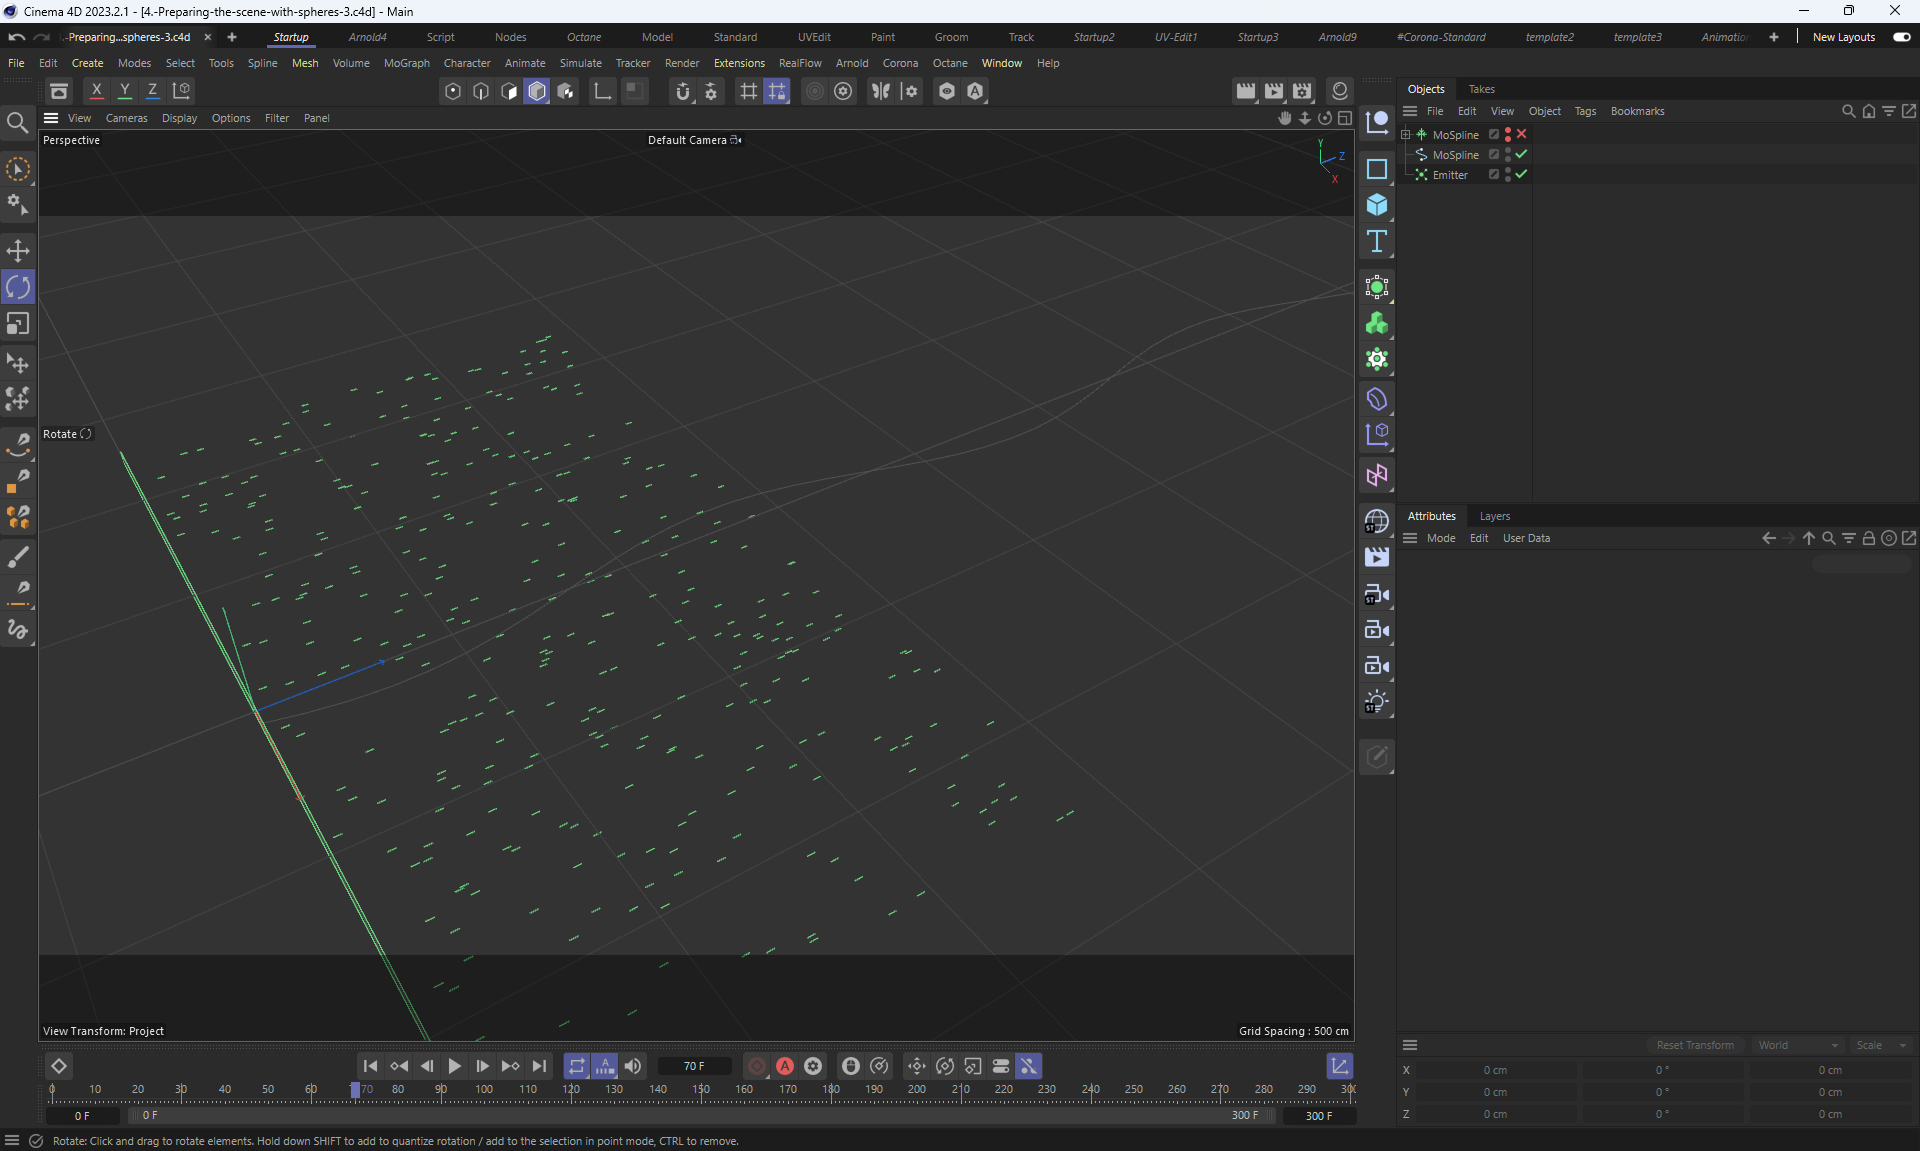
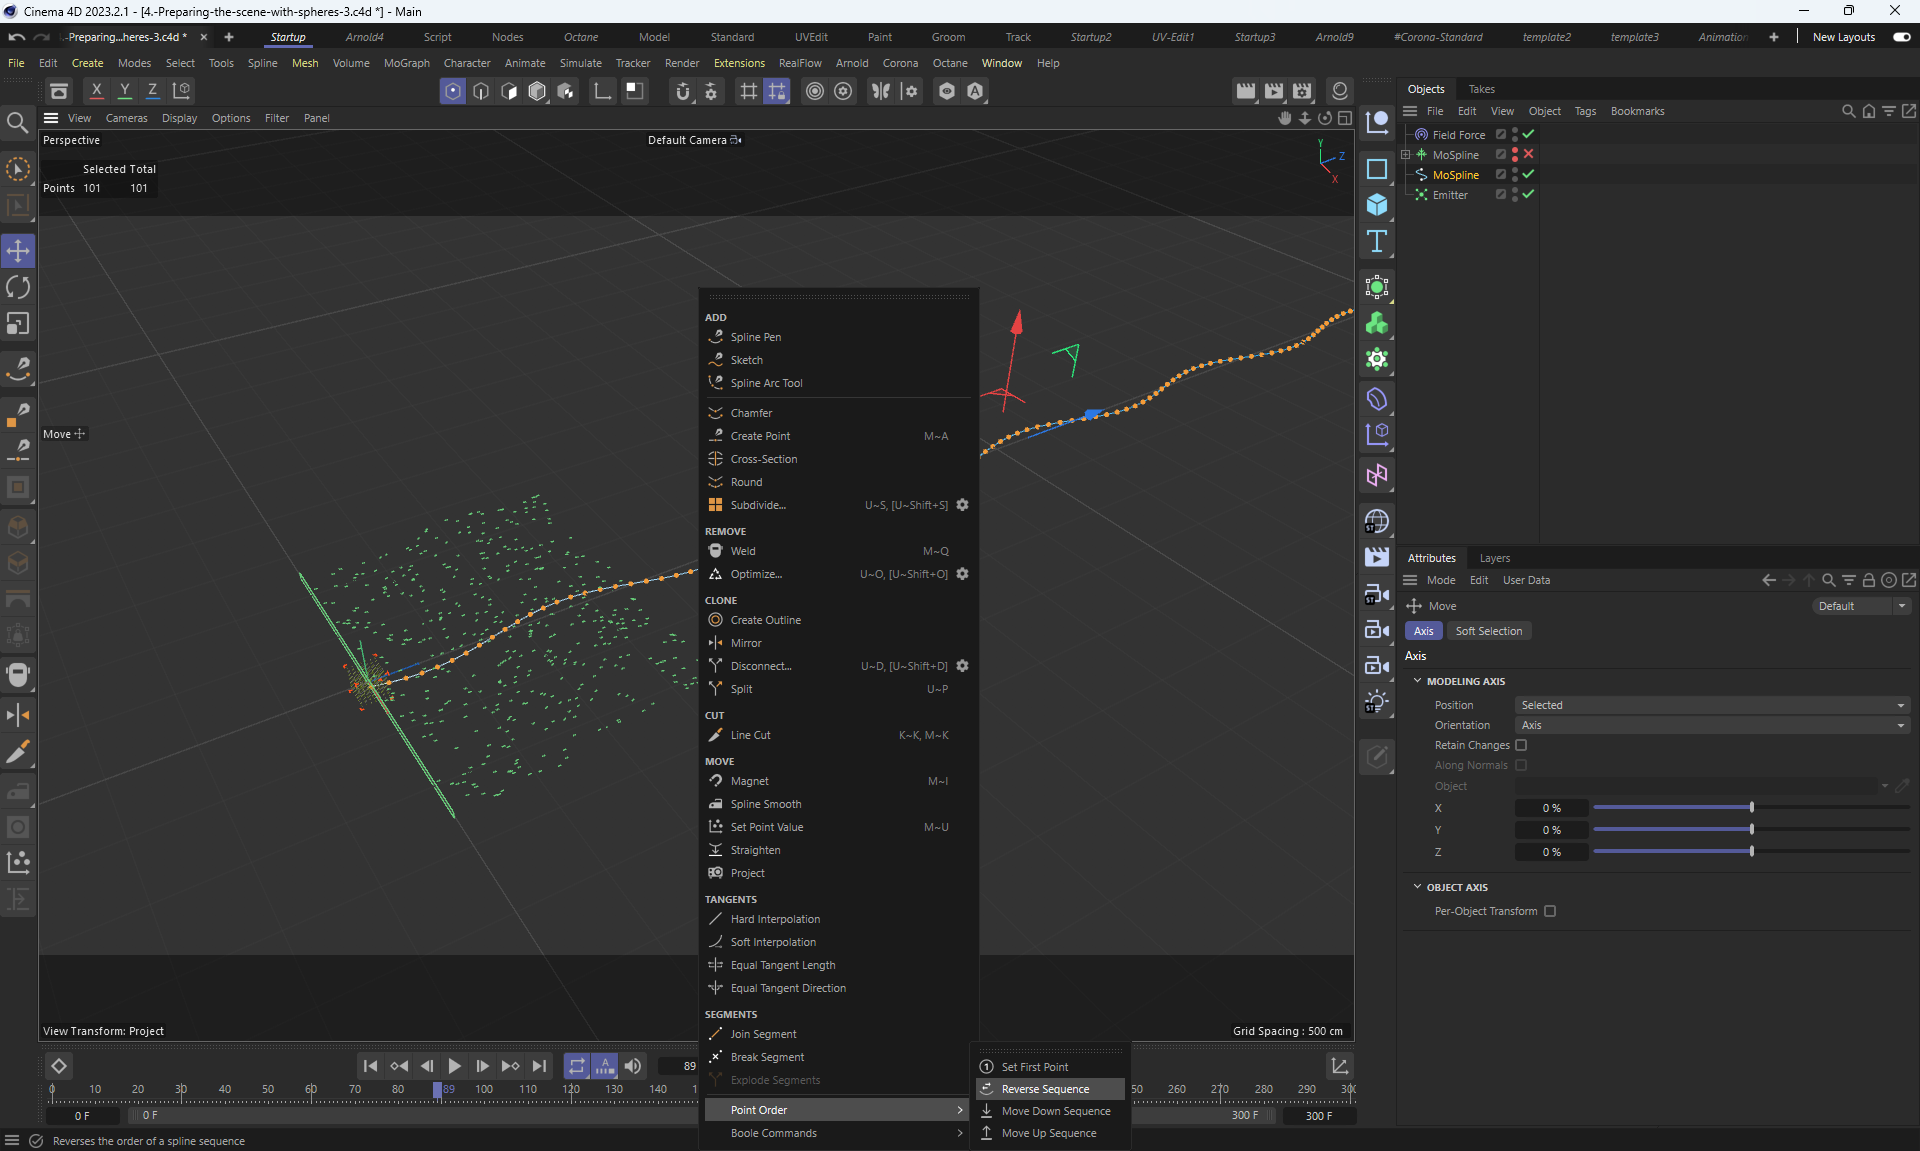
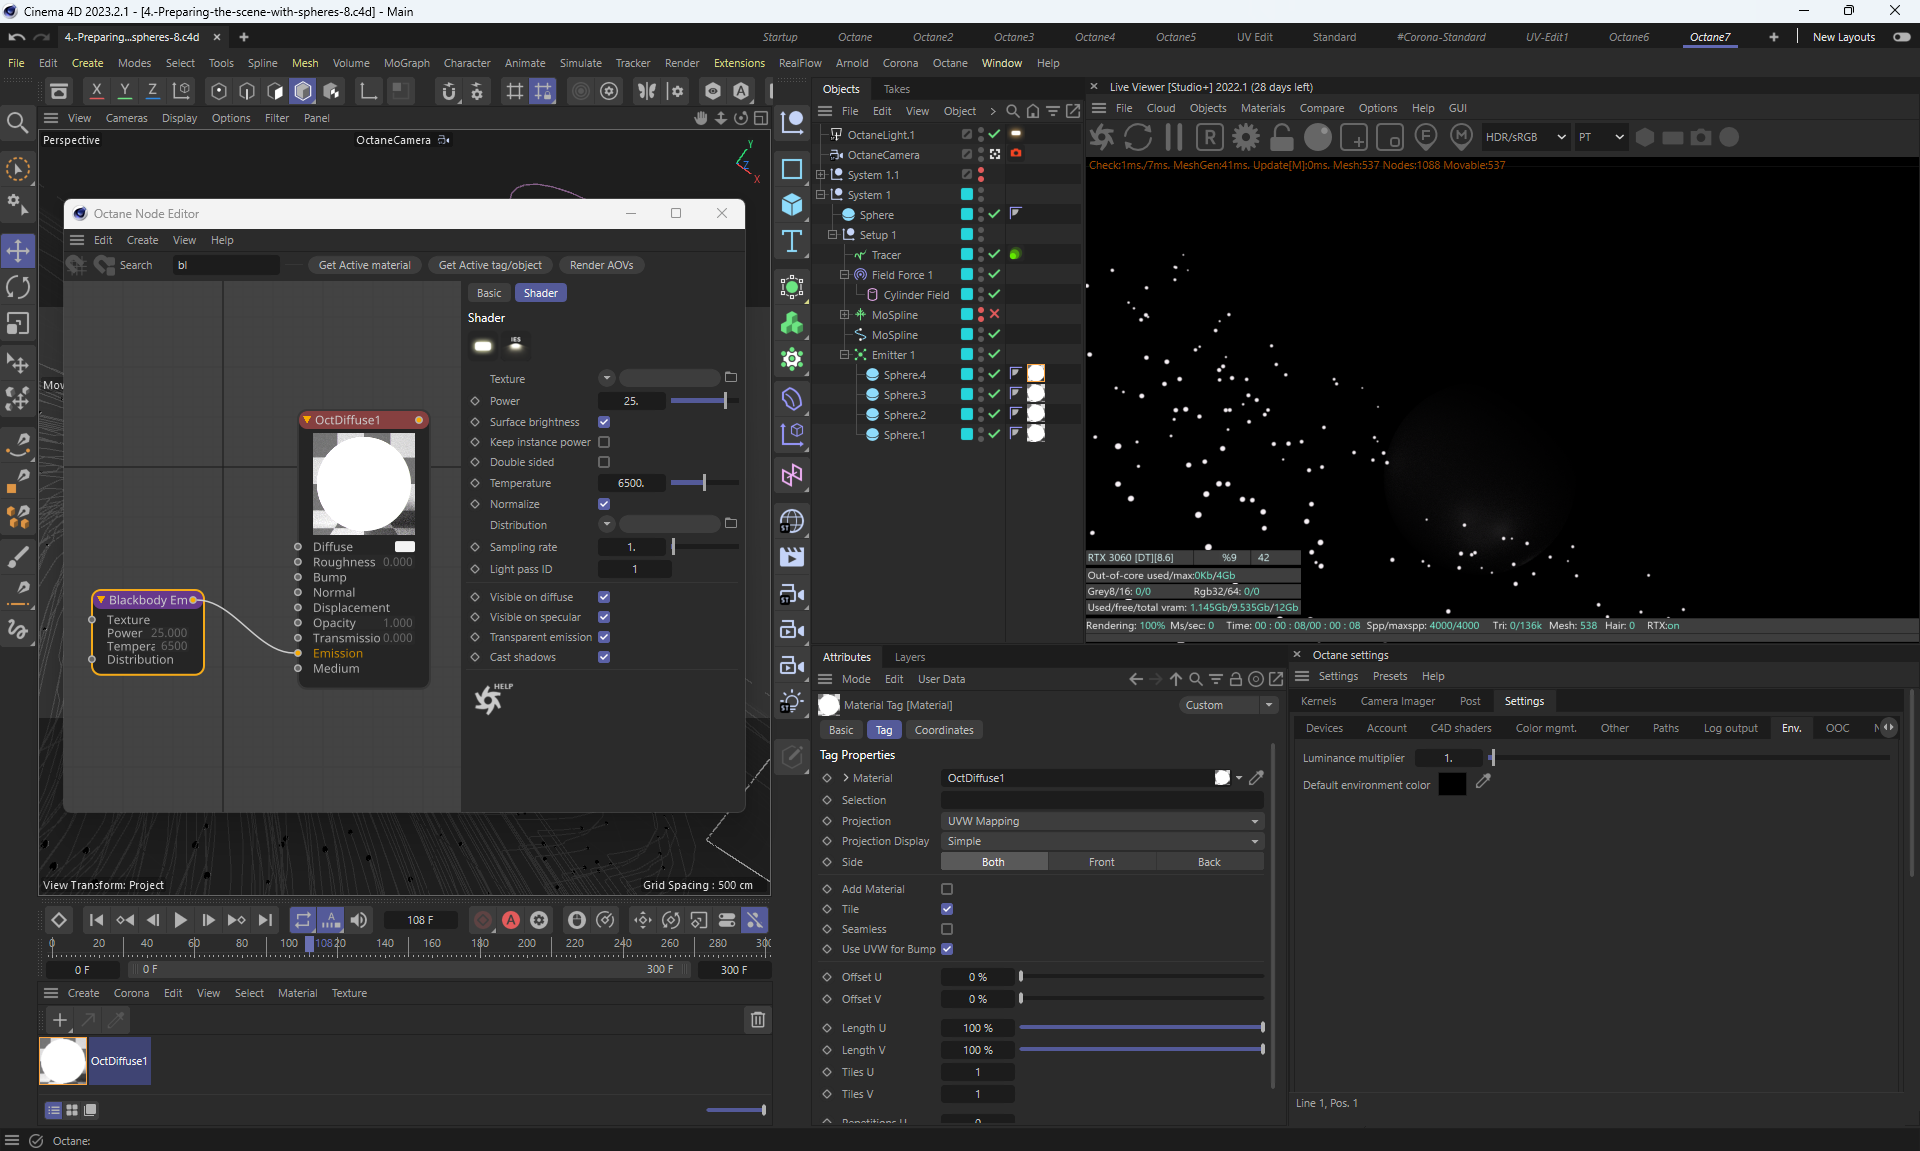
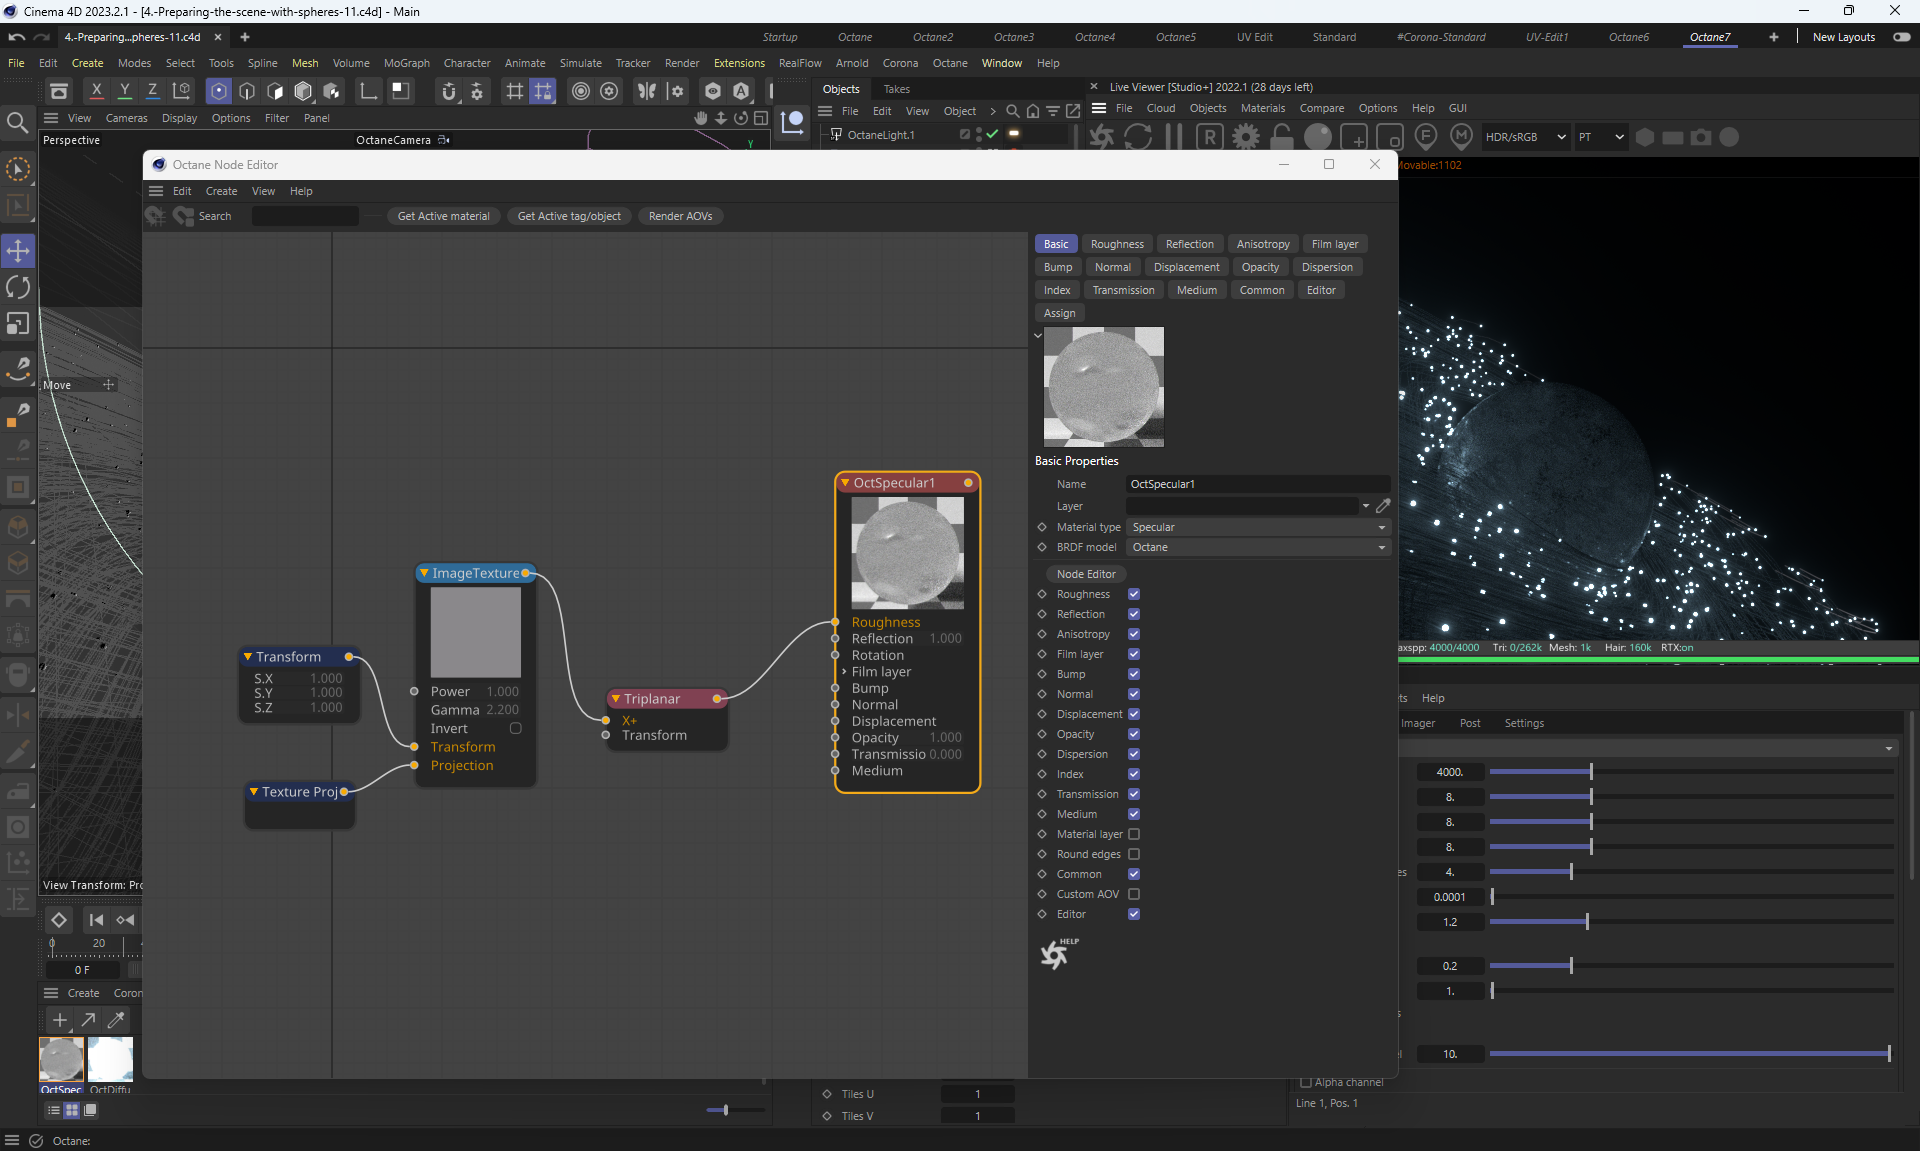
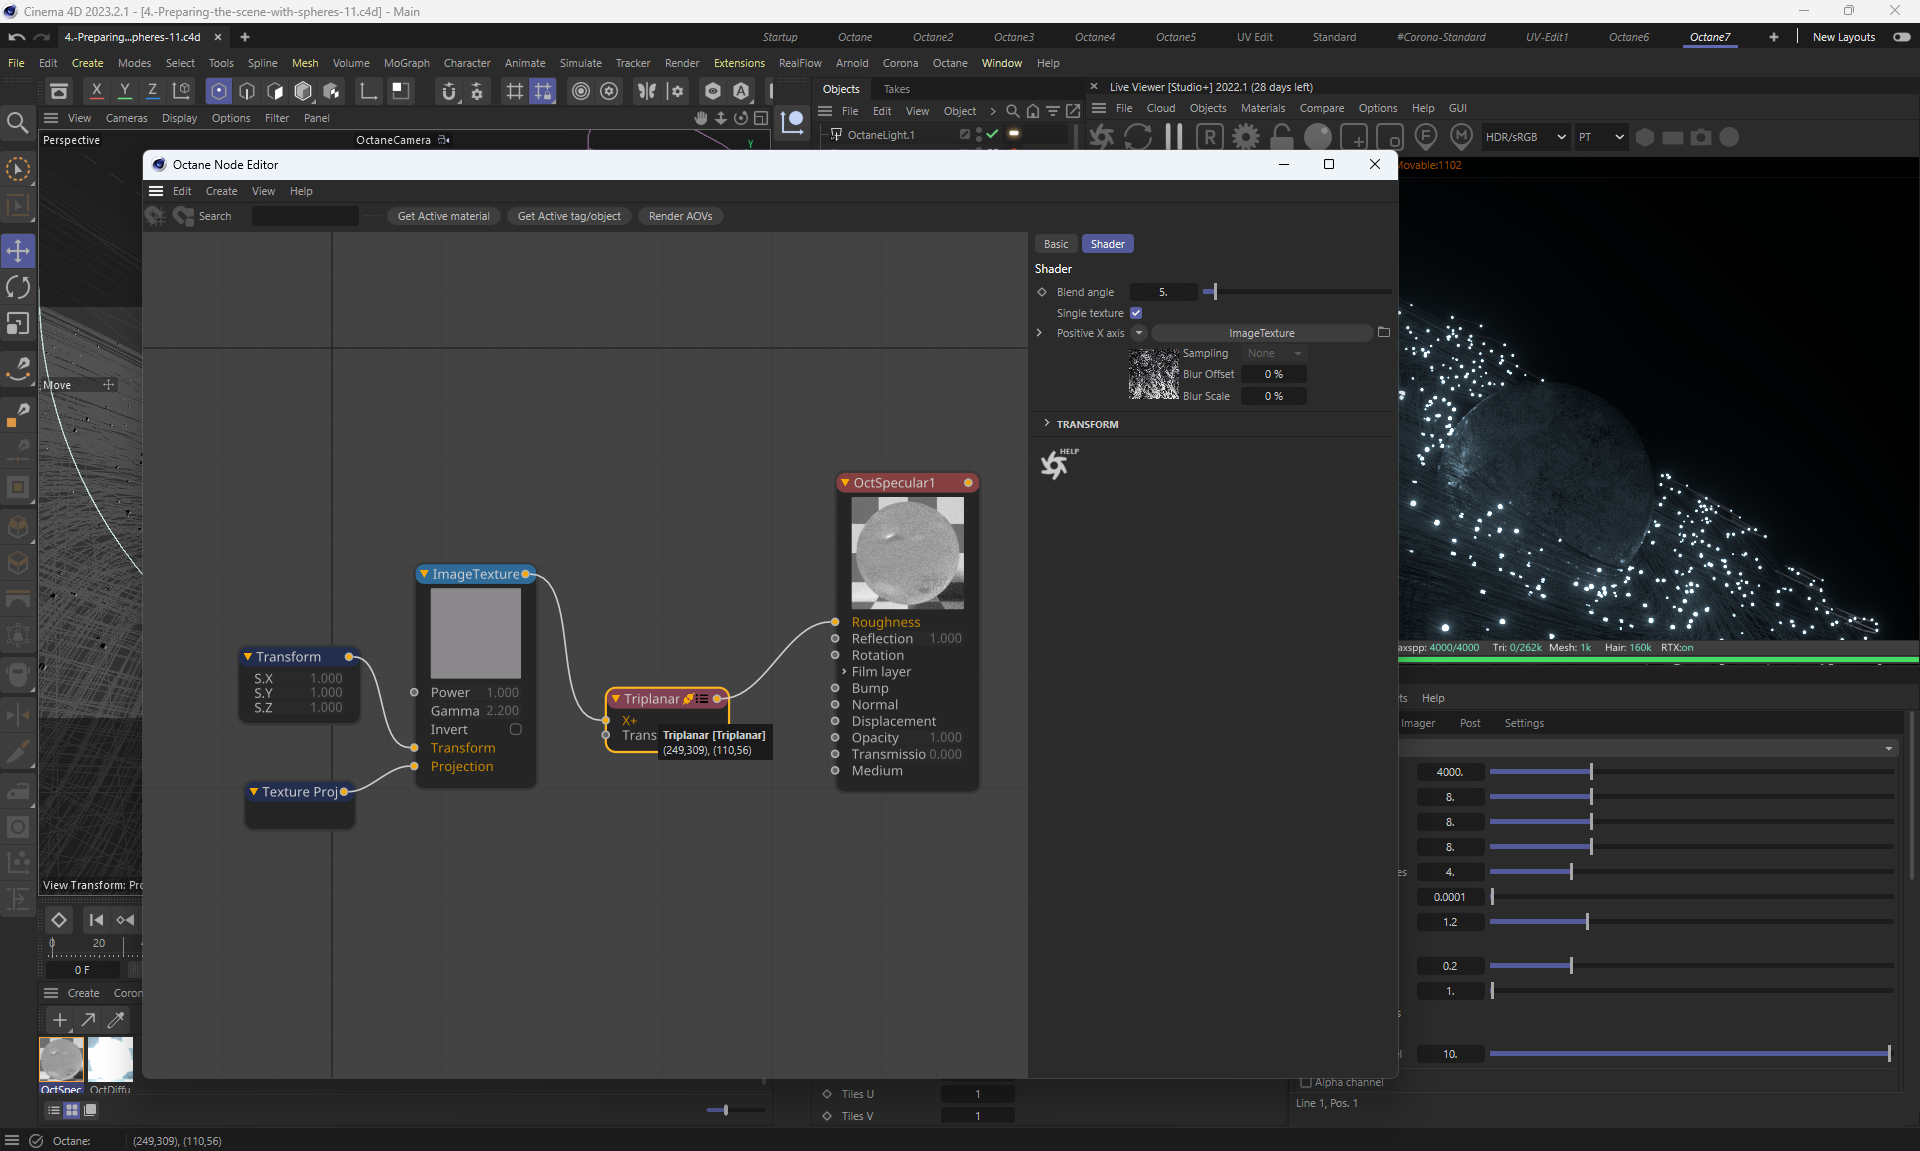
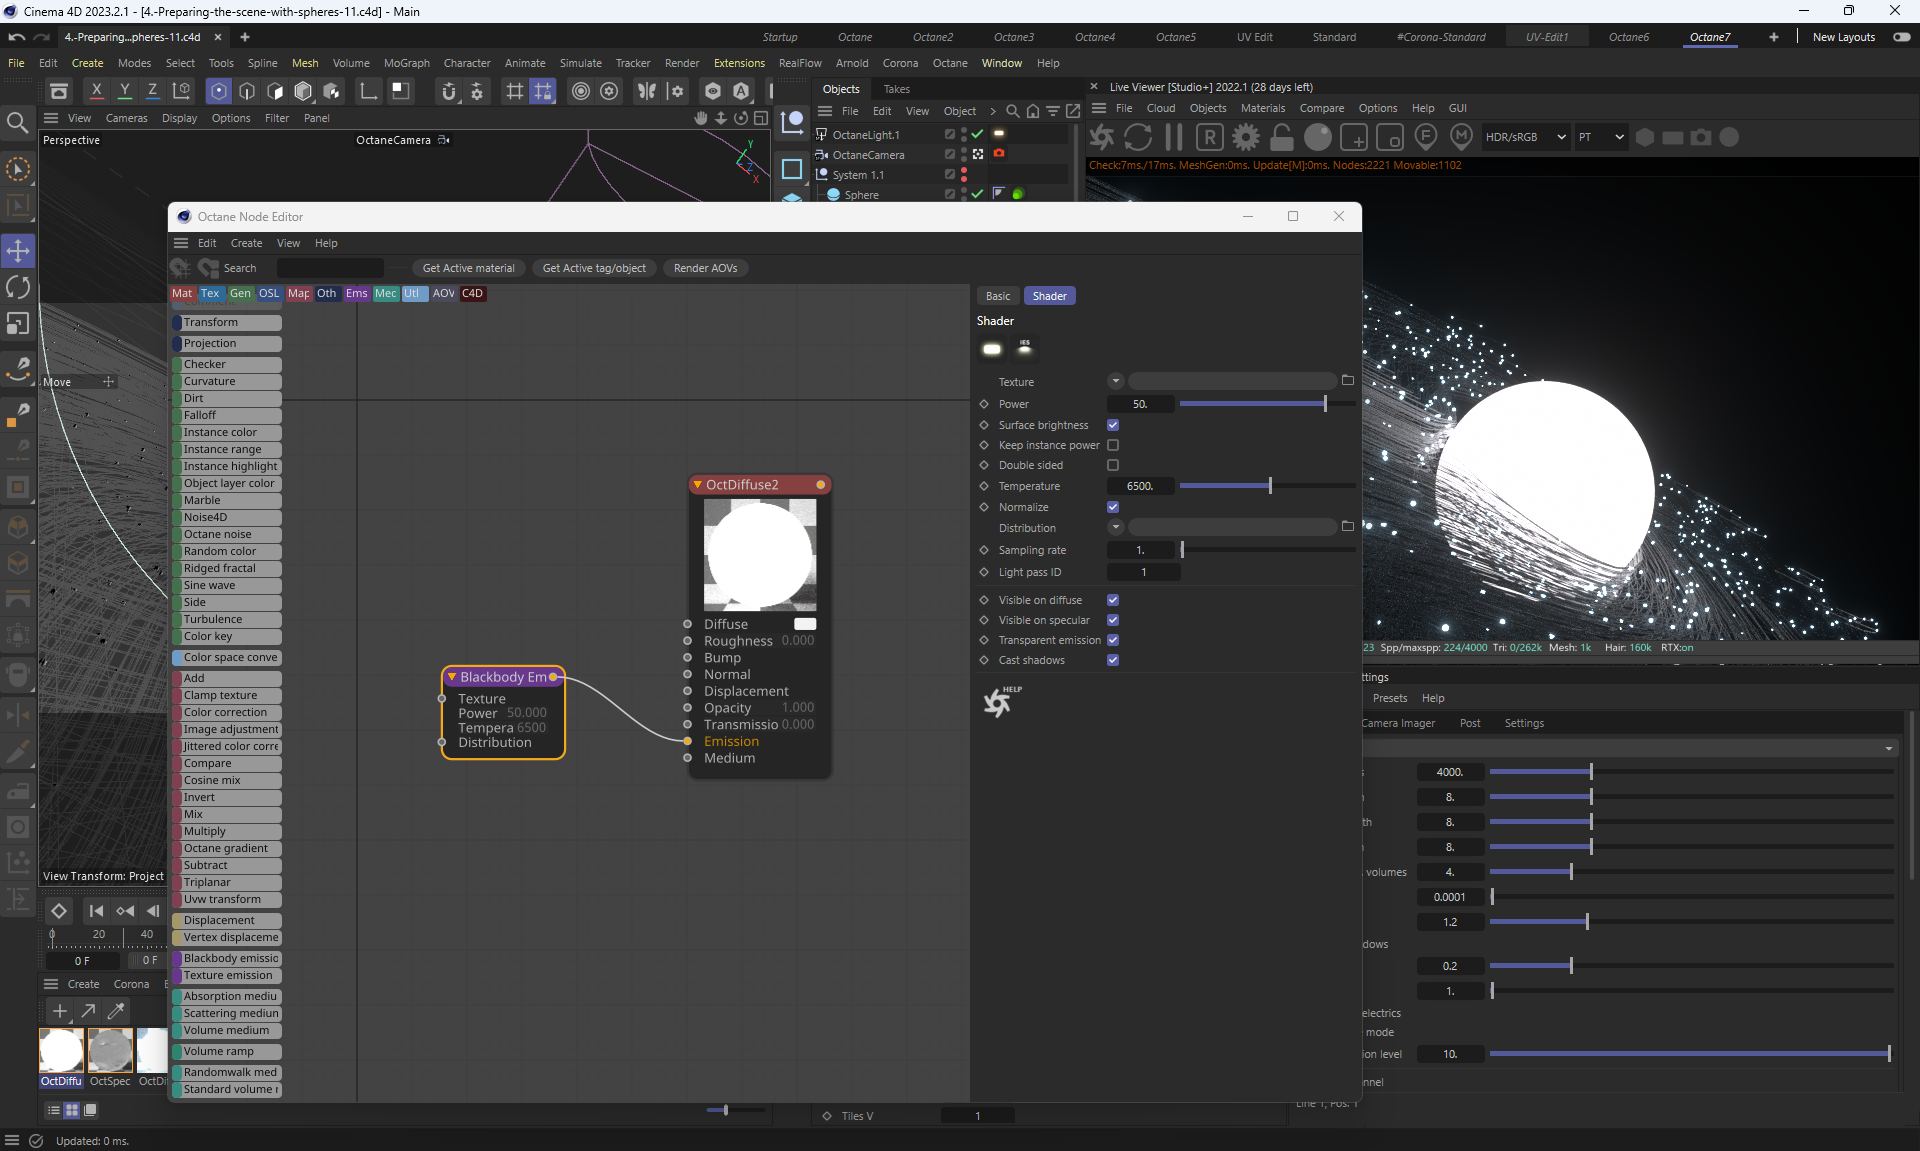
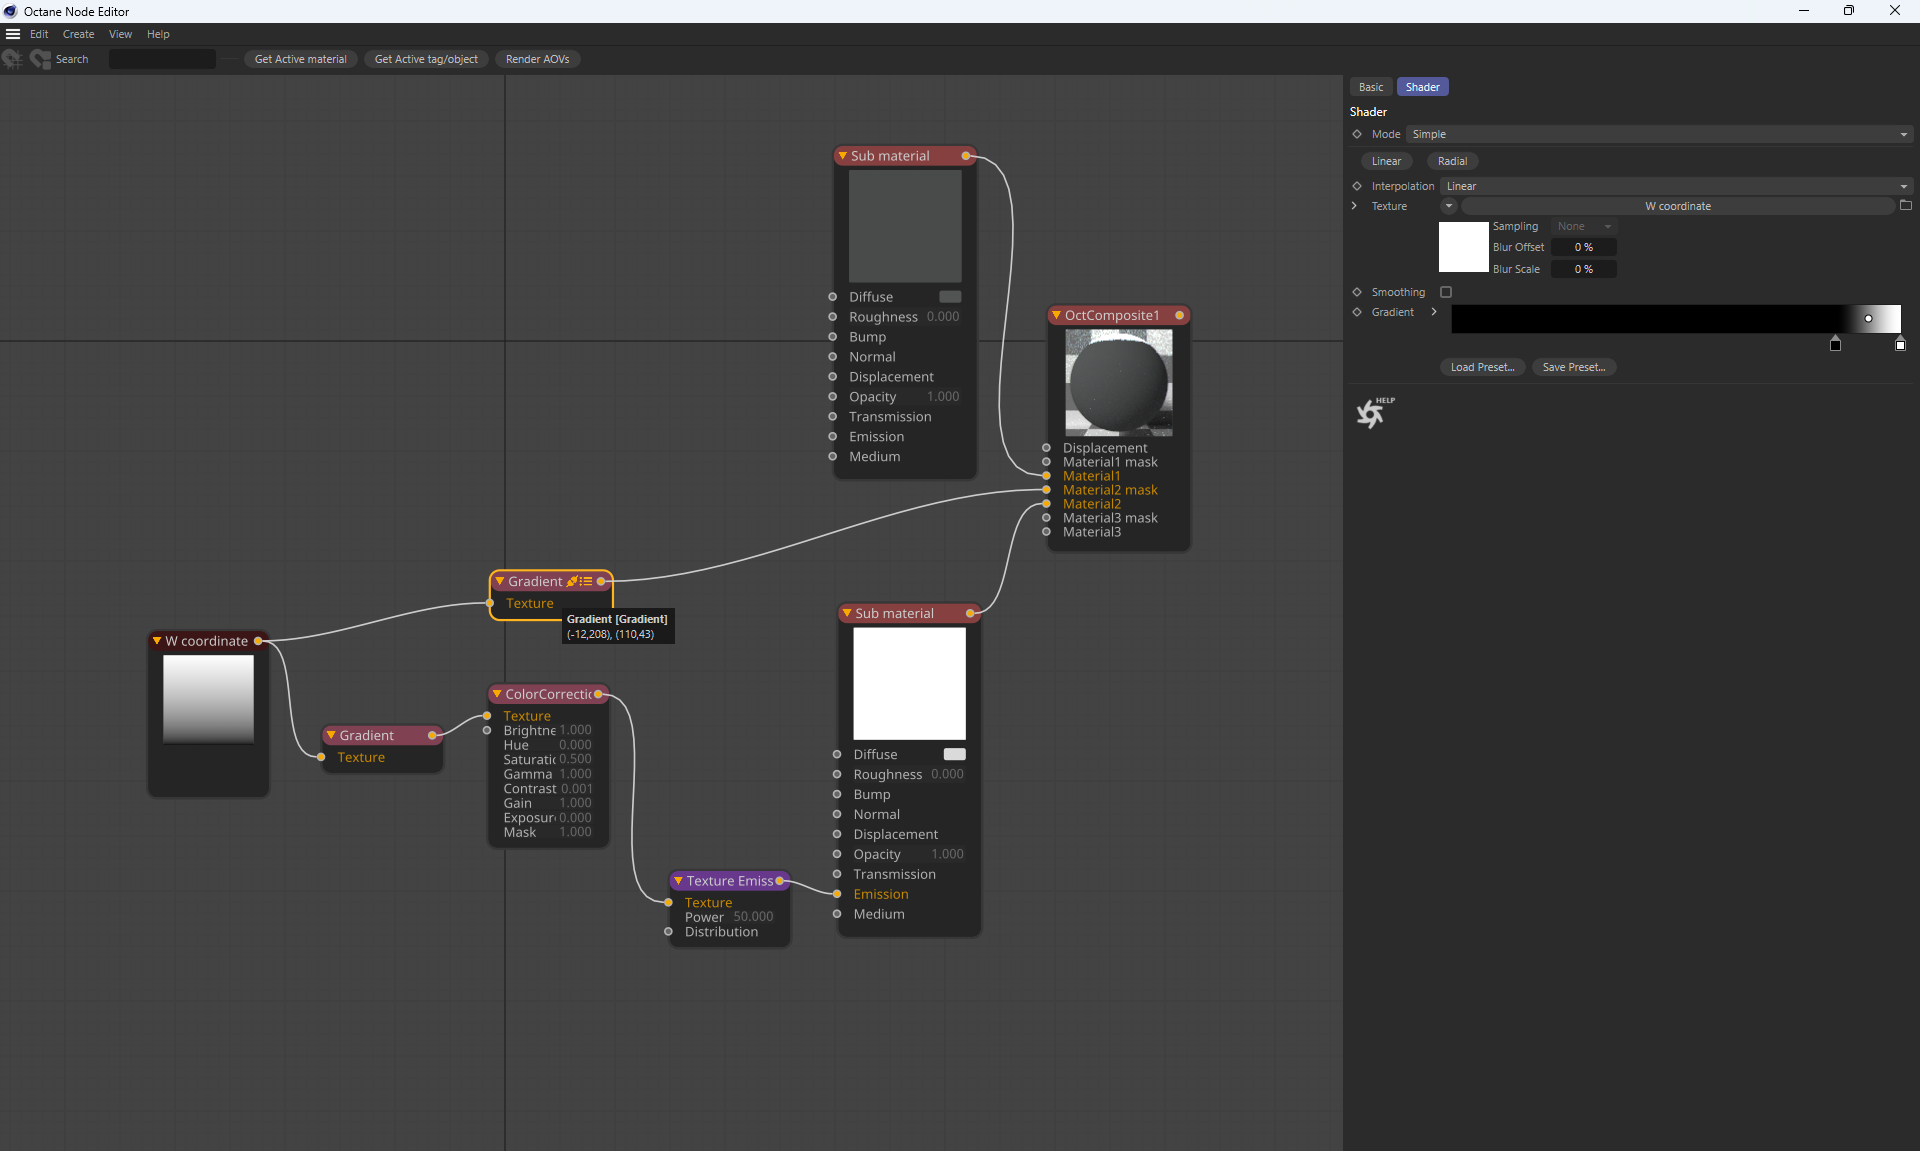
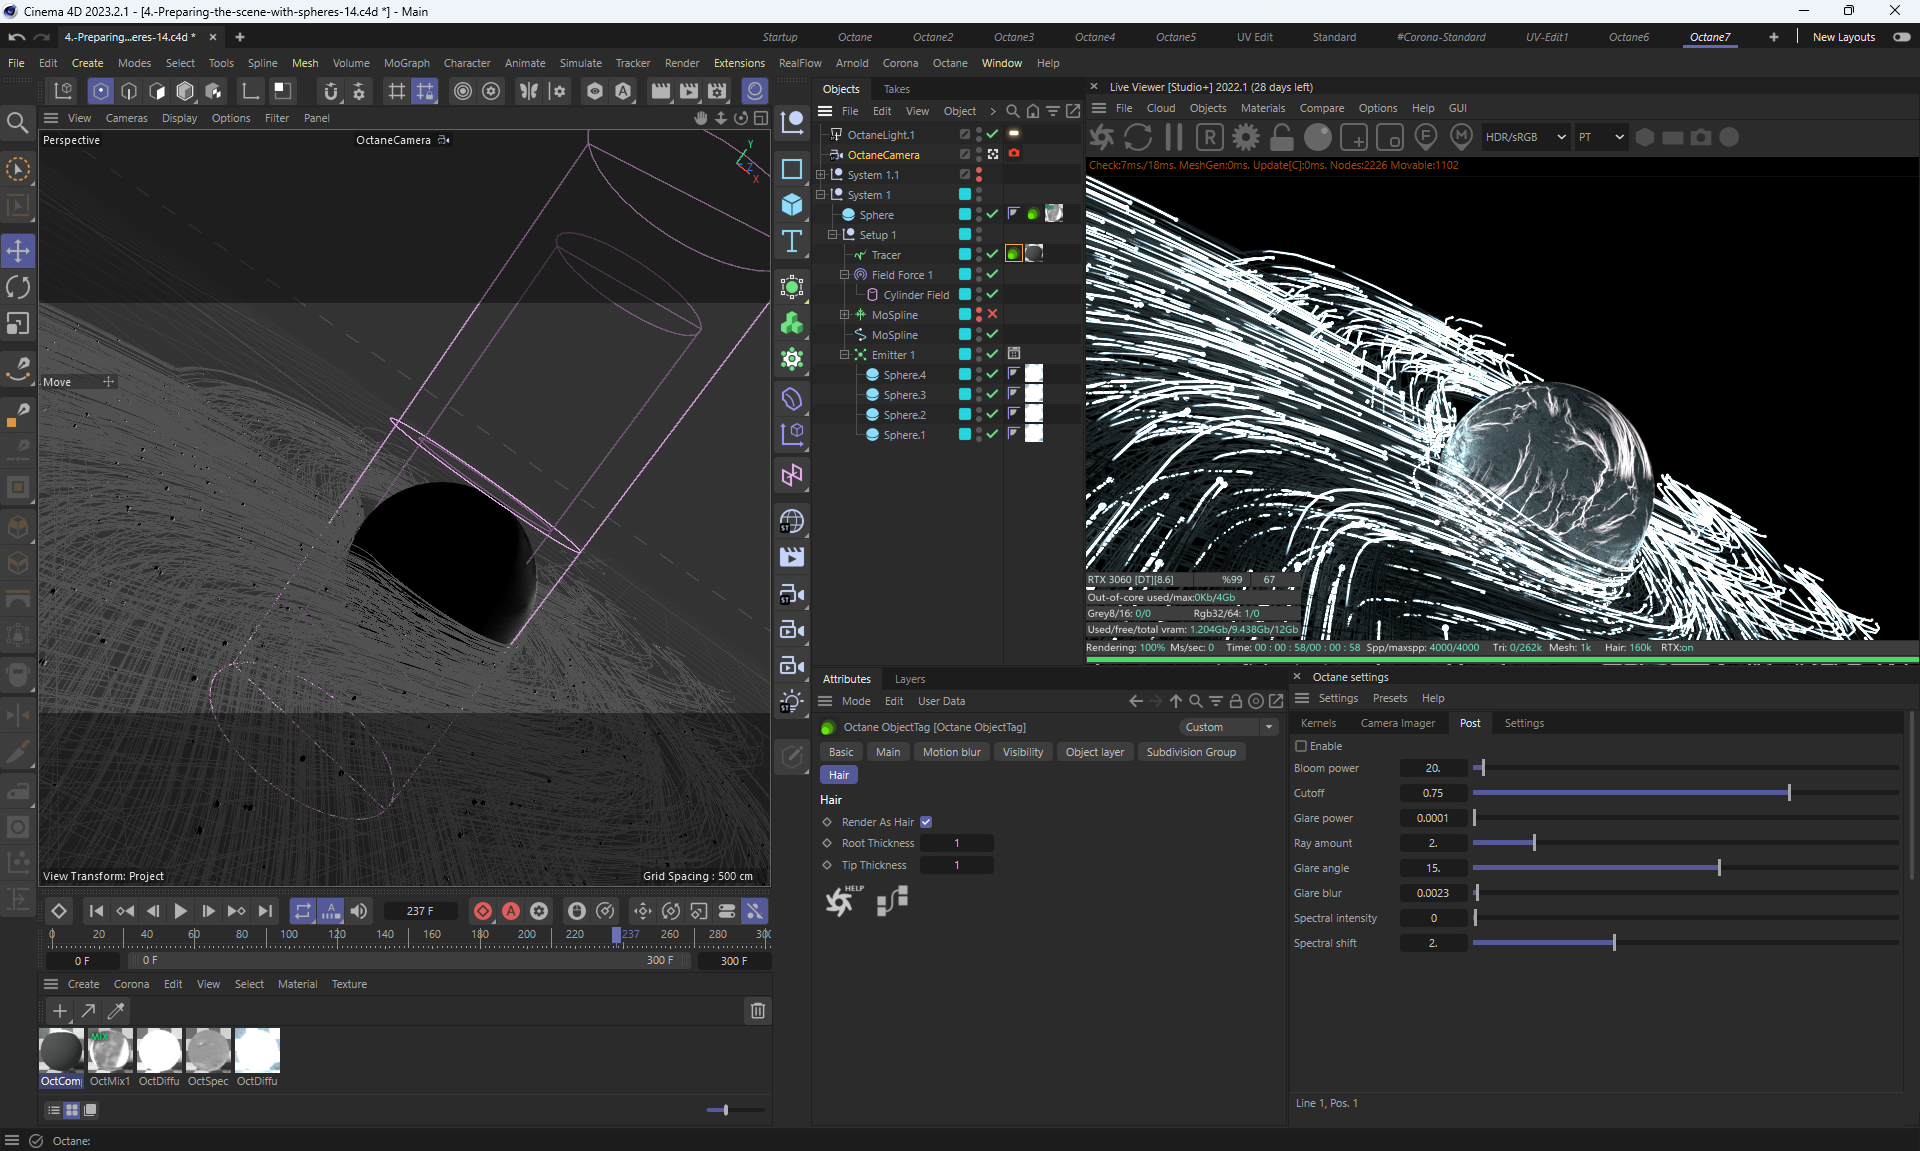
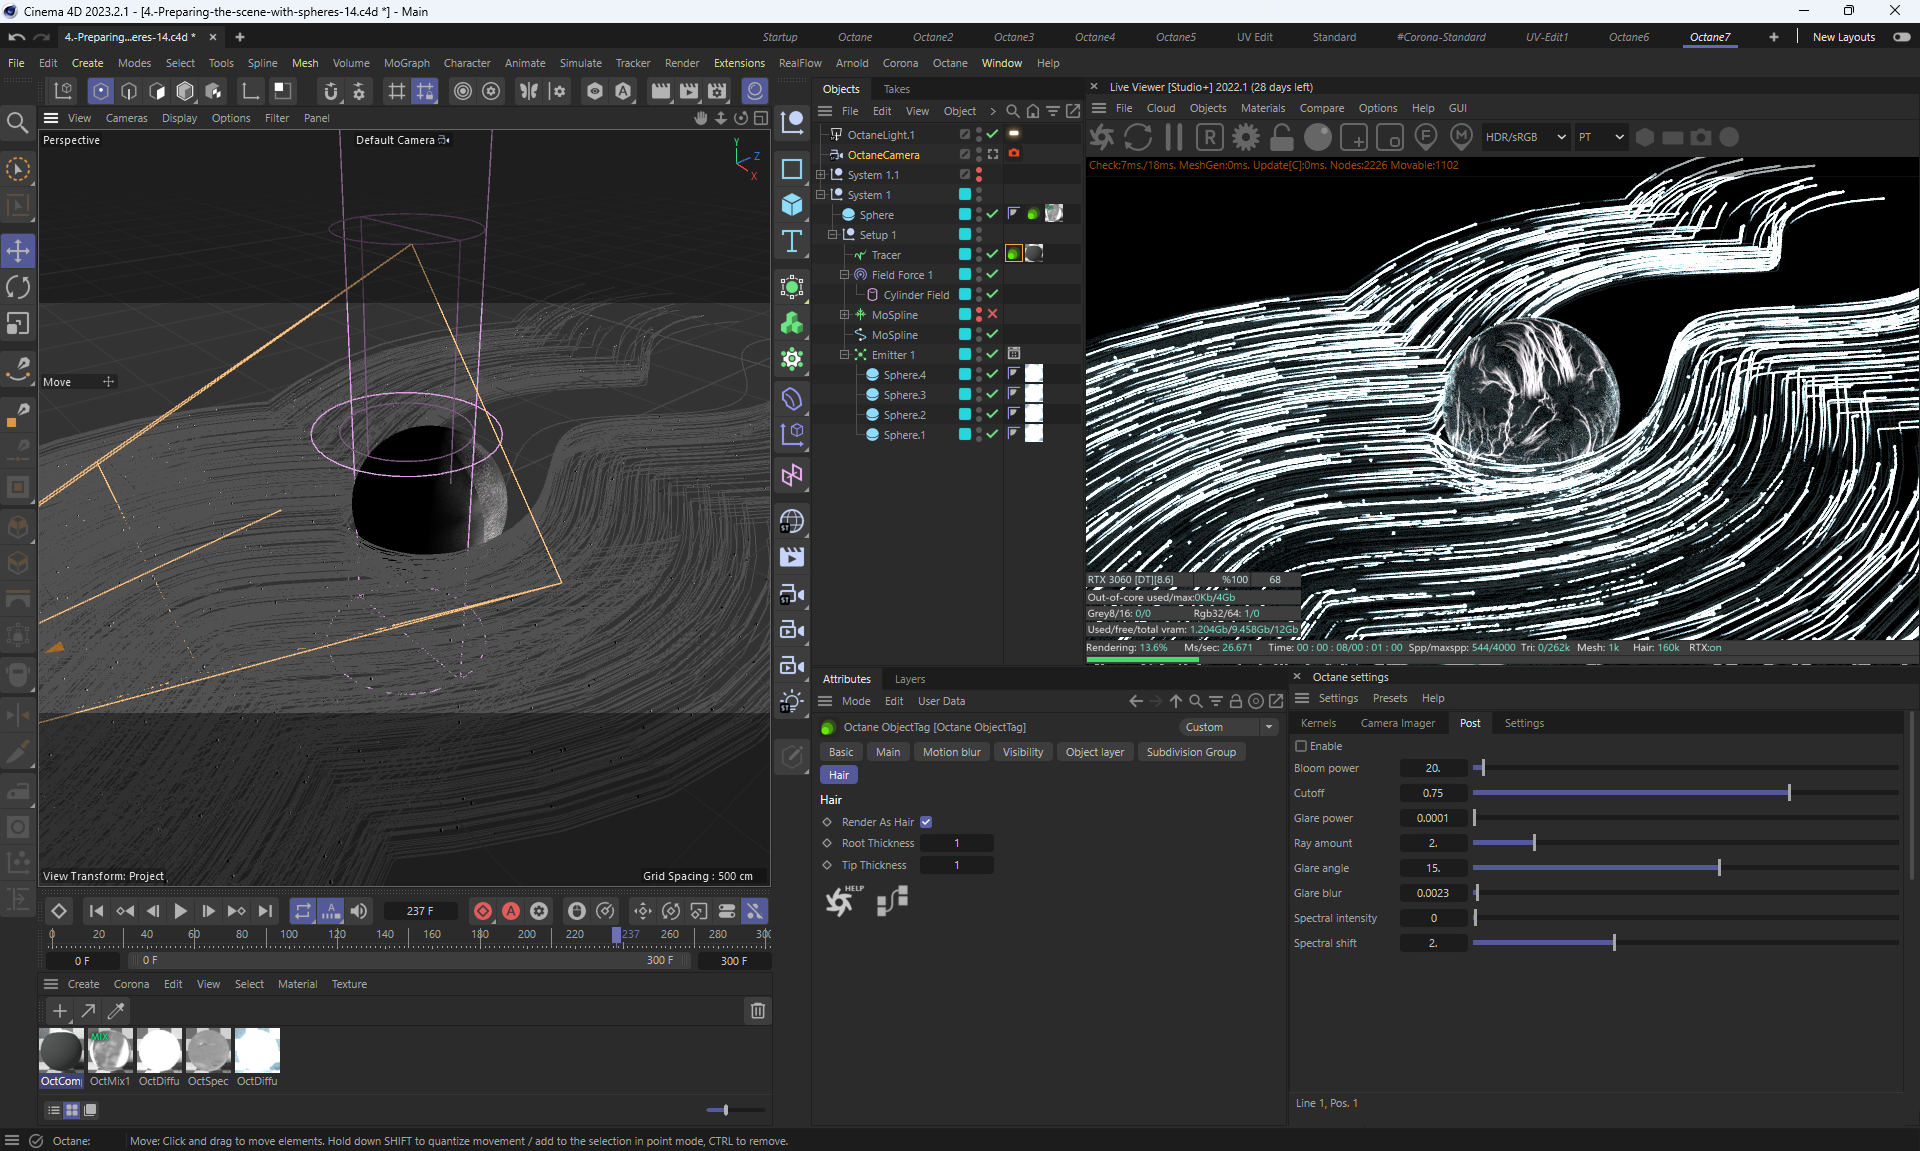
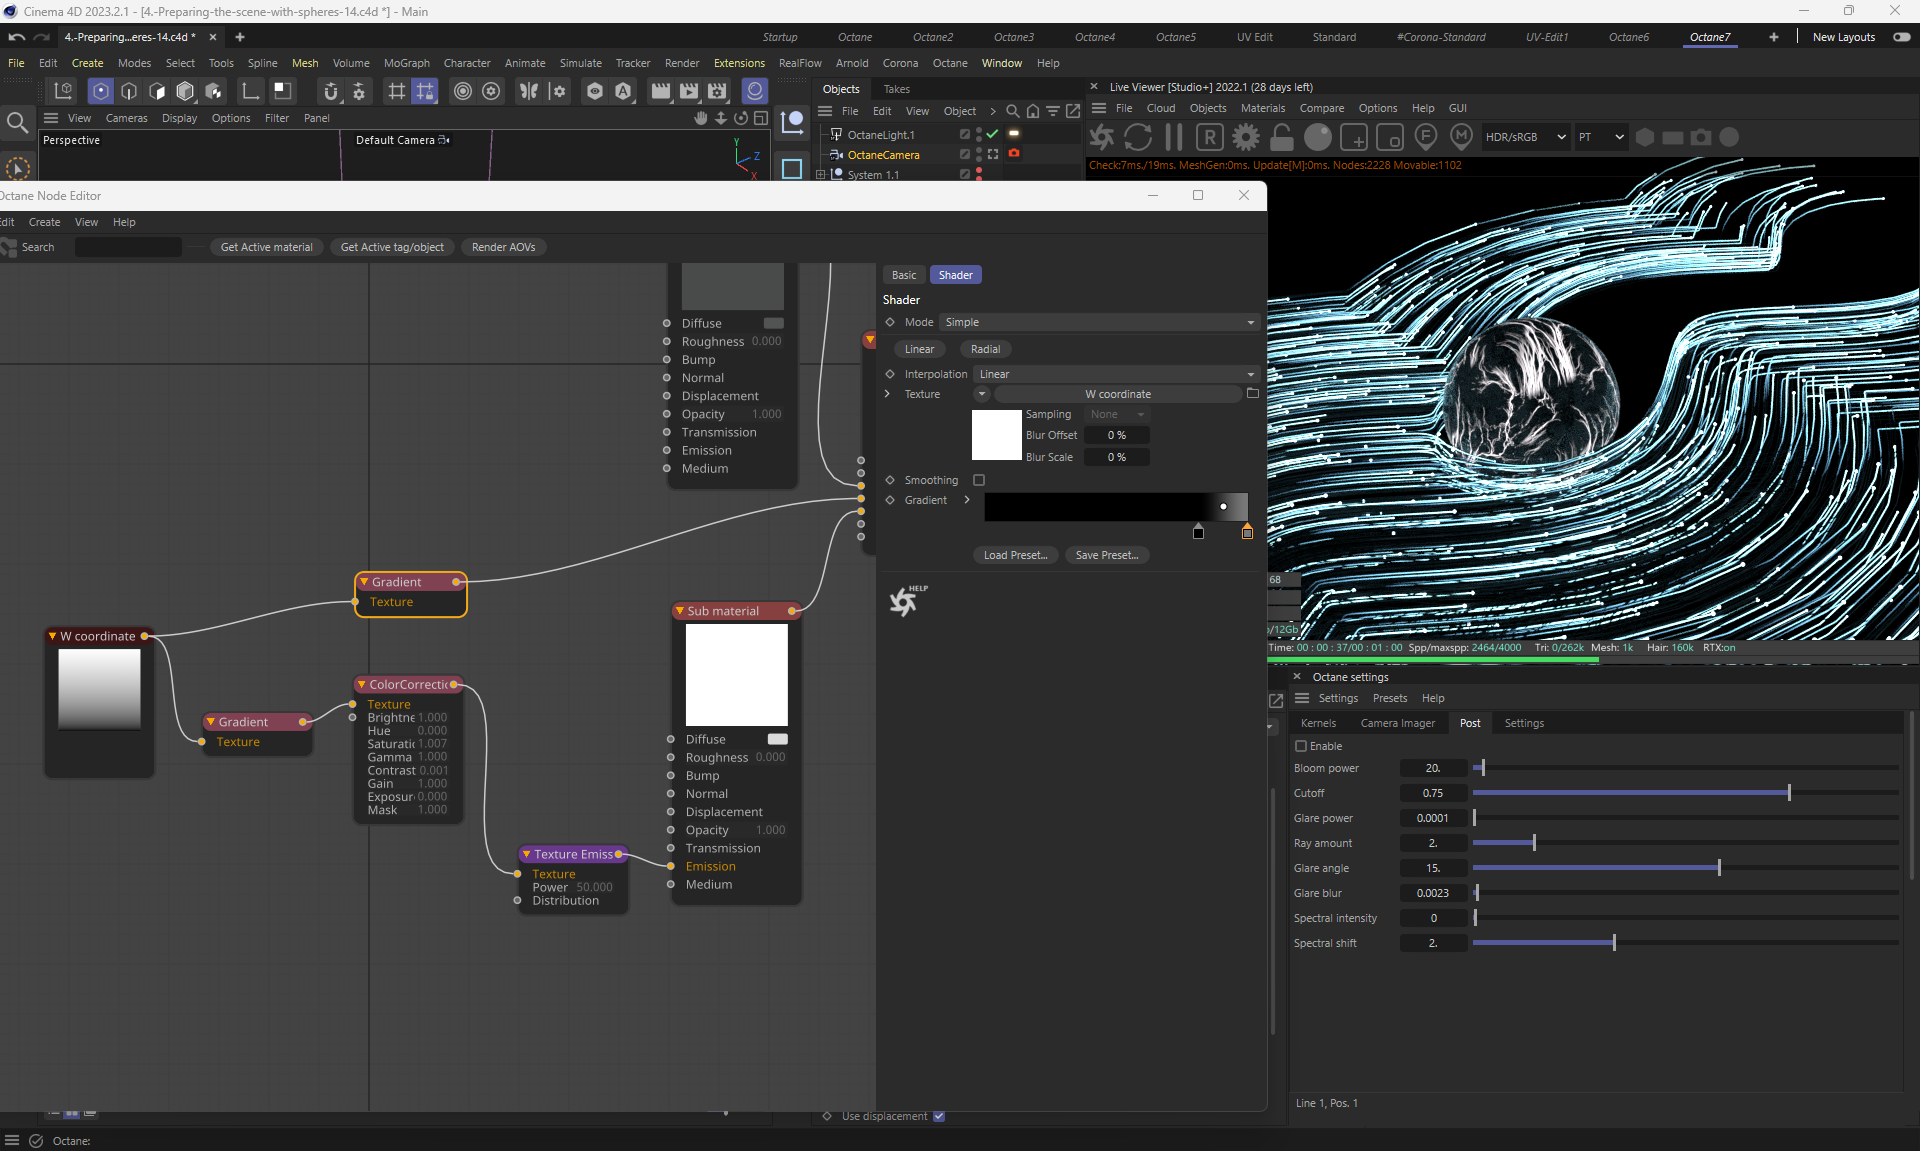
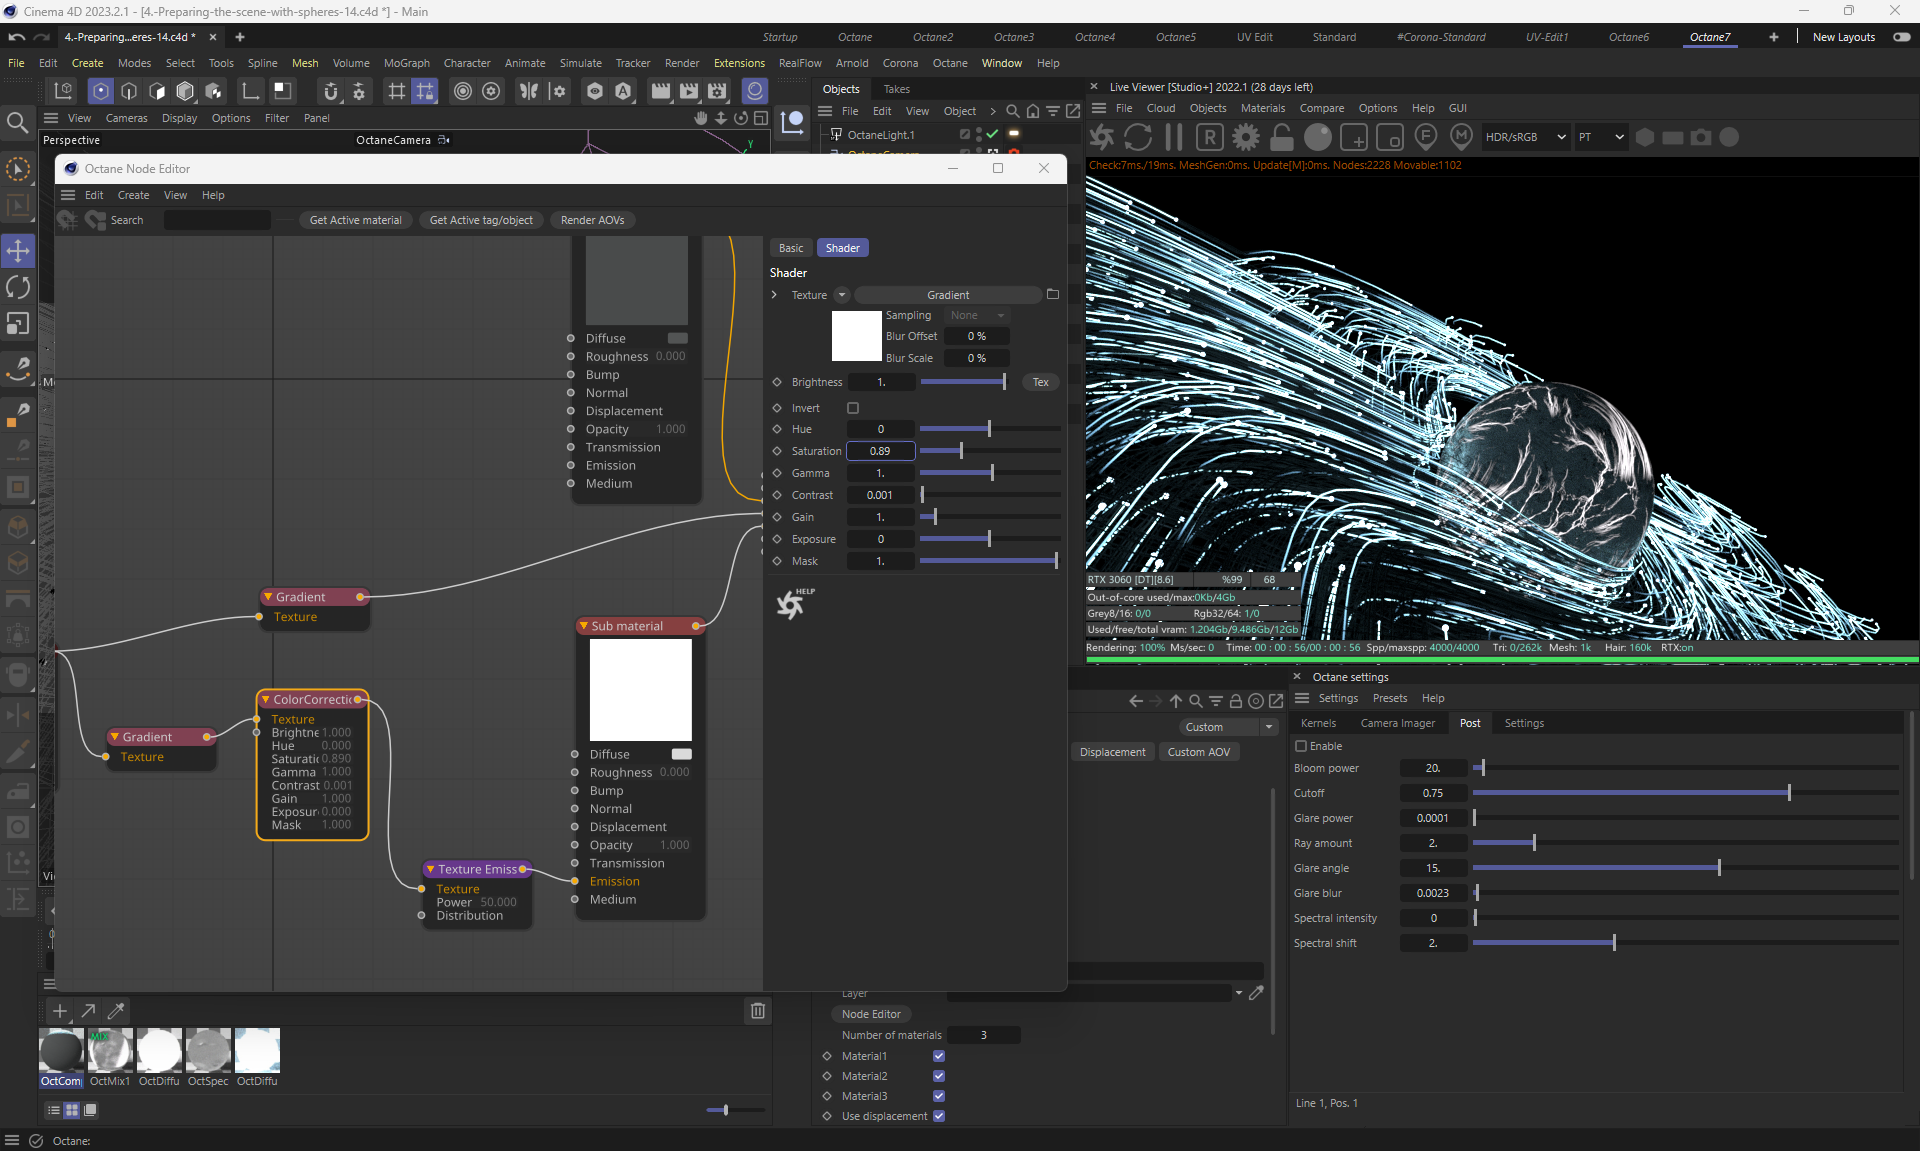
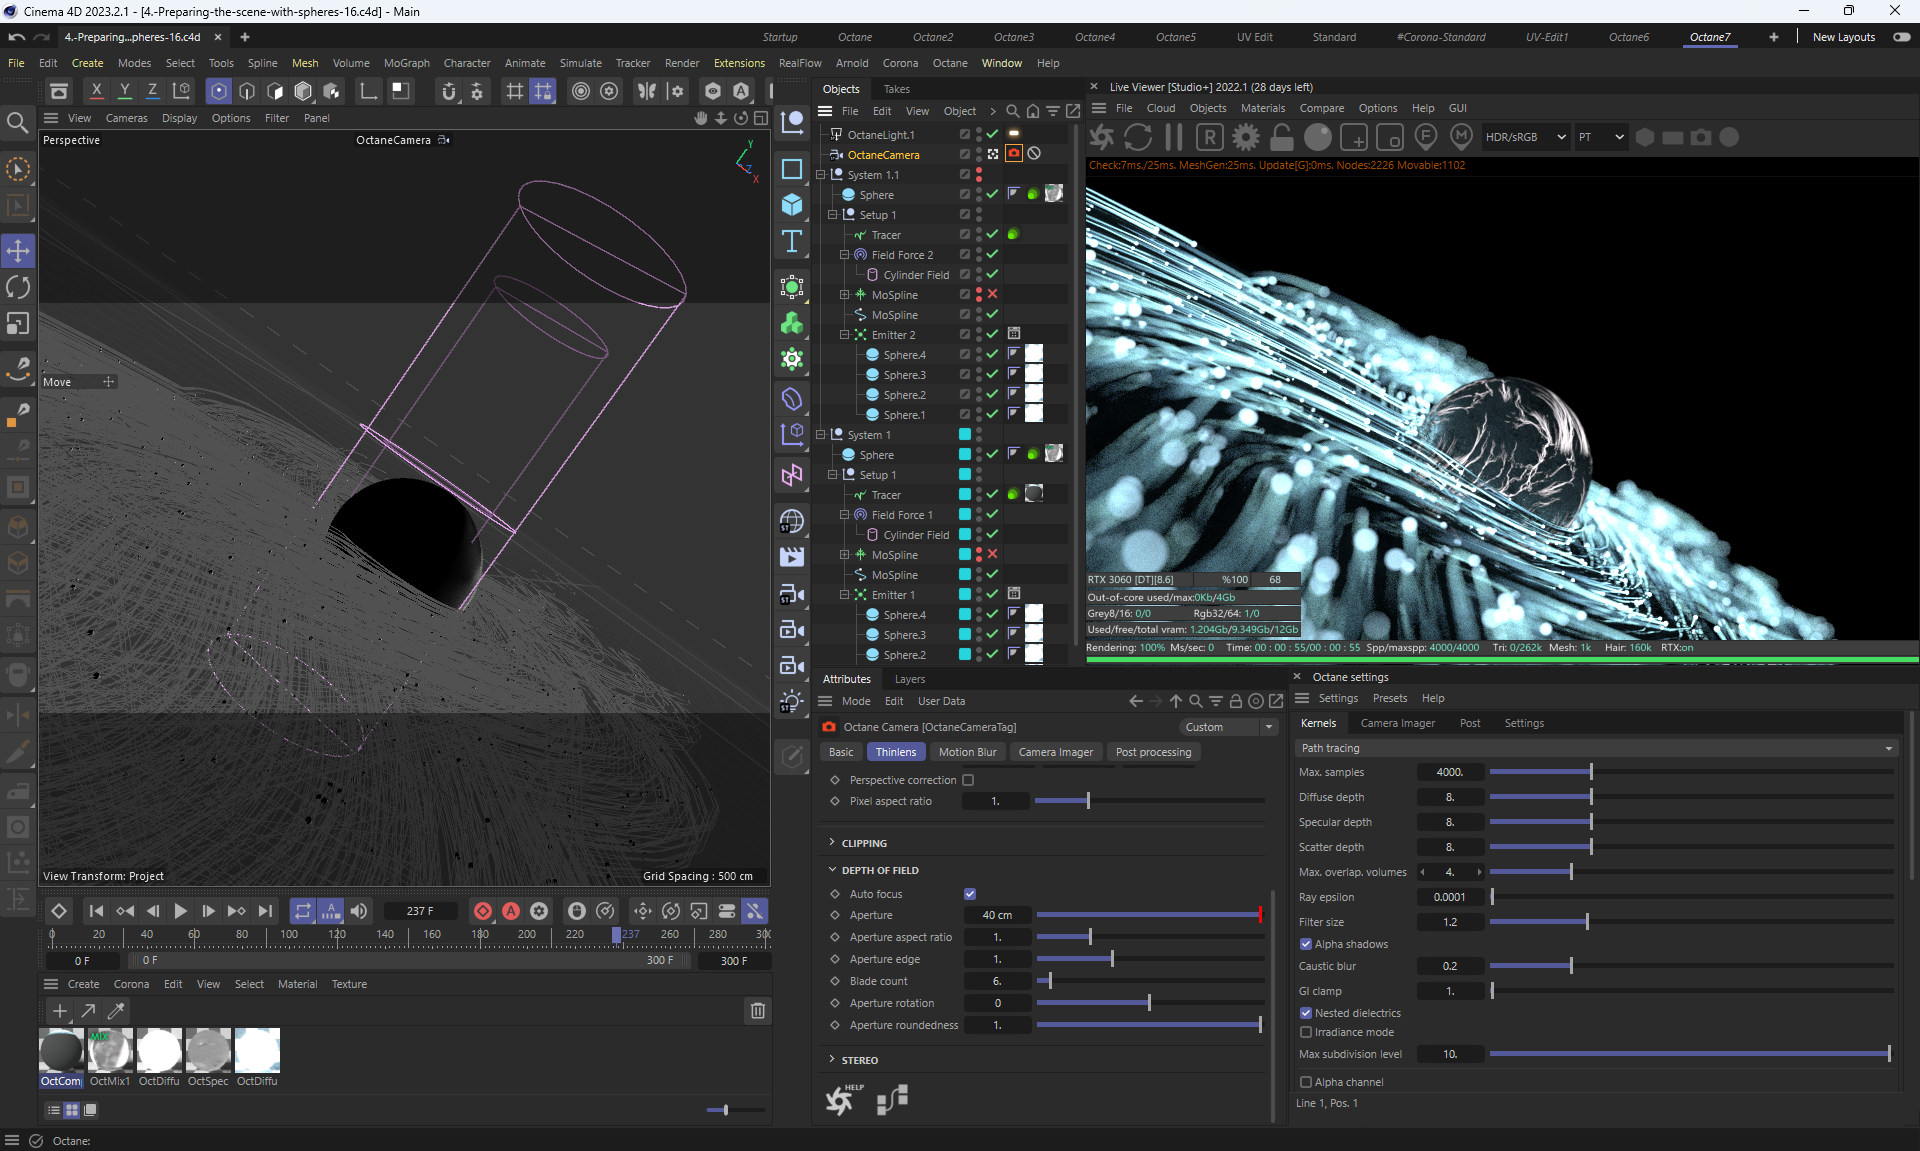
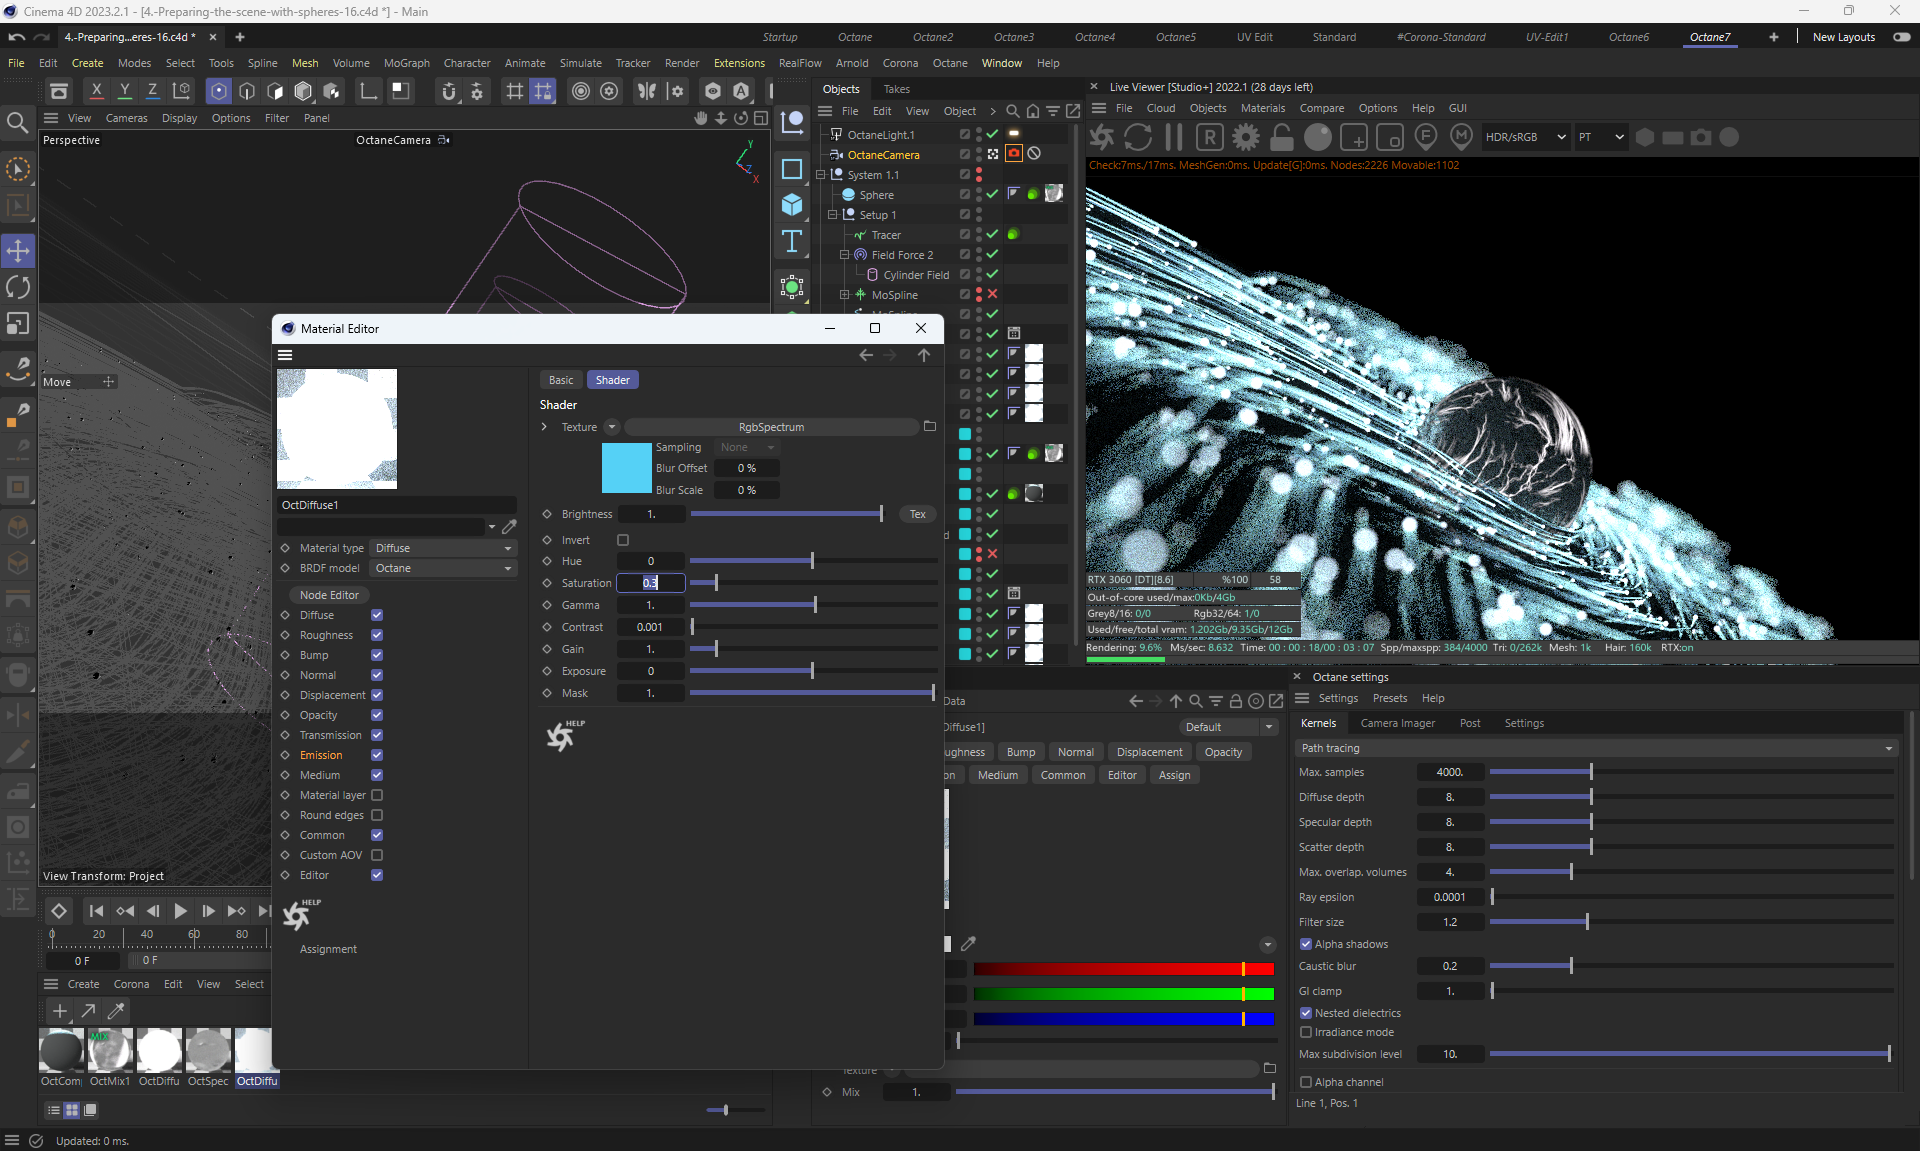
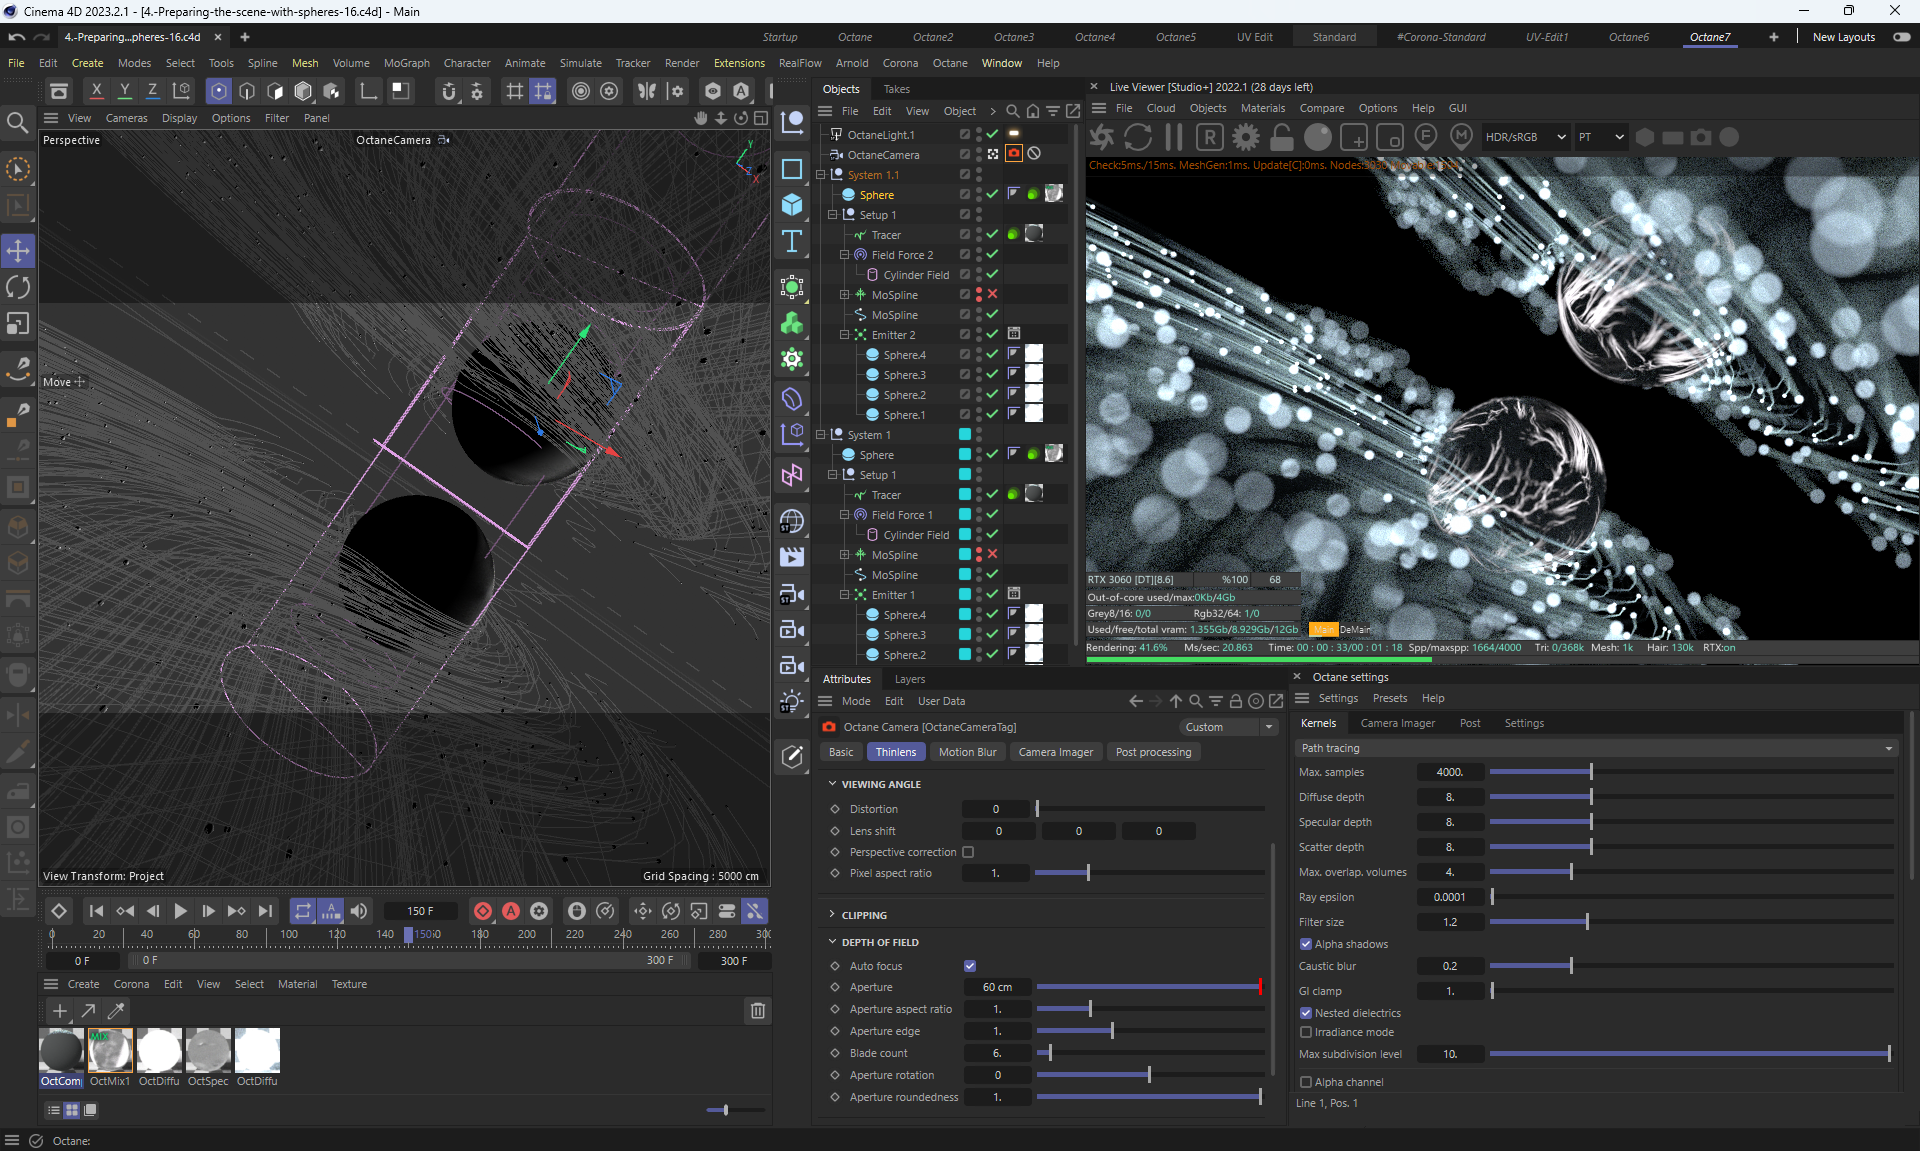
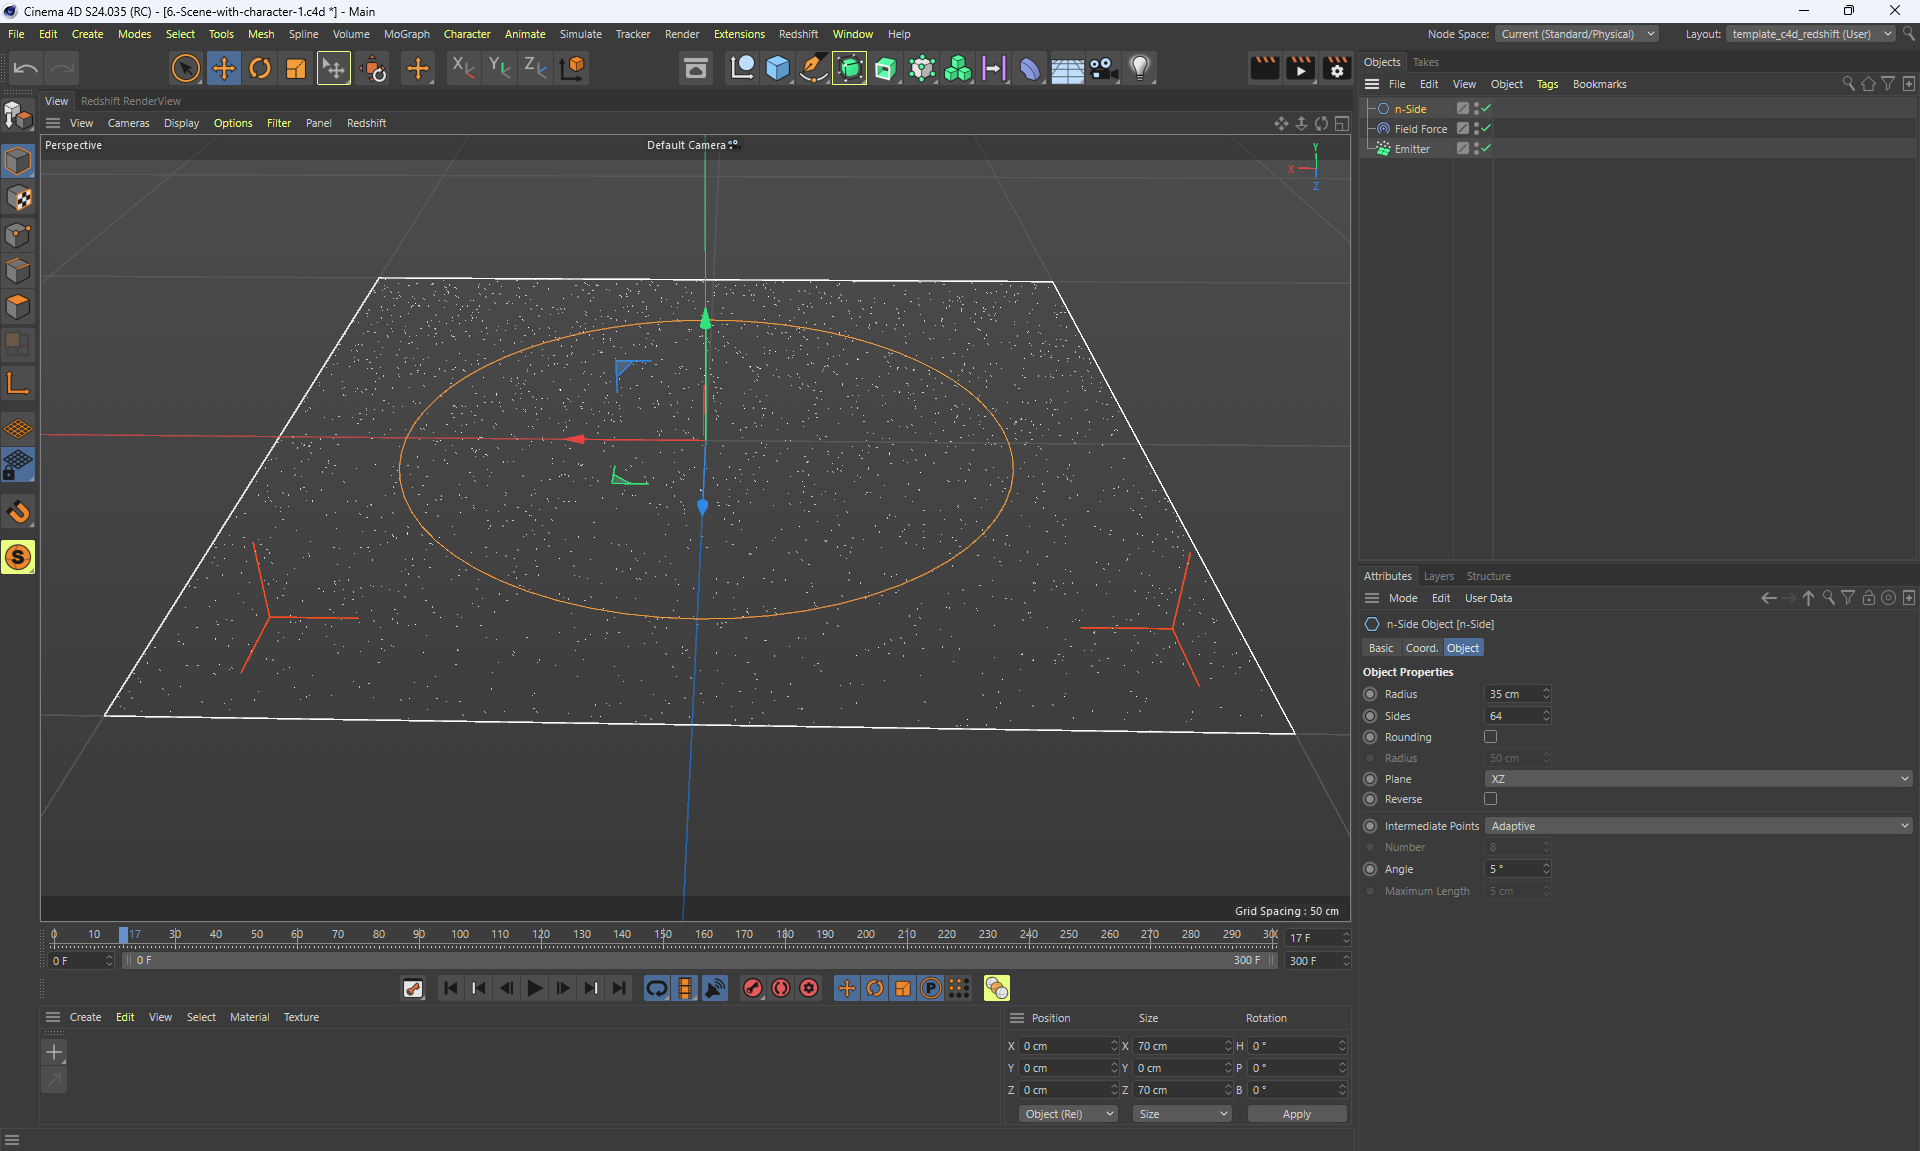
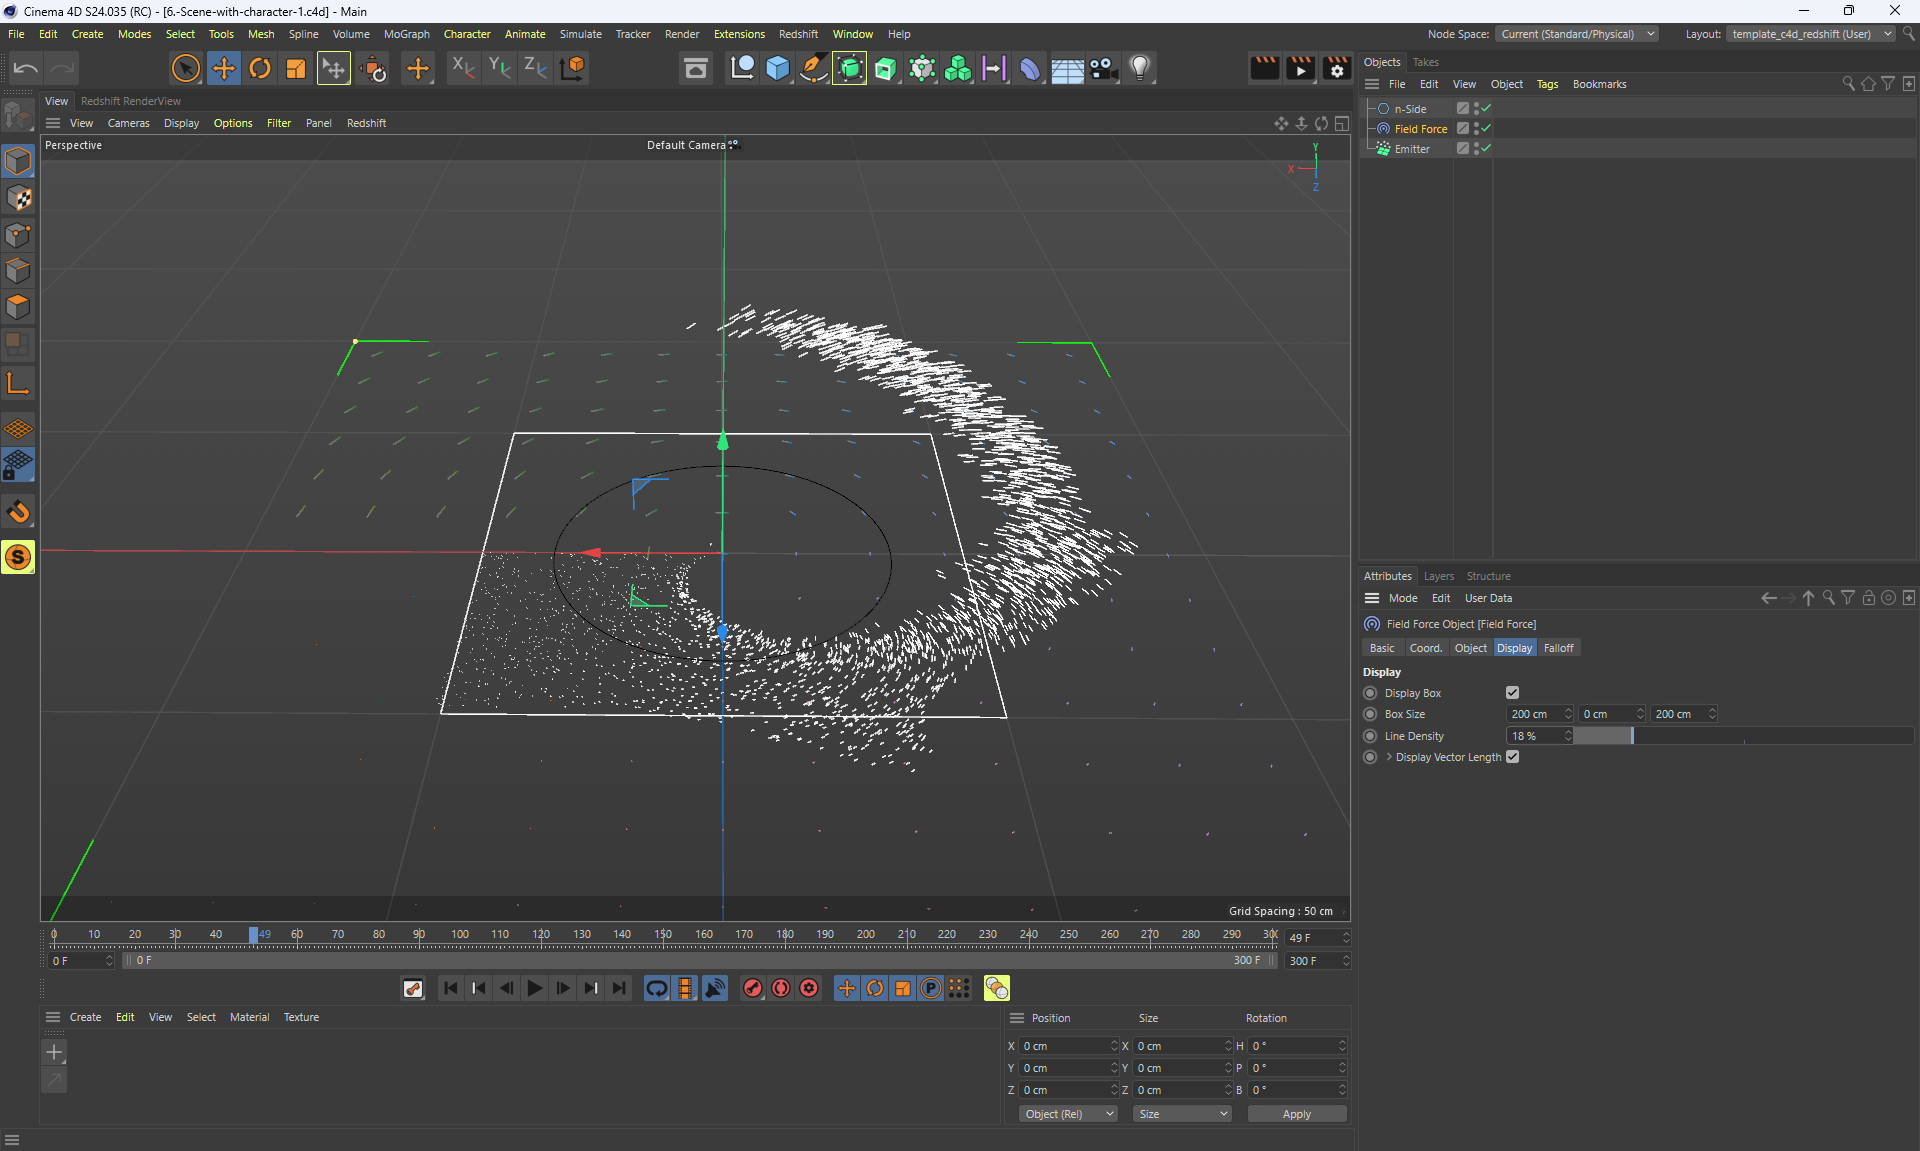
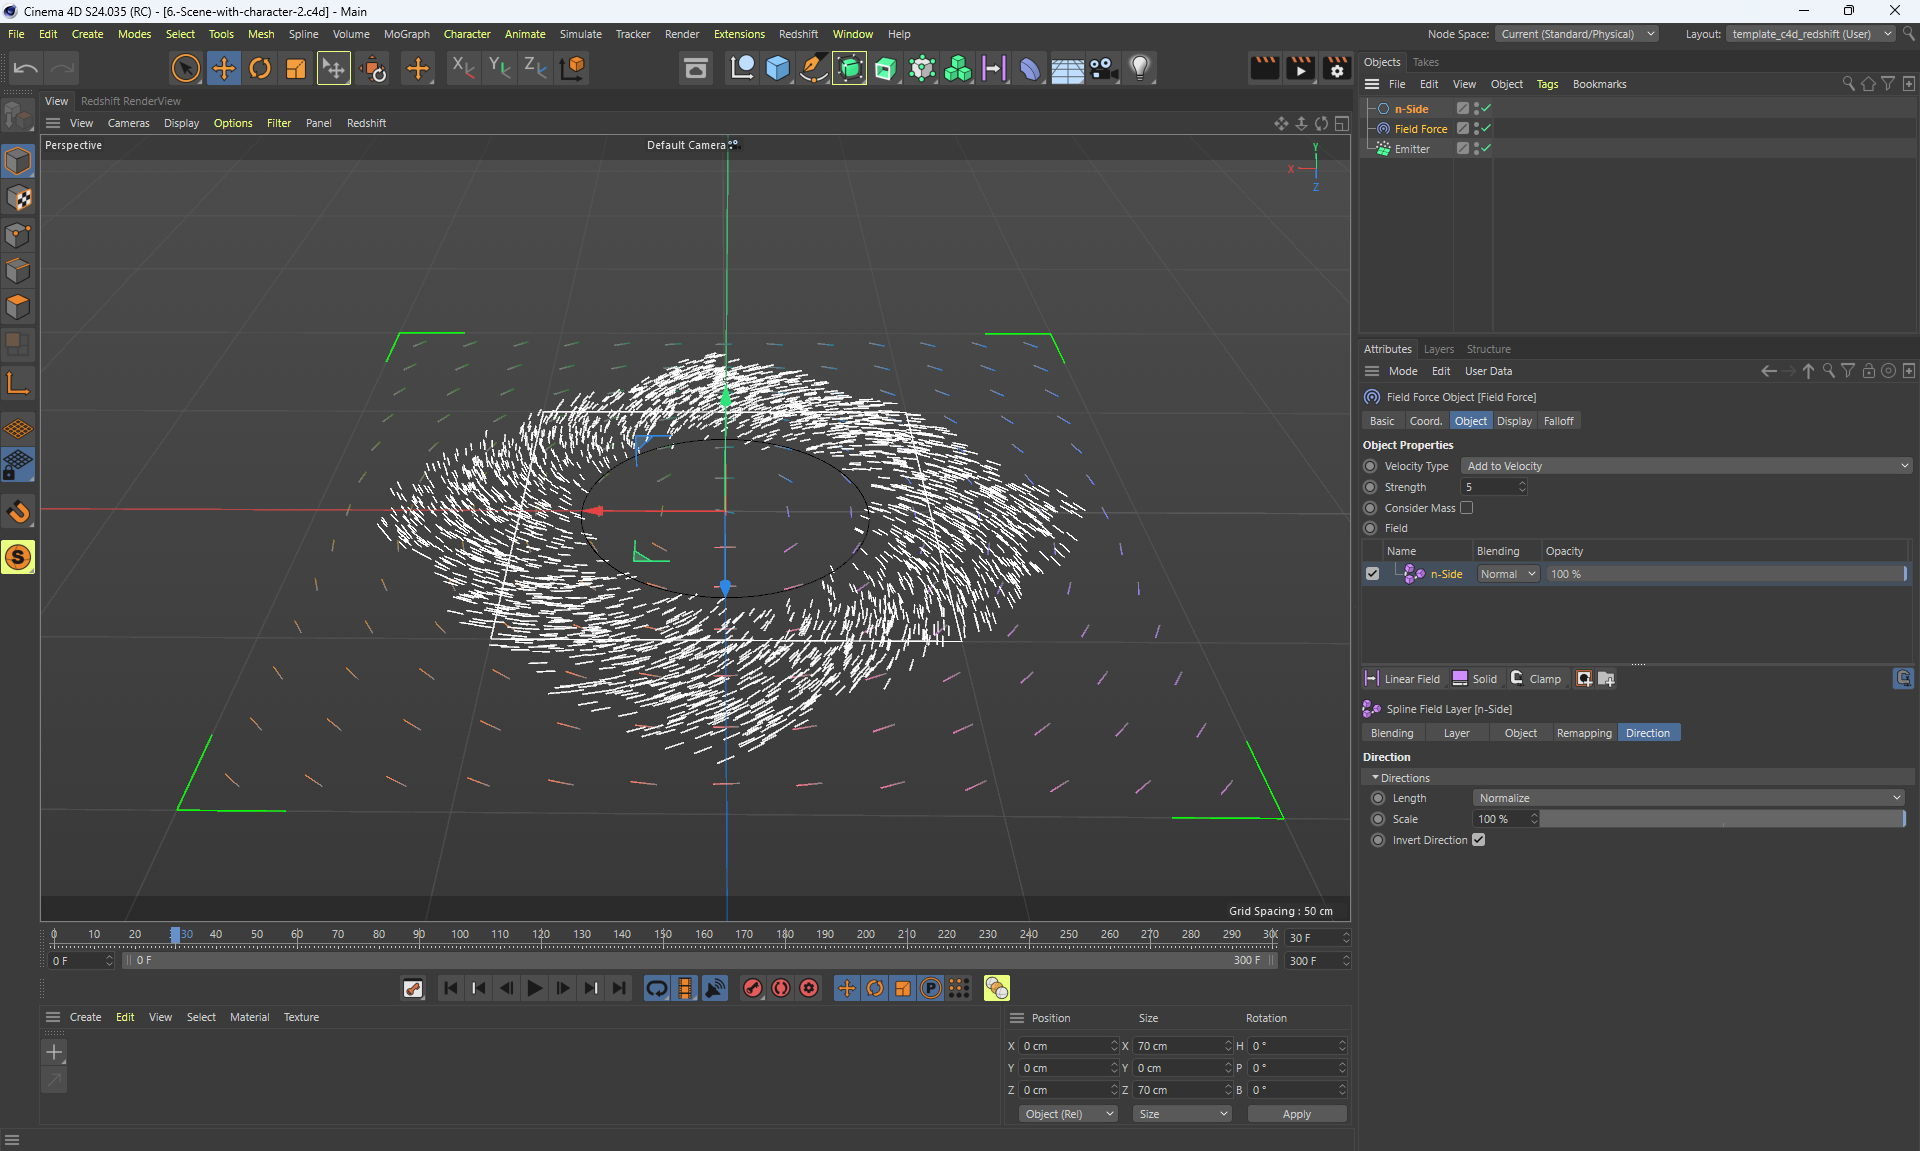
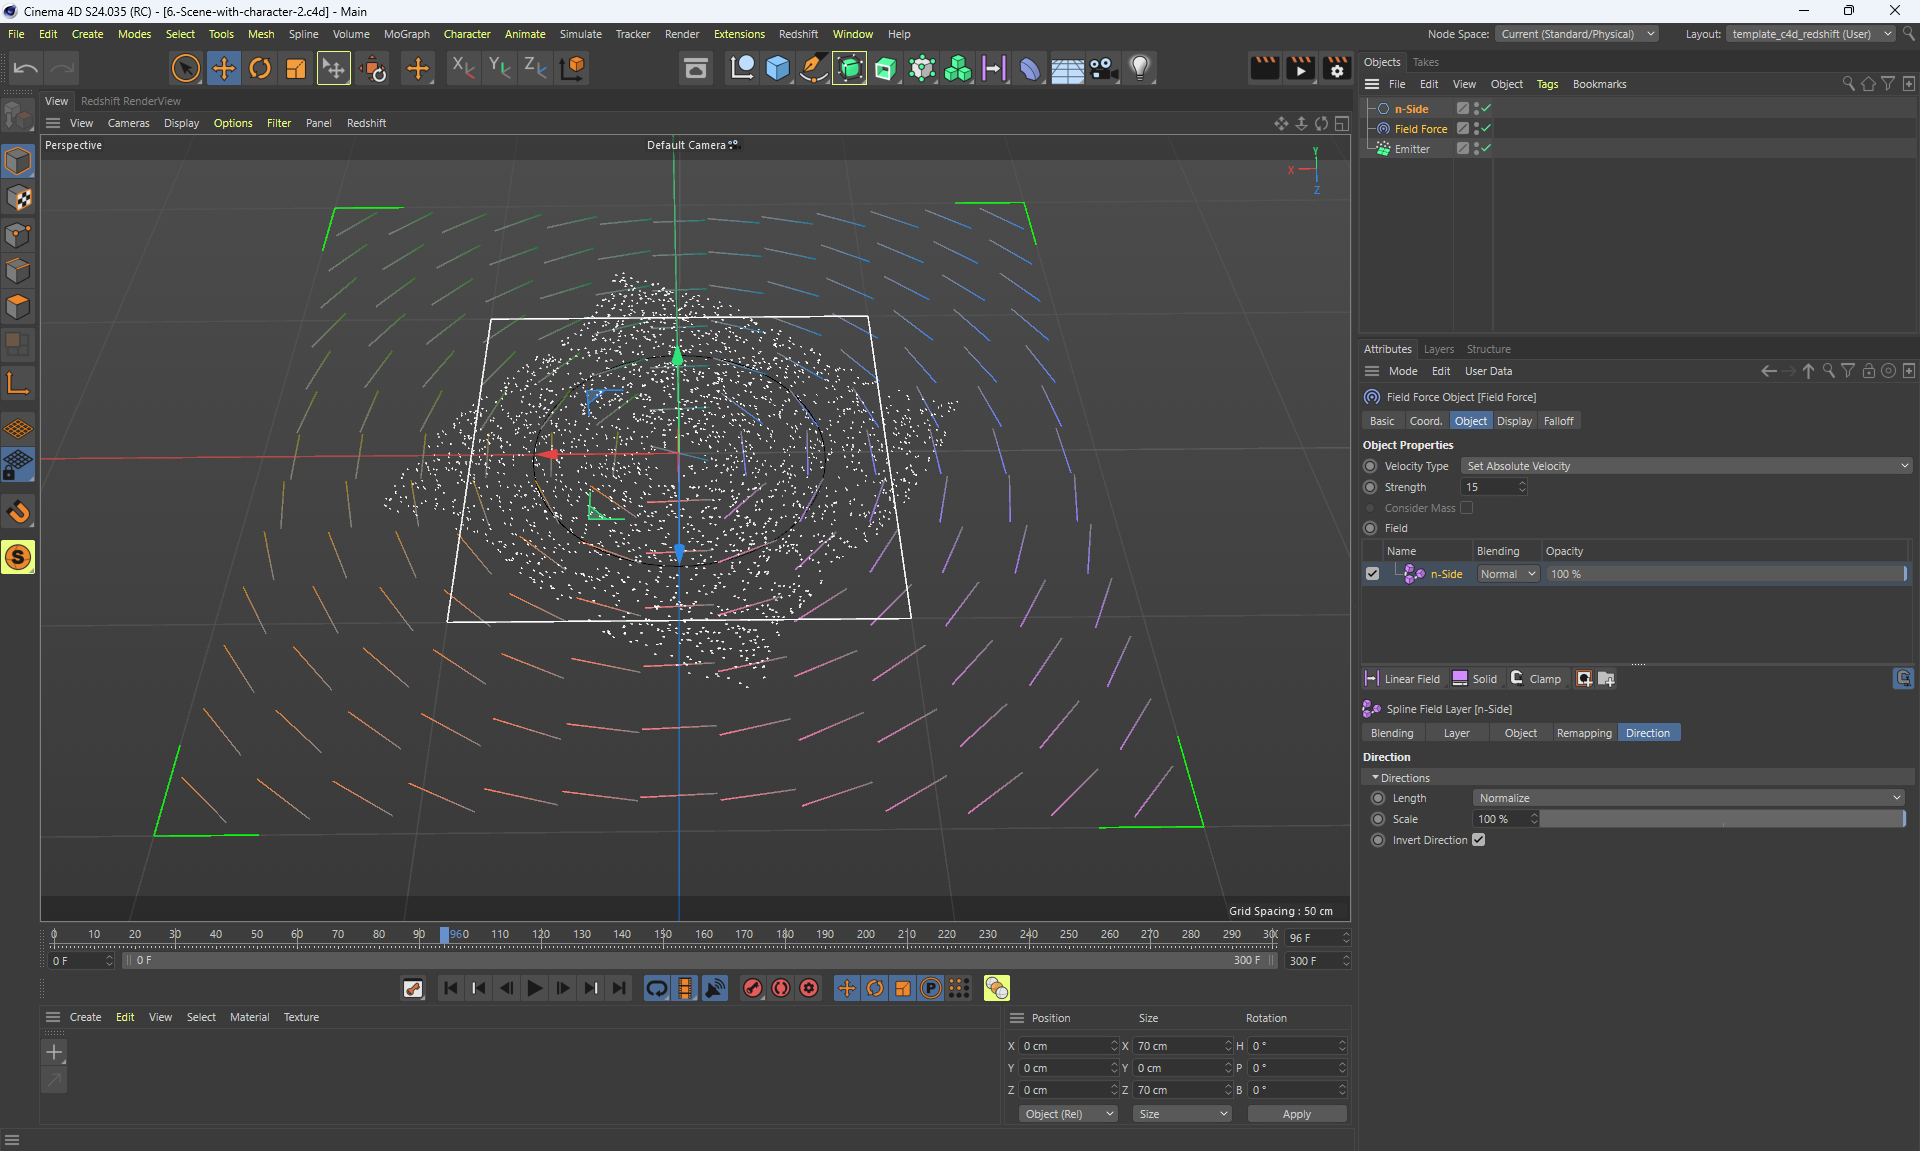
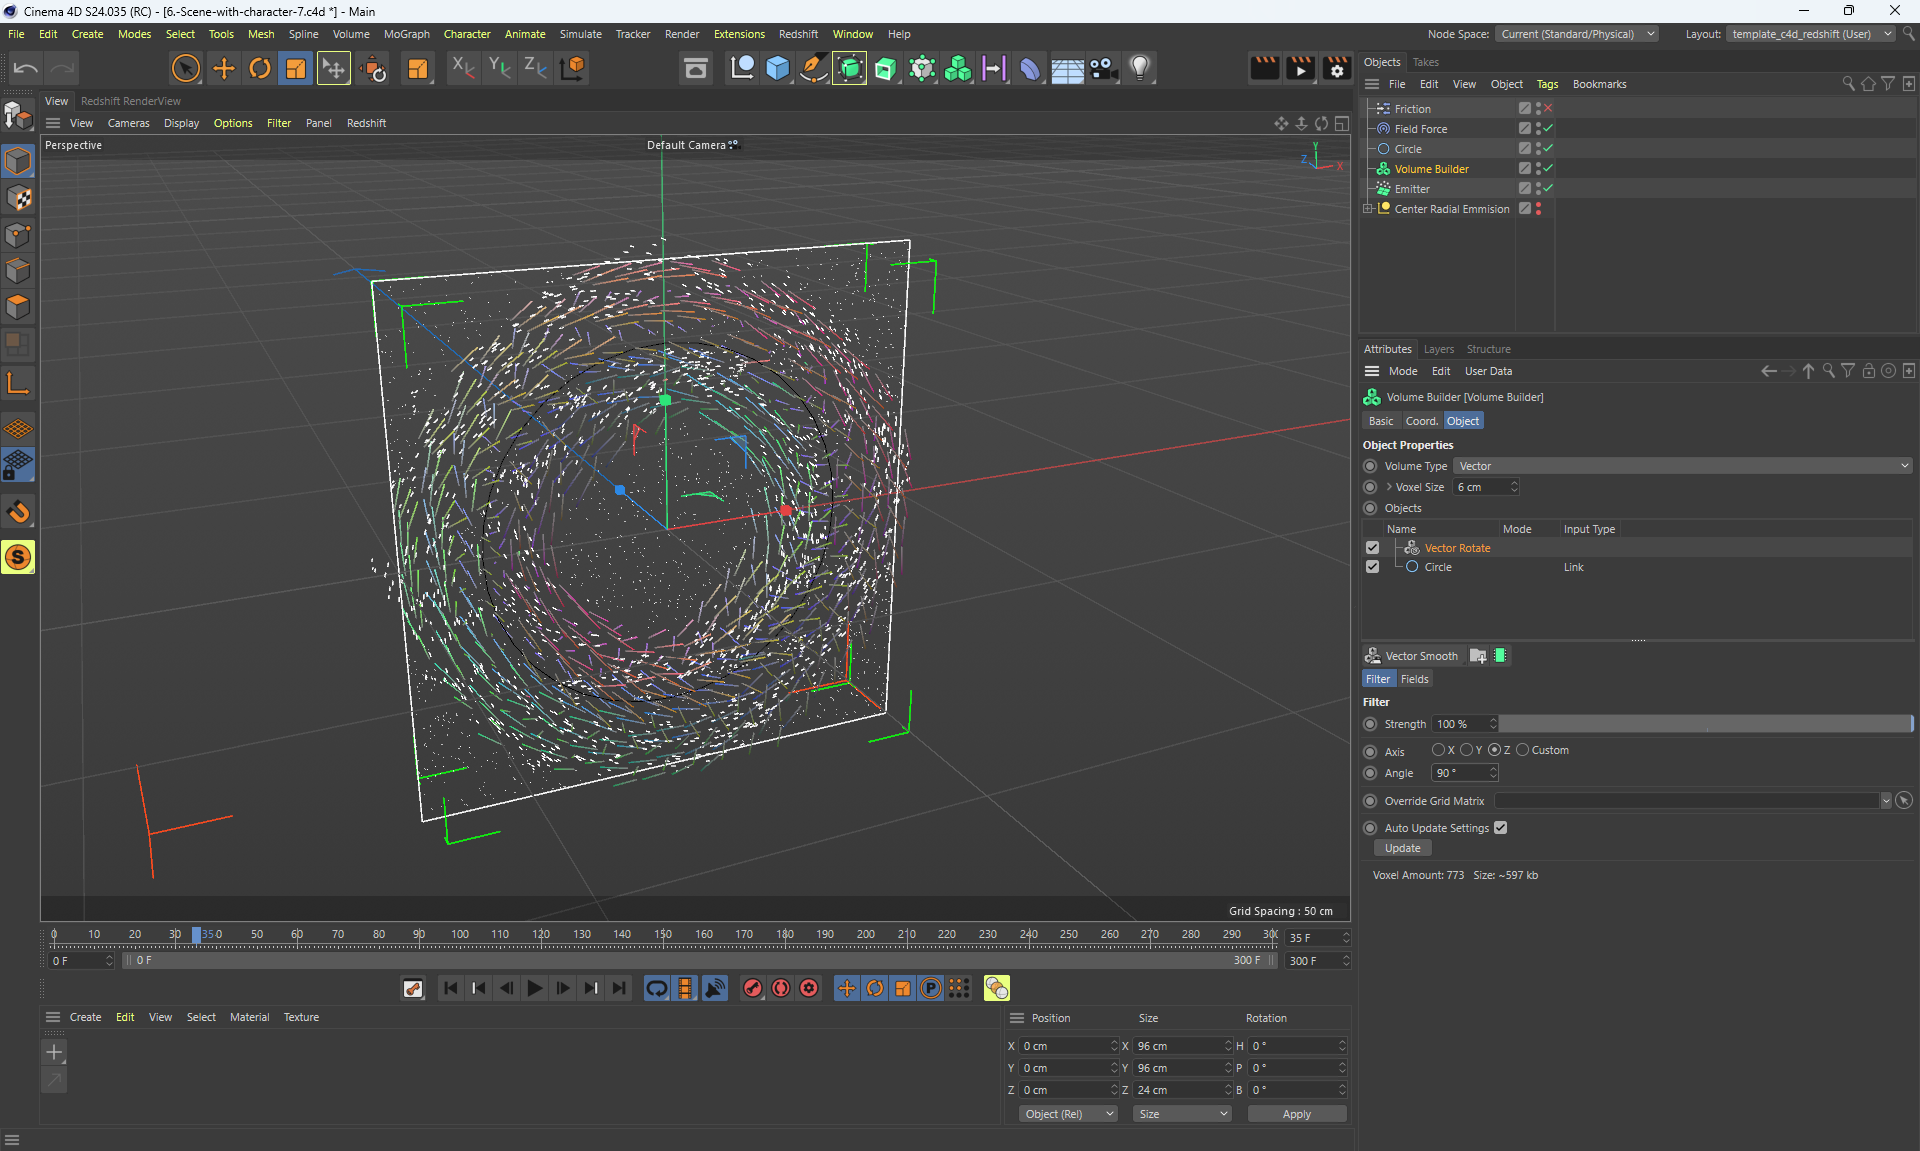
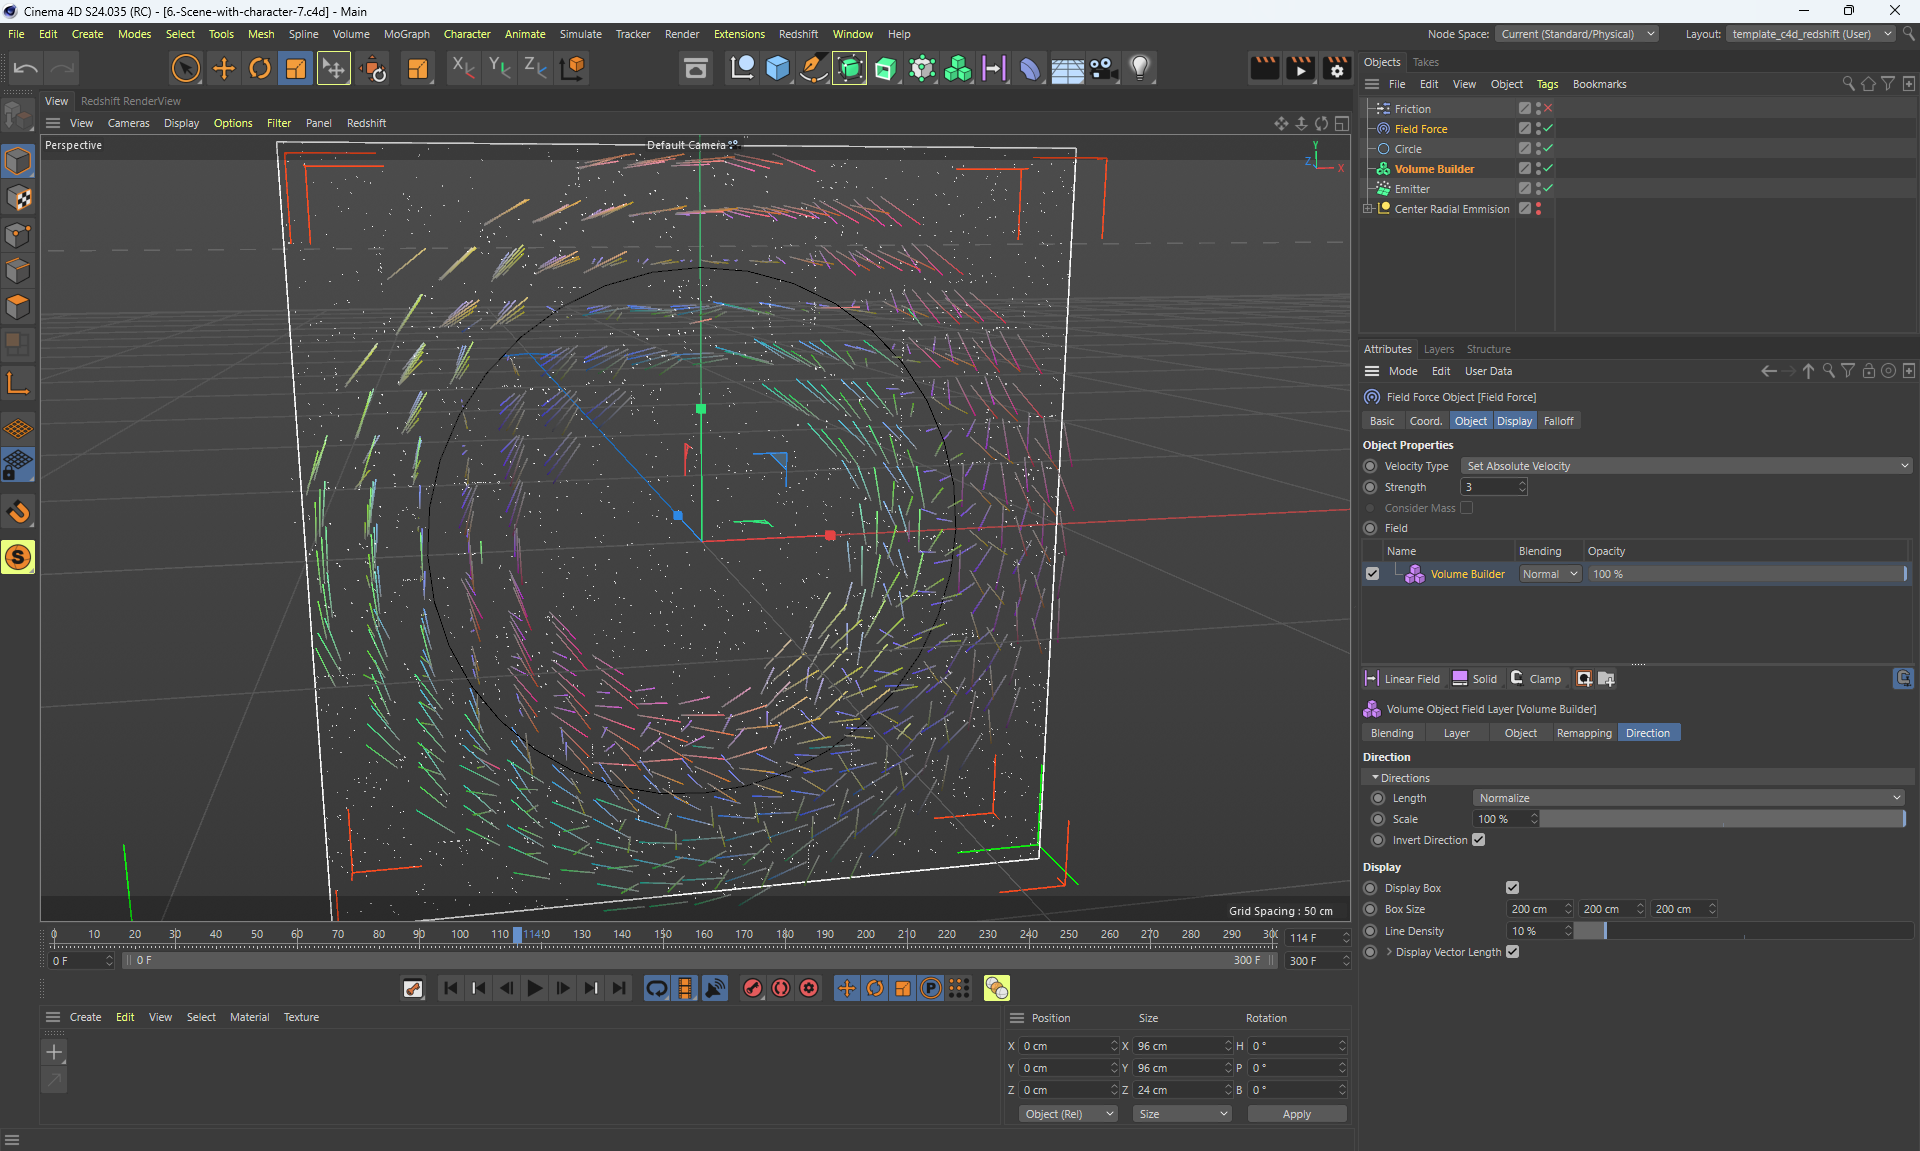
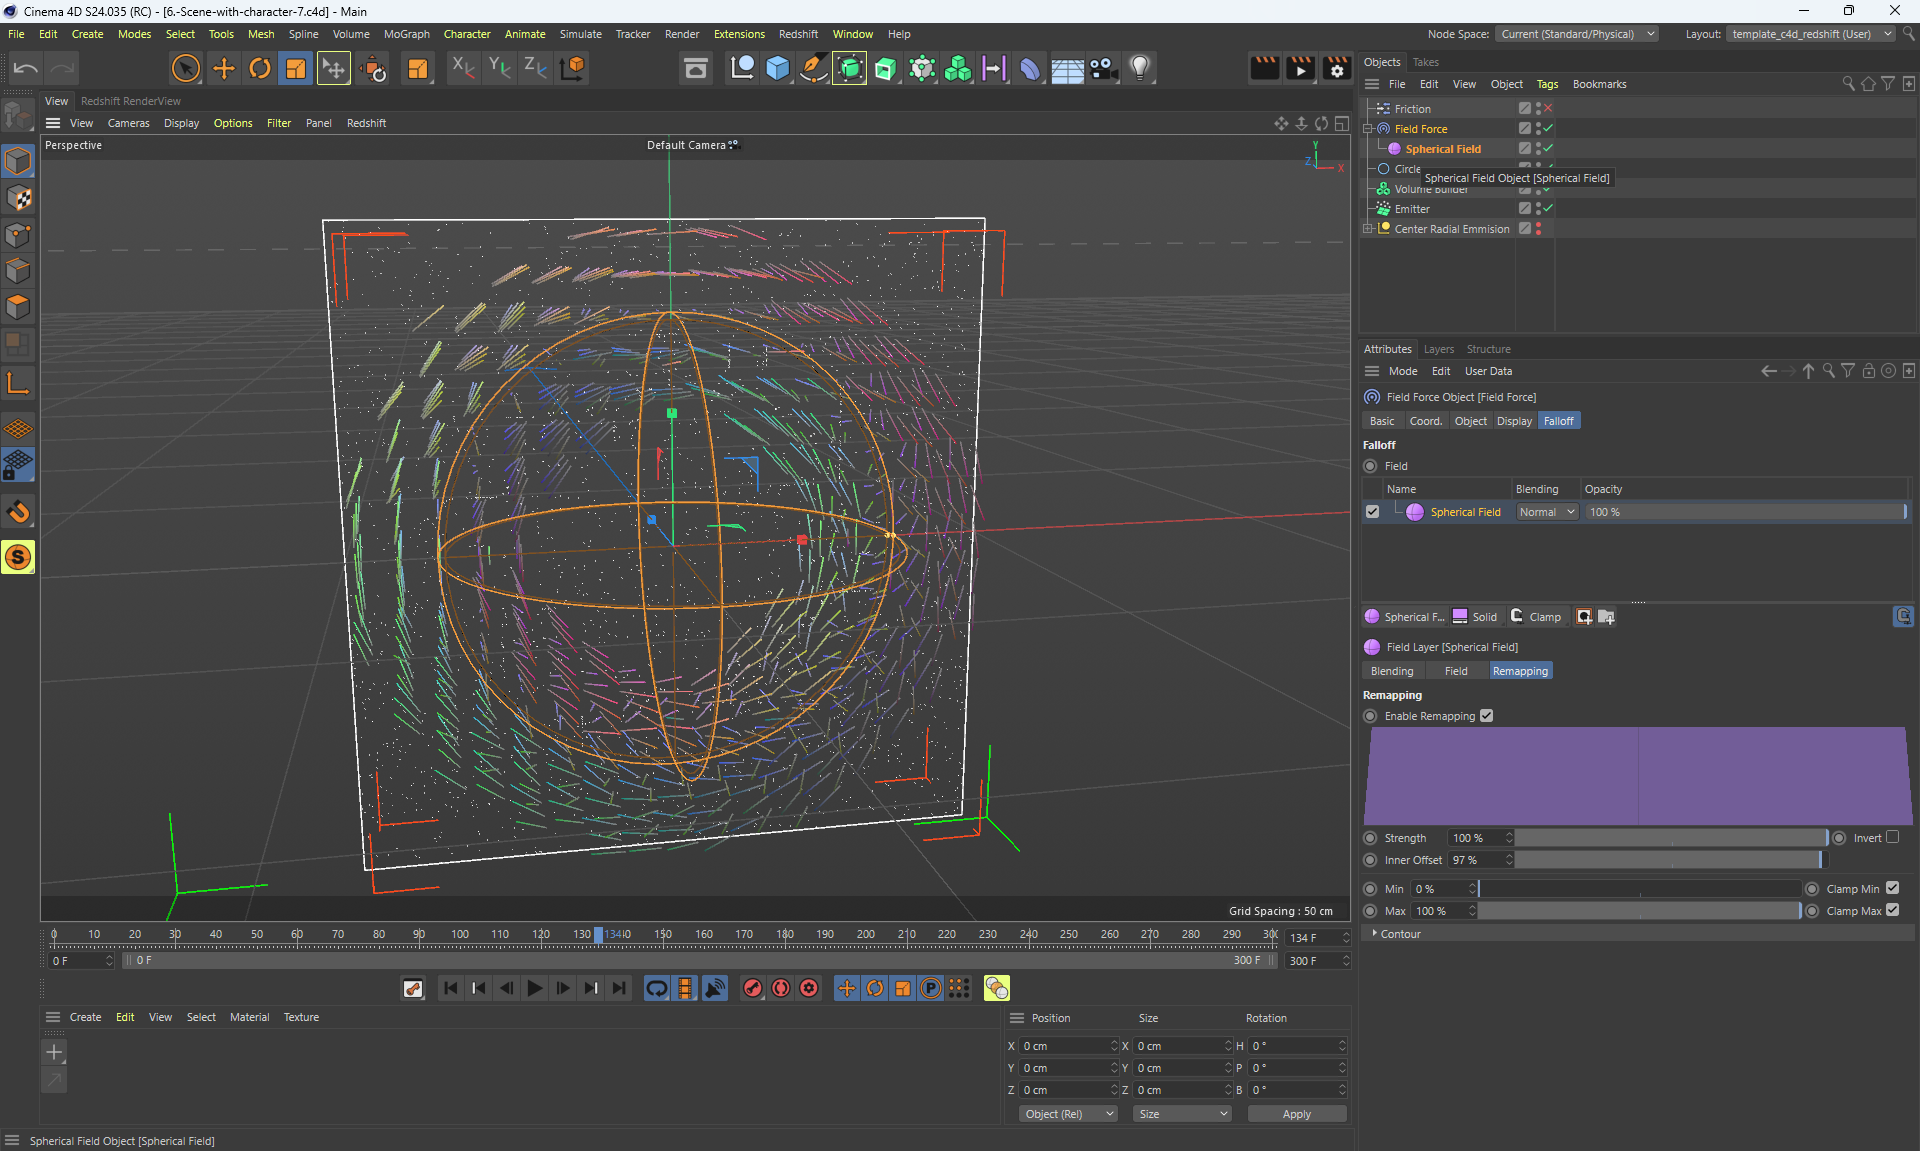
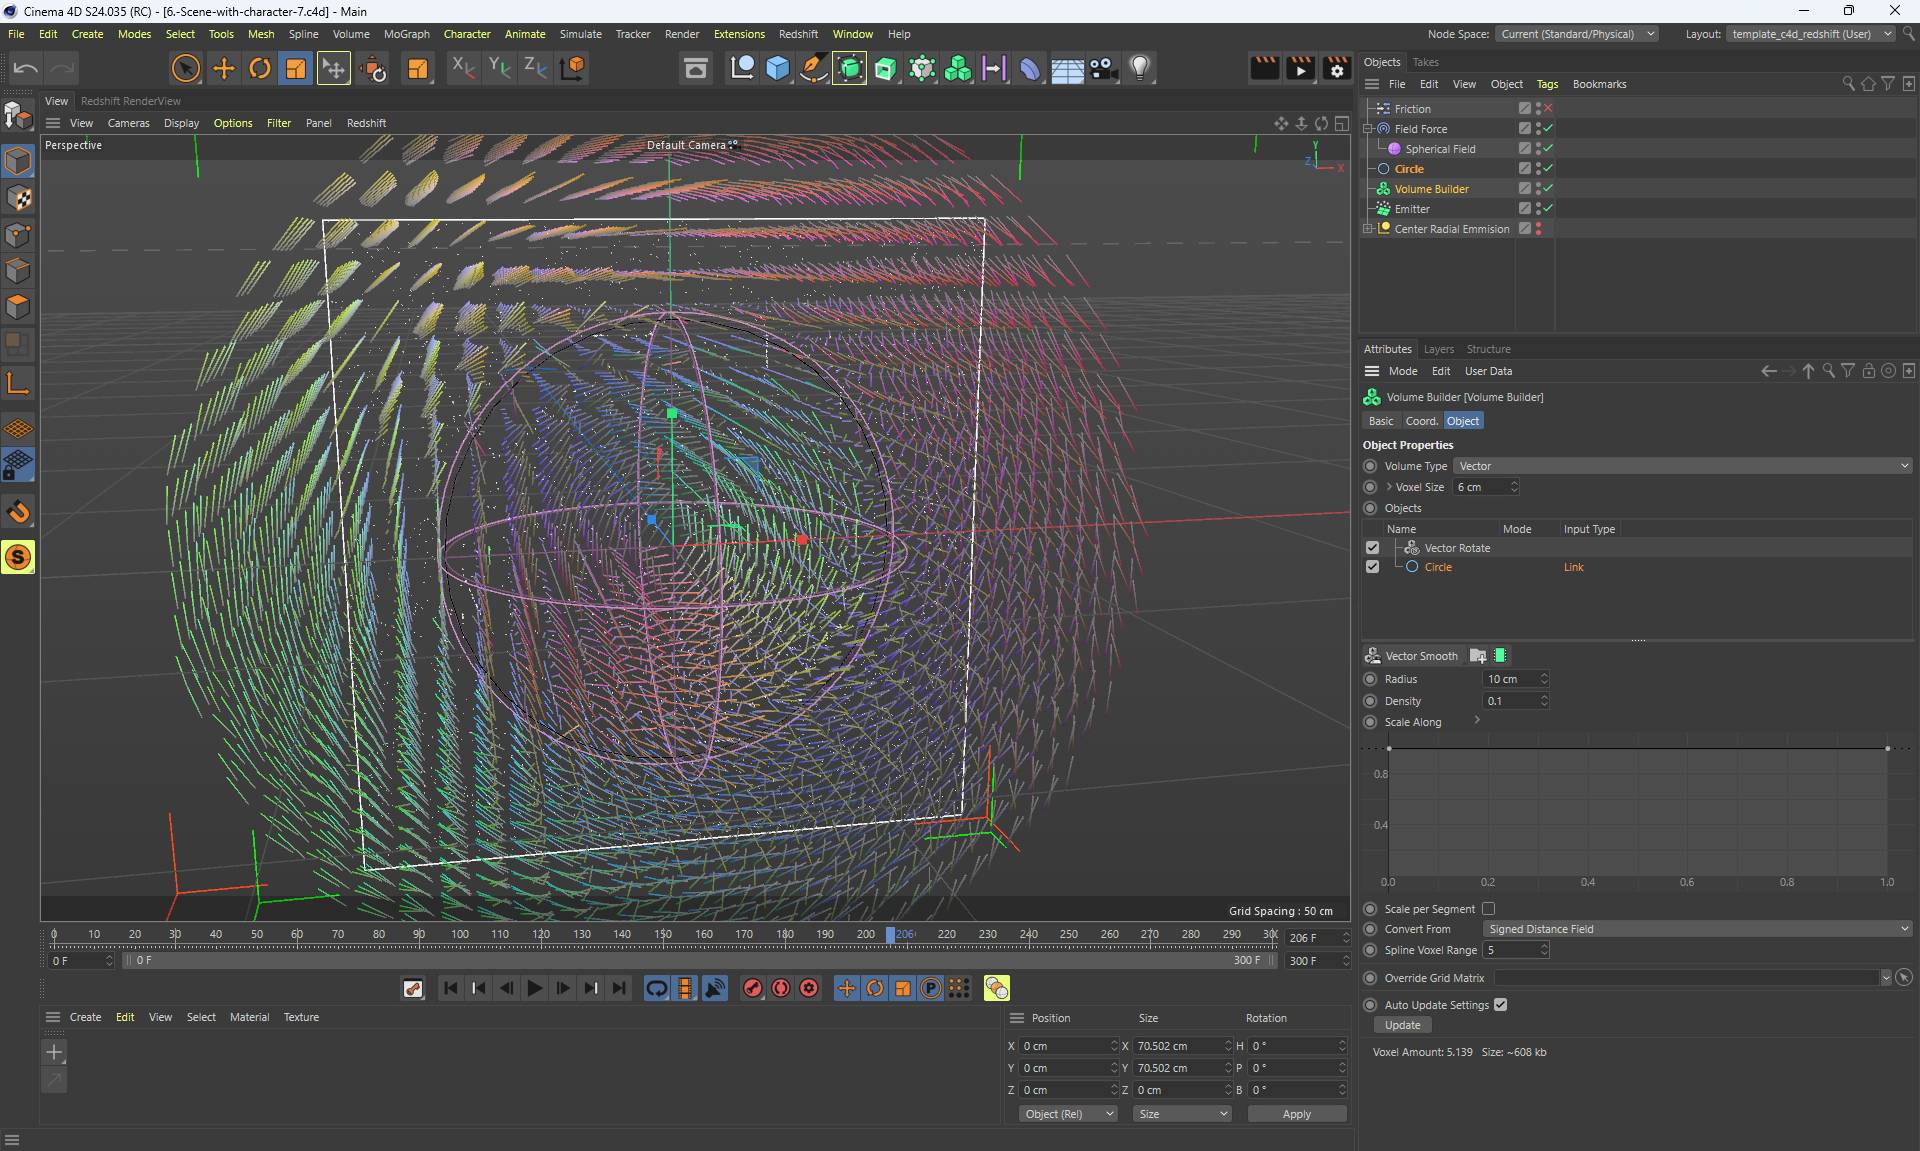
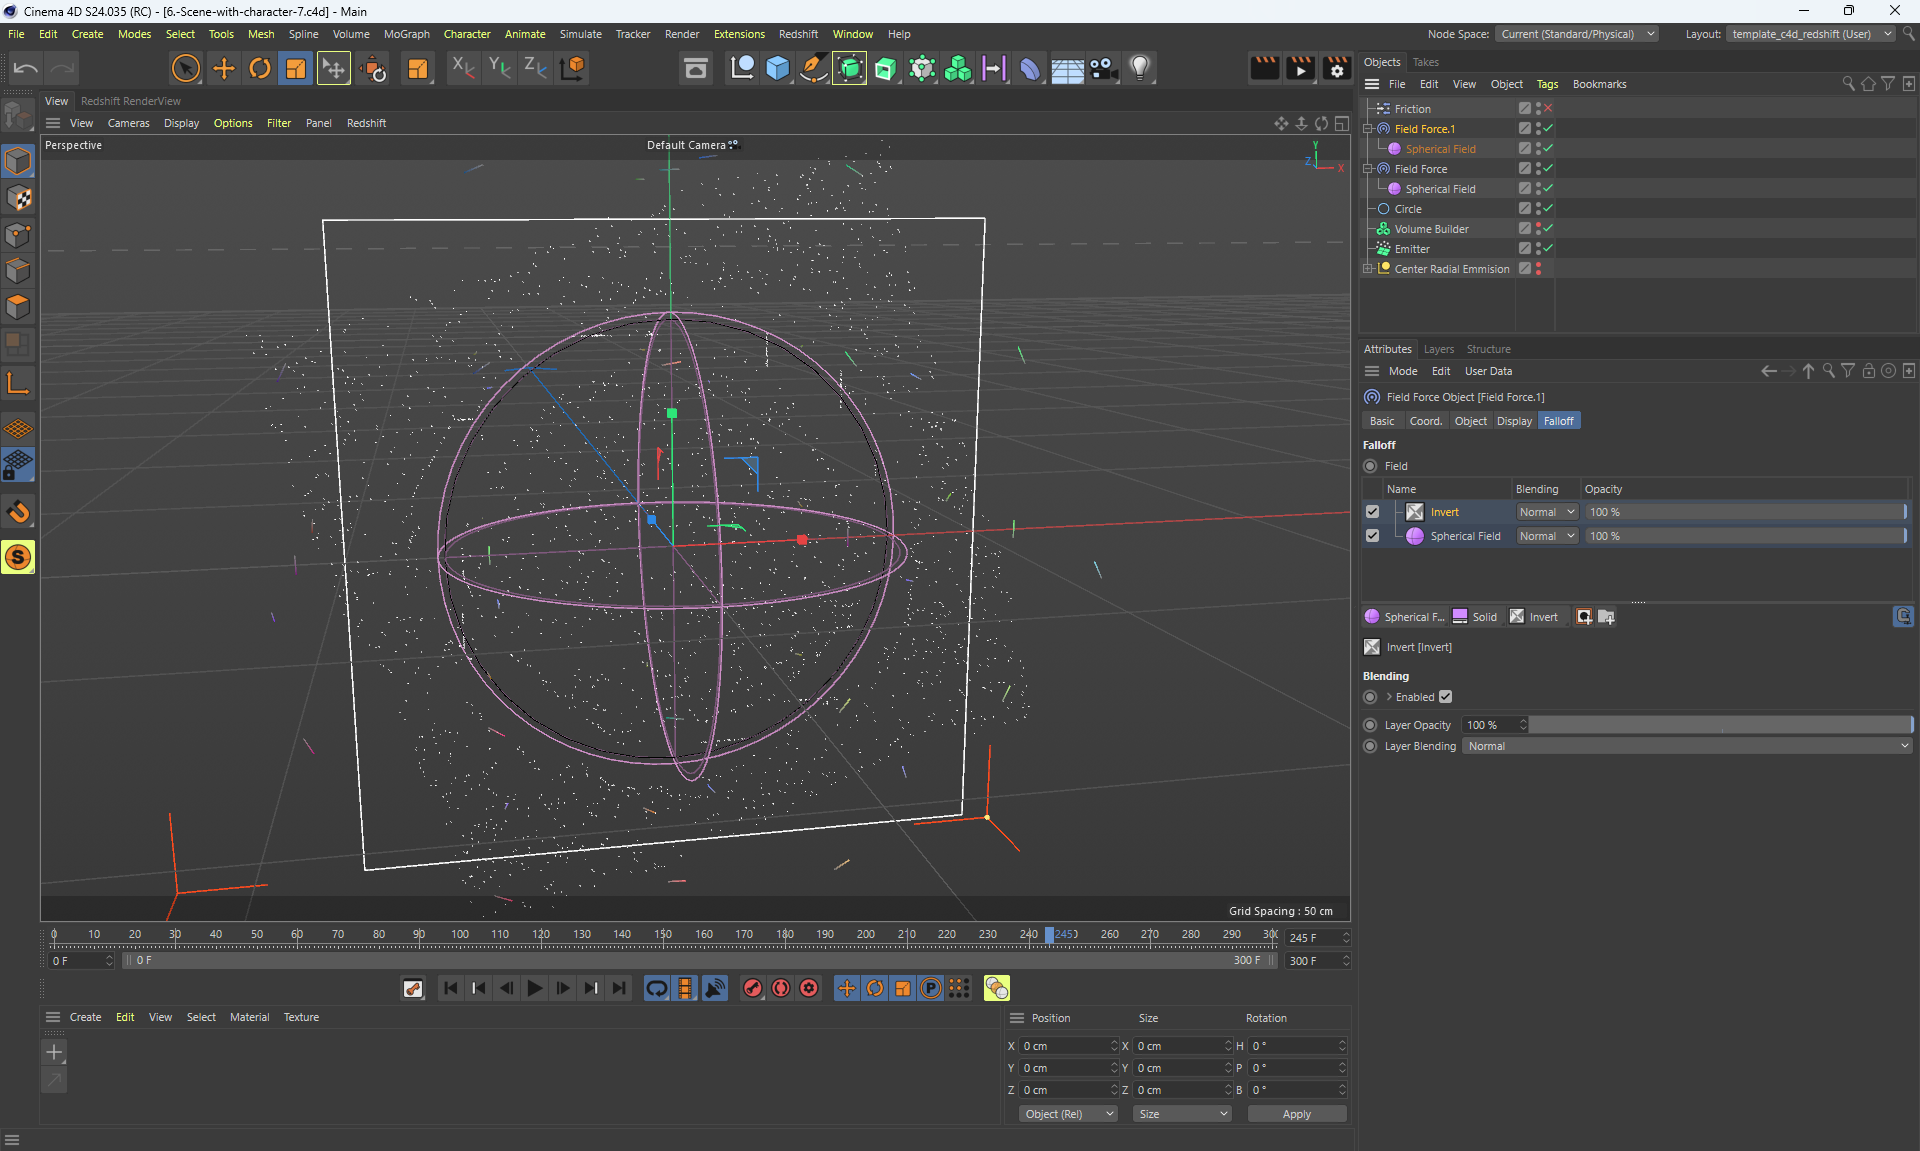
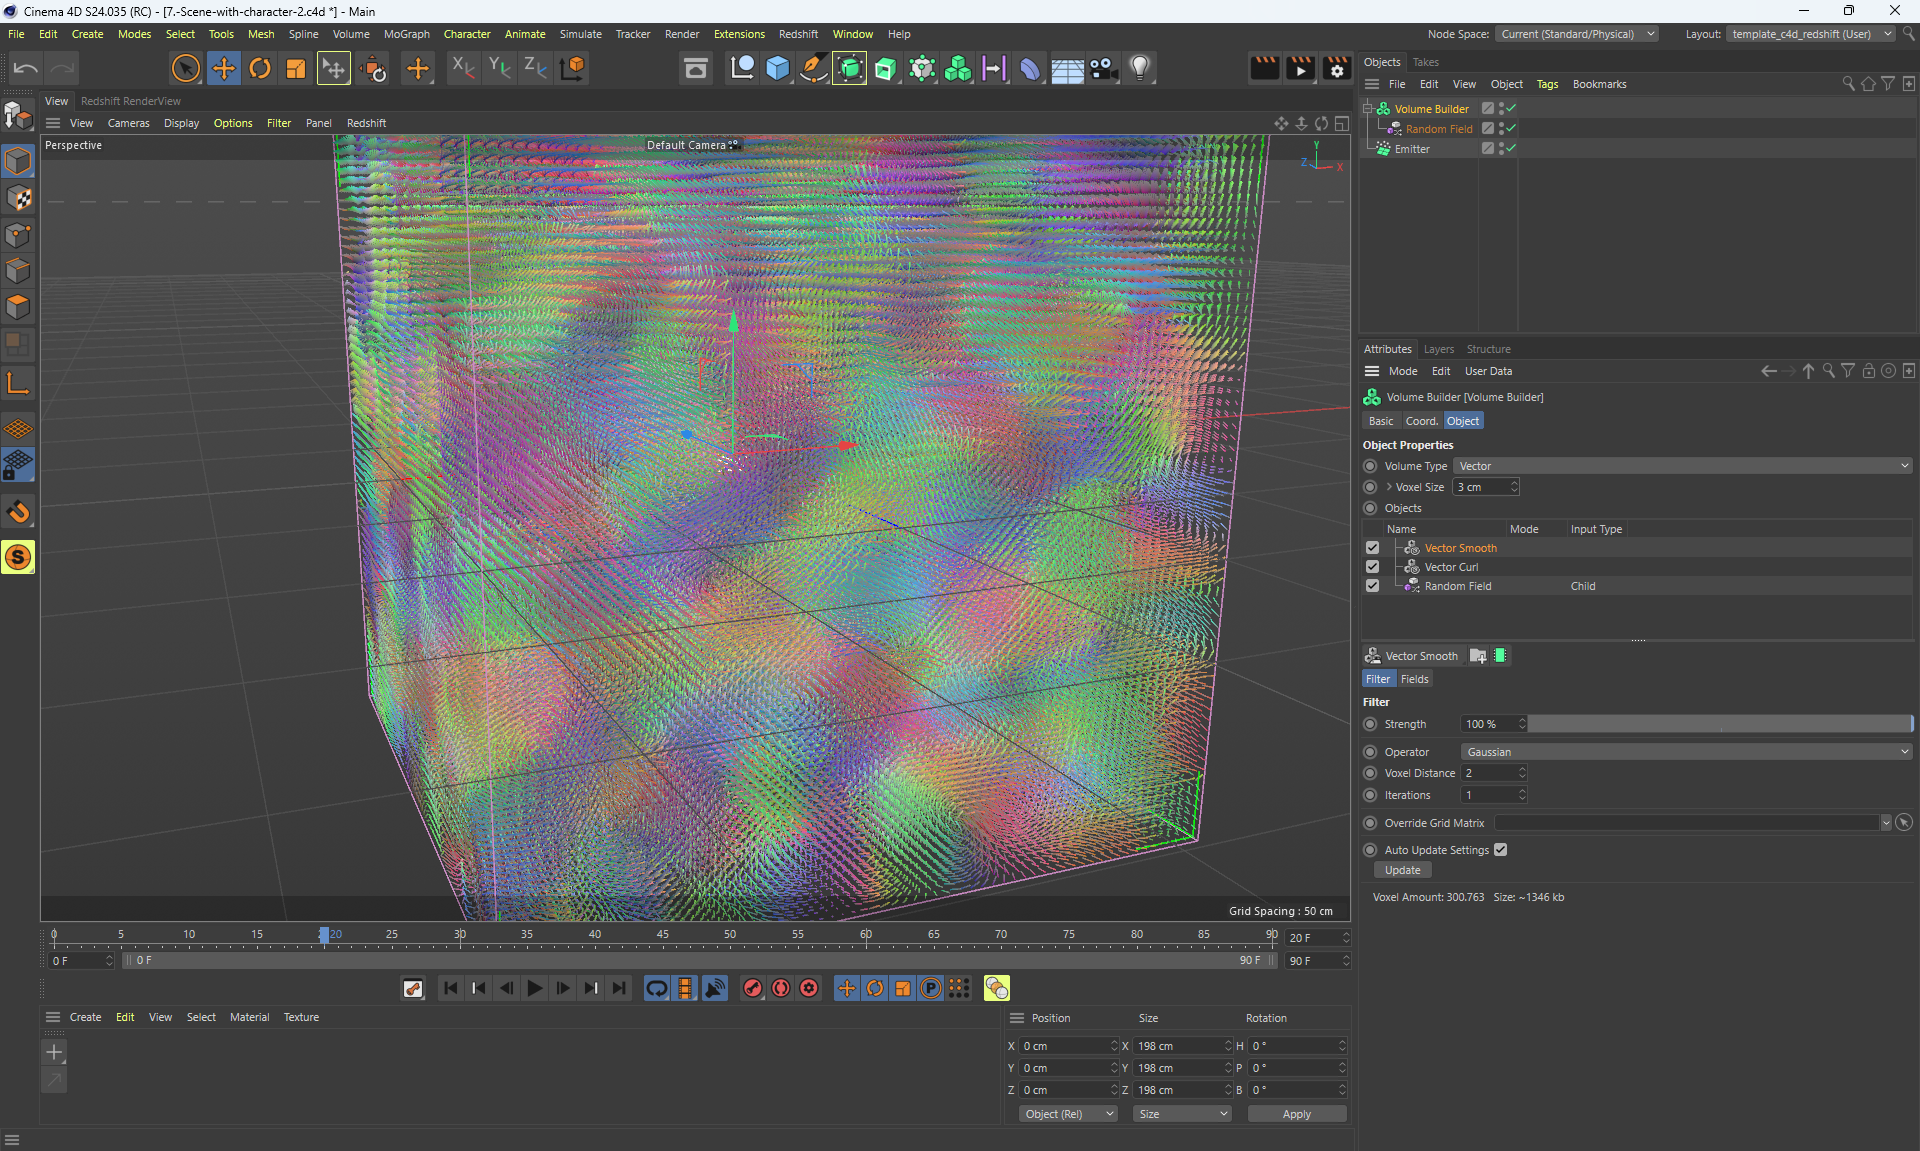
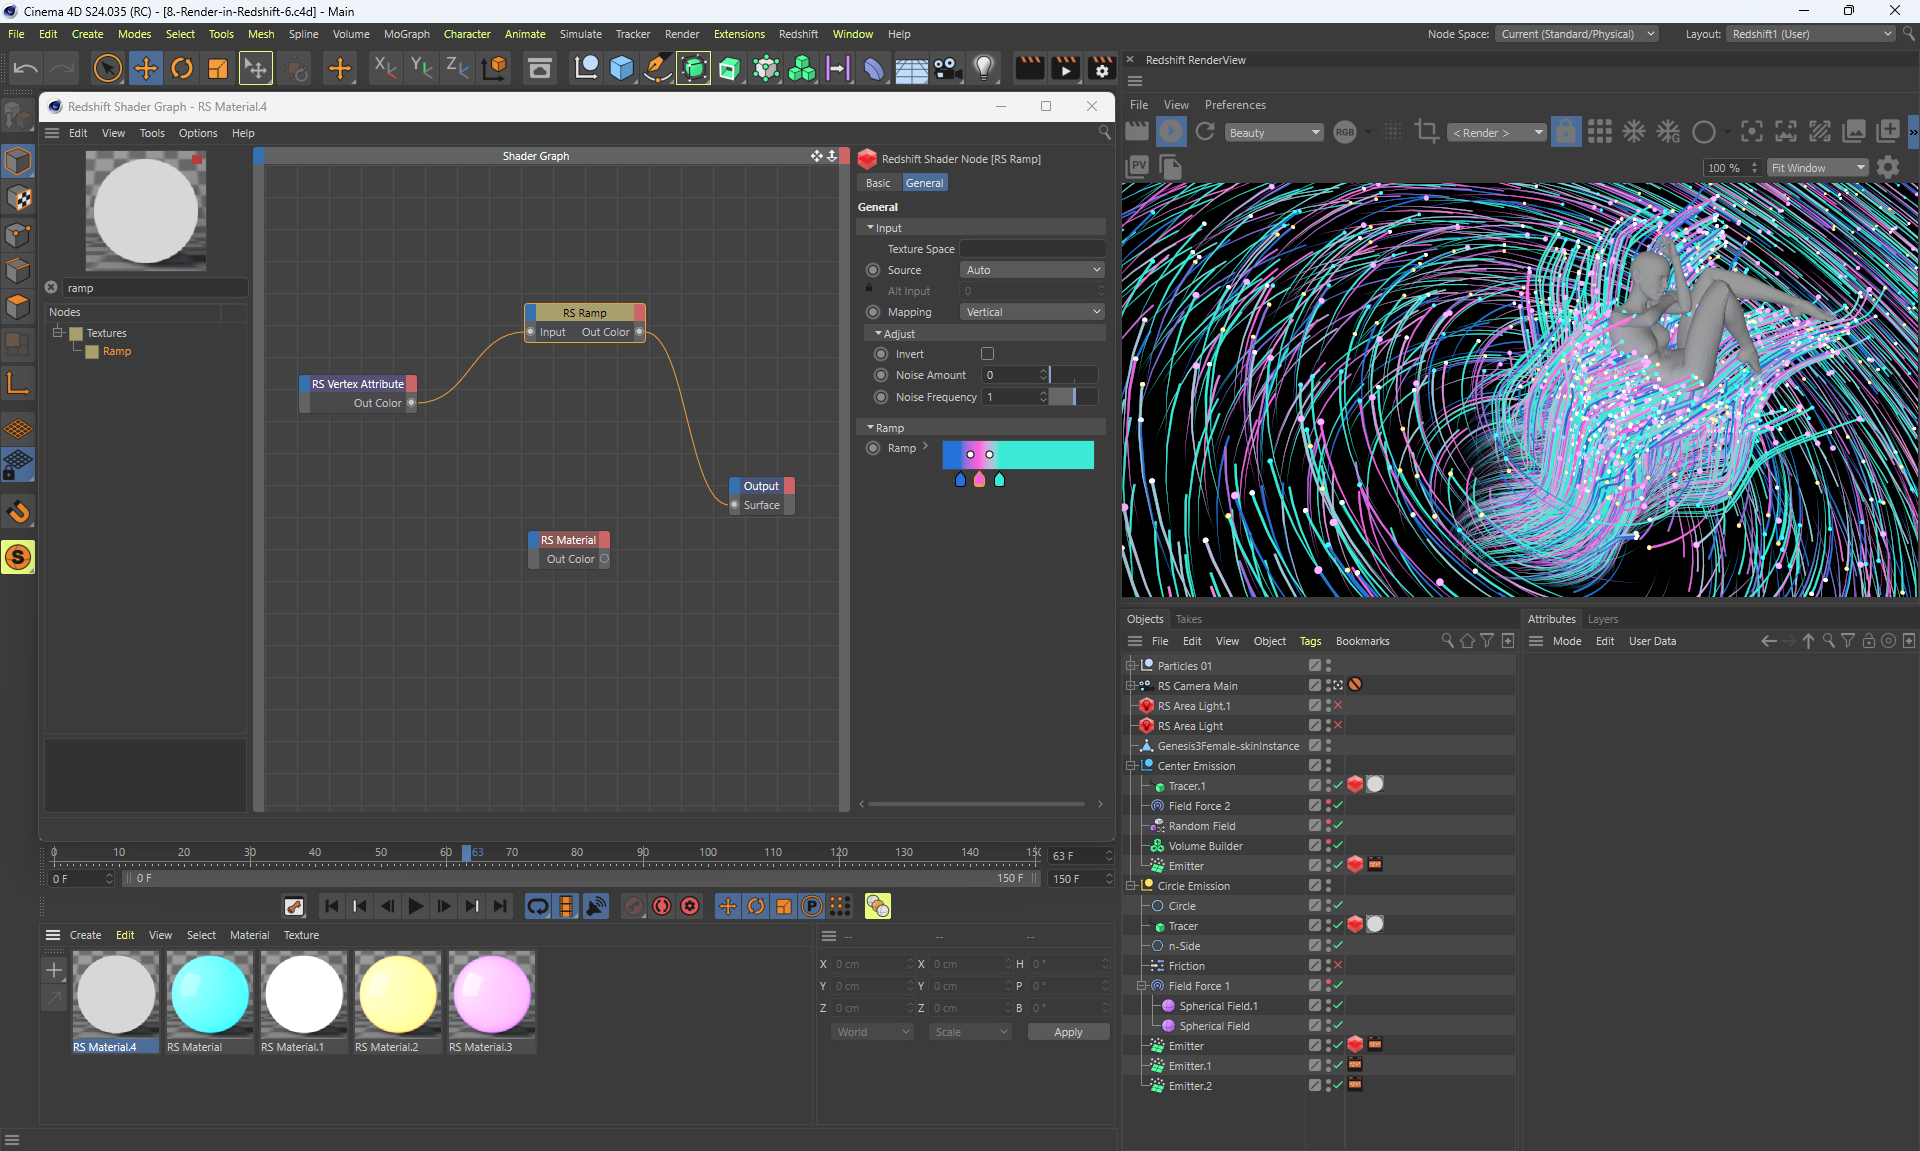
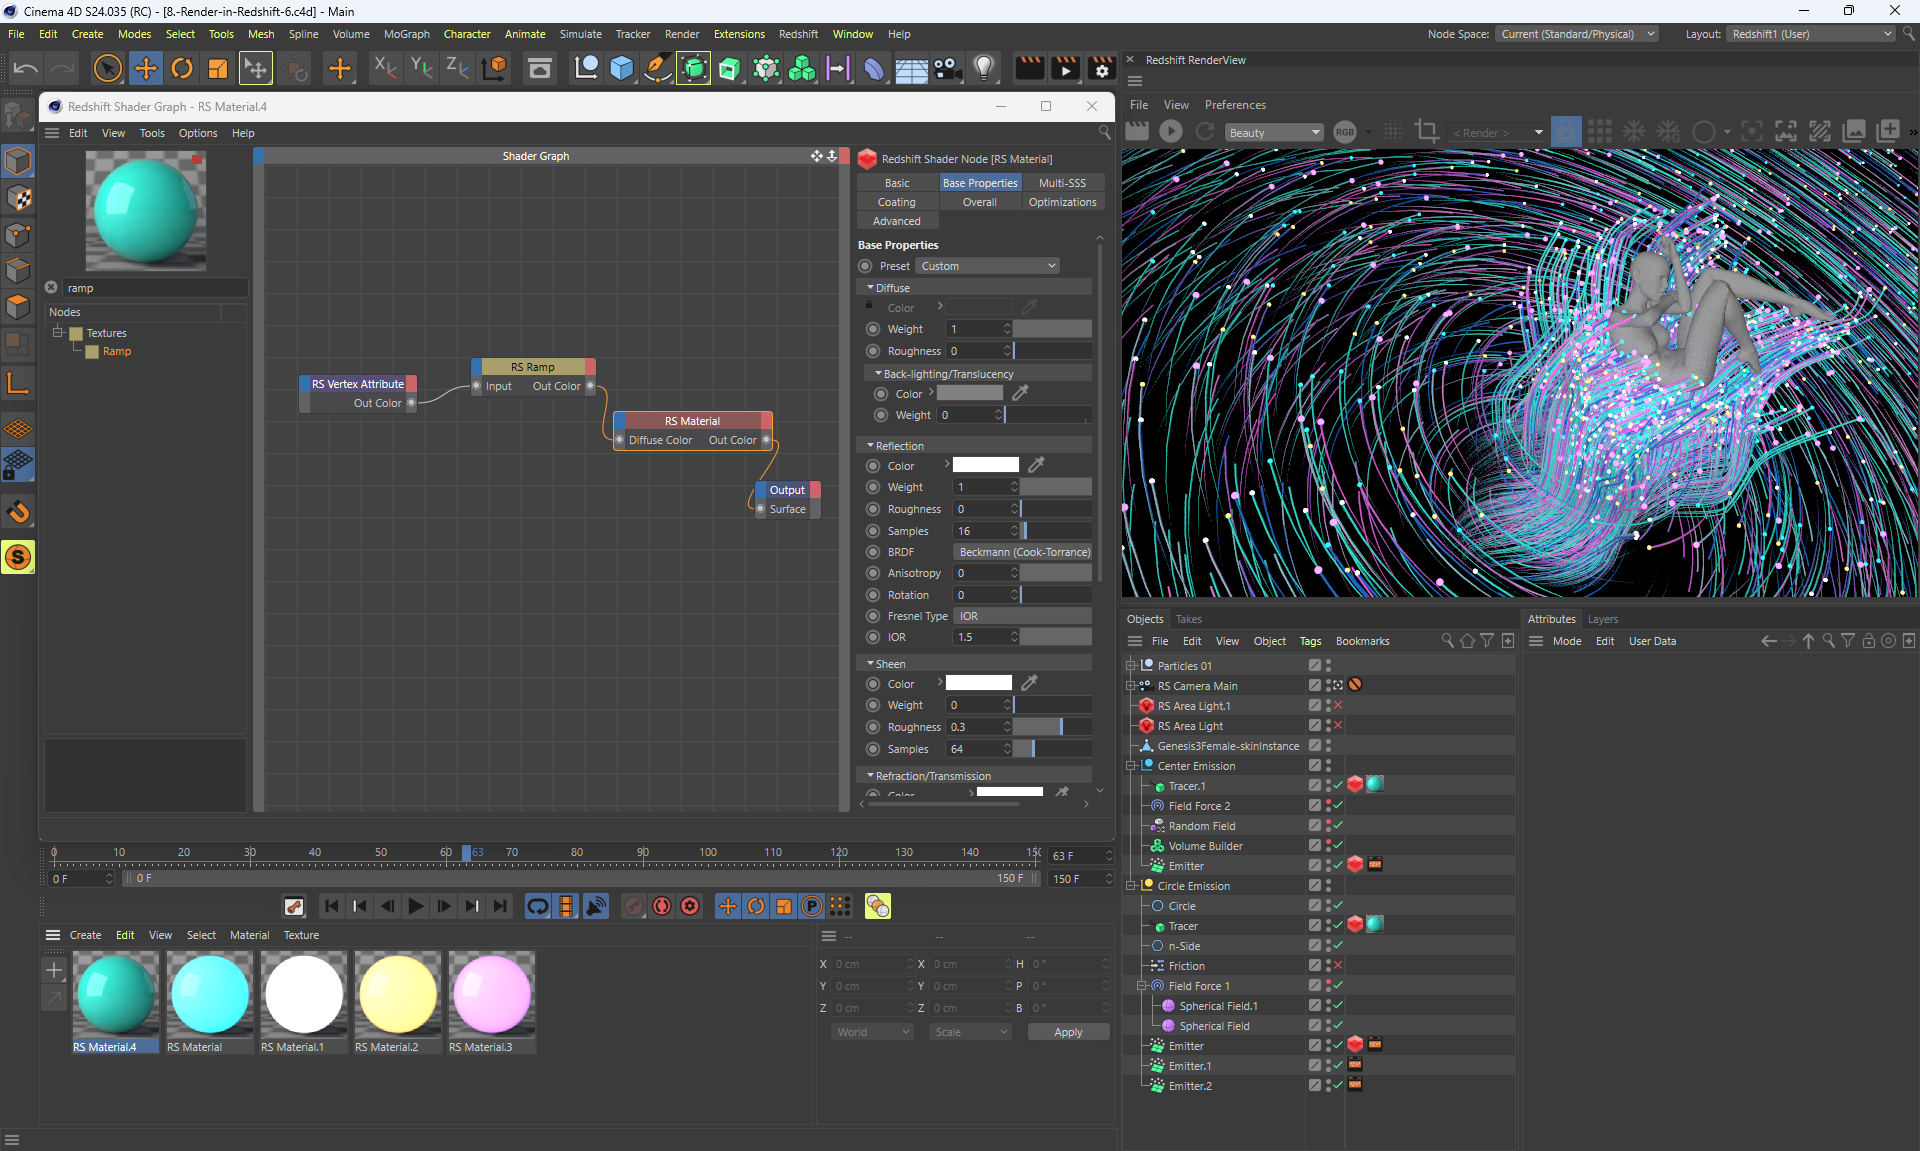
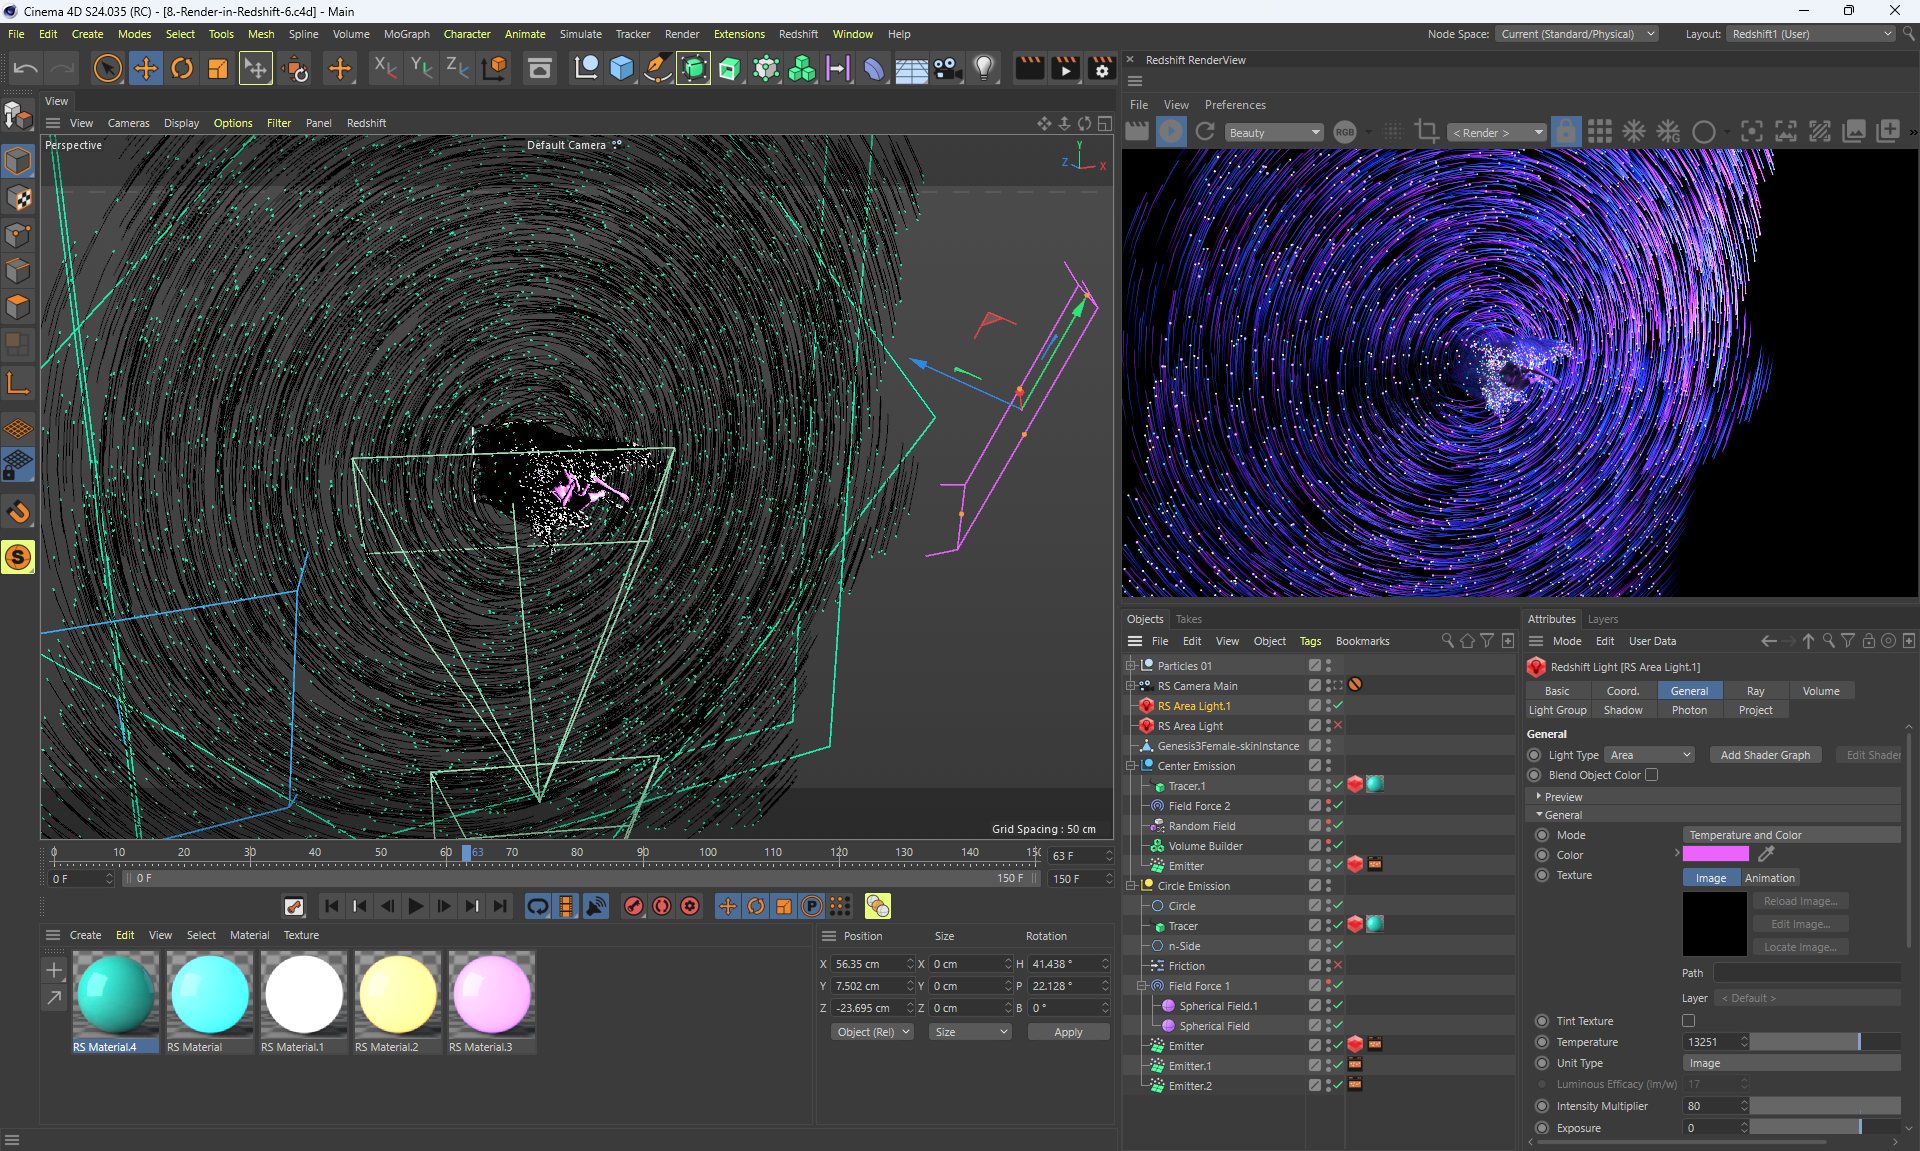
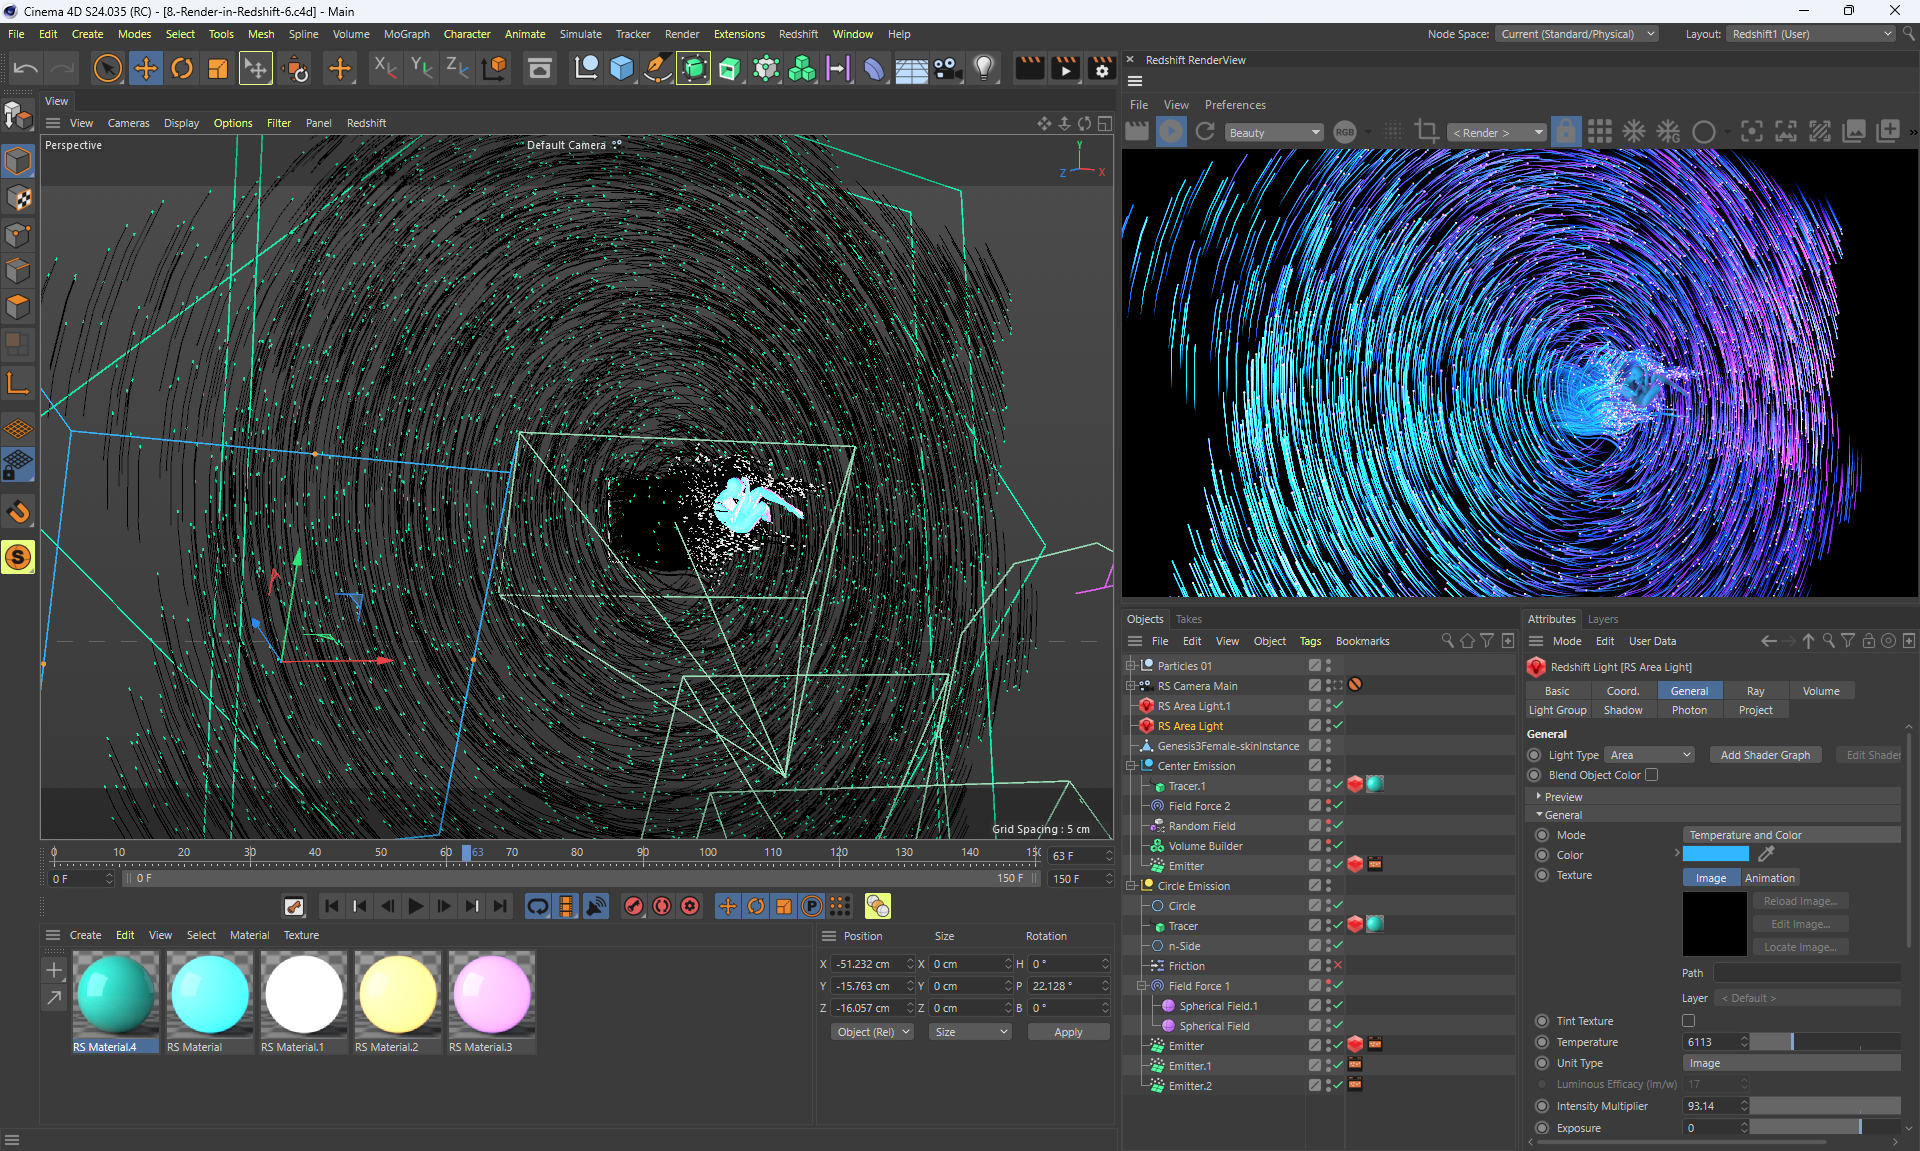
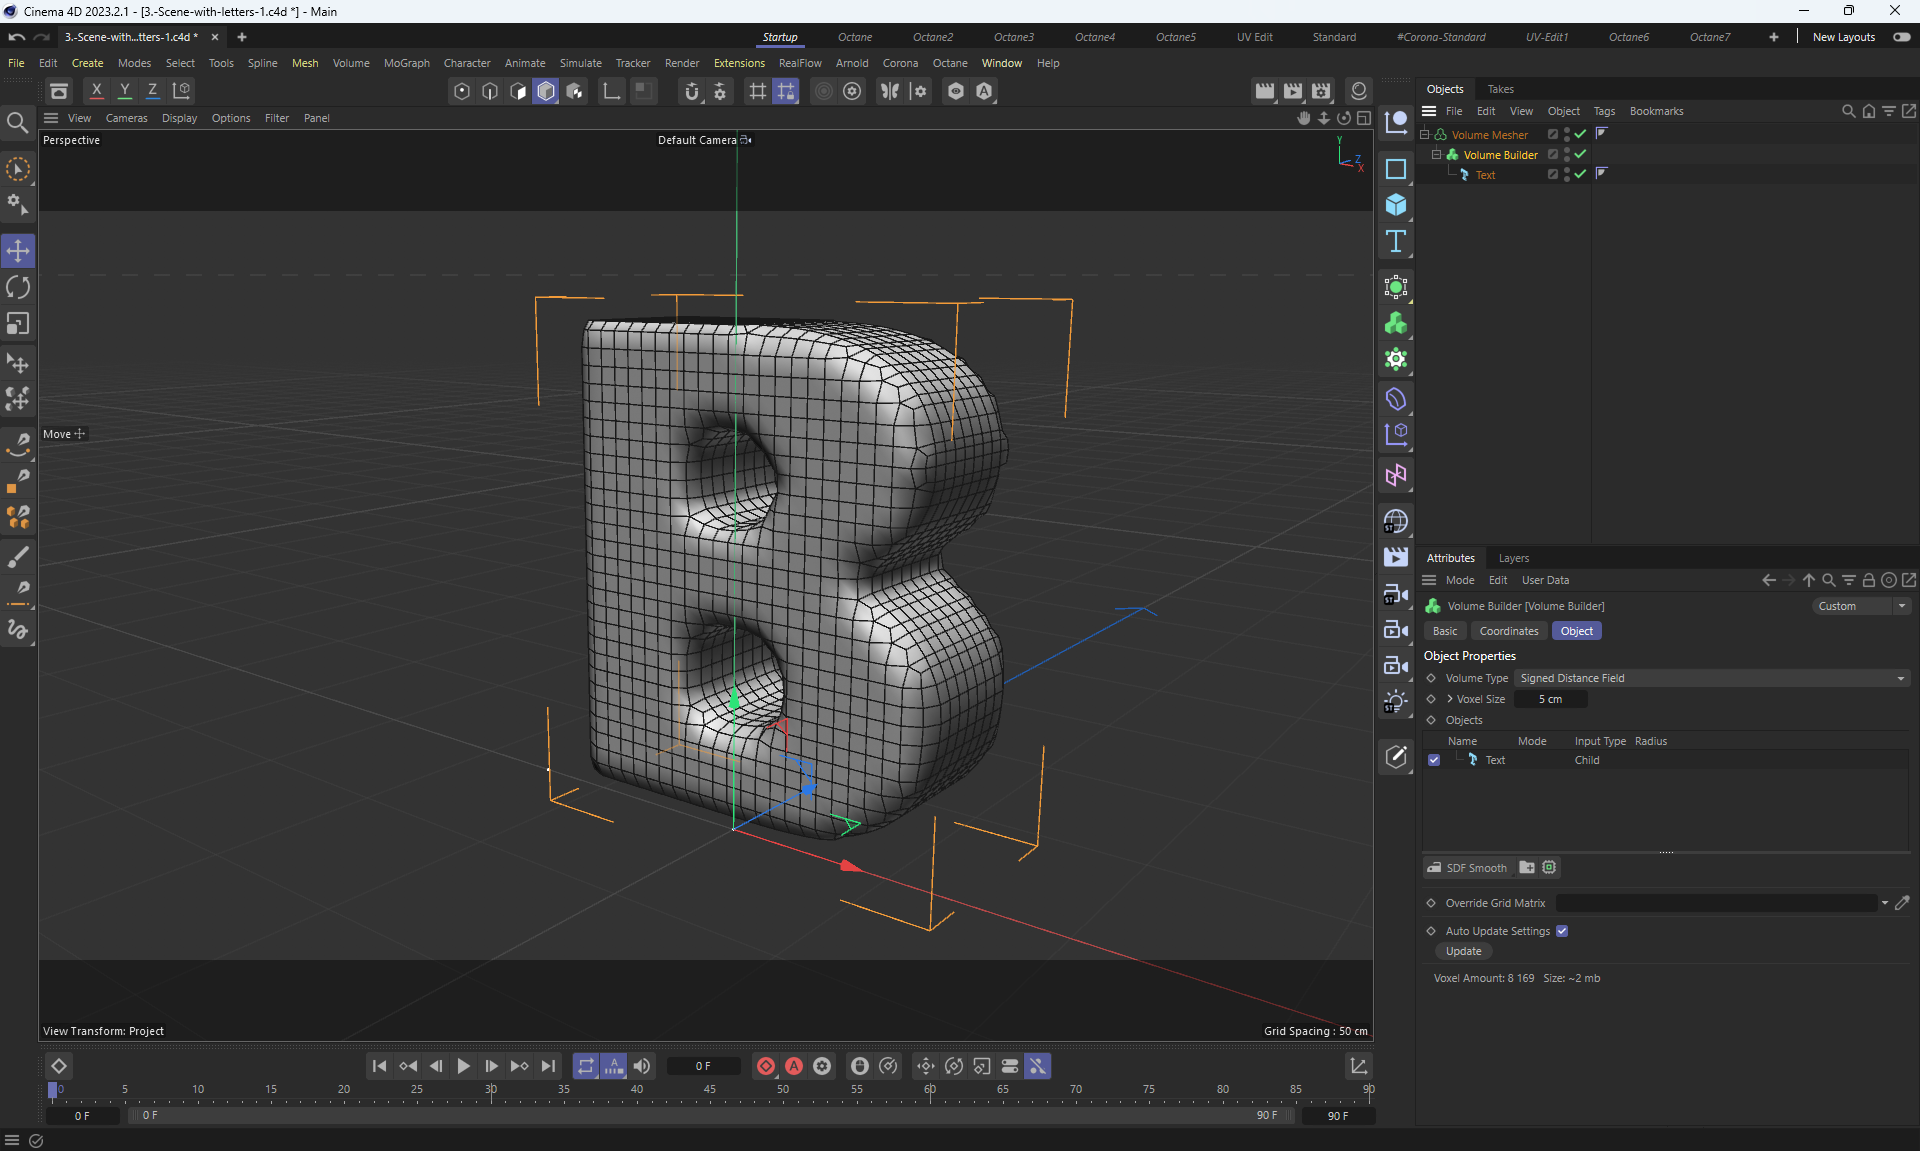
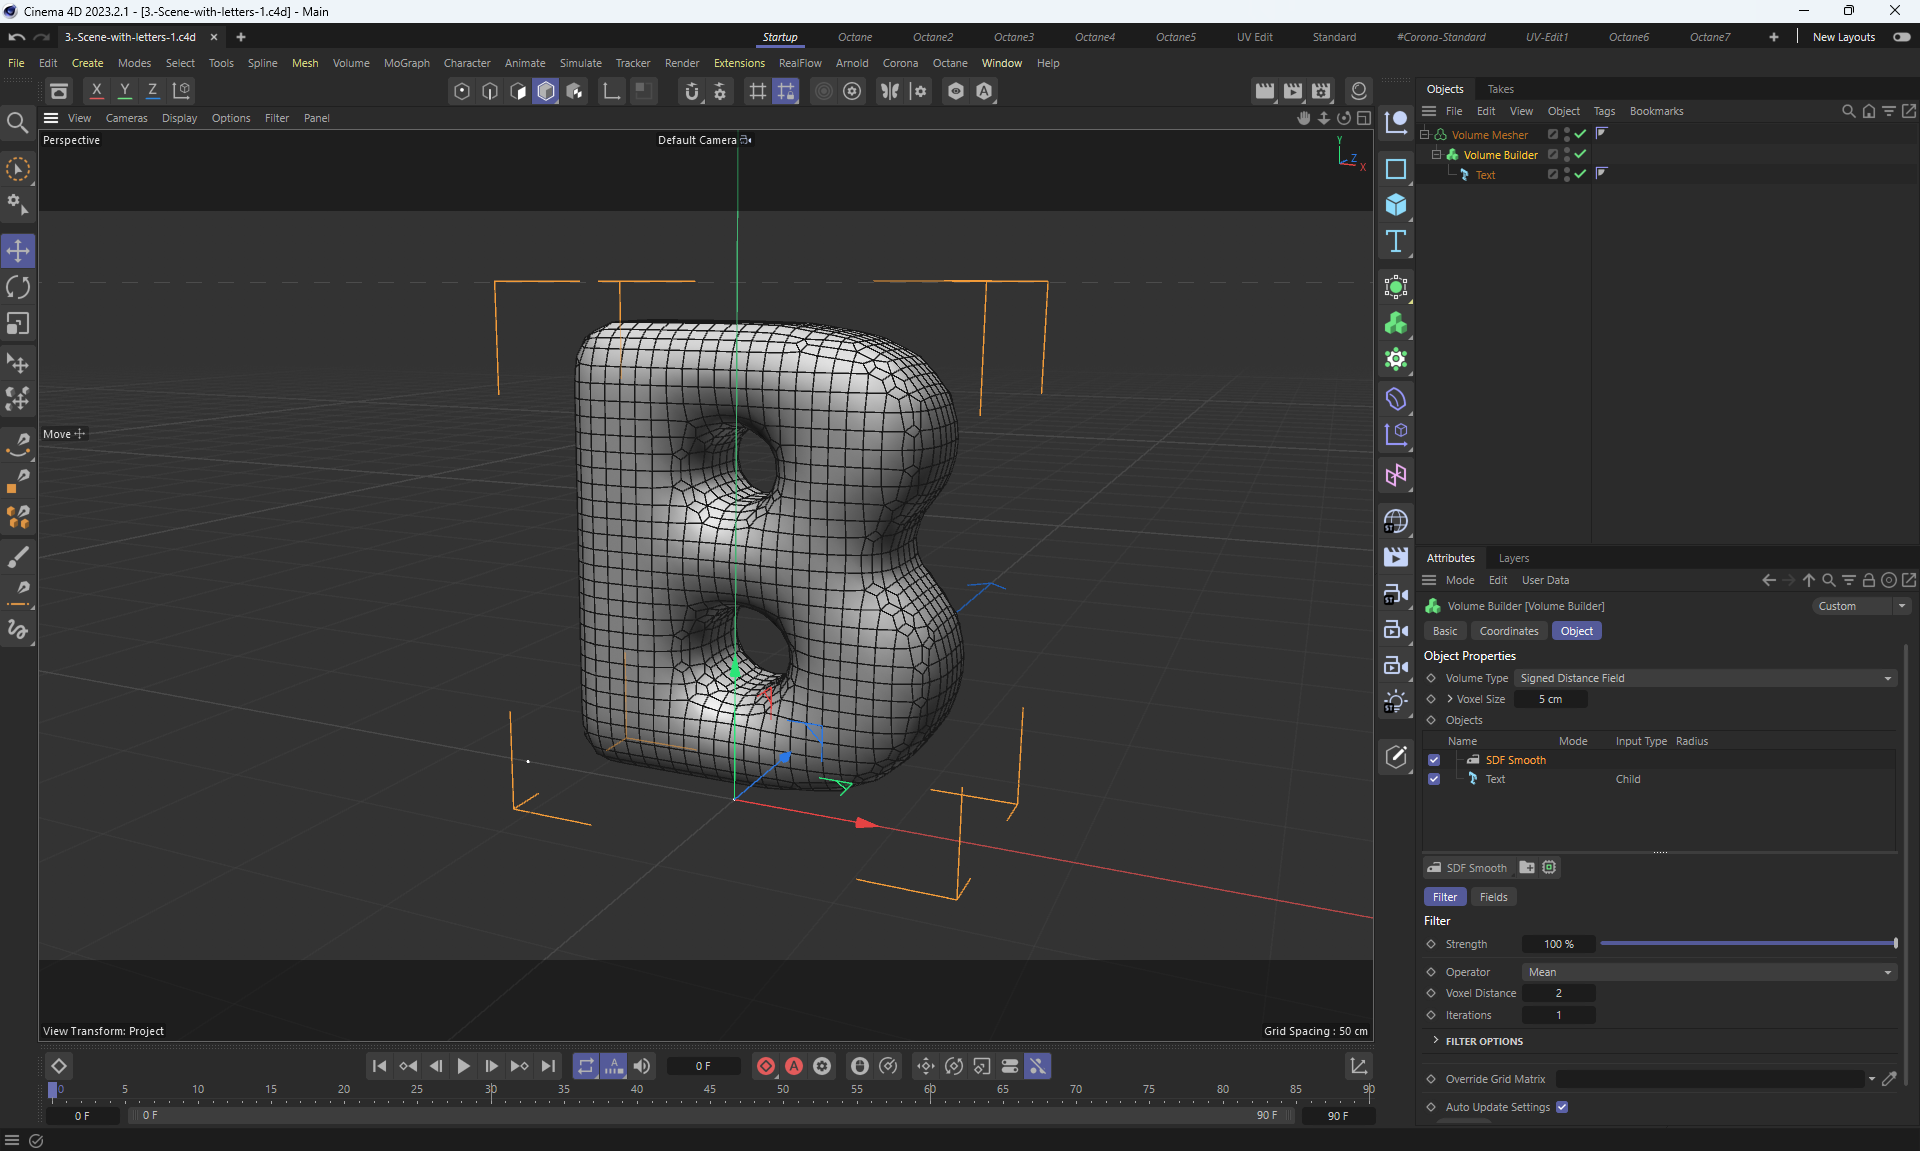
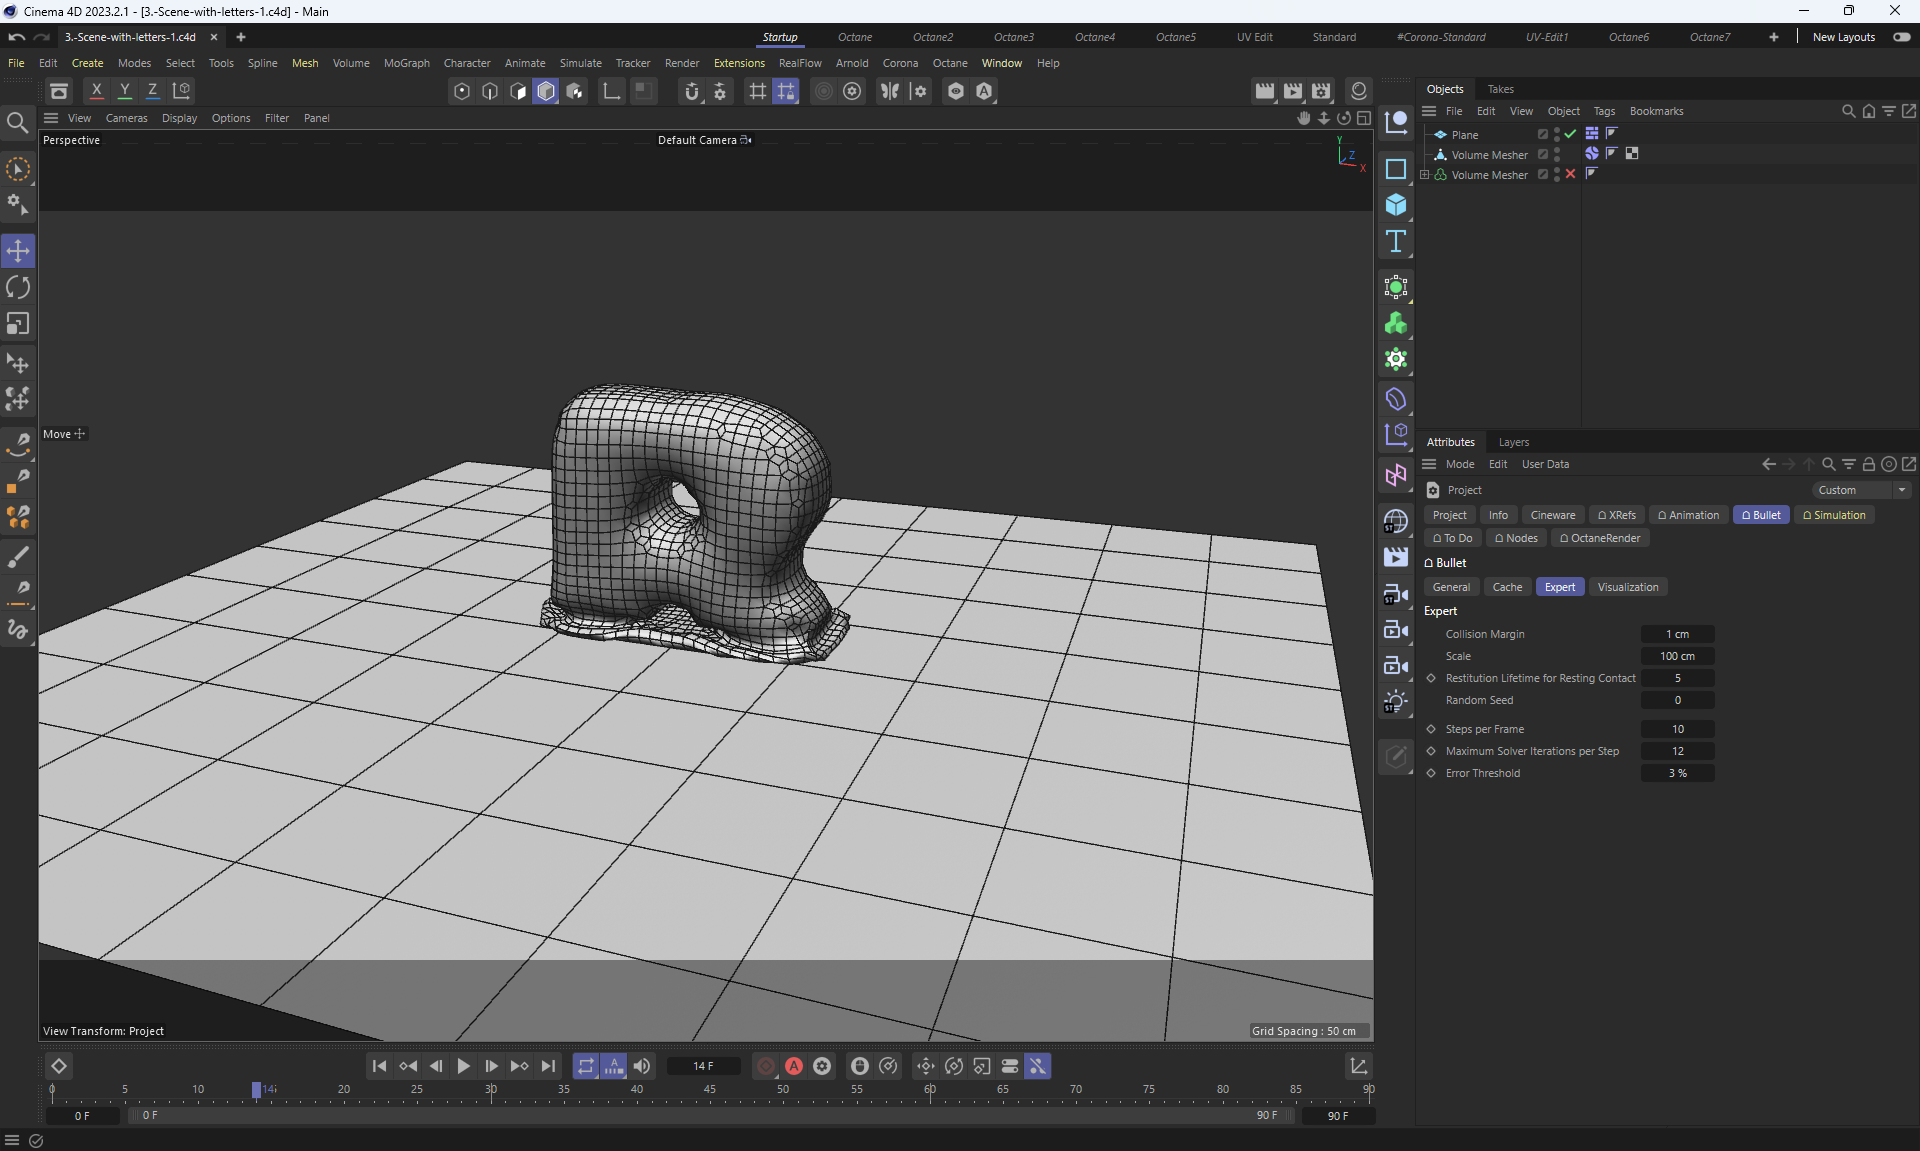
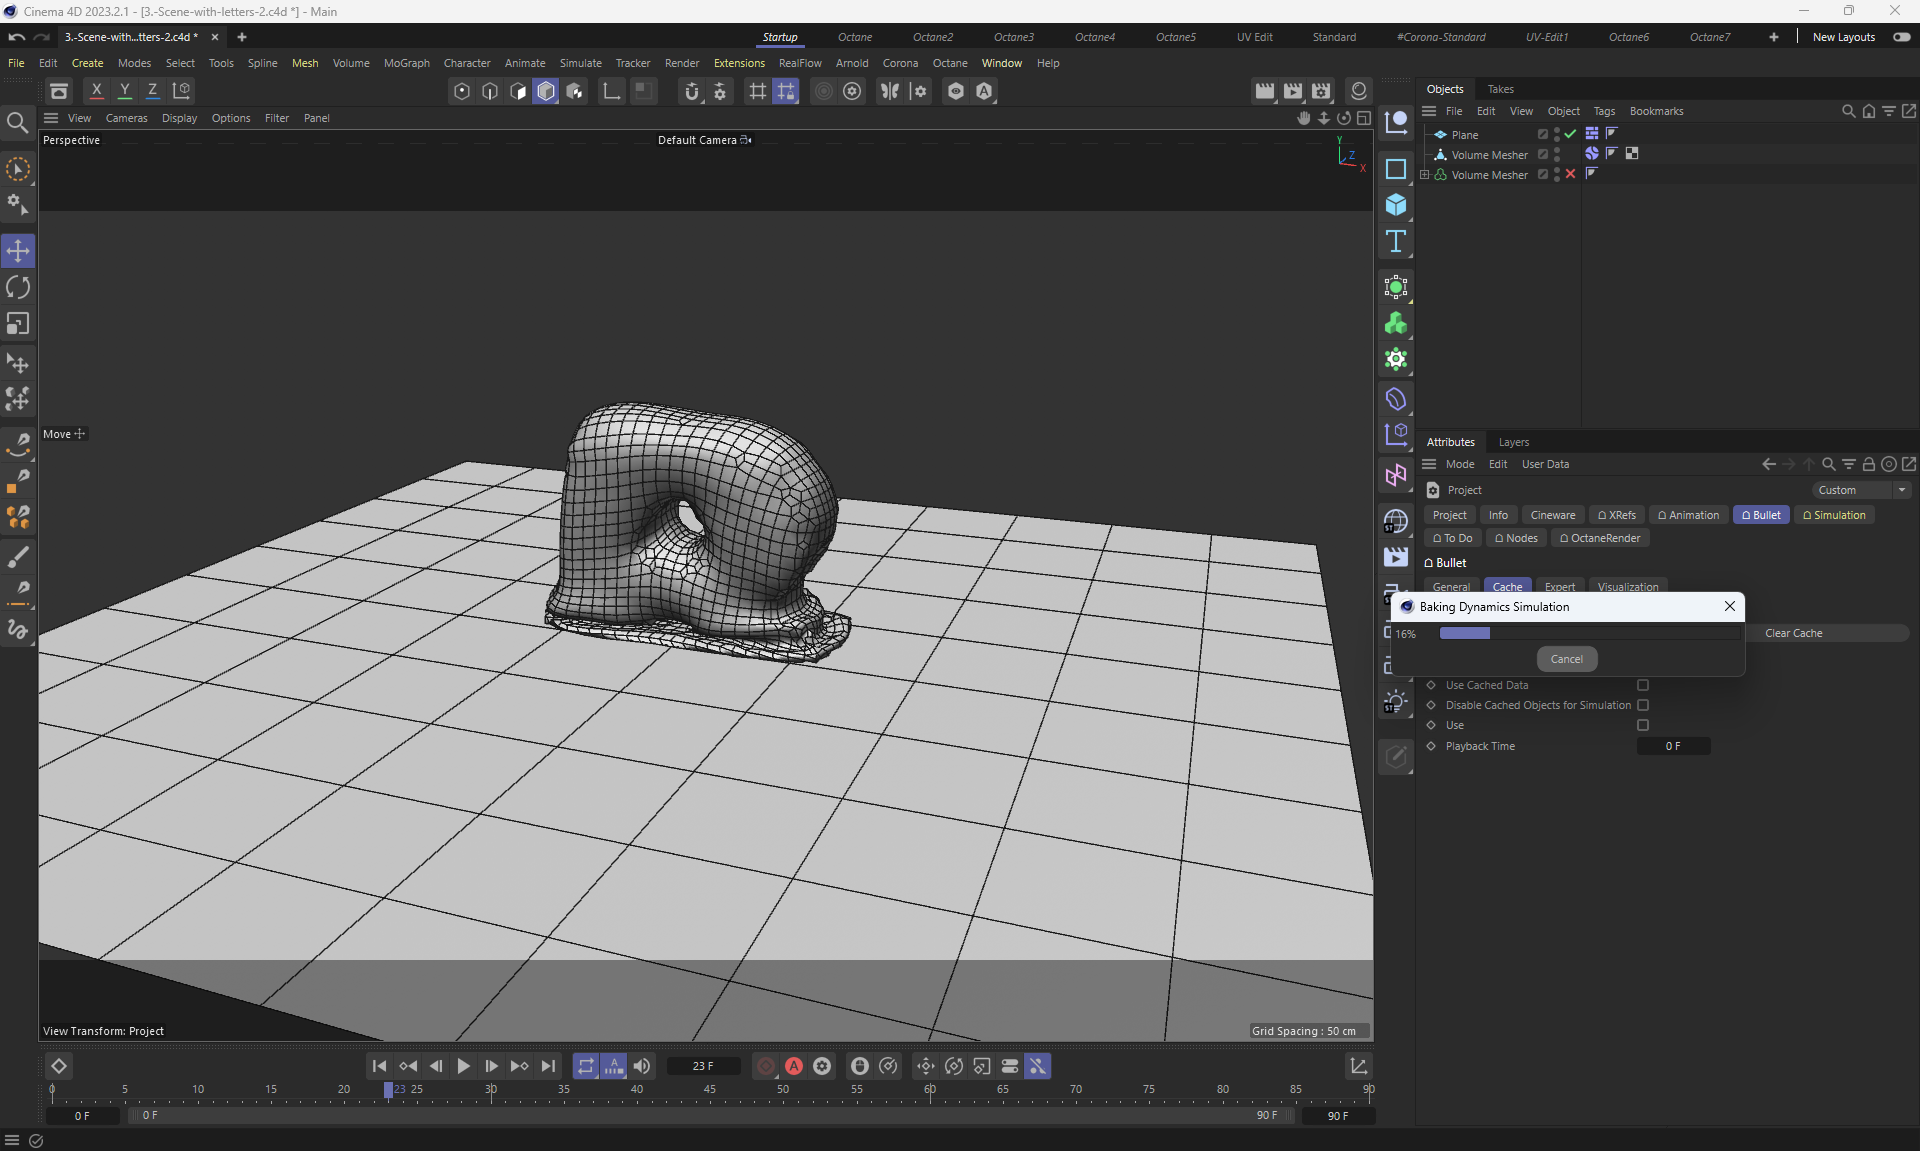
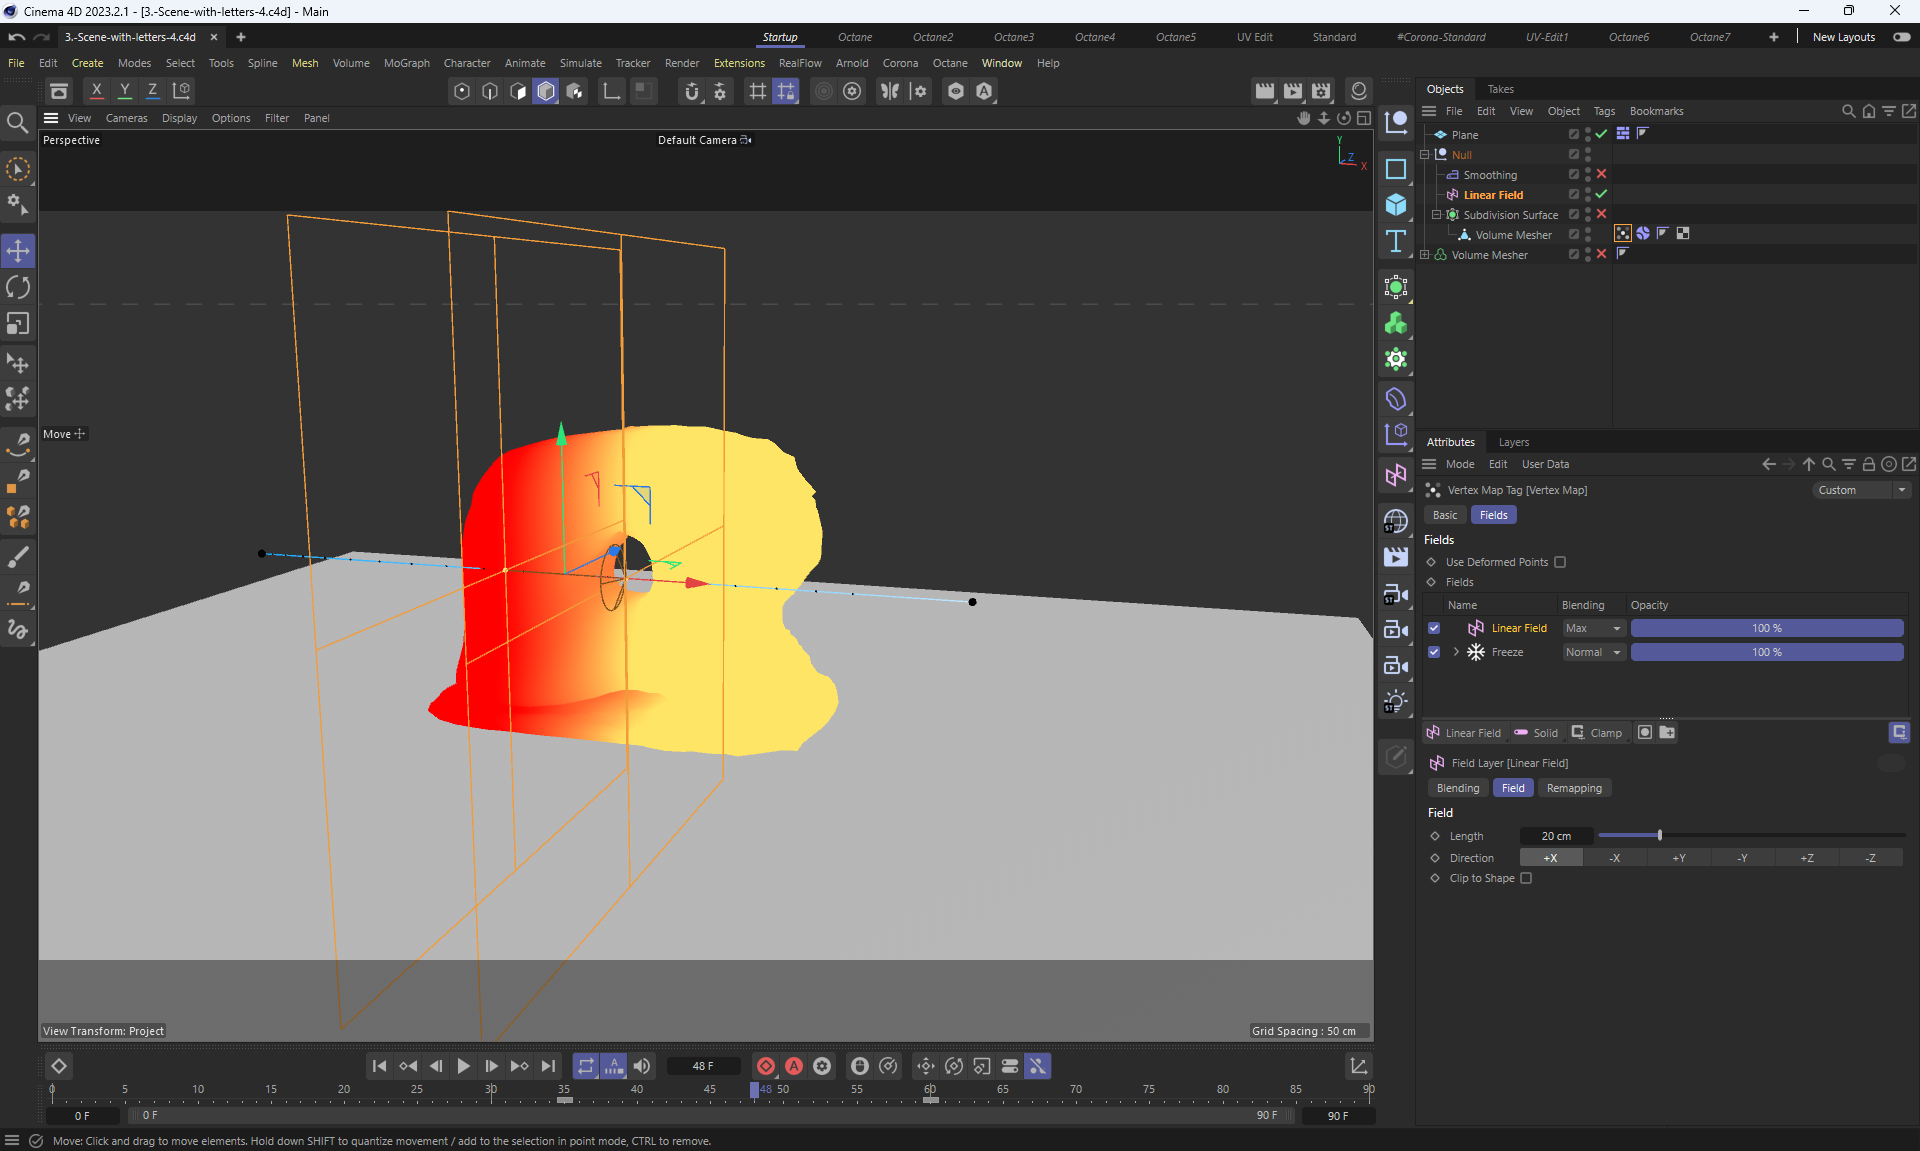
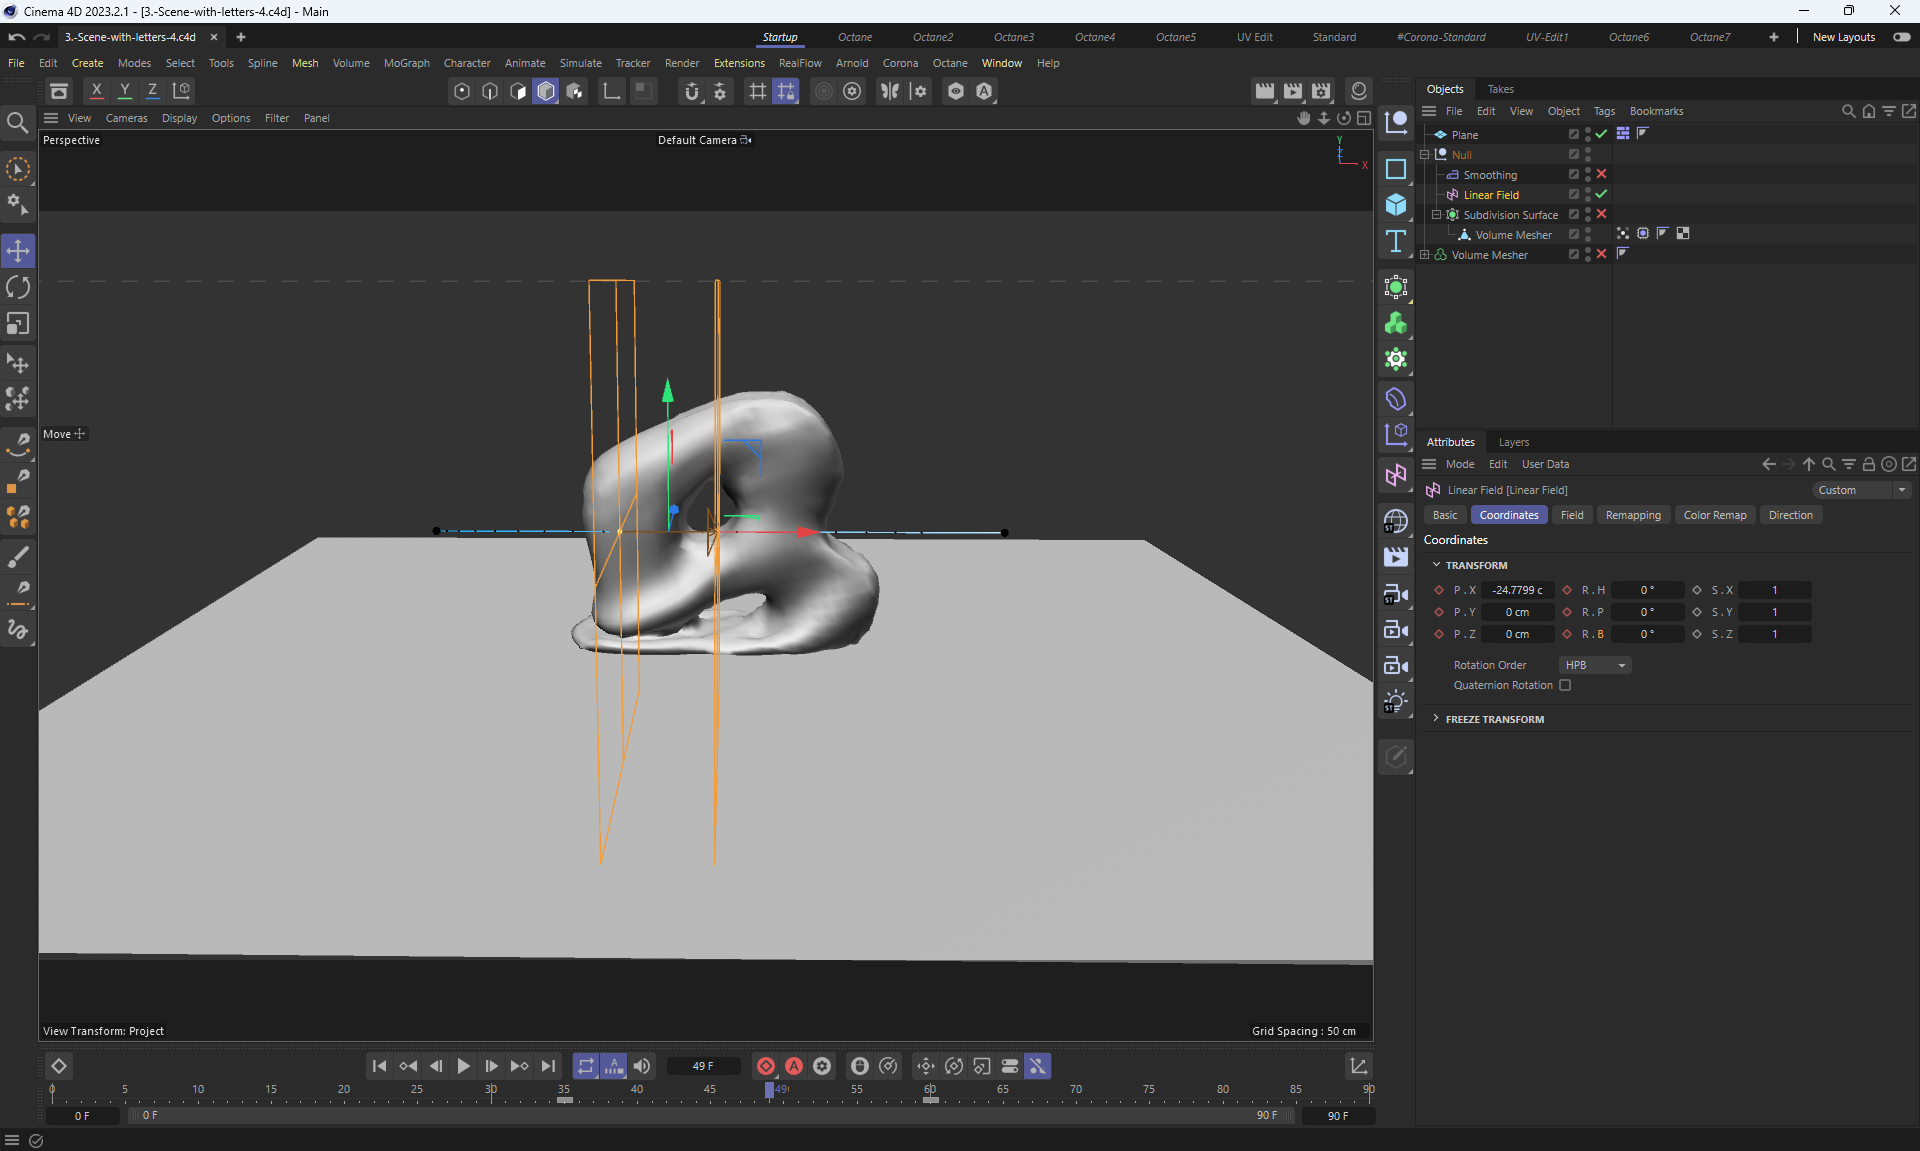
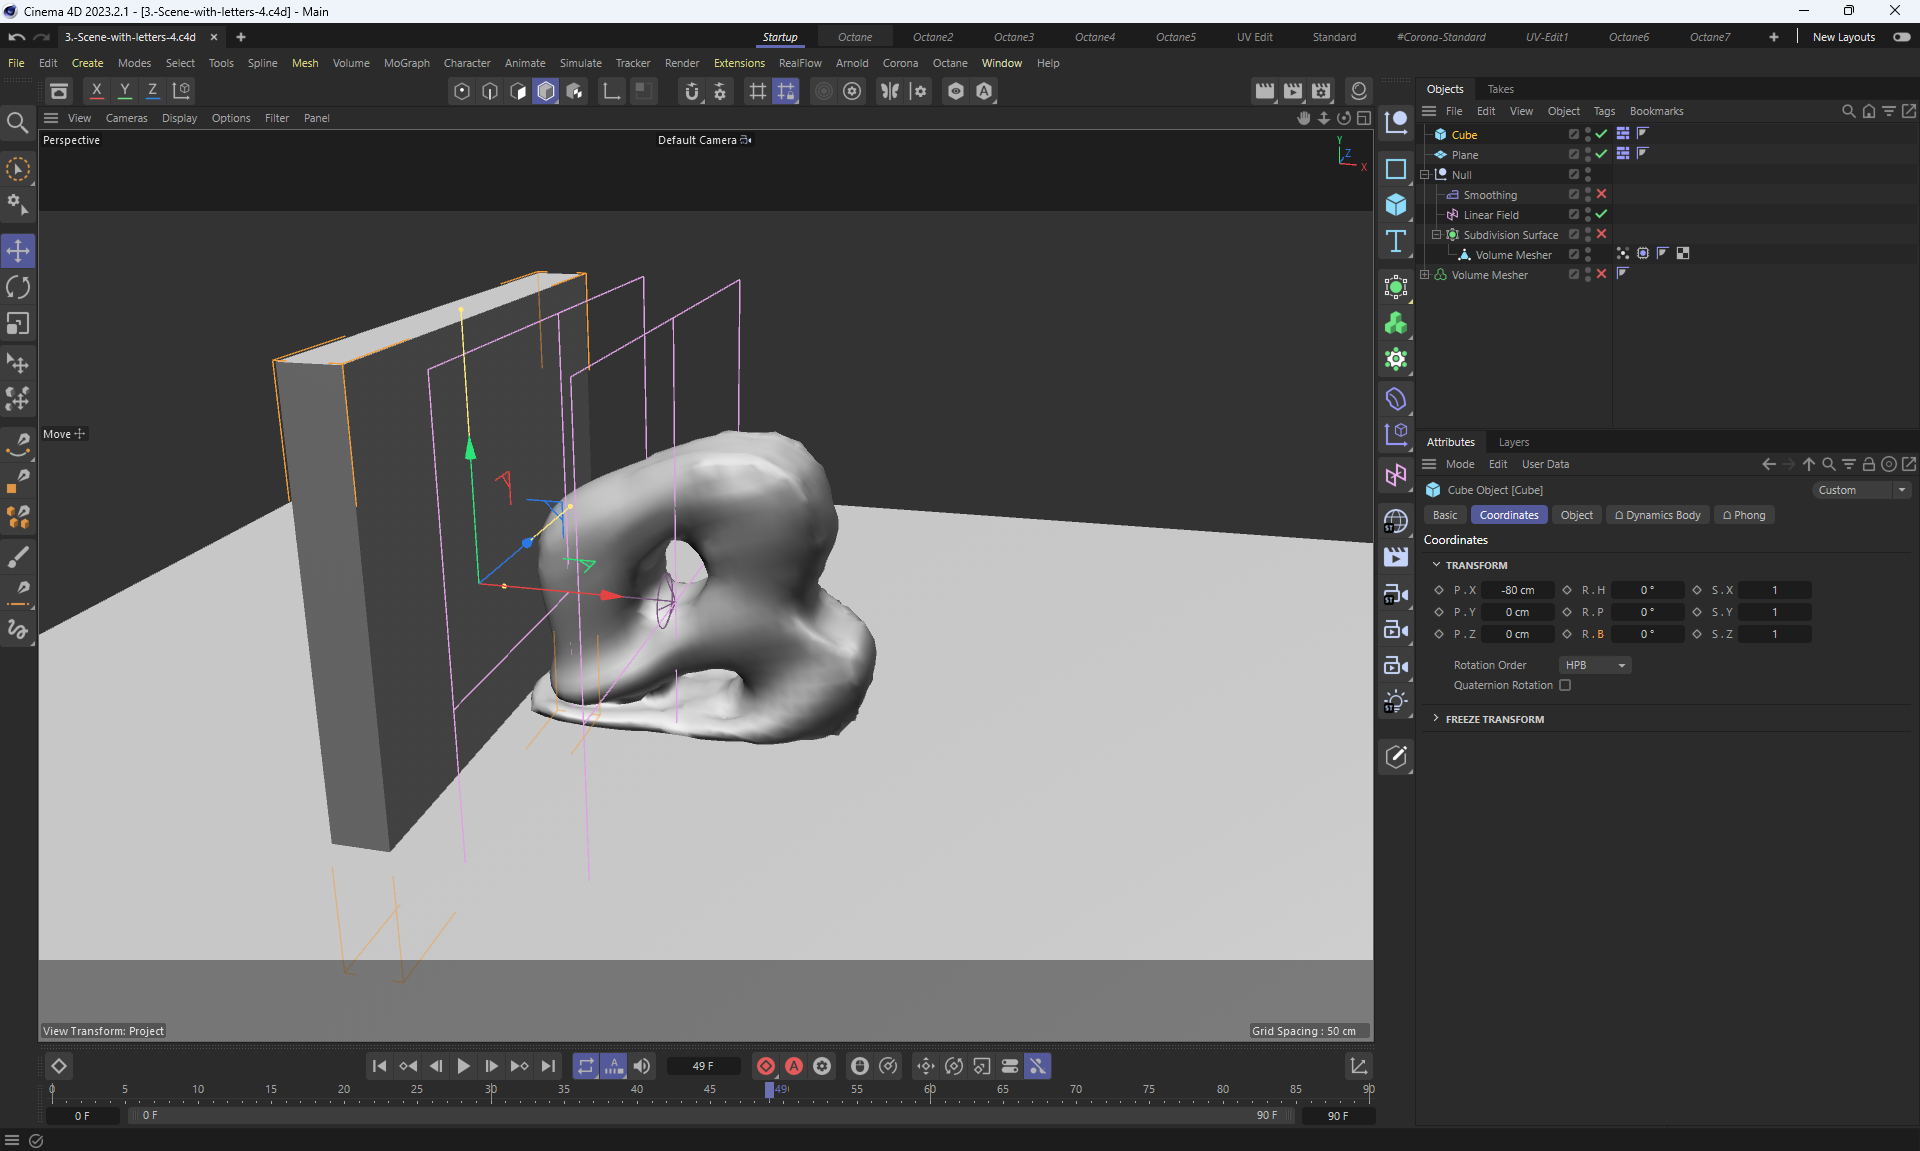
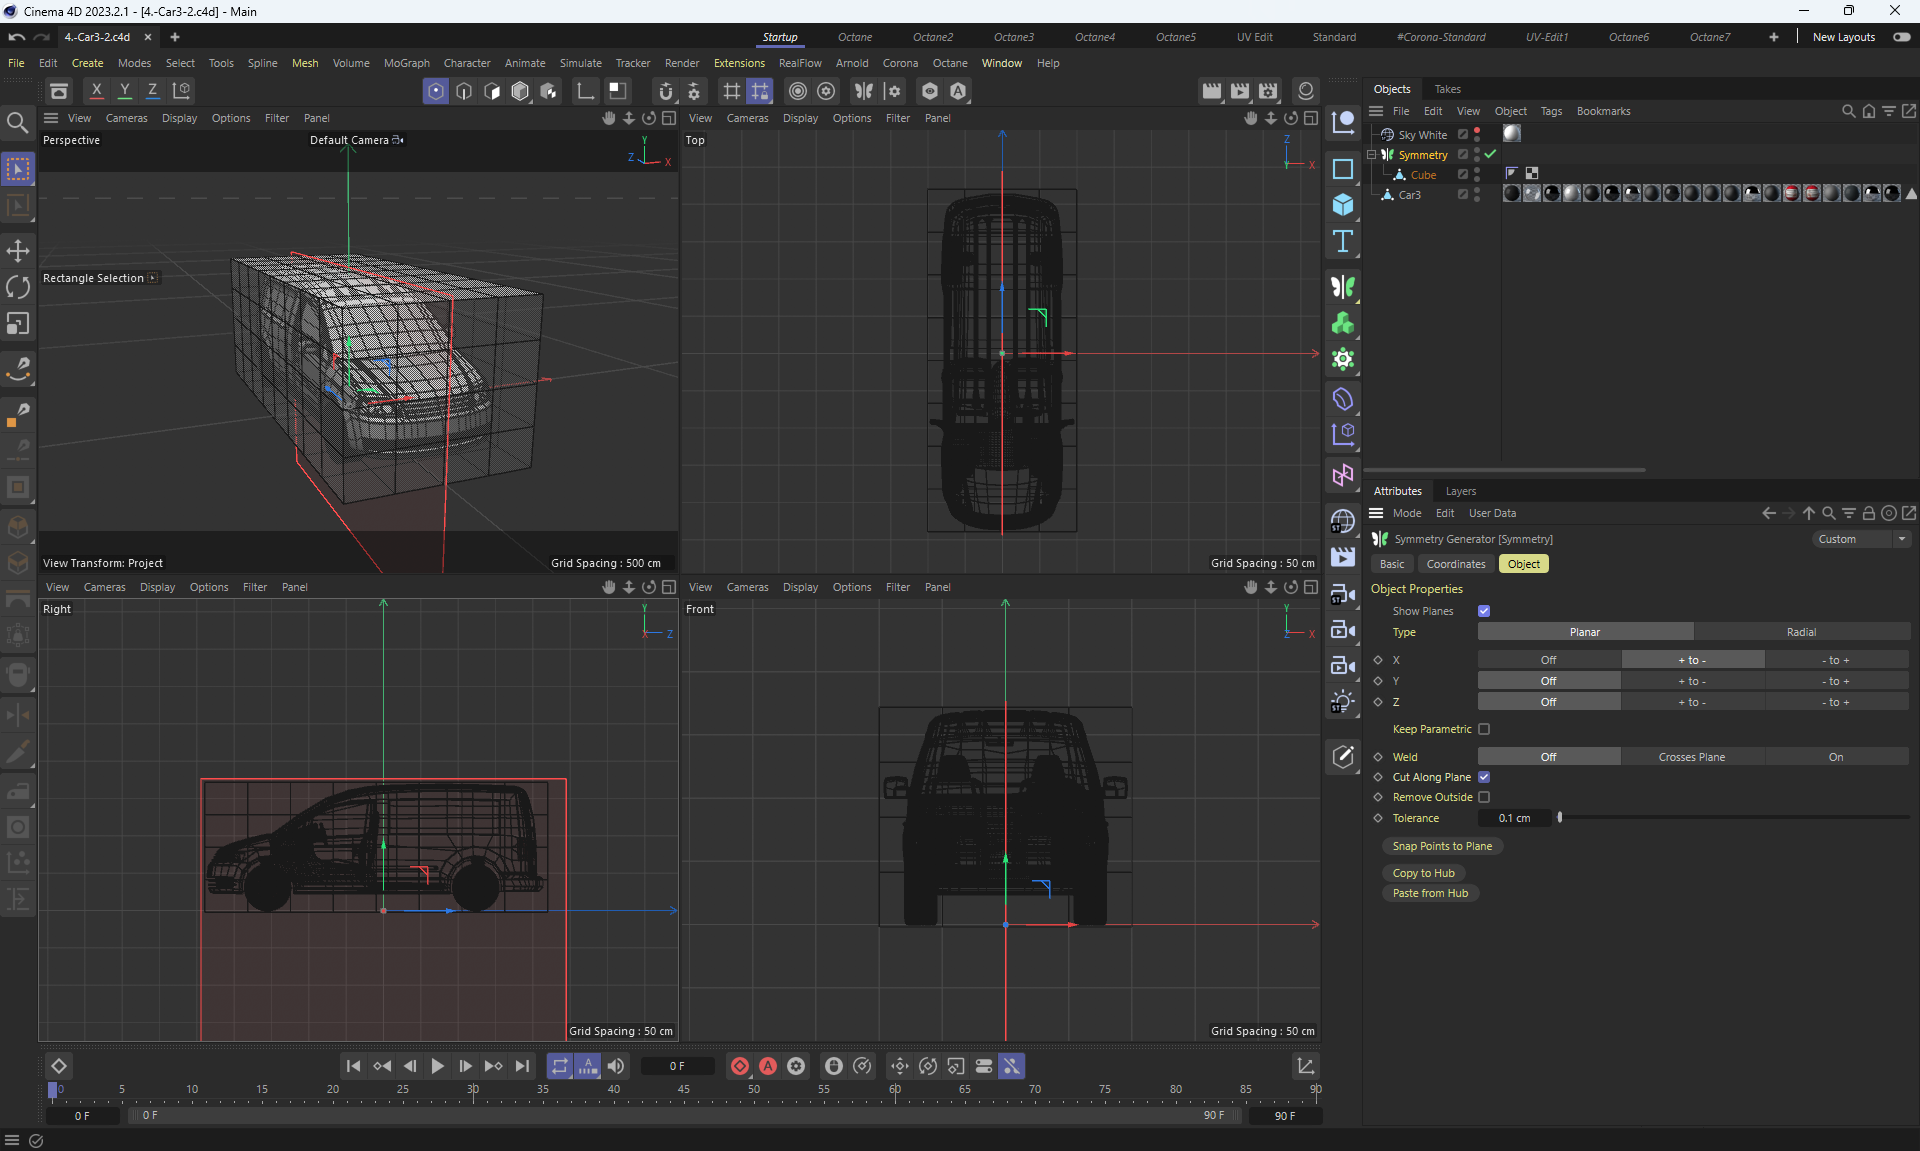
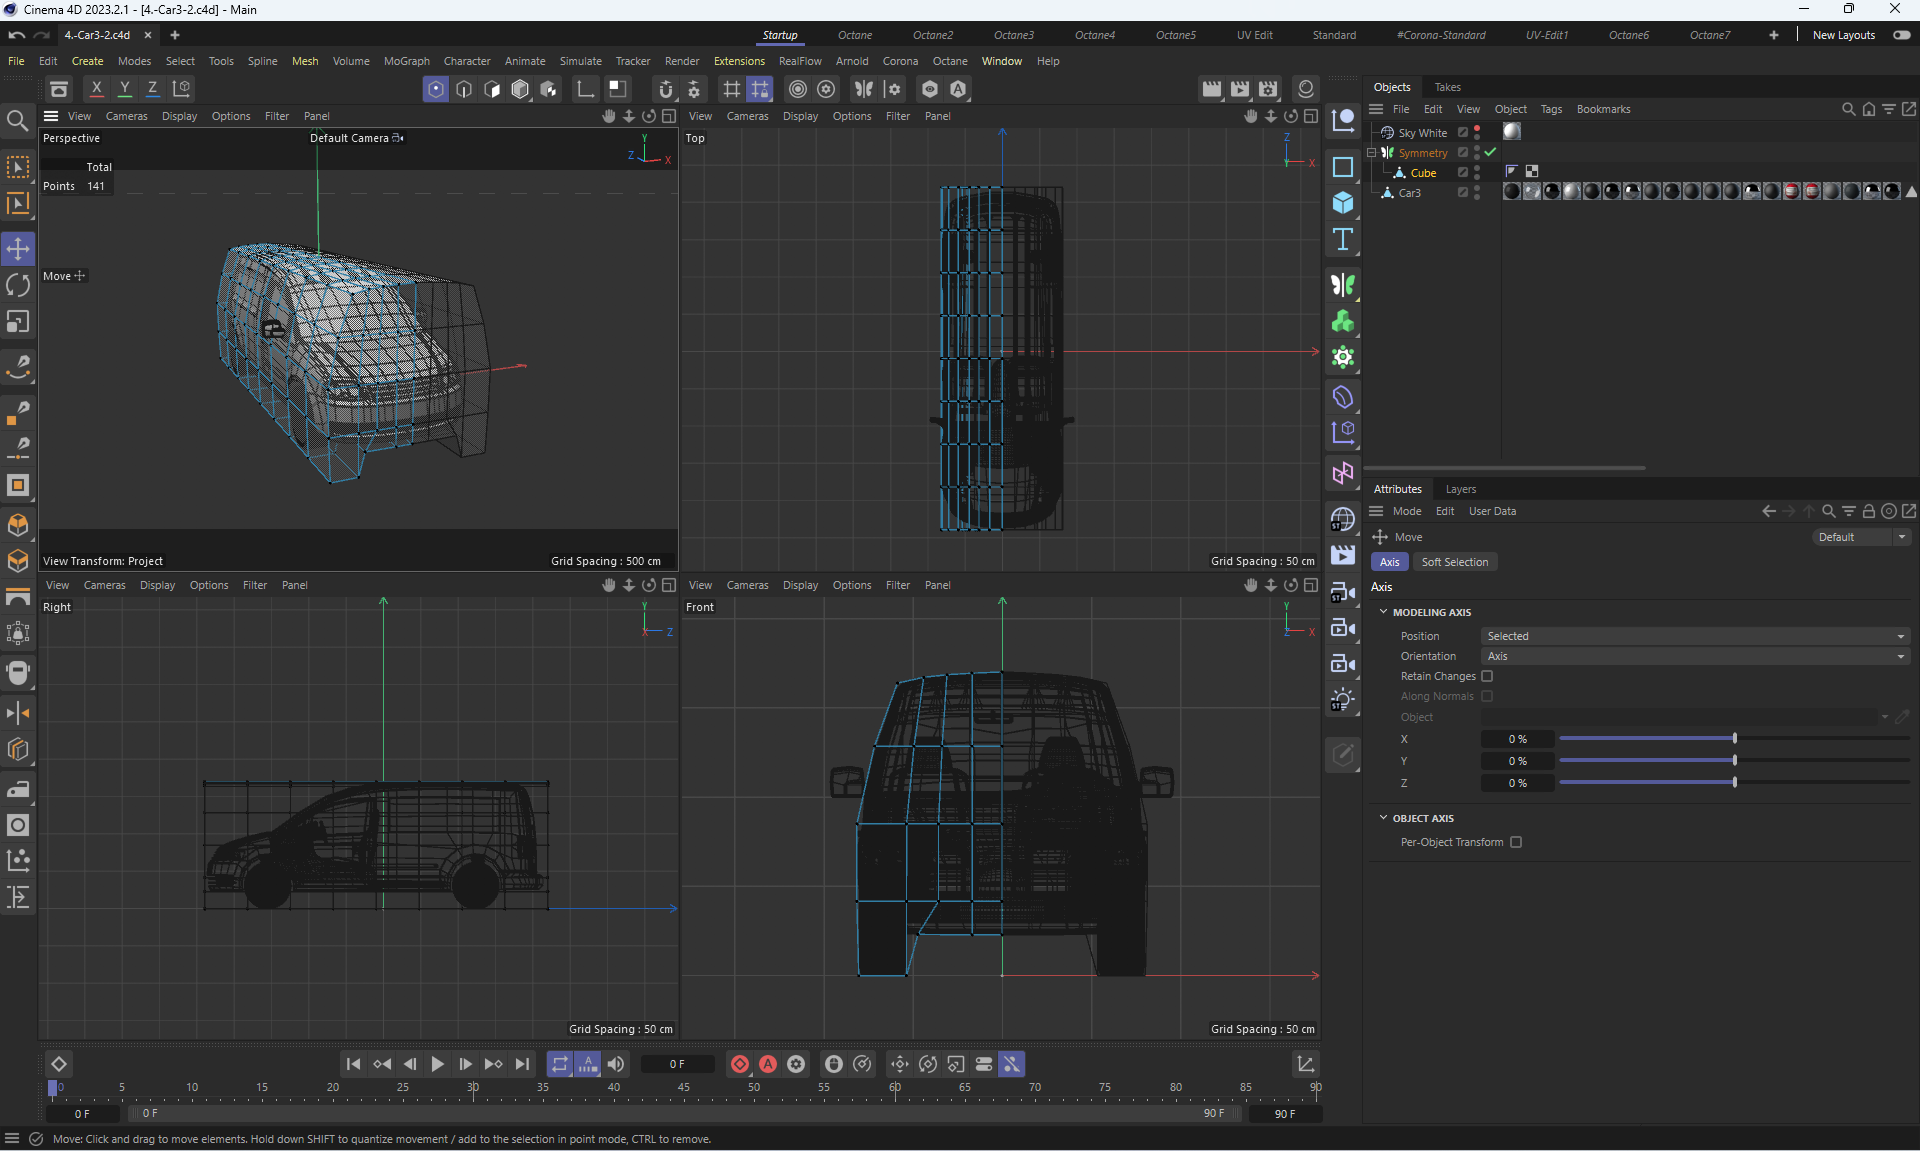
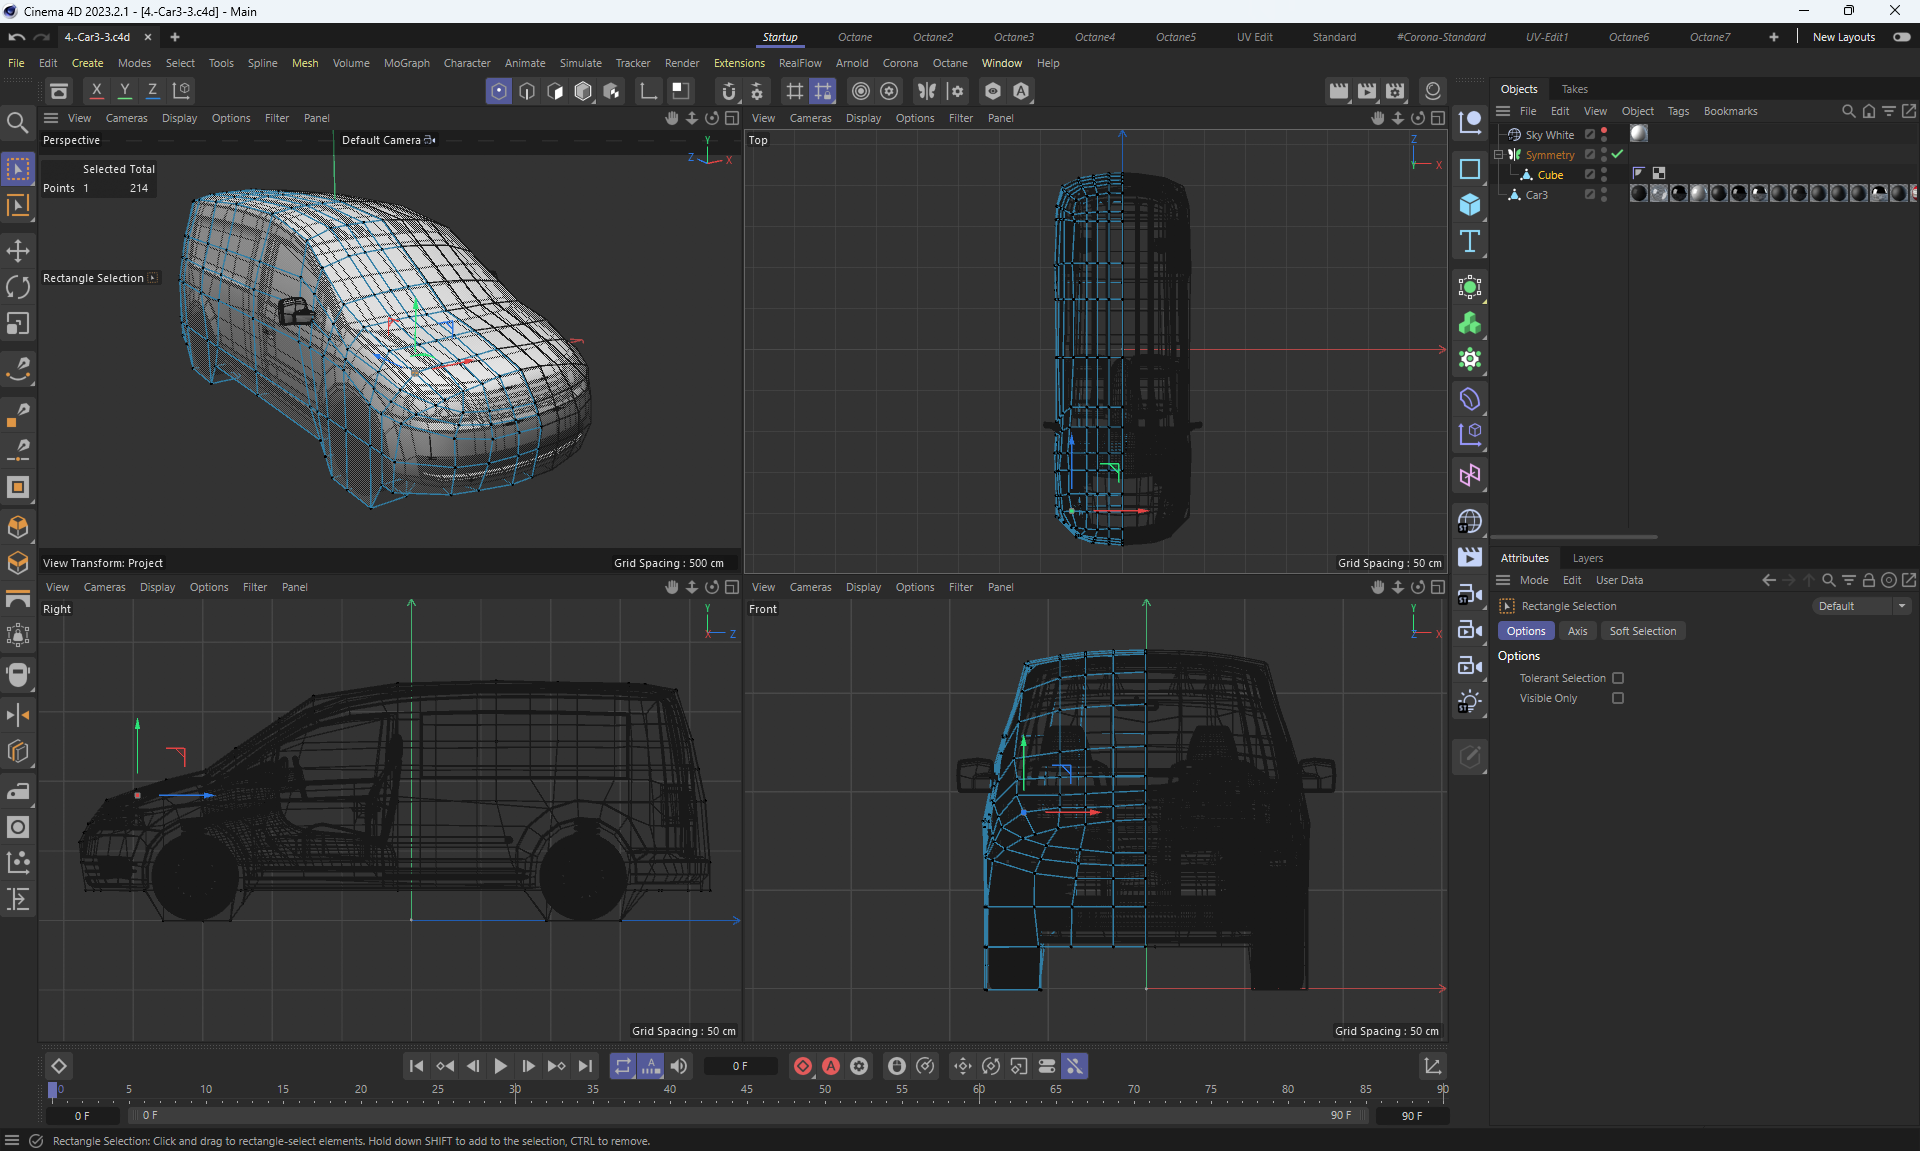
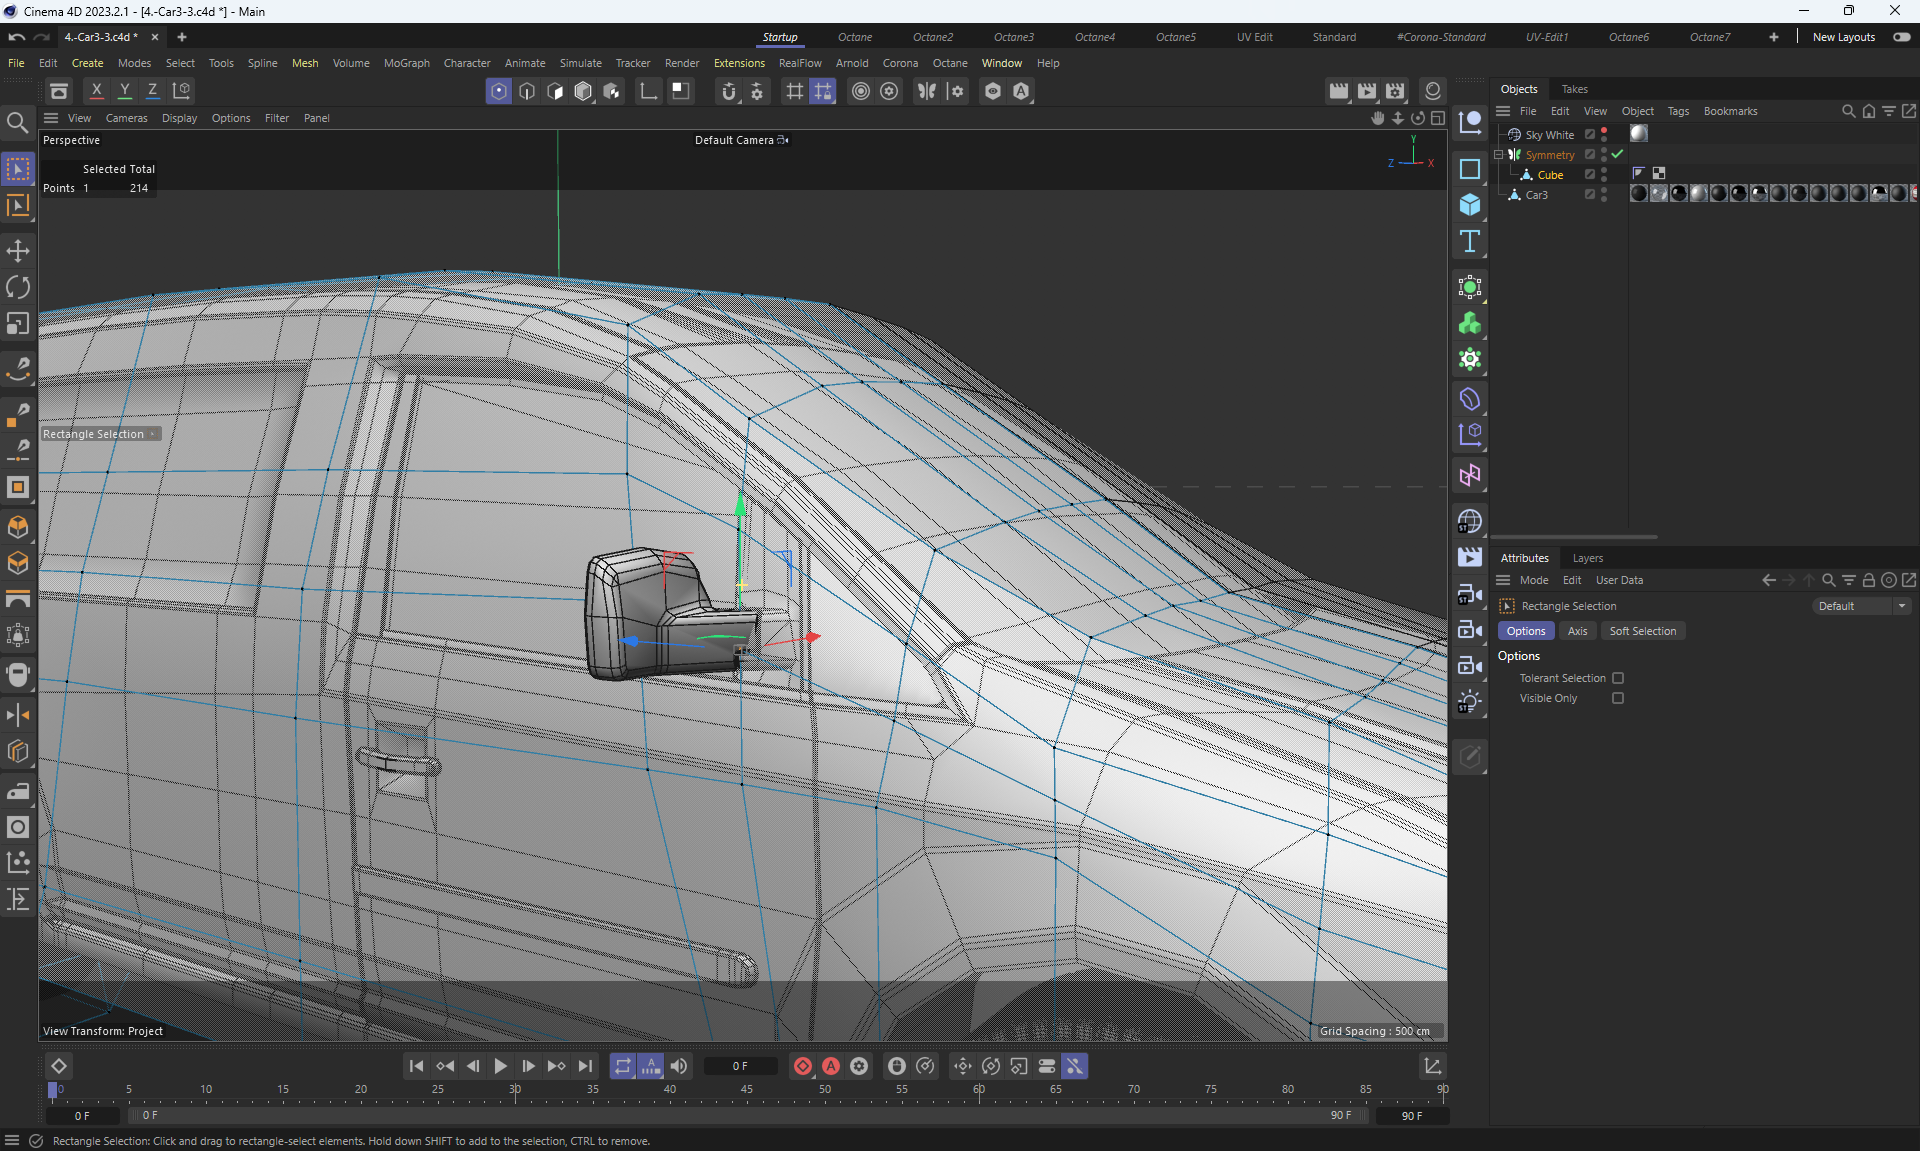
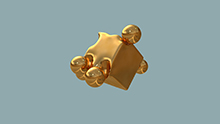
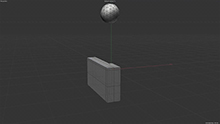
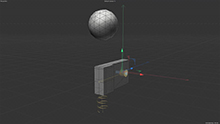
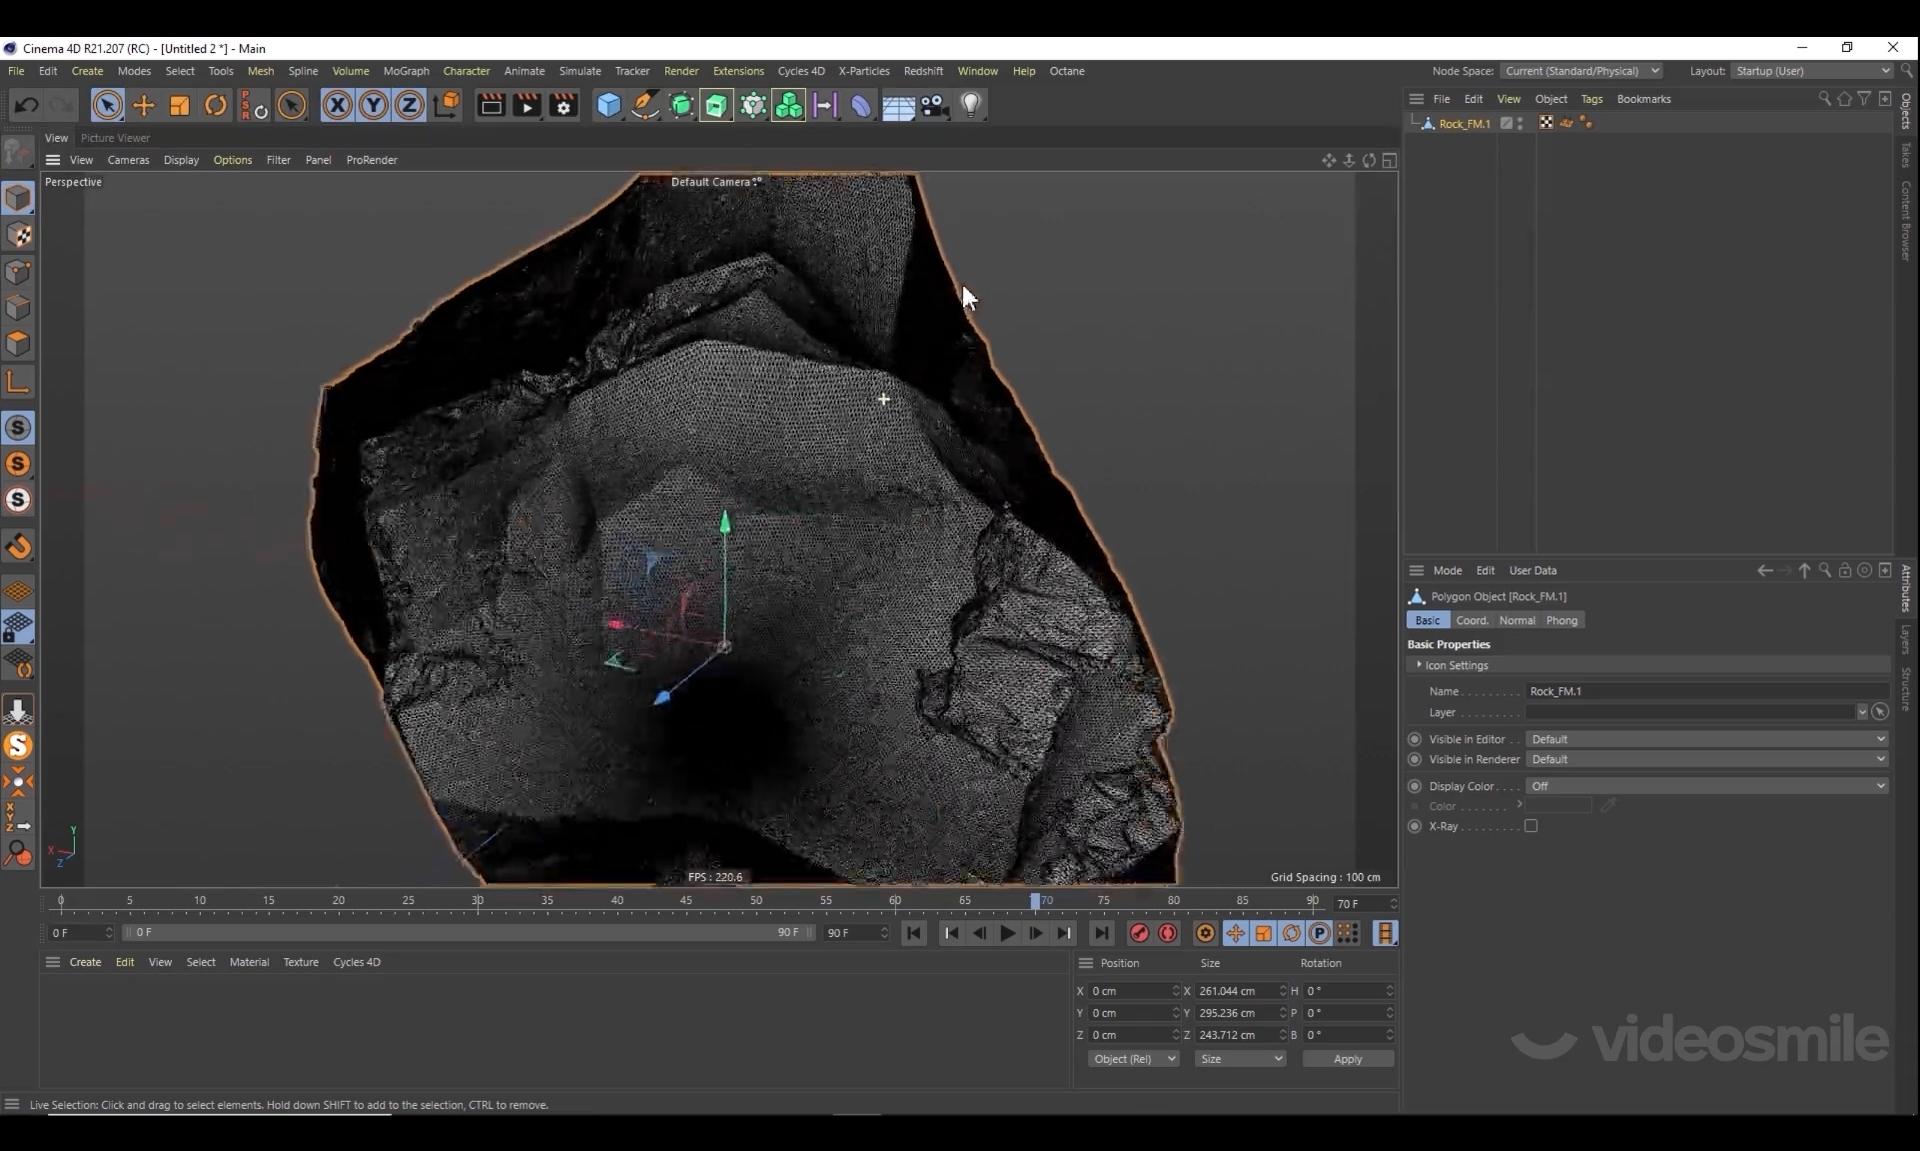
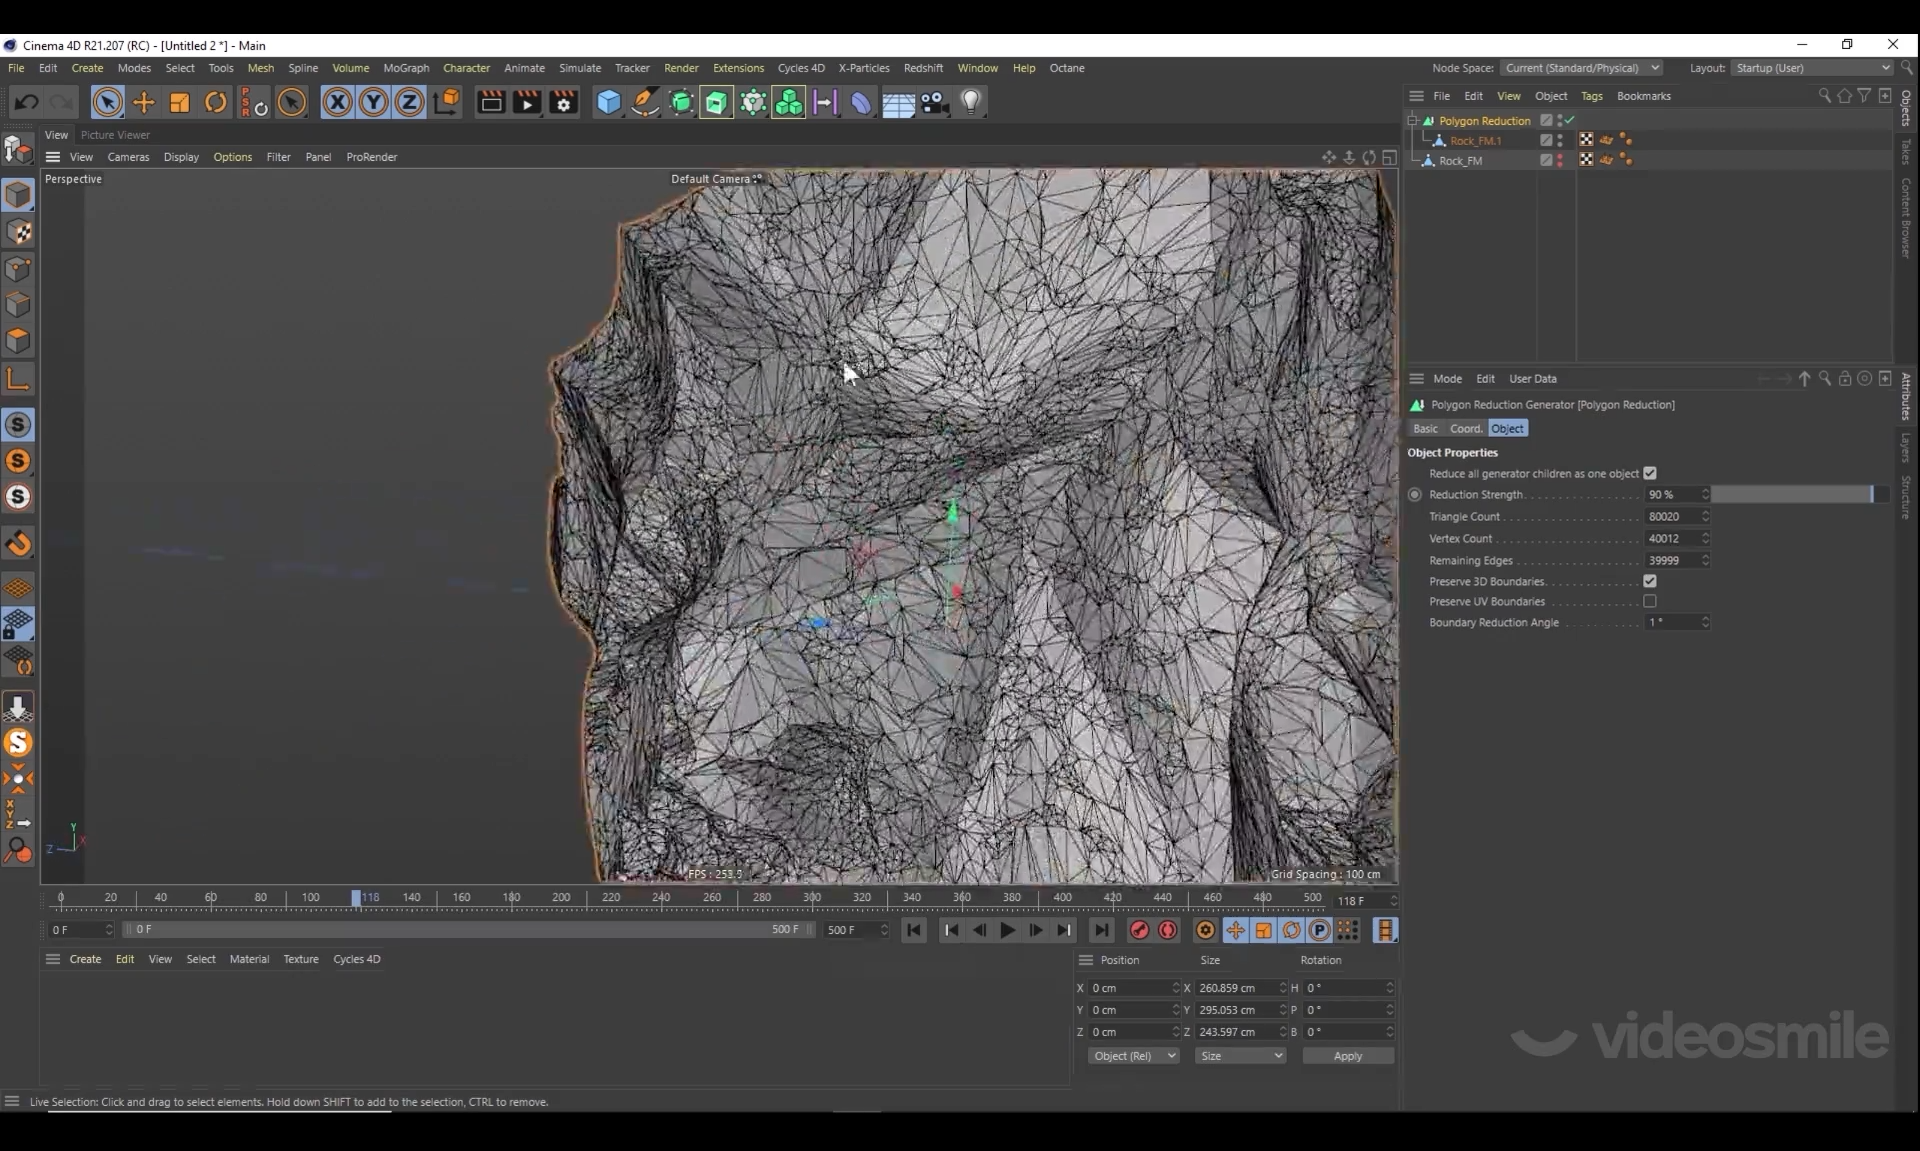
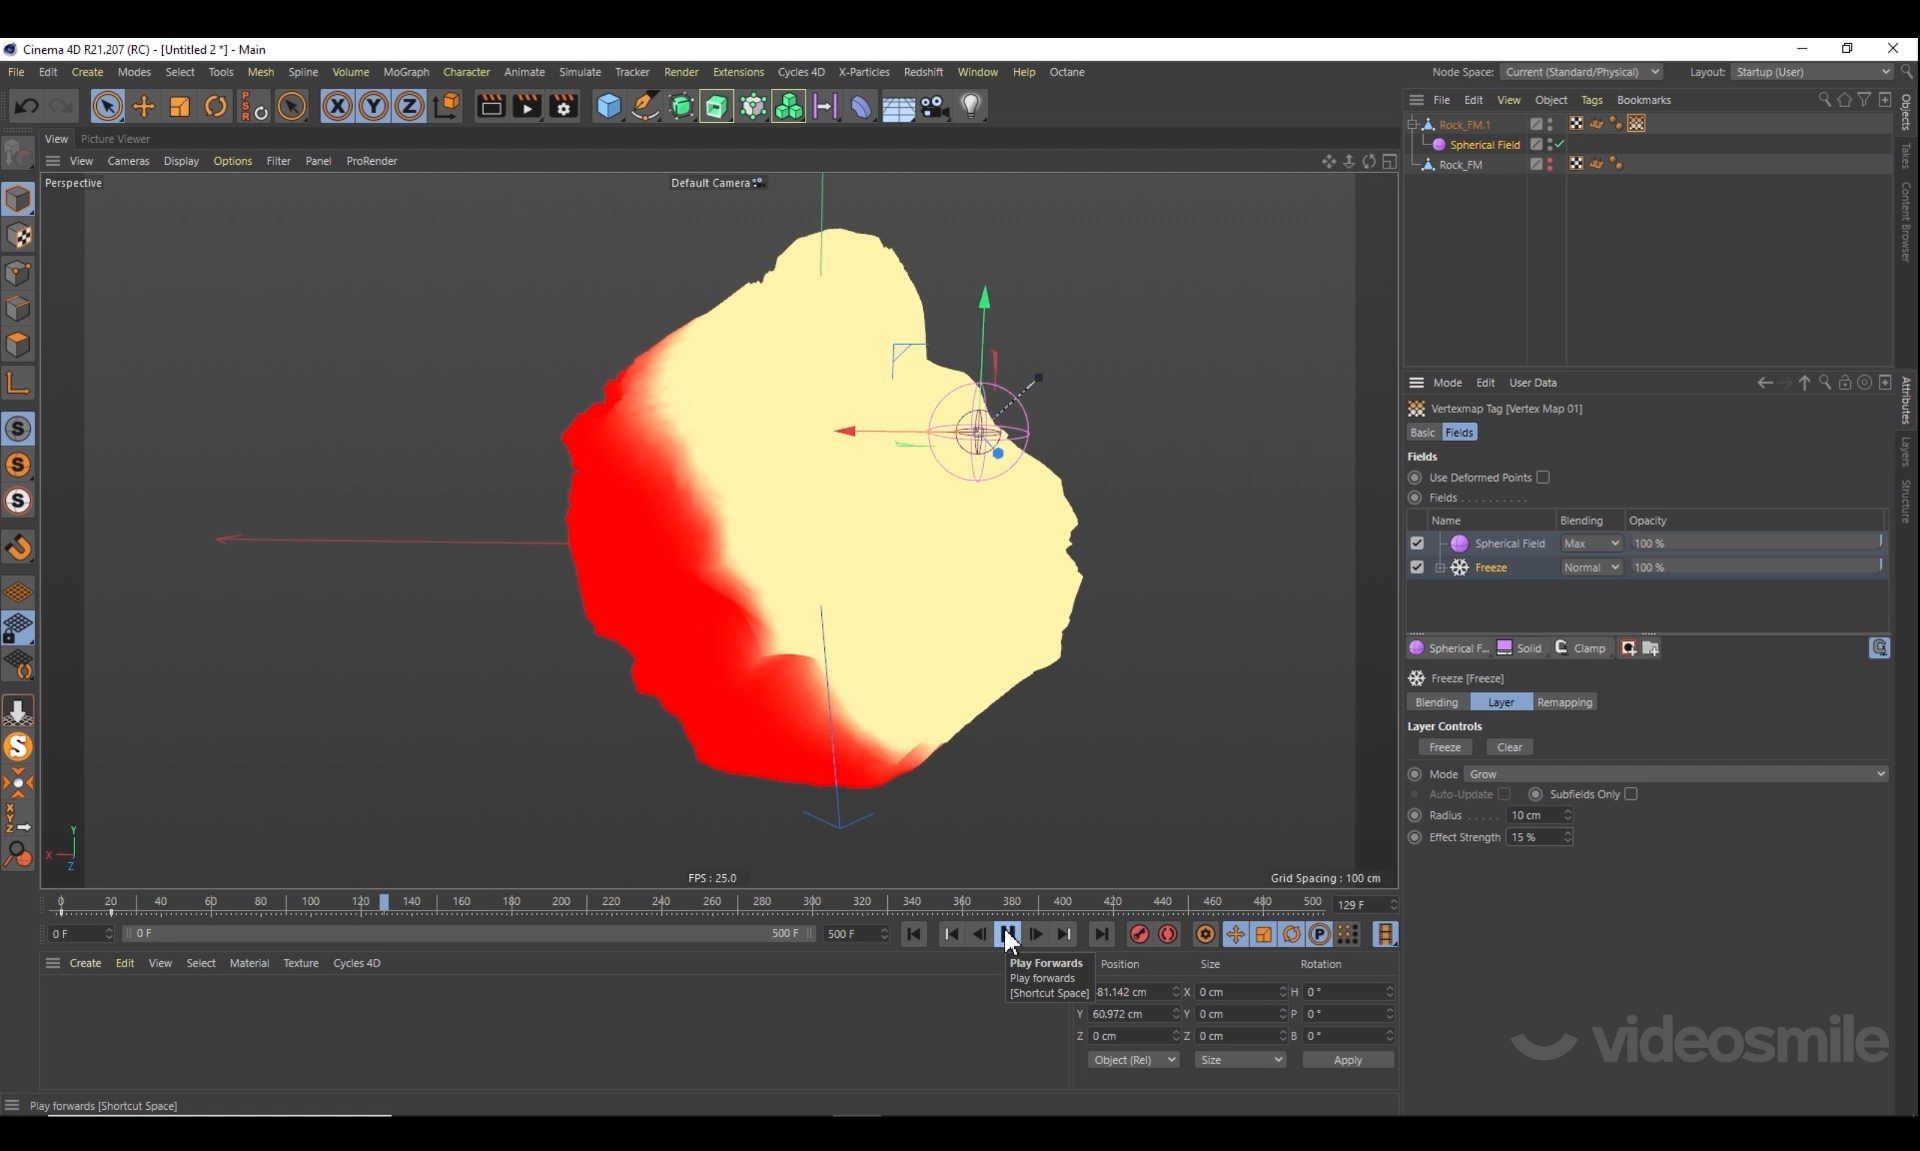
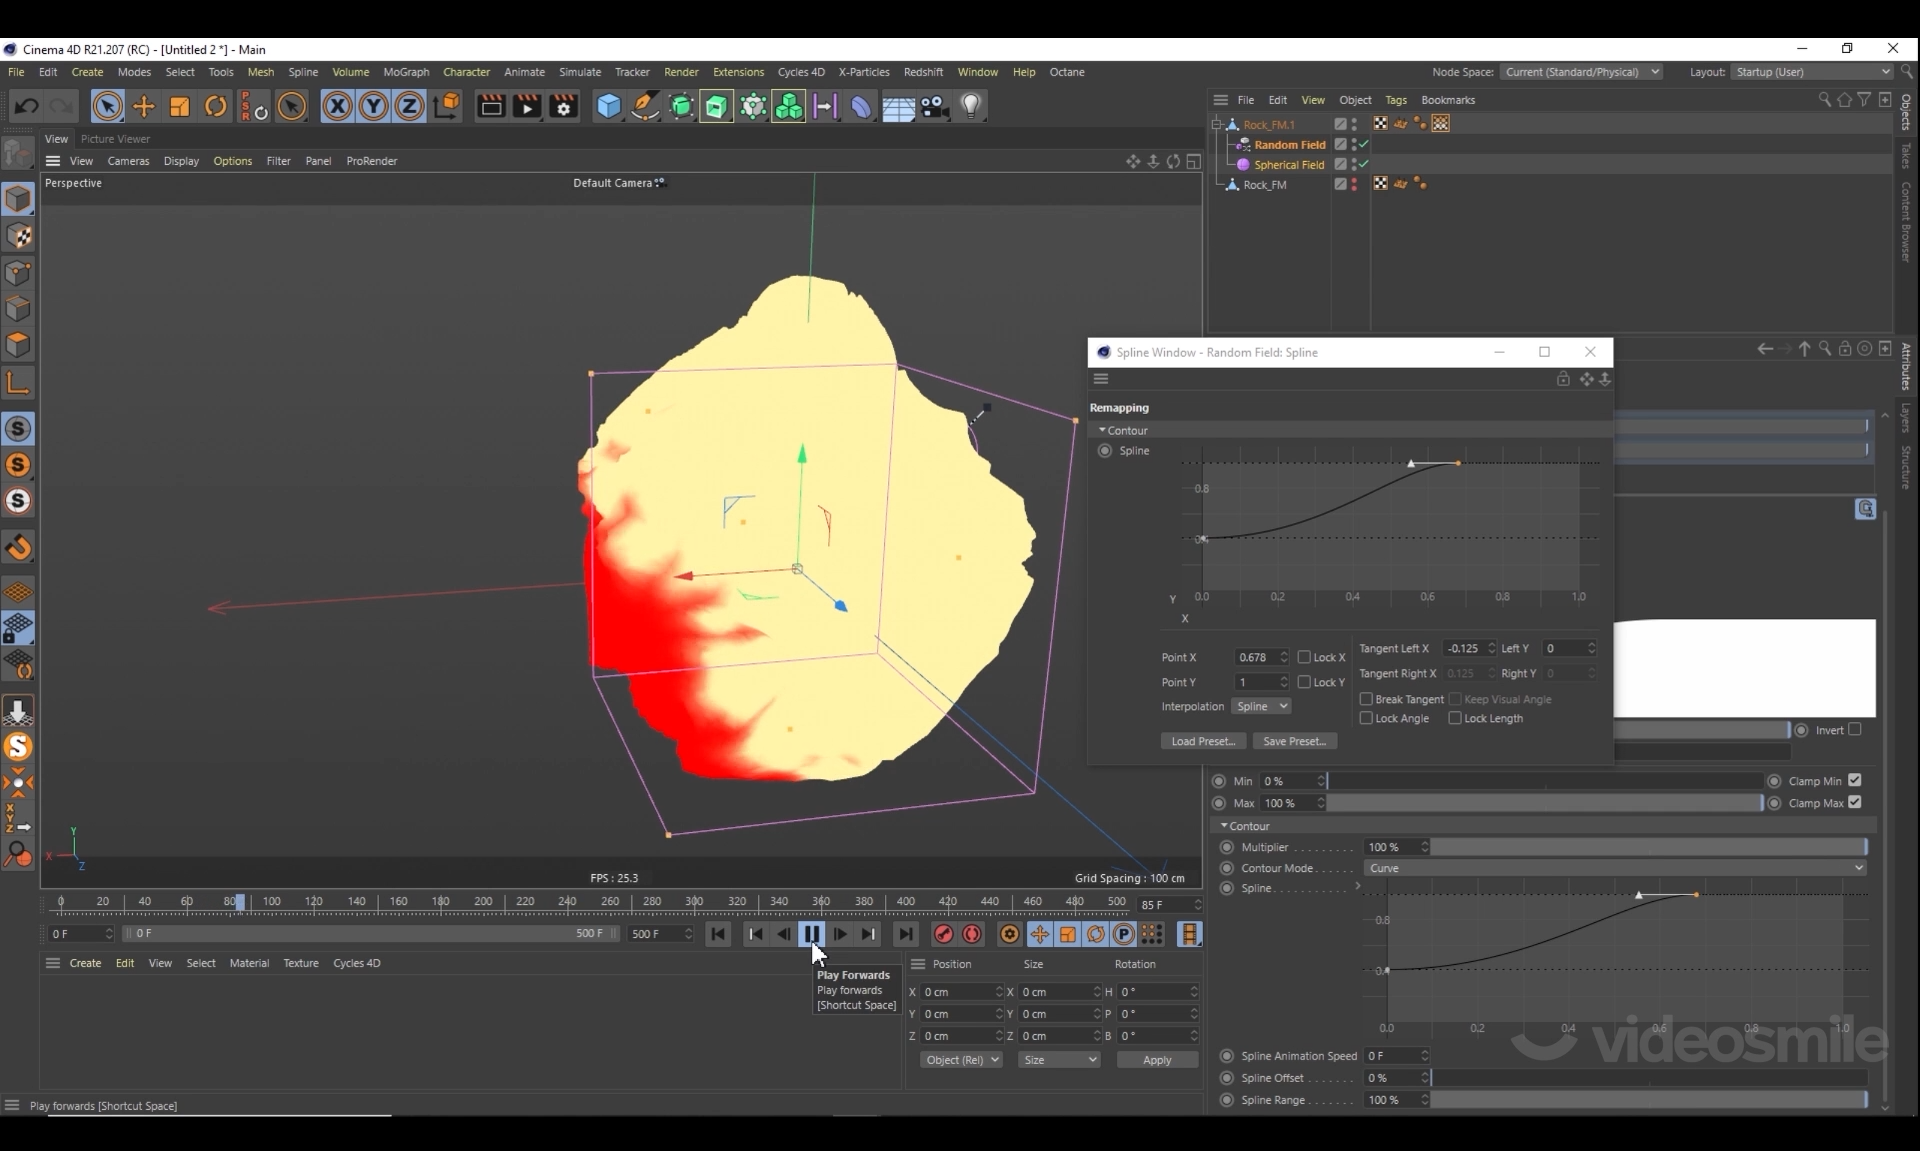
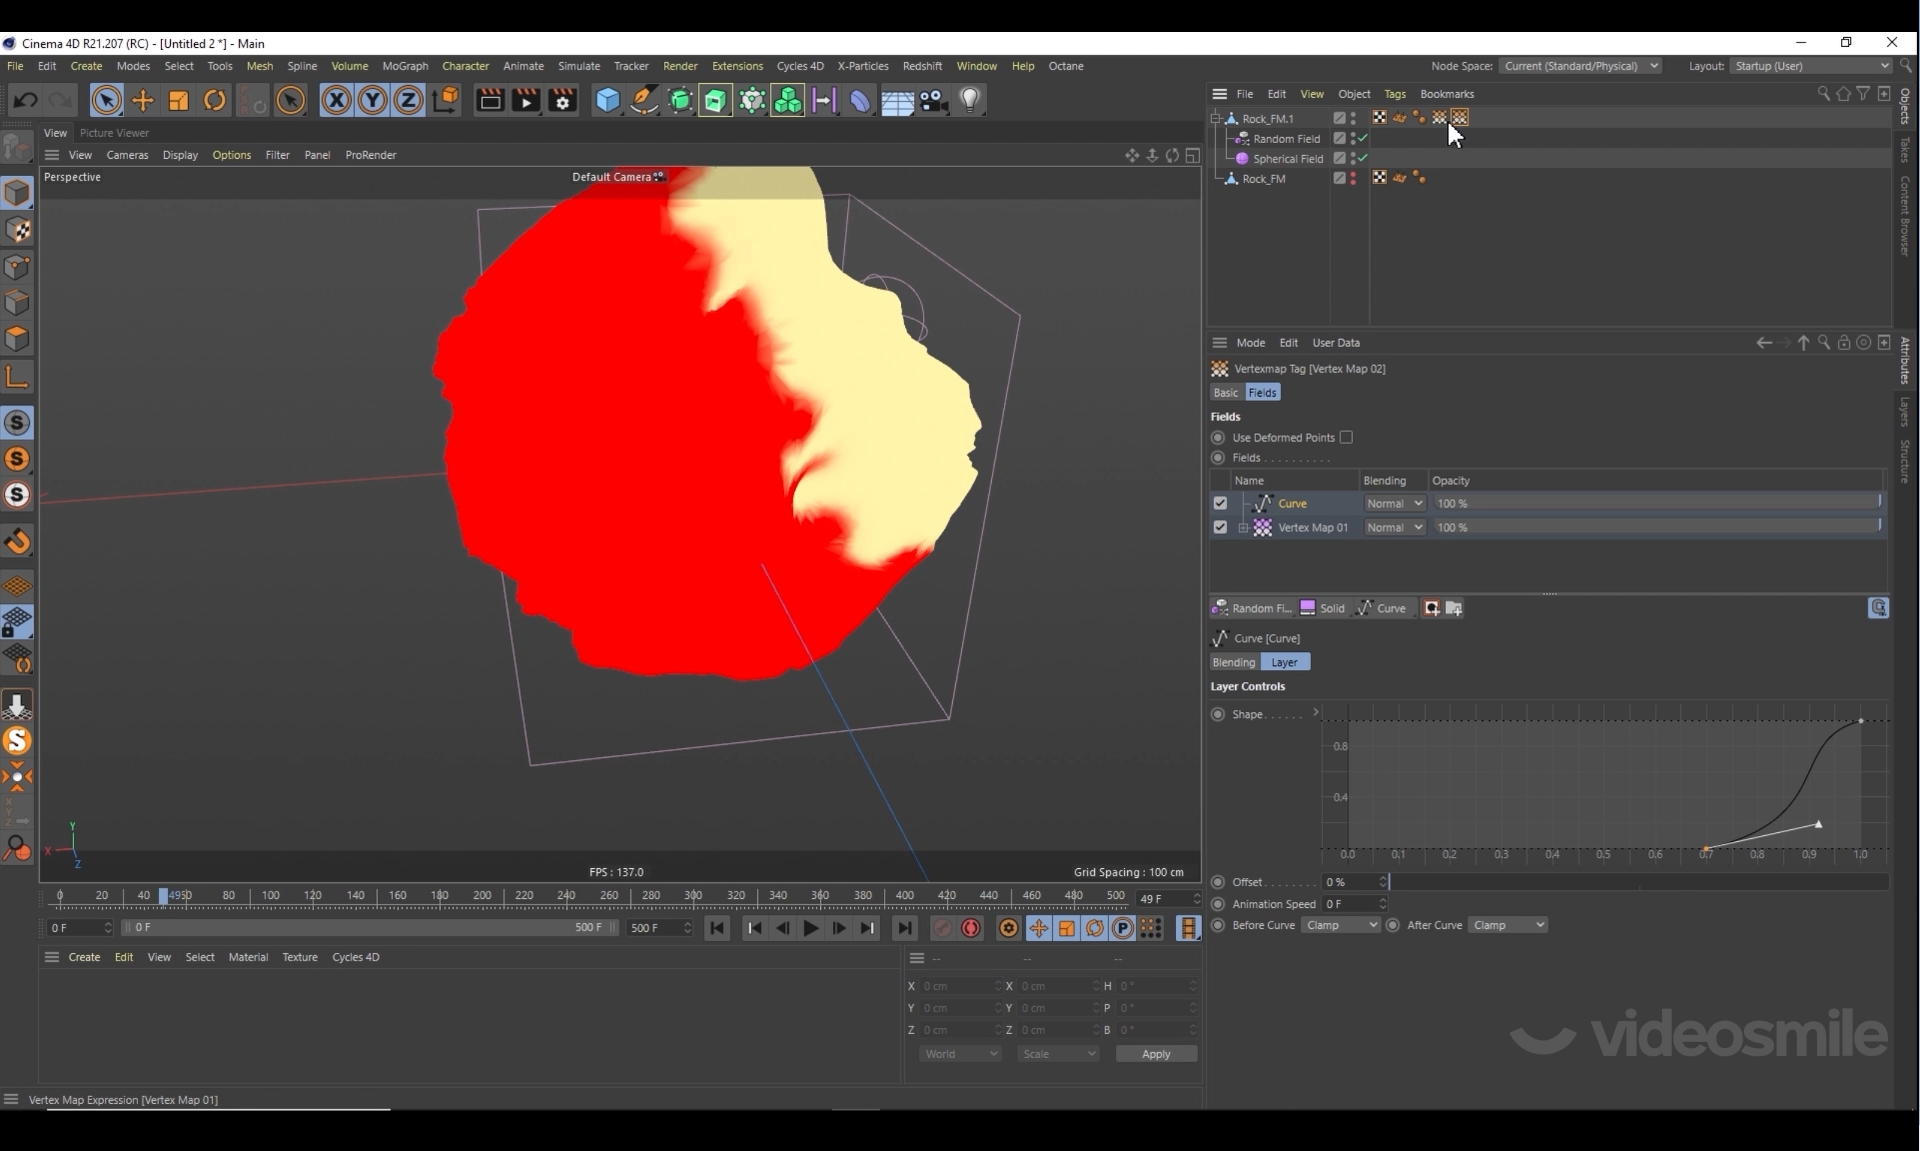
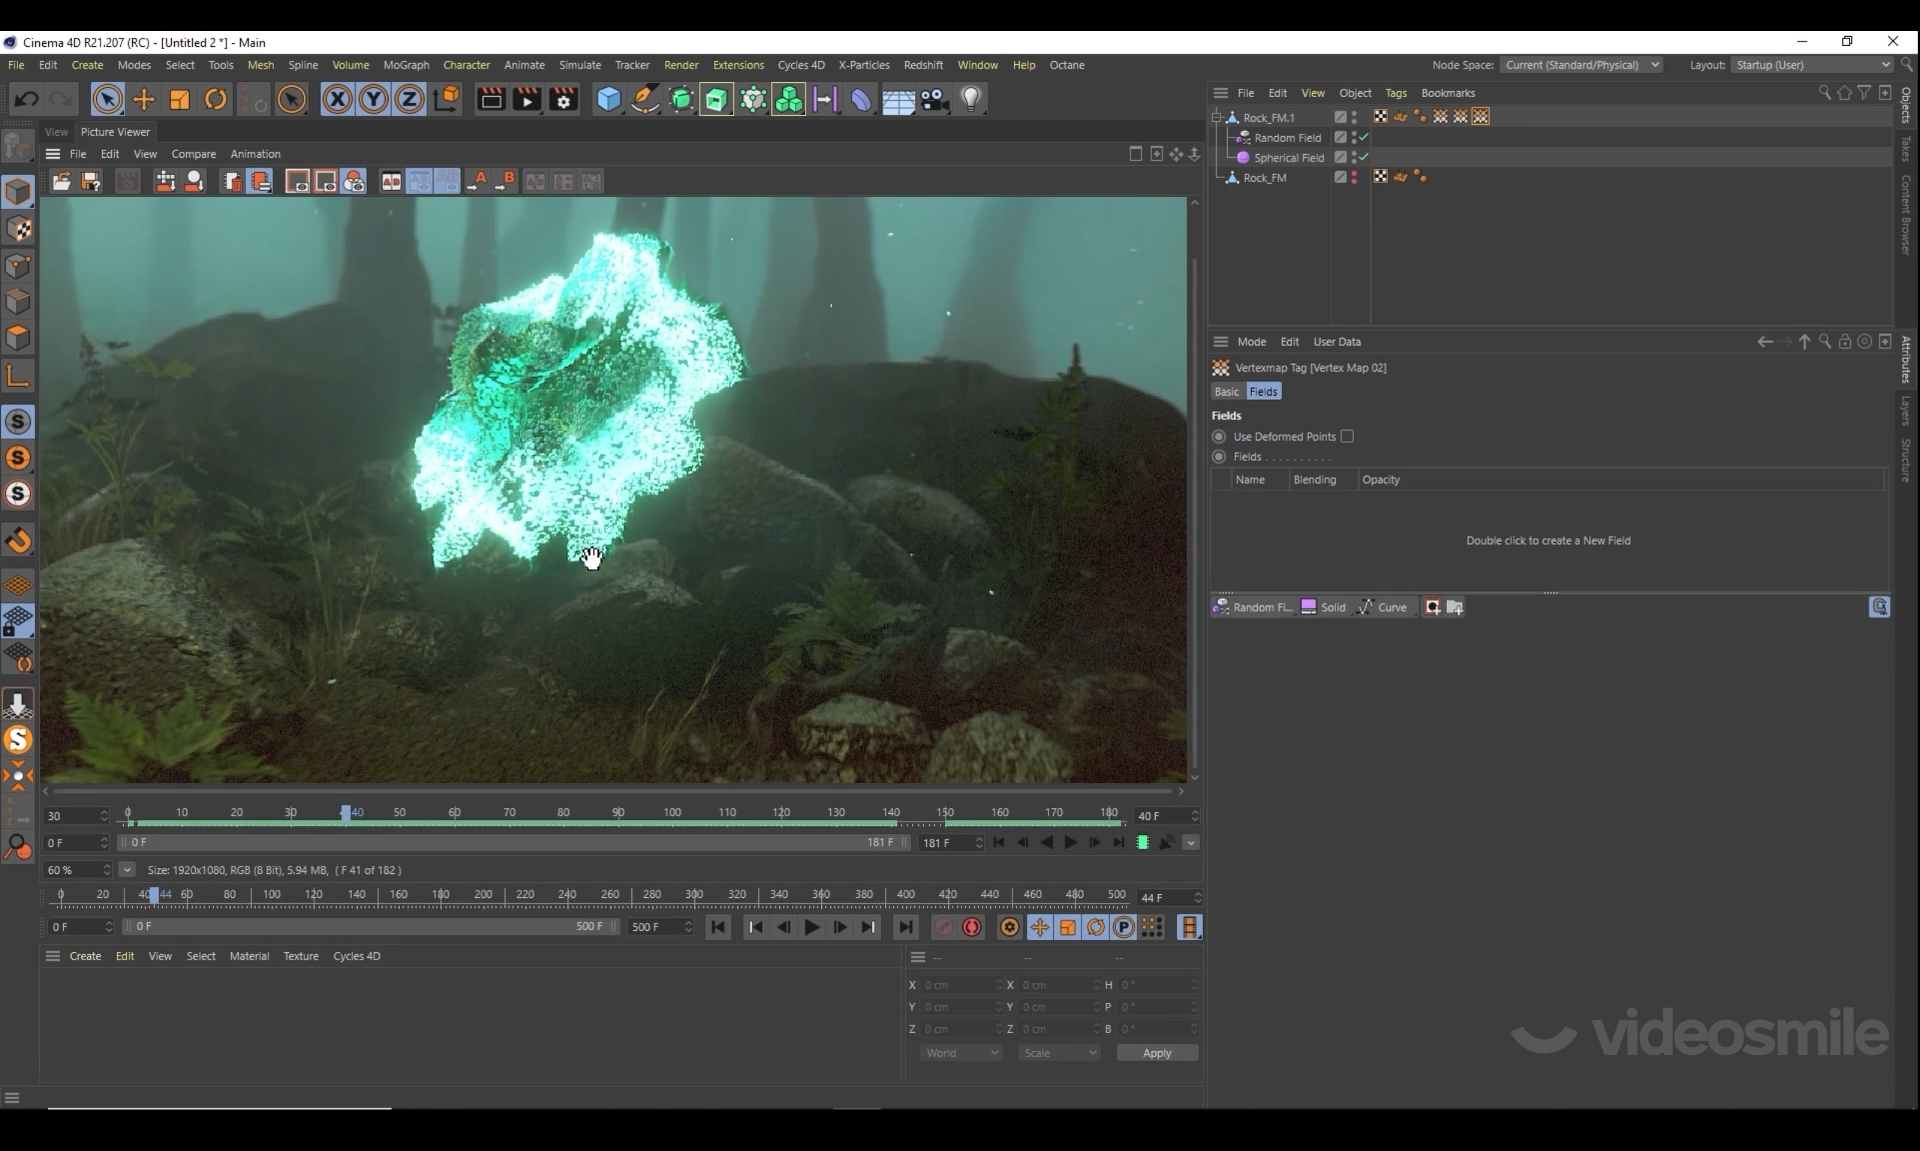
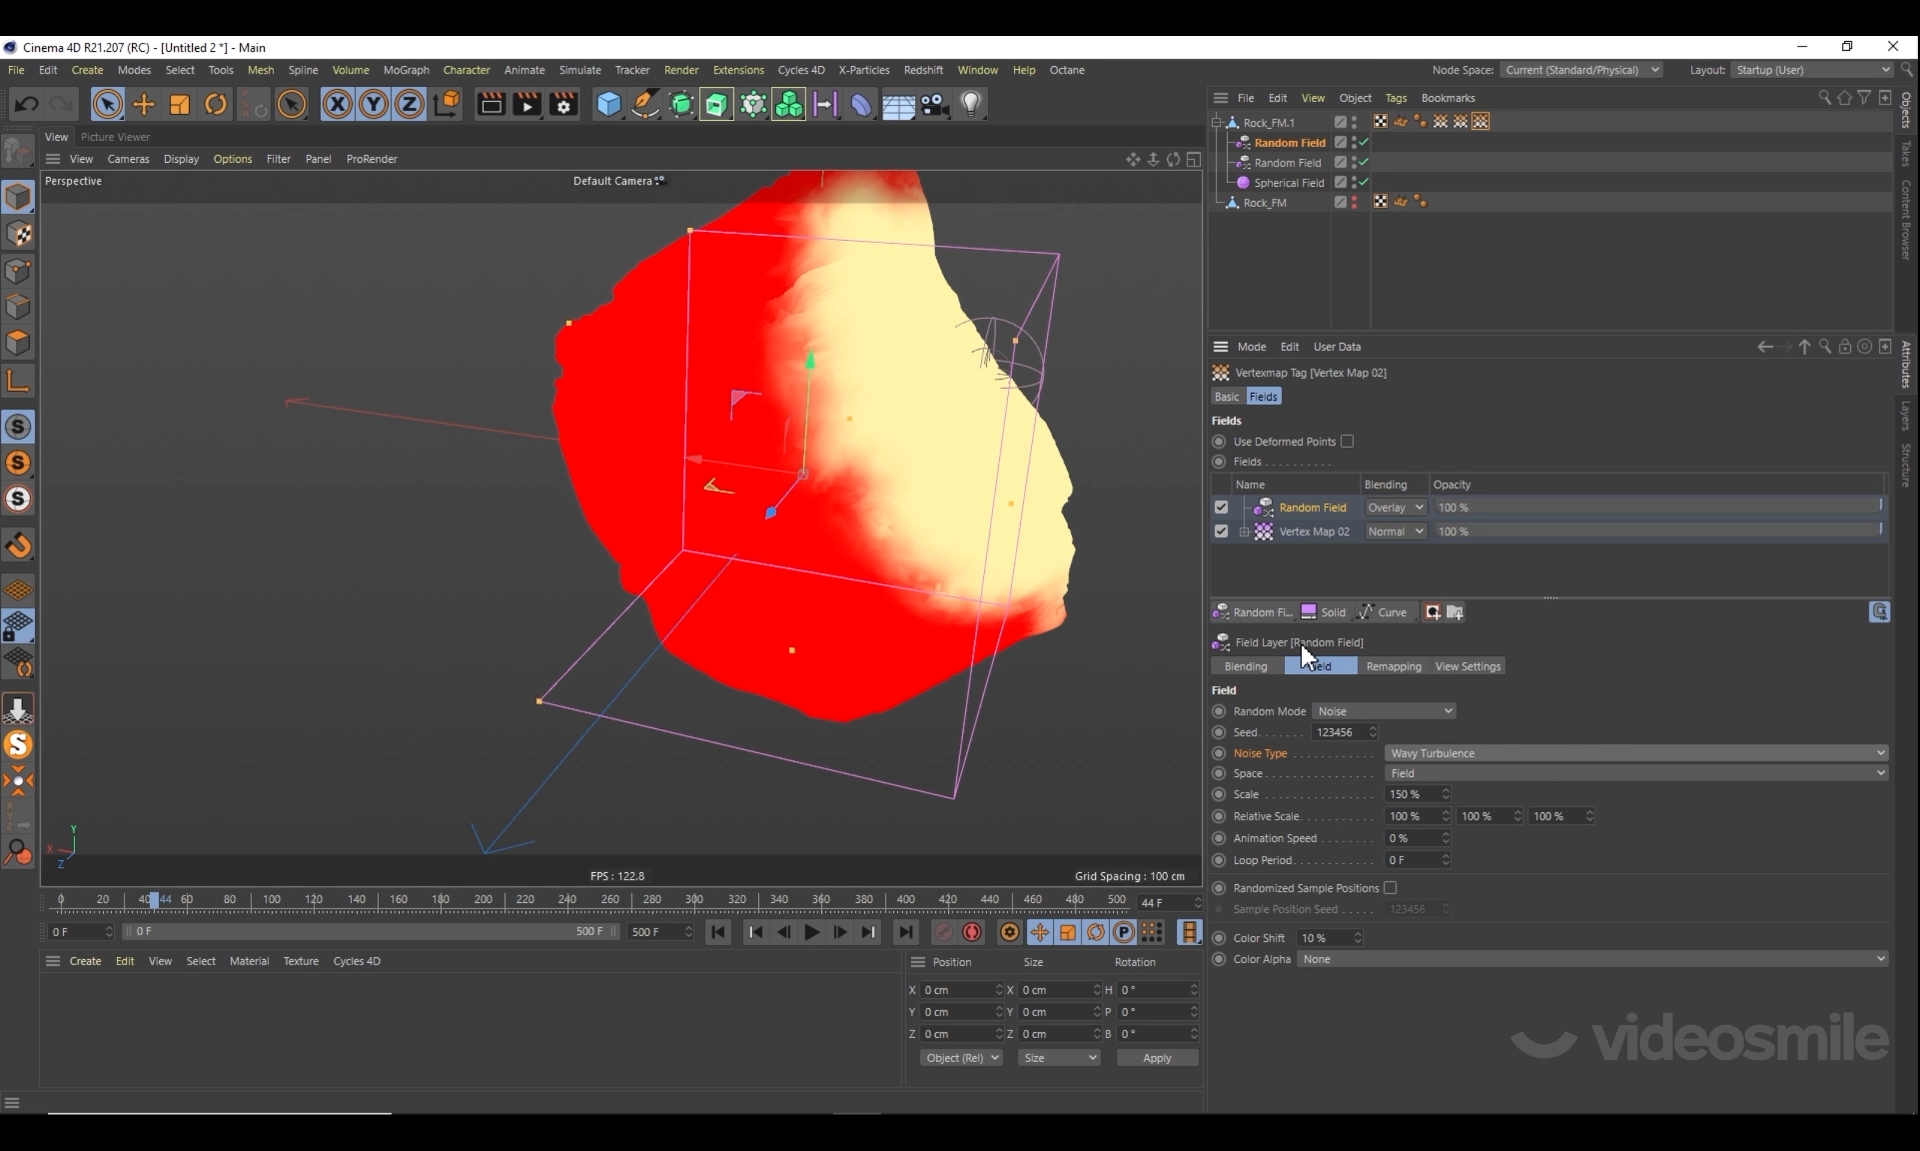
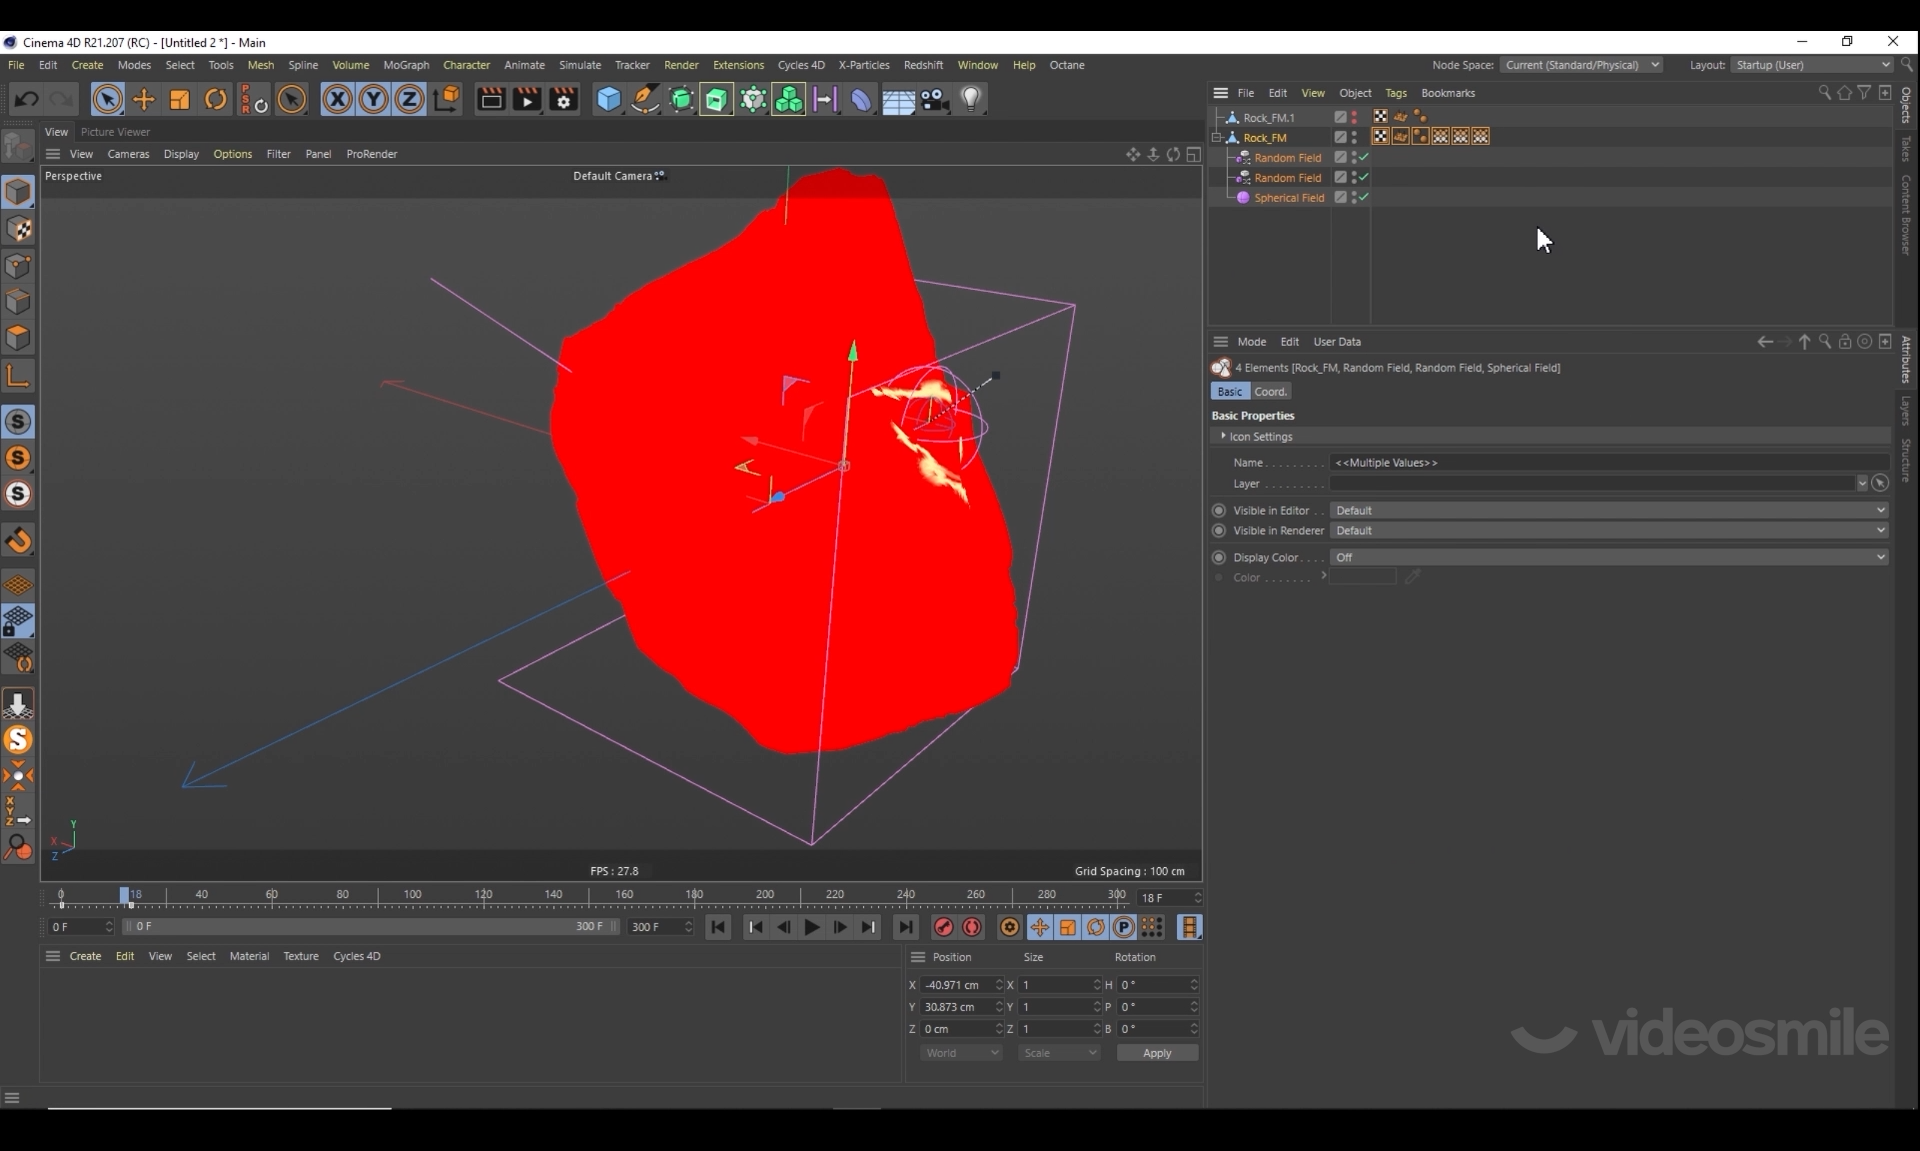
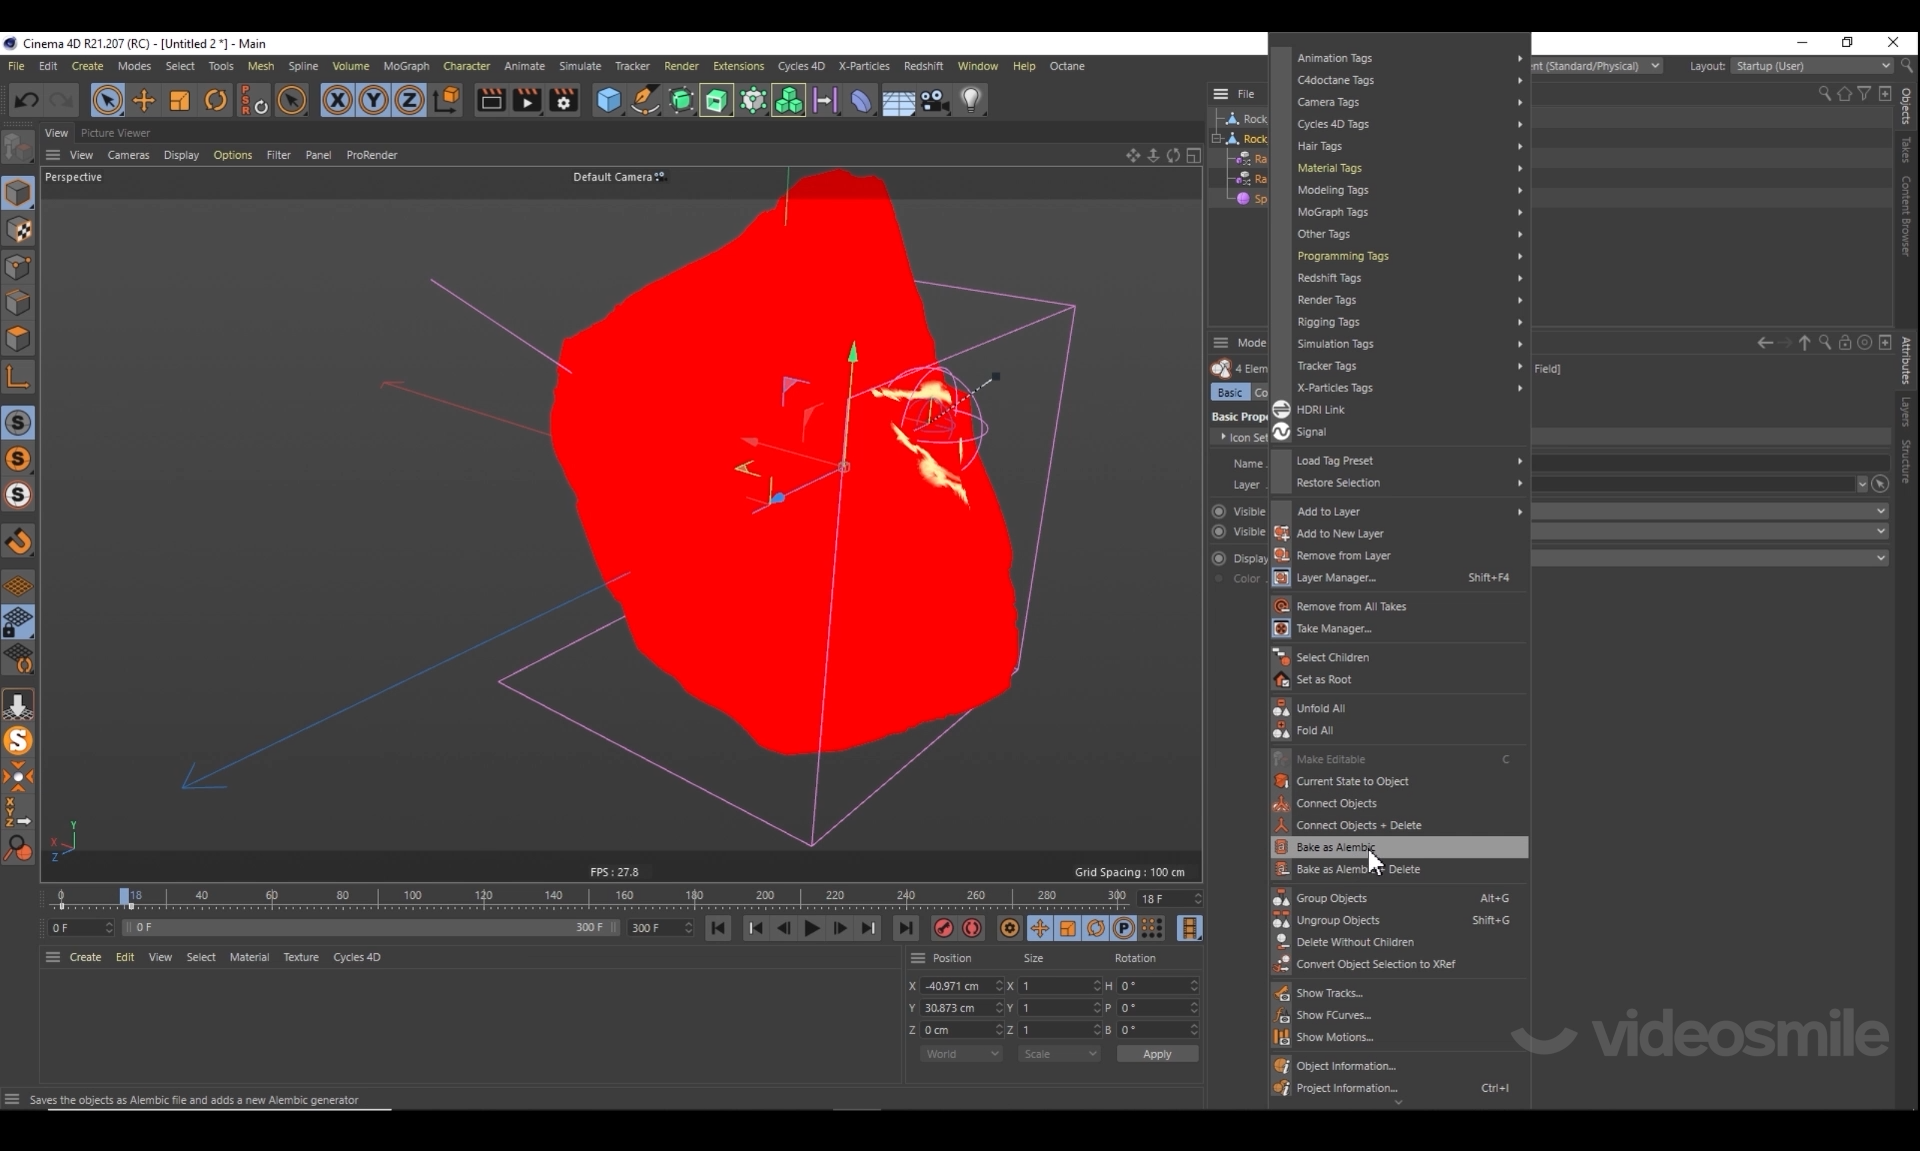
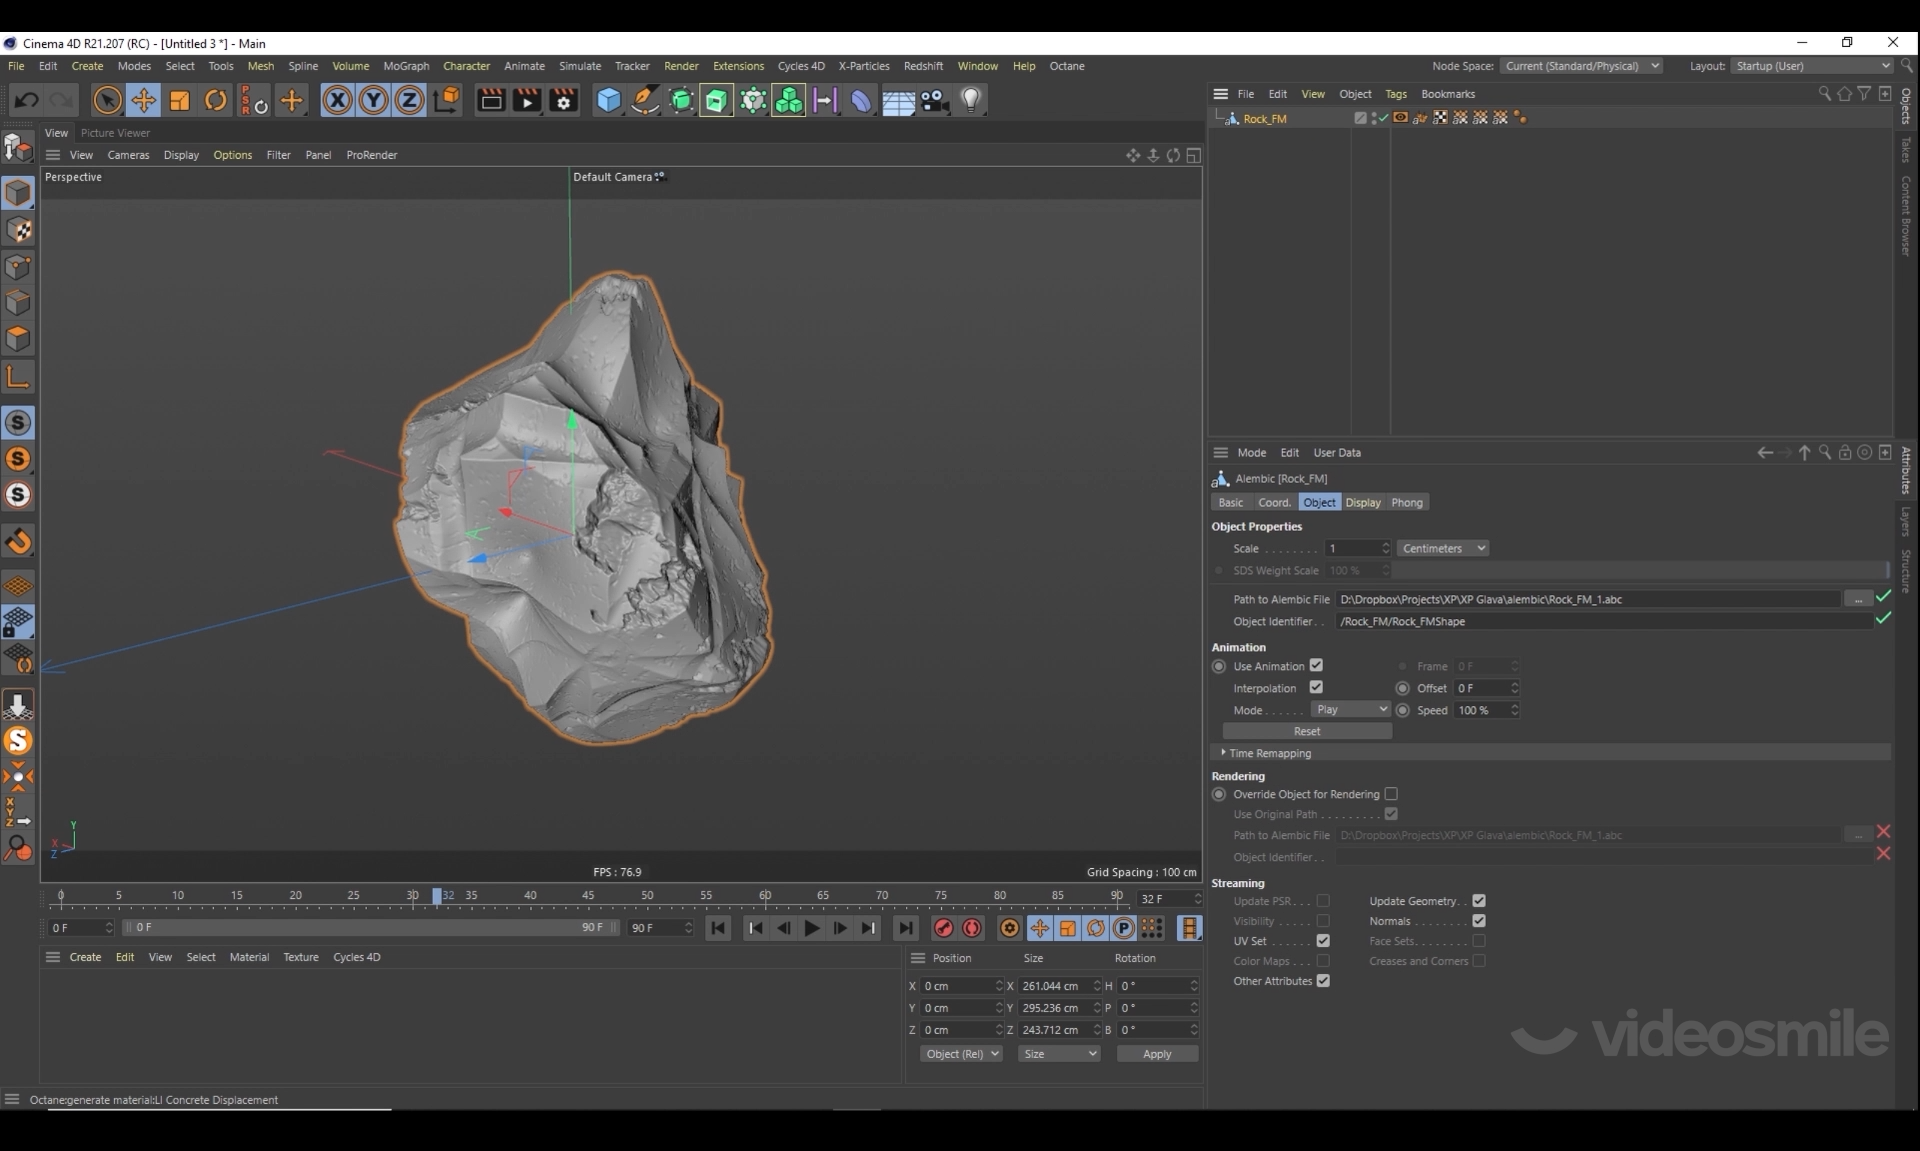
1. Fields in Cinema 4D
Video1 (7mb)
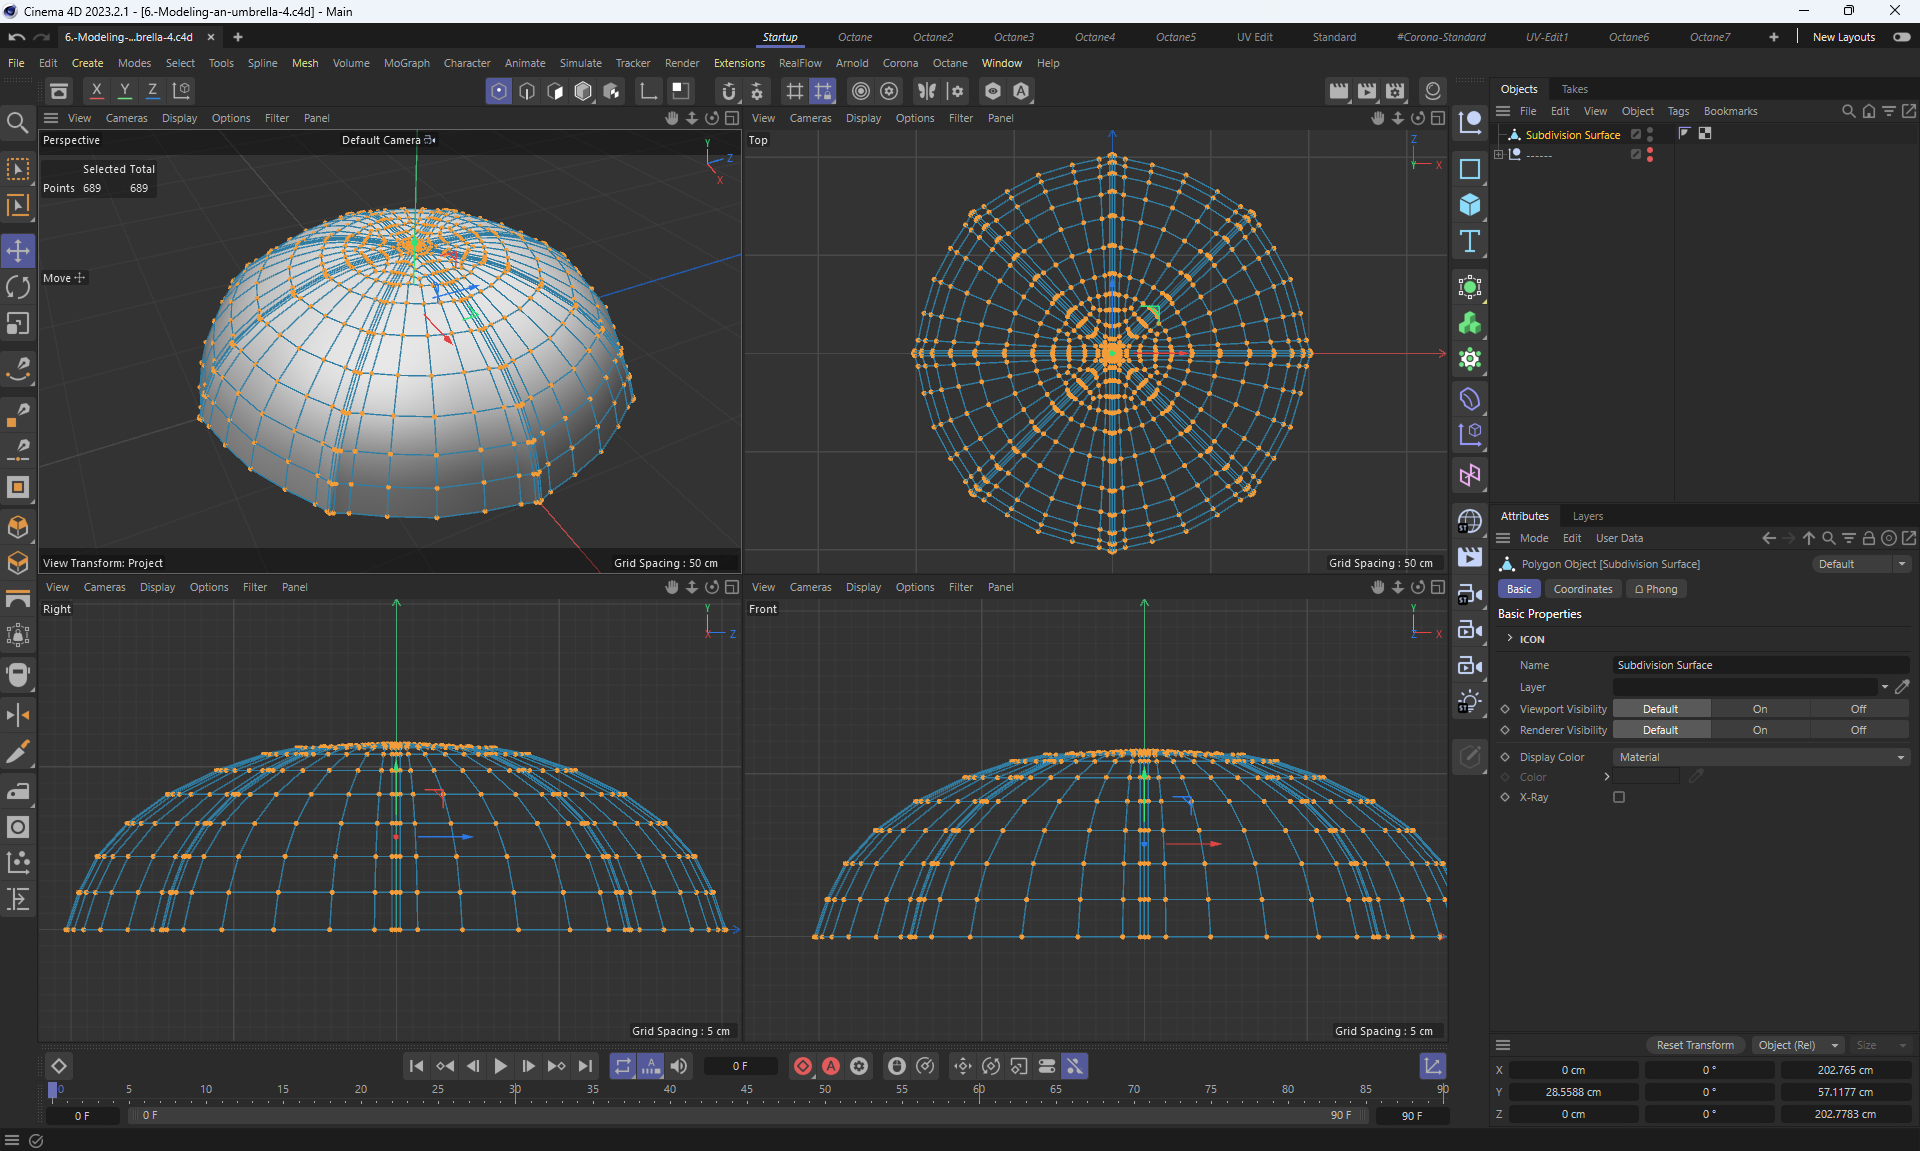
image1
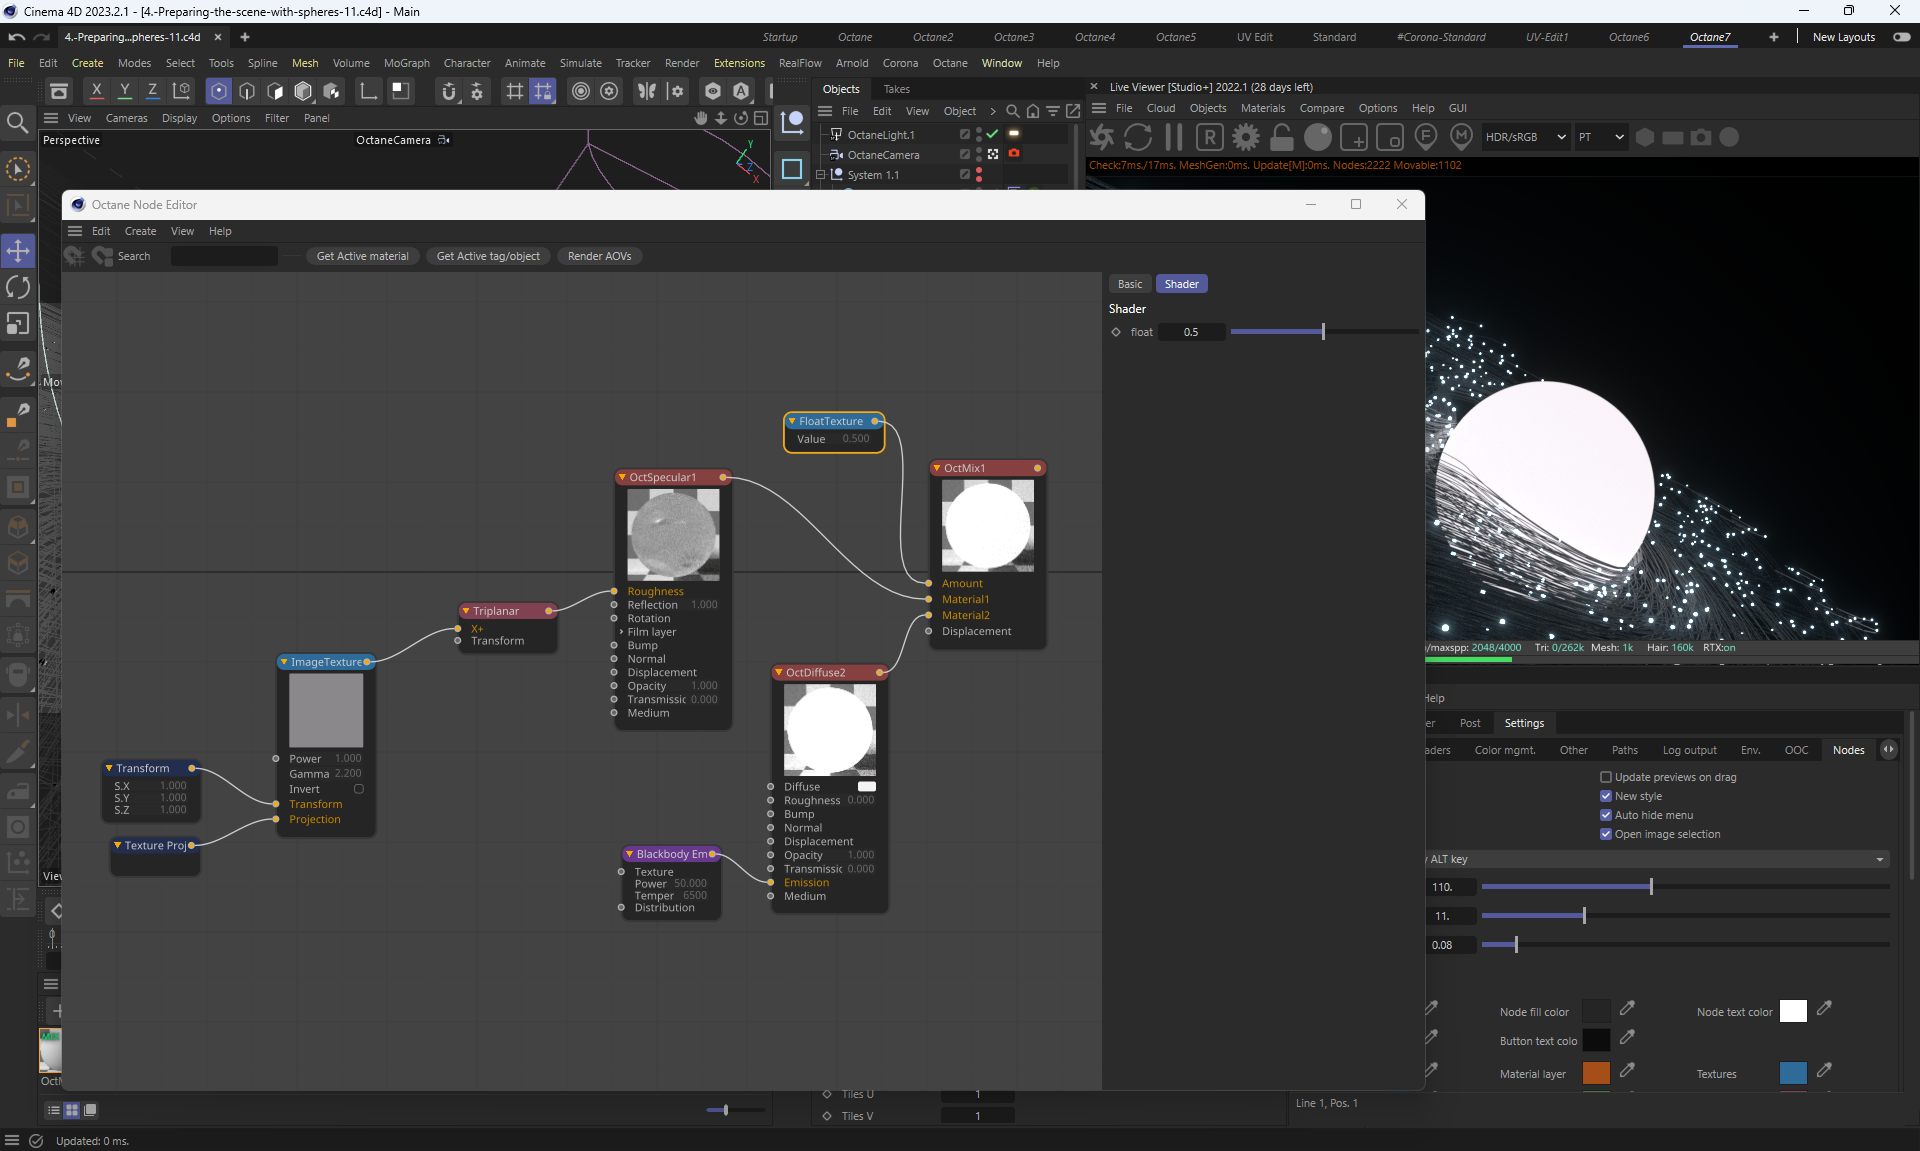
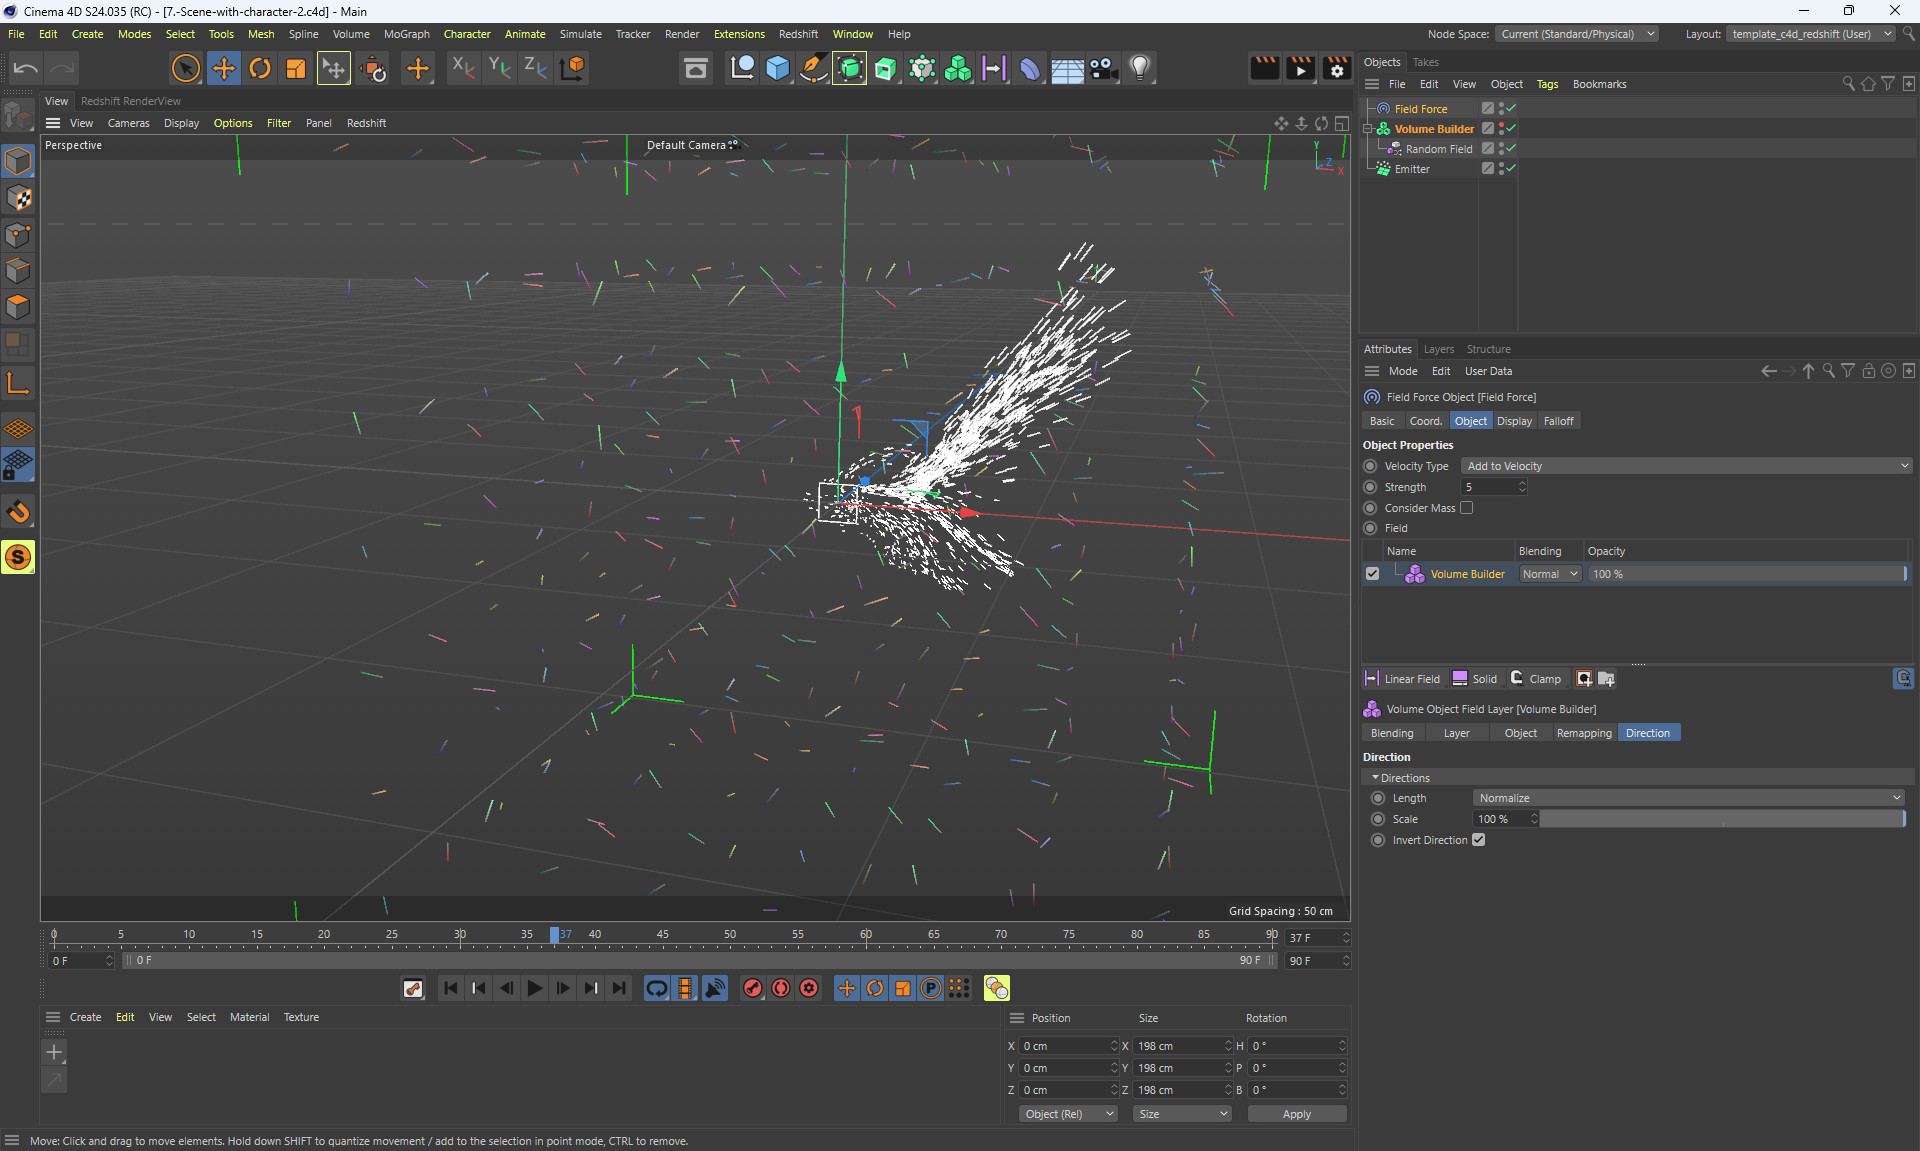
video2 (11.8mb)
image2
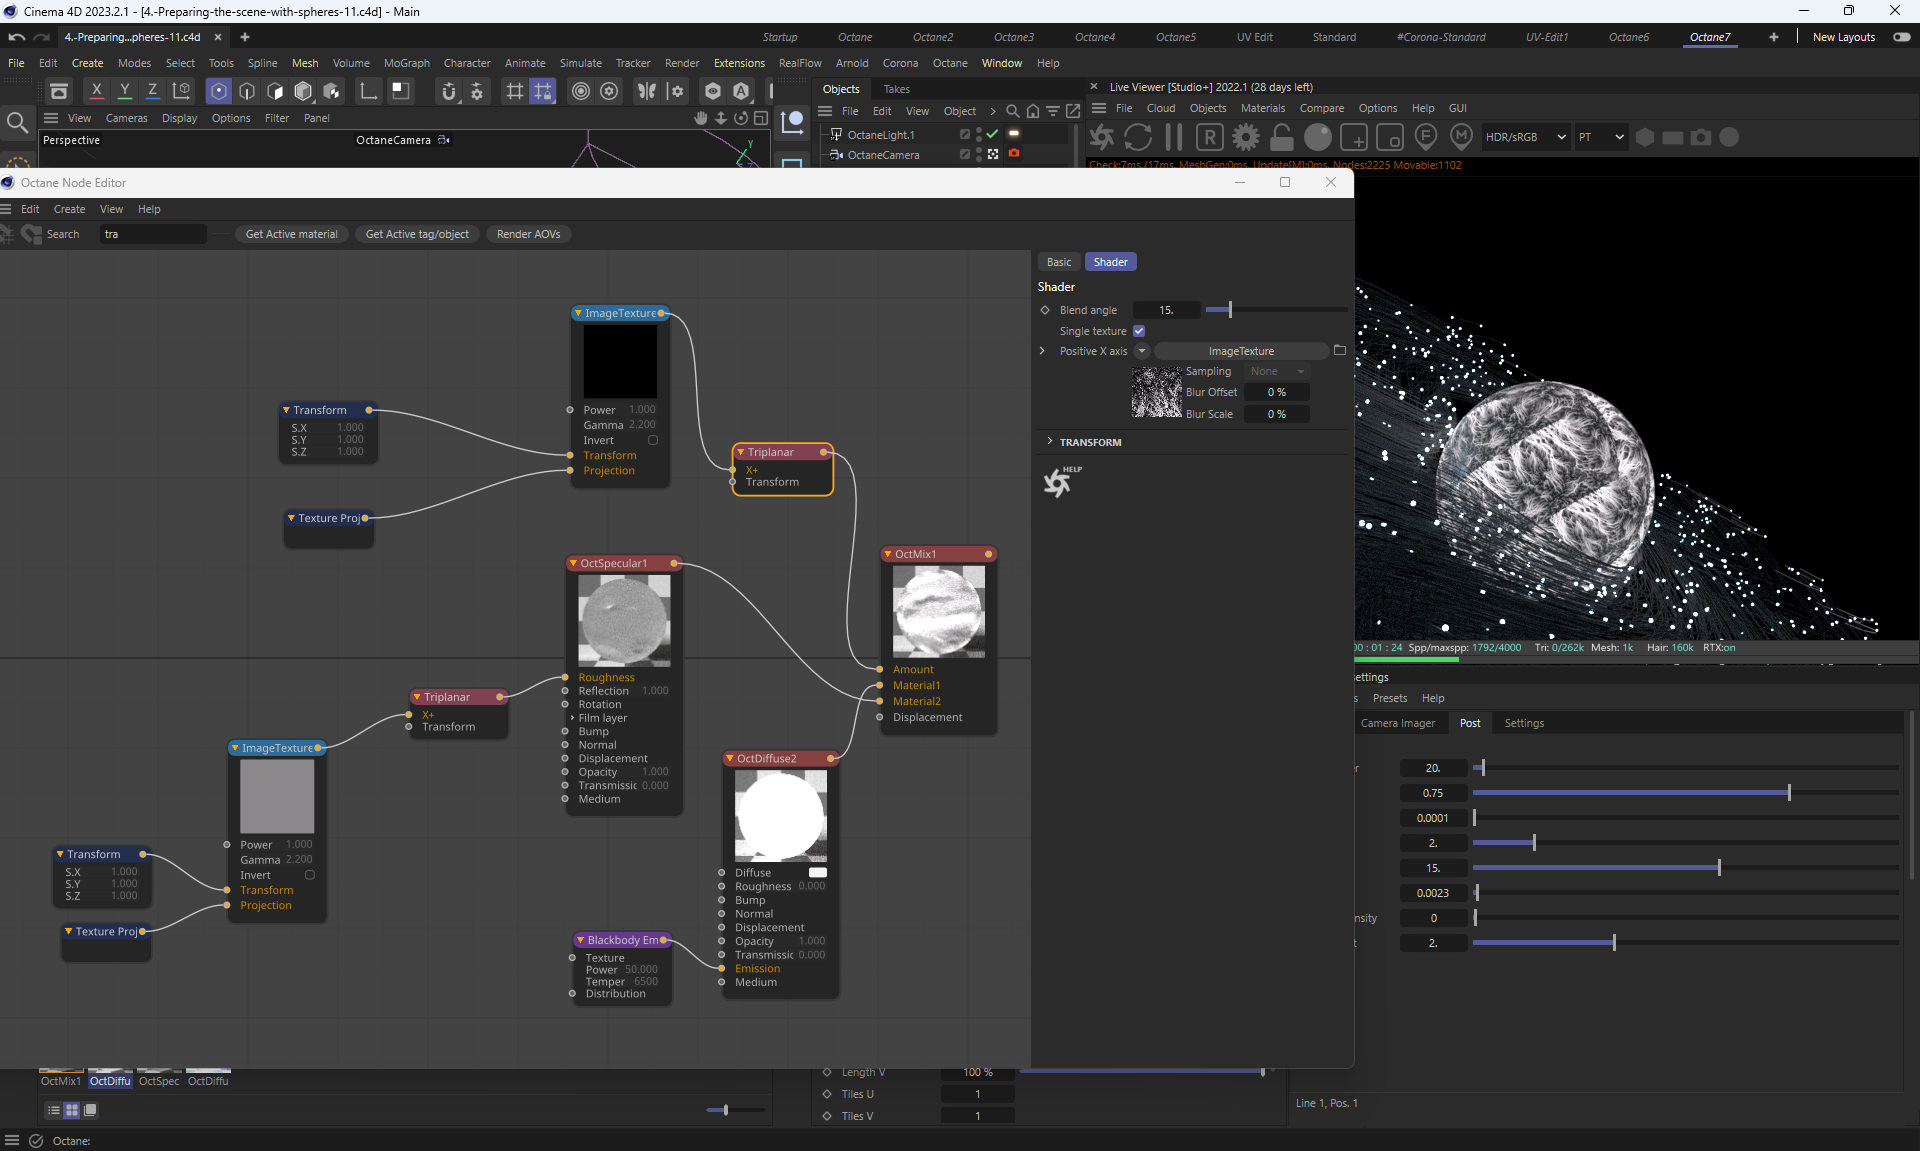
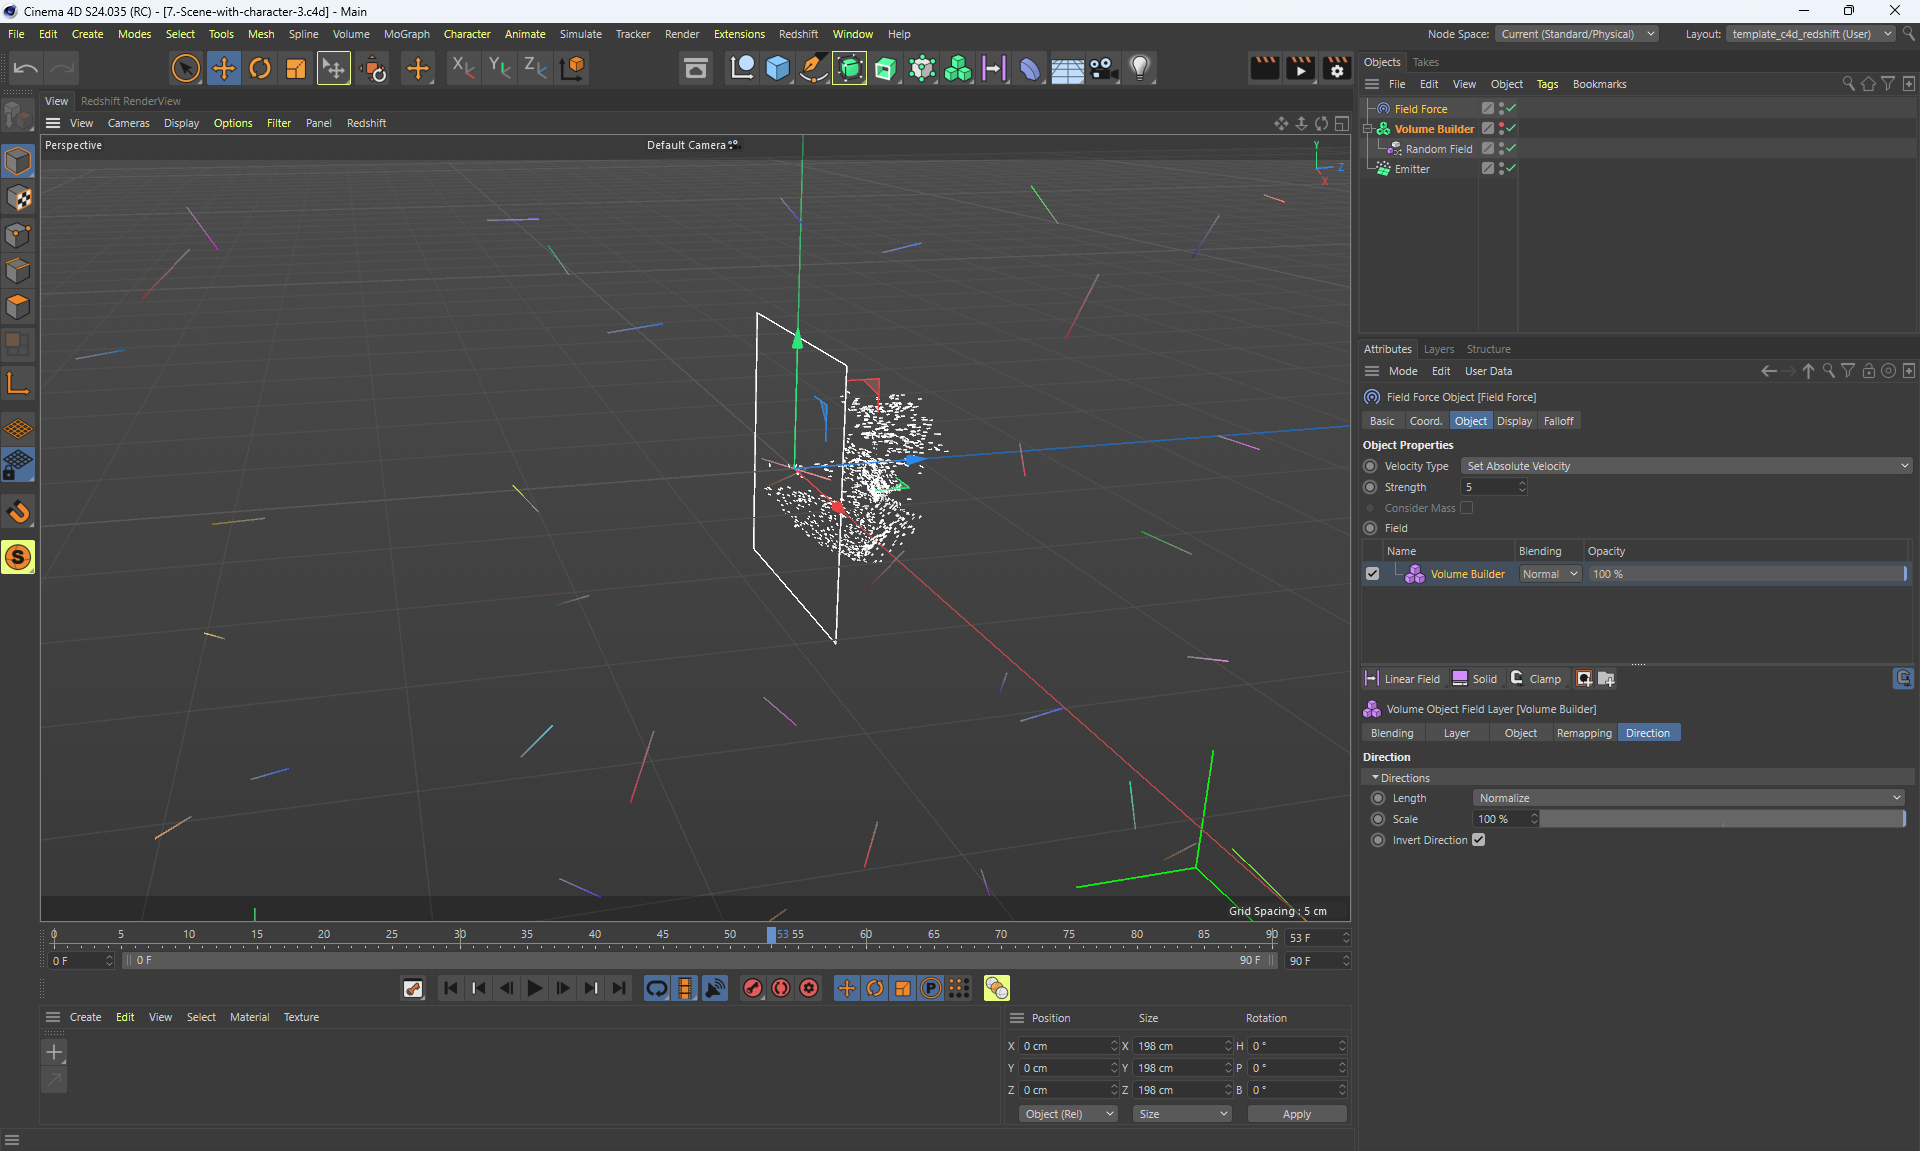
video3 (11.4mb)
image3
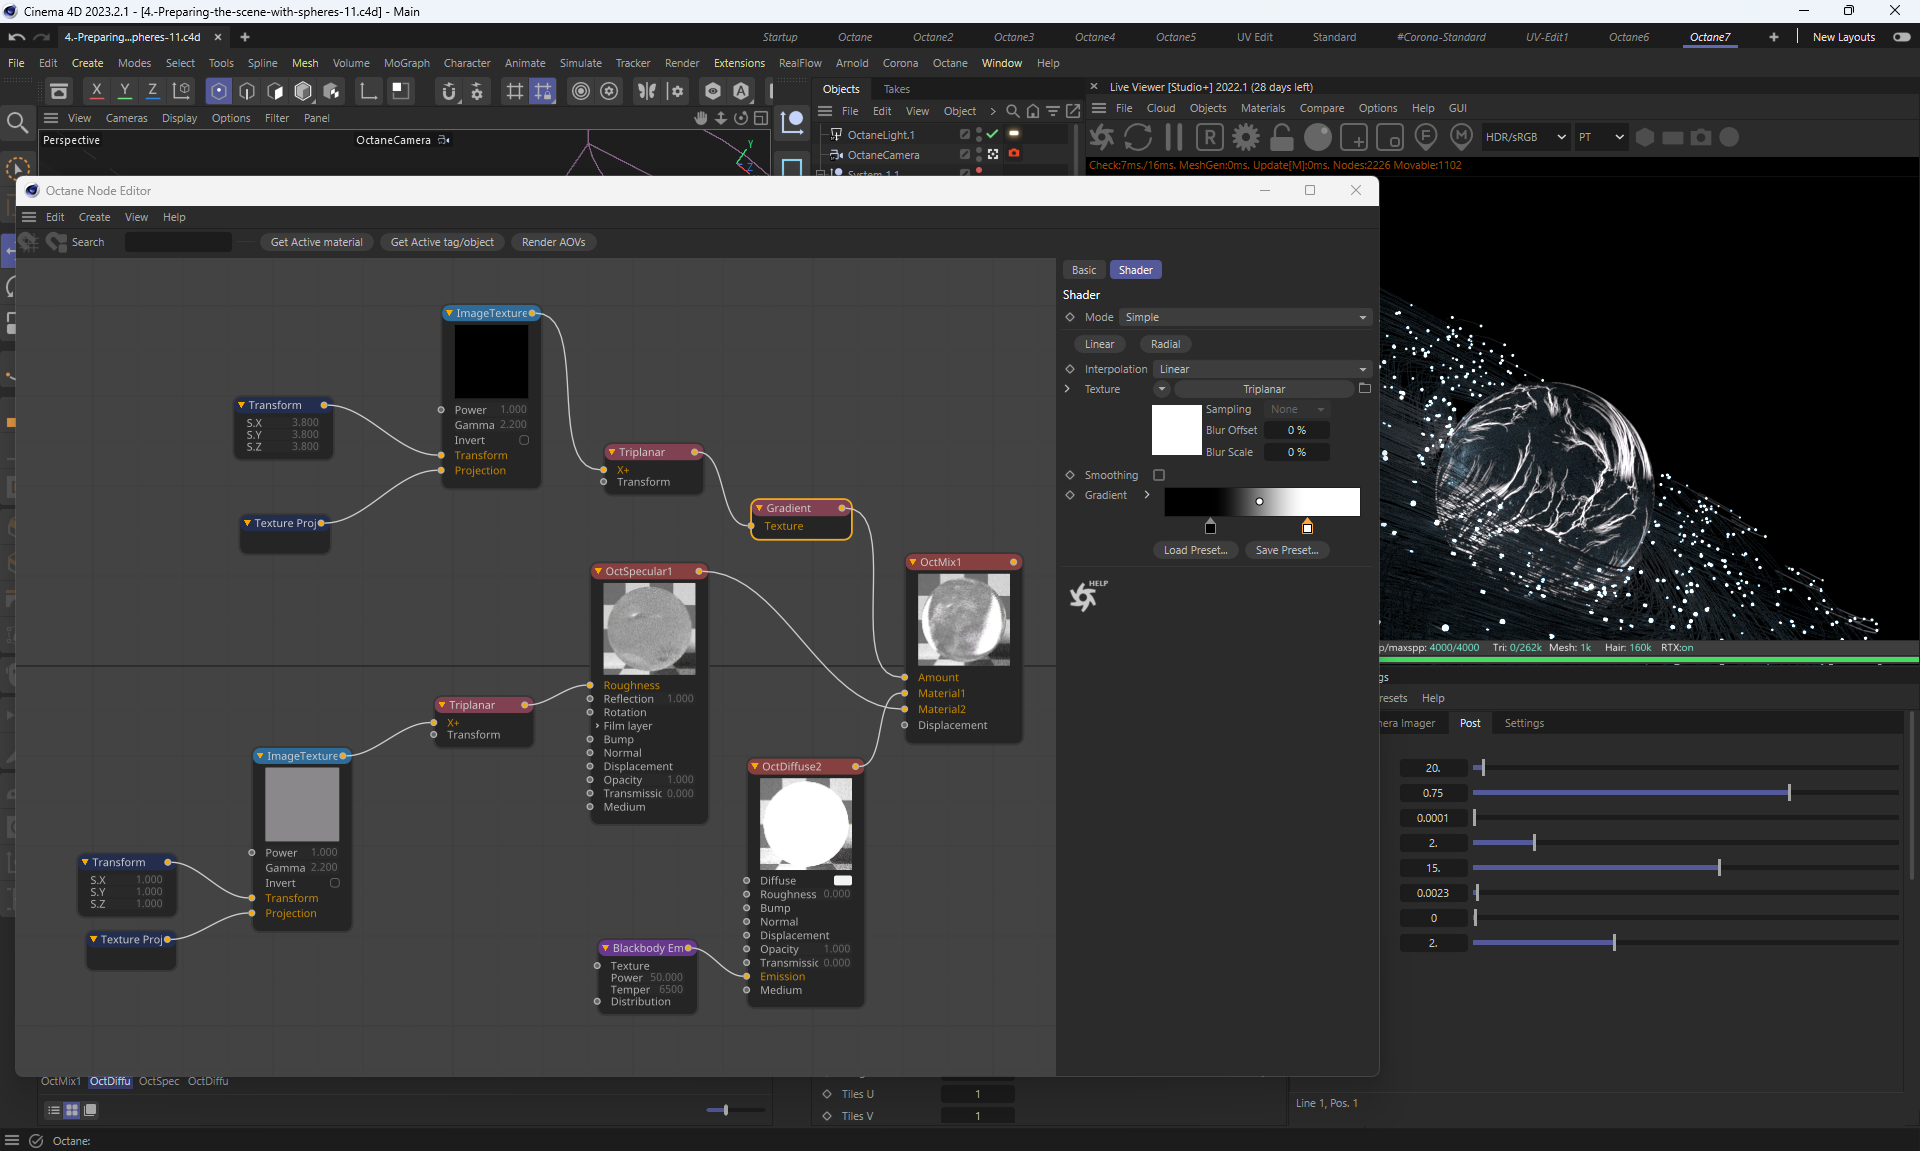
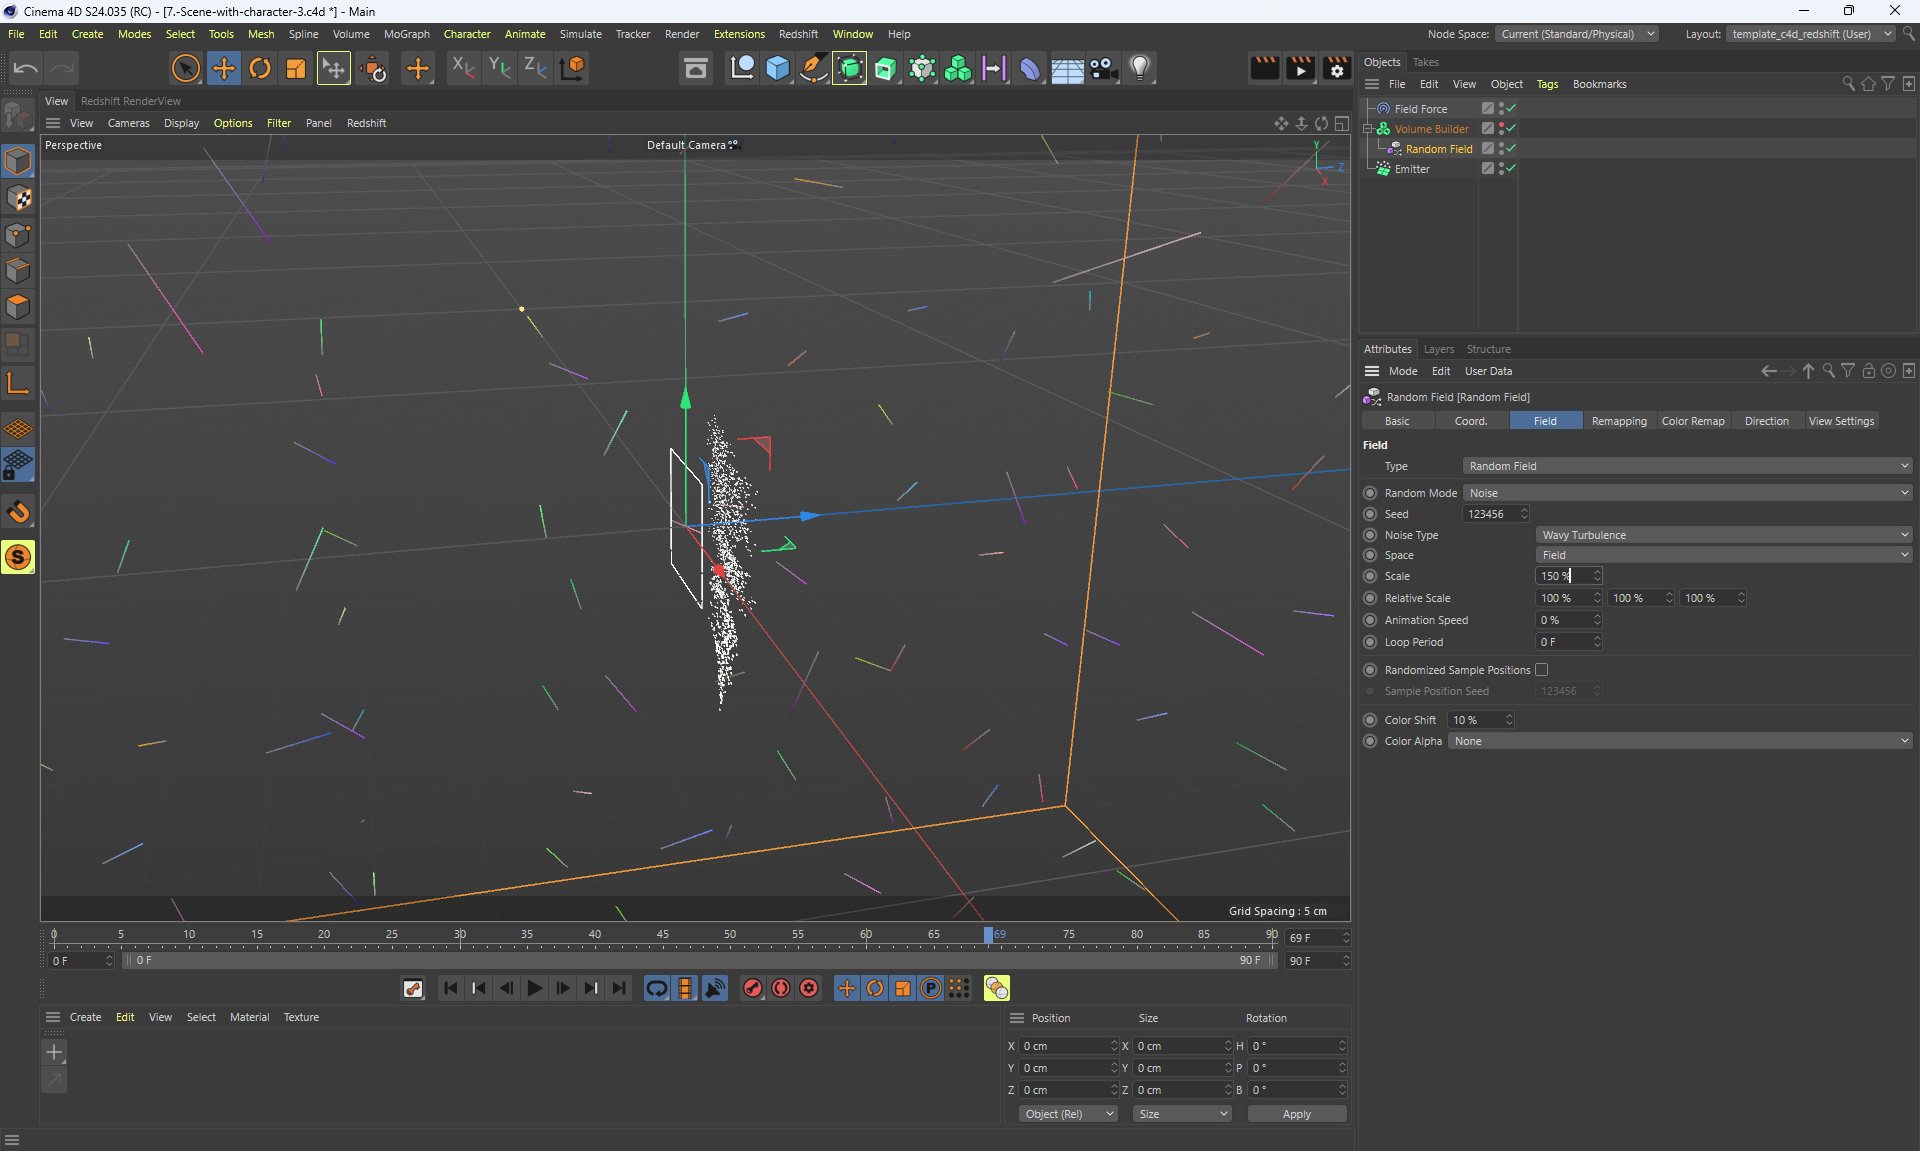
video4 (10.6mb)
image4
video5 (10mb)
image5
video6 (5mb)
image6
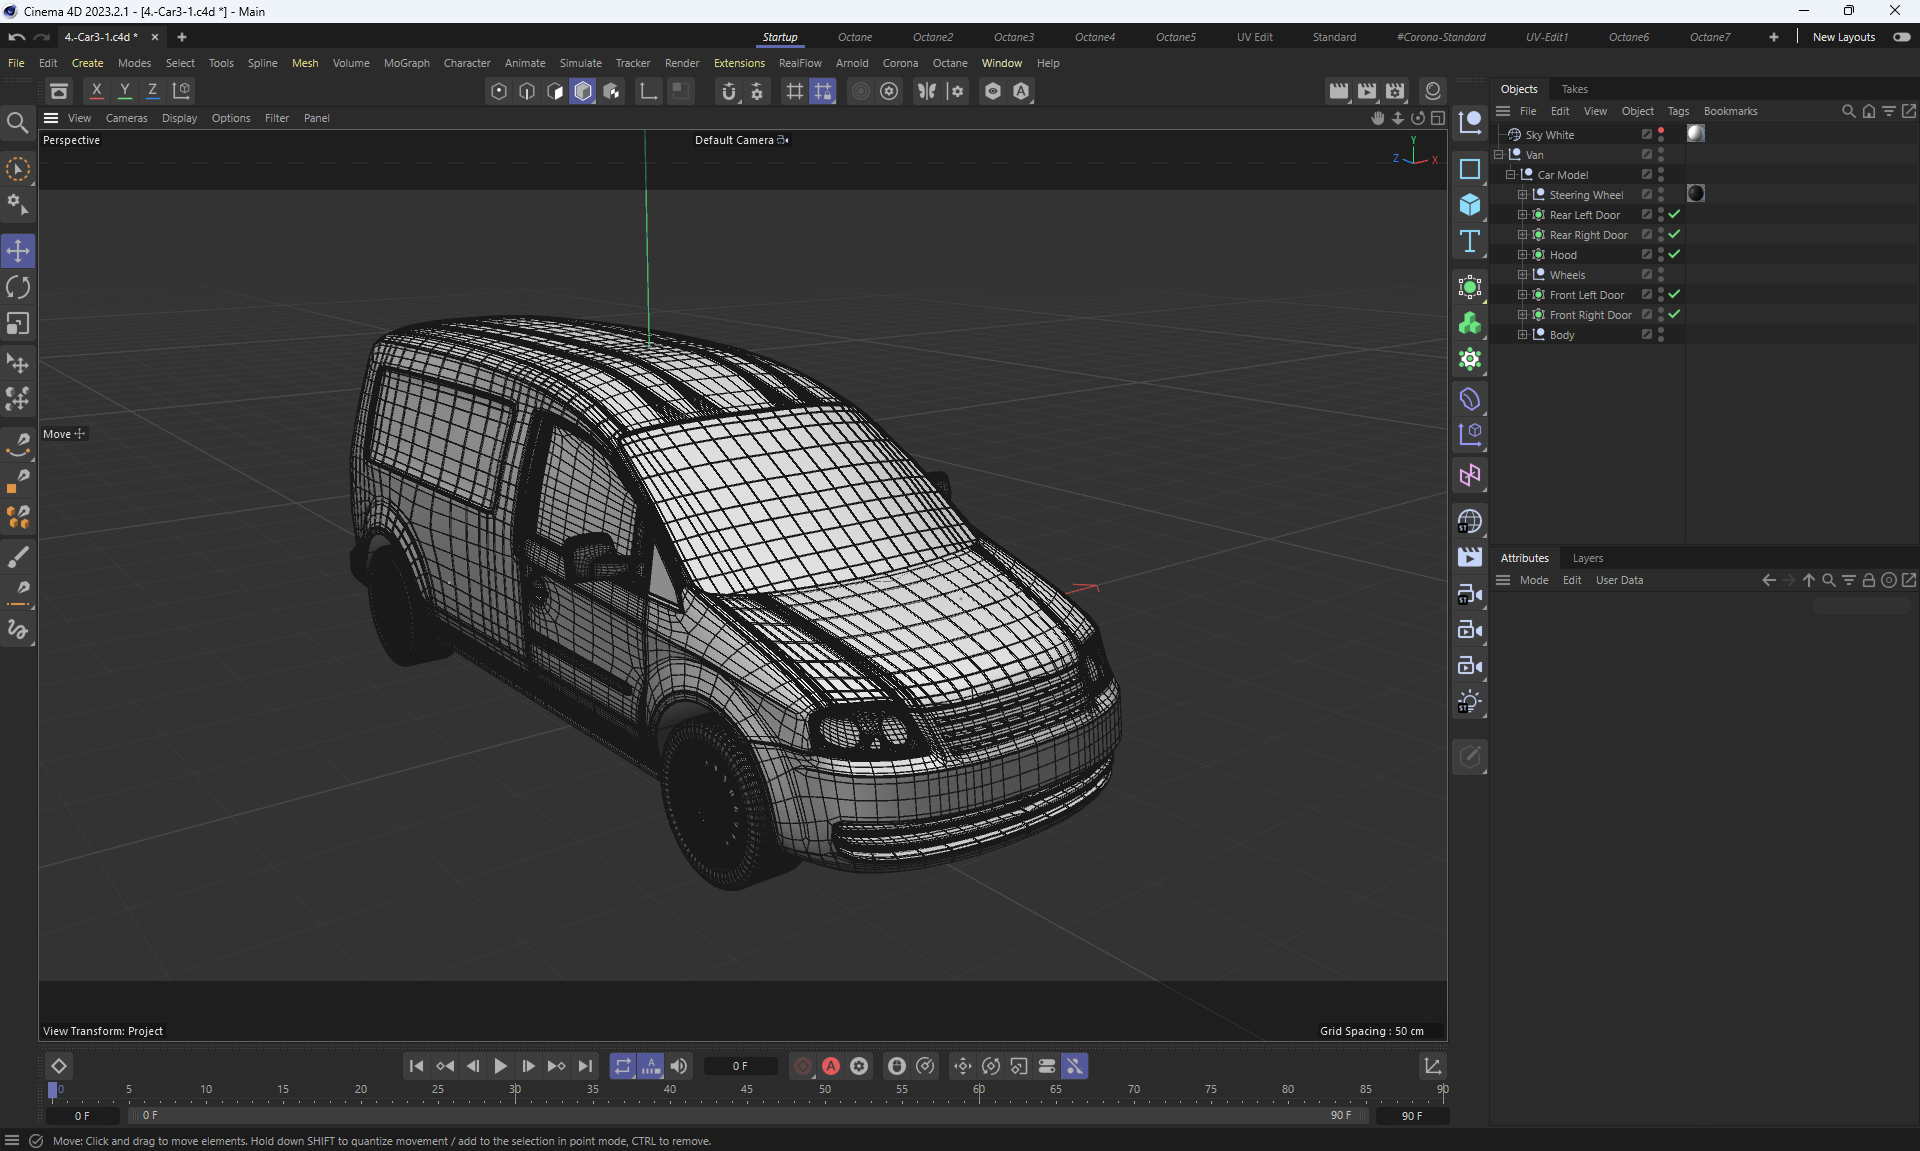
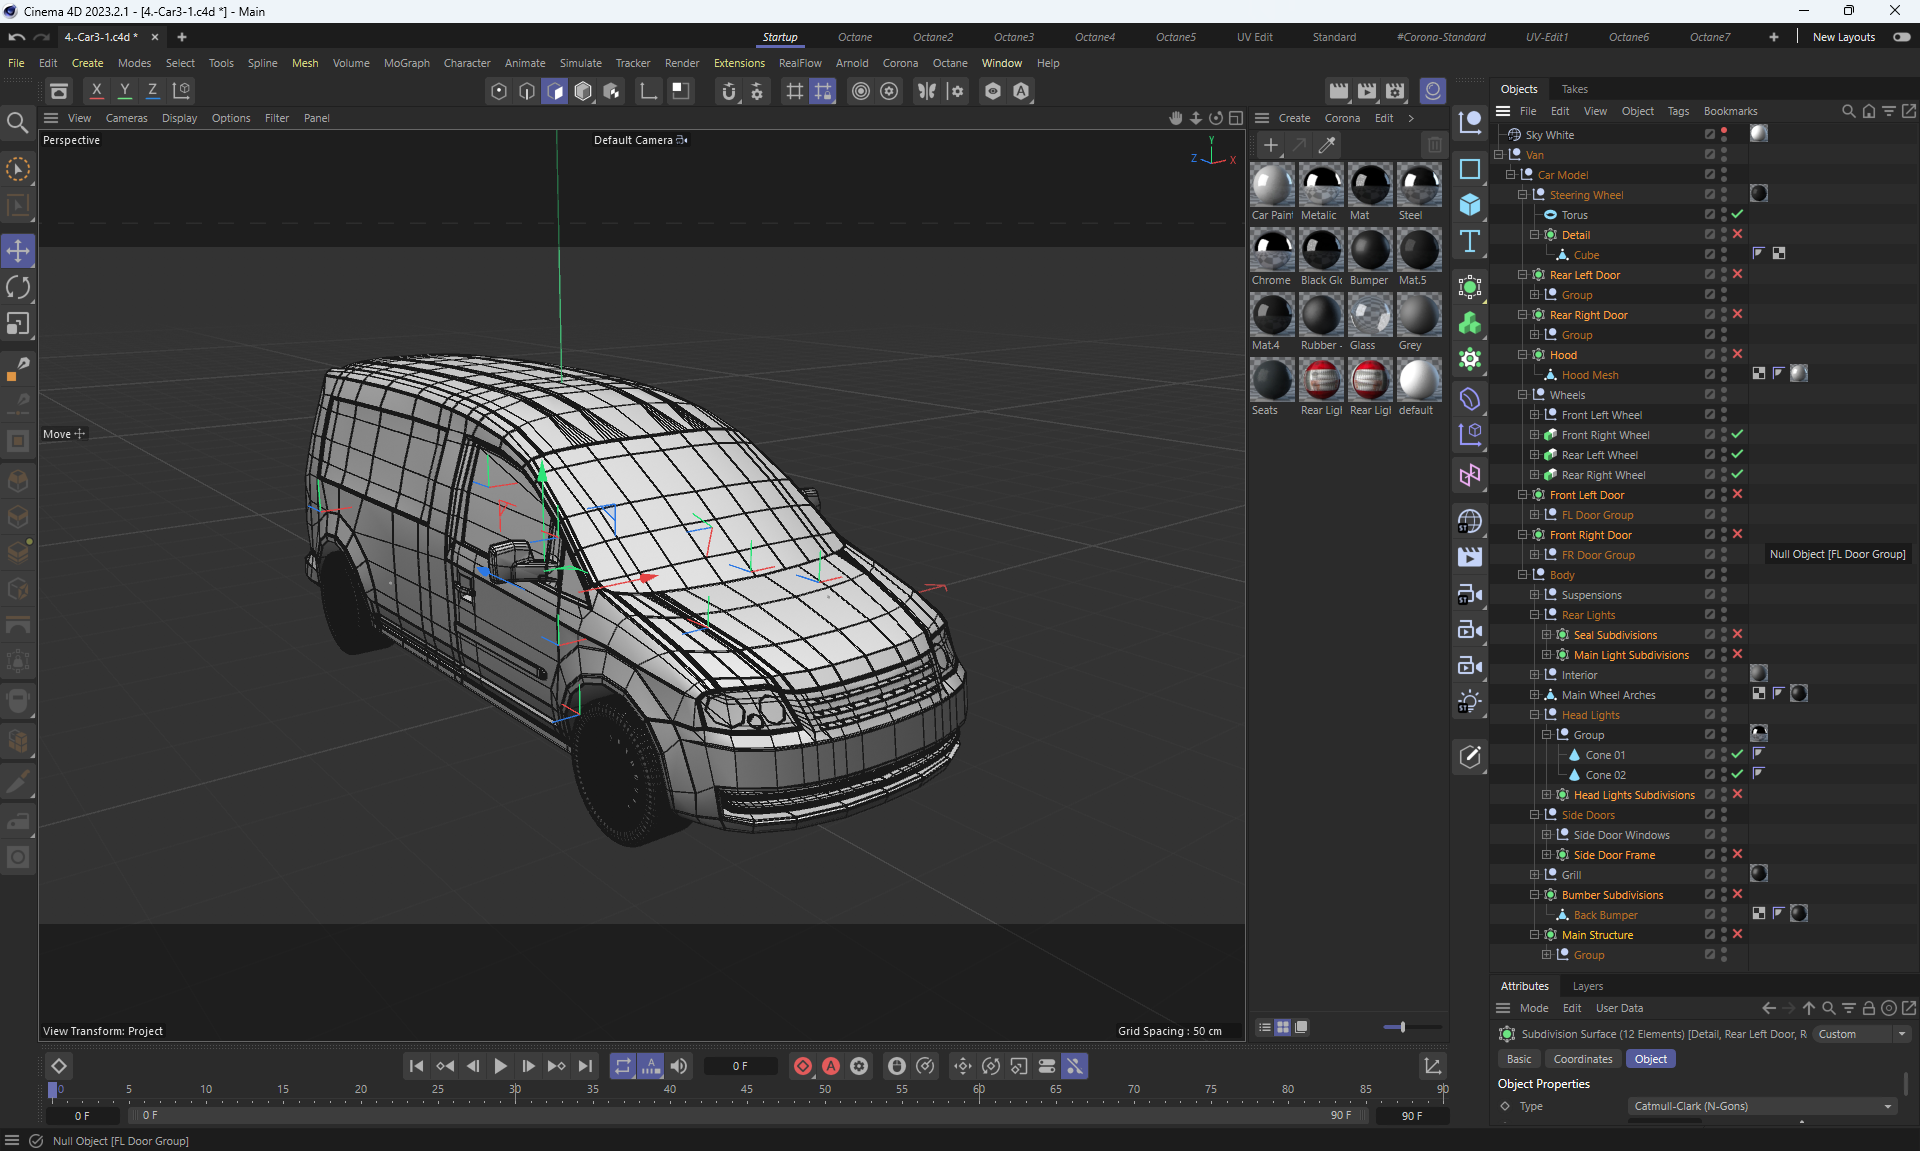
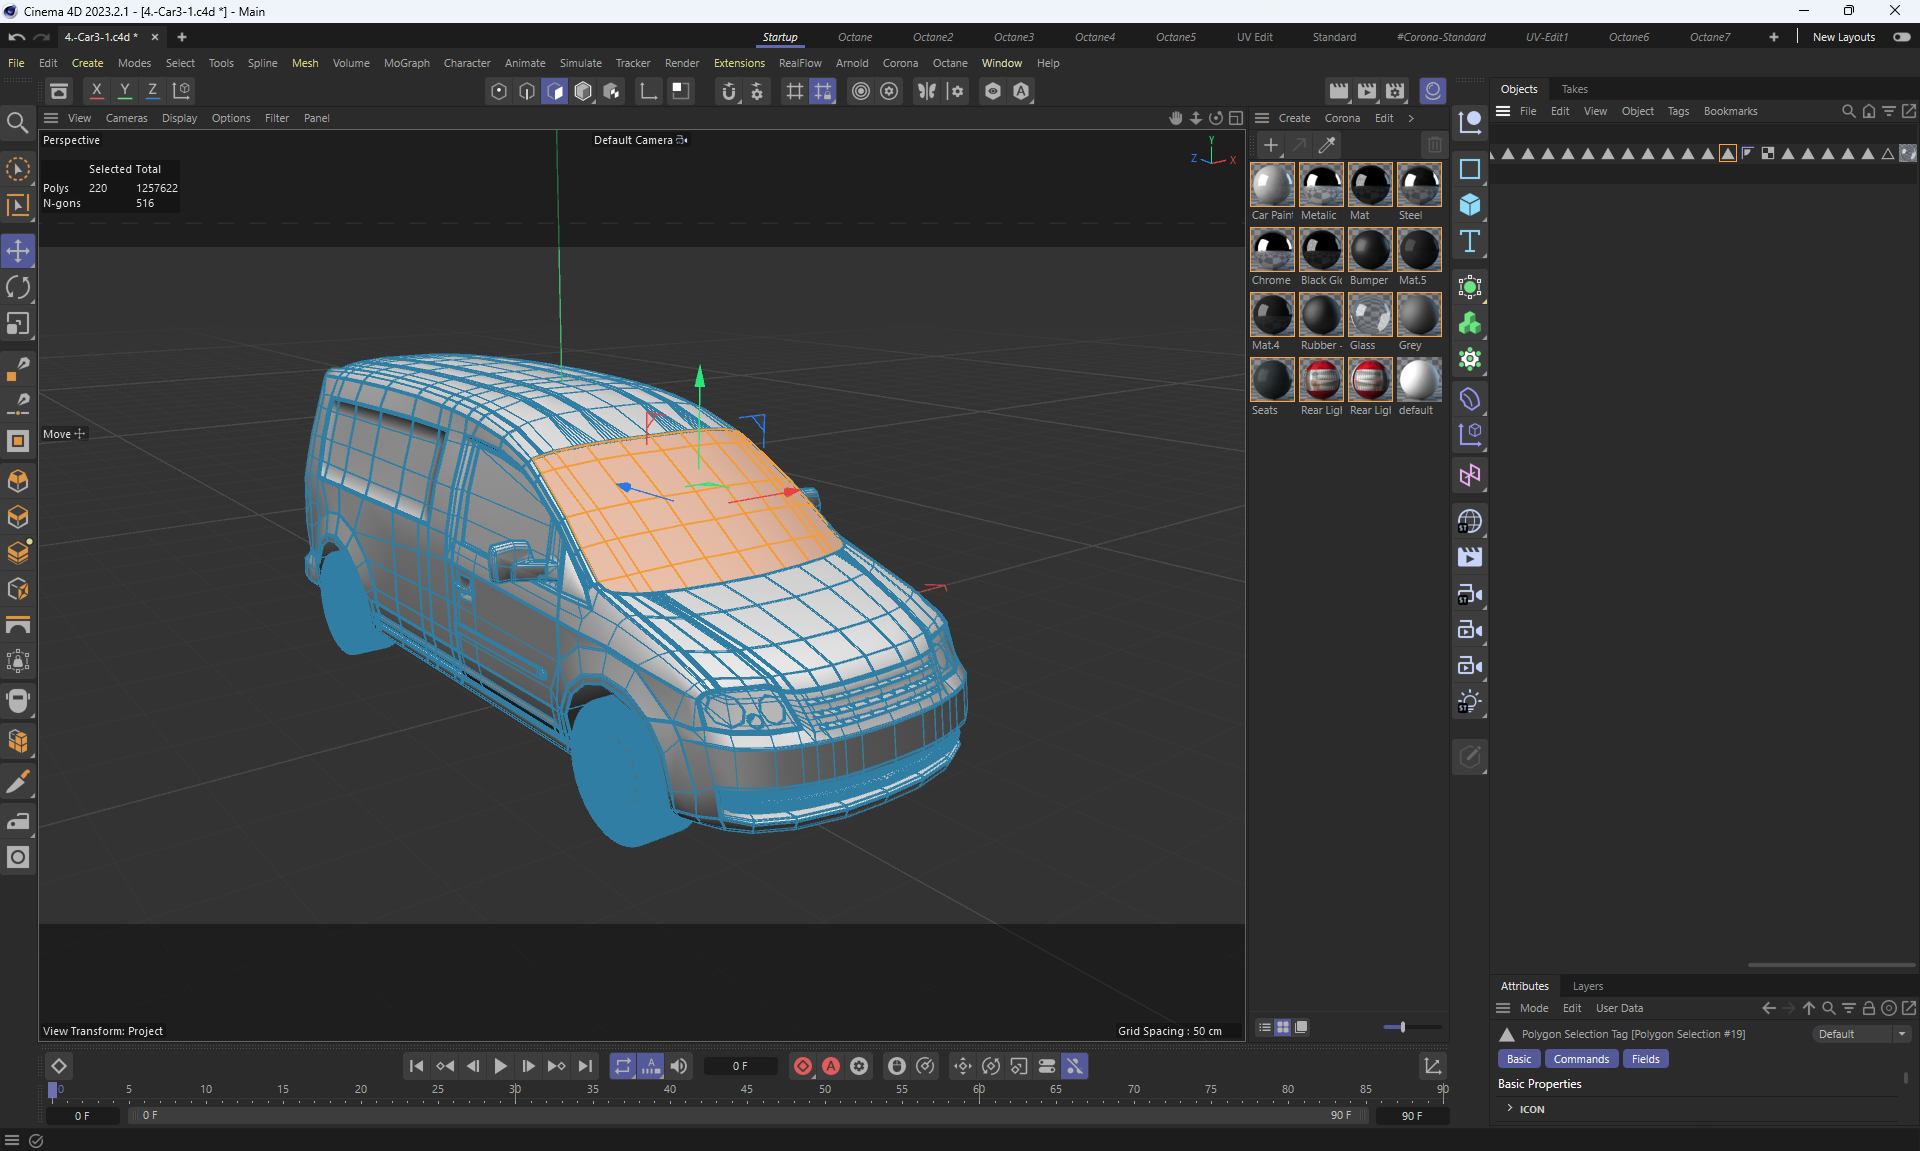
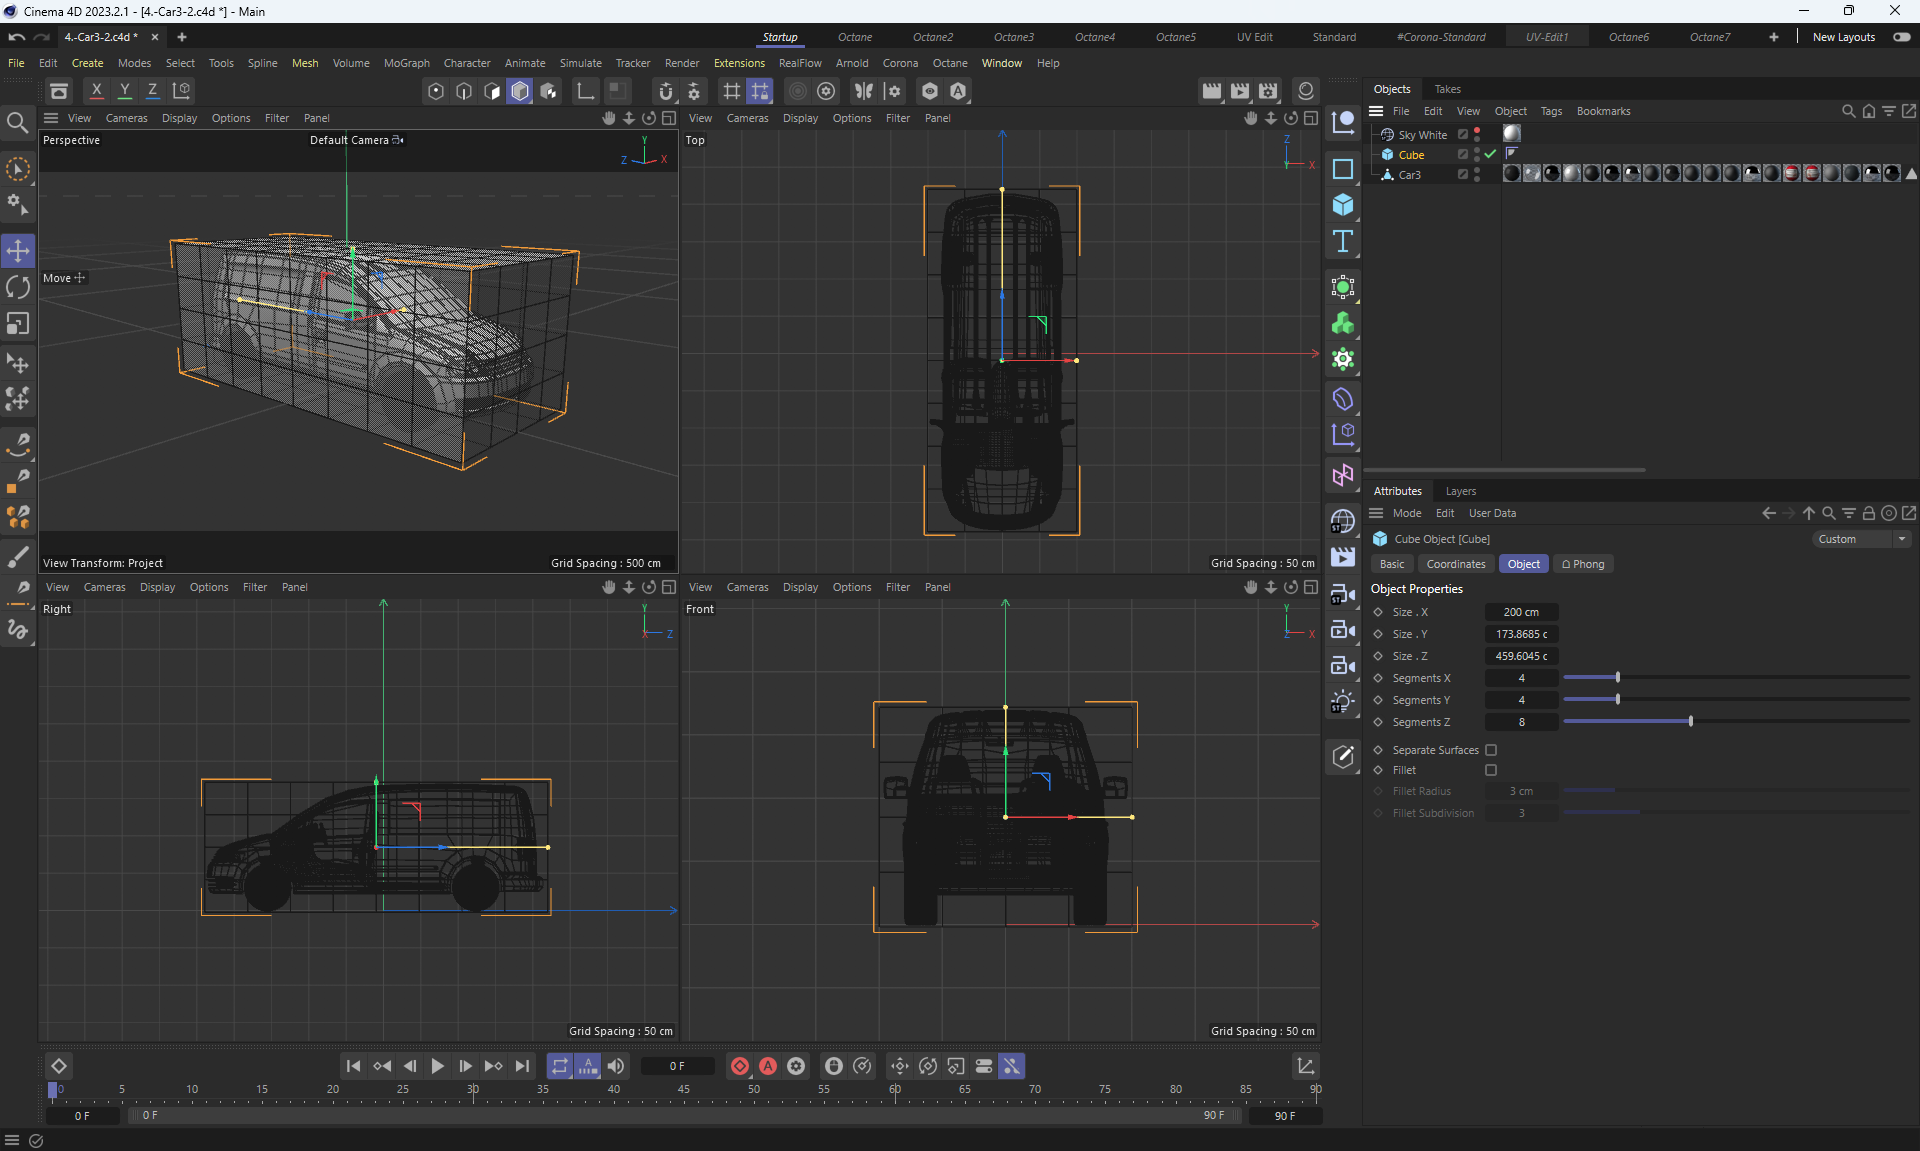
I watched the lessons and tested the author's materials. The author taught the scenes in the starting state, created them to the final state using video.
Other videos: Cinema 4D: Color shader in Octane Cinema 4D & Octane Tutorial - Adding a Background Image (3 Ways)
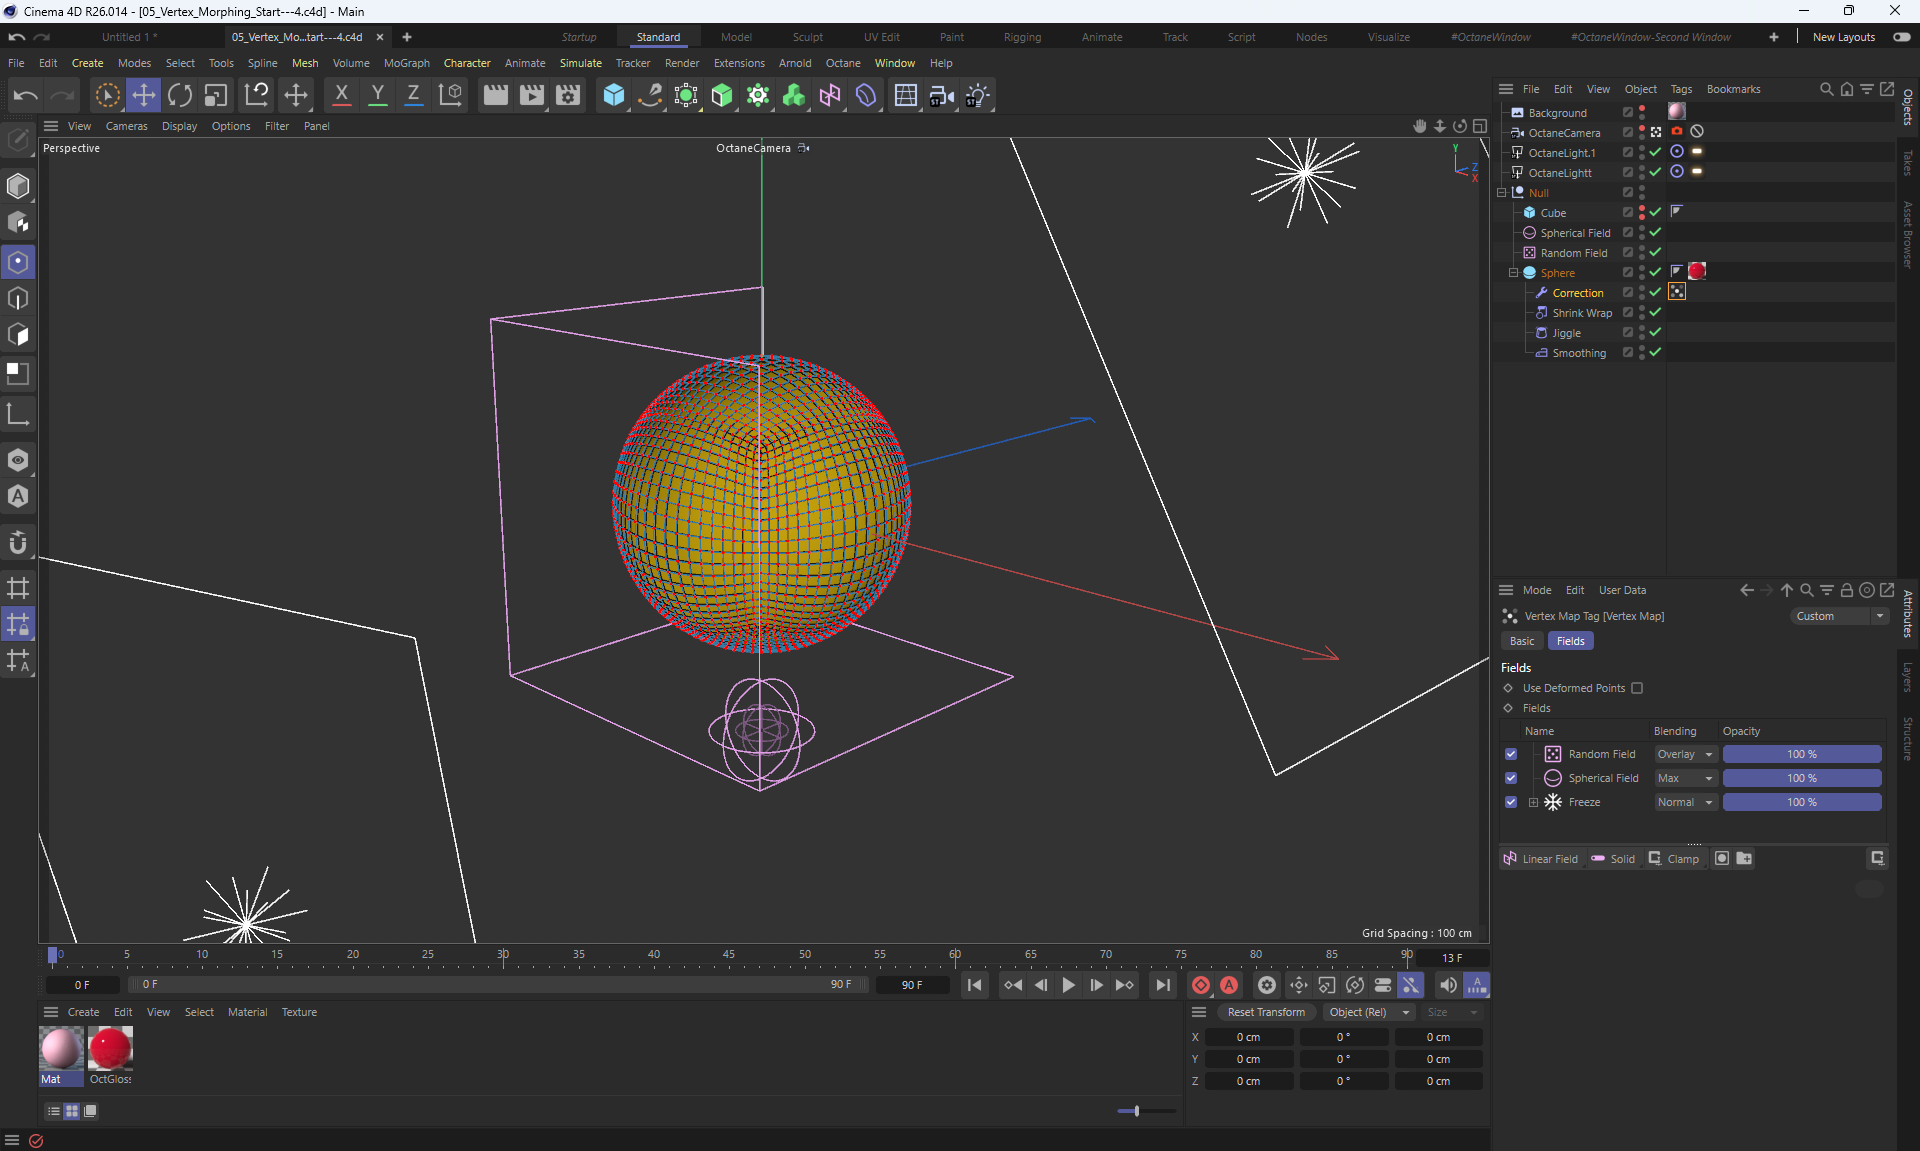
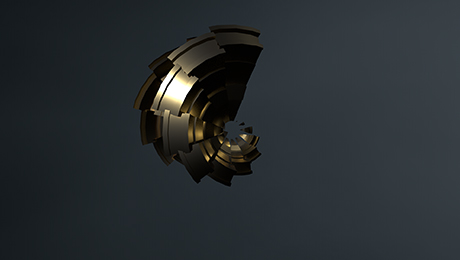
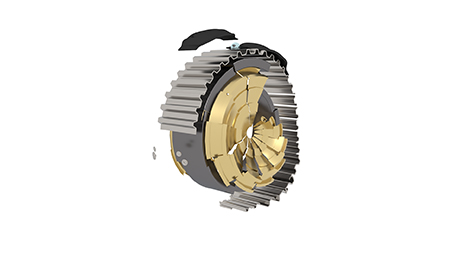
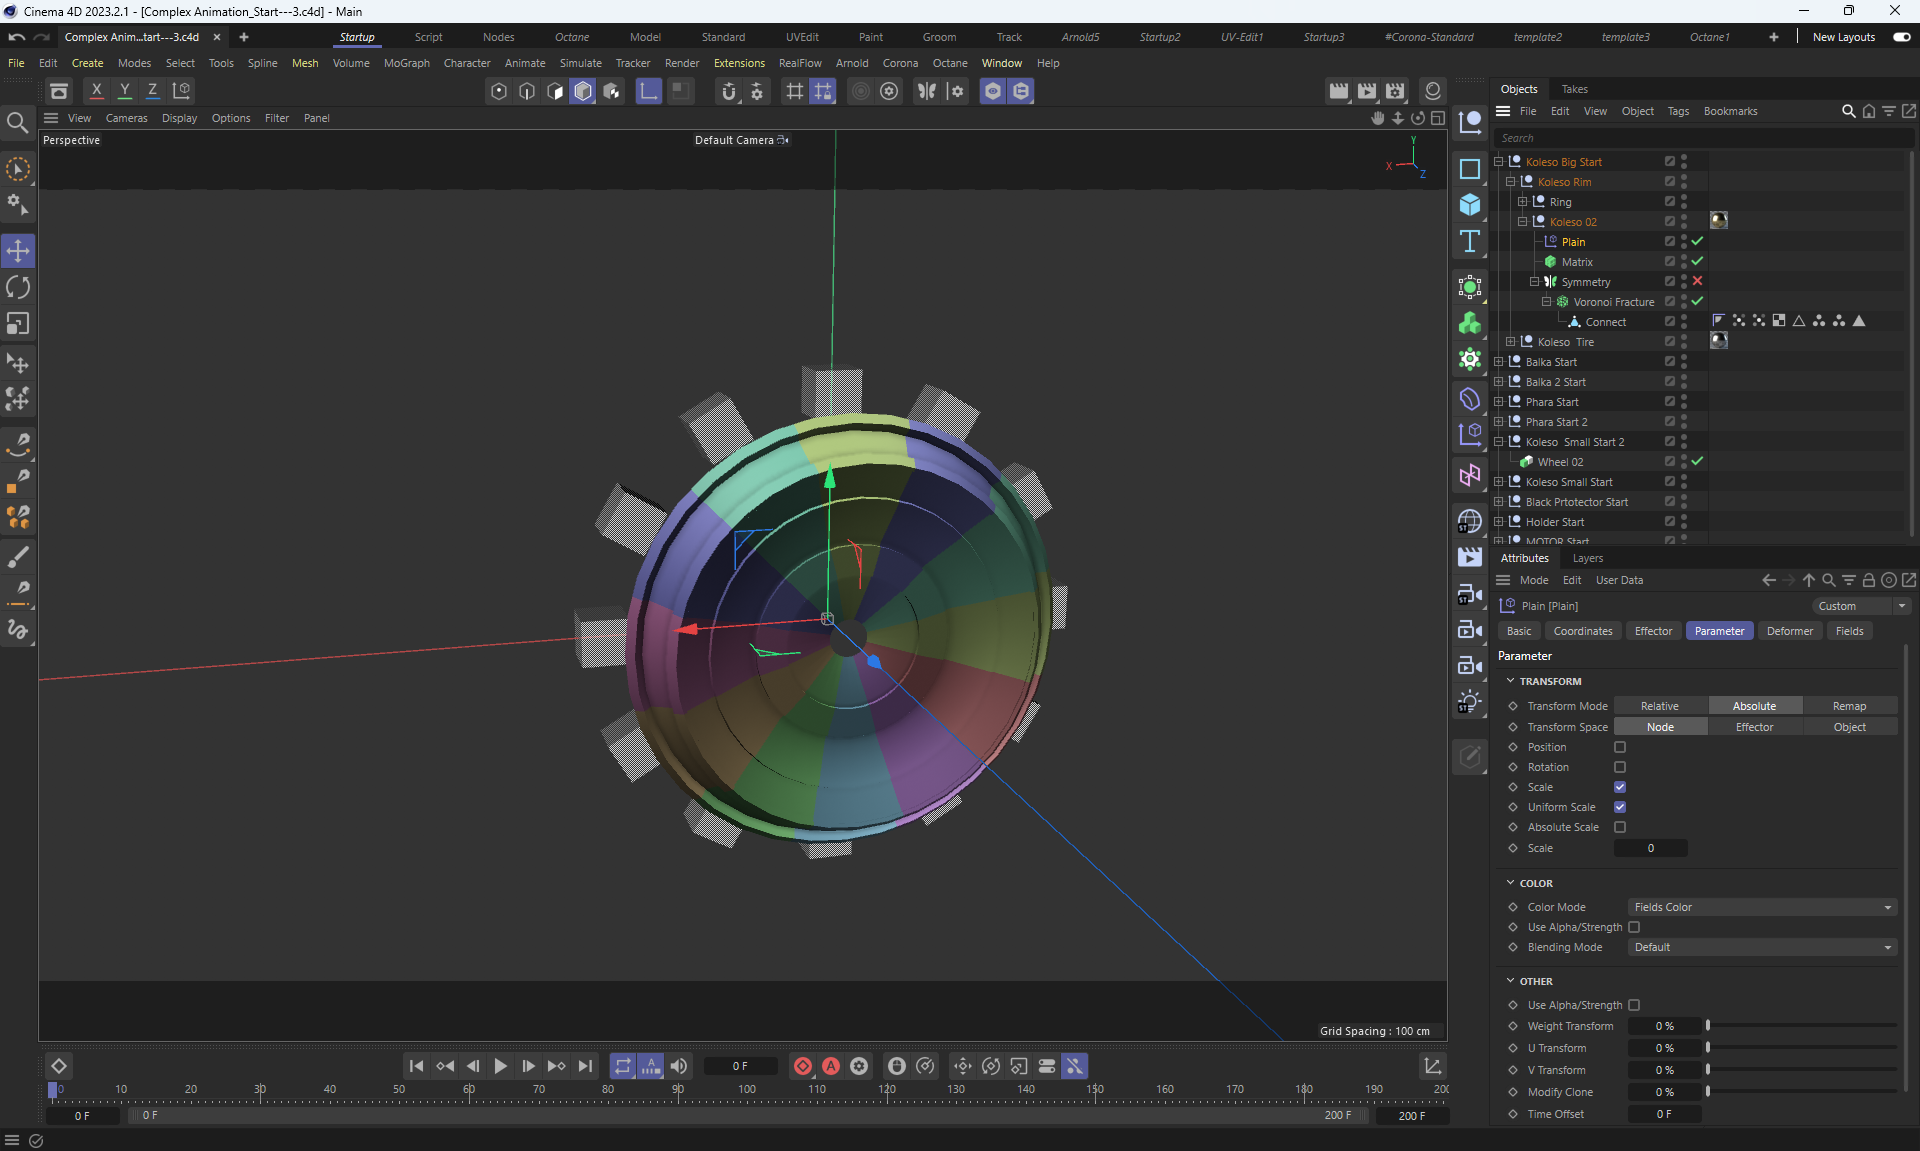
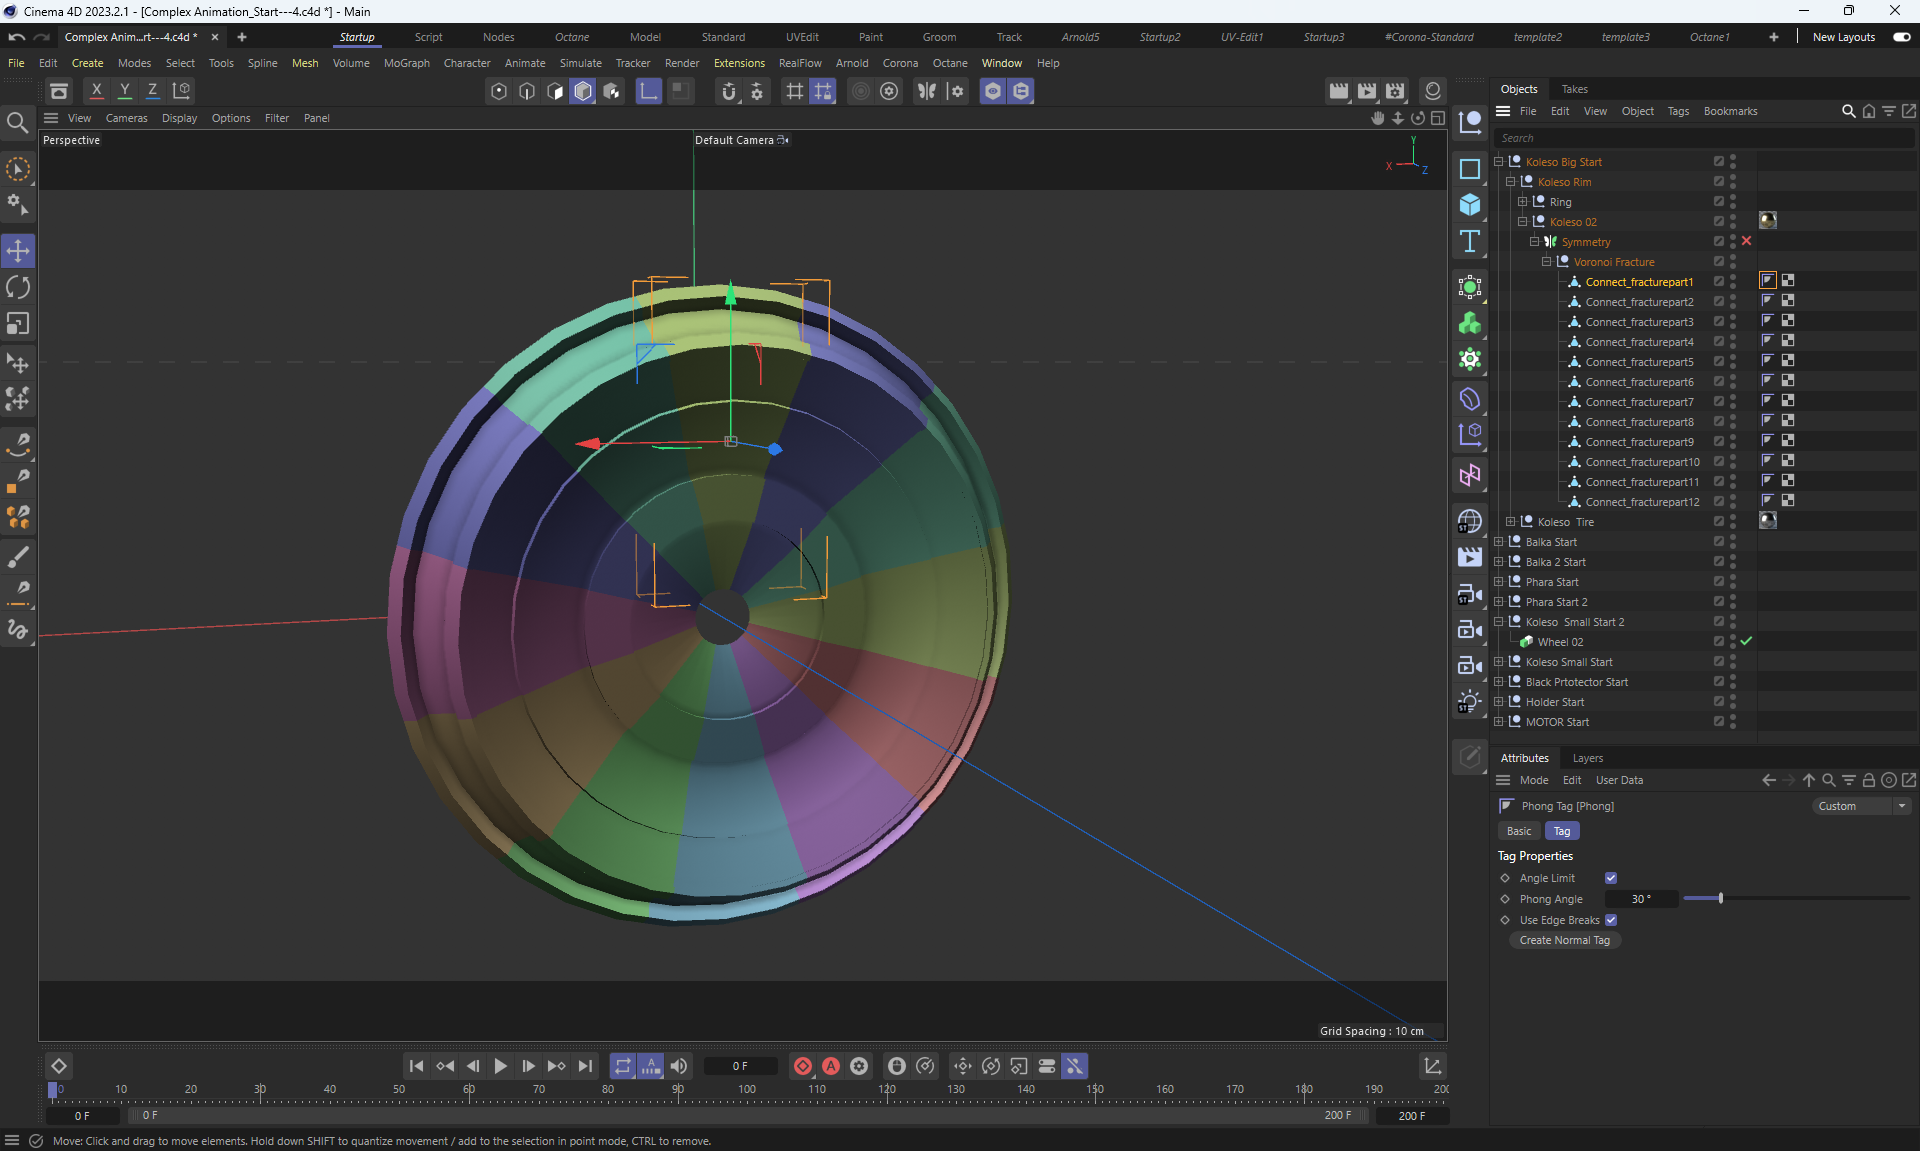
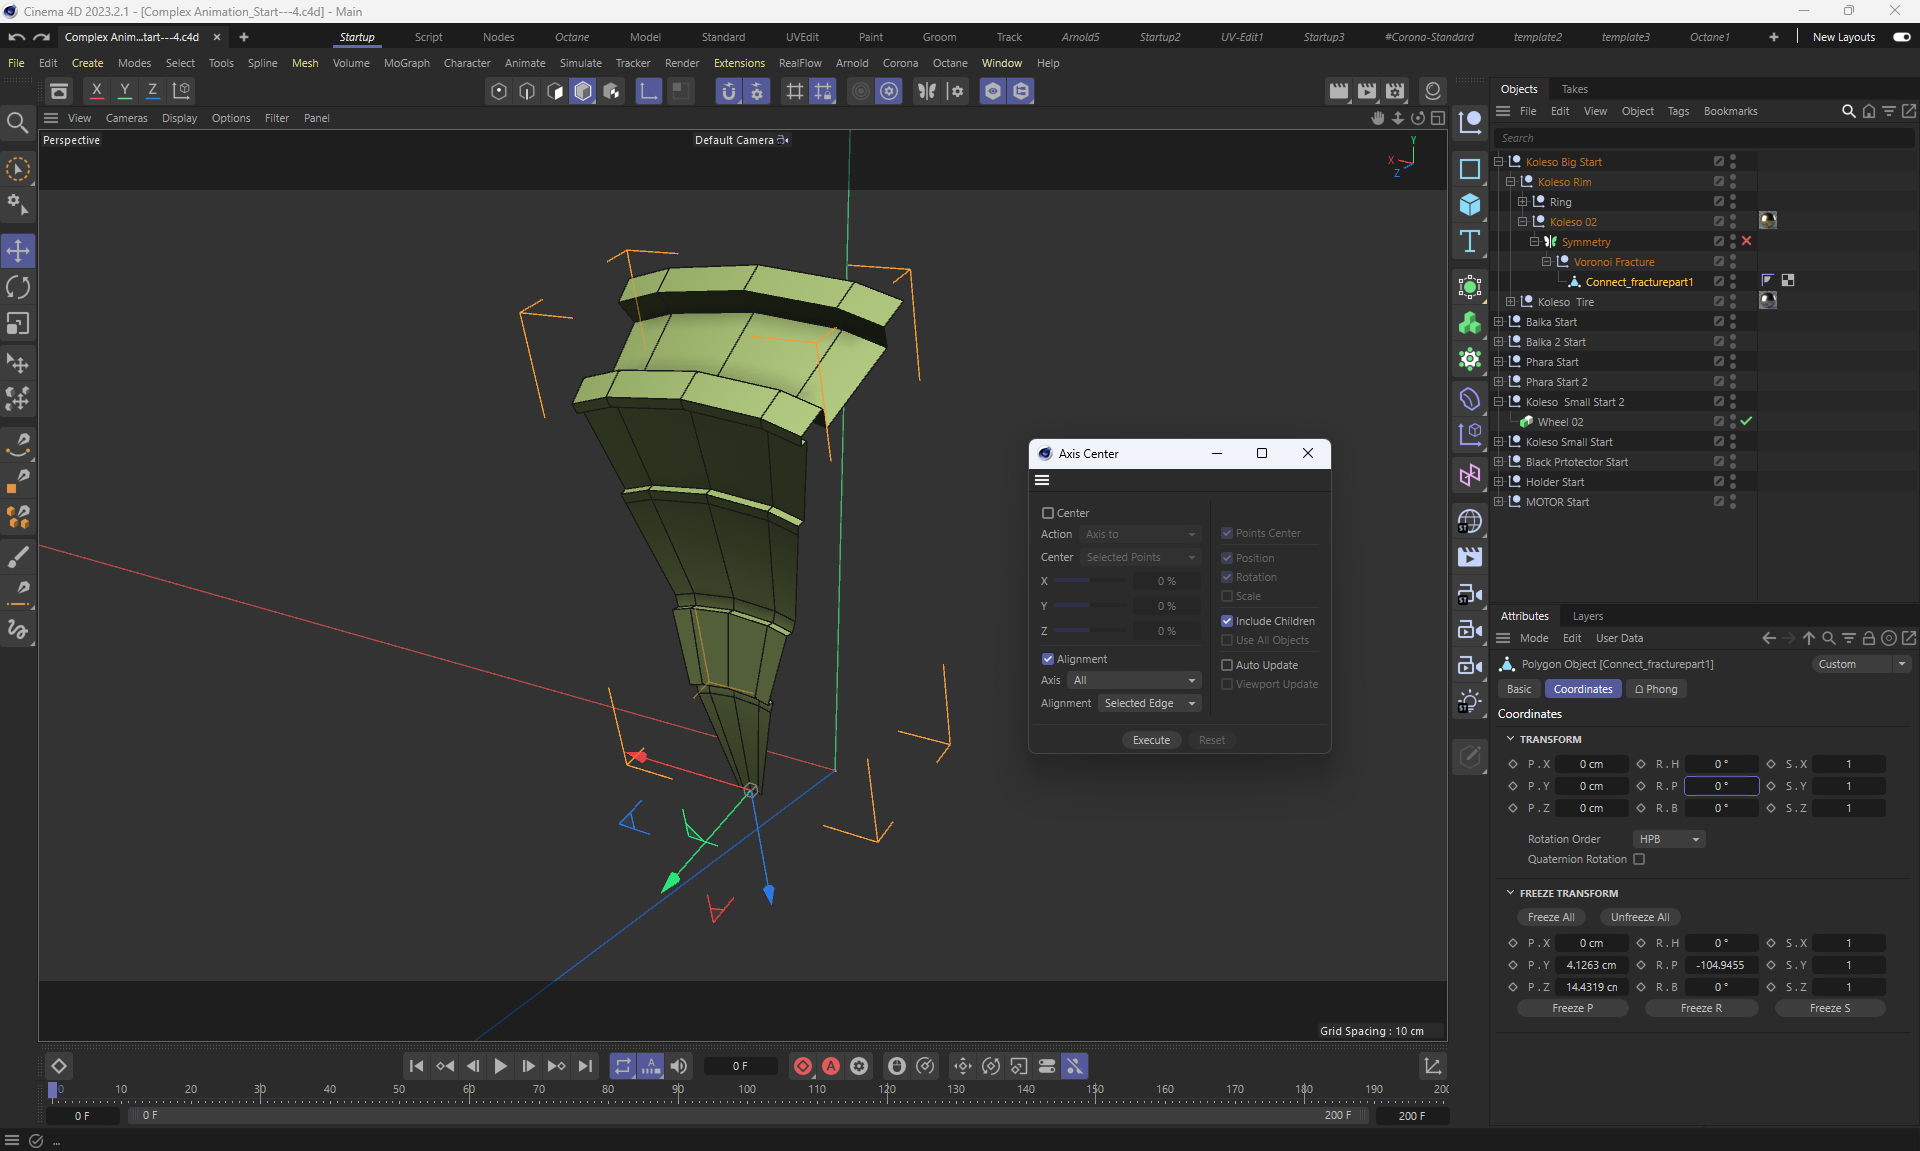
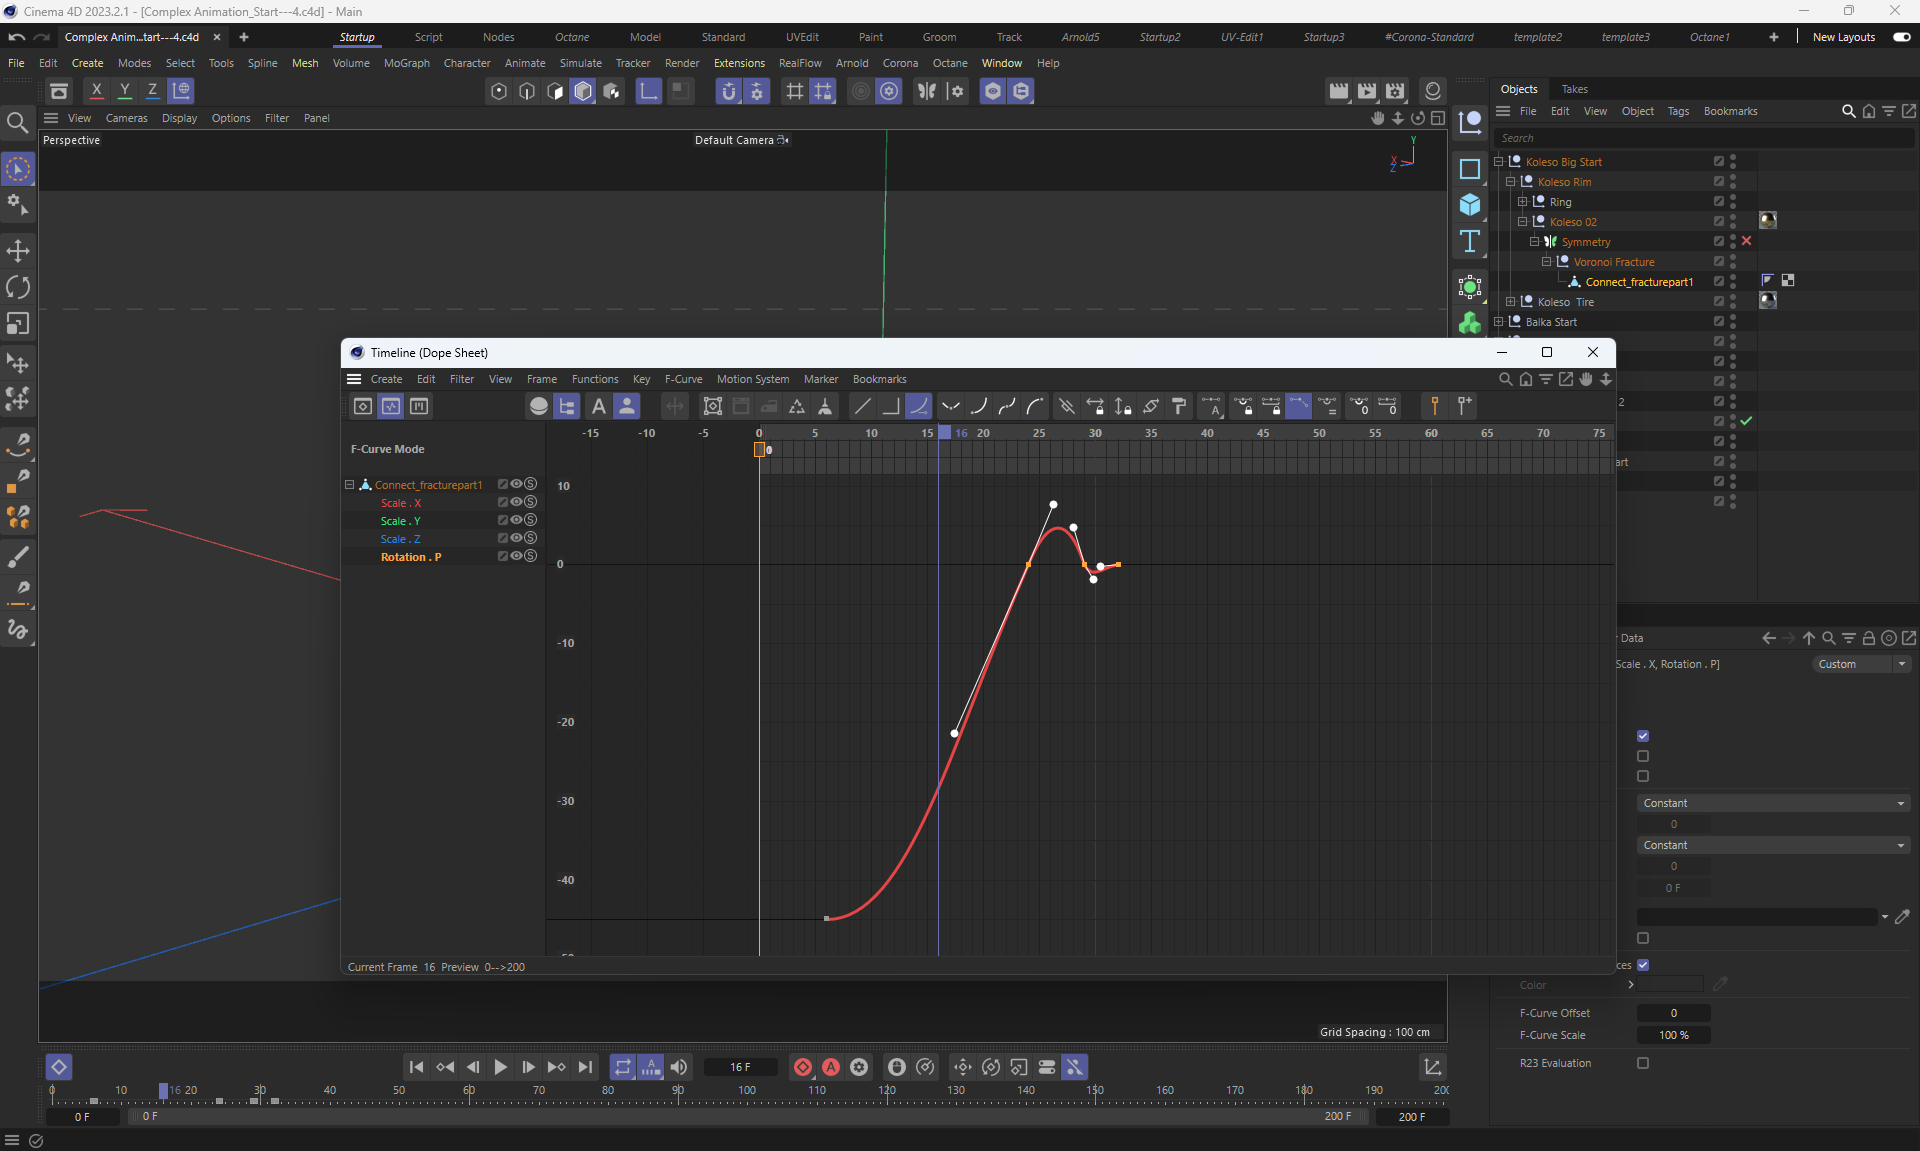
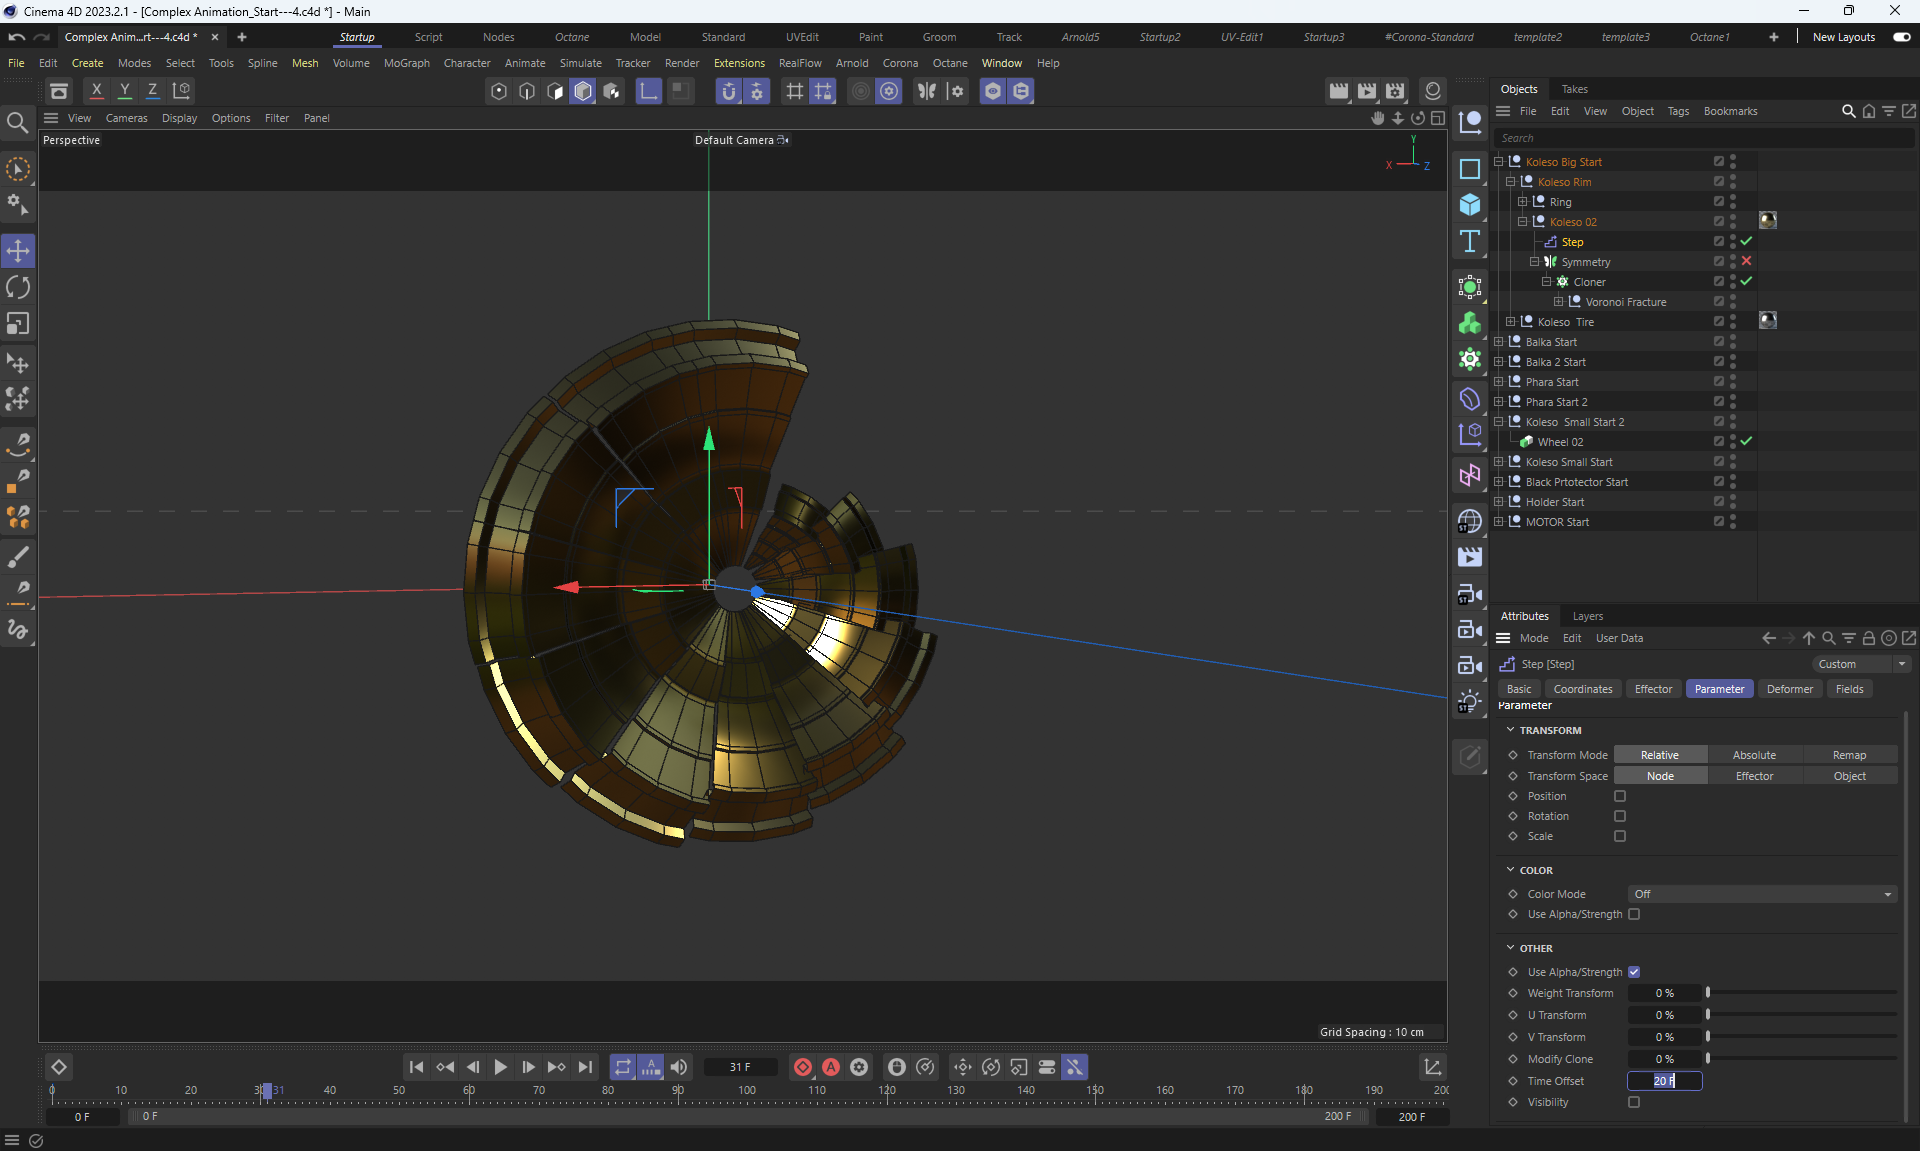
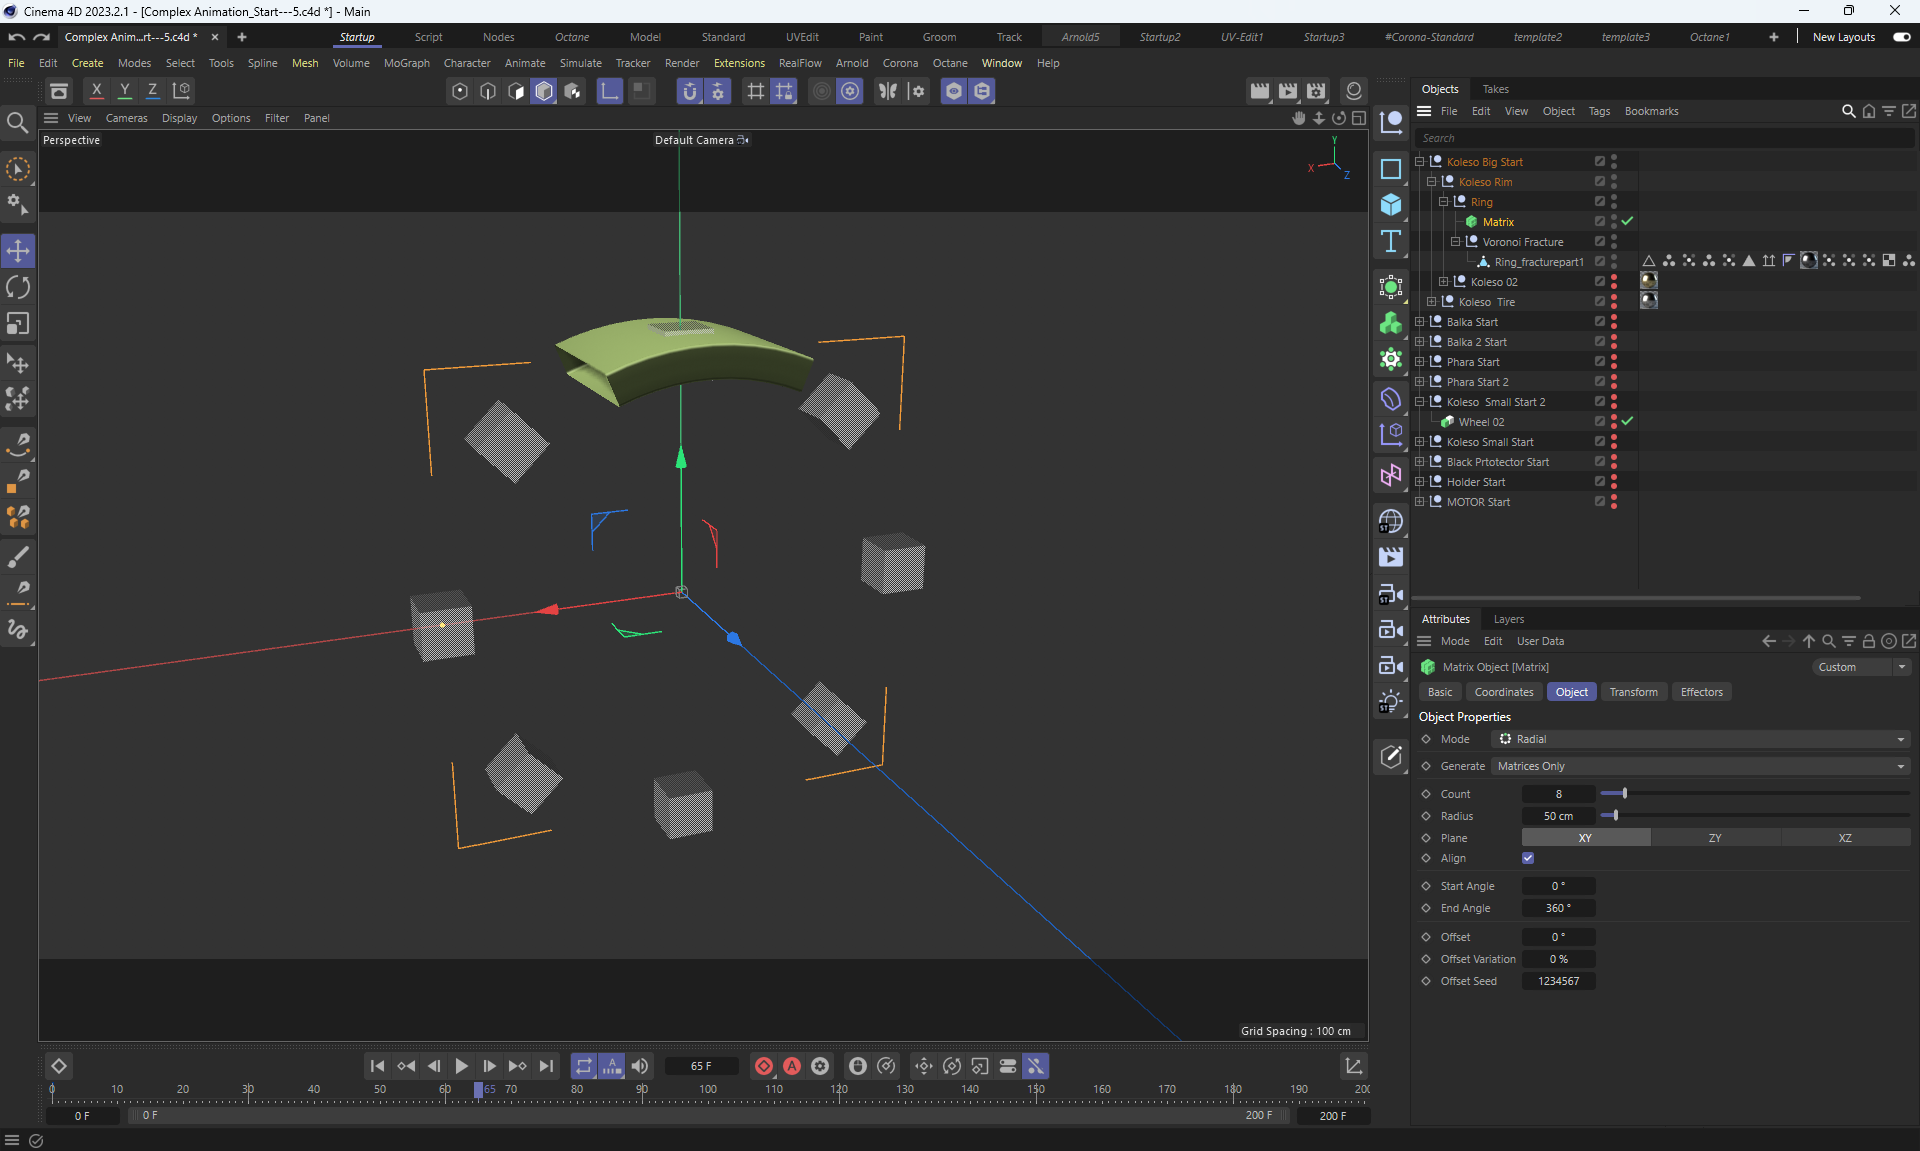
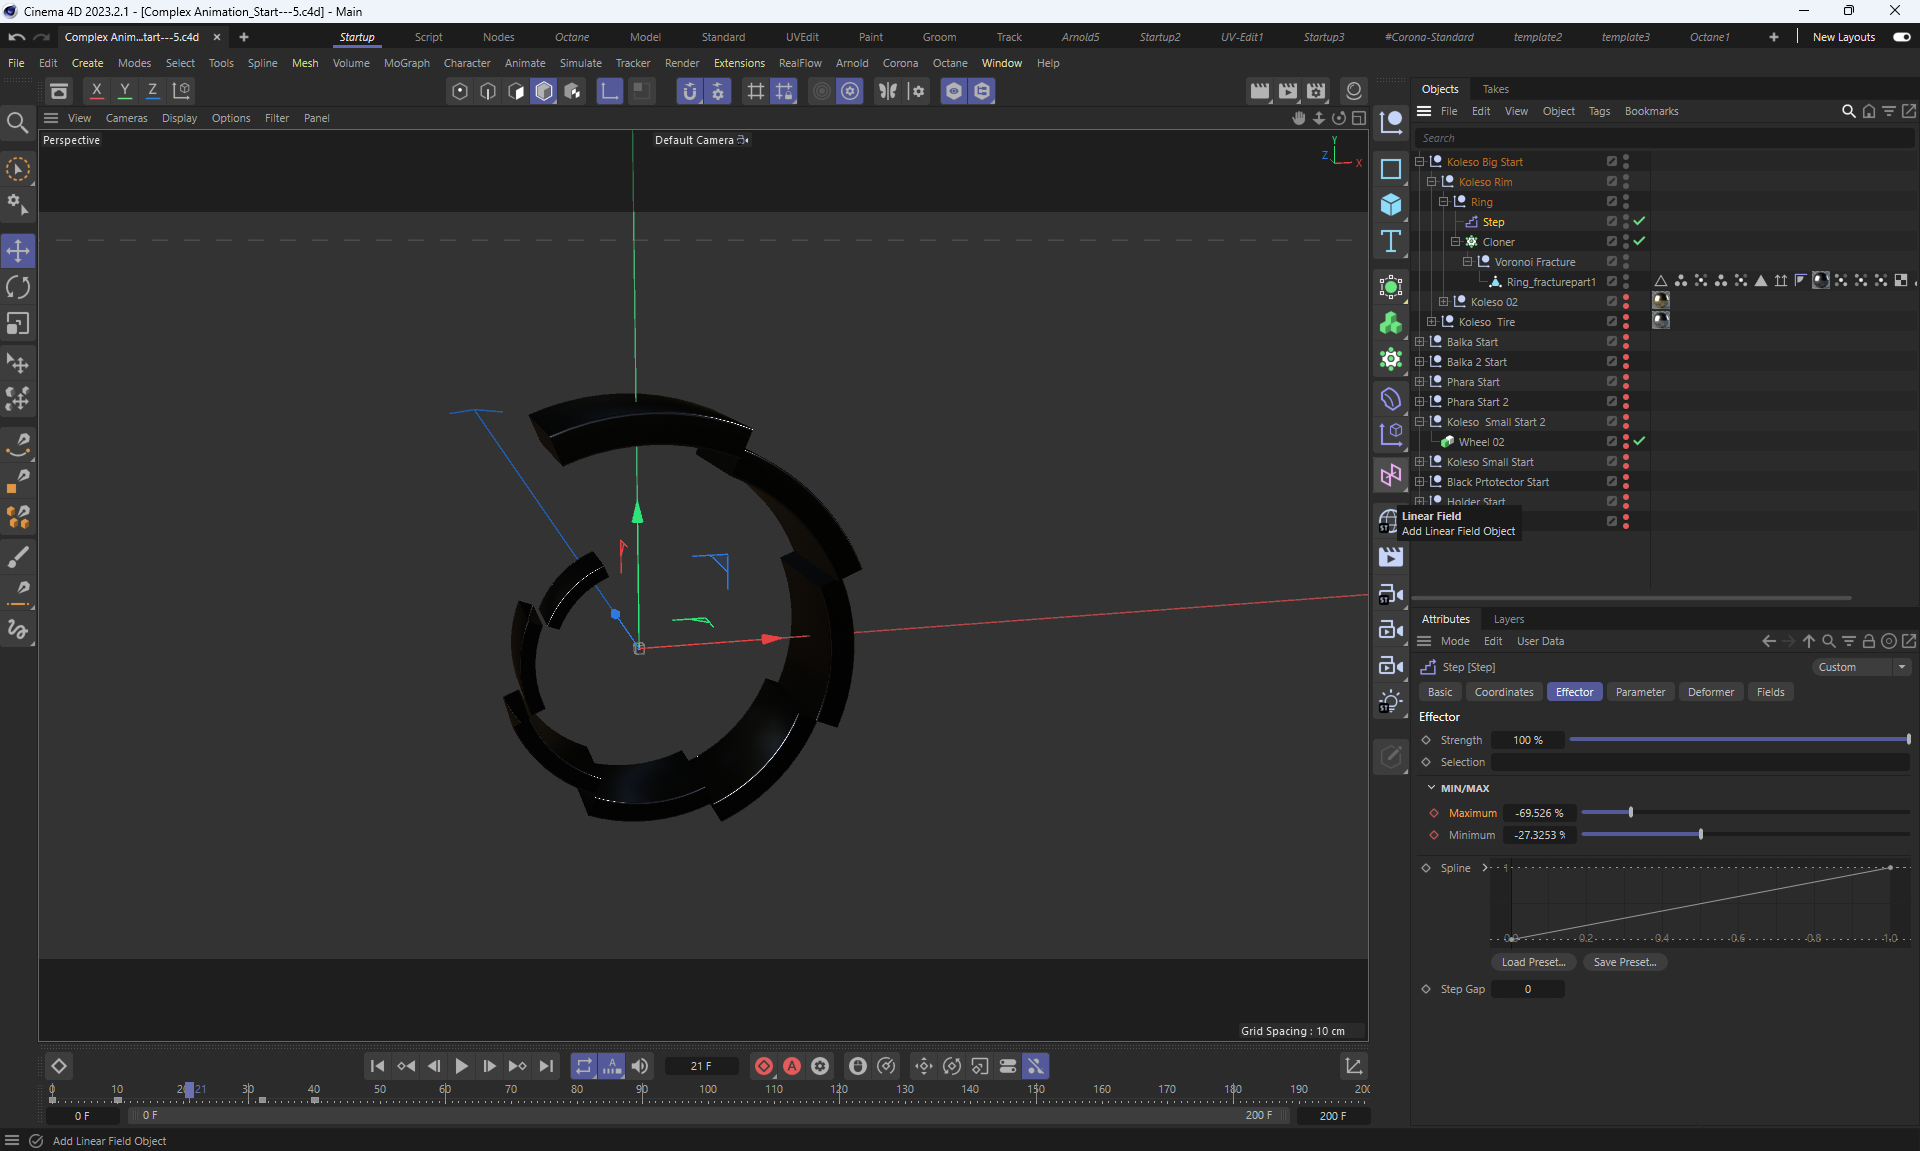
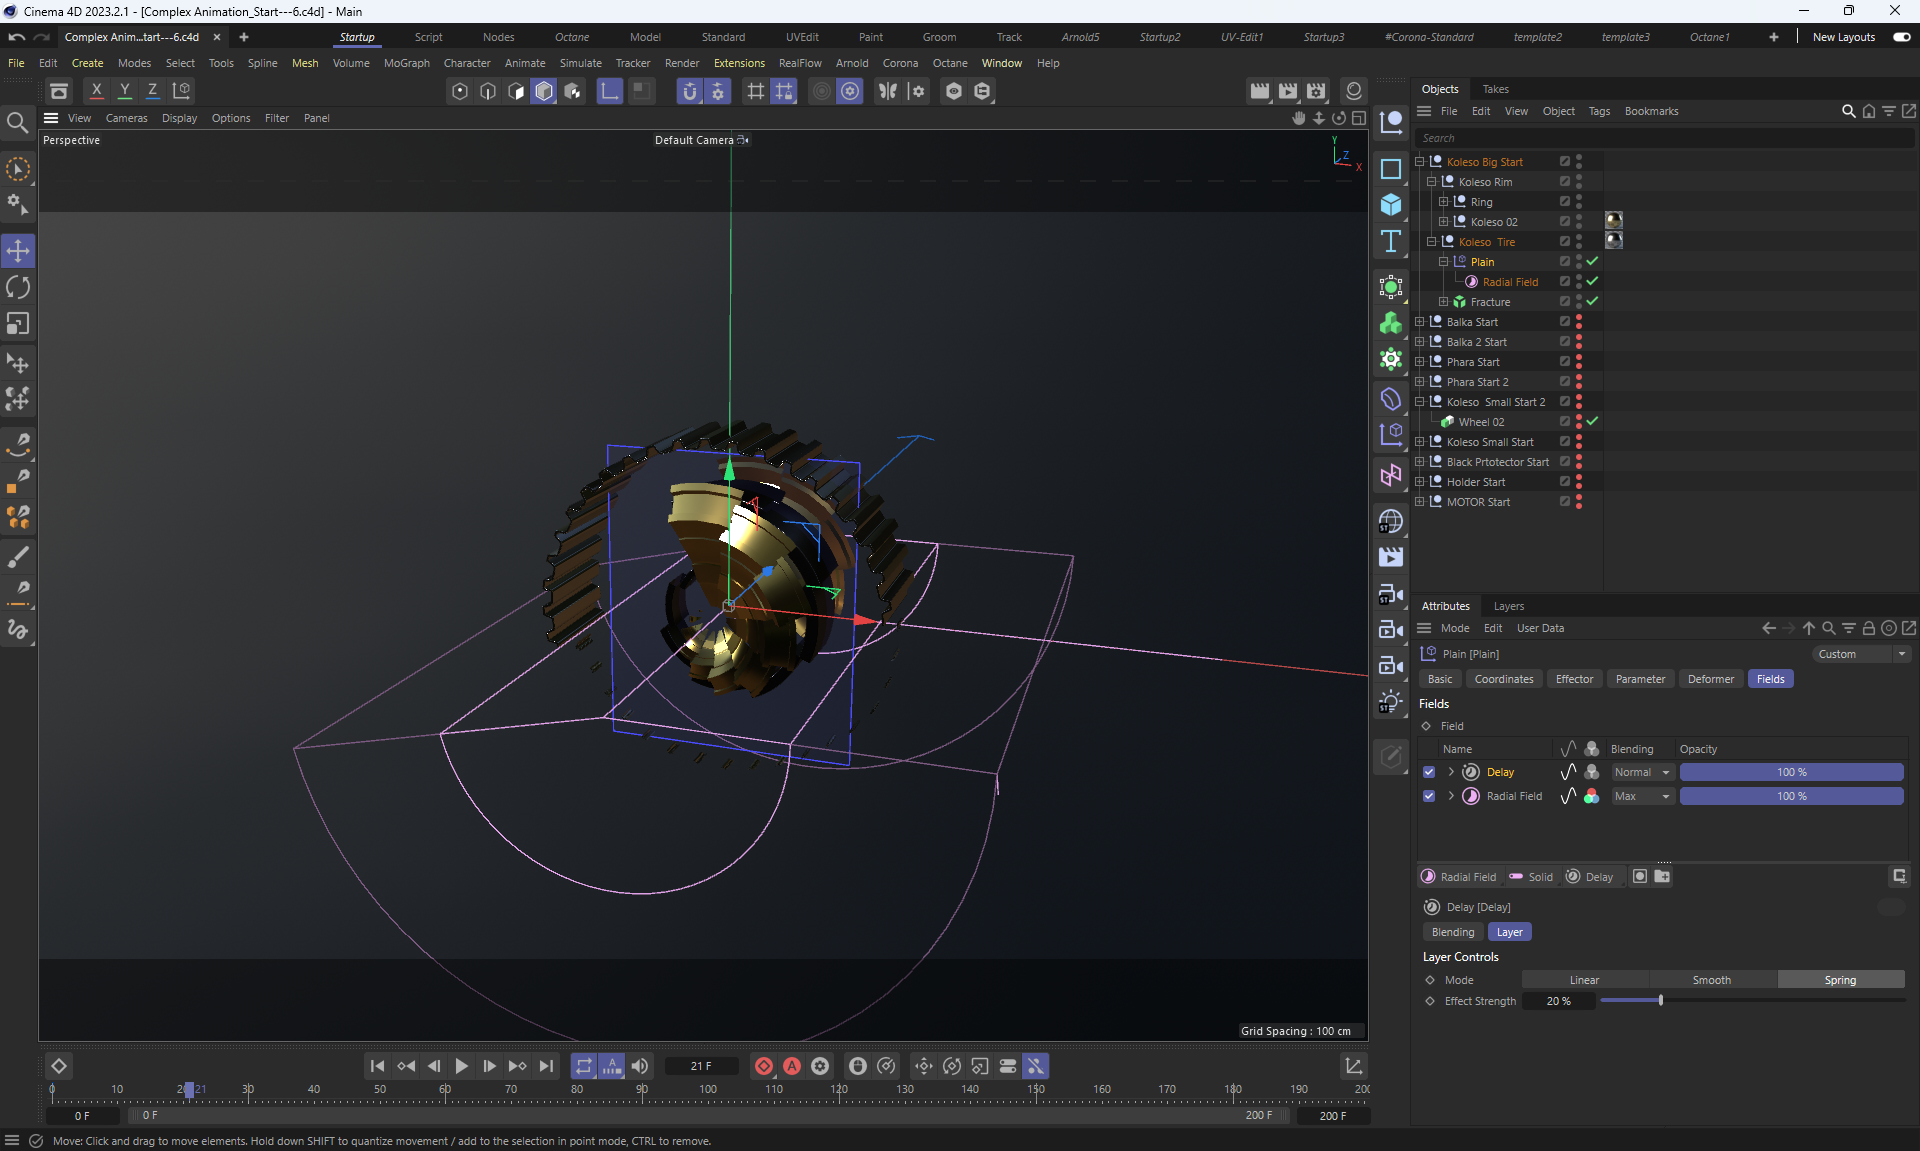
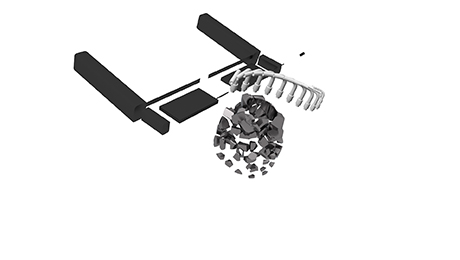
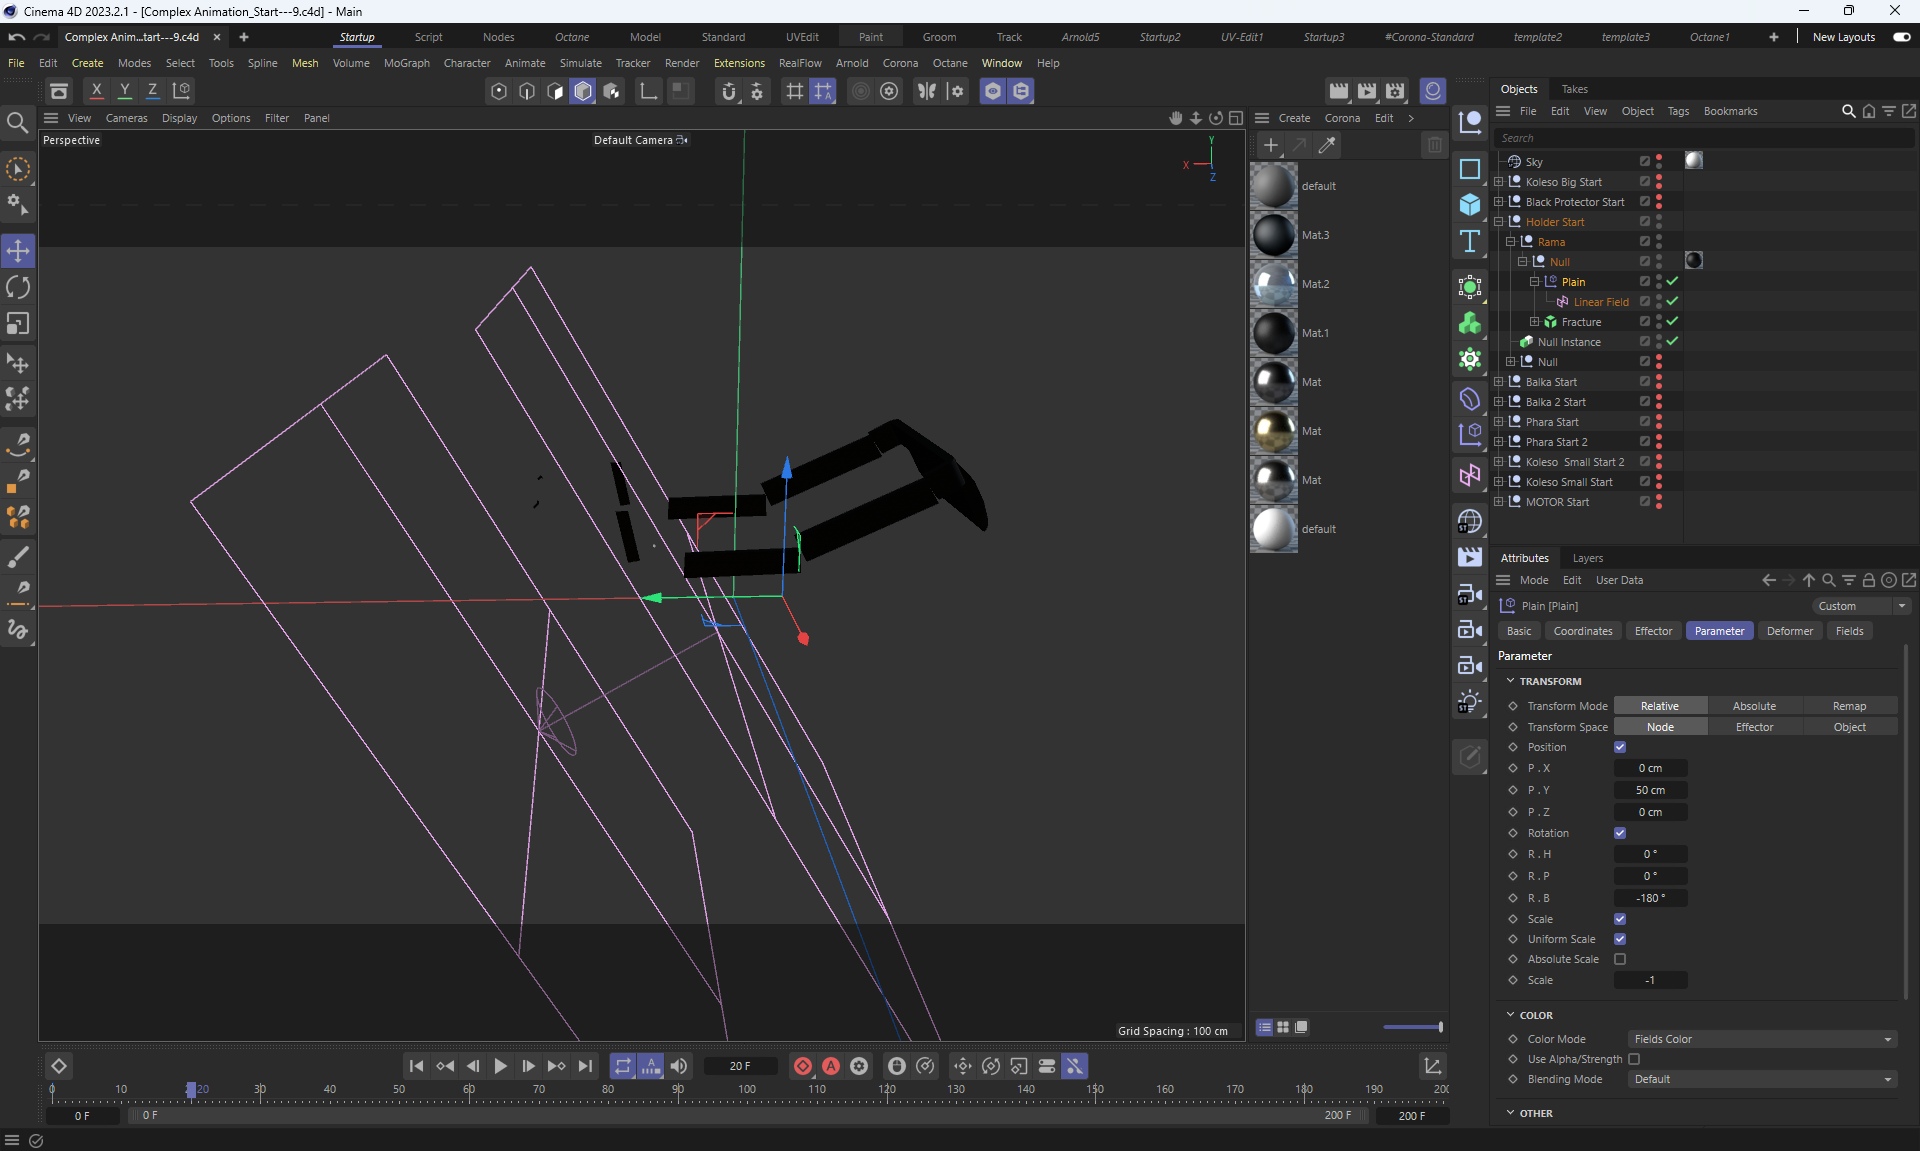
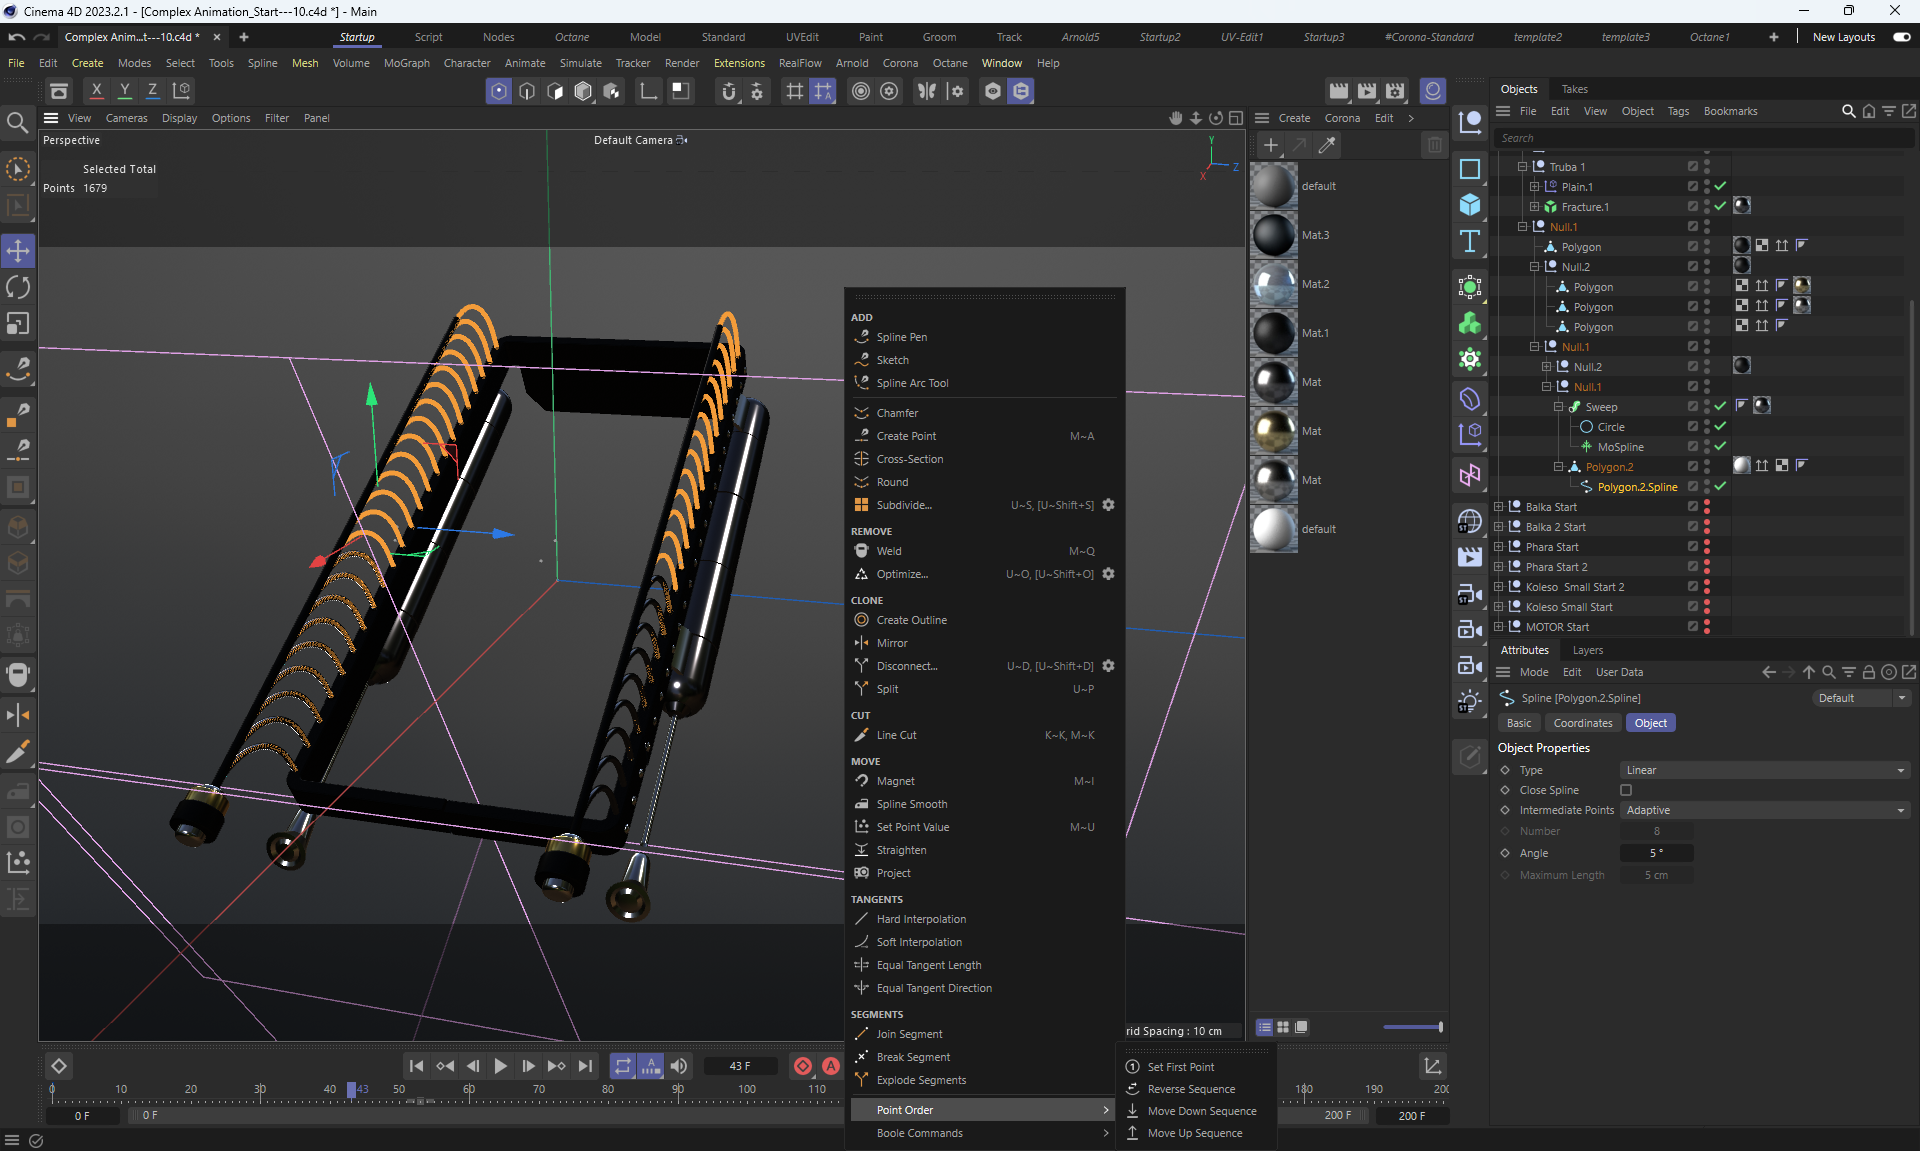
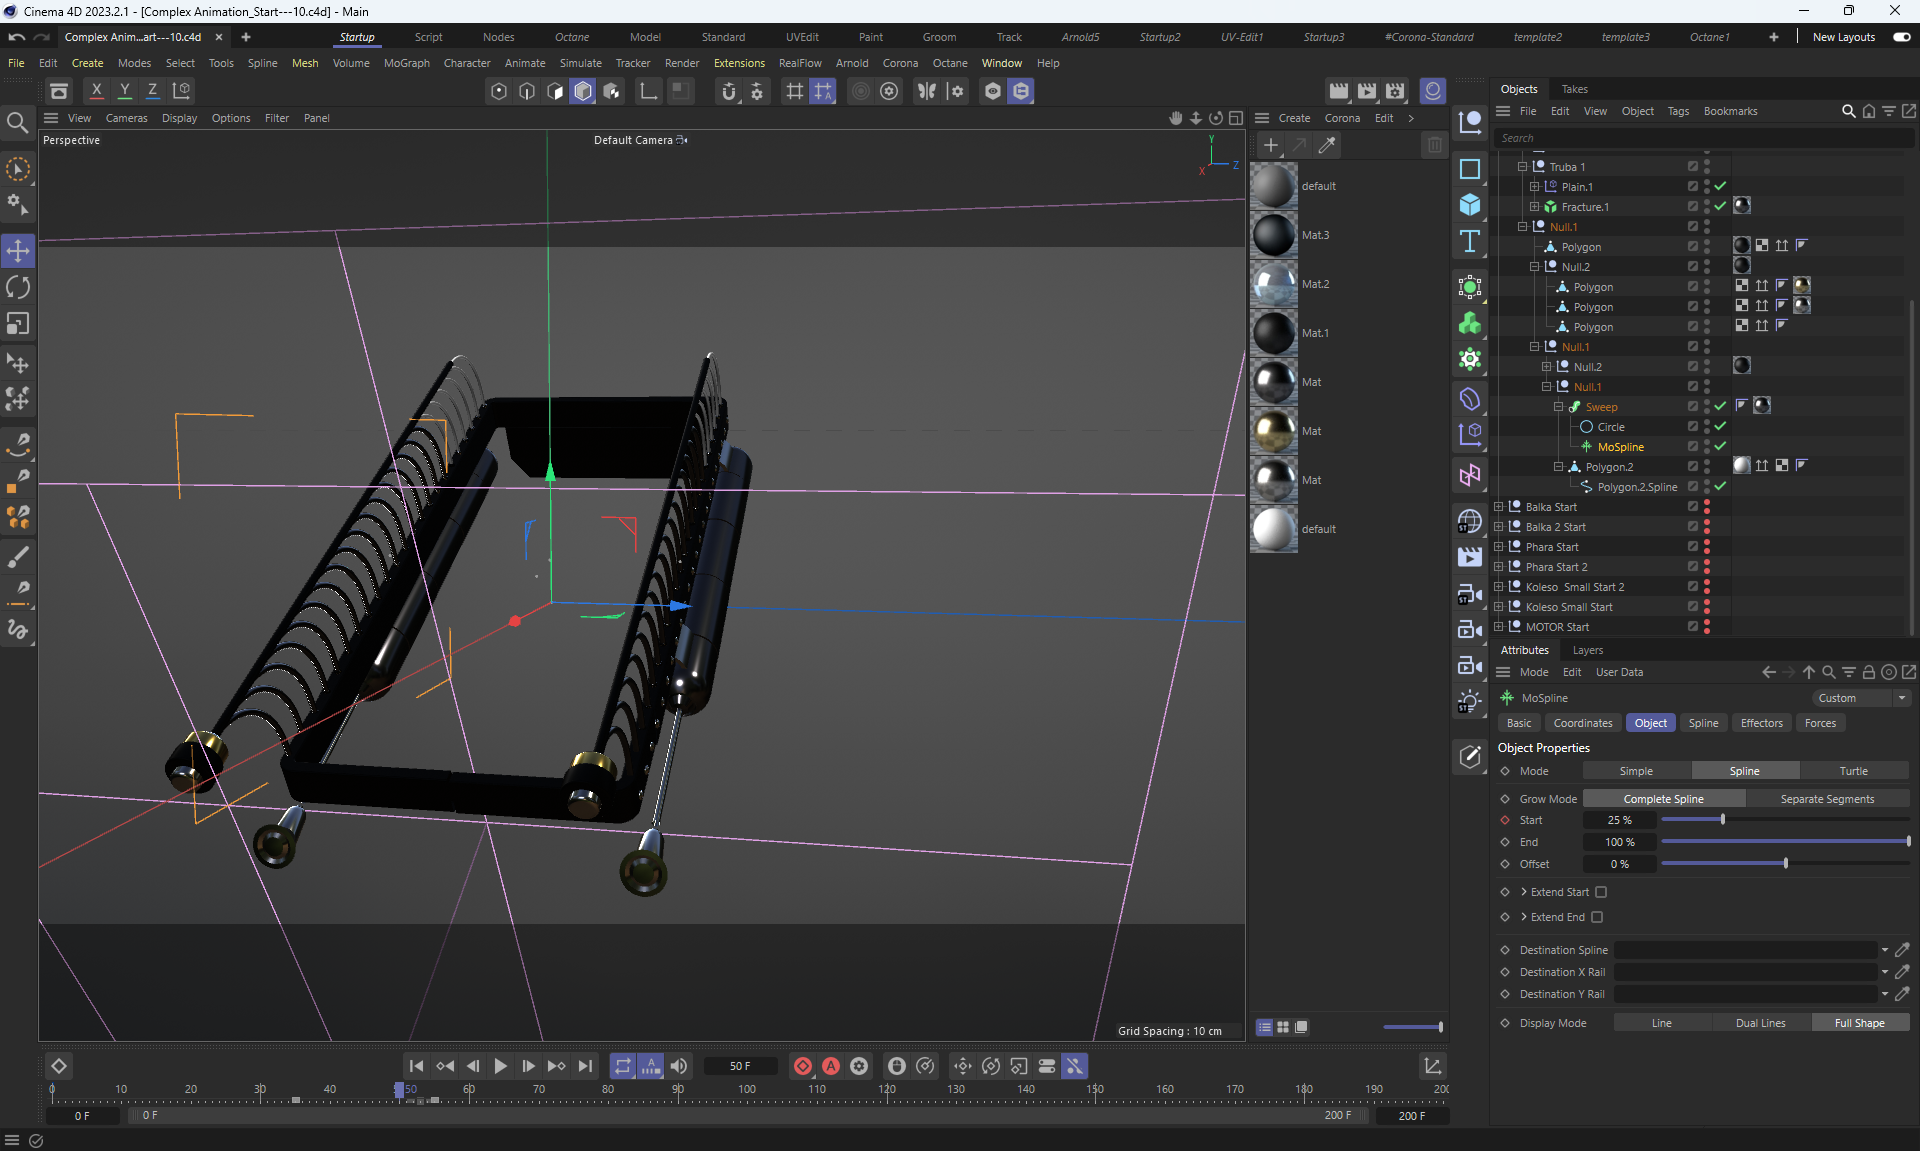
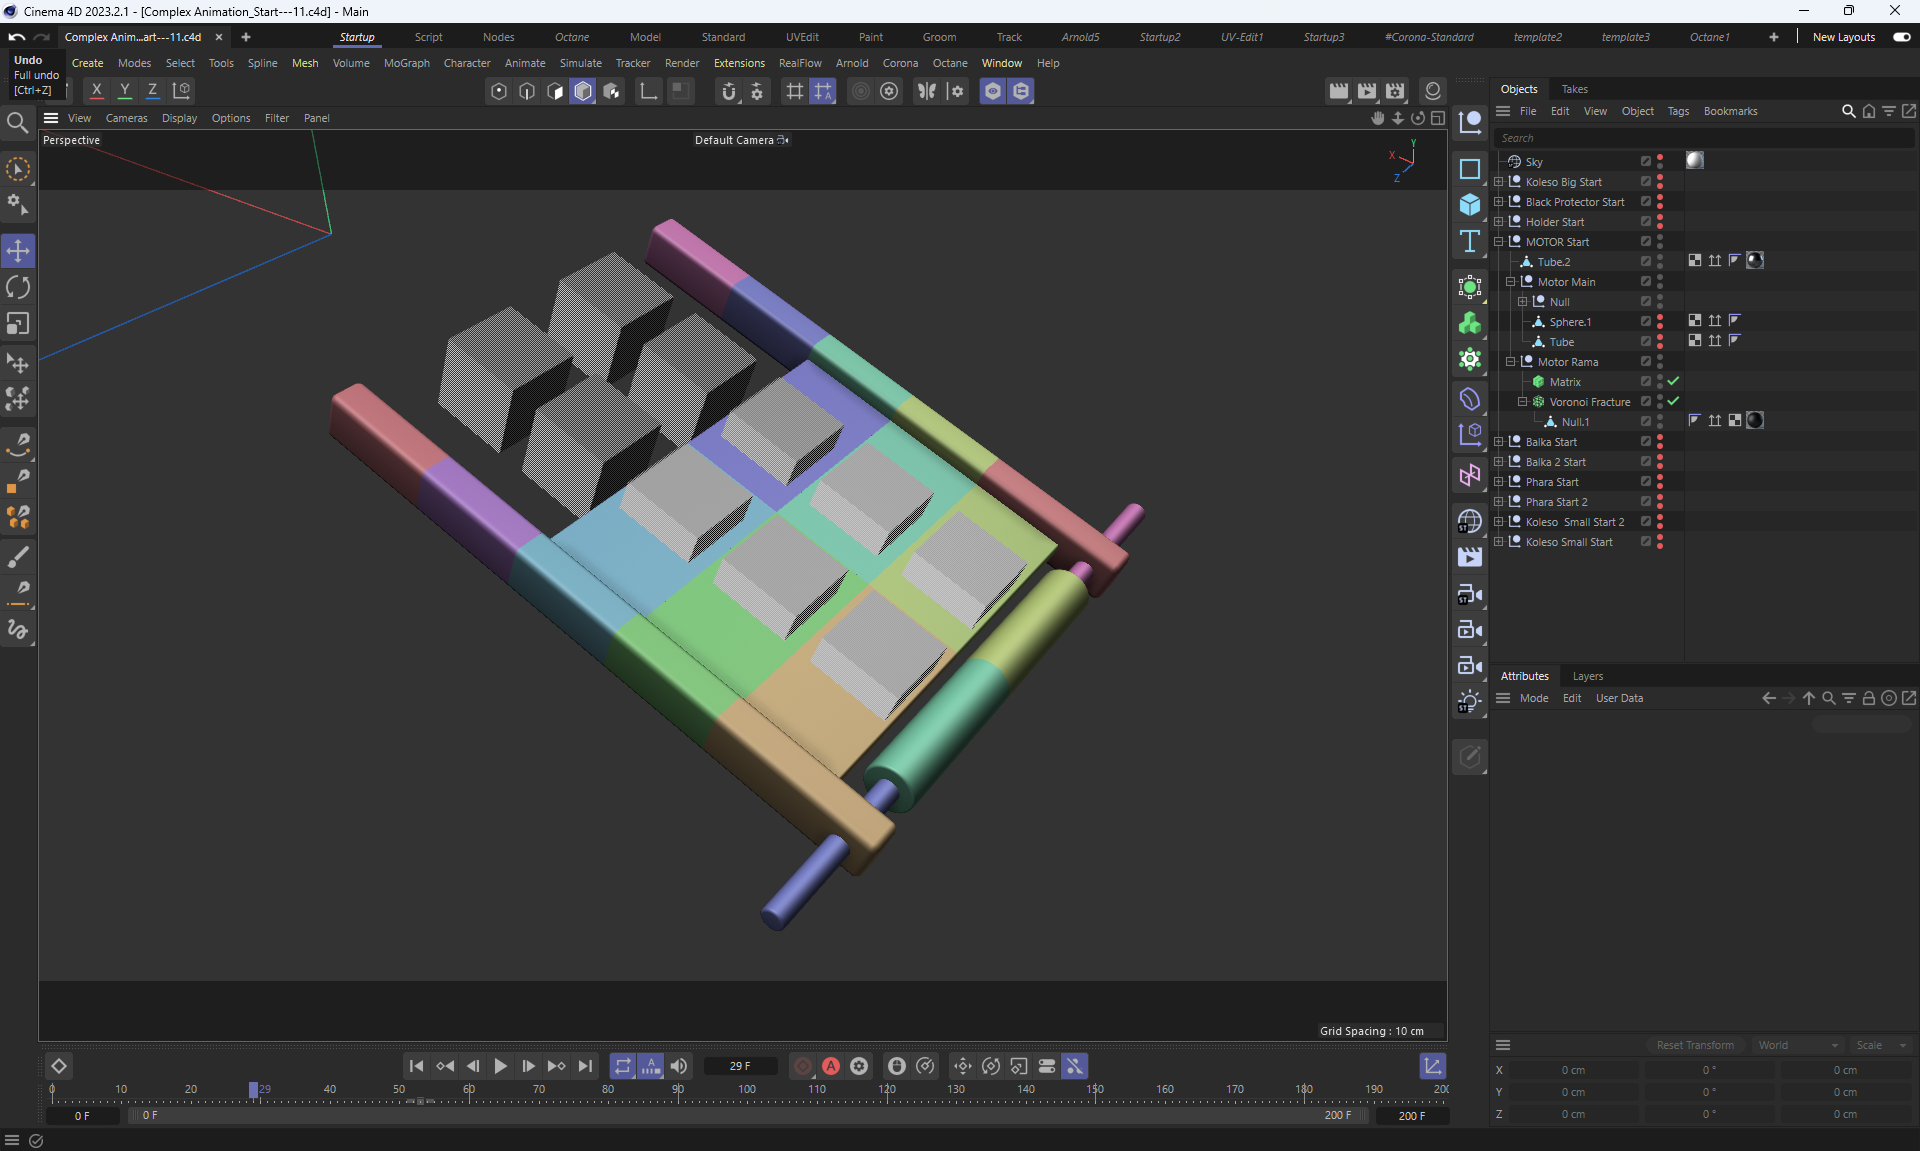
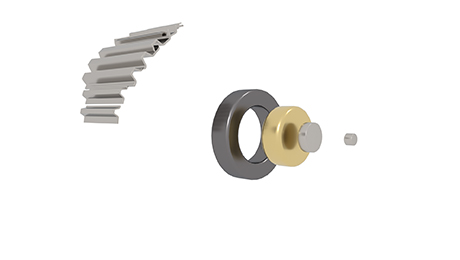
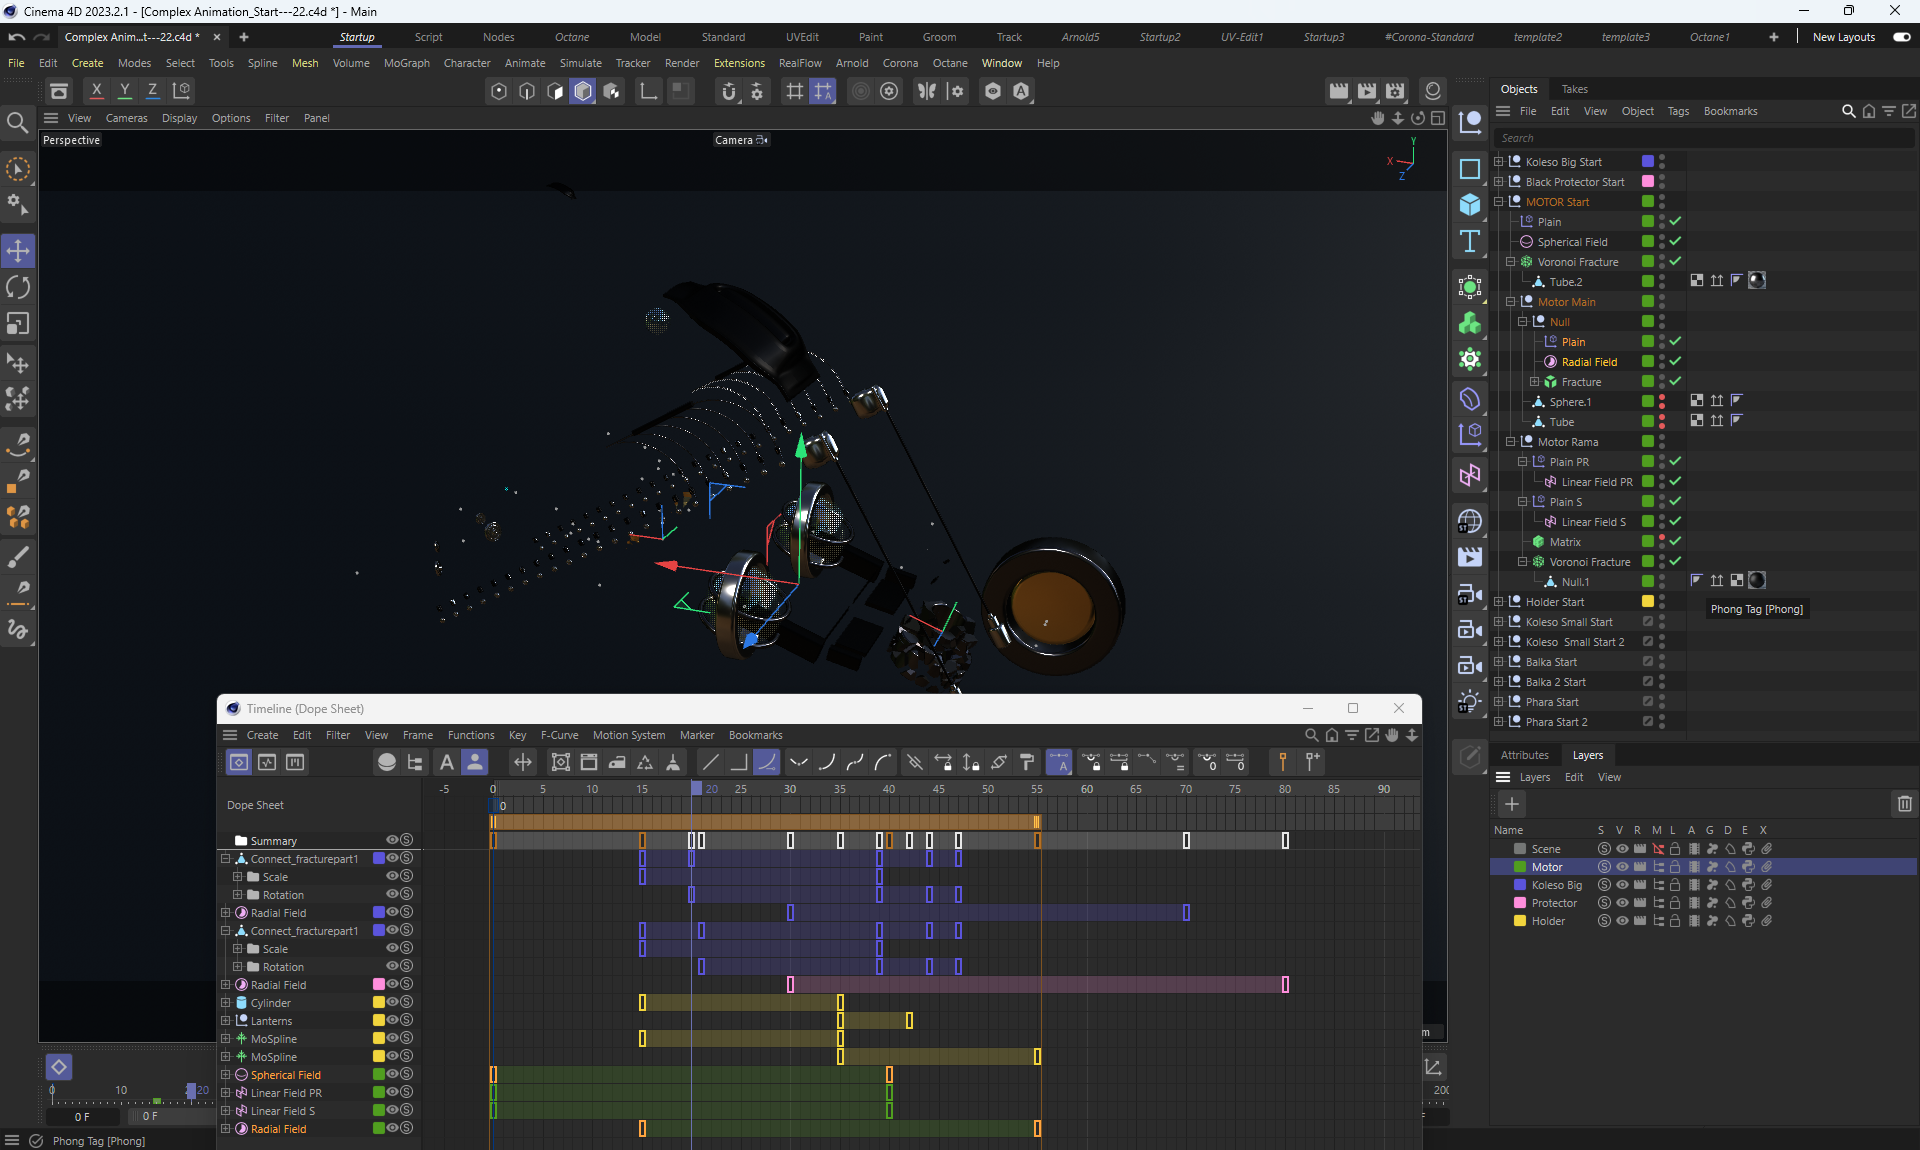
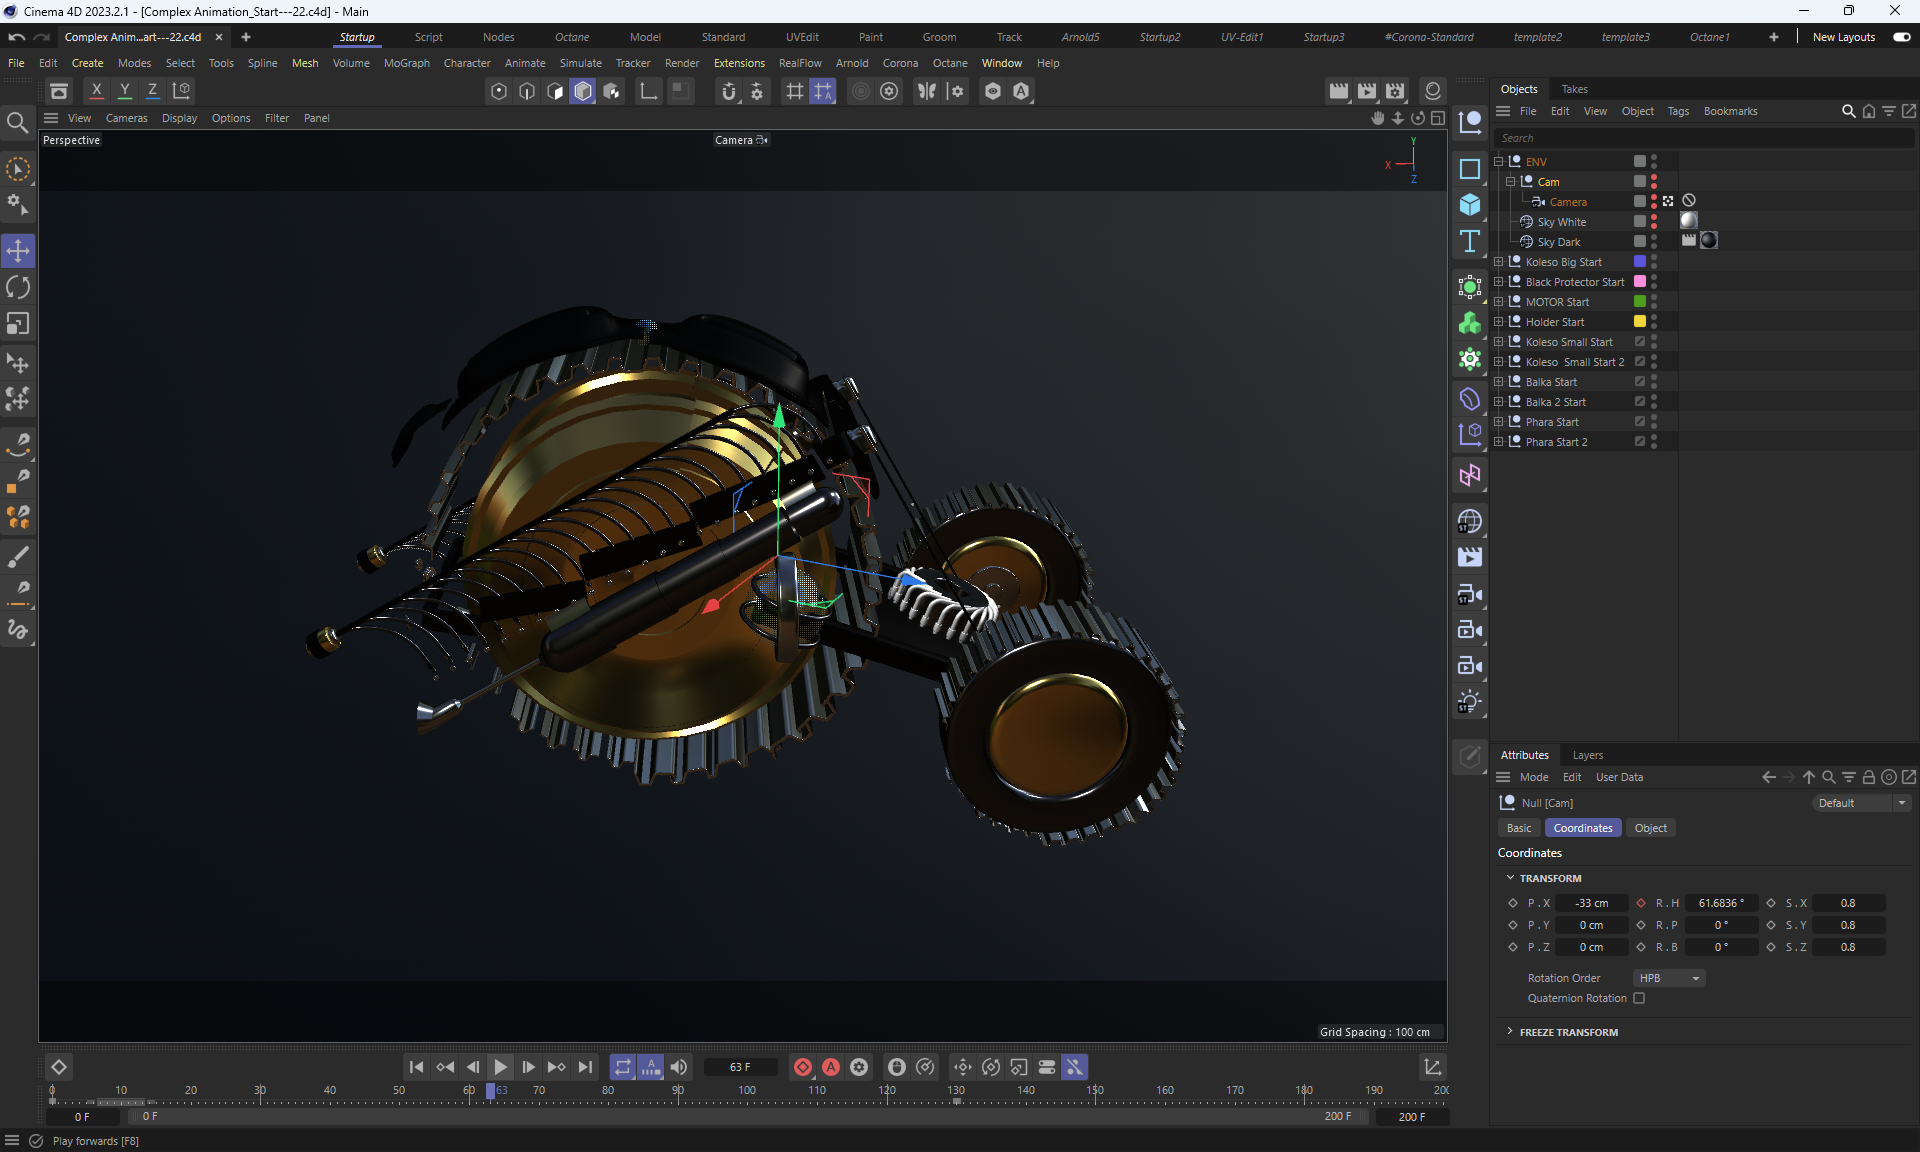
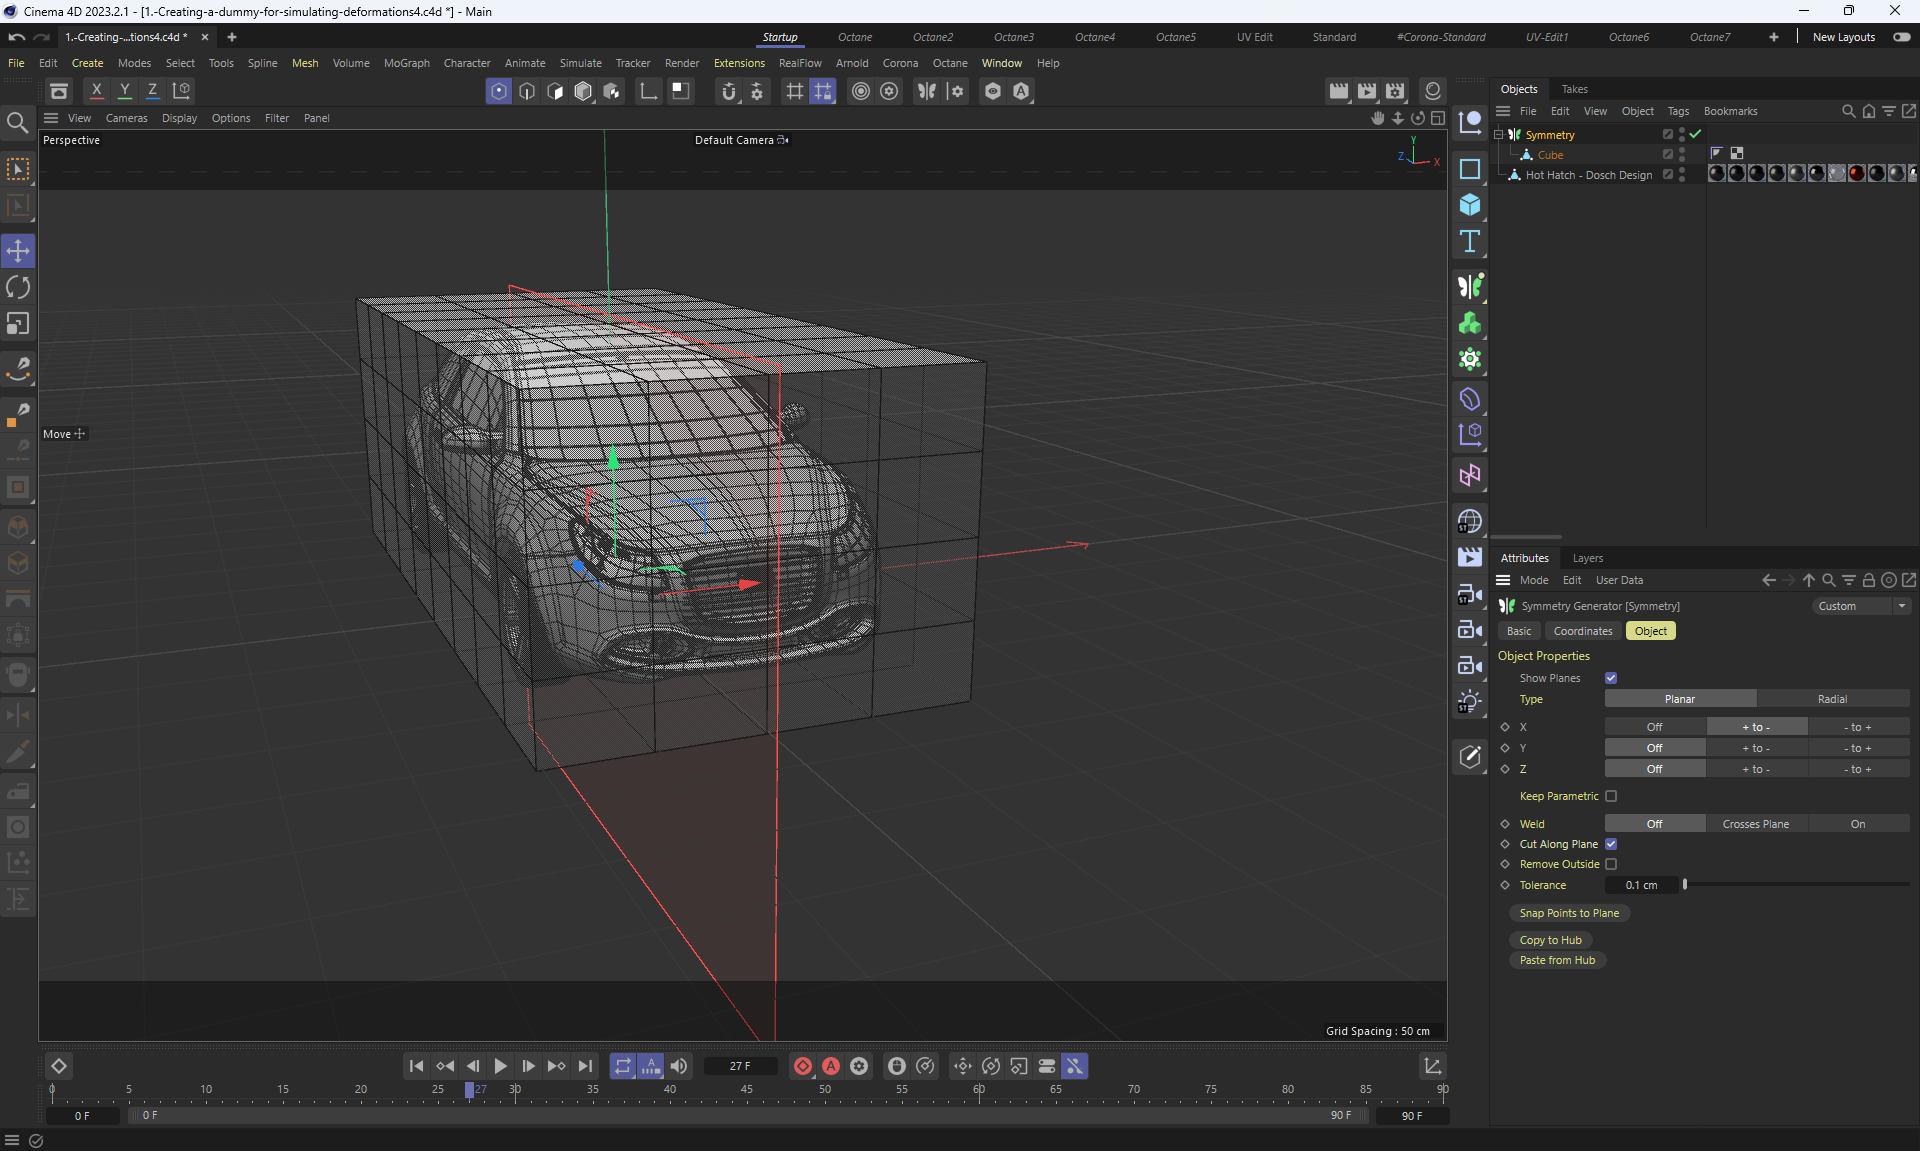
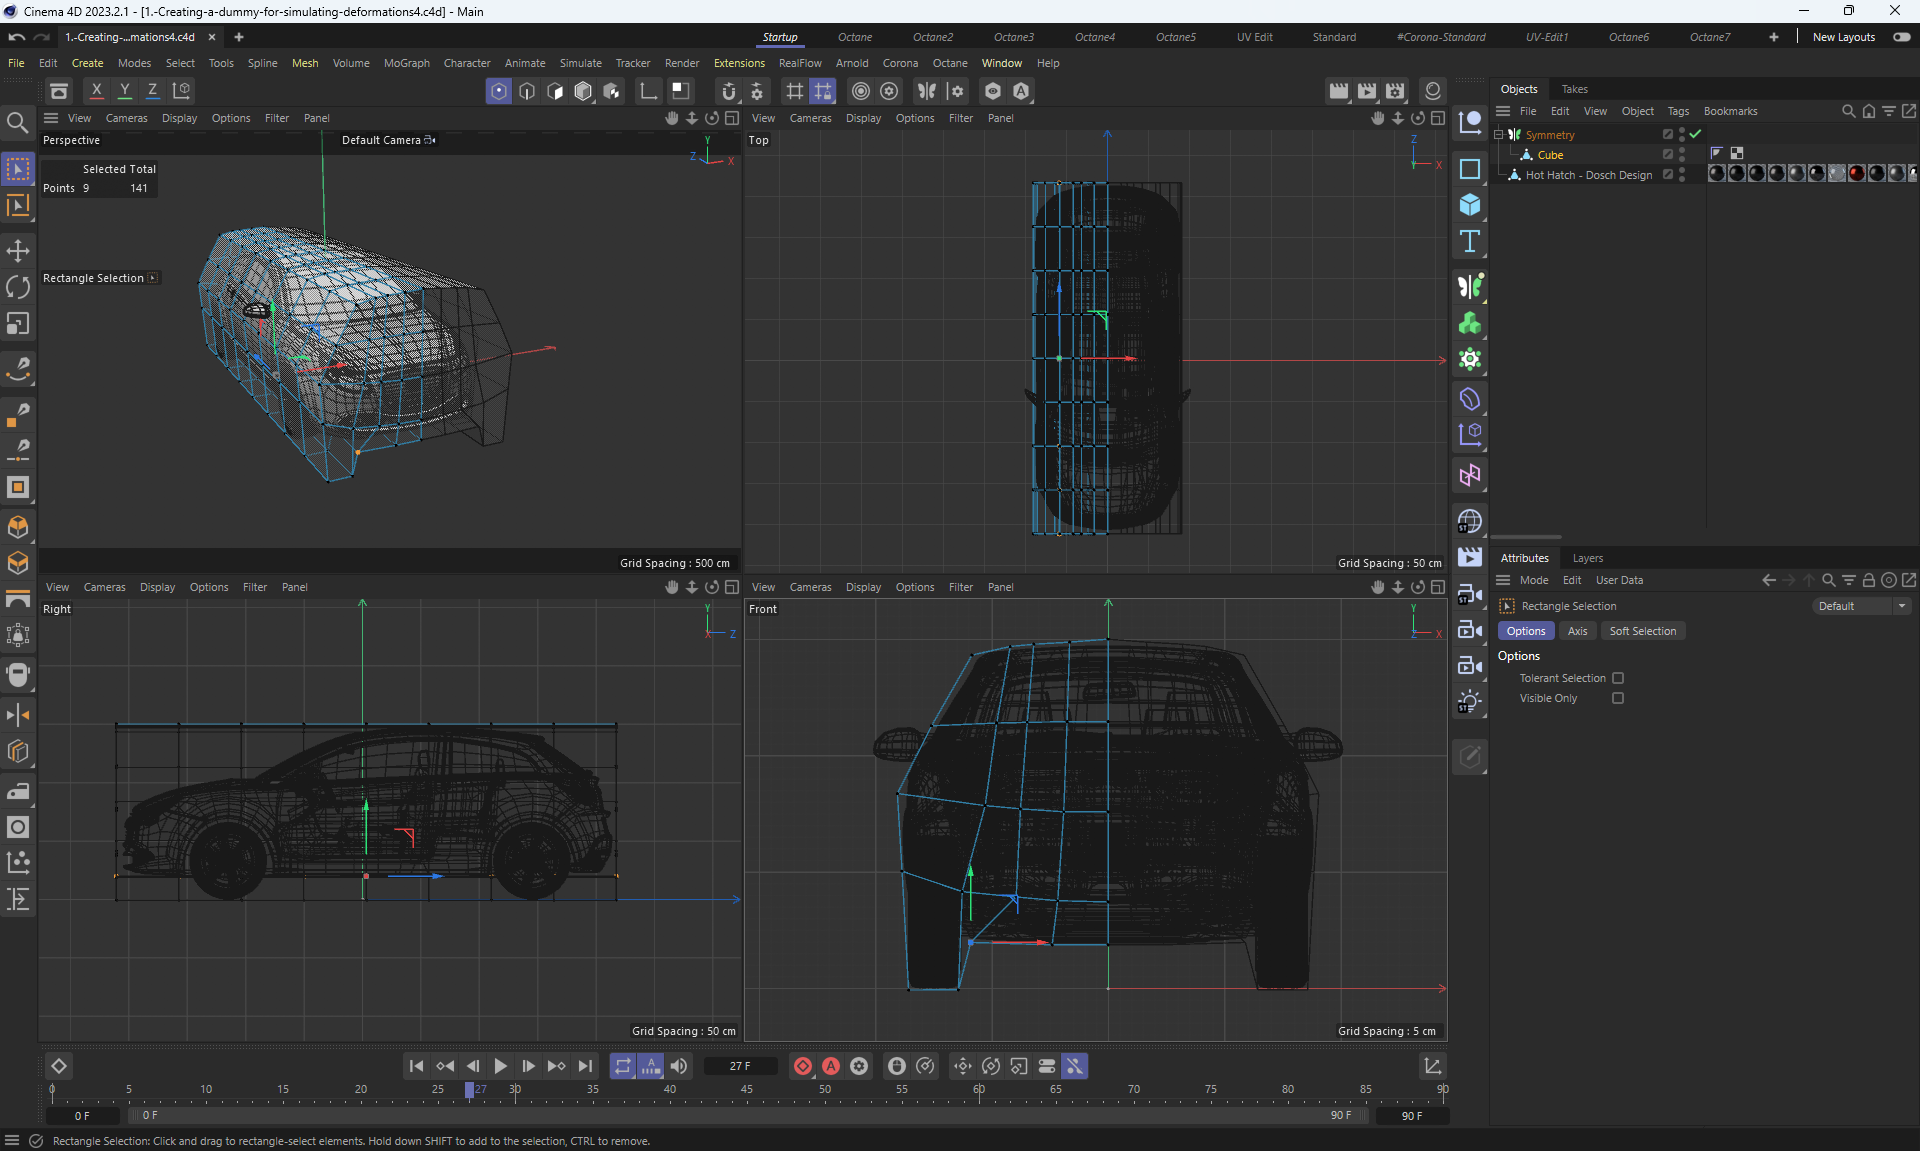
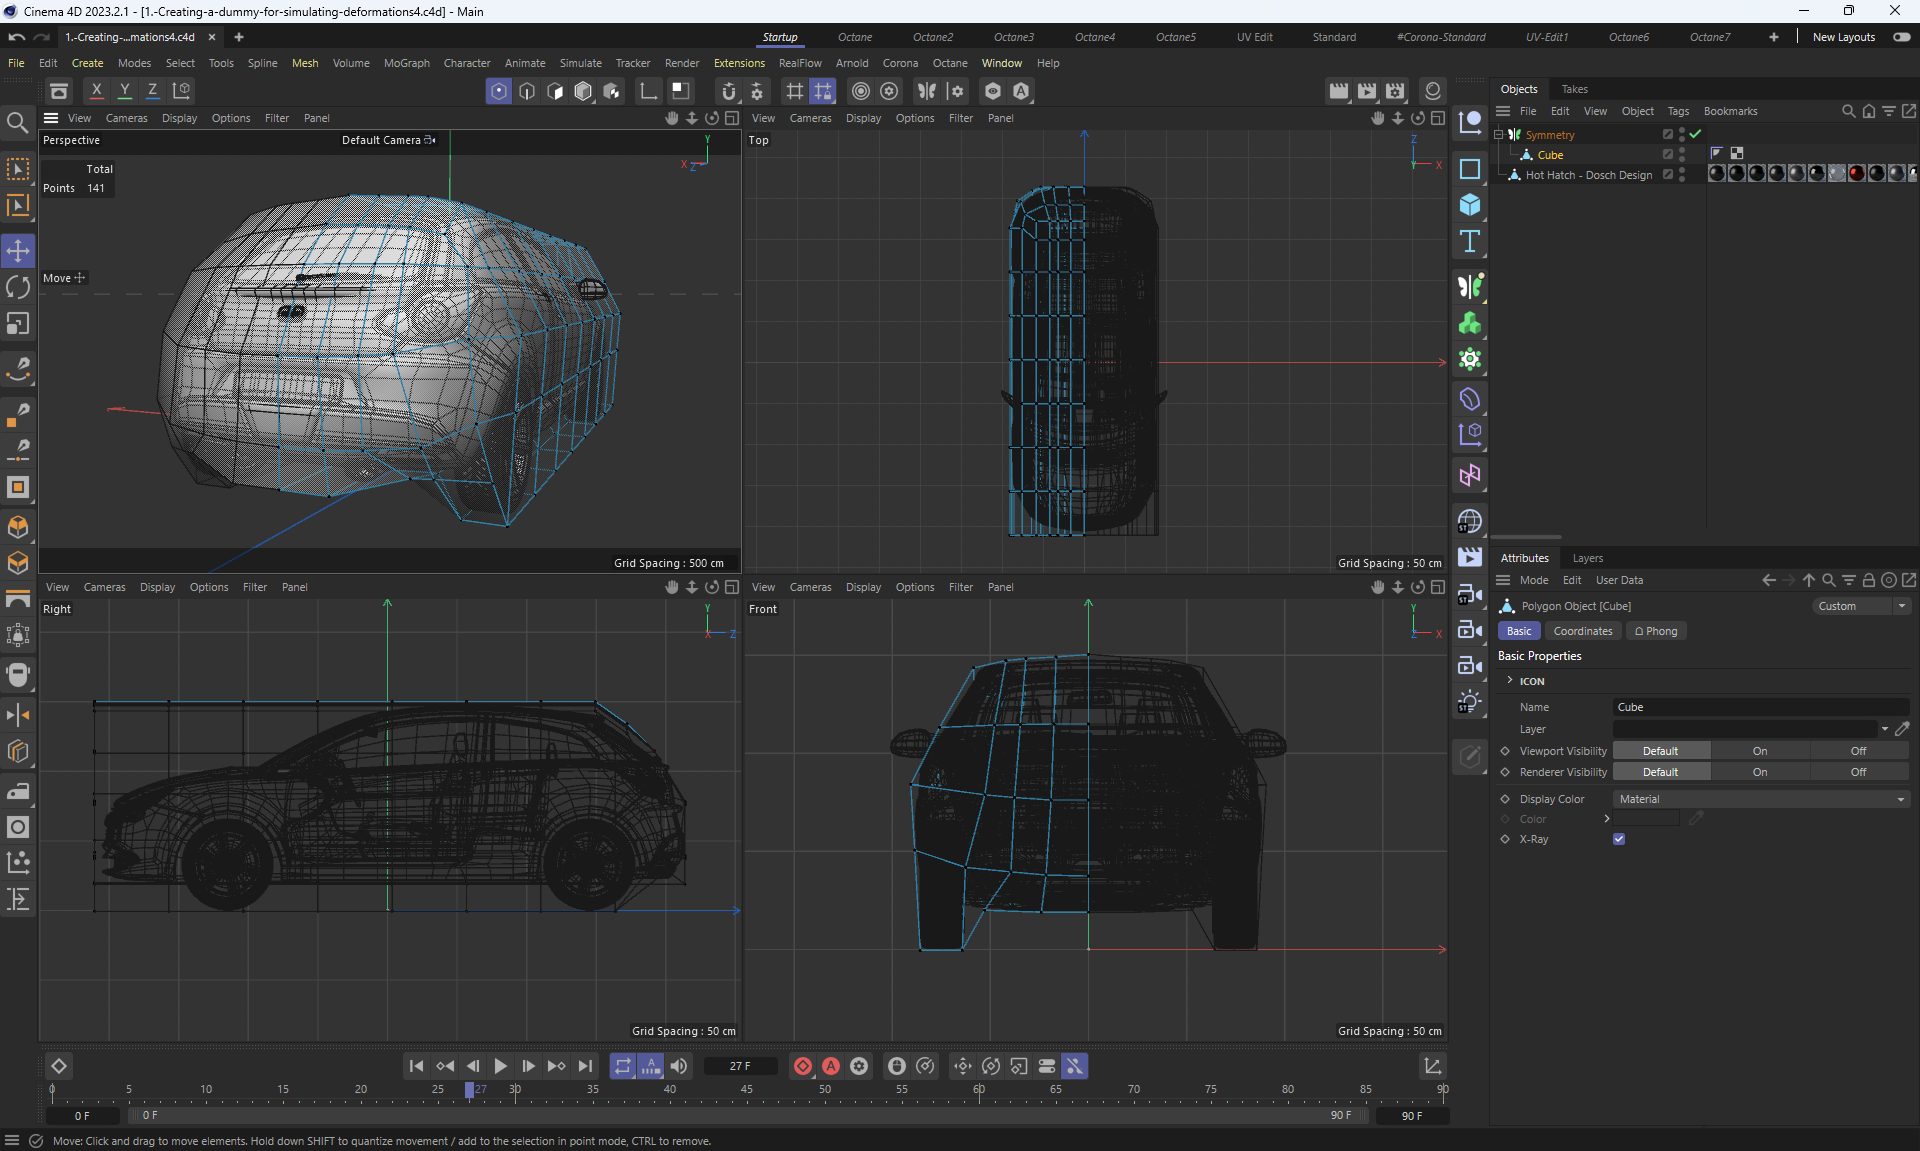
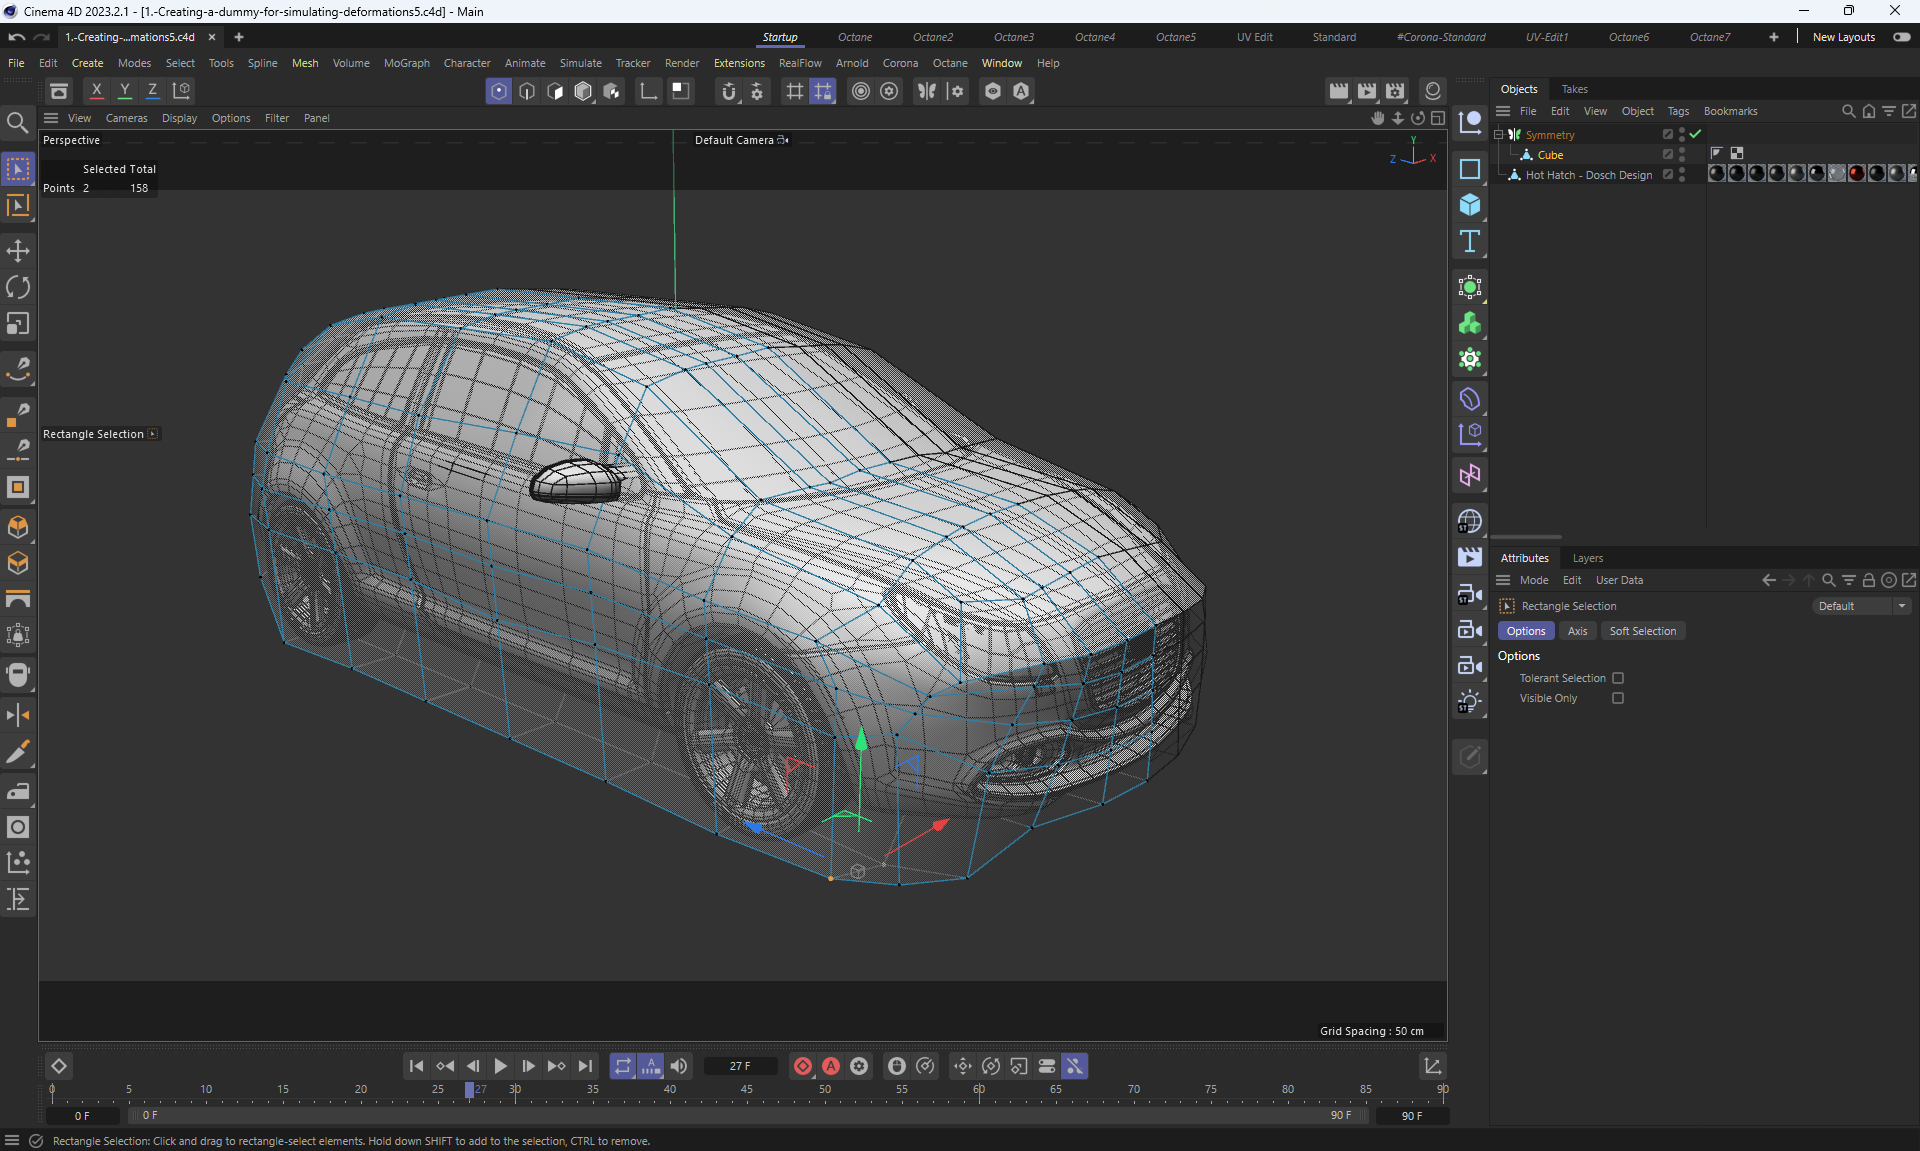
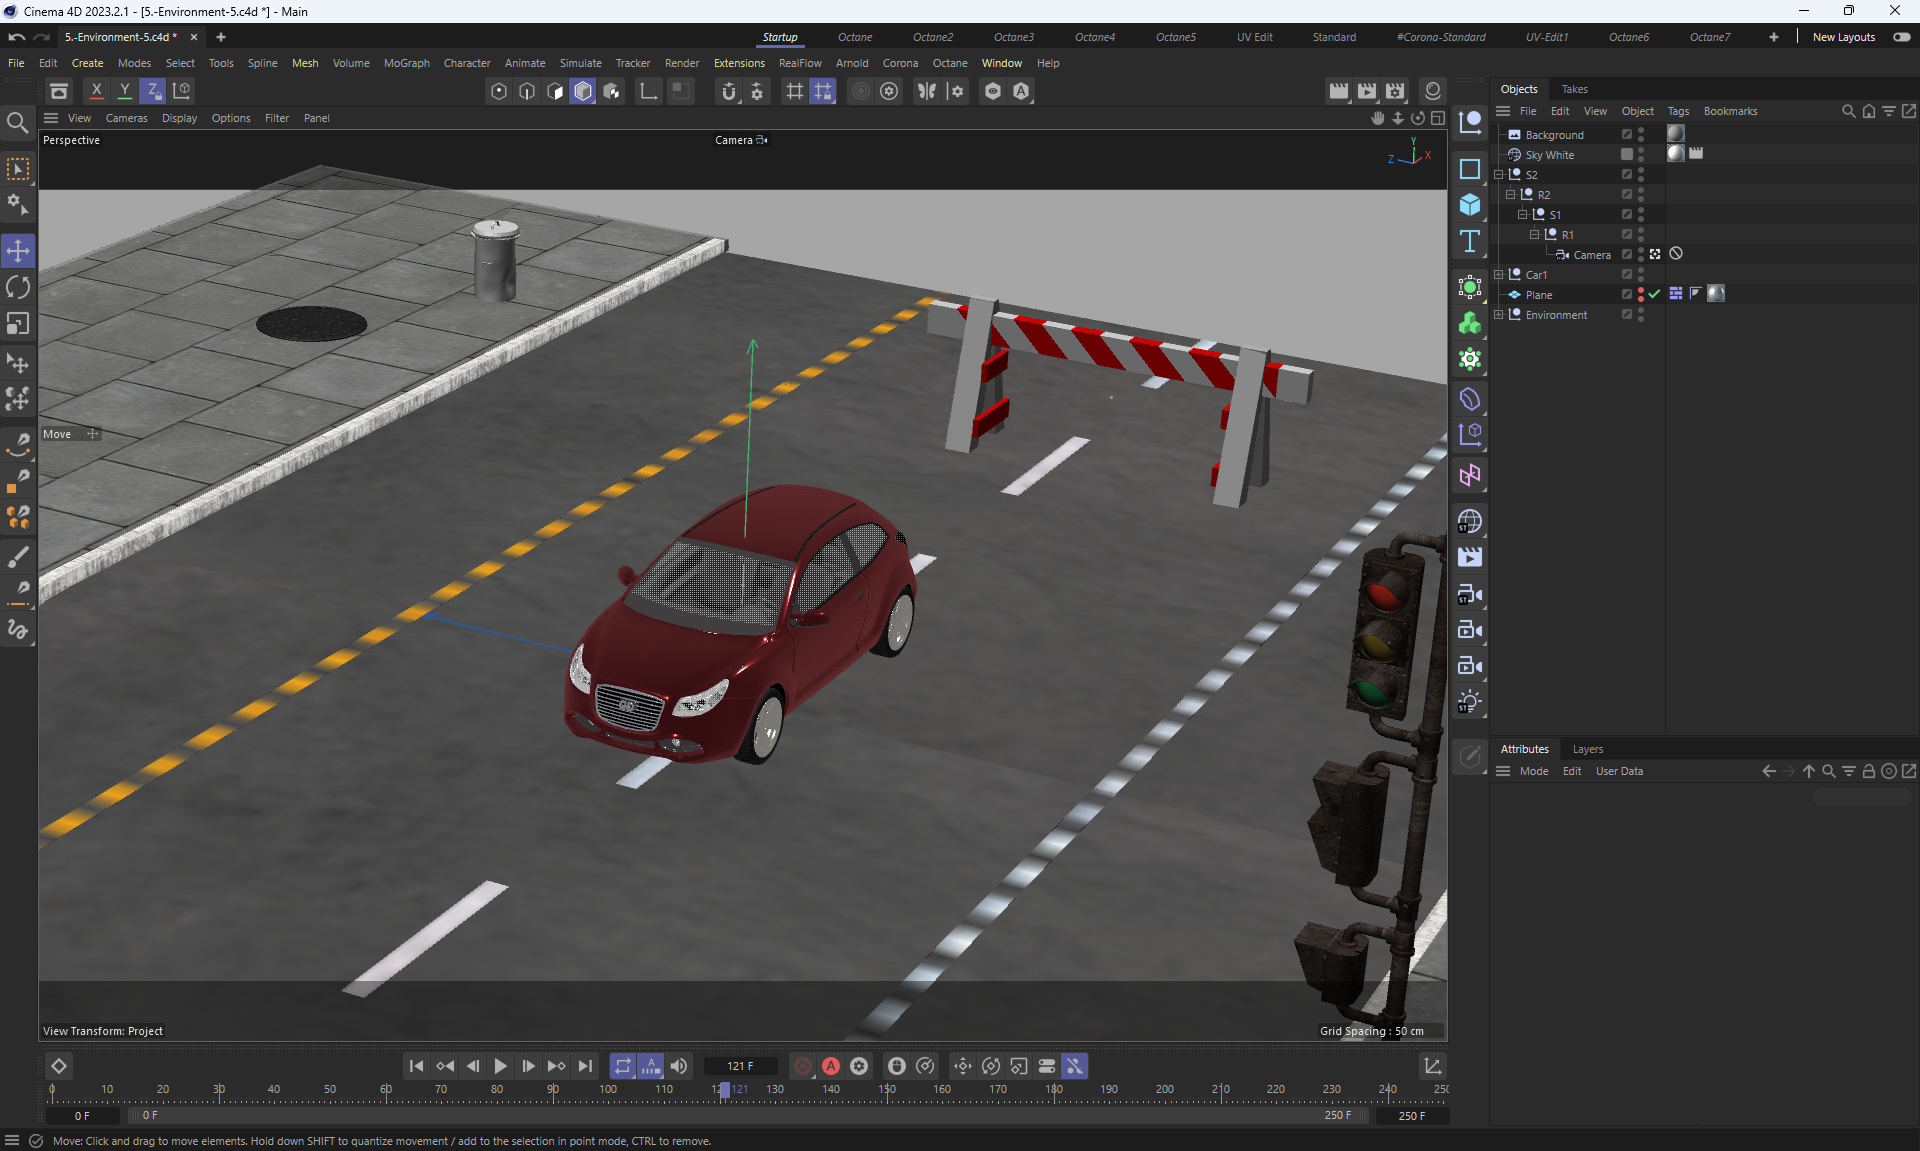
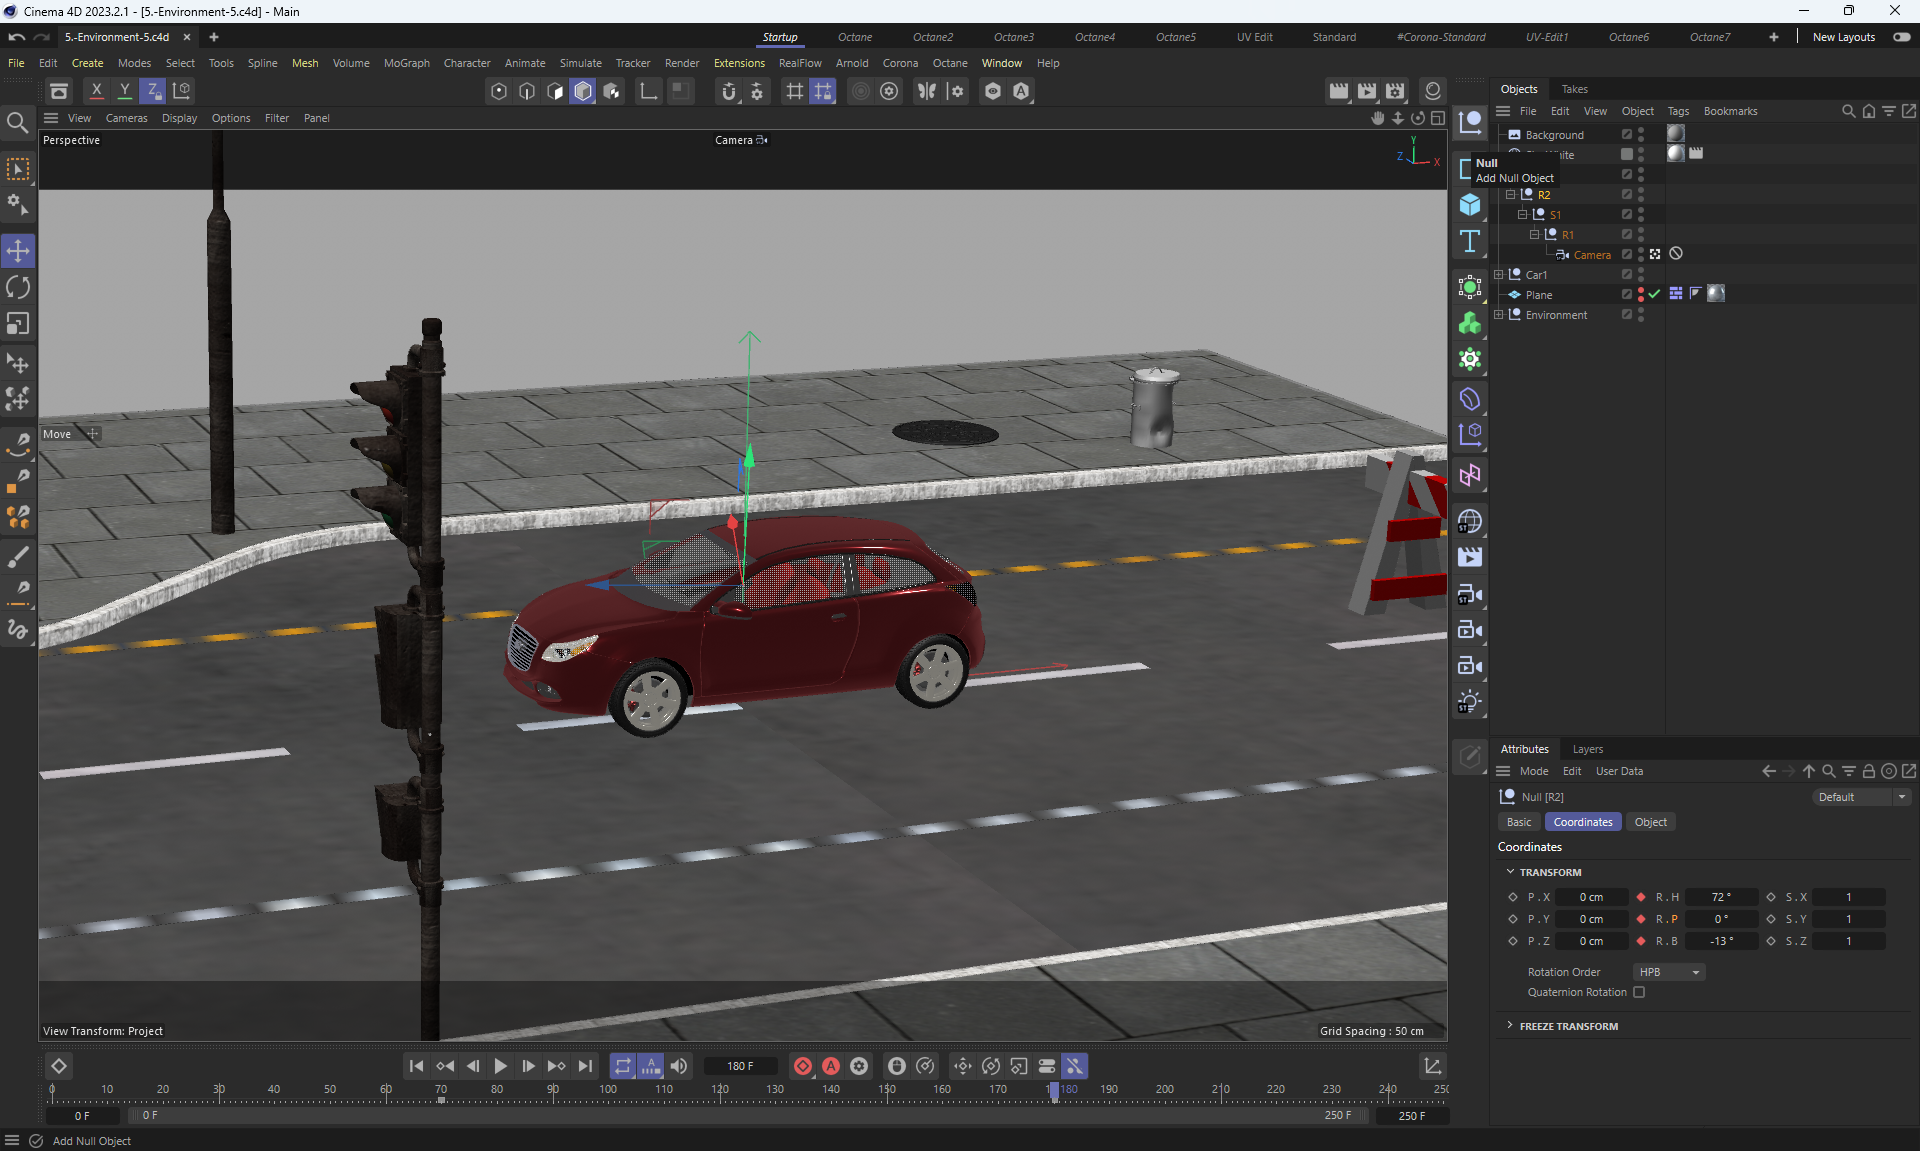
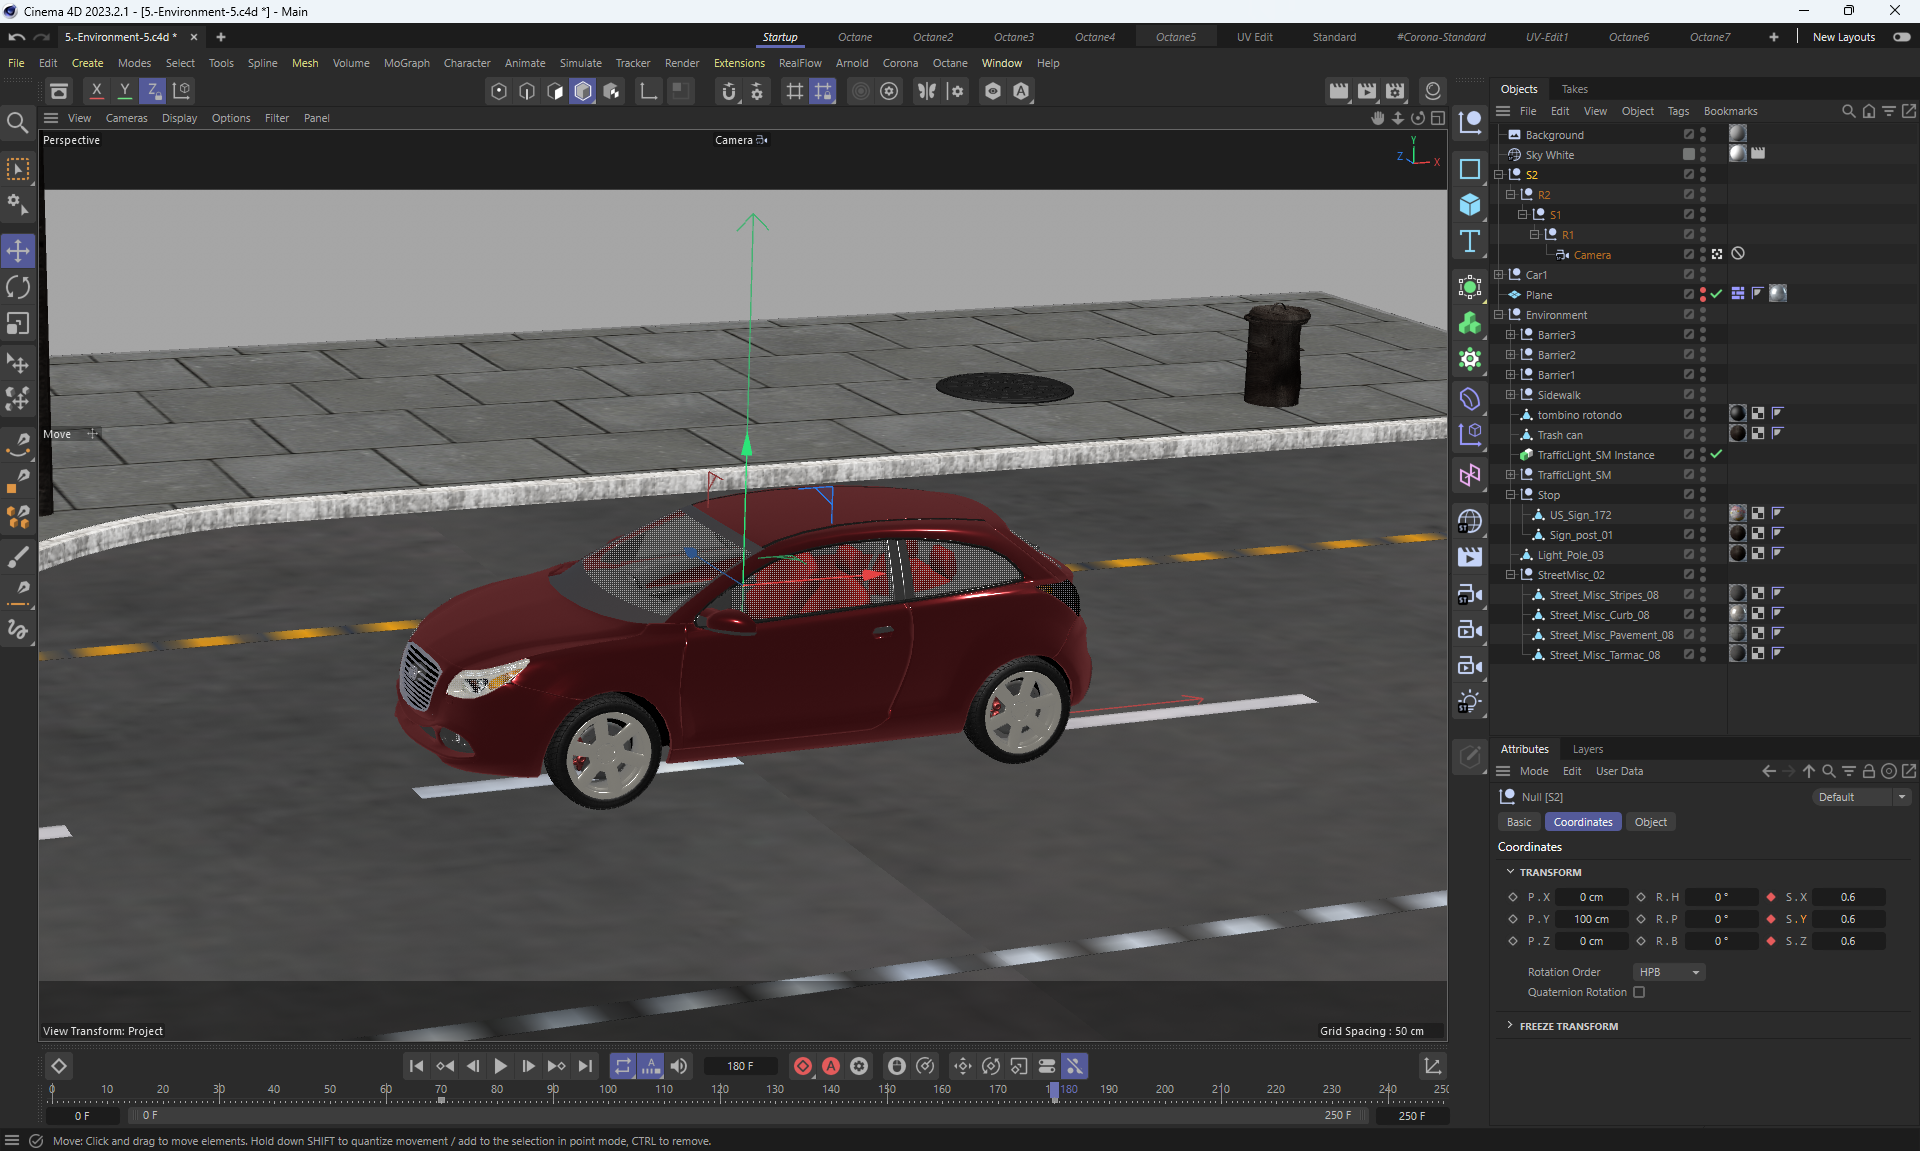
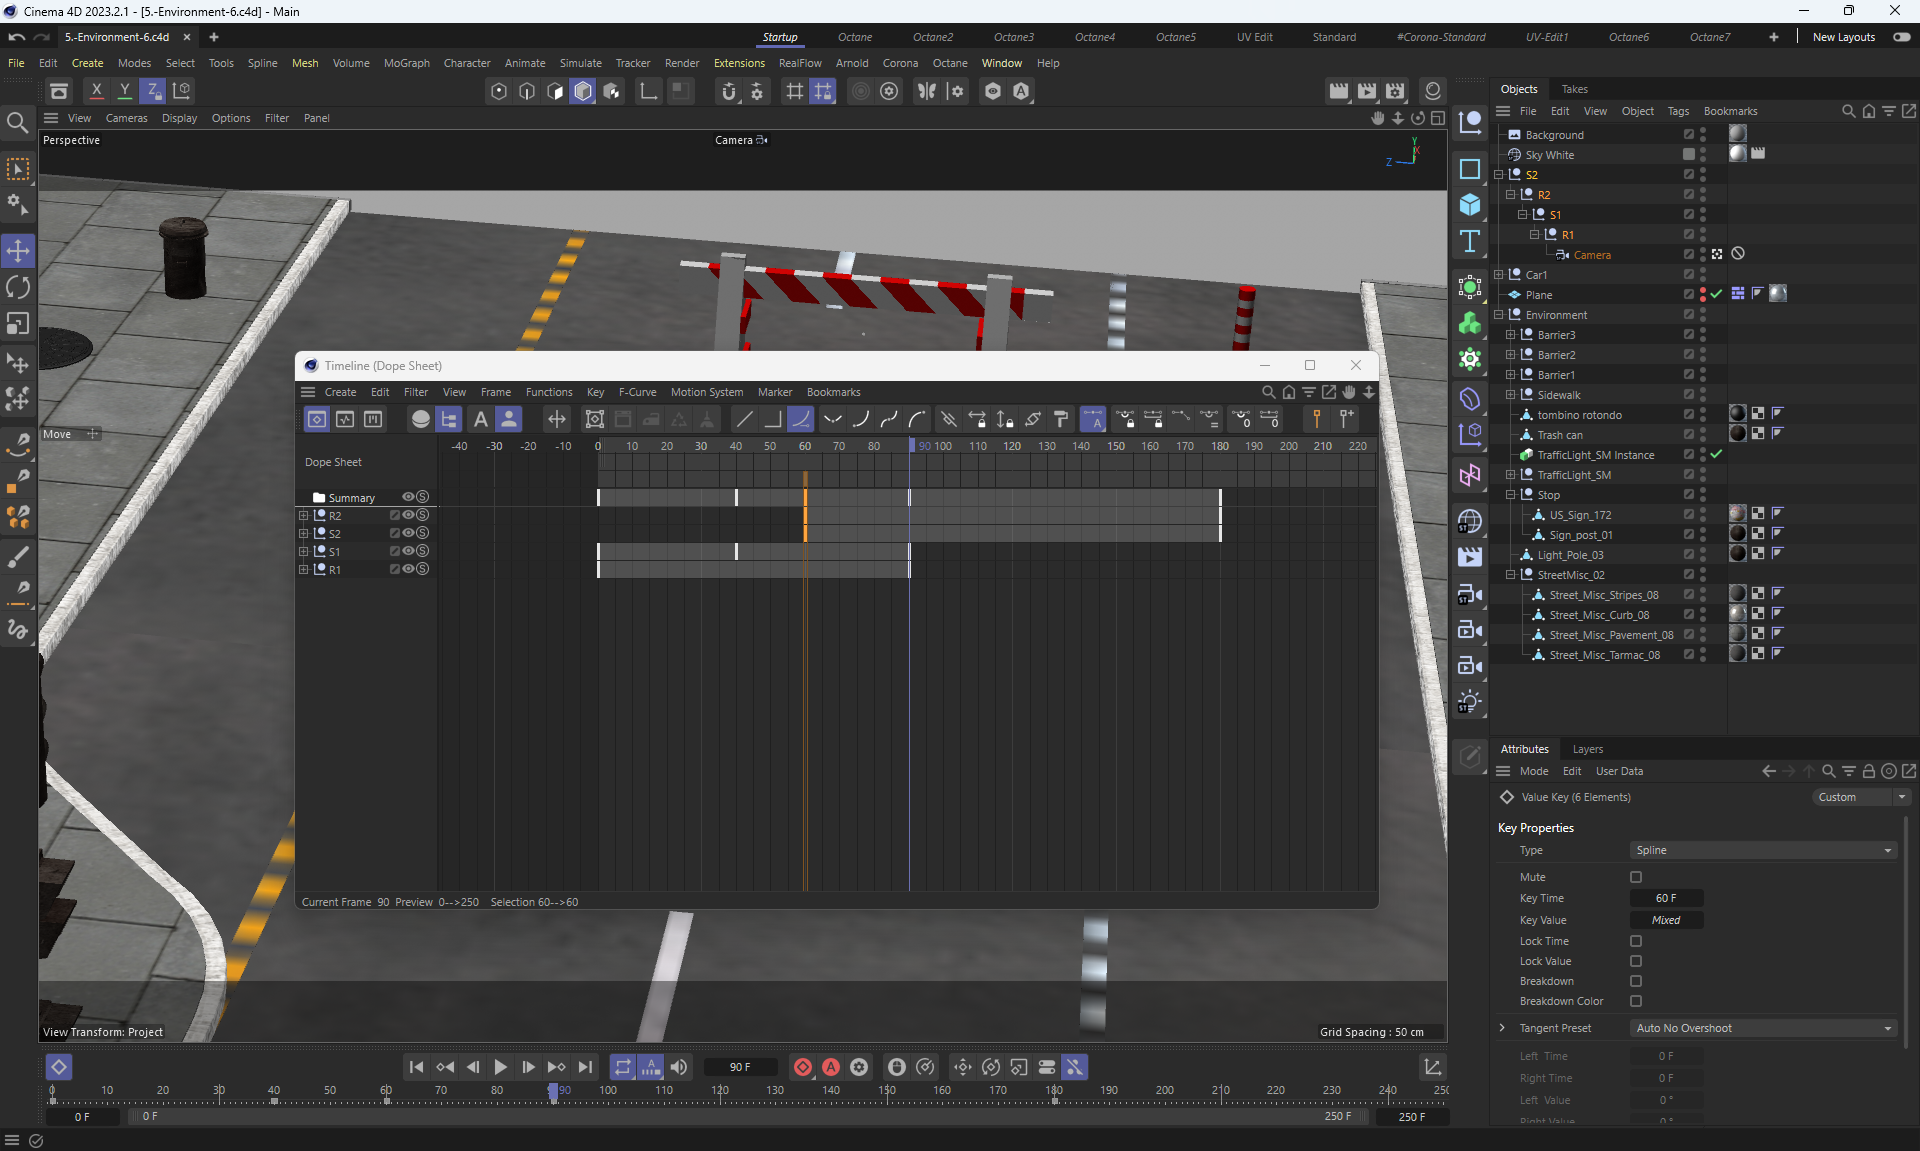
2. Animation of complex objects
Video1 (3.5mb)
image1
video2 (3.6mb)
image2
video3 (3.2mb)
image3
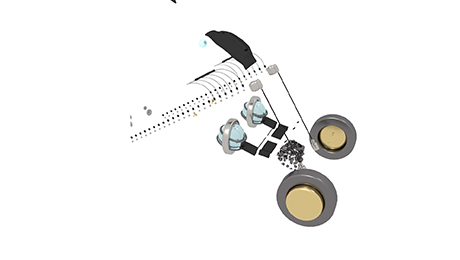
video4 (3.6mb)
image4
video5 (3.9mb)
image5 Final
video6 (8mb)
image6
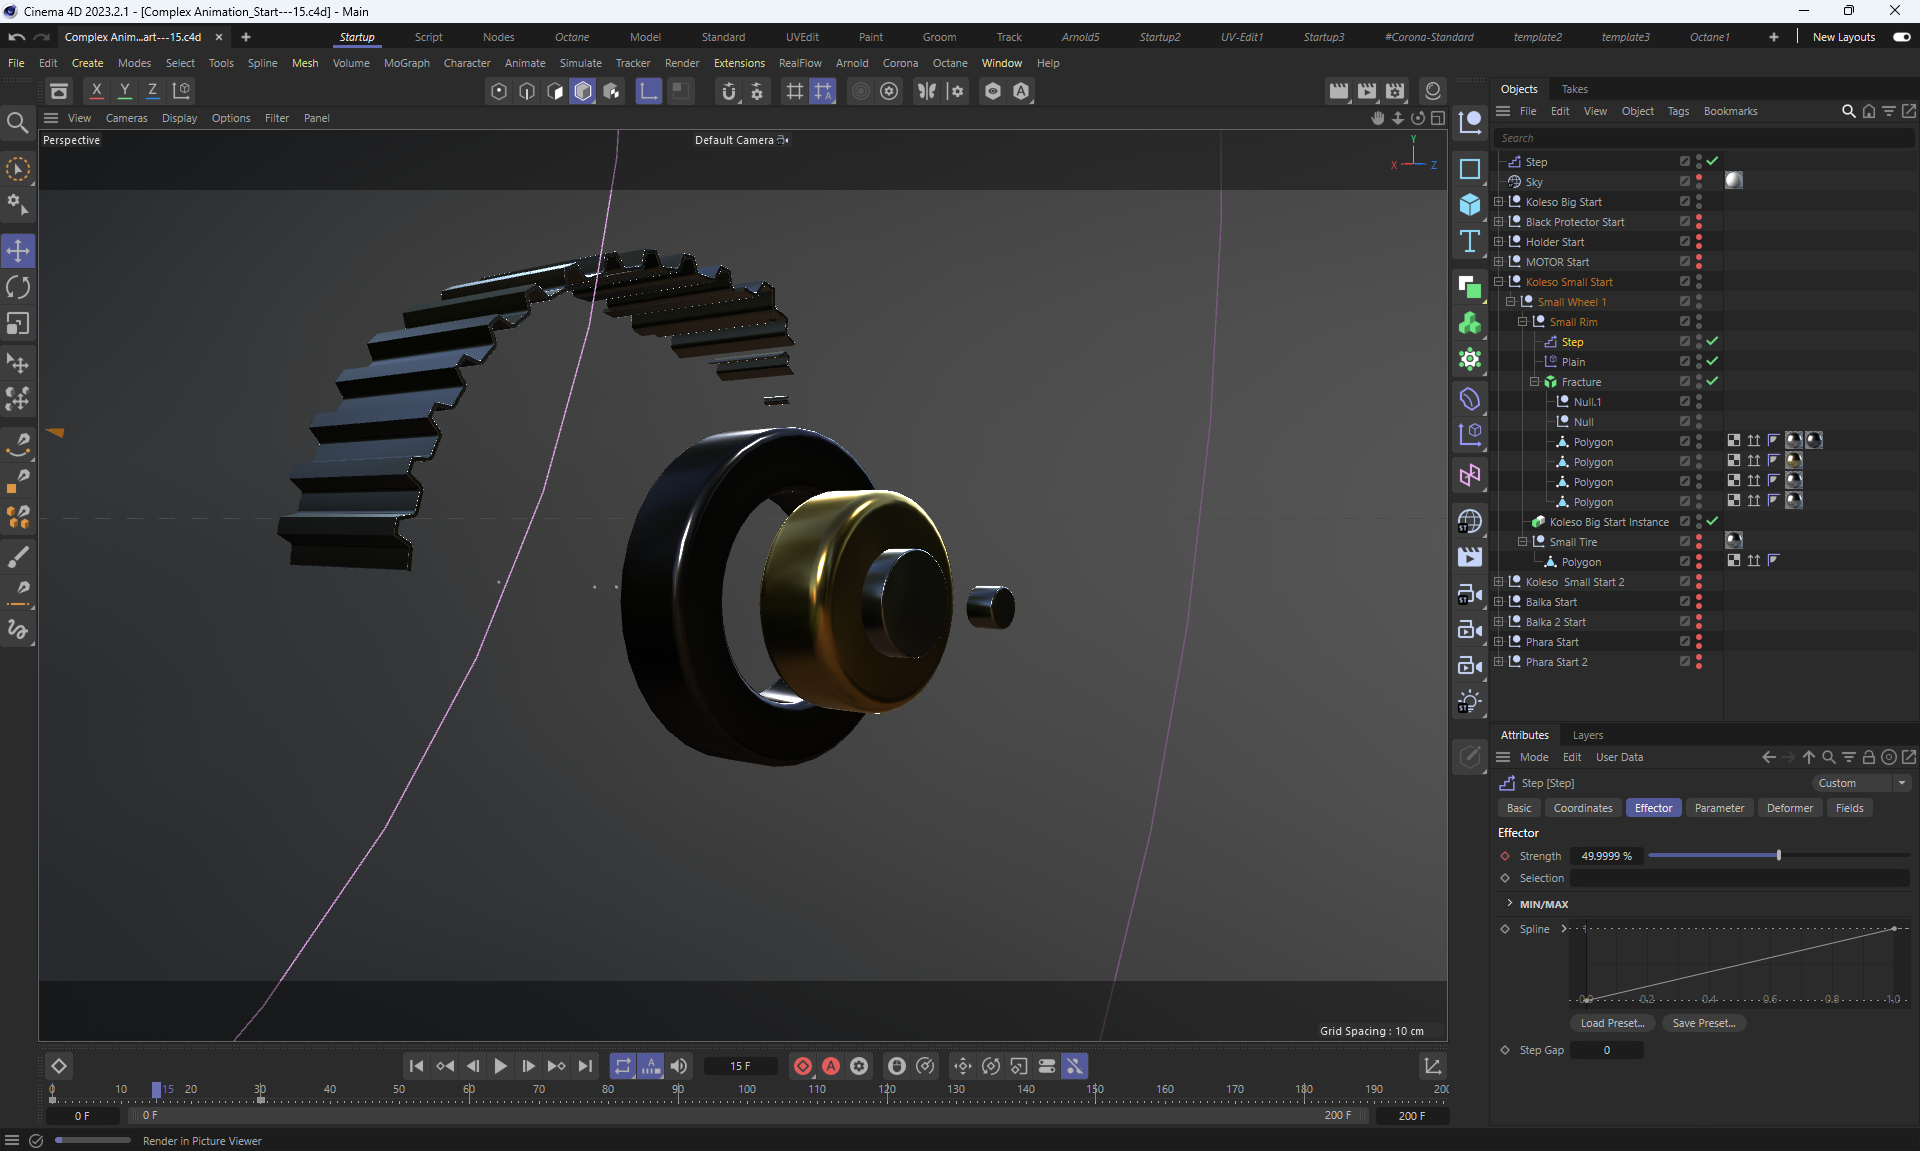
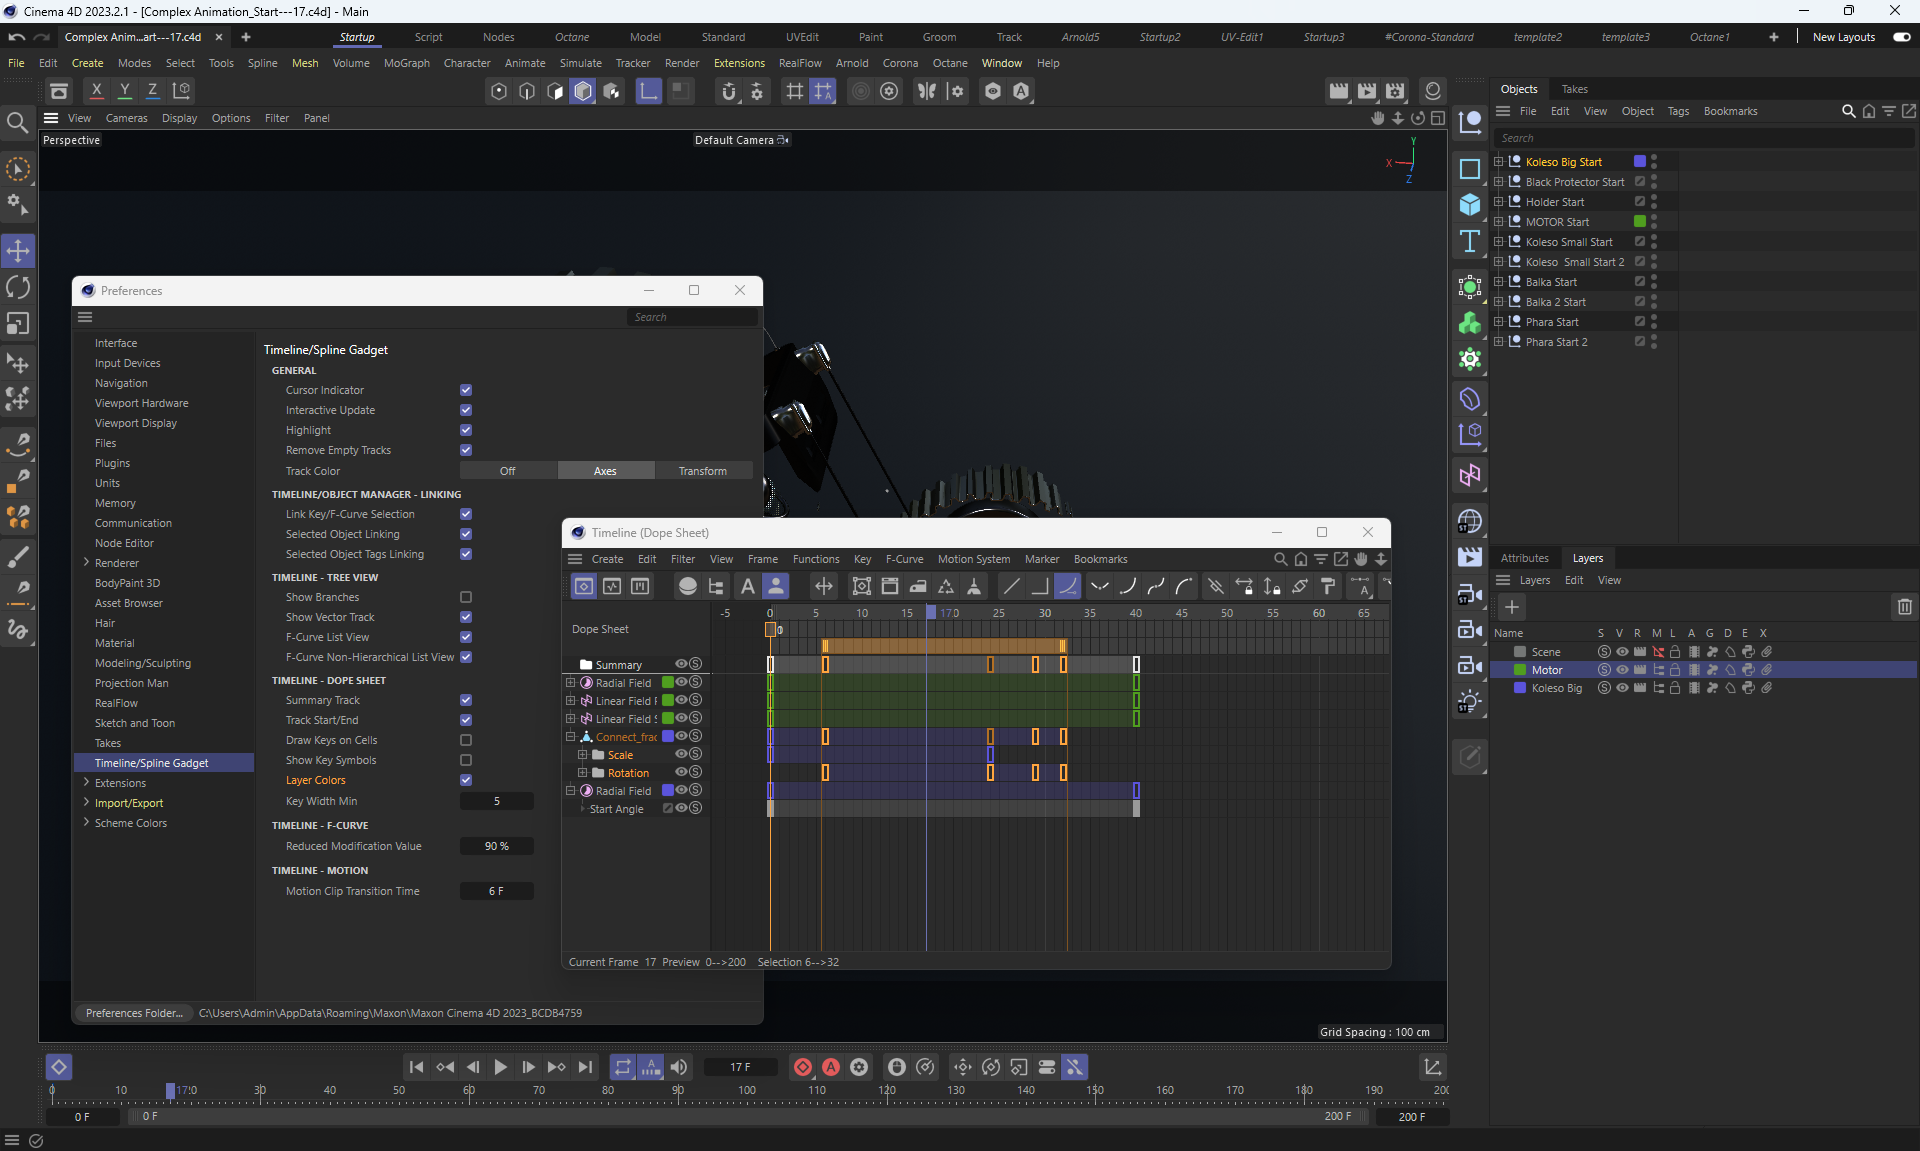
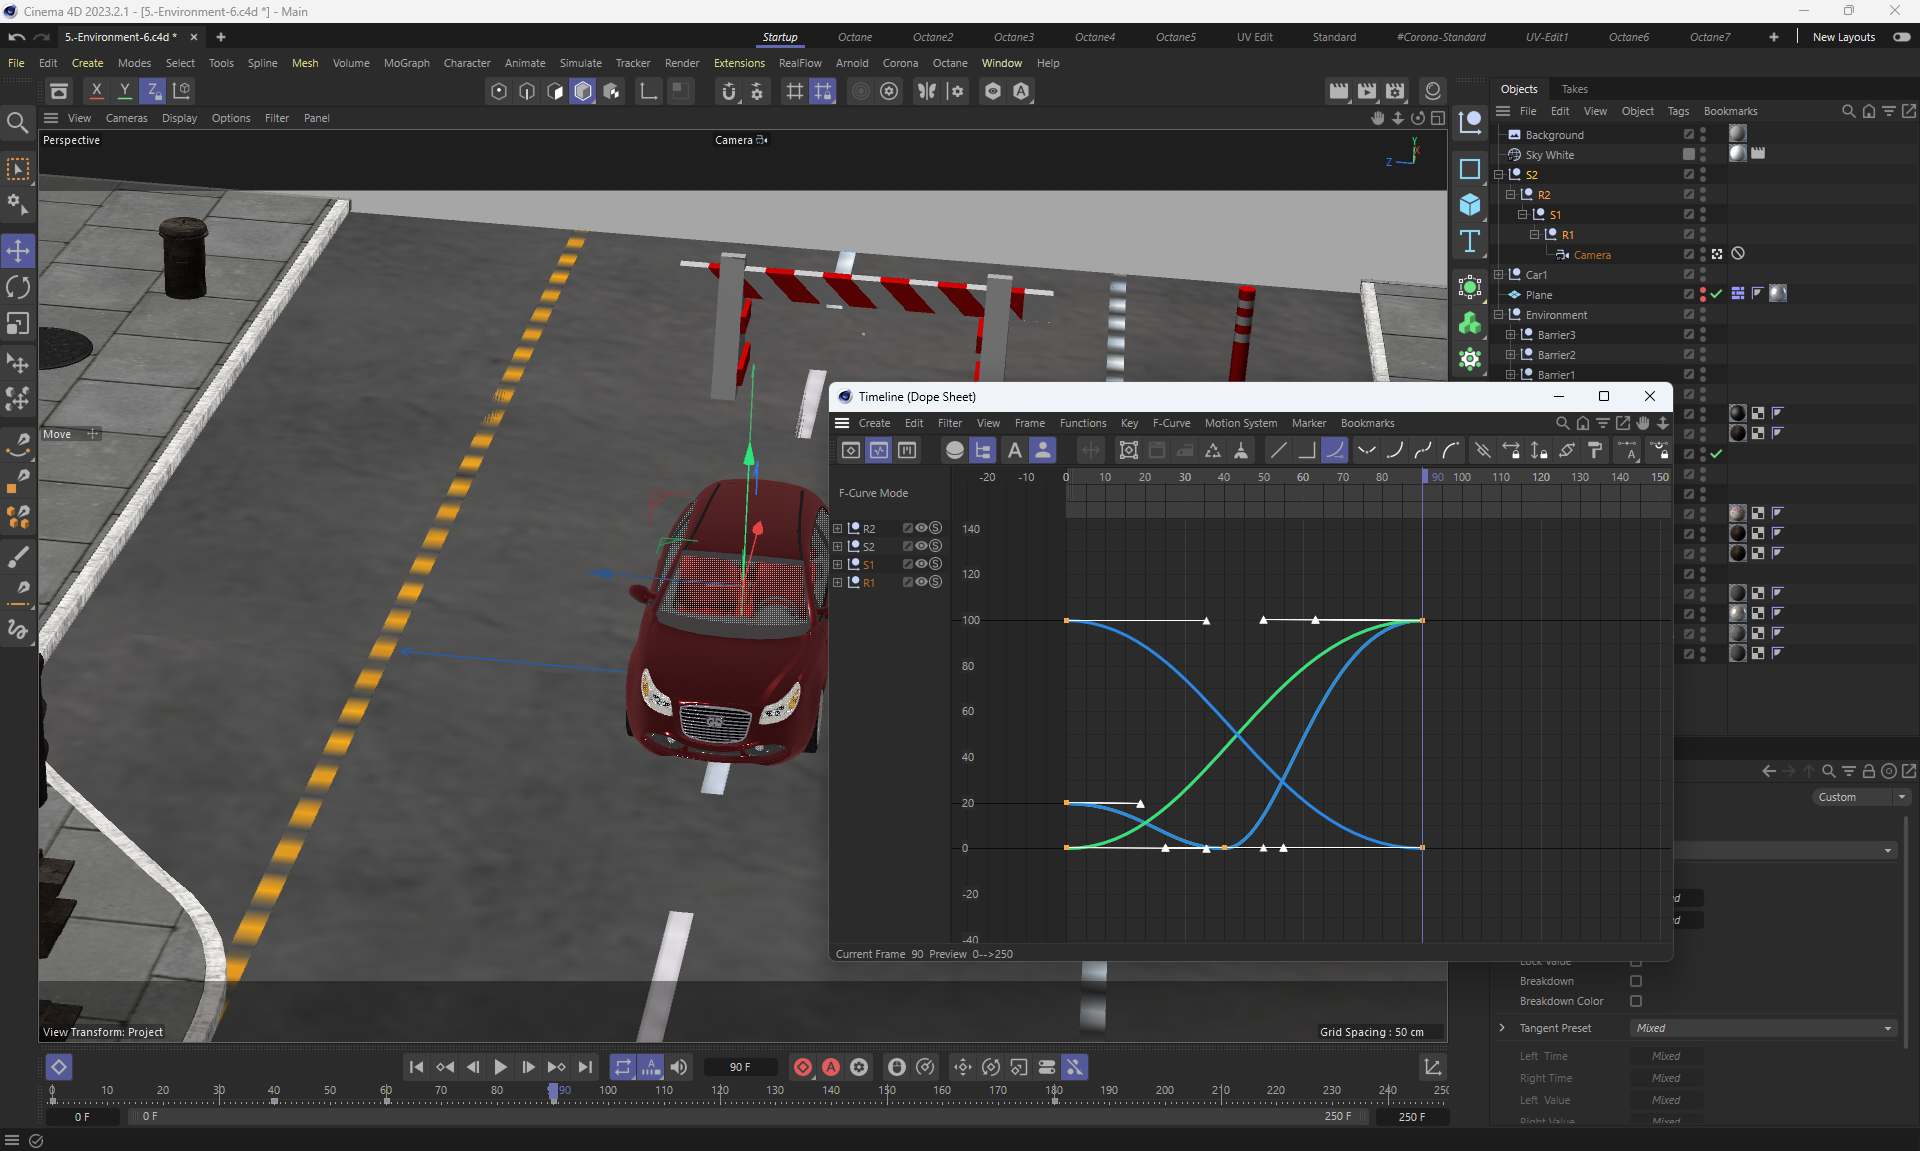
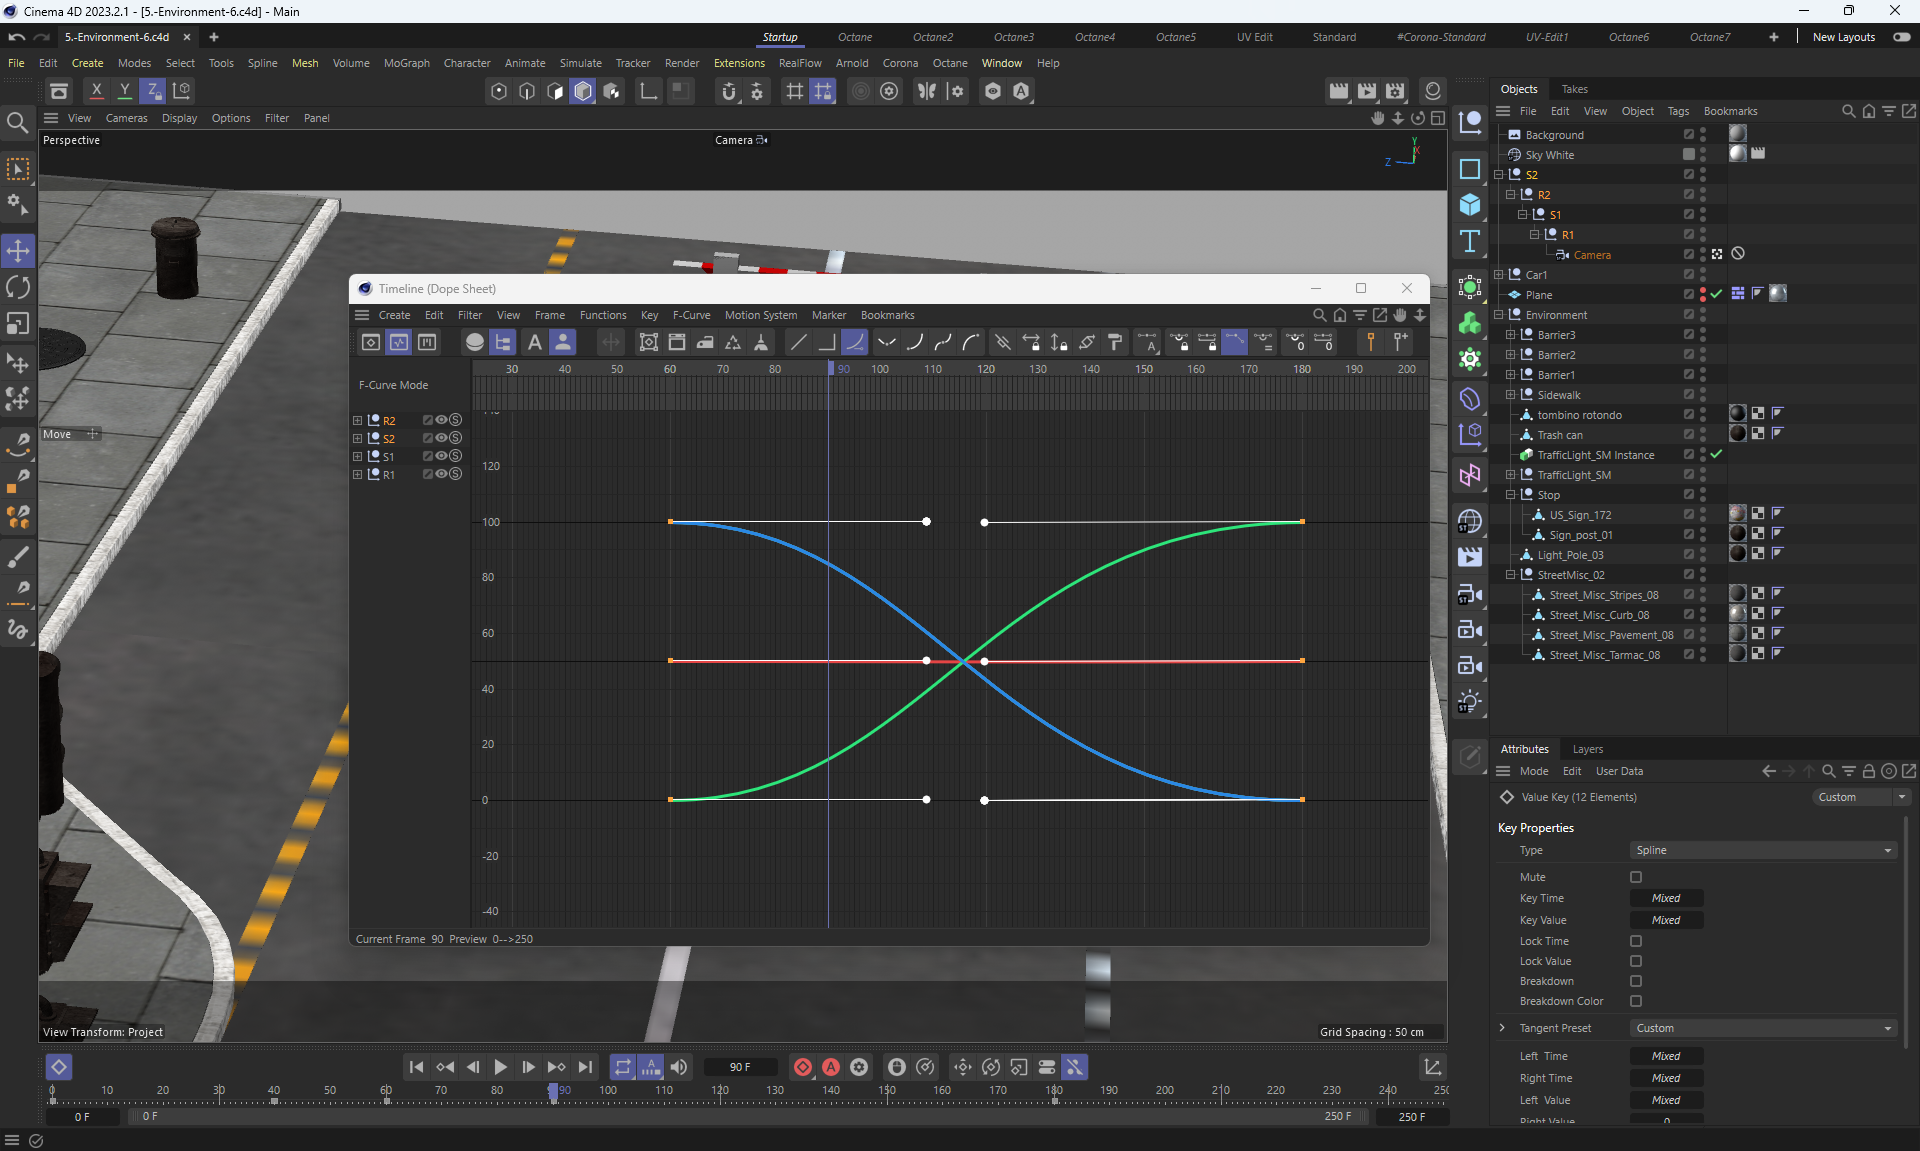
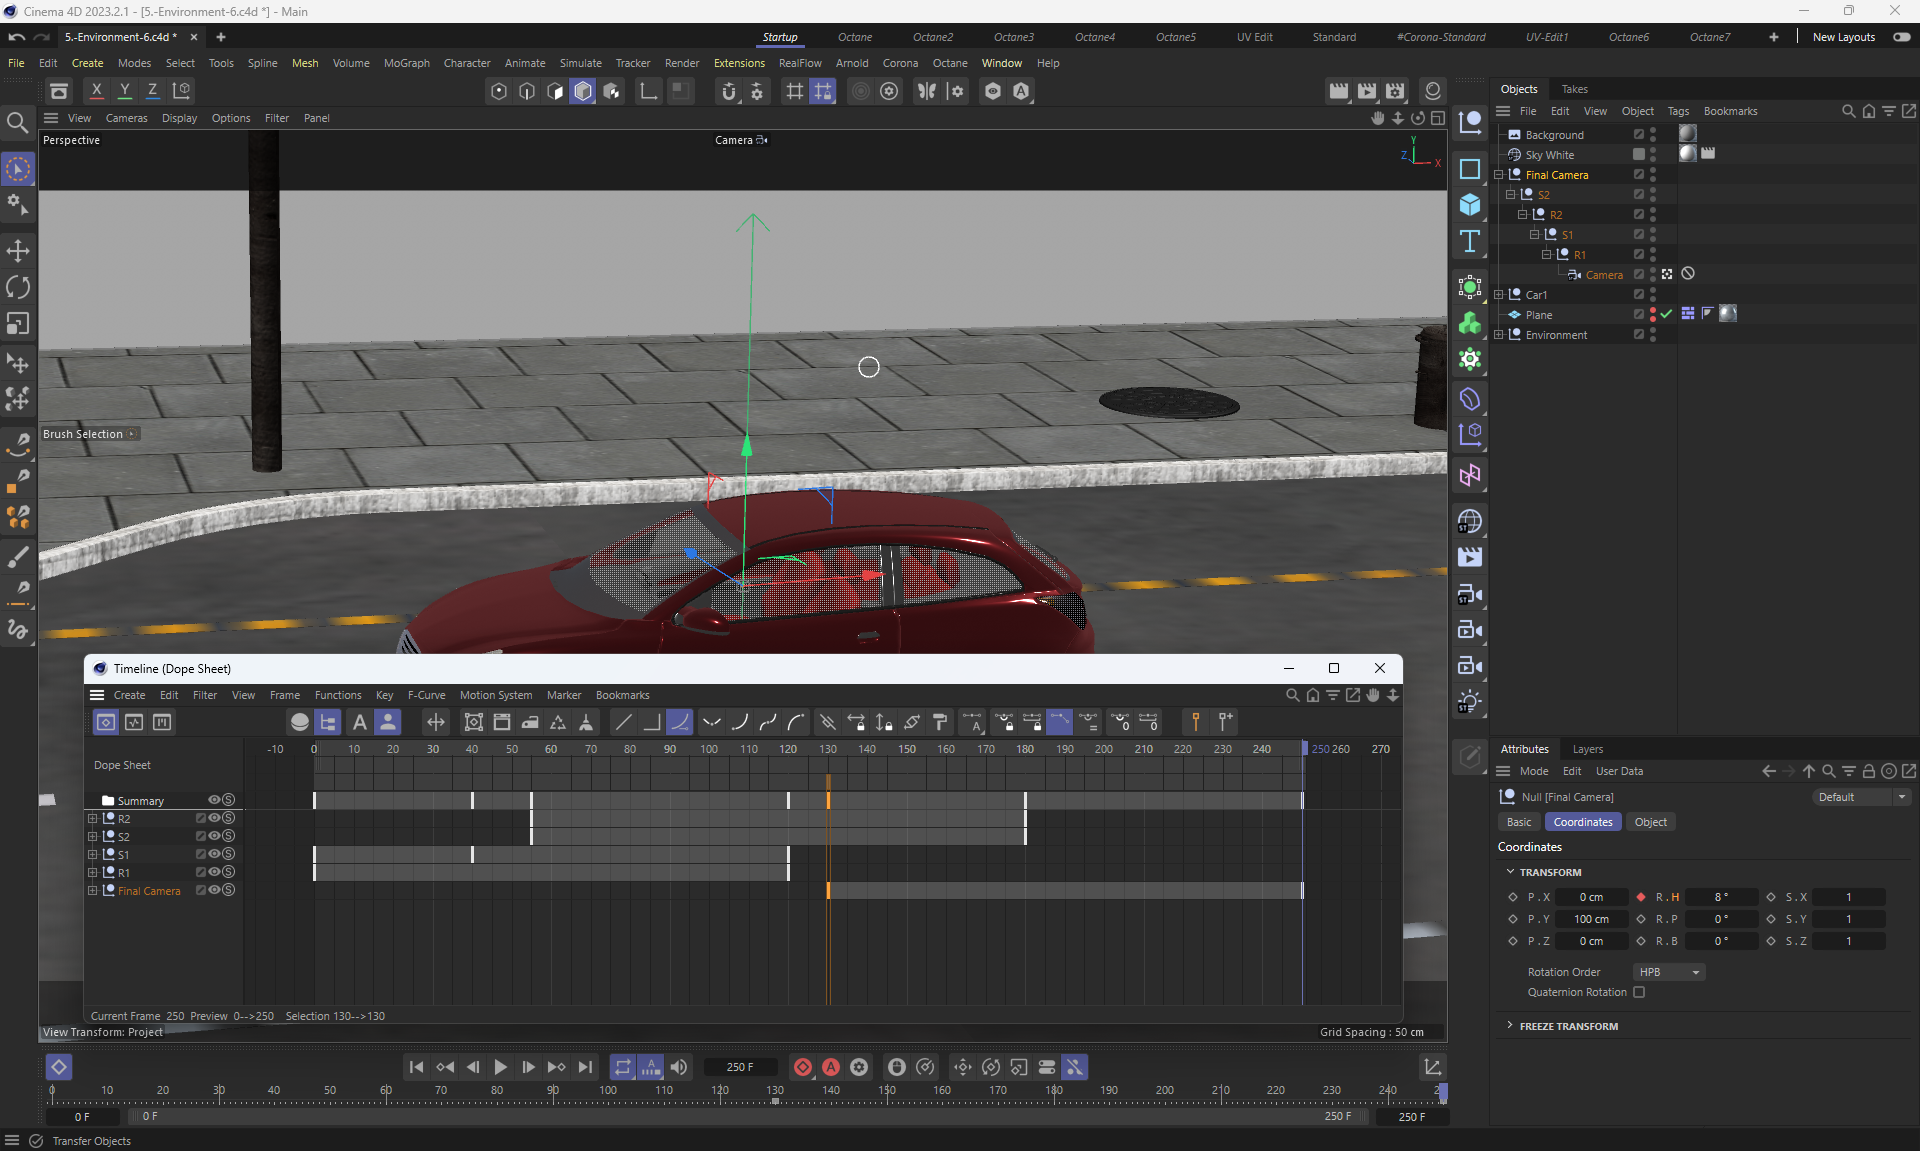
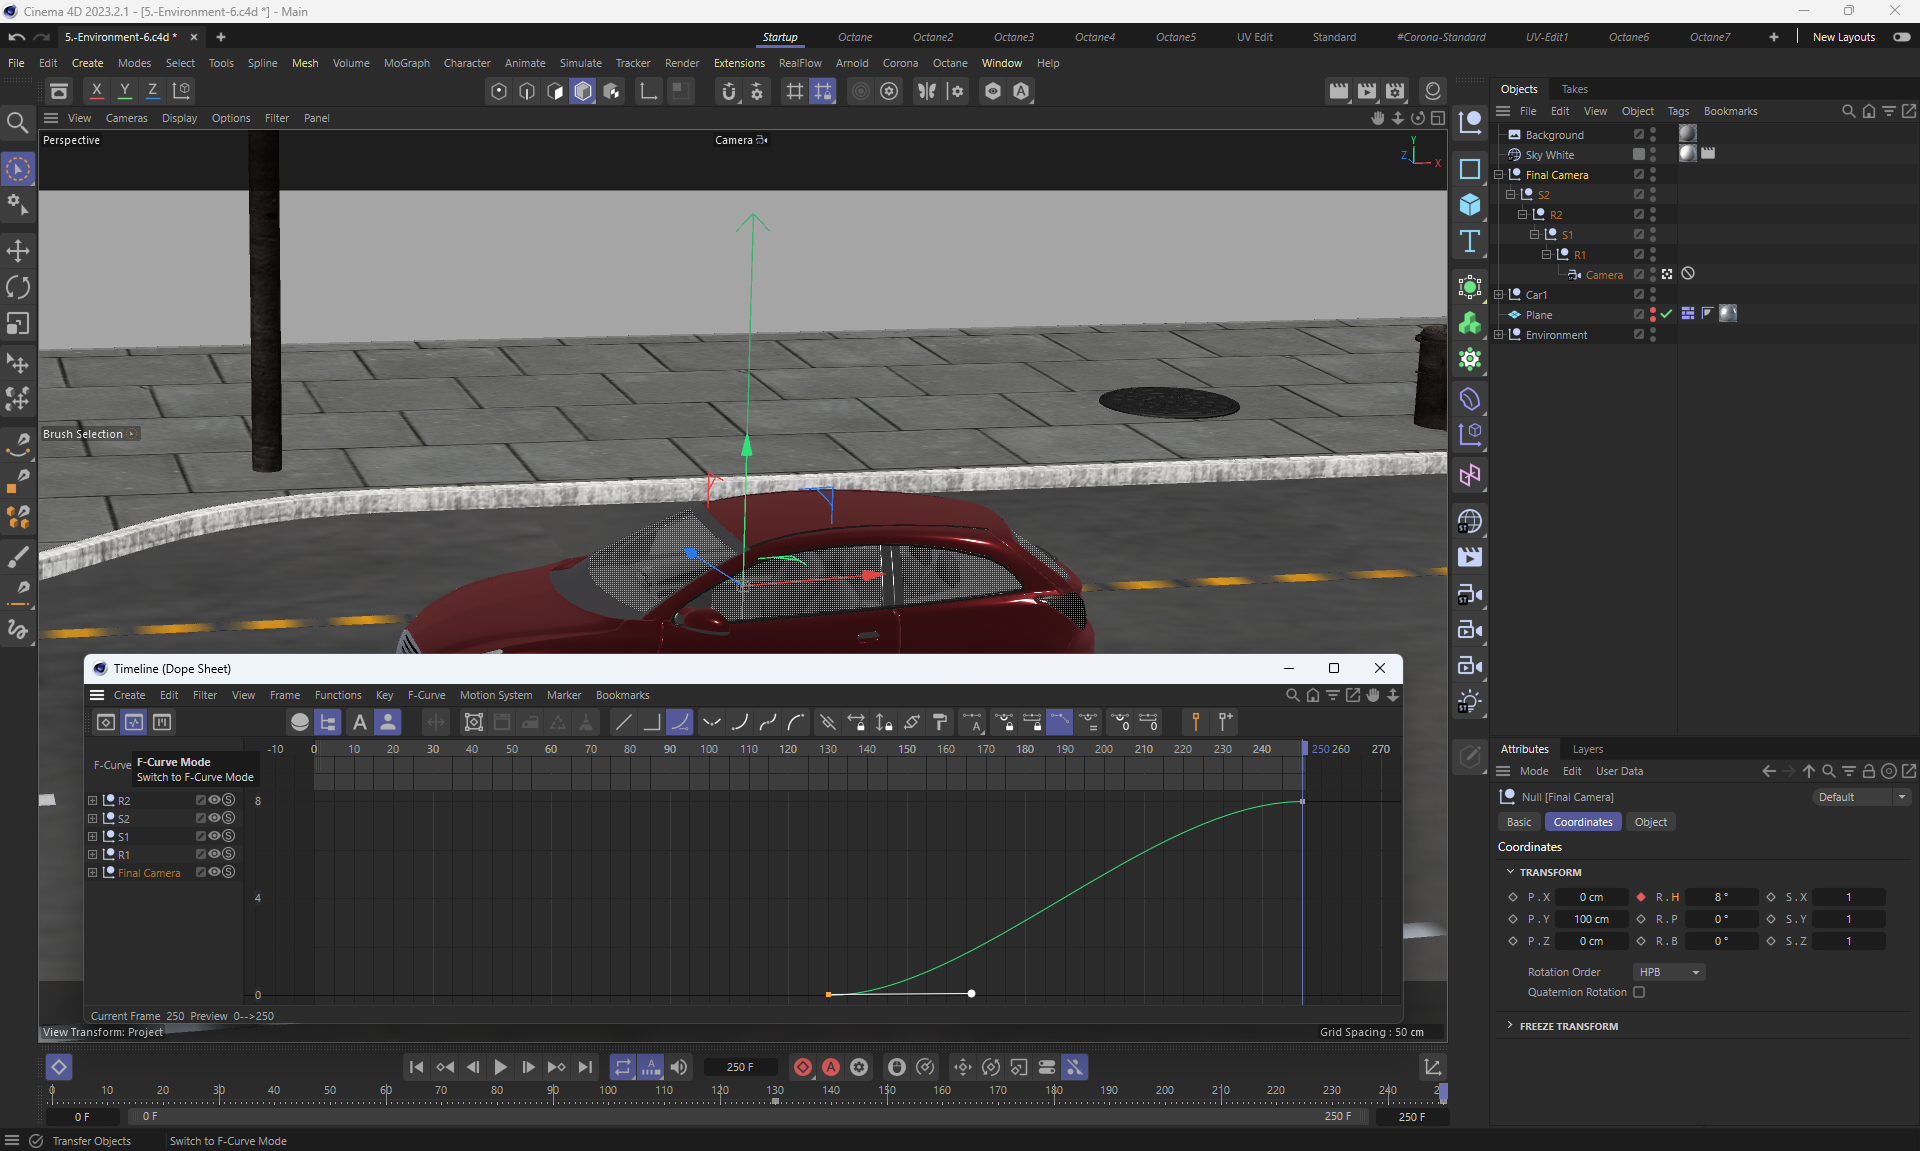
While studying this section, I learned how to work with the timeline.
The timeline has an "Automatic mode" with all animations and a "User mode" where you can selectively add groups of layers with animations and edit them.
Animations were created according to the author's lesson, animations of individual static elements can be modified.
For better visibility of all animations, you need to create many cameras and focus them on different angles, as the author did in the lessons.
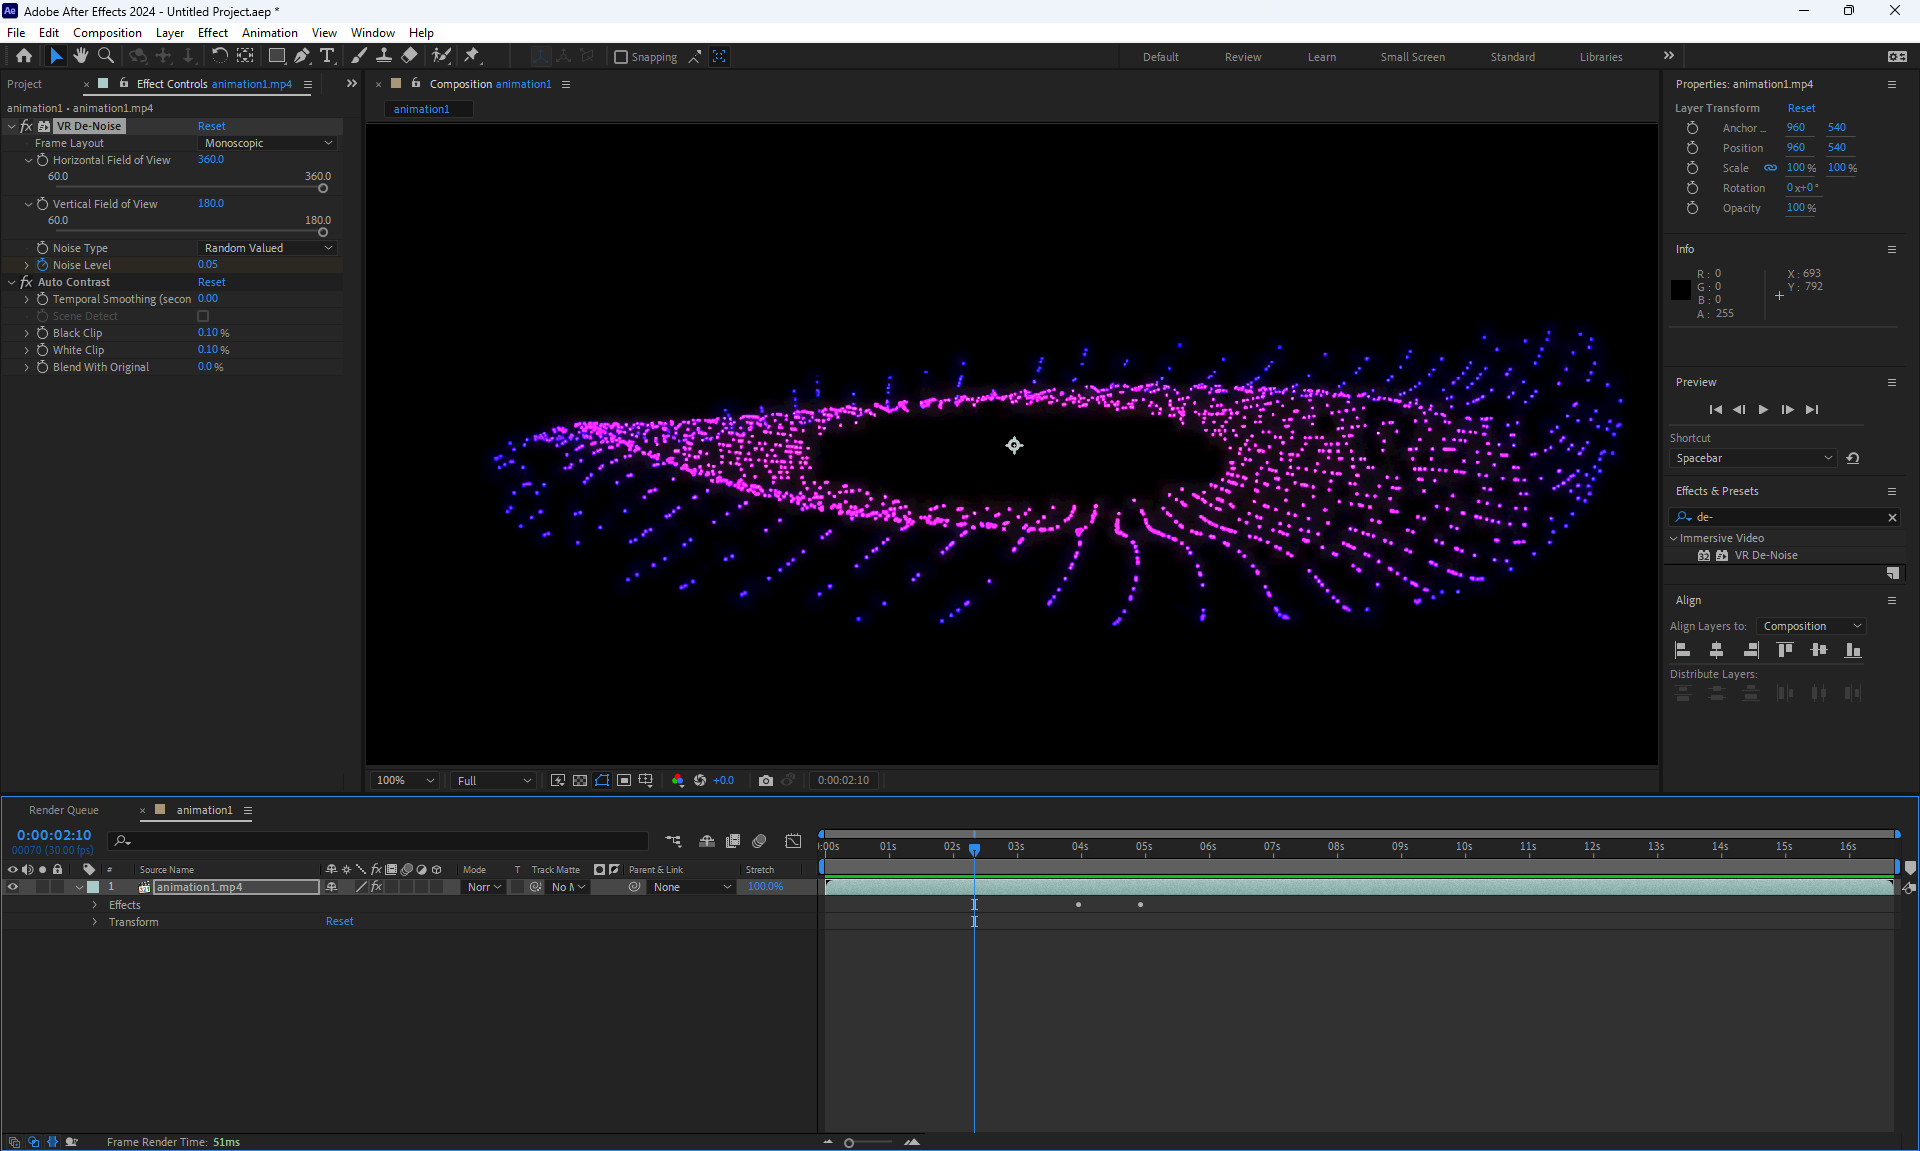
Other video: How to DENOISE Grainy Footage in After Effects
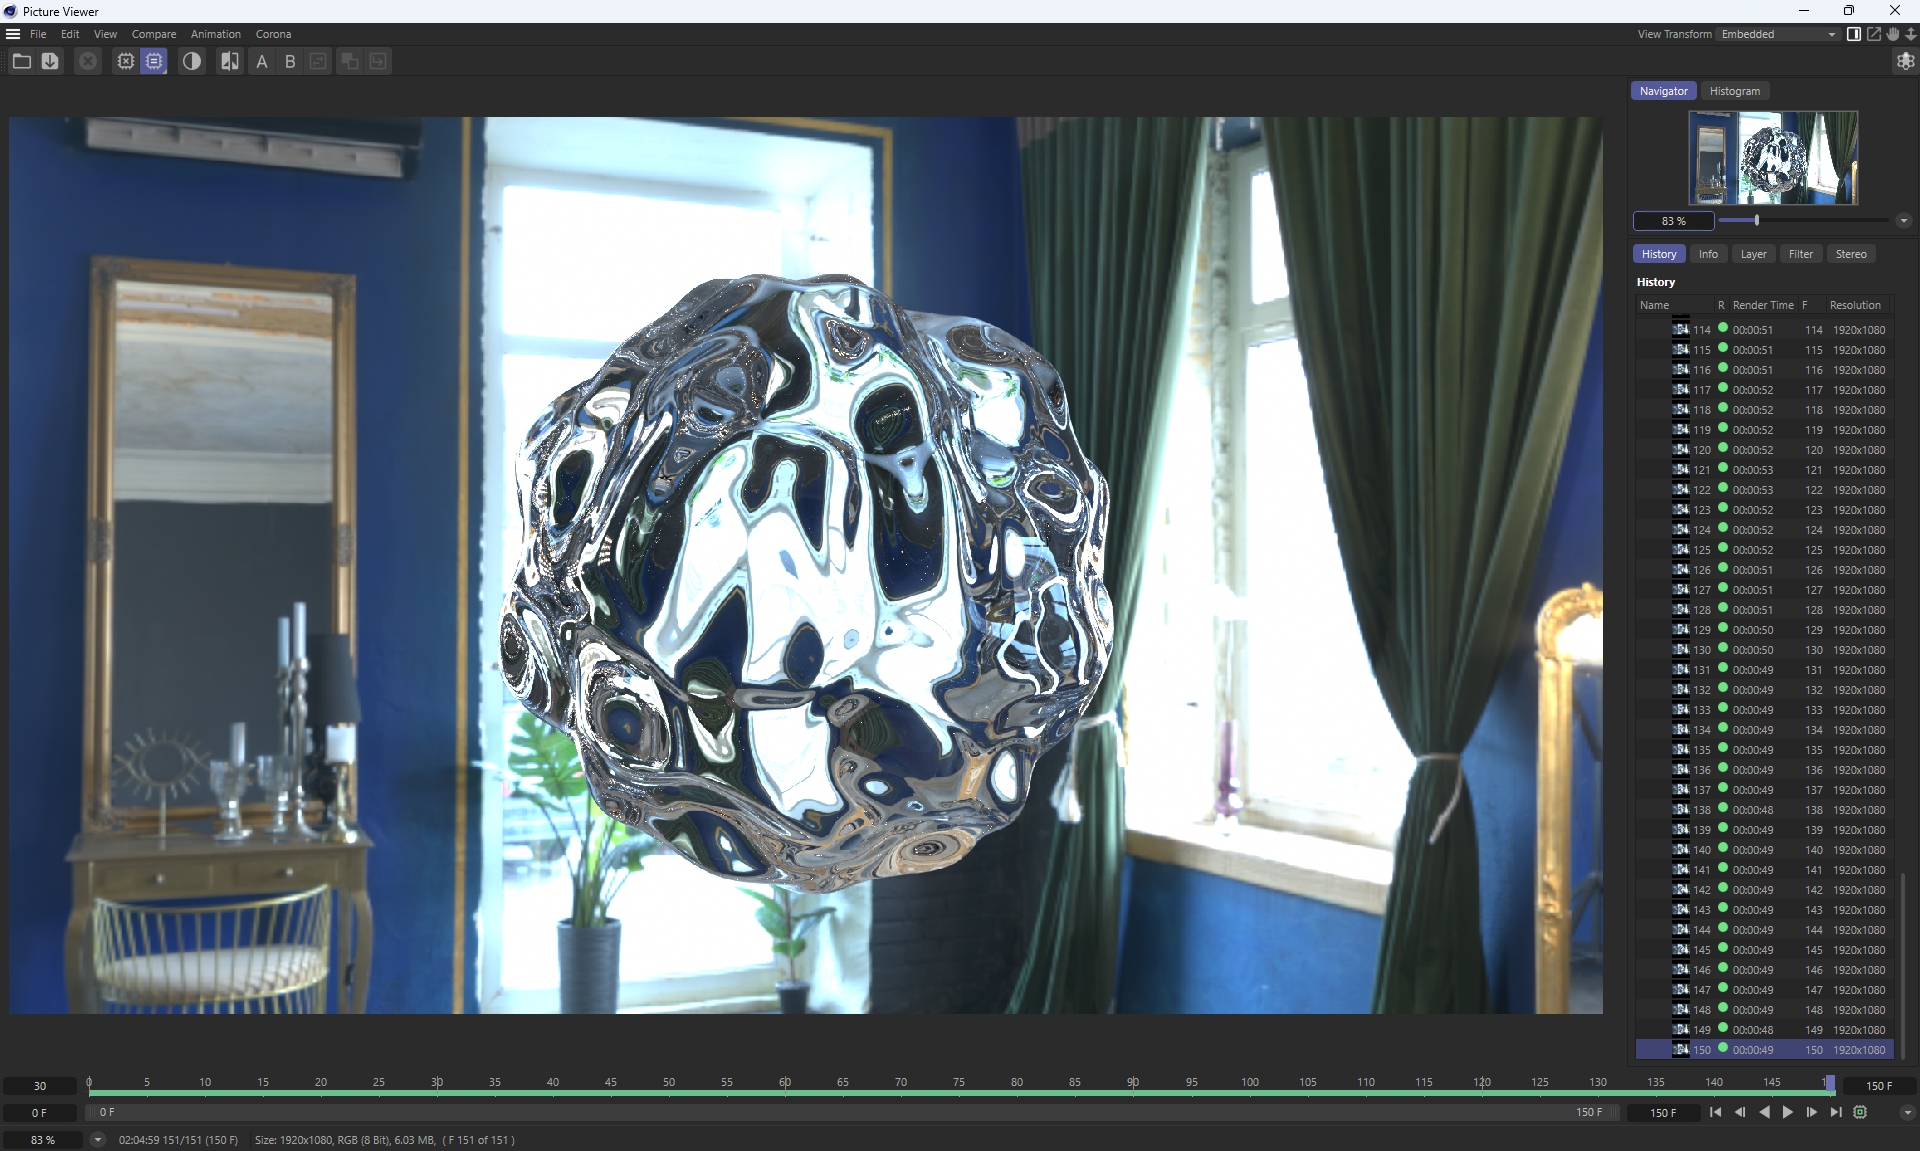
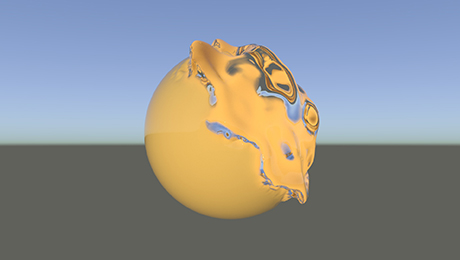
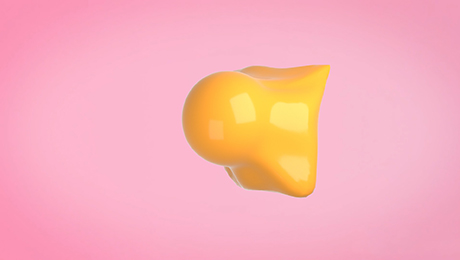
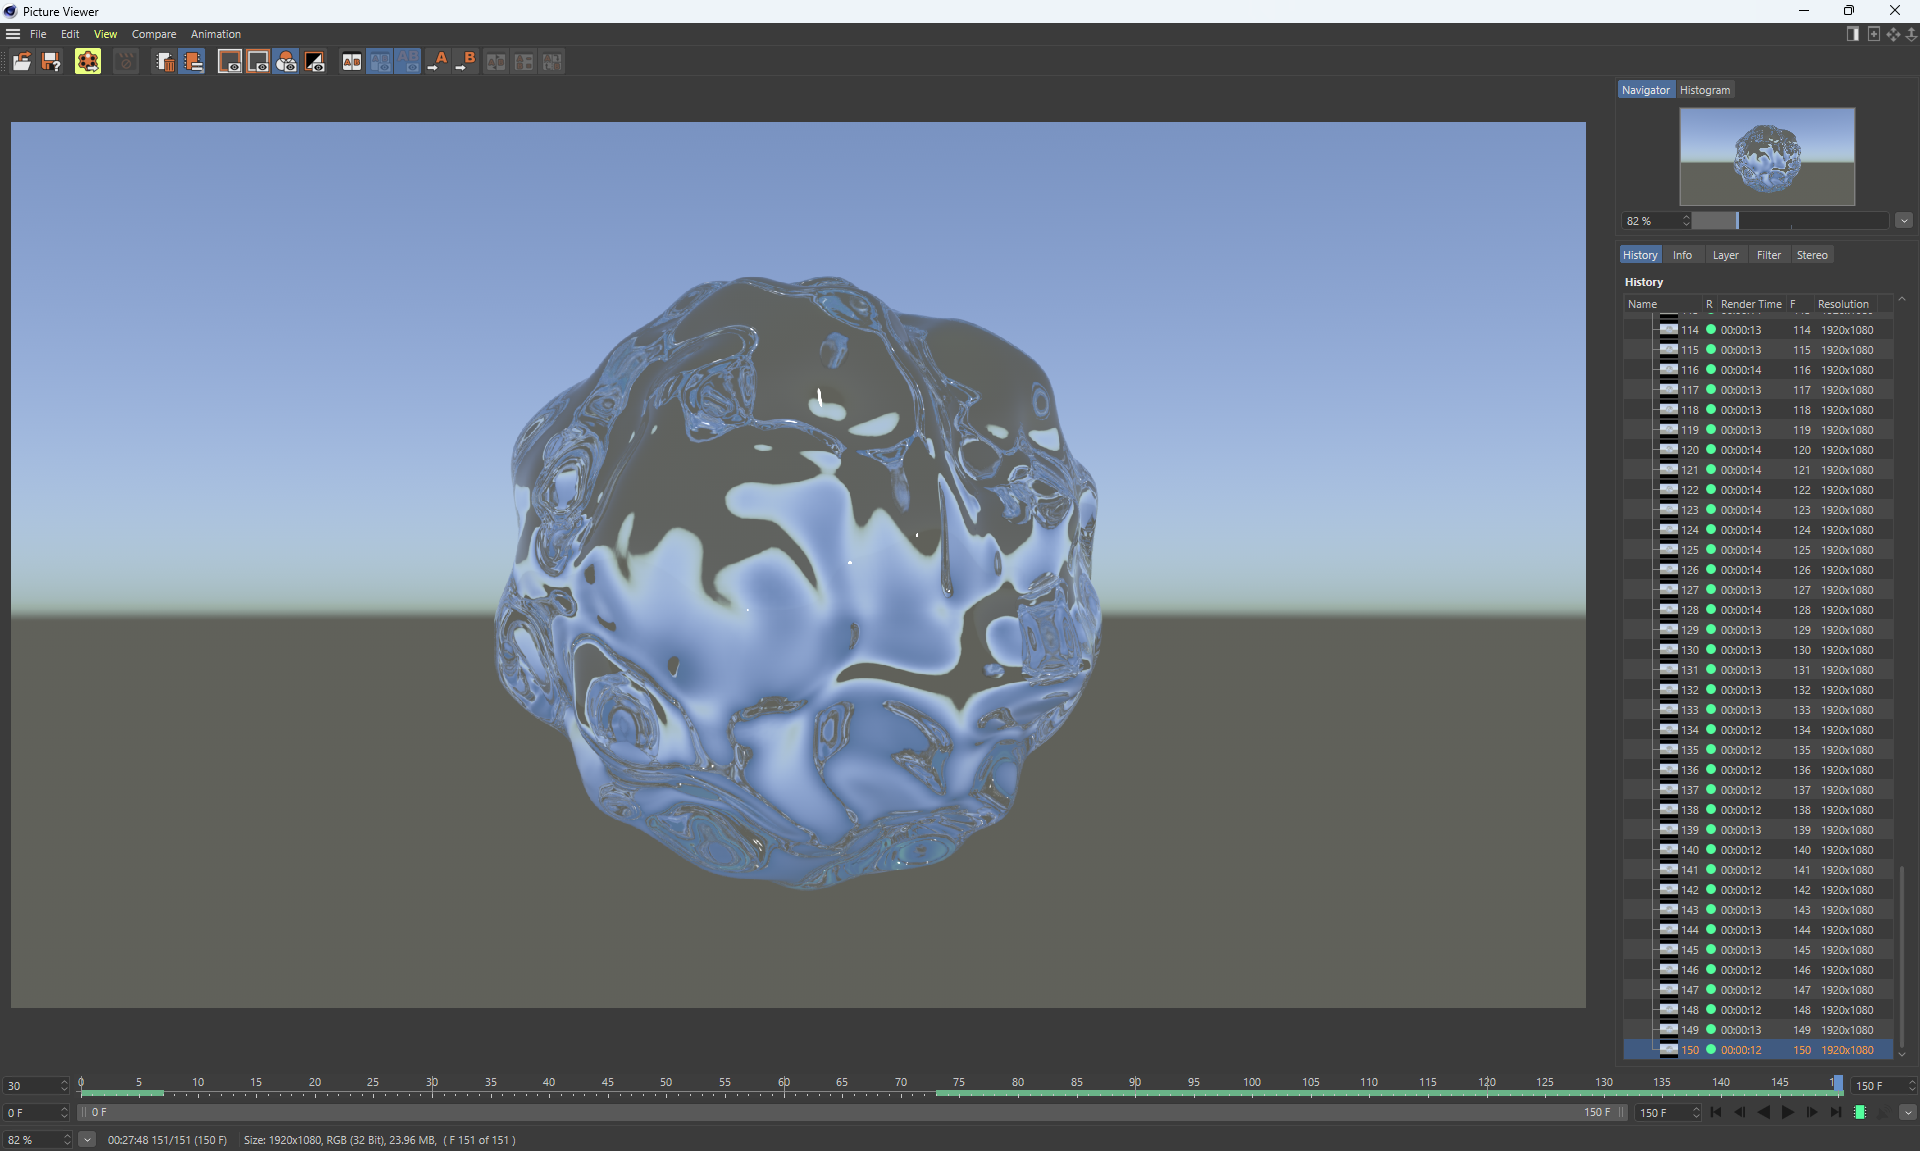
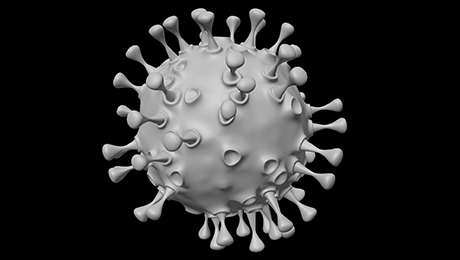
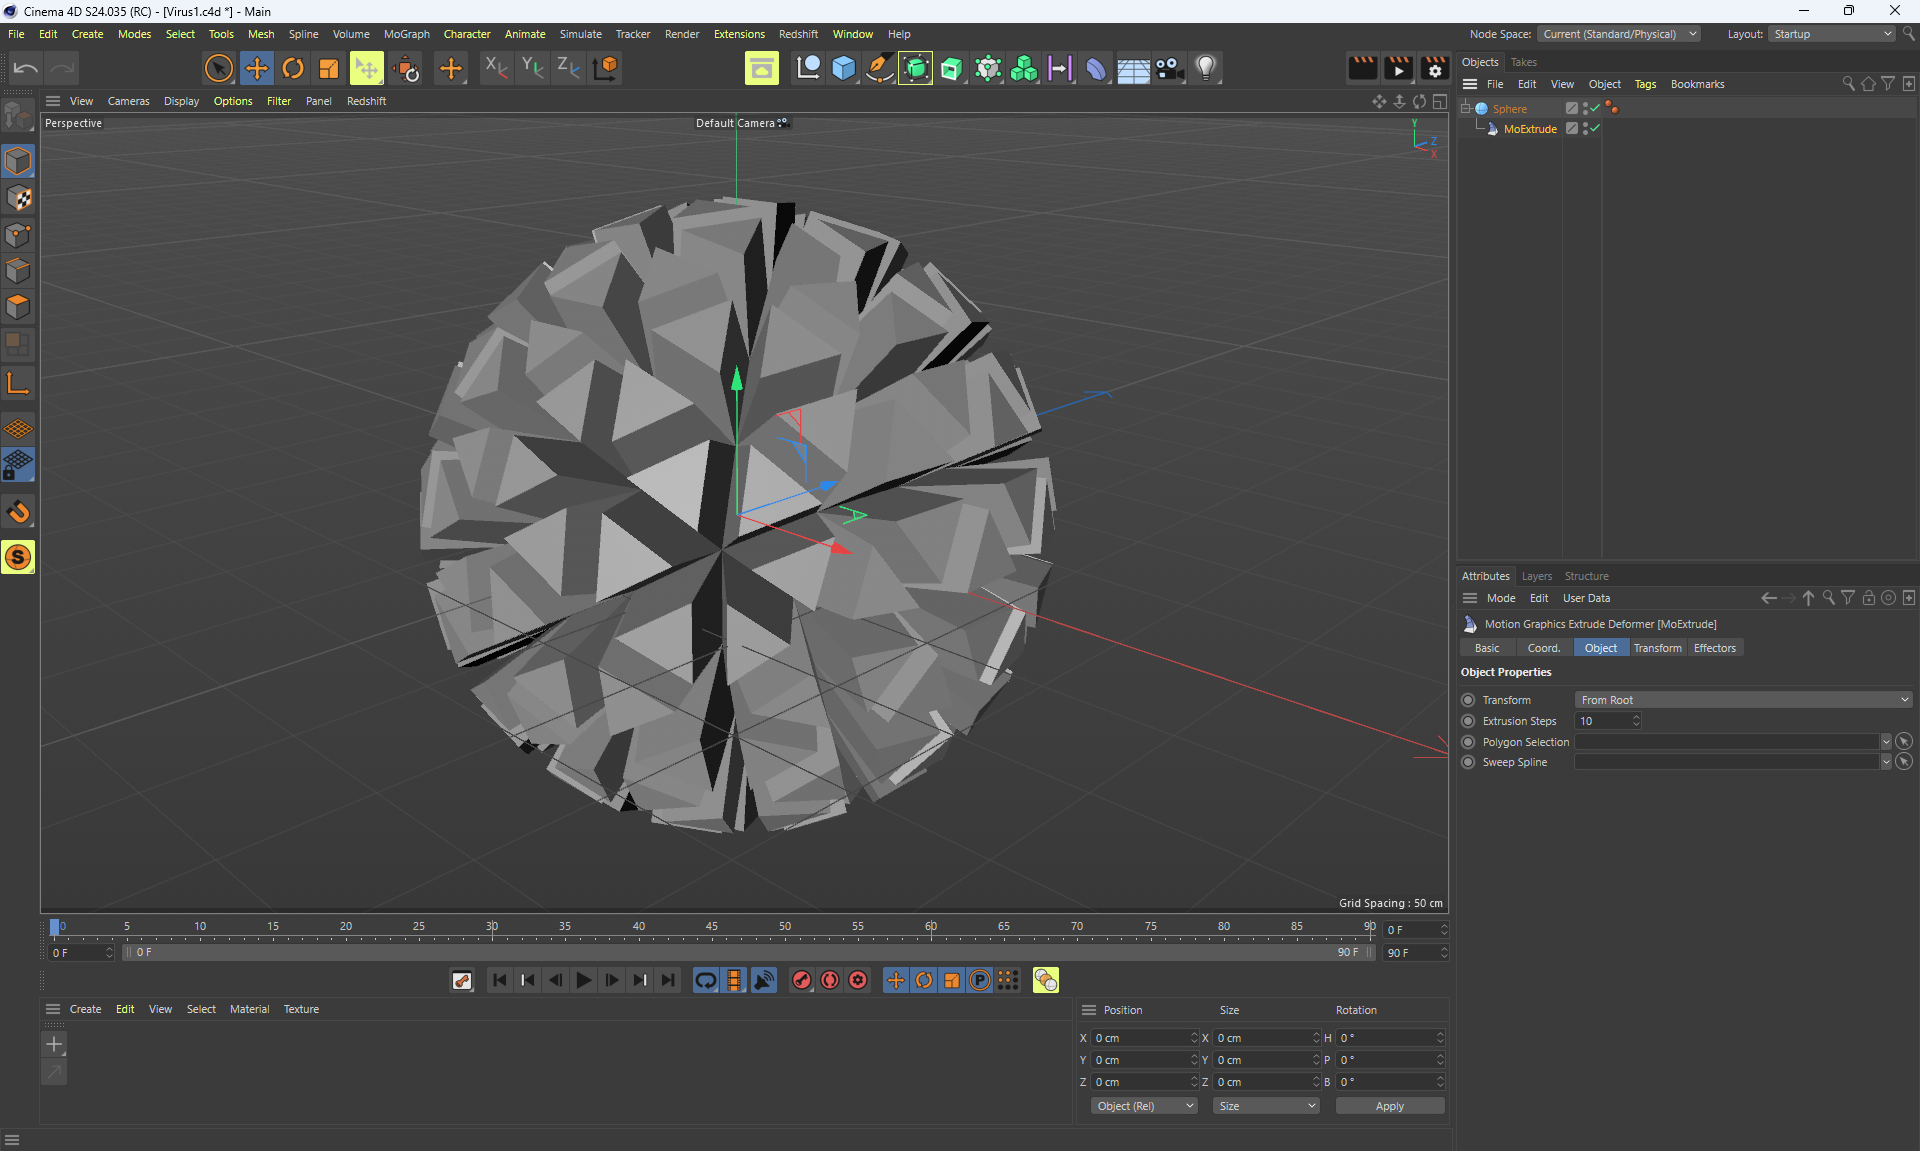
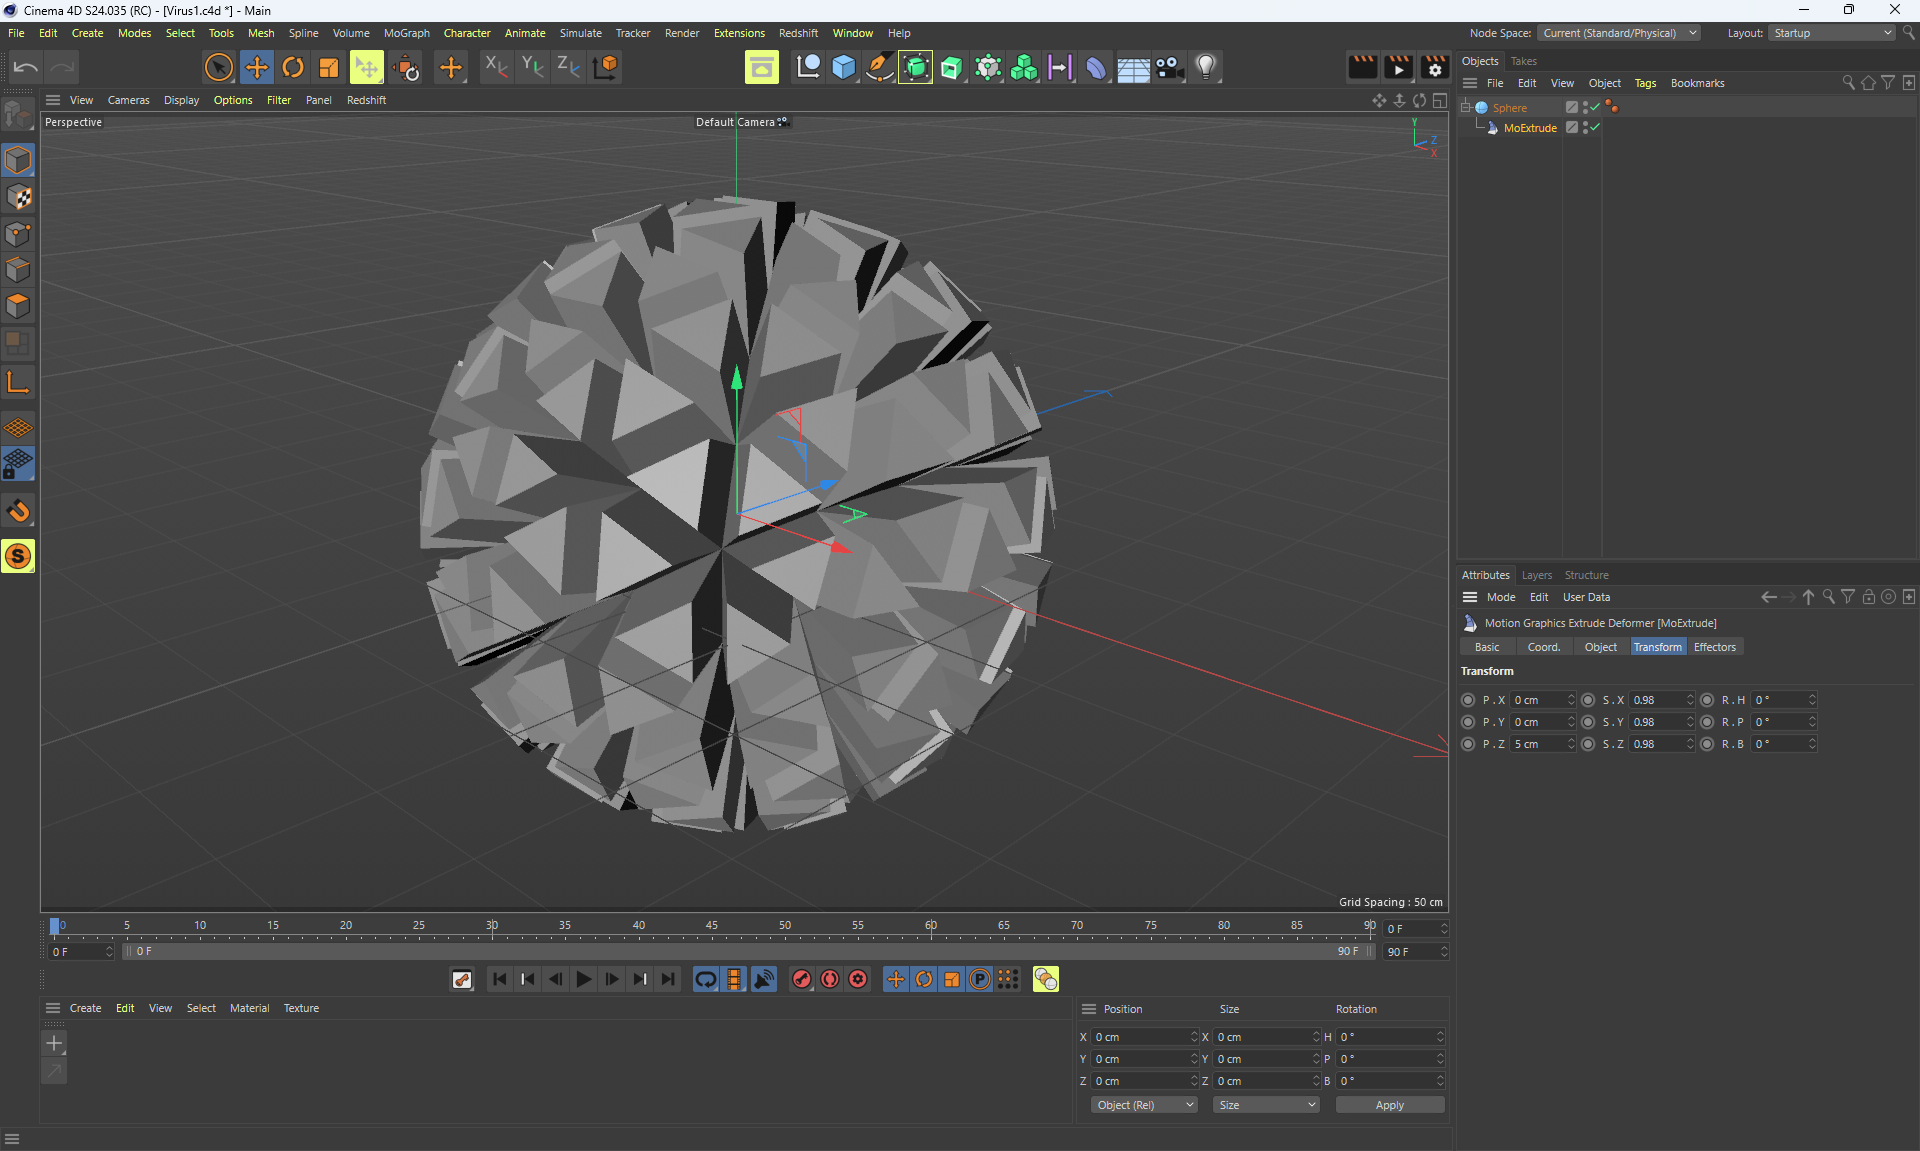
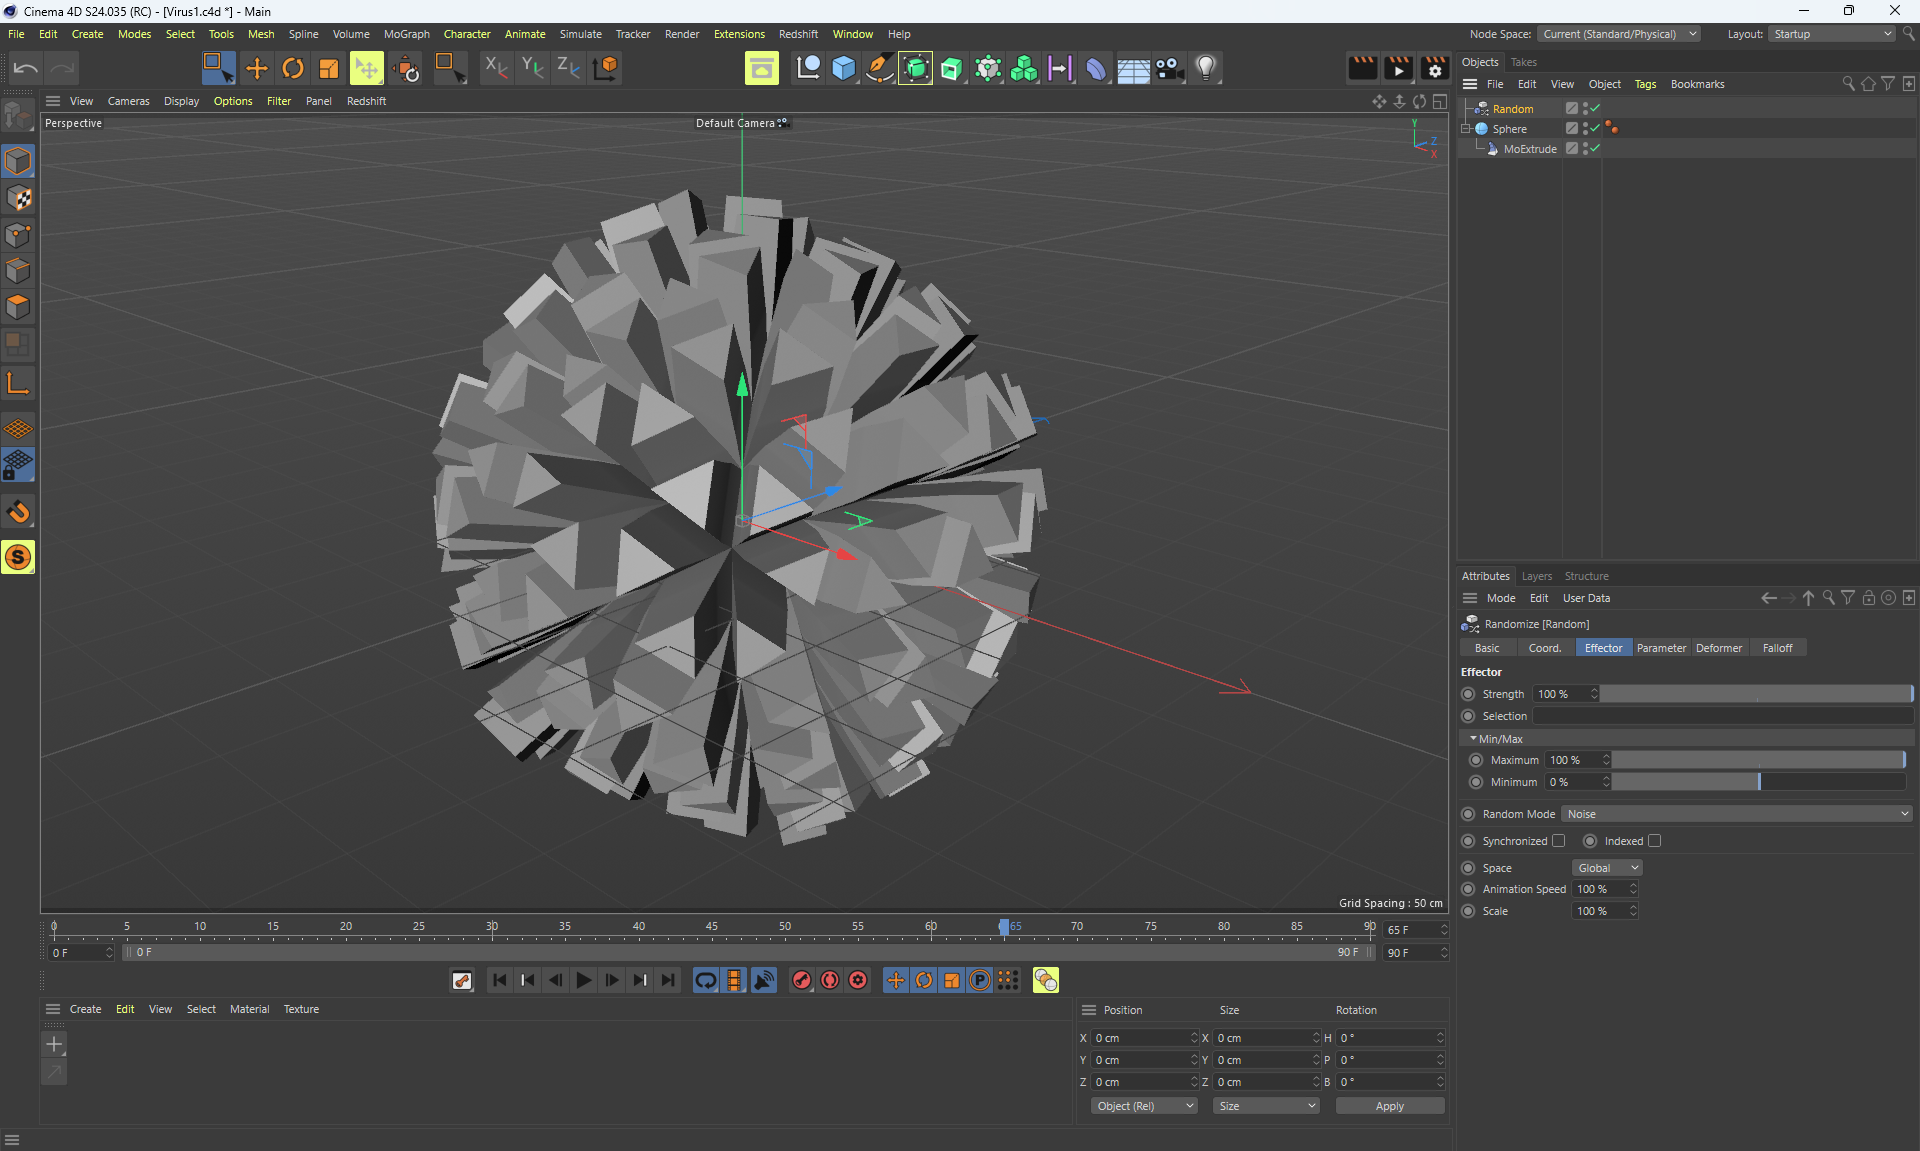
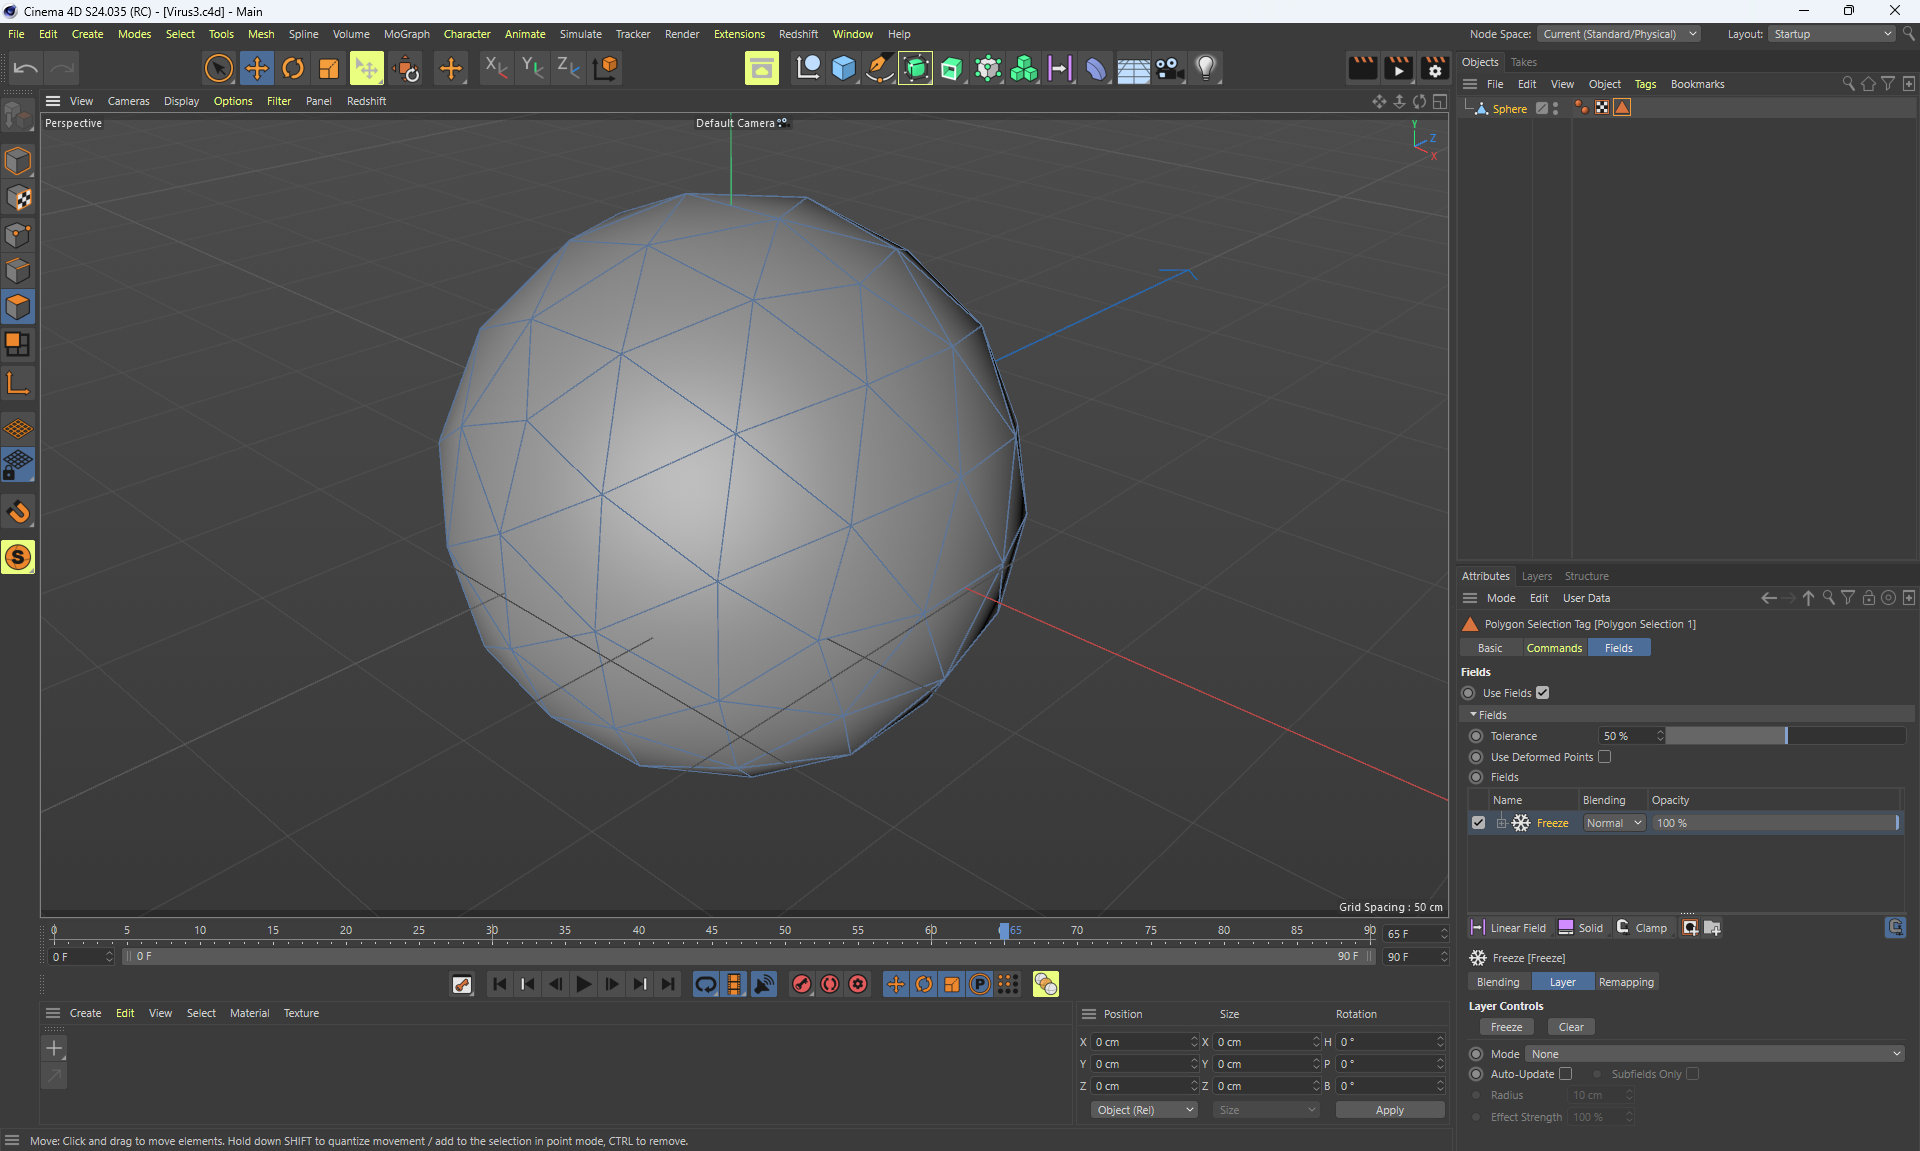
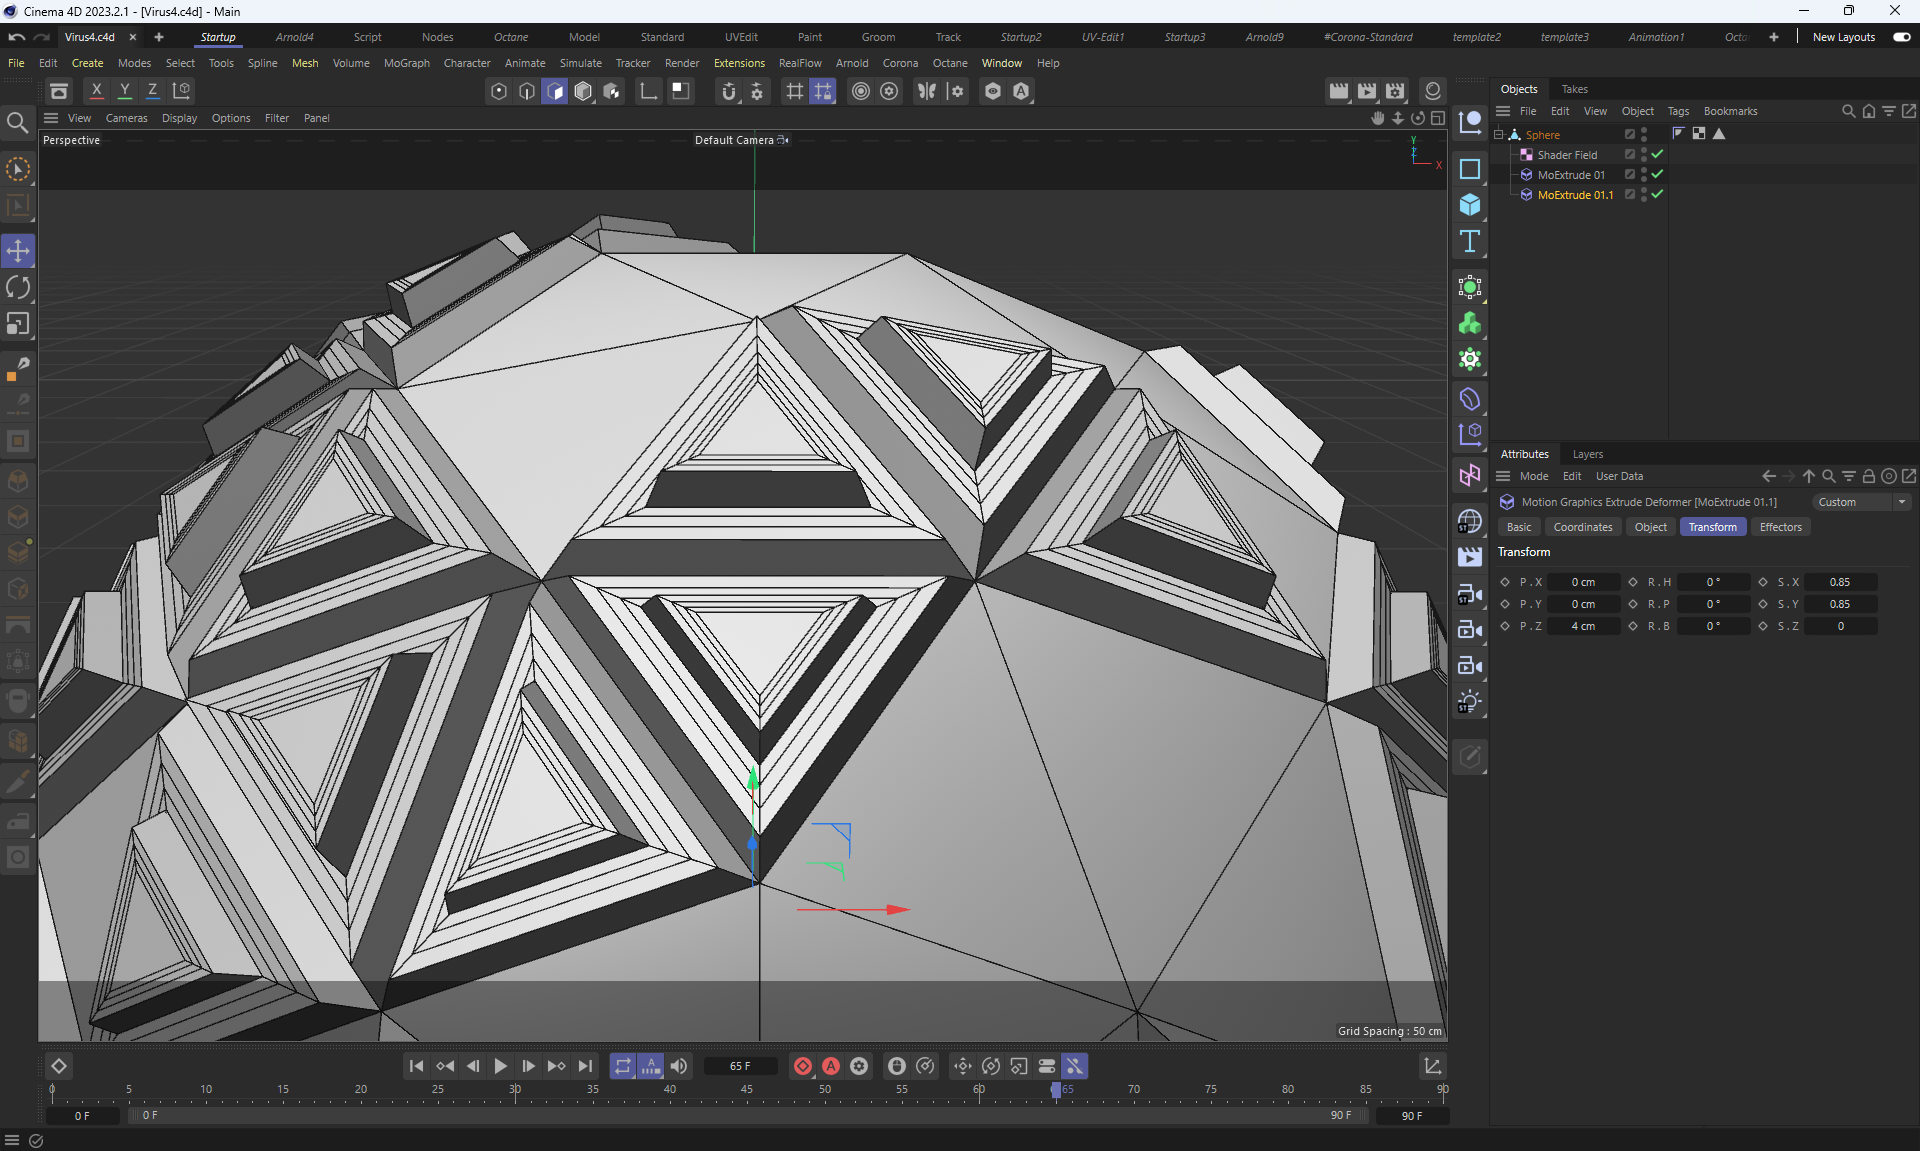
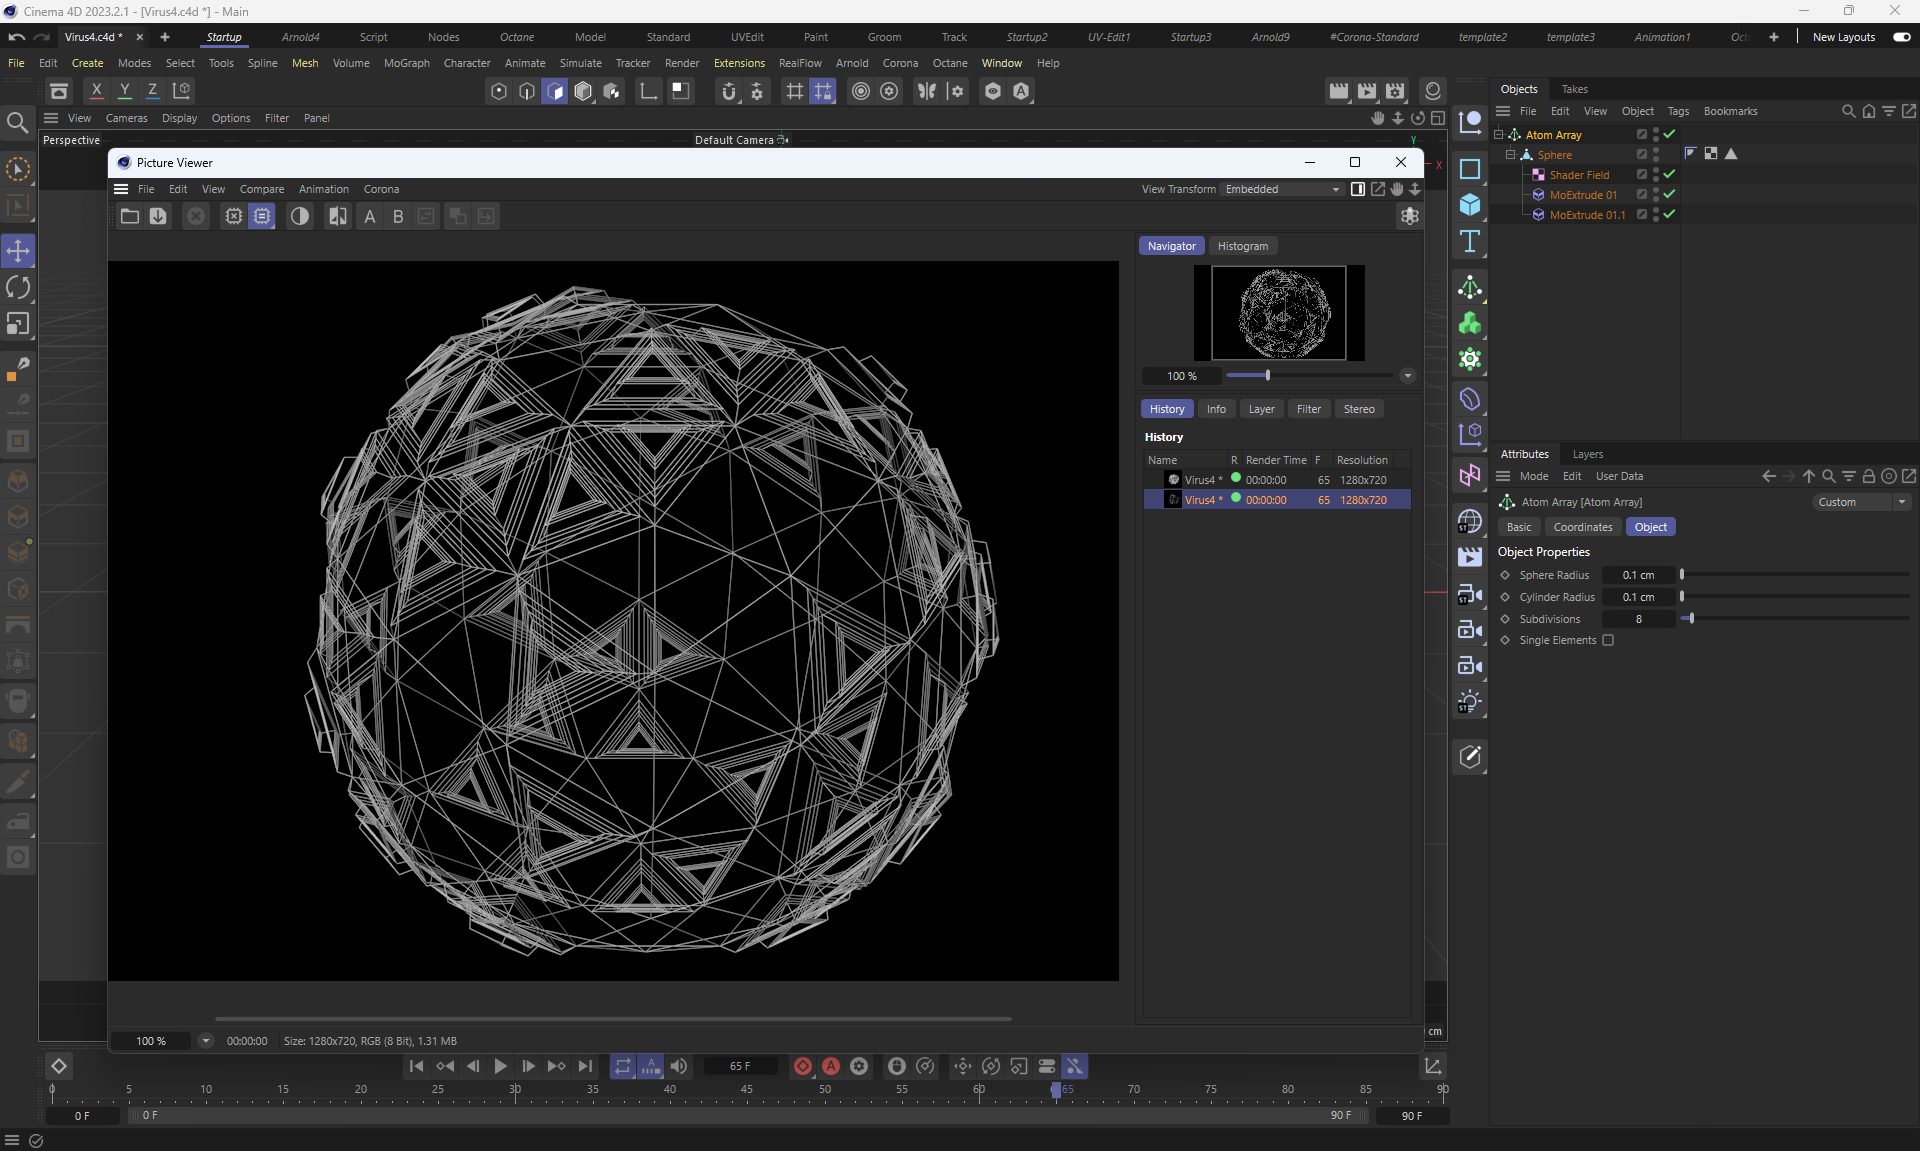
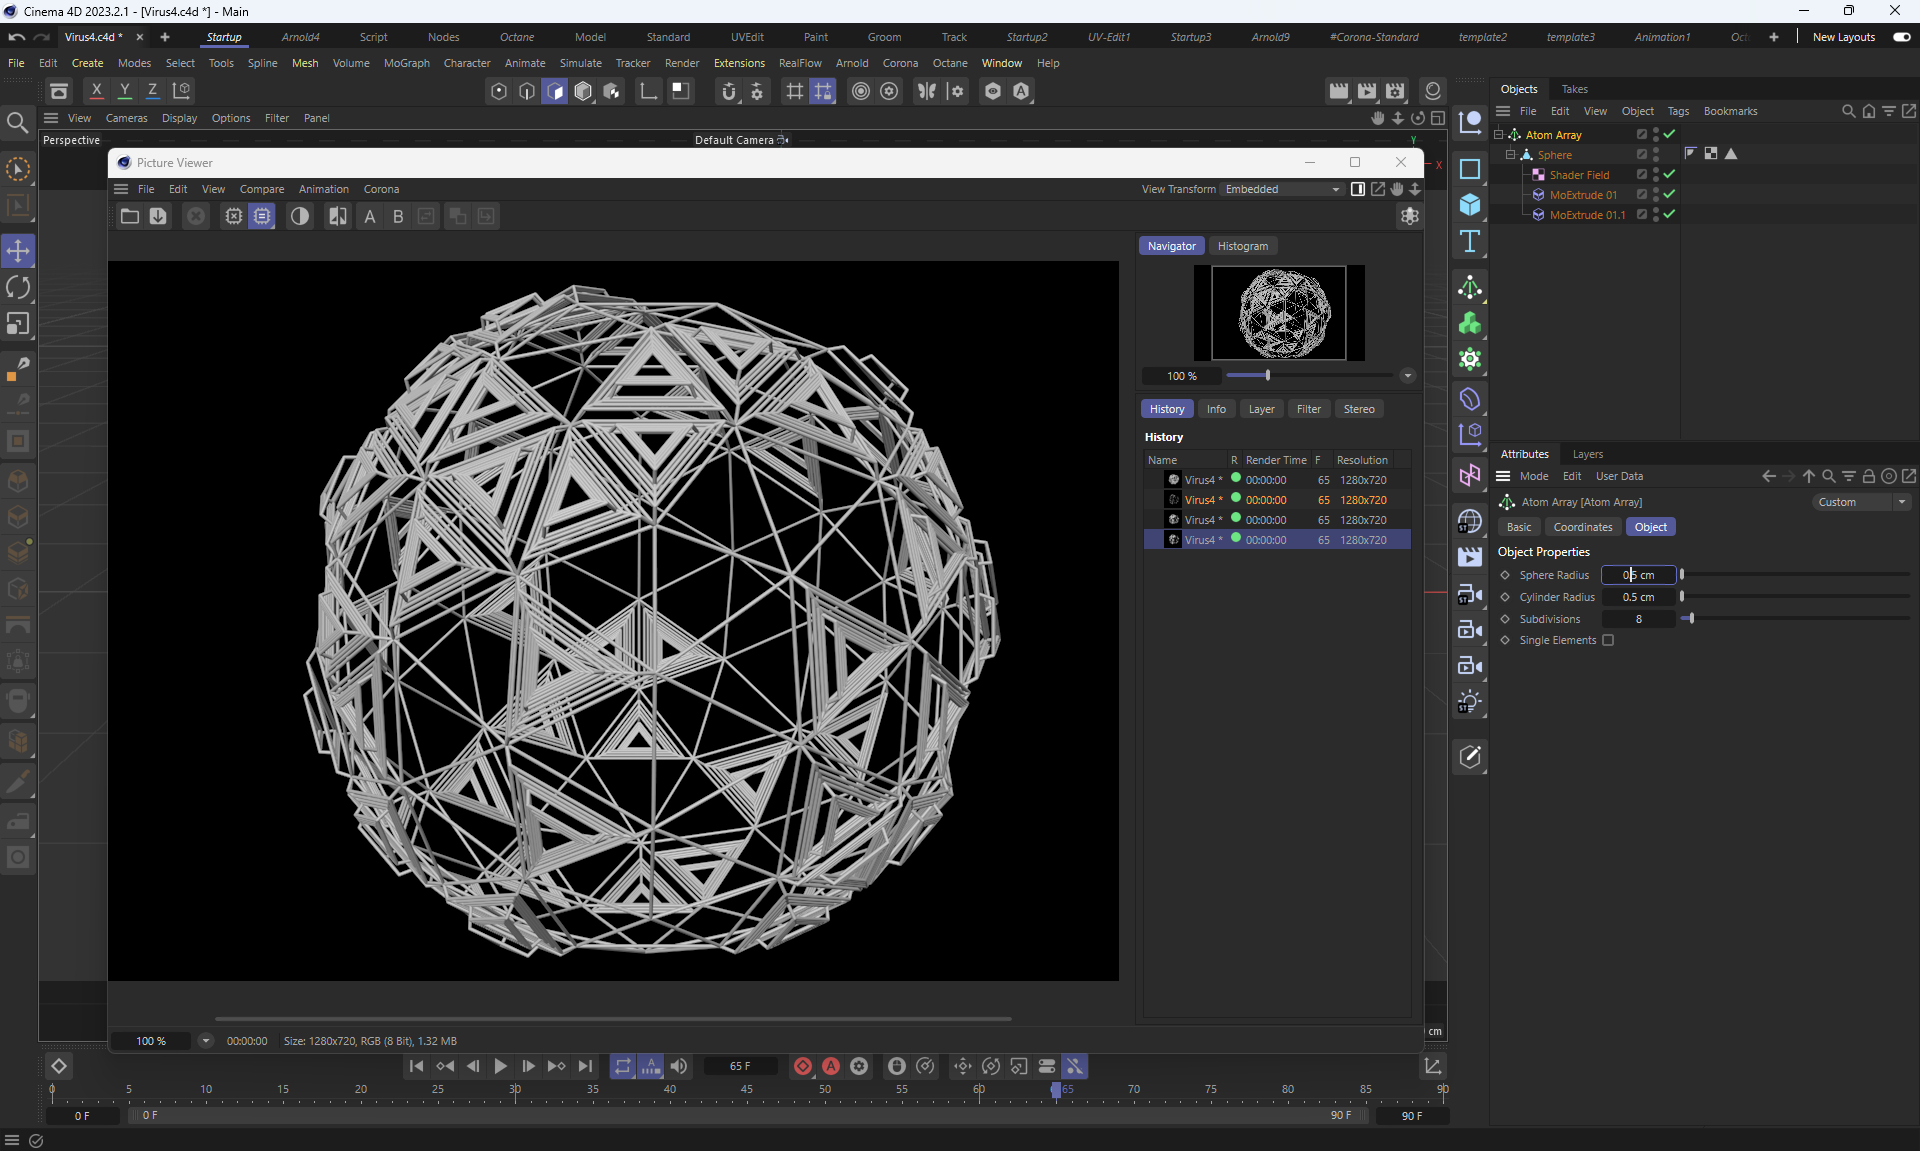
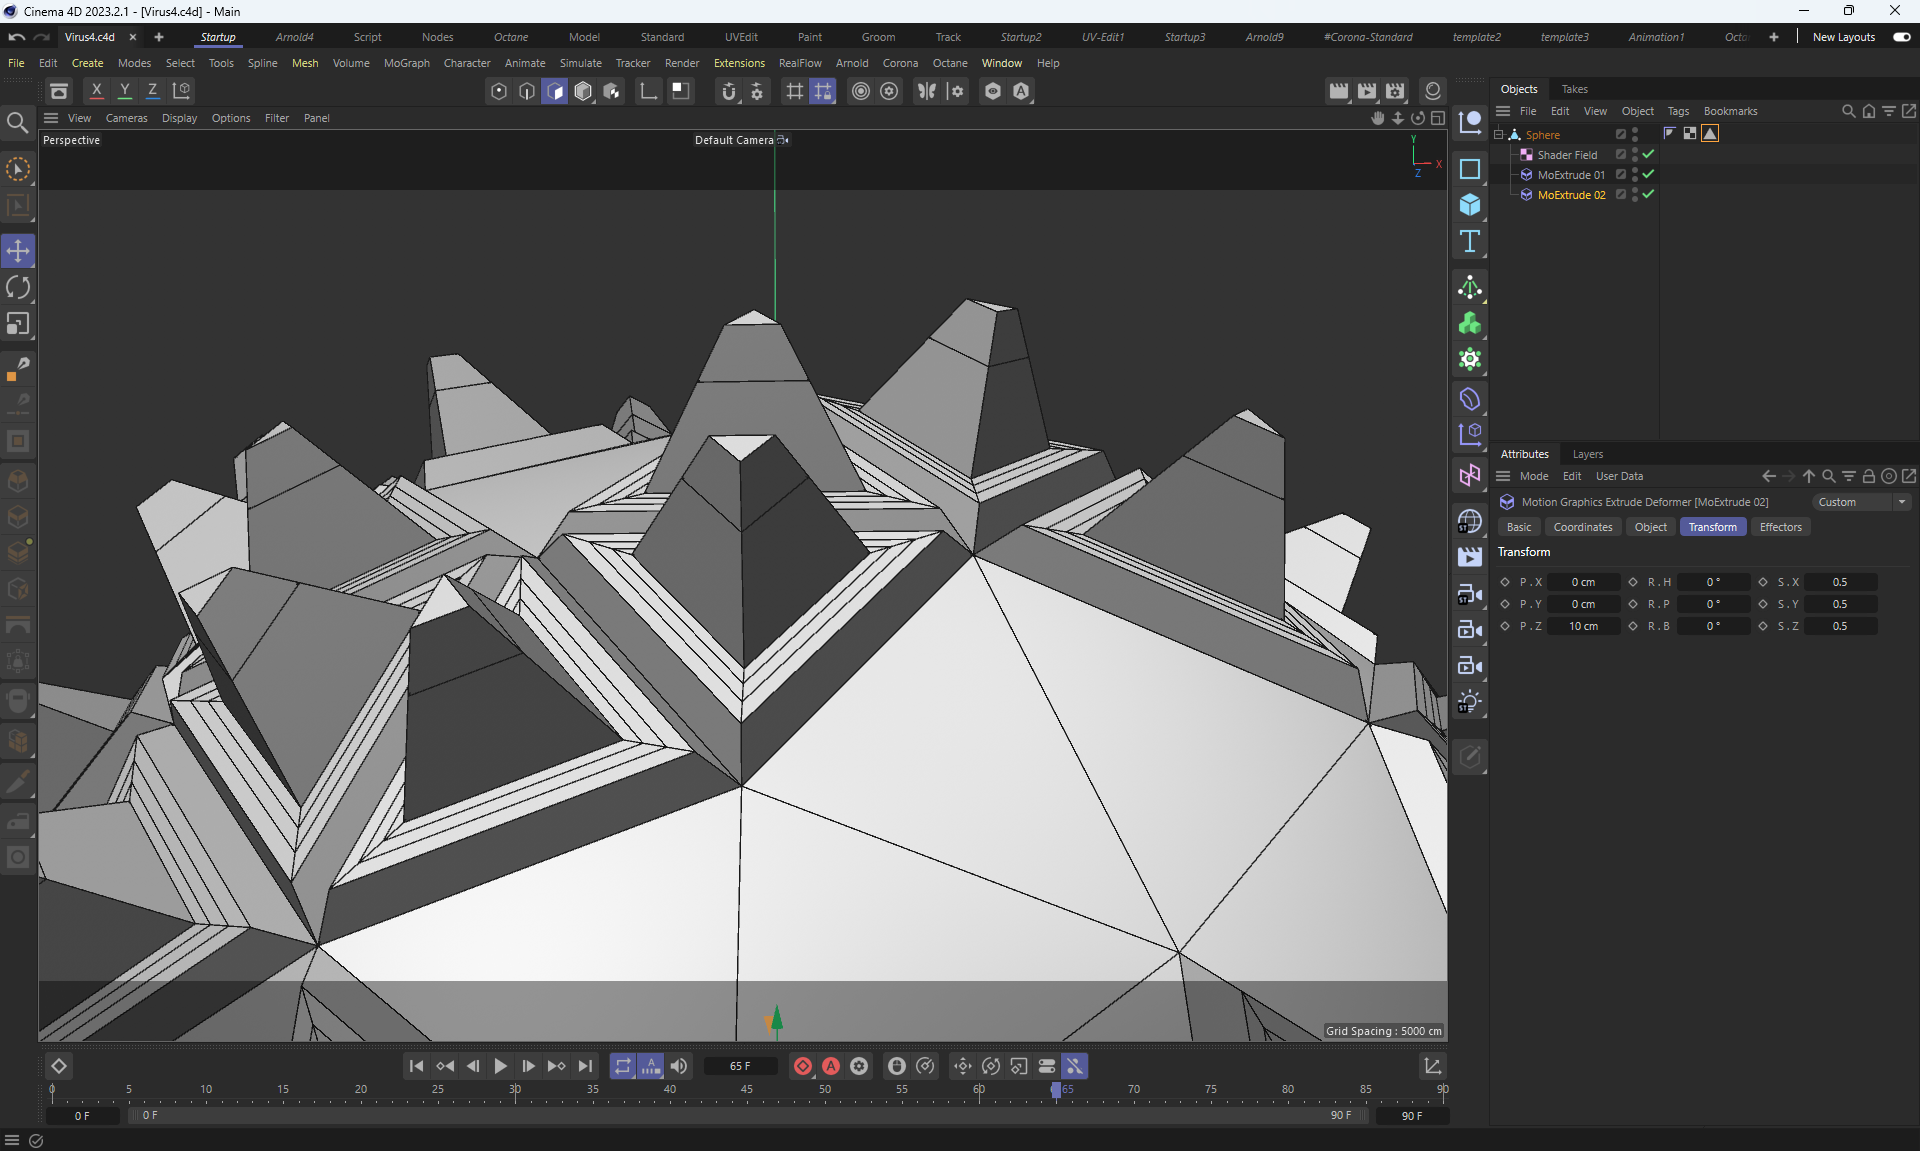
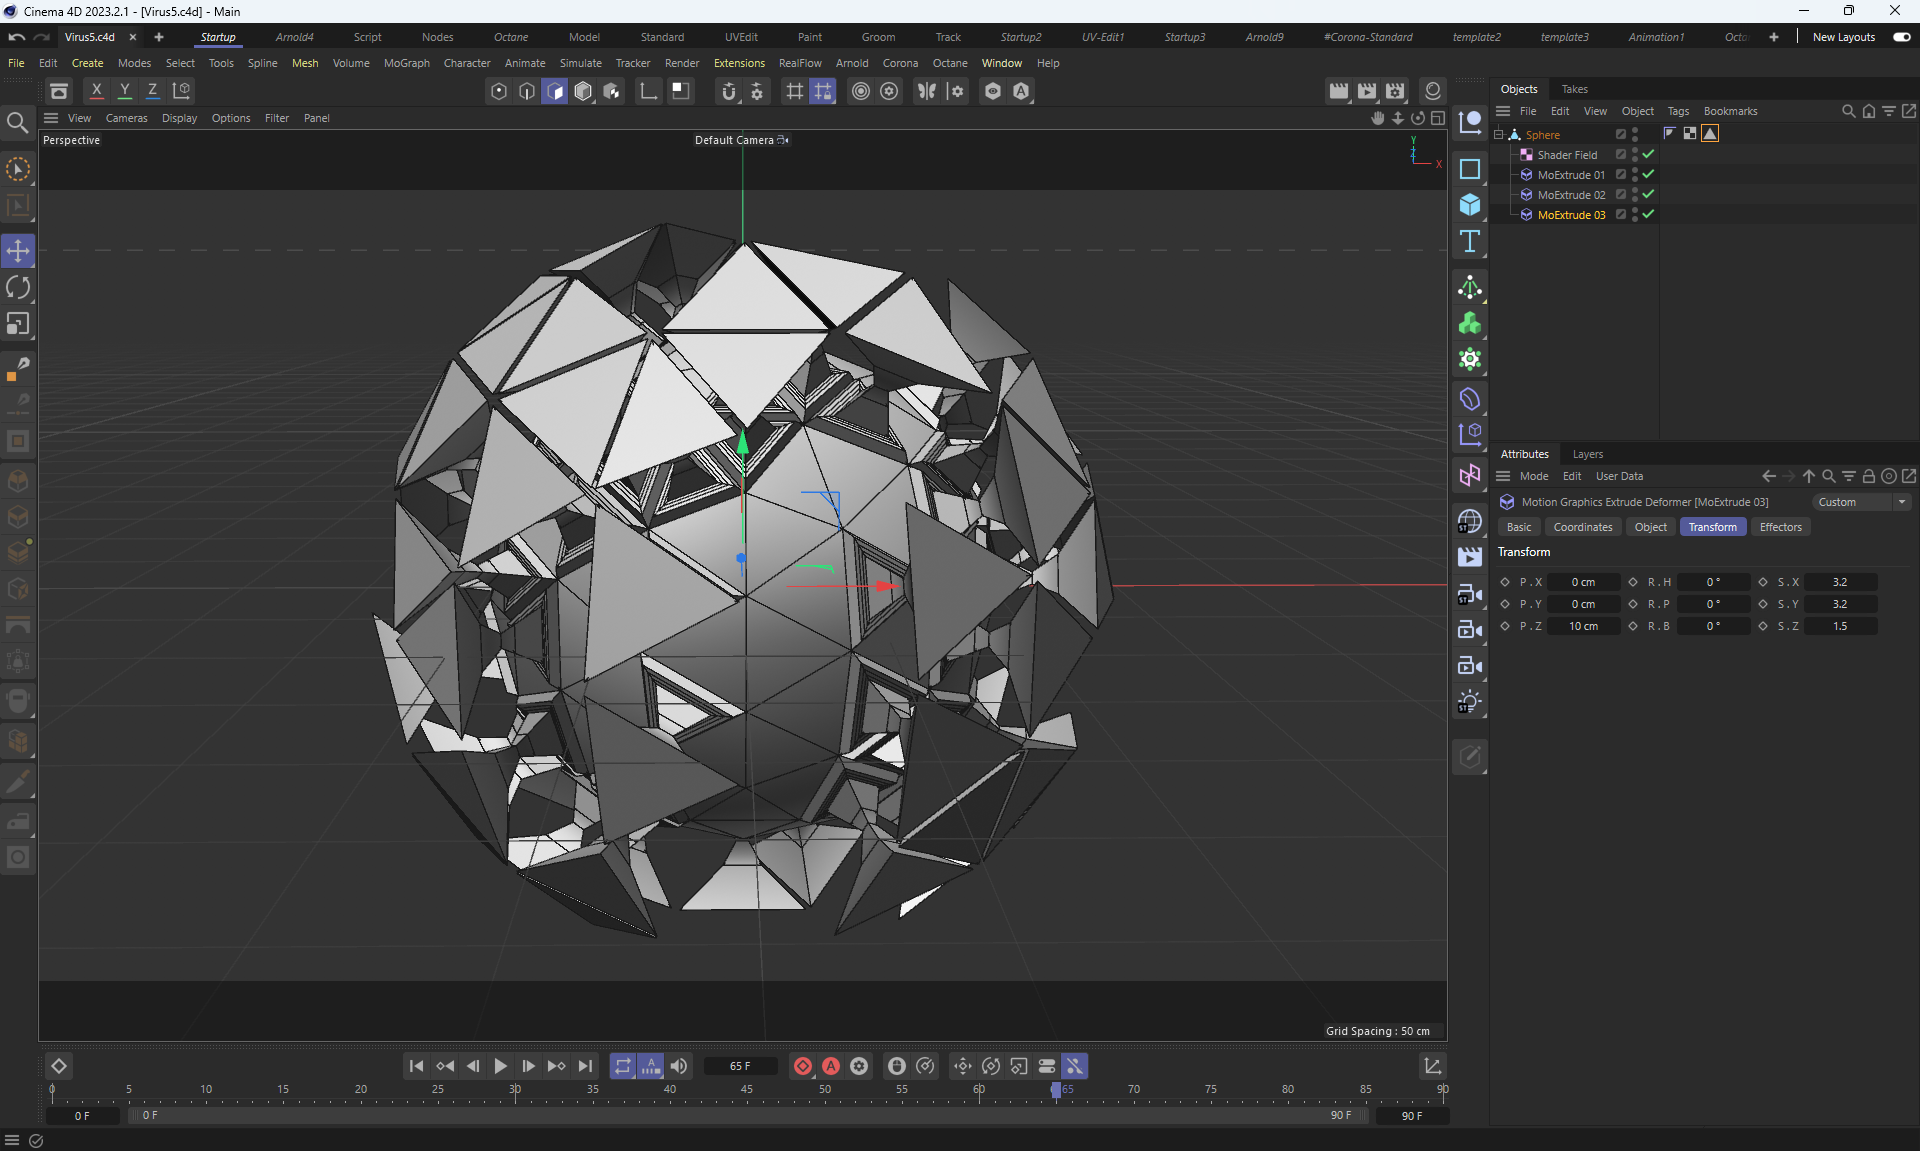
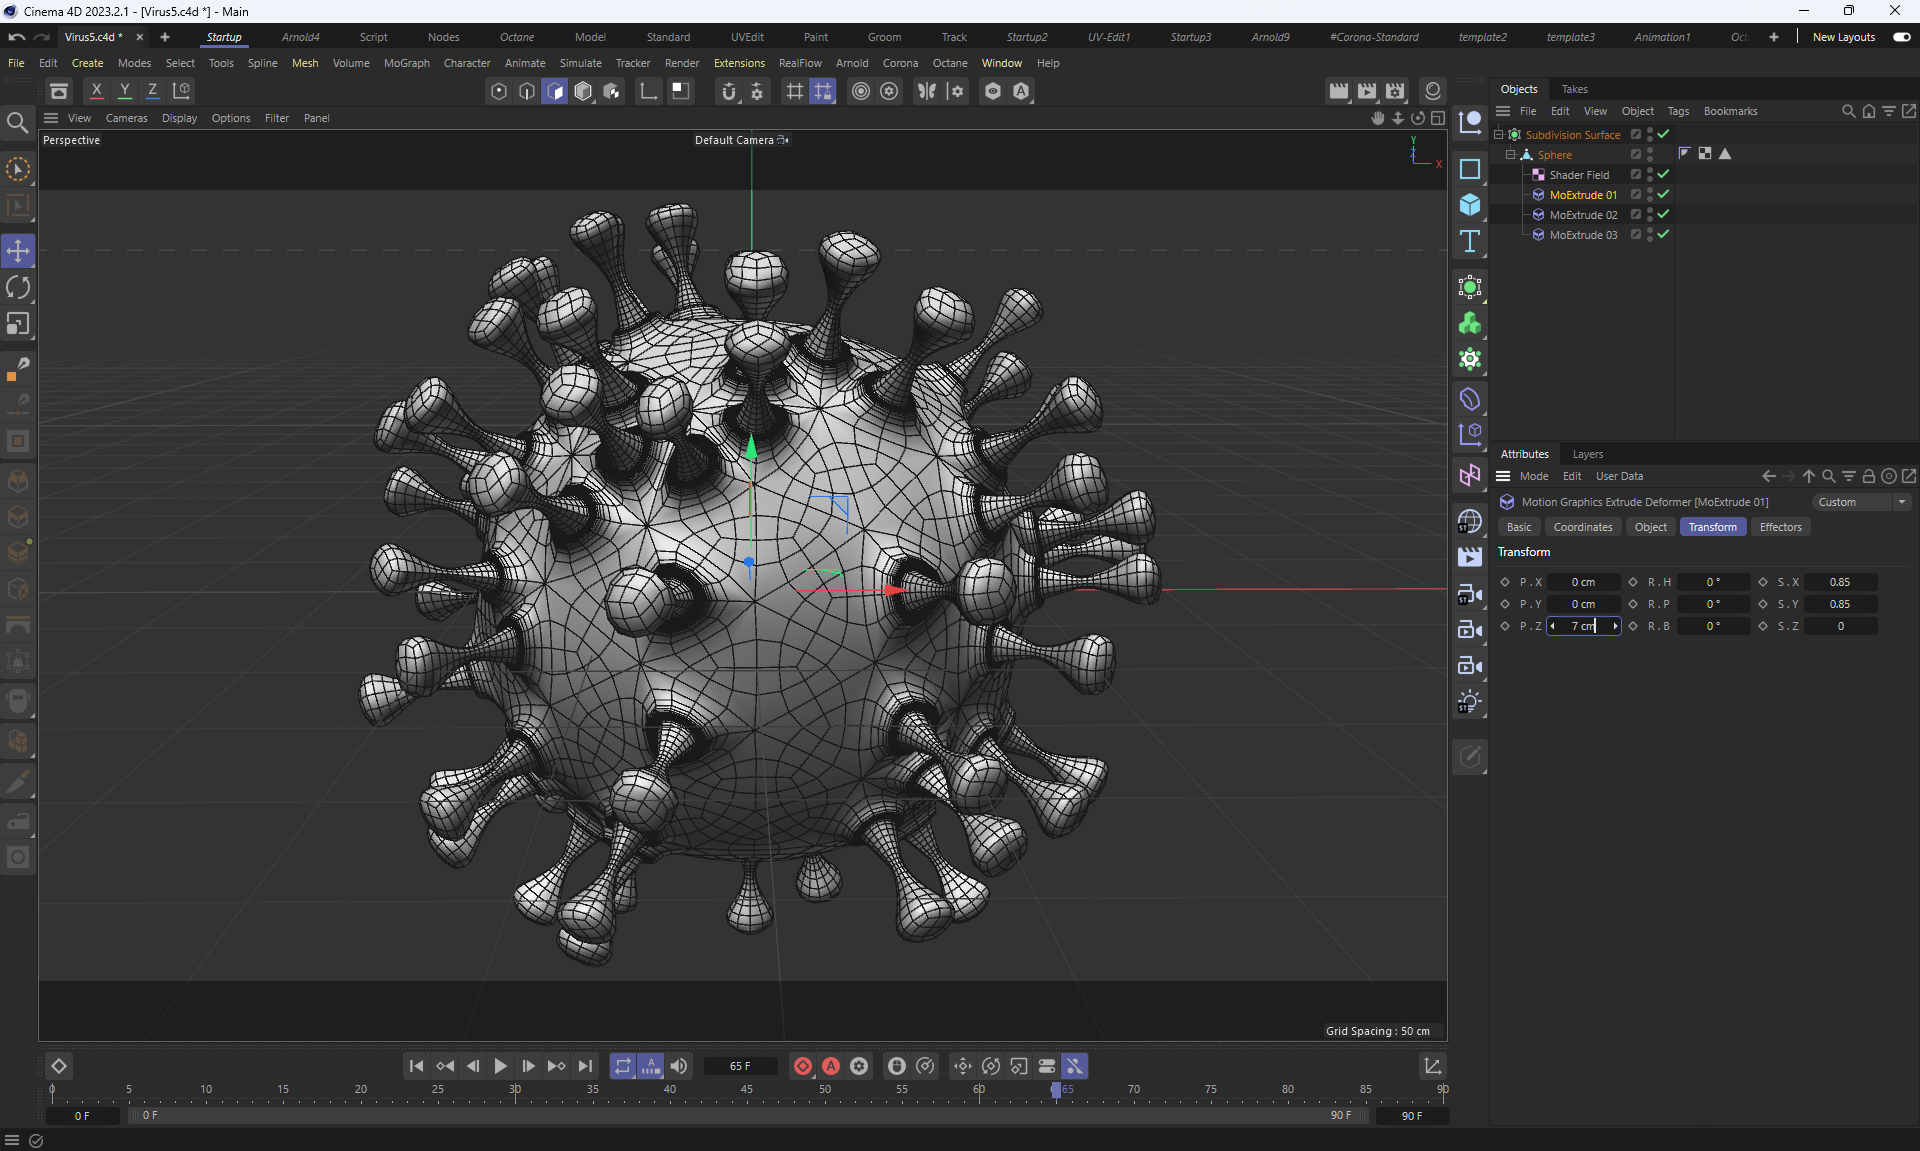
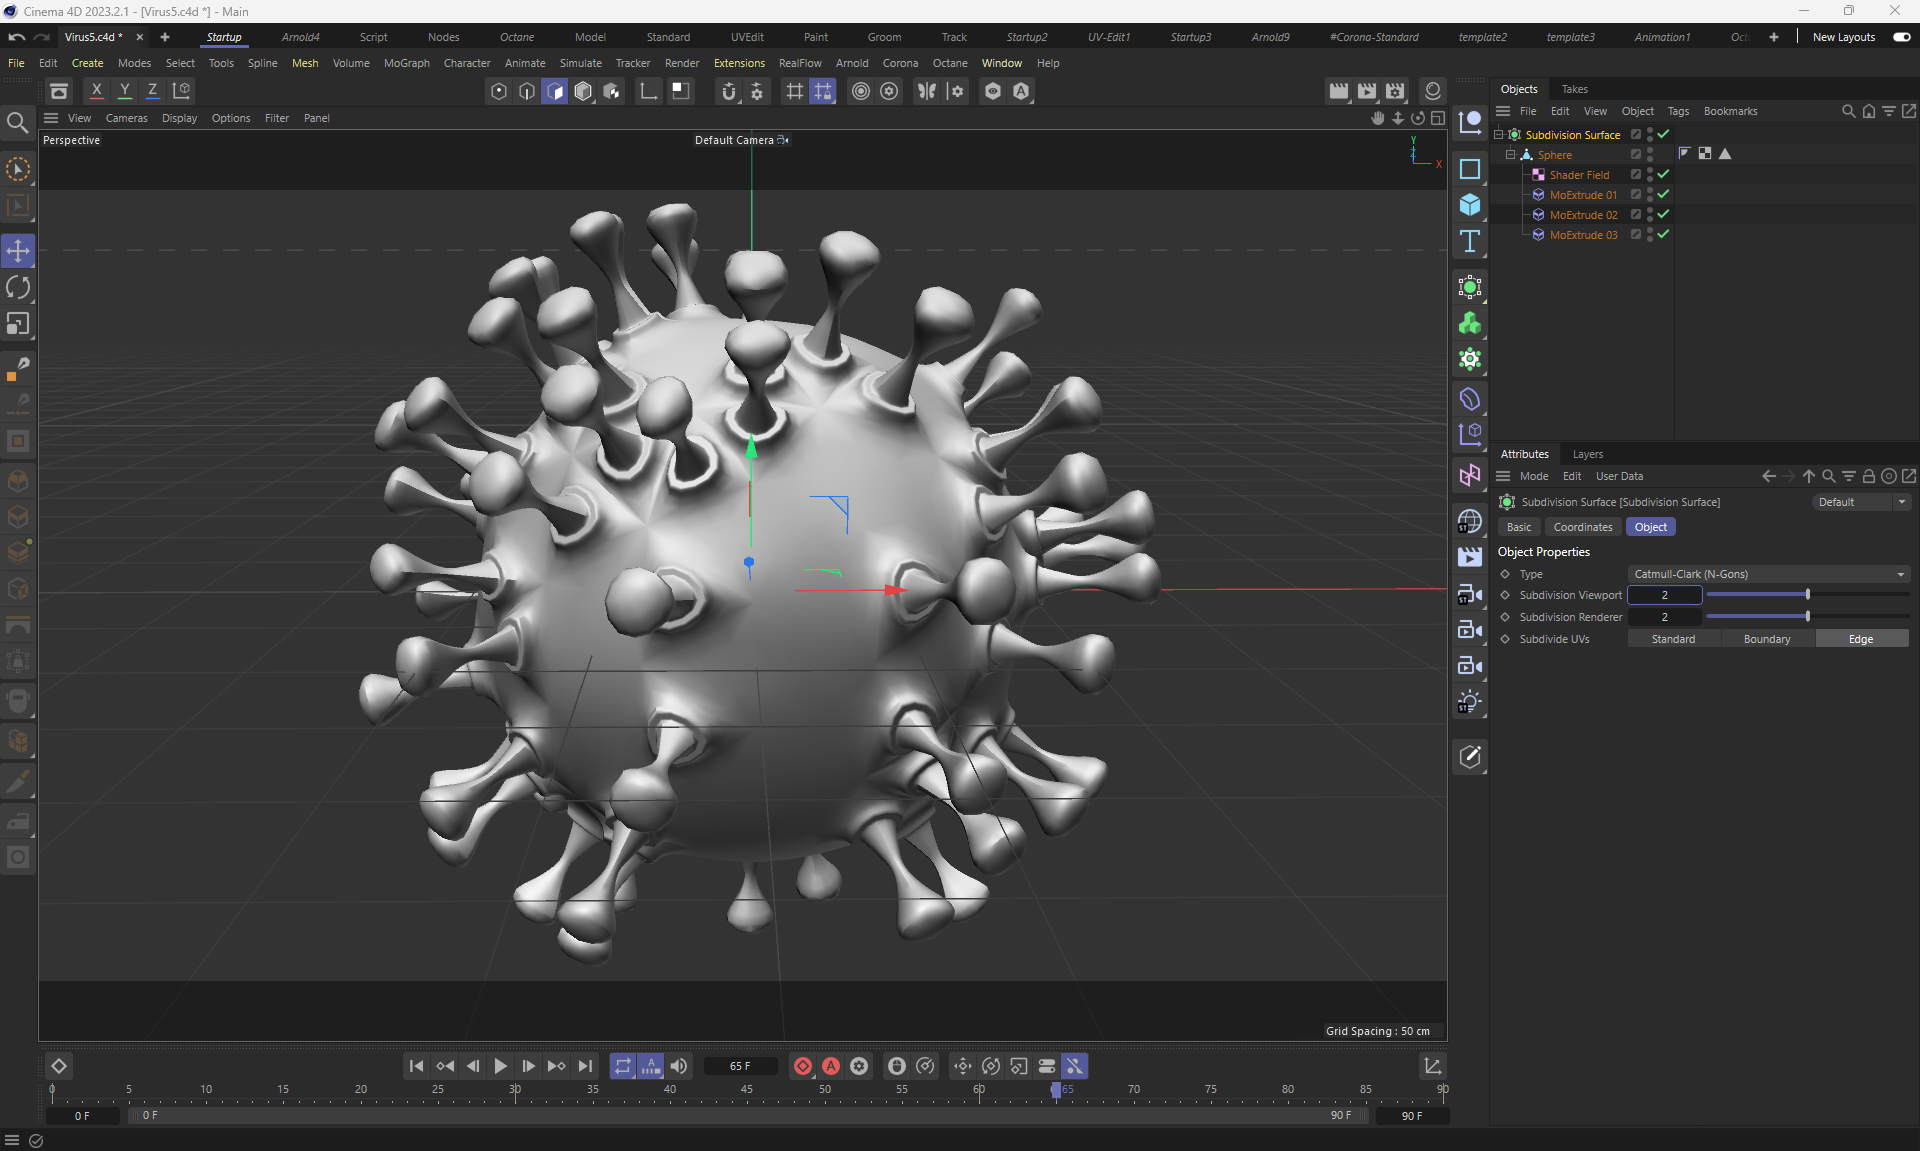
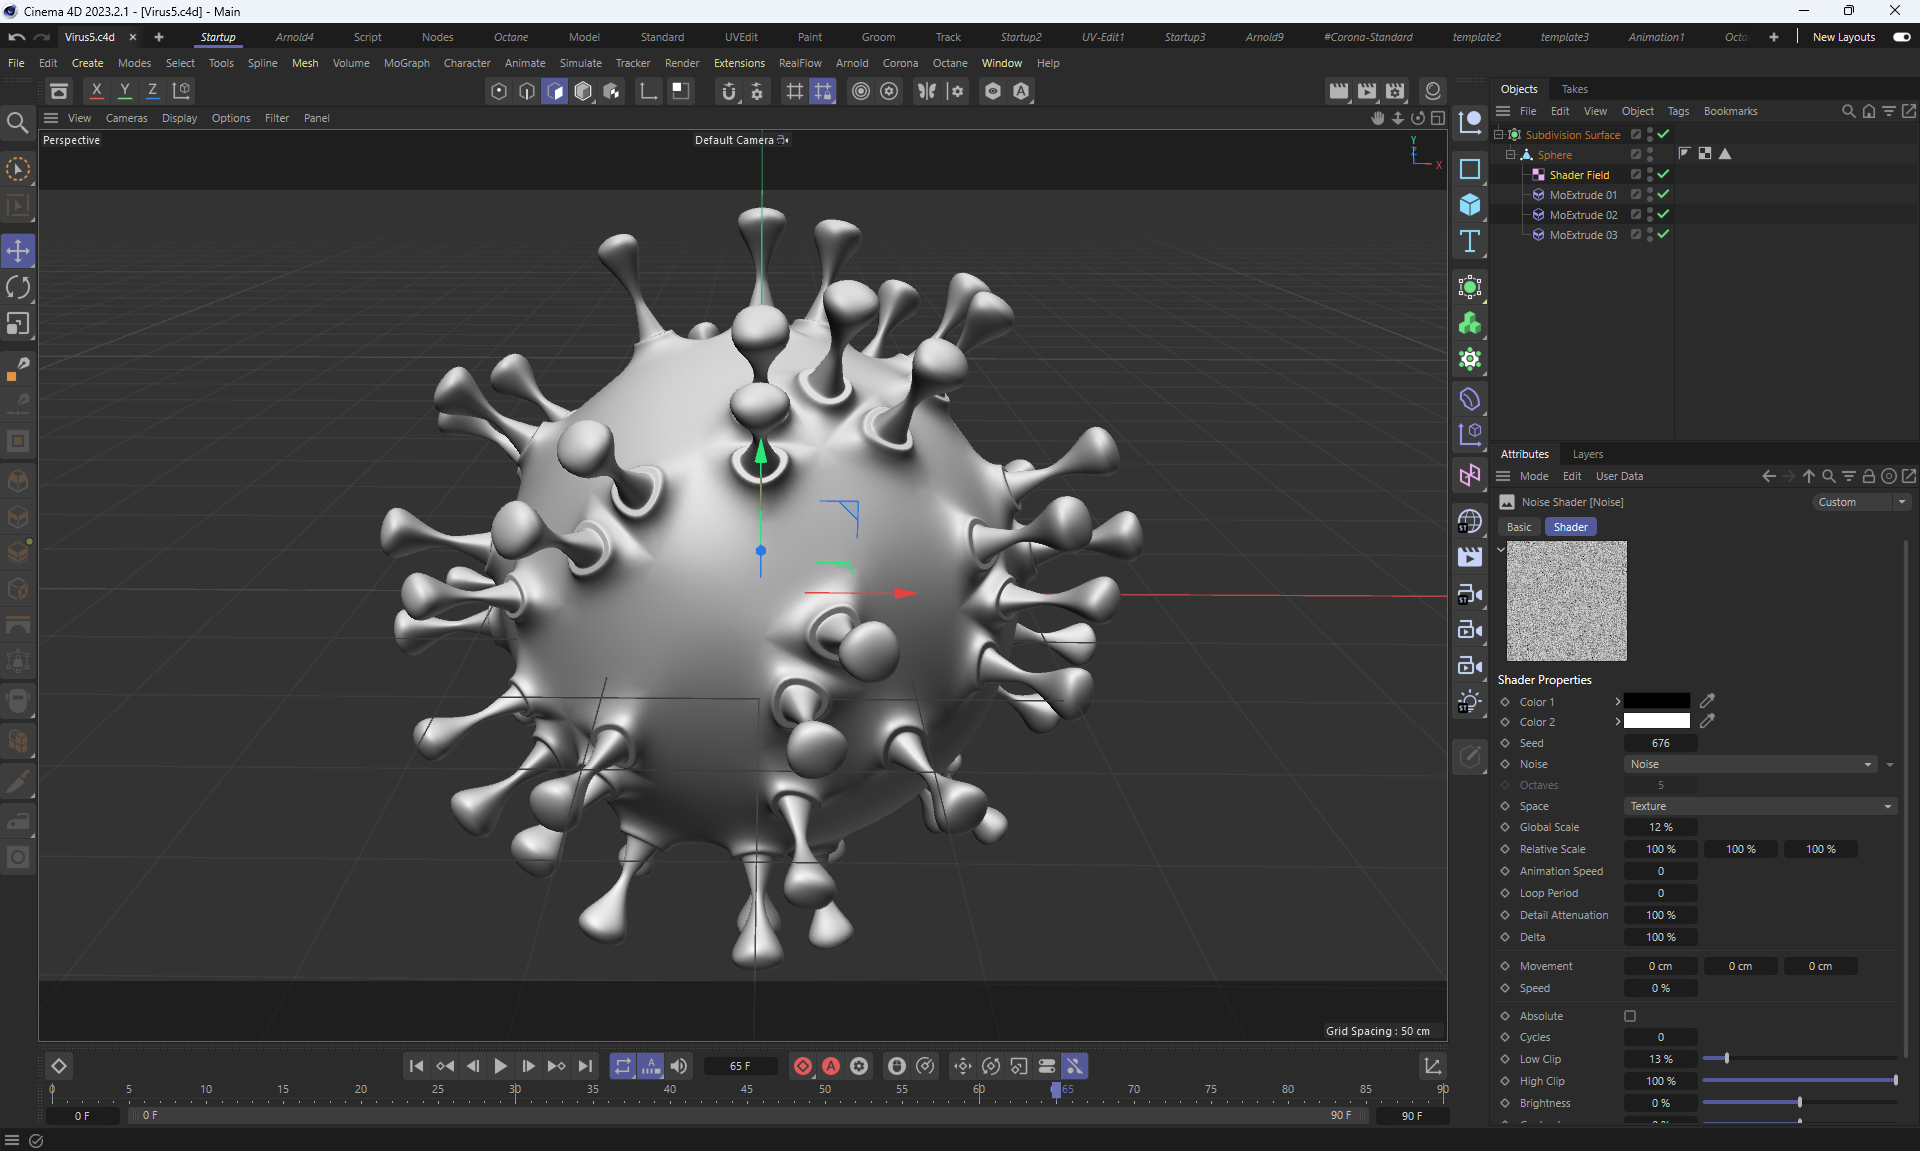
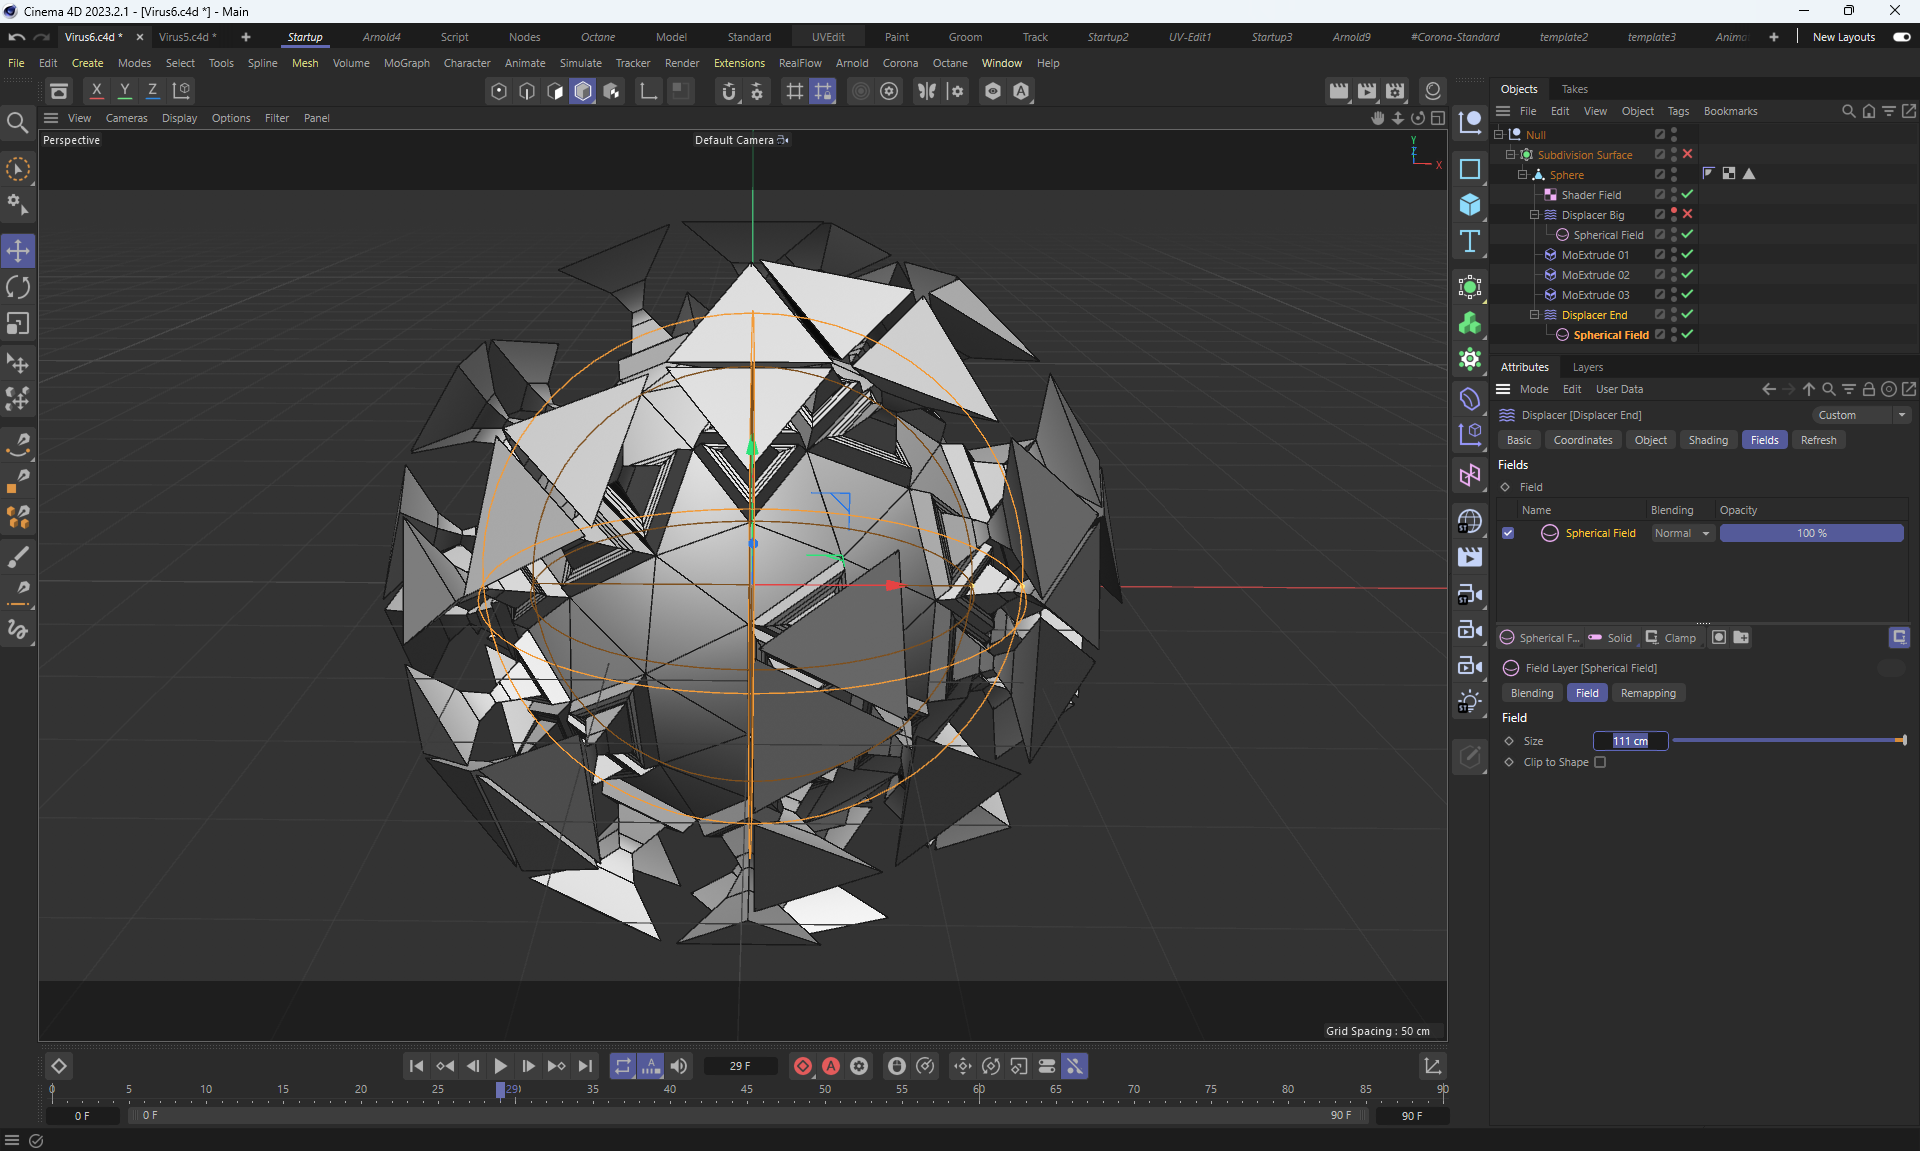
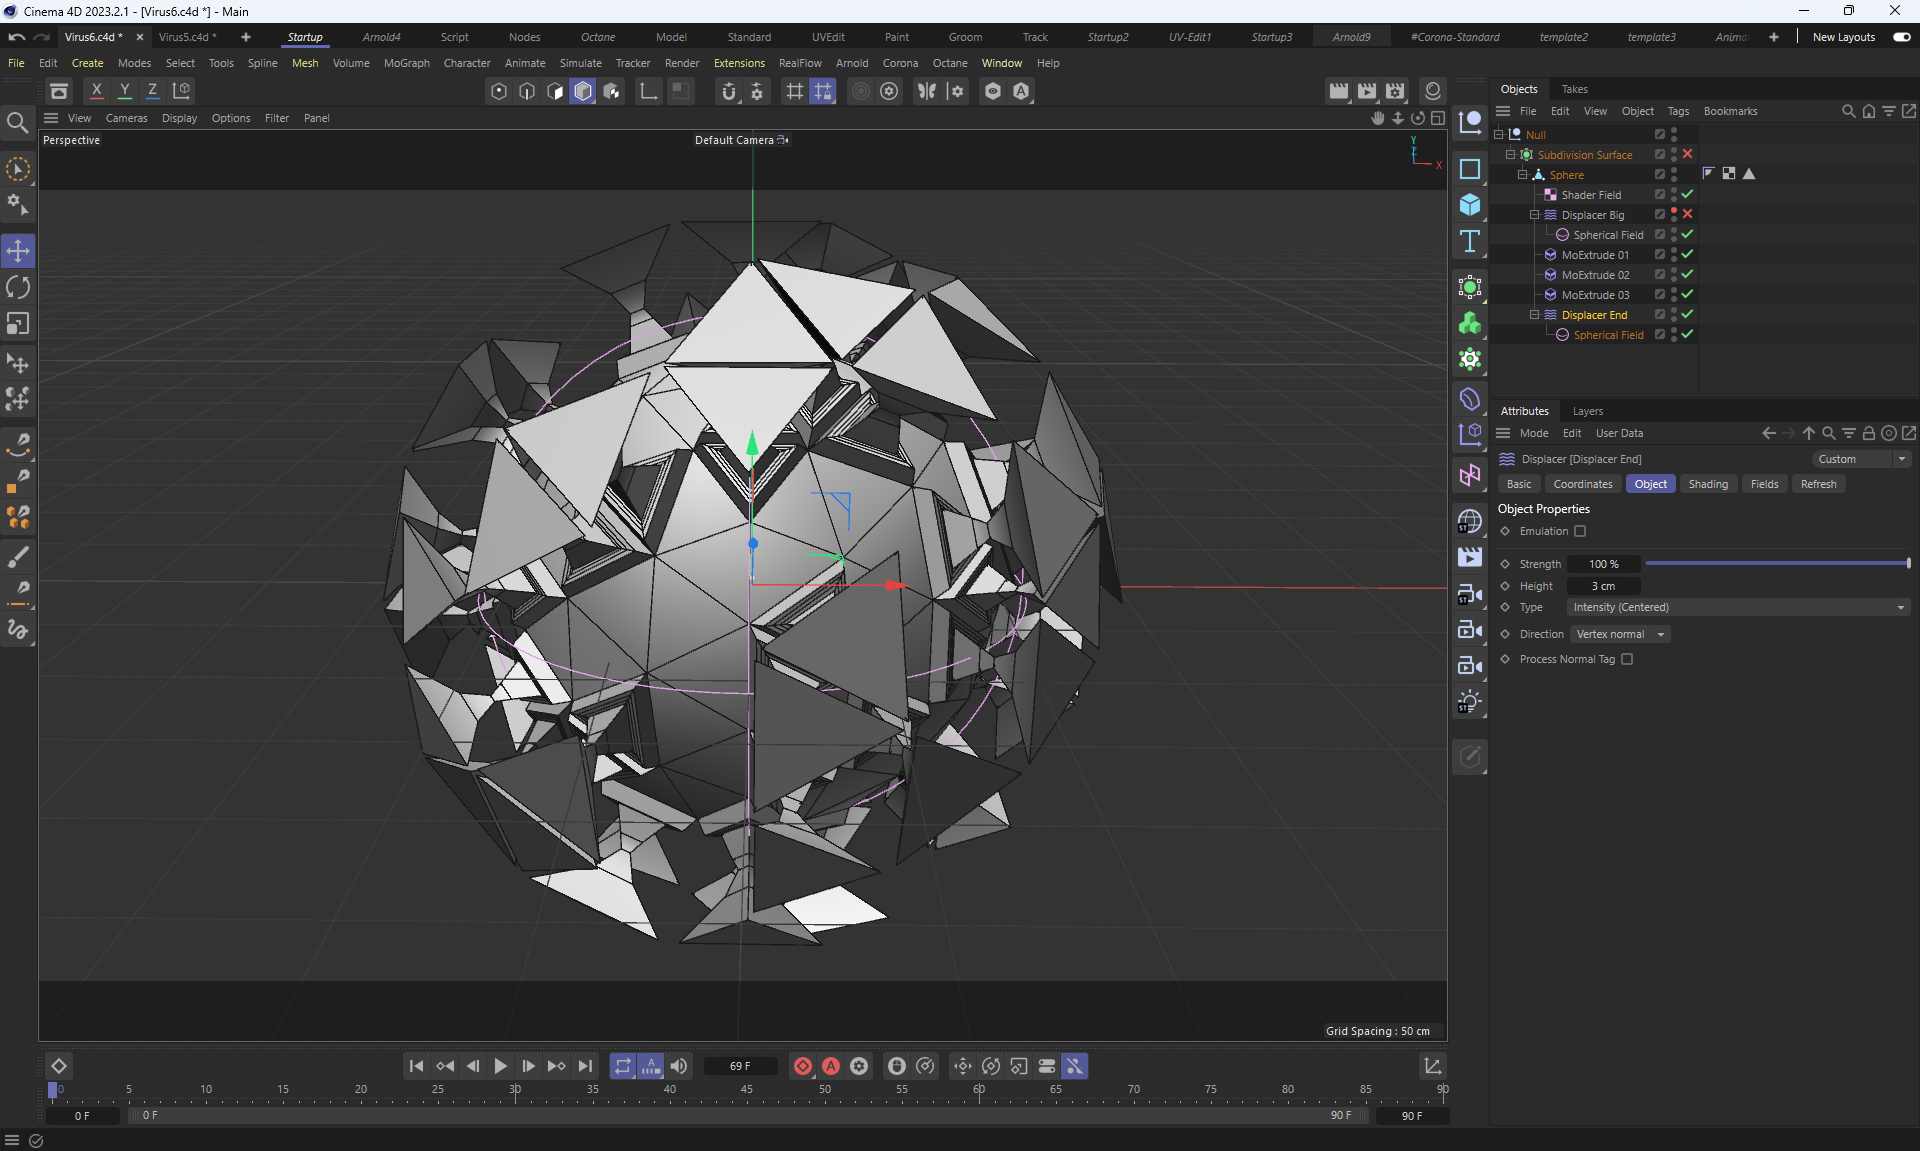
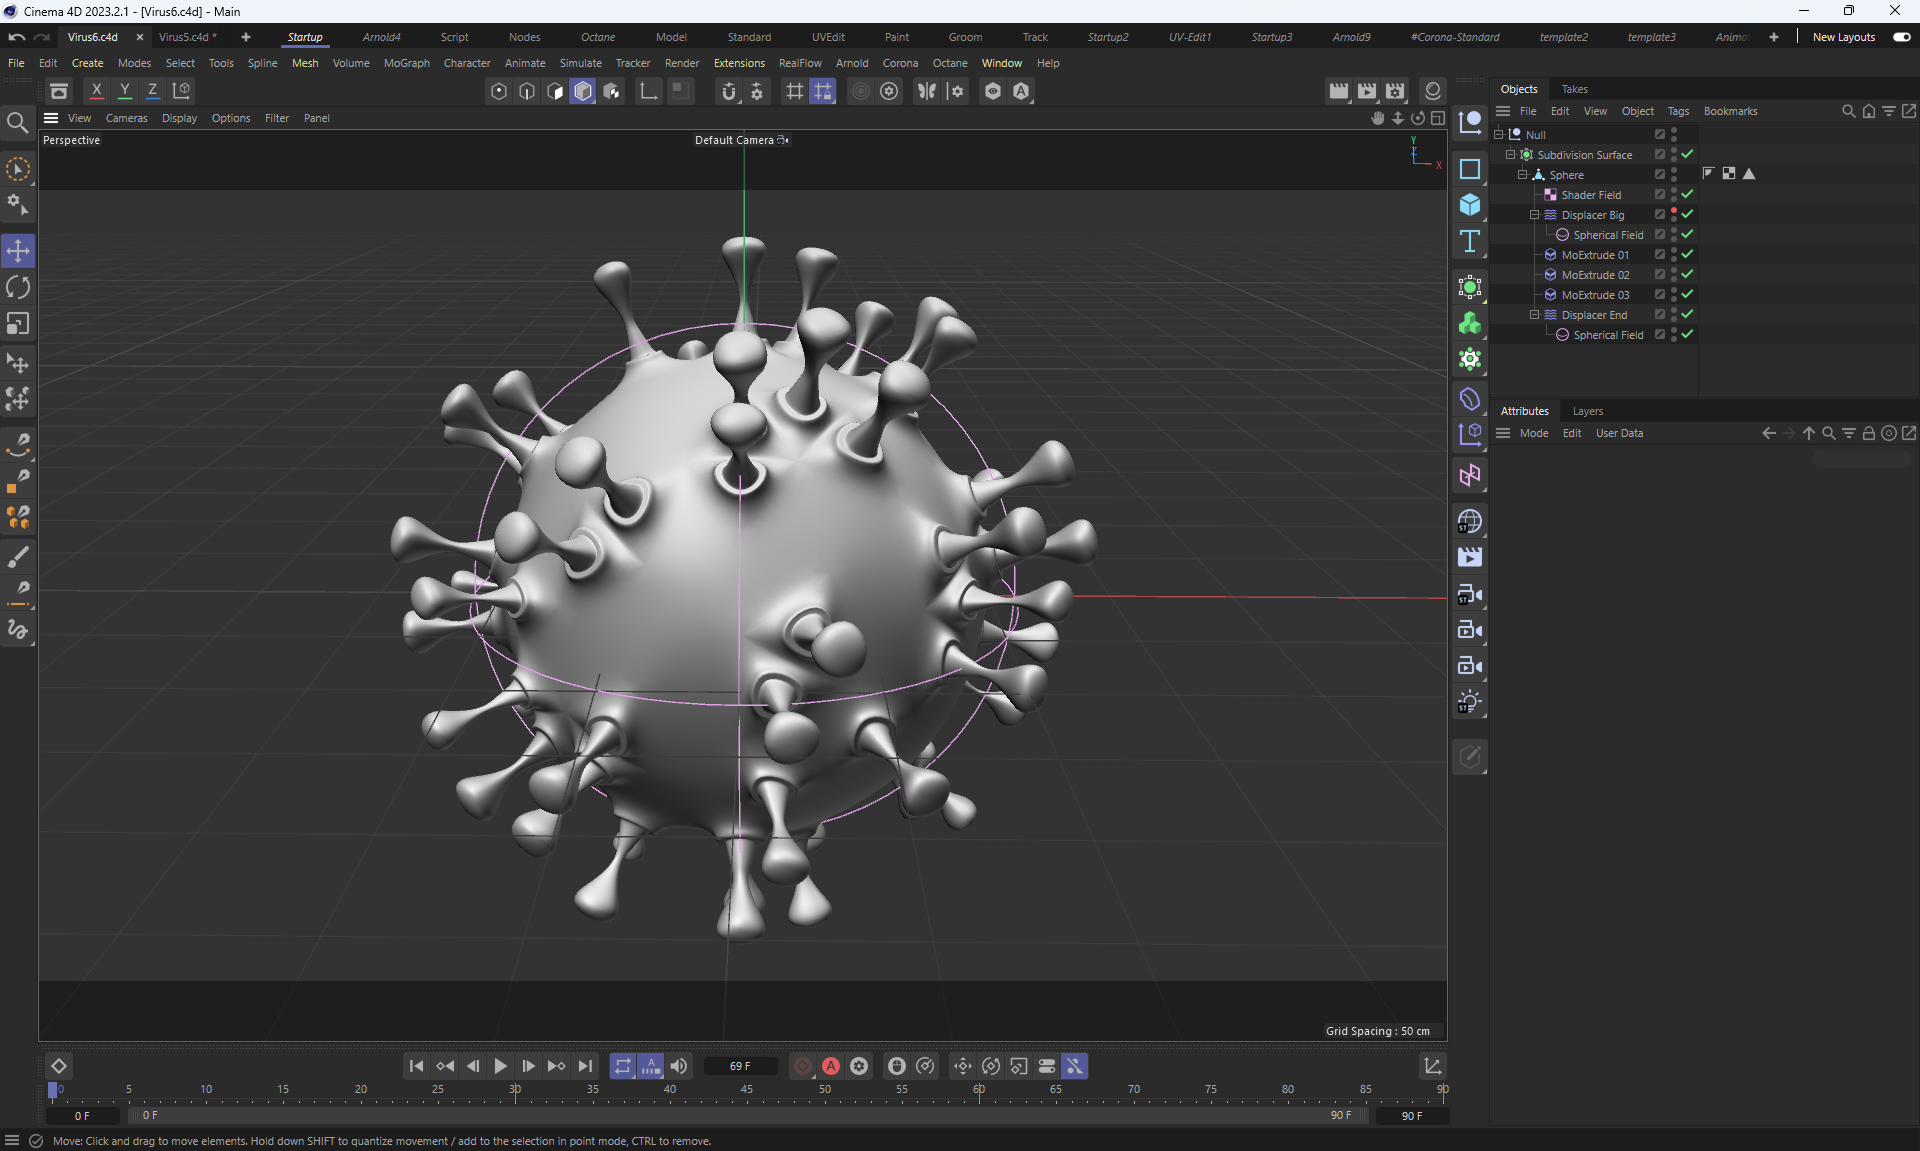
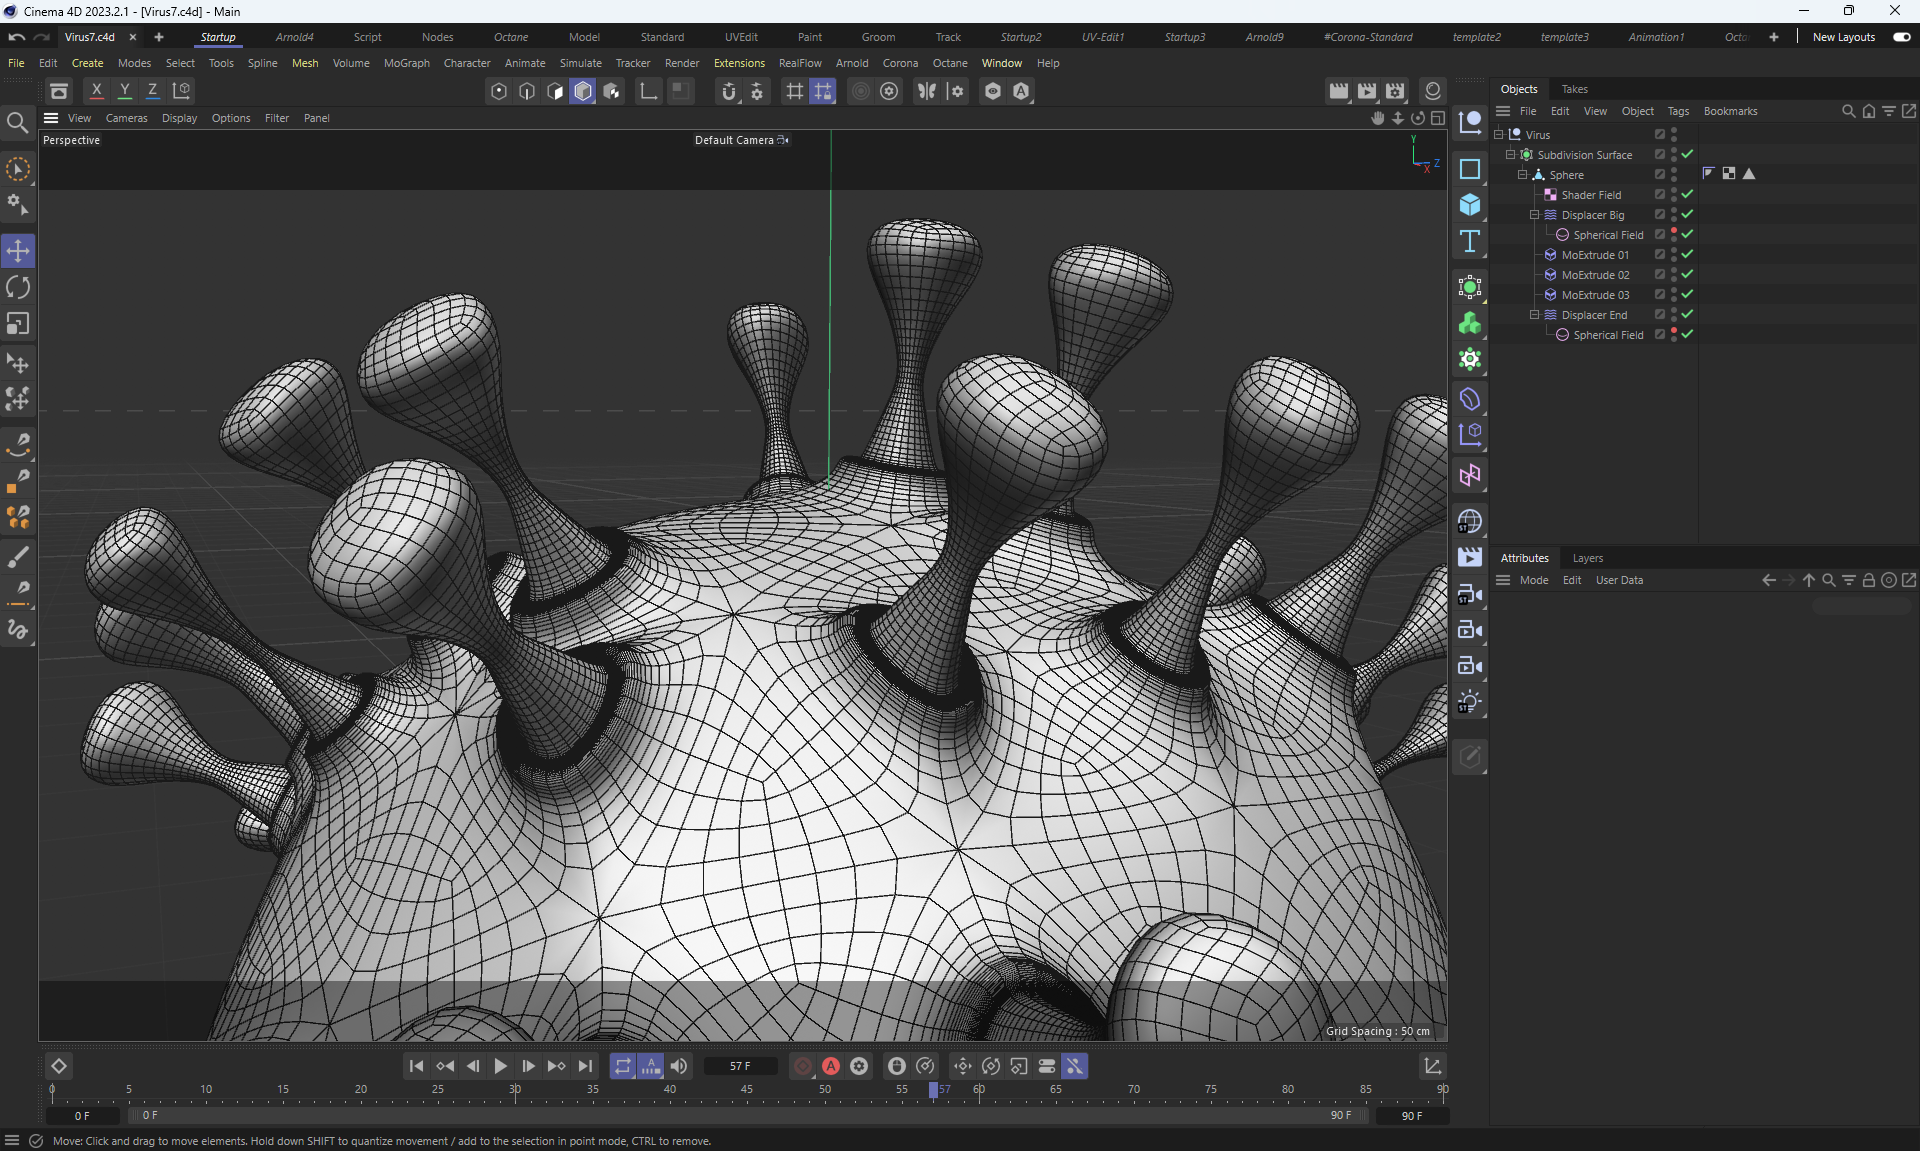
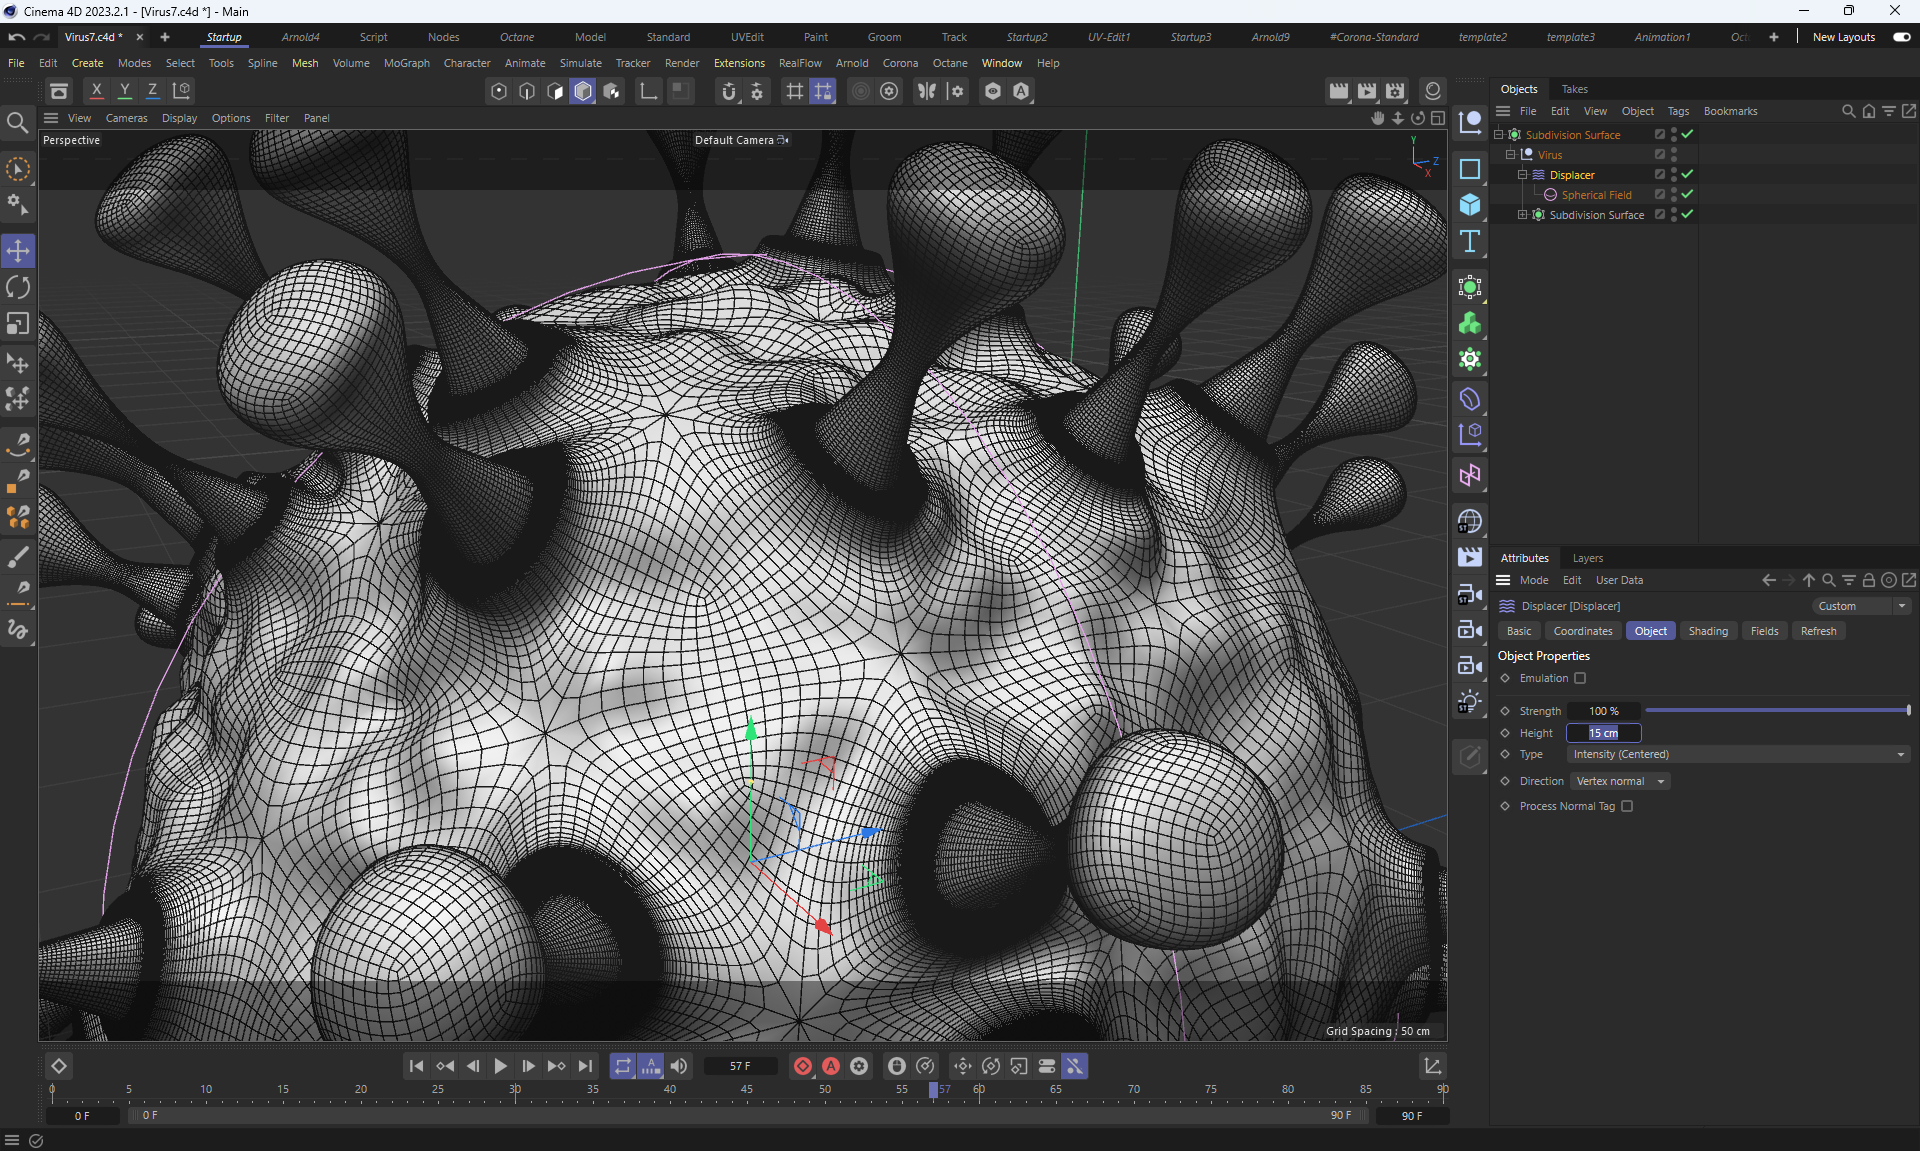
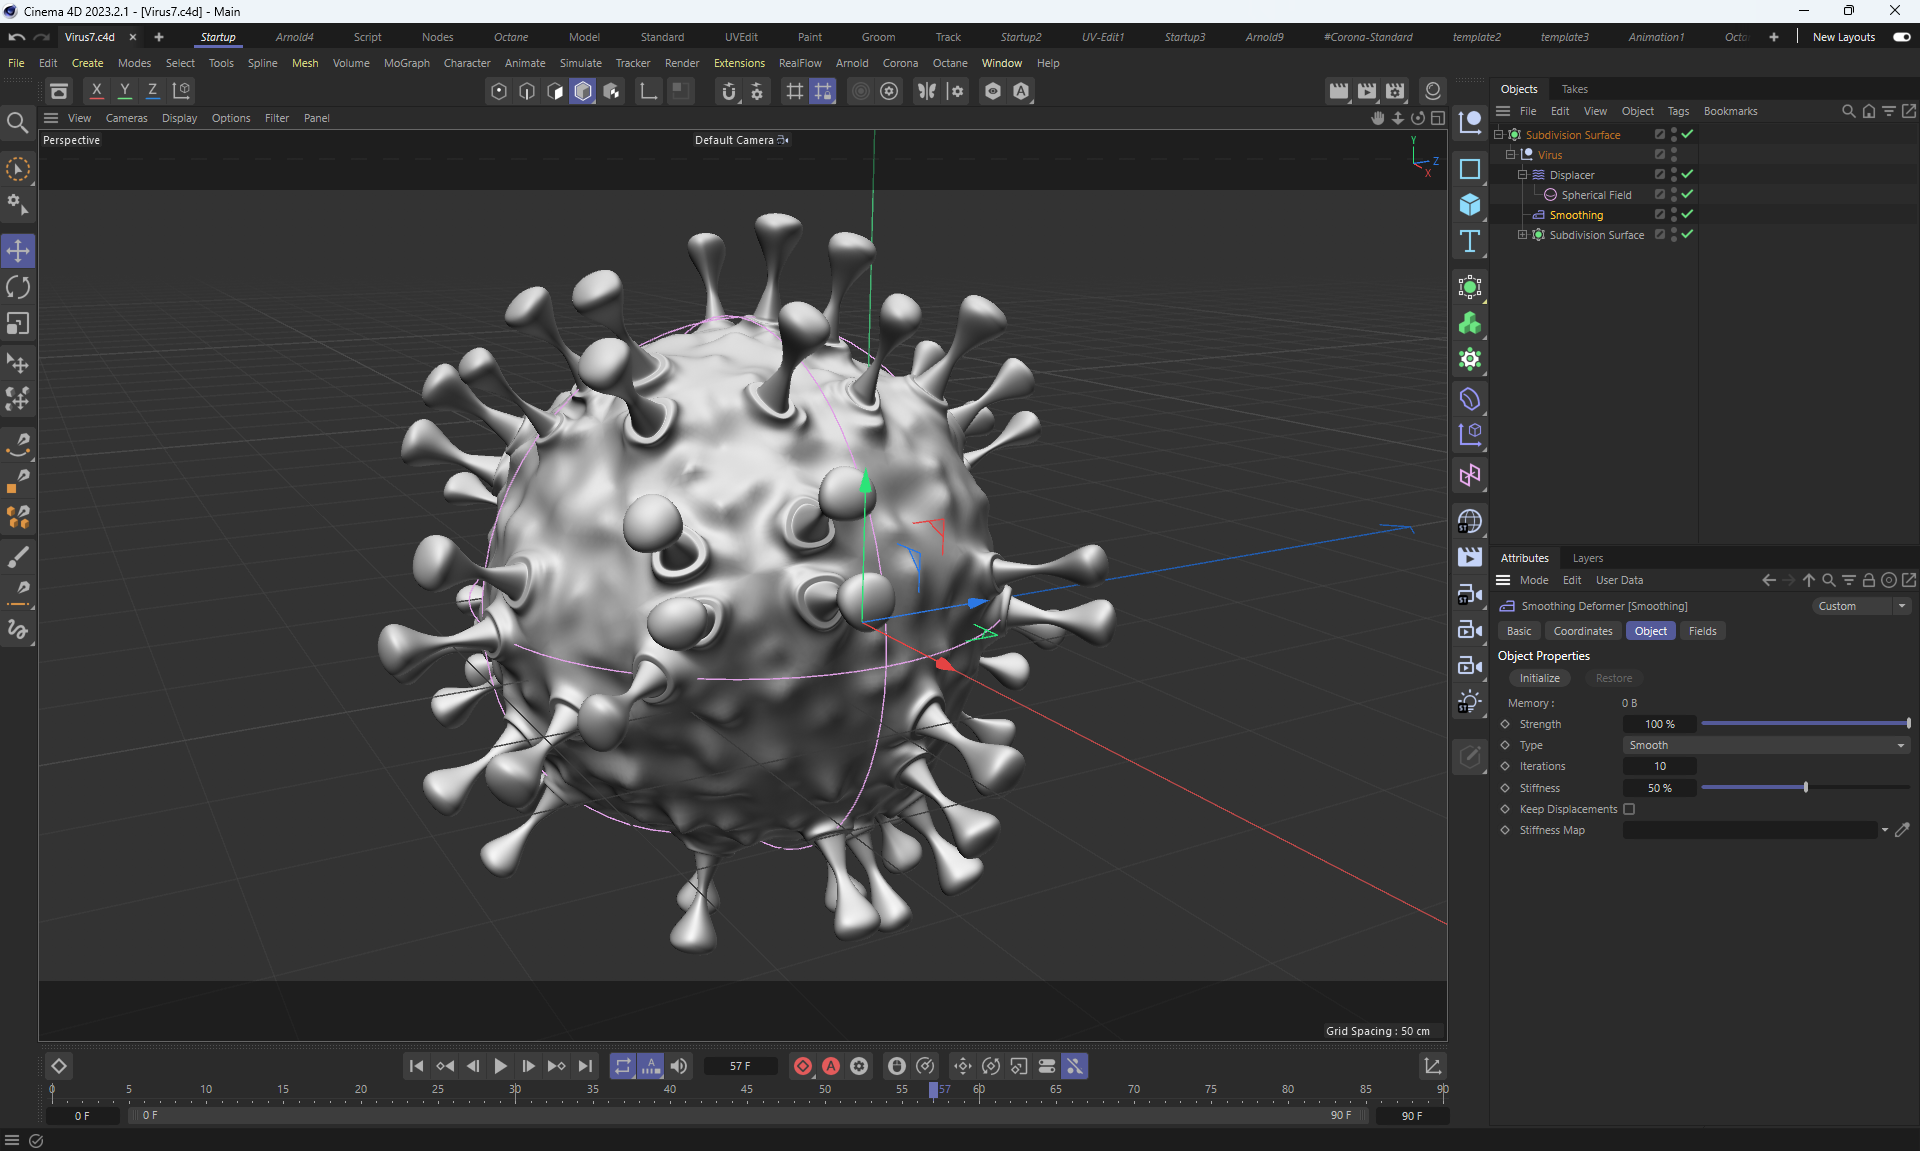
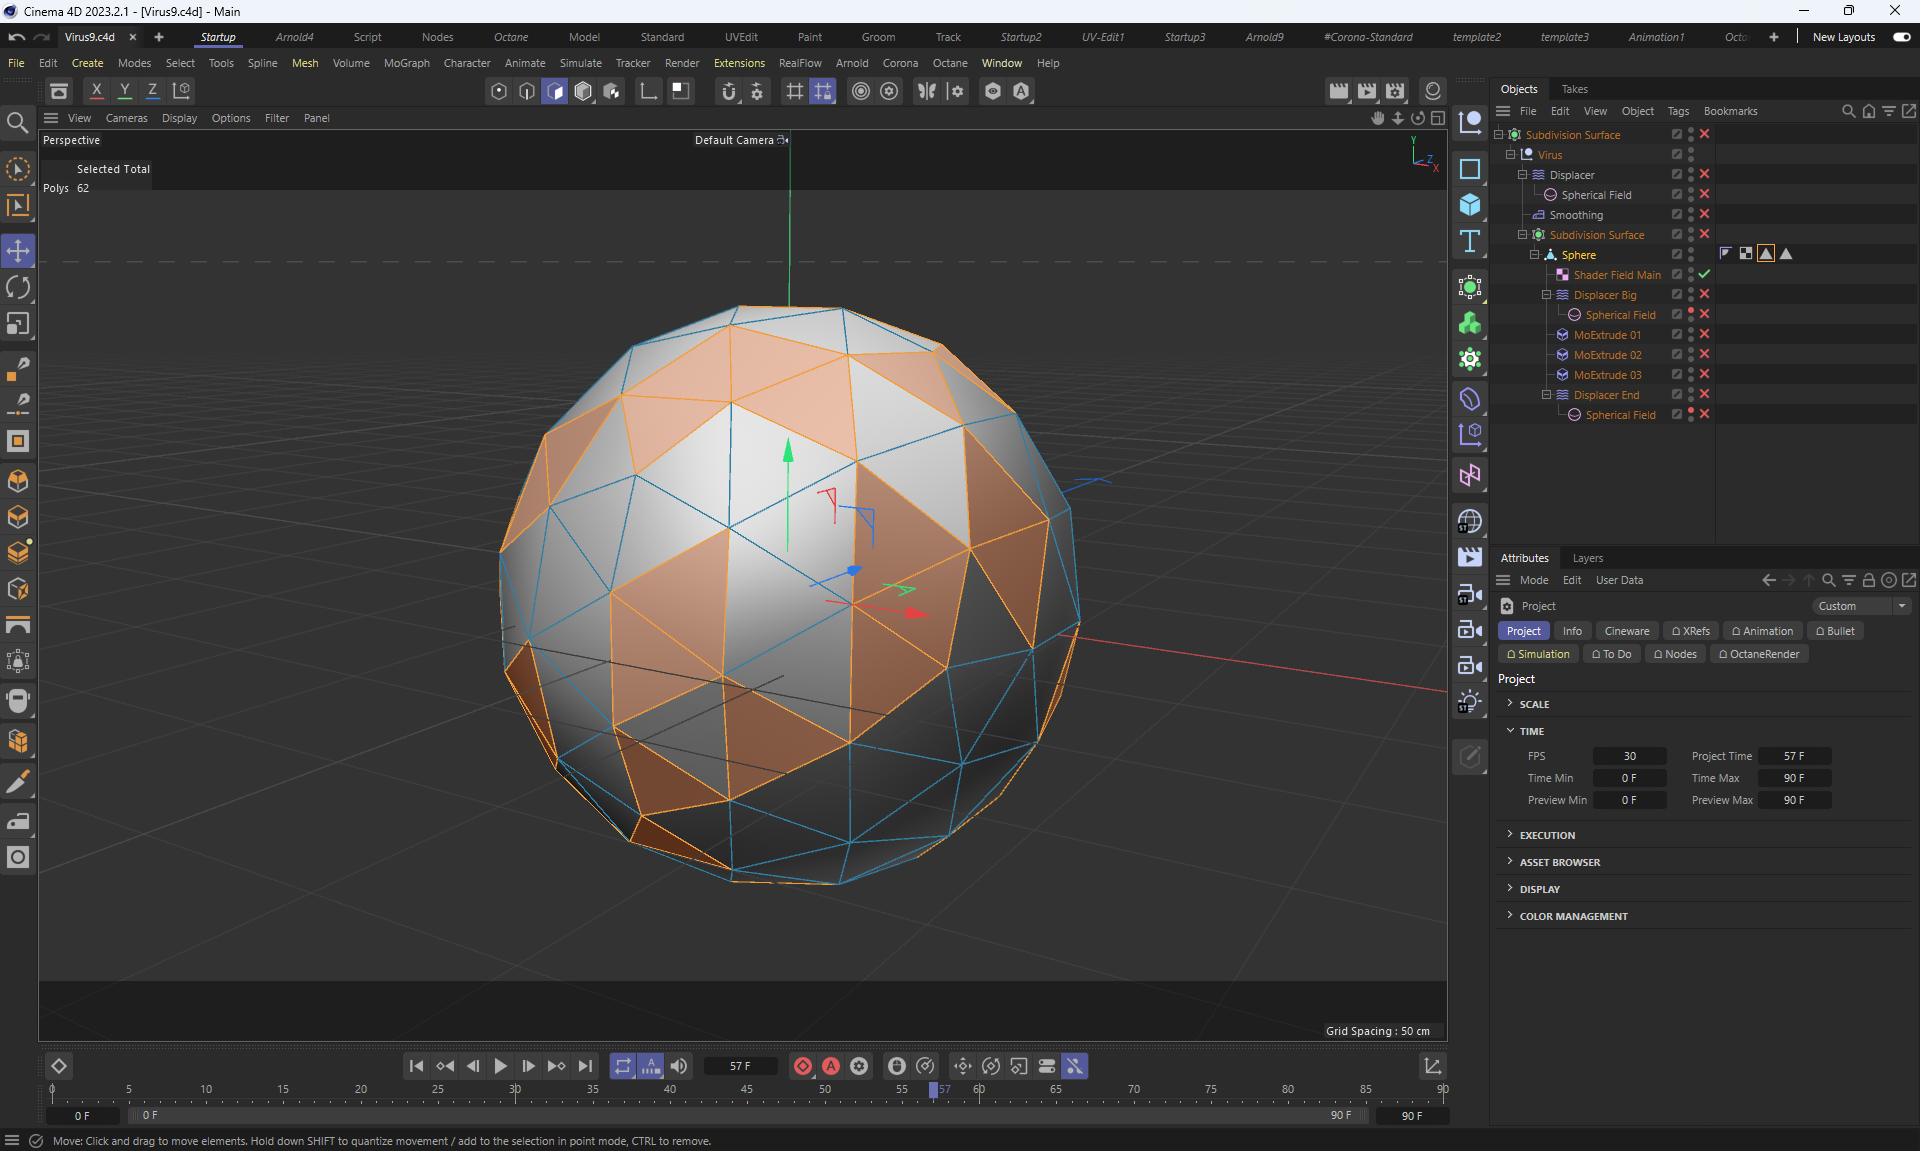
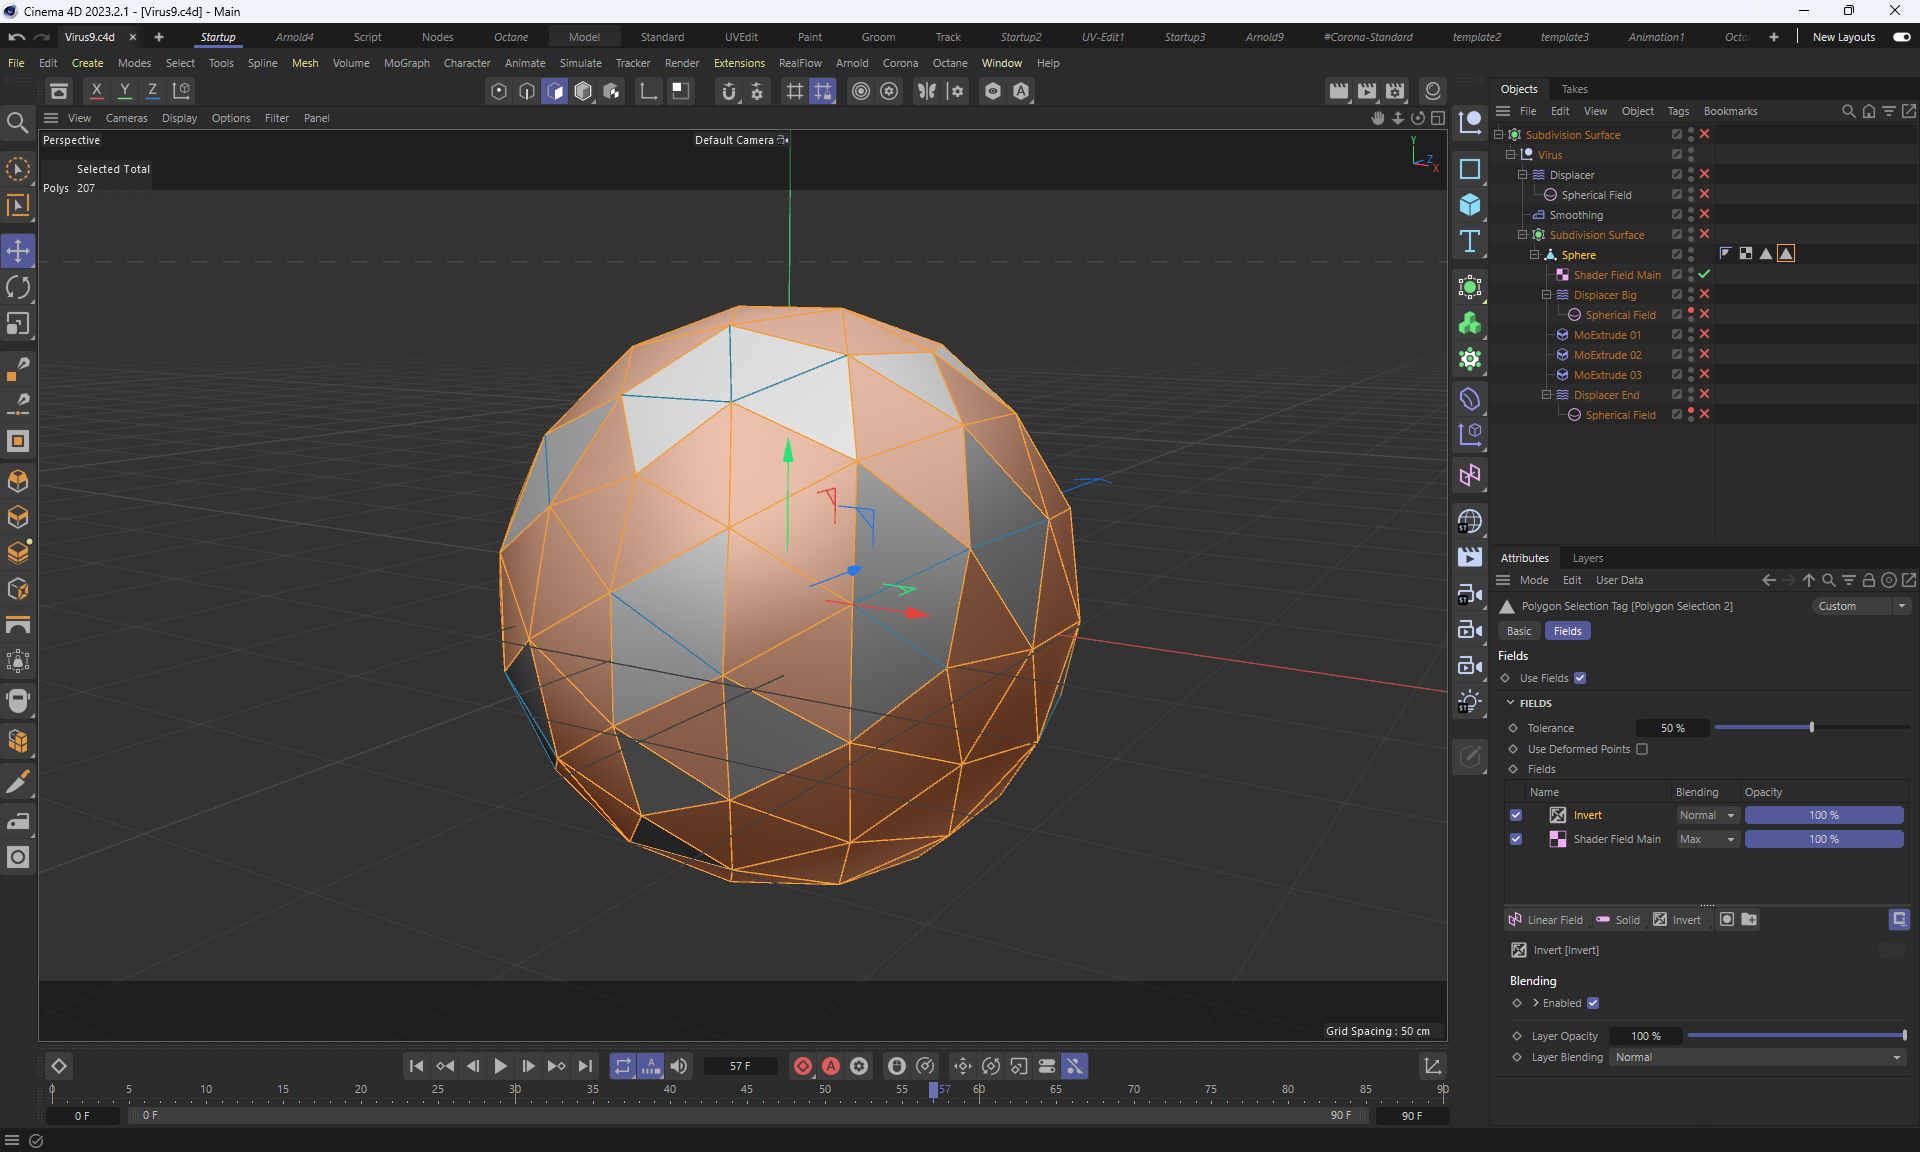
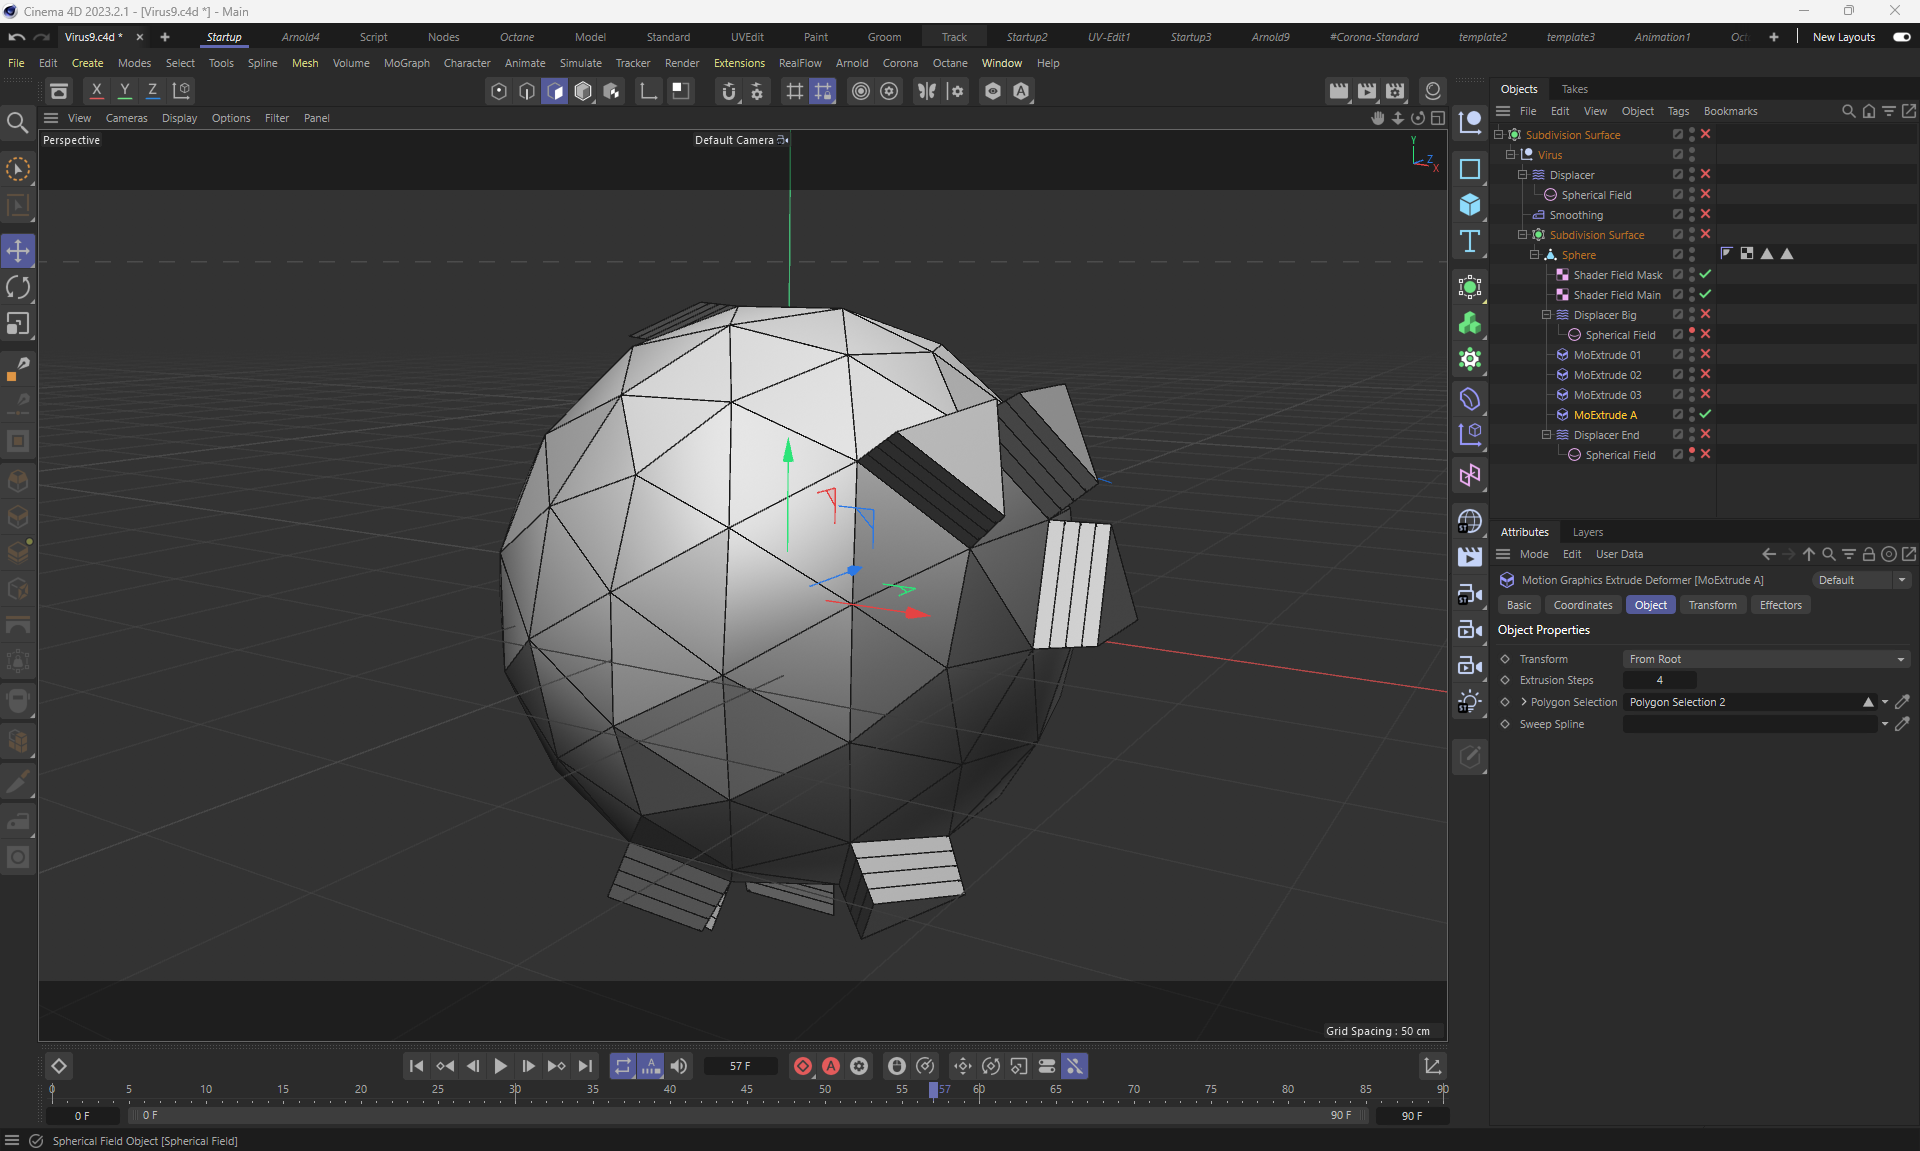
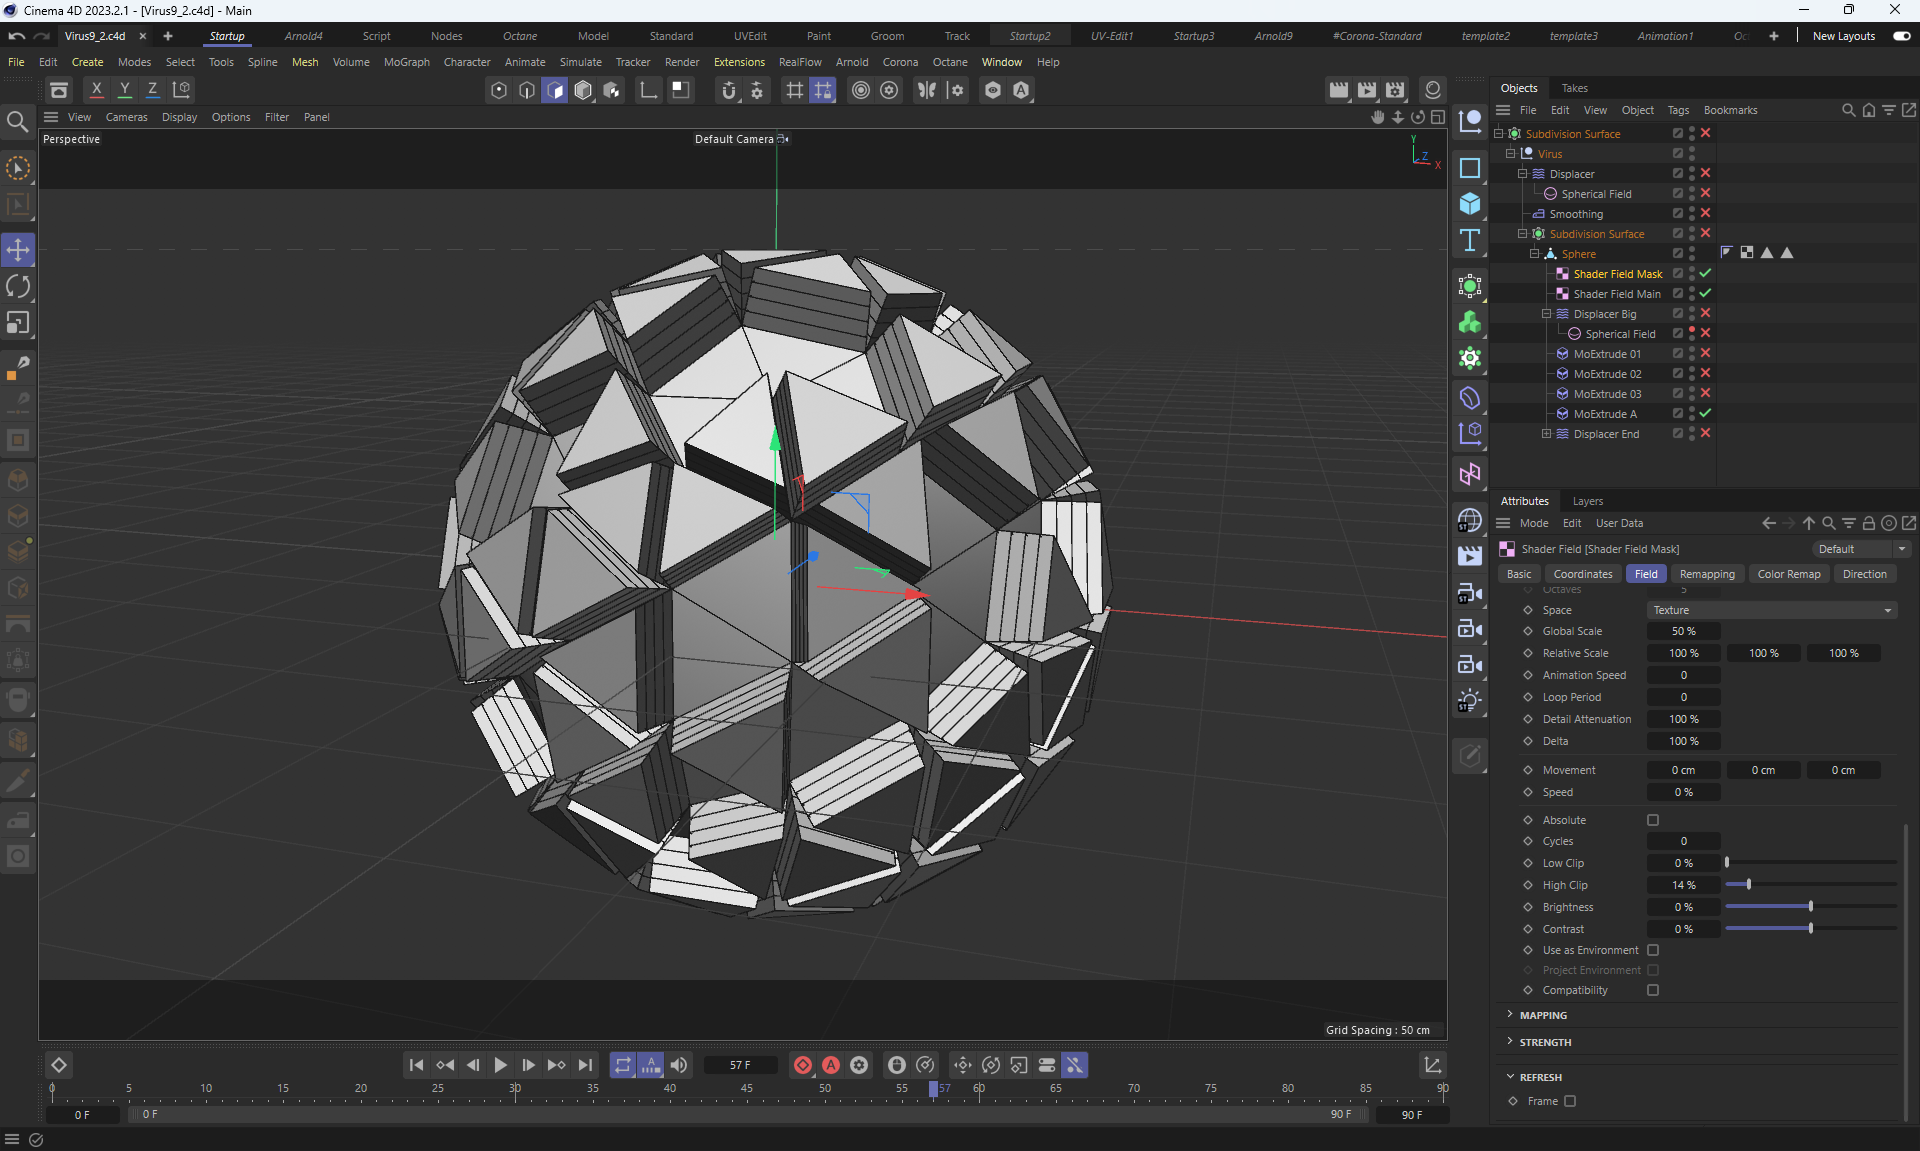
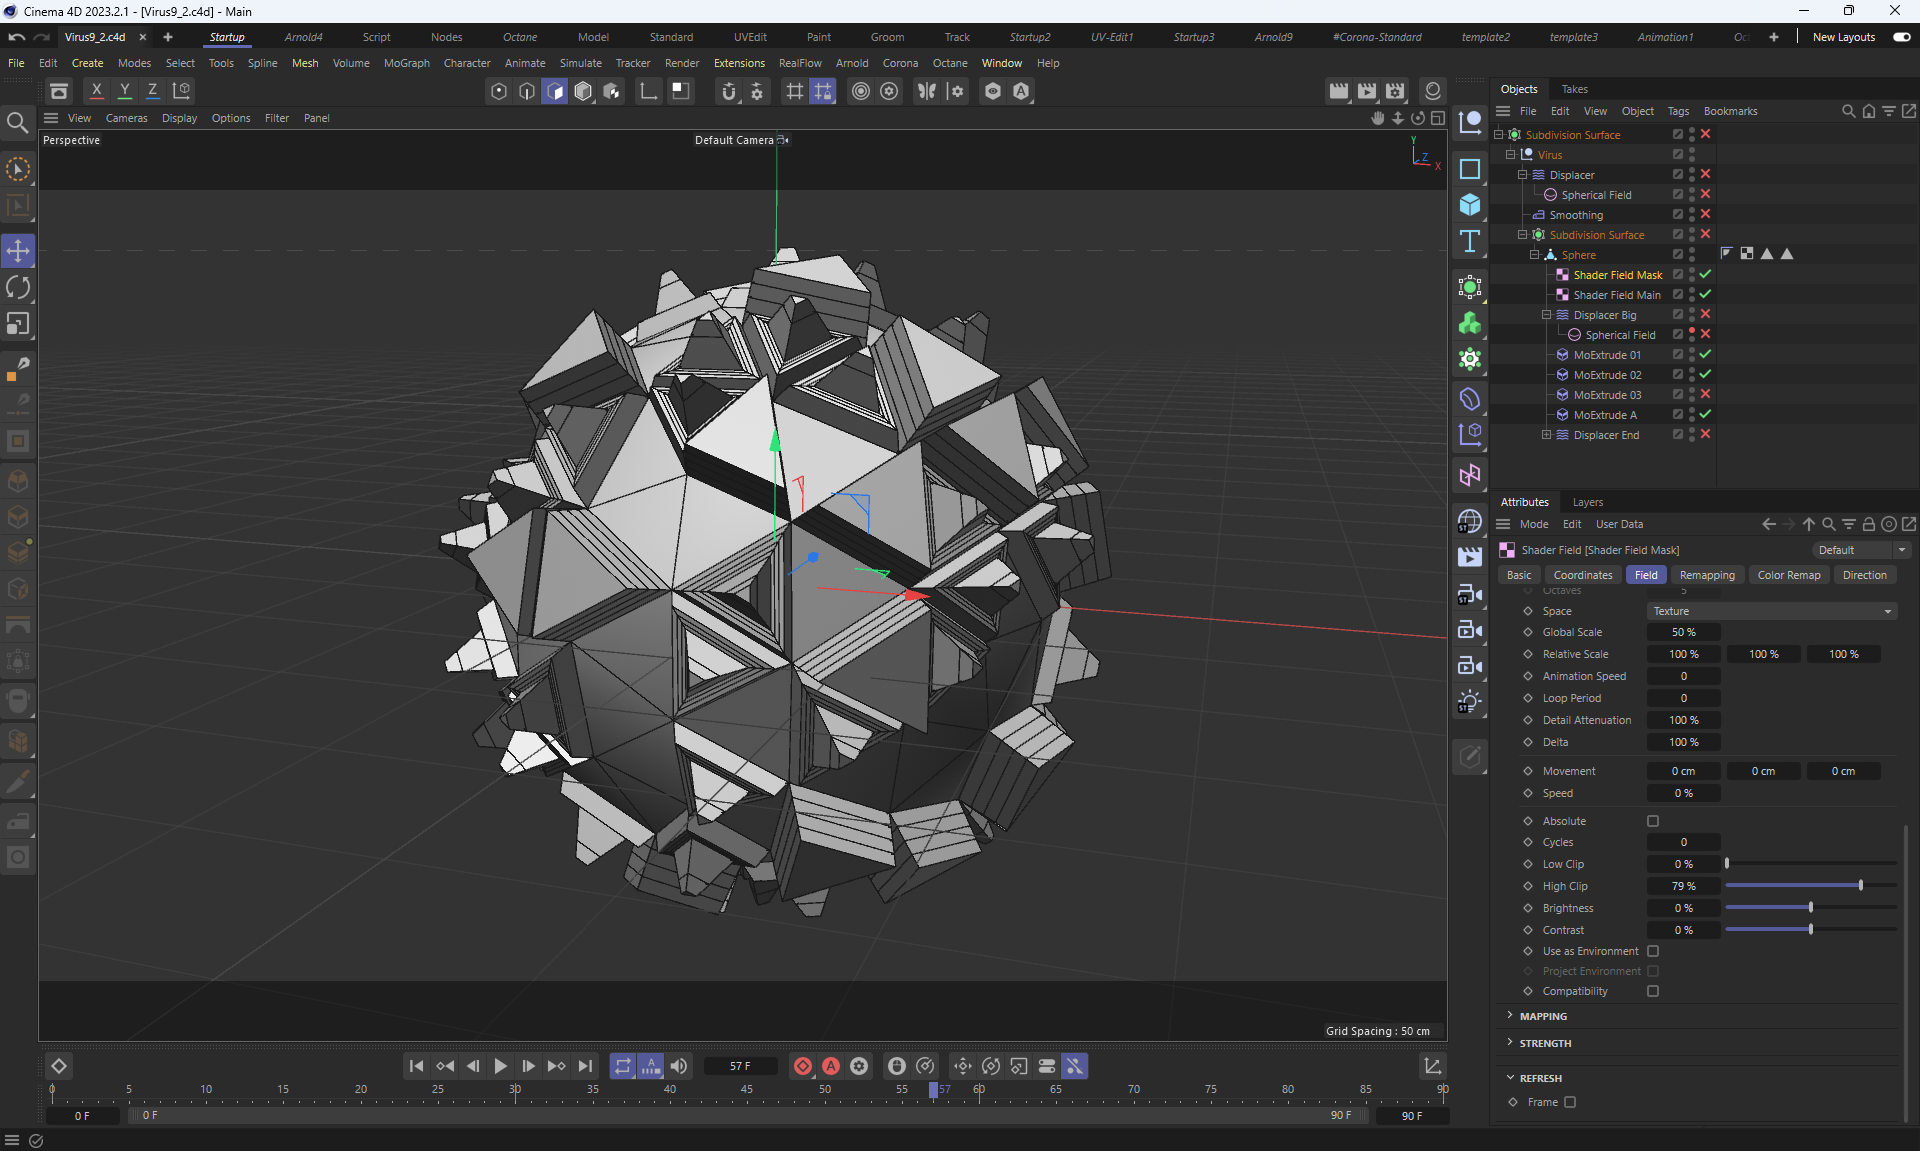
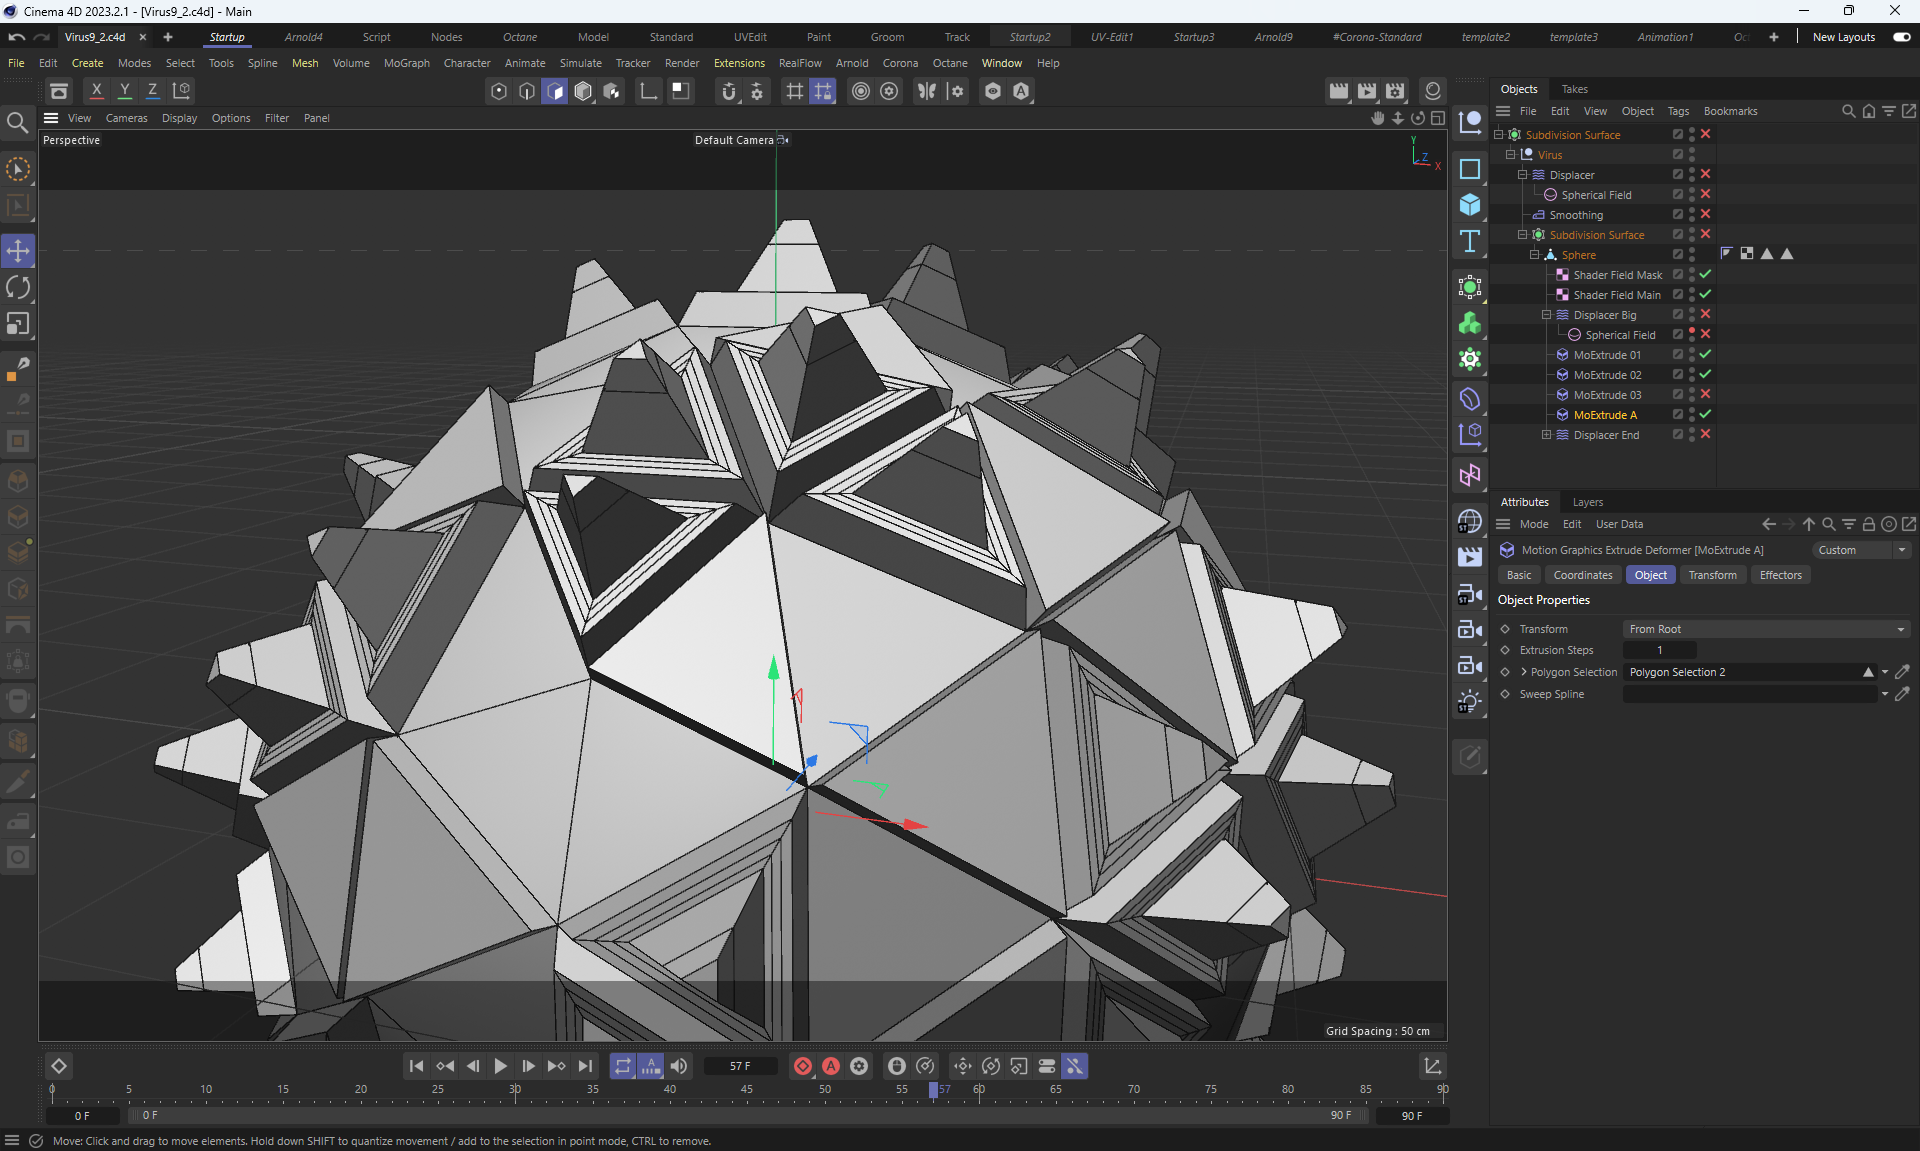
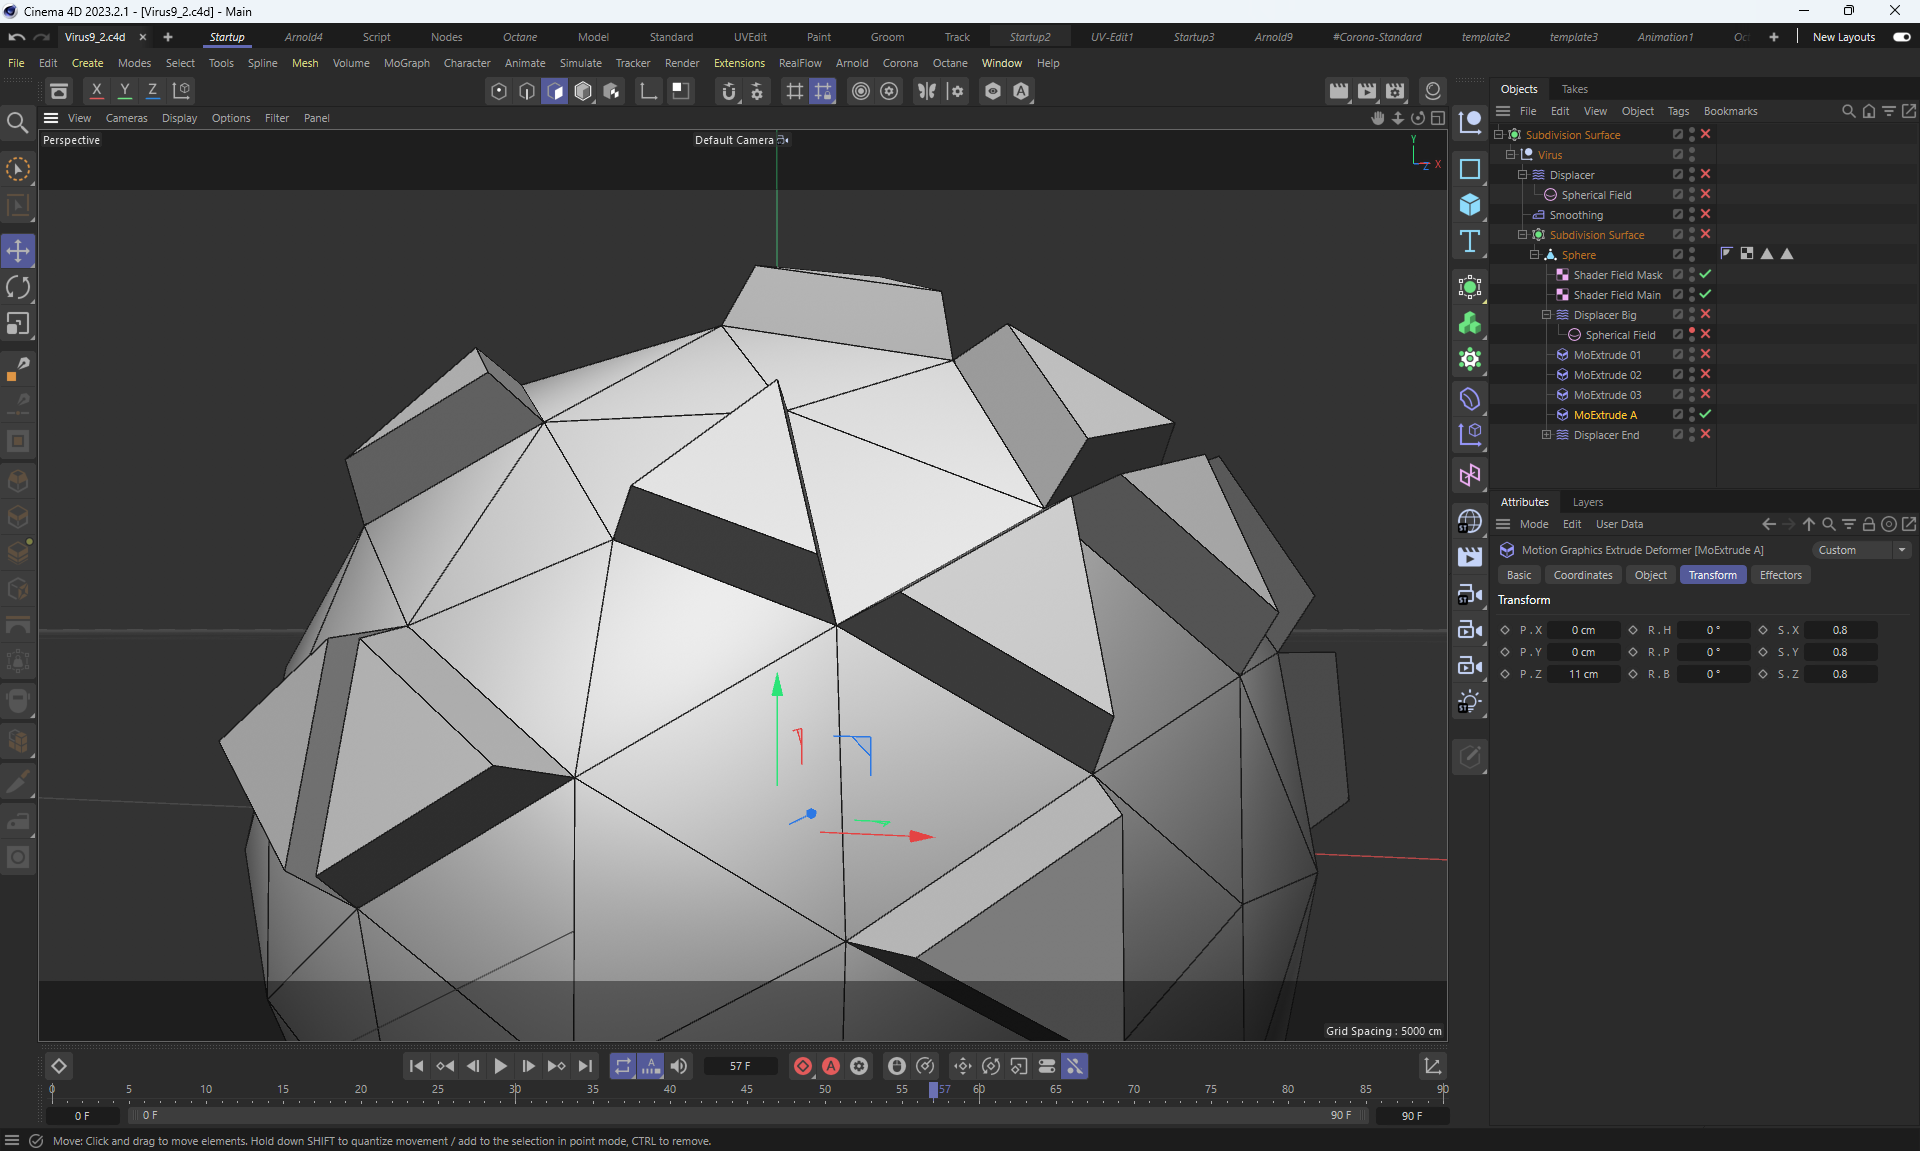
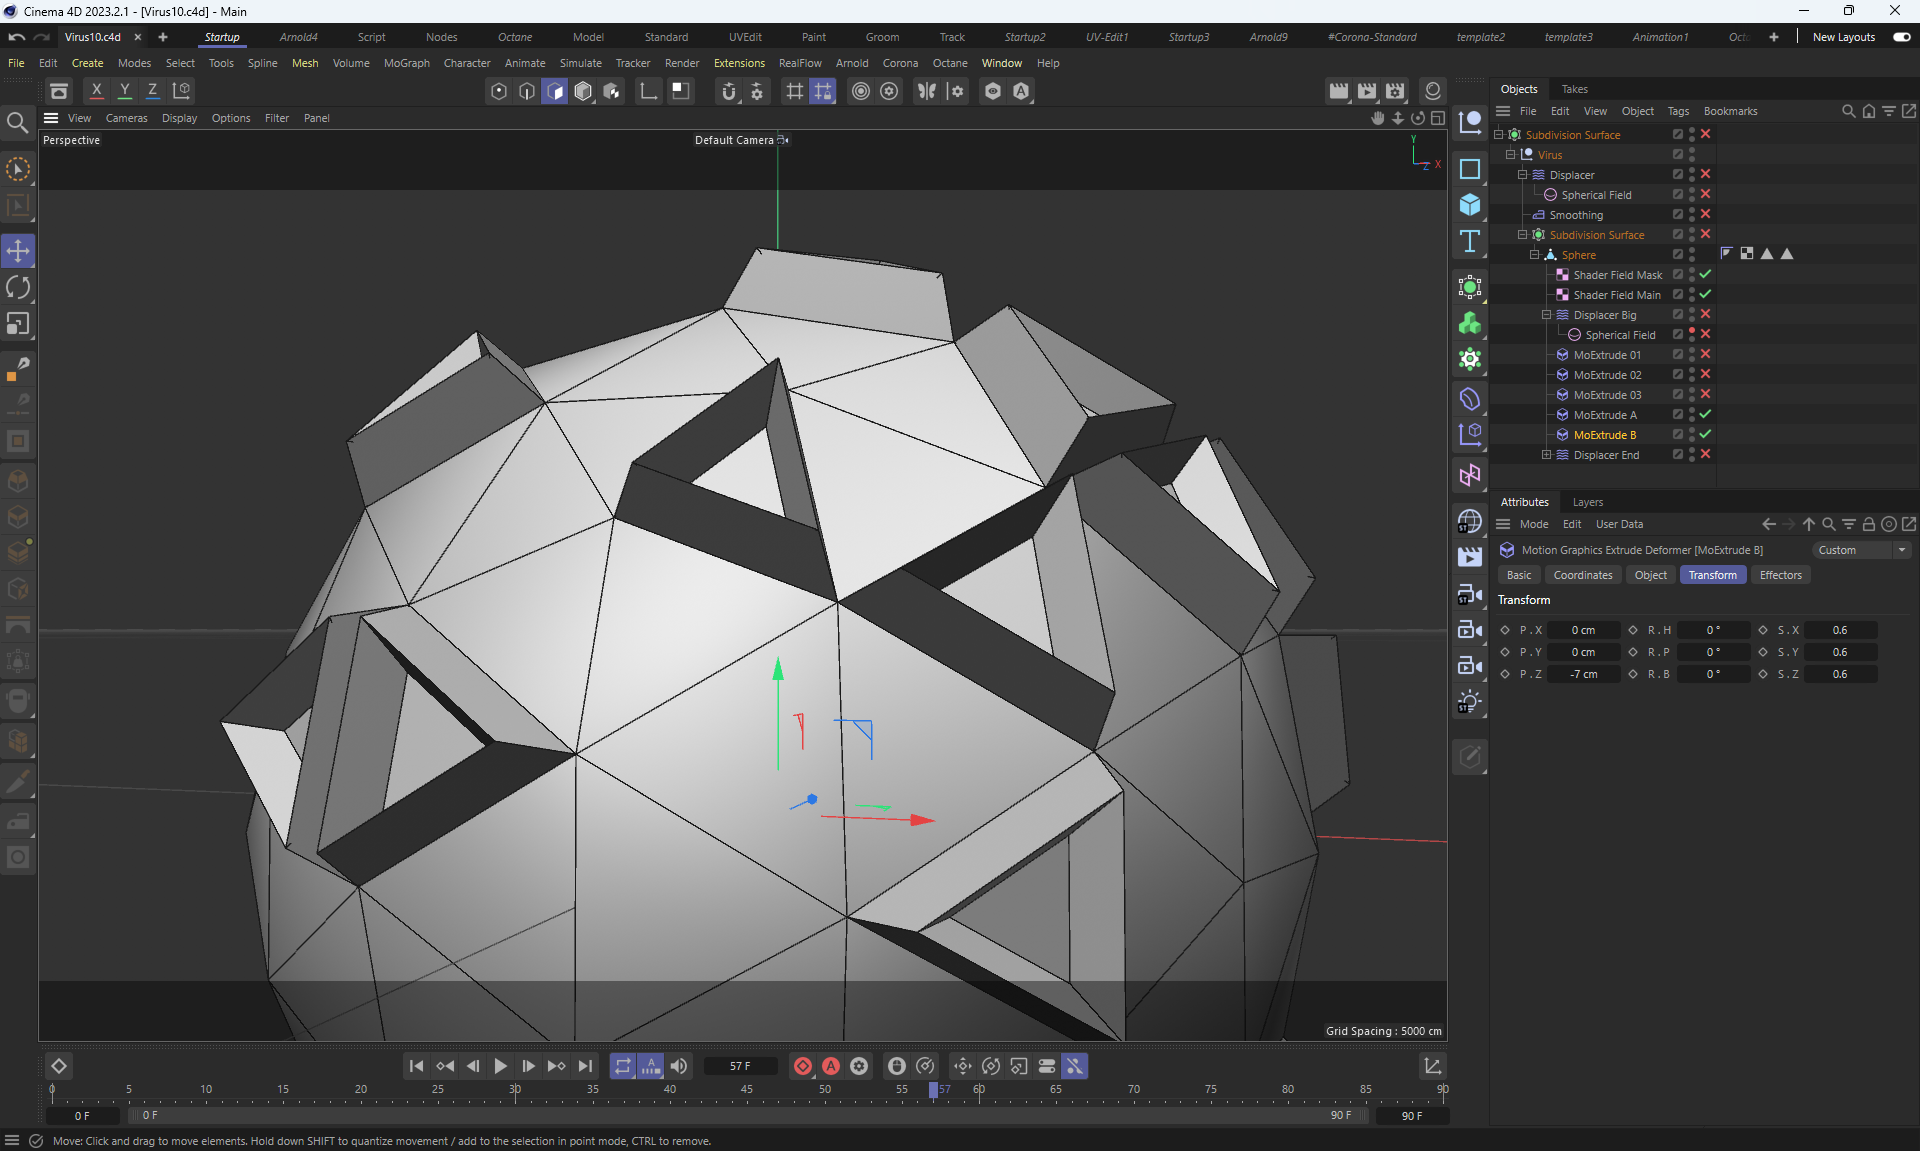
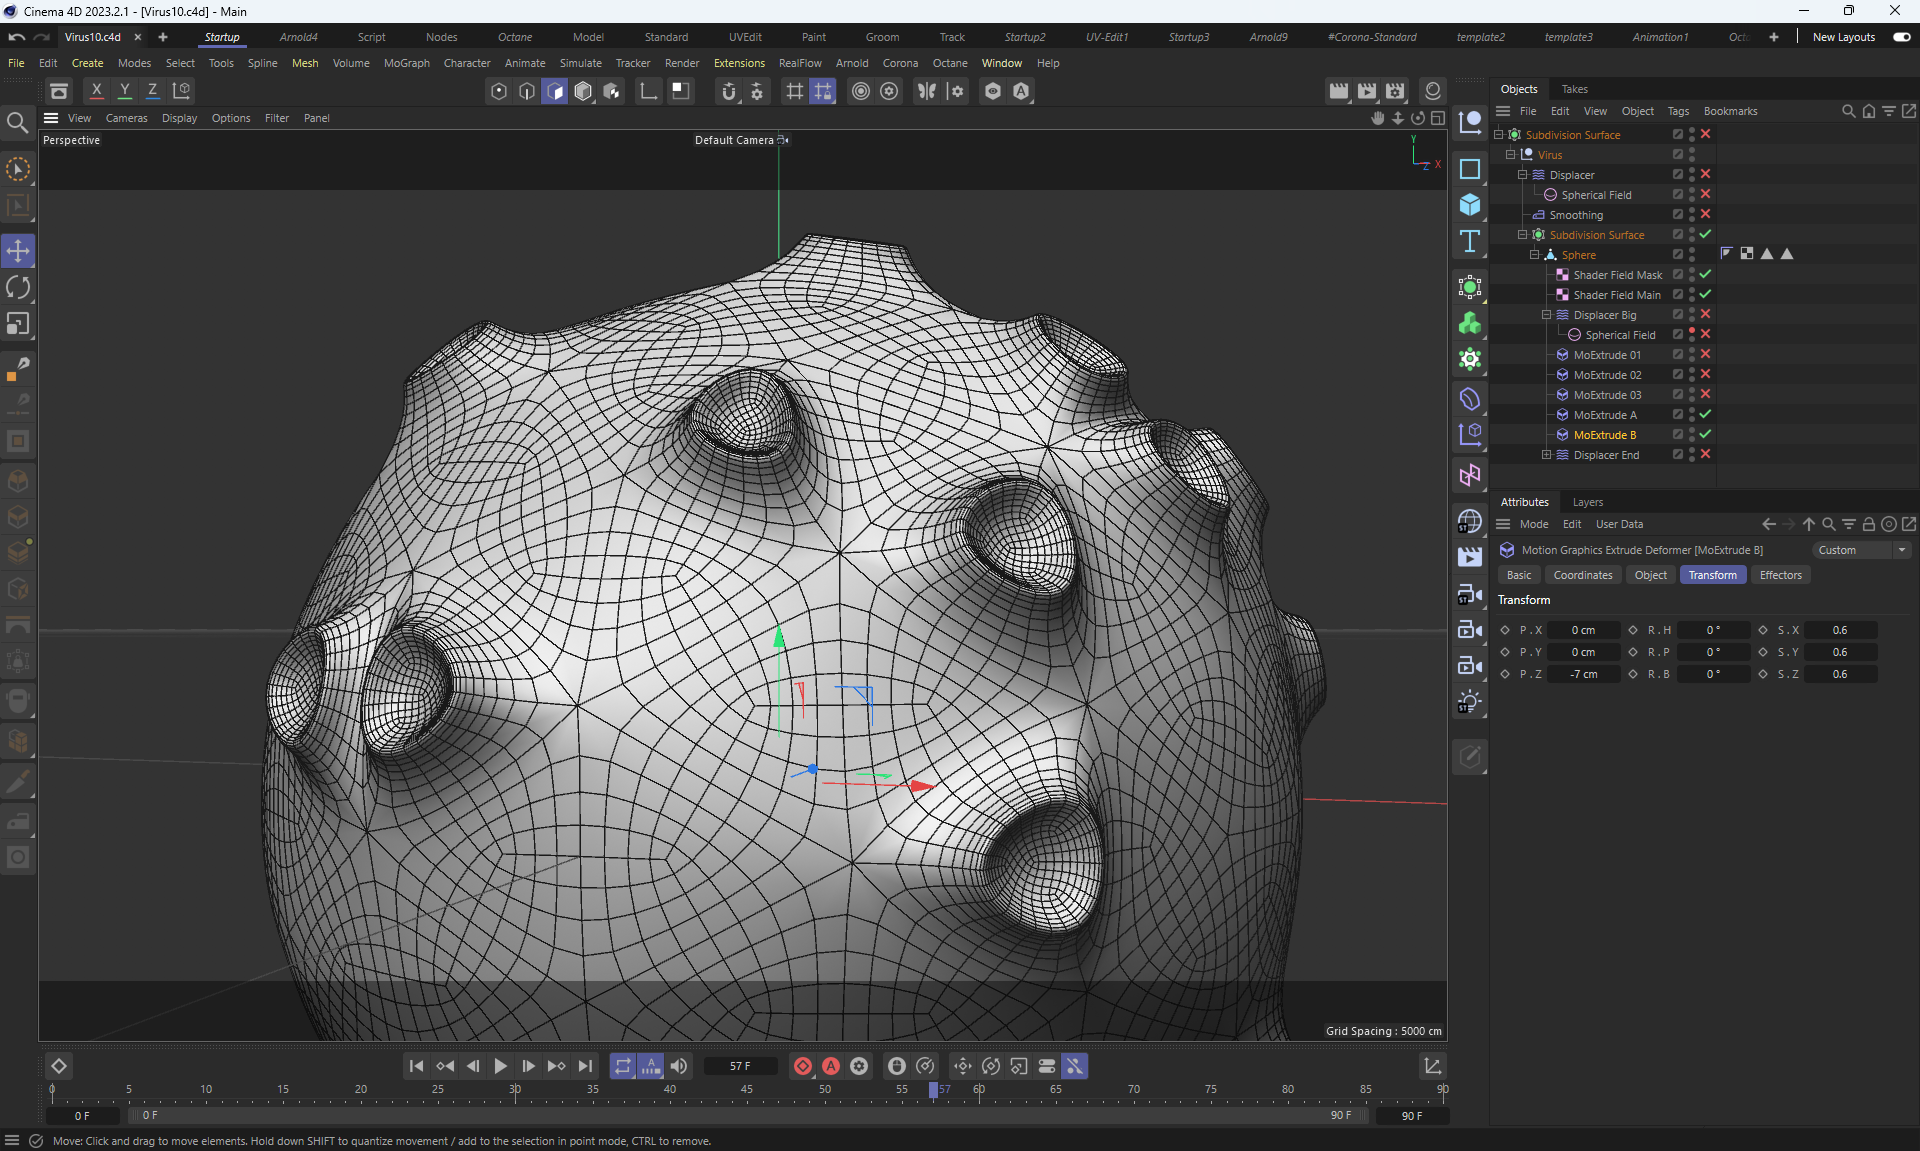
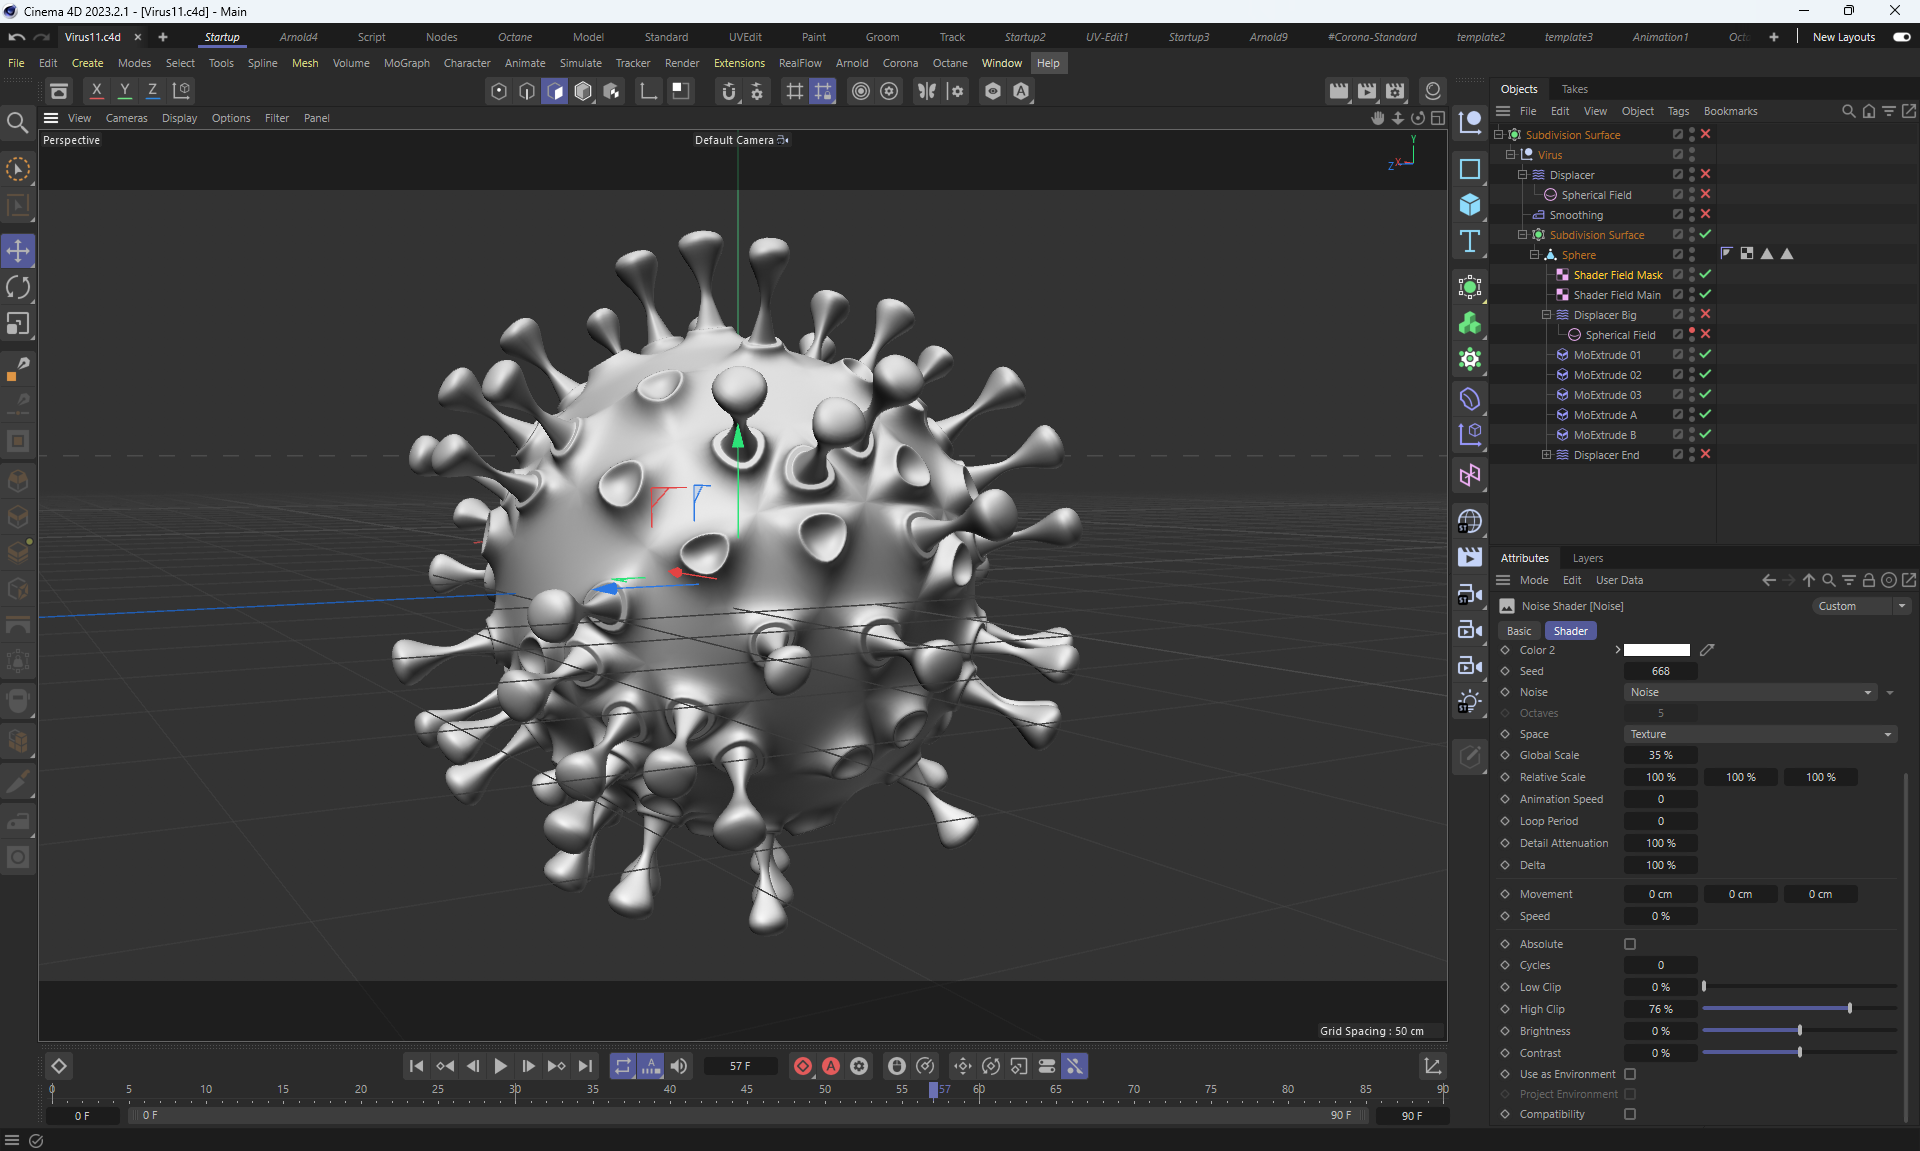
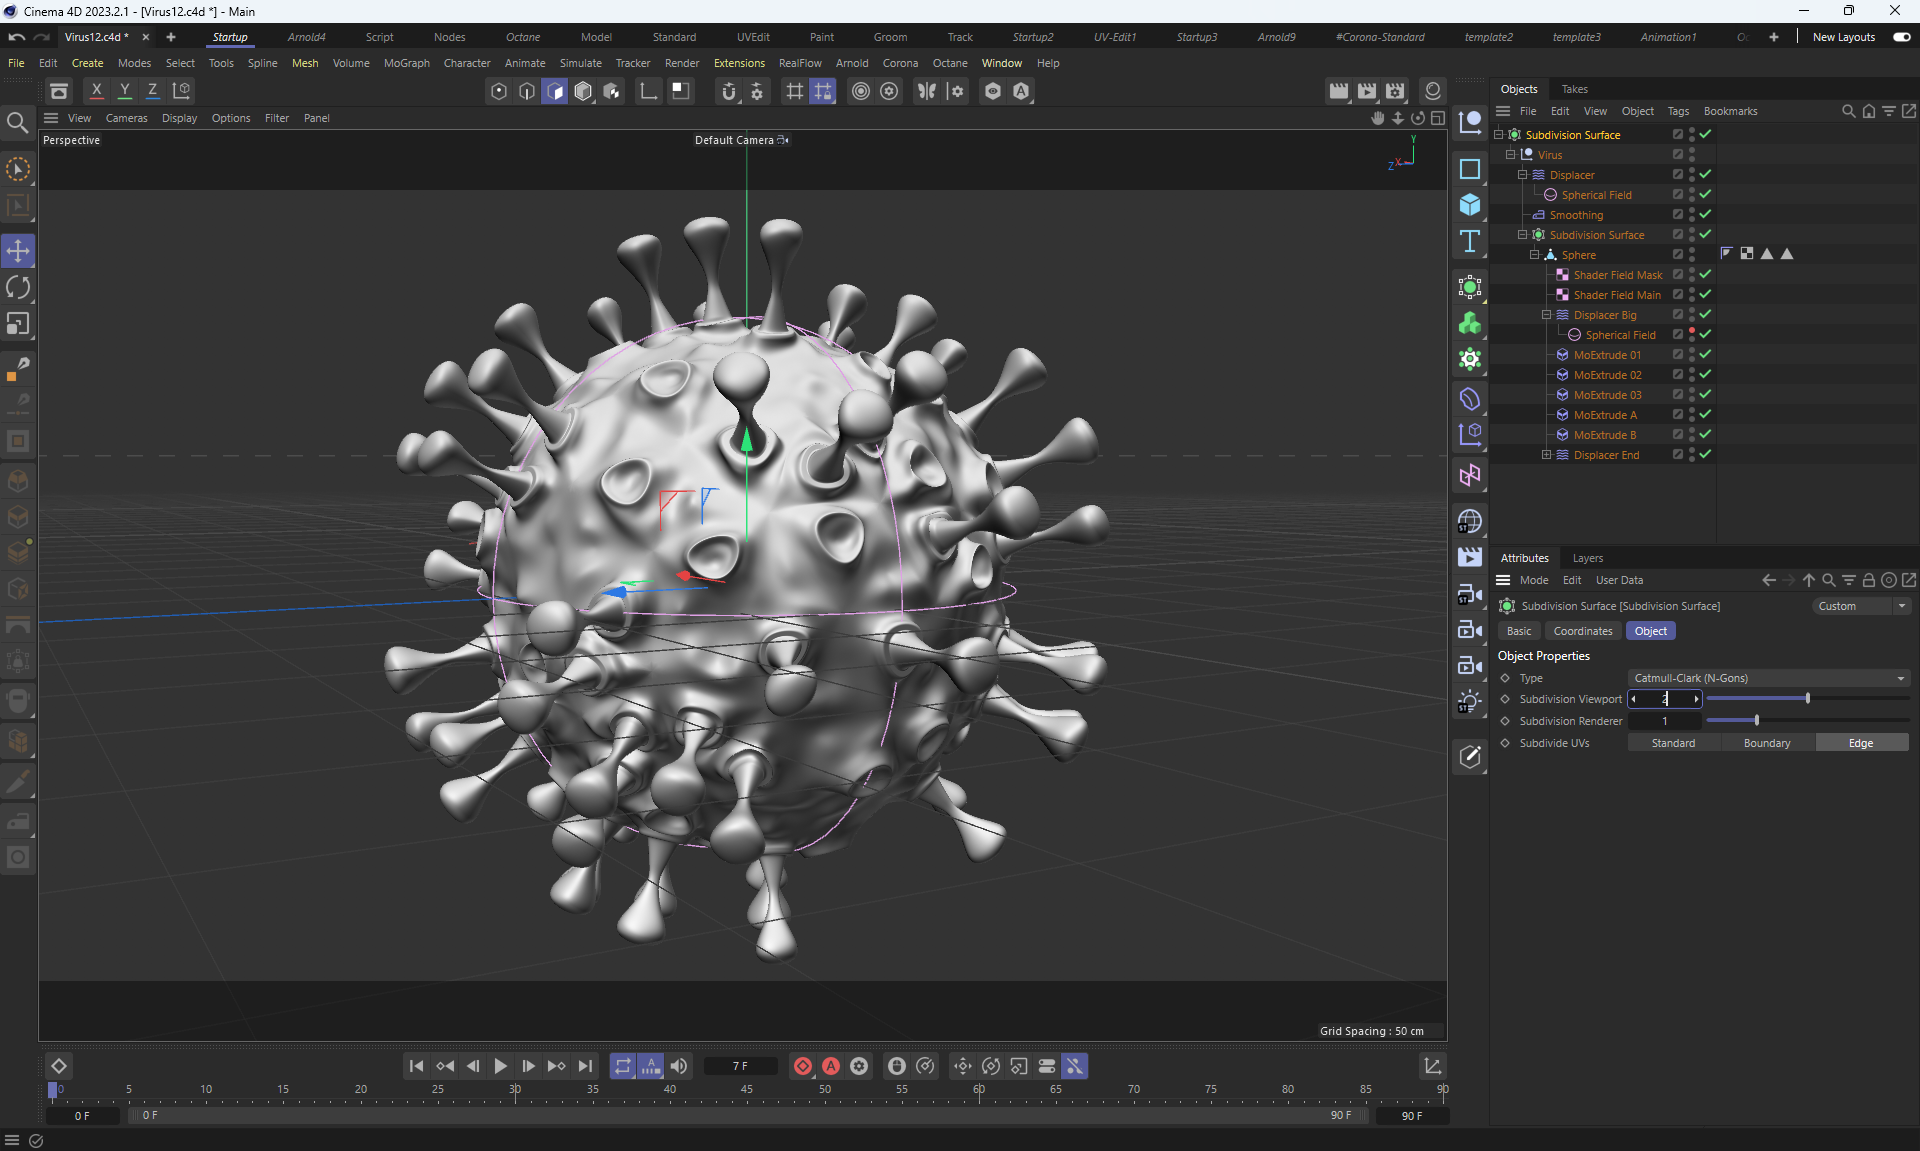
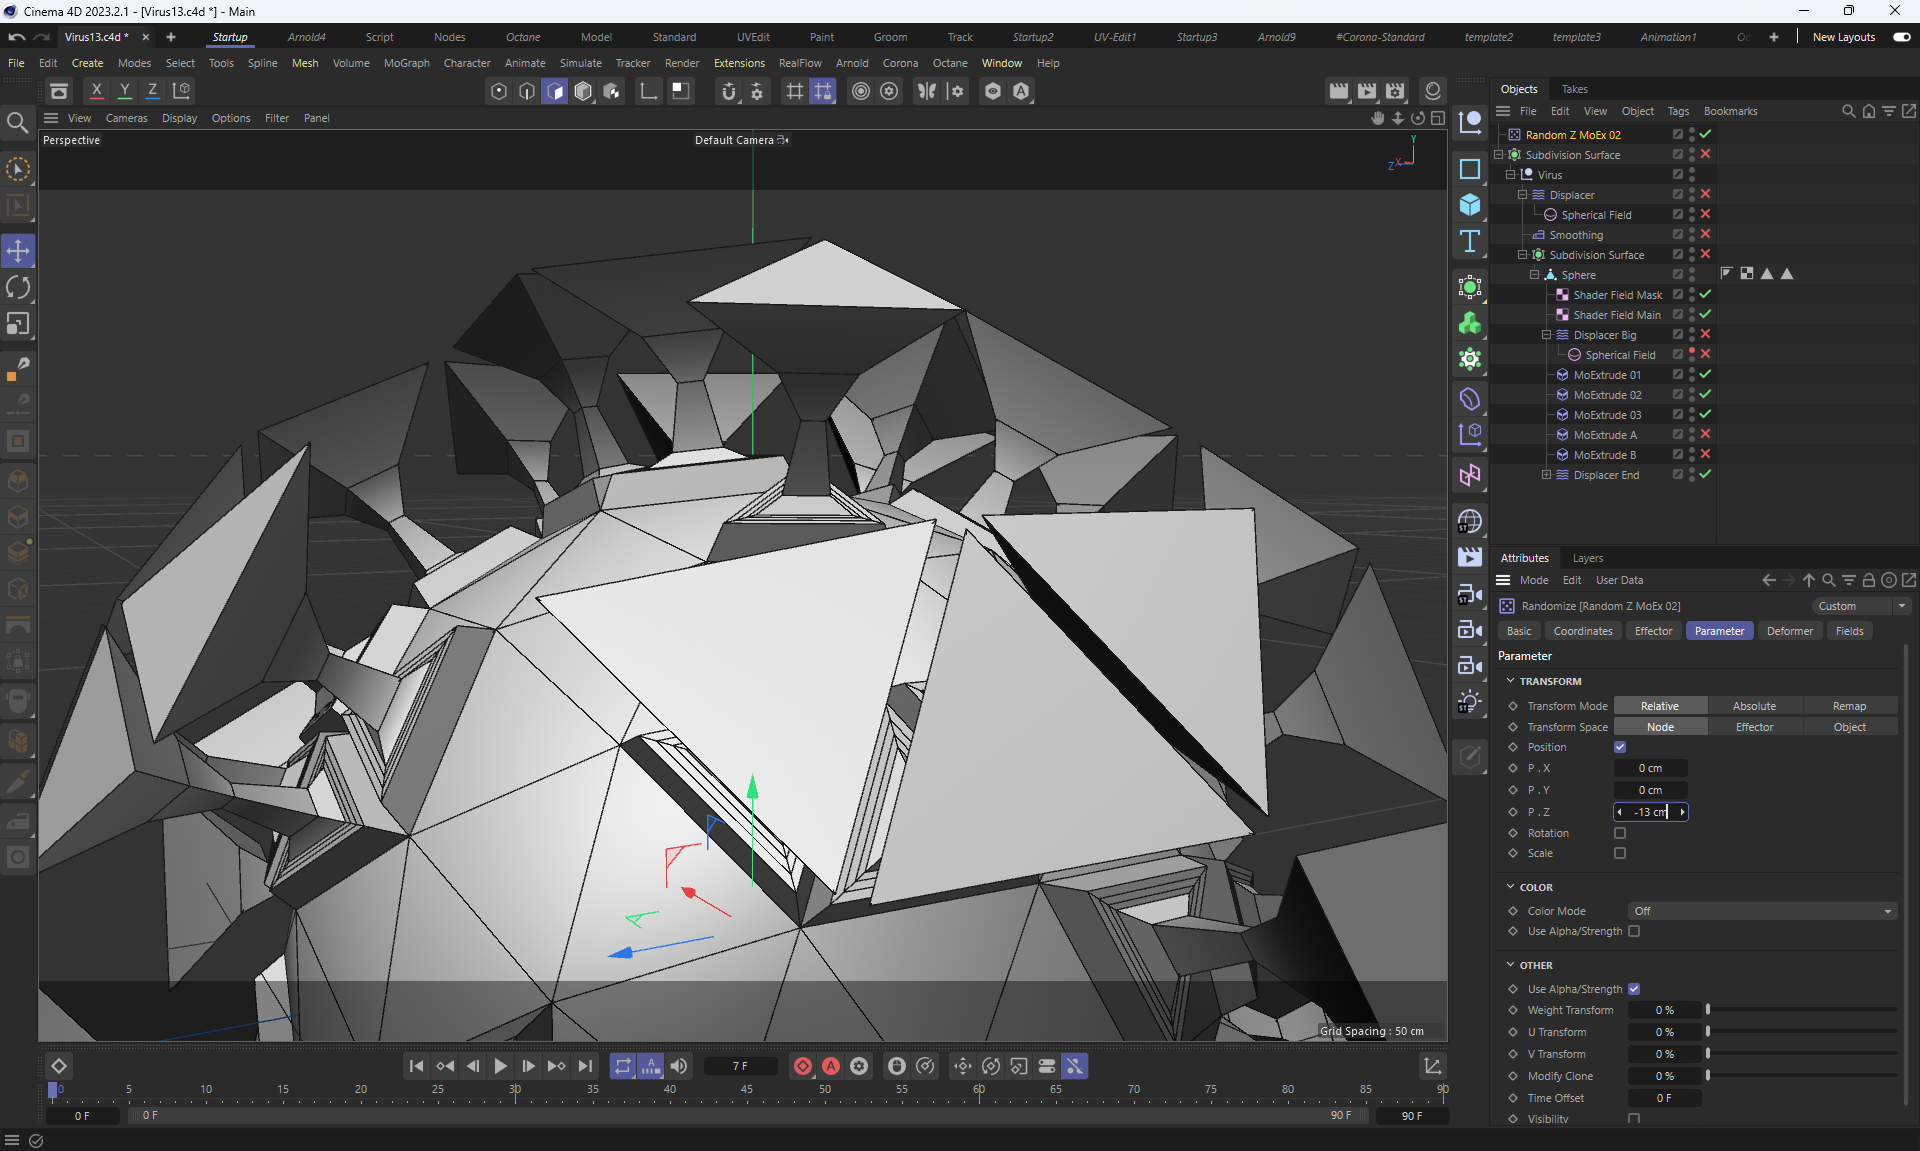
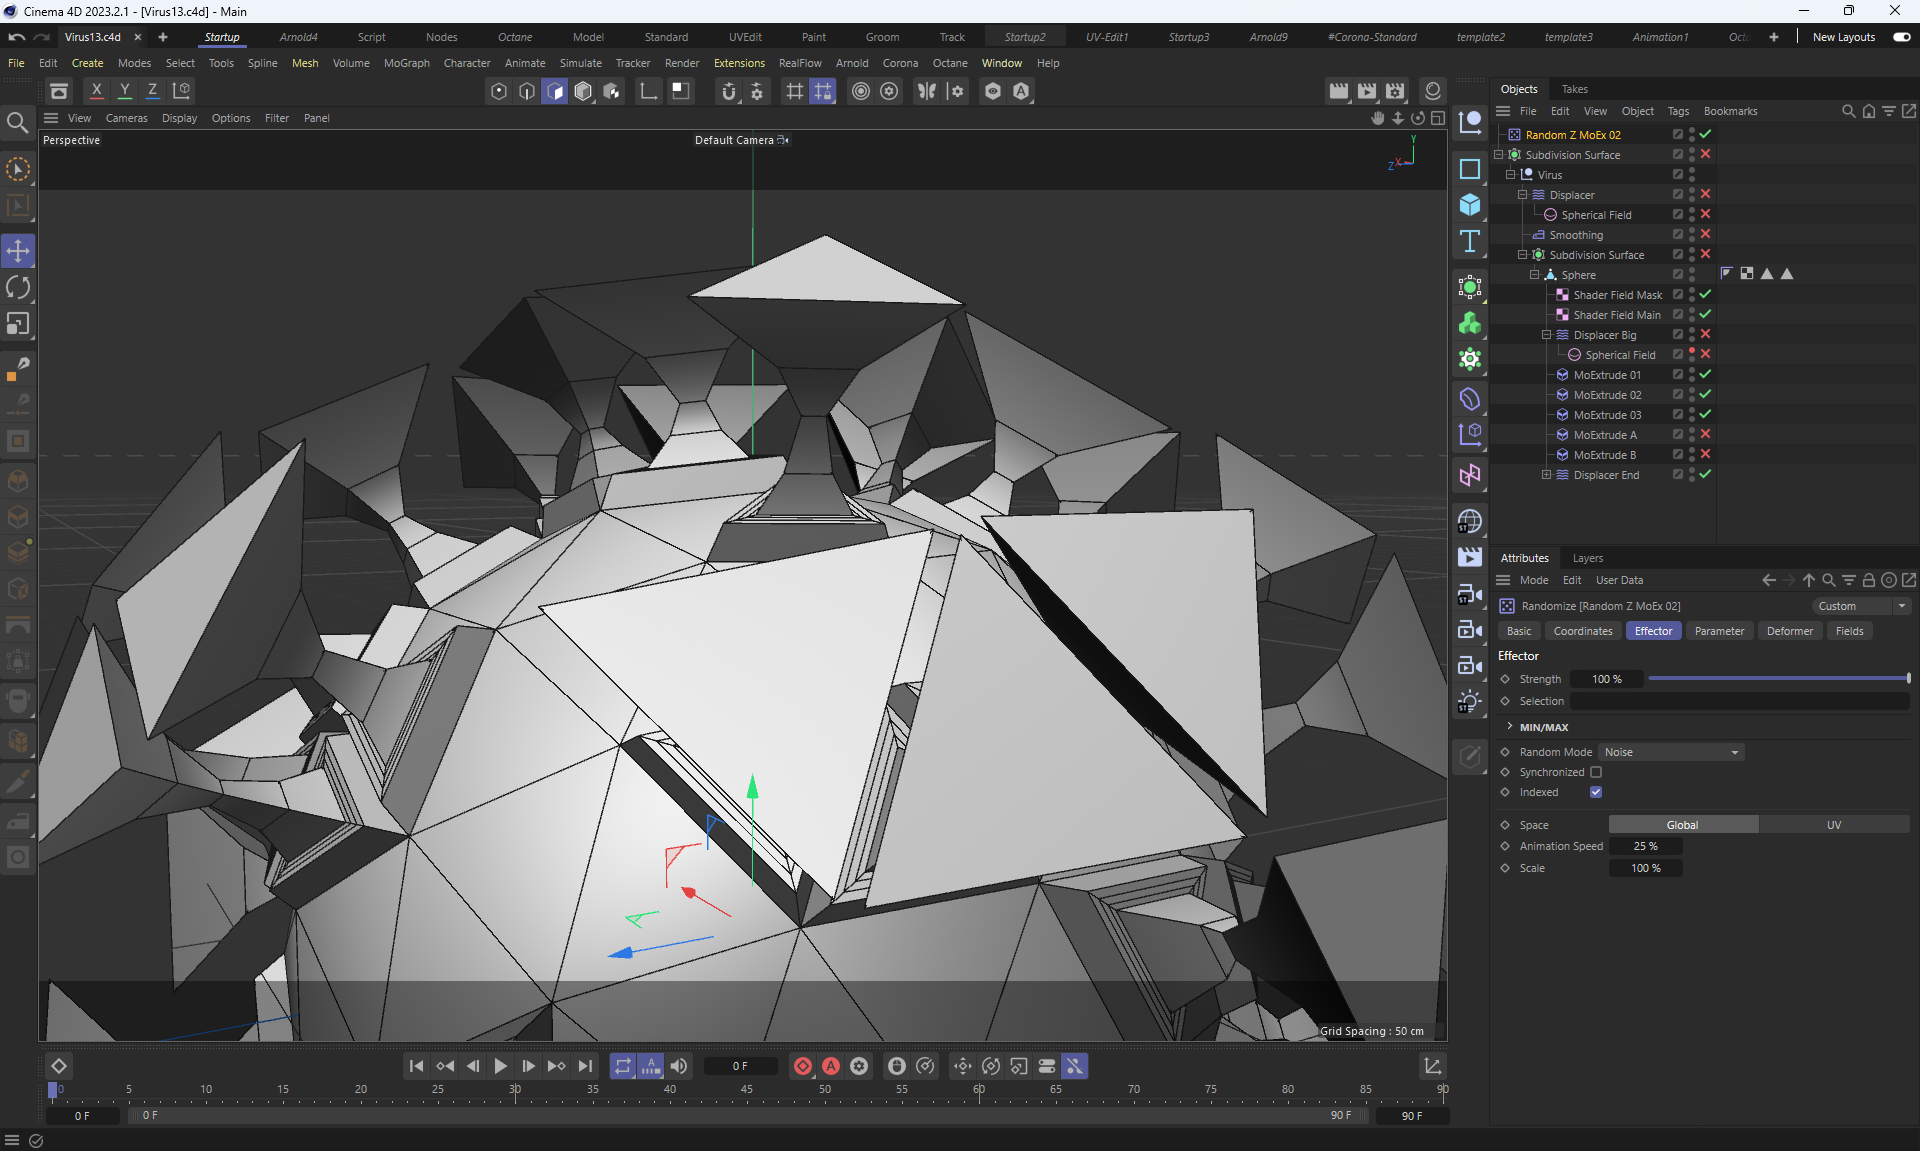
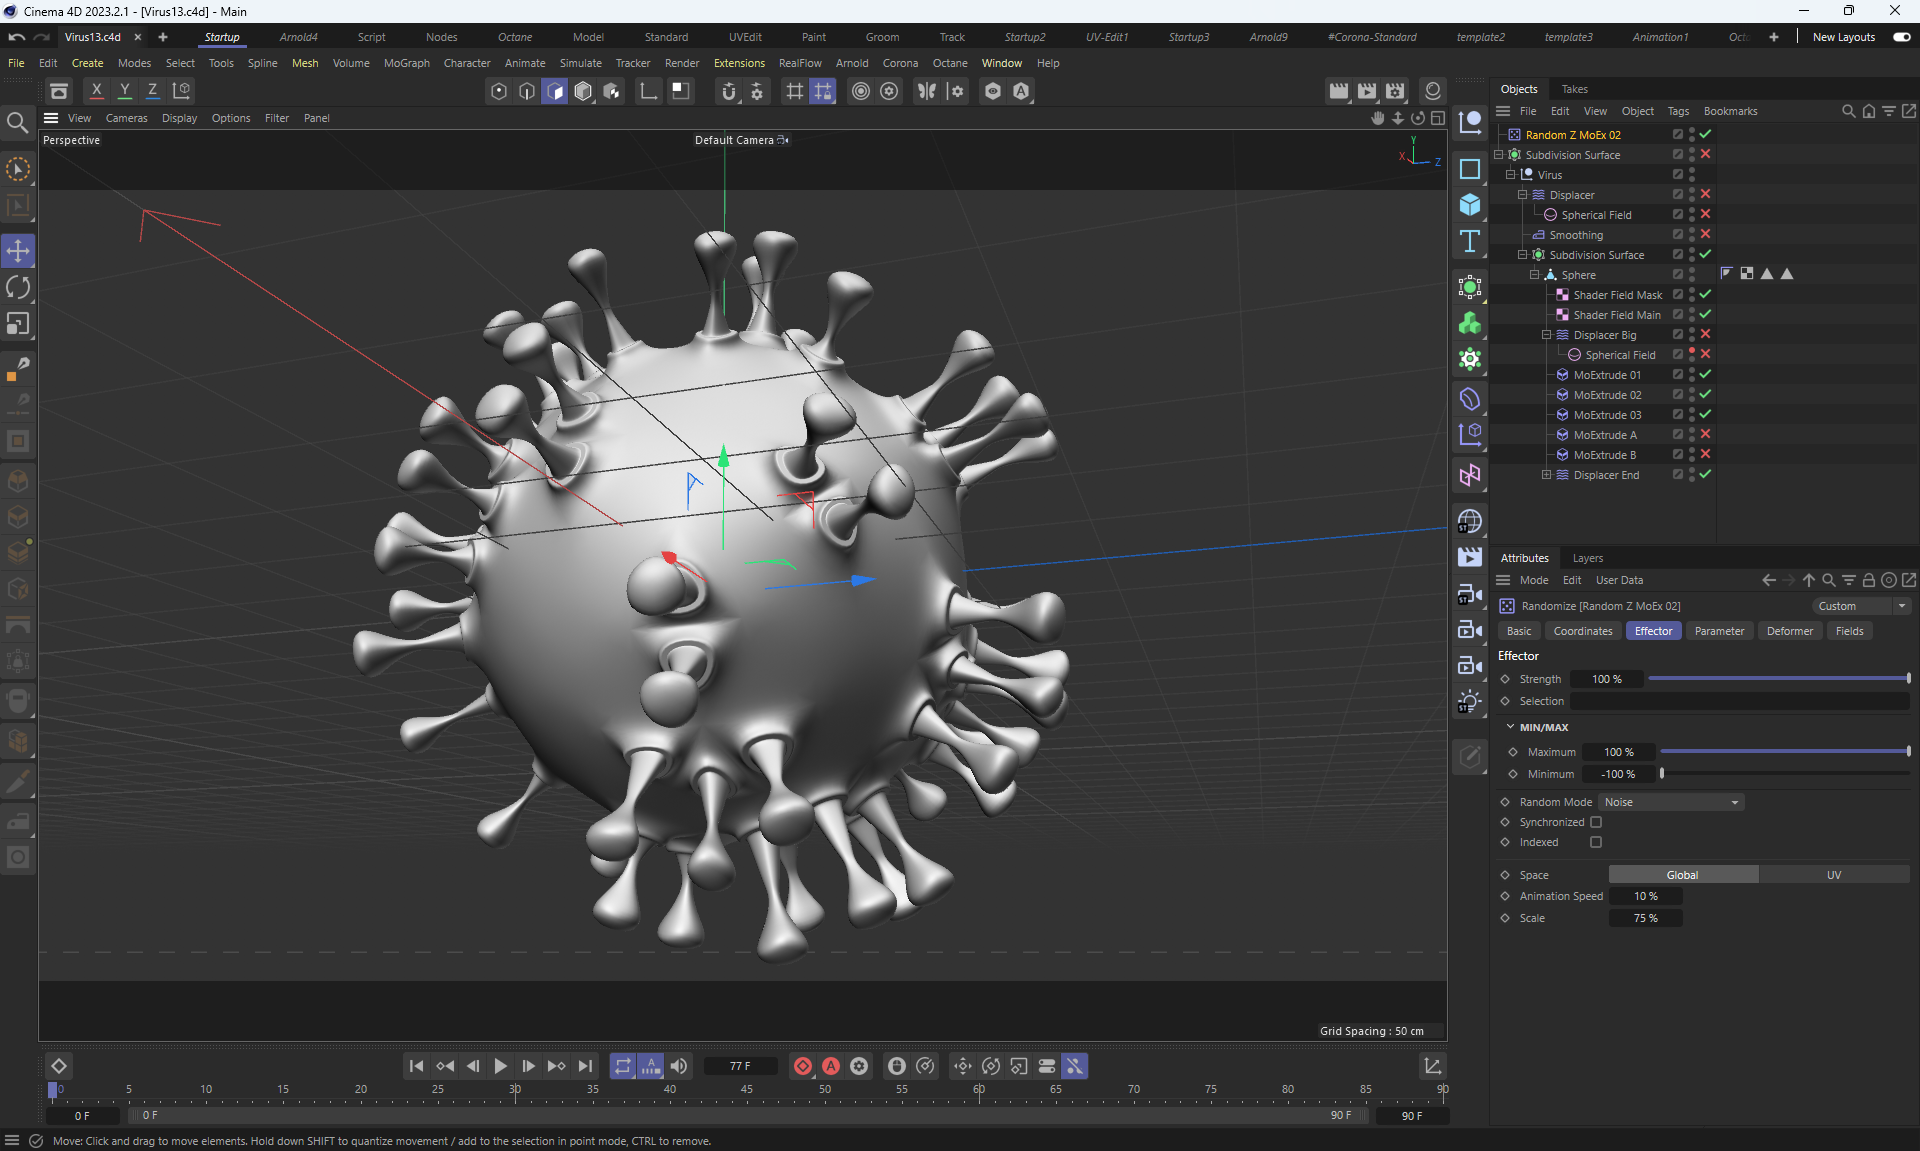
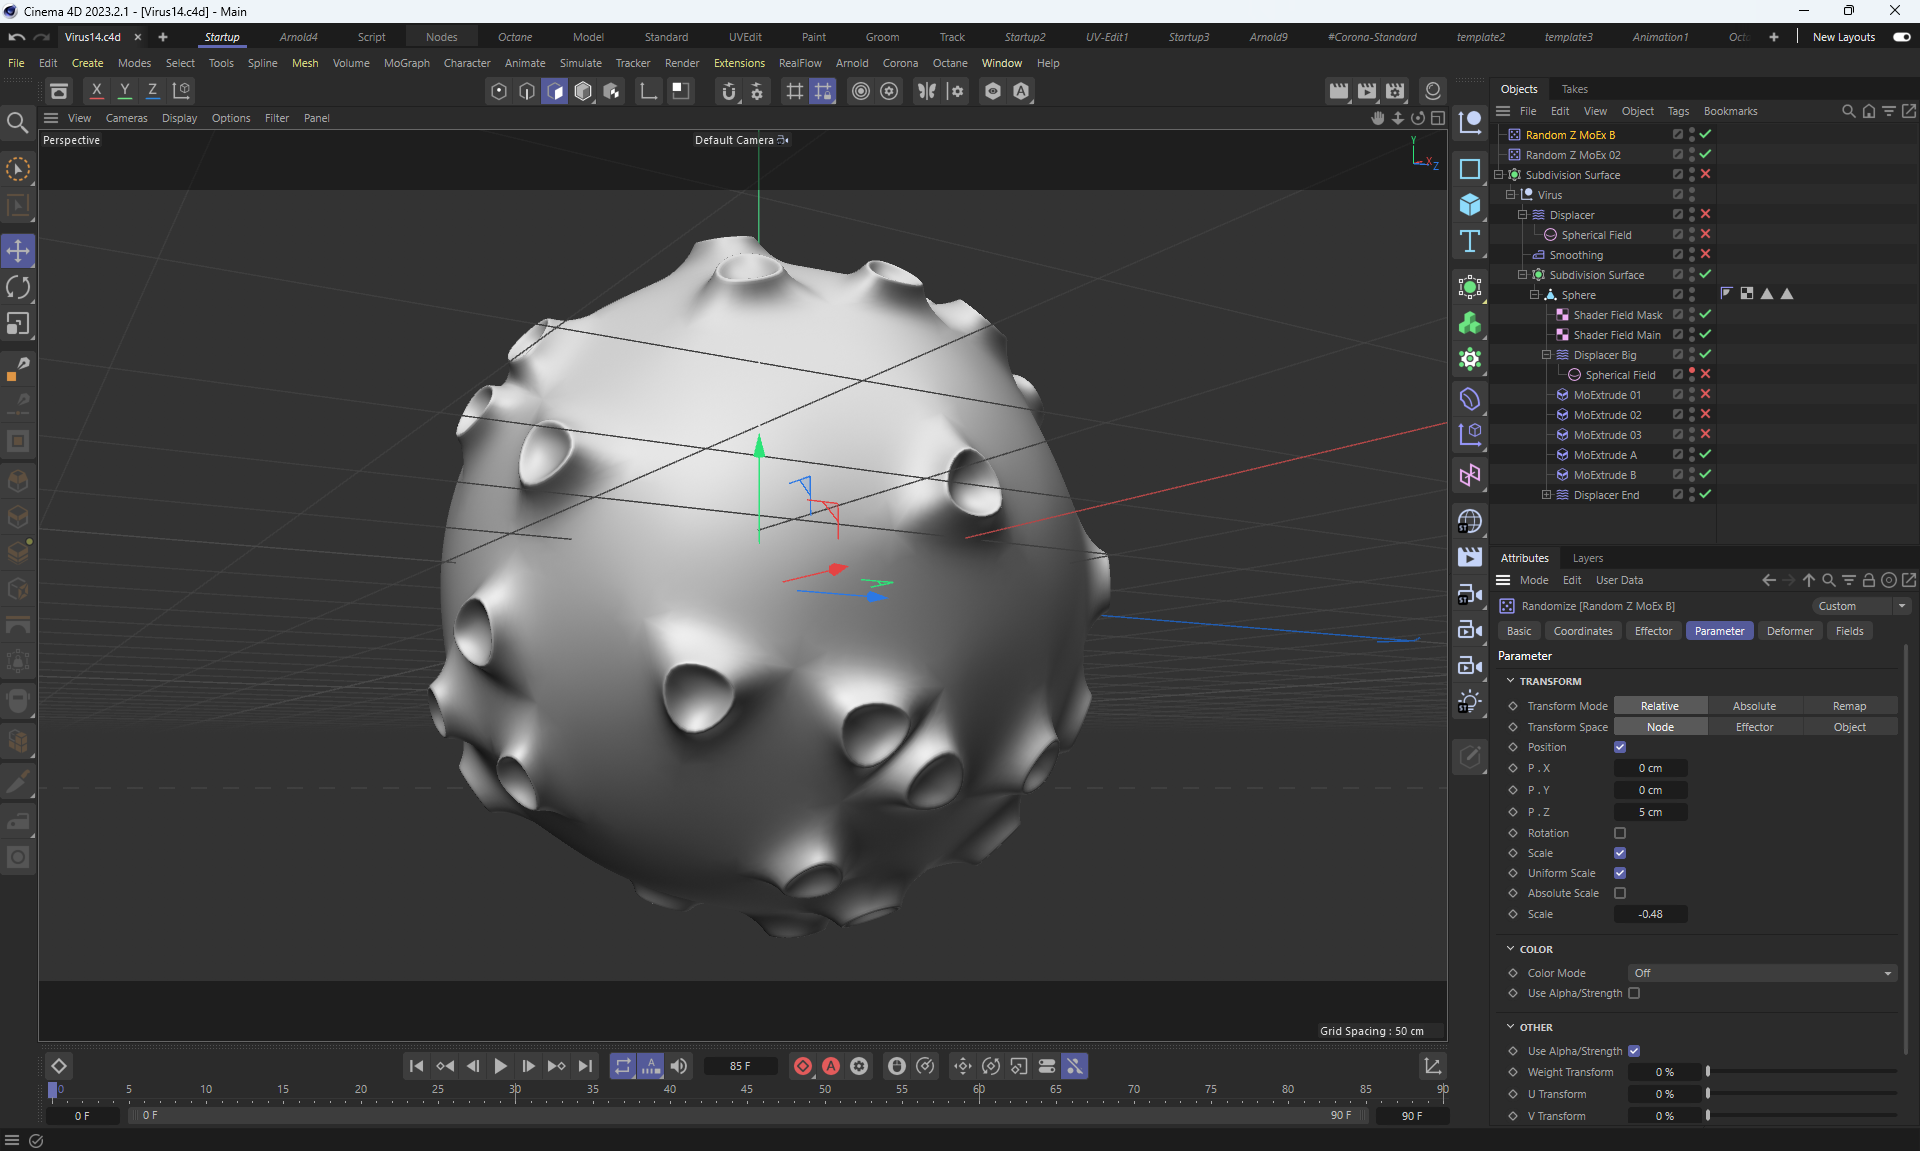
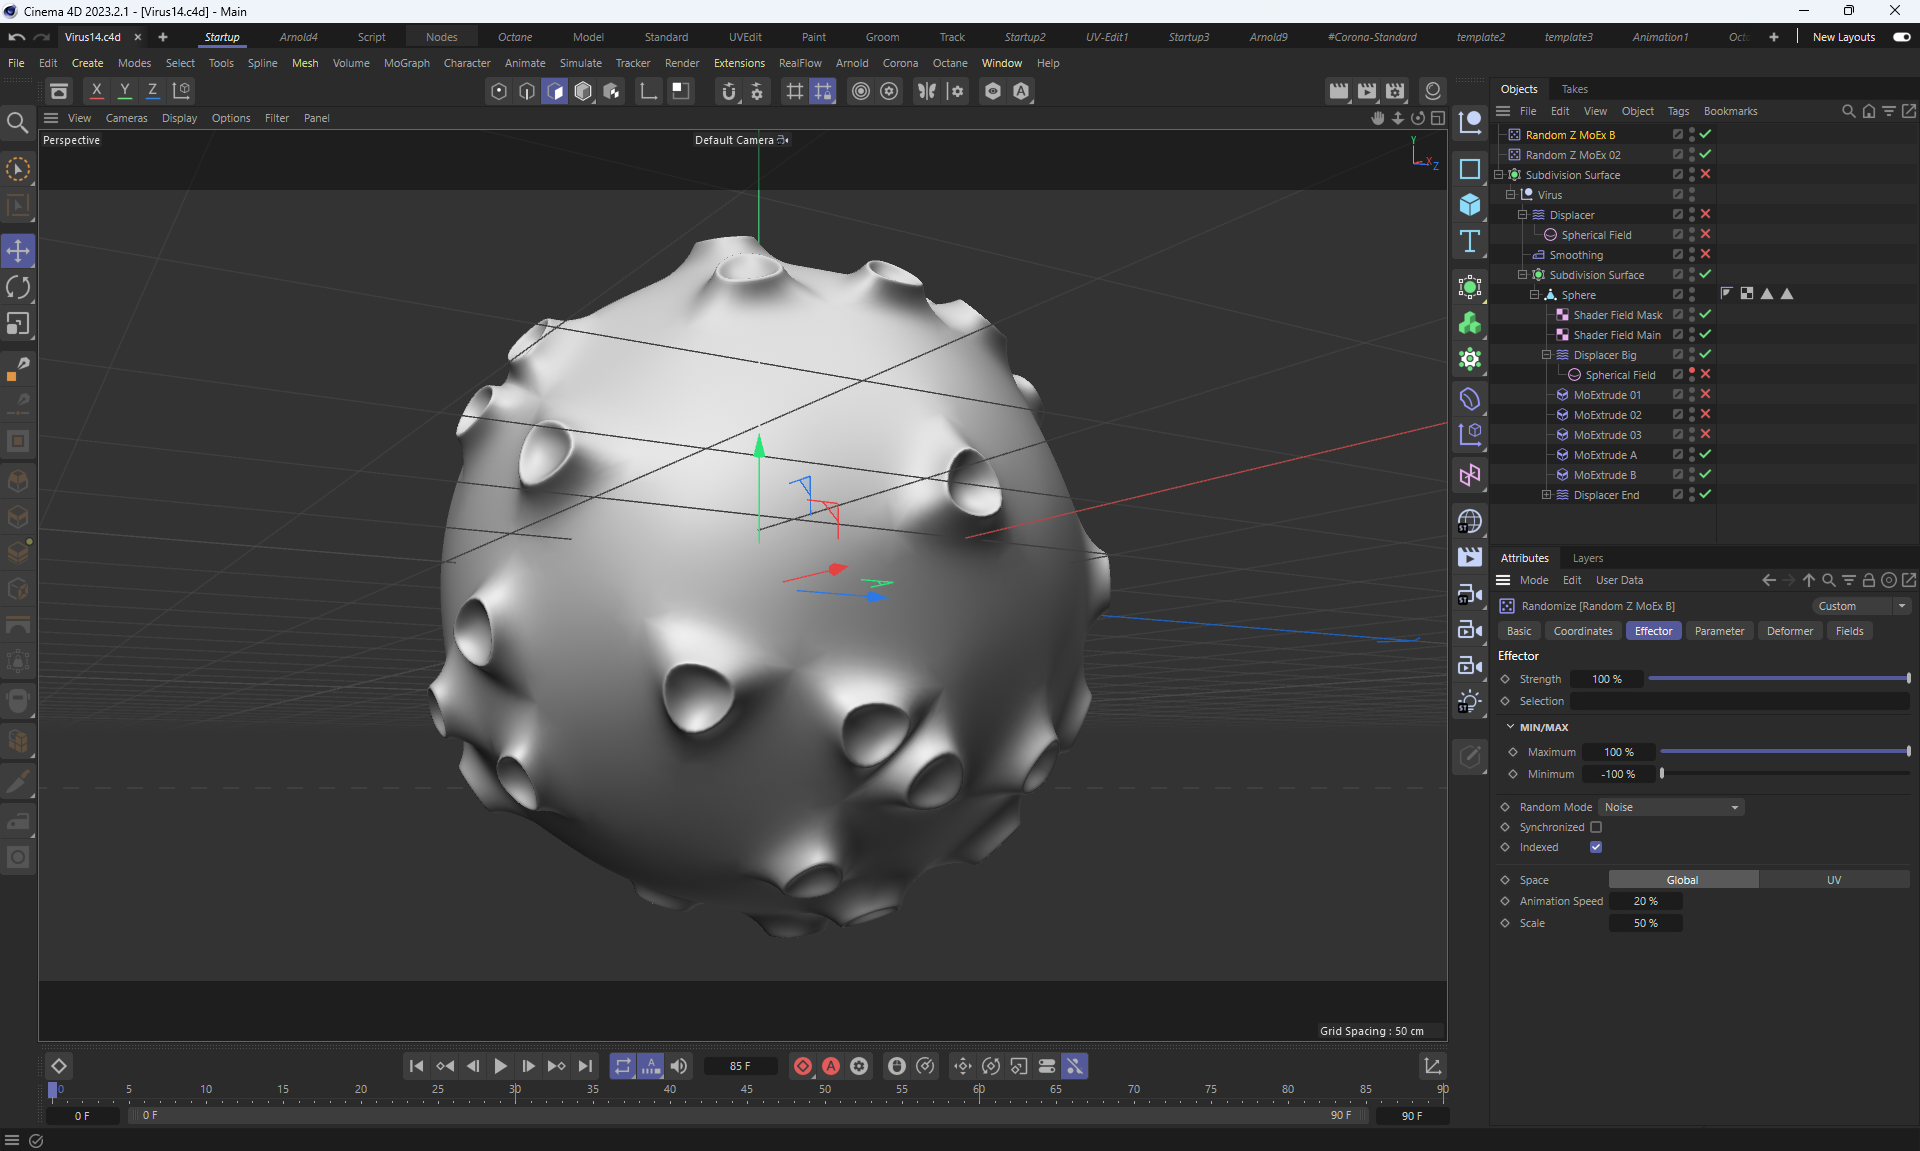
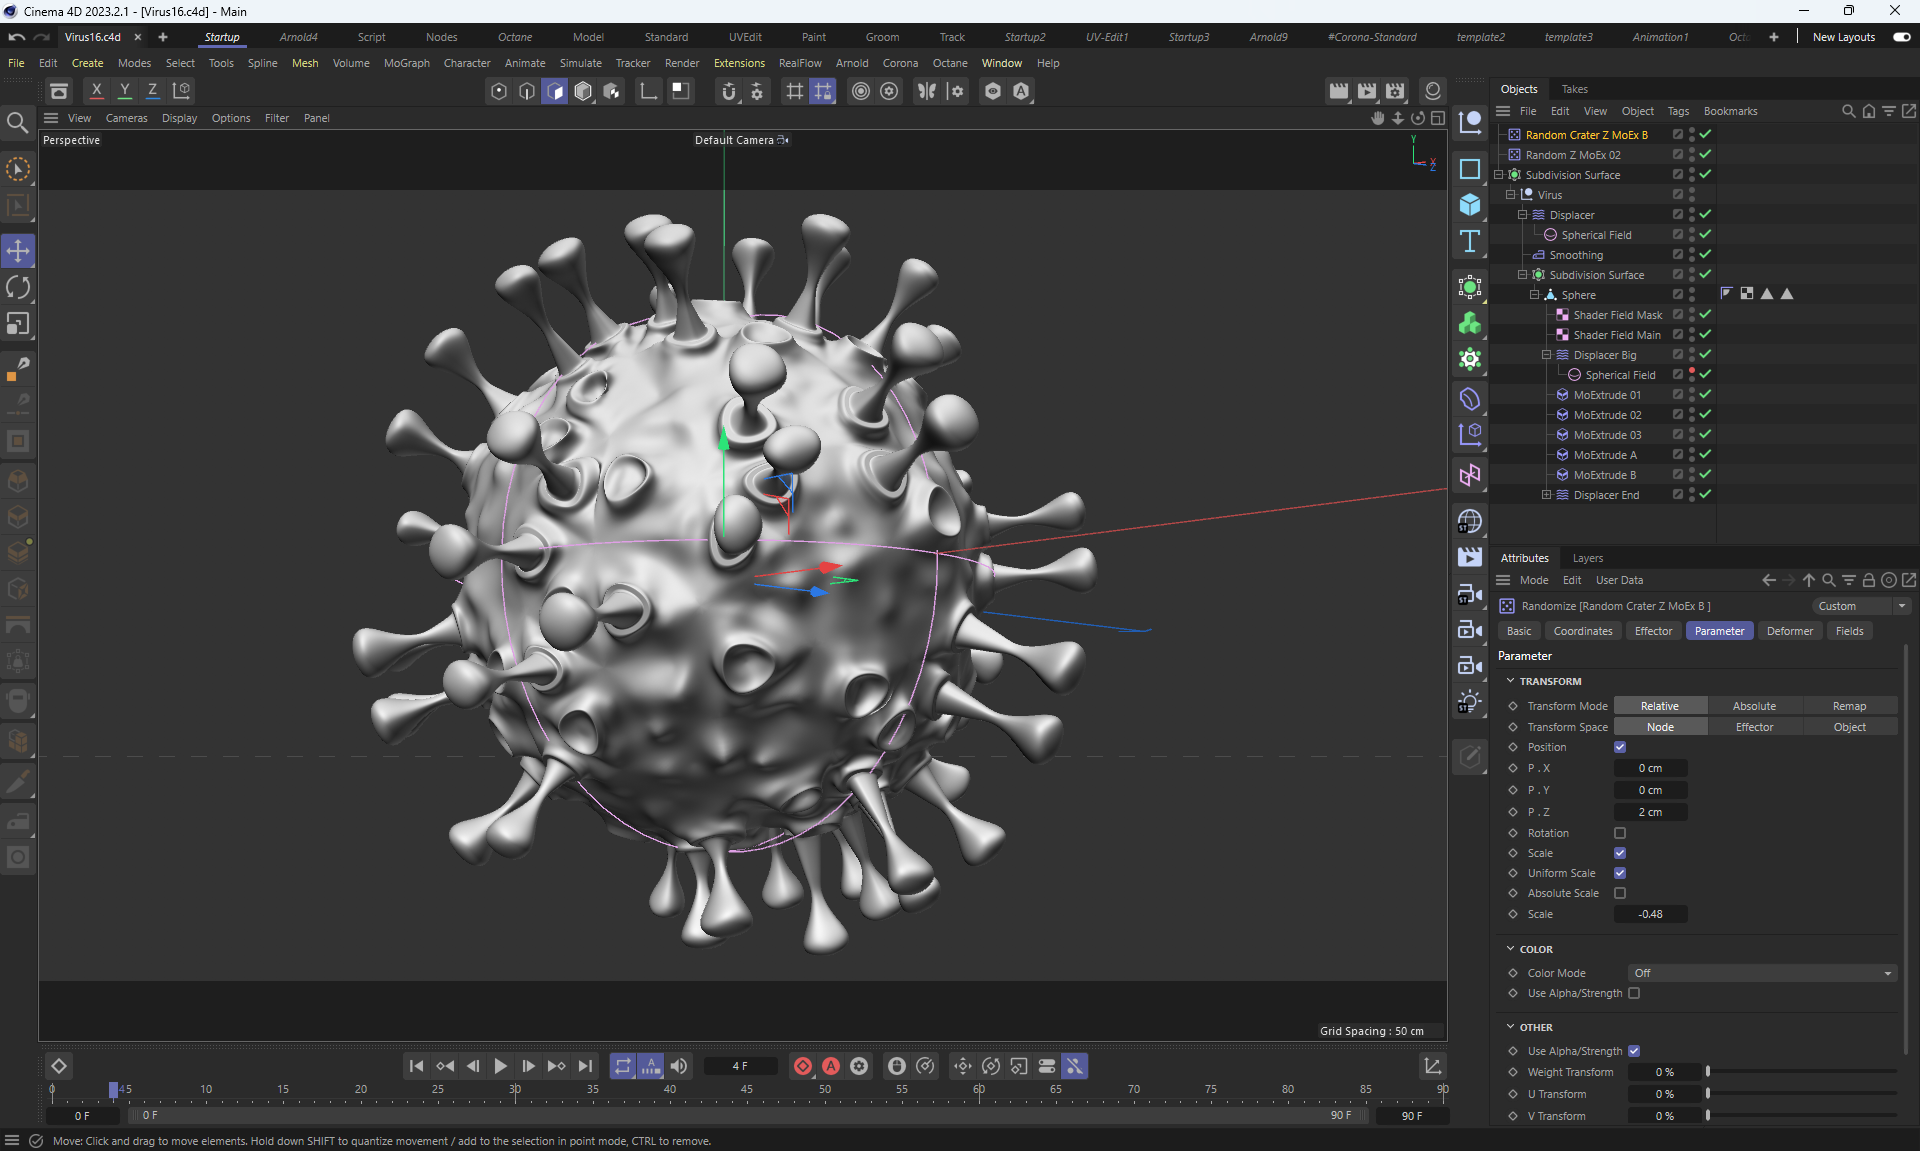
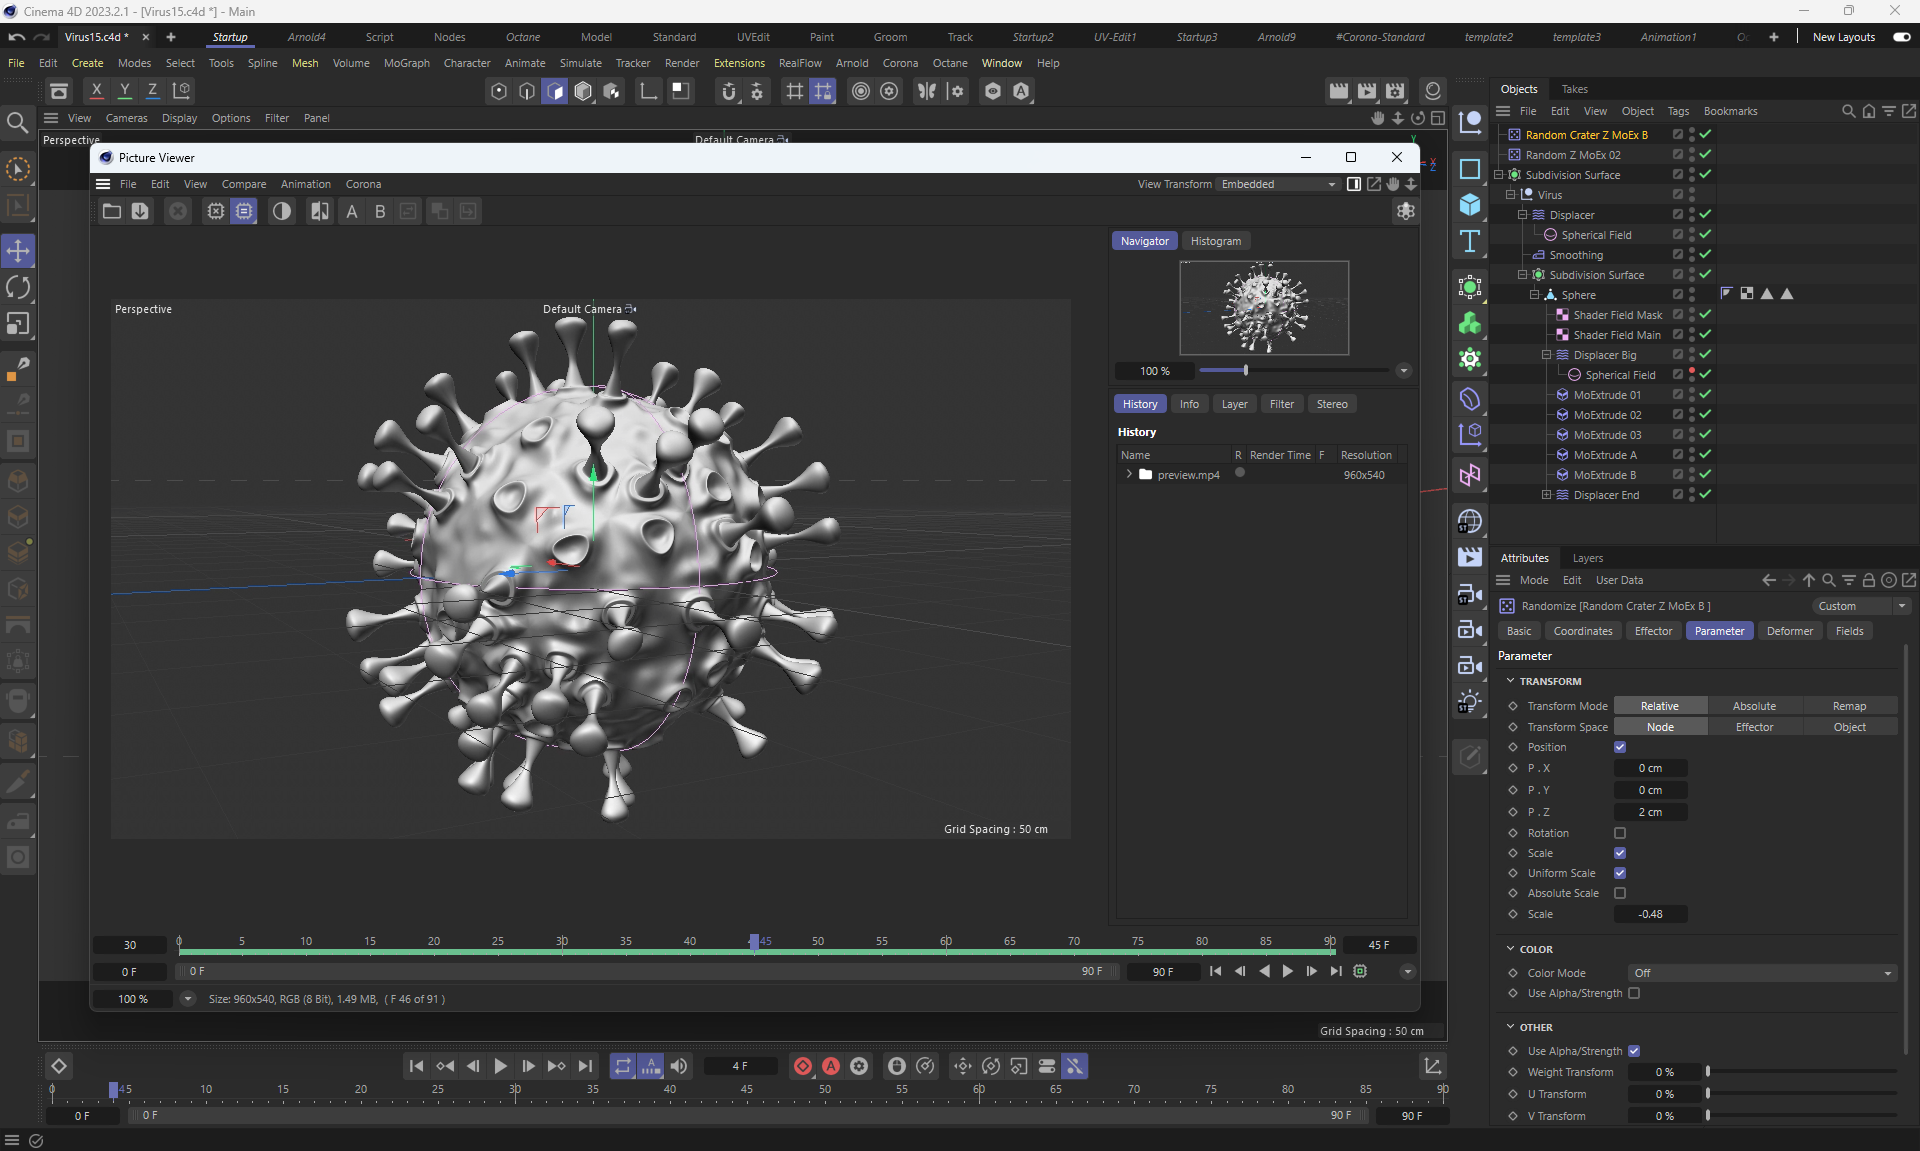
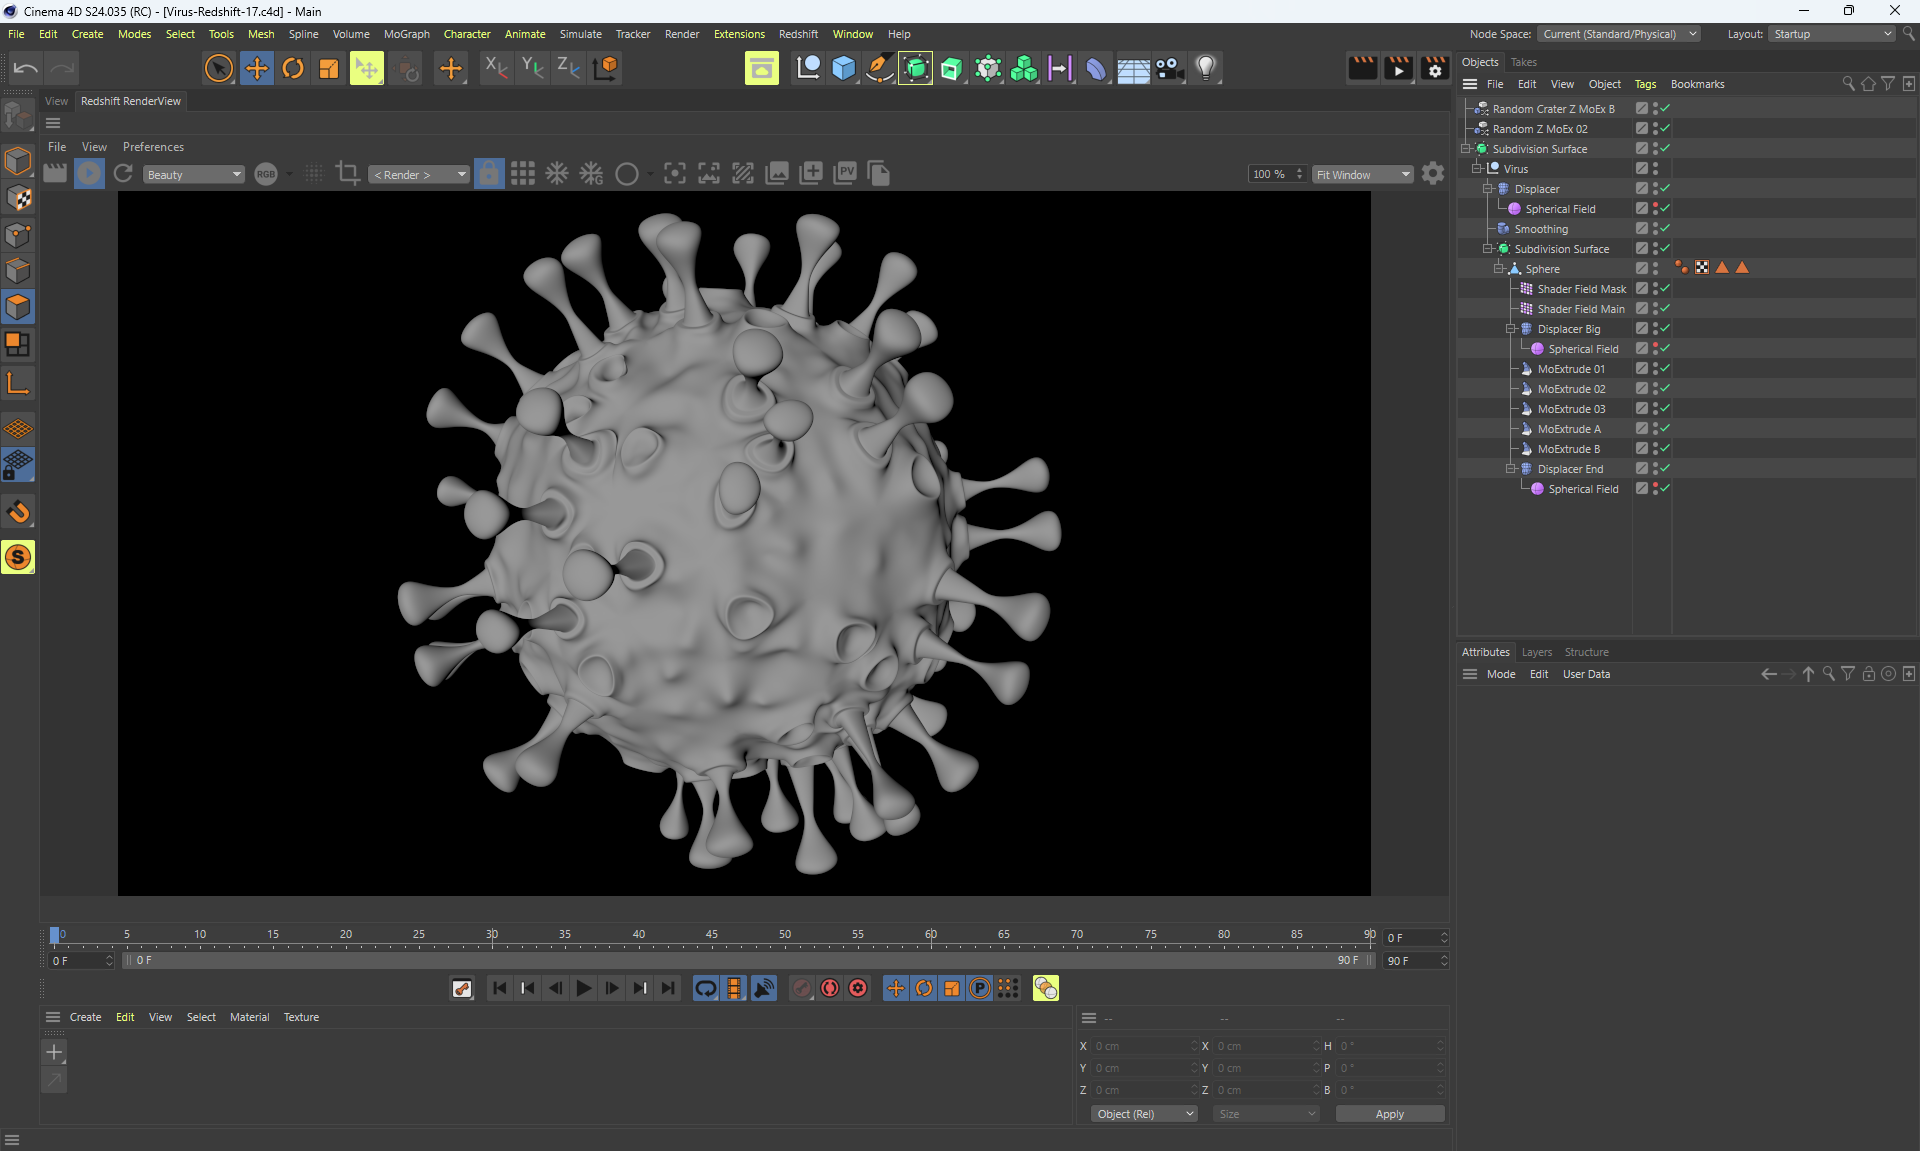
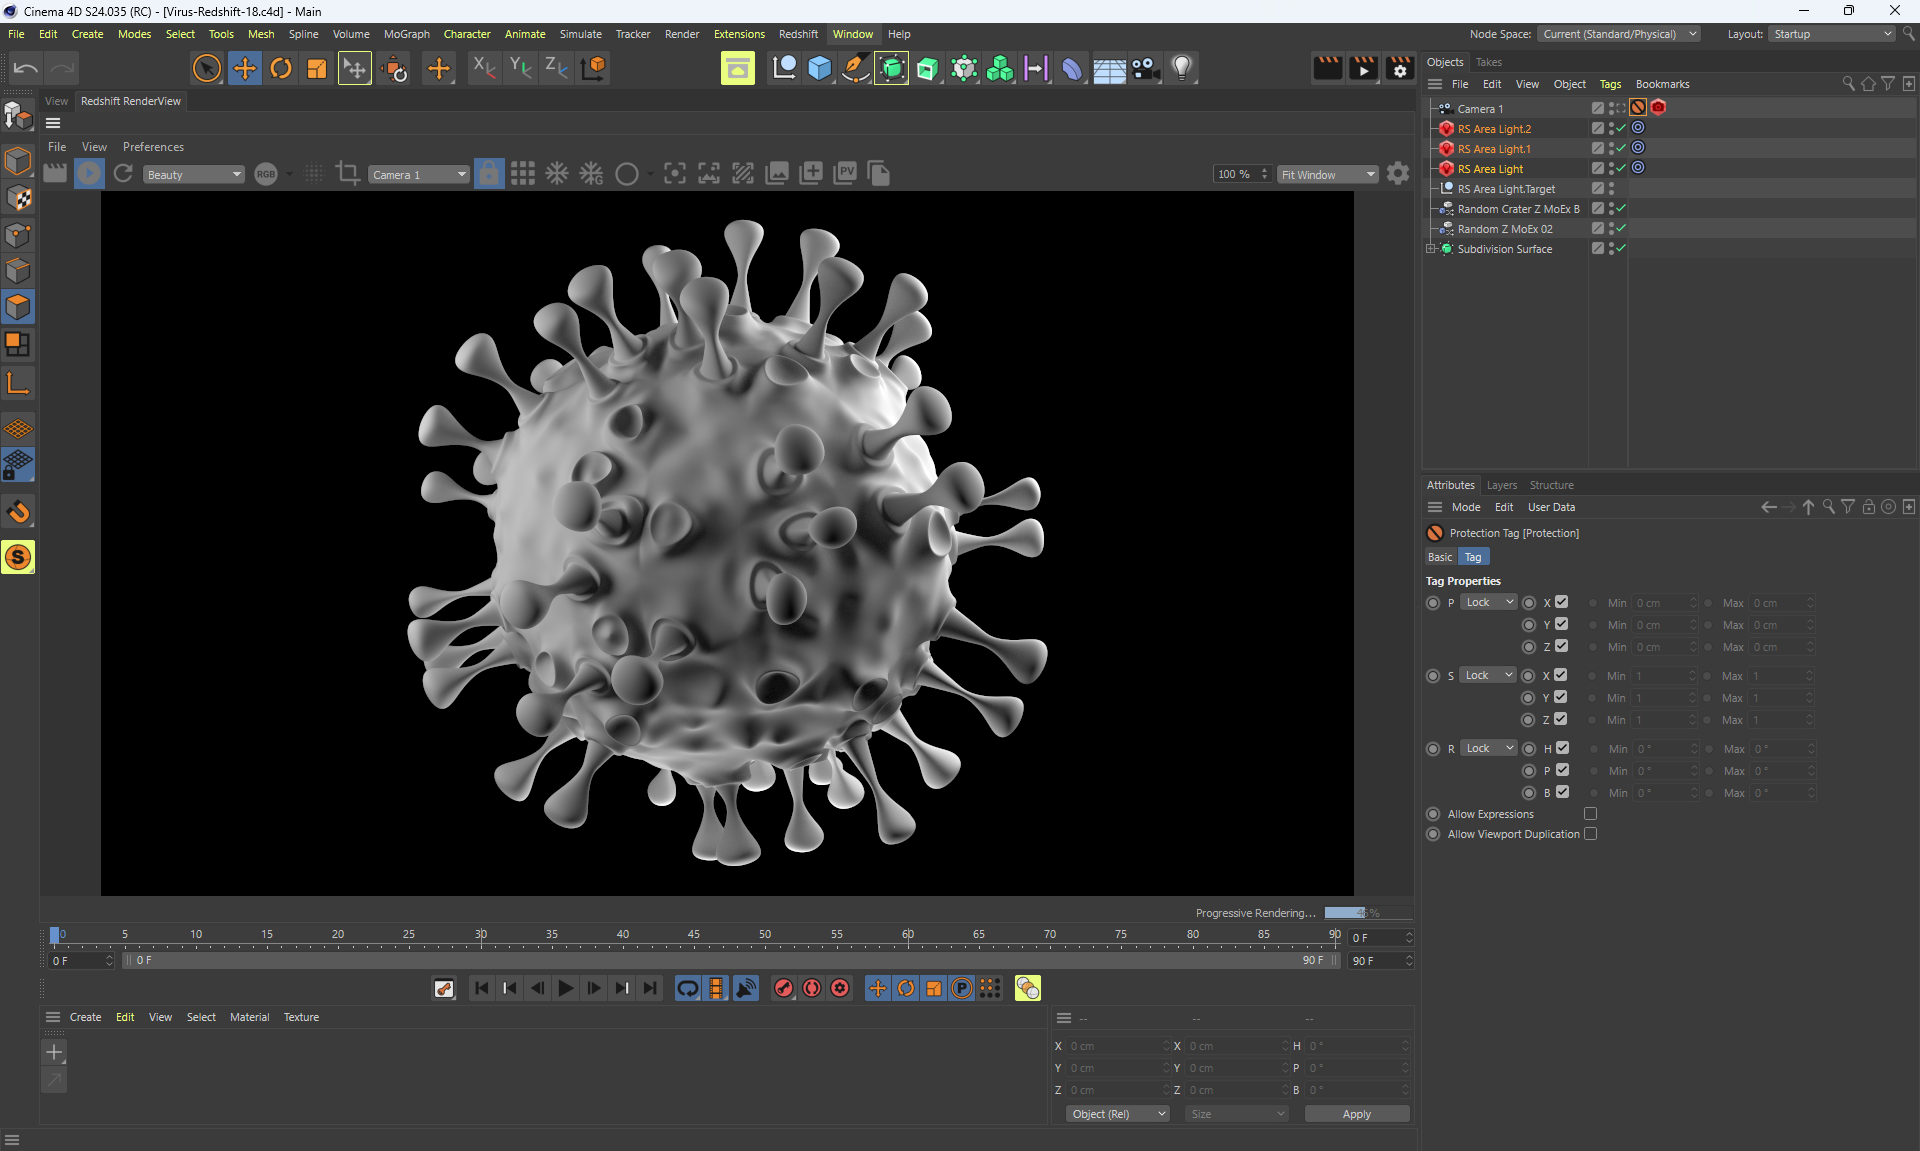
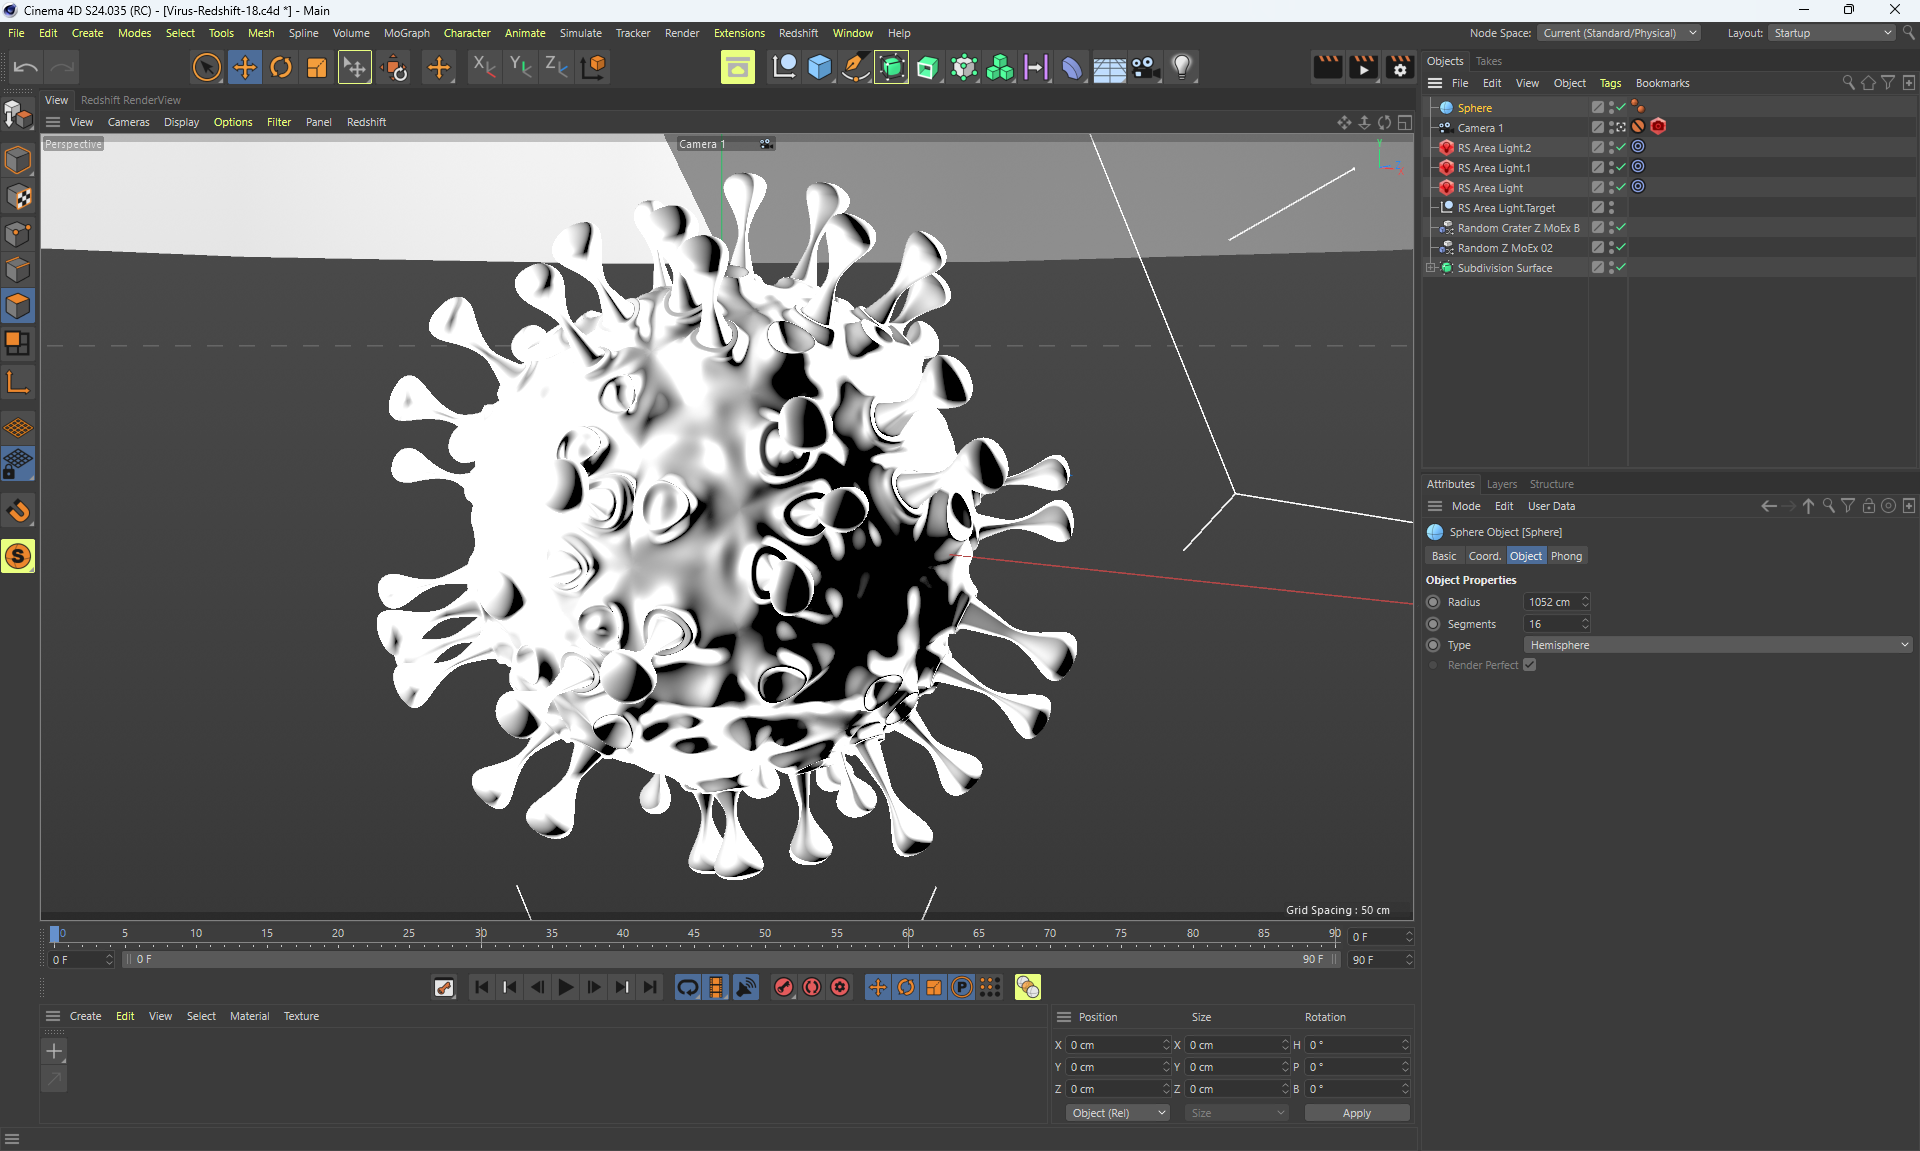
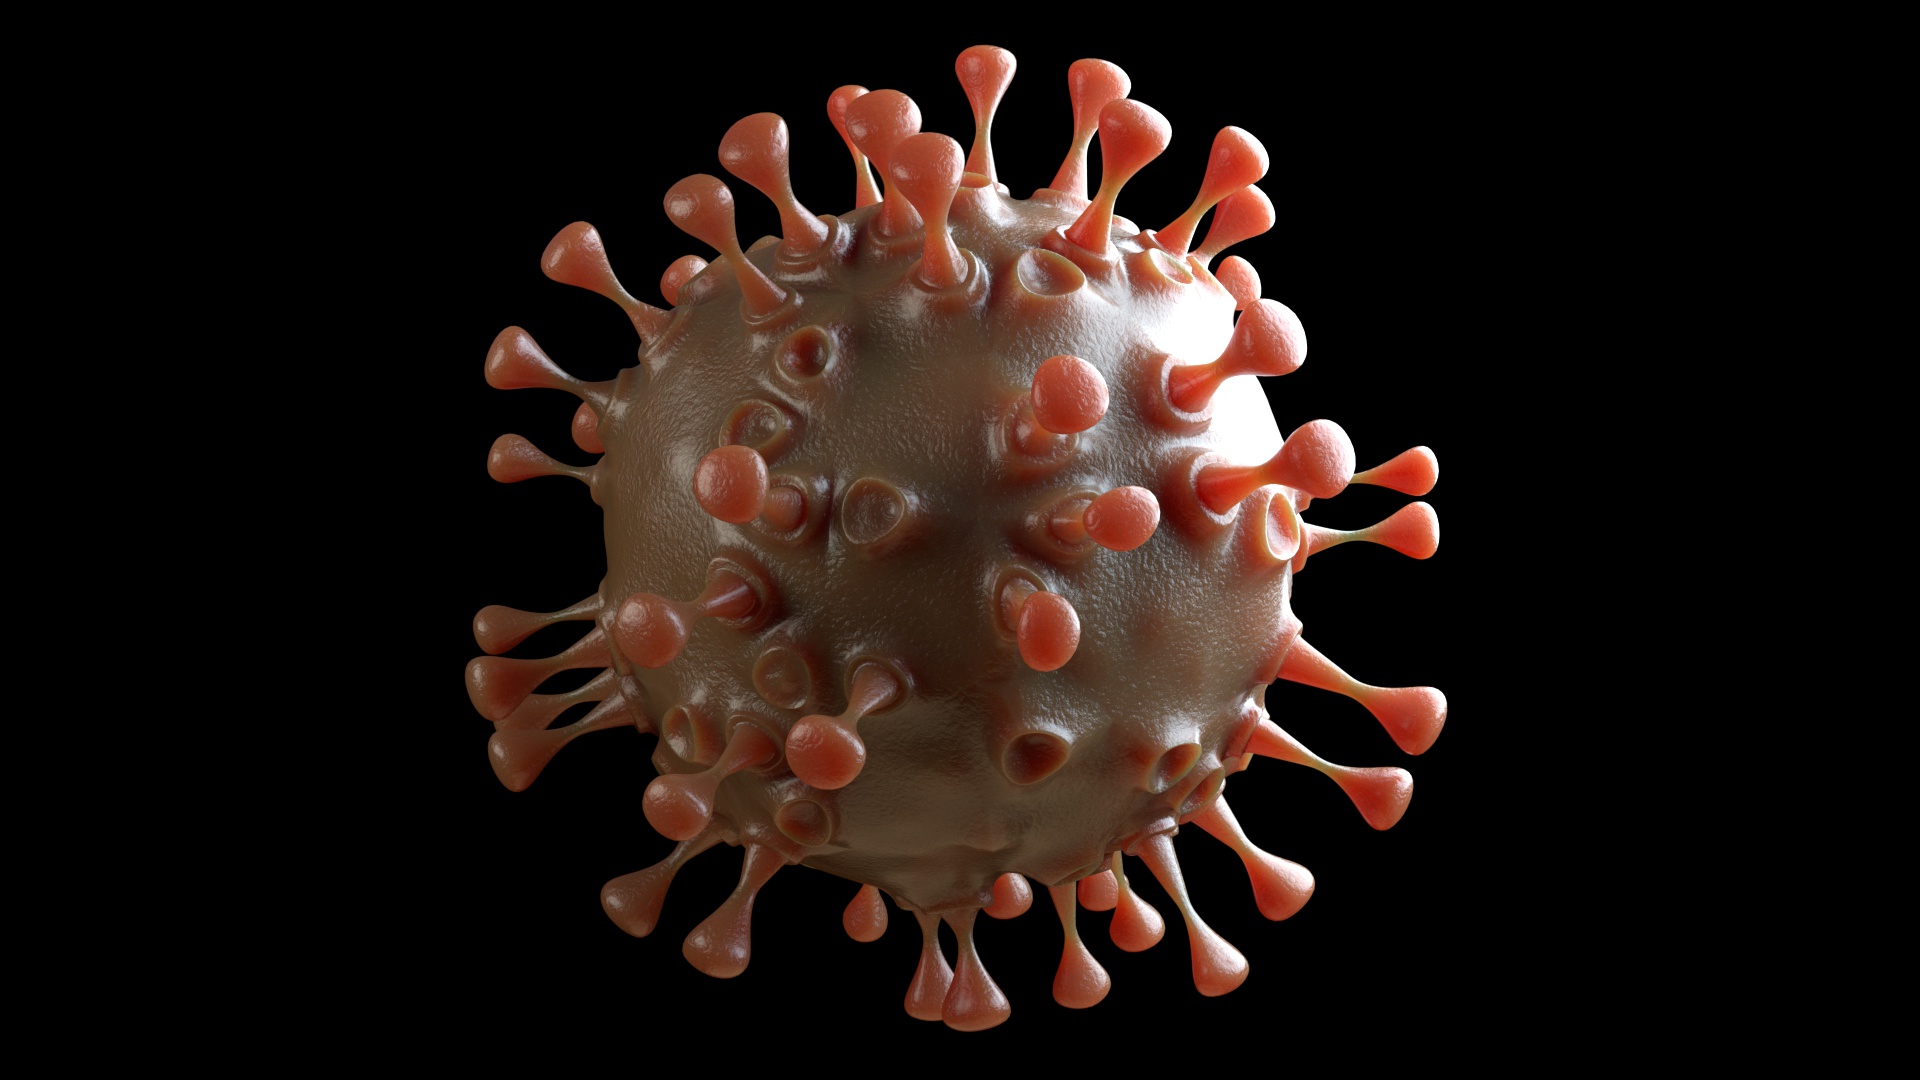
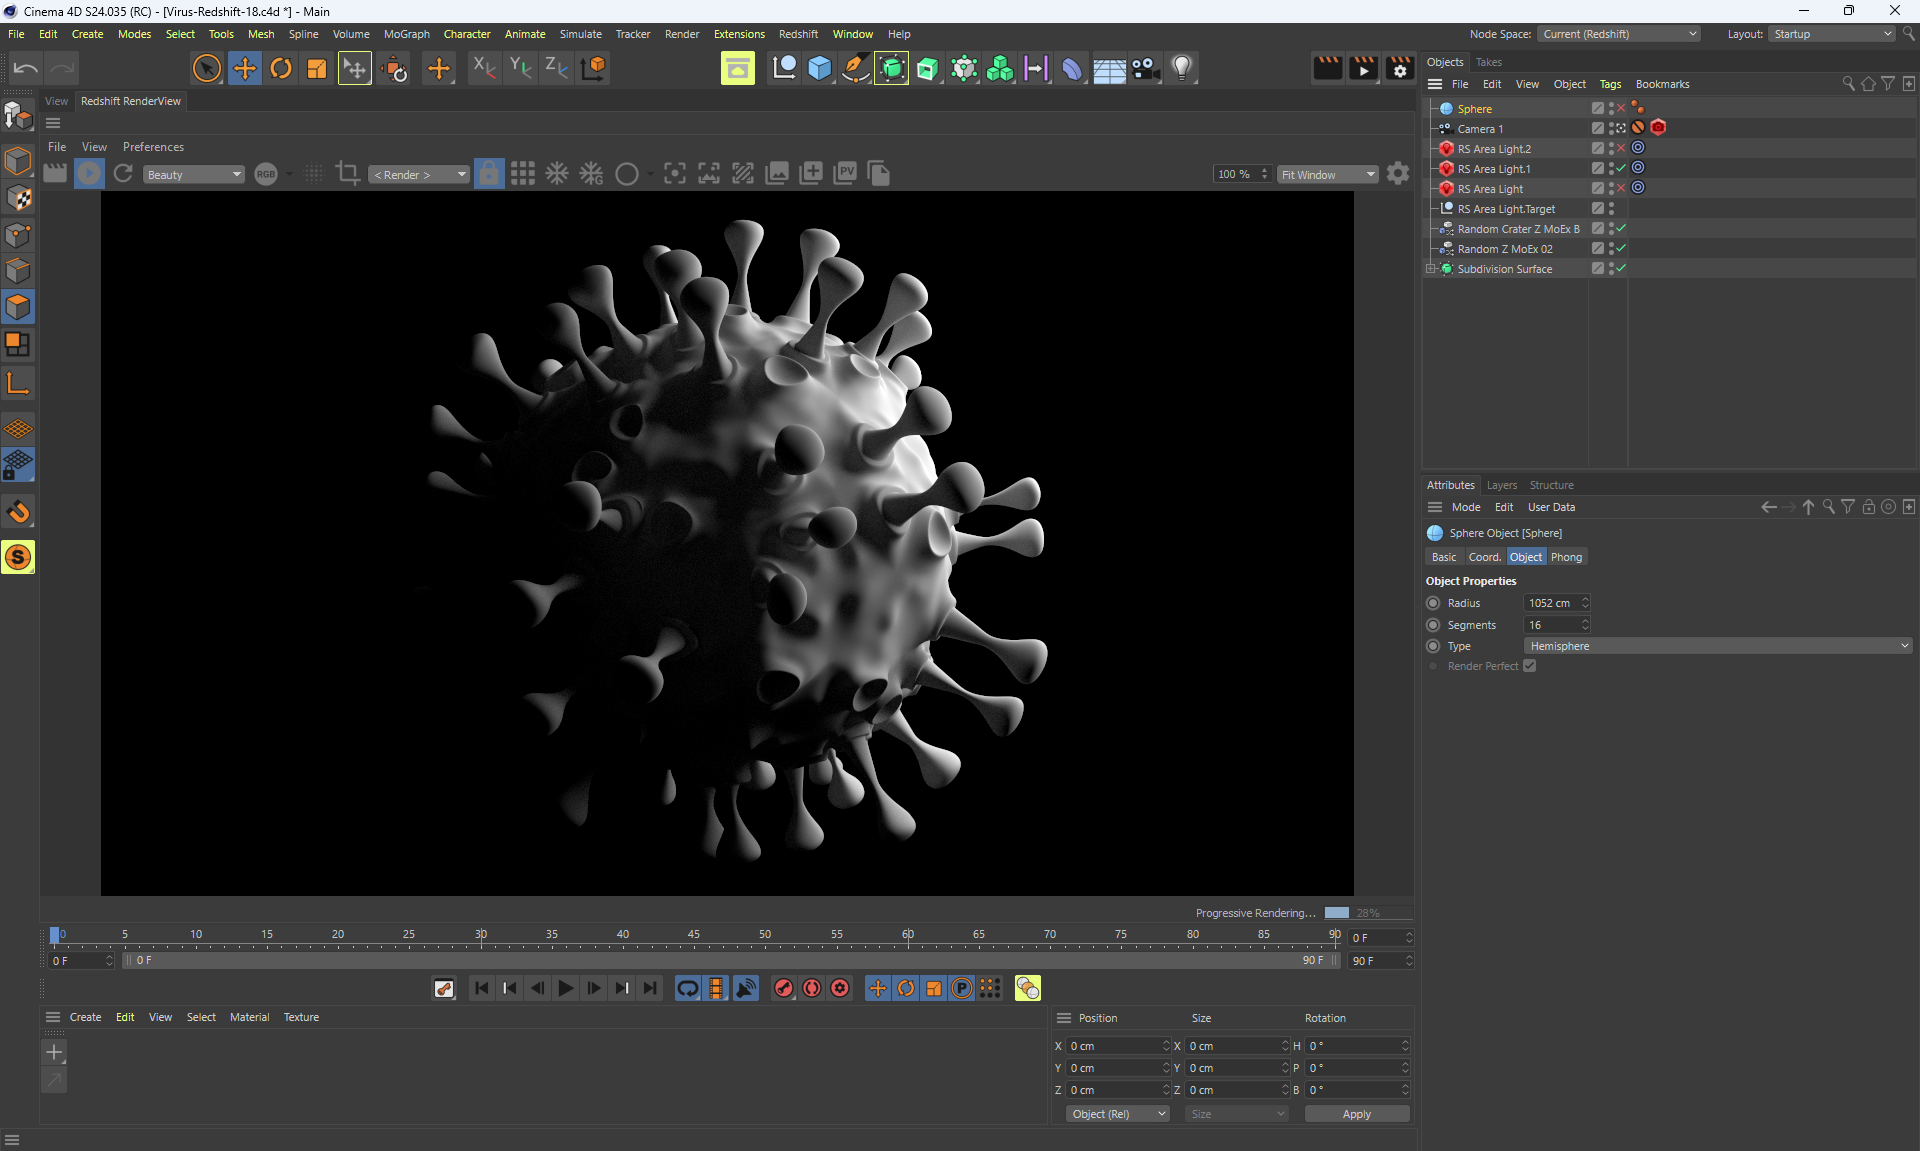
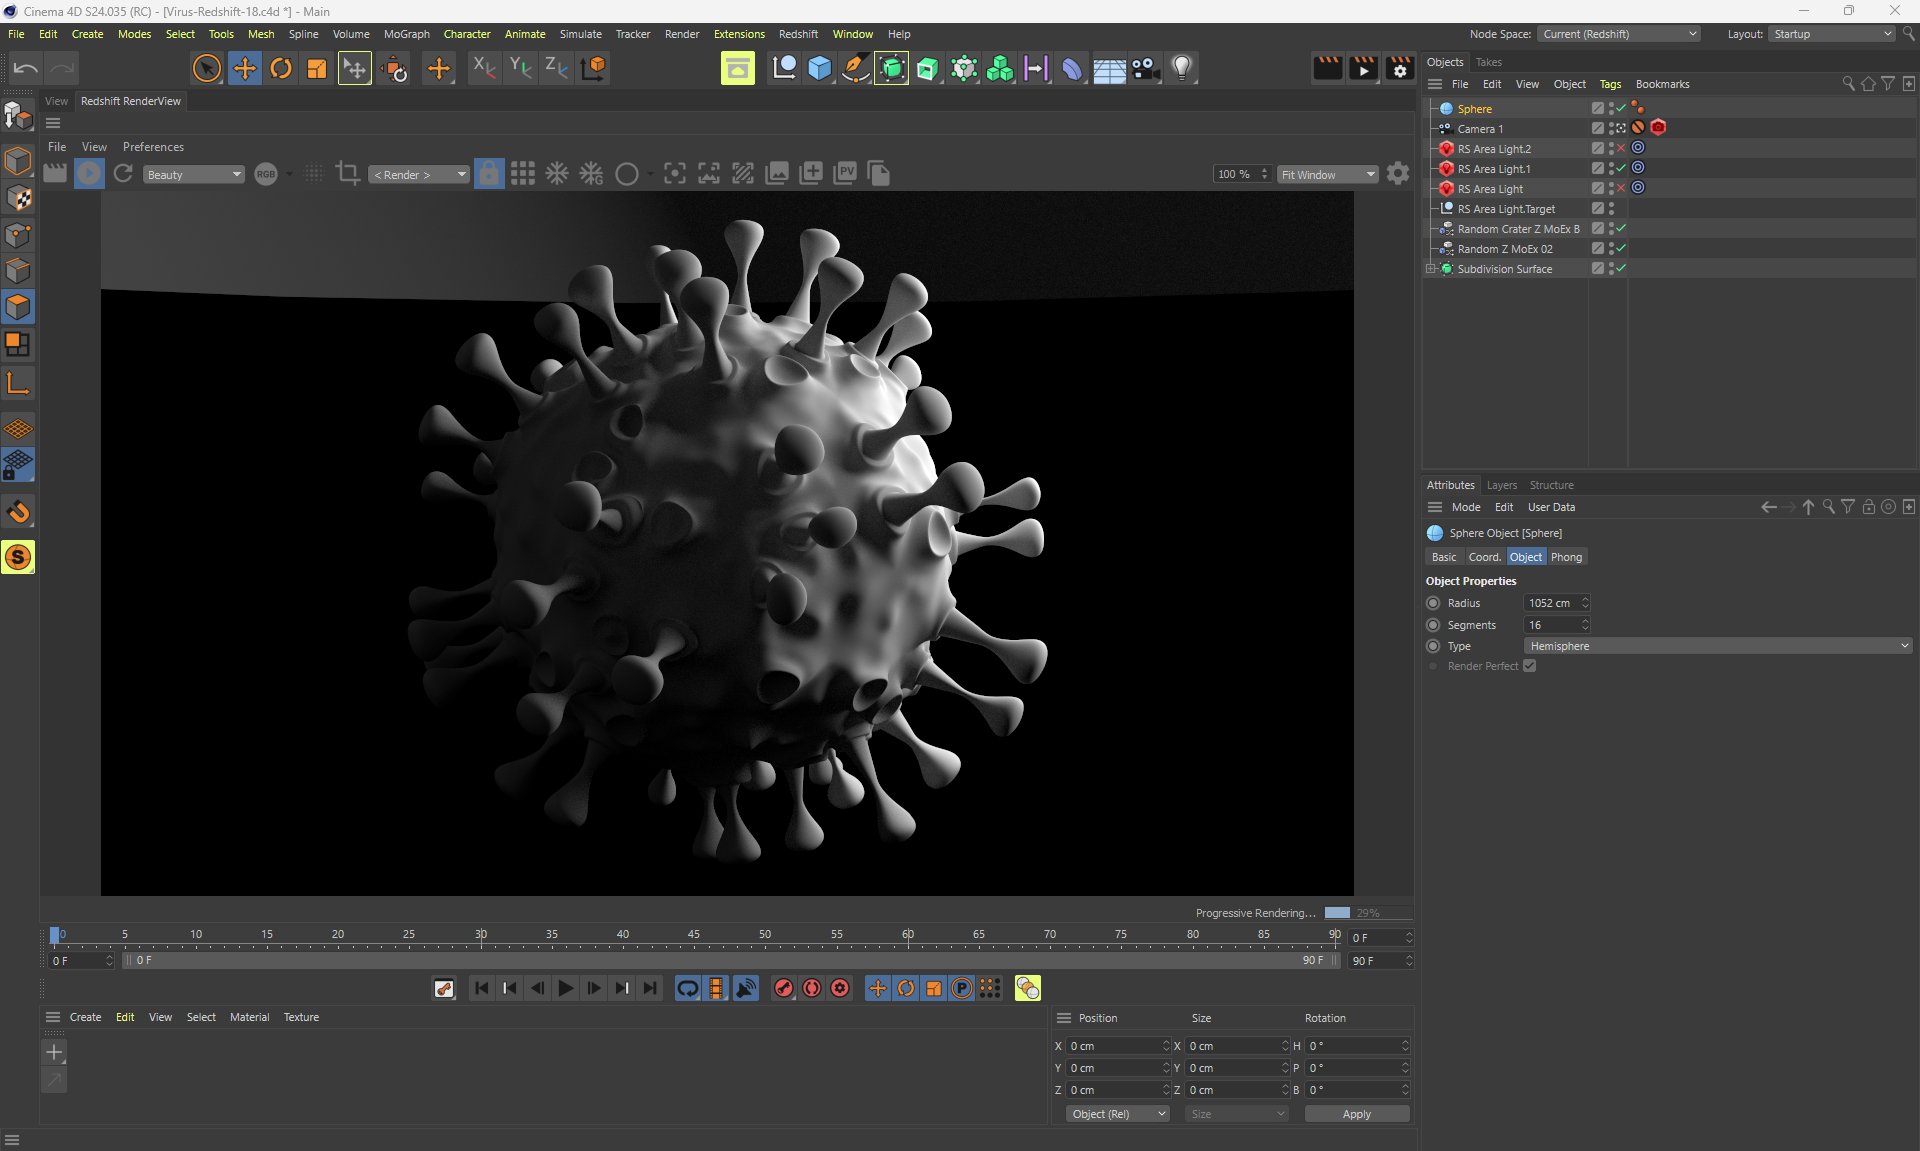
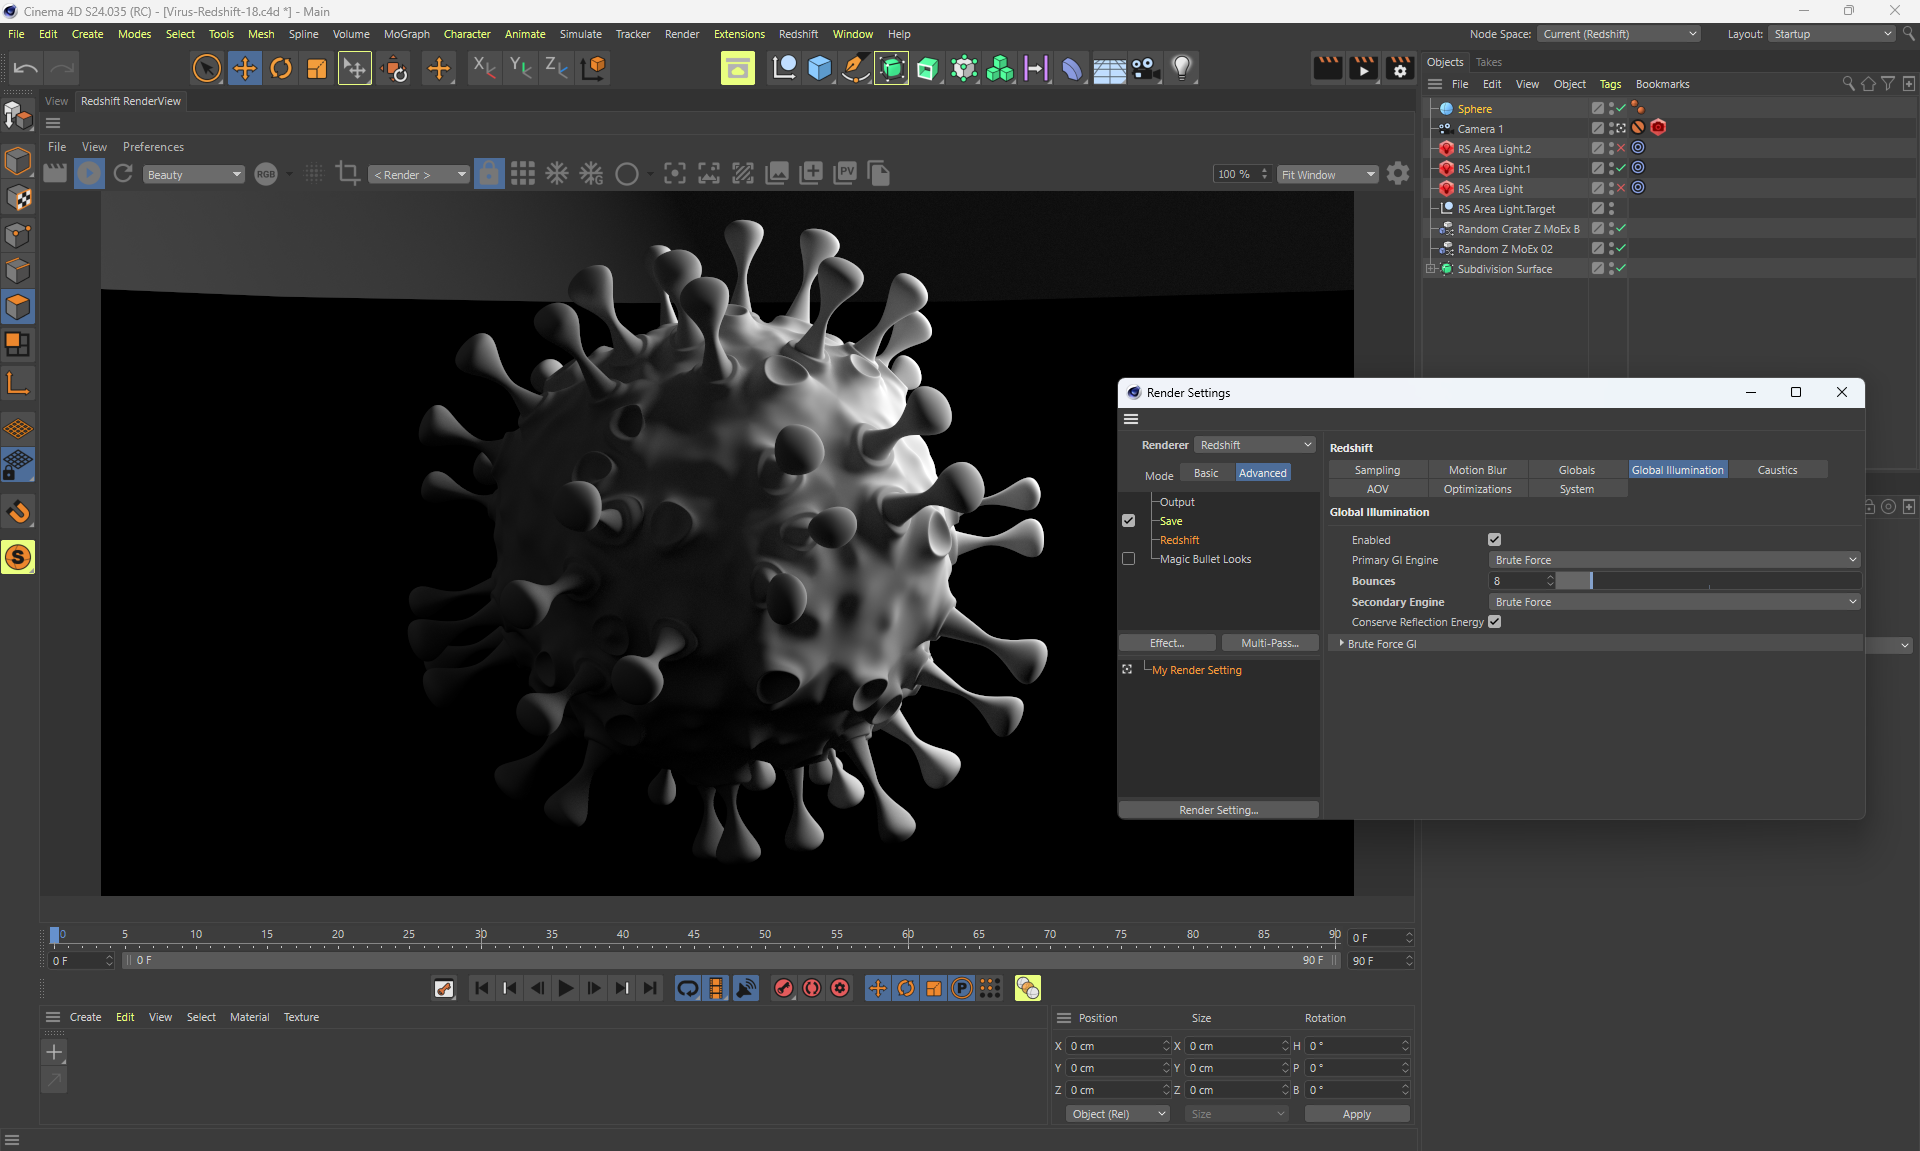
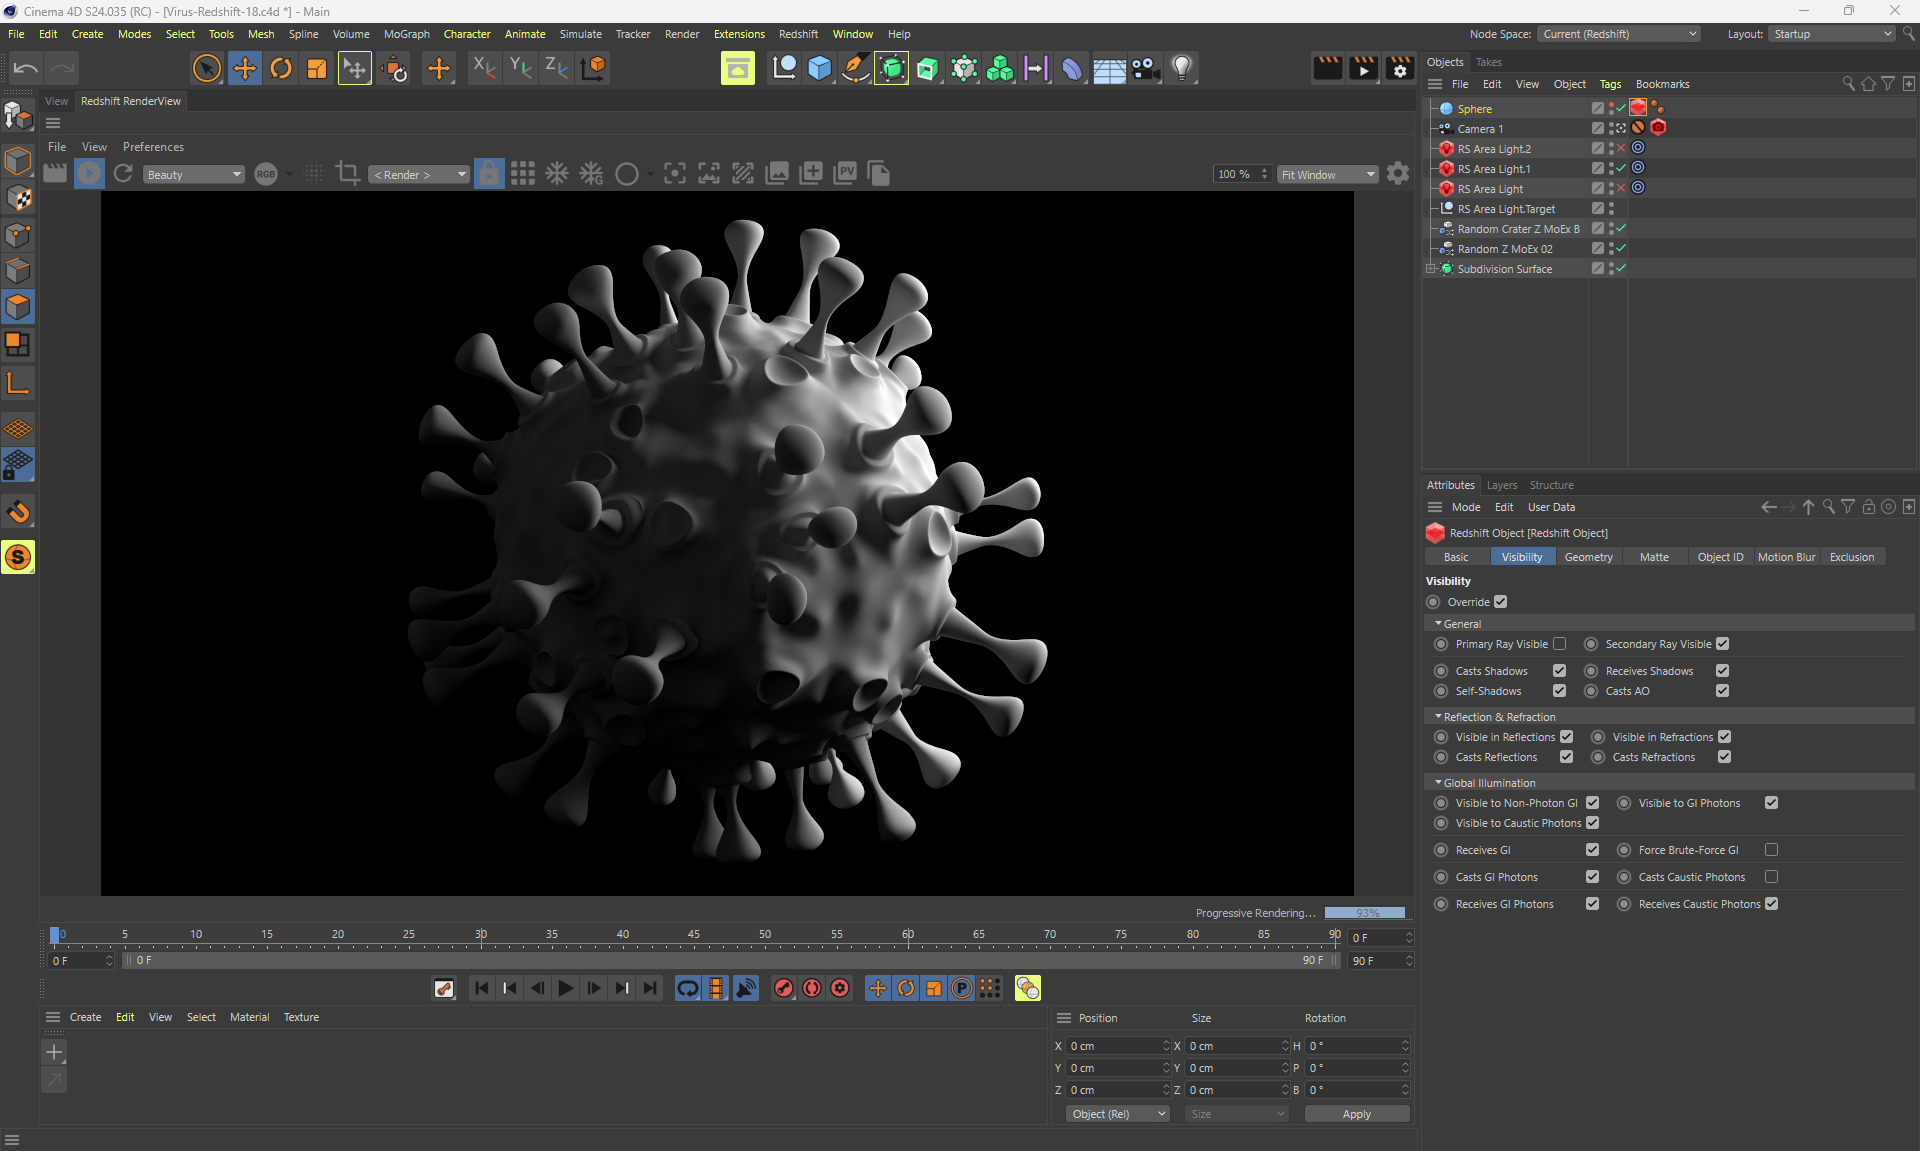
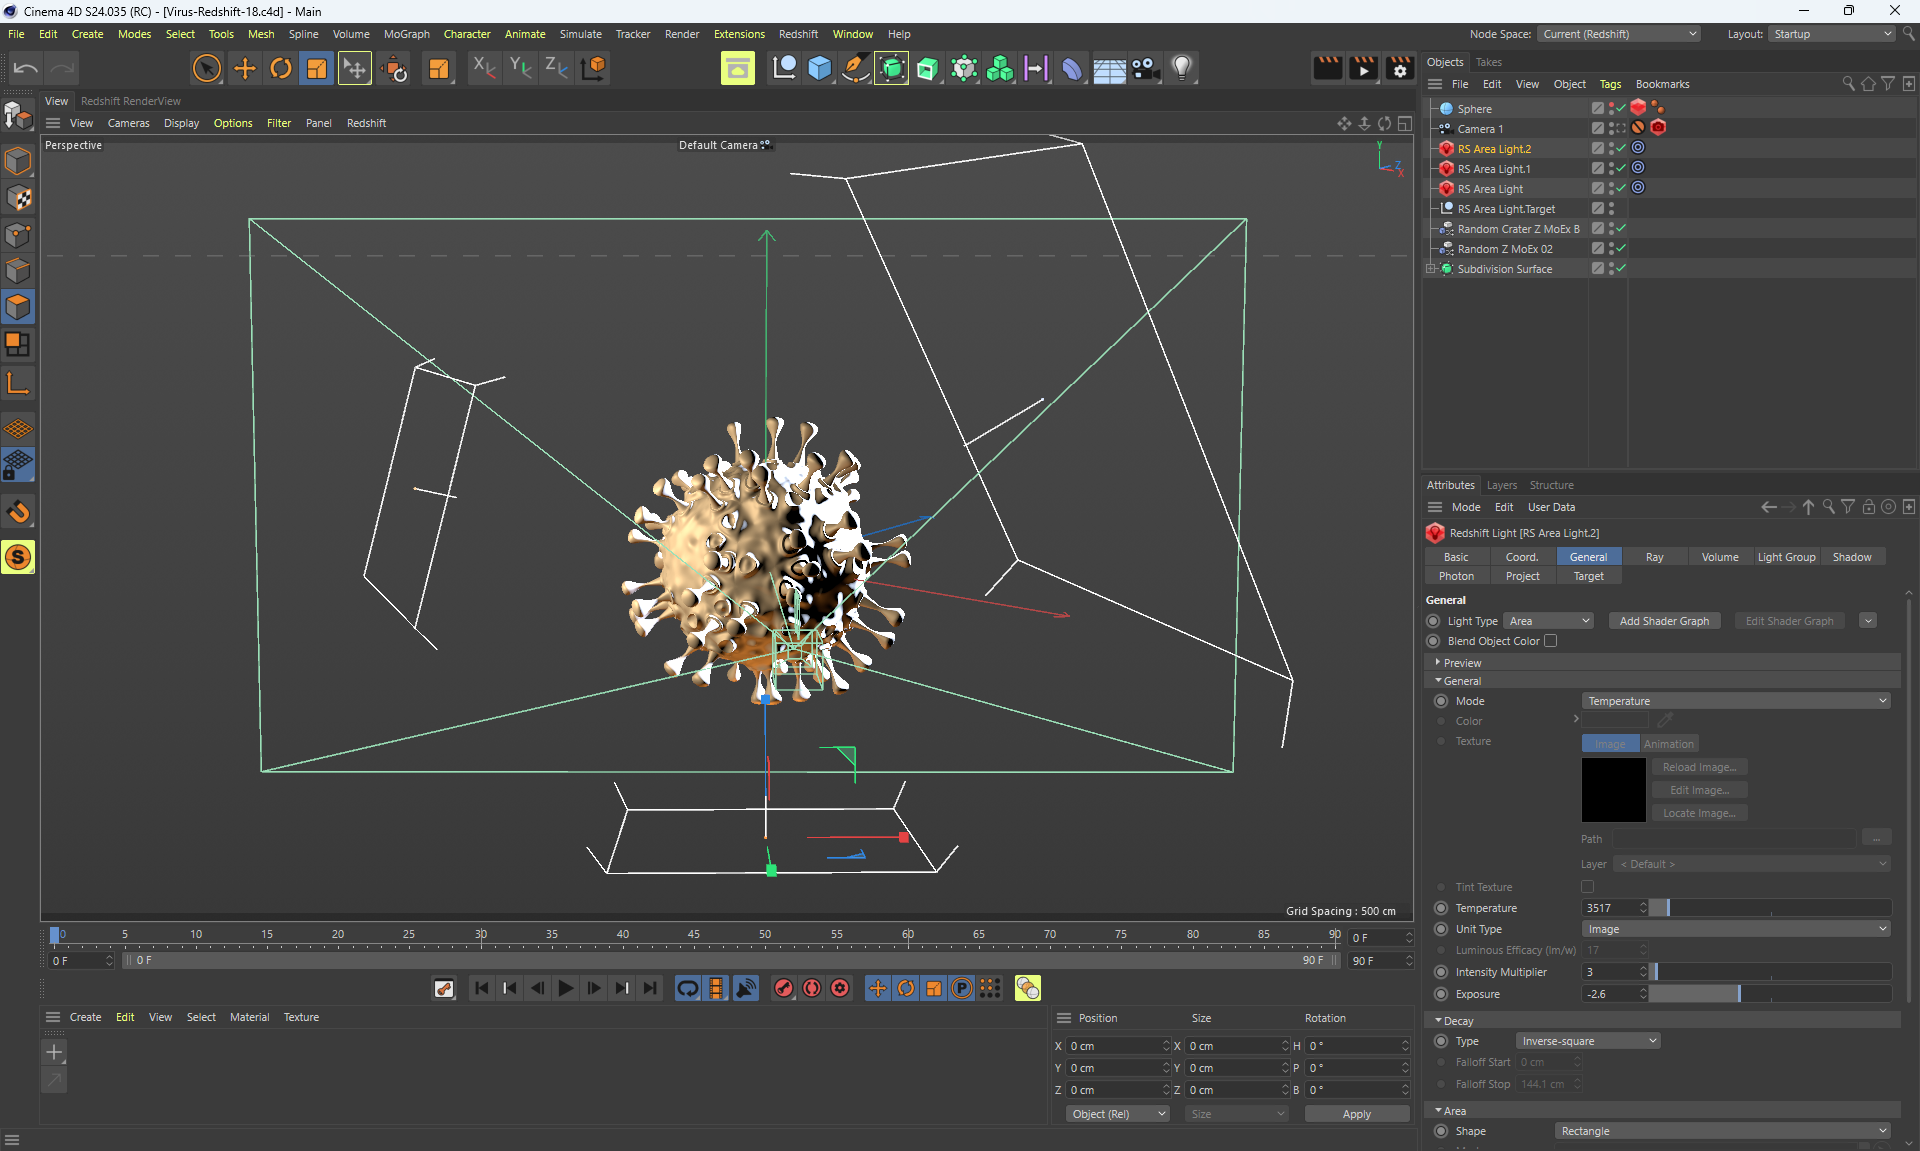
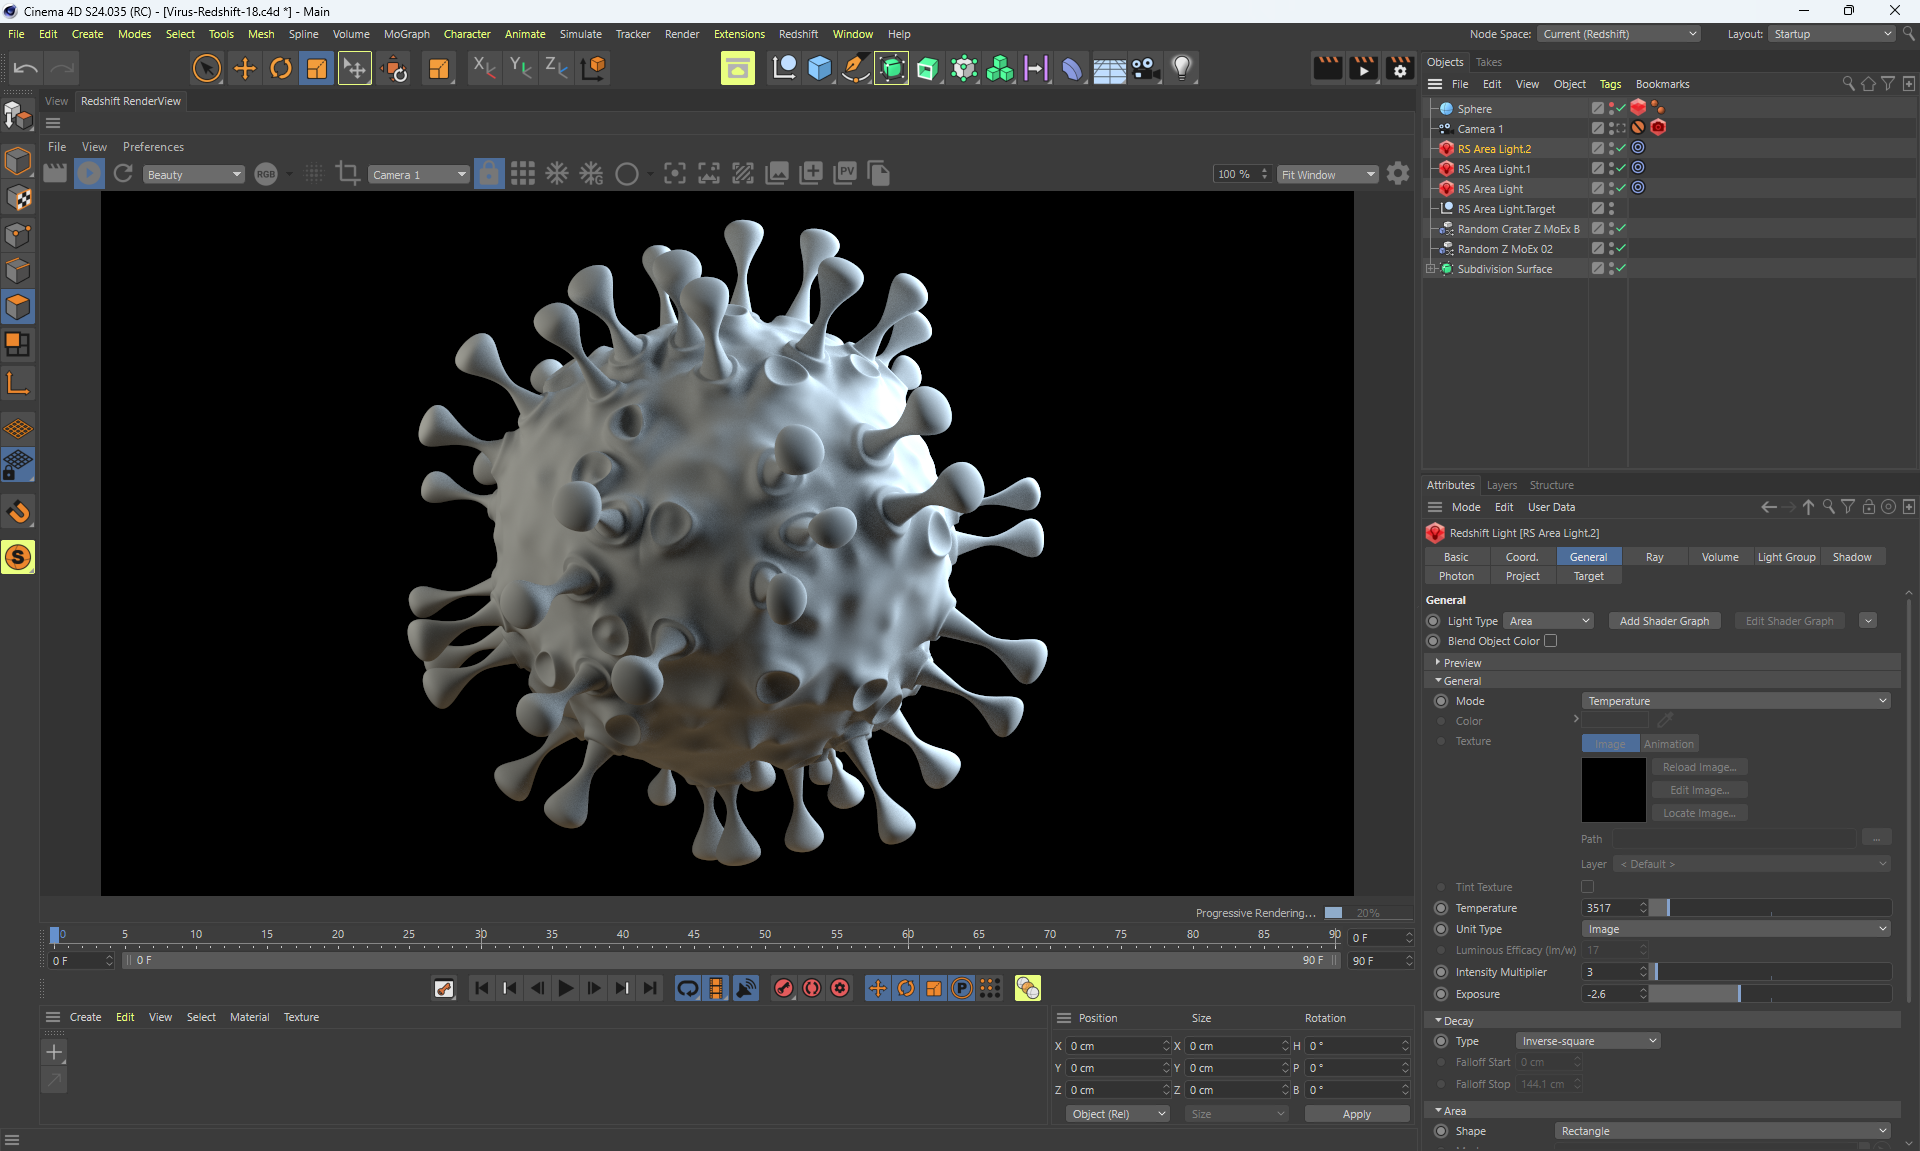
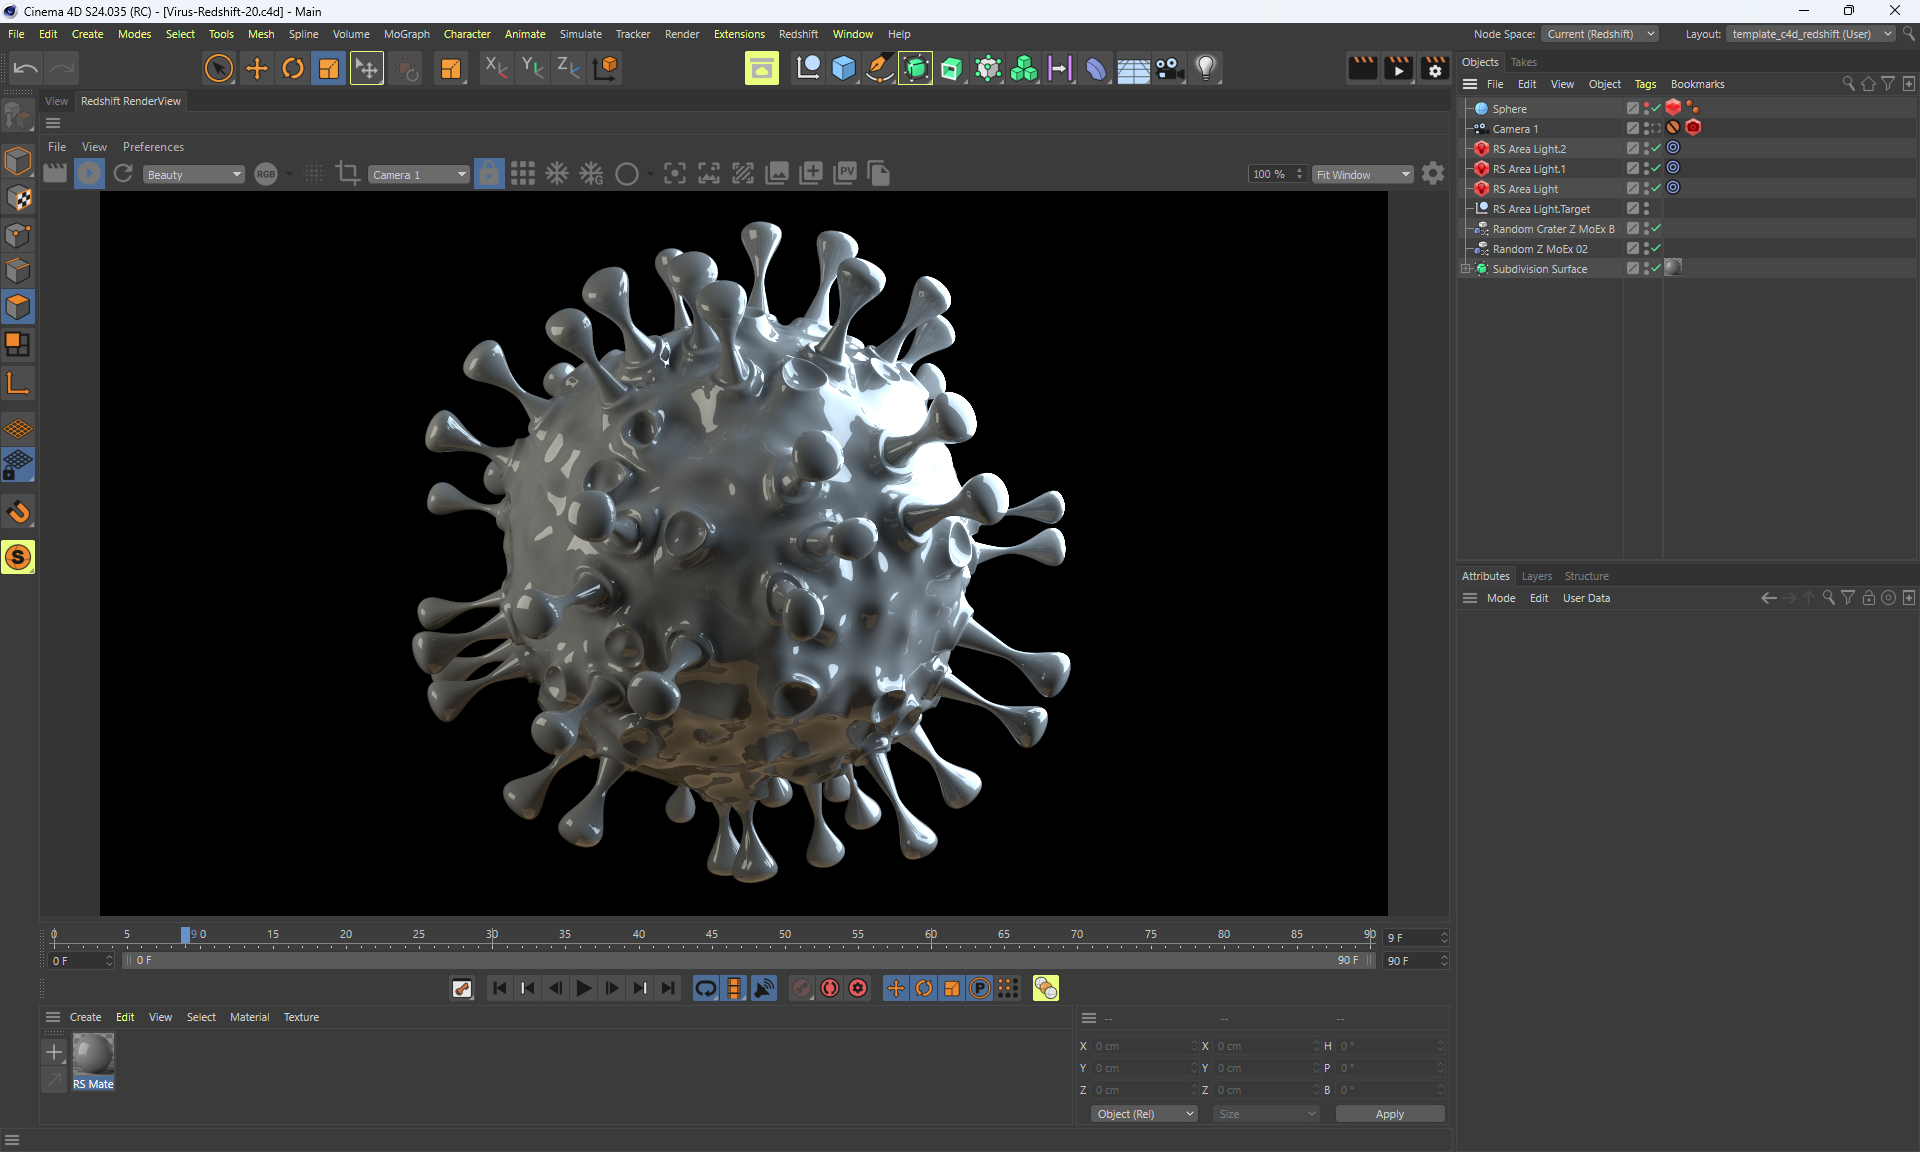
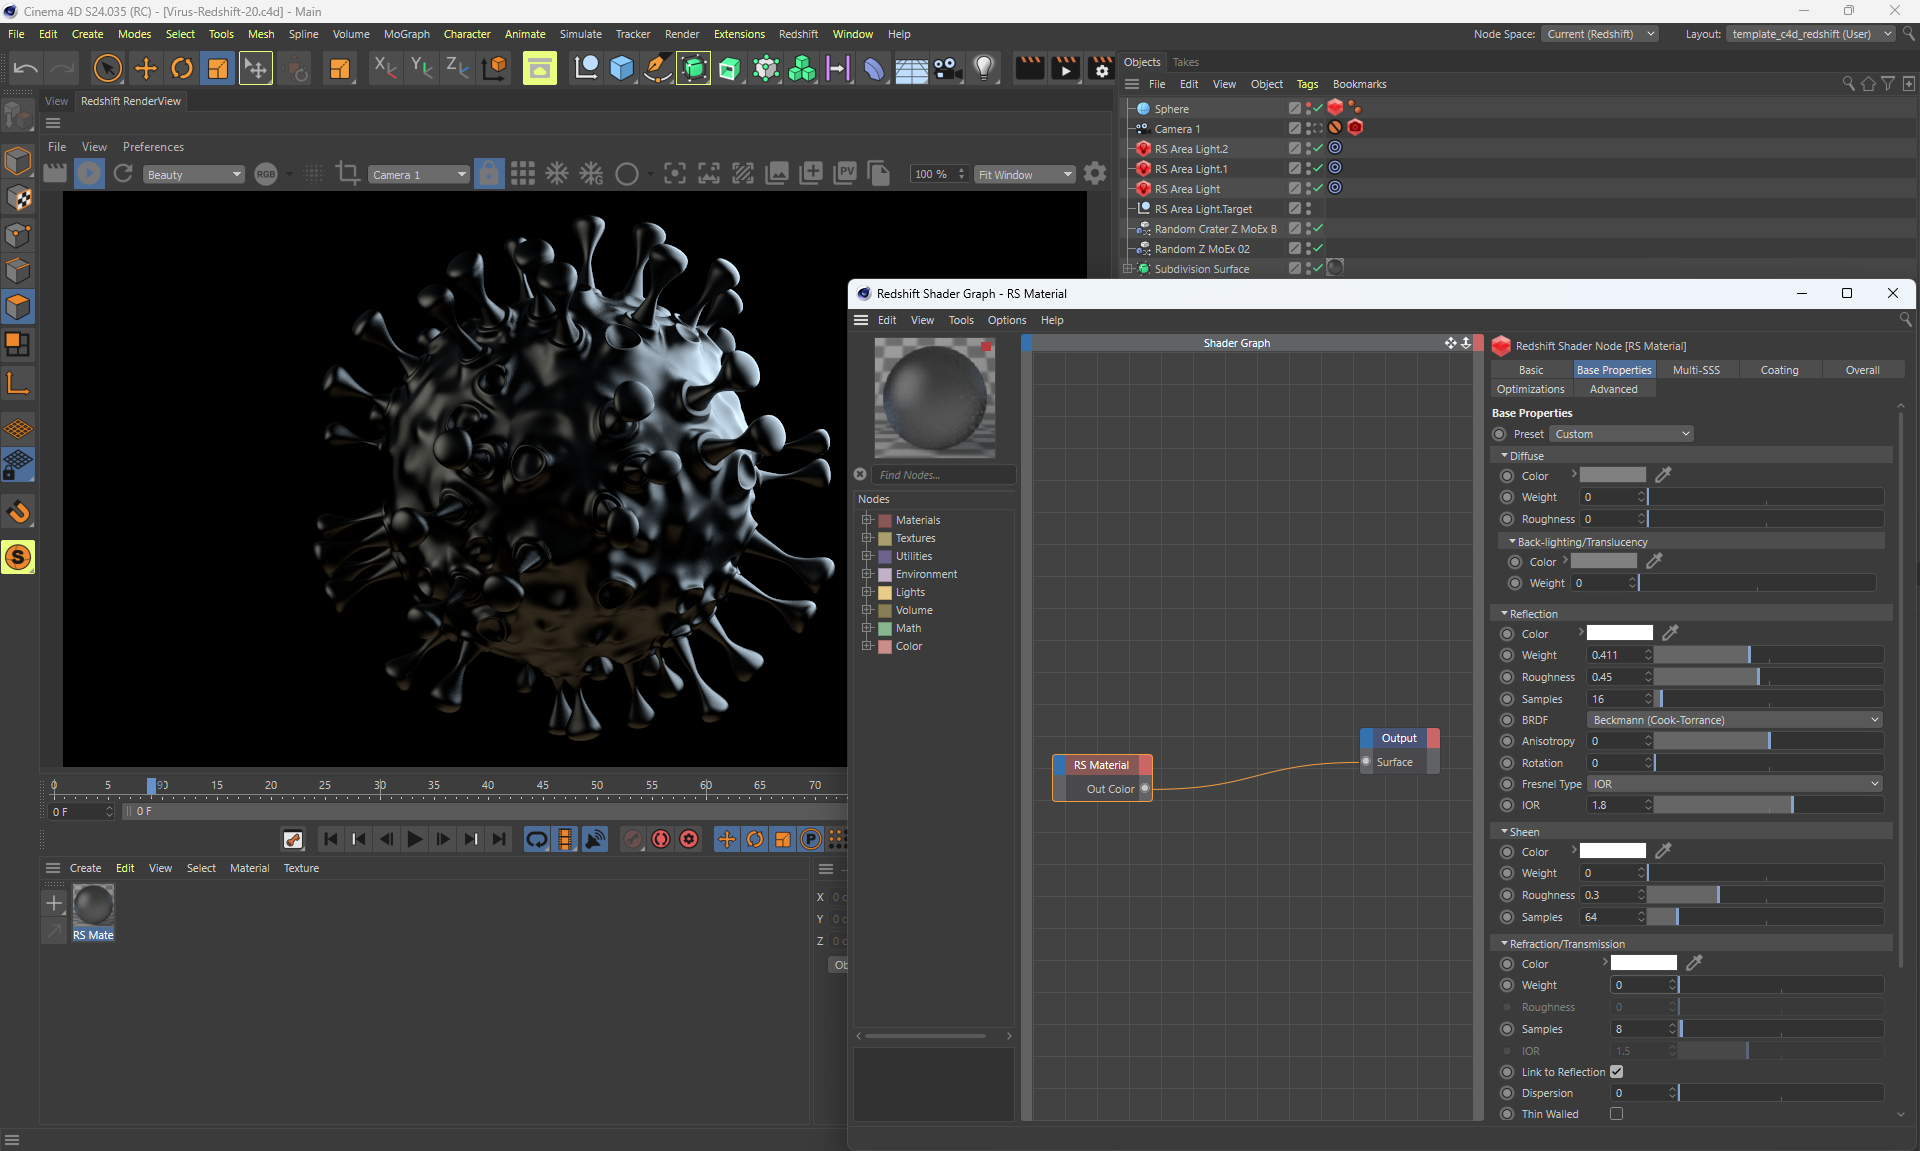
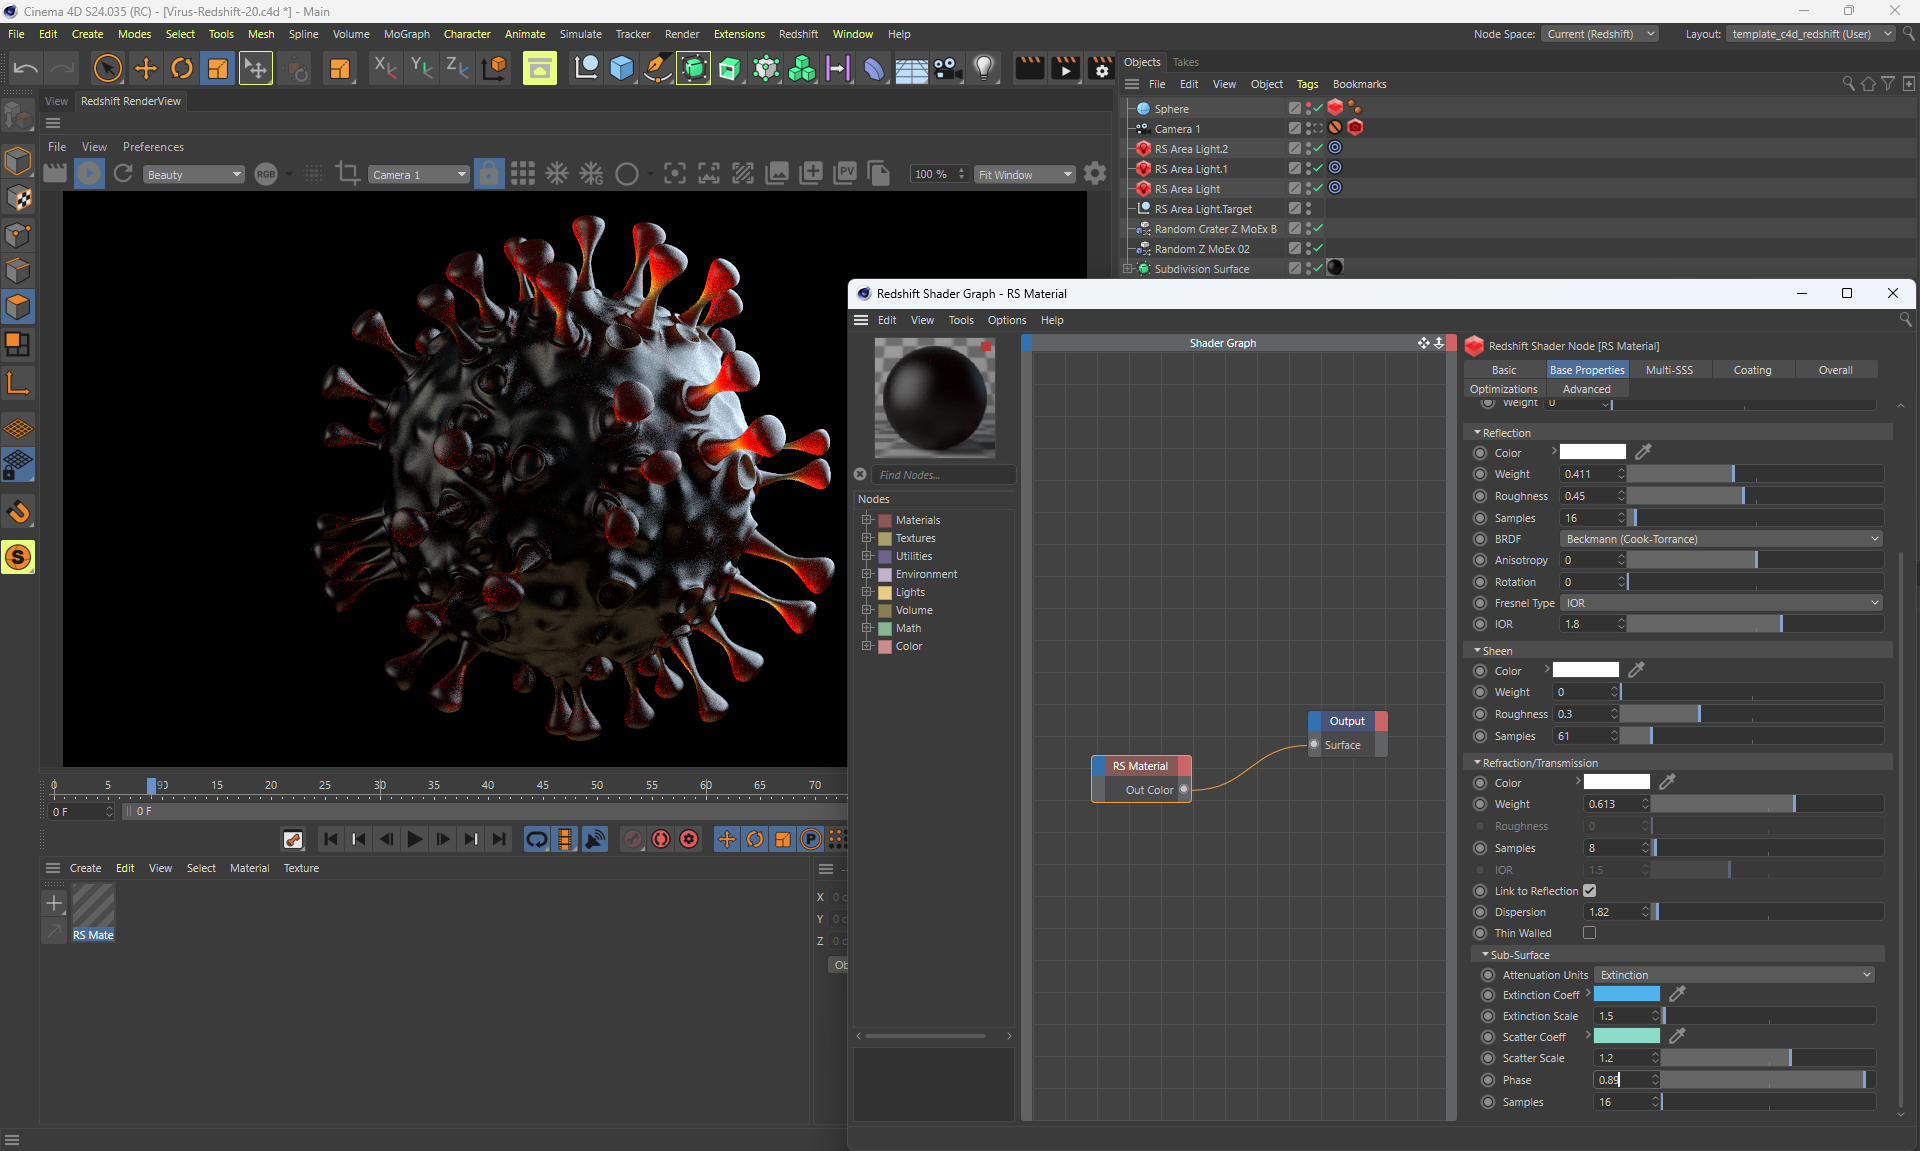
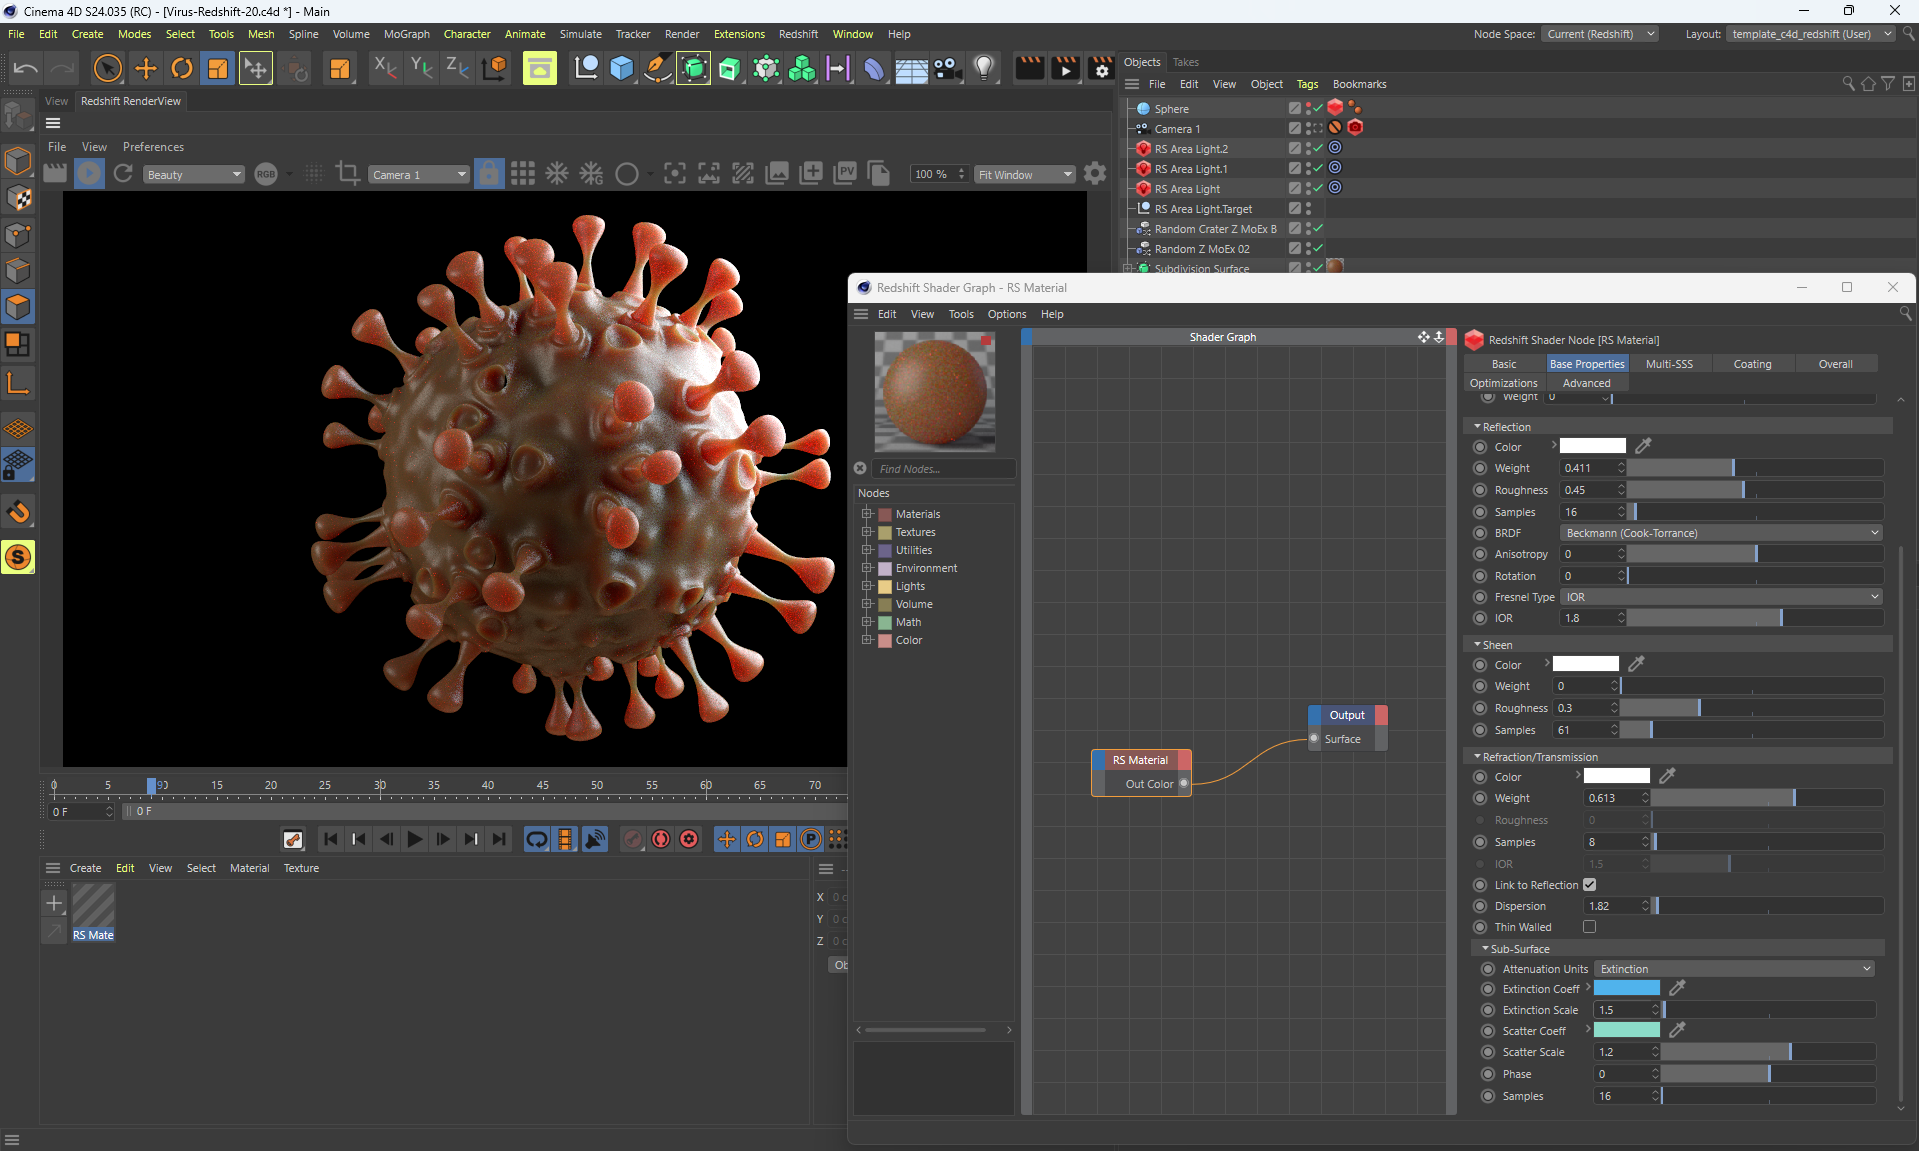
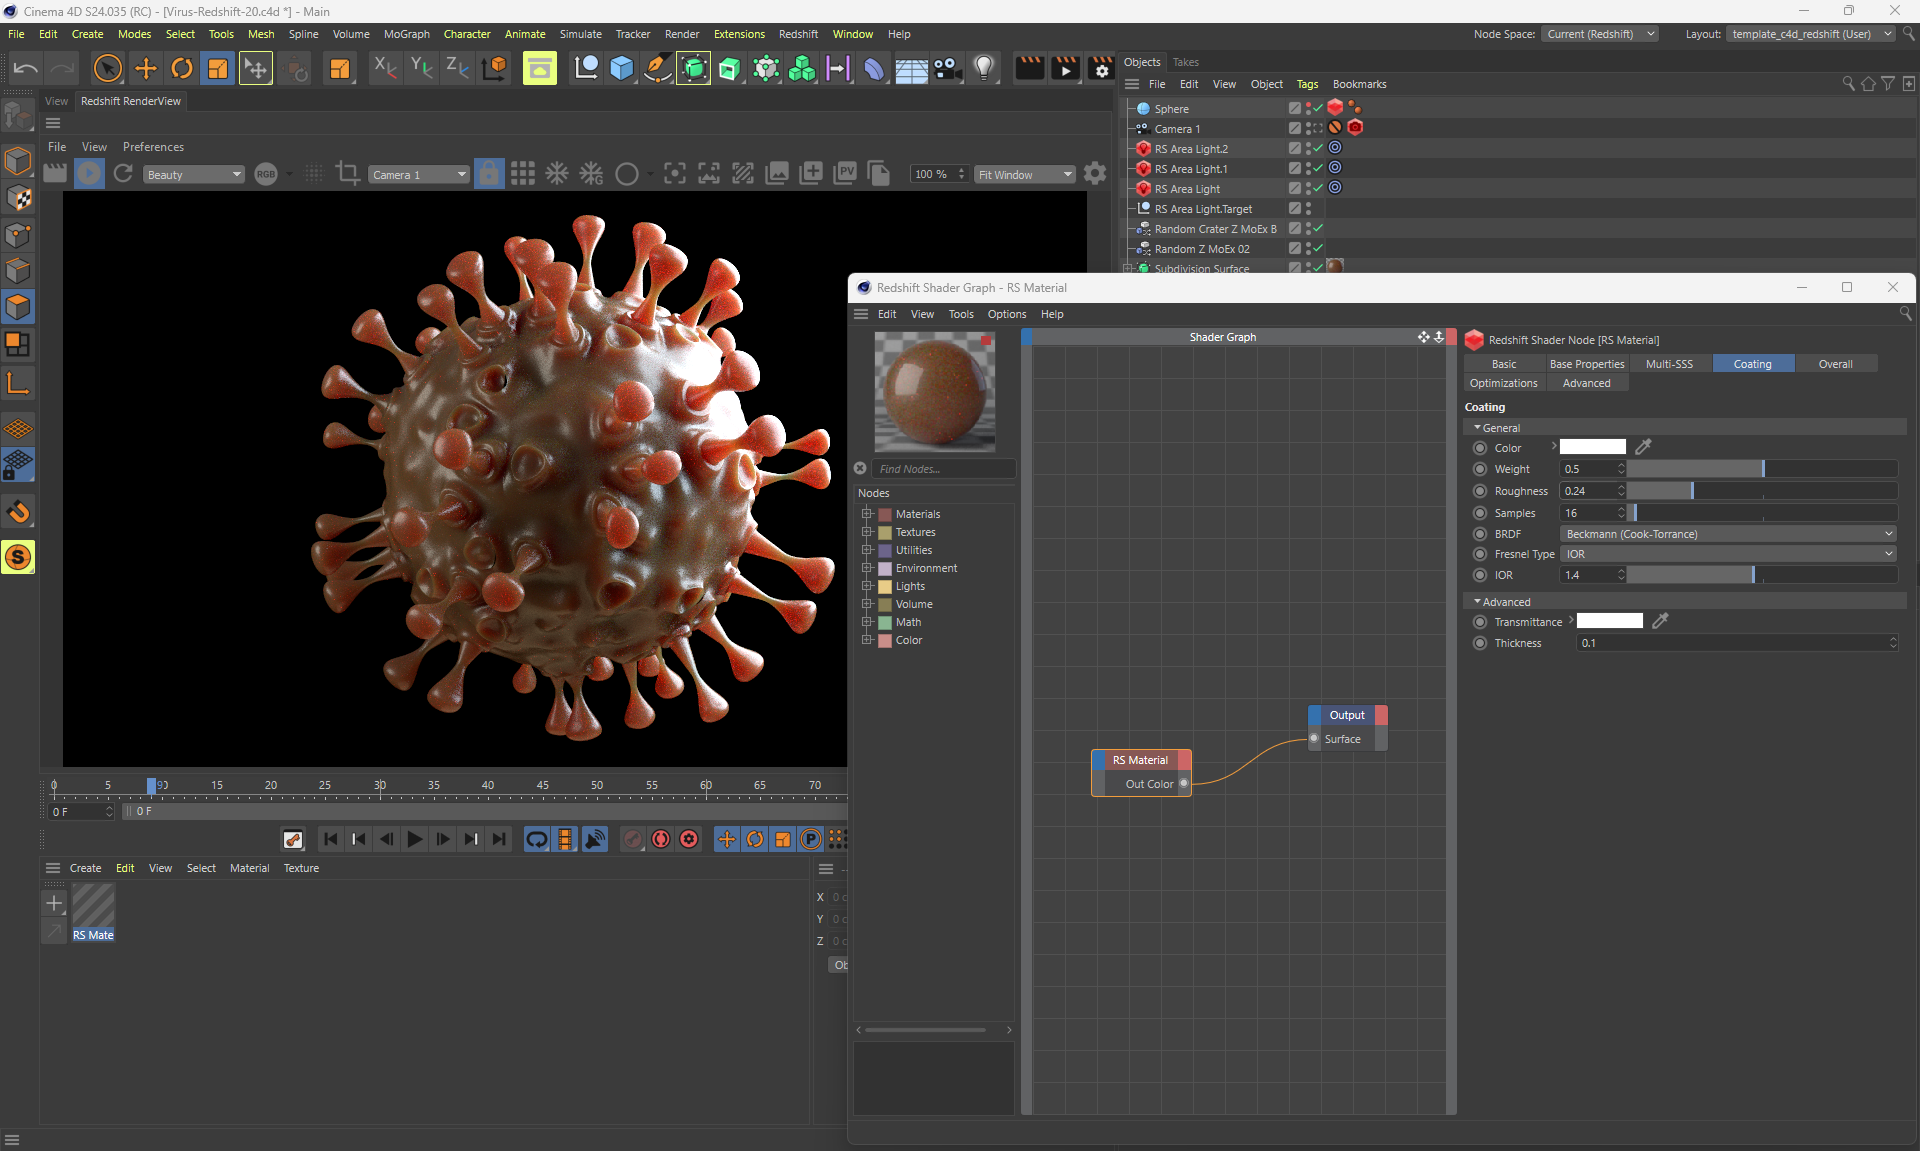
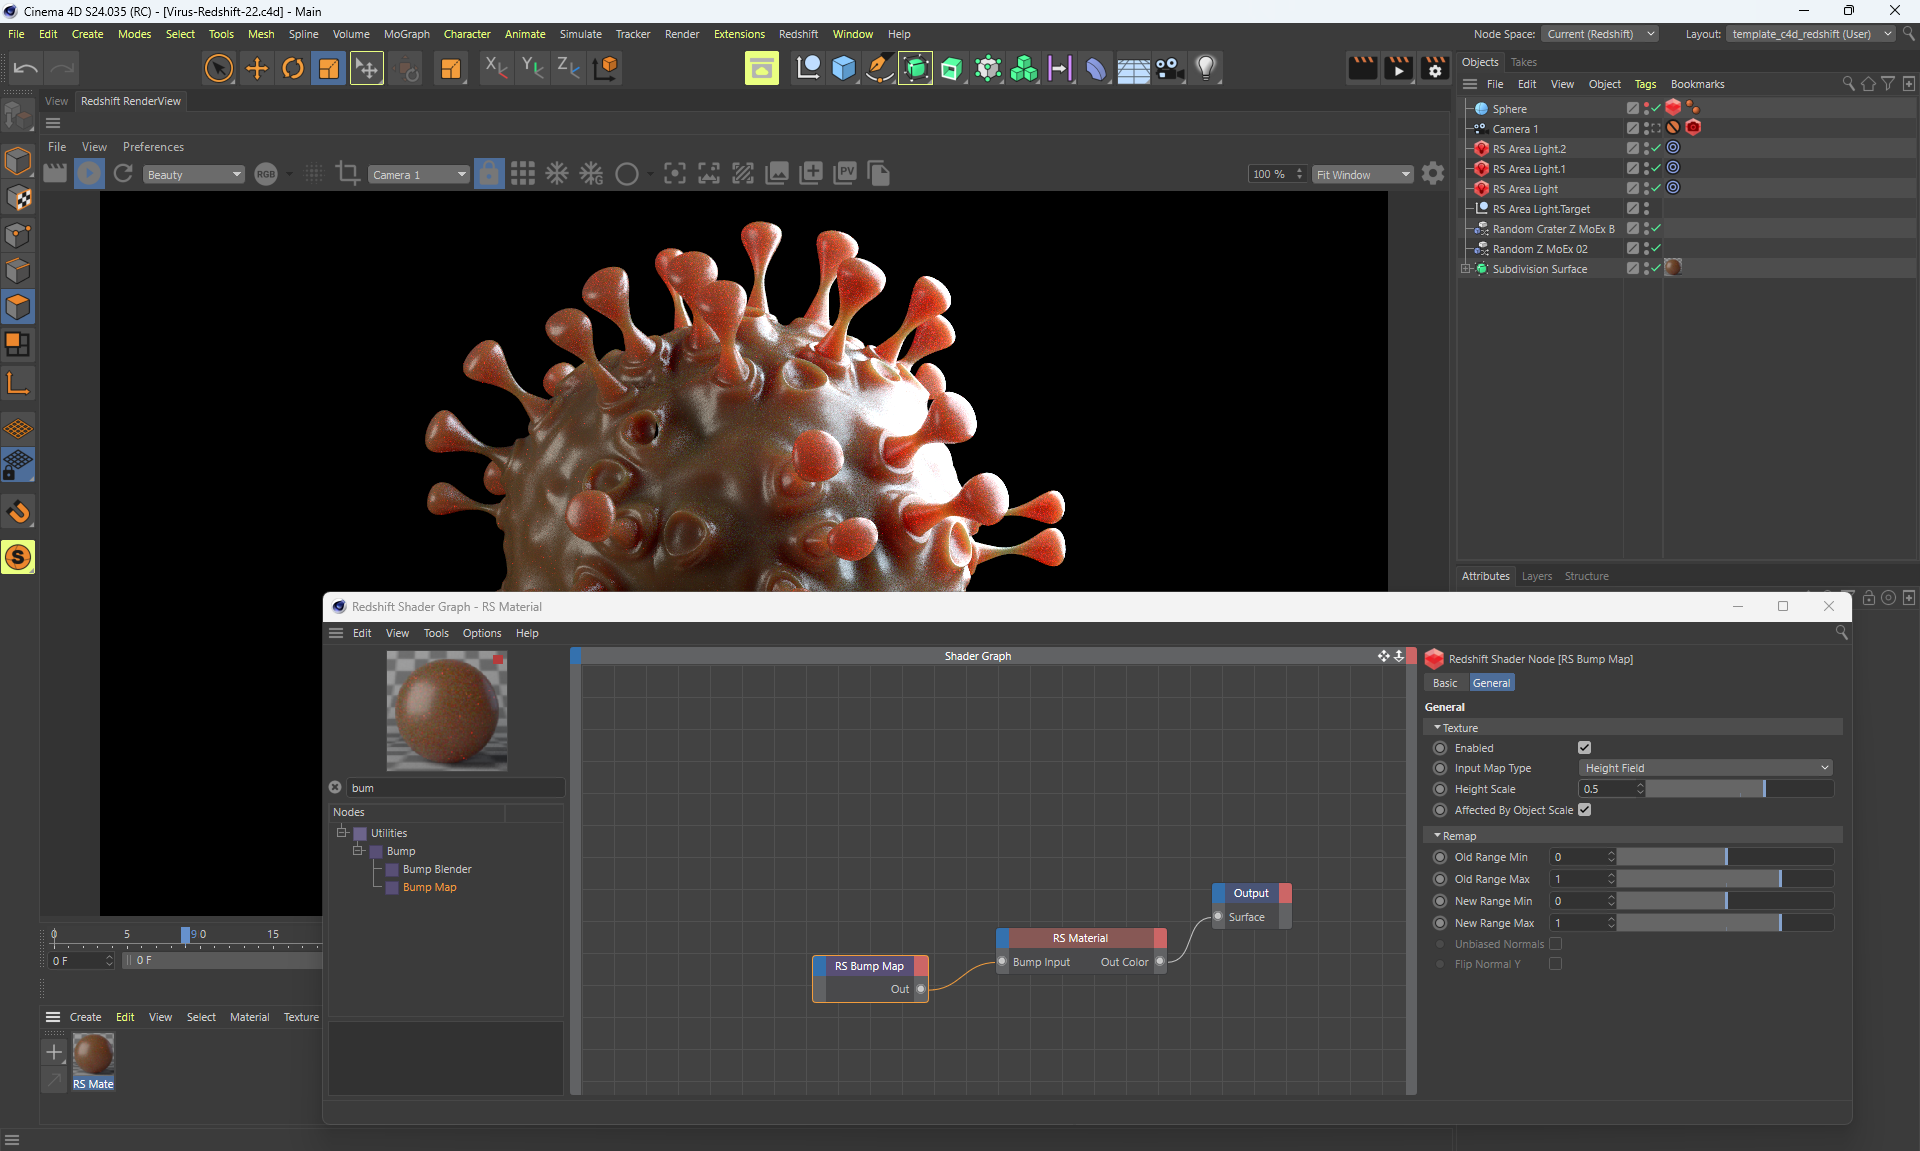
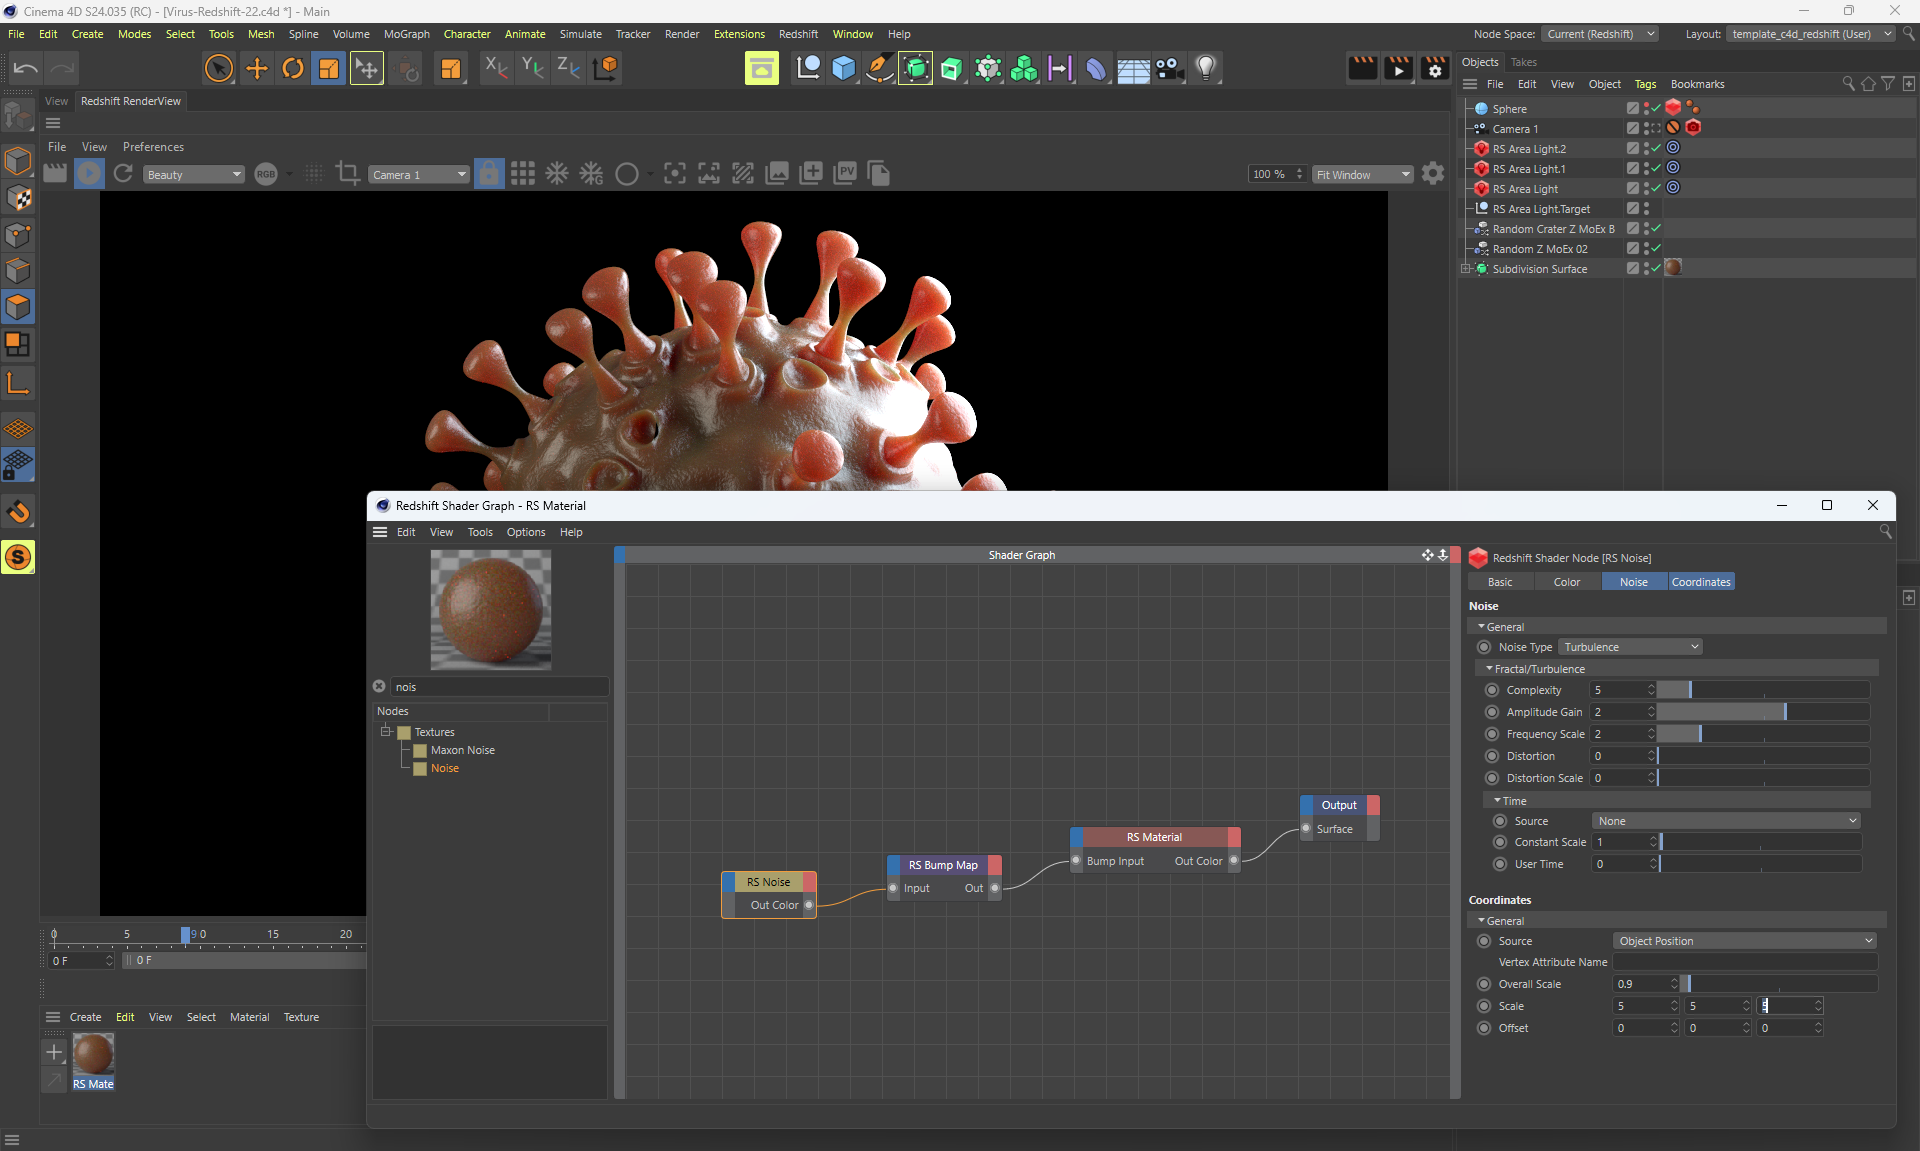
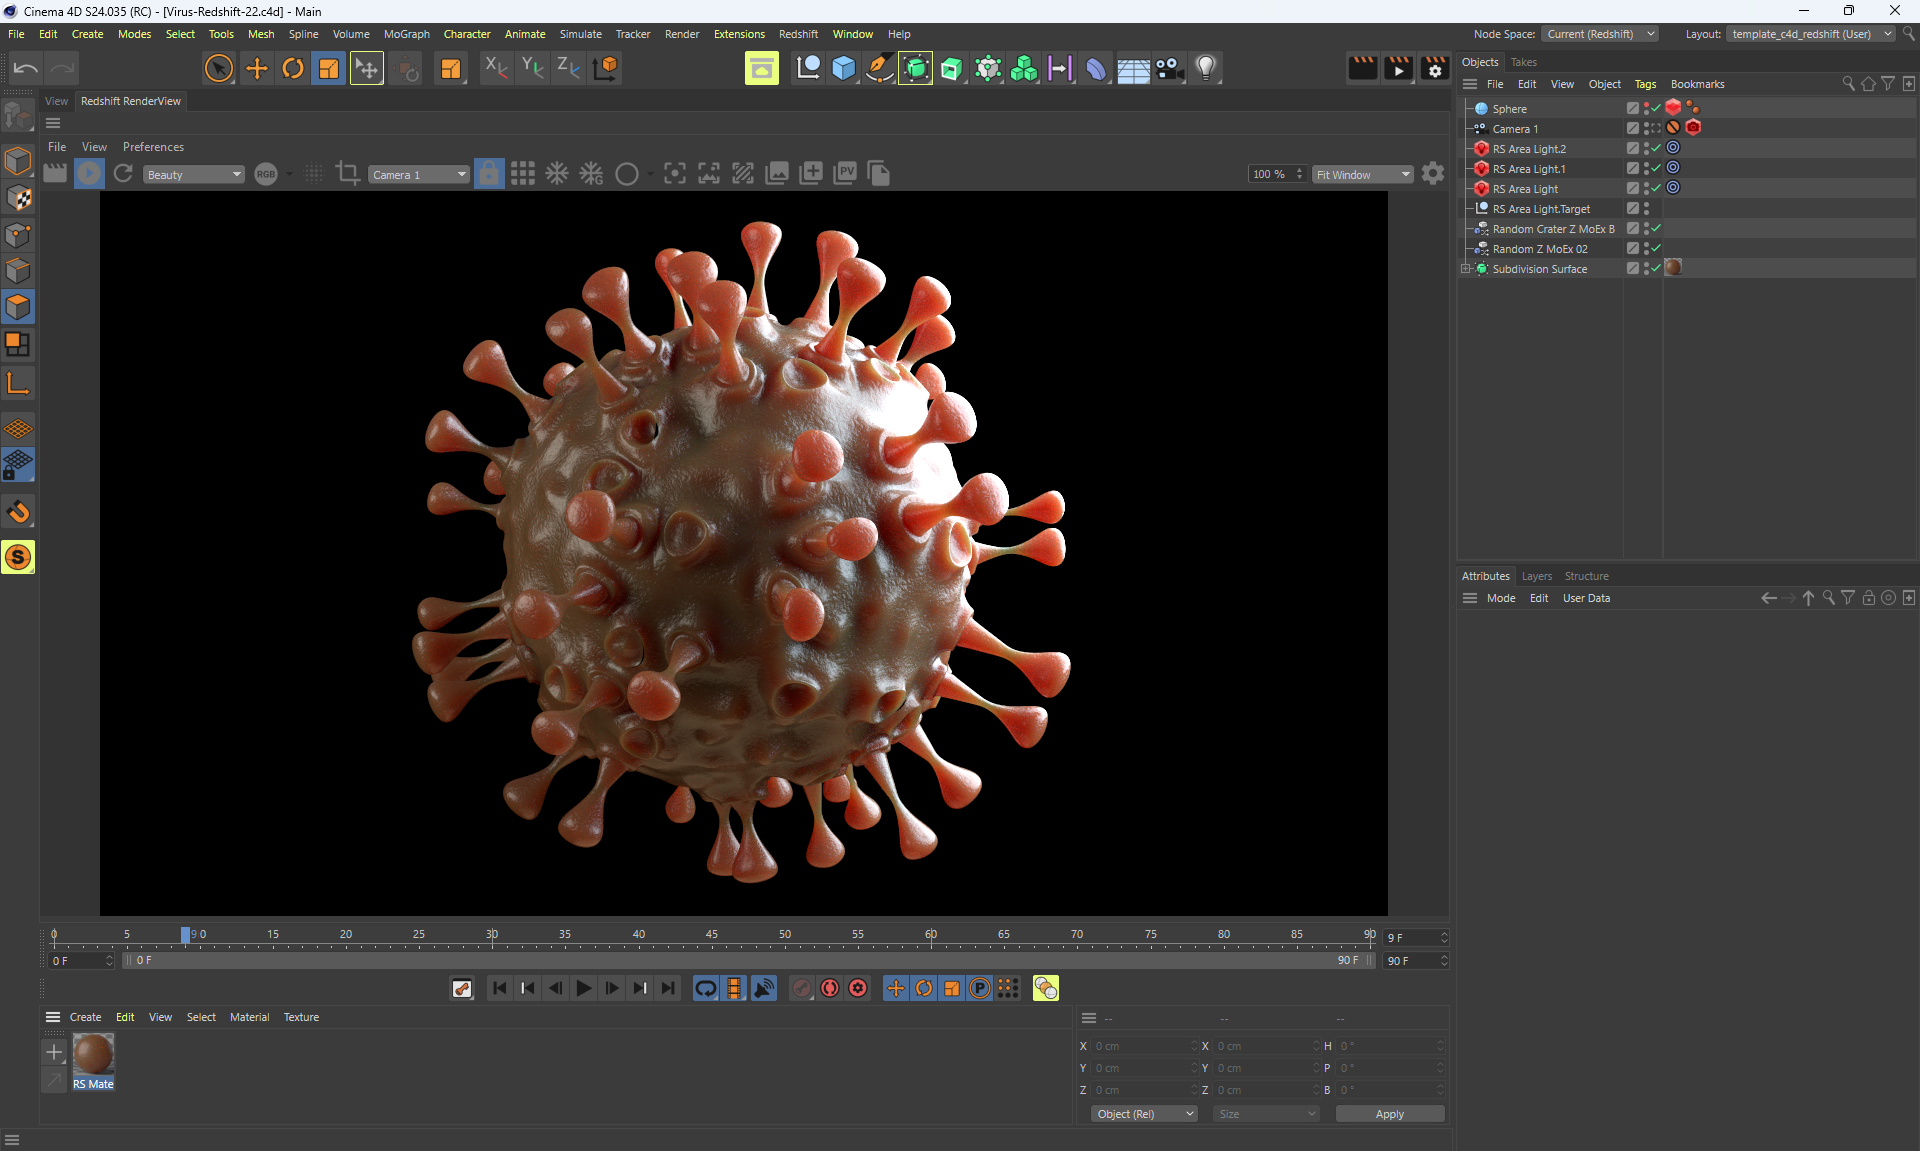
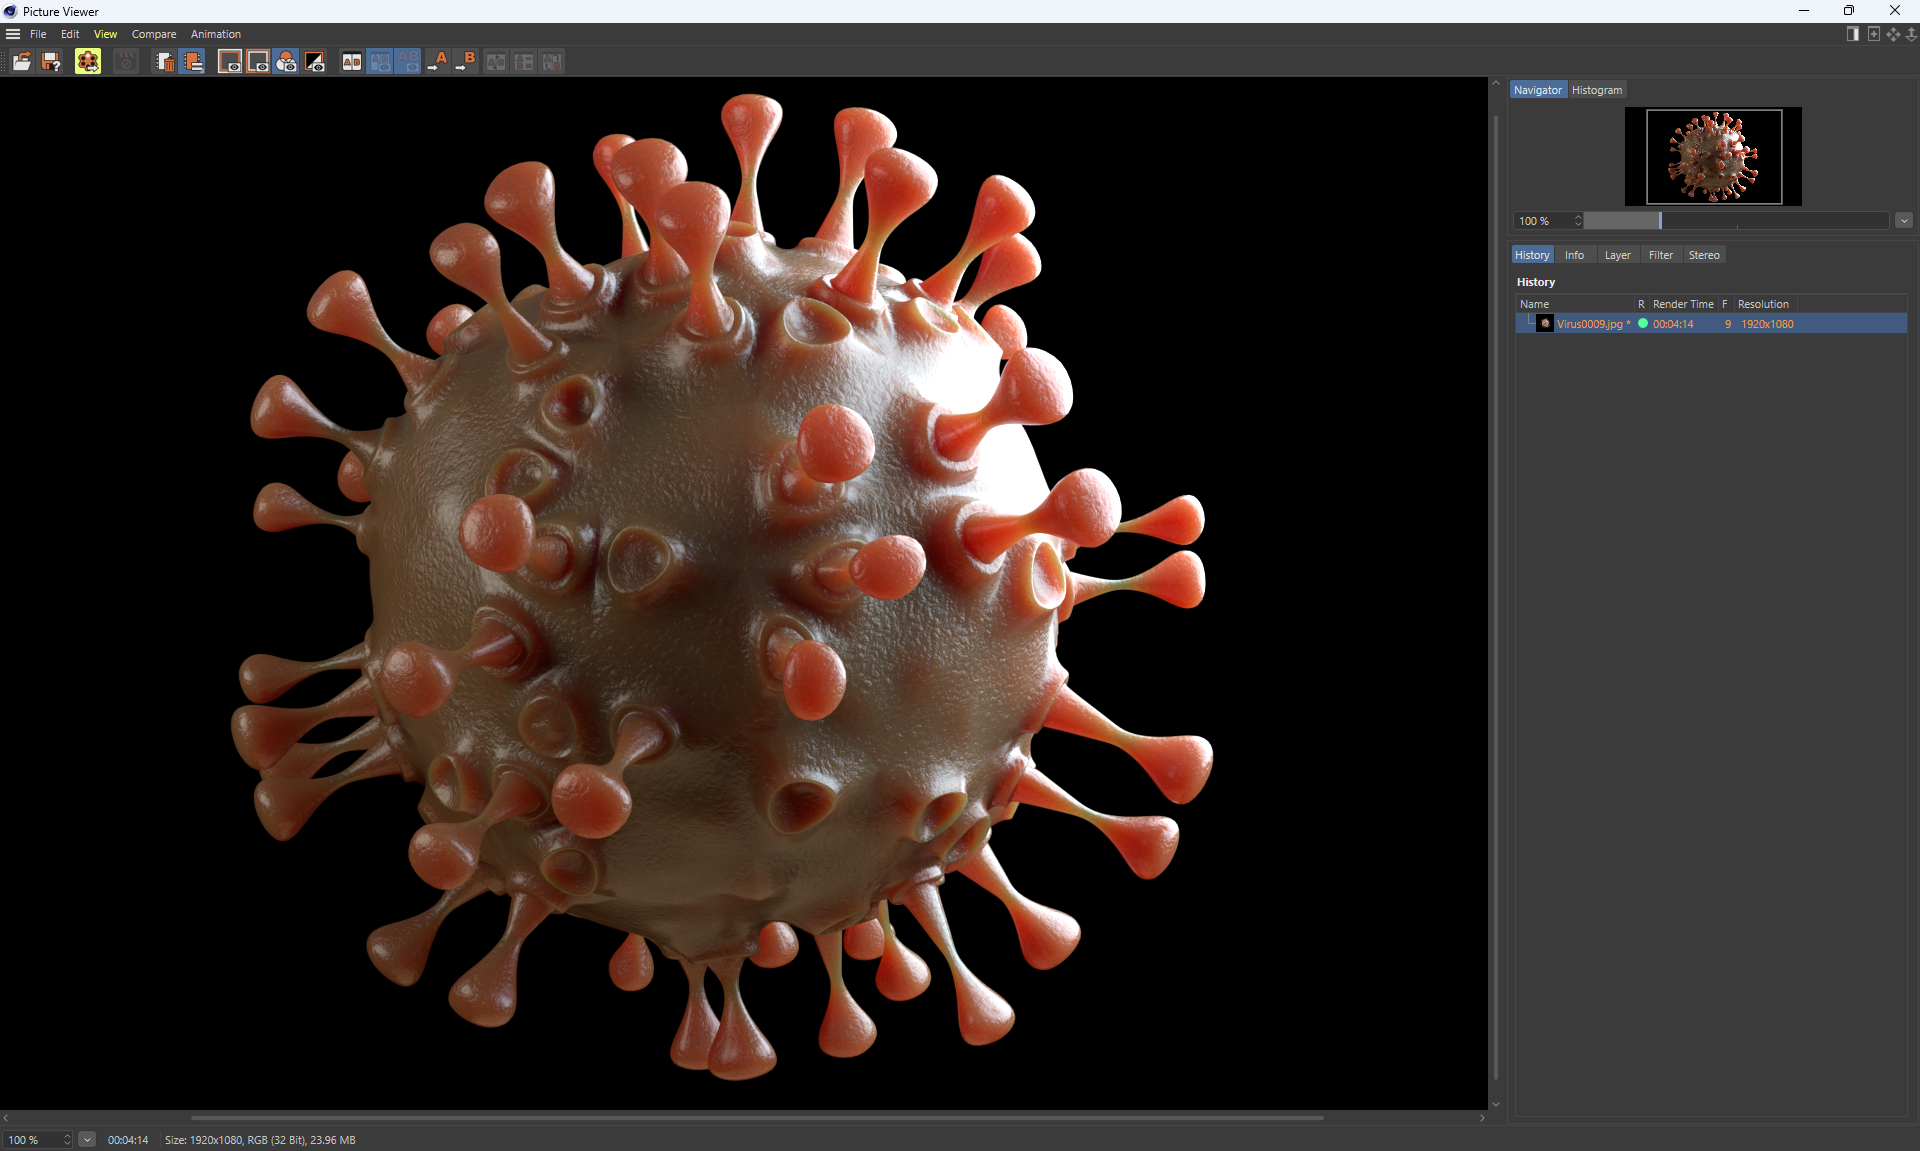
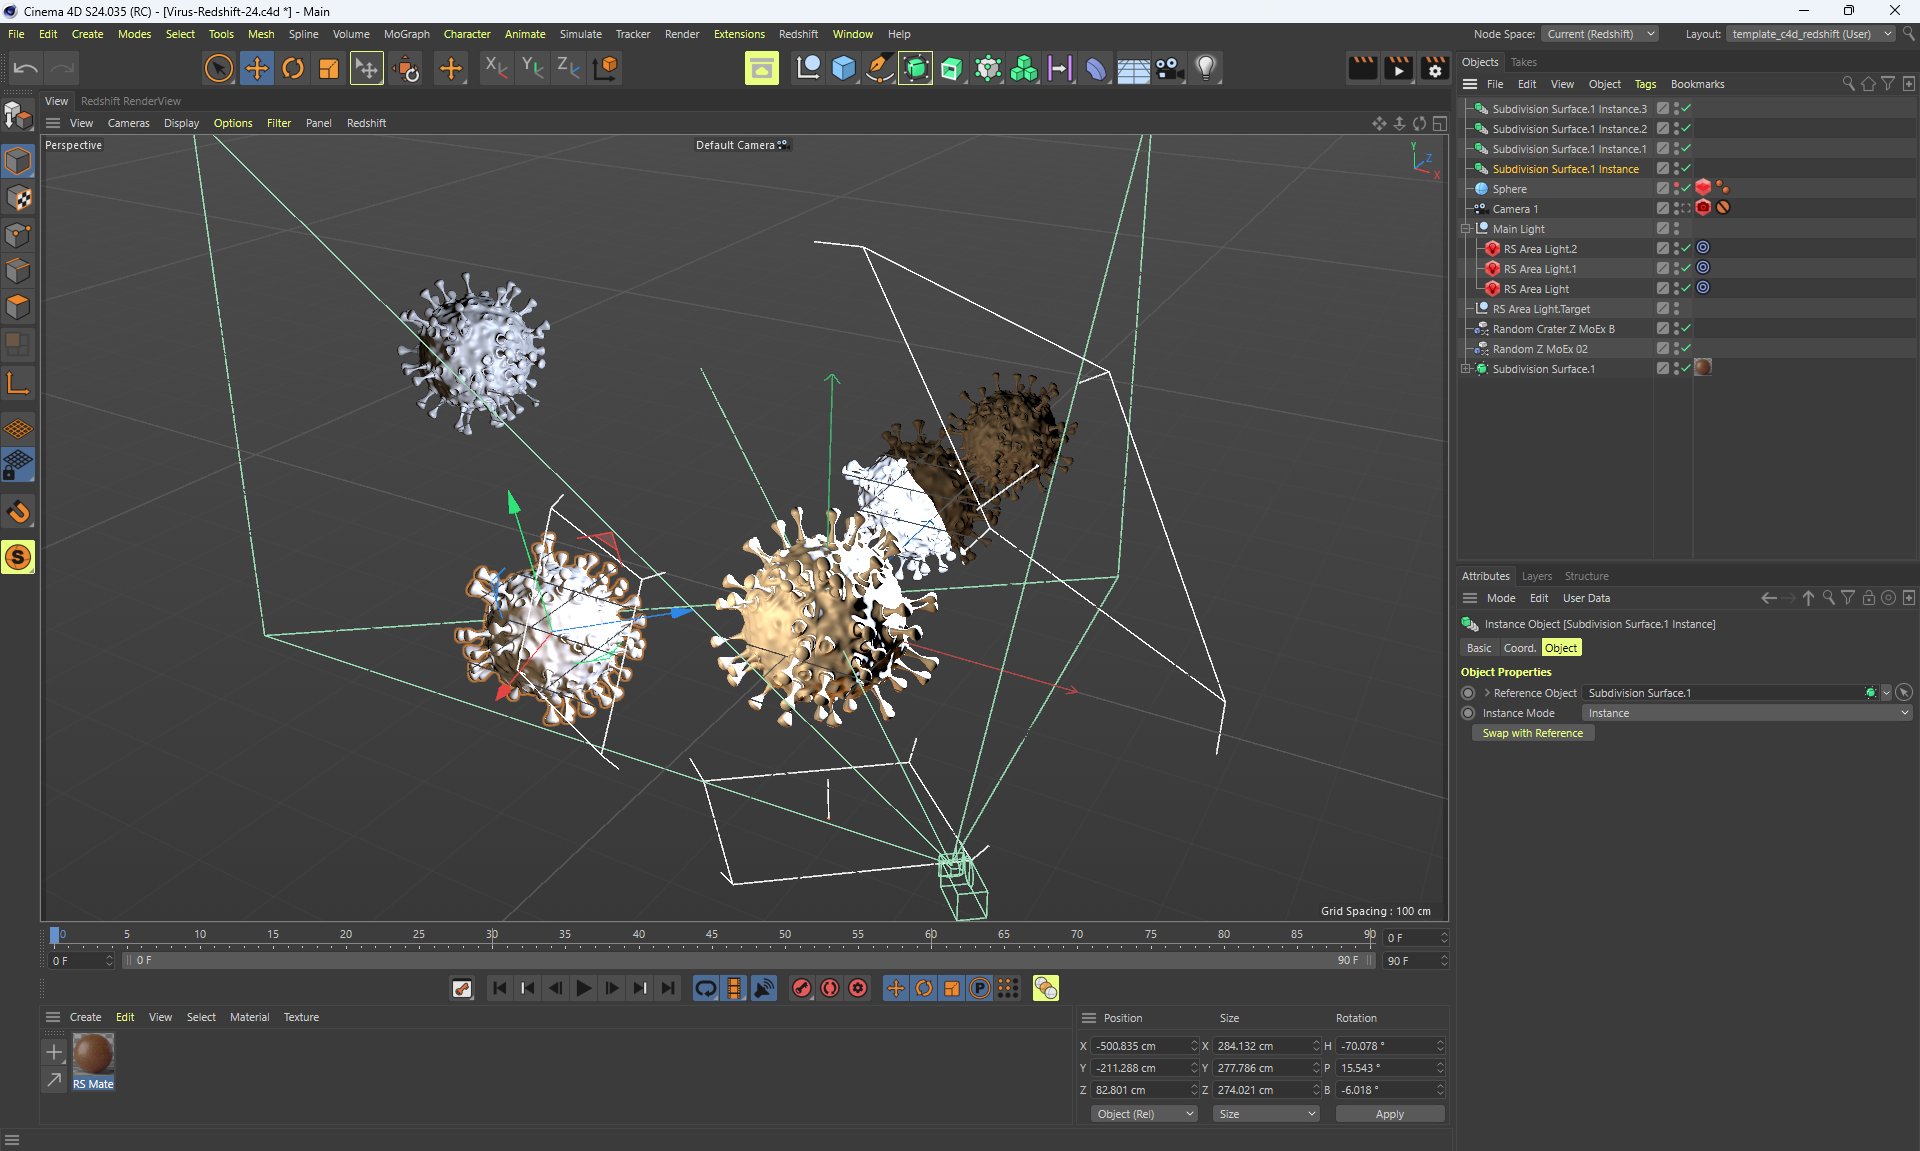
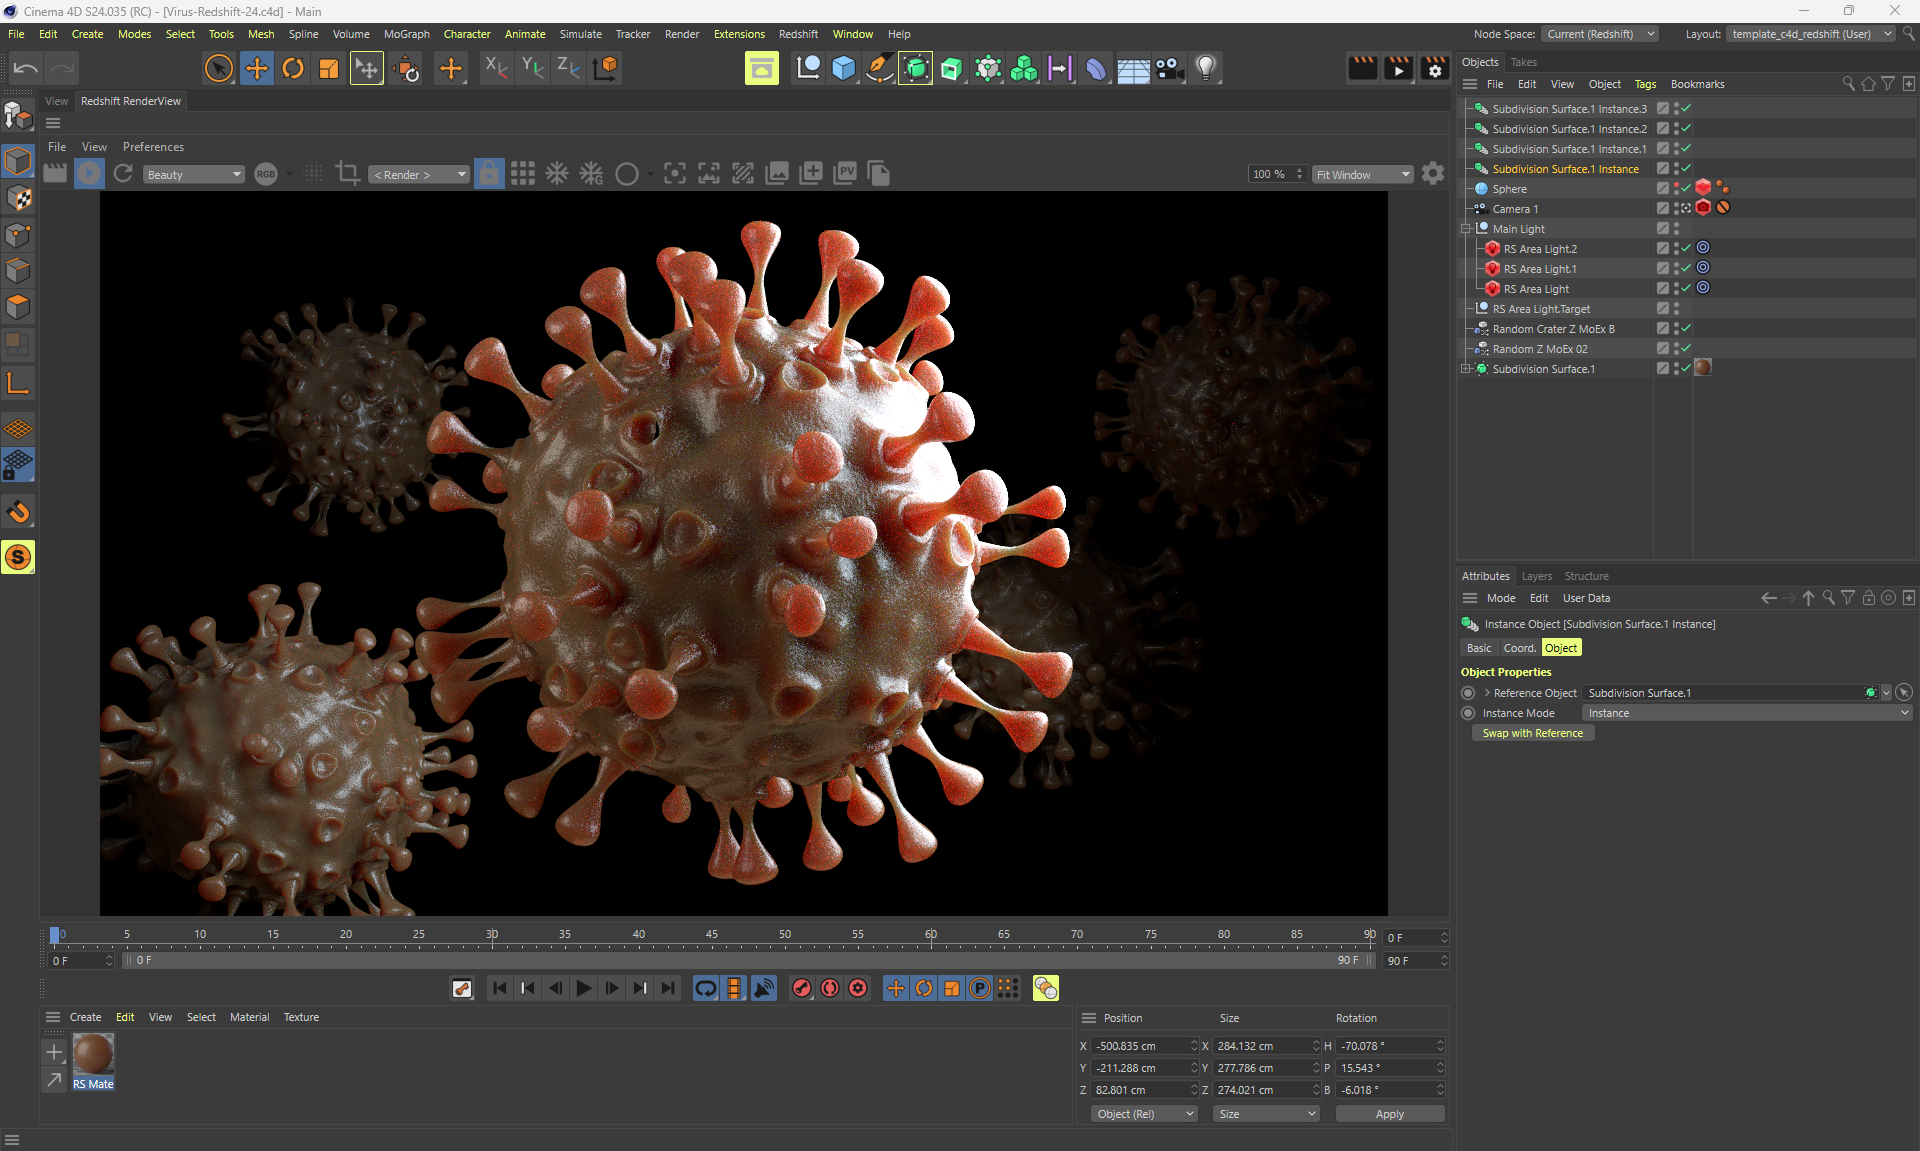
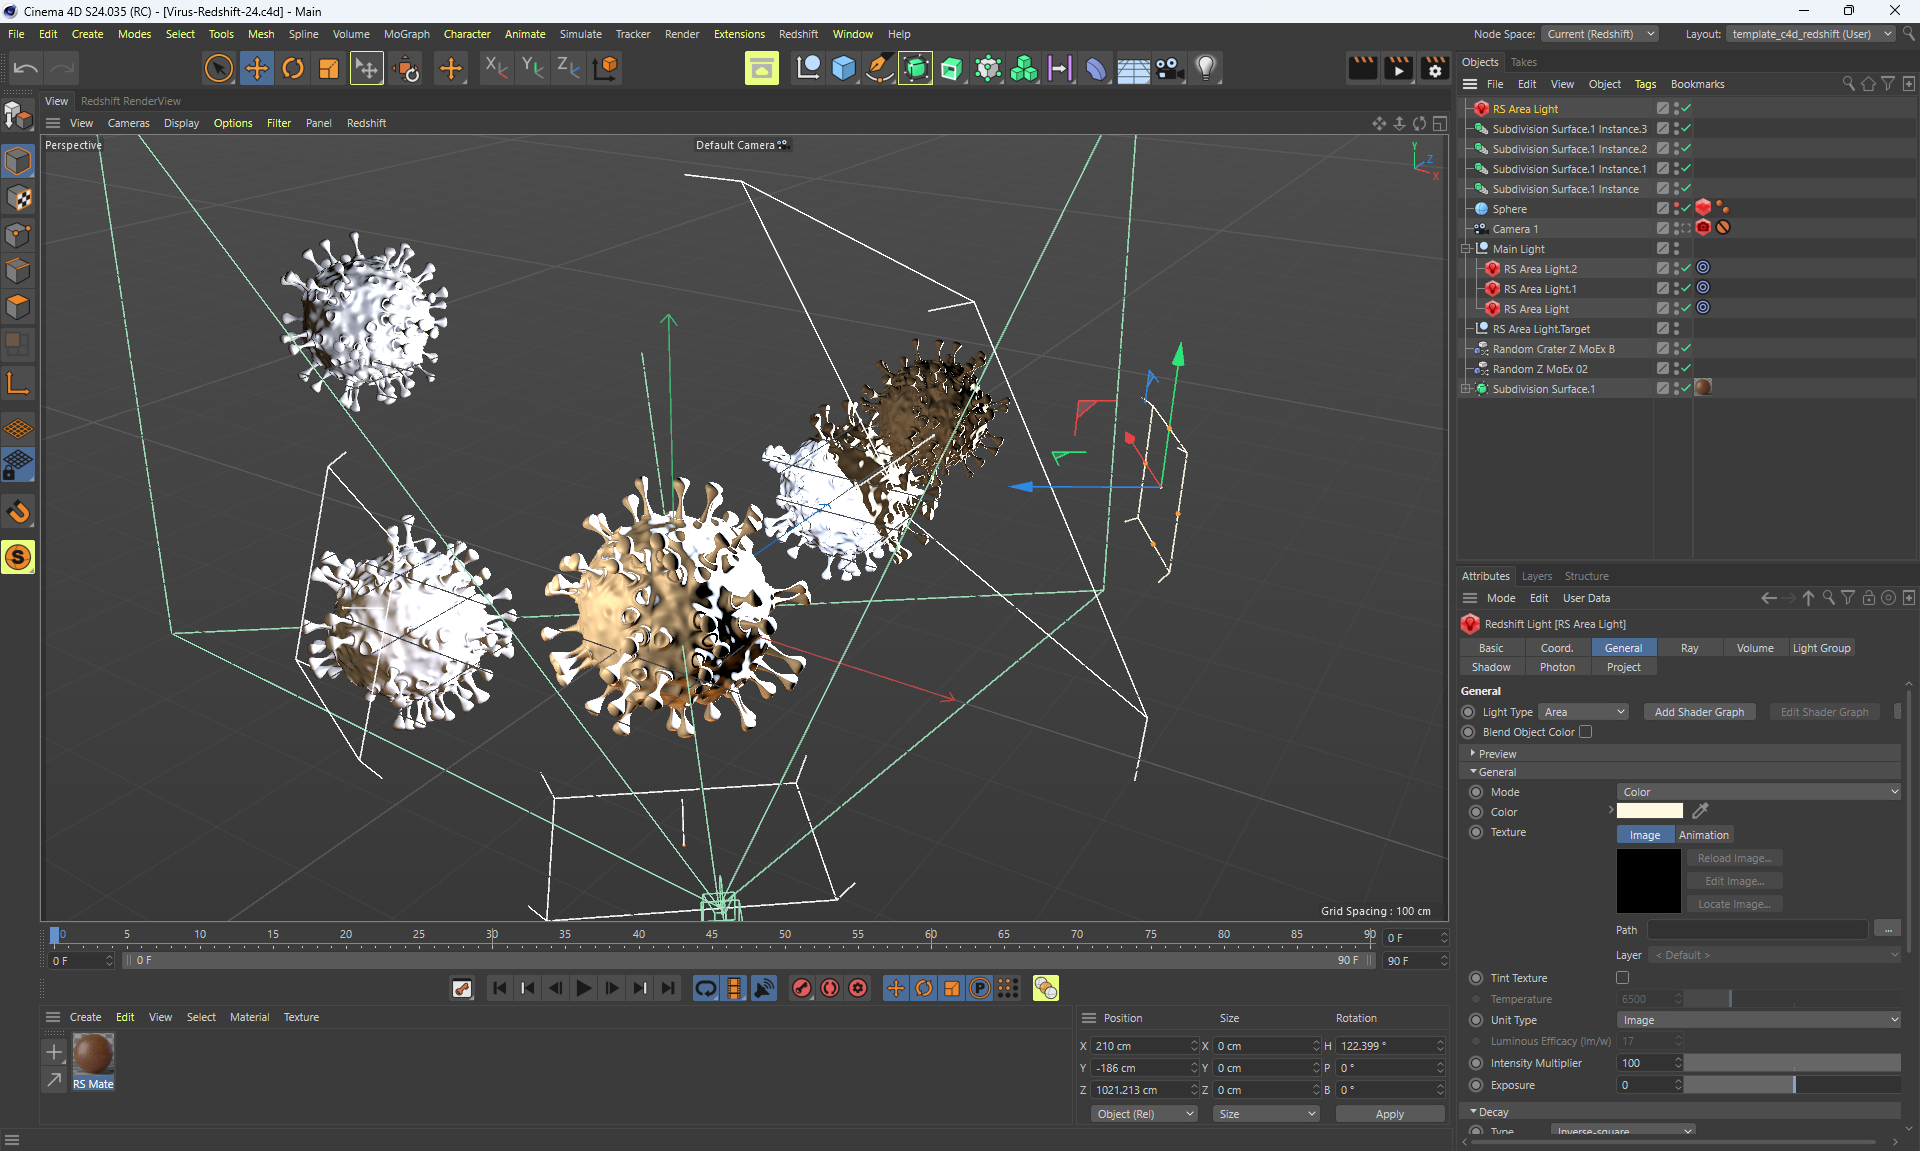
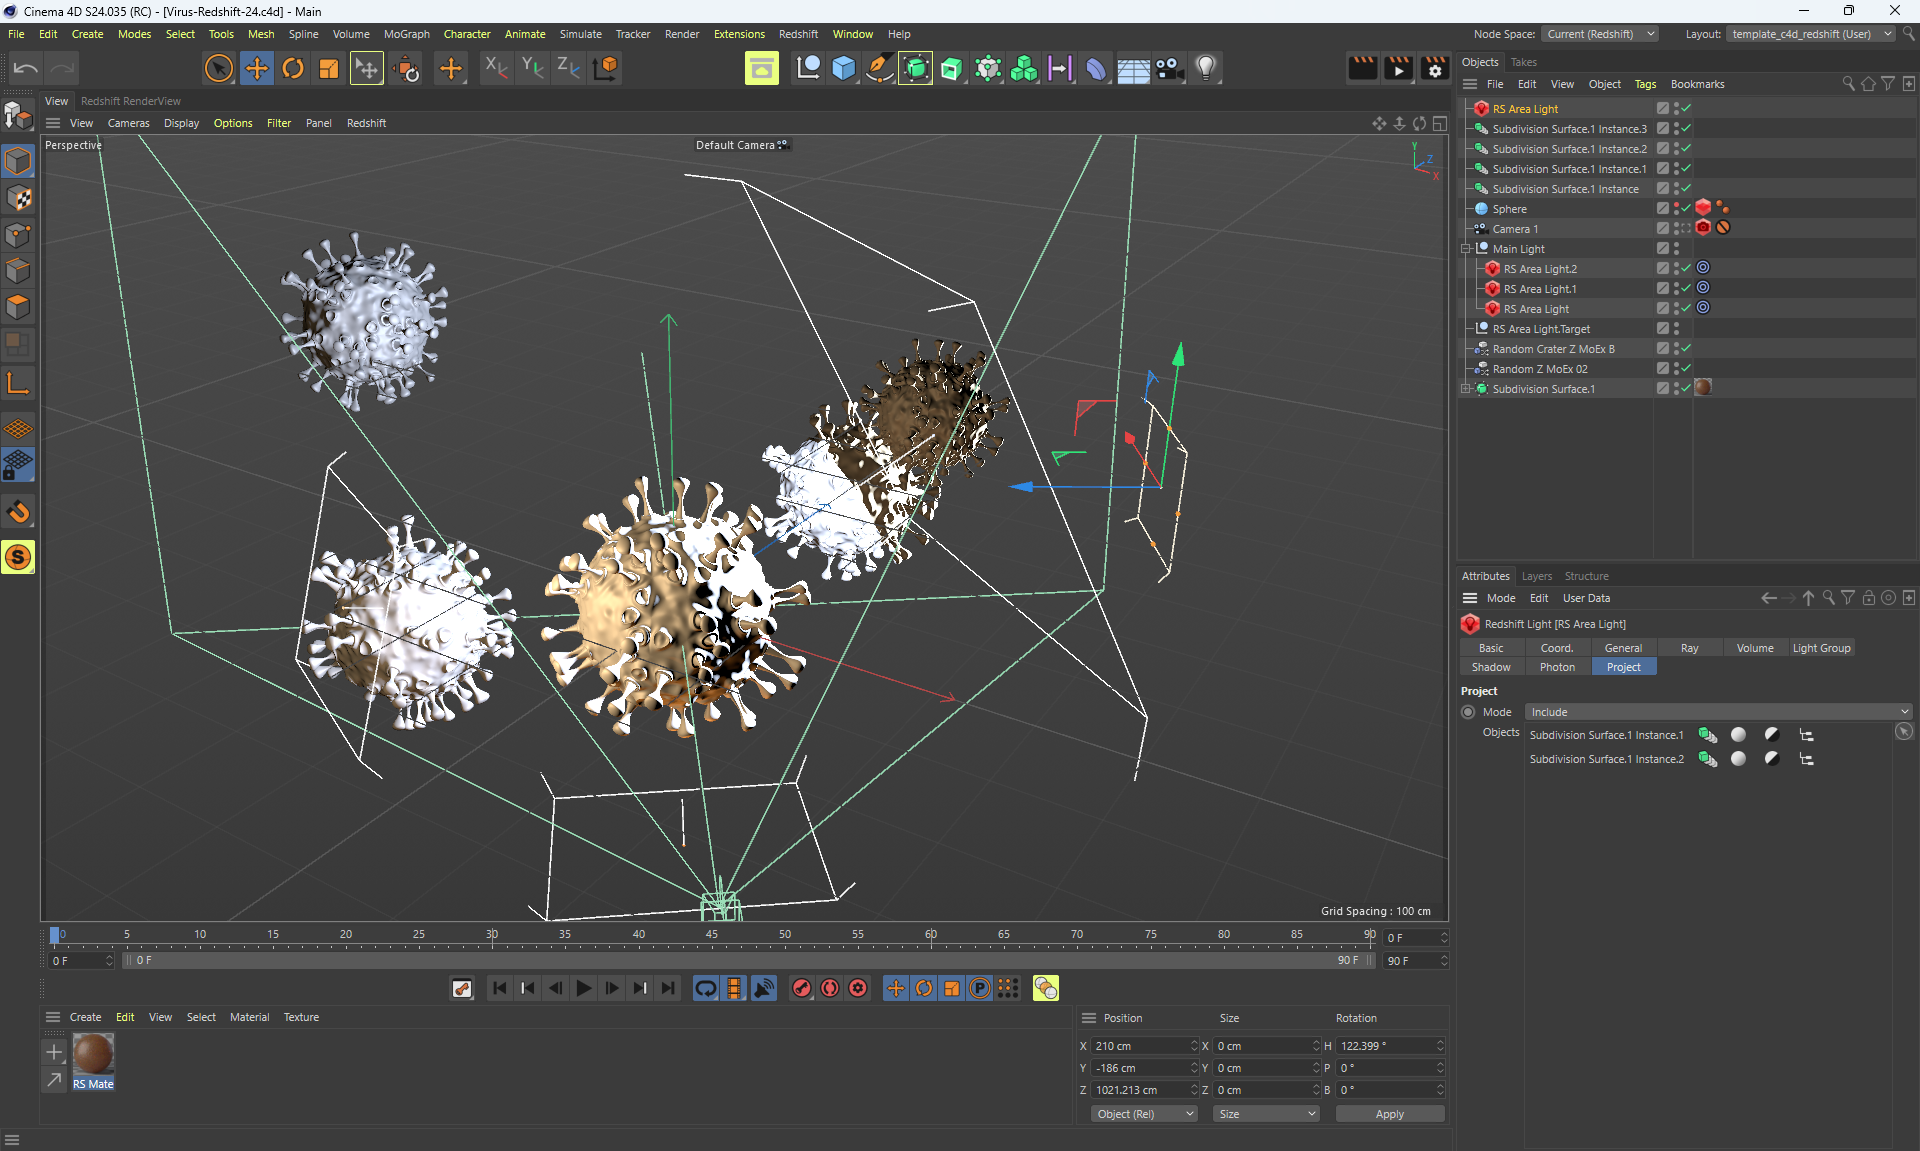
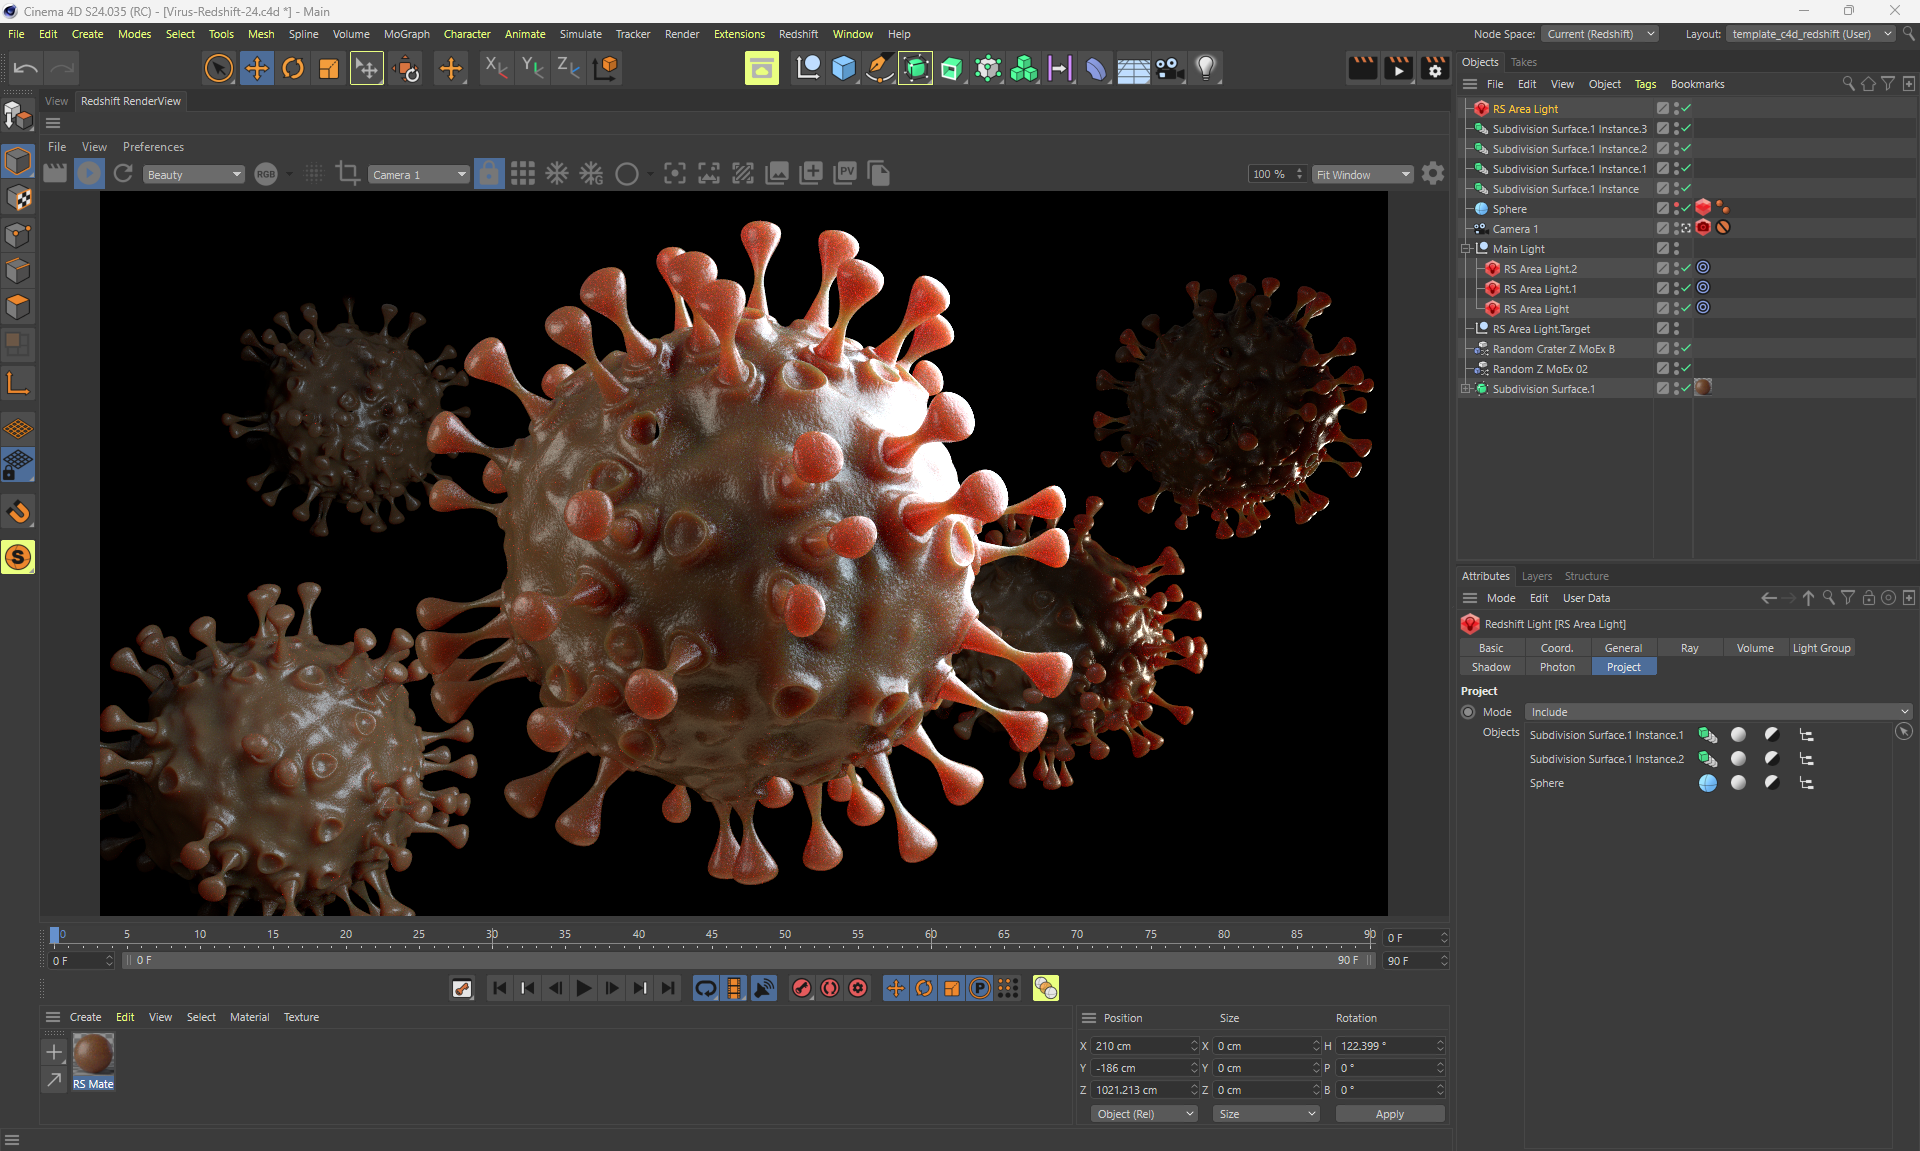
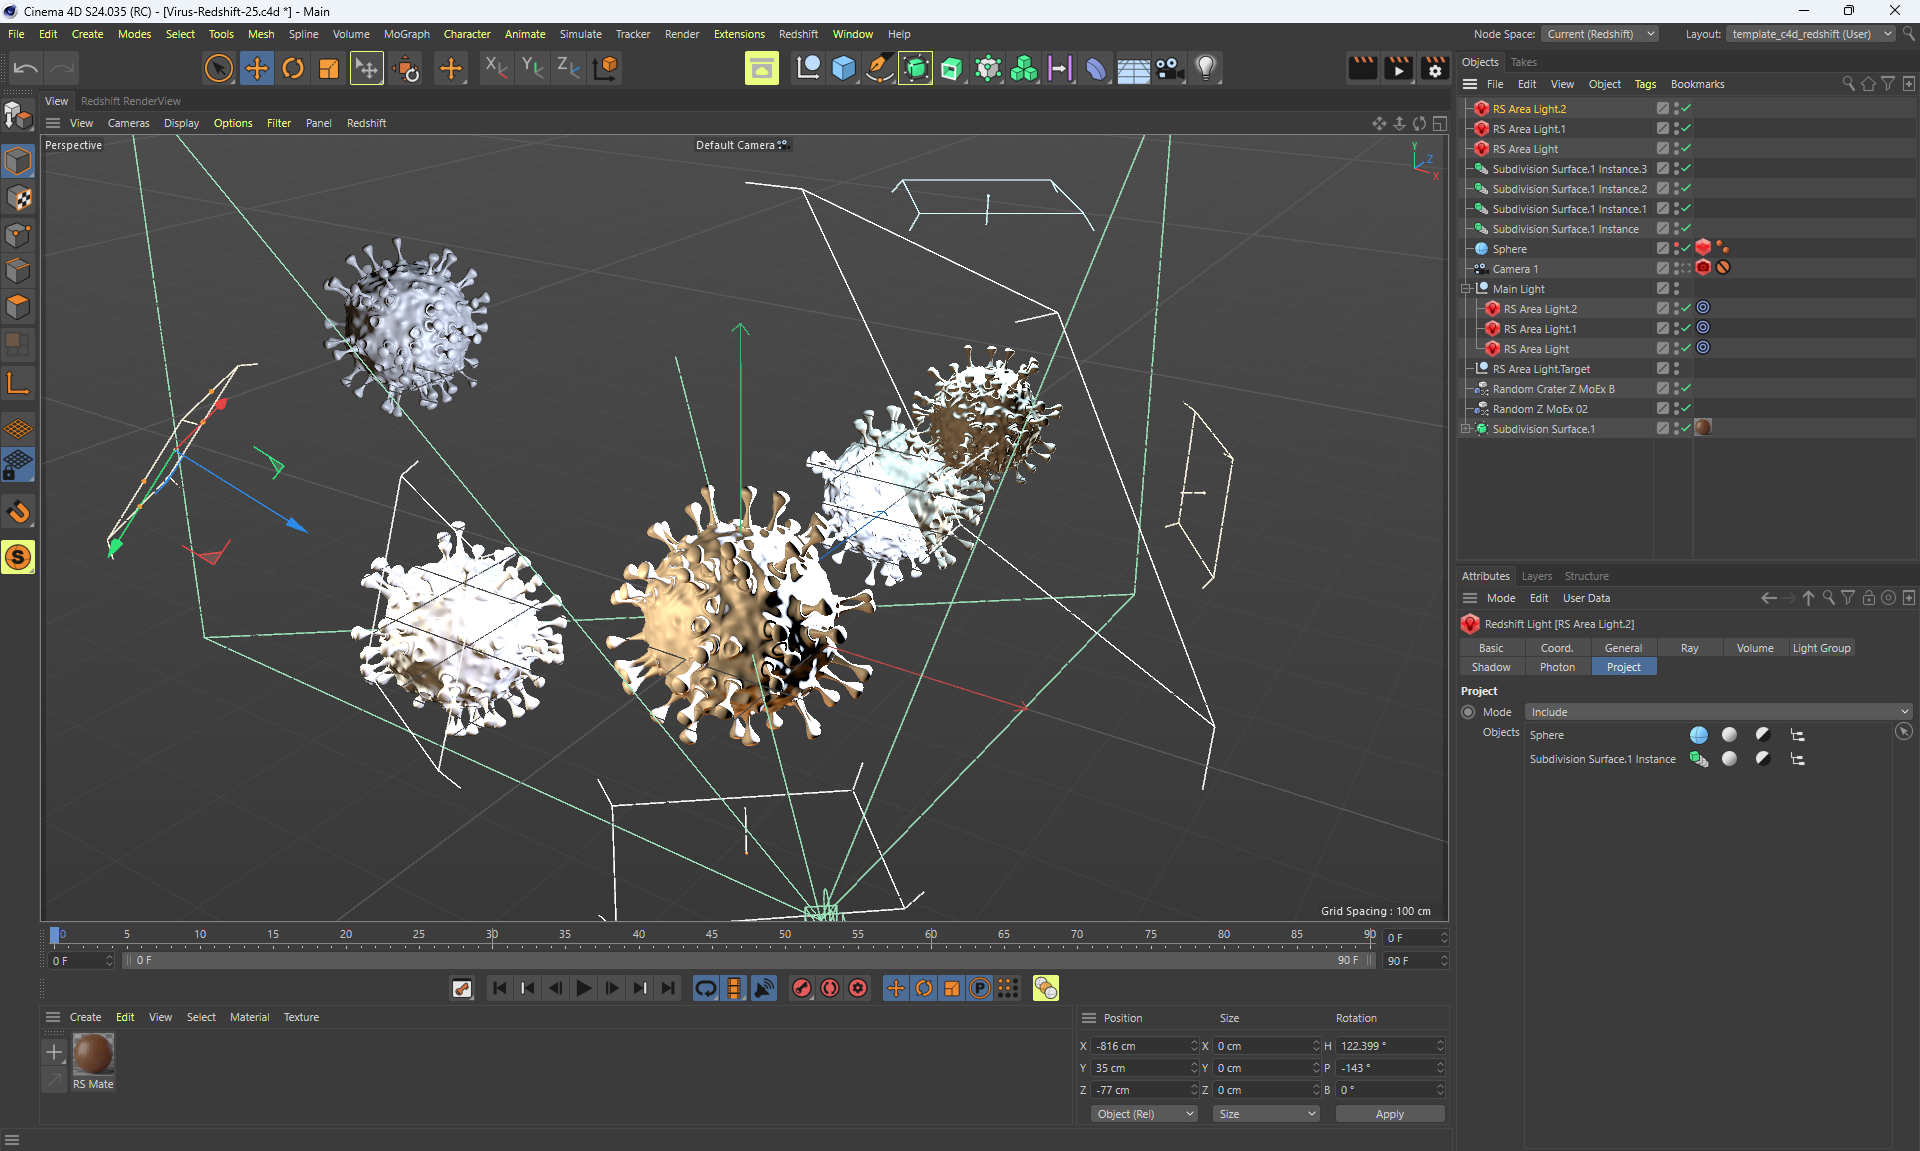
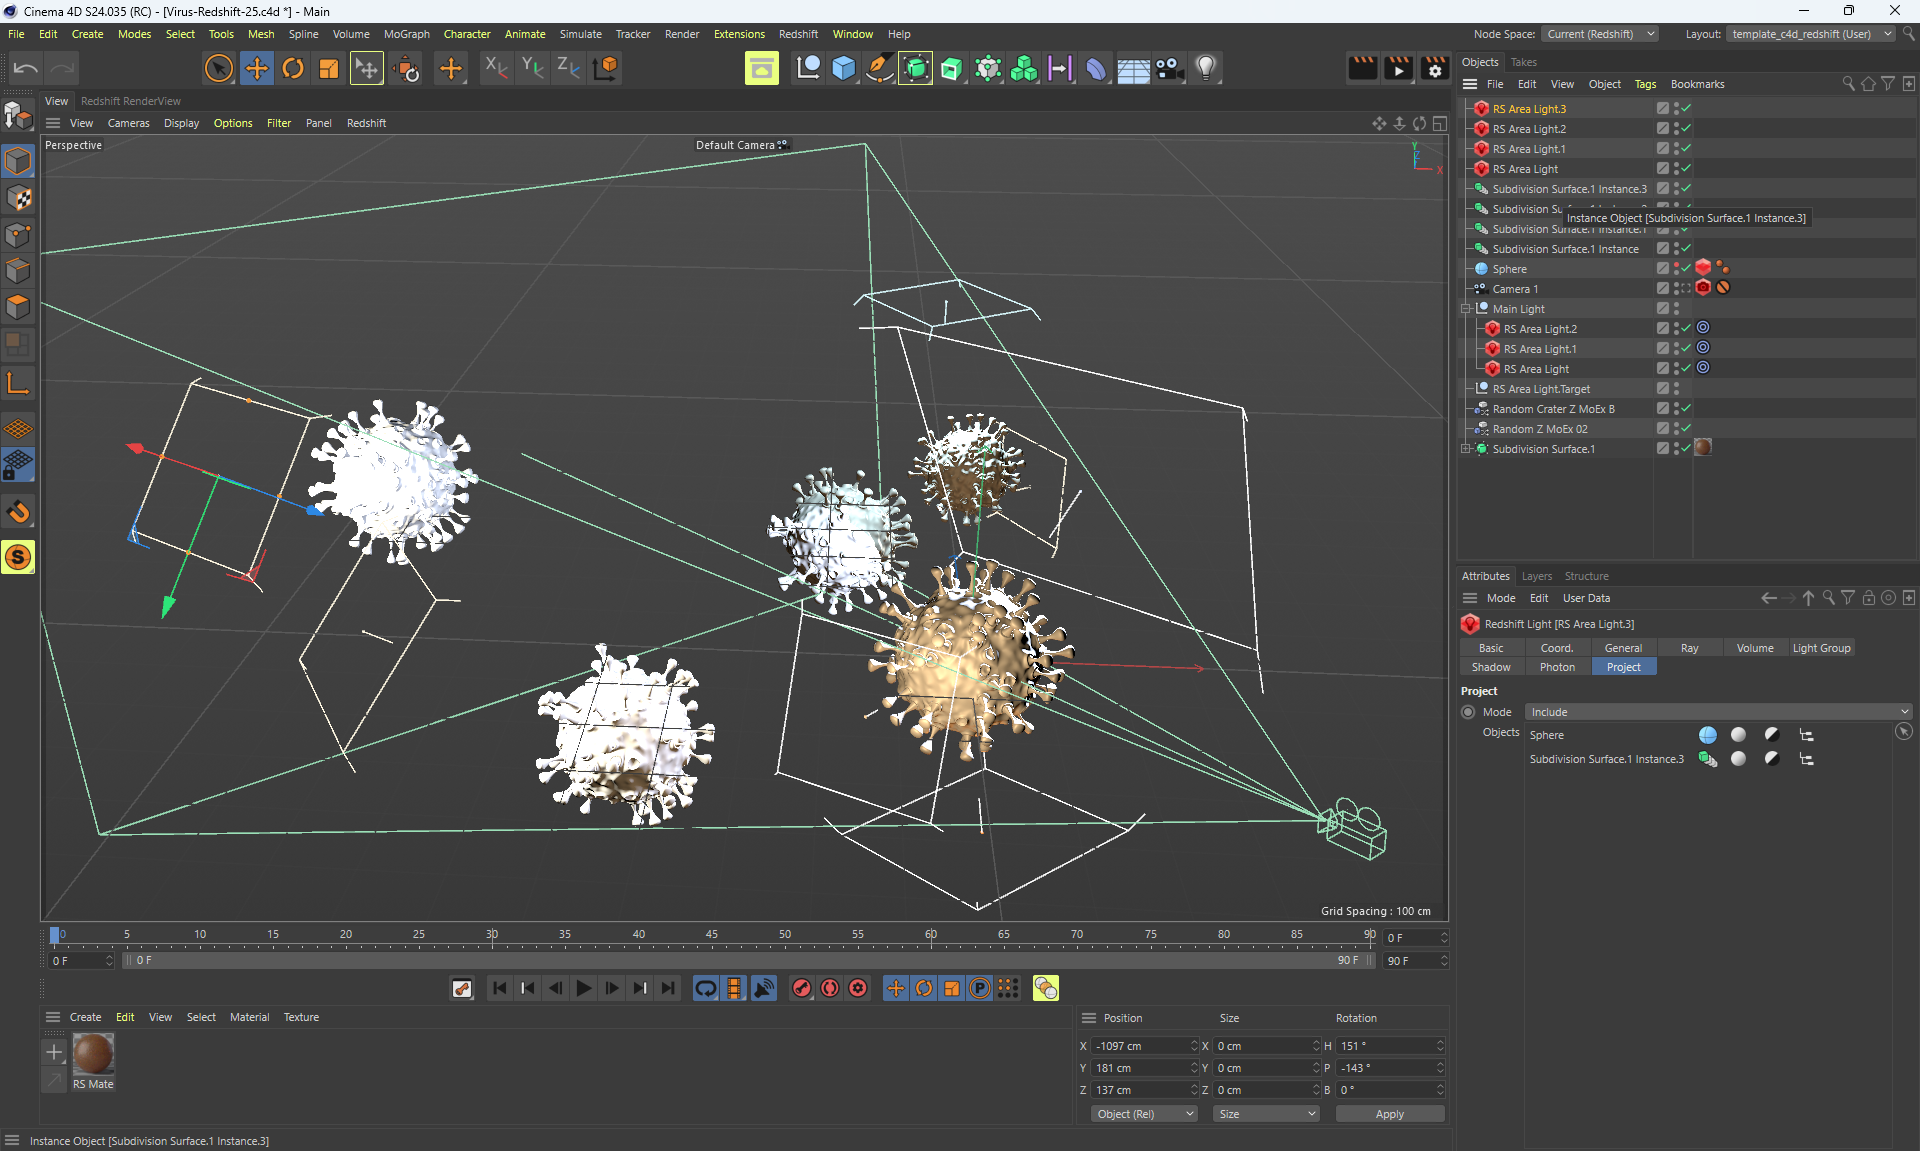
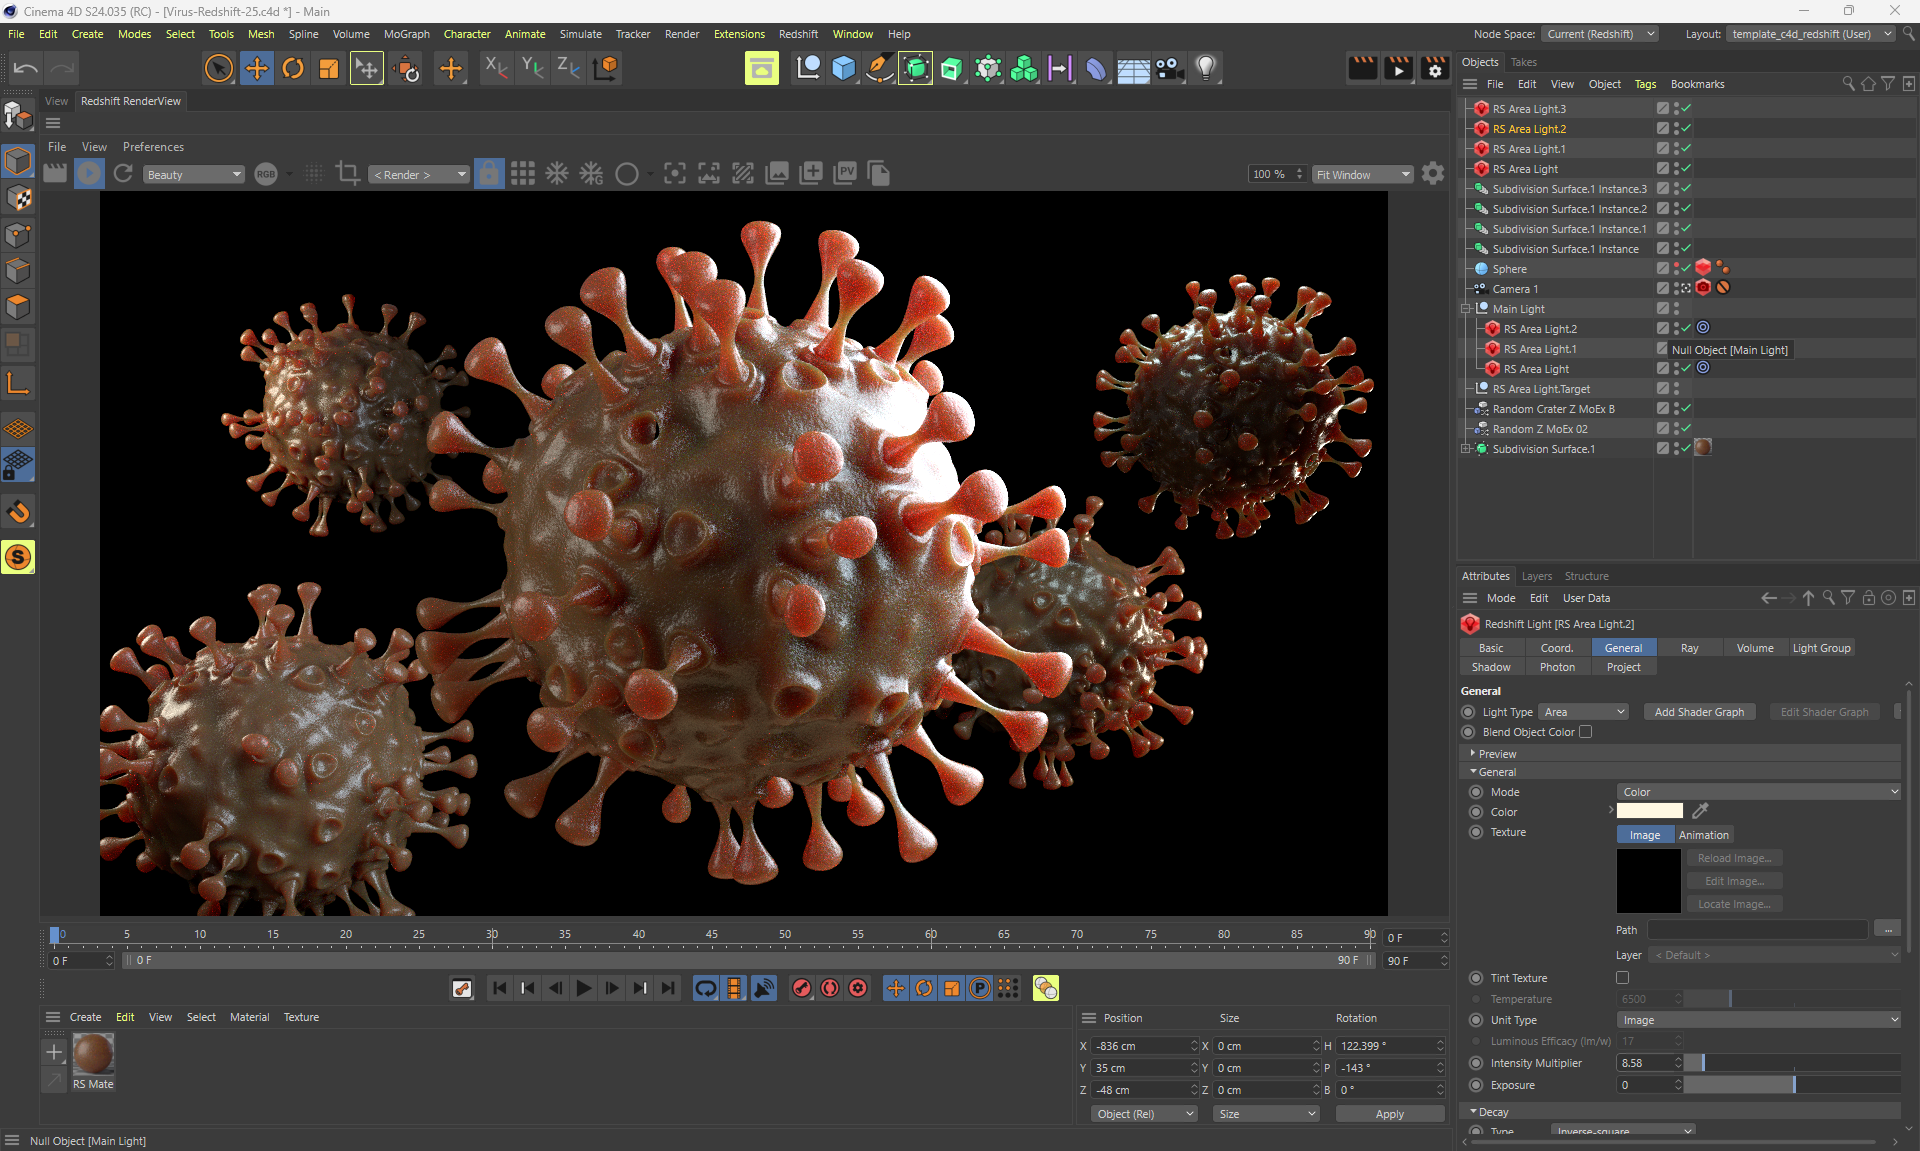
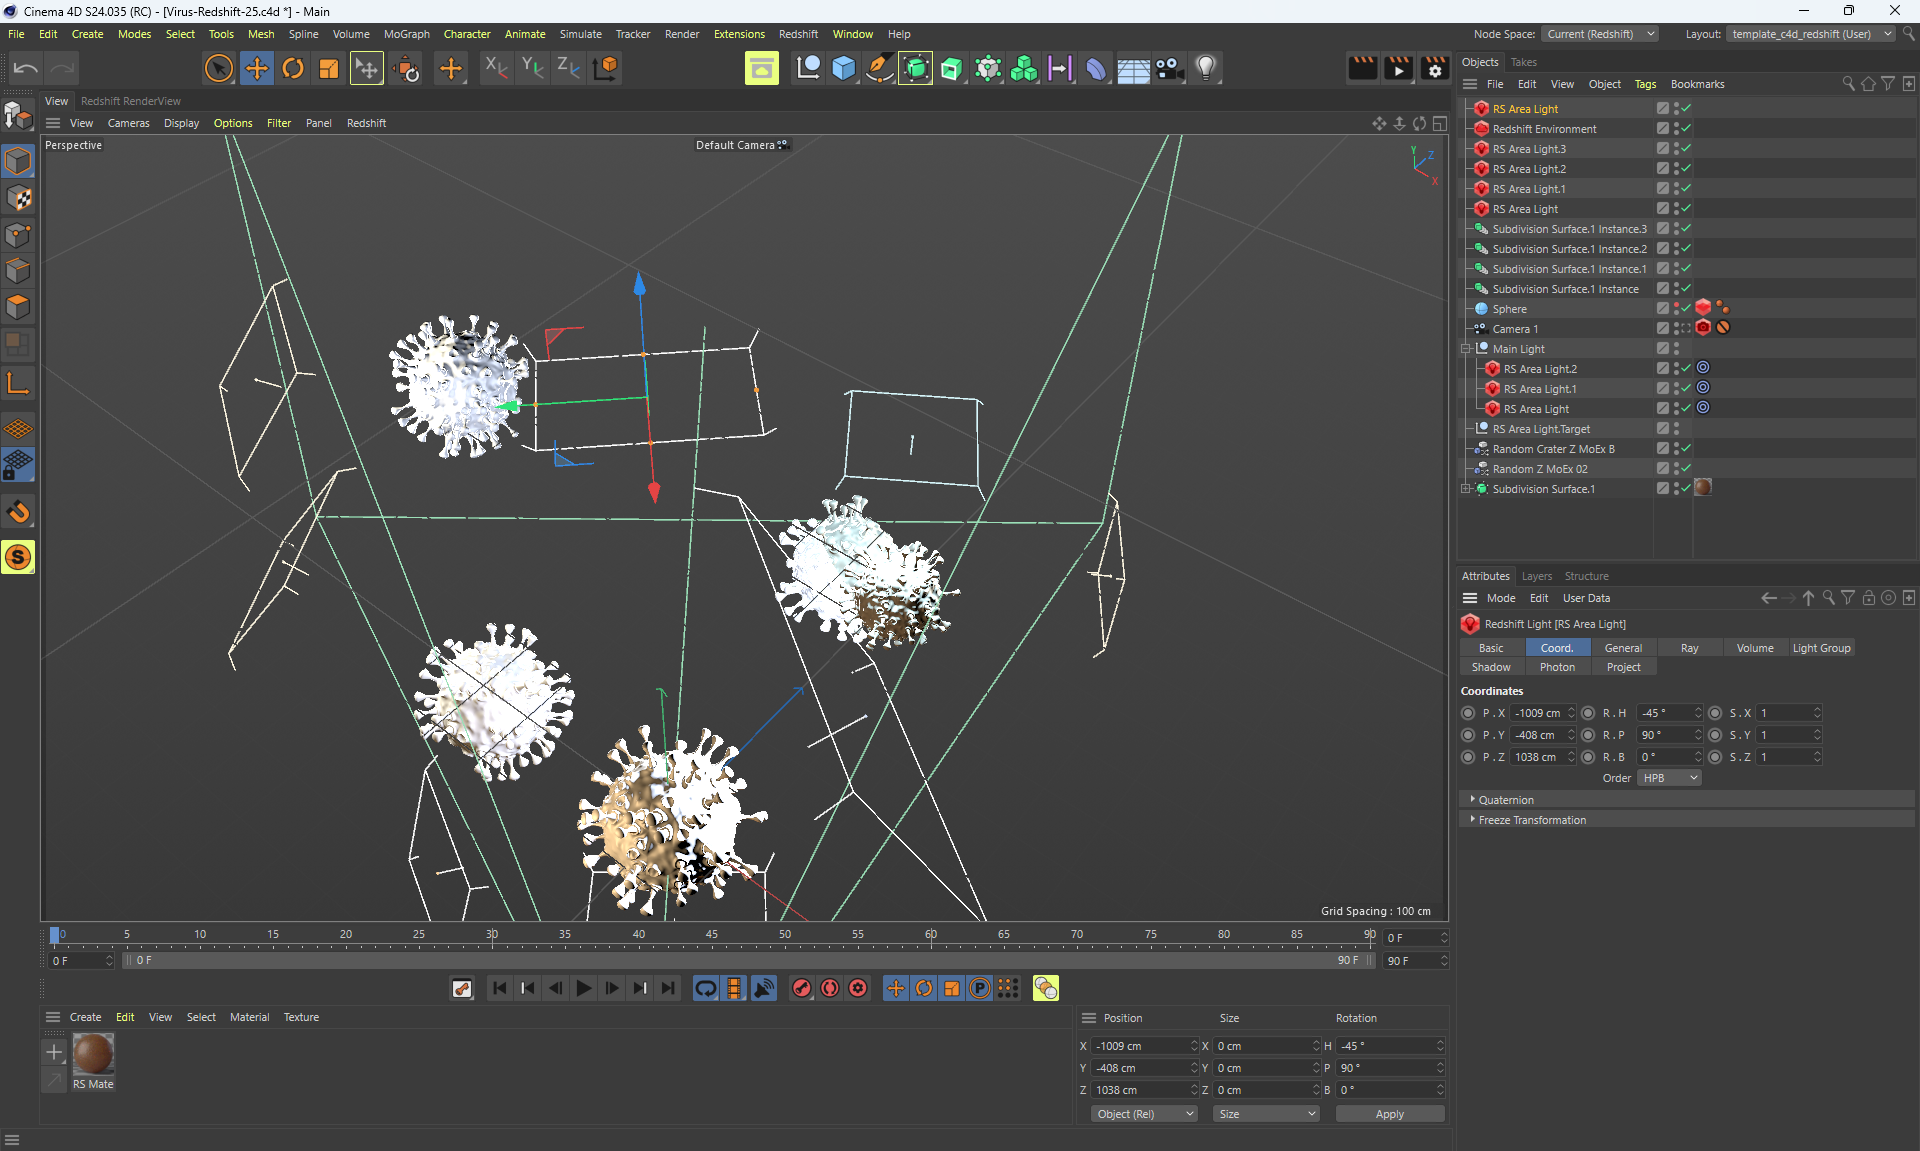
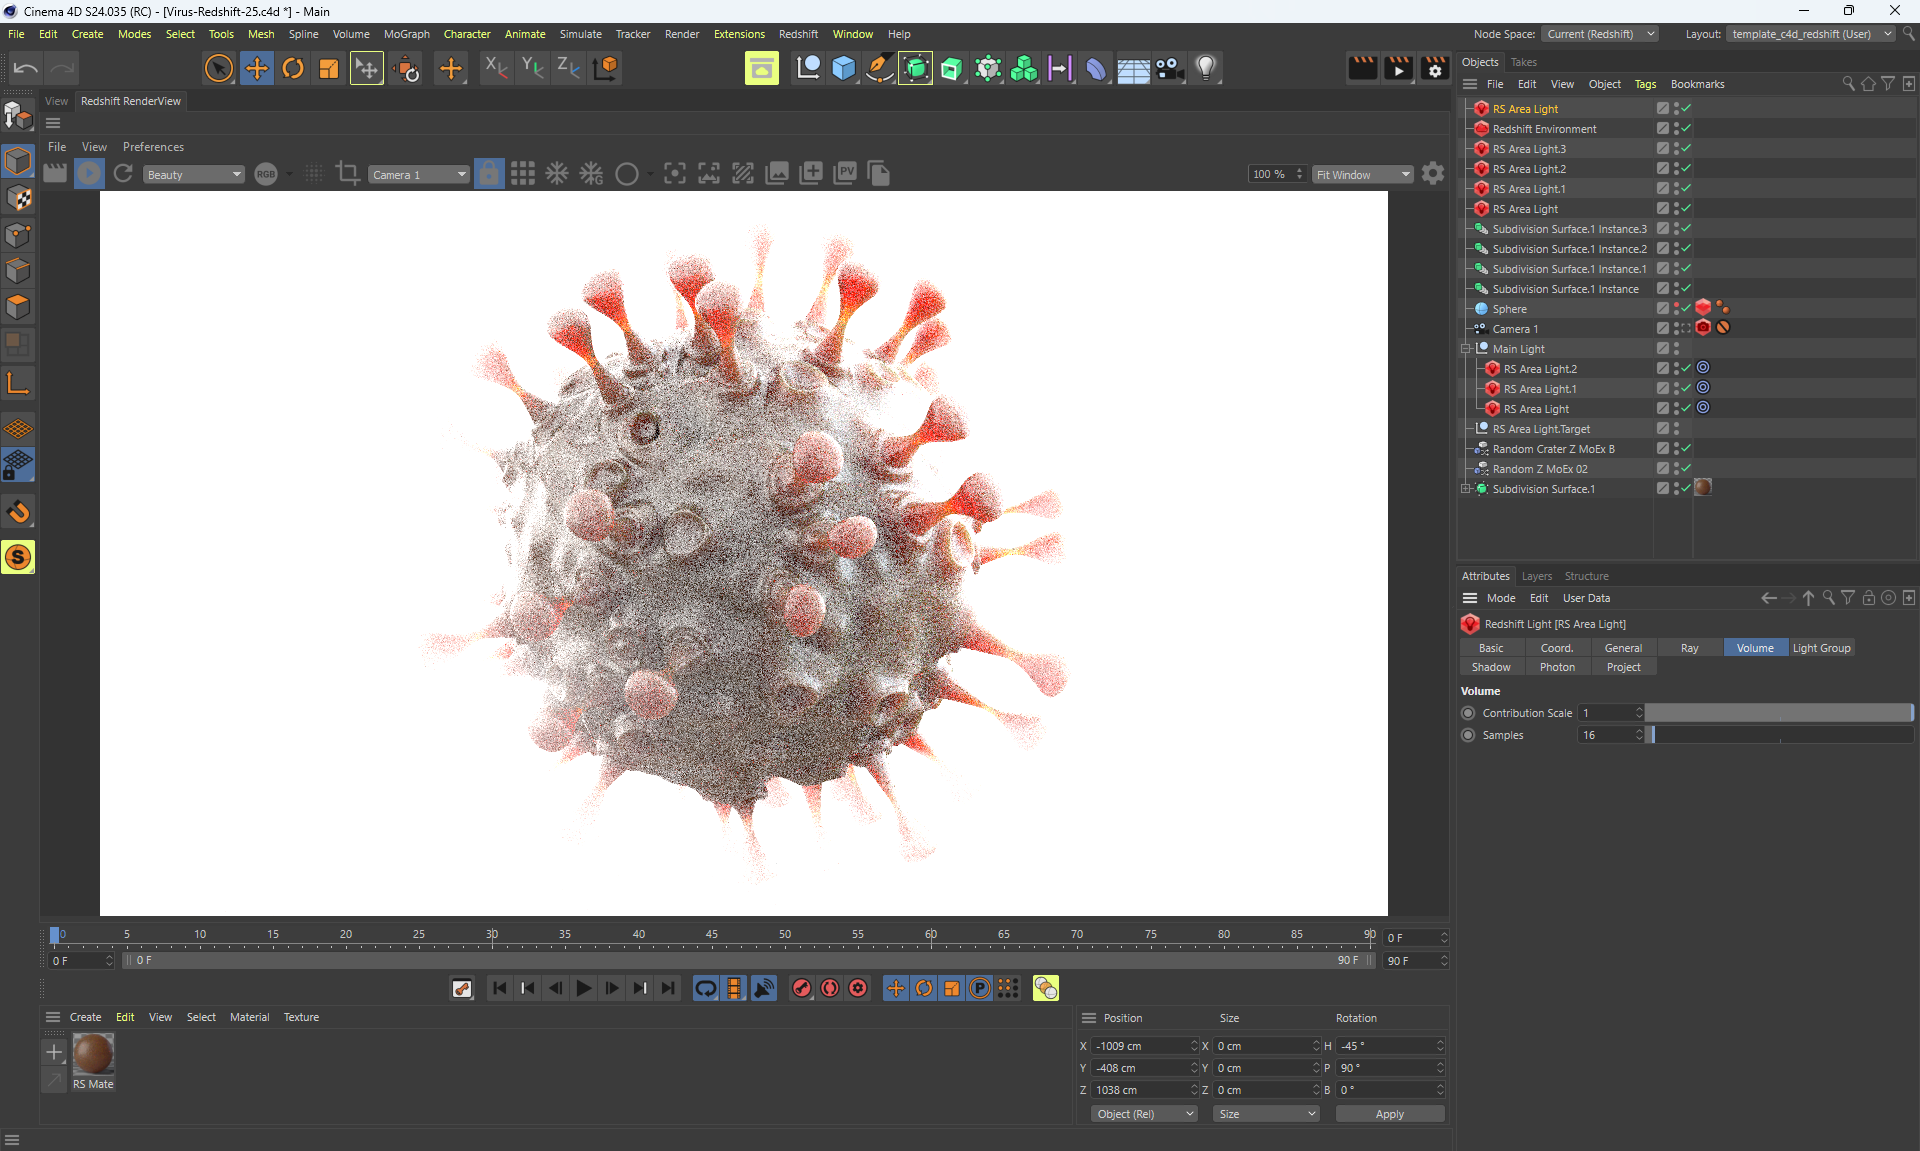
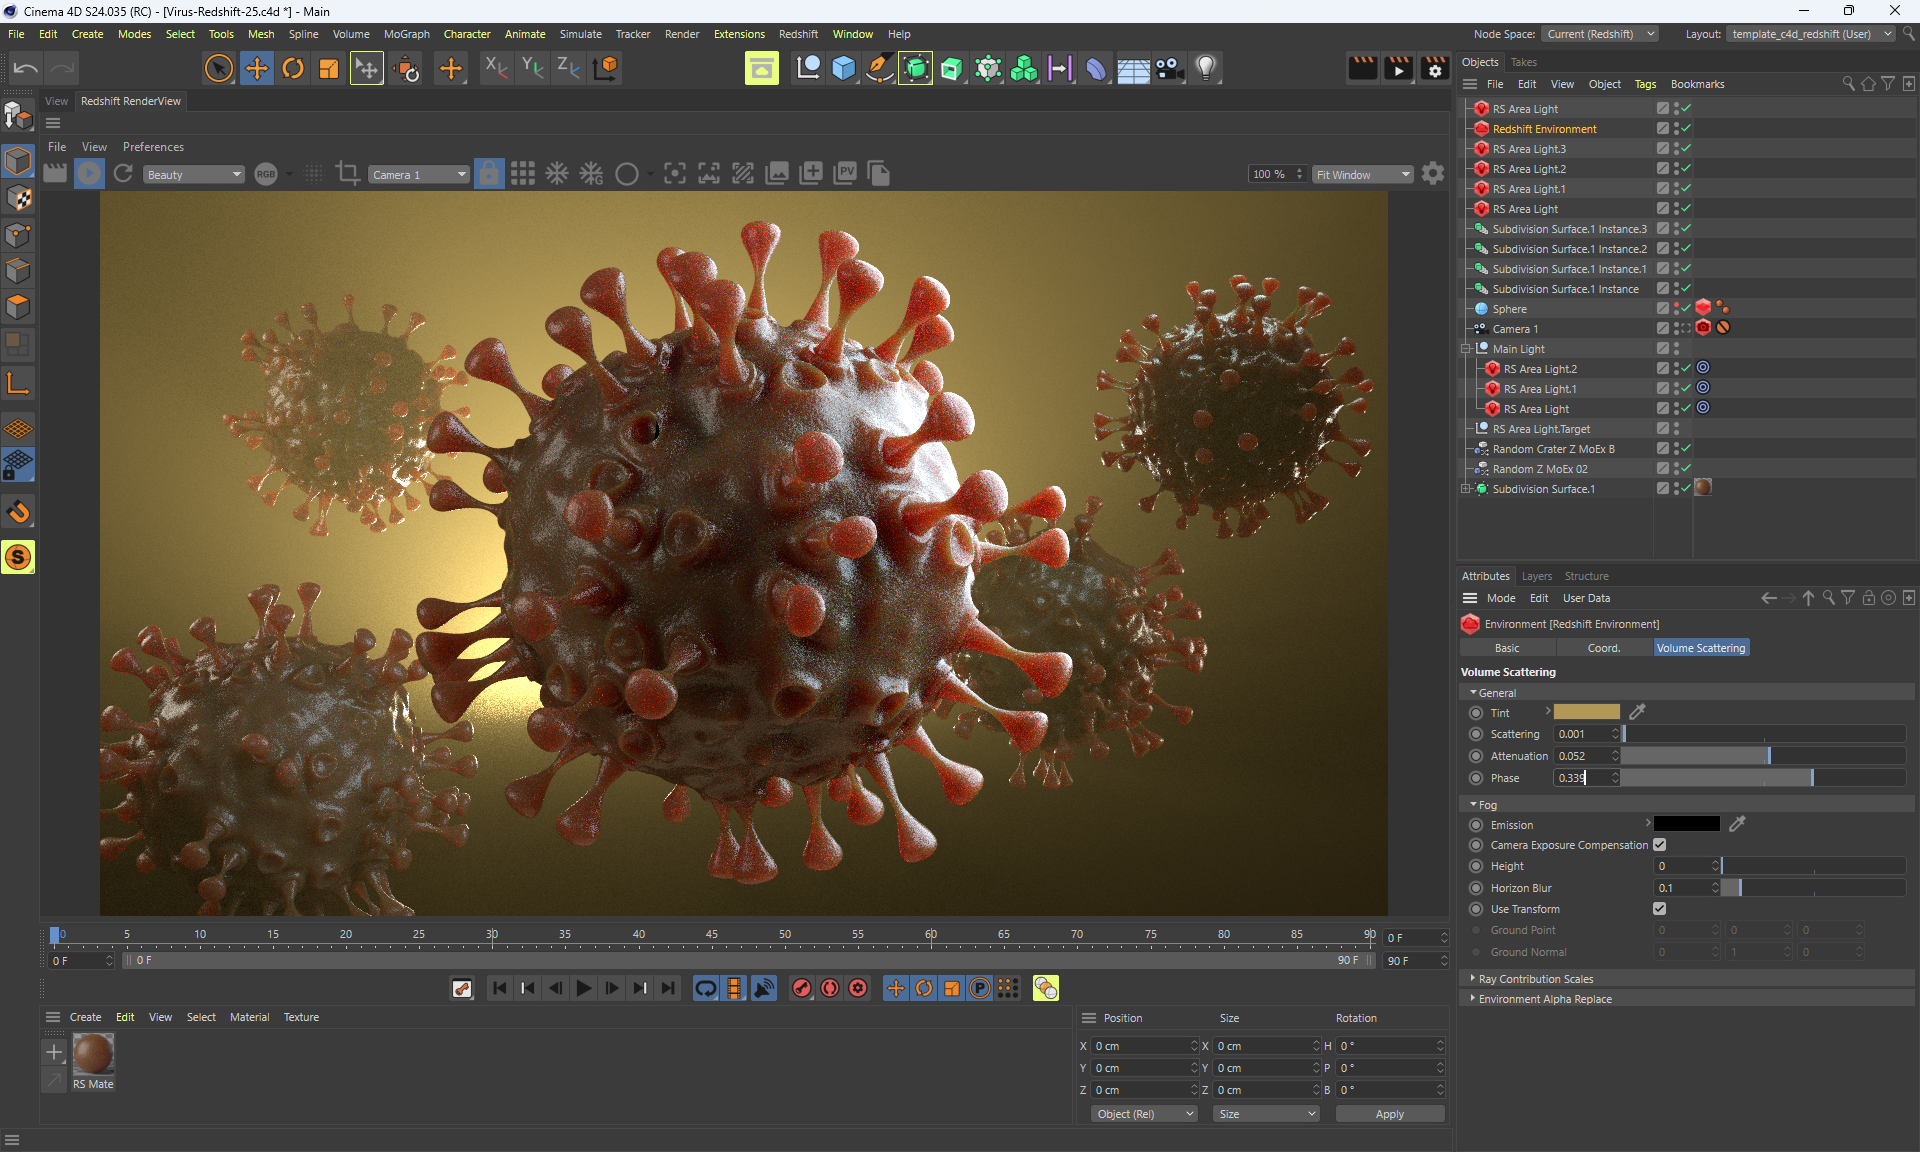
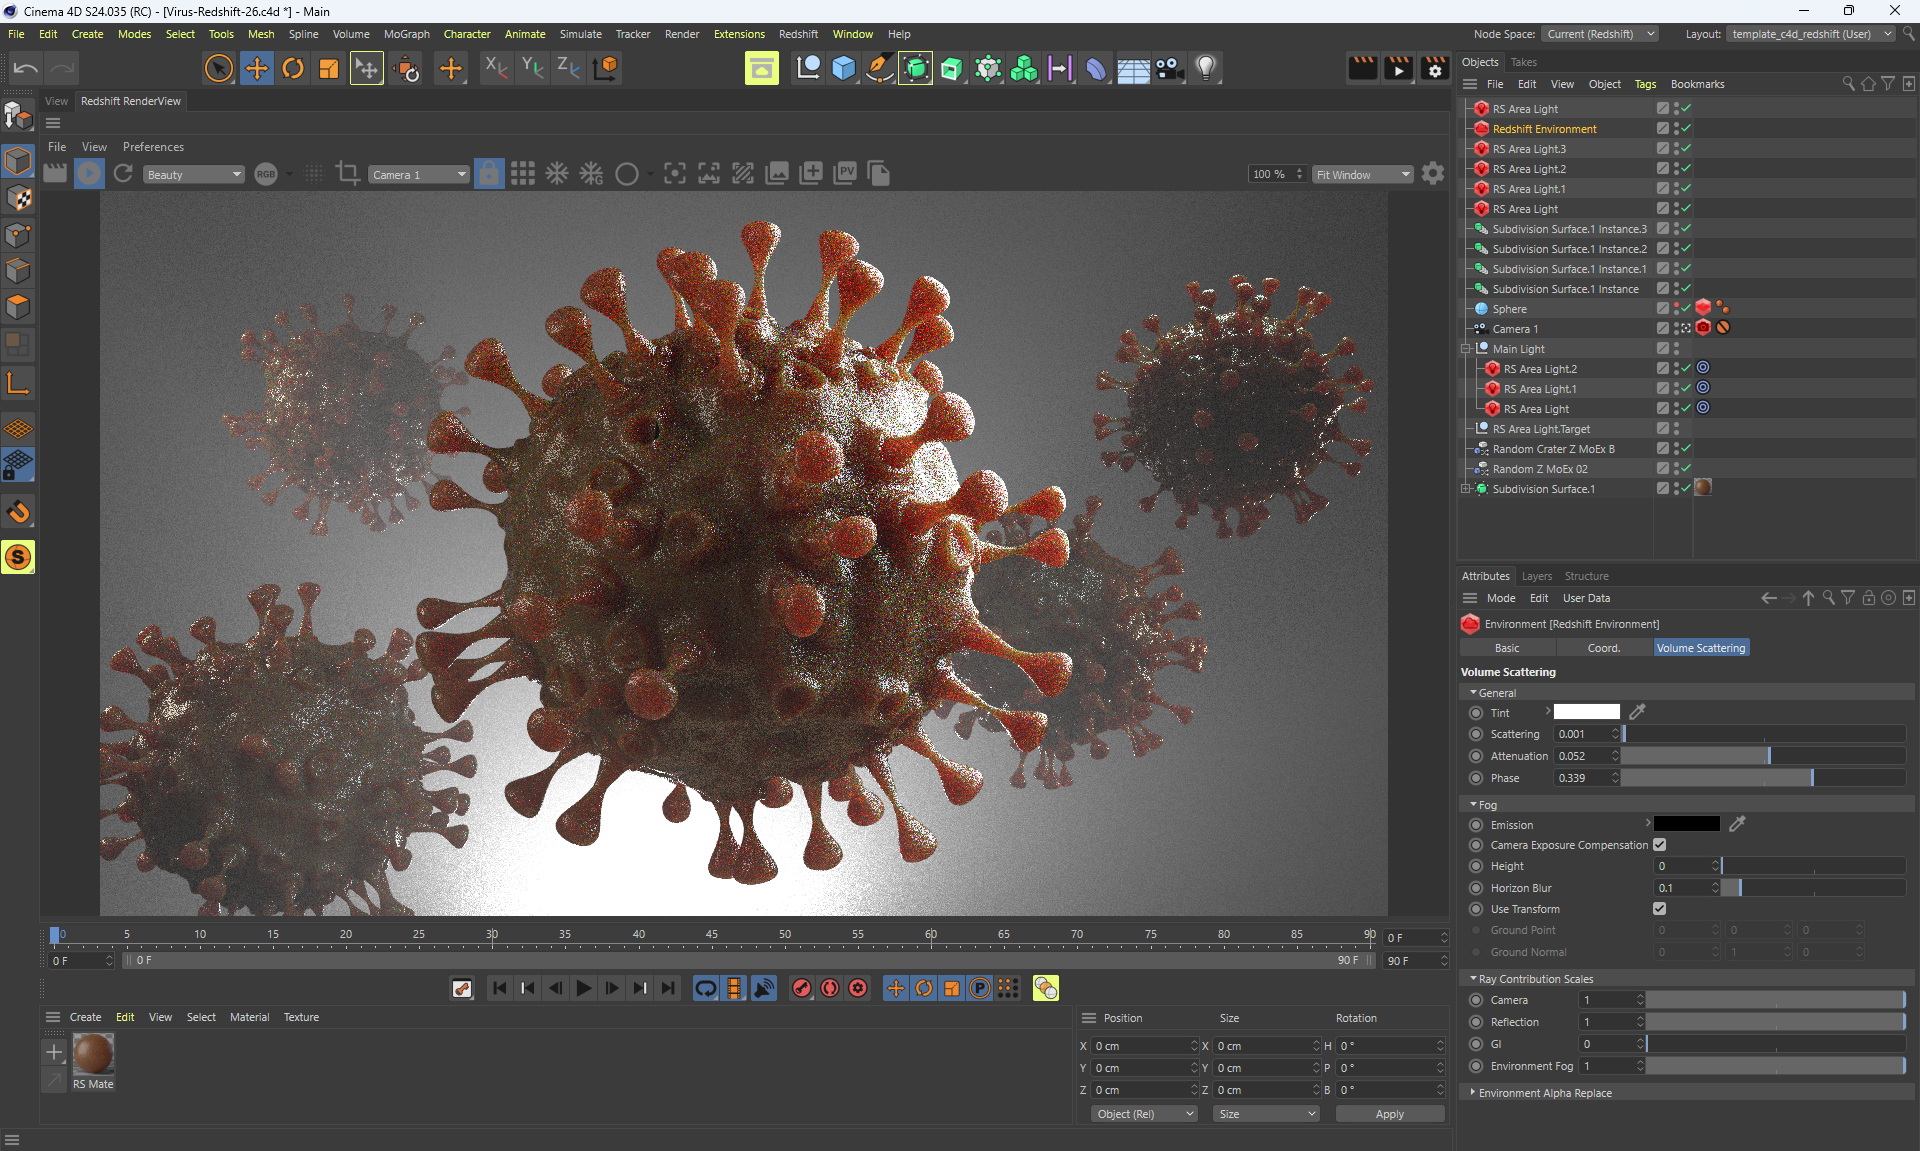
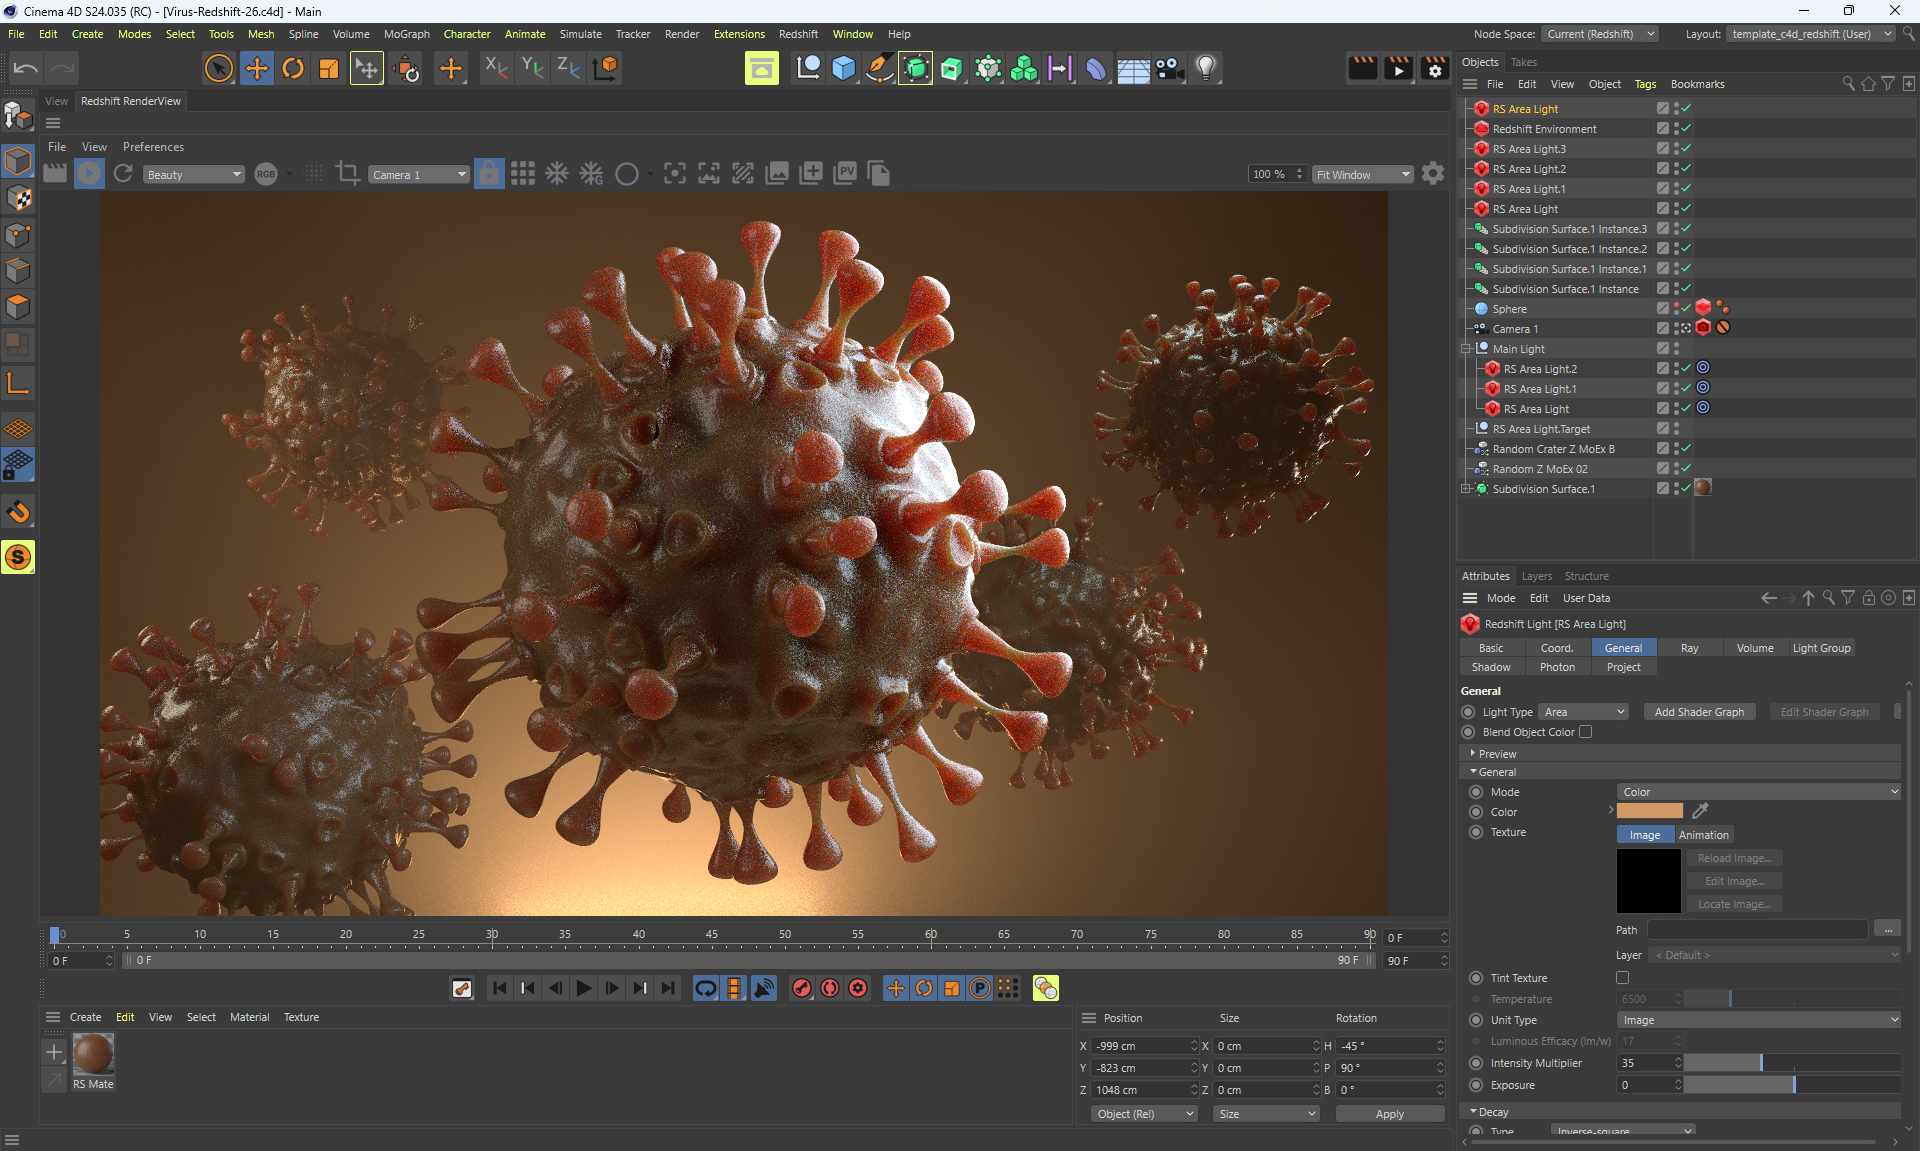
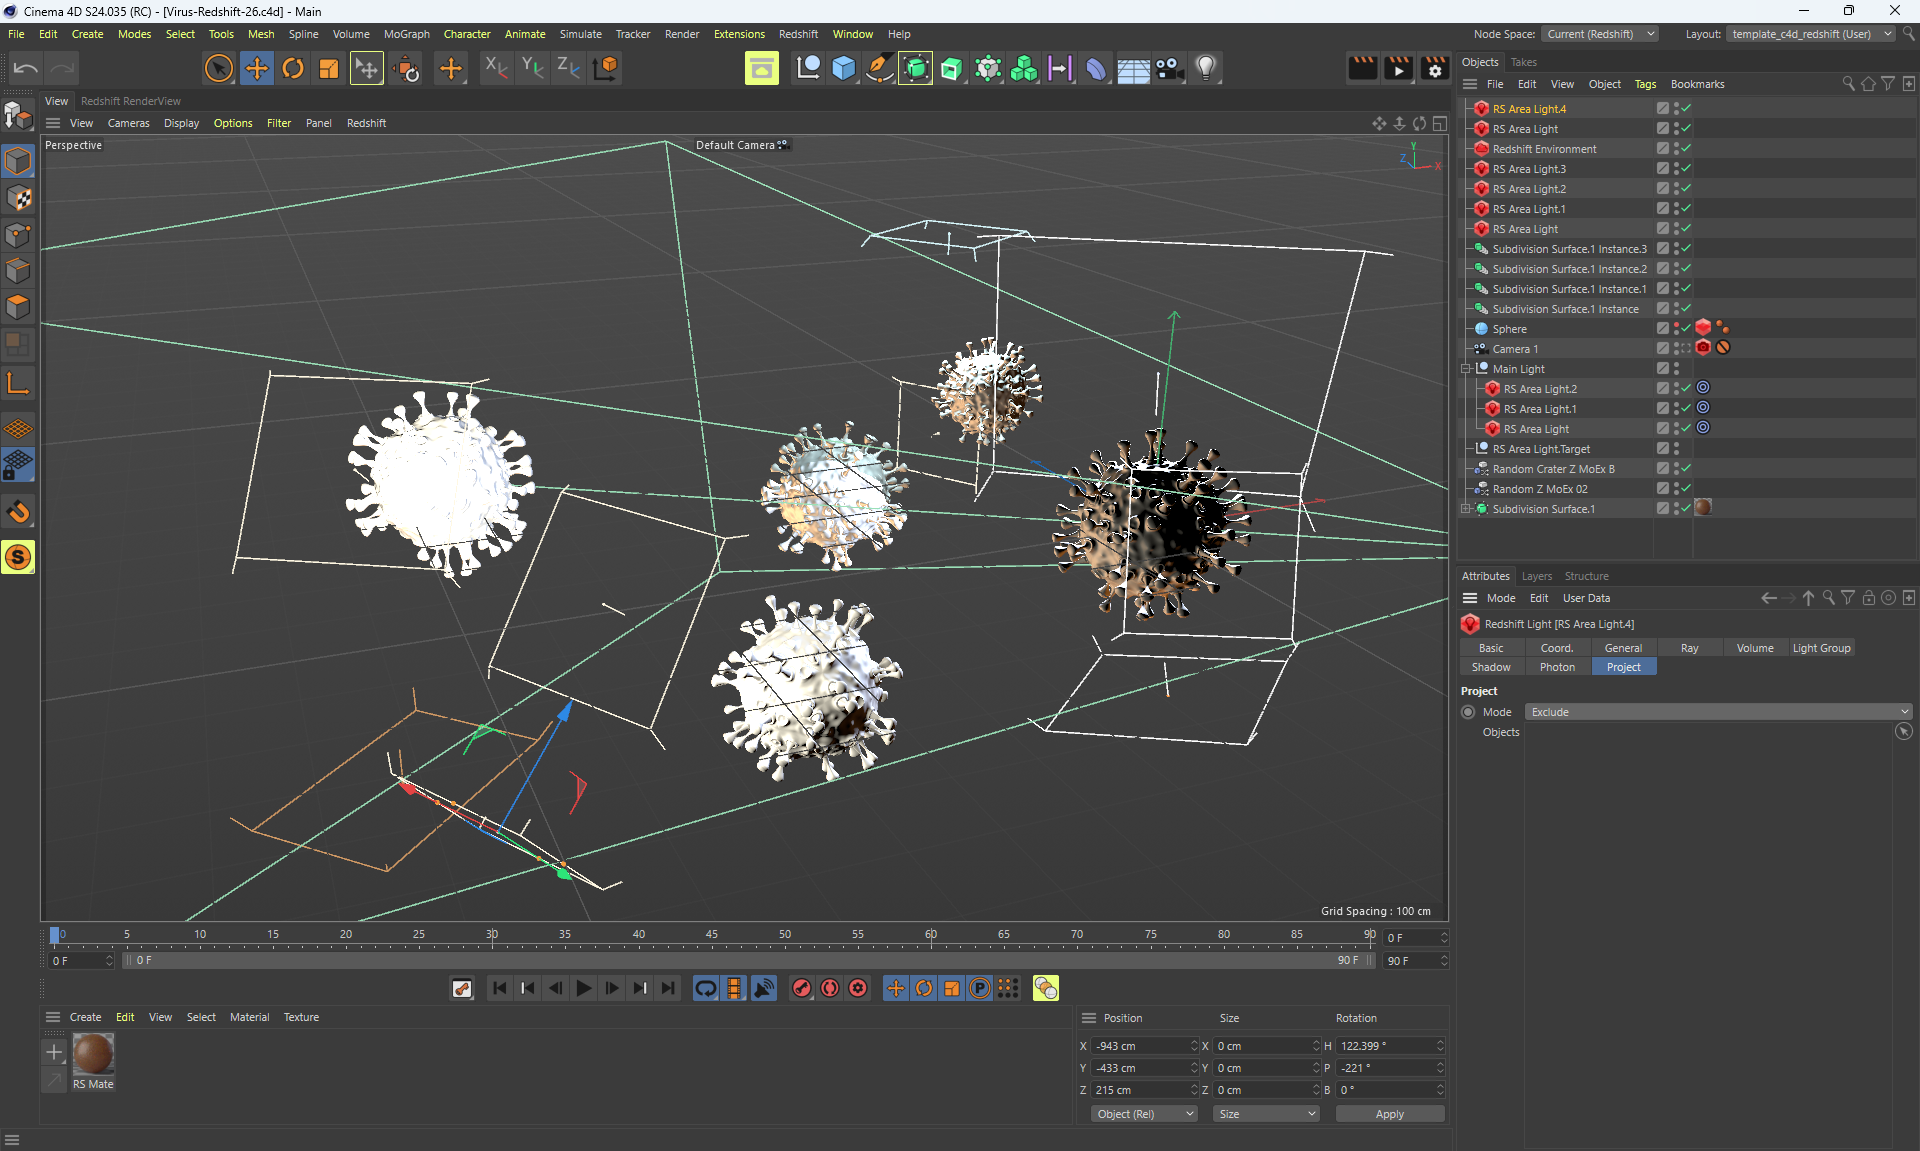
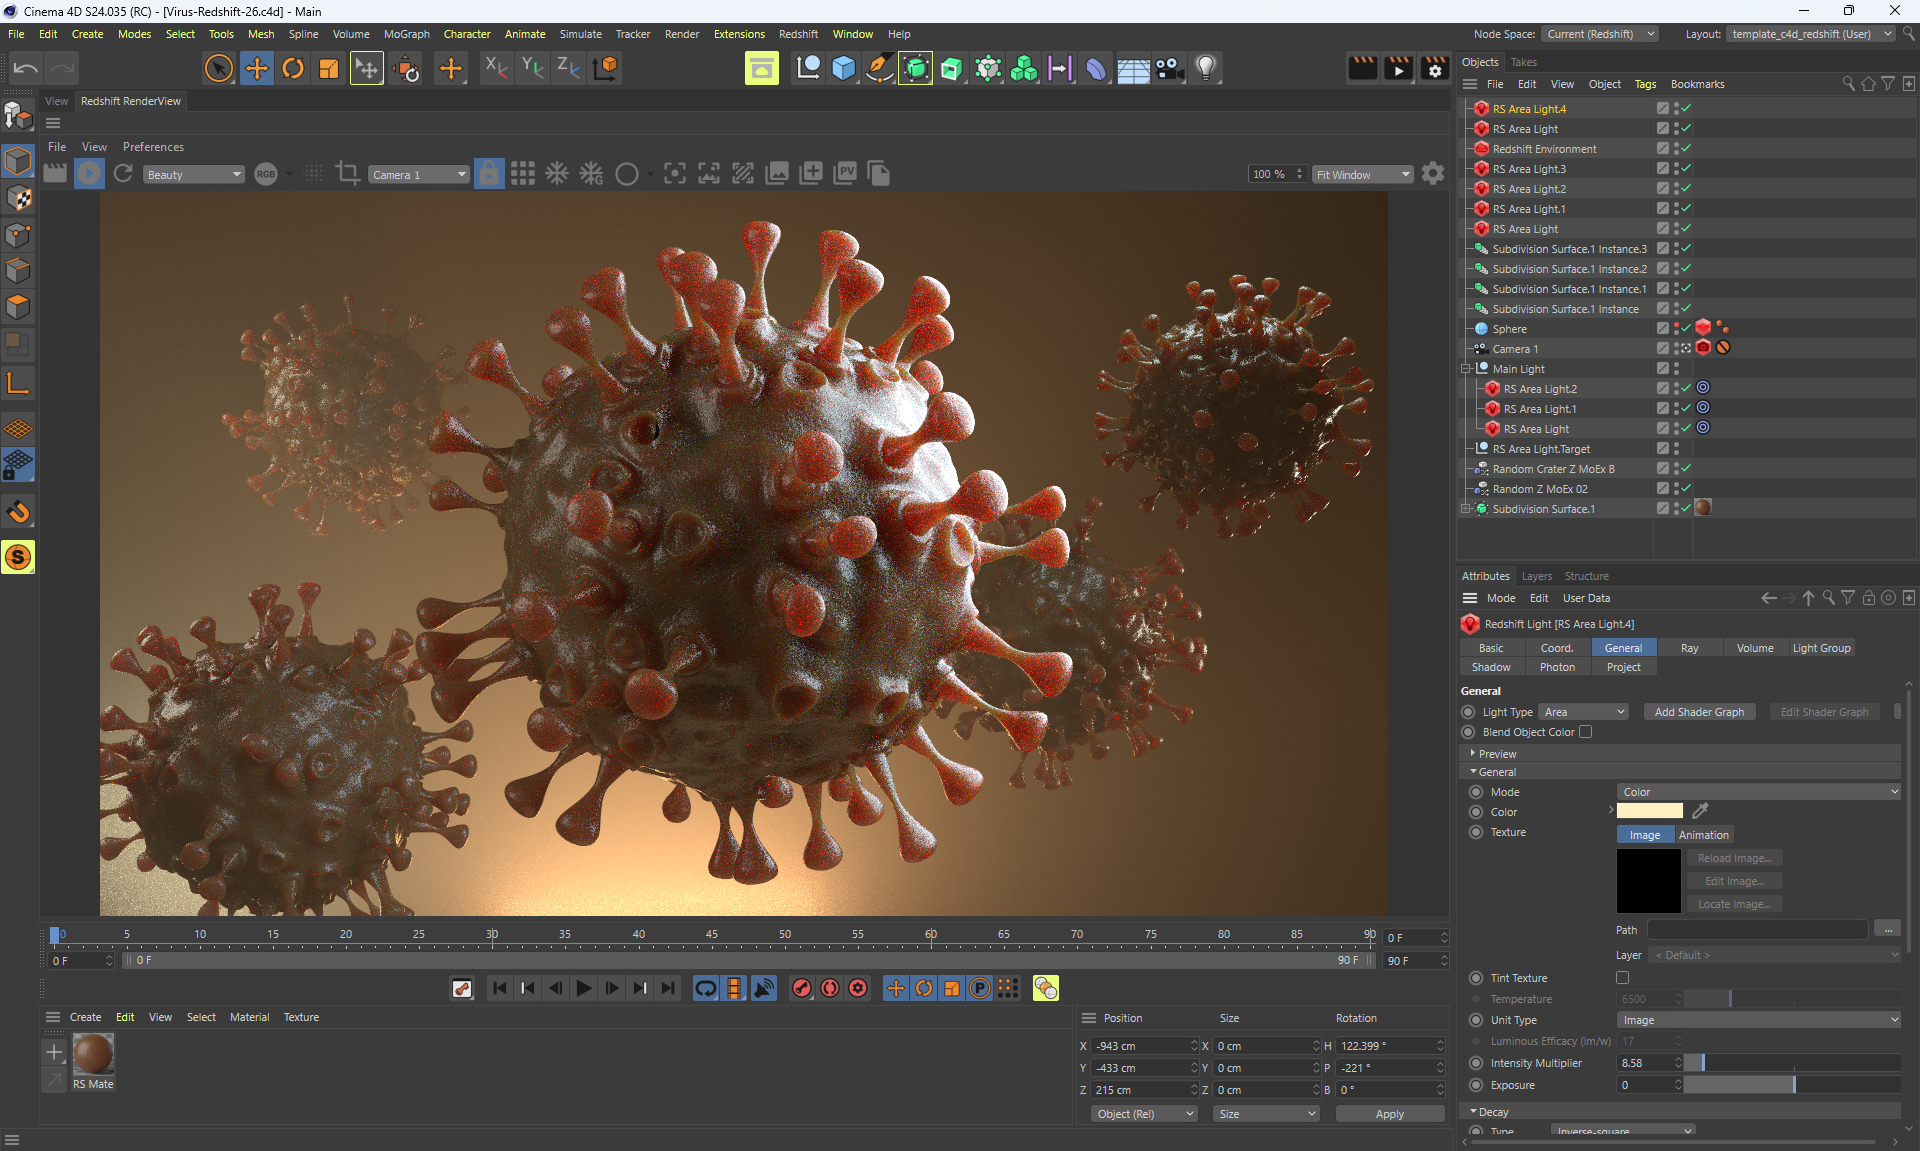
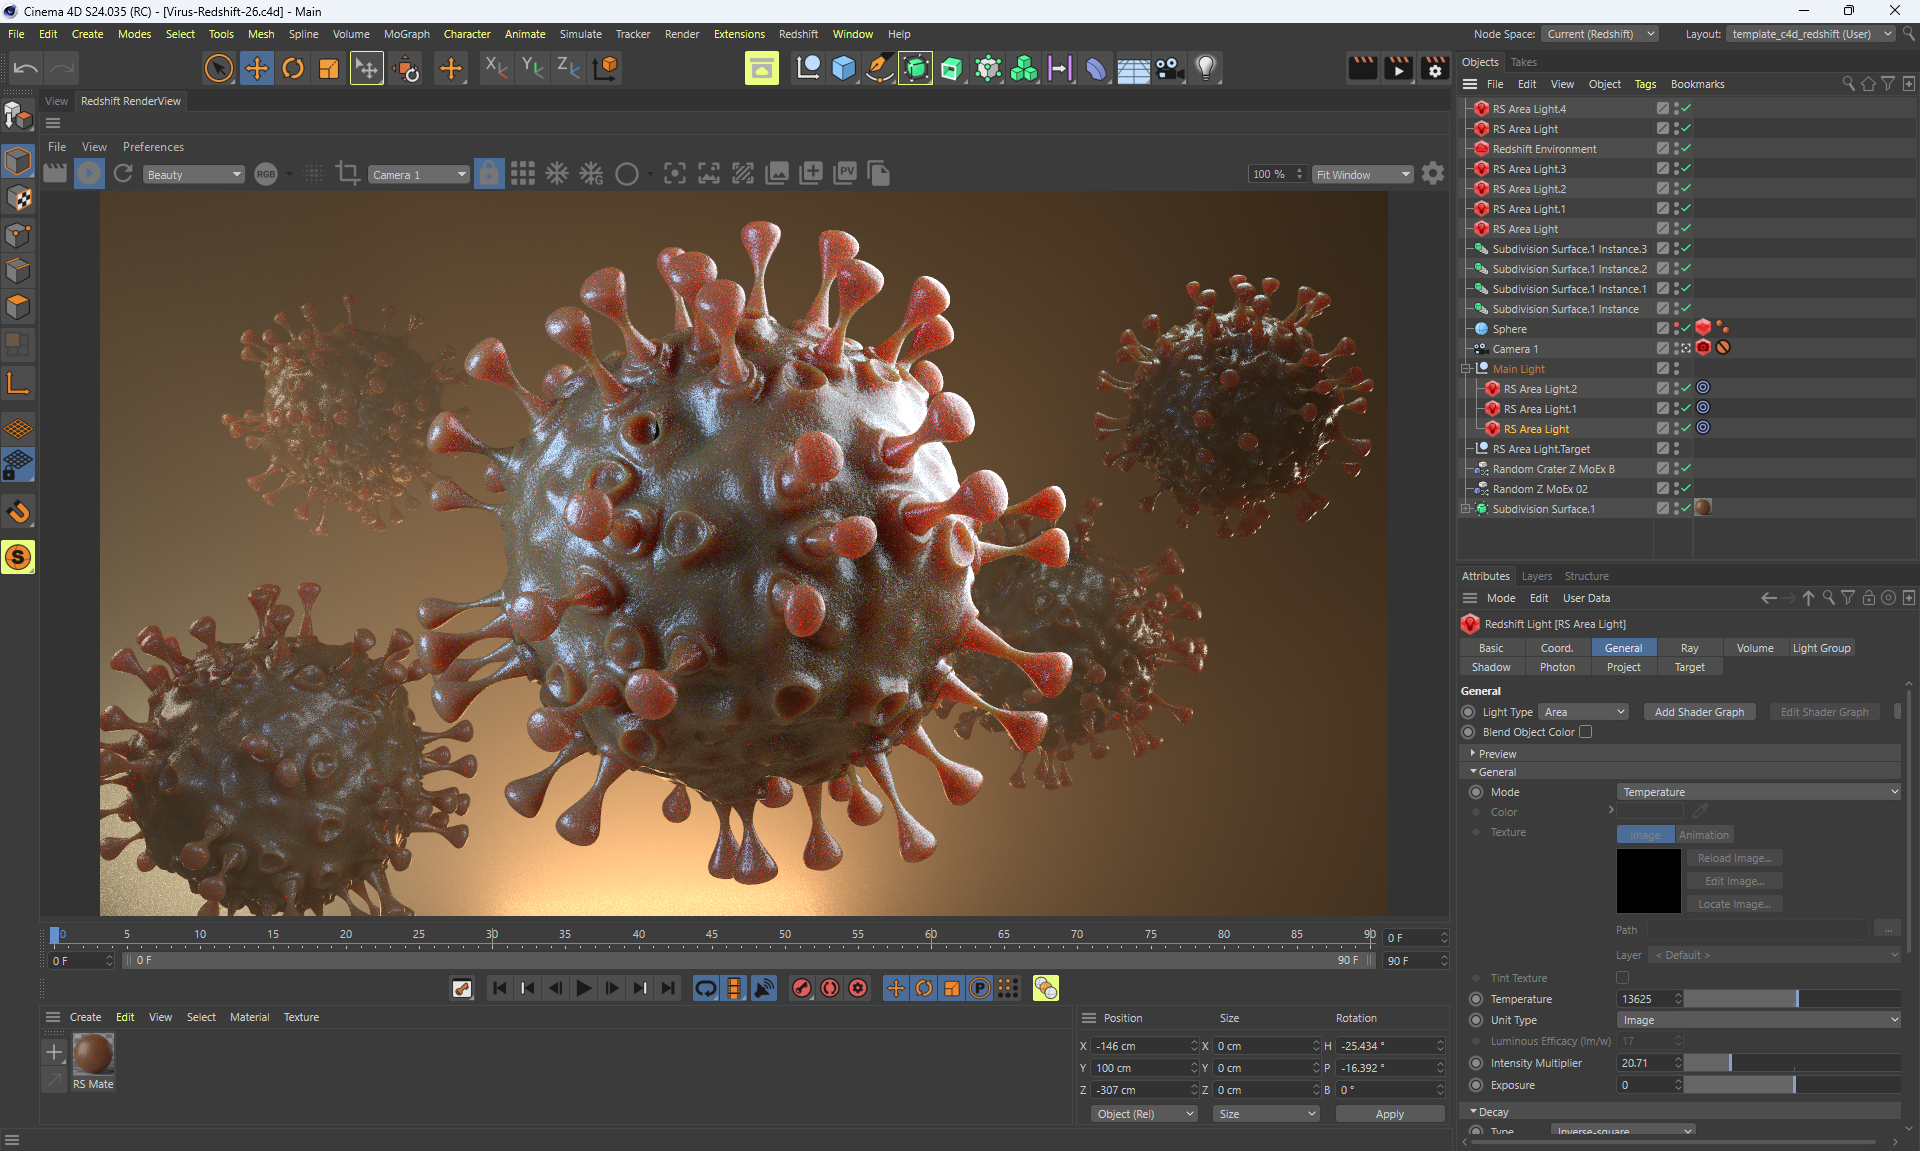
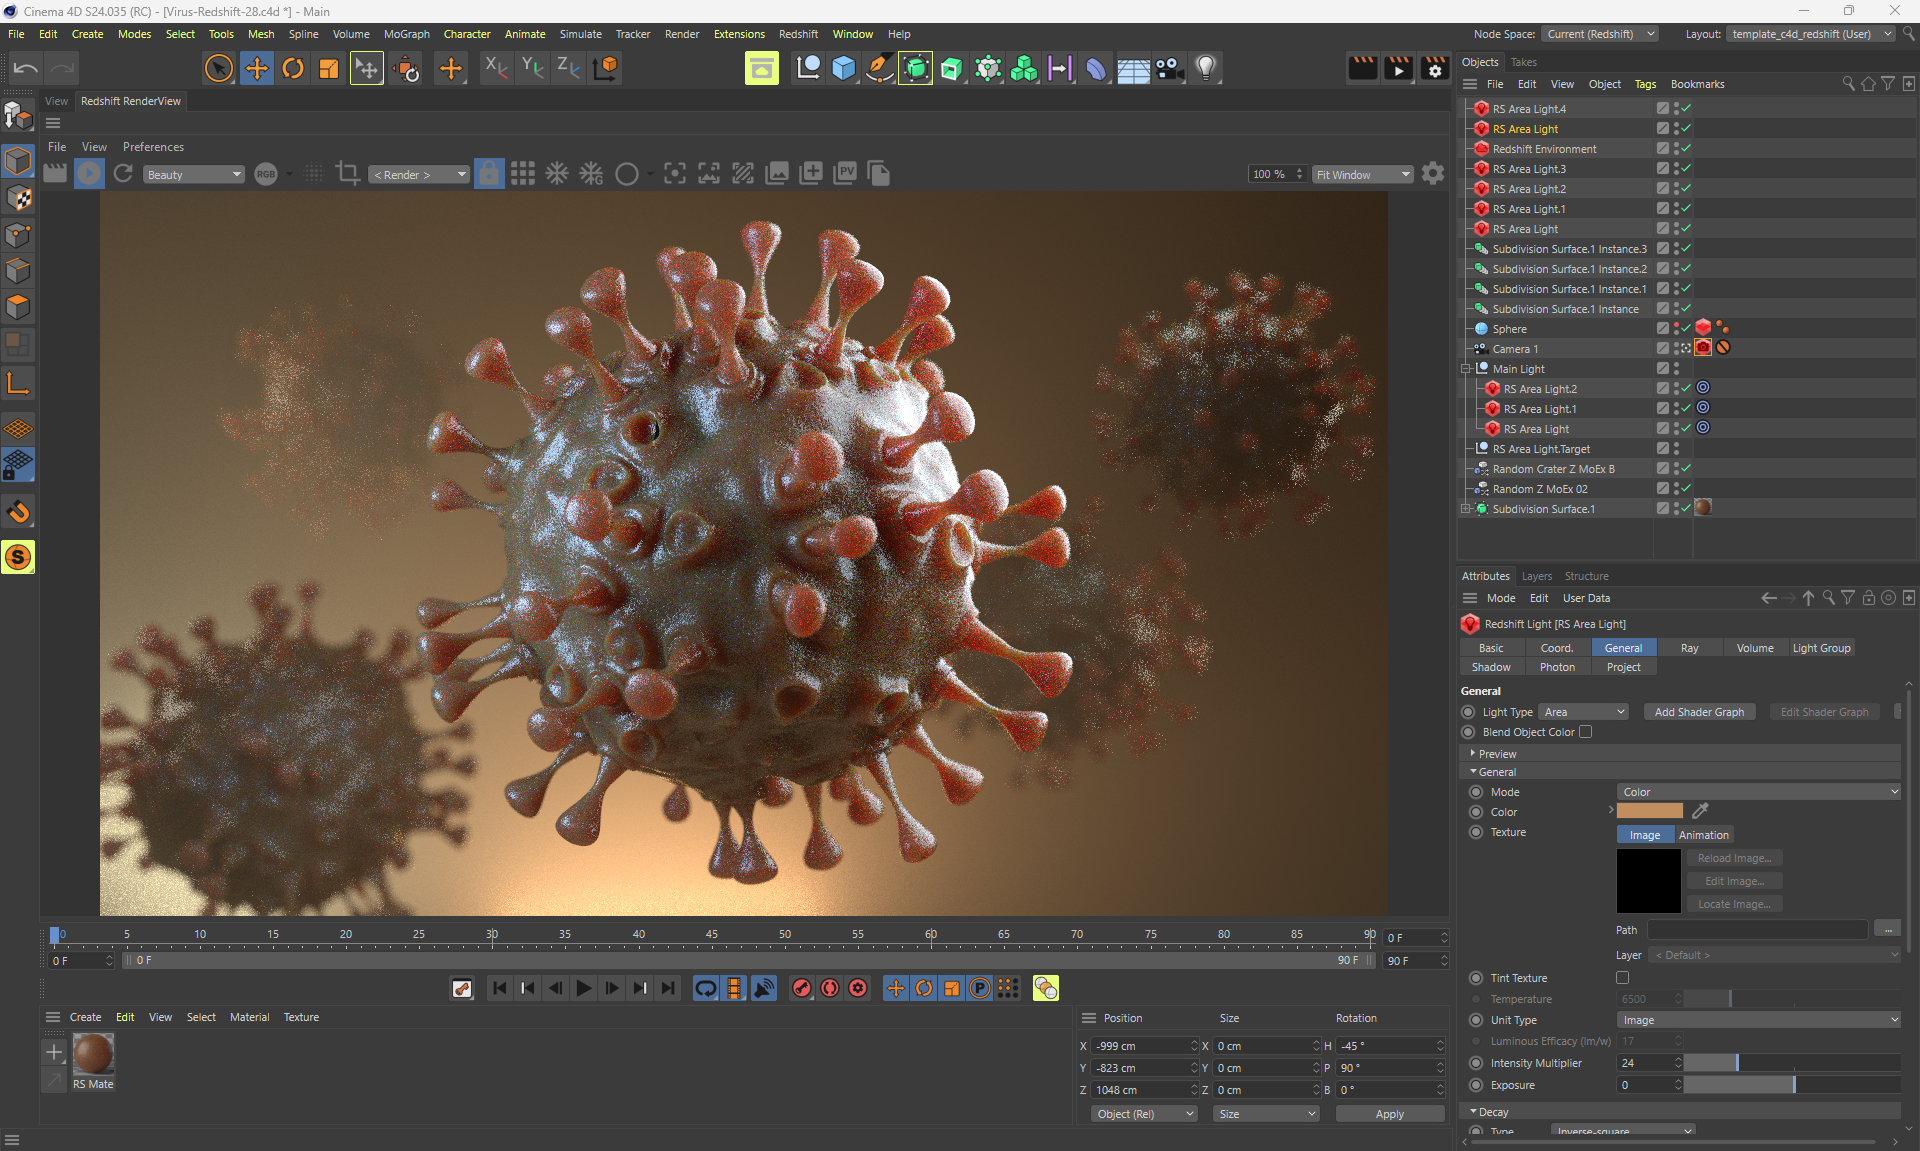
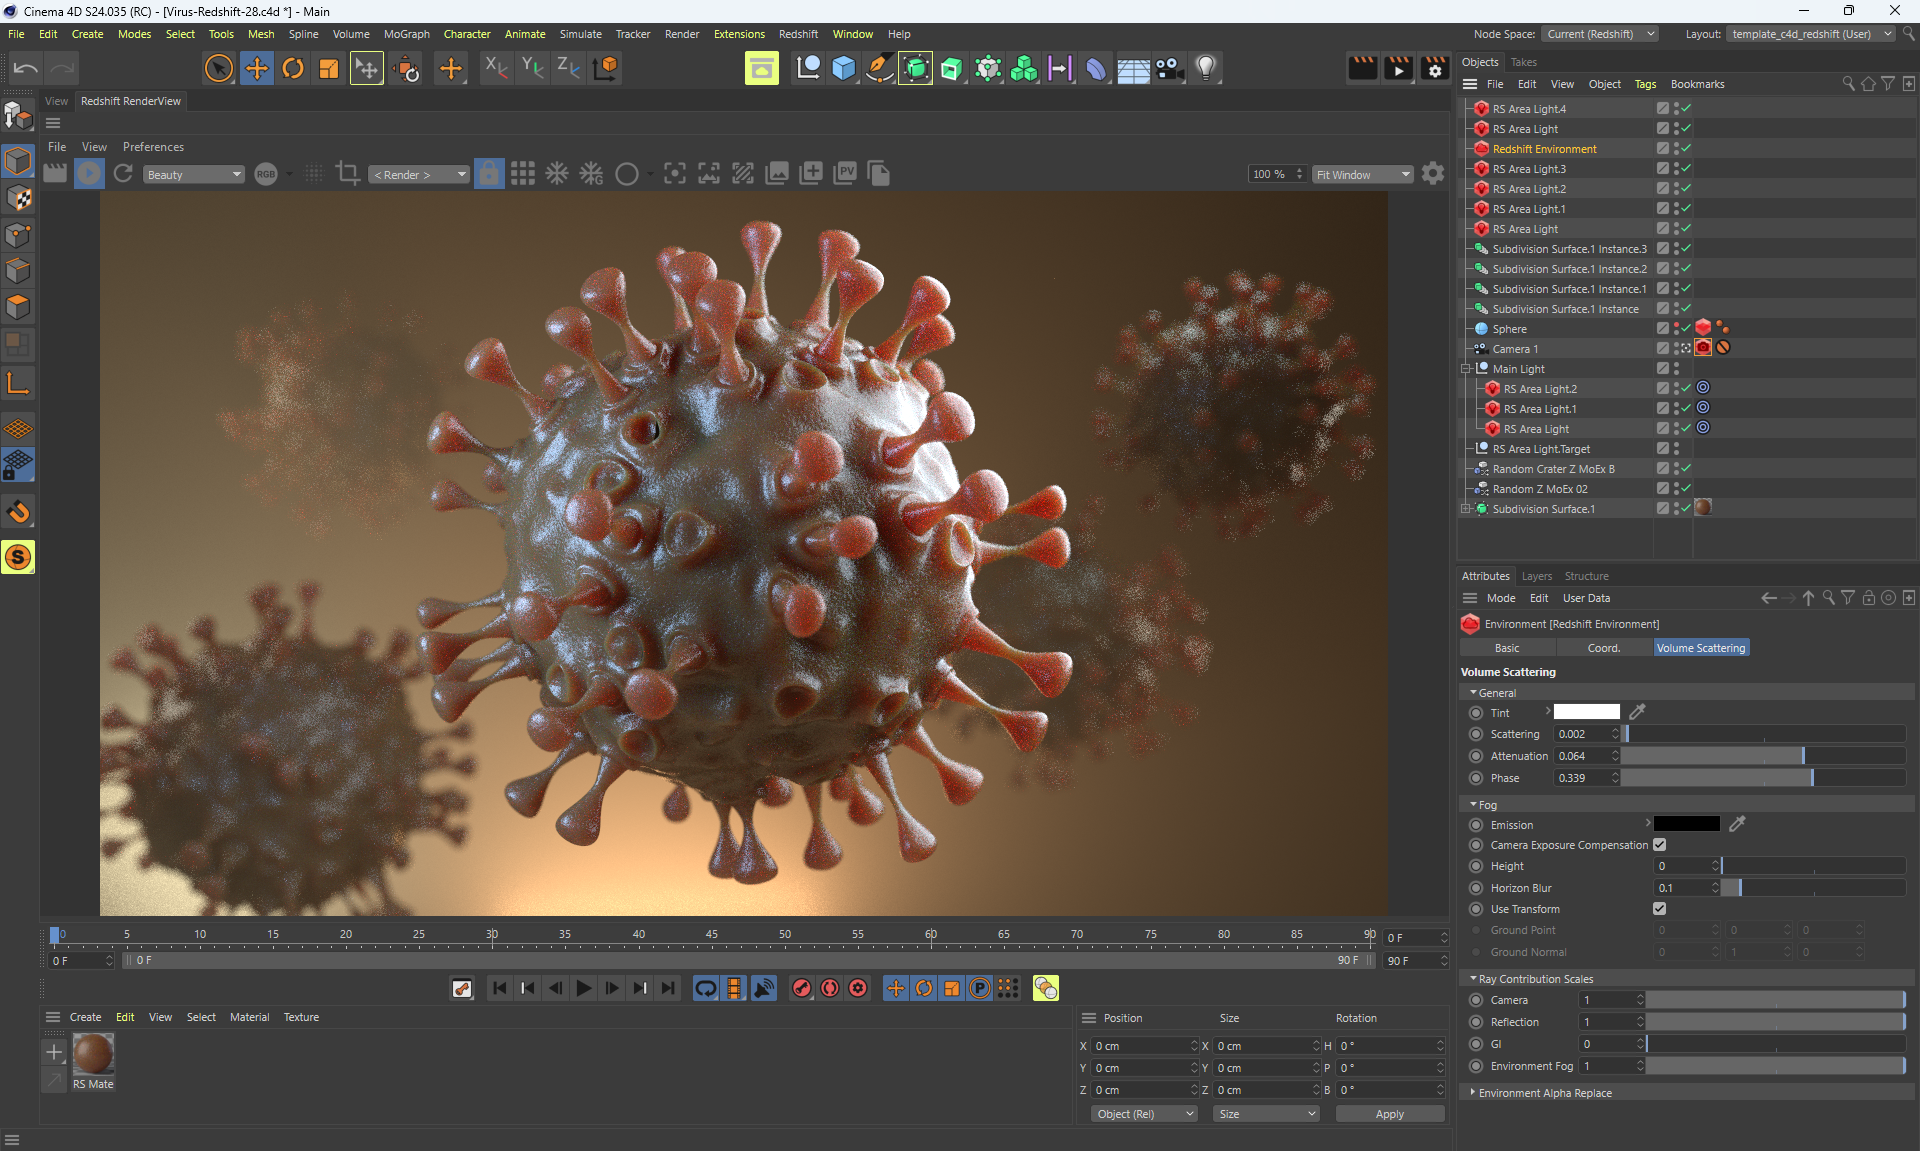
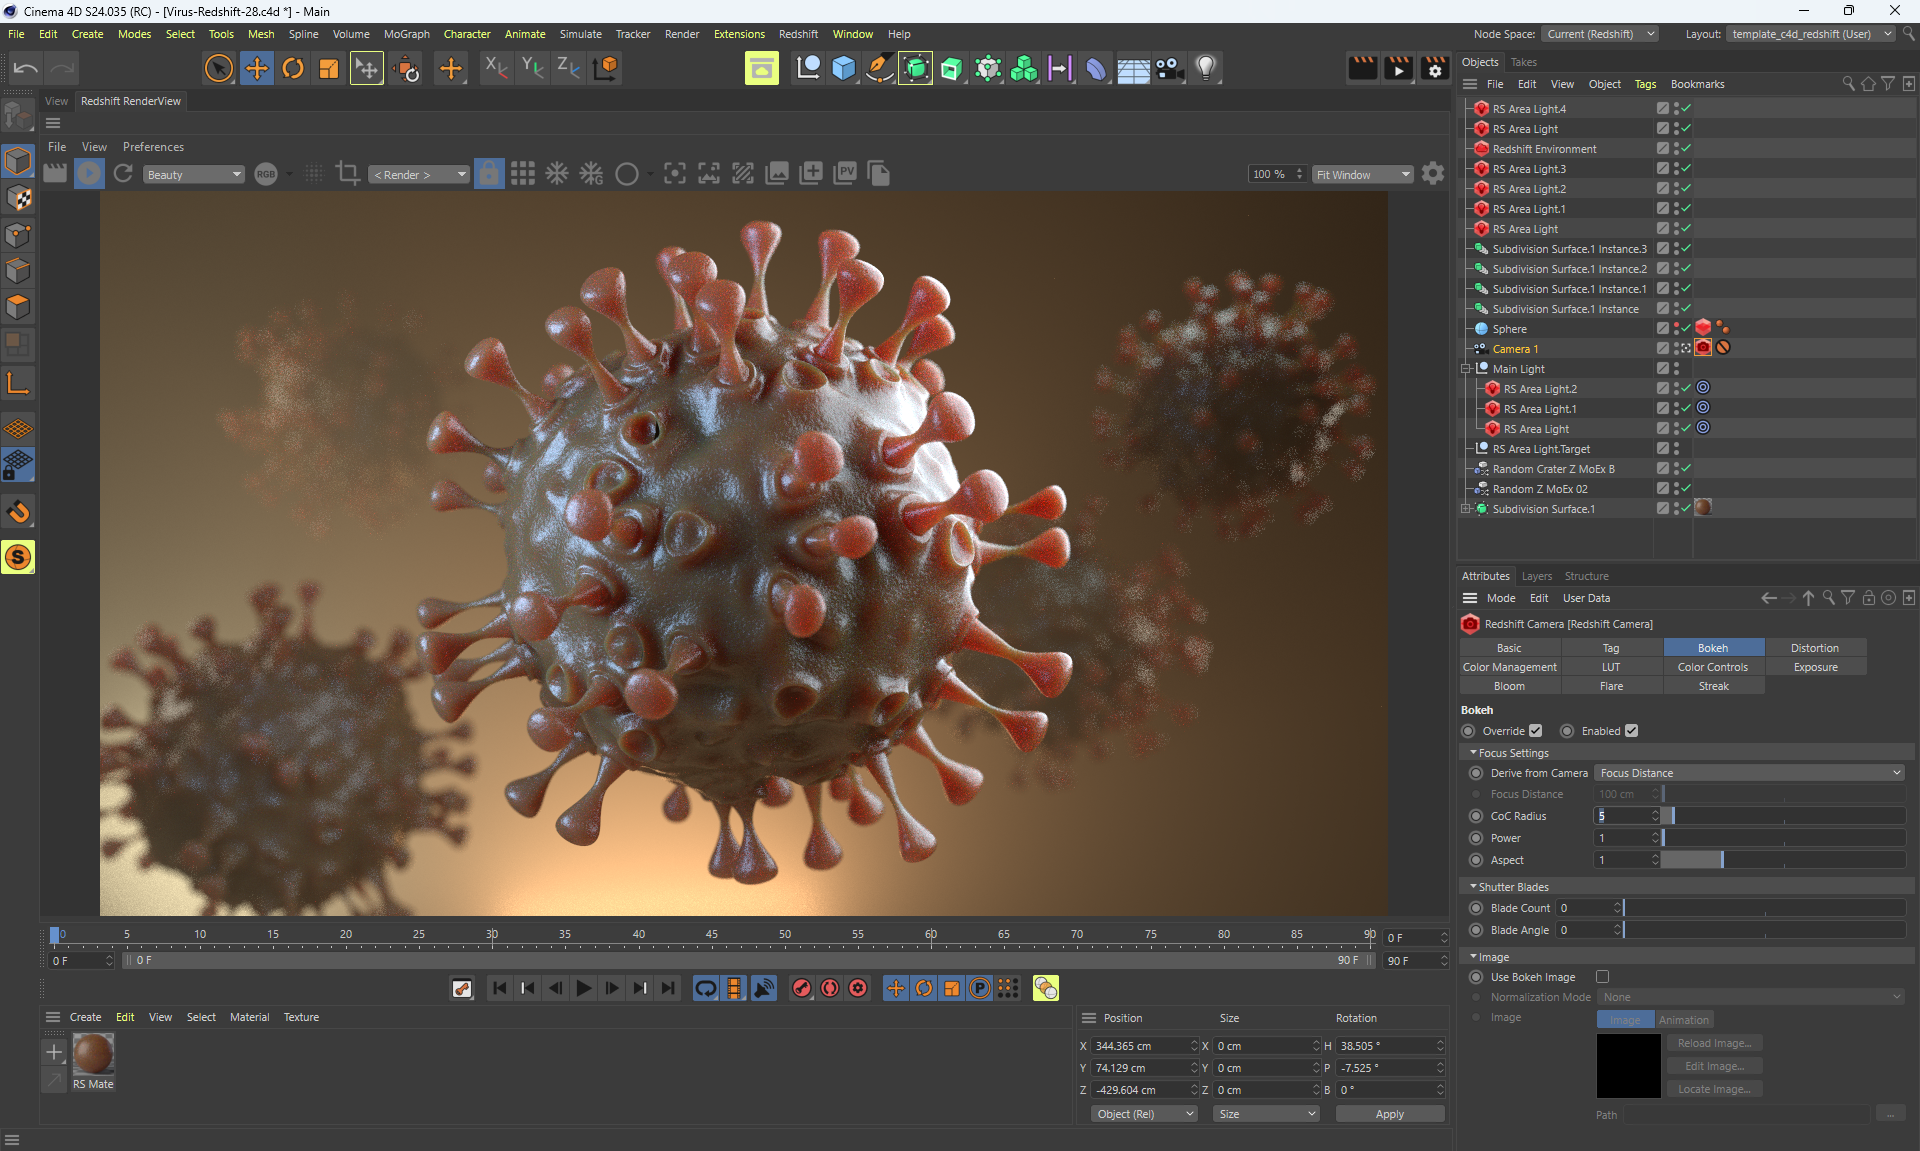
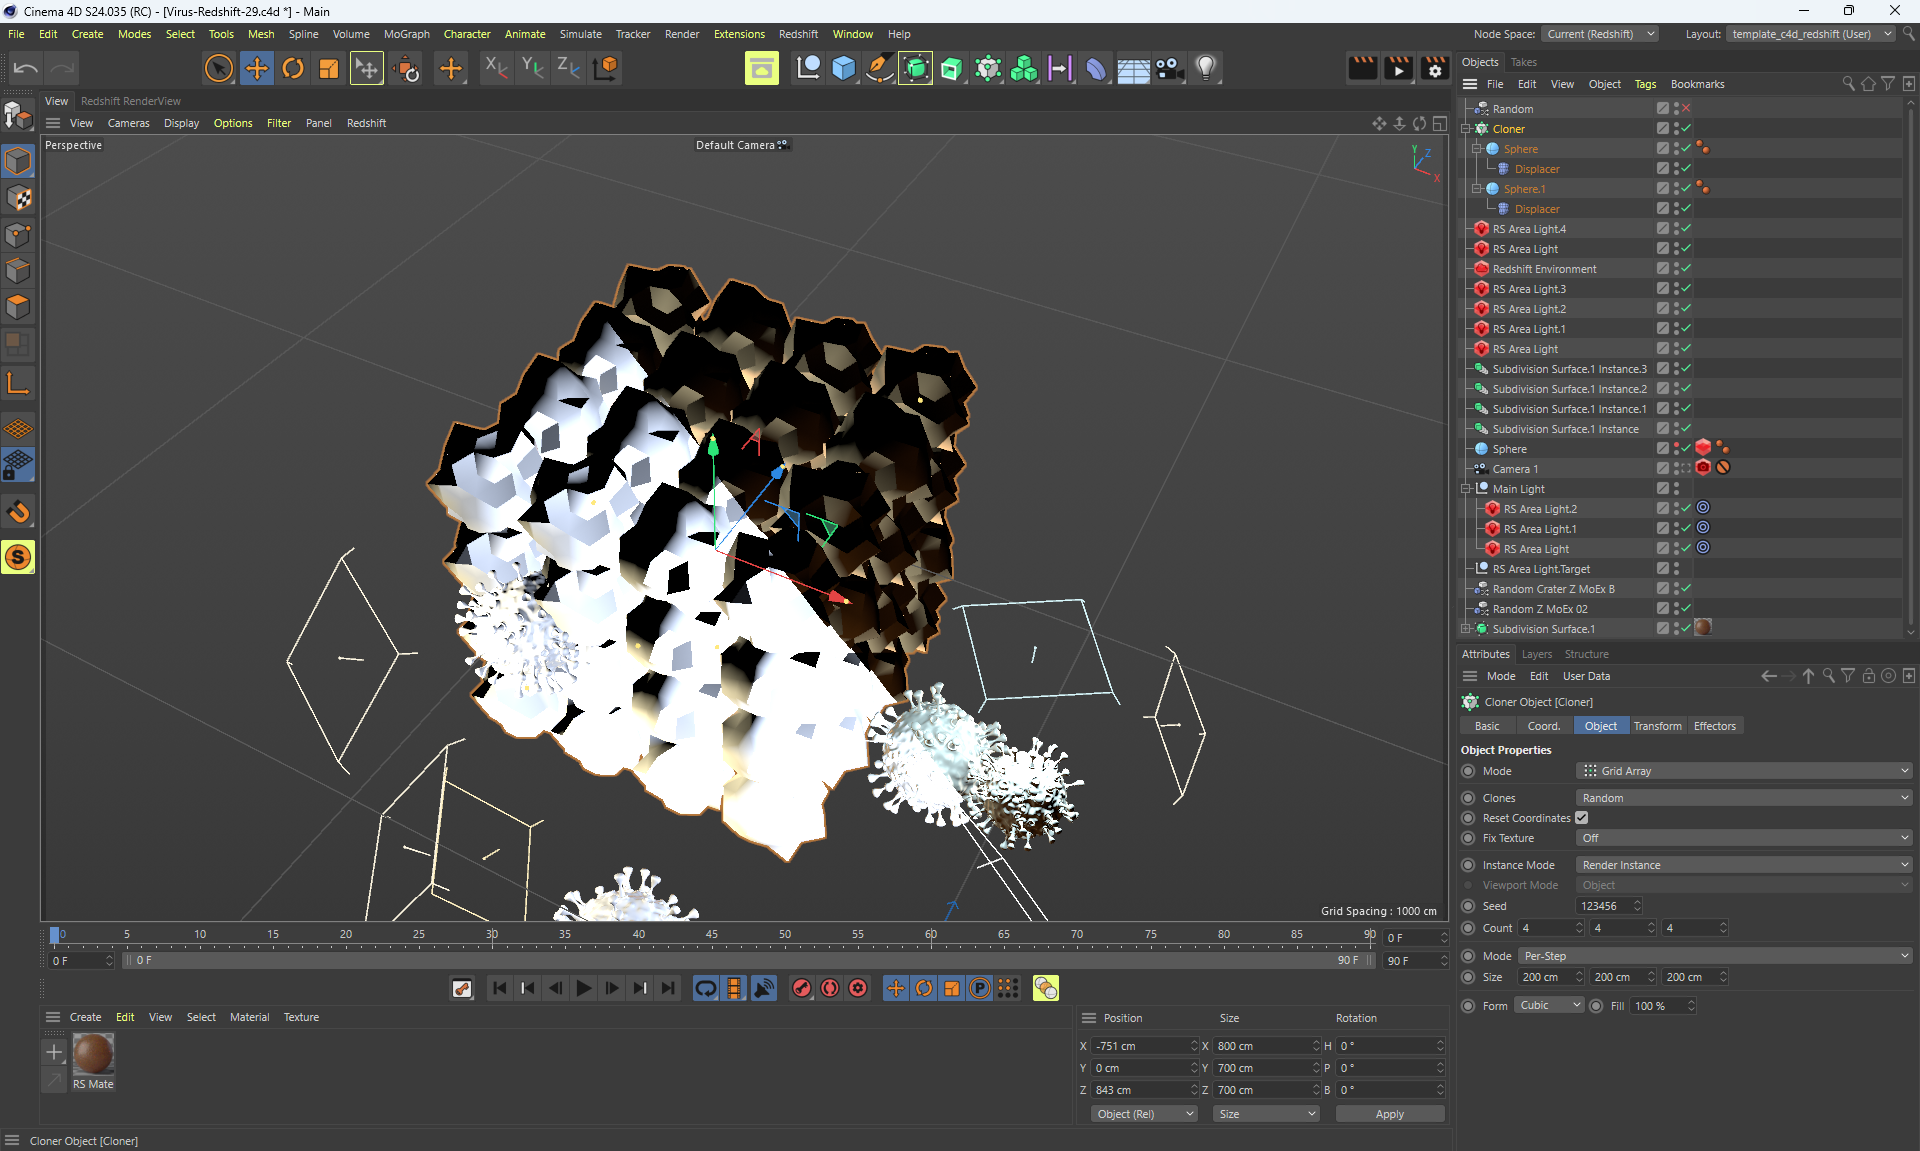
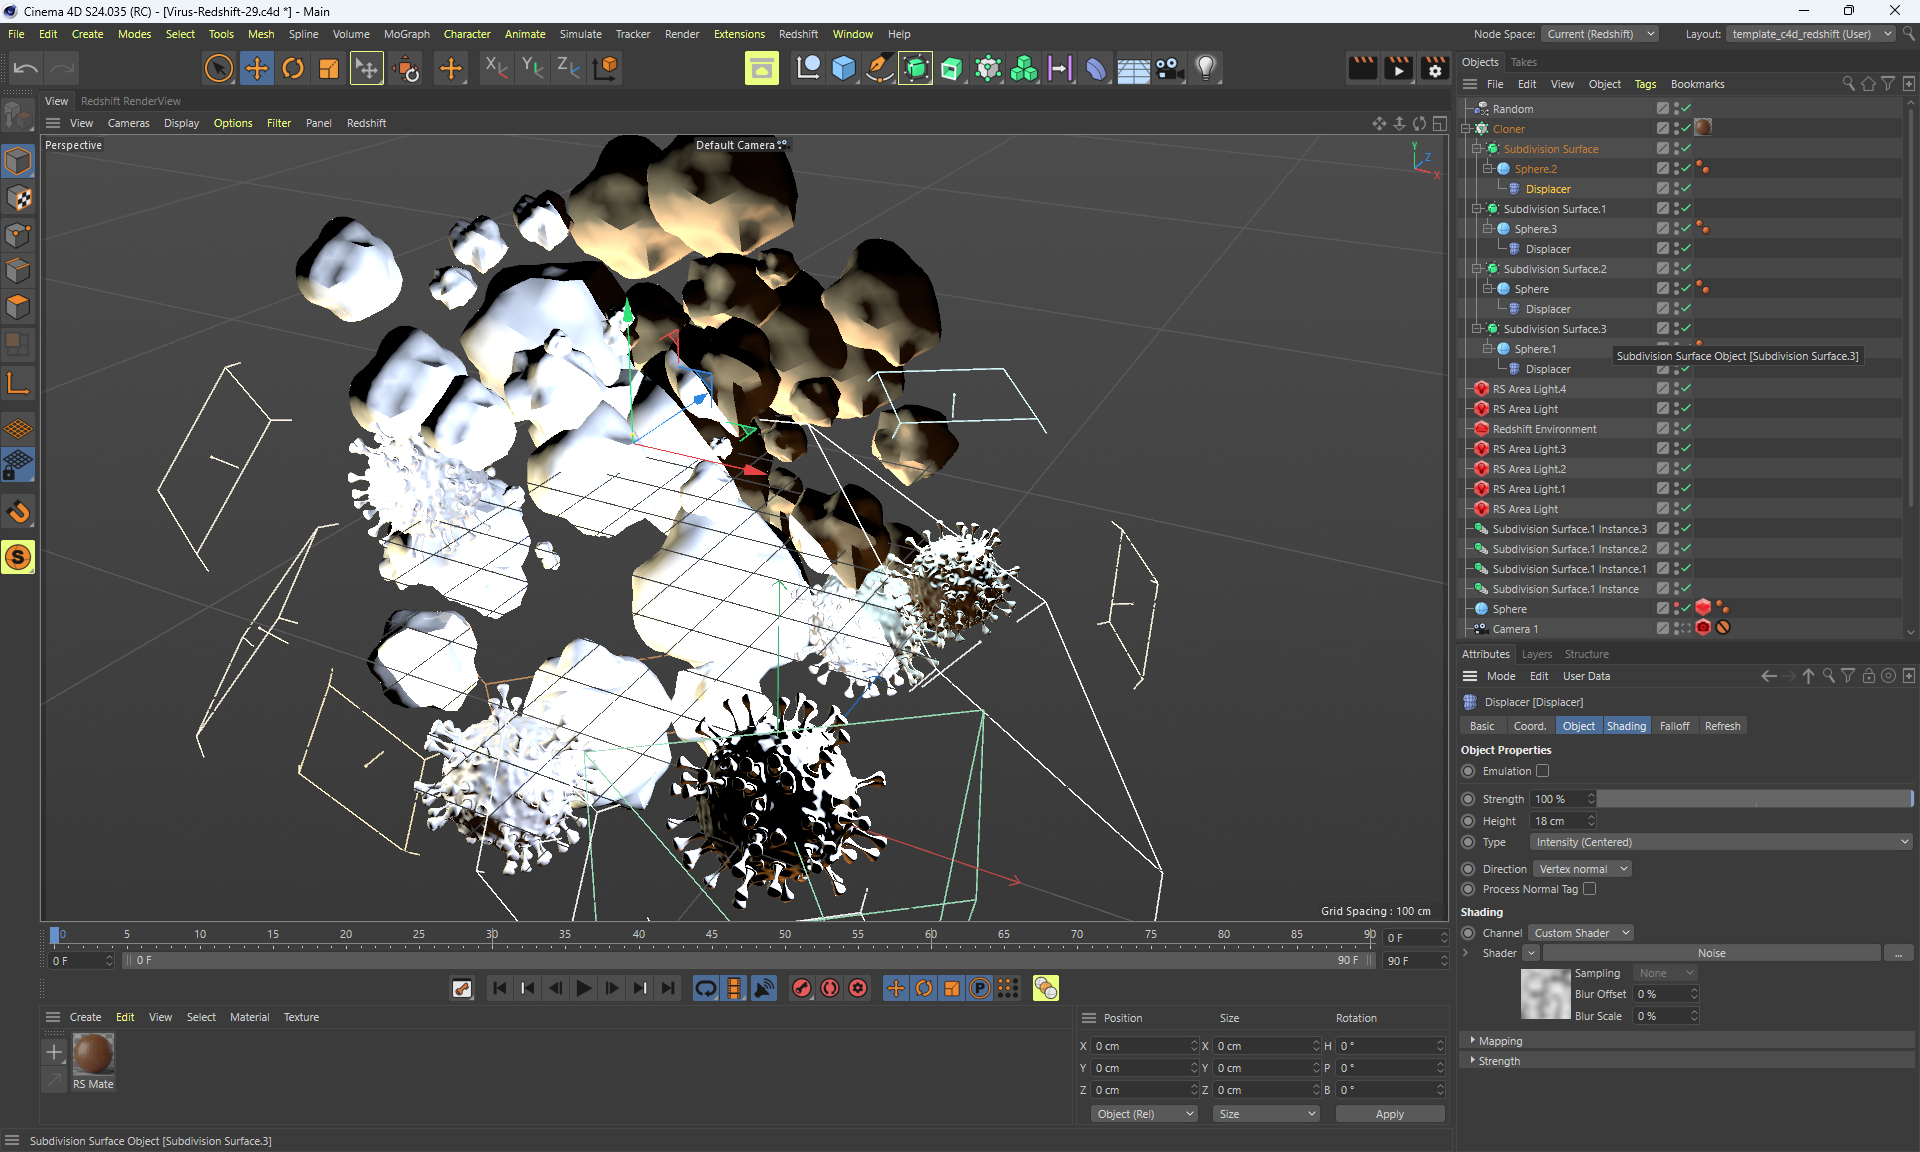
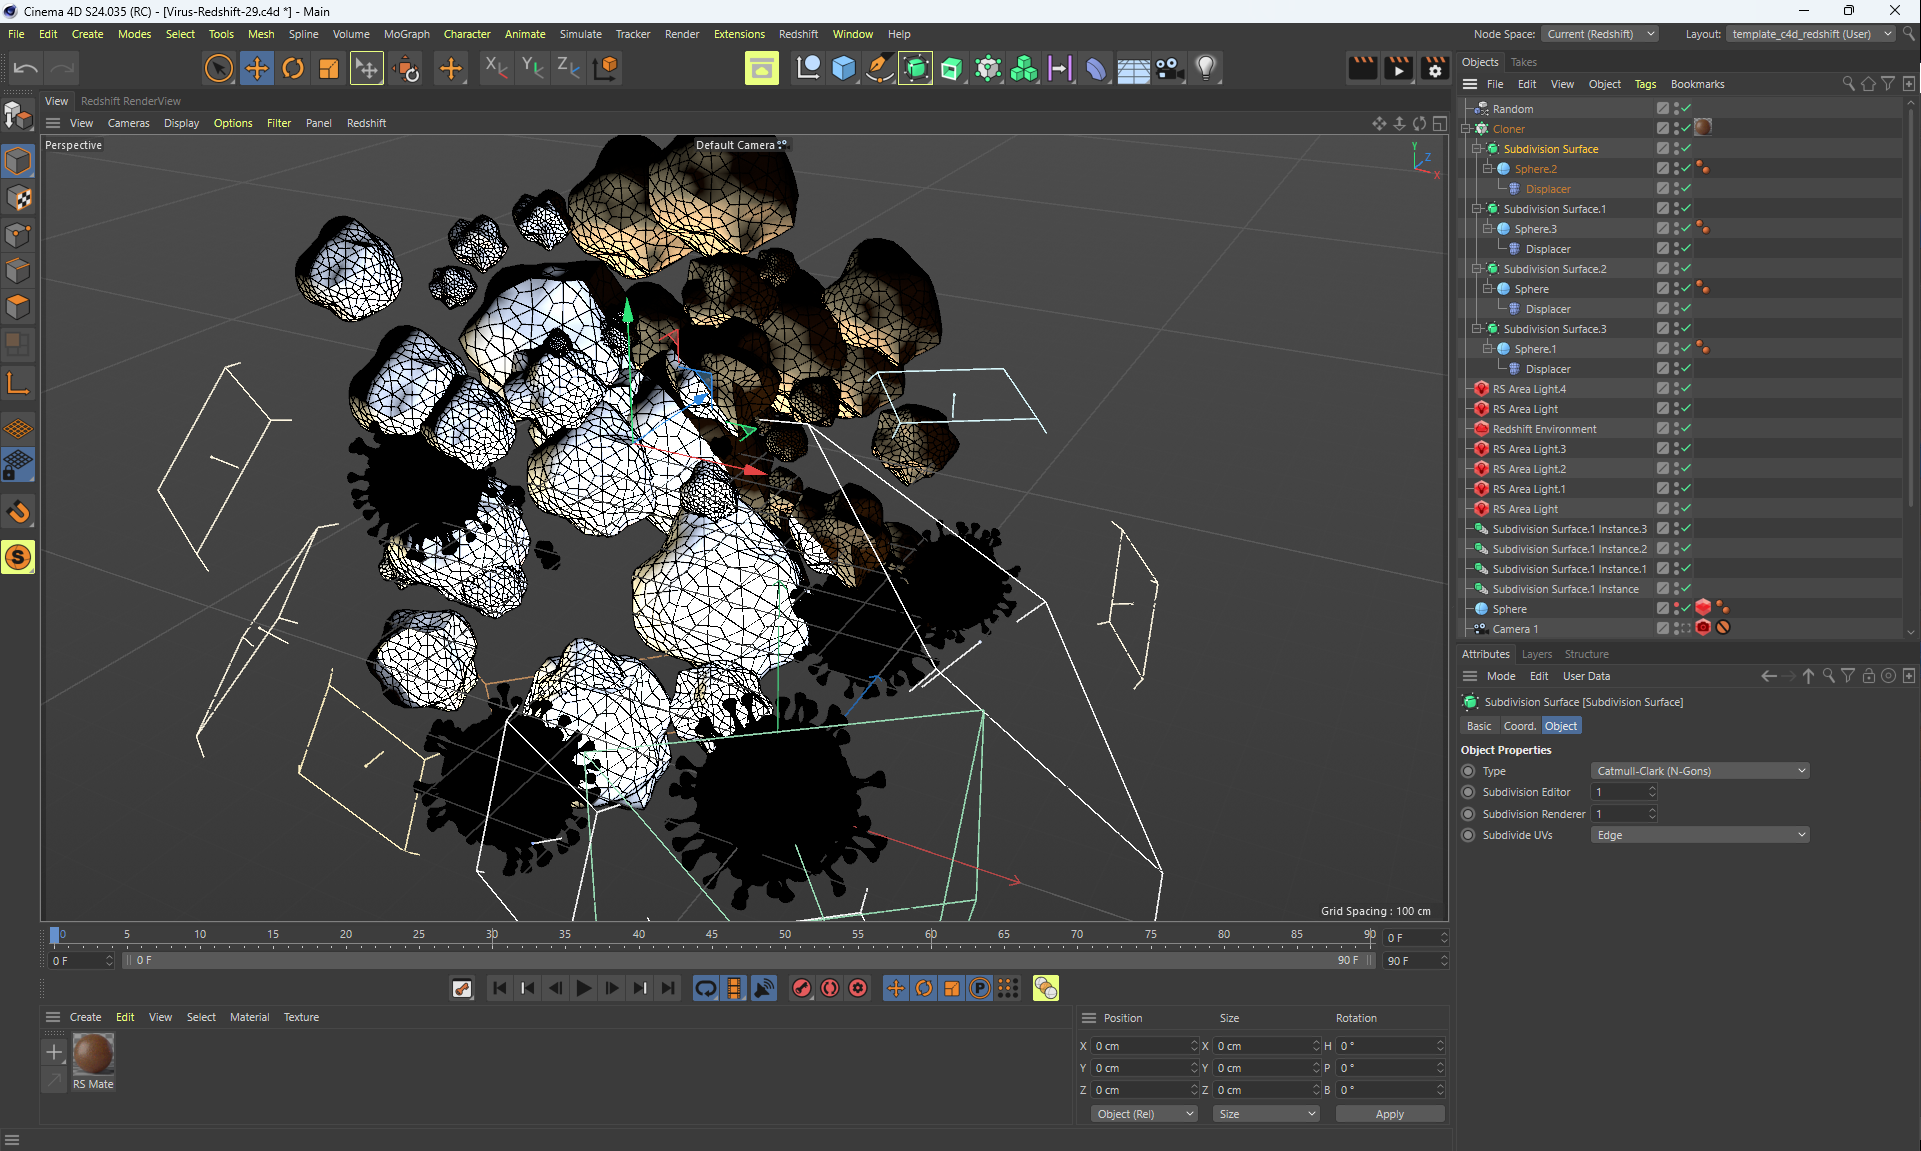
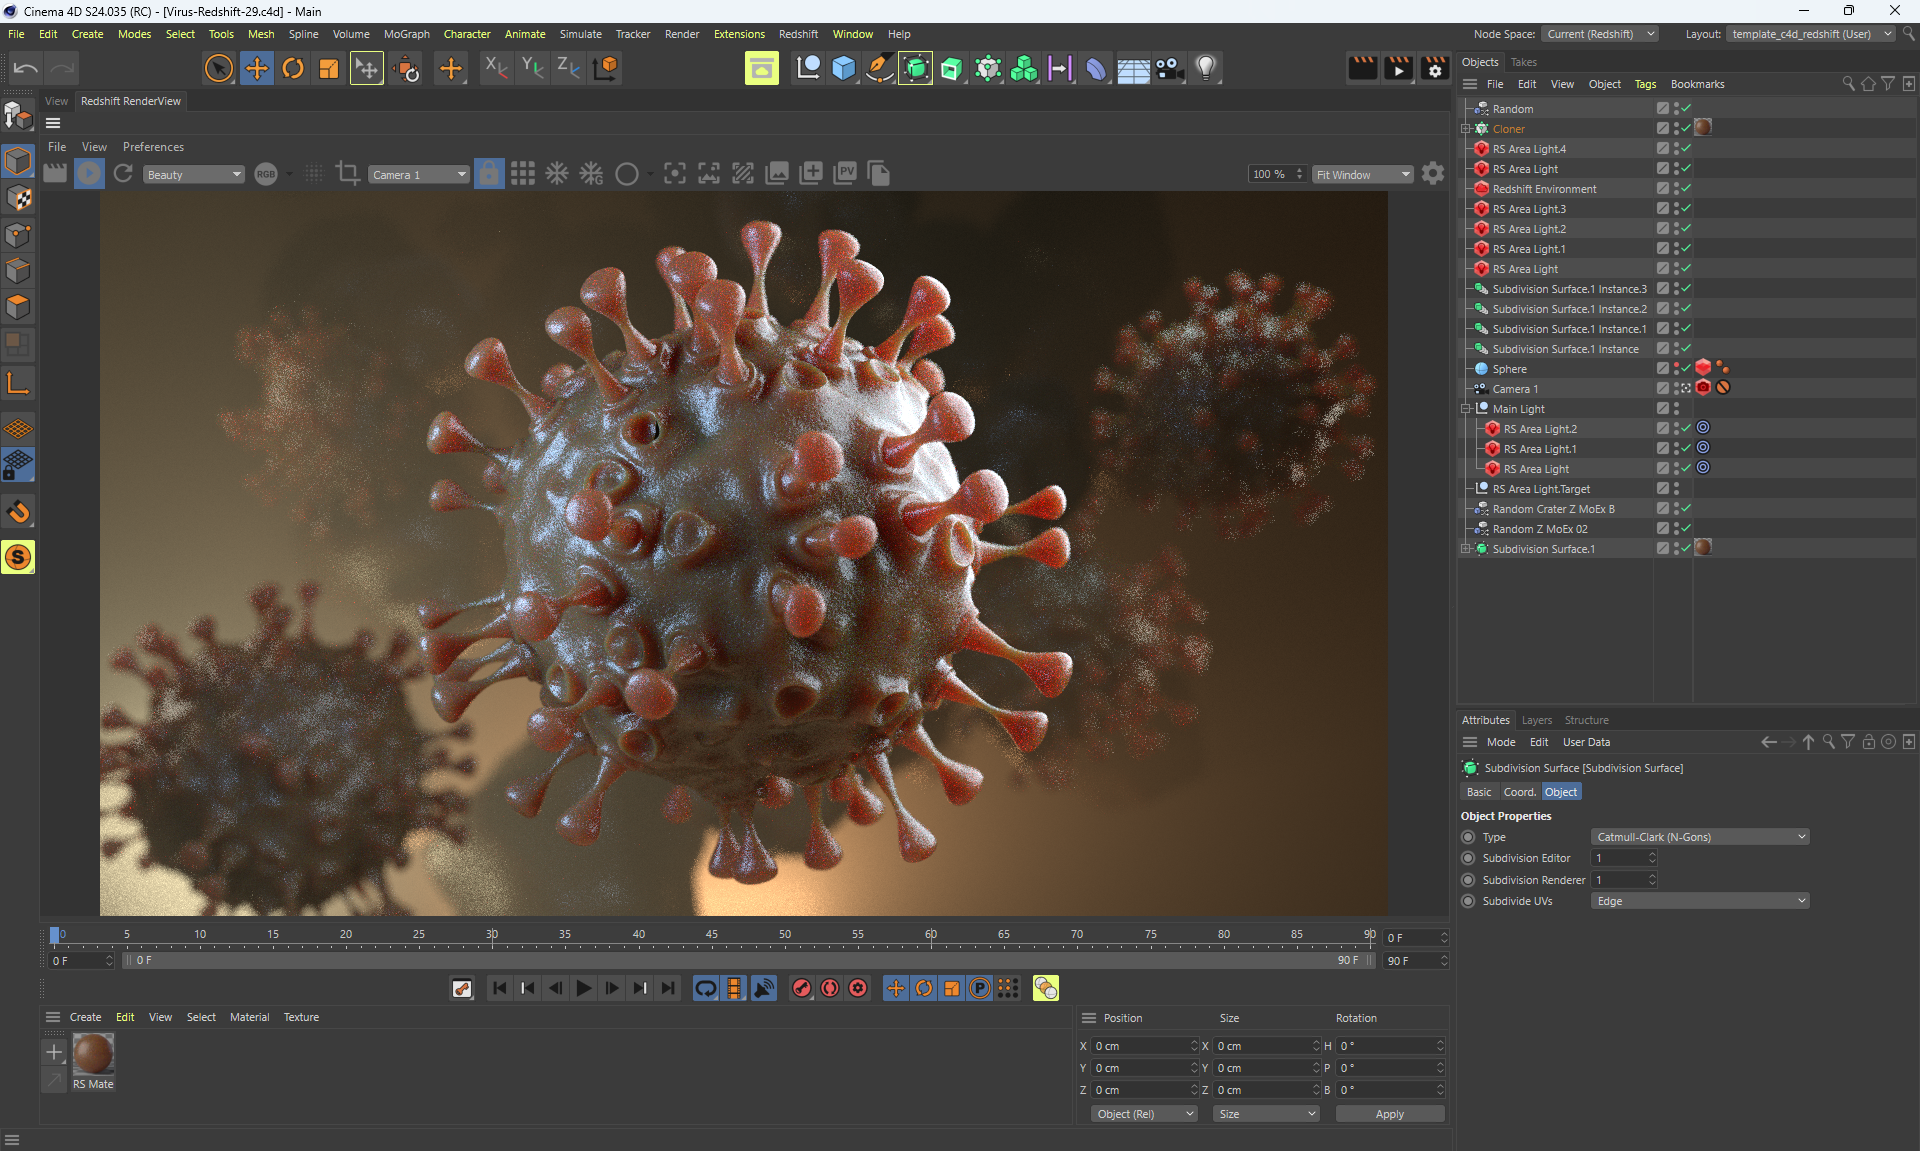
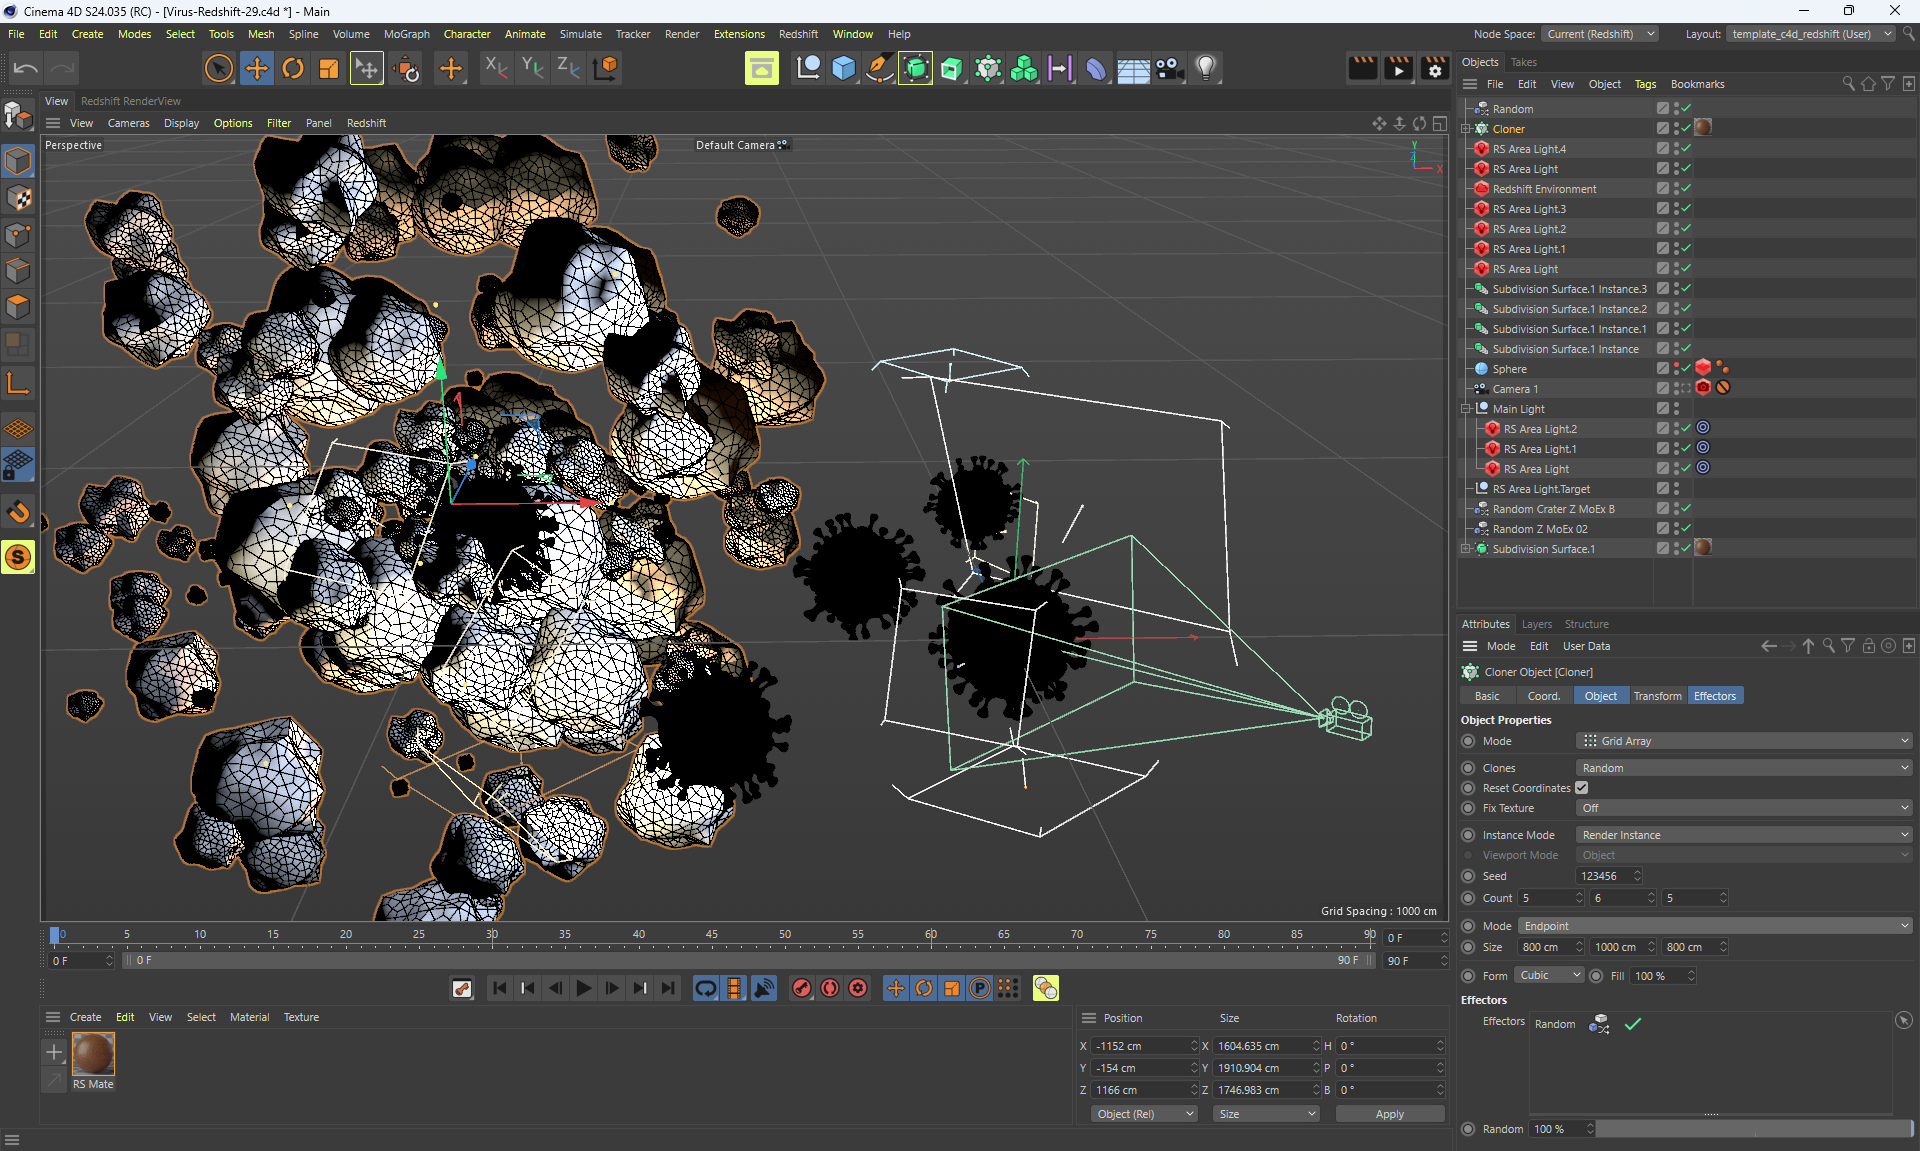
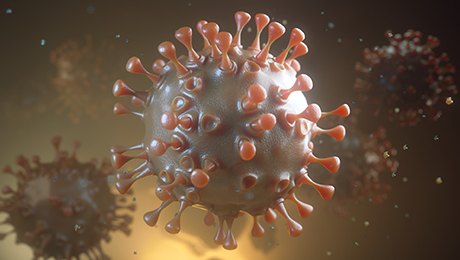
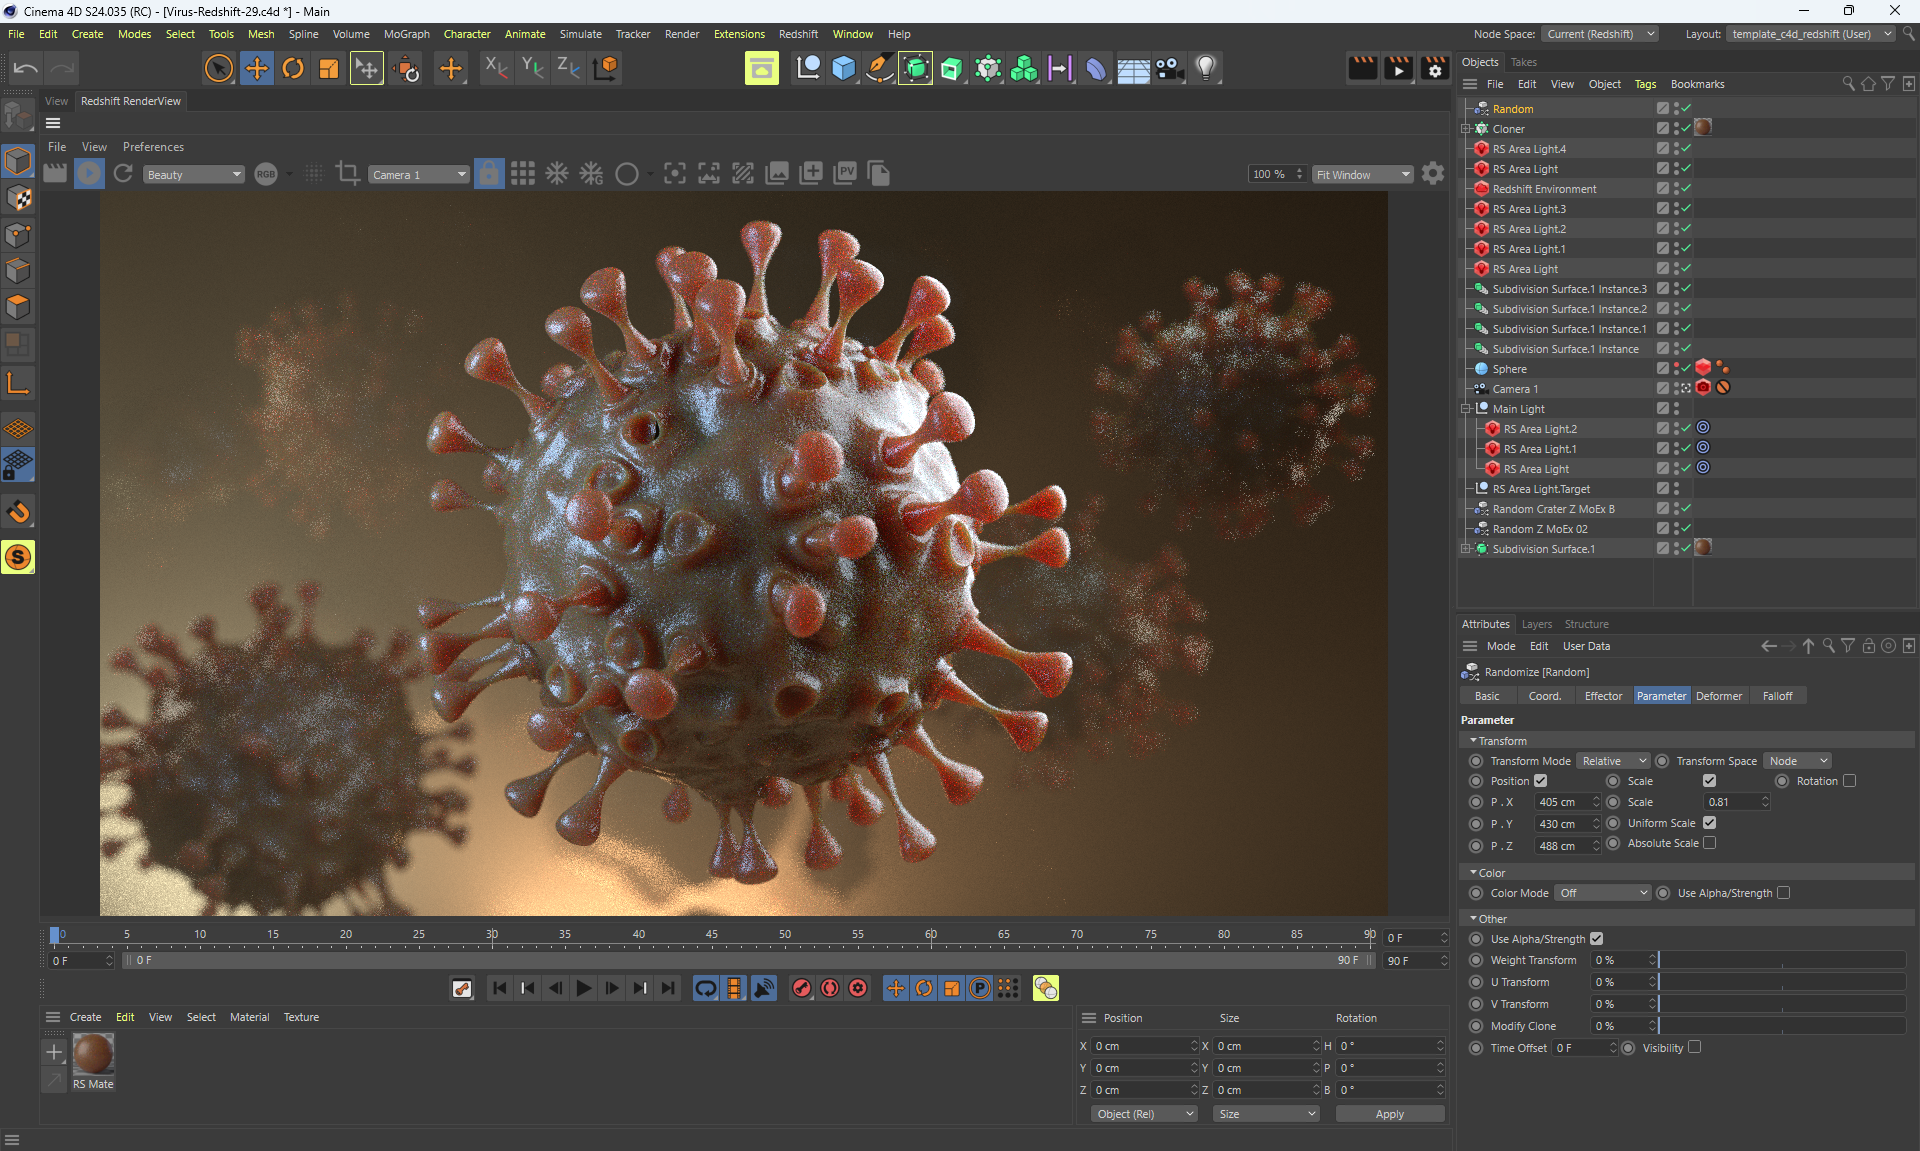
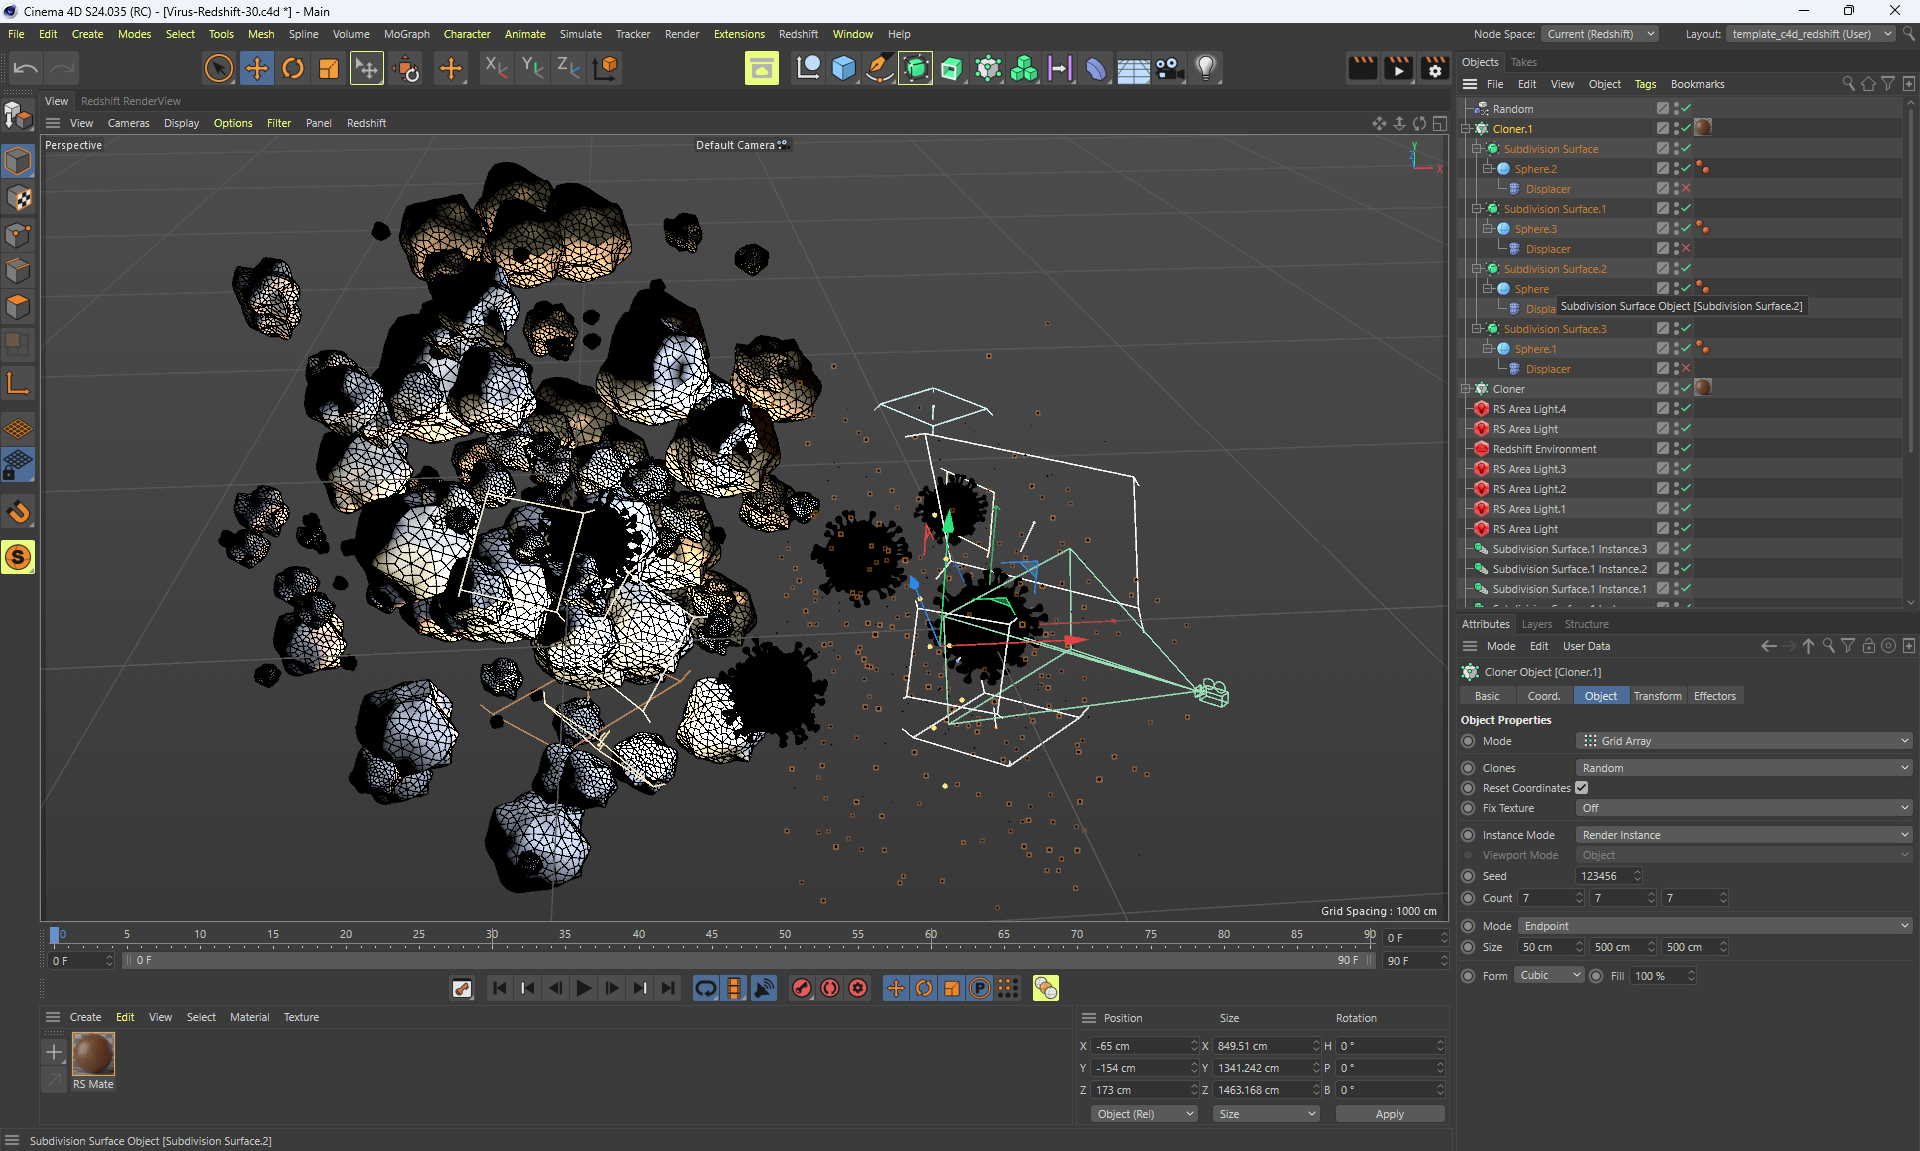
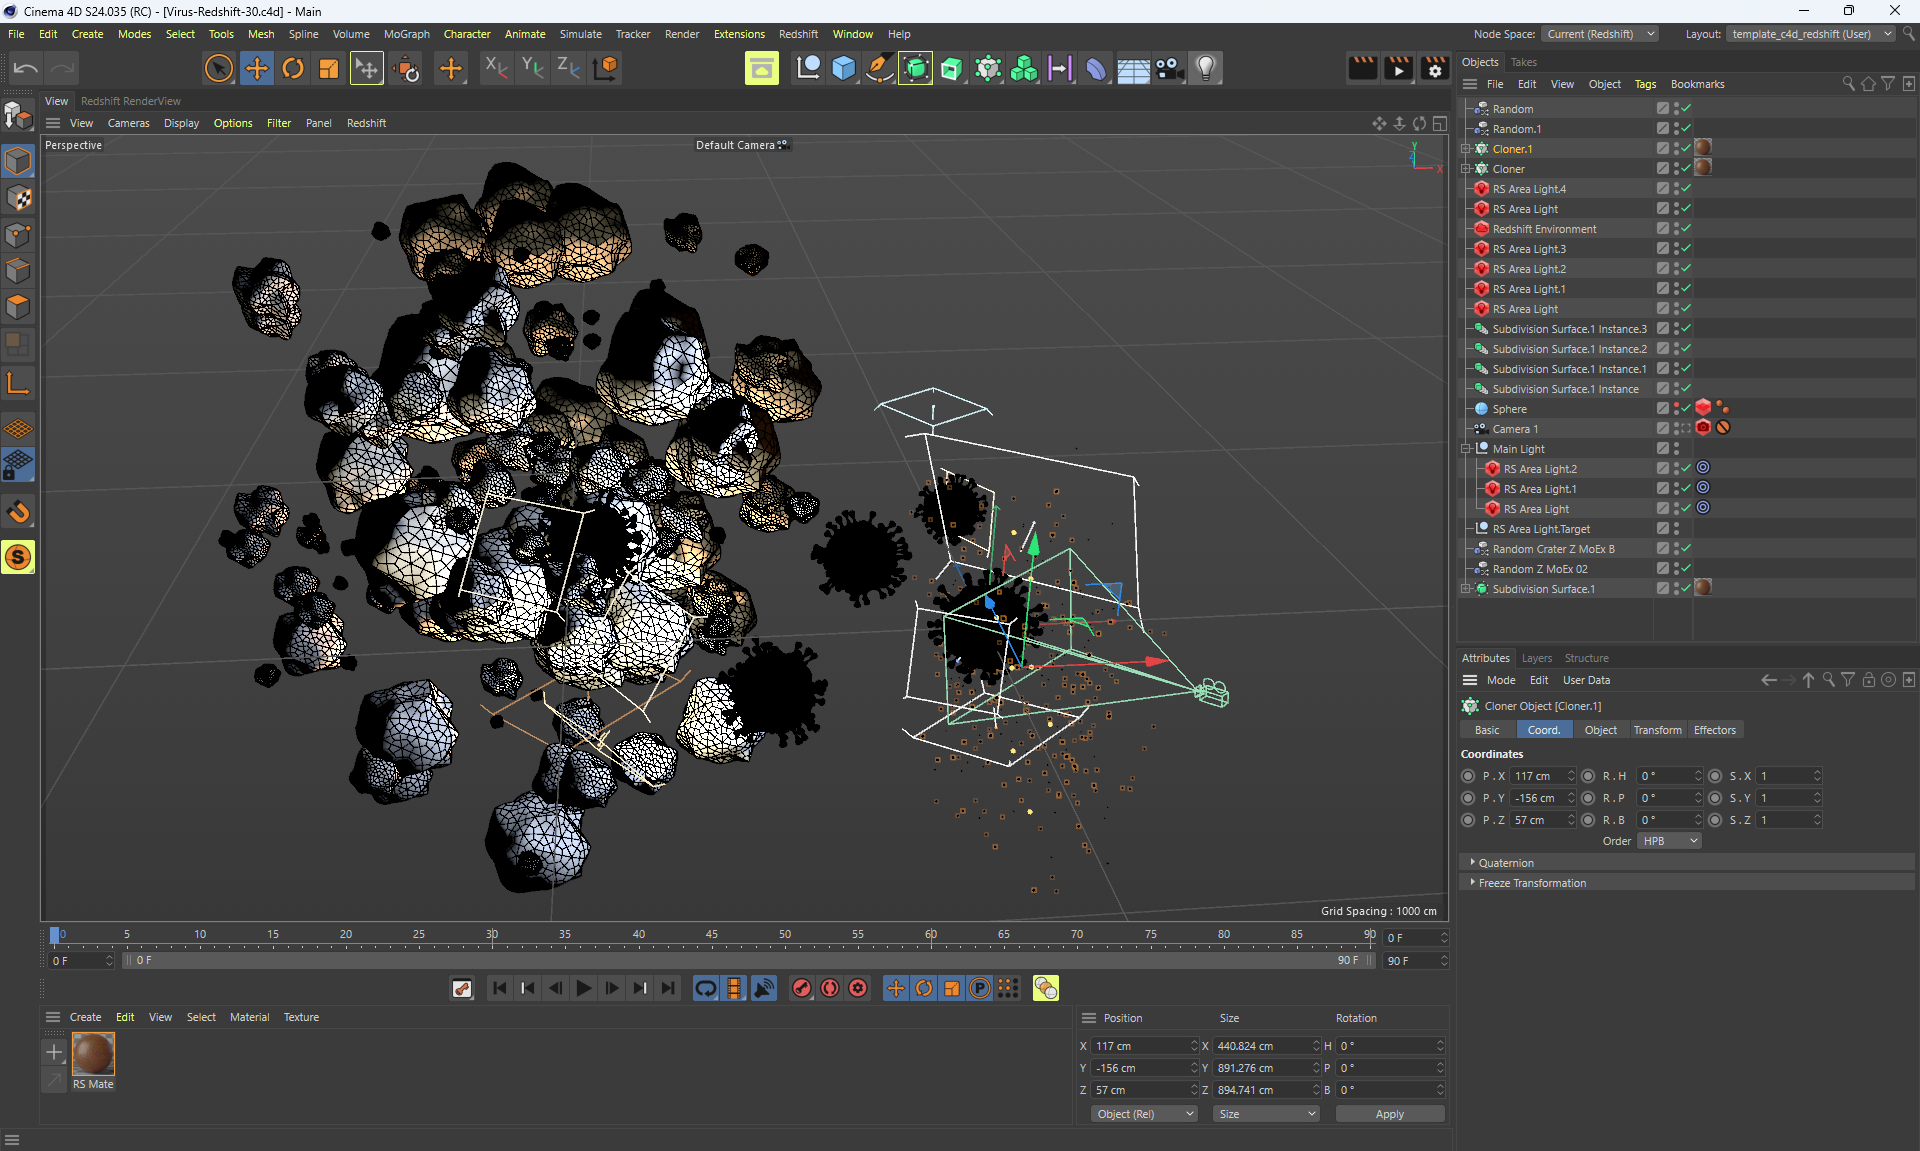
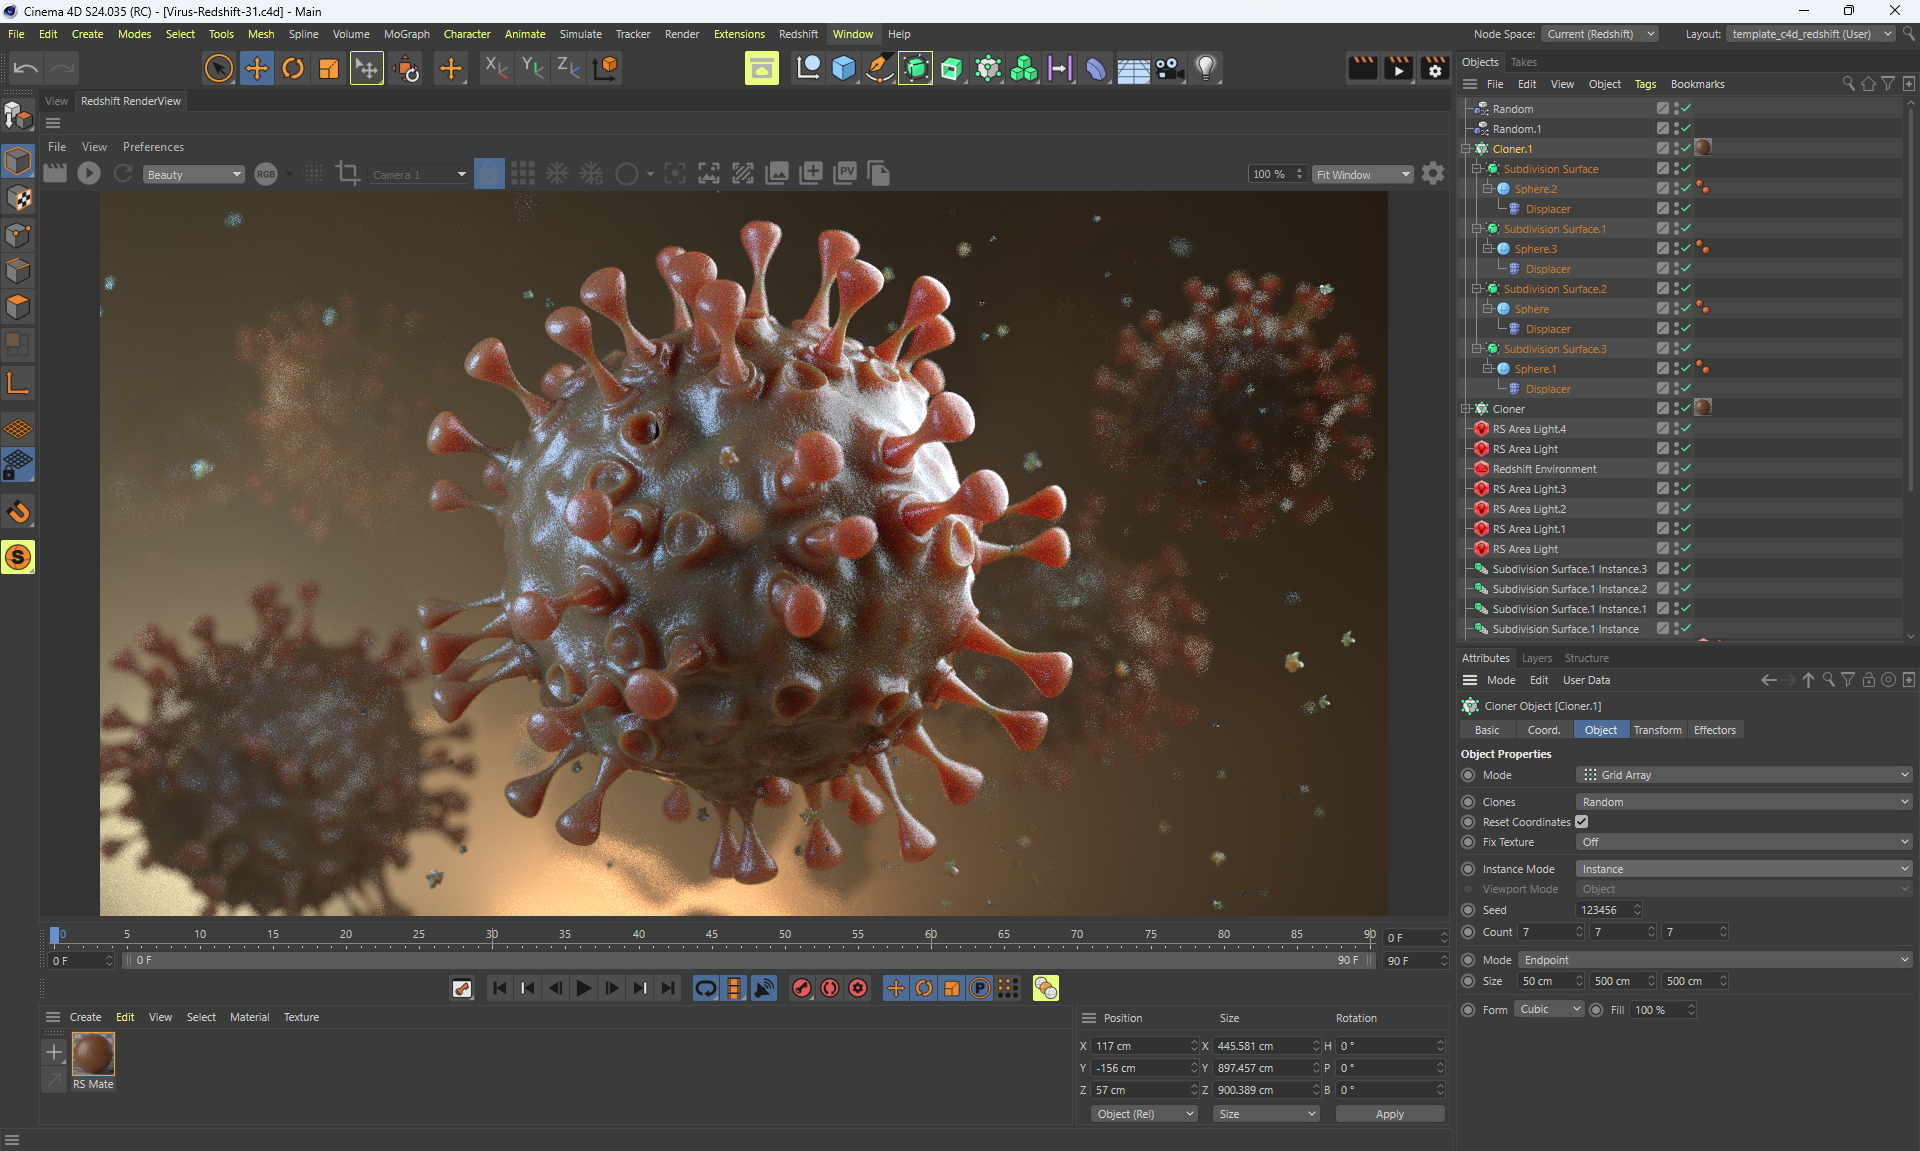
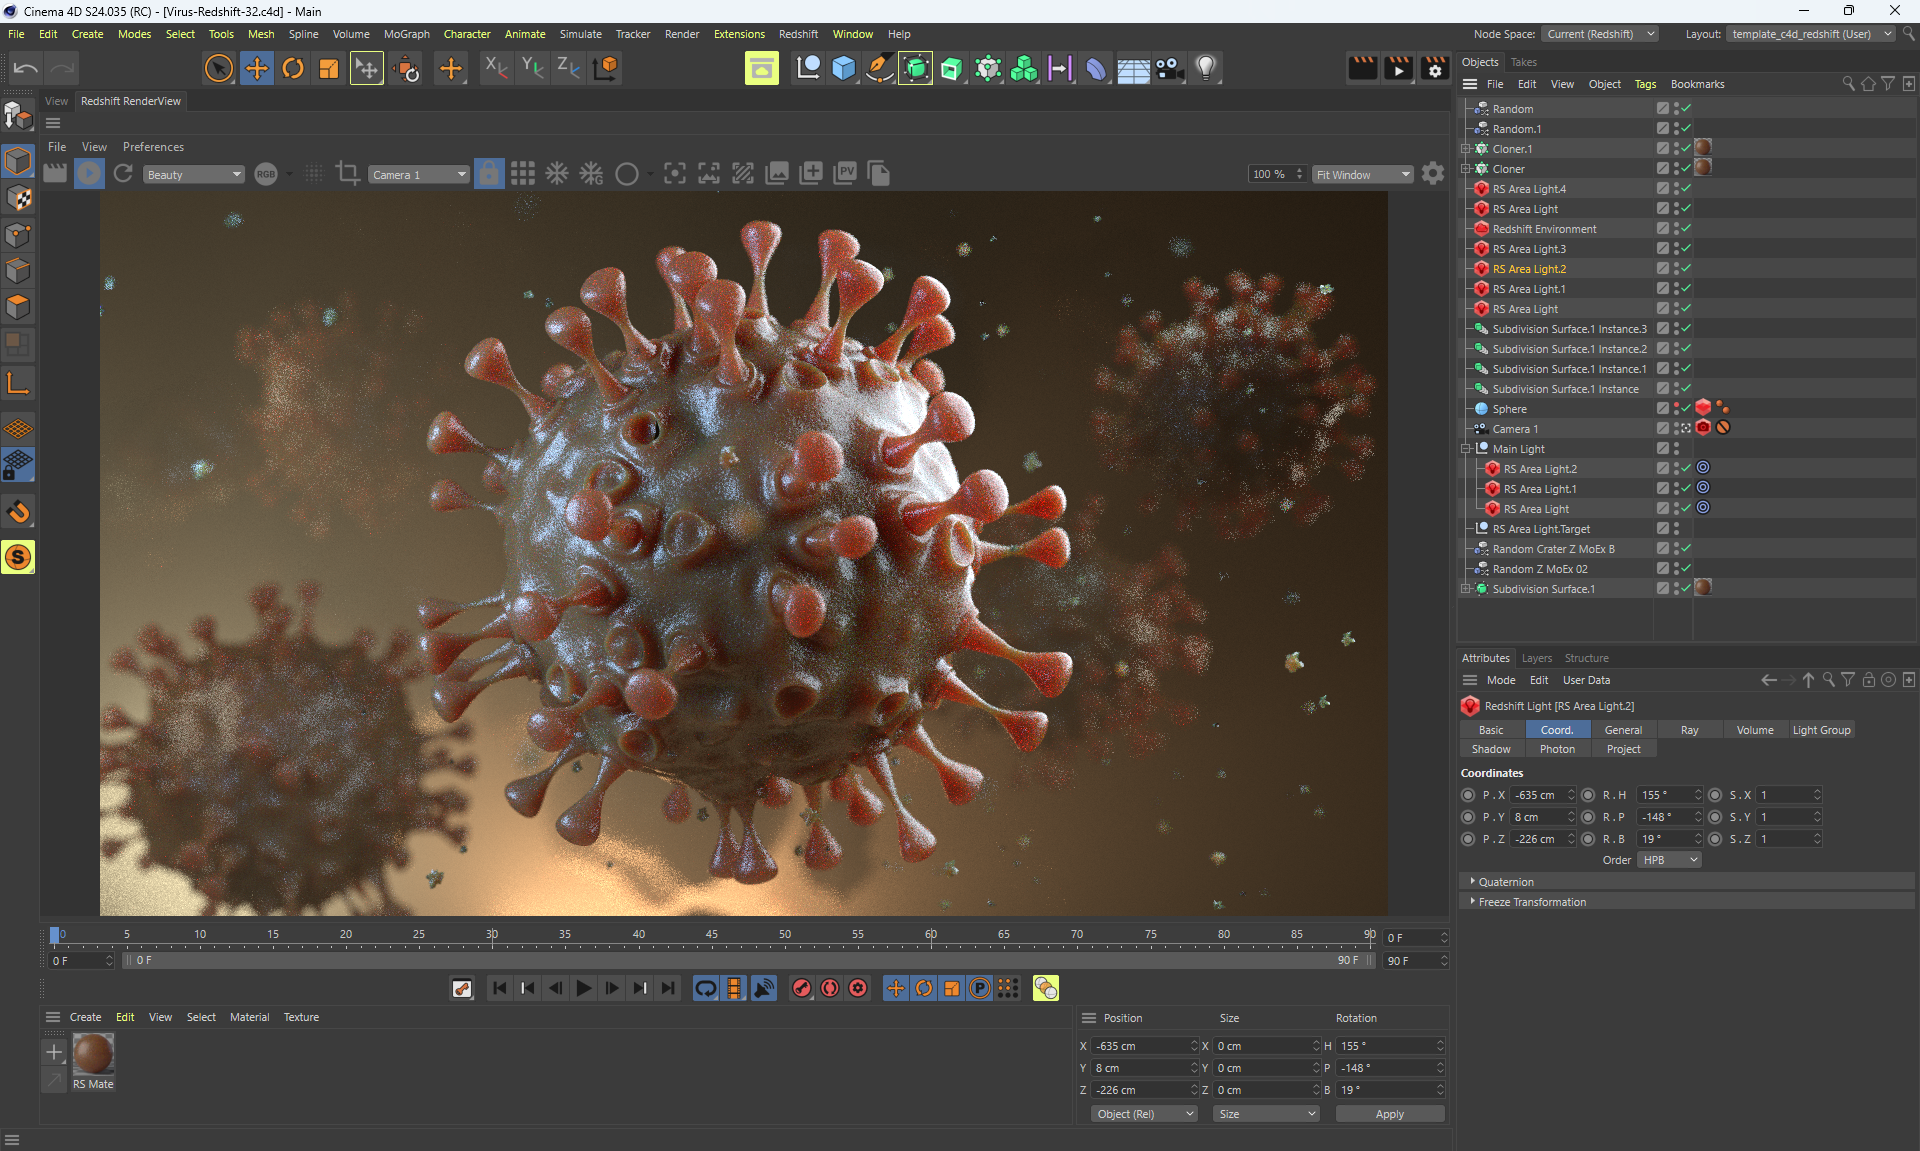
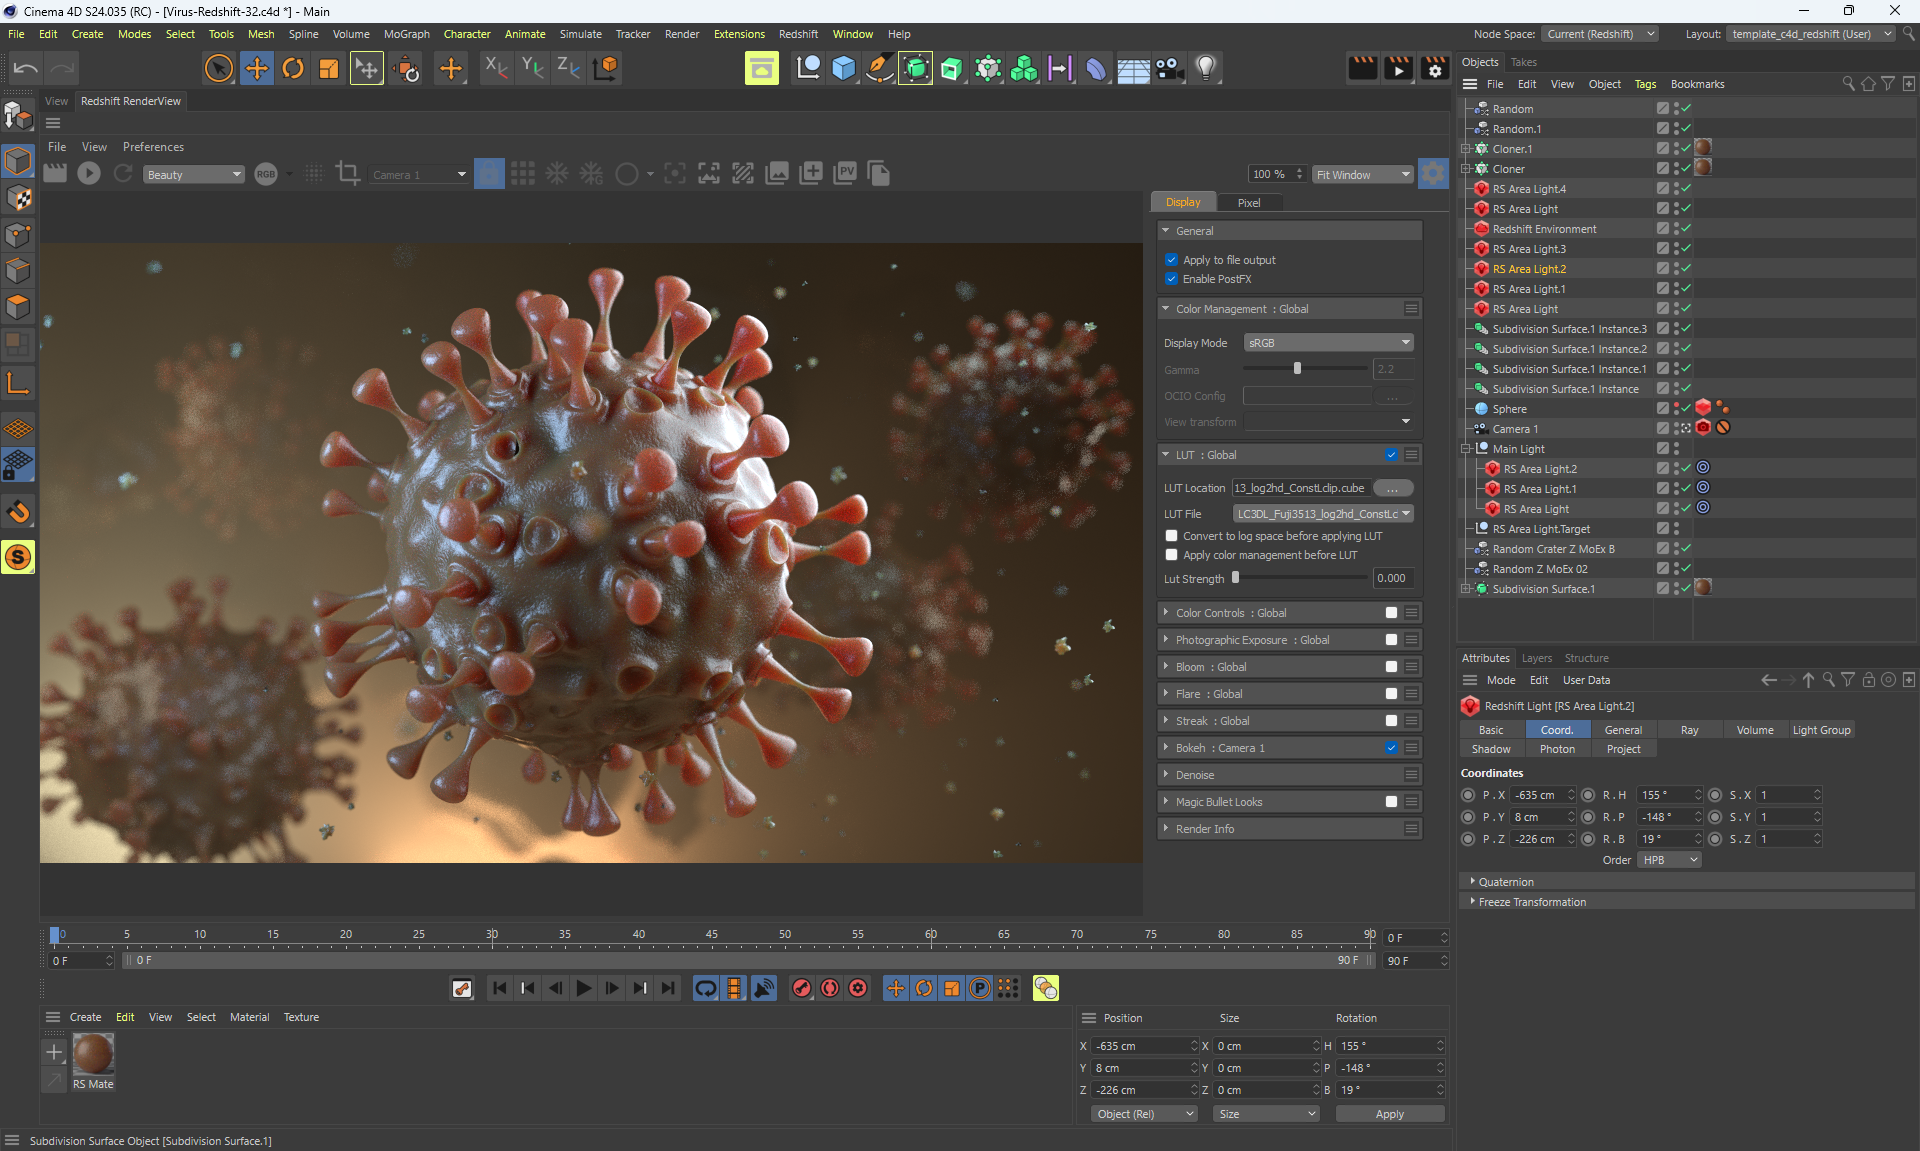
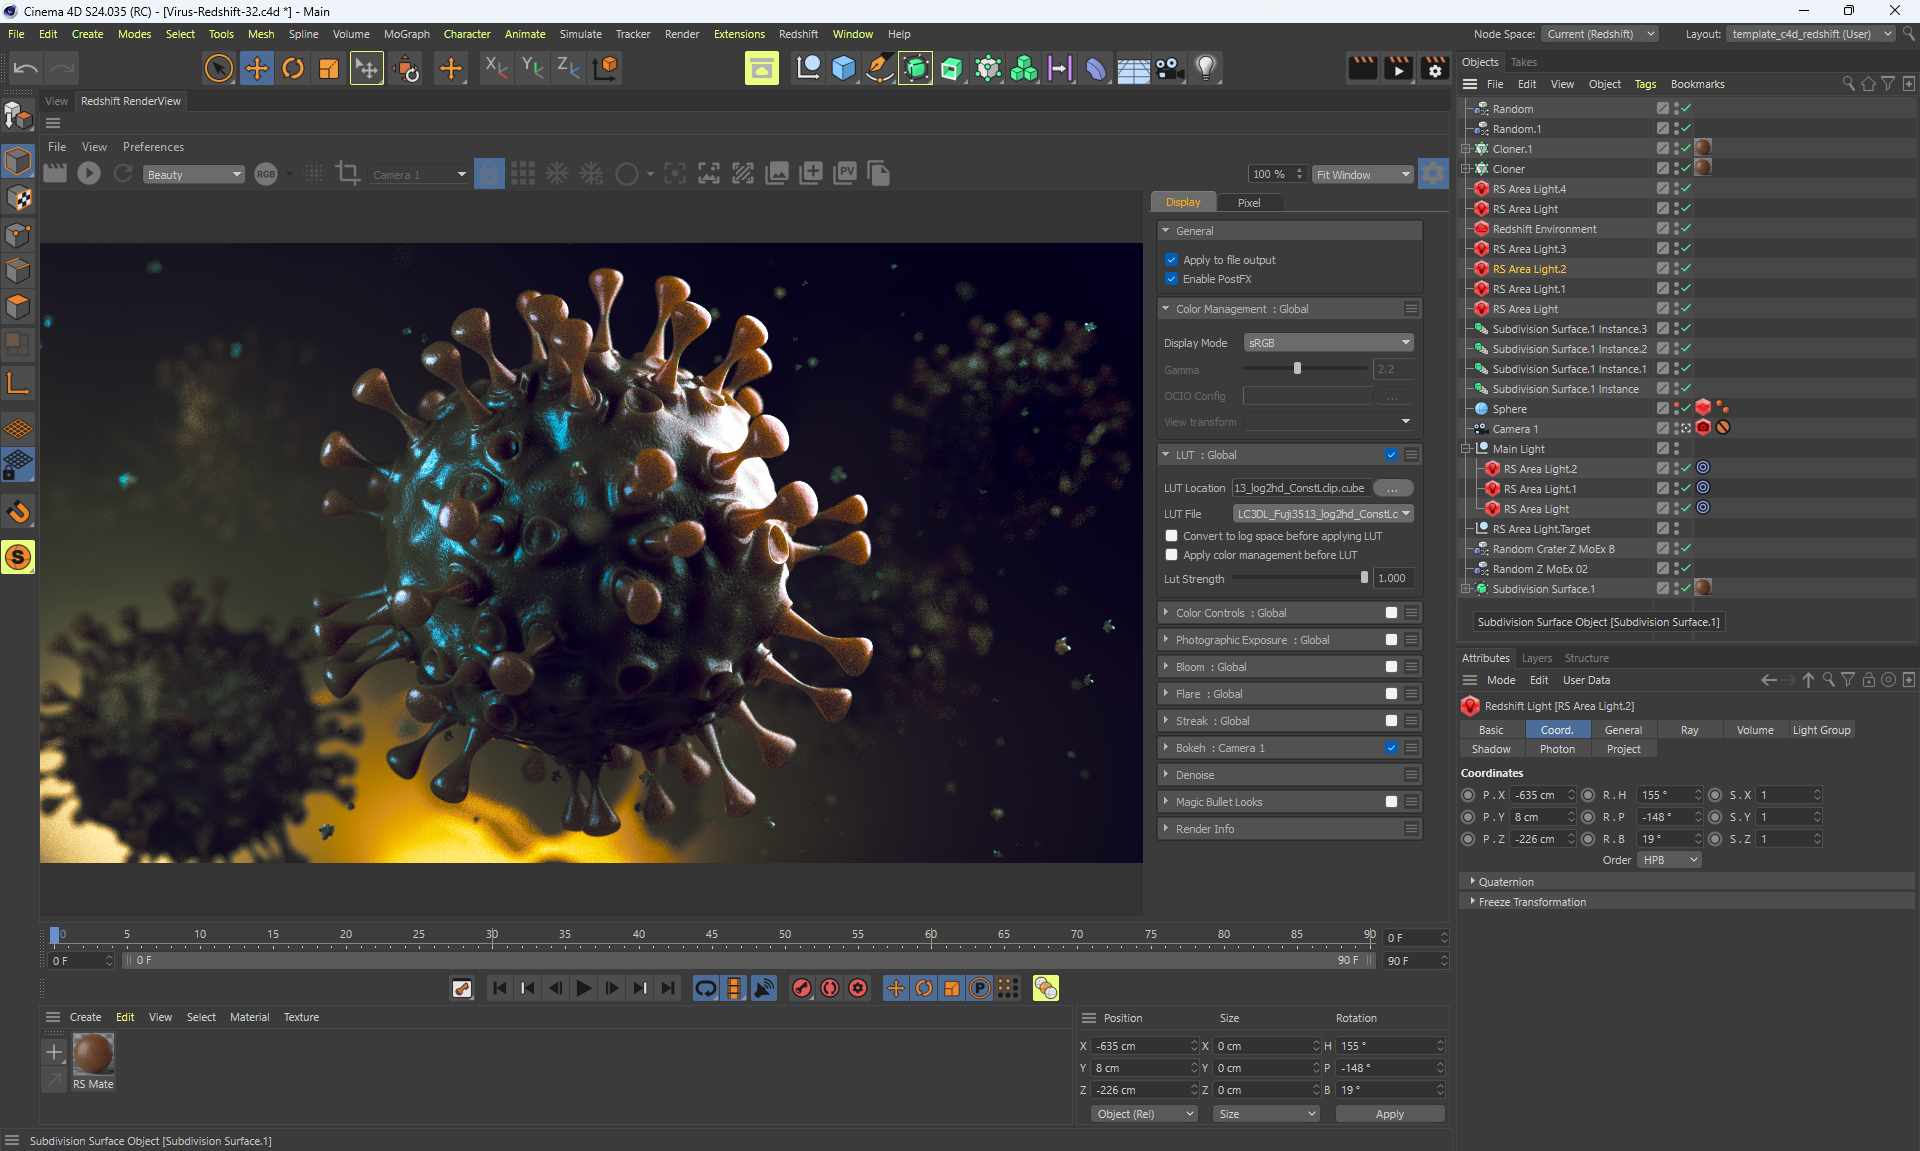
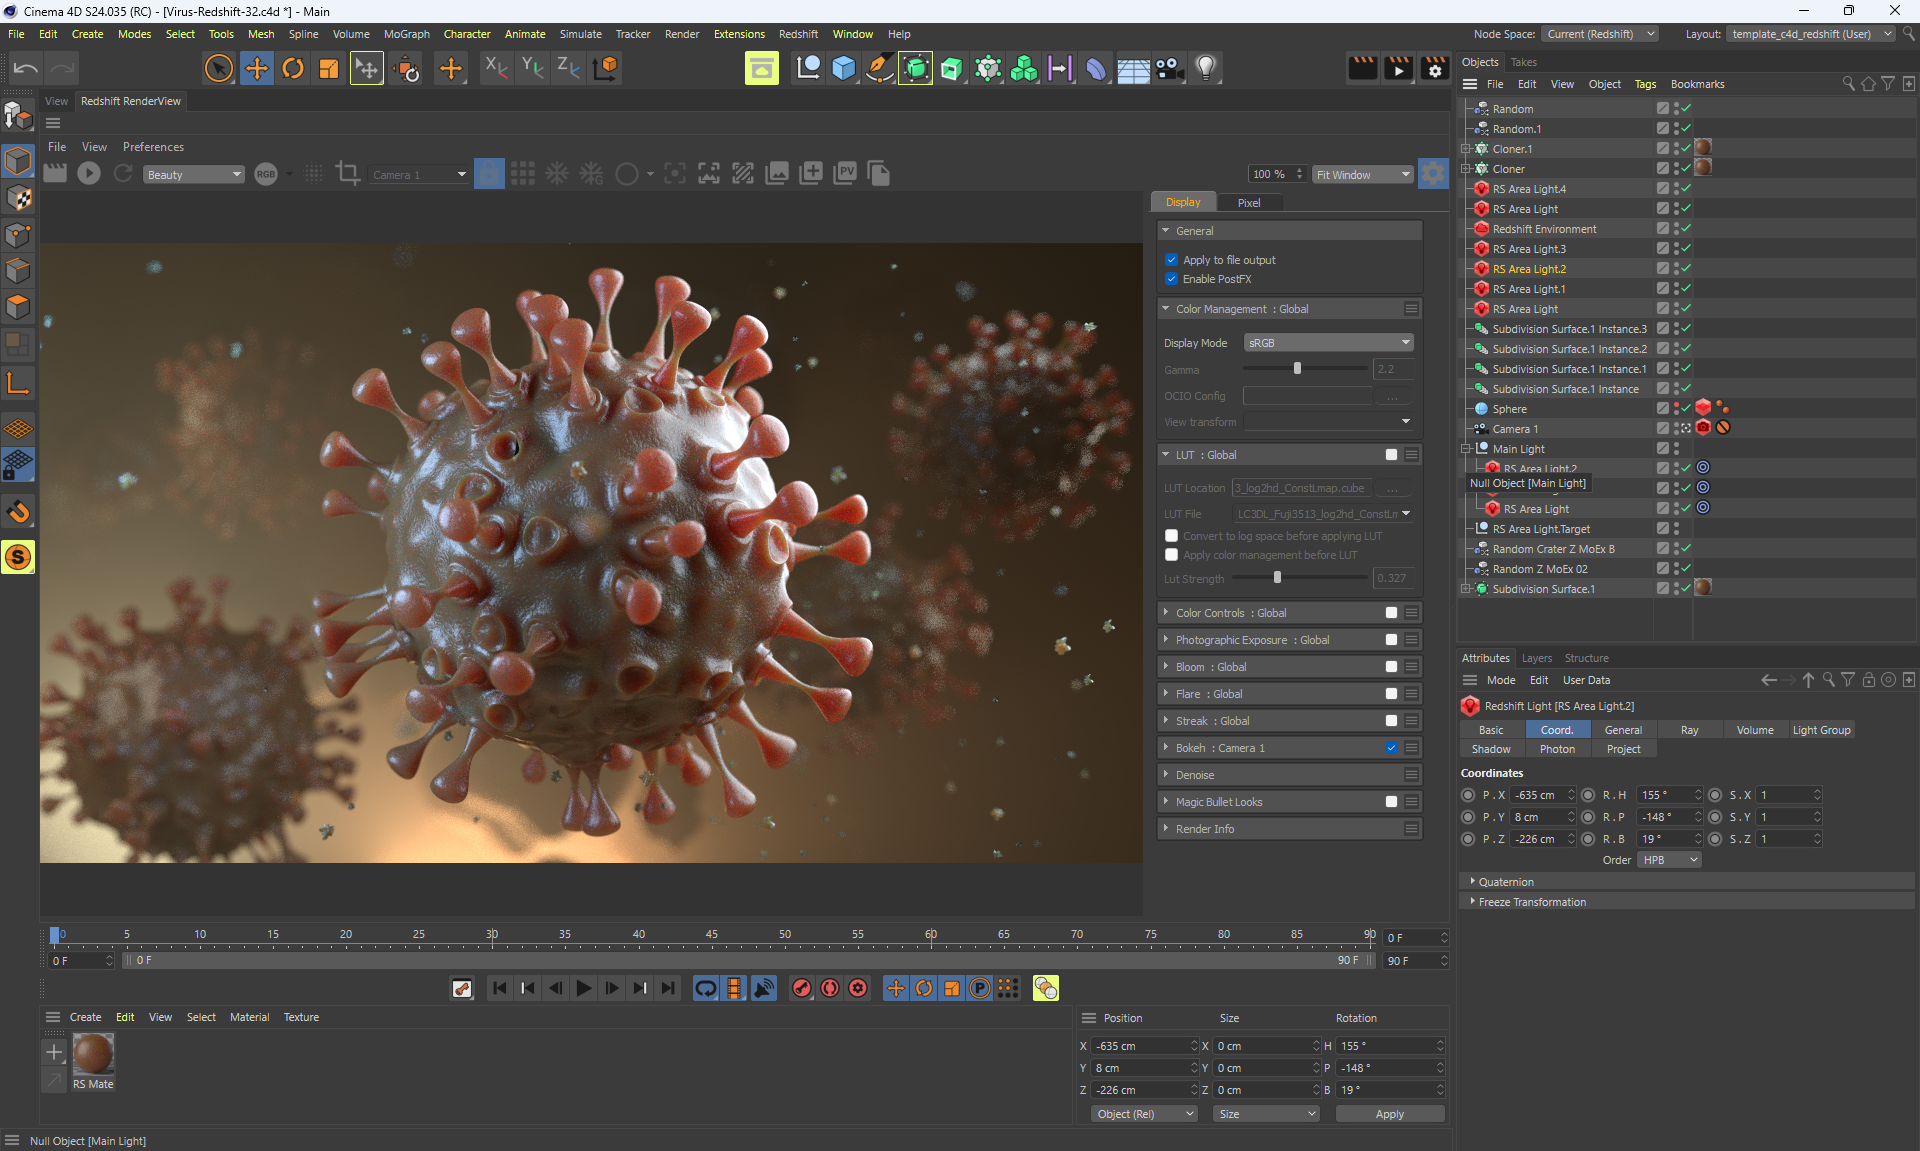
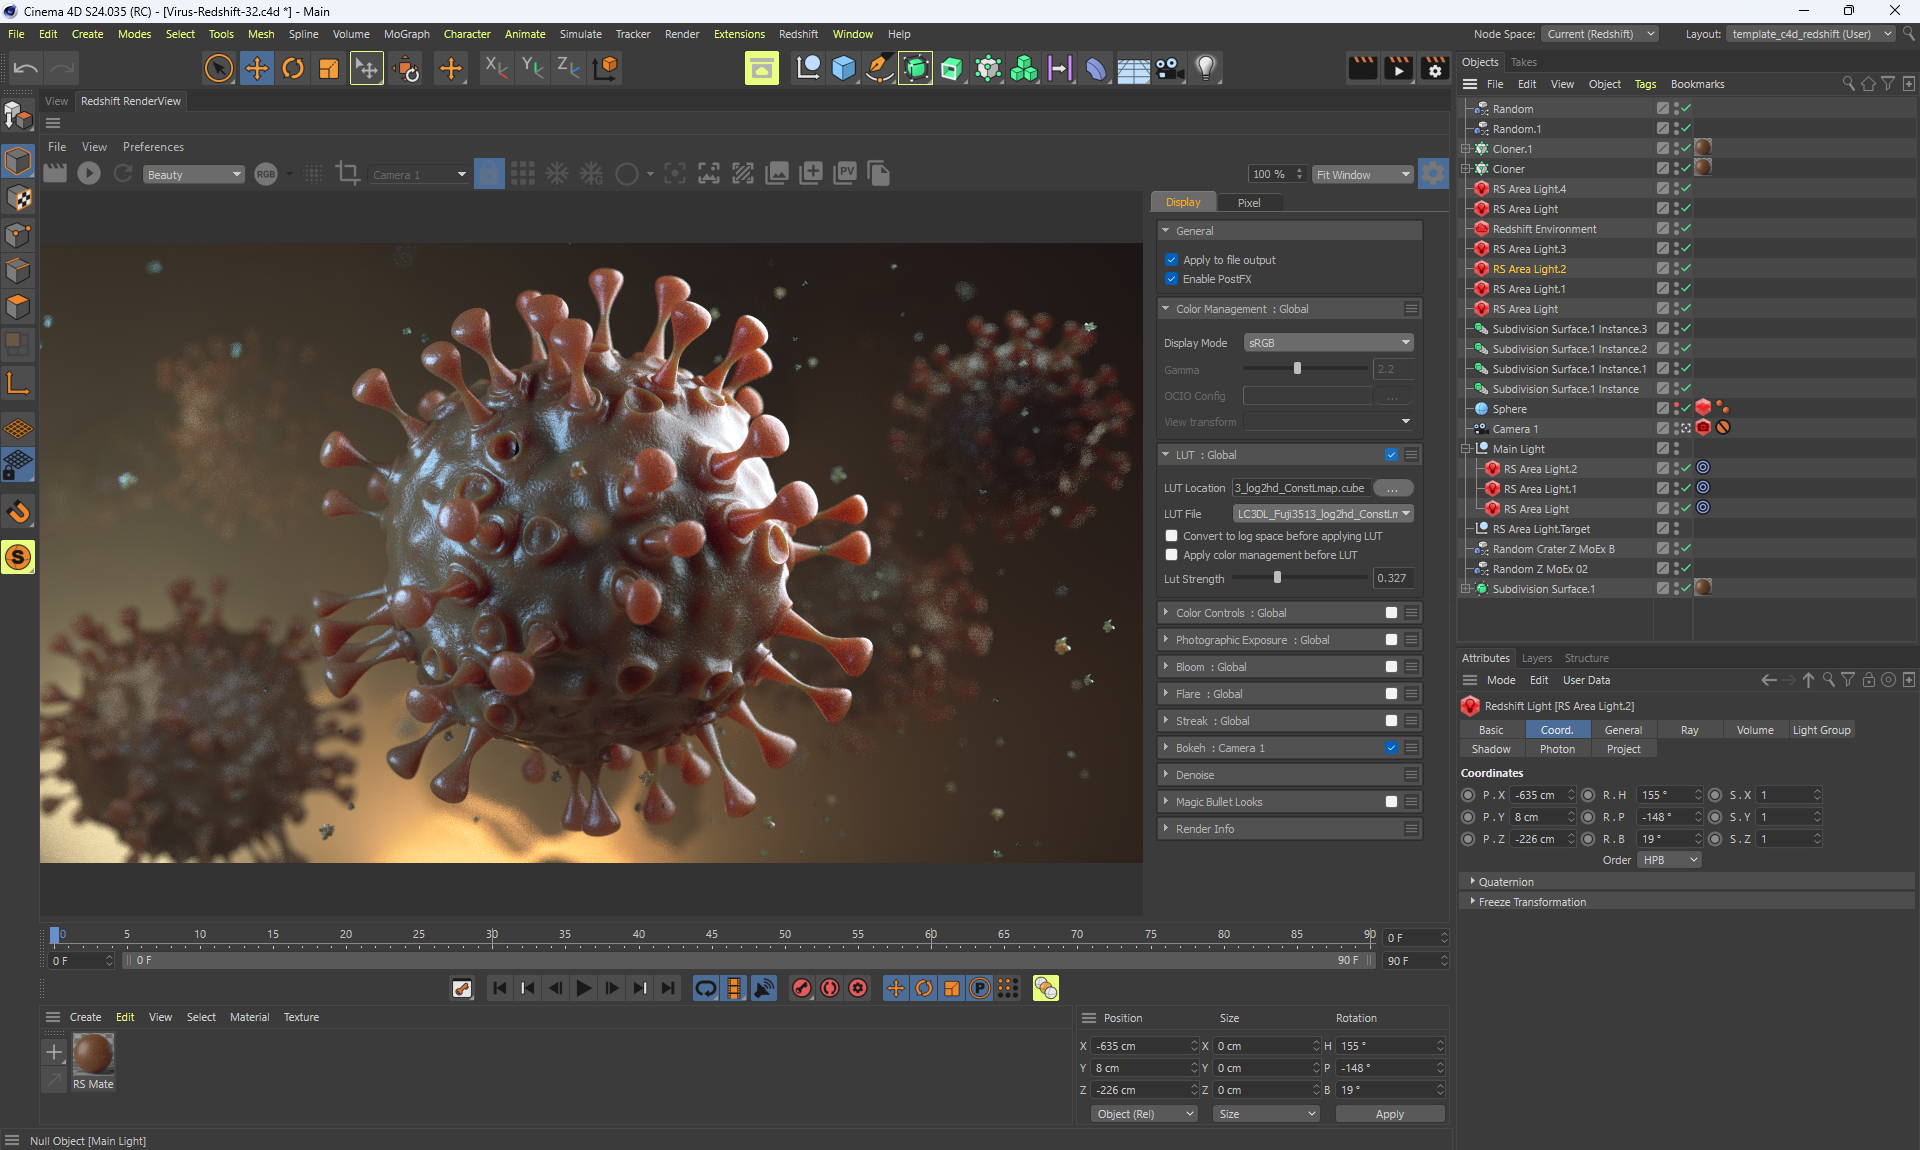
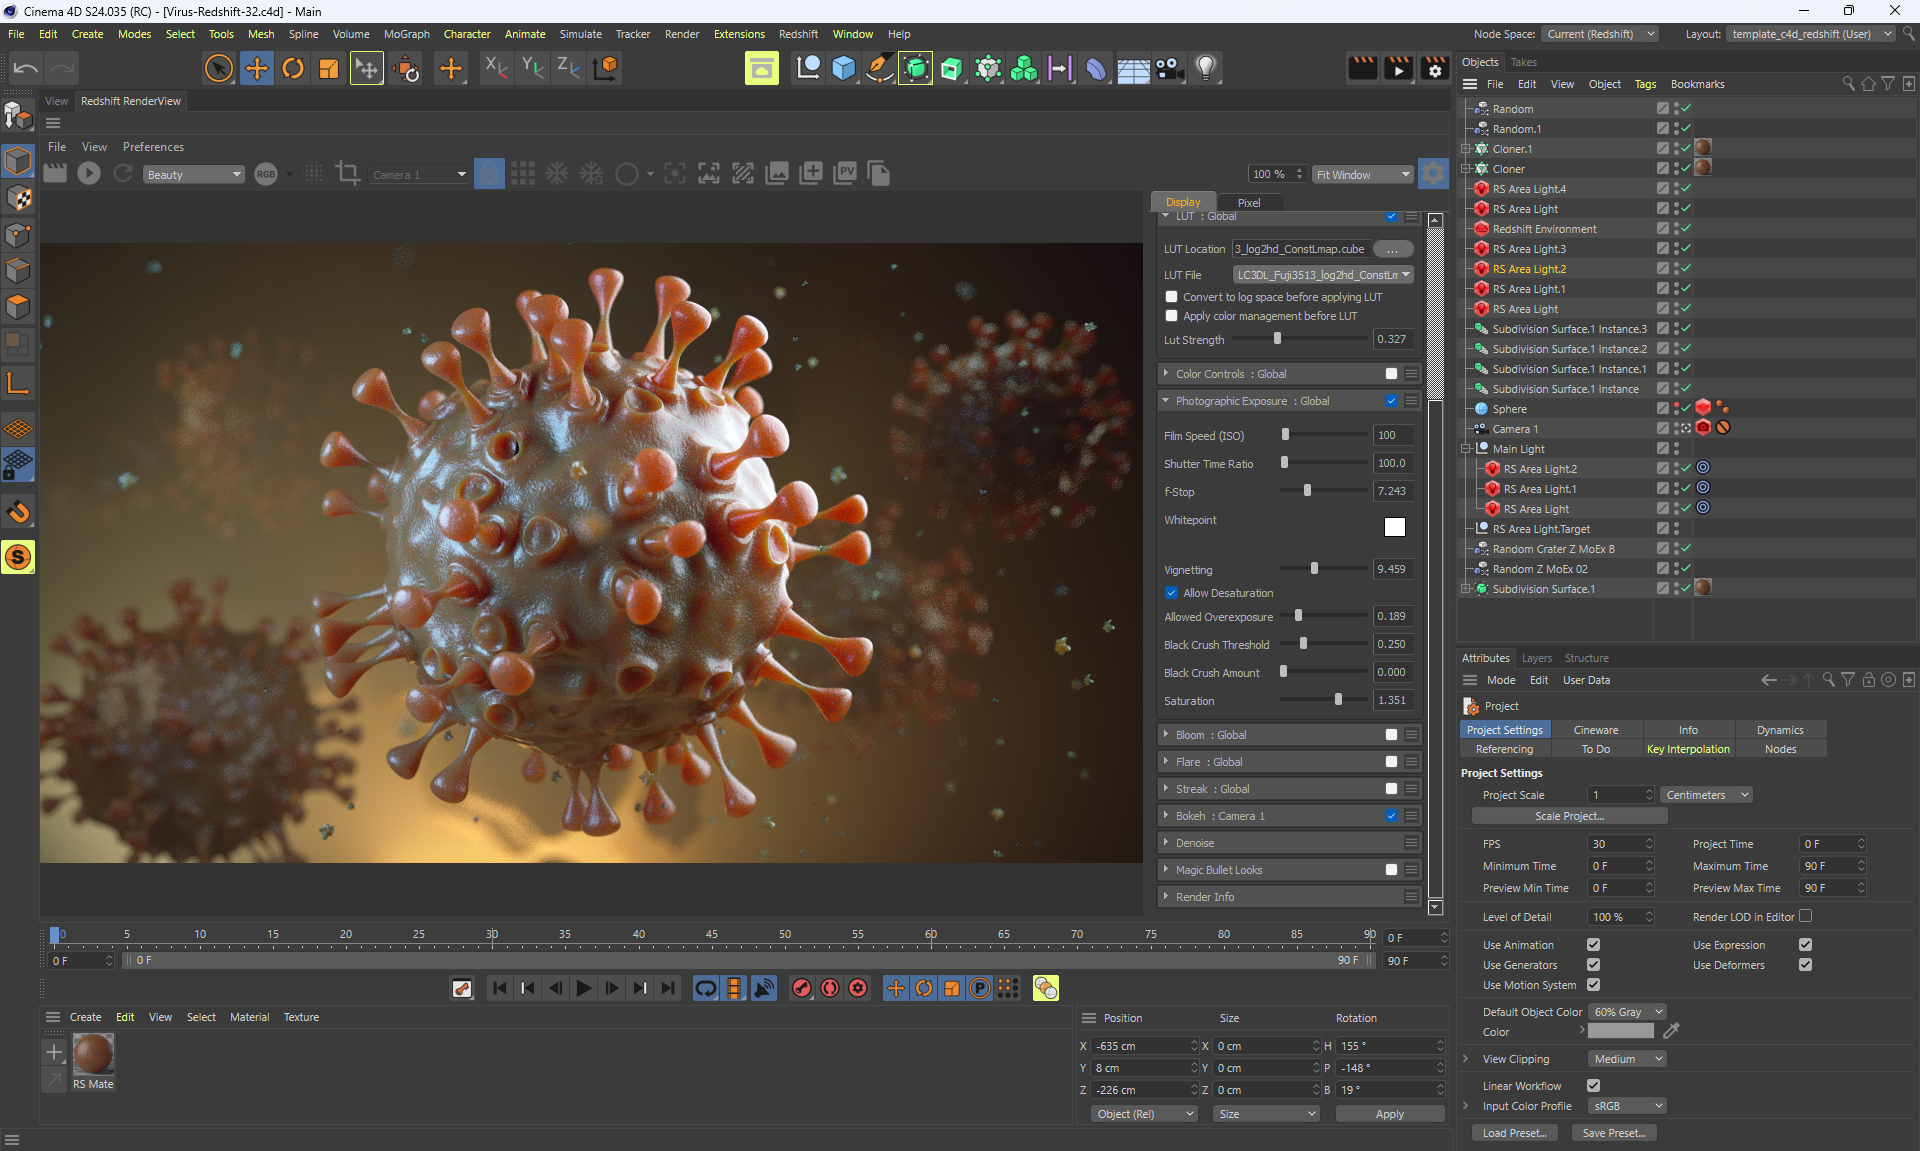
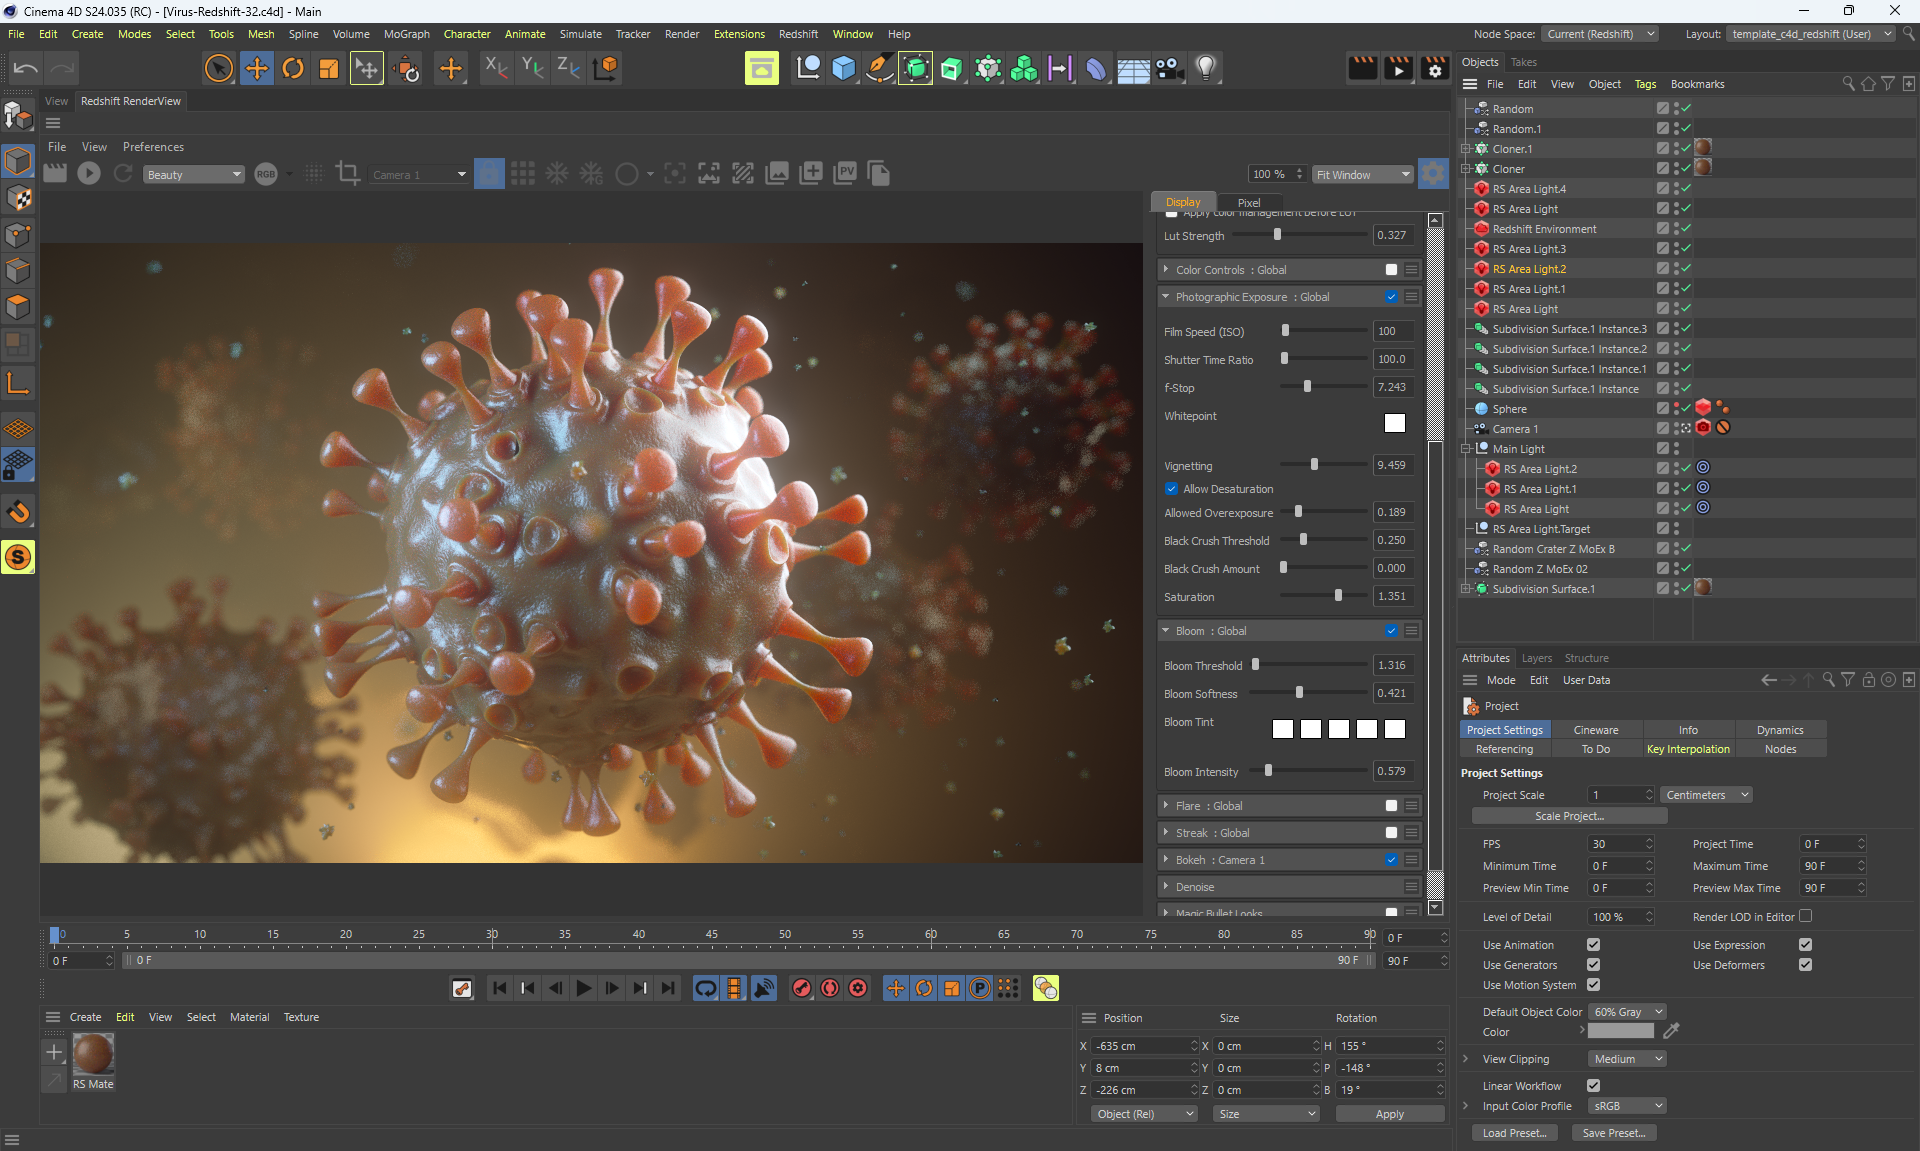
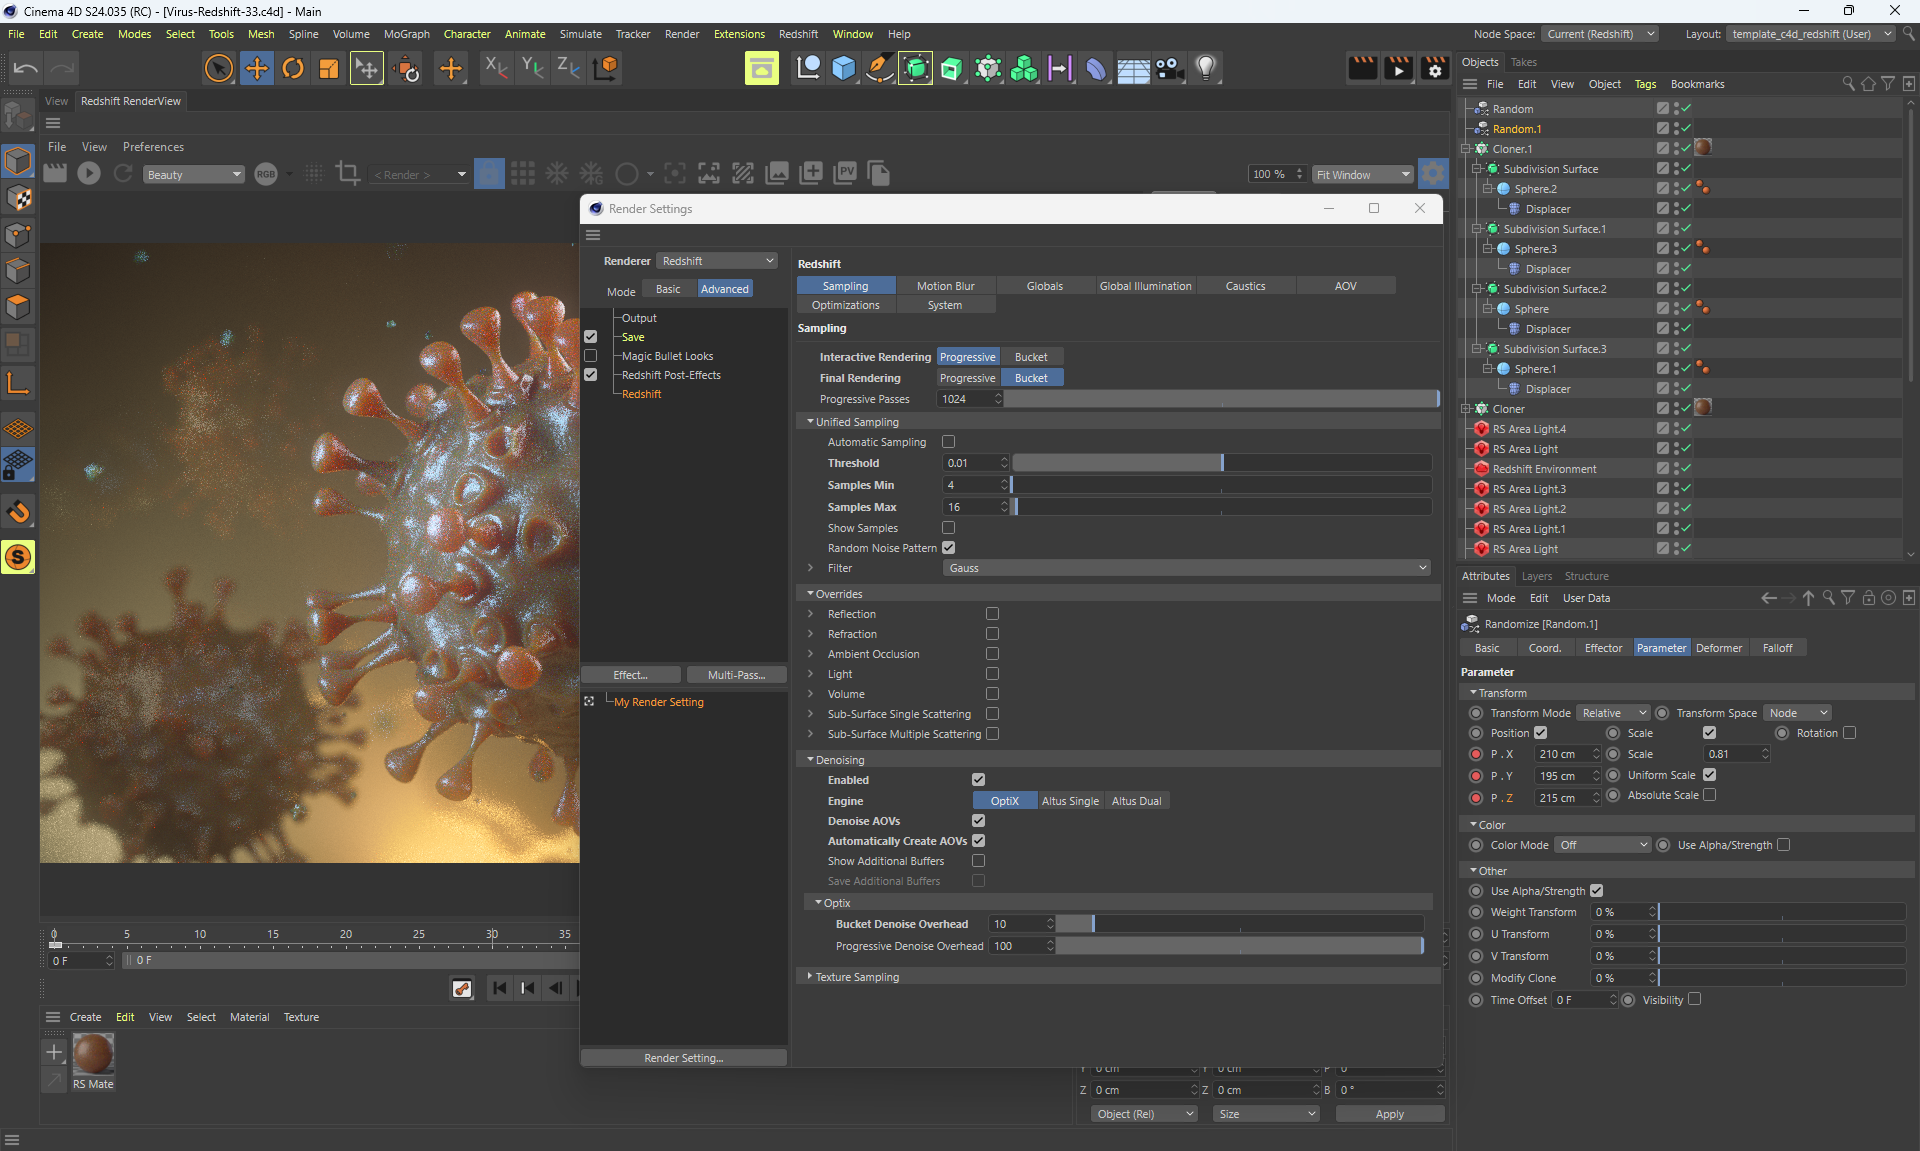
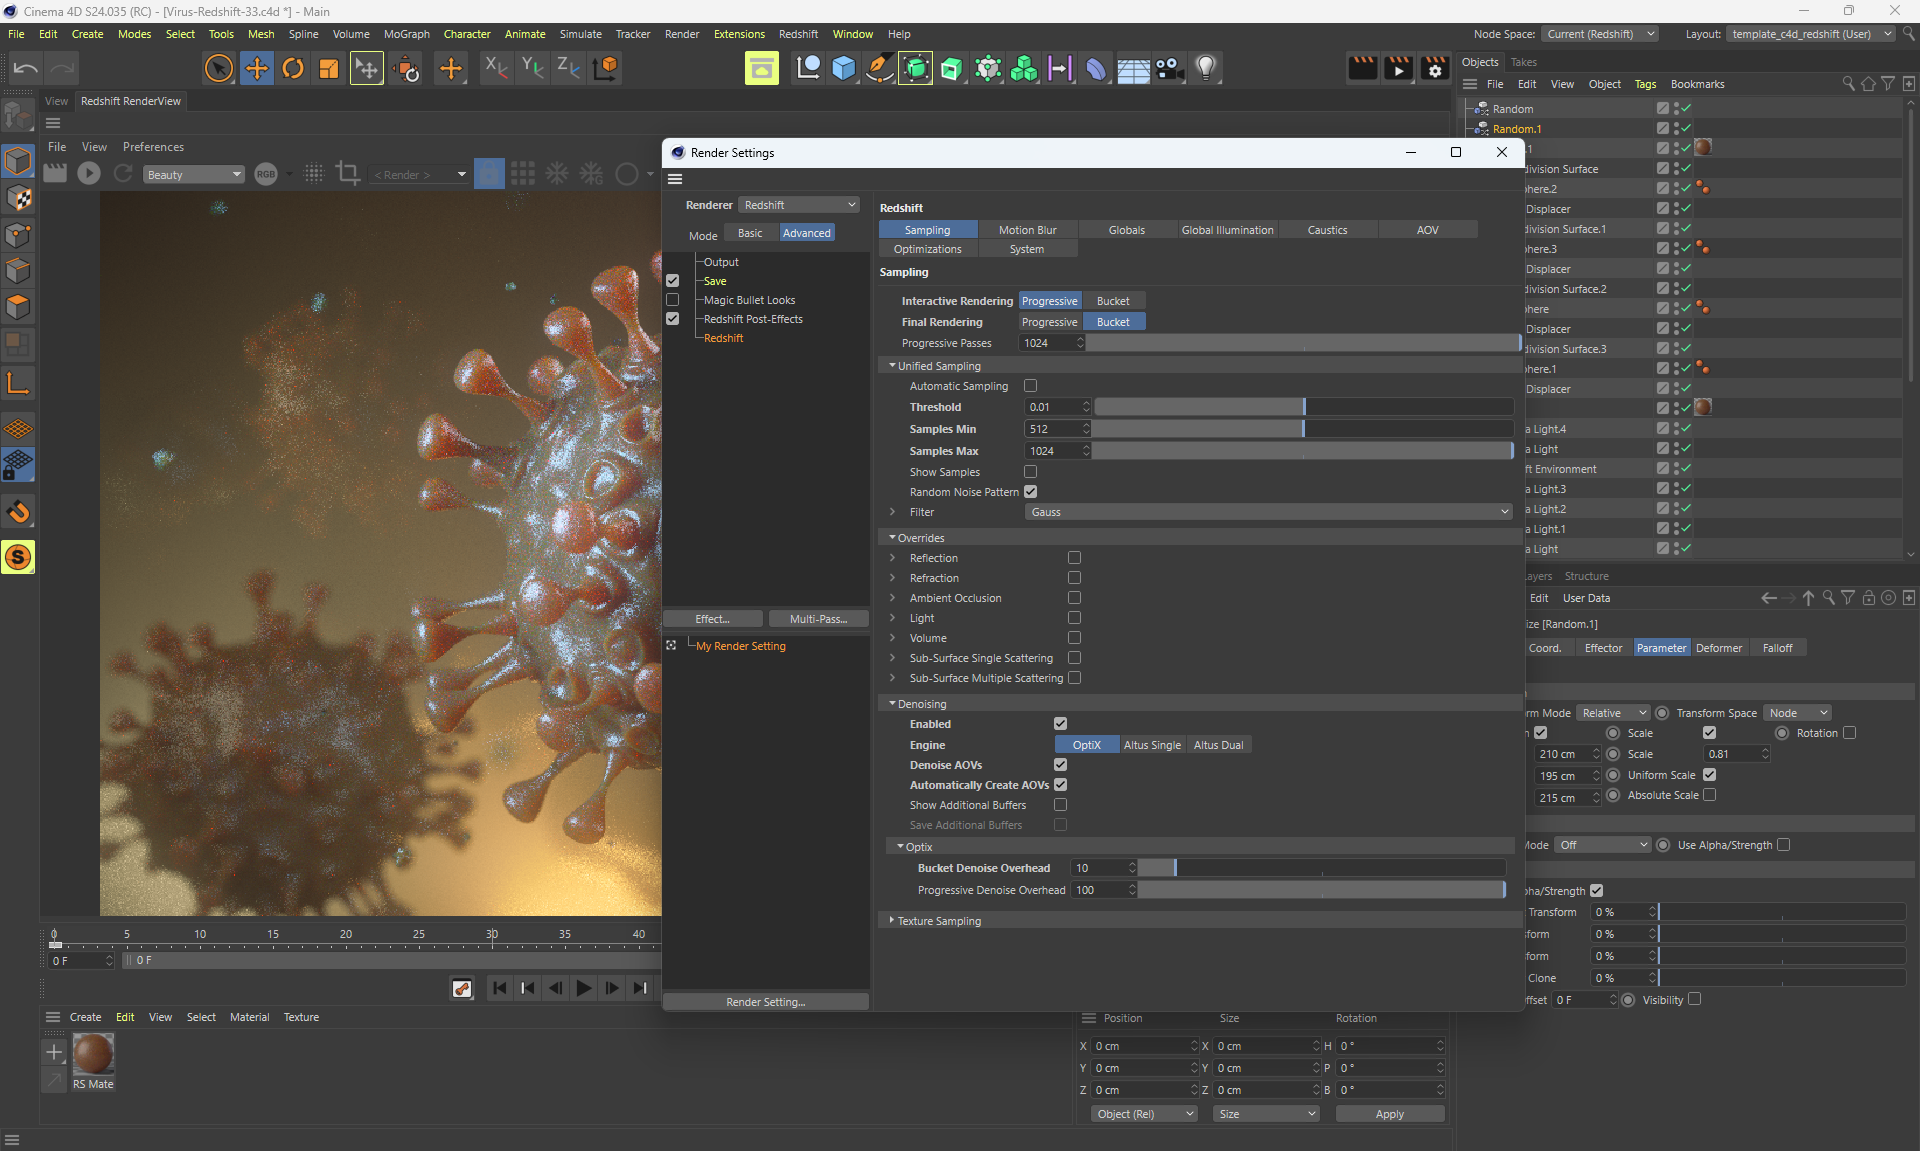
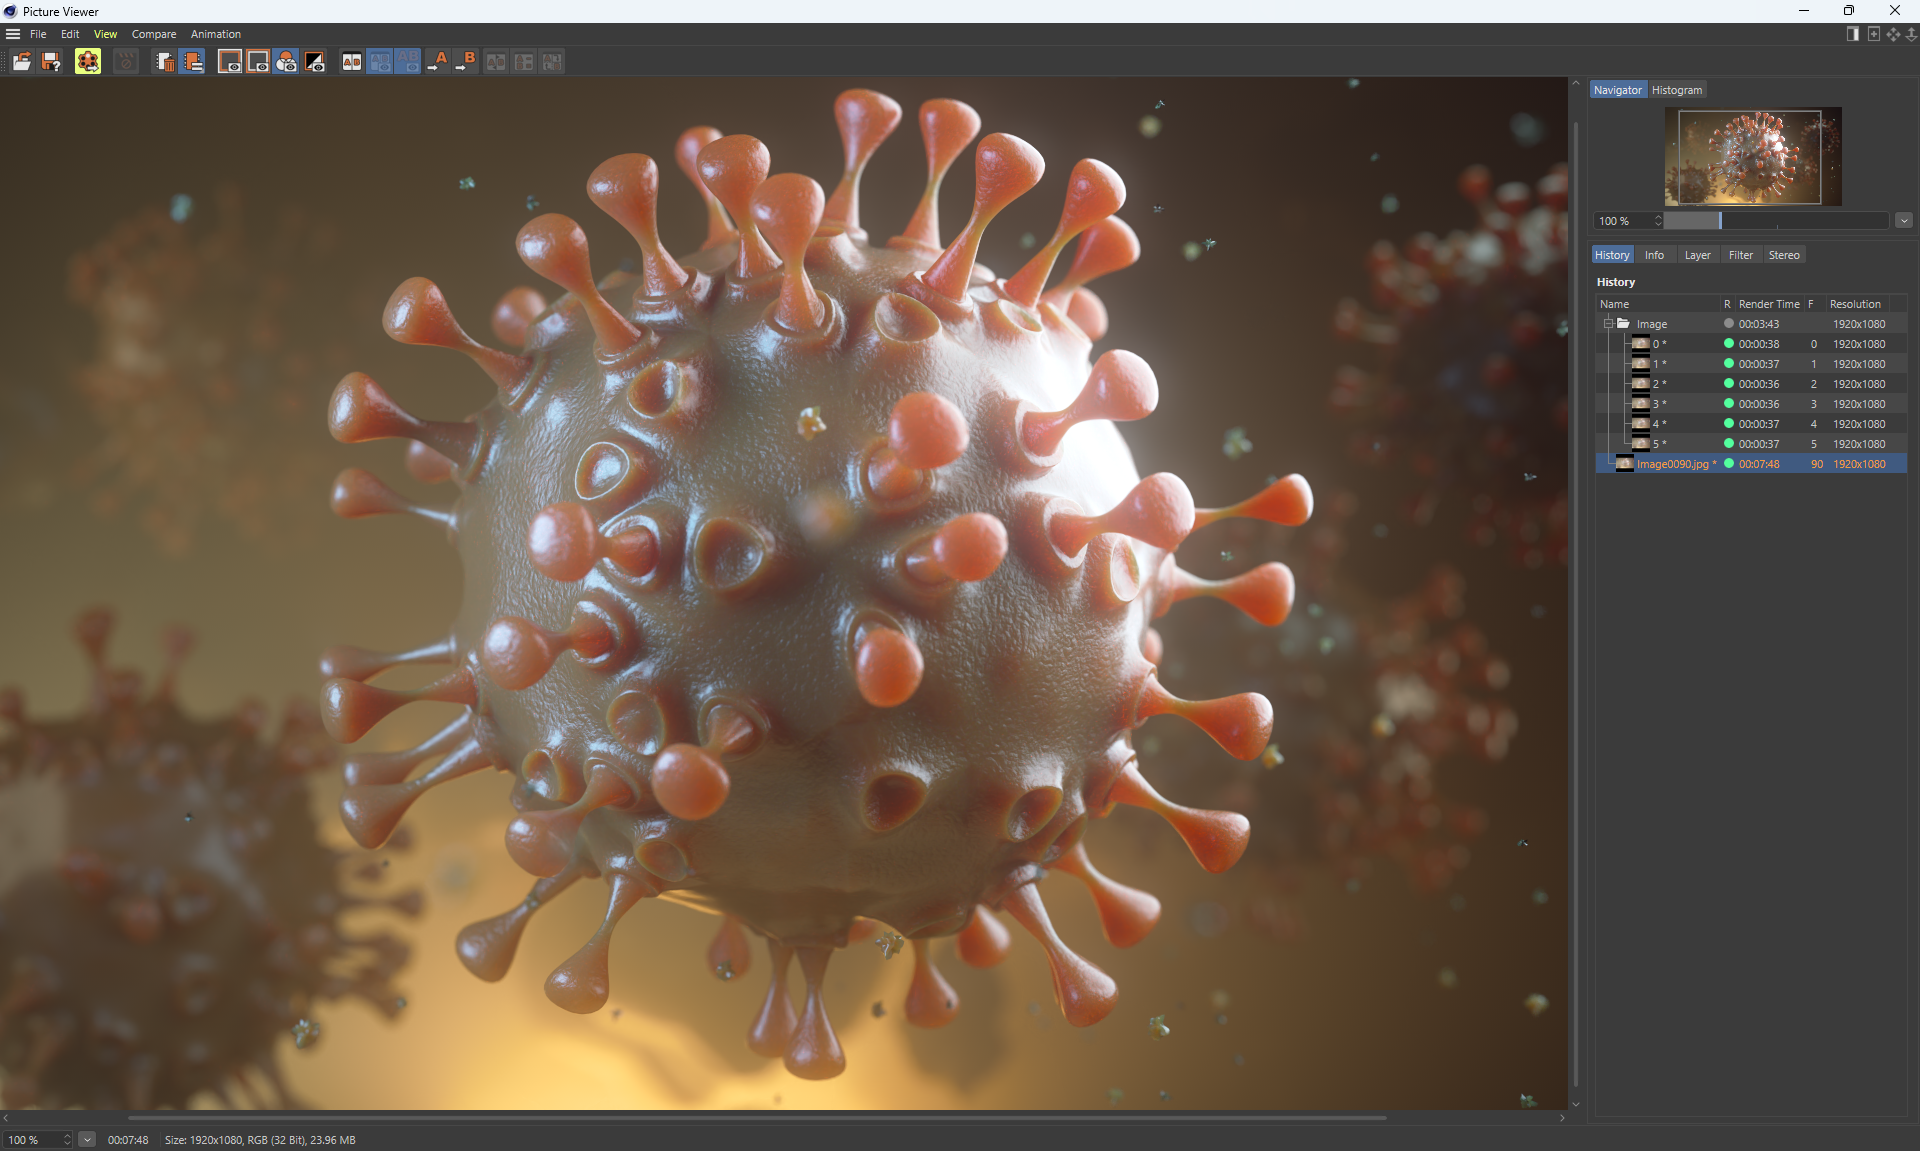
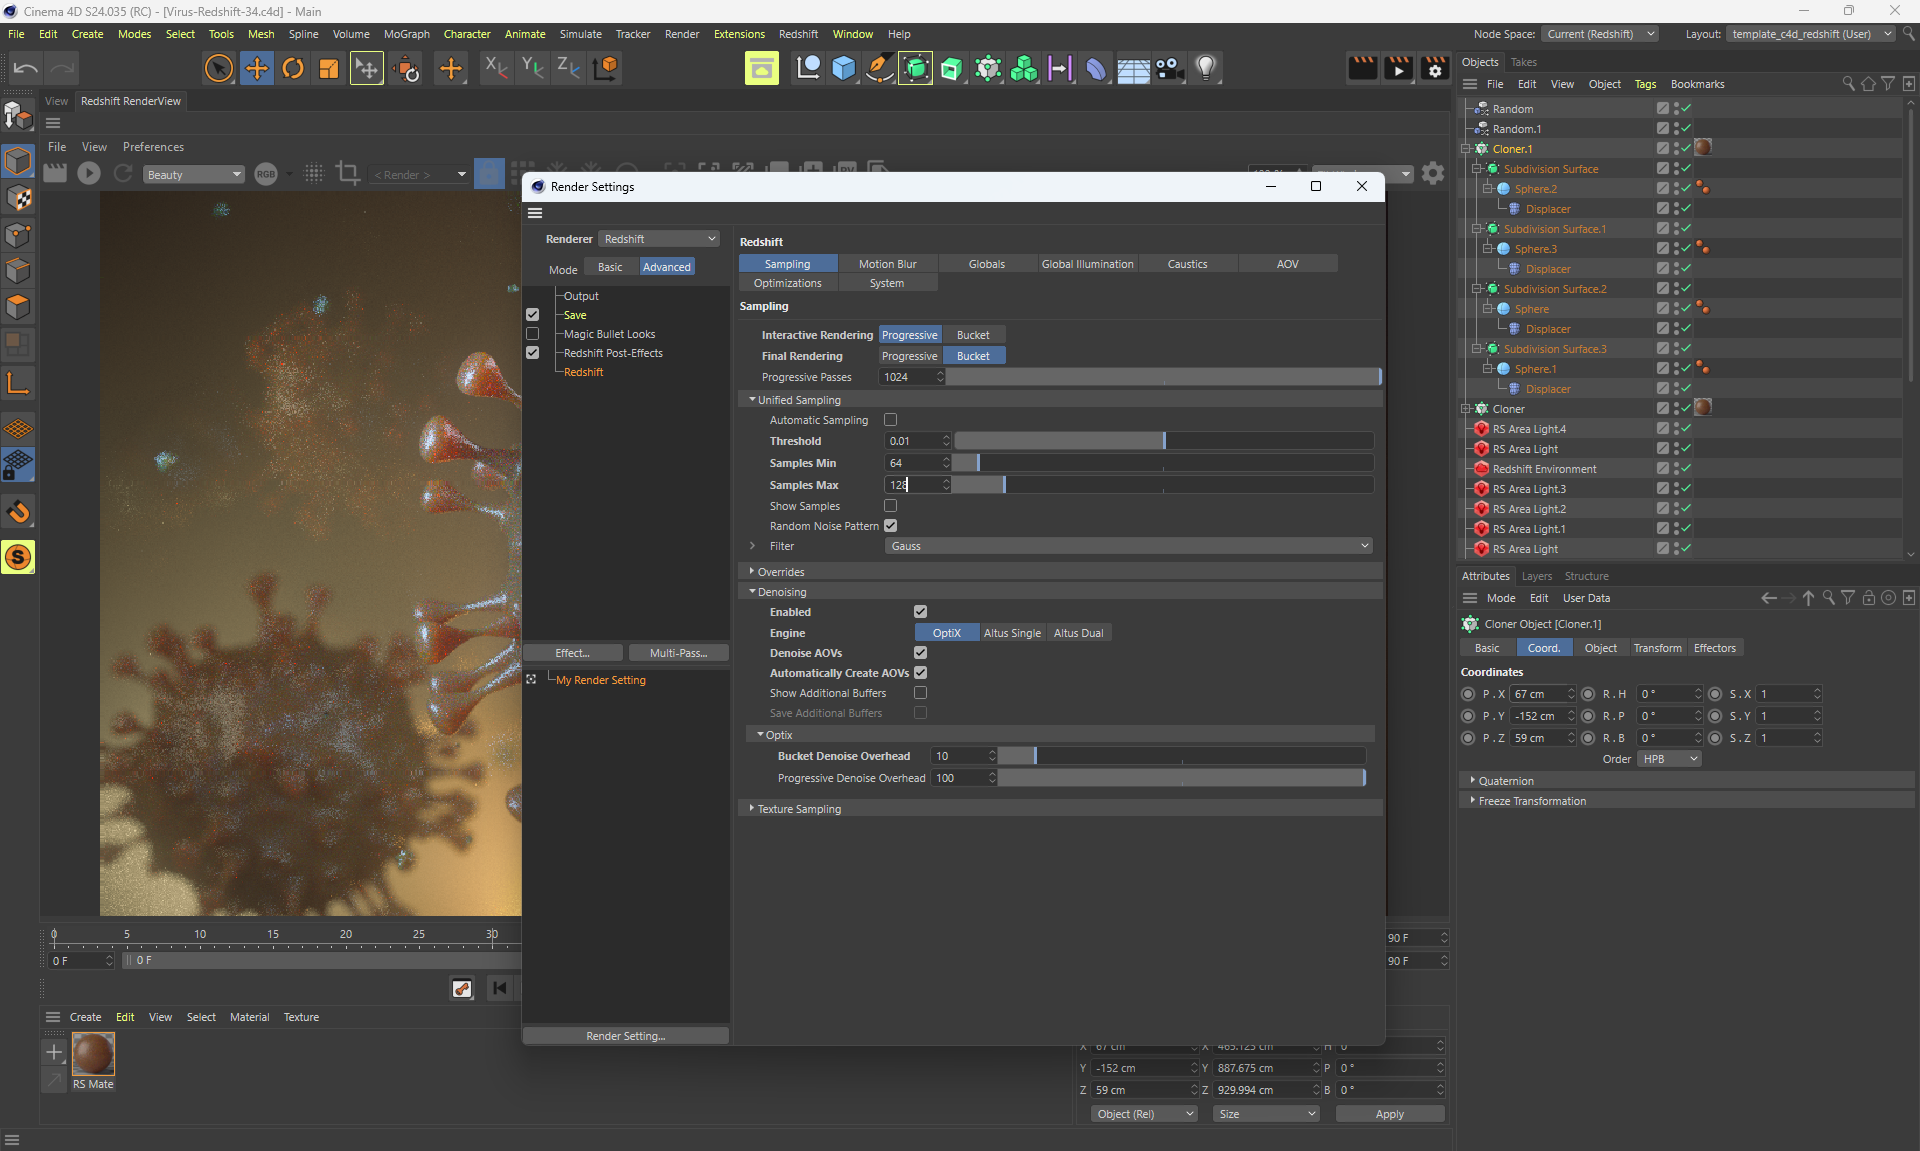
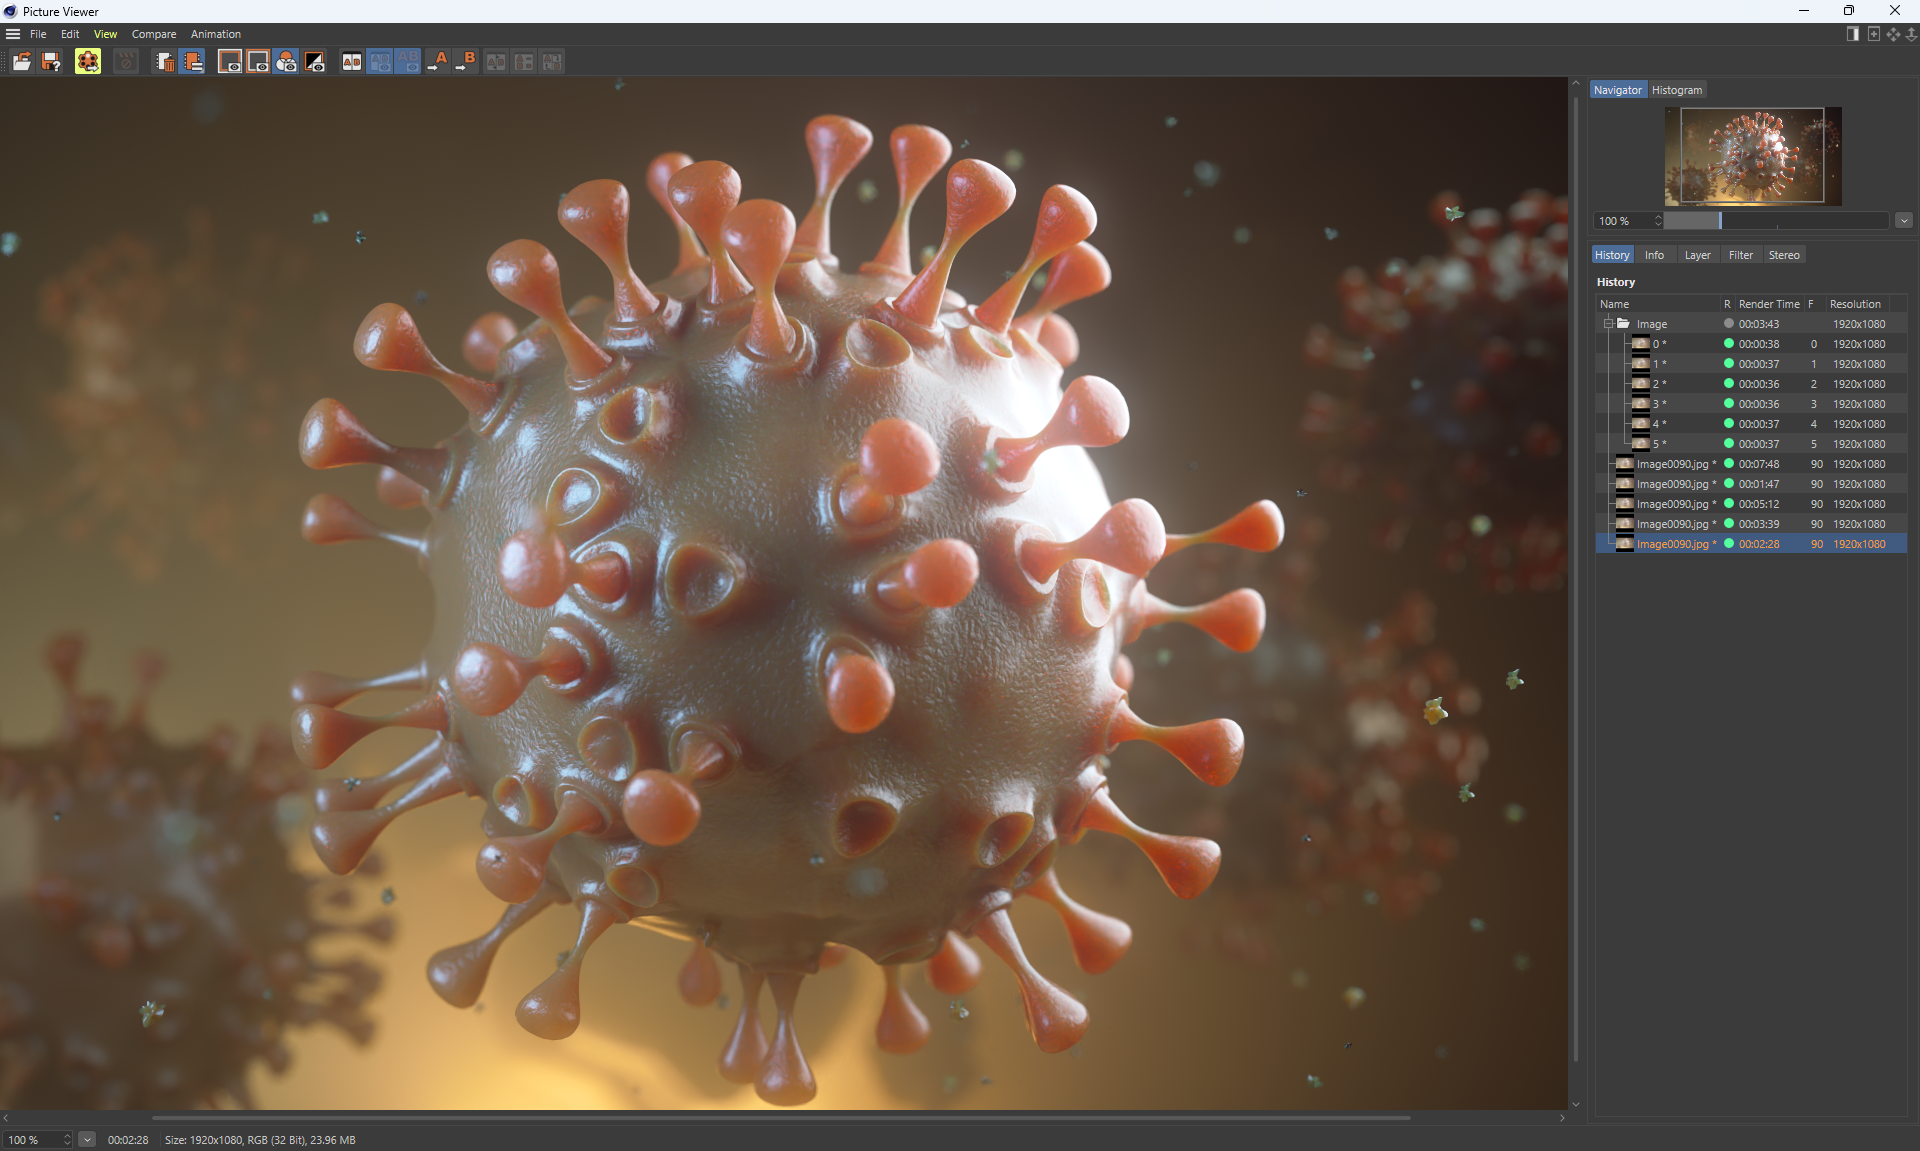
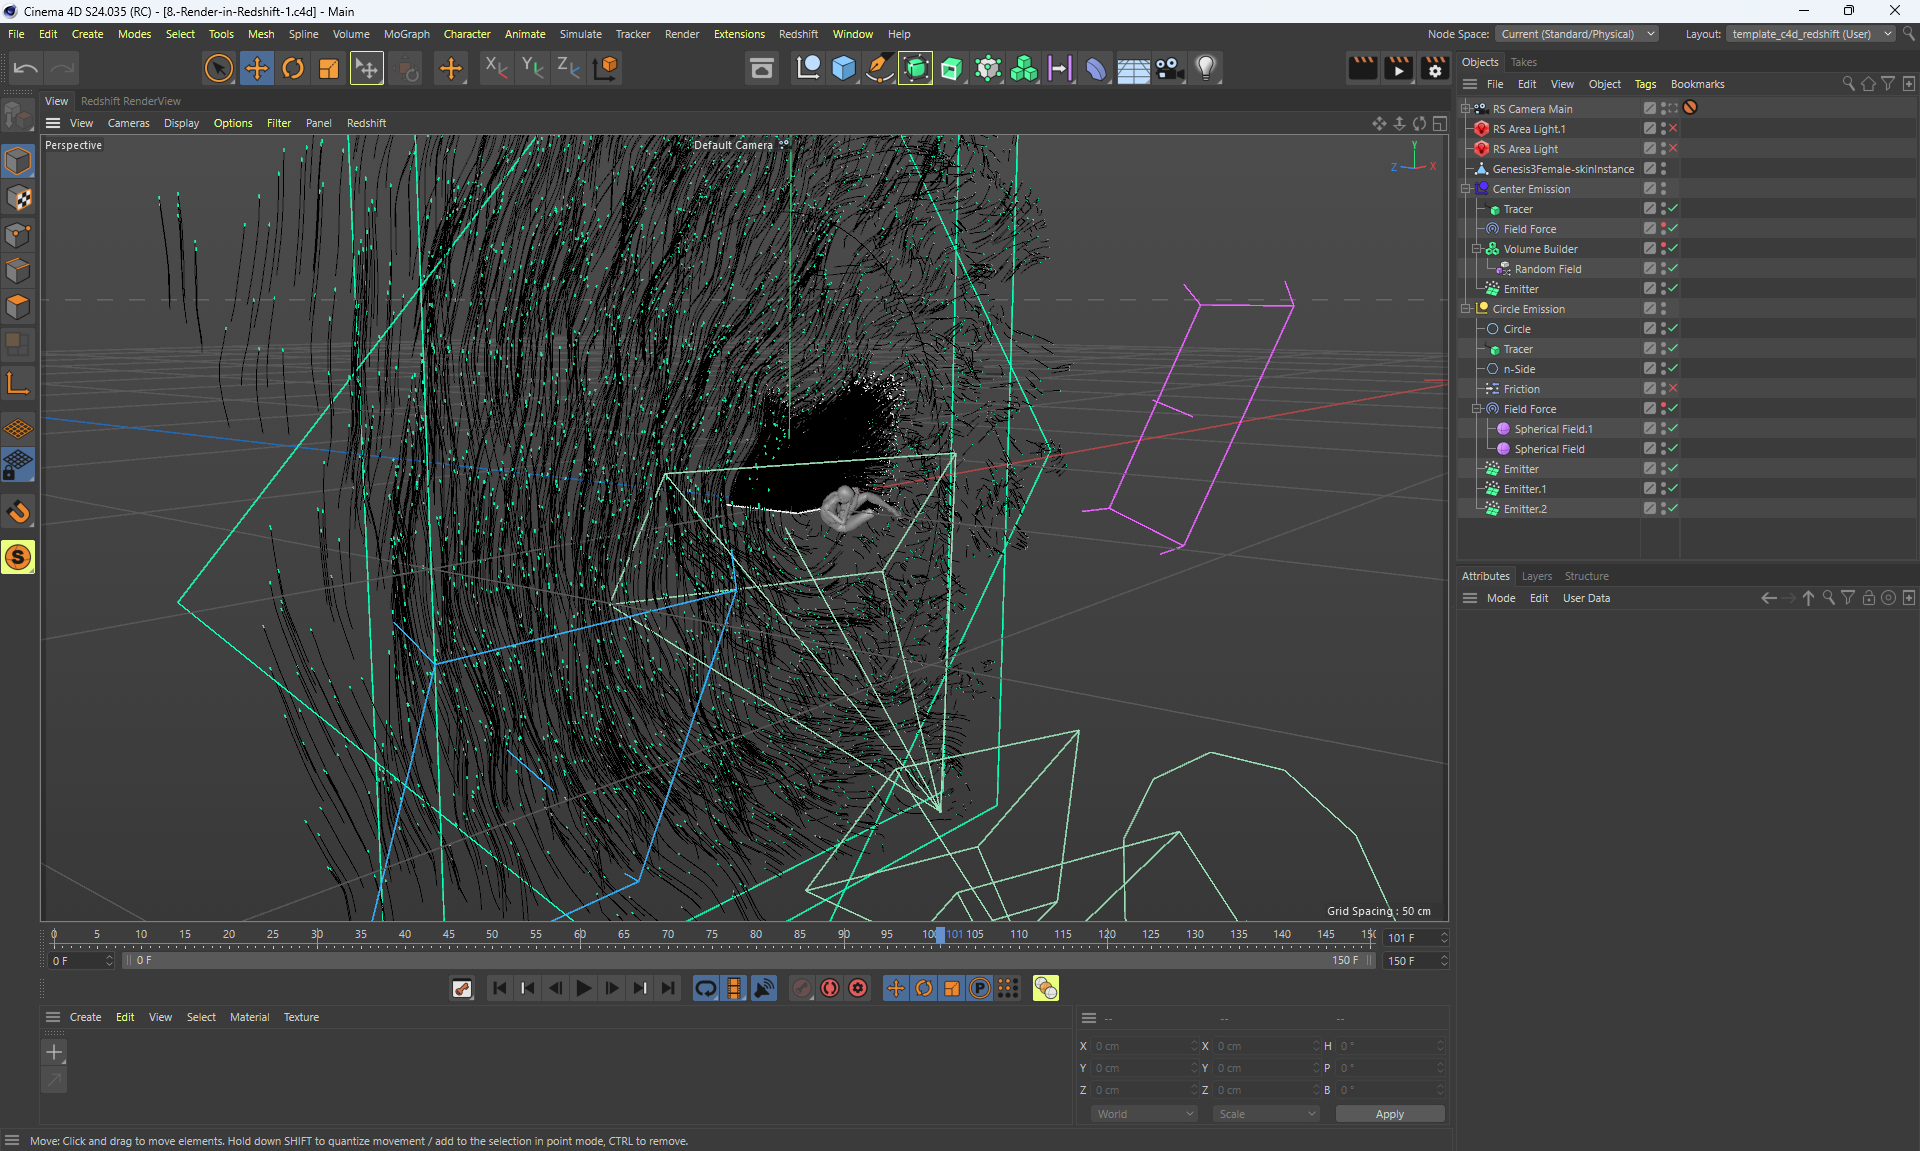
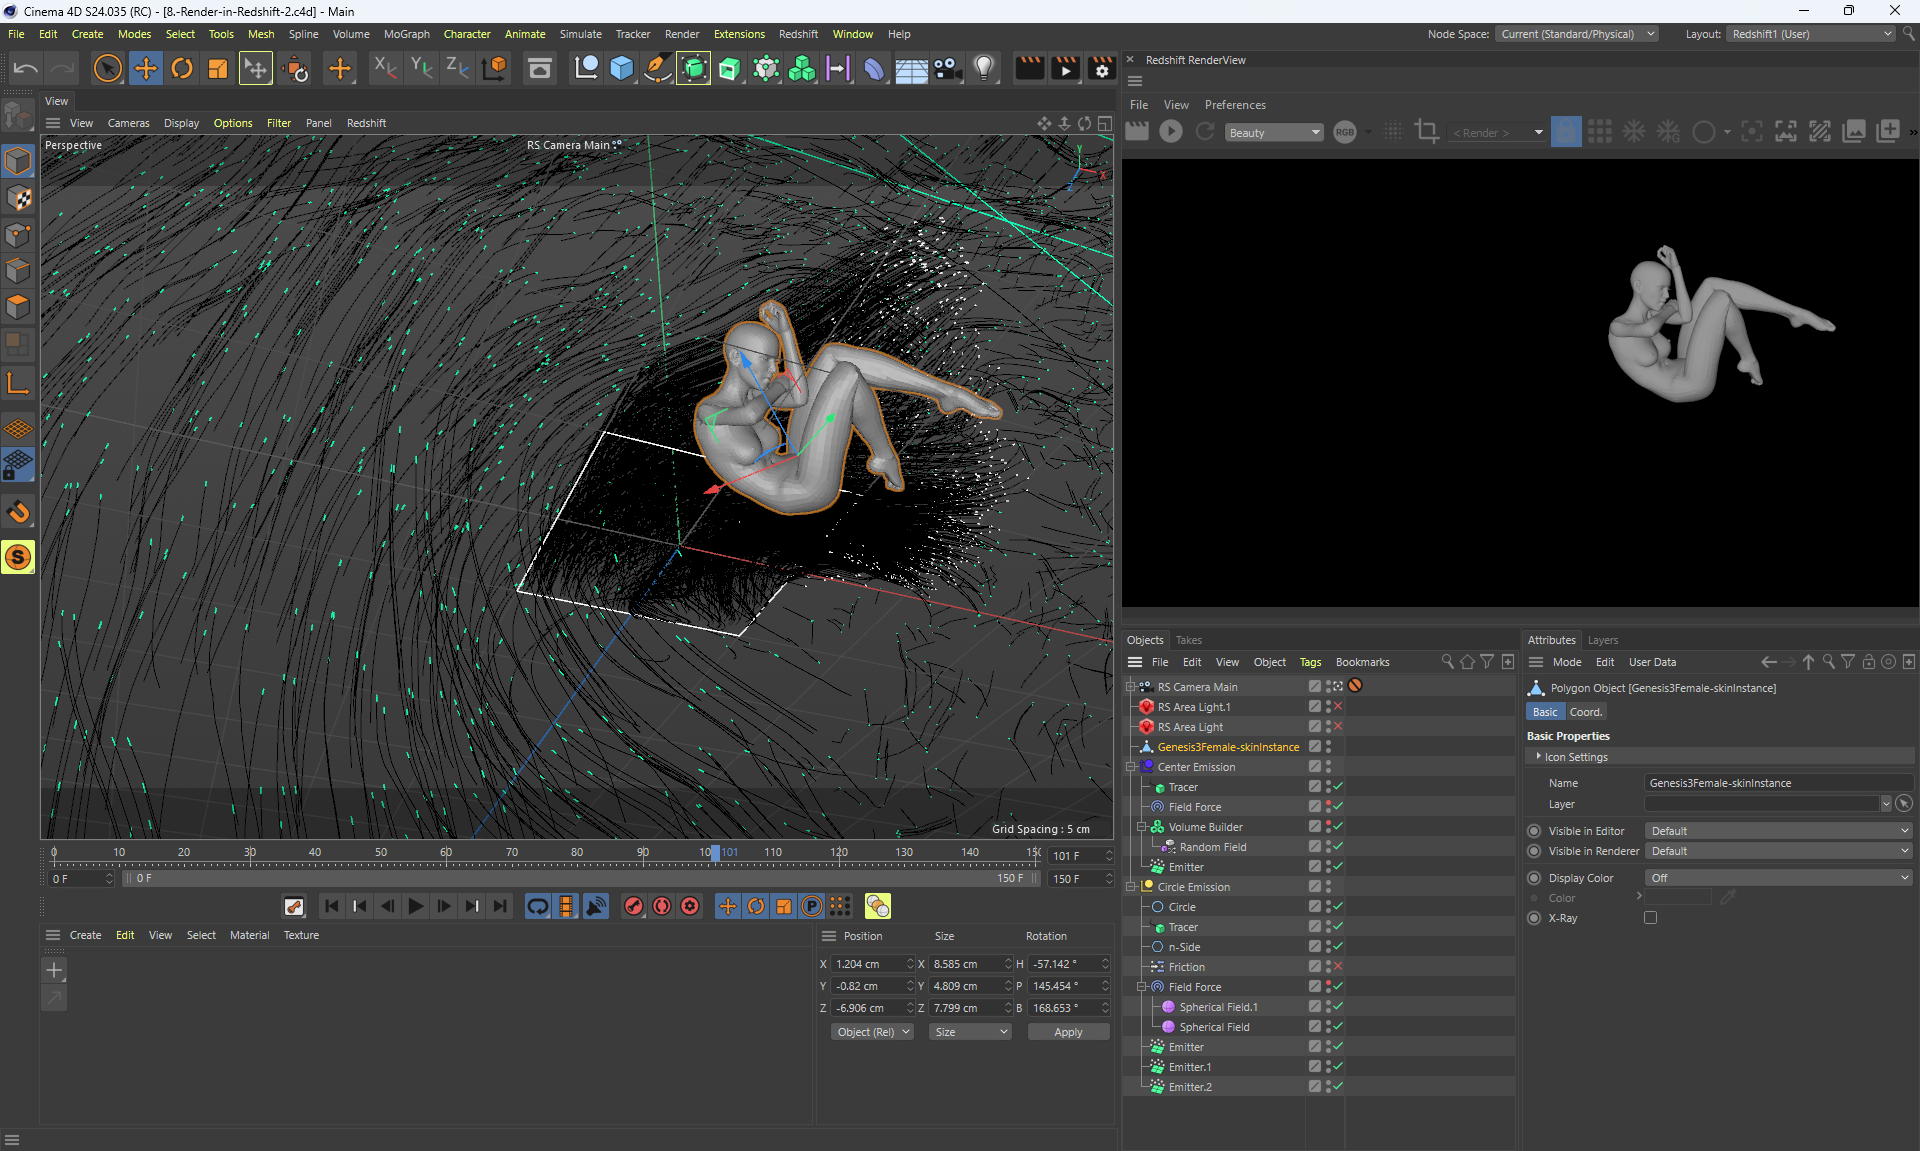
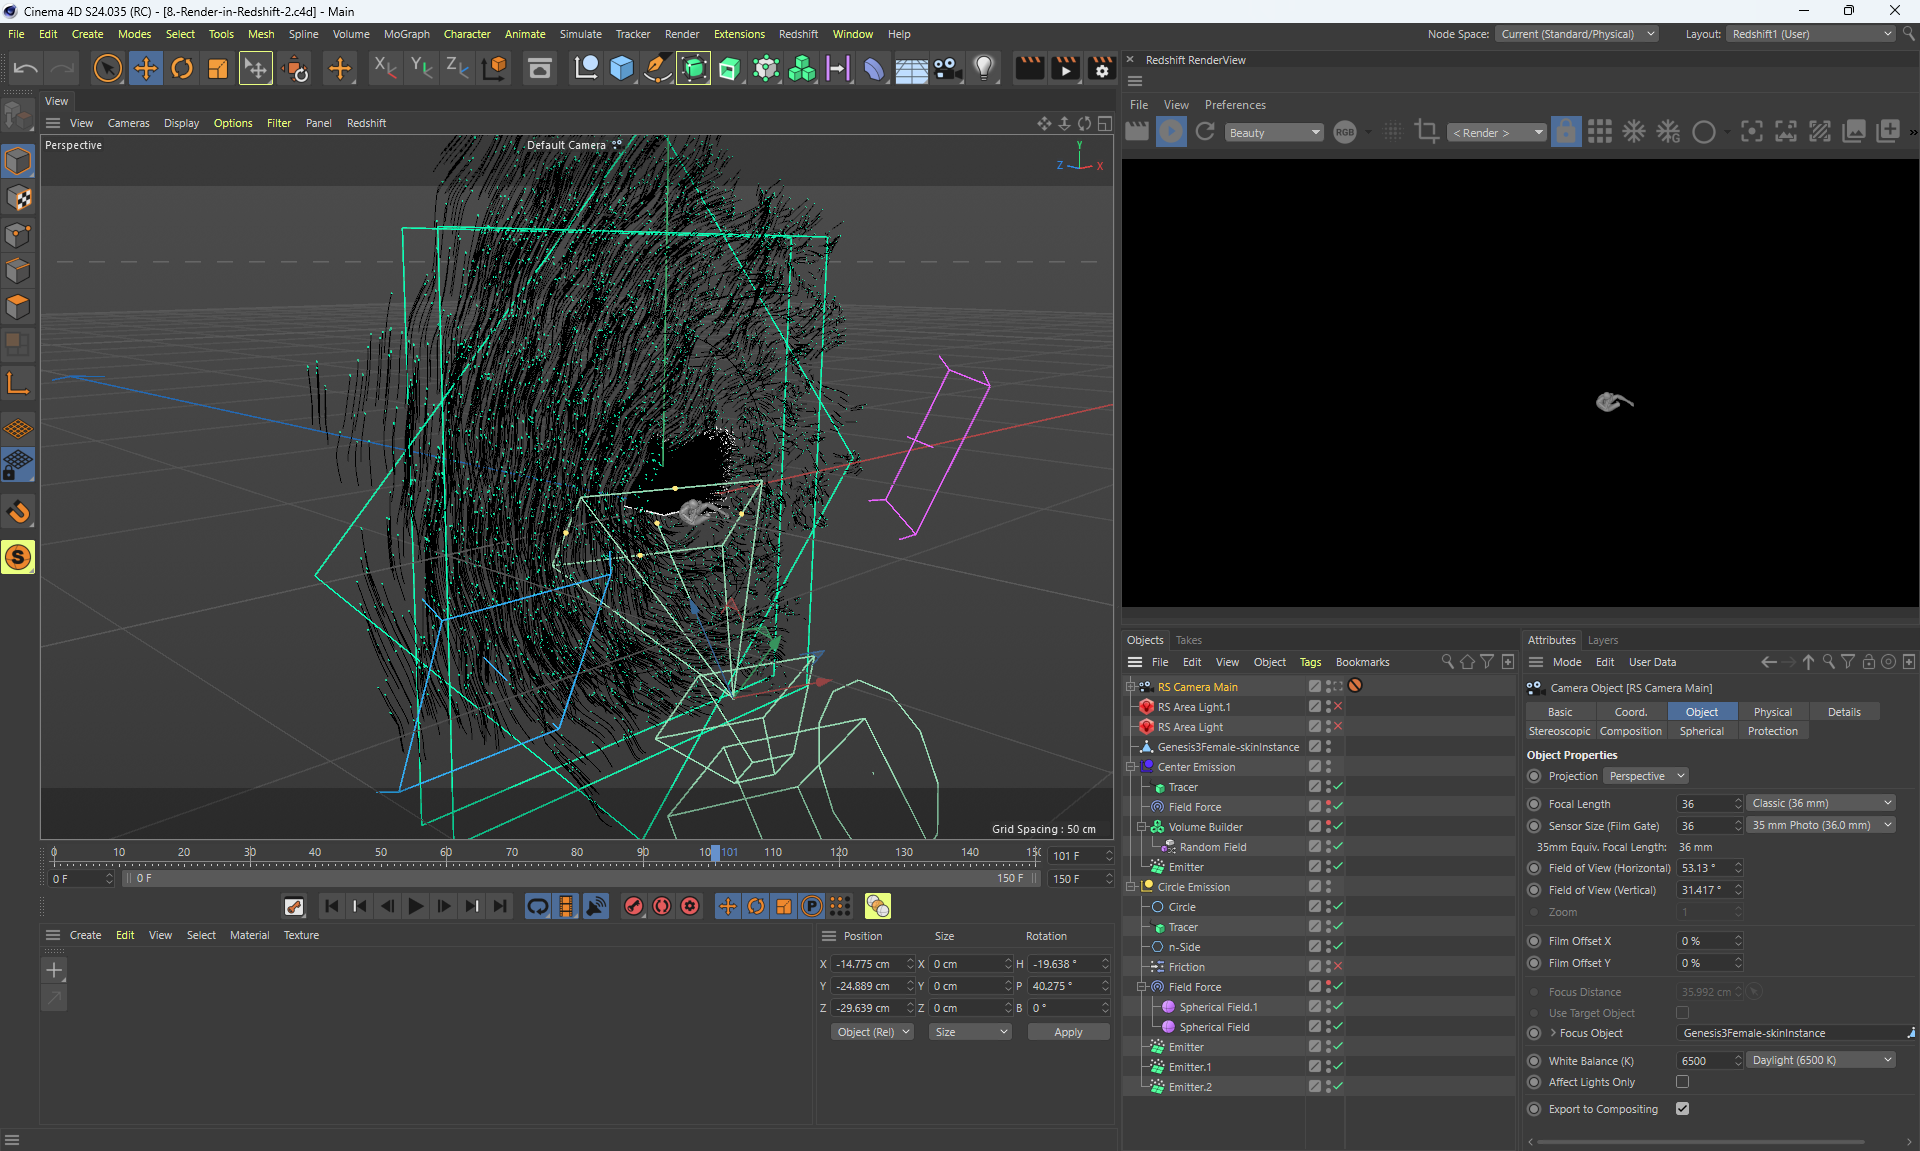
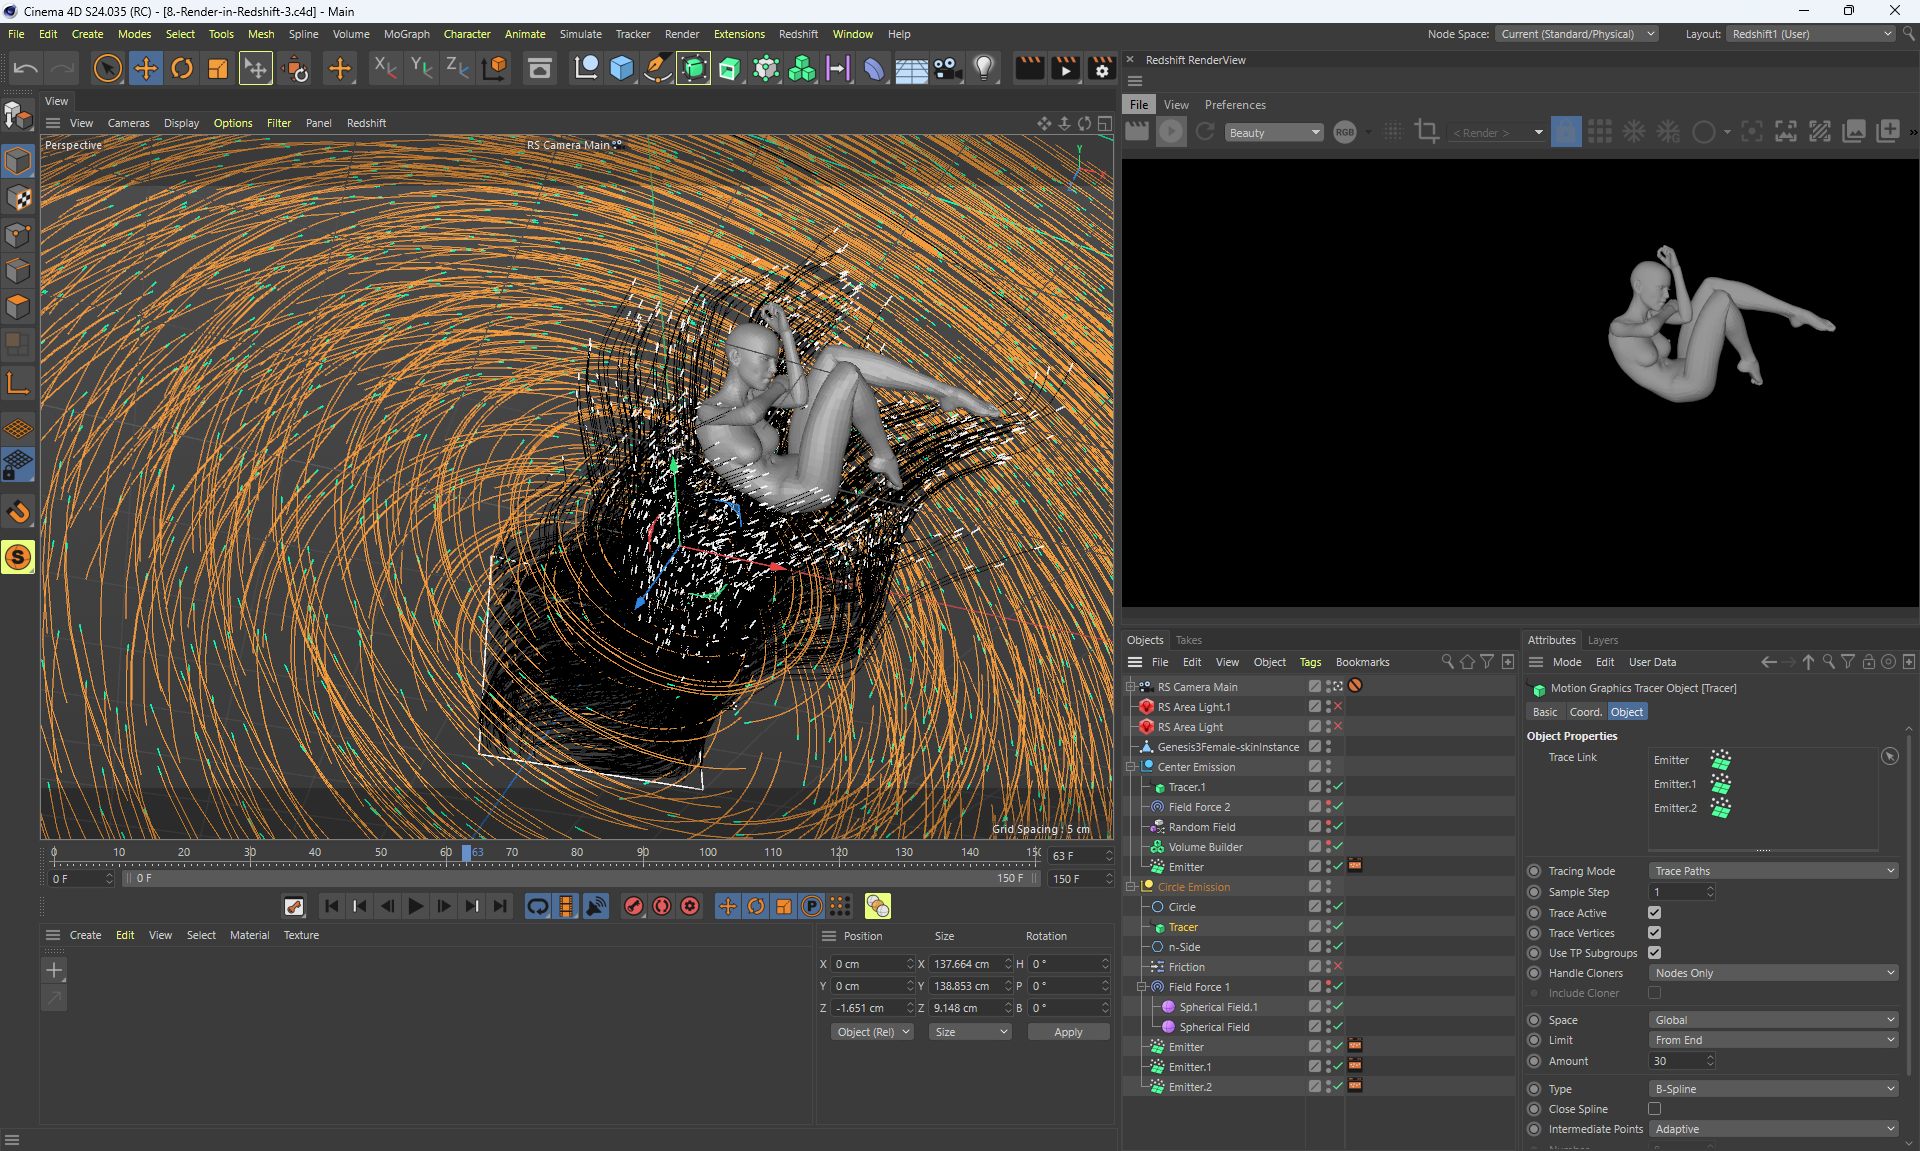
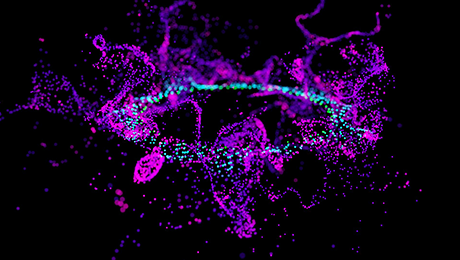
3. Virus visualization
Video1 (5.2mb)
image1
image2
video3 (5.6mb)
image3
I modeled this virus after the author, studied how to do it, tested all the settings to get a similar result.
Other video: The Best Redshift Settings - Cinema 4D/Redshift
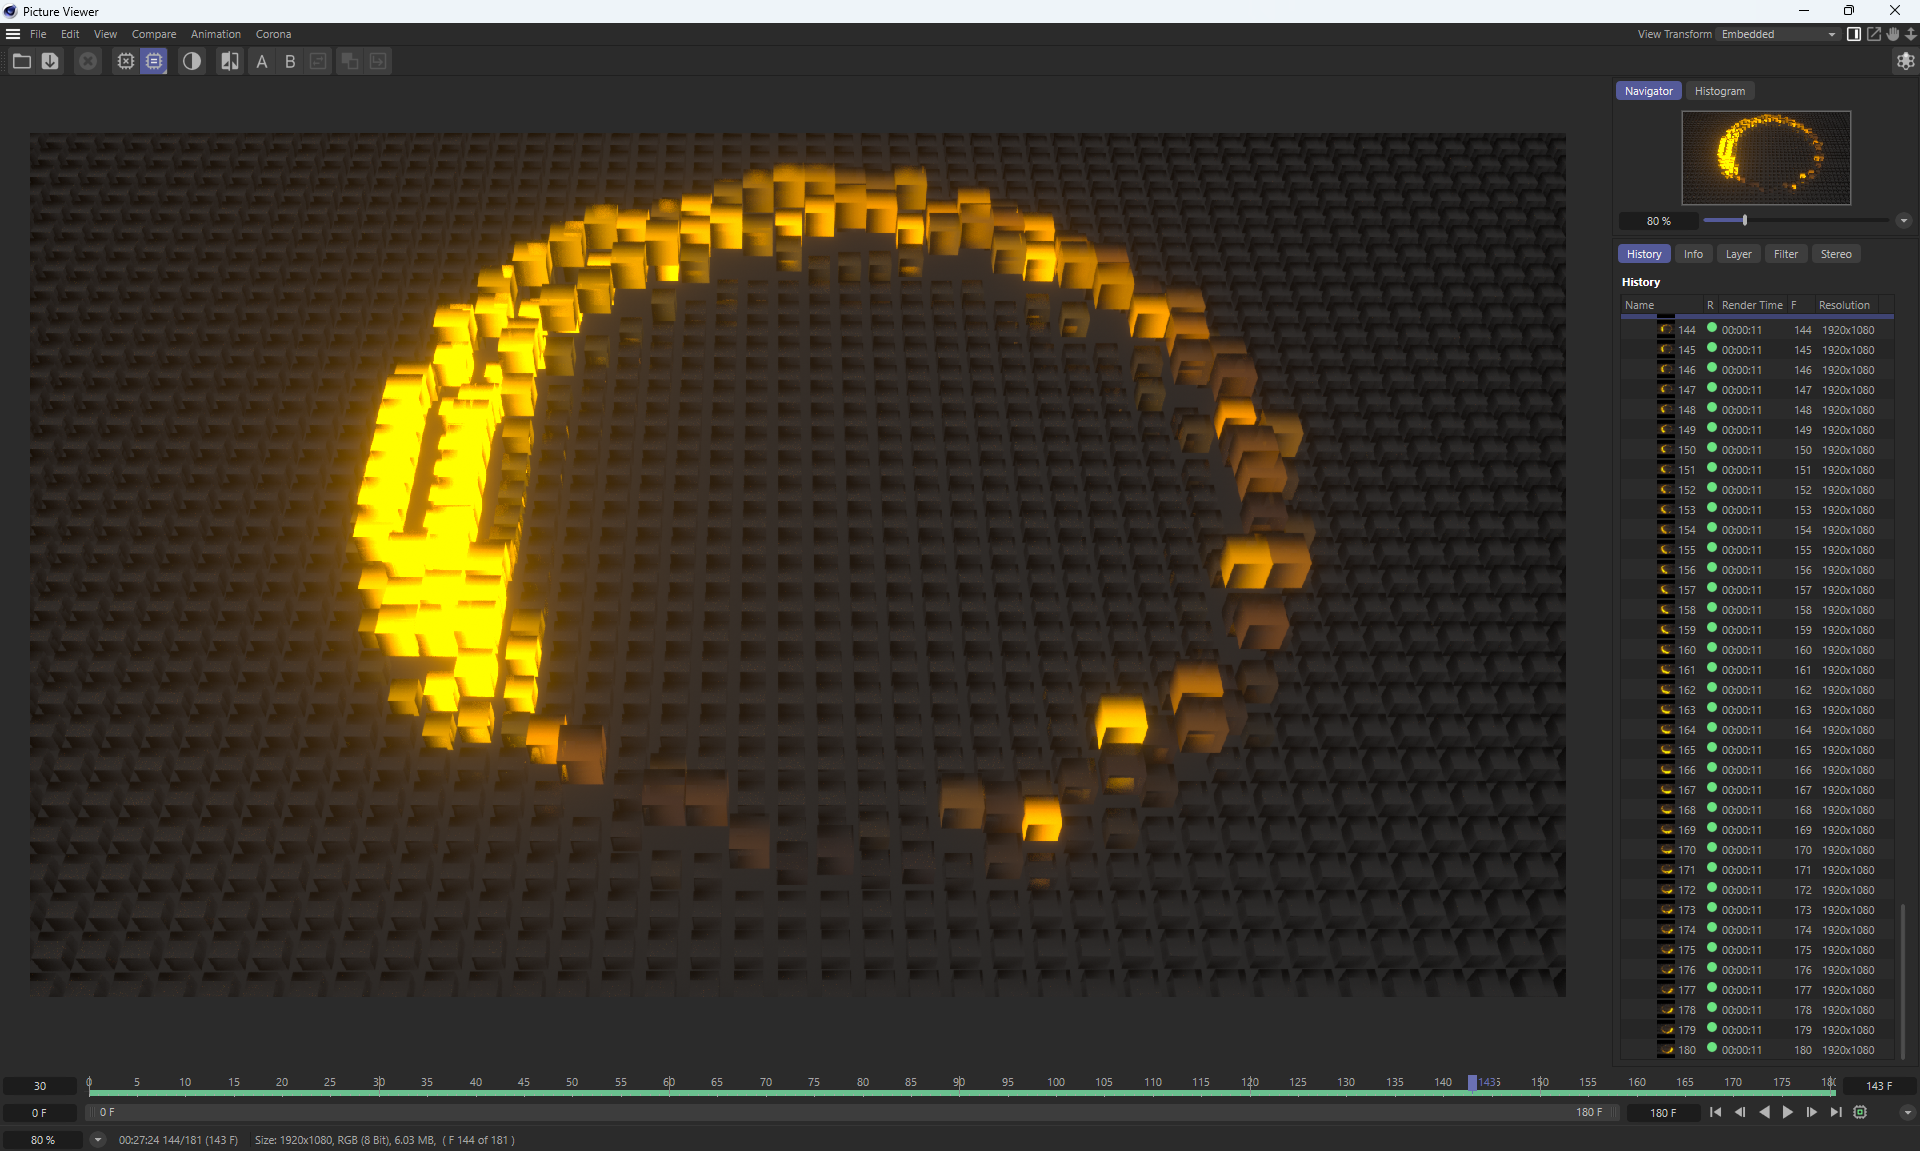
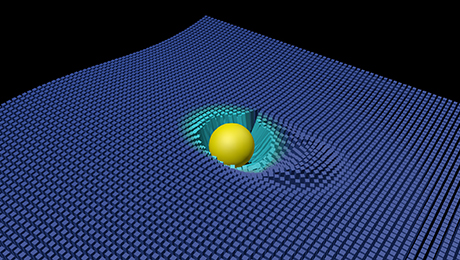
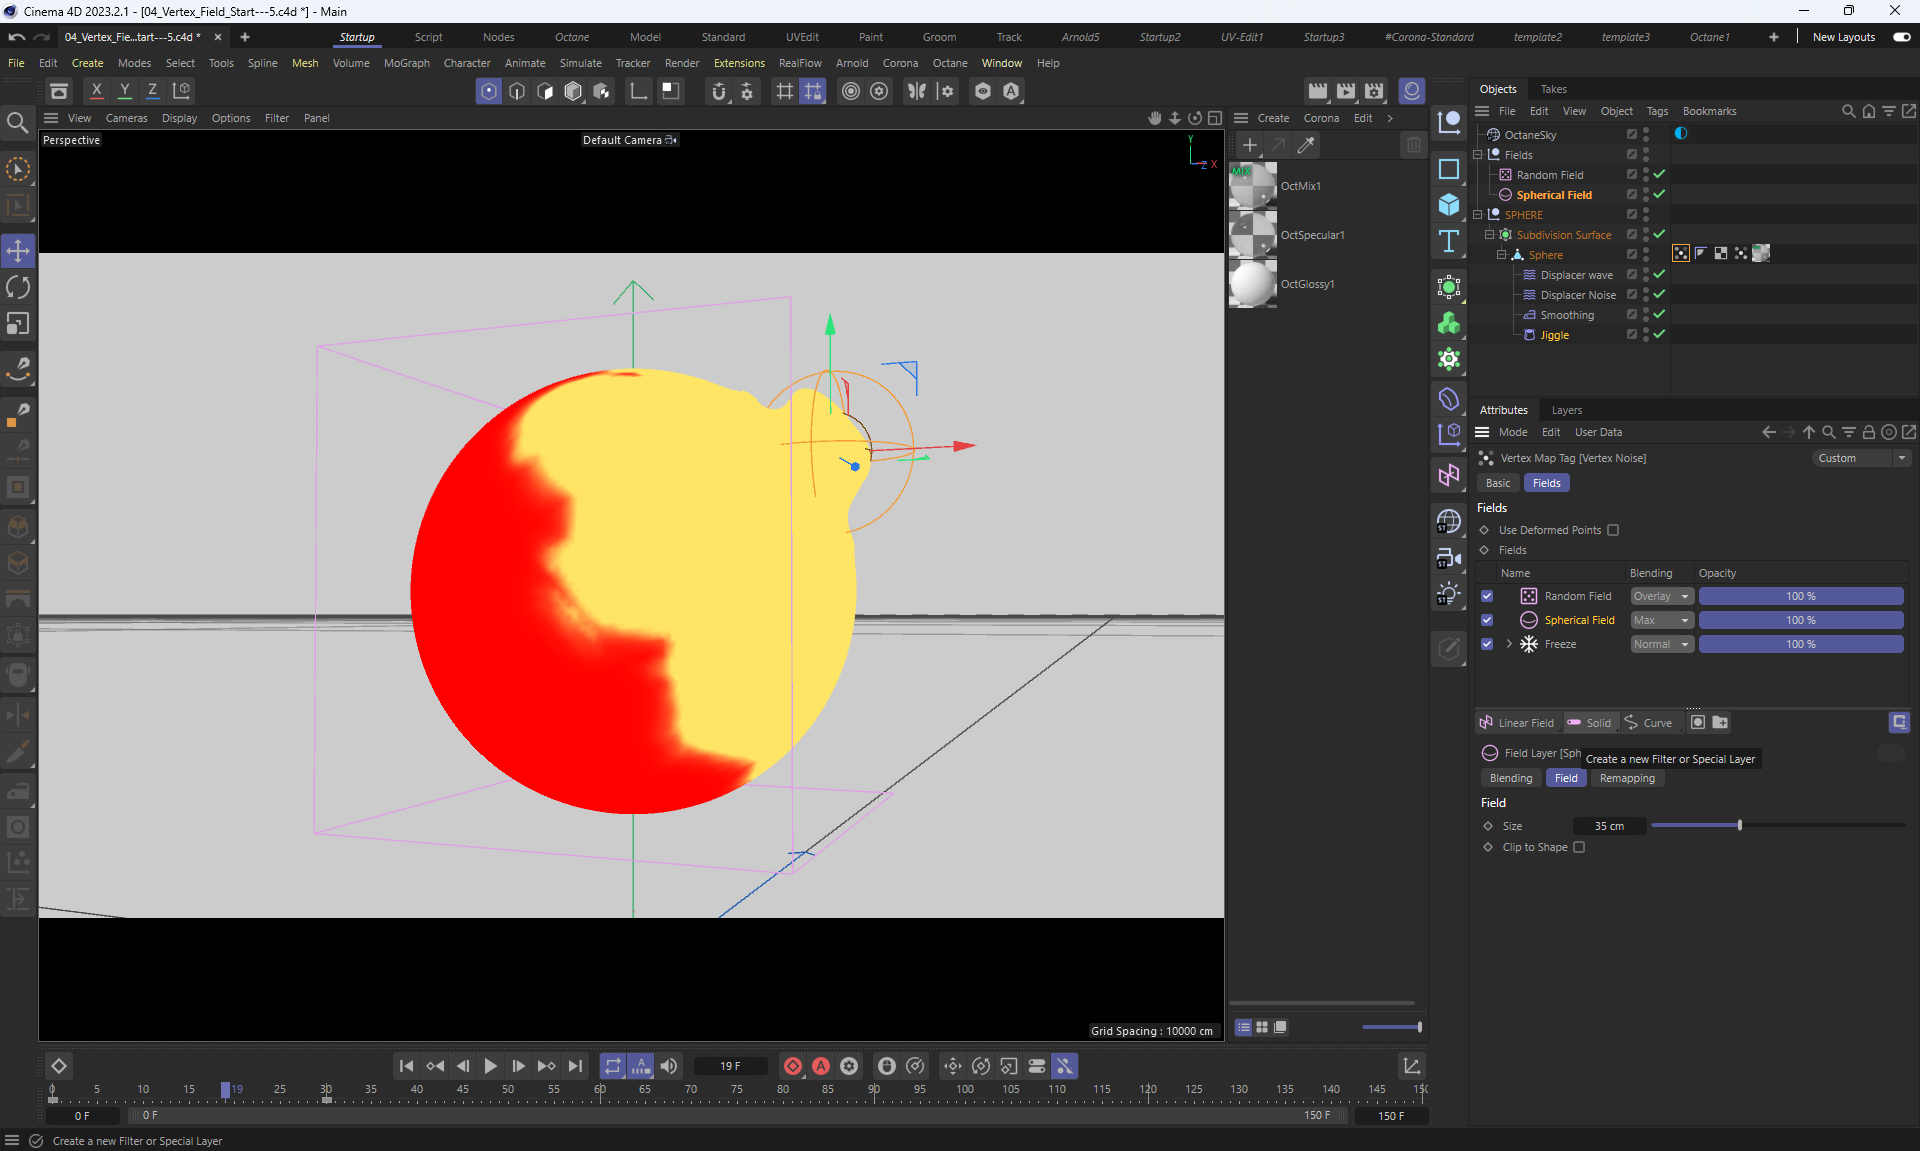
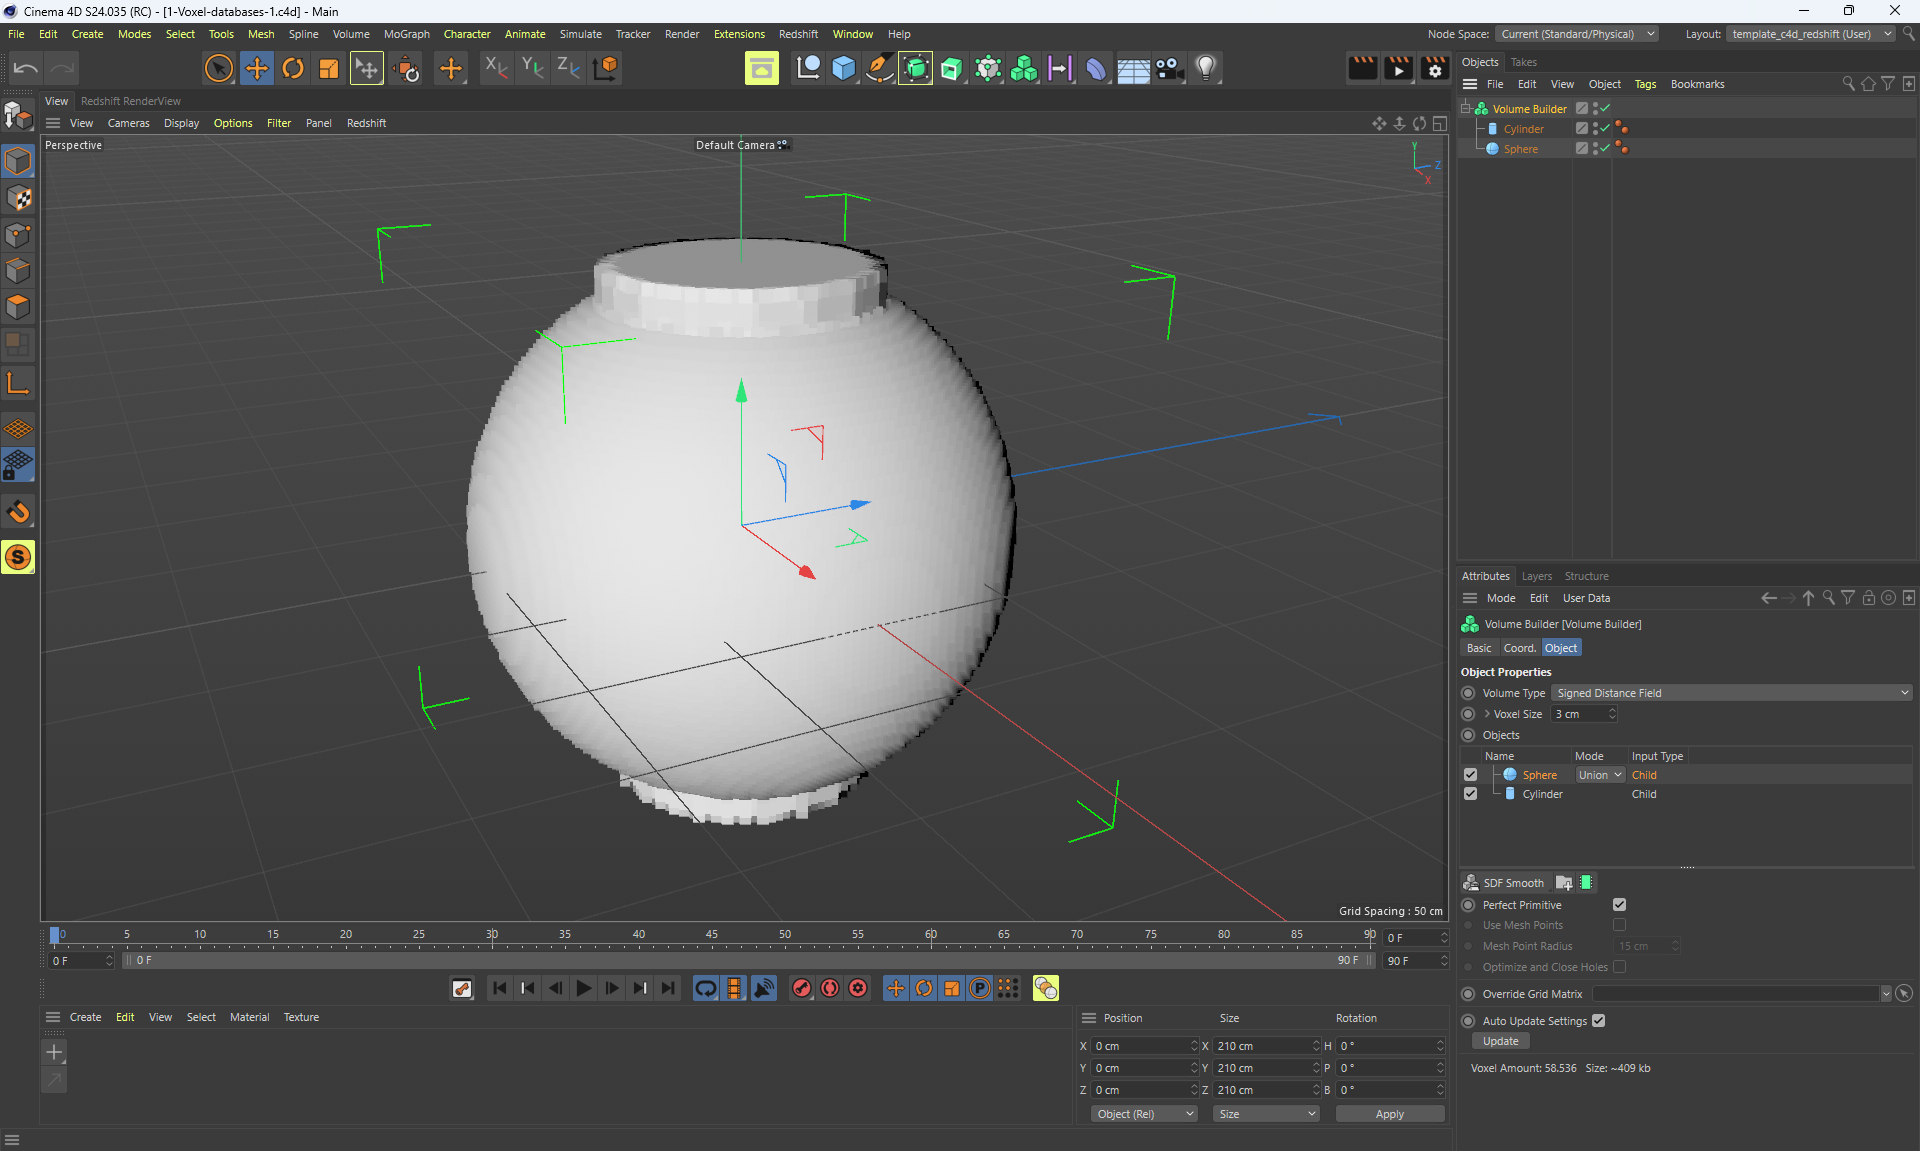
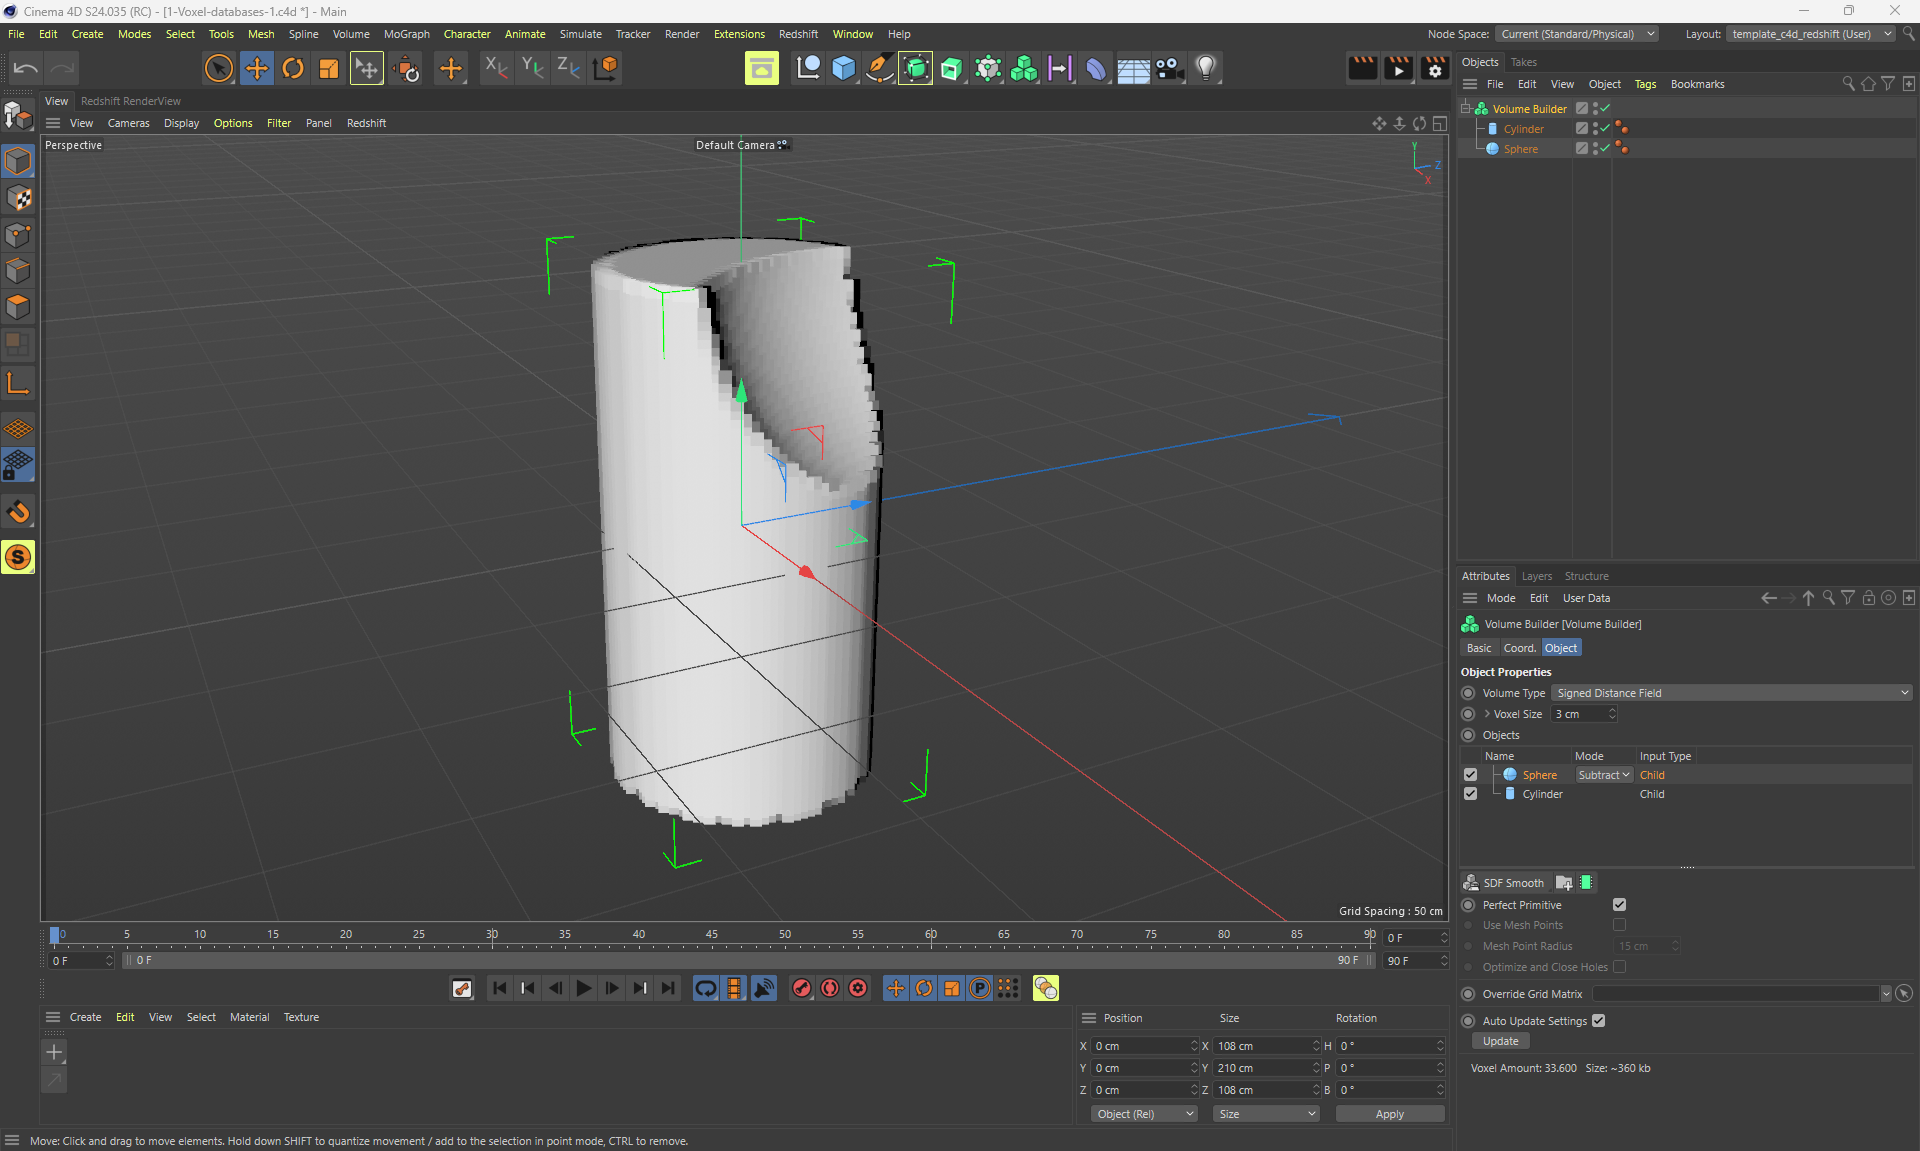
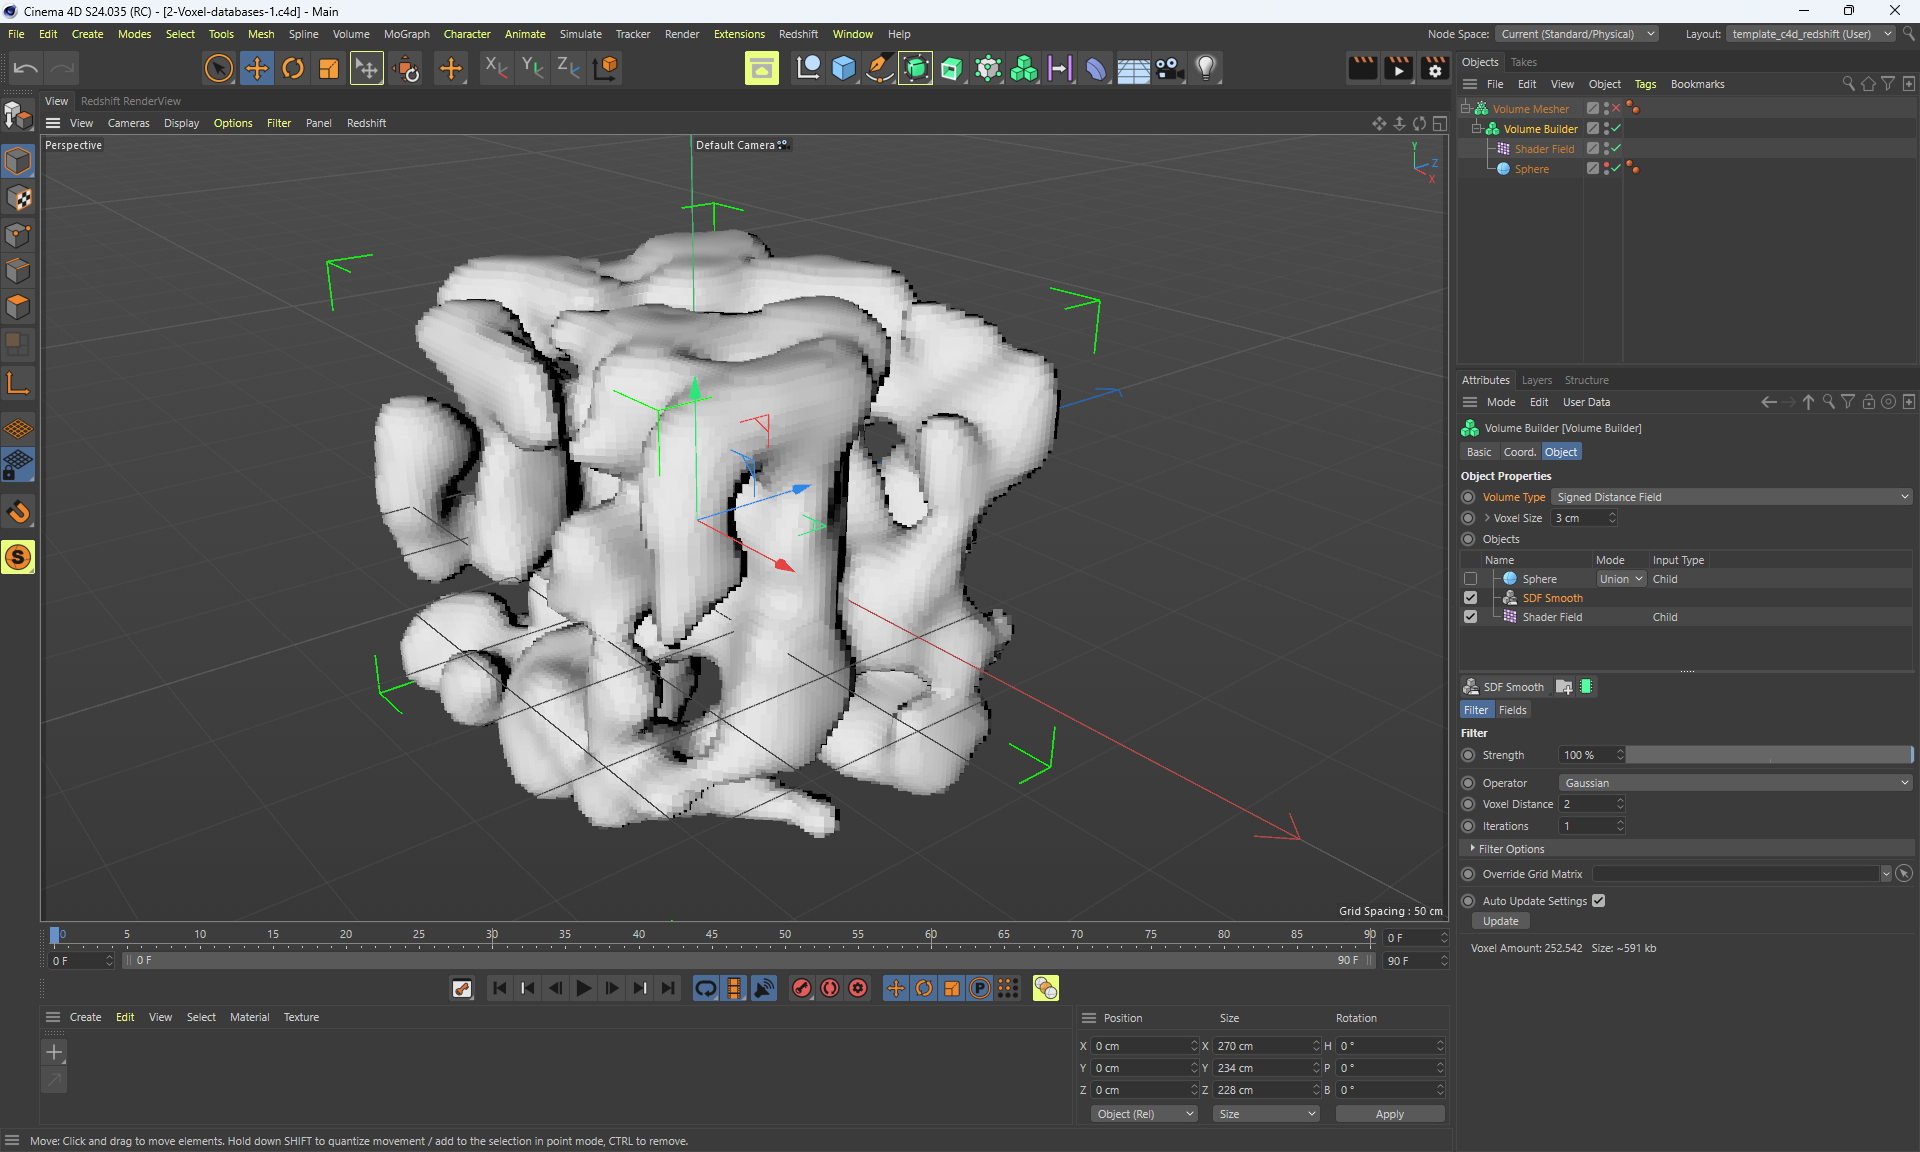
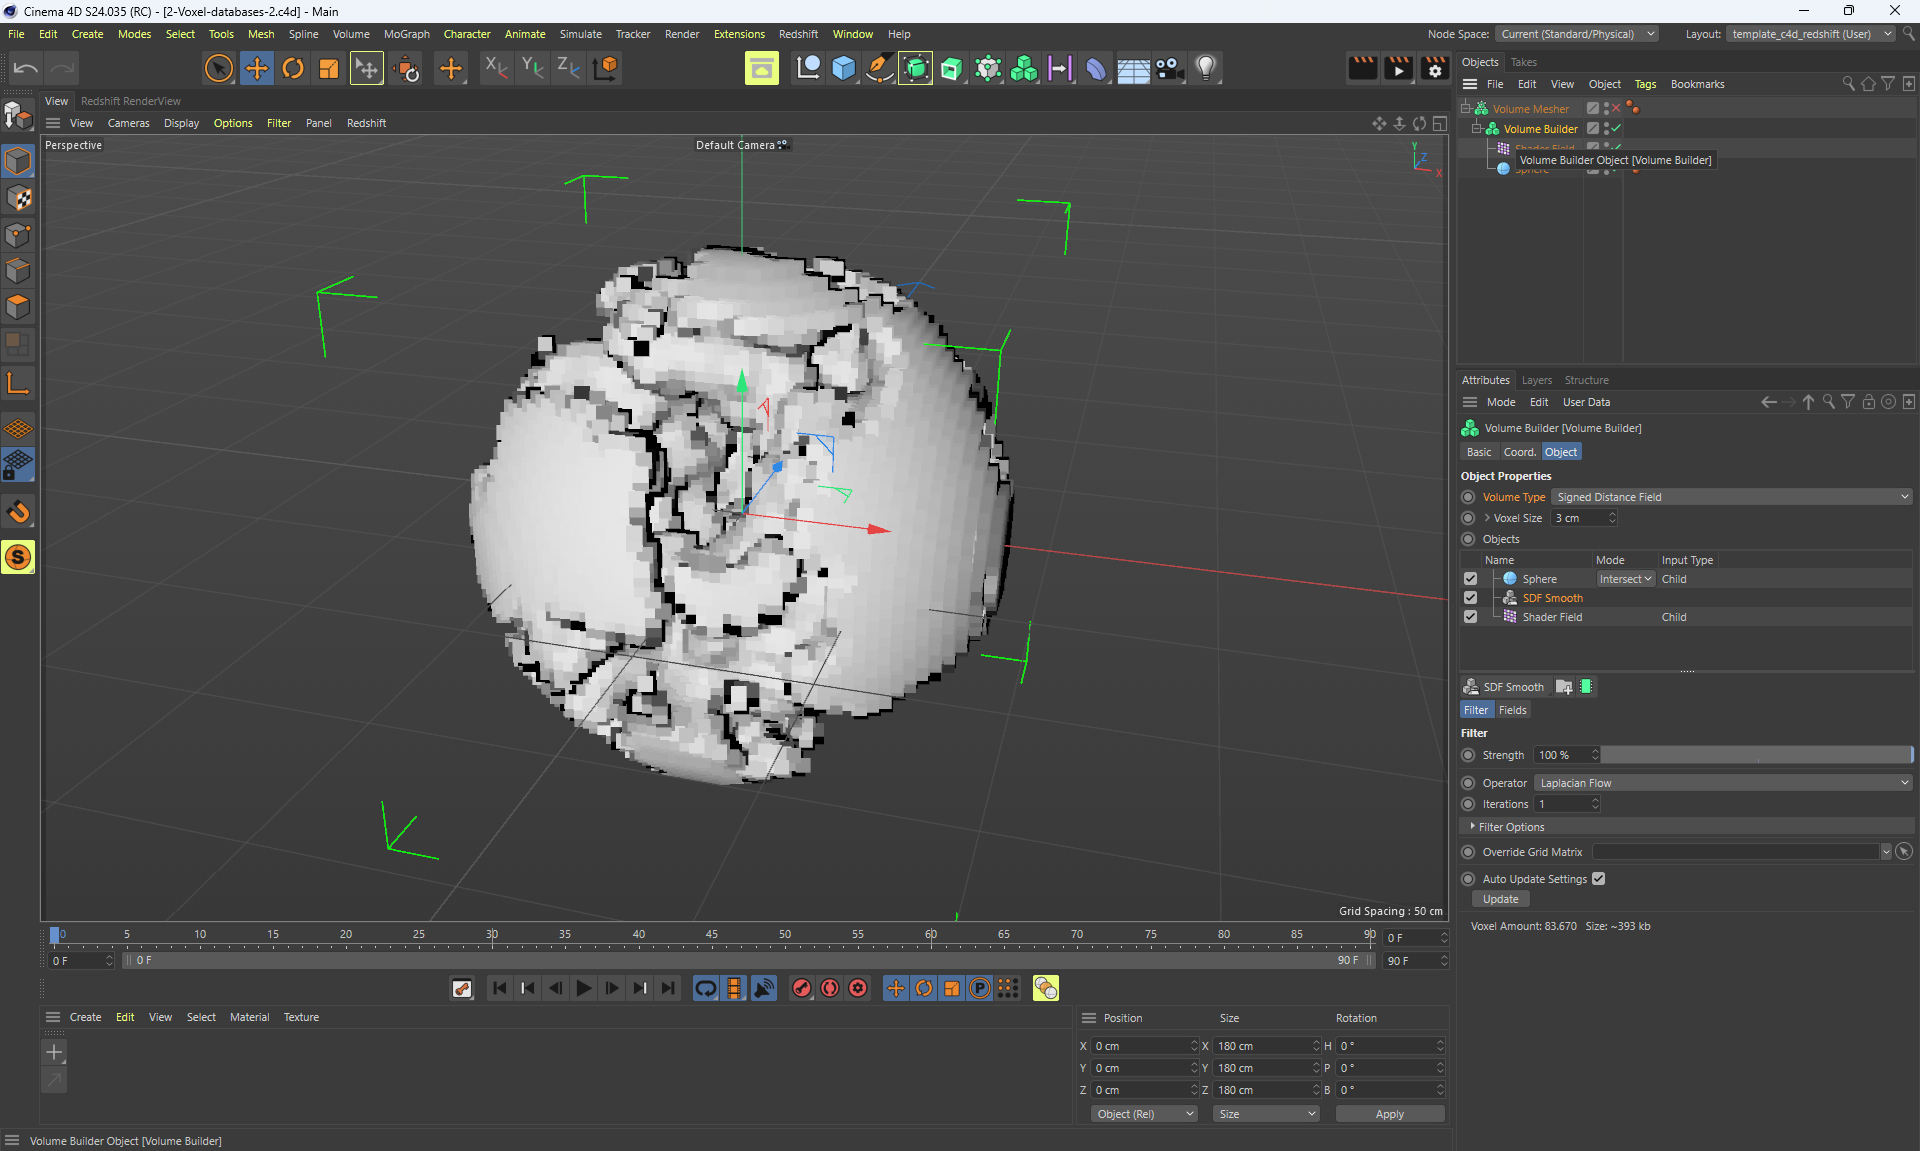
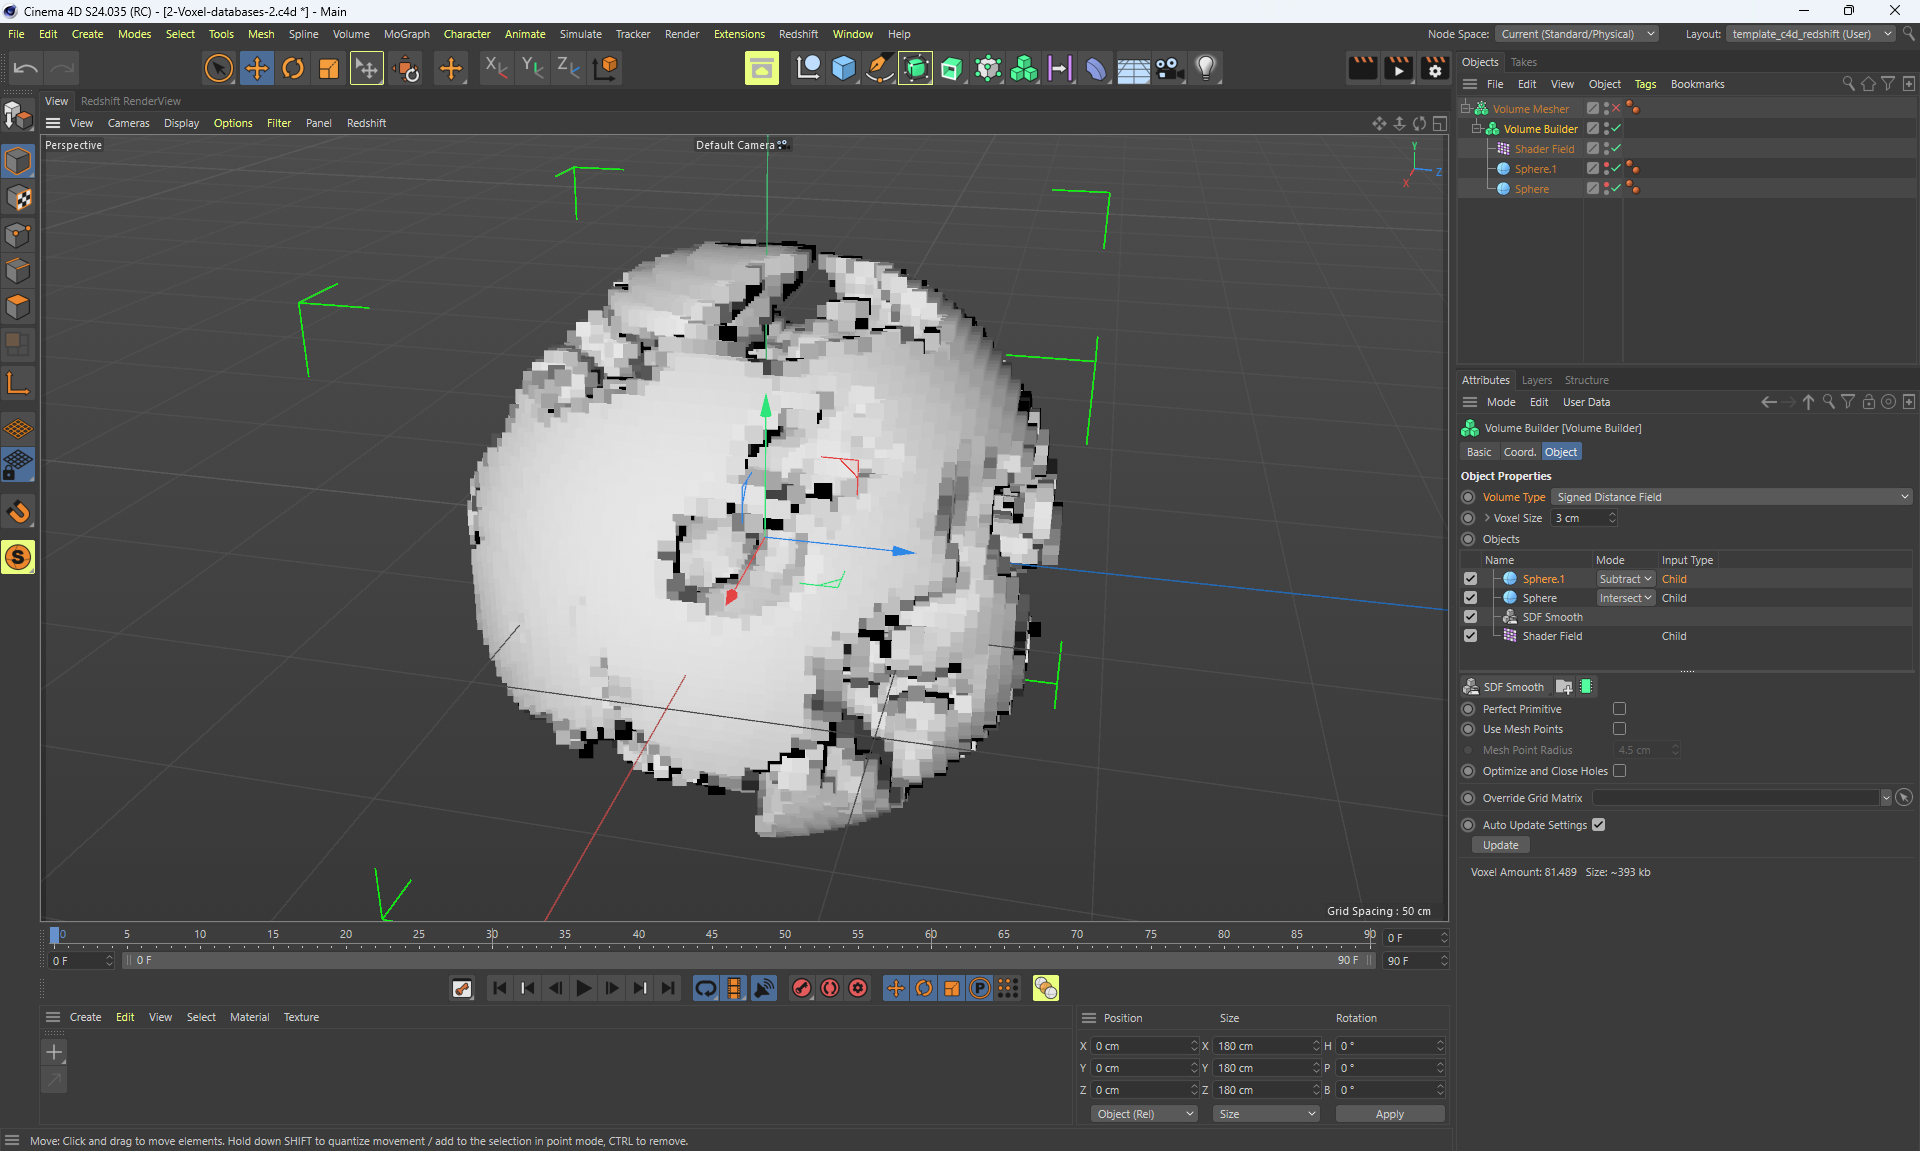
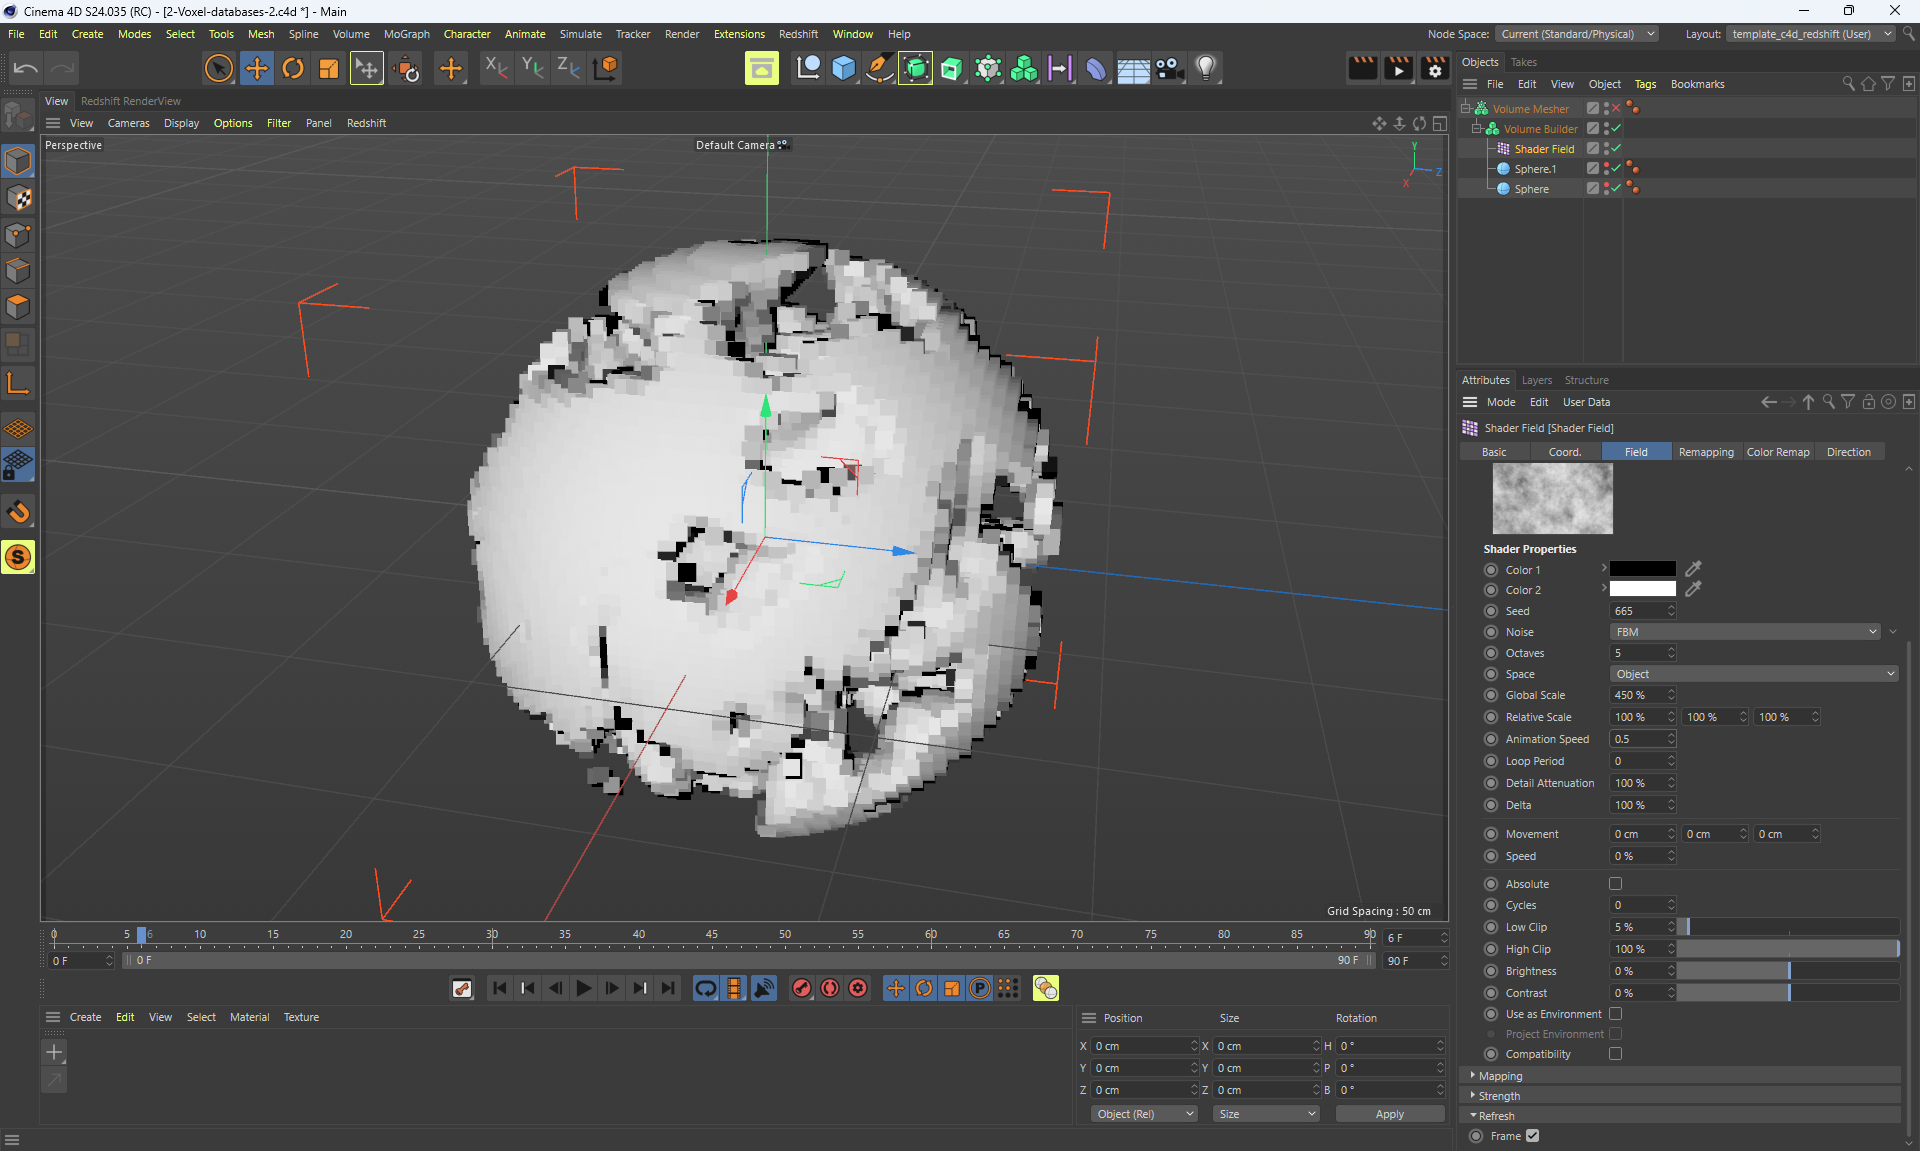
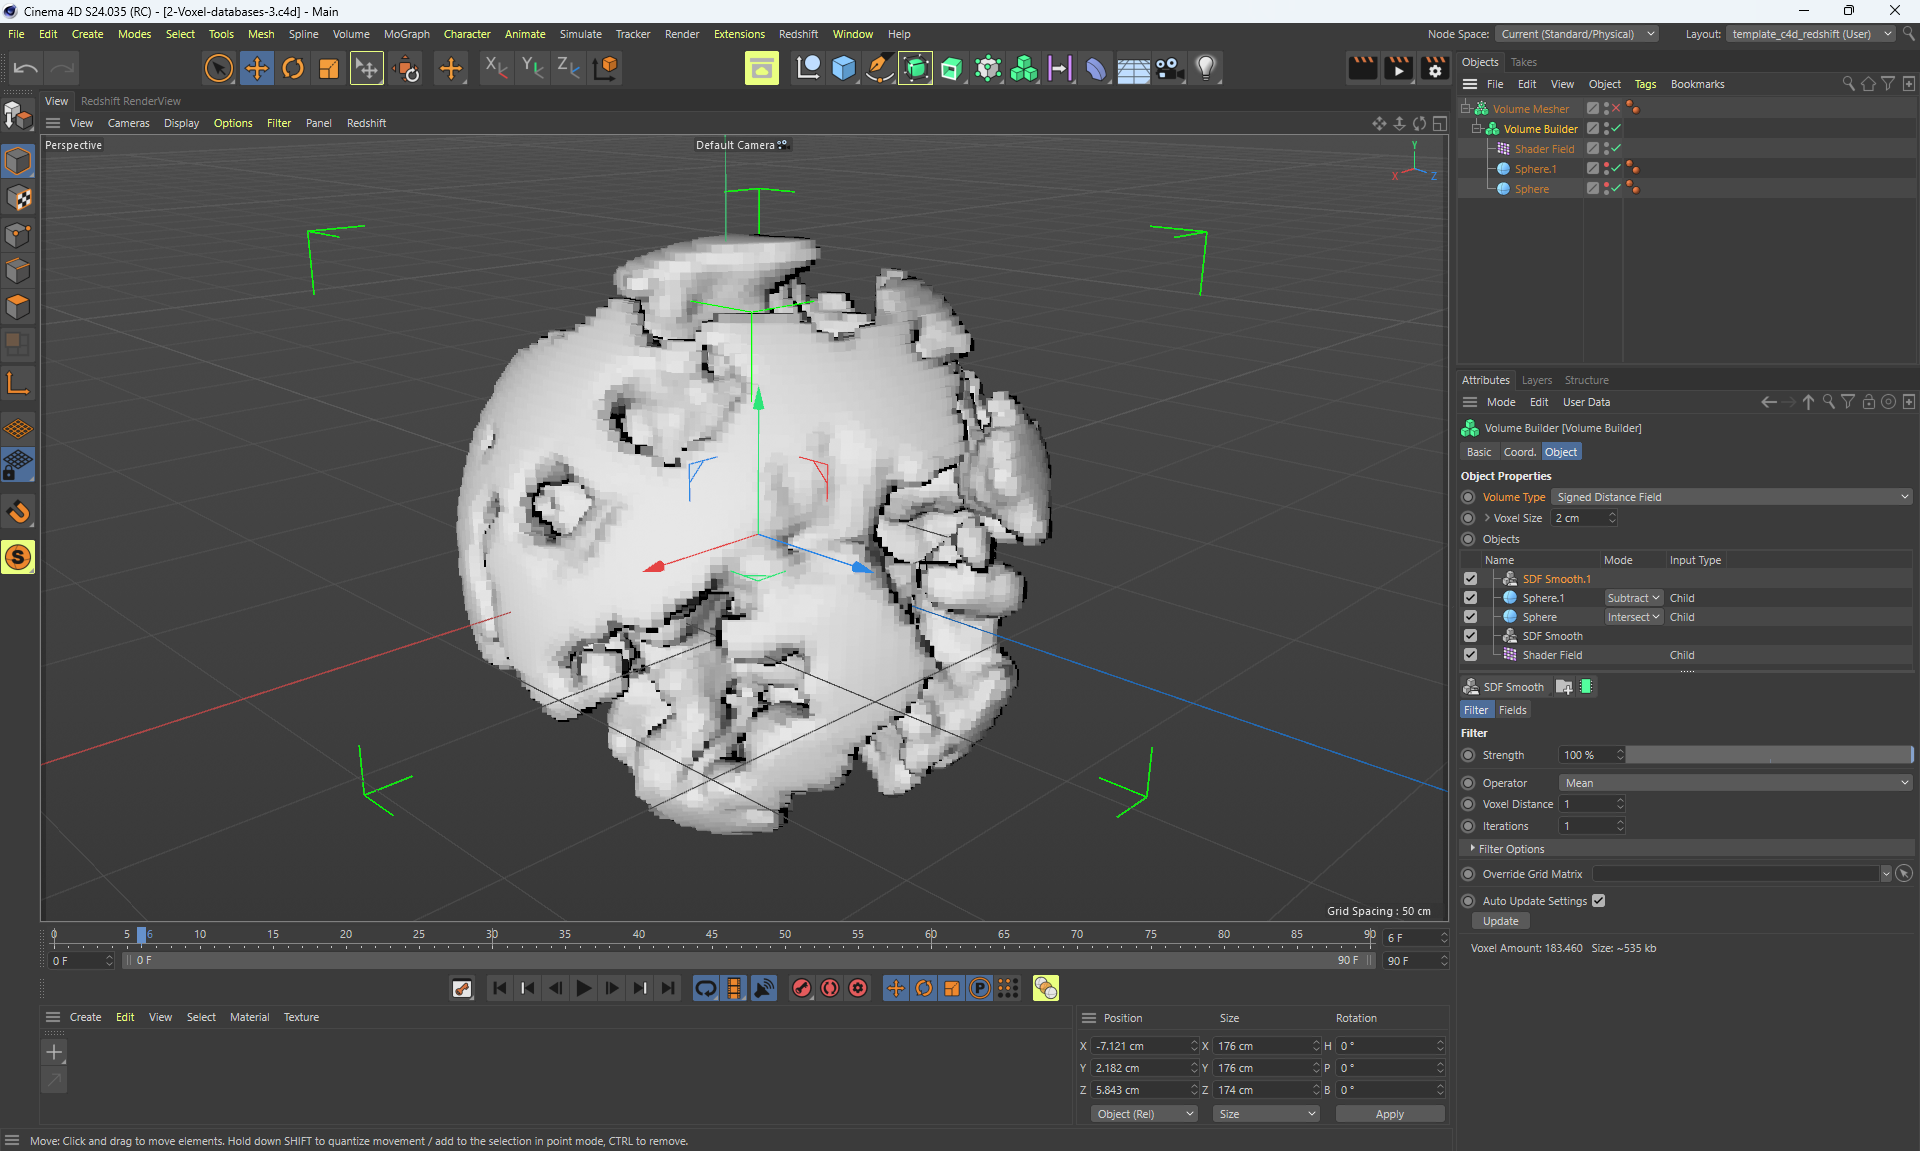
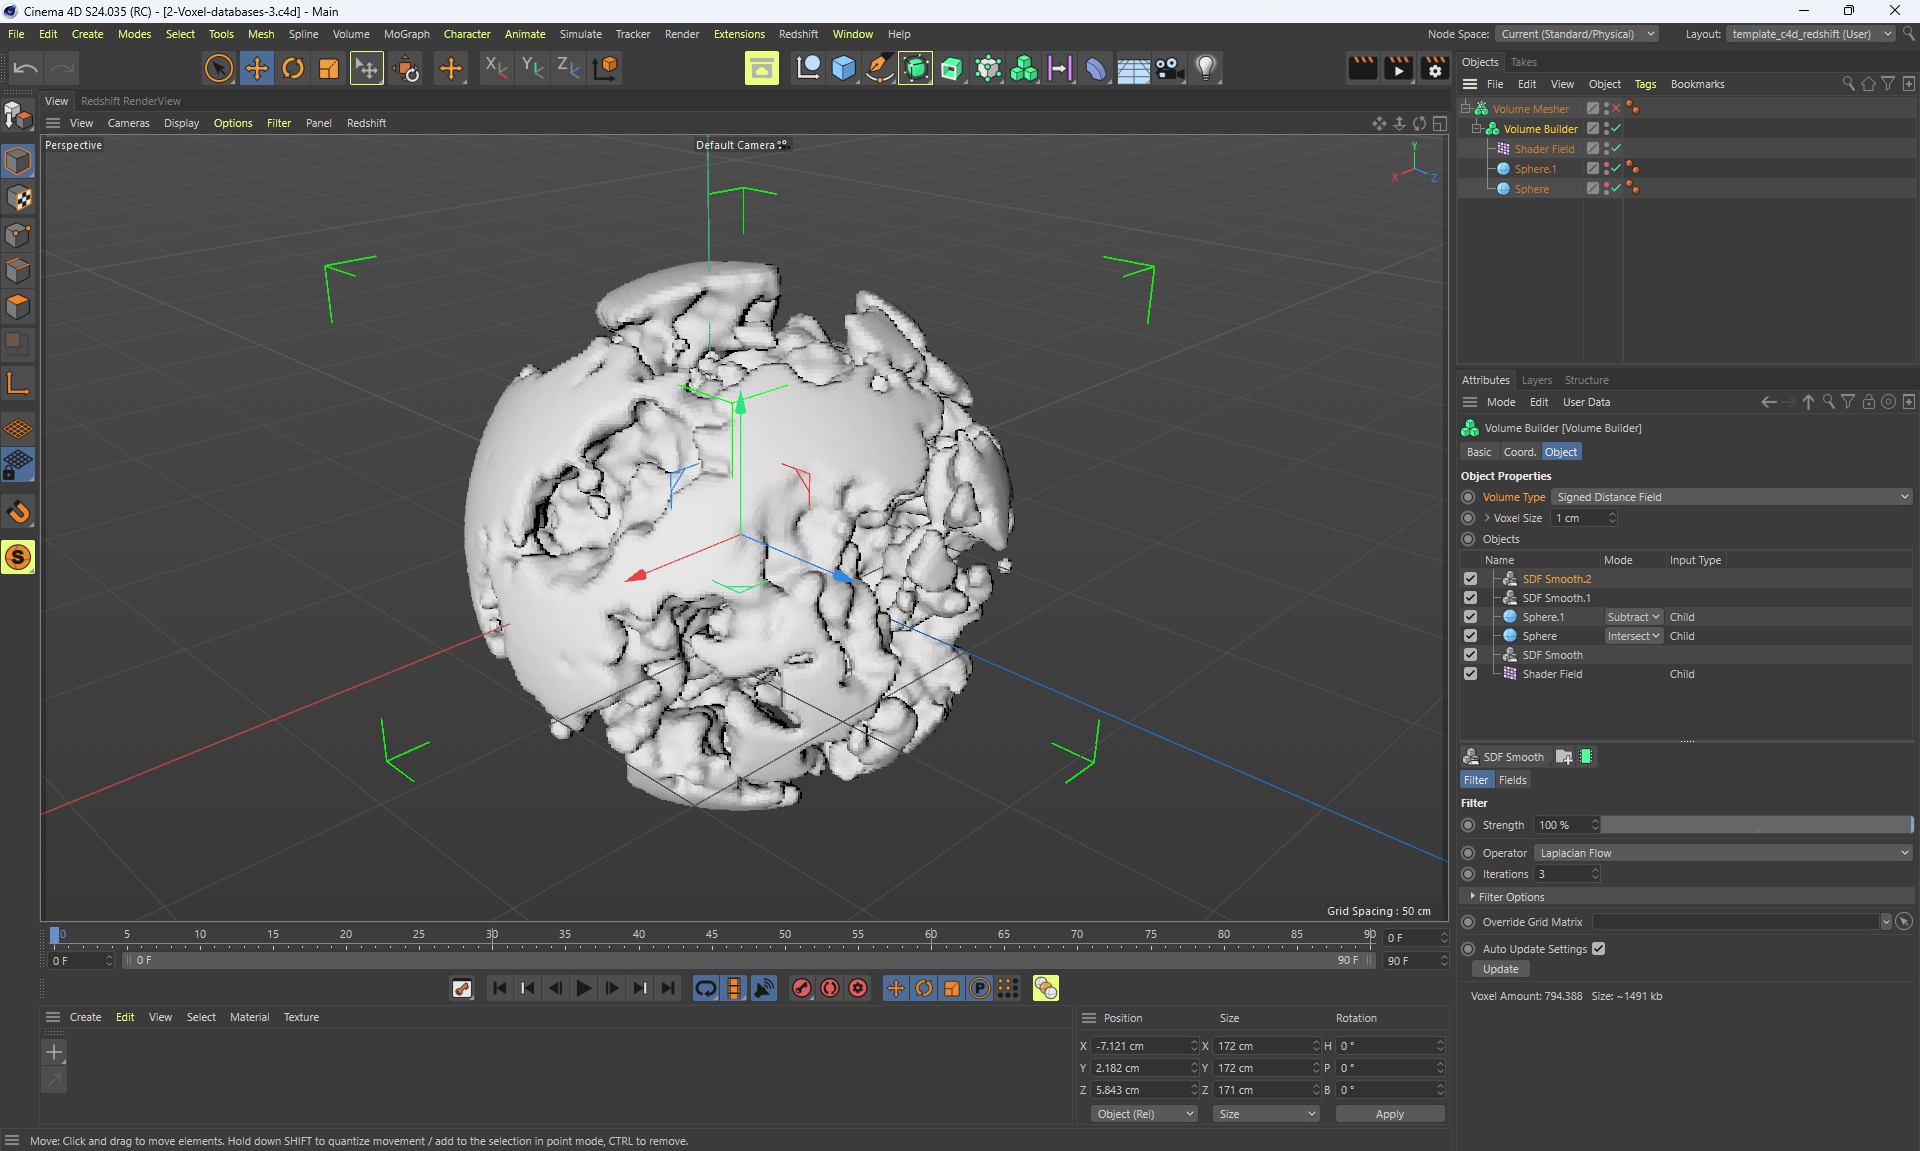
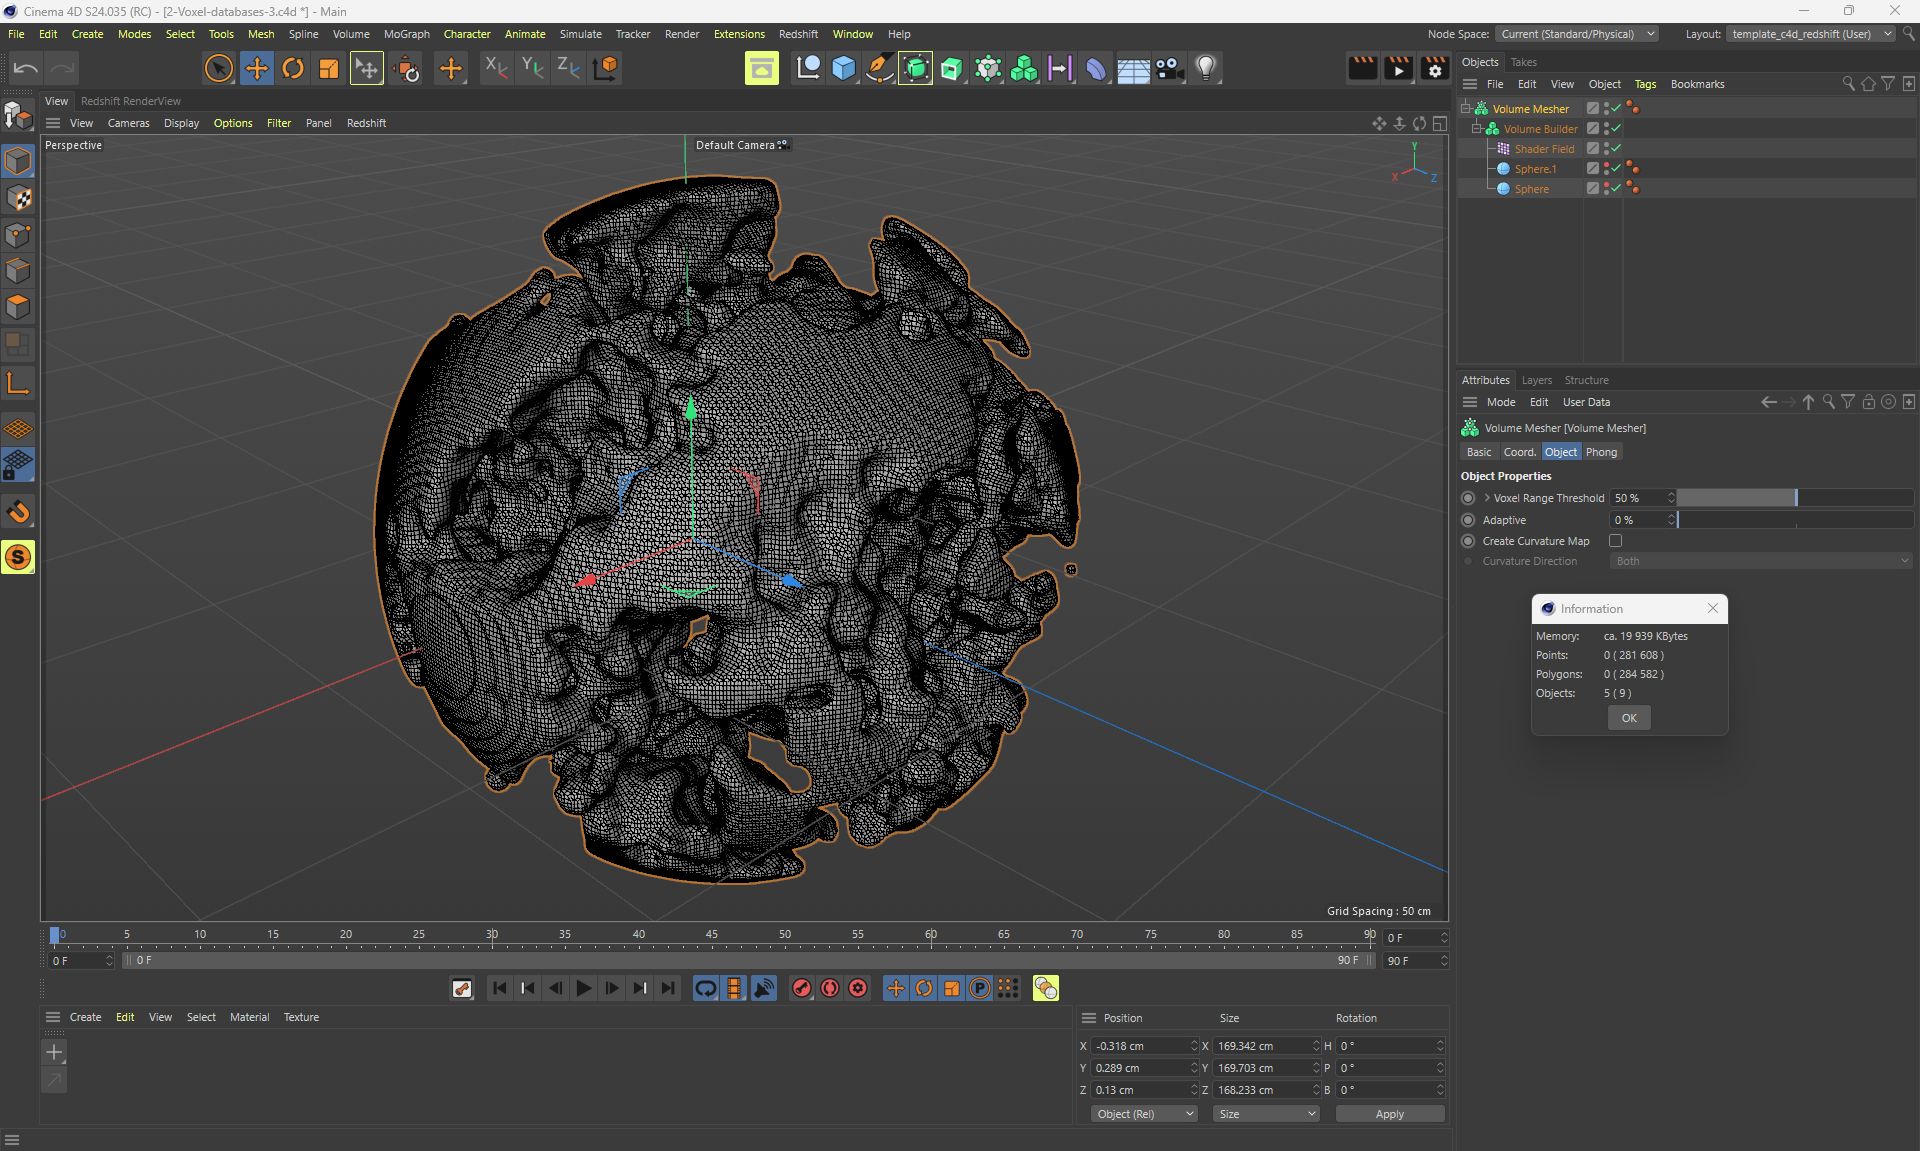
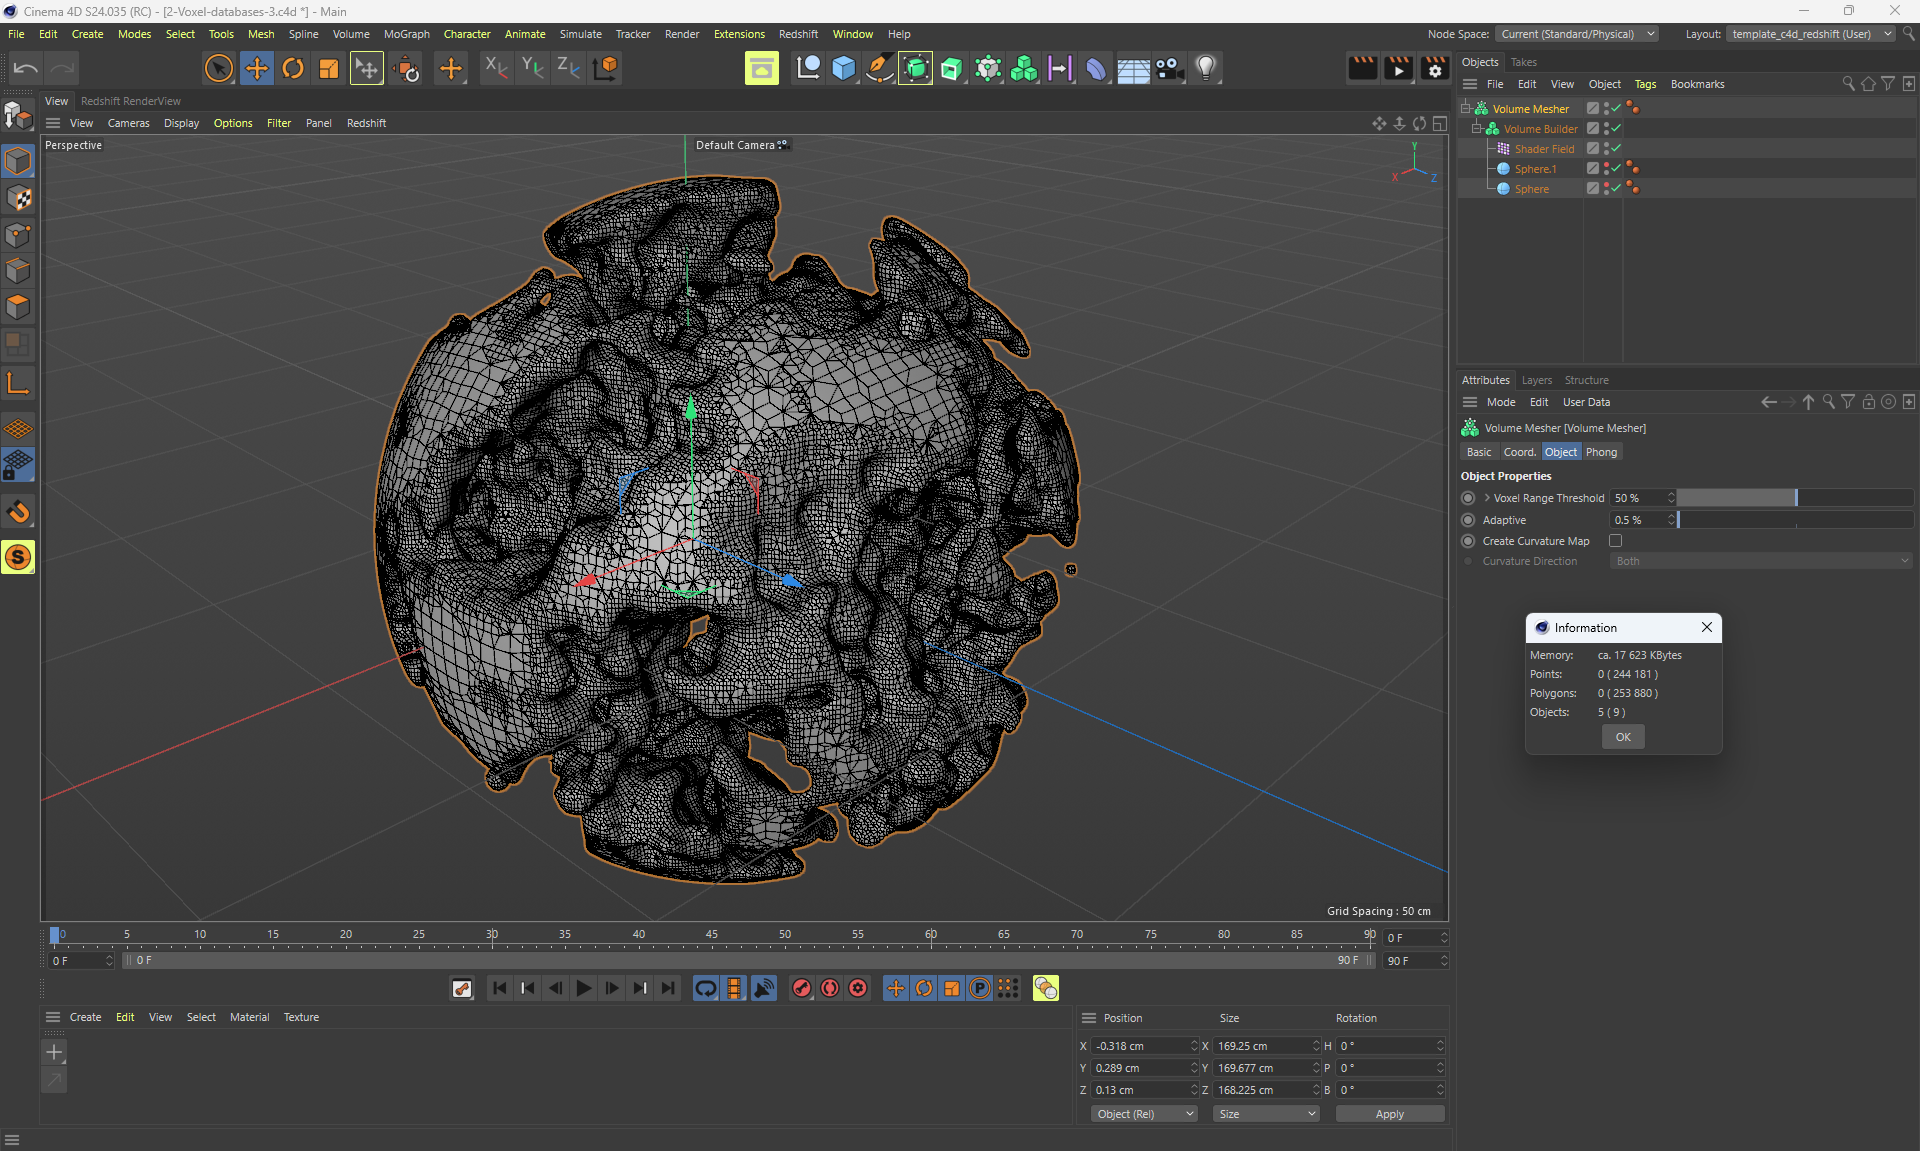
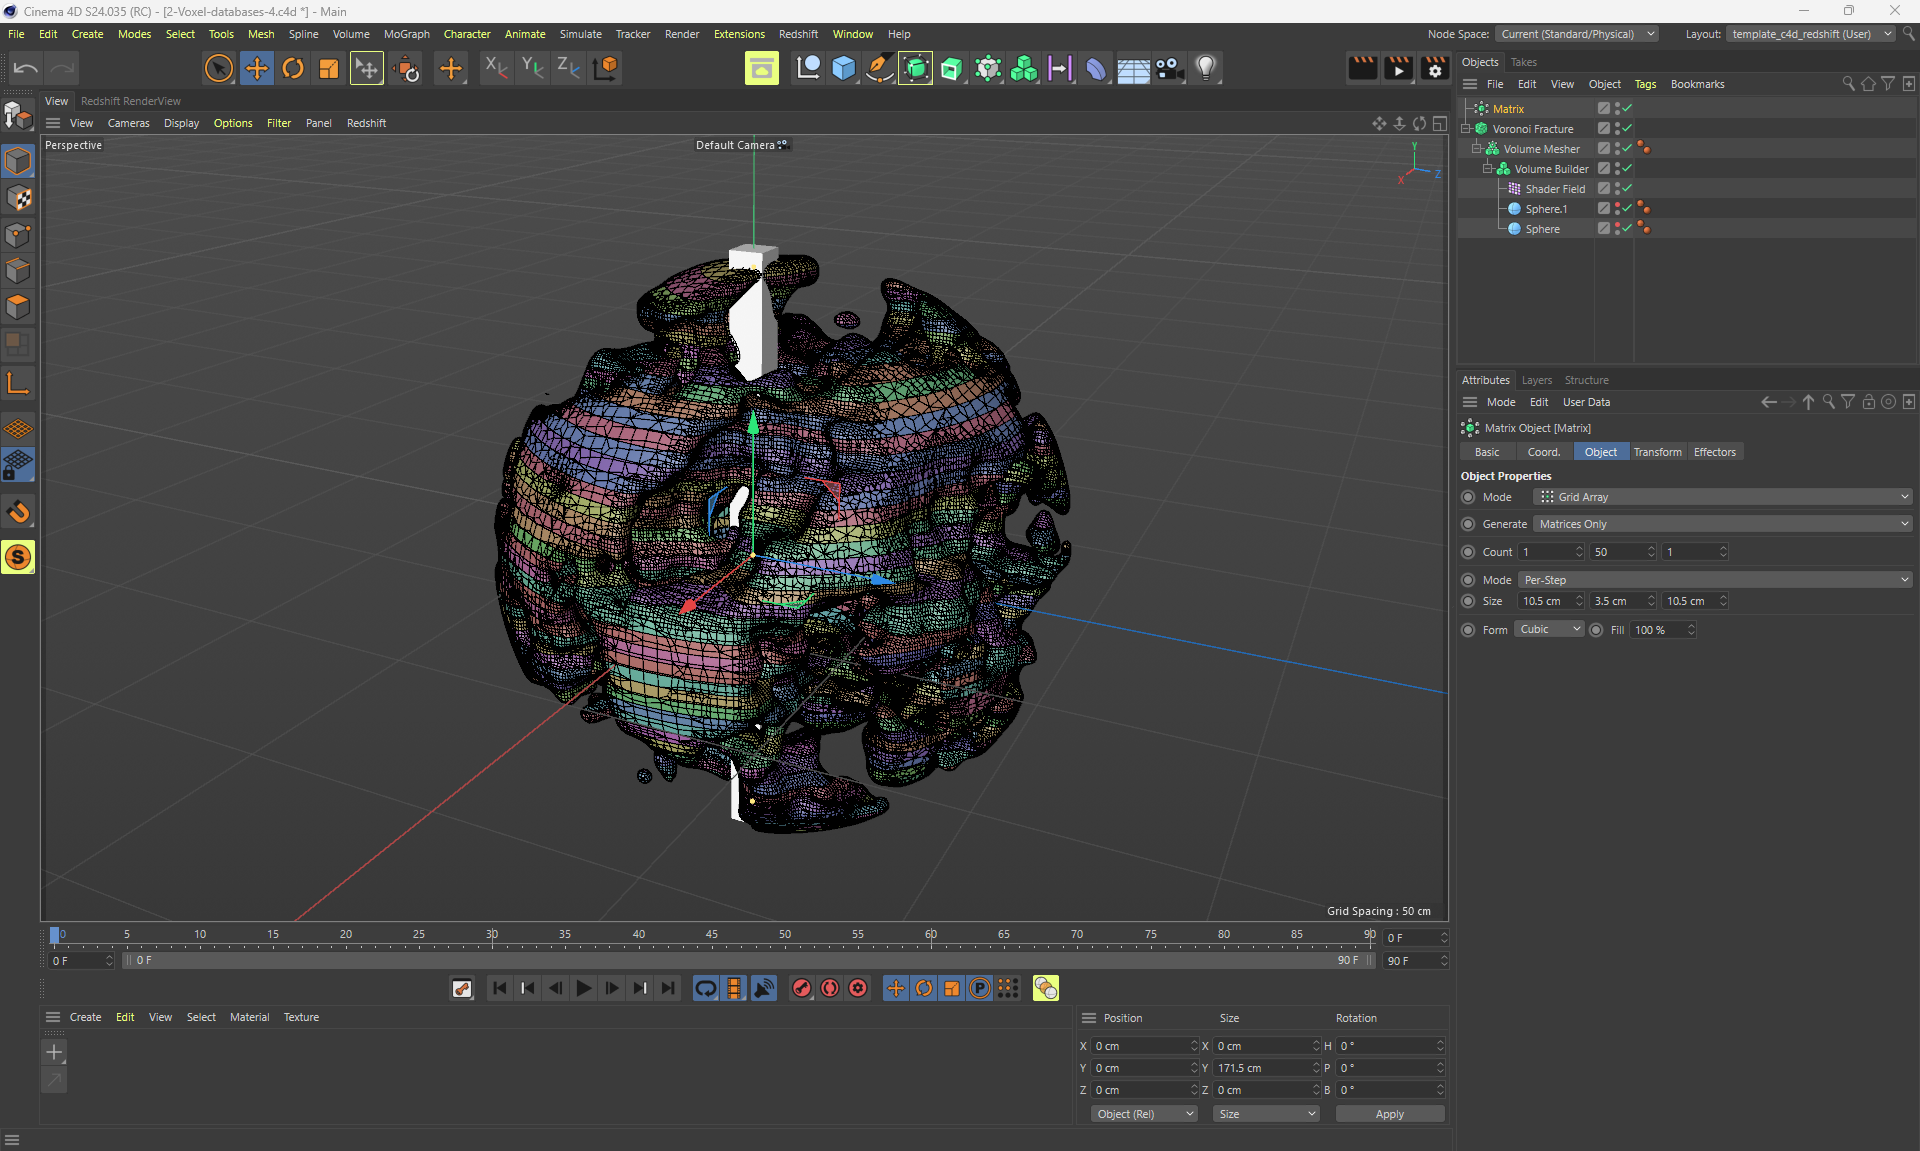
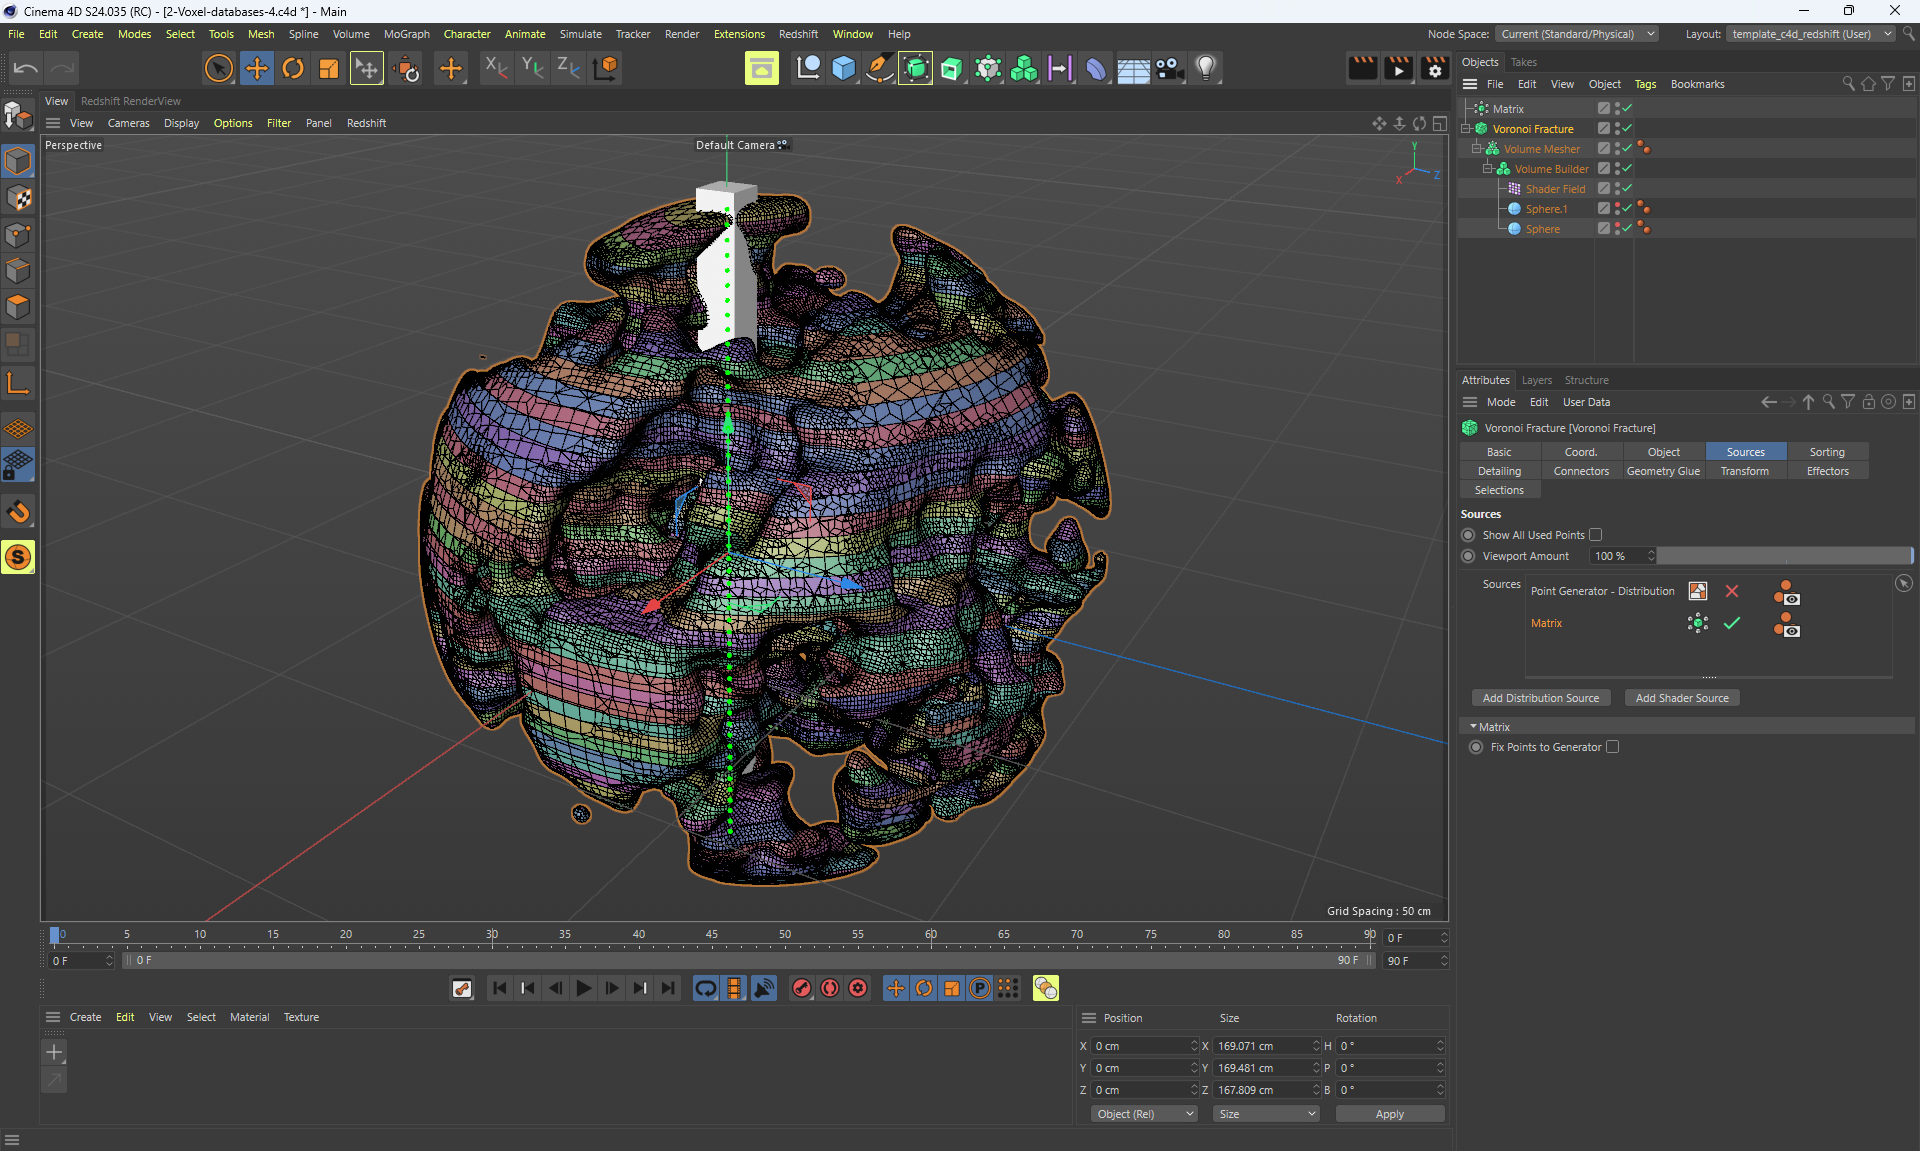
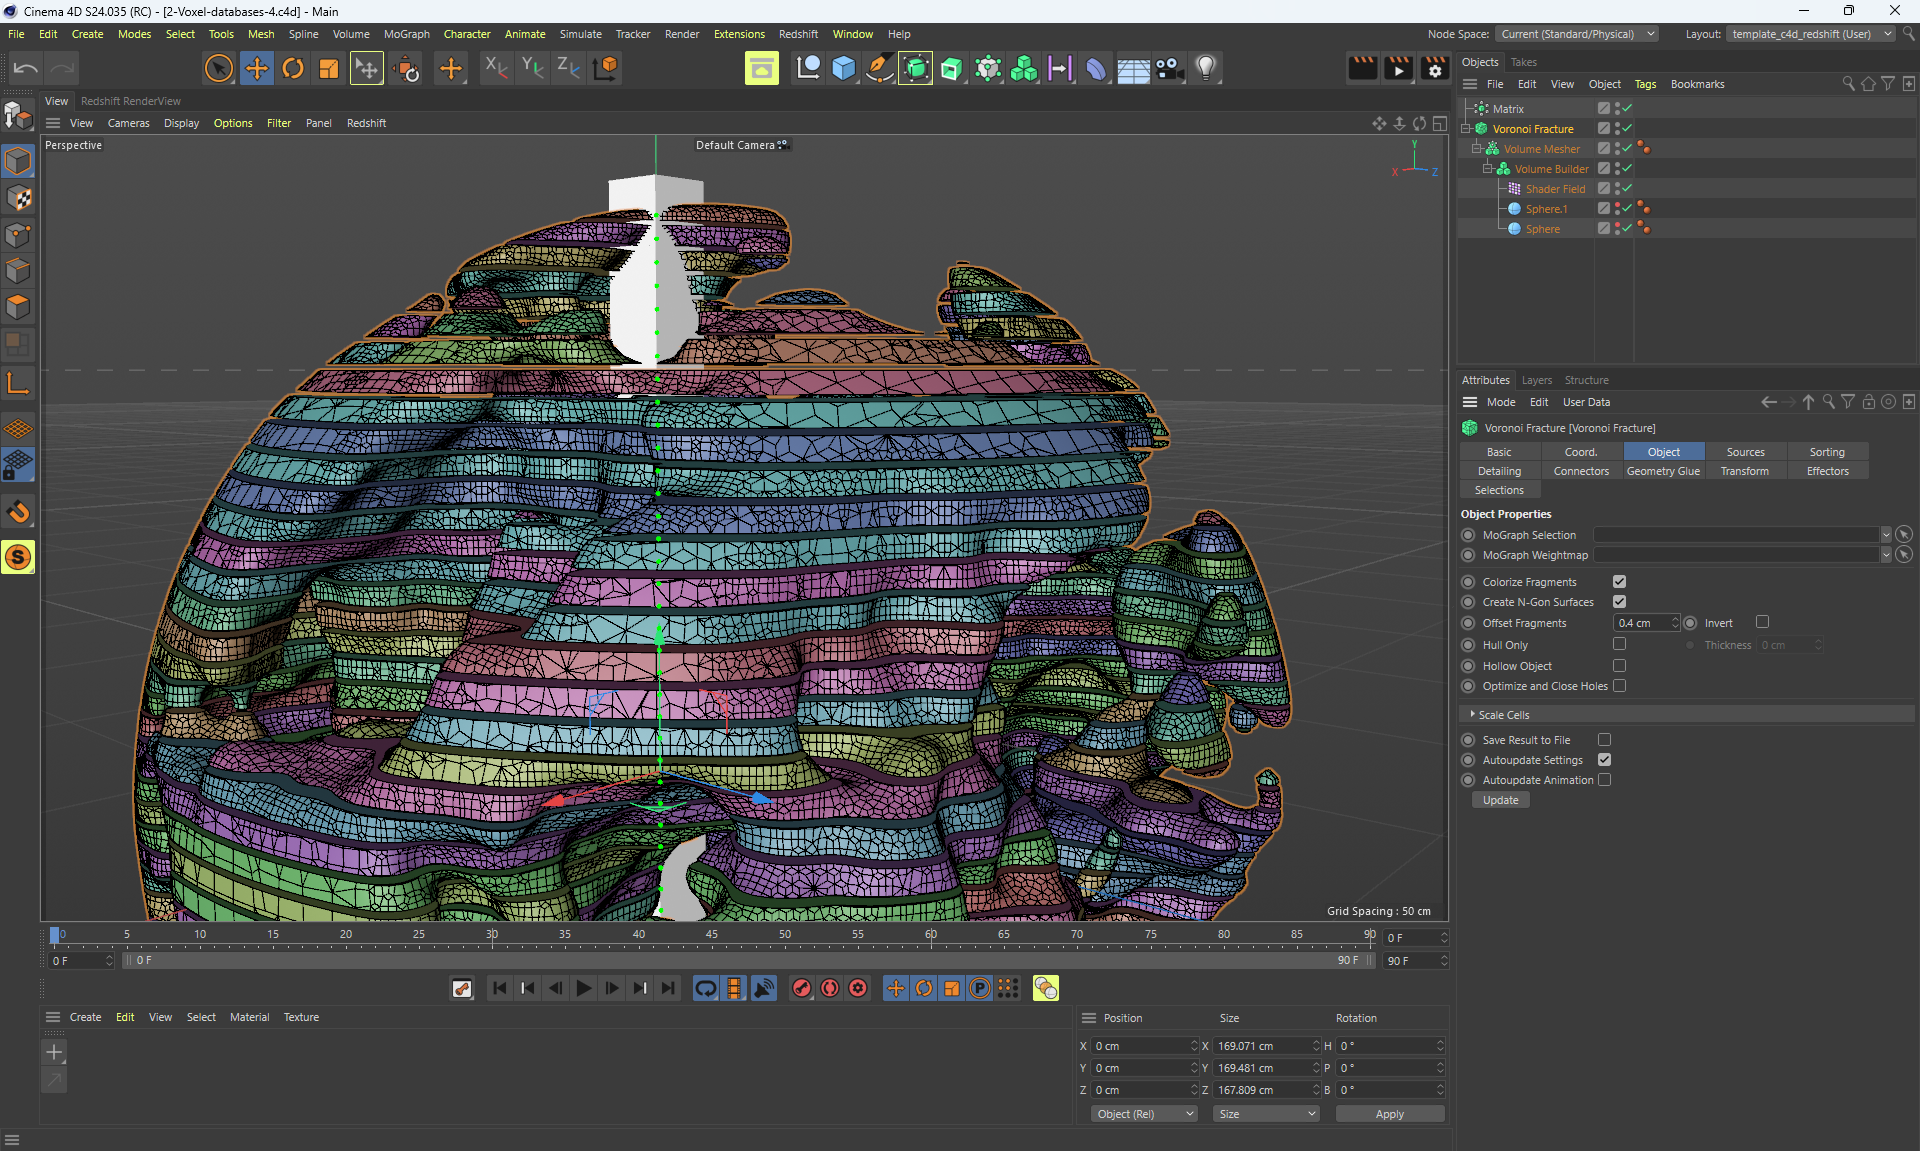
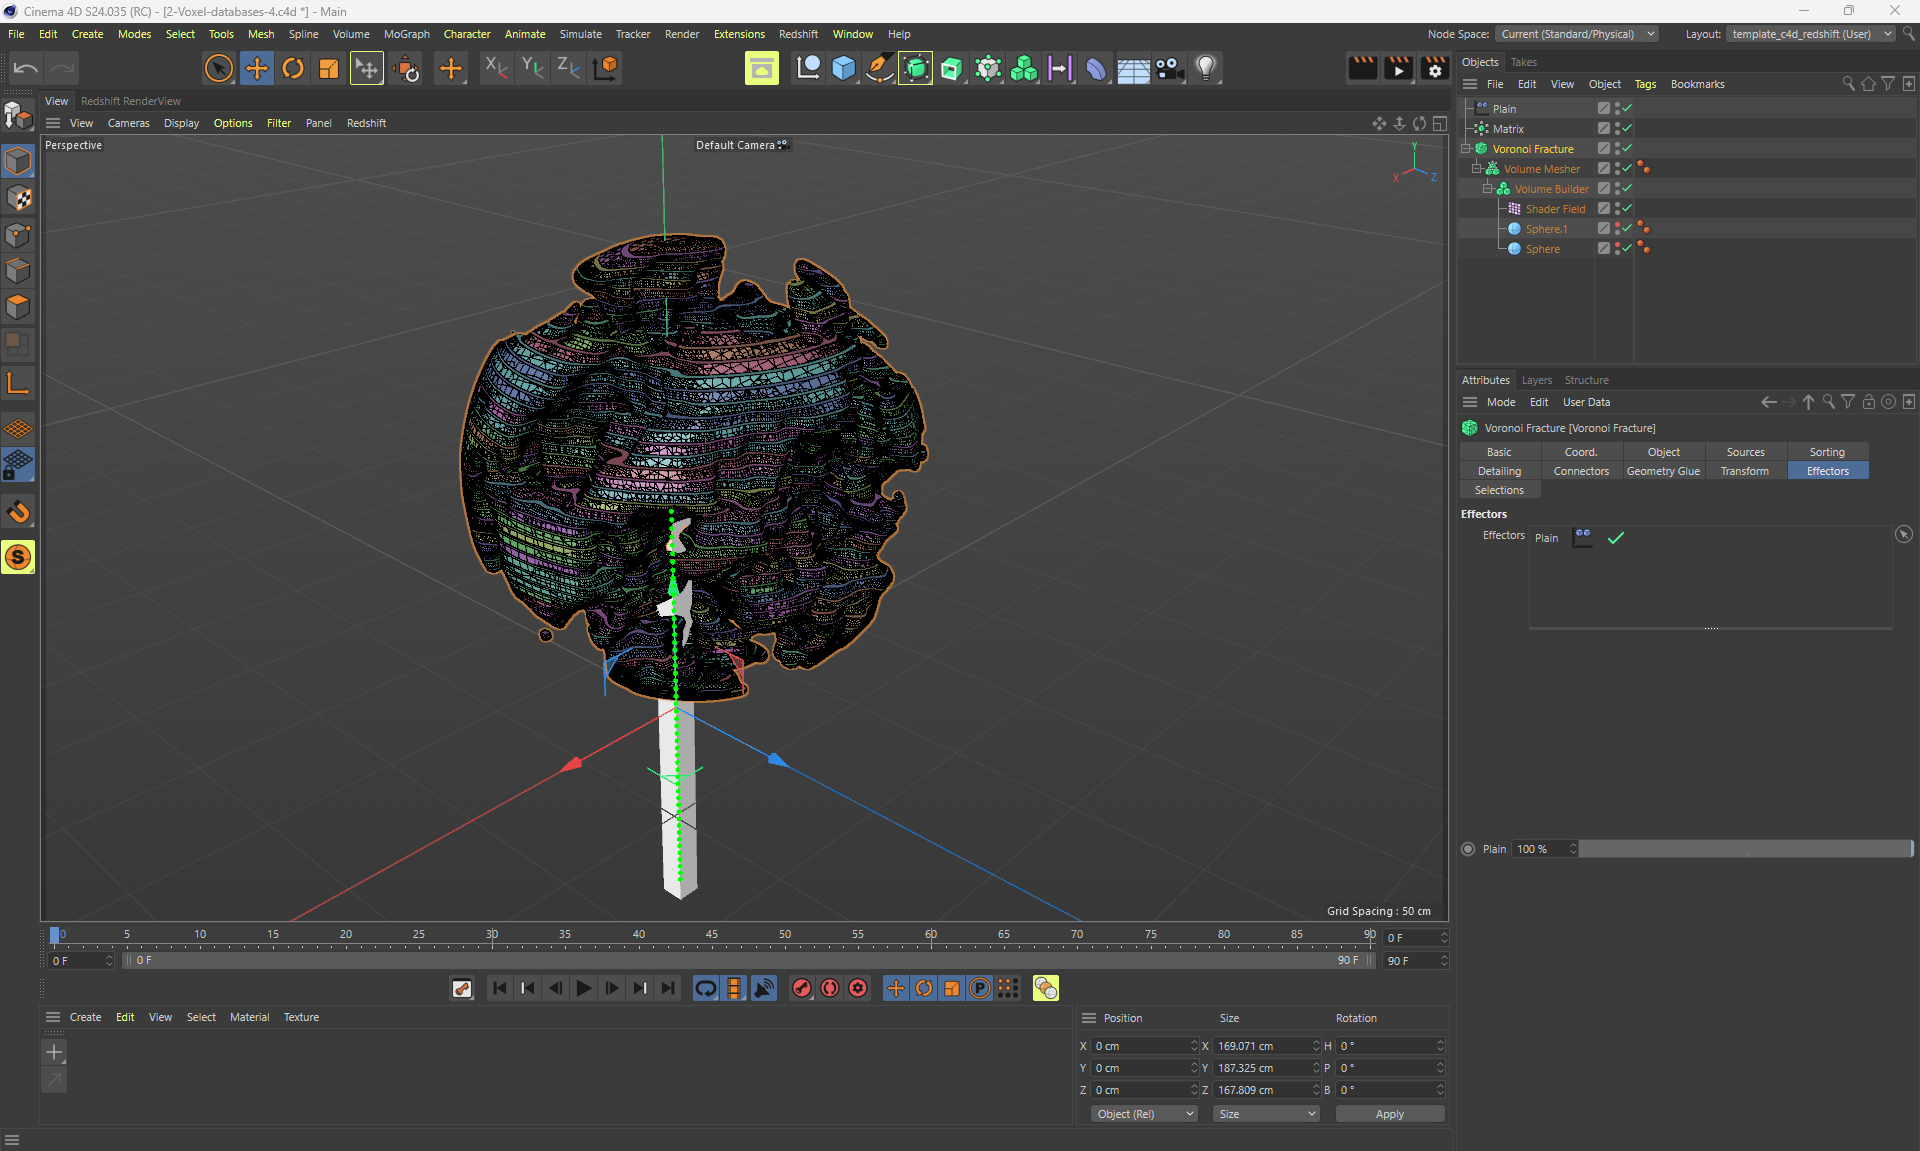
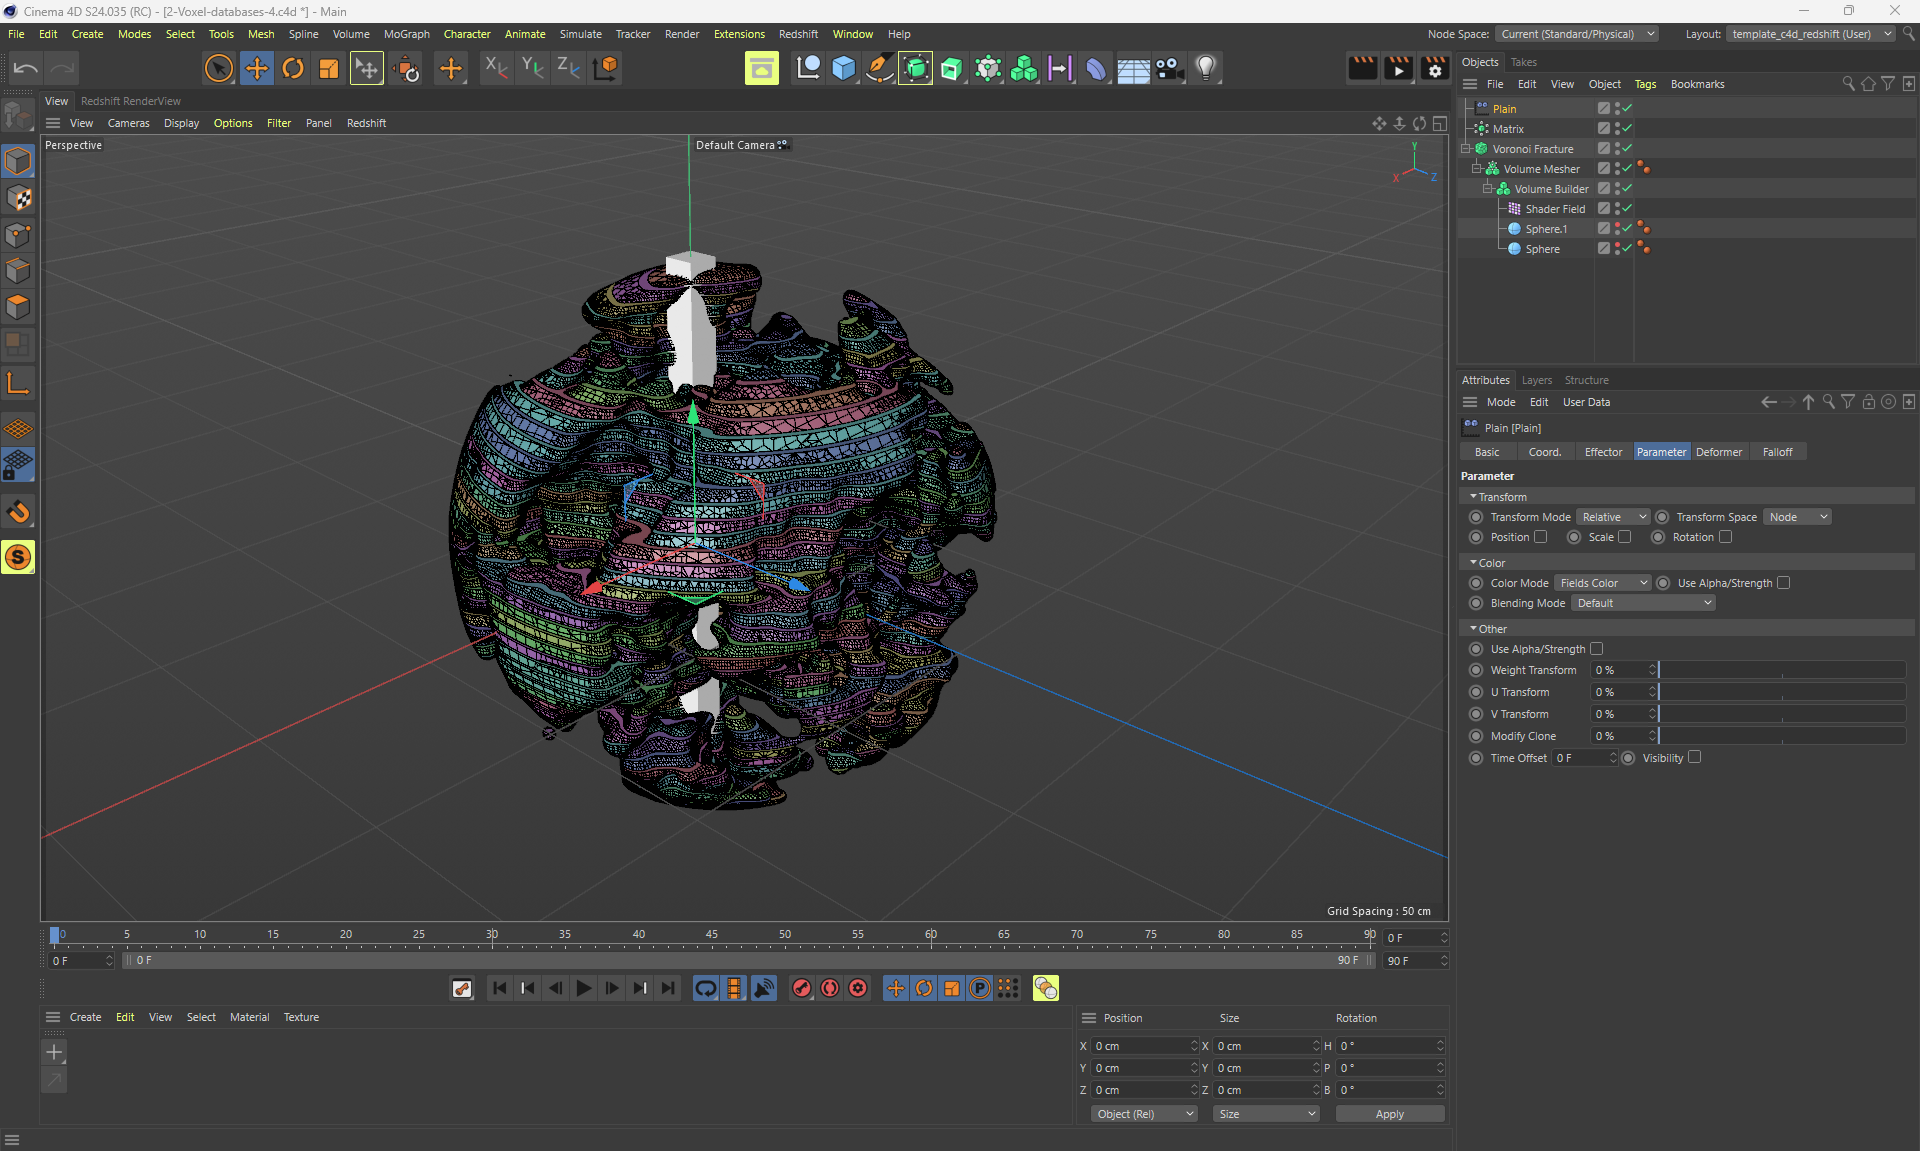
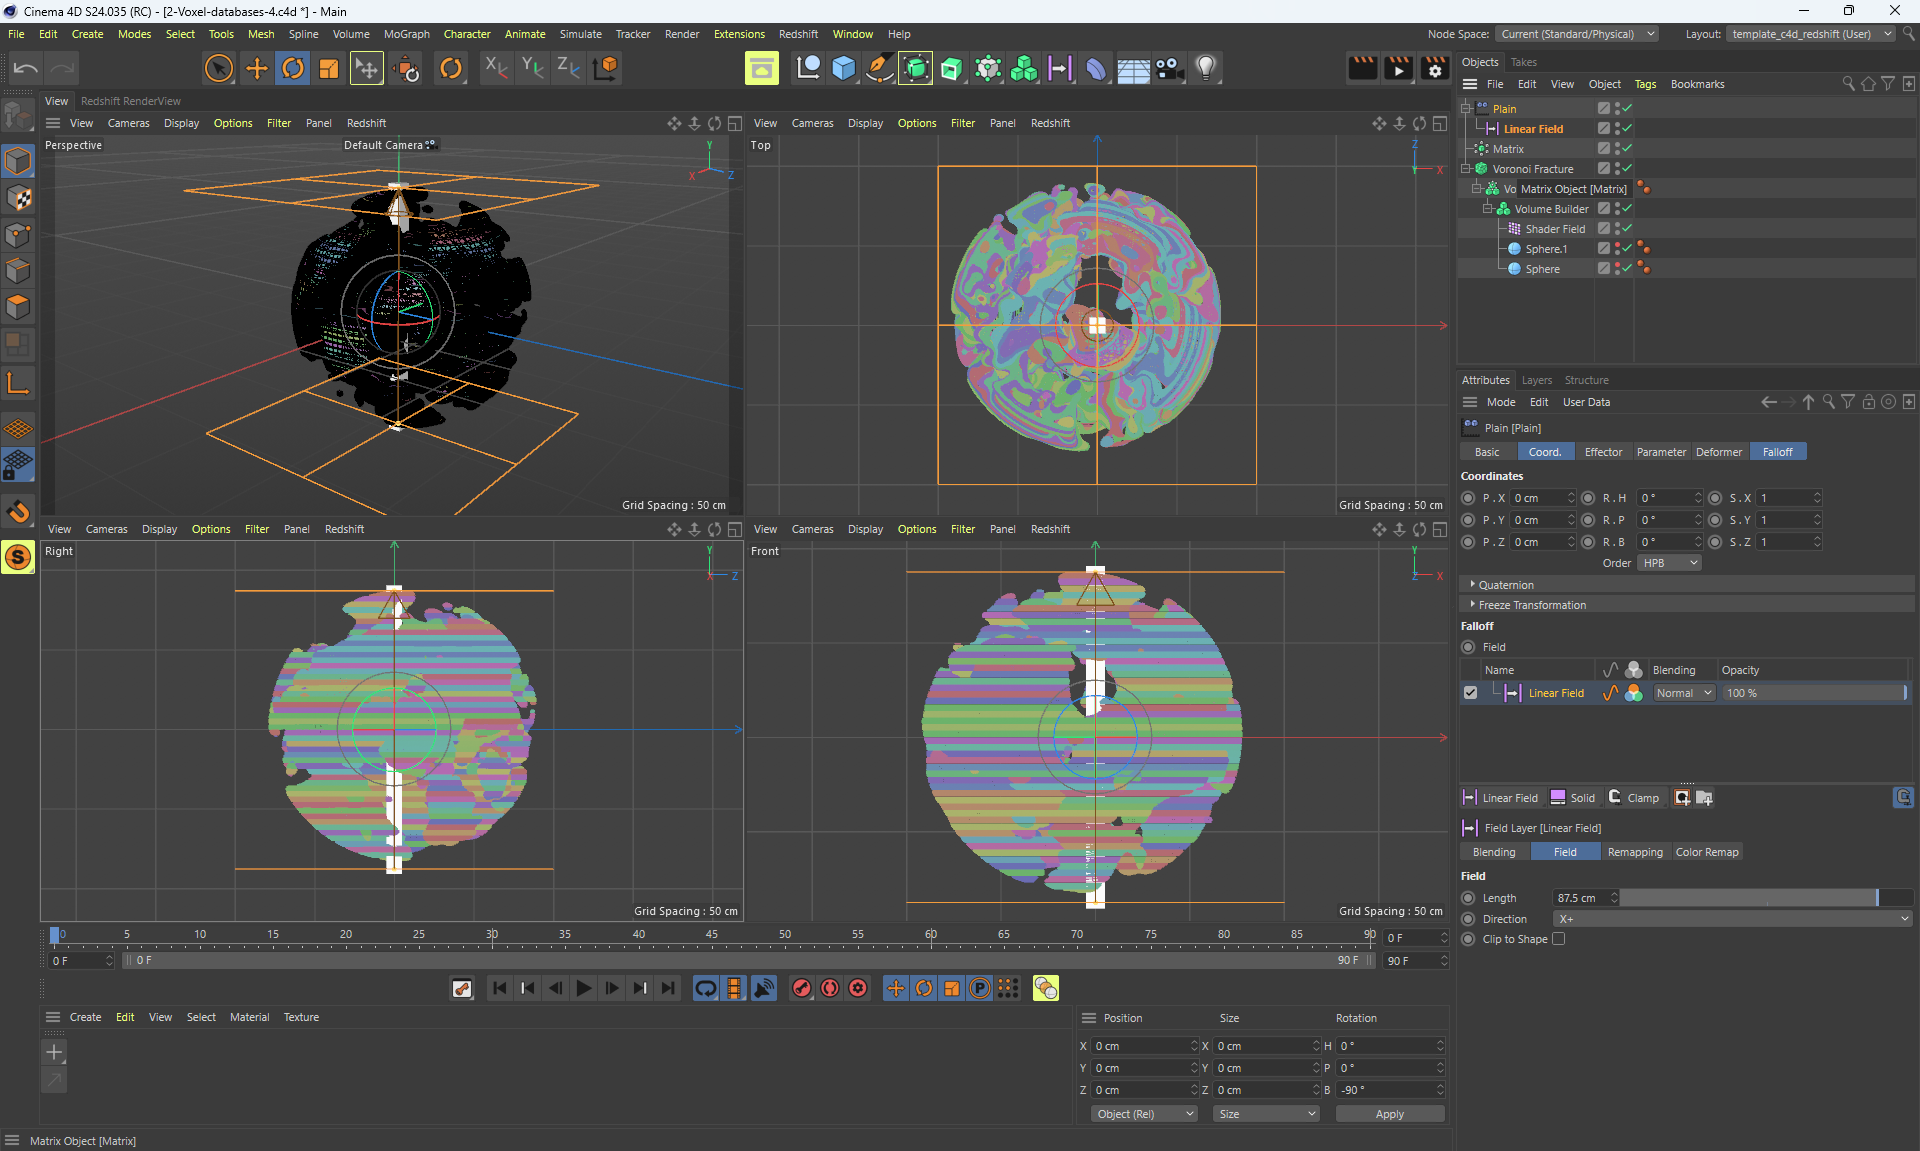
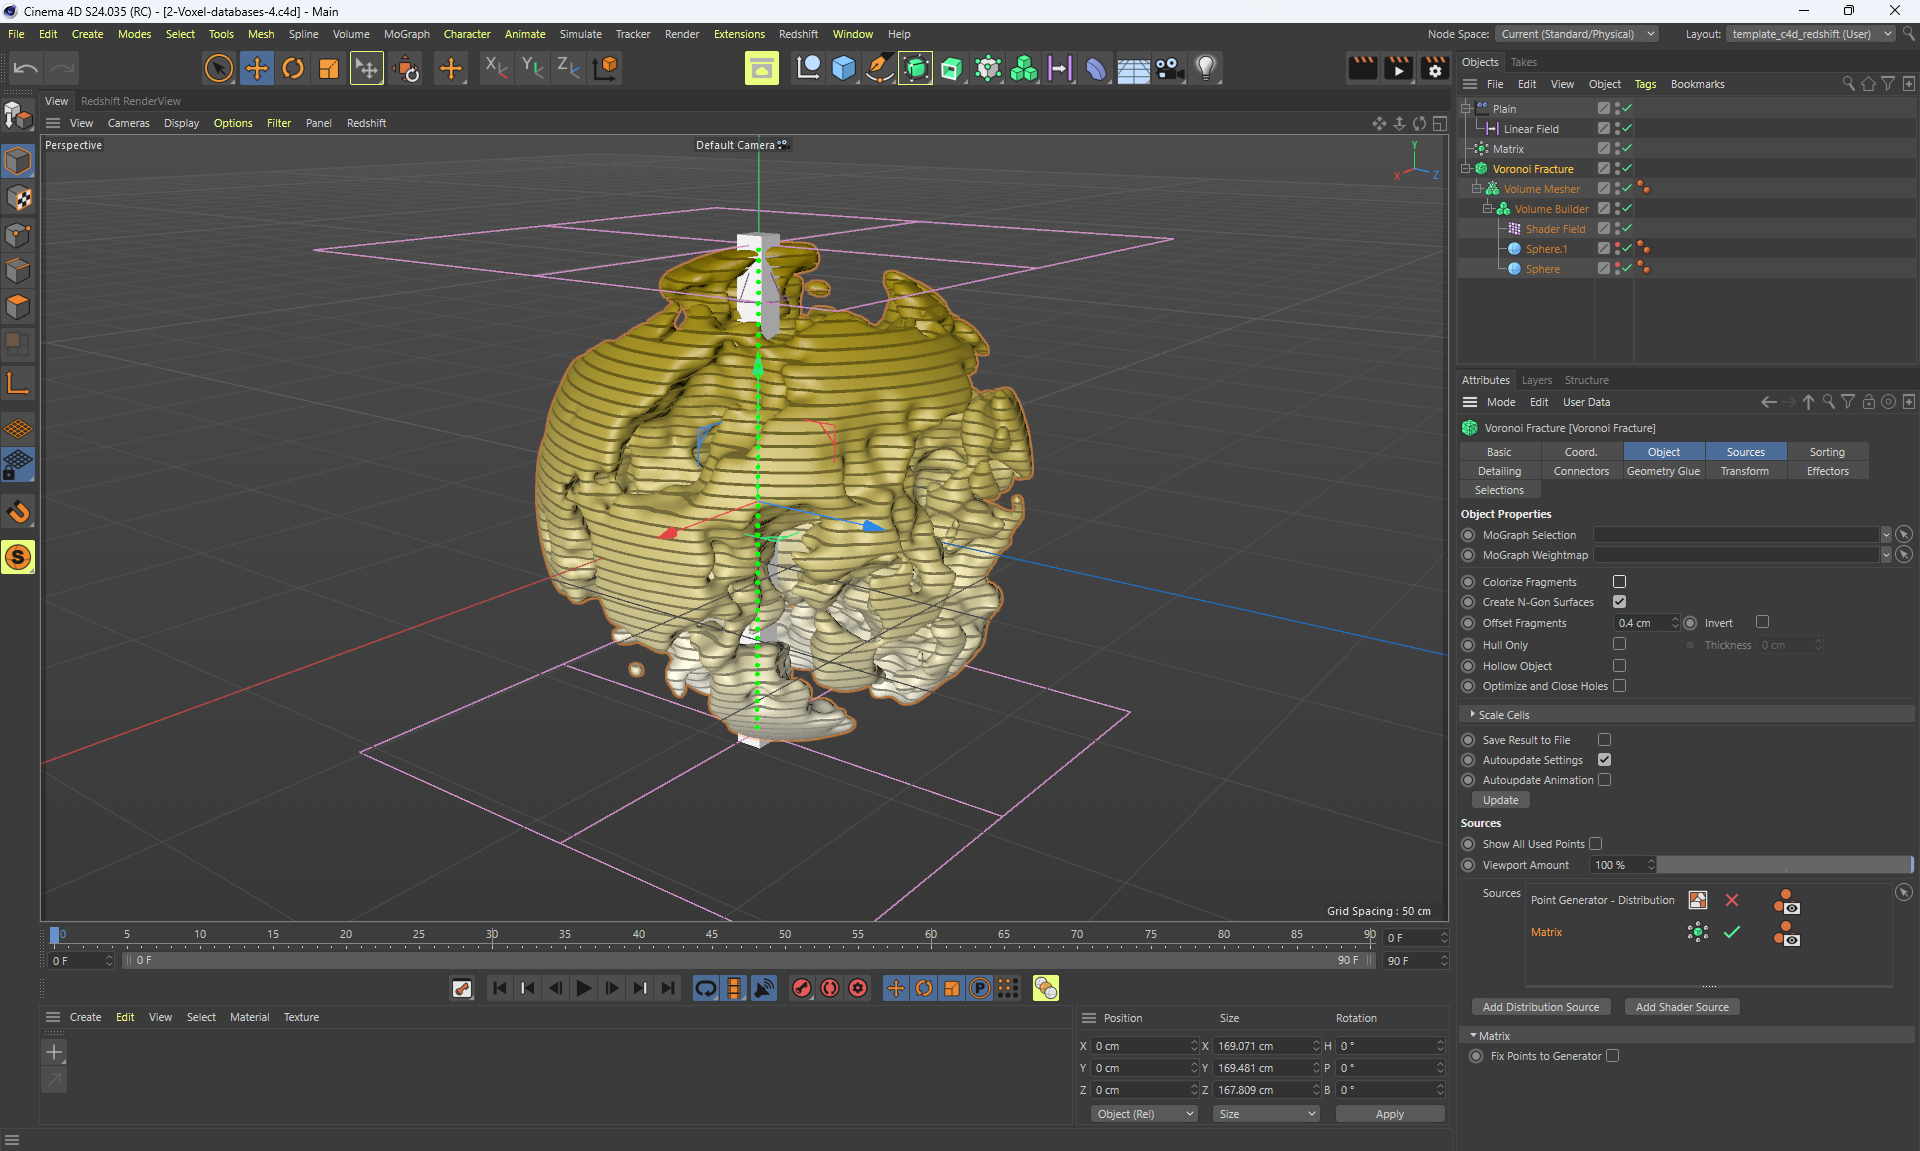
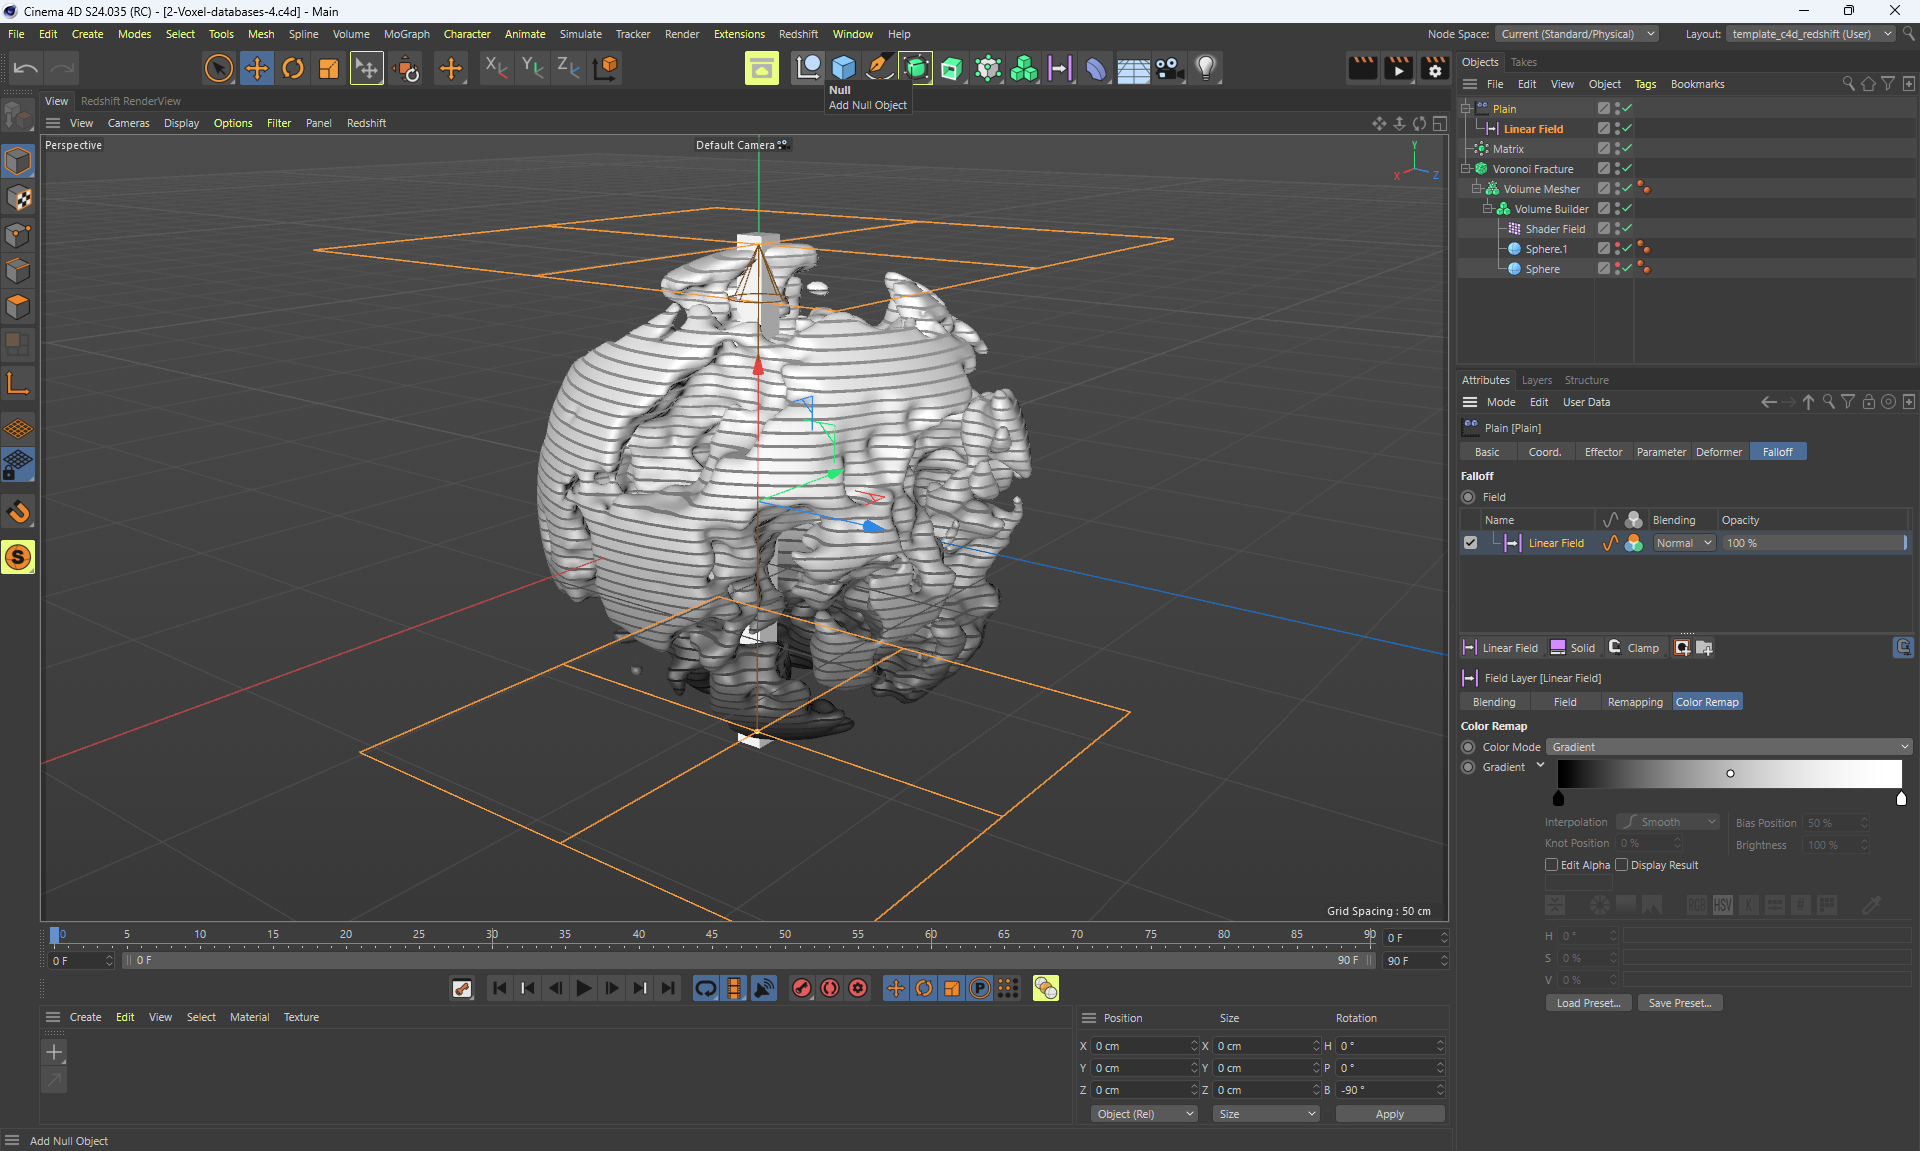
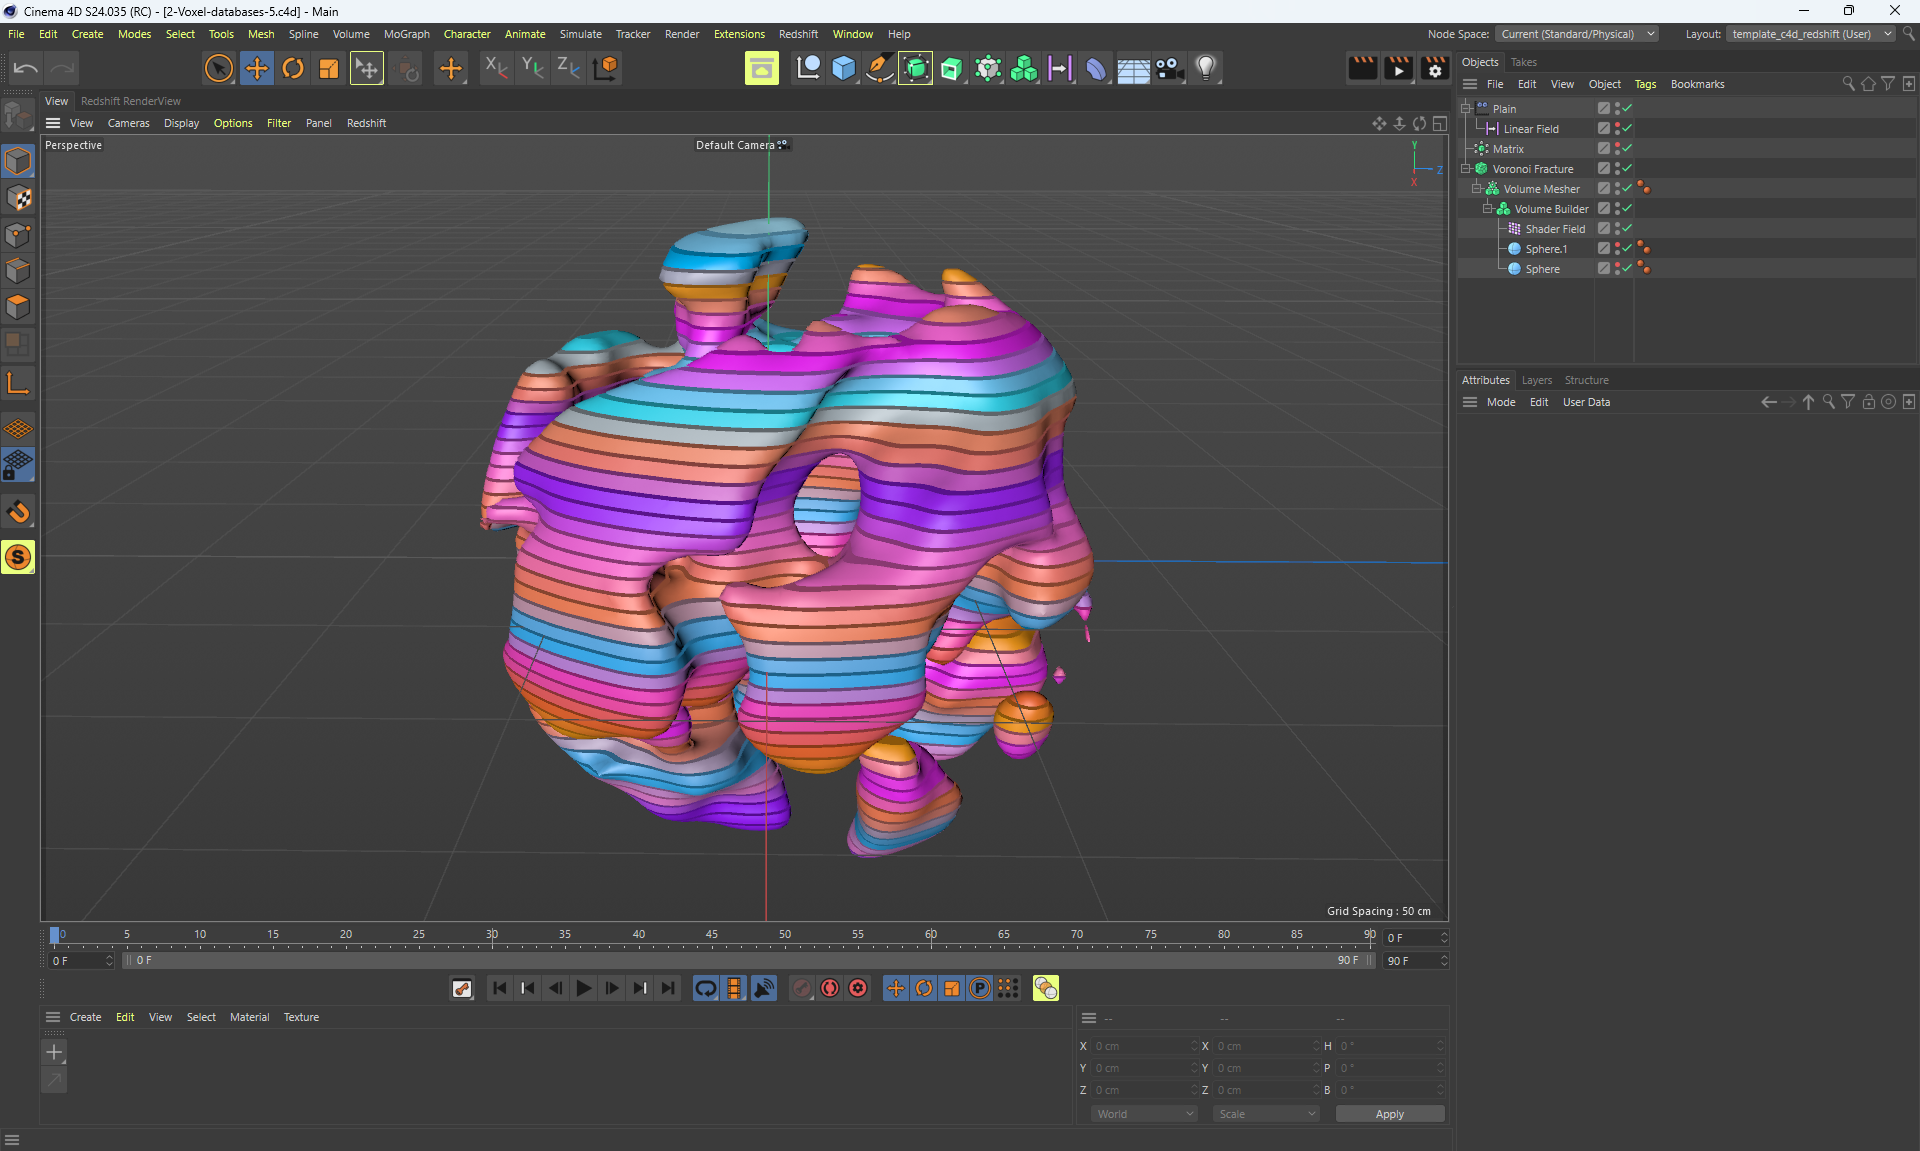
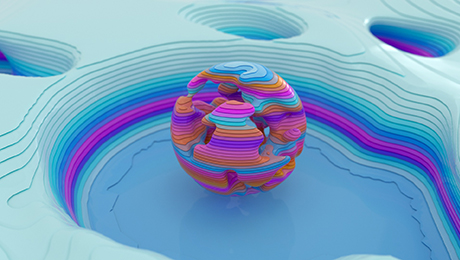
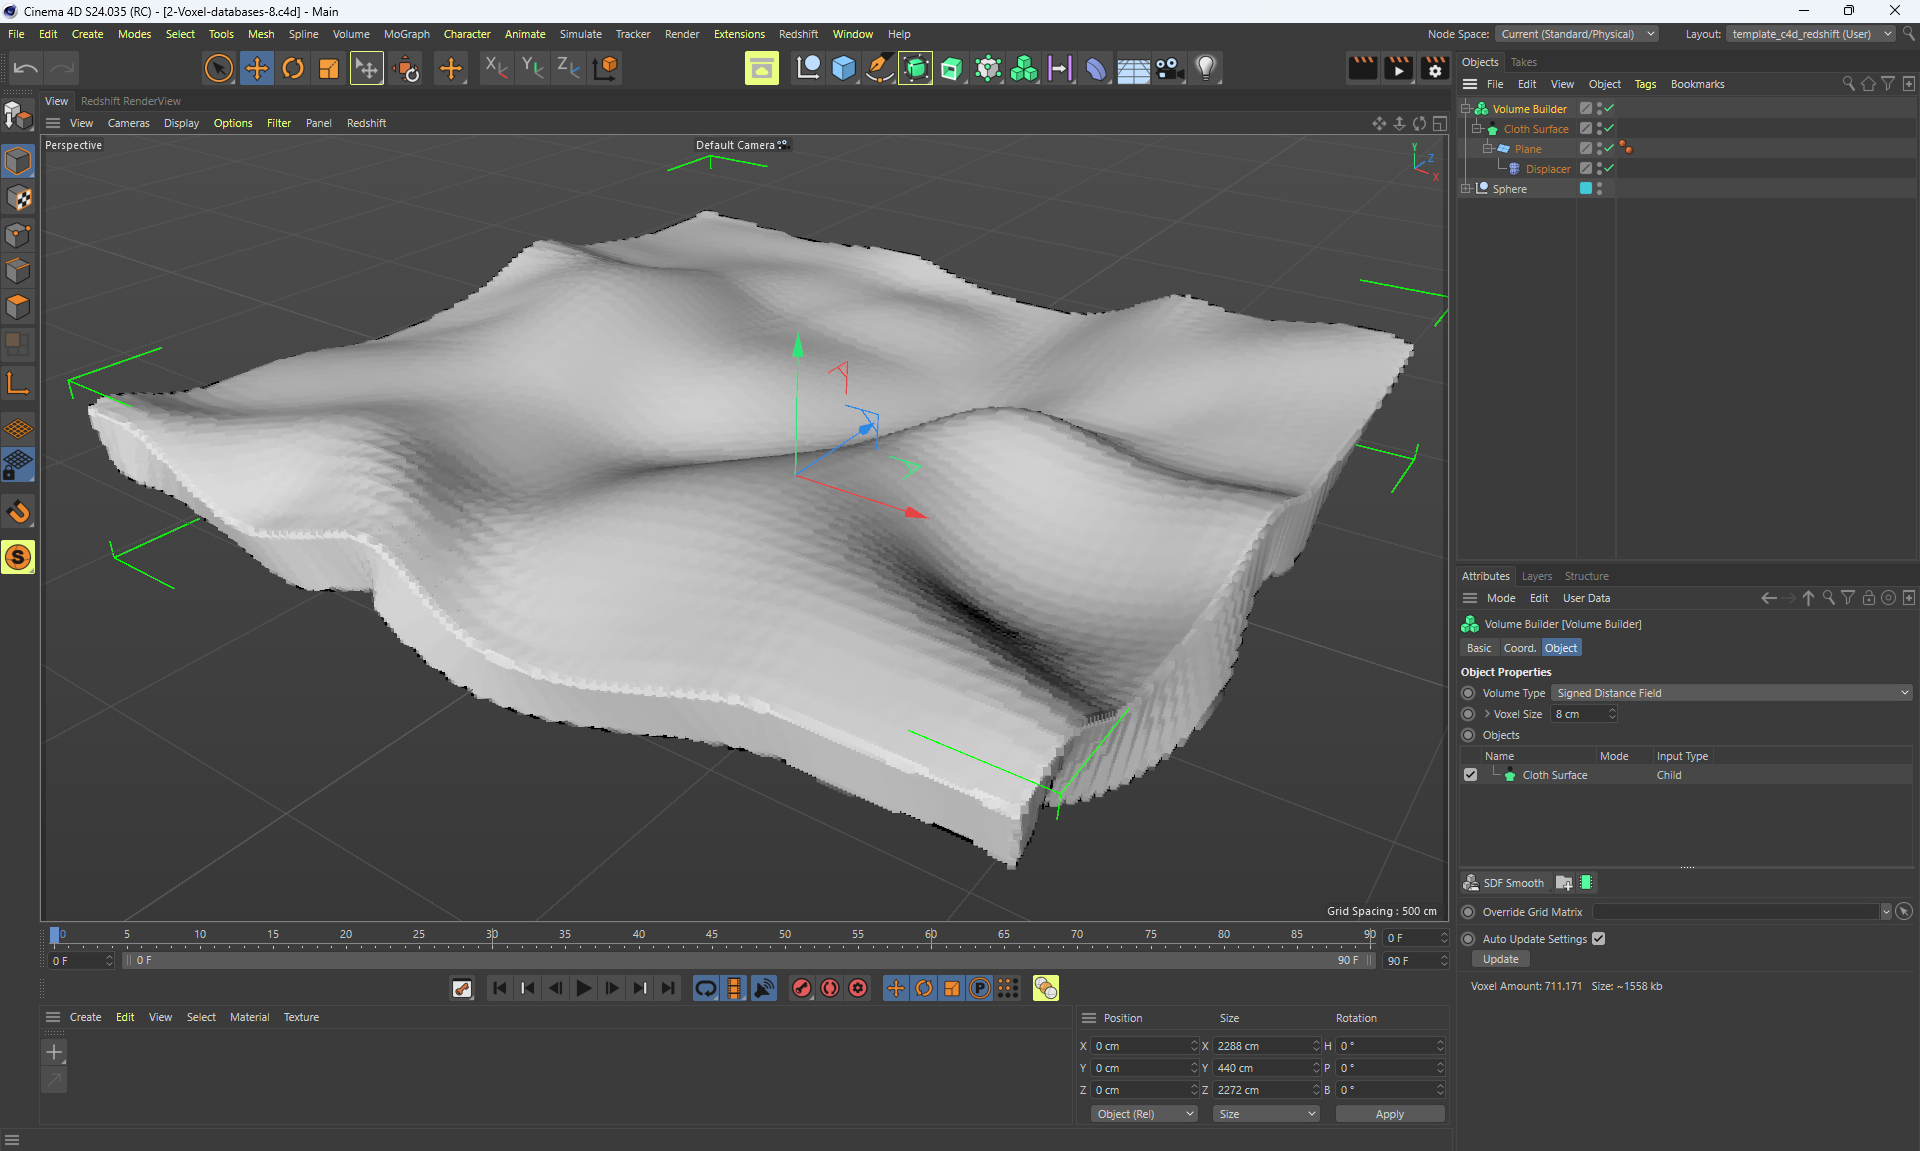
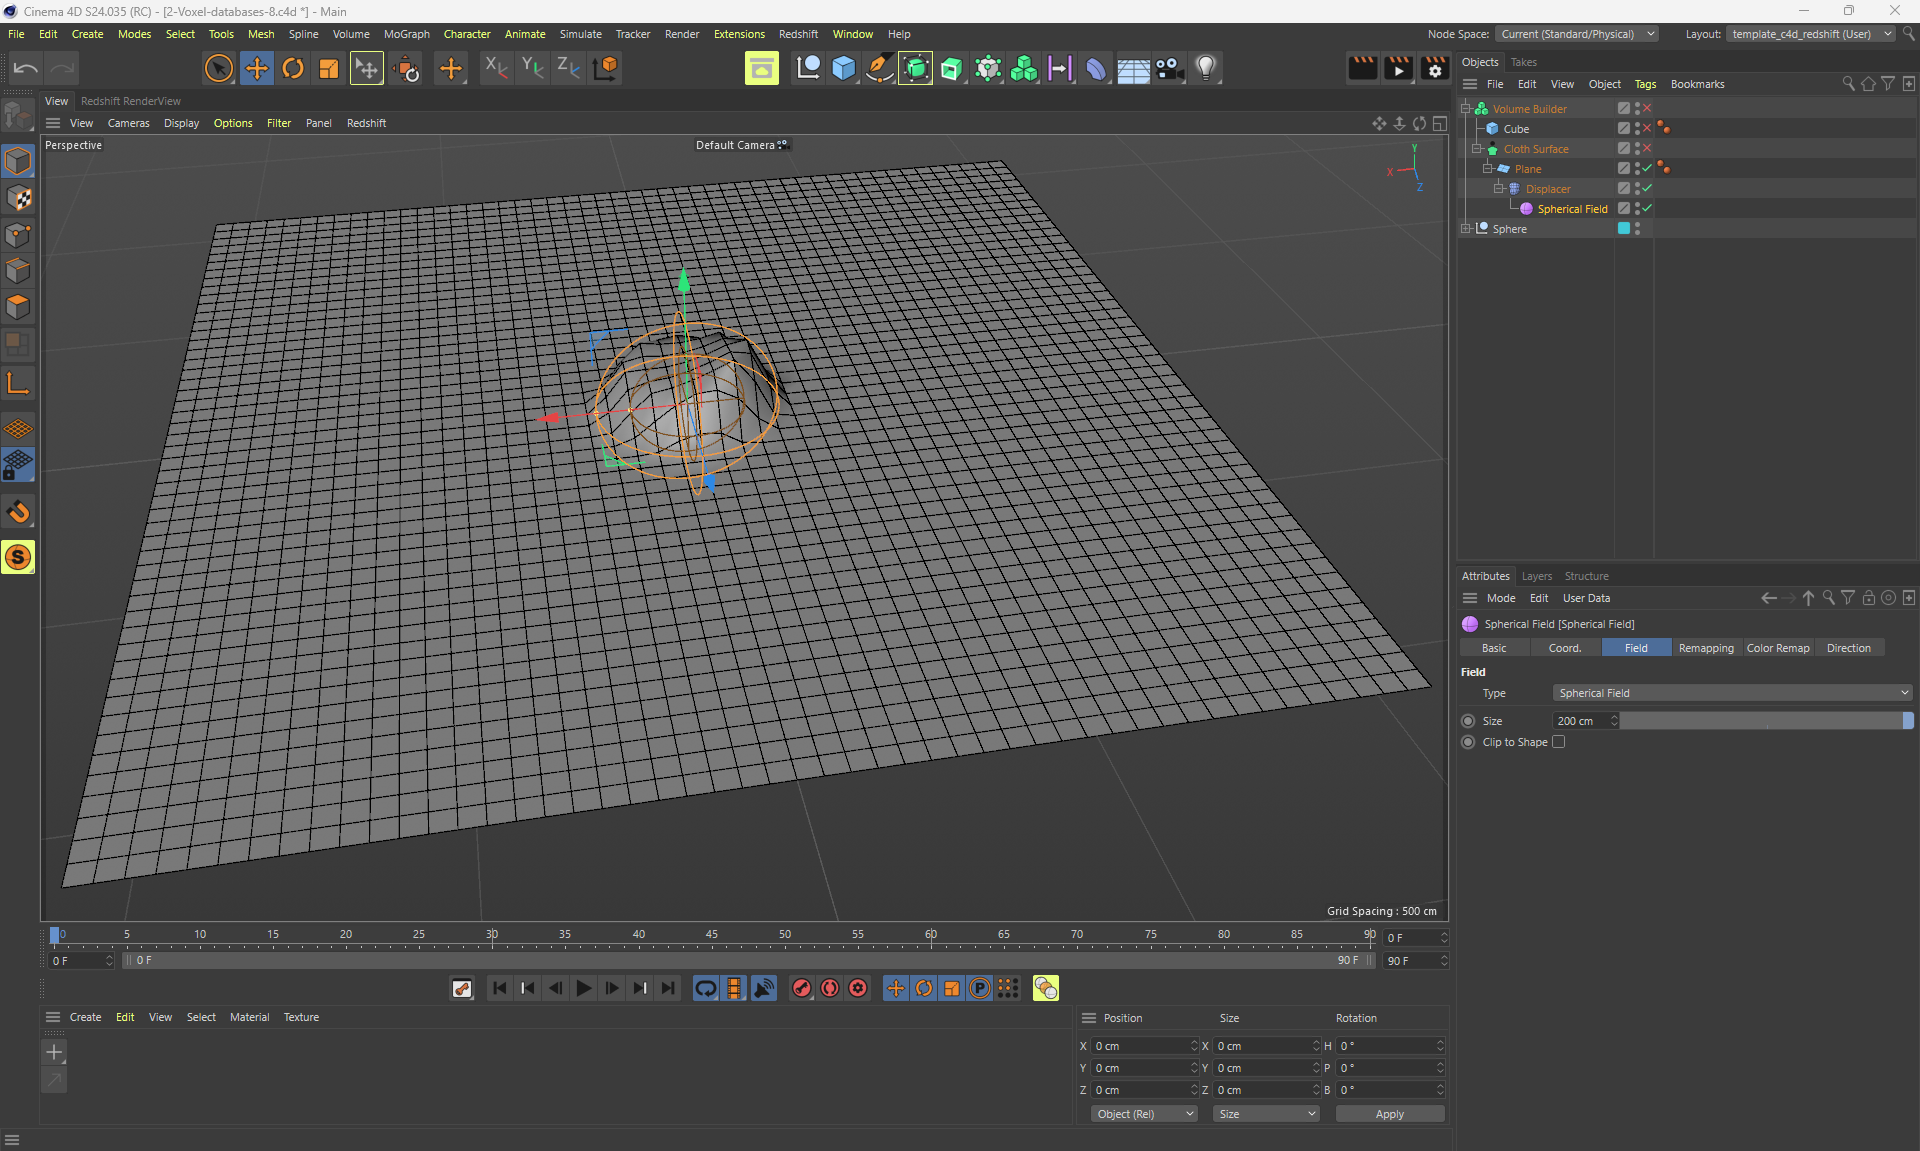
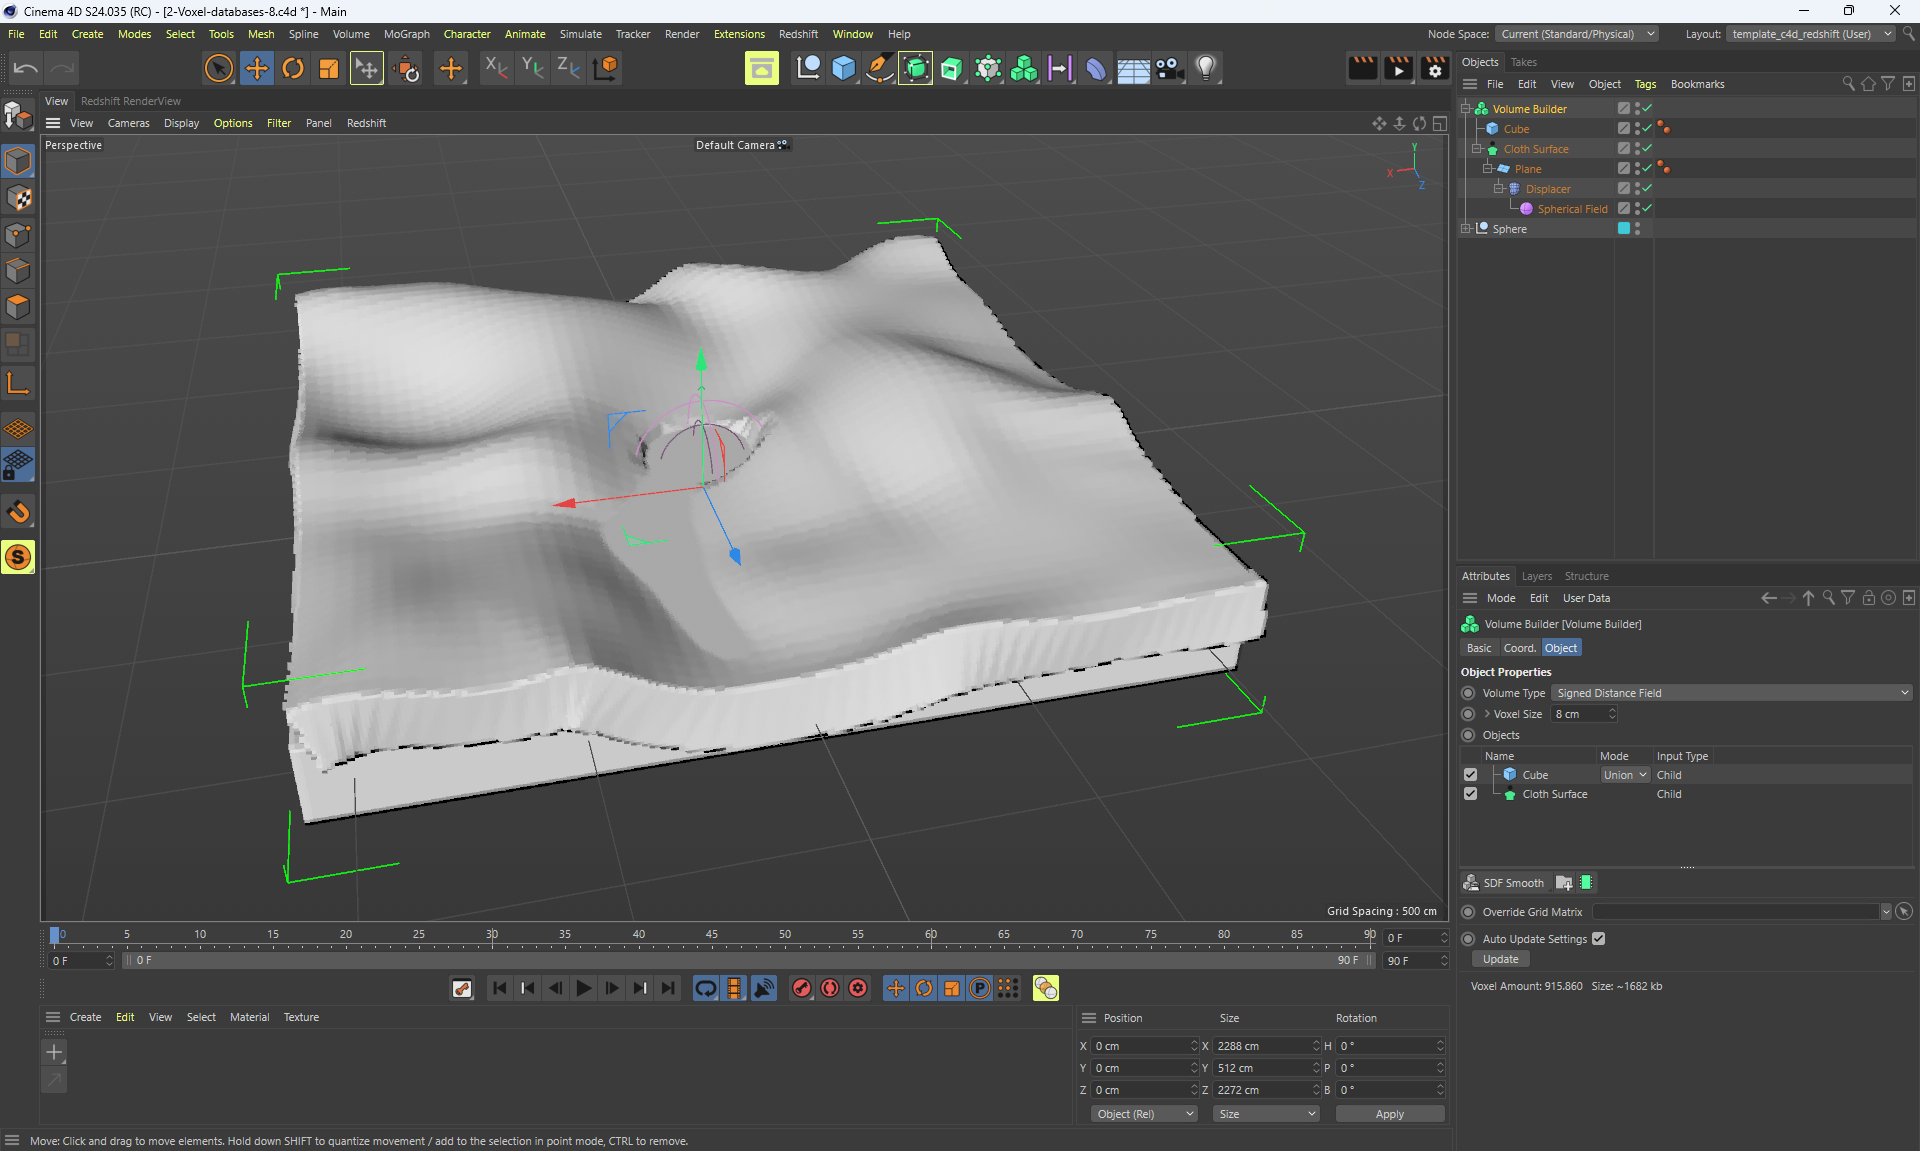
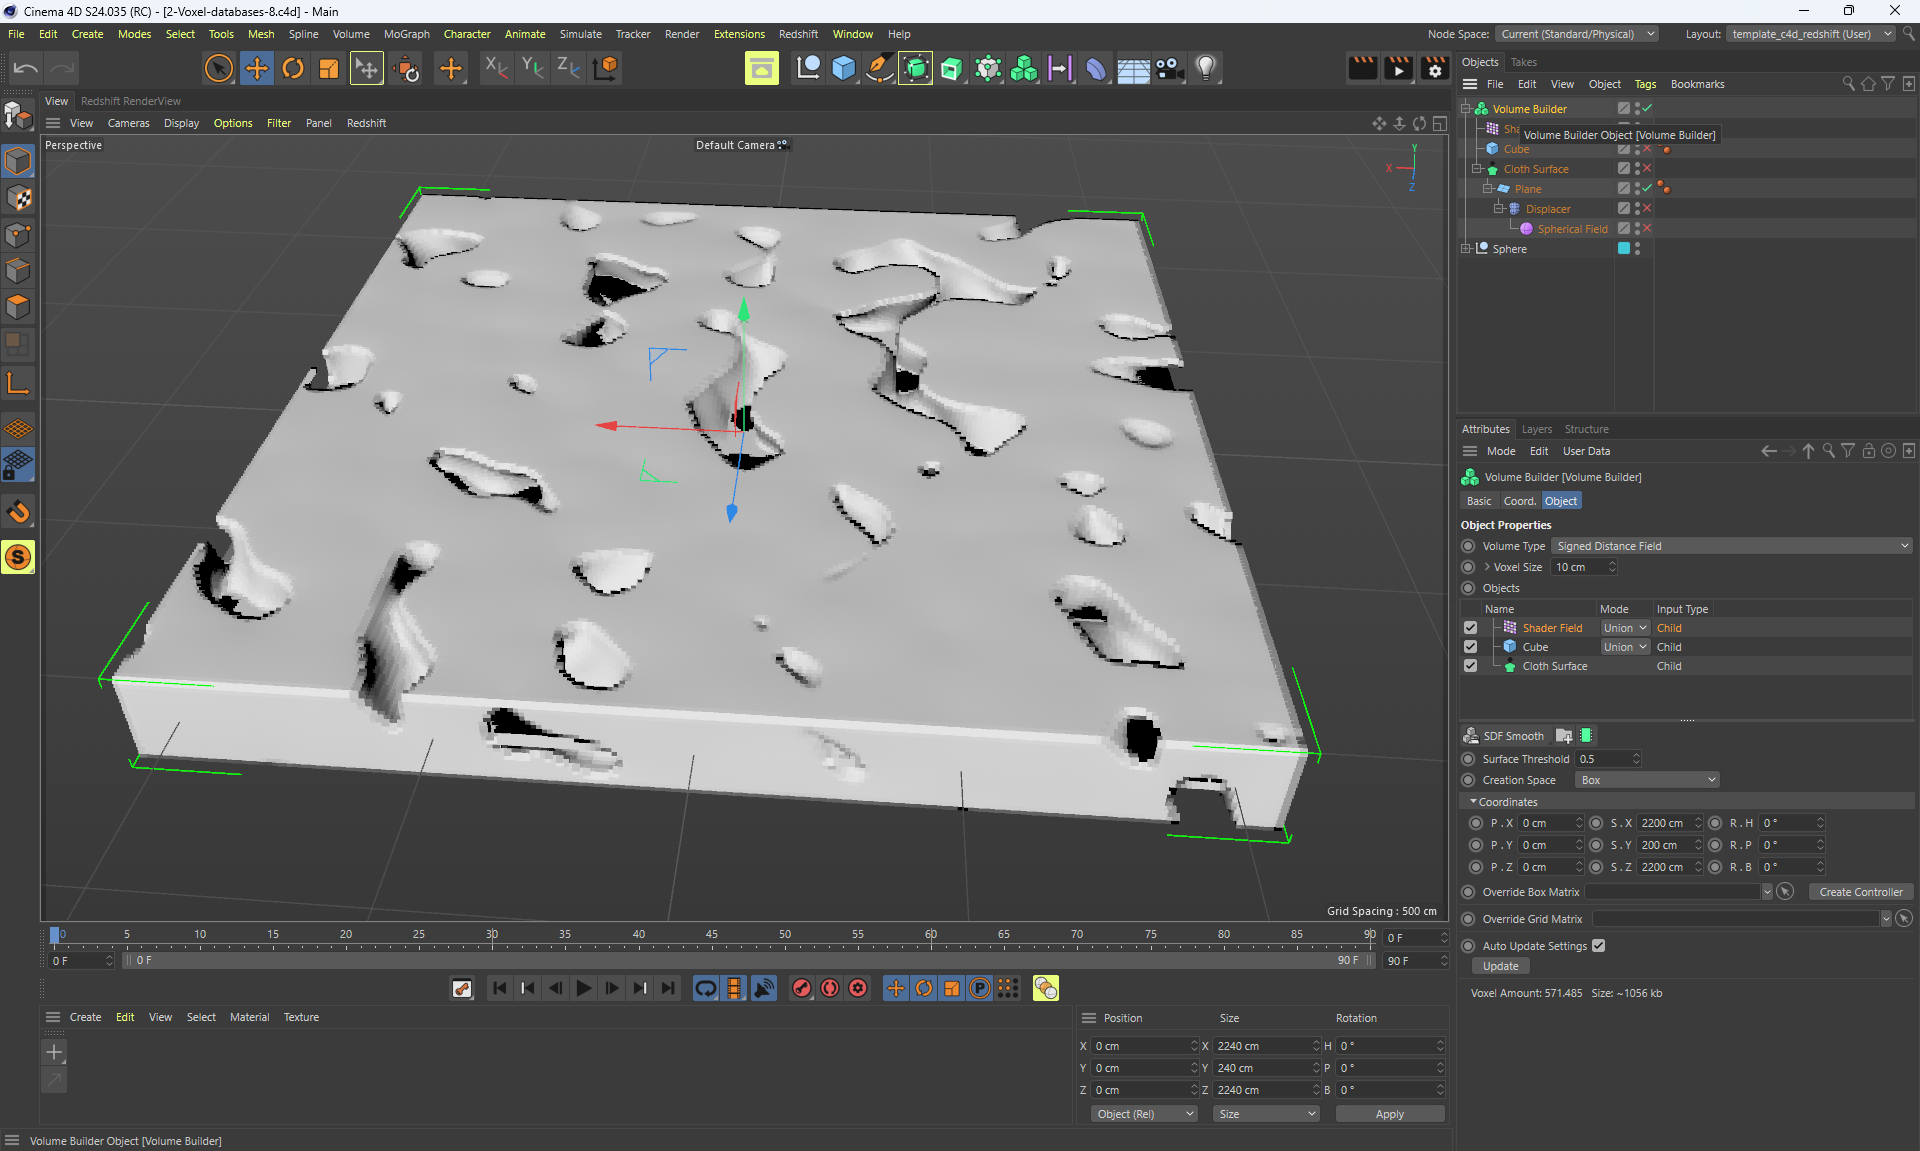
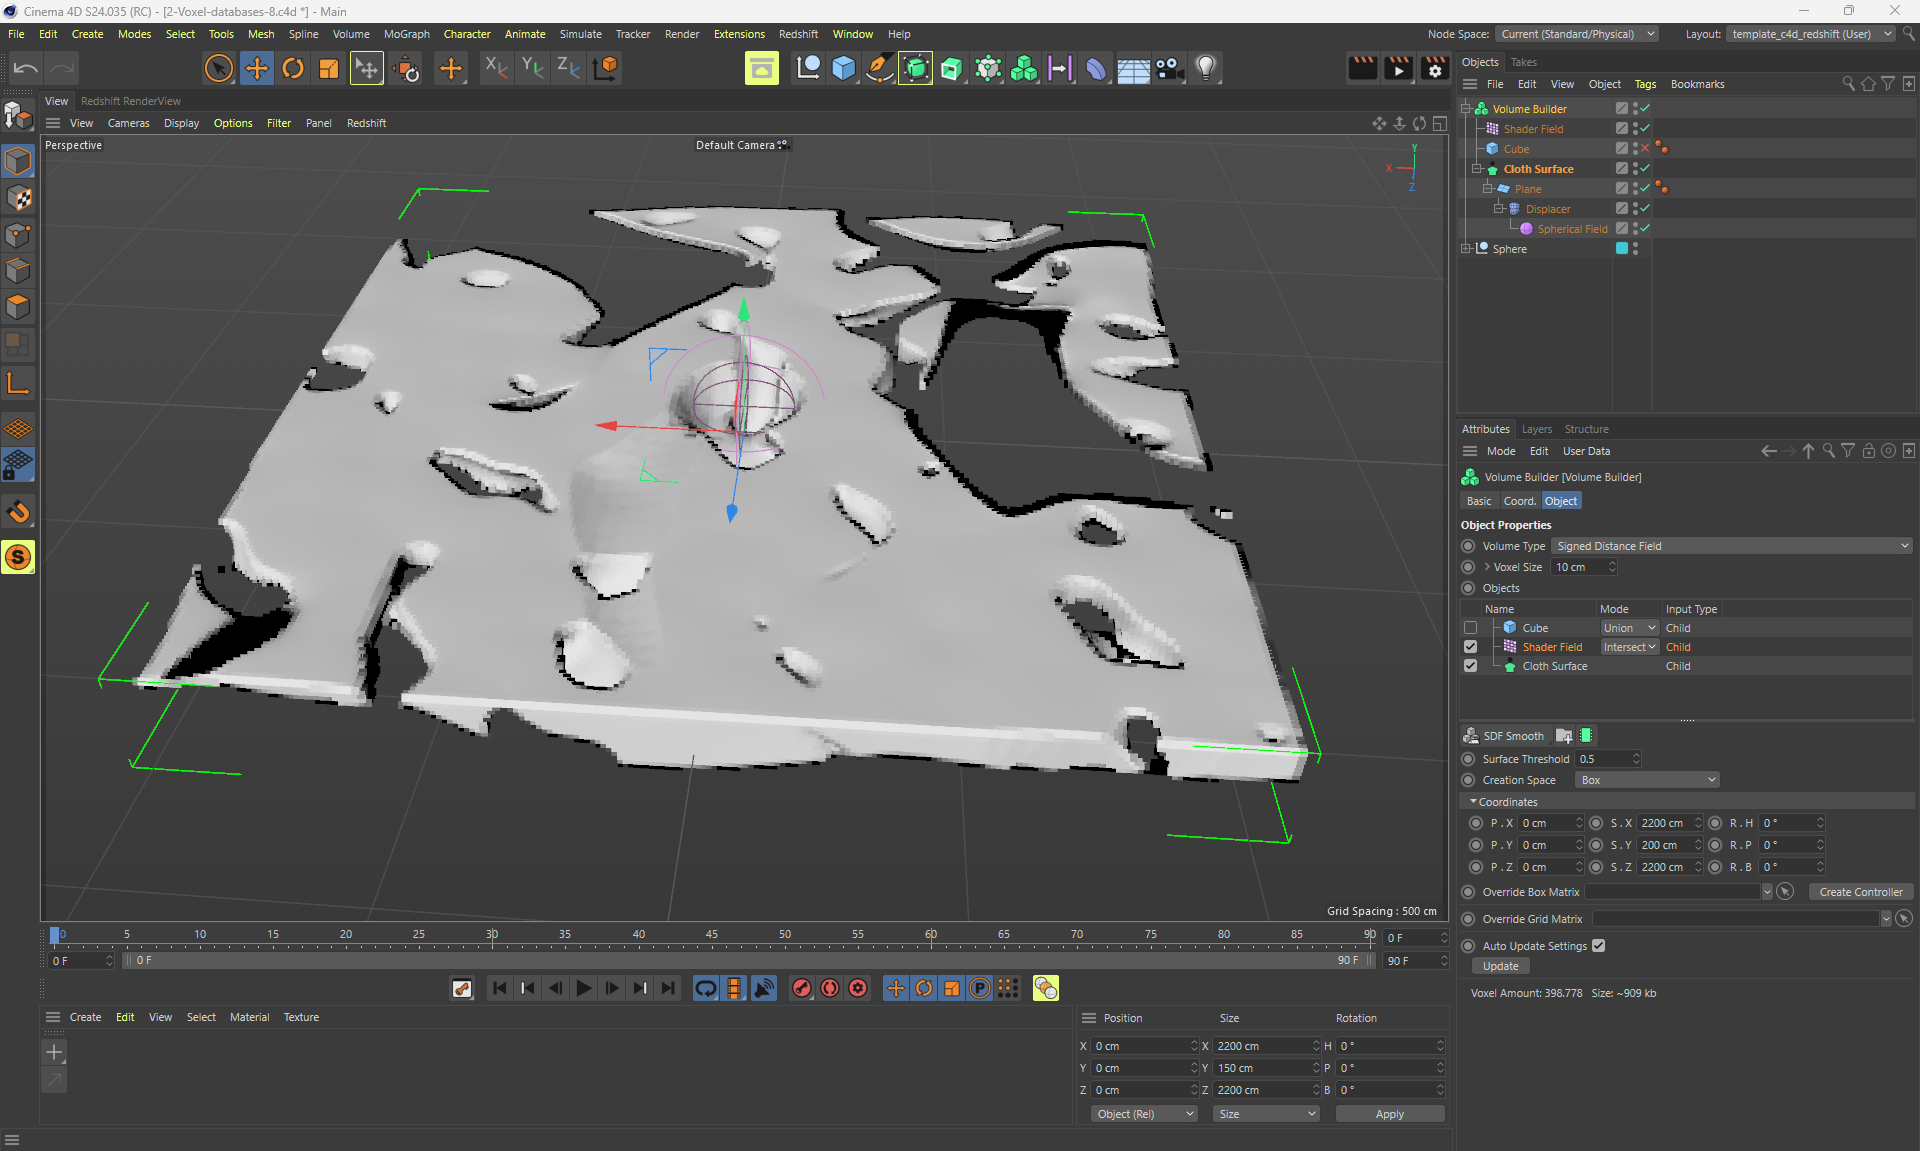
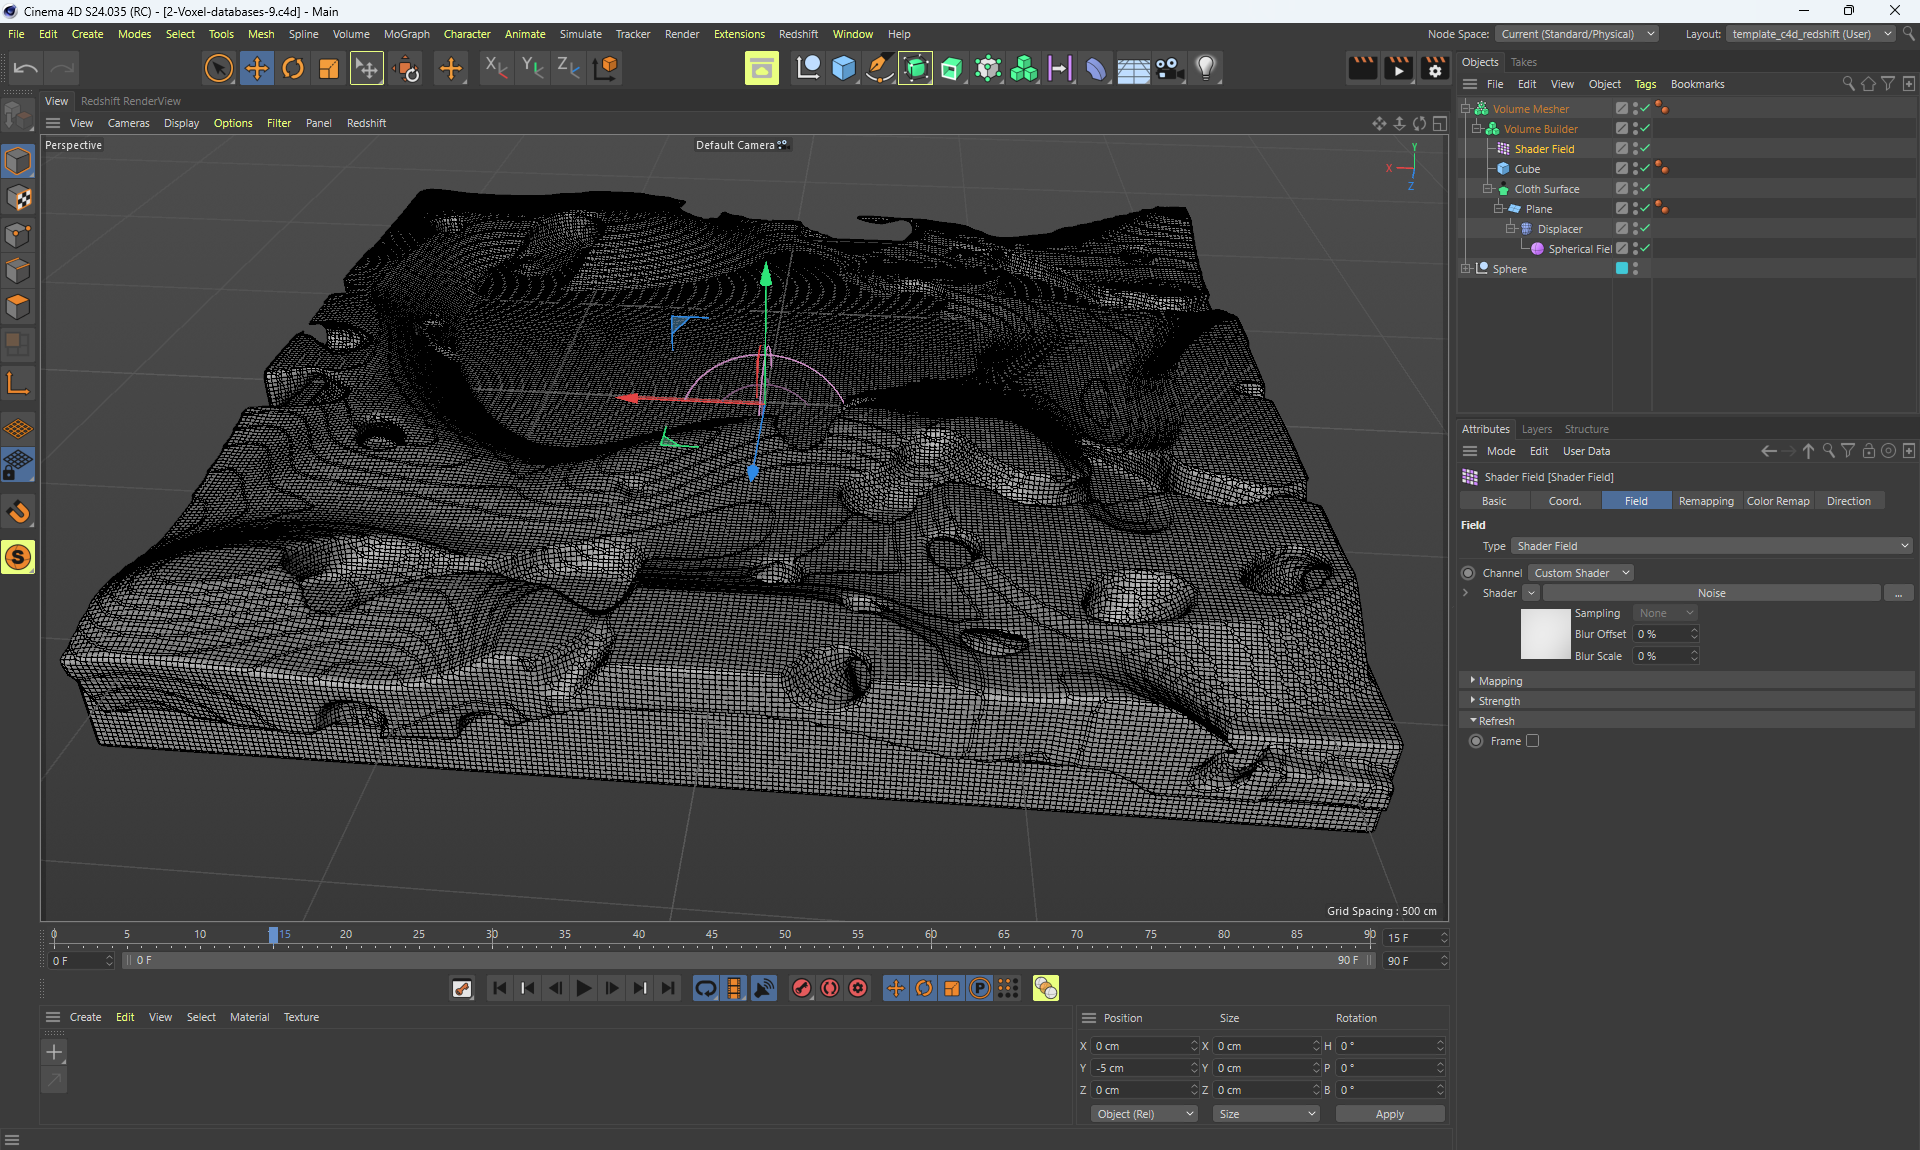
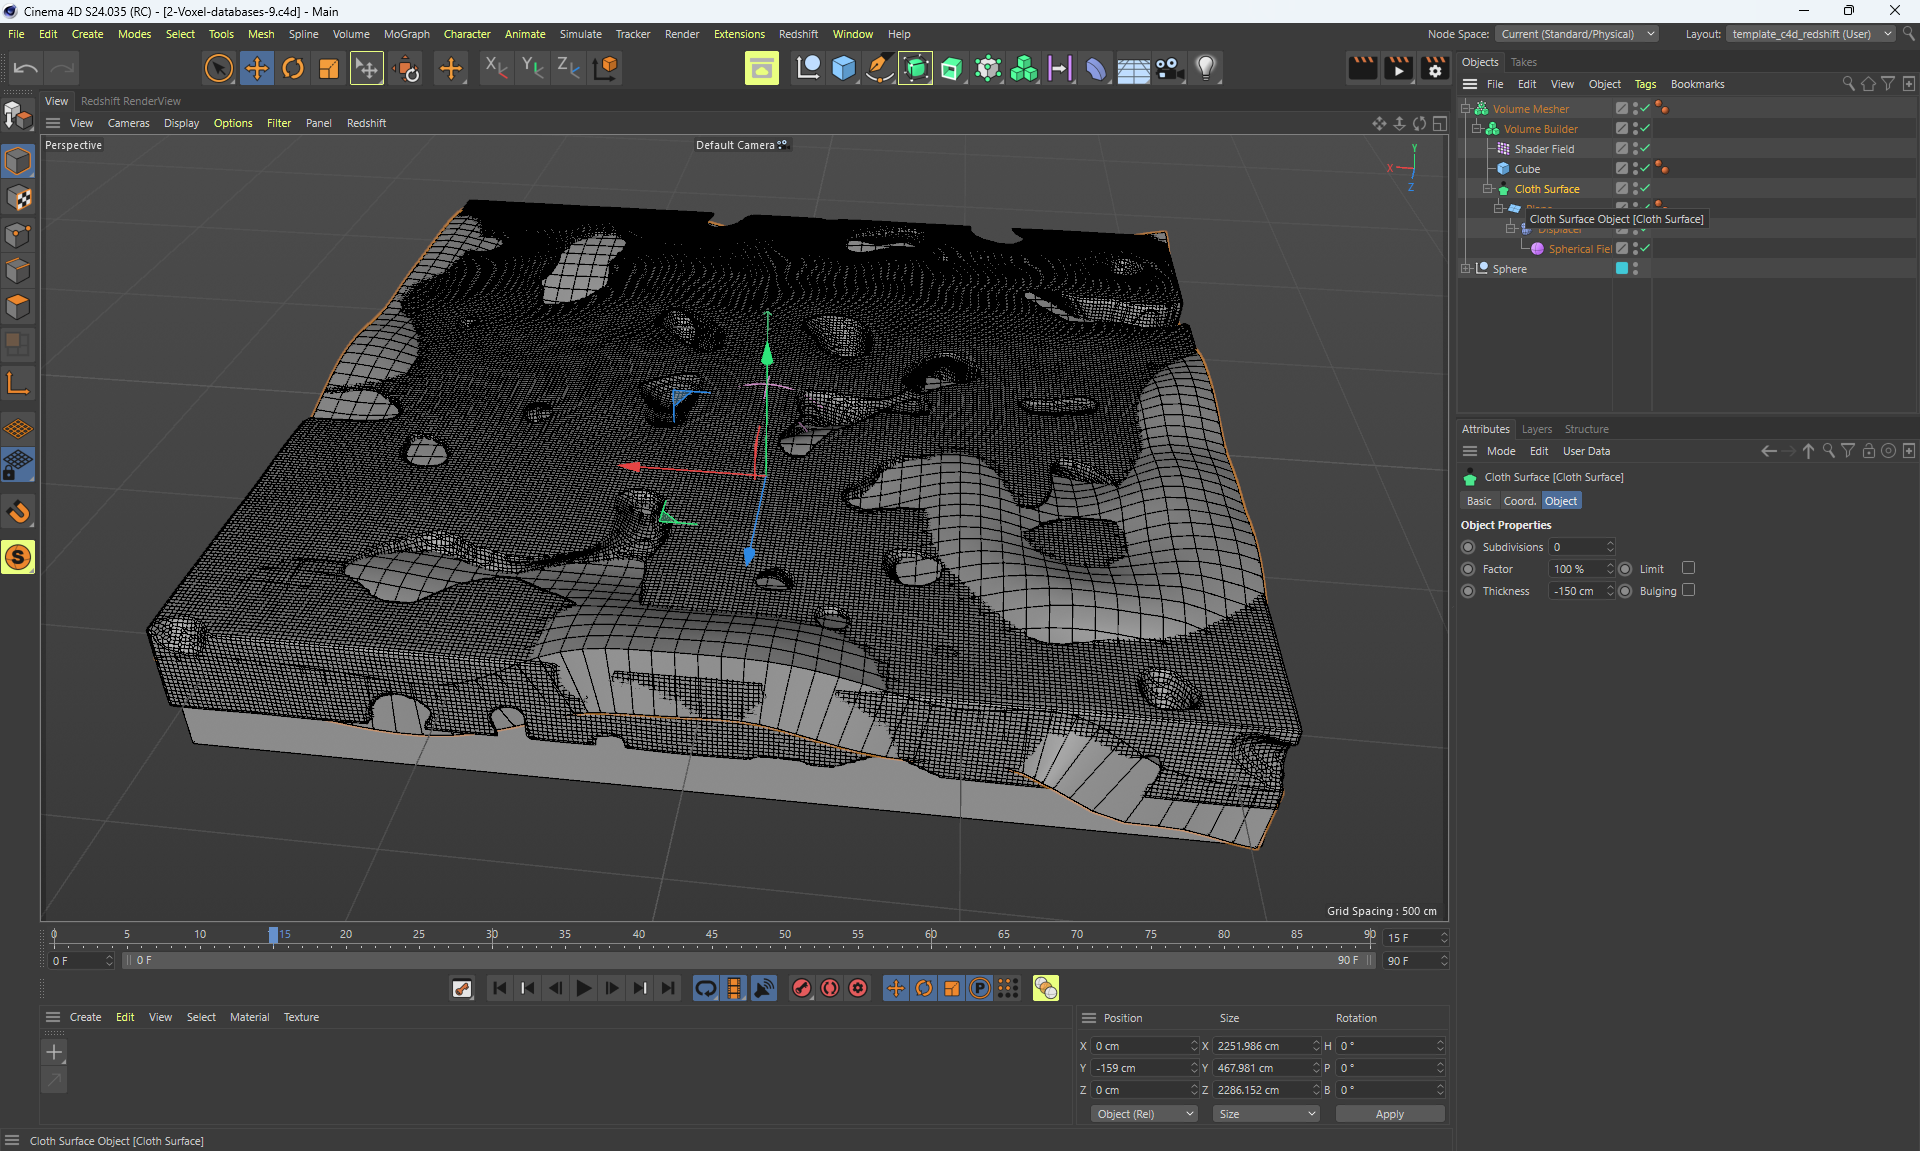
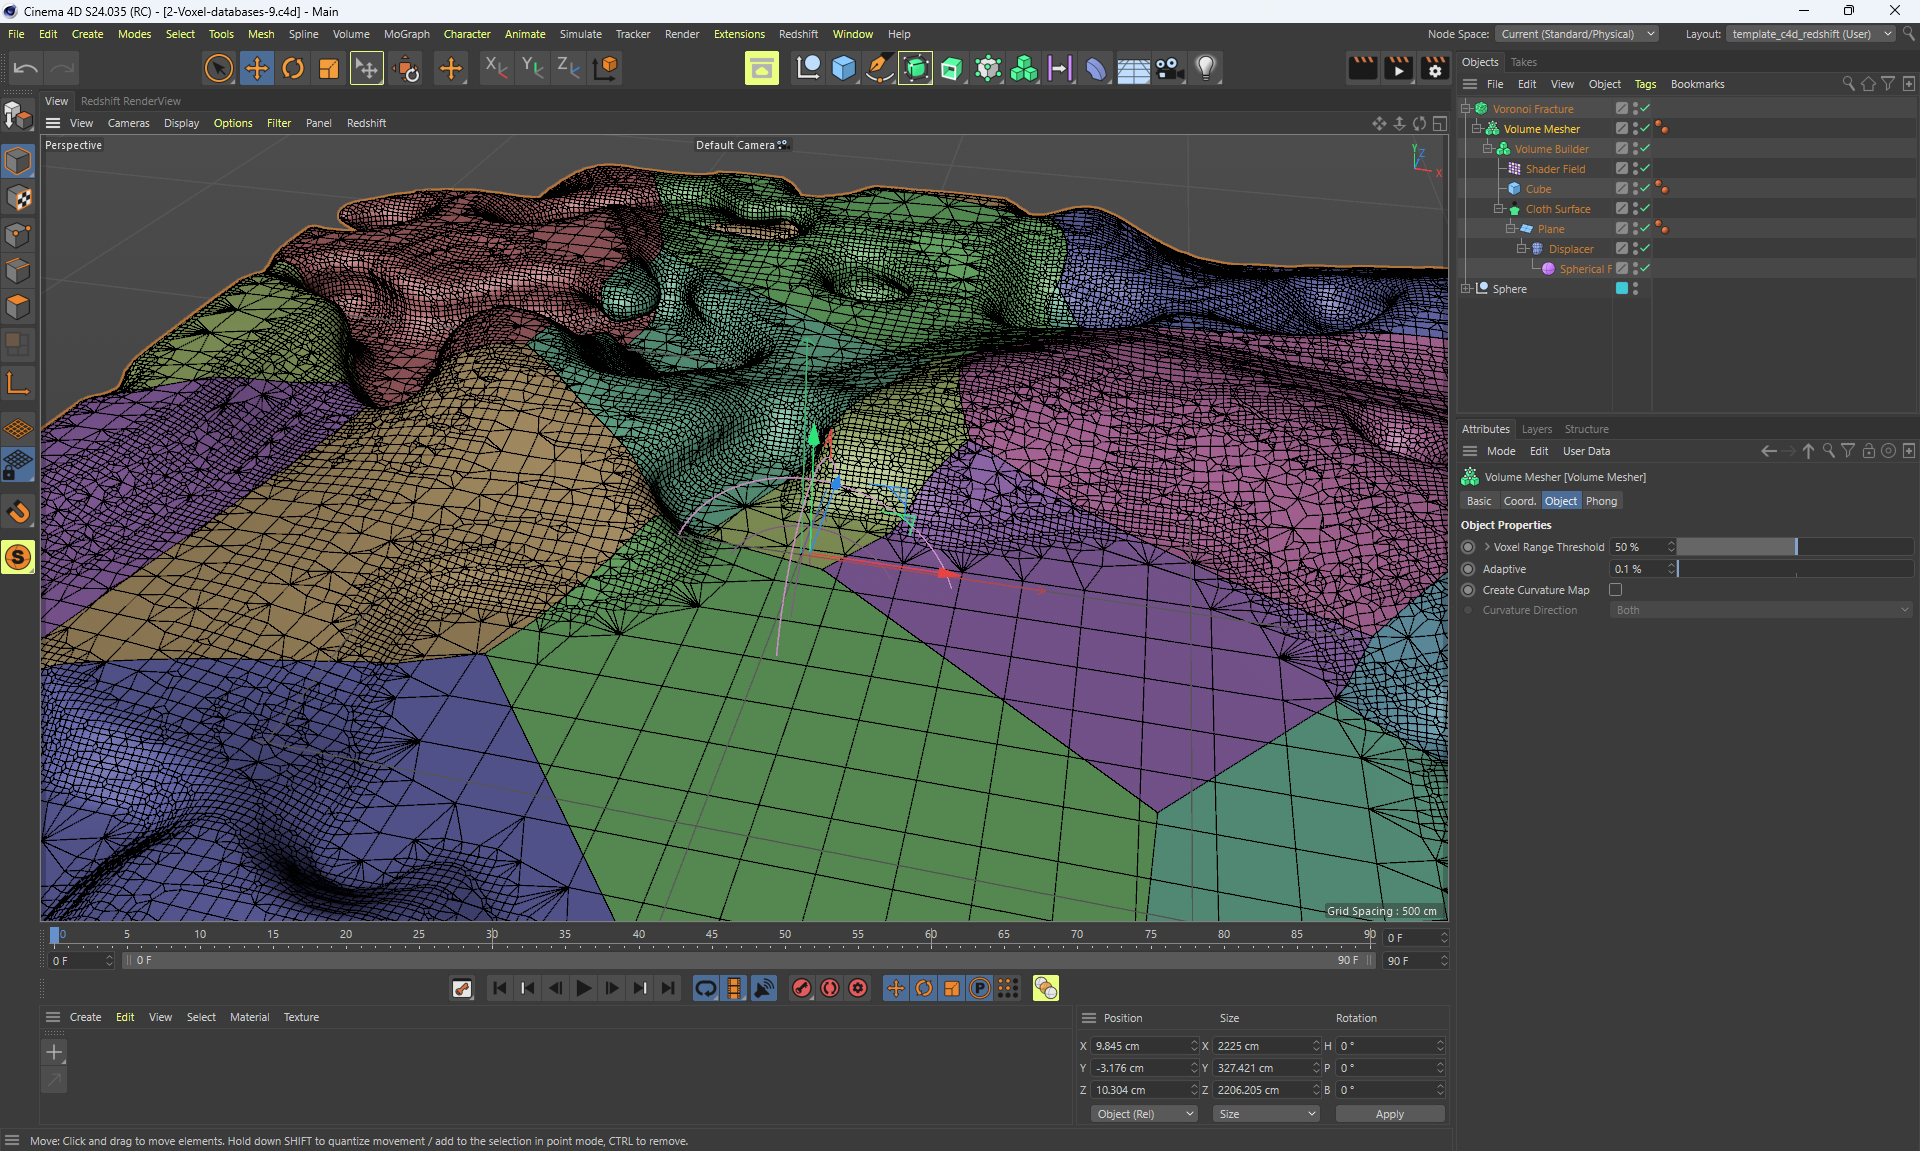
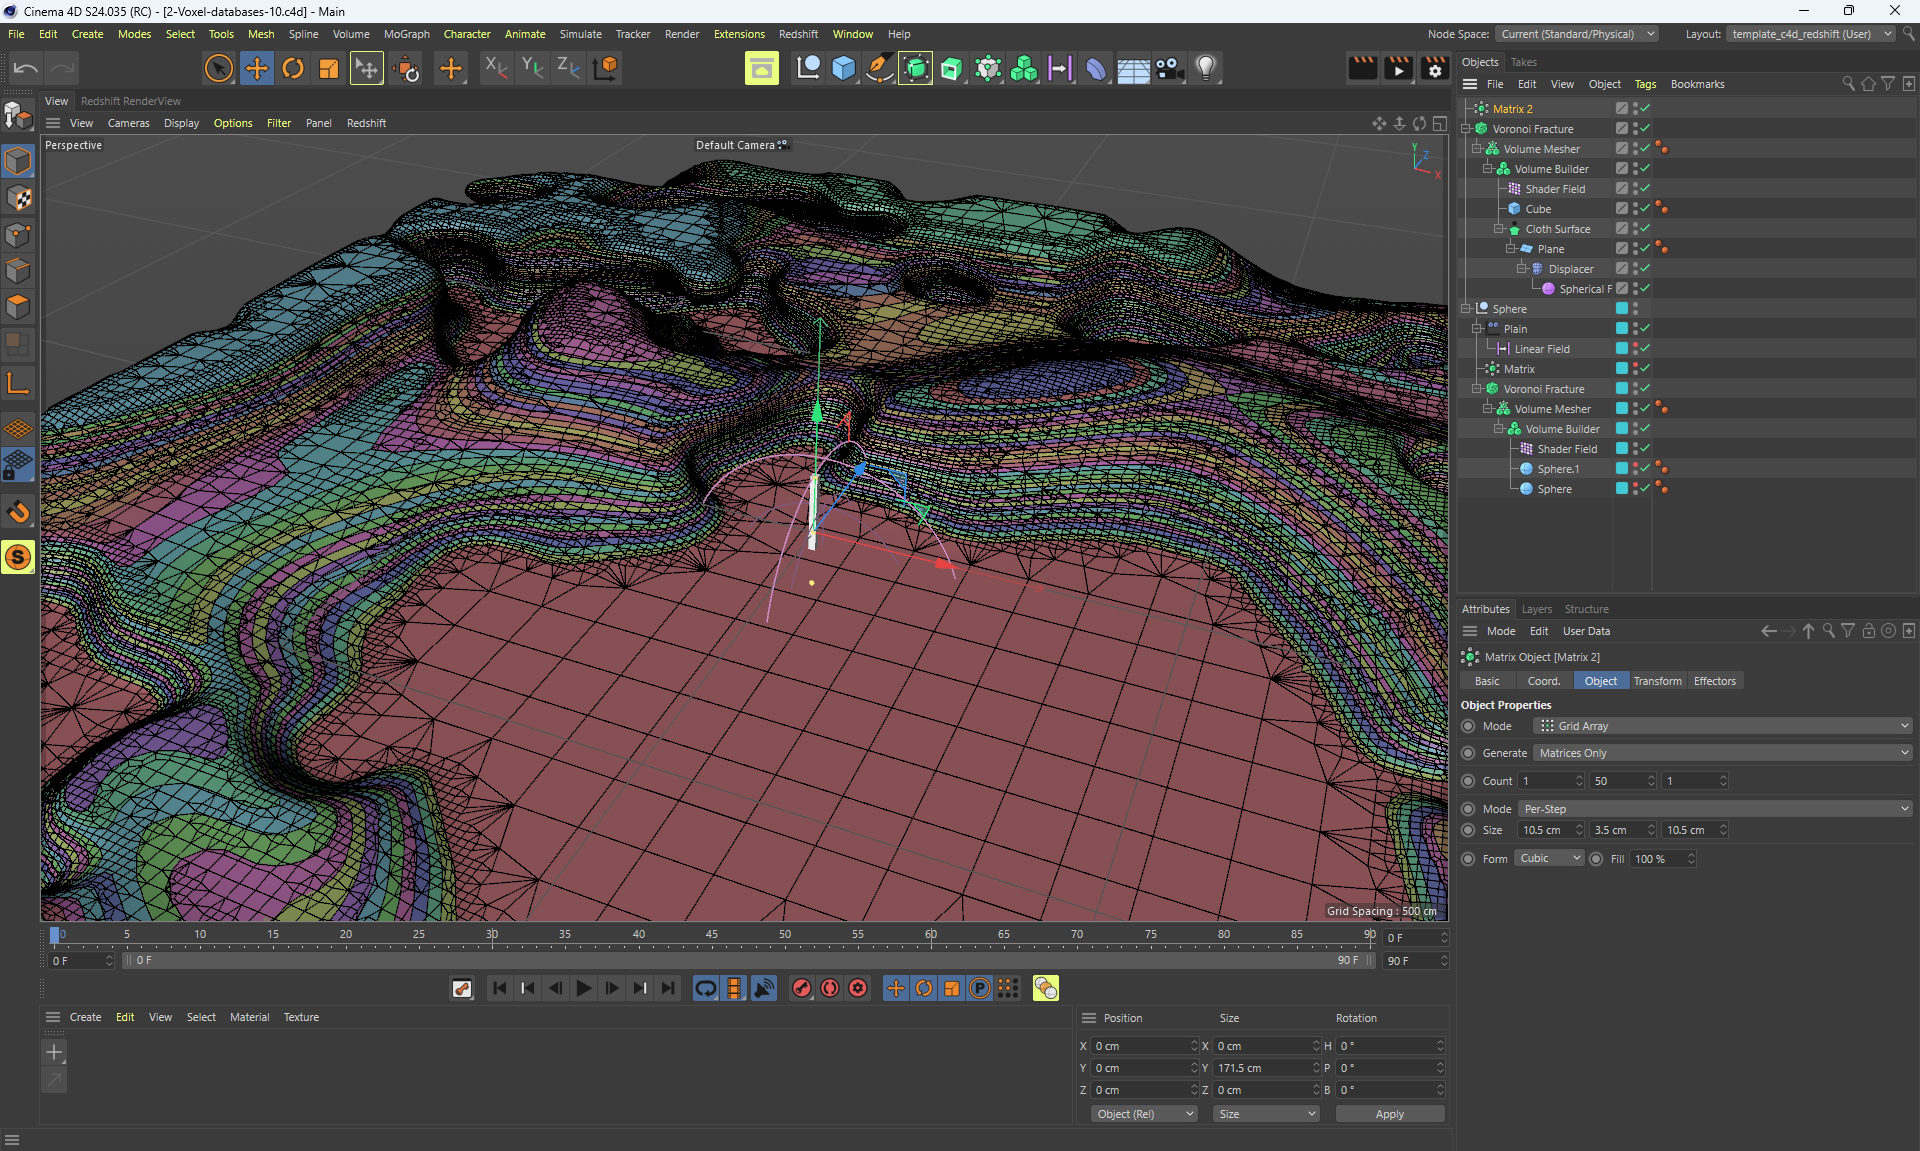
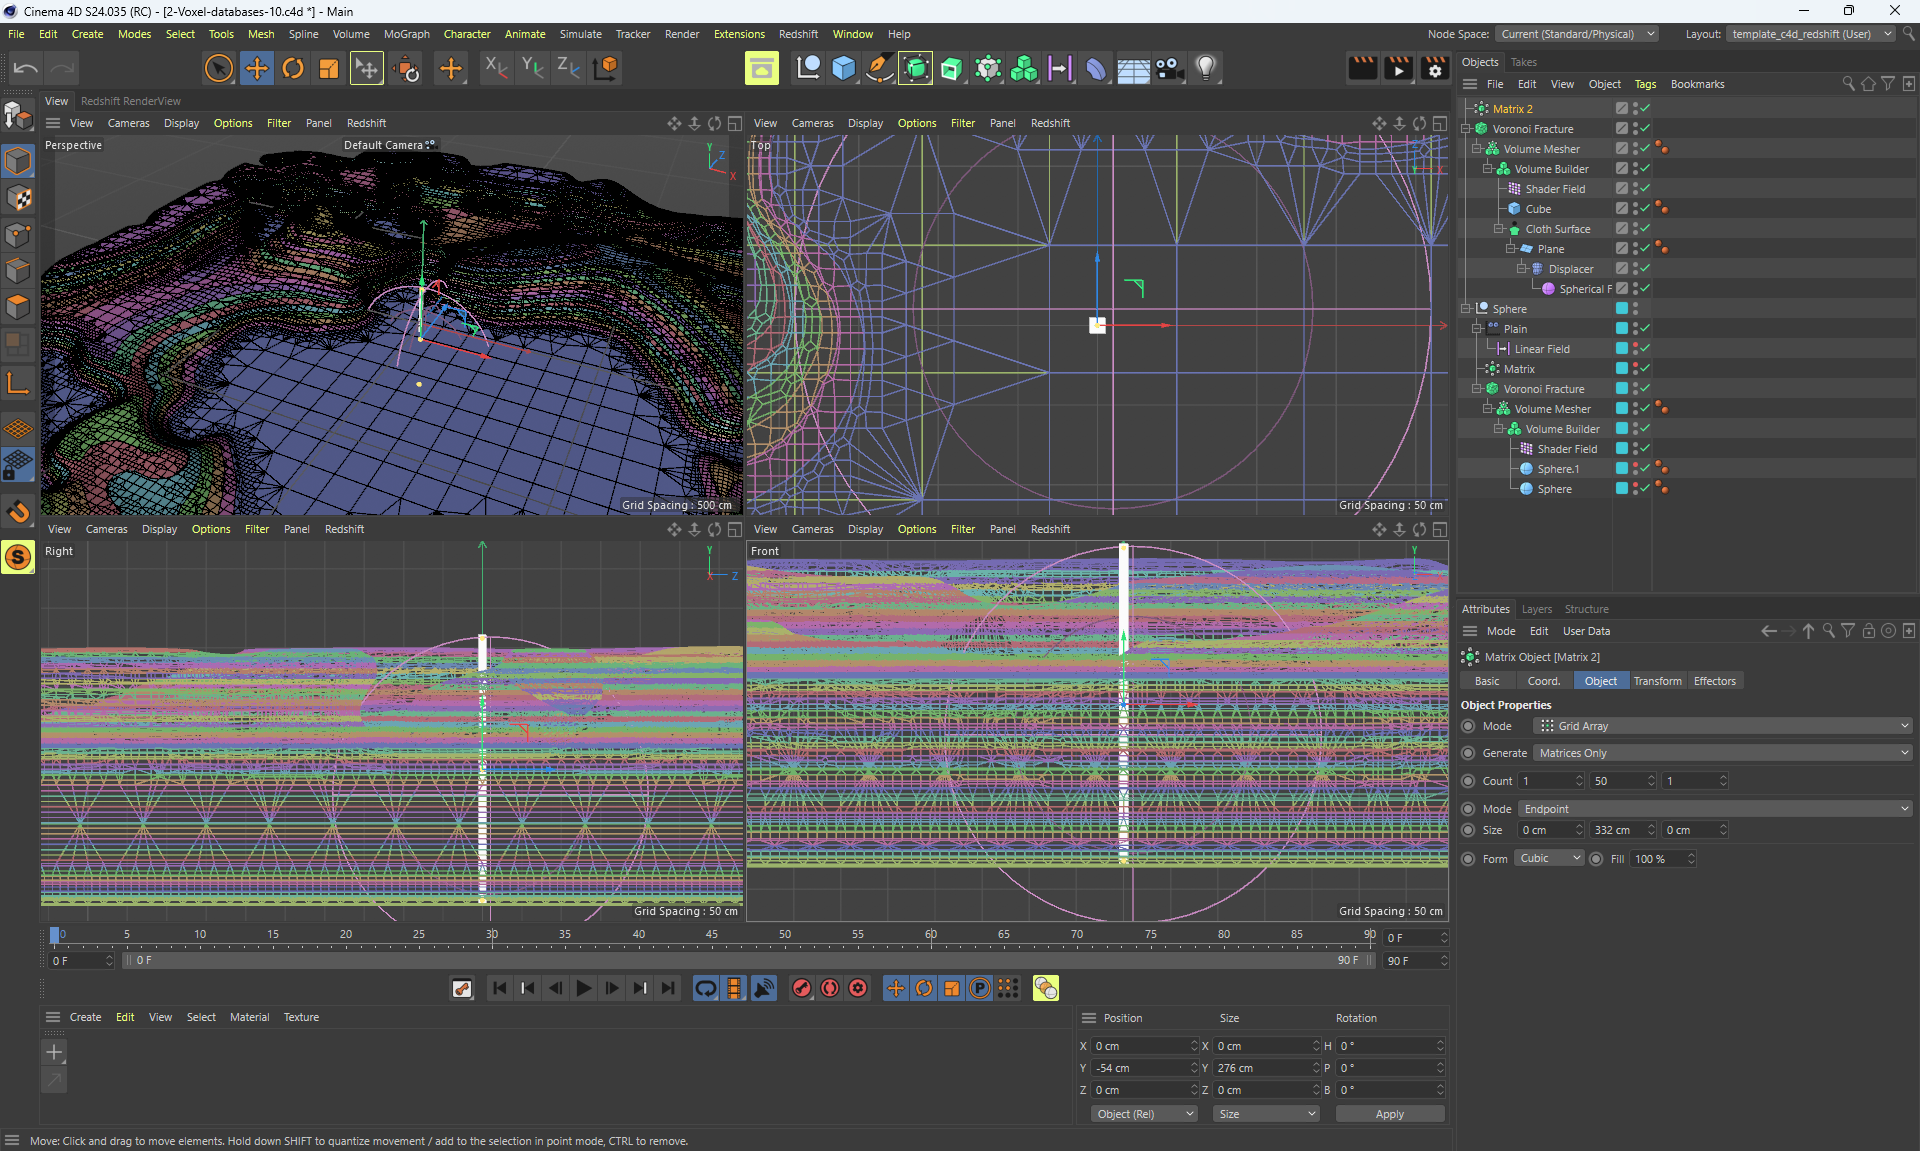
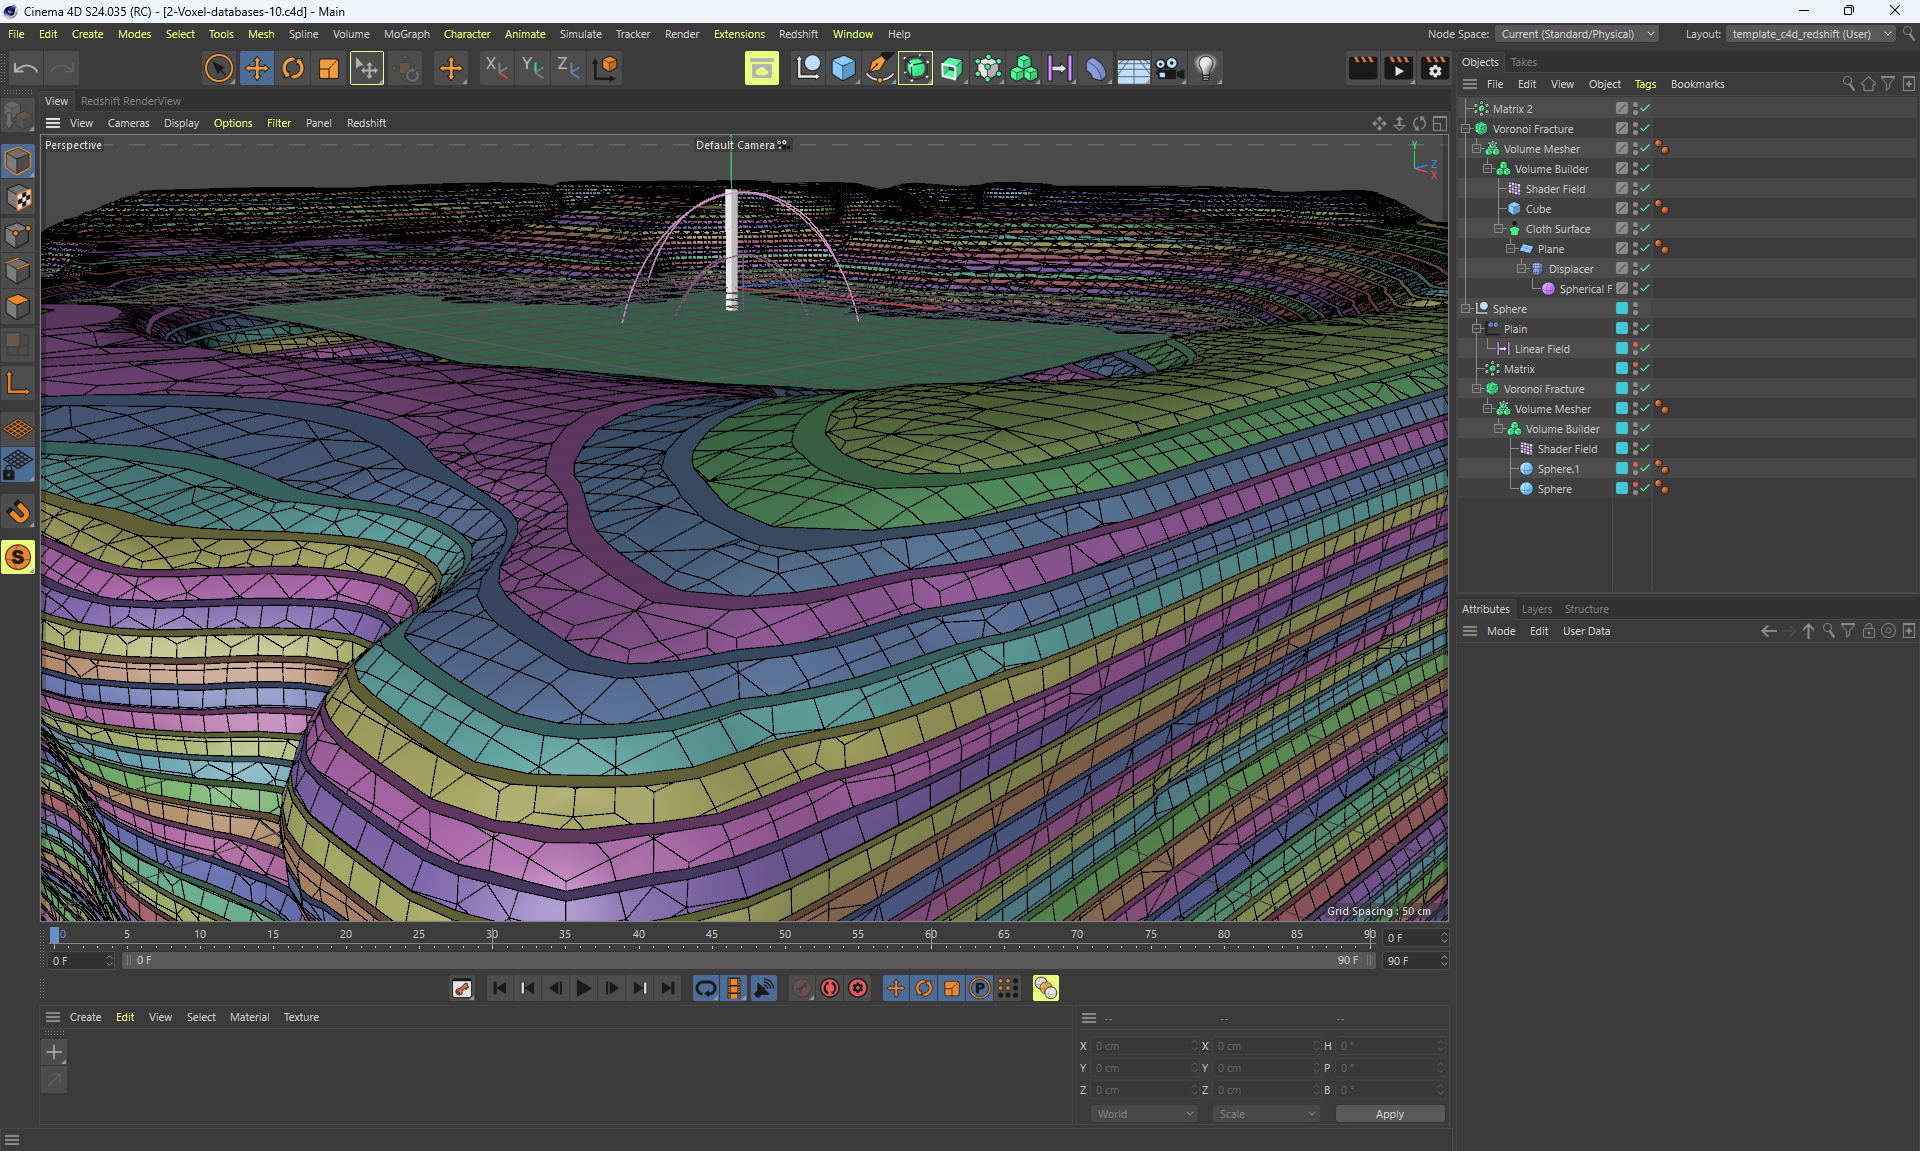
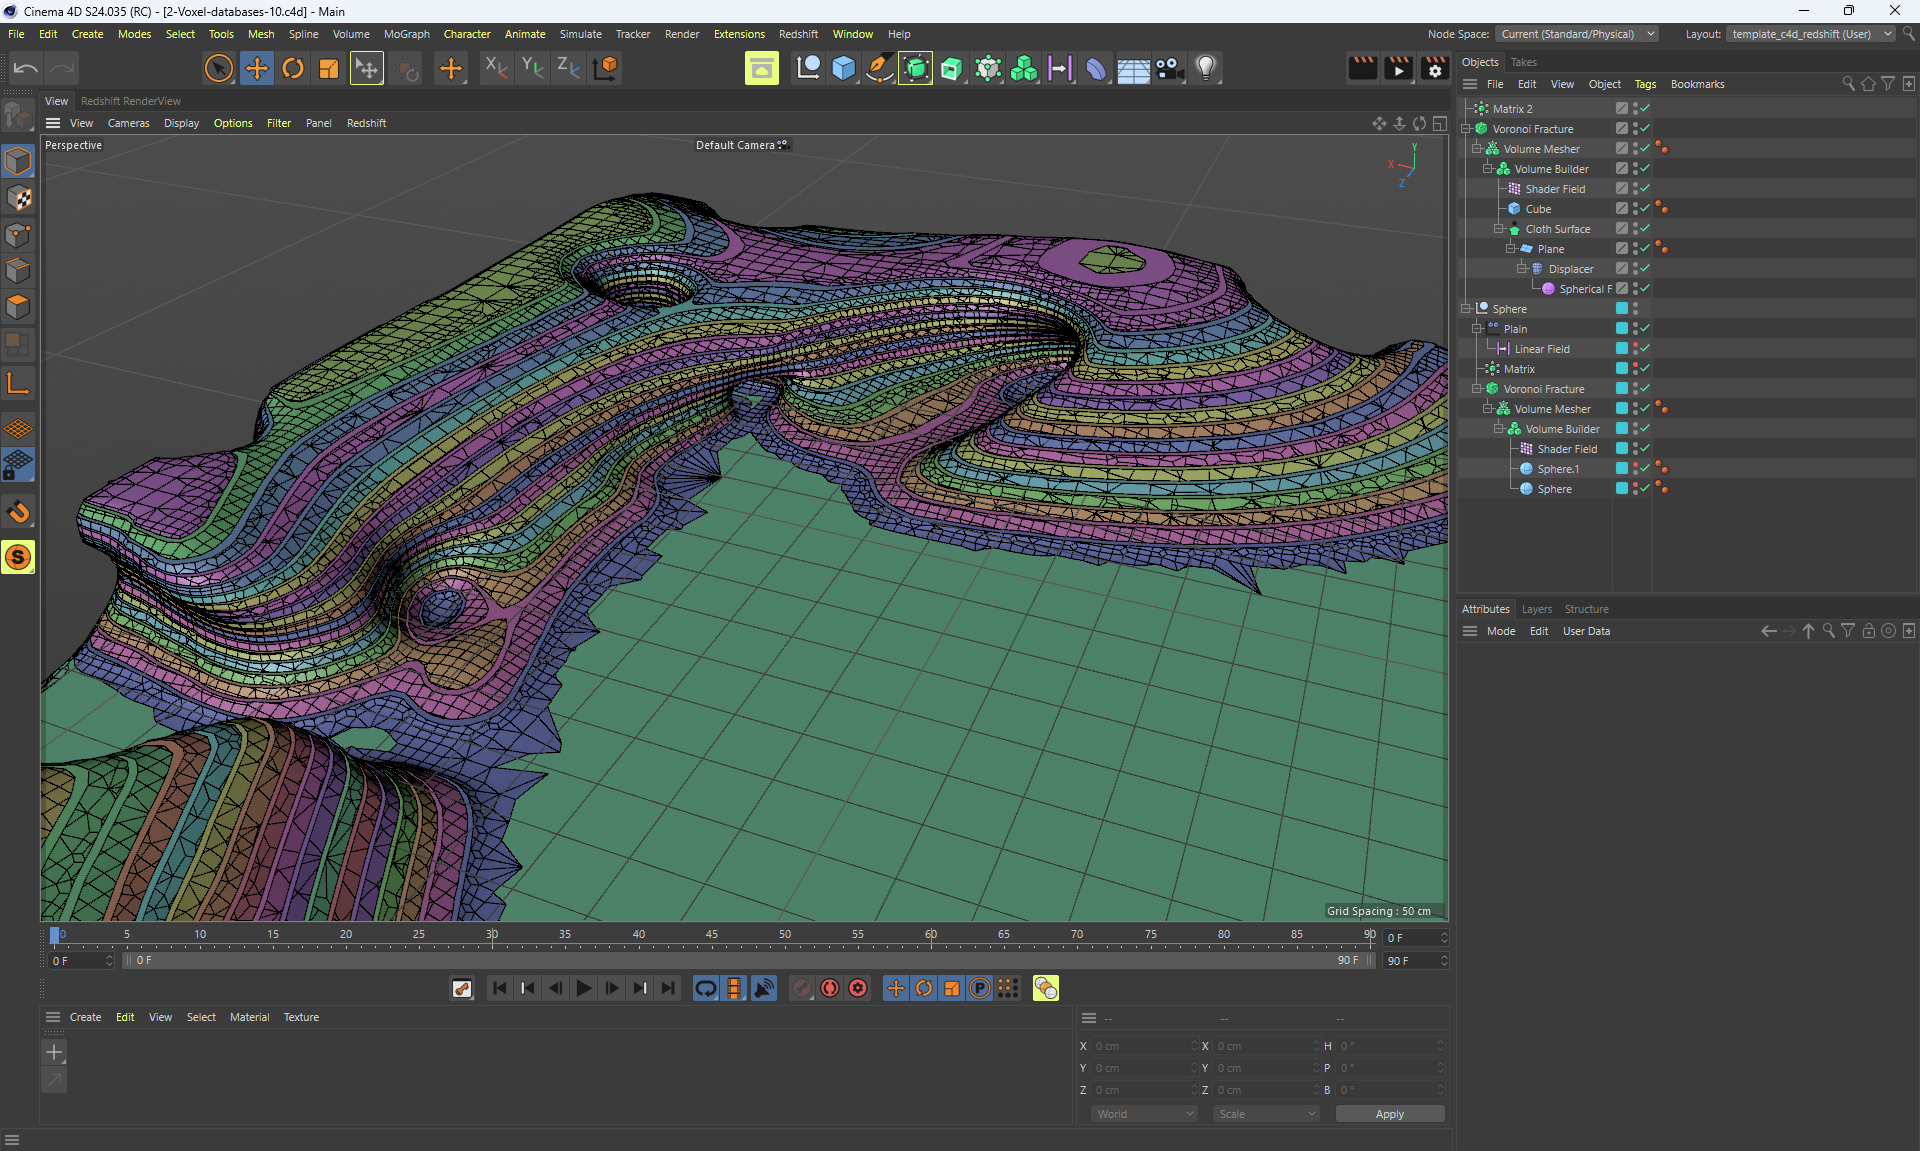
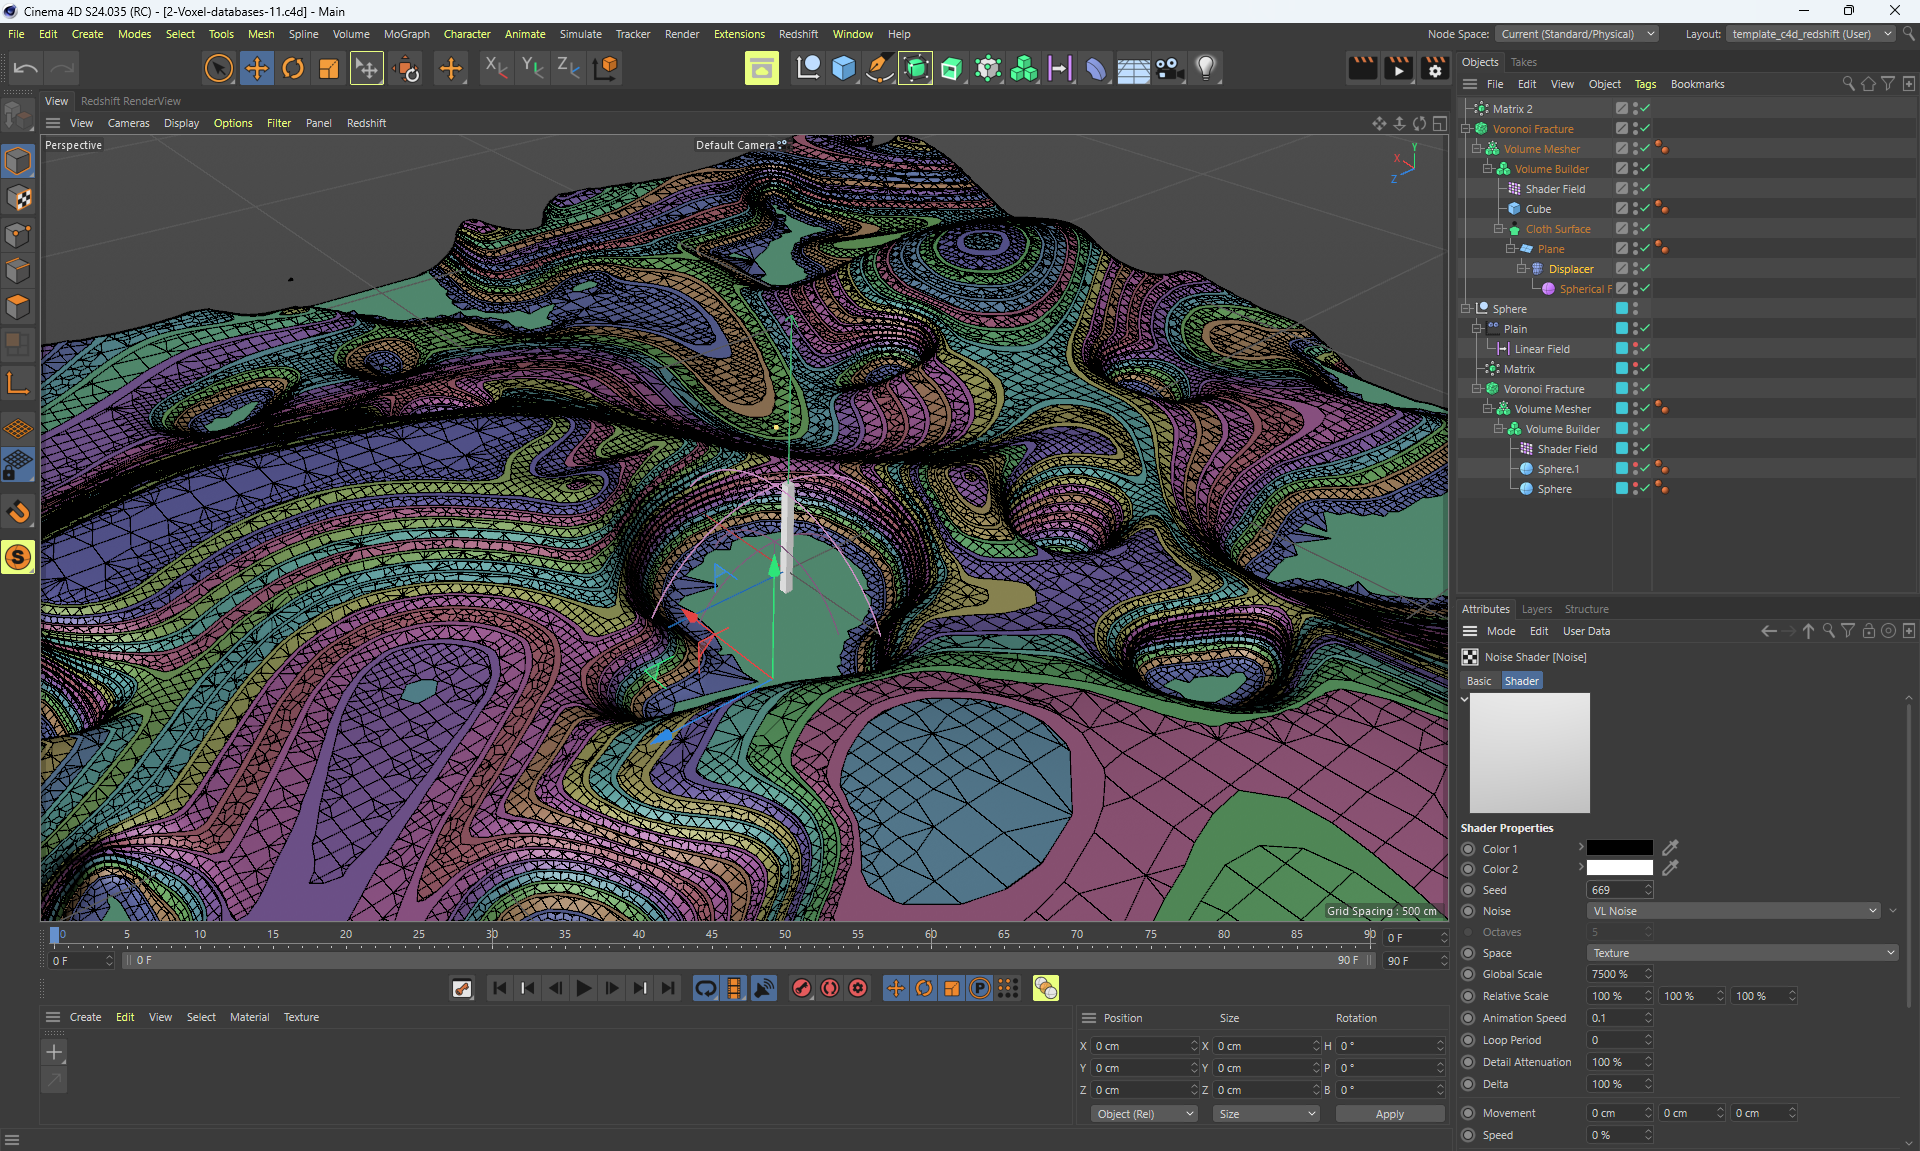
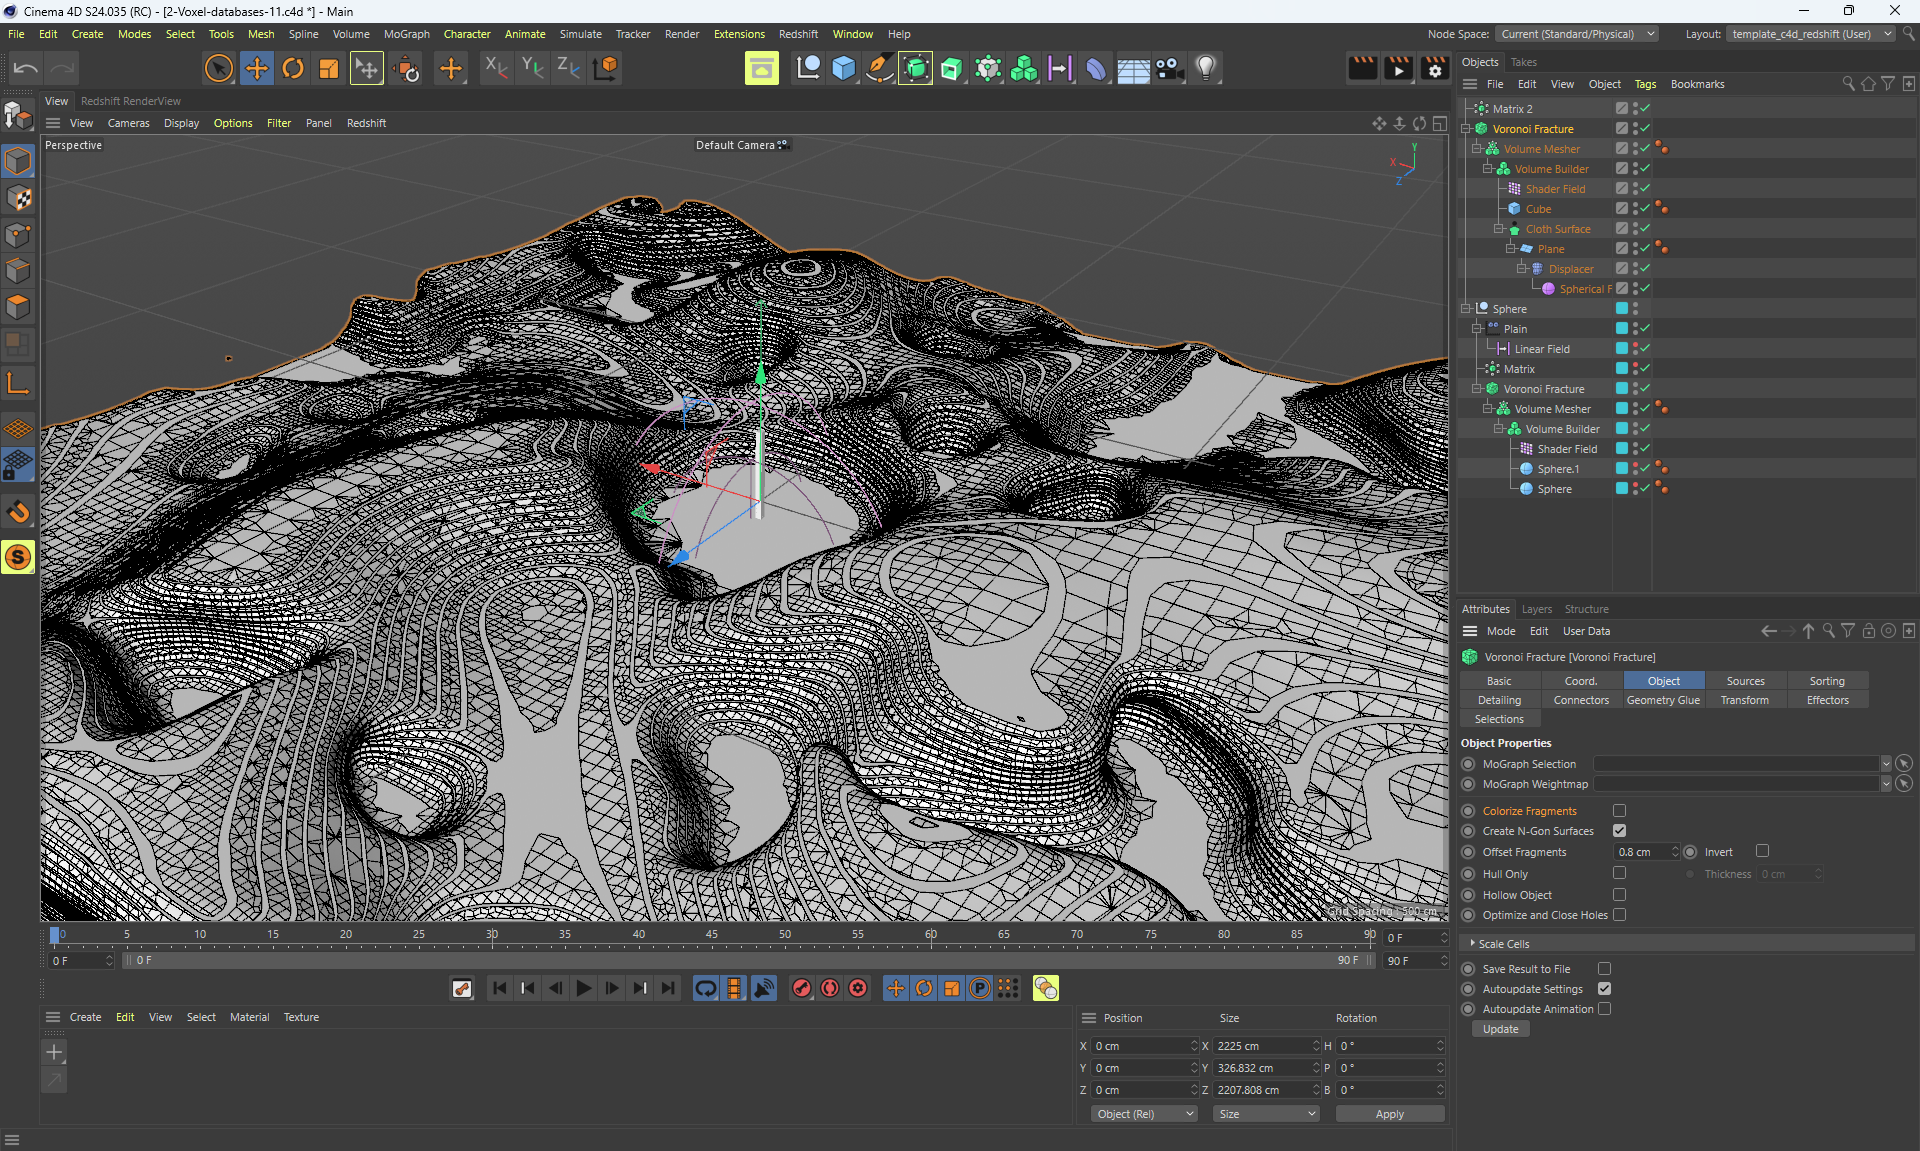
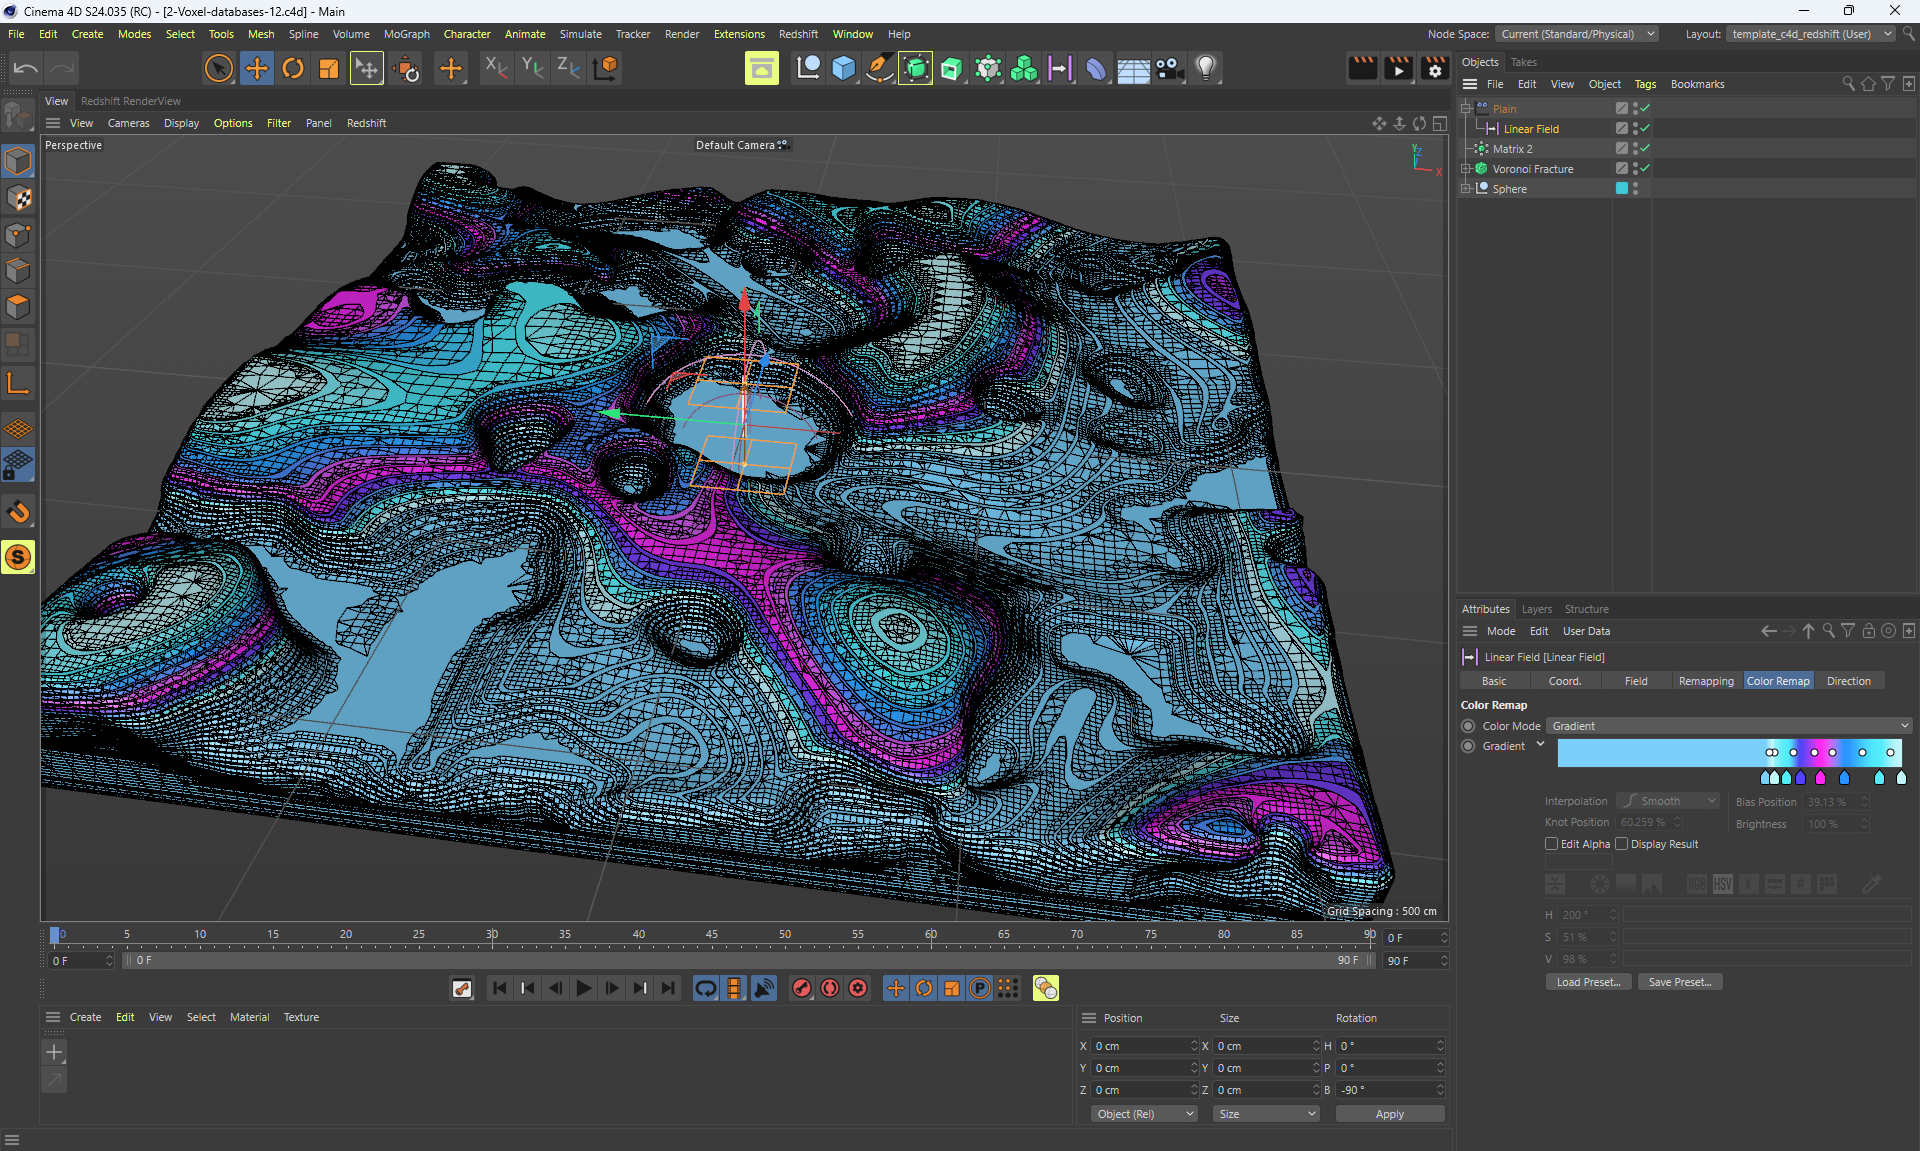
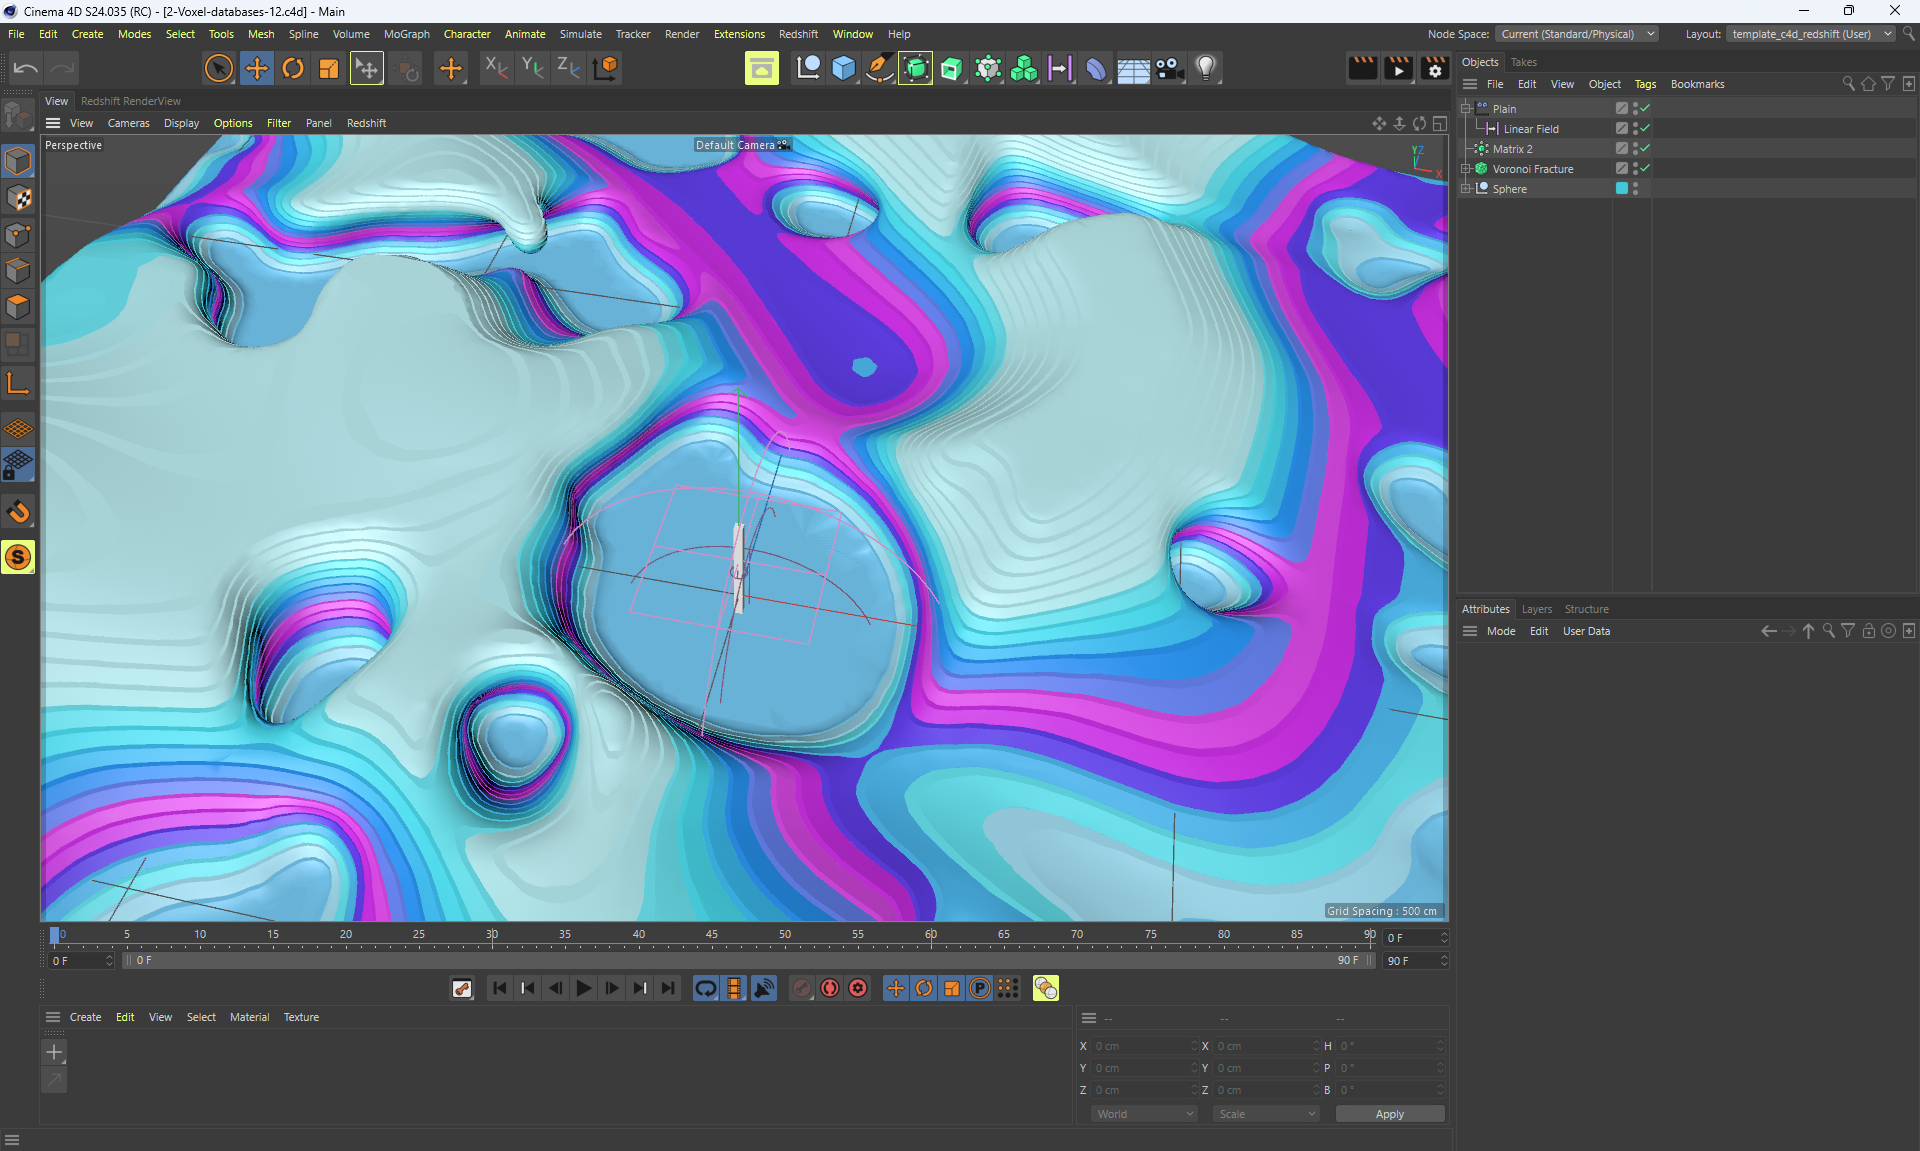
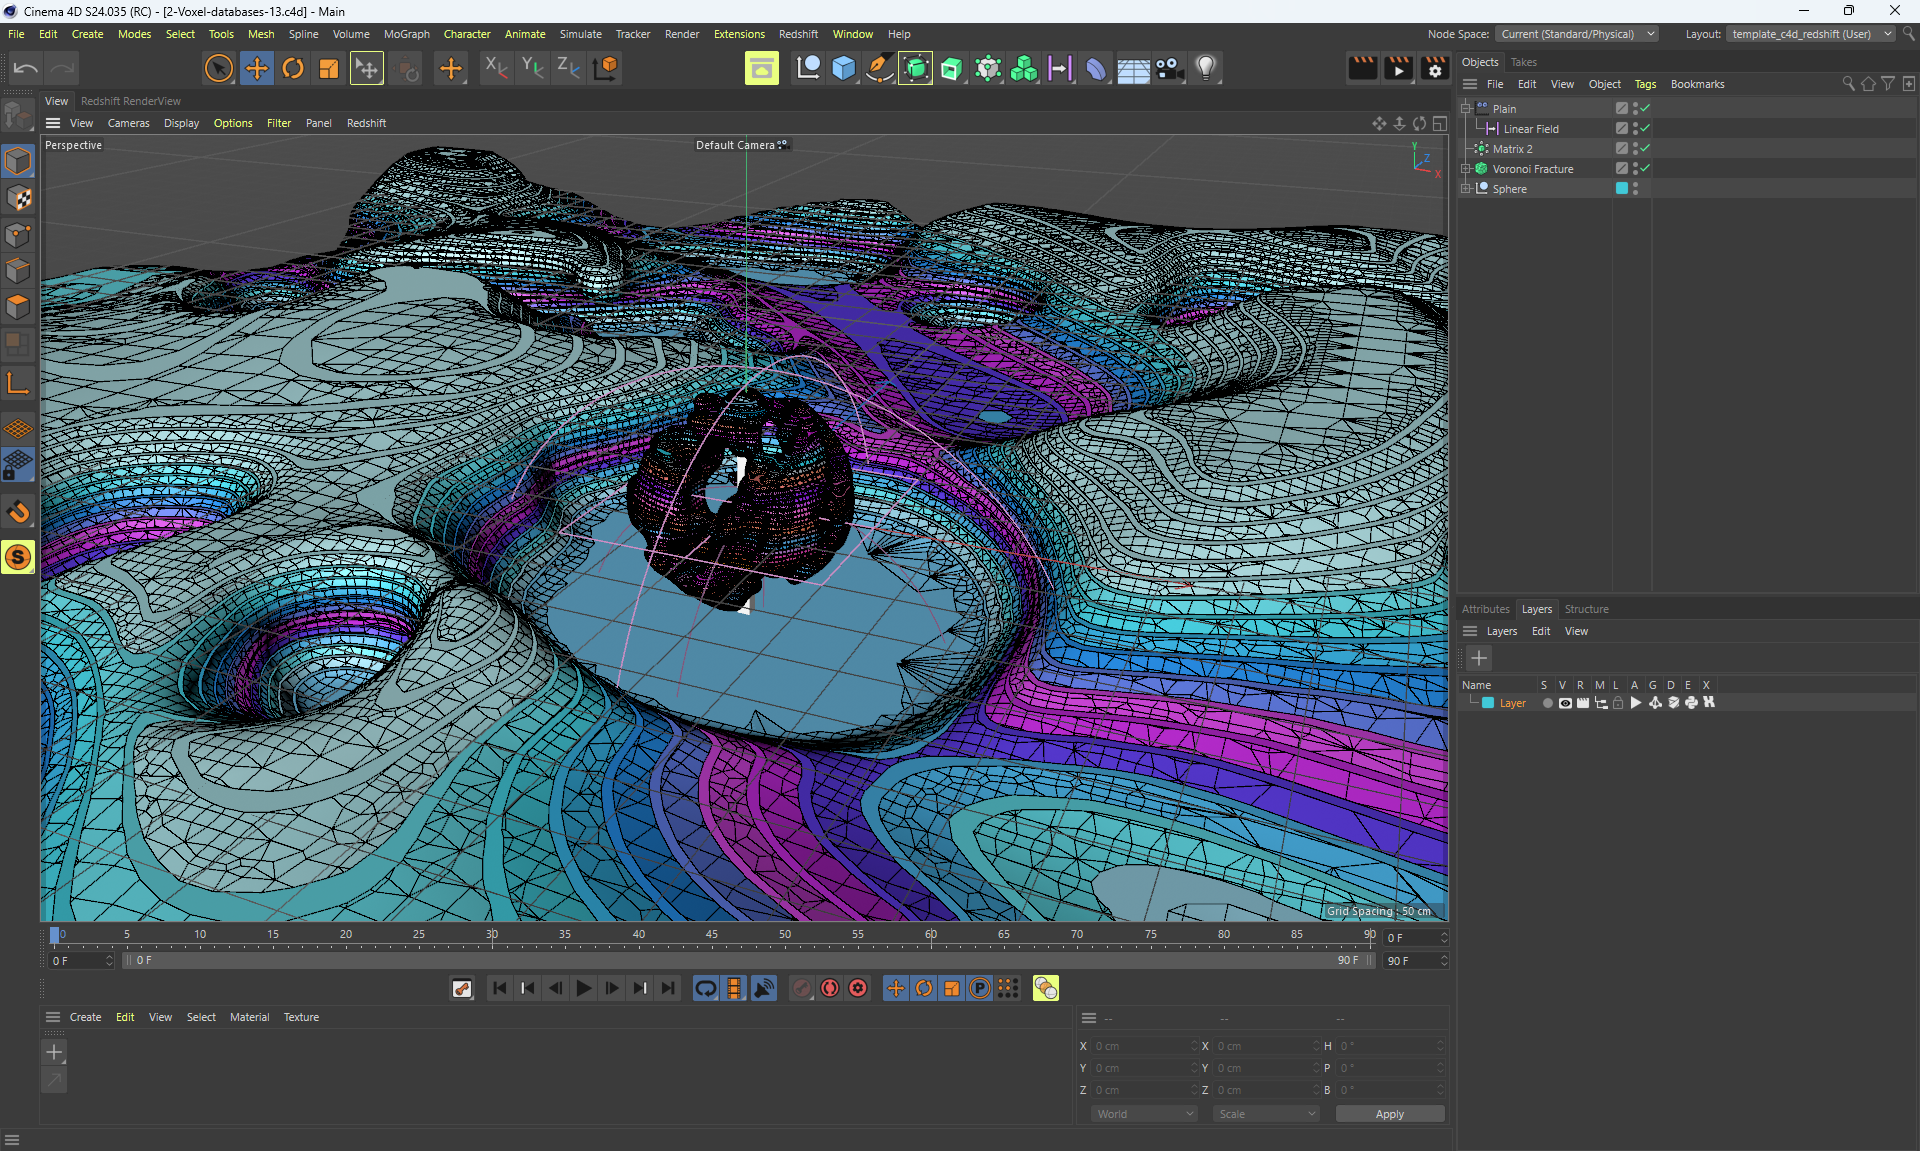
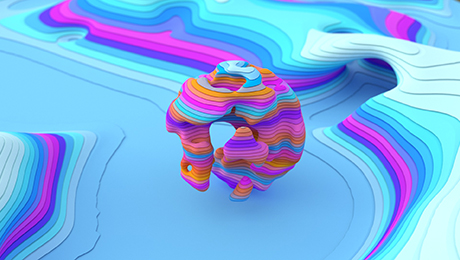
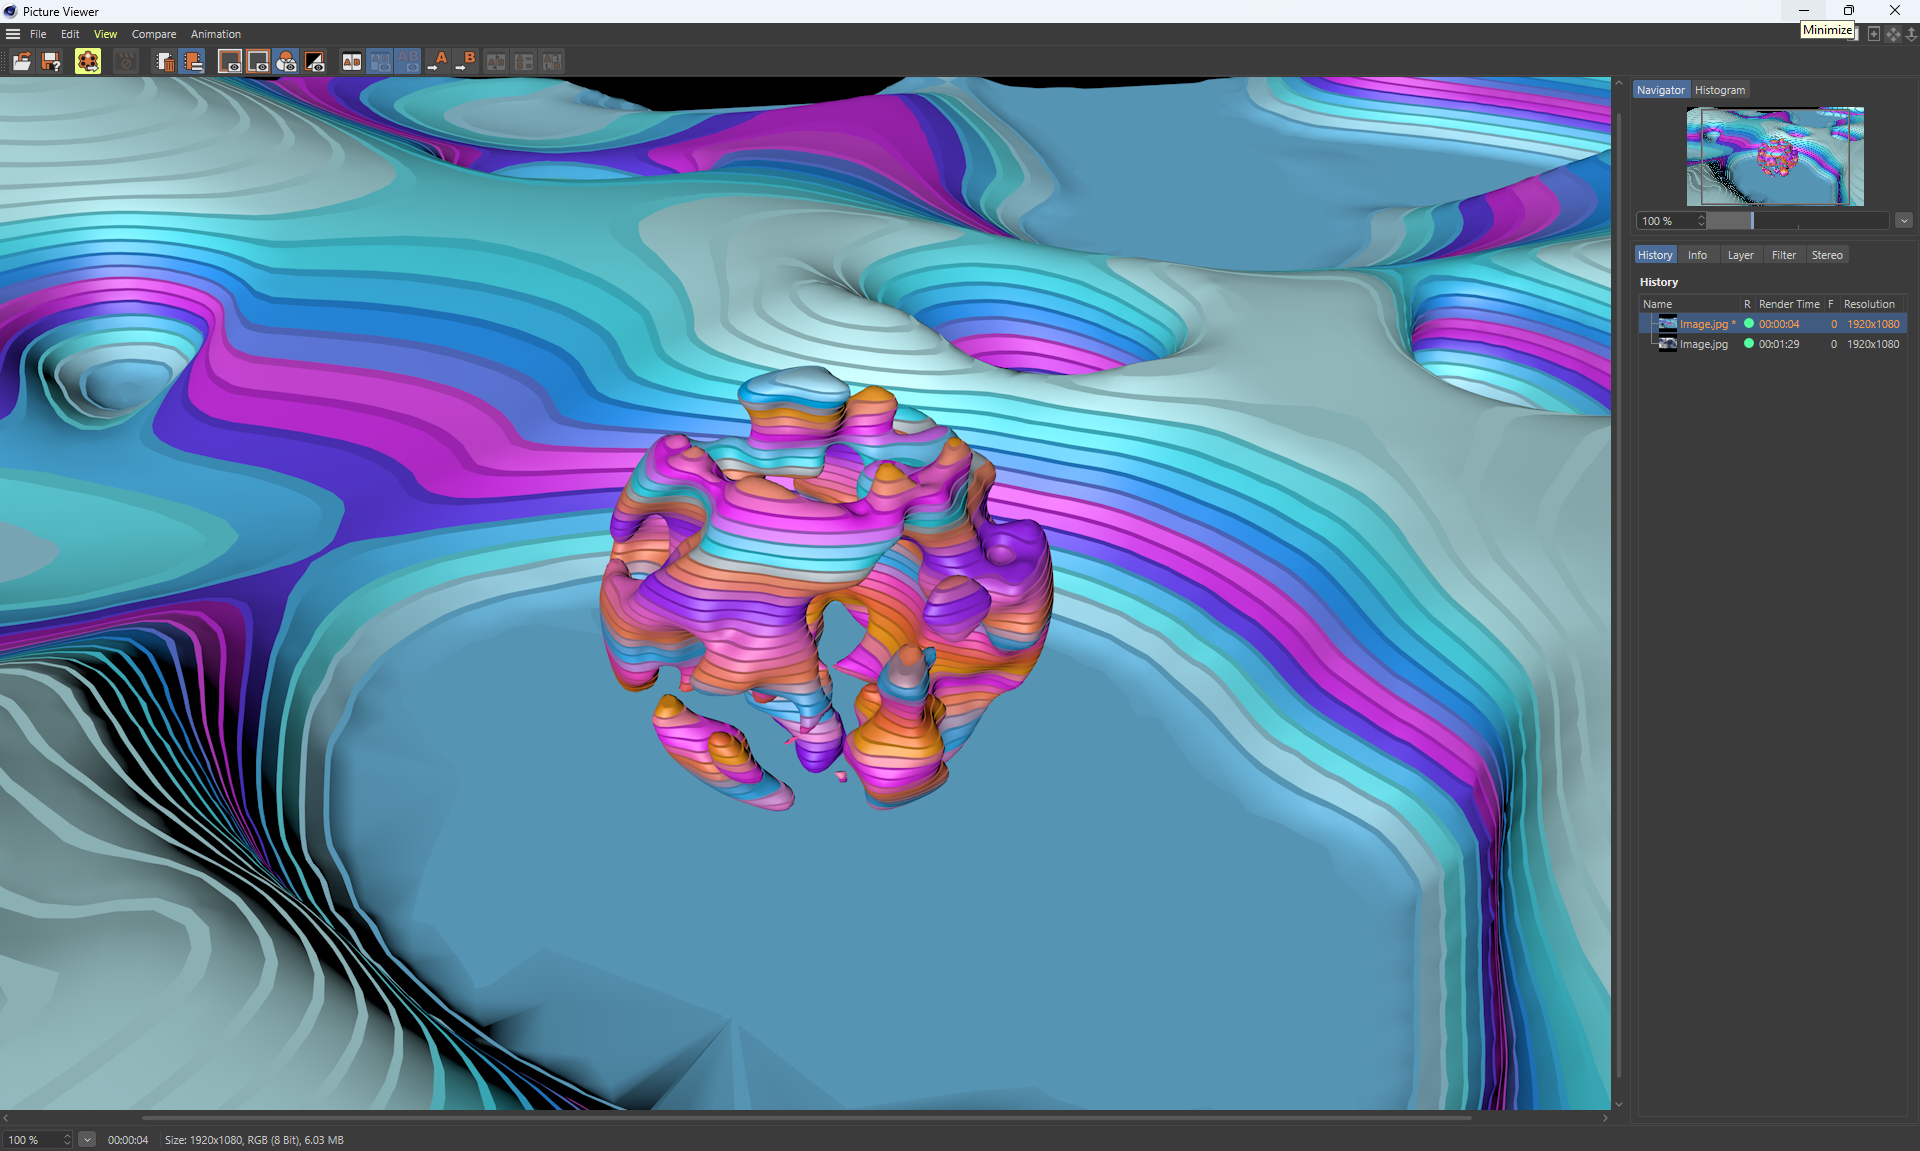
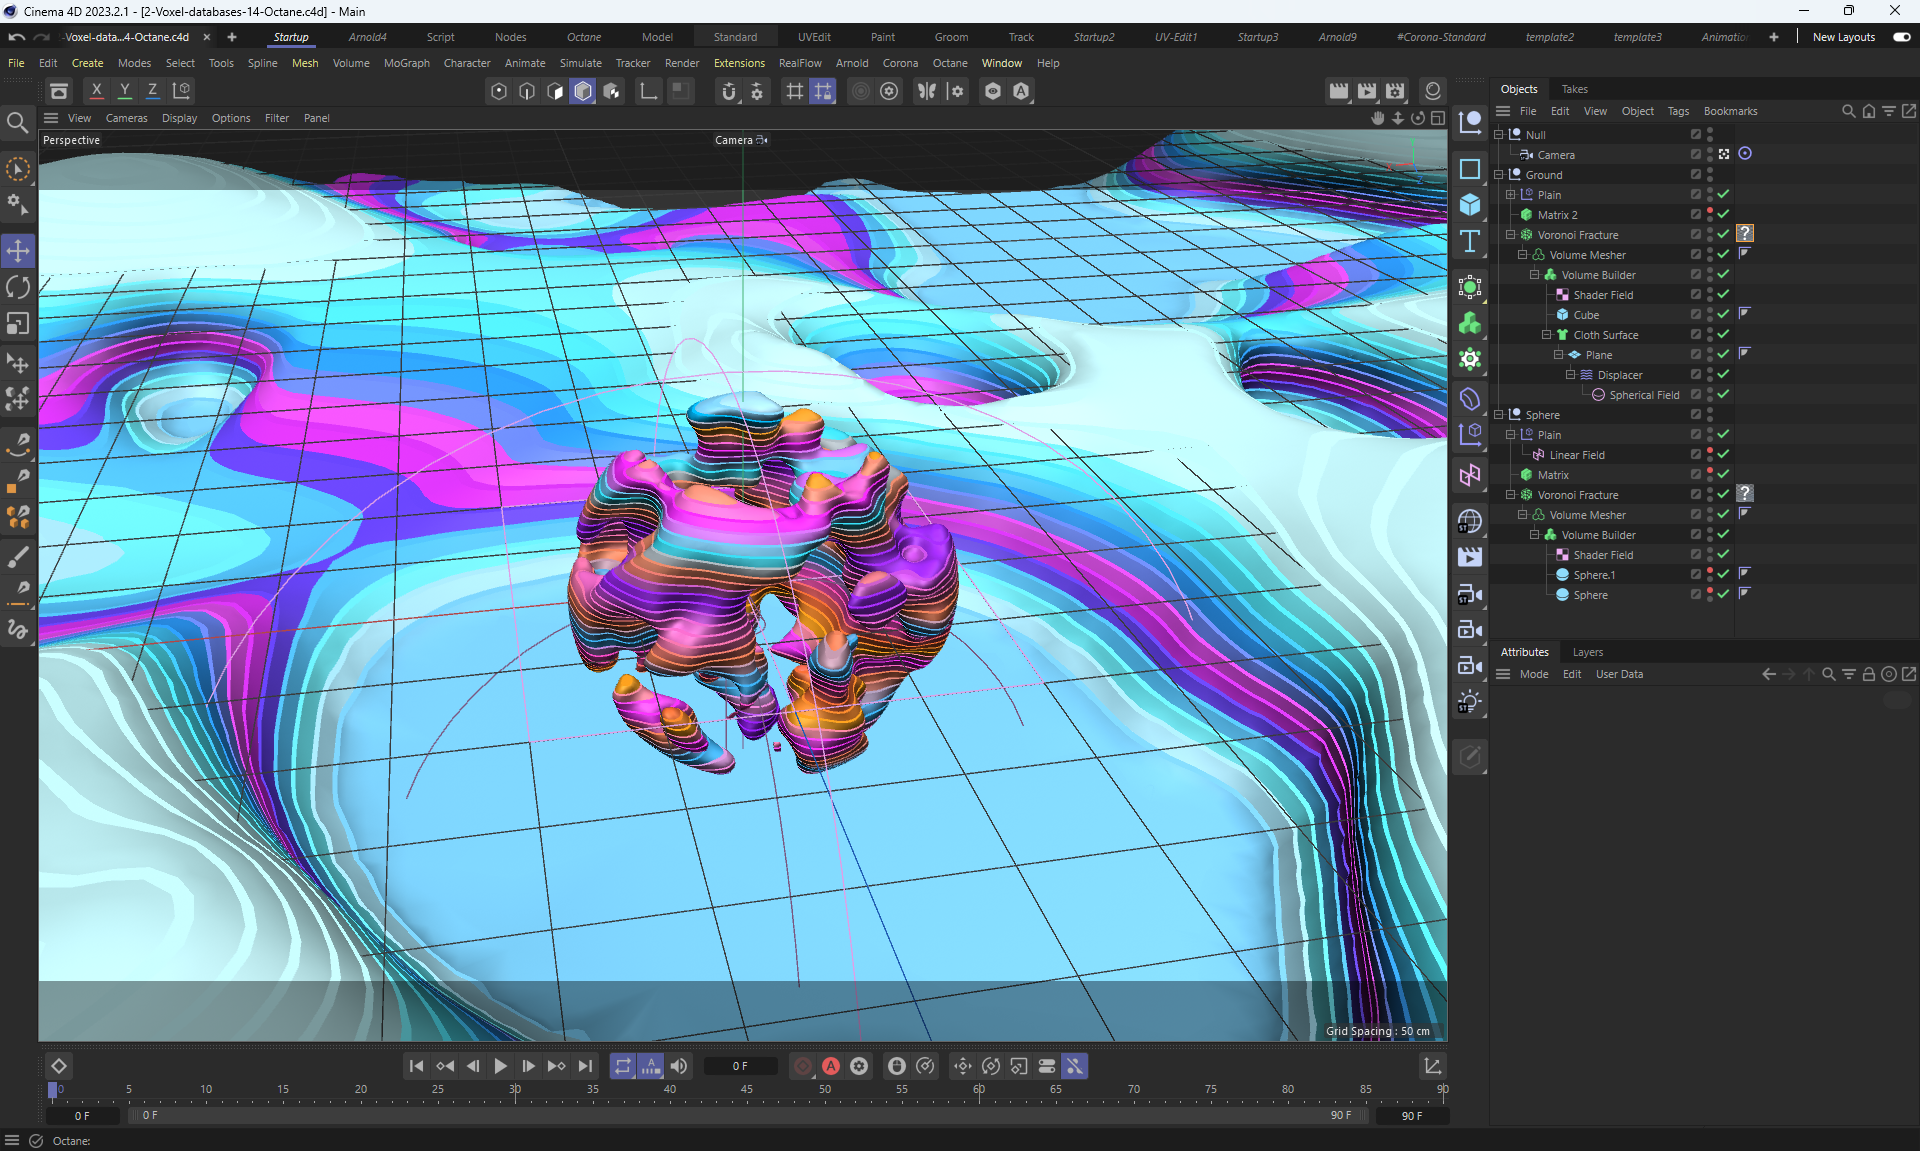
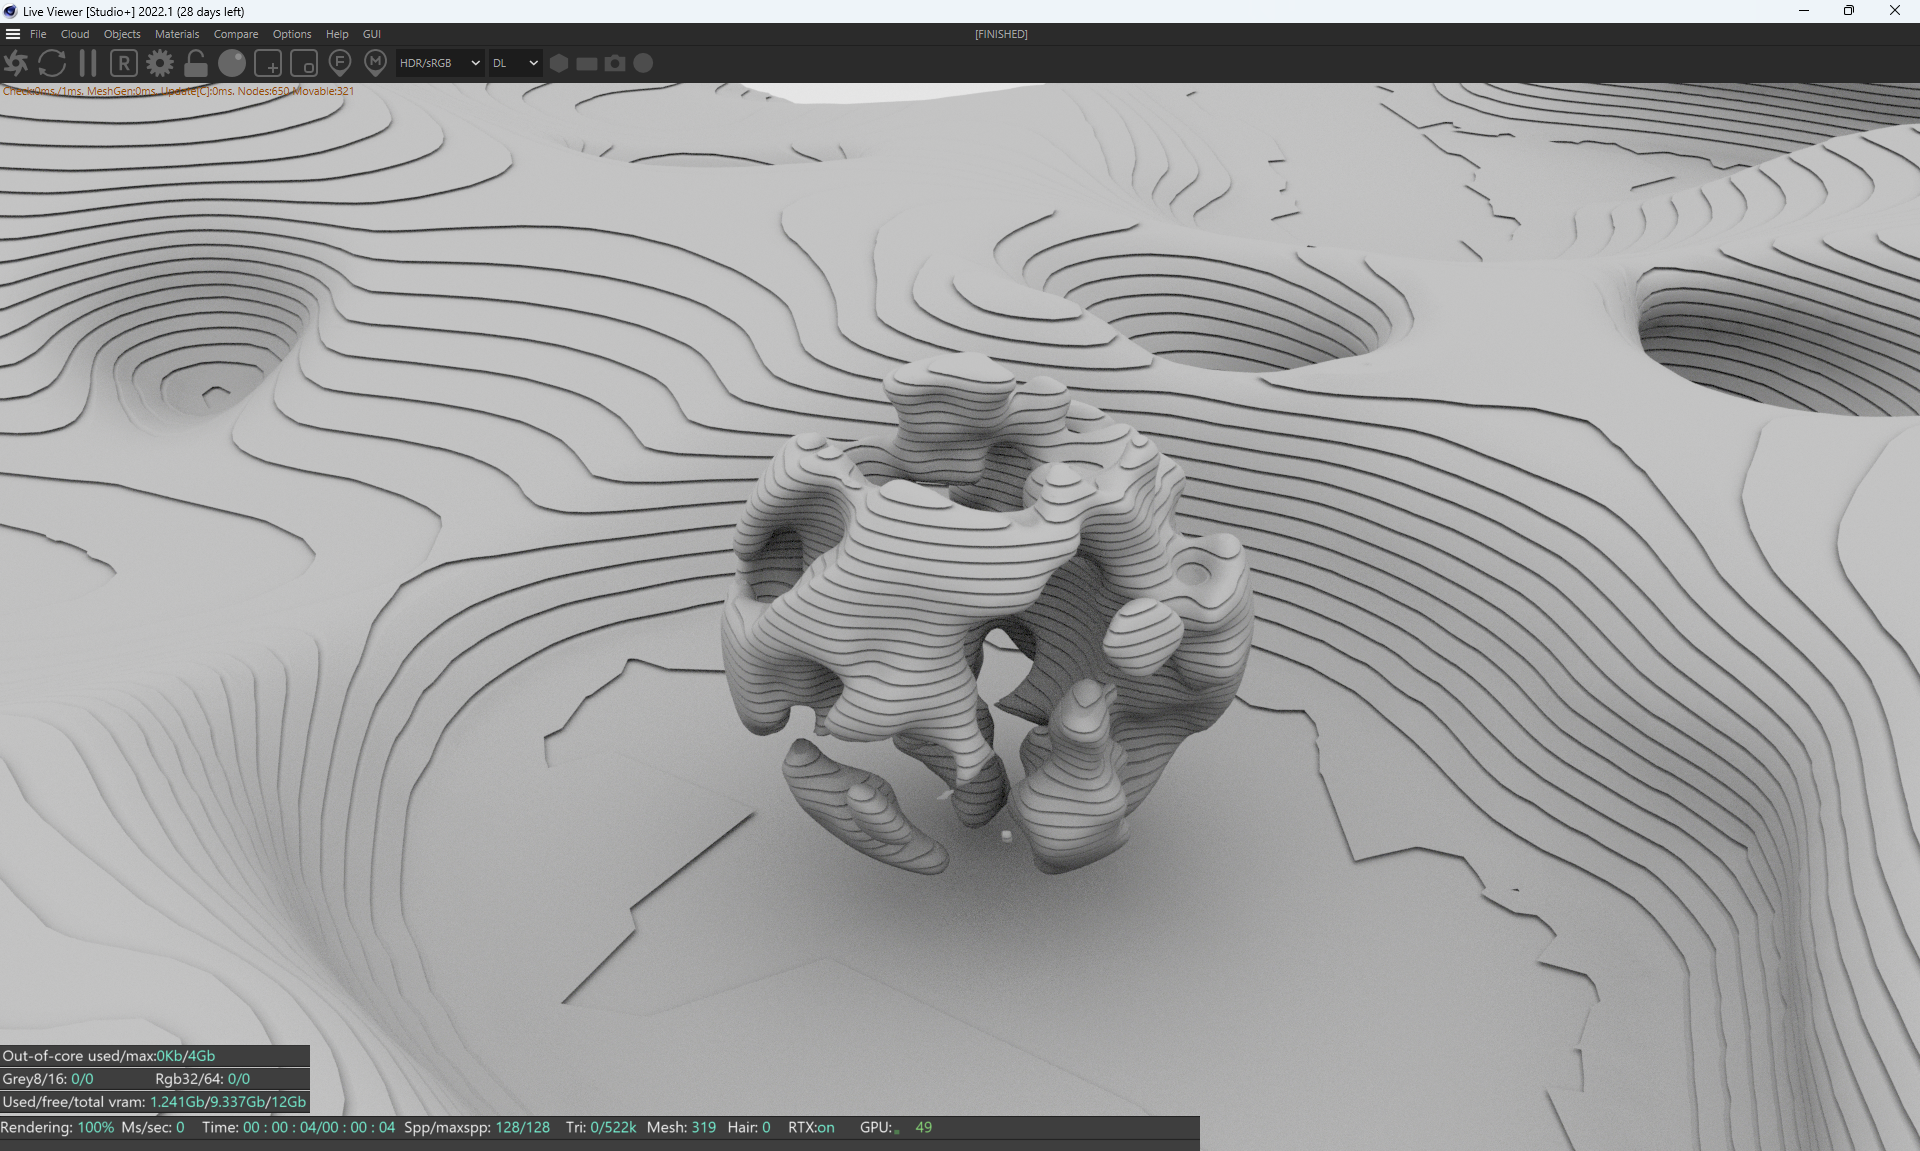
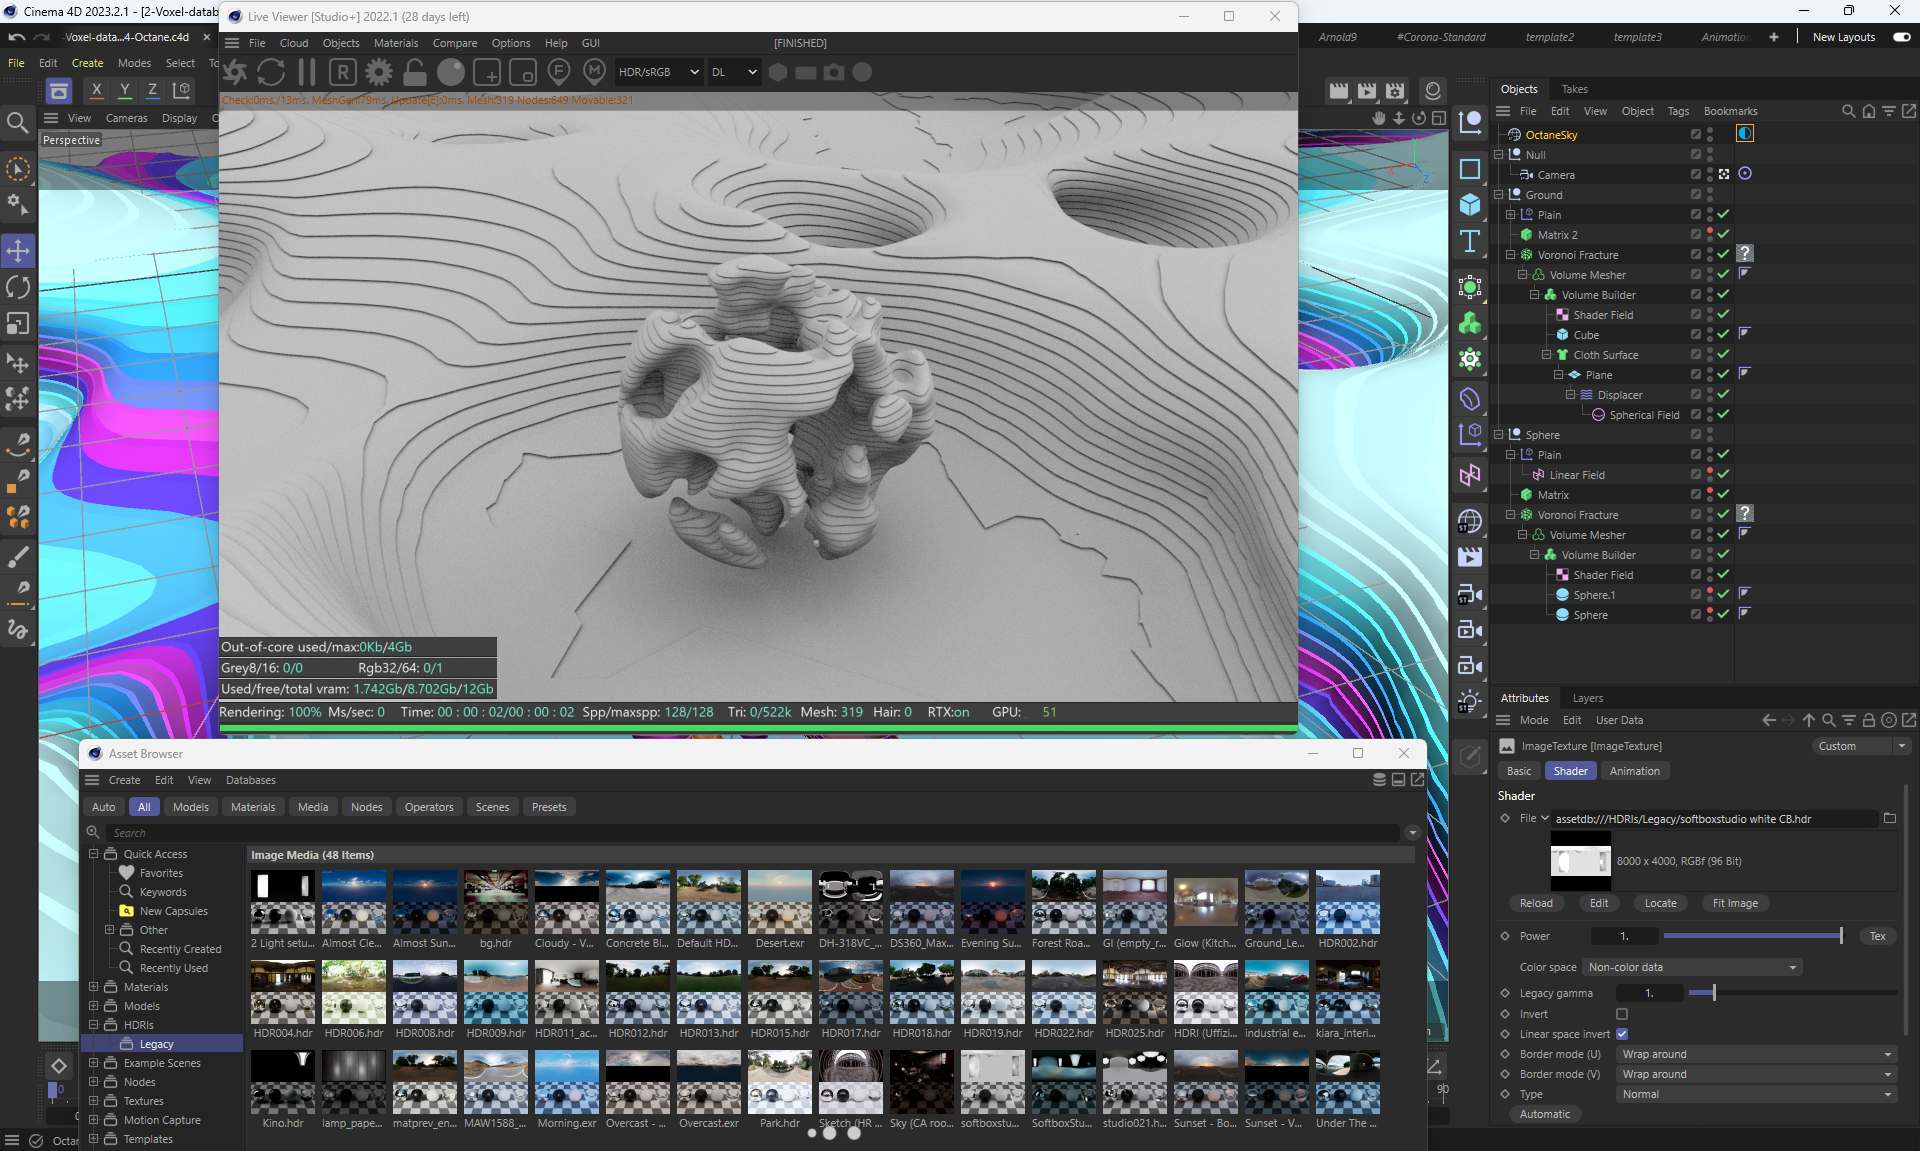
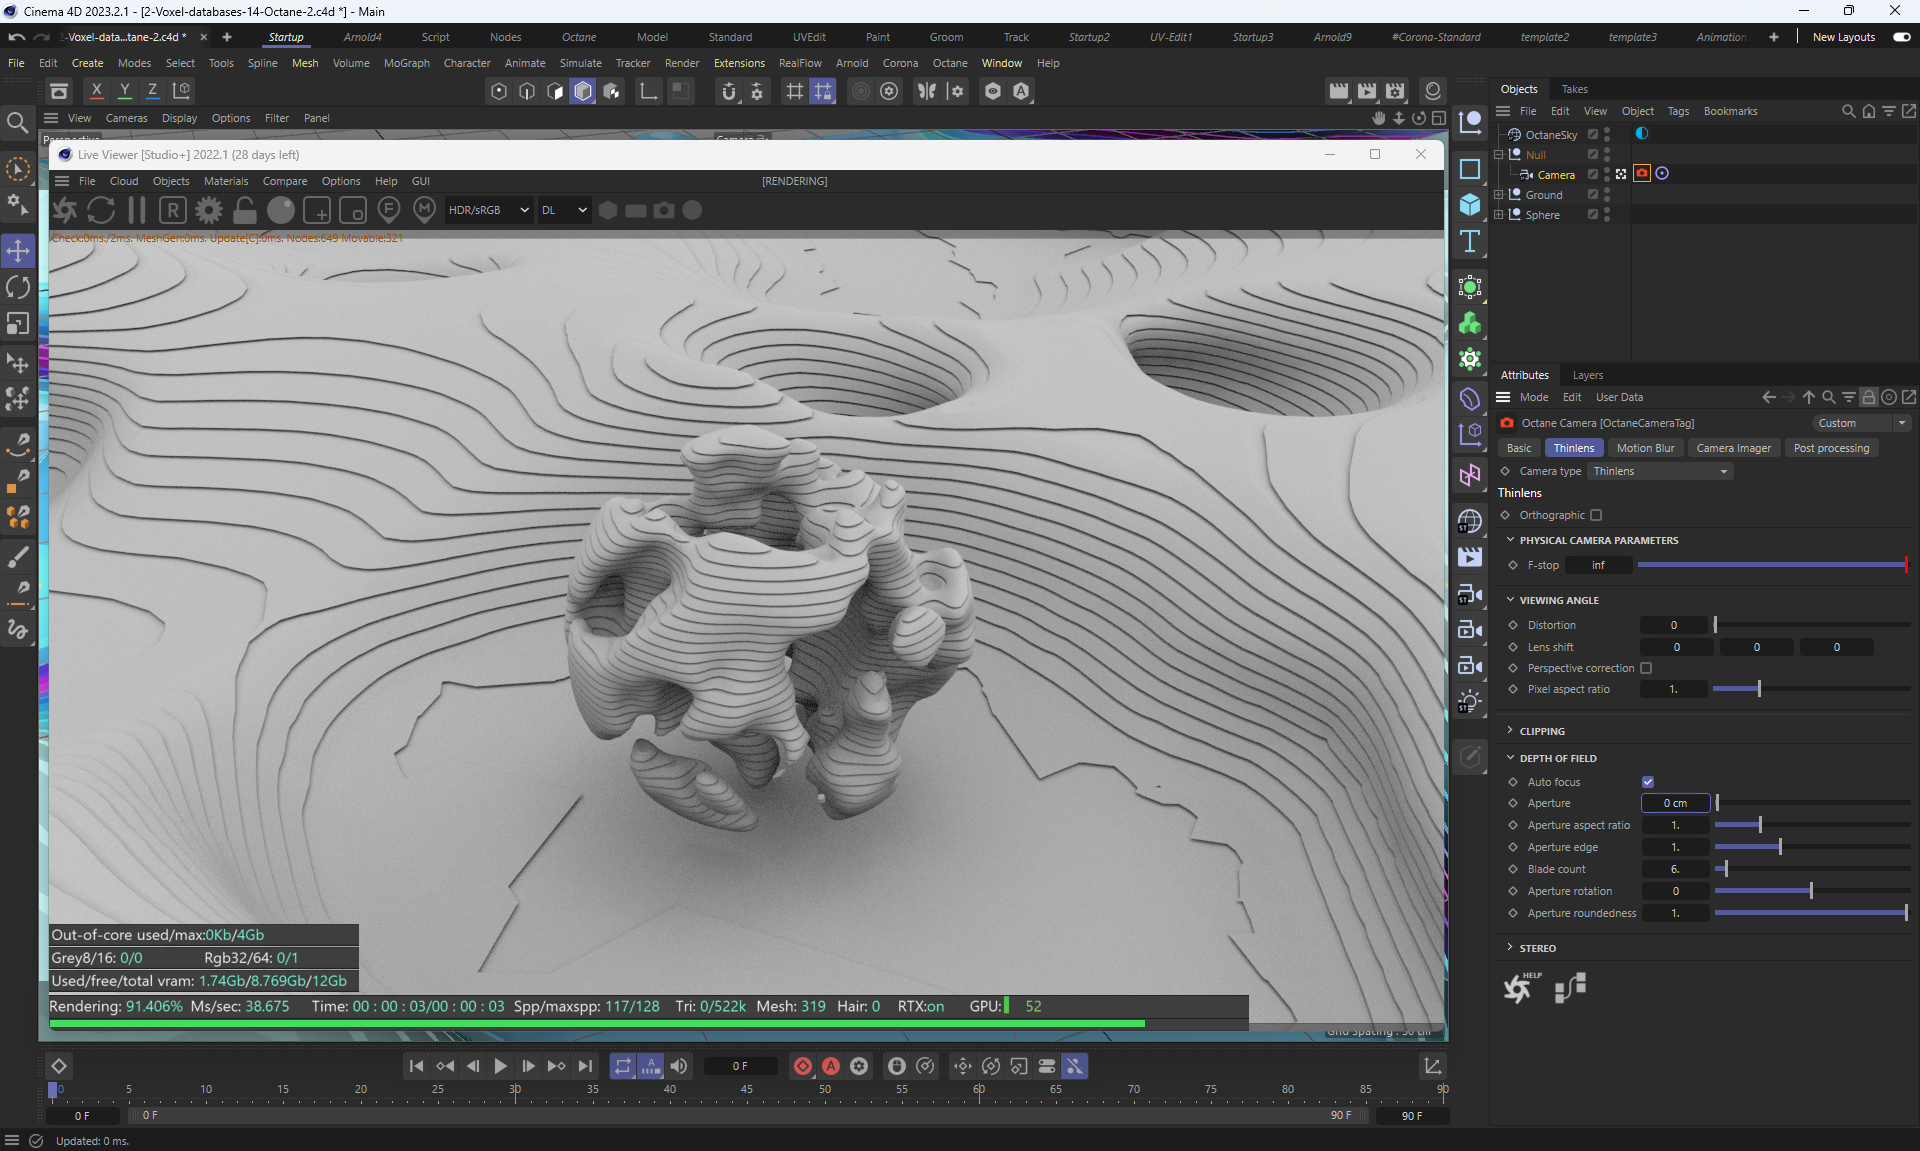
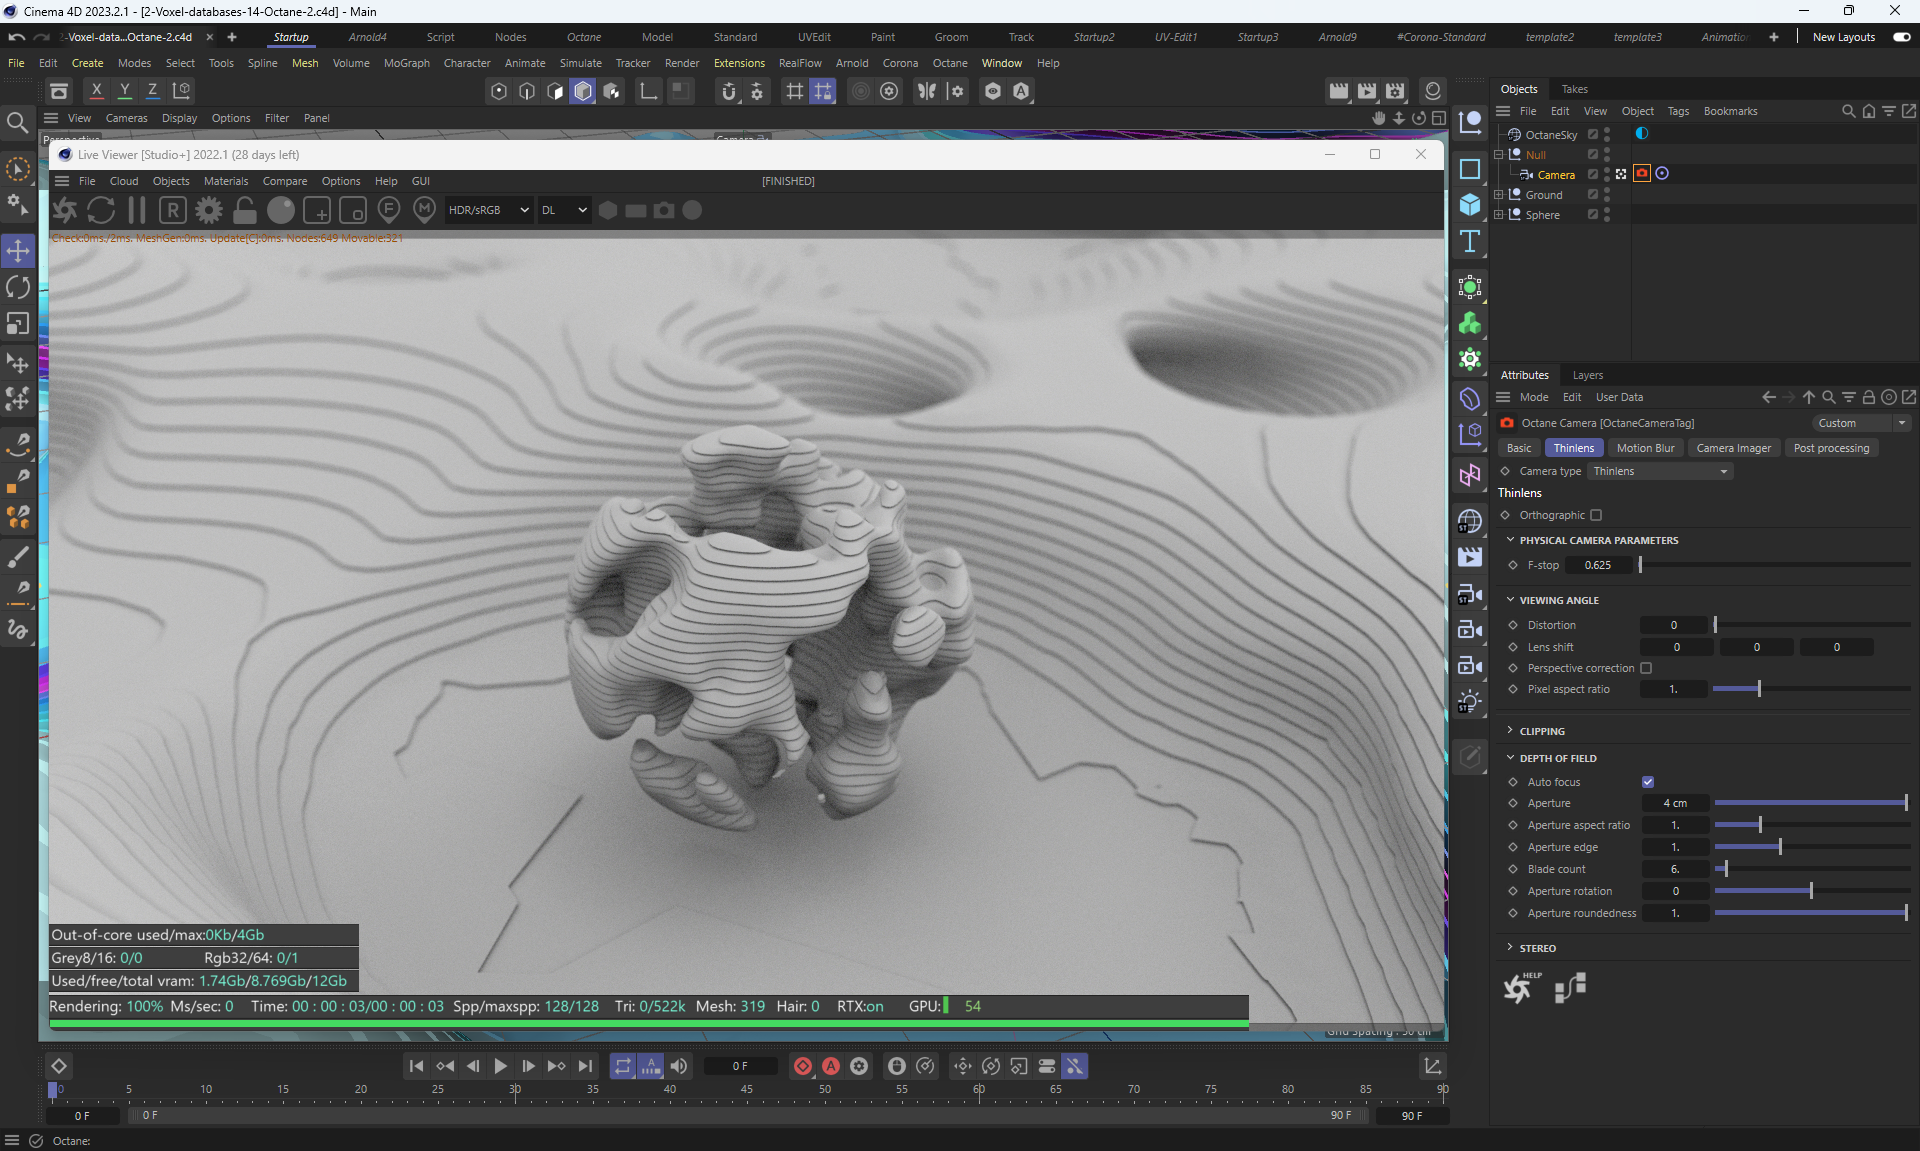
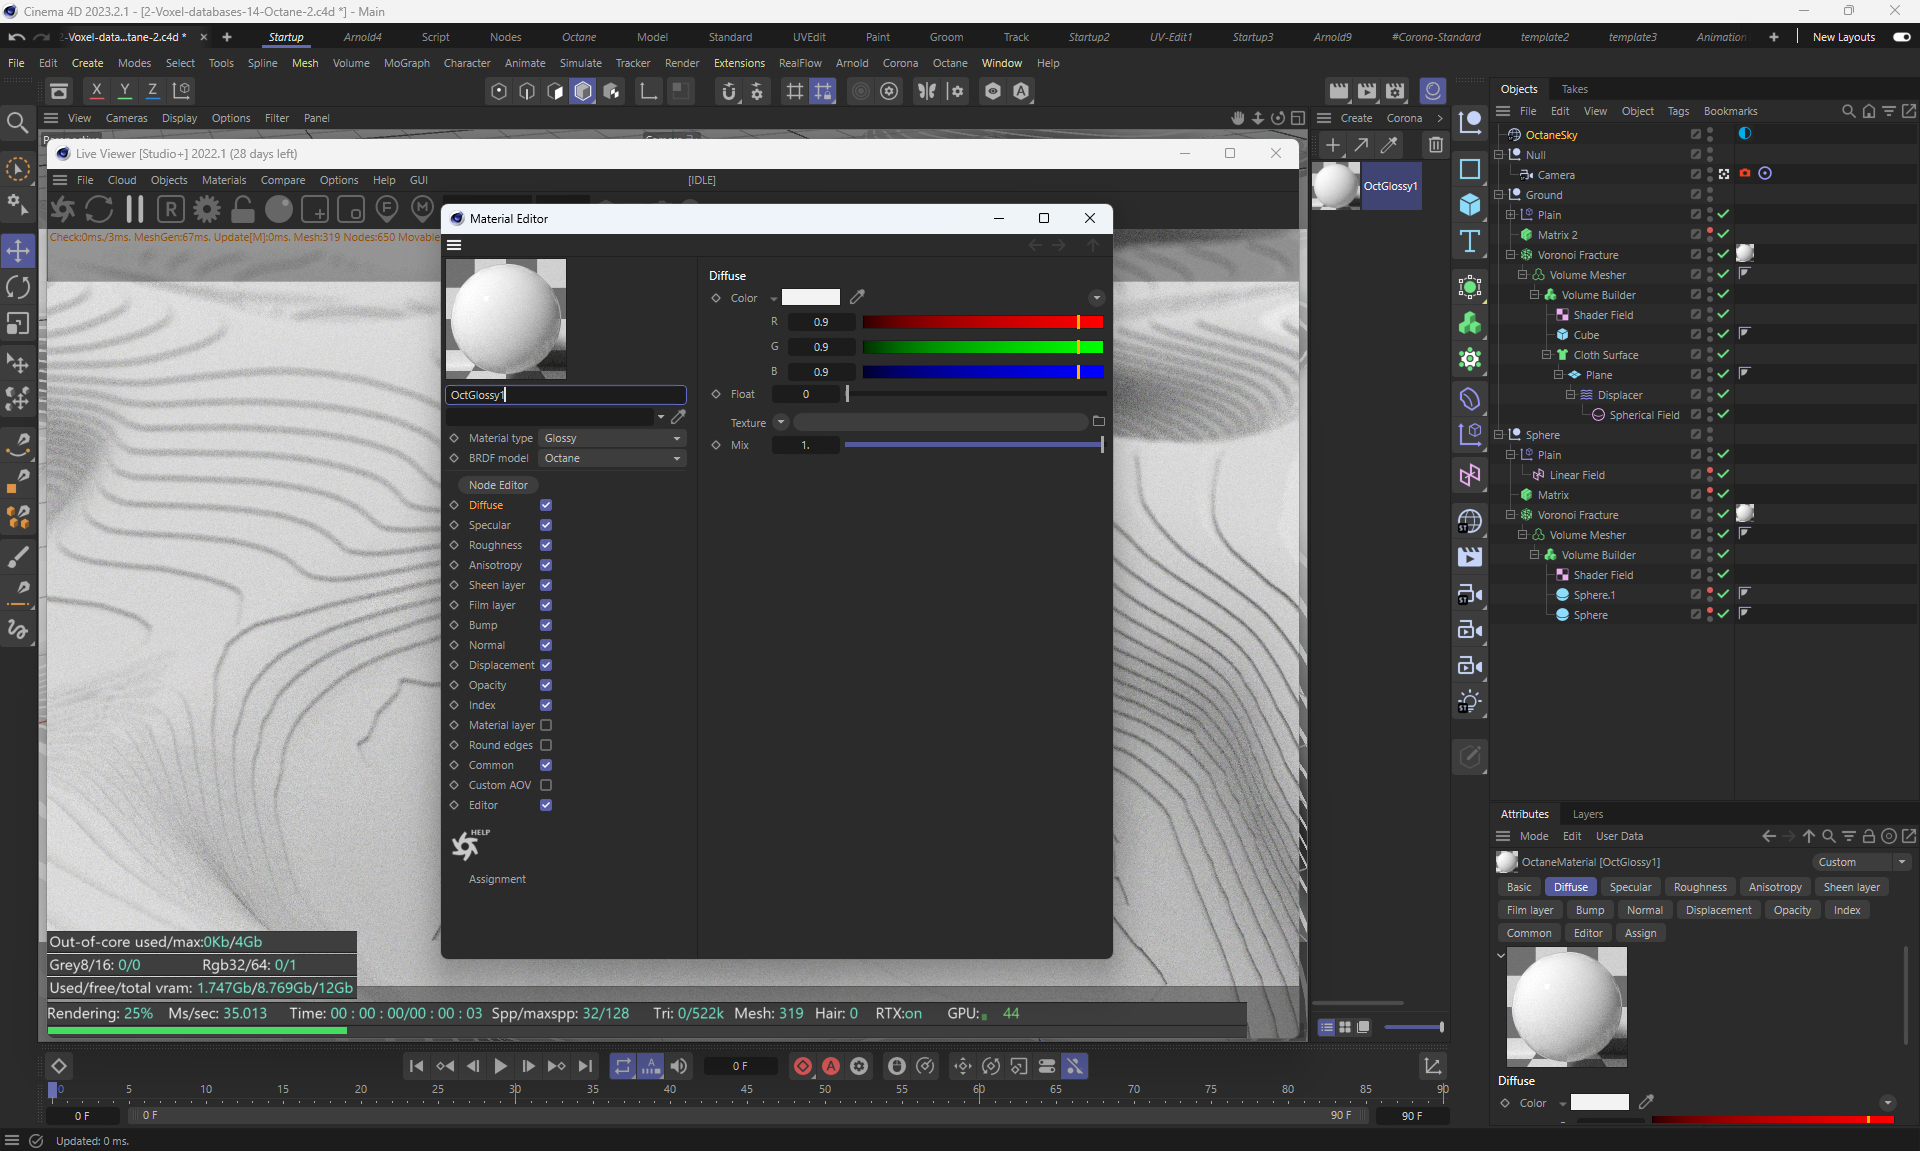
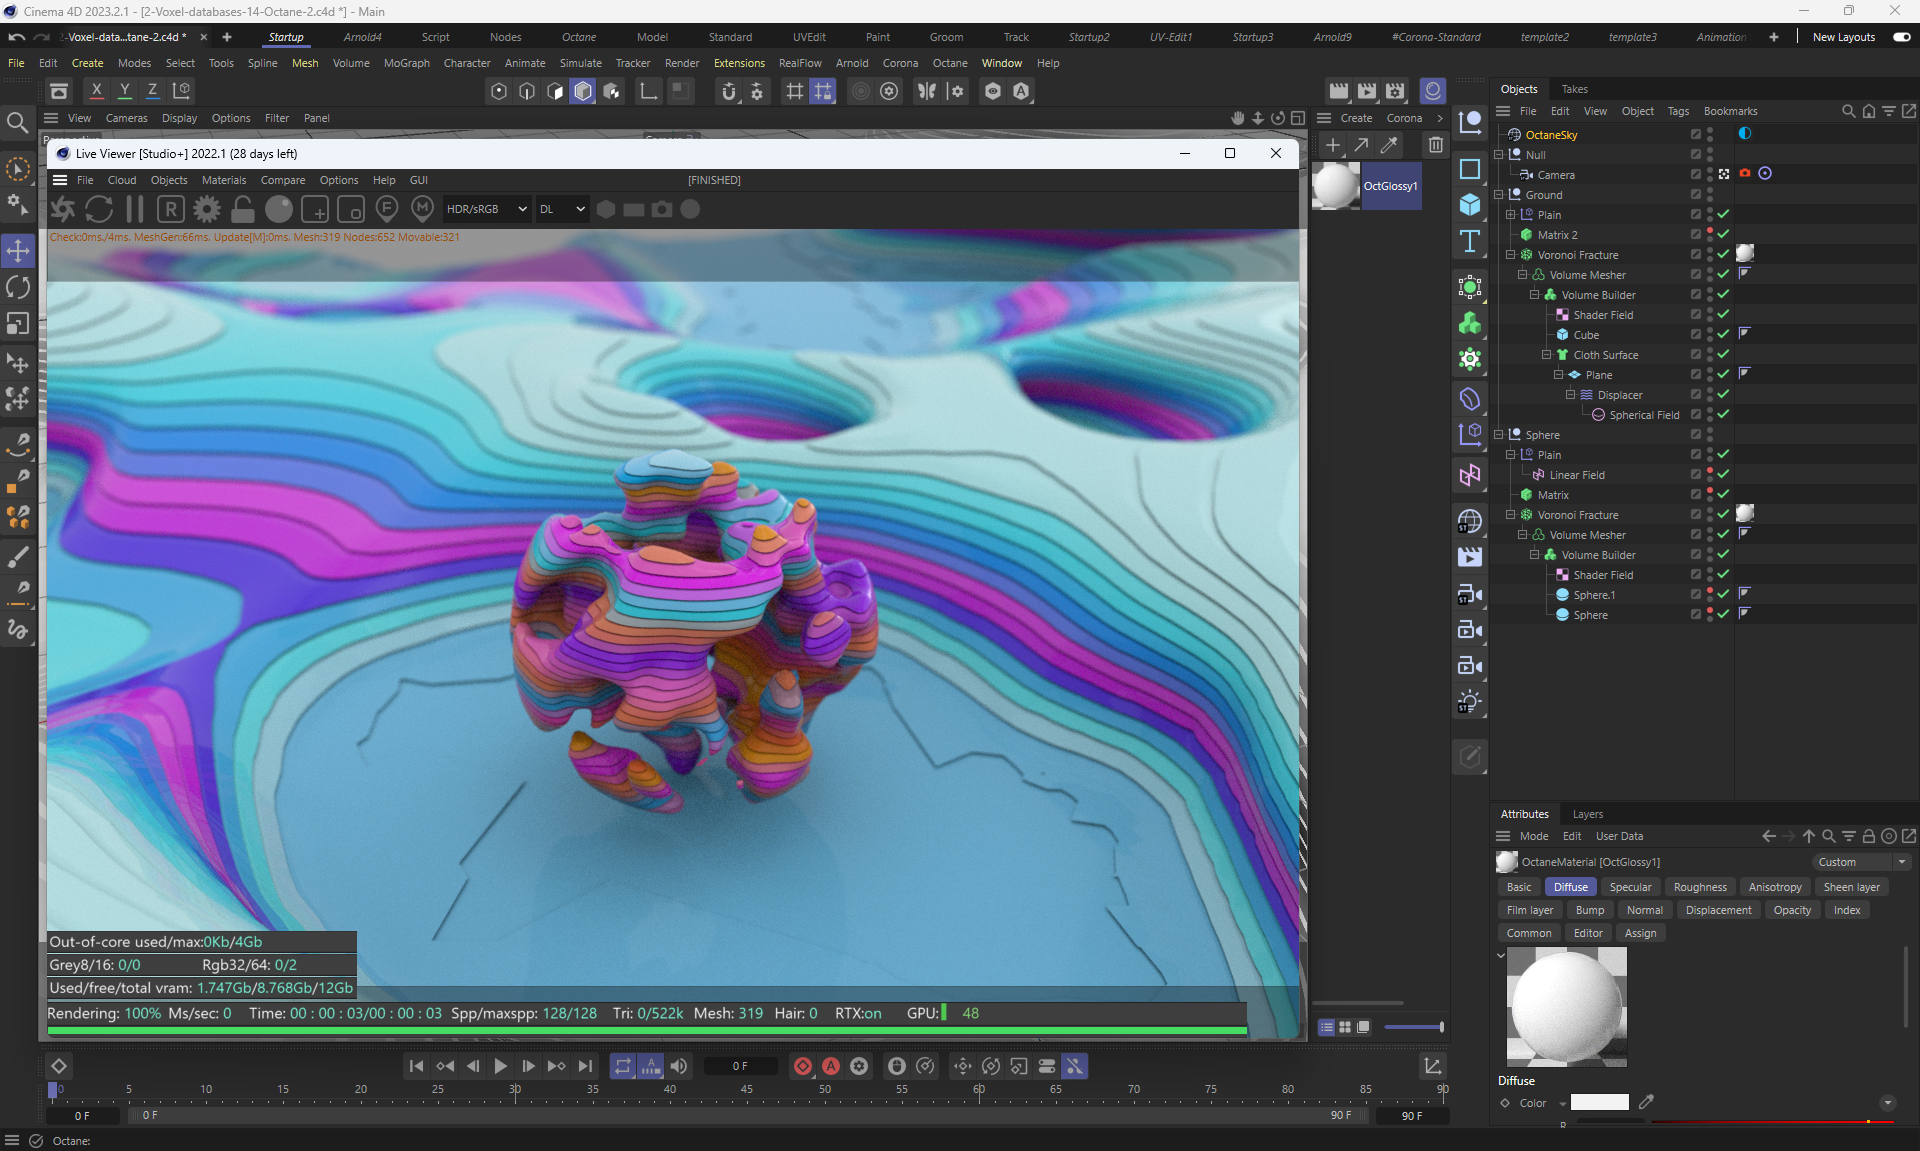
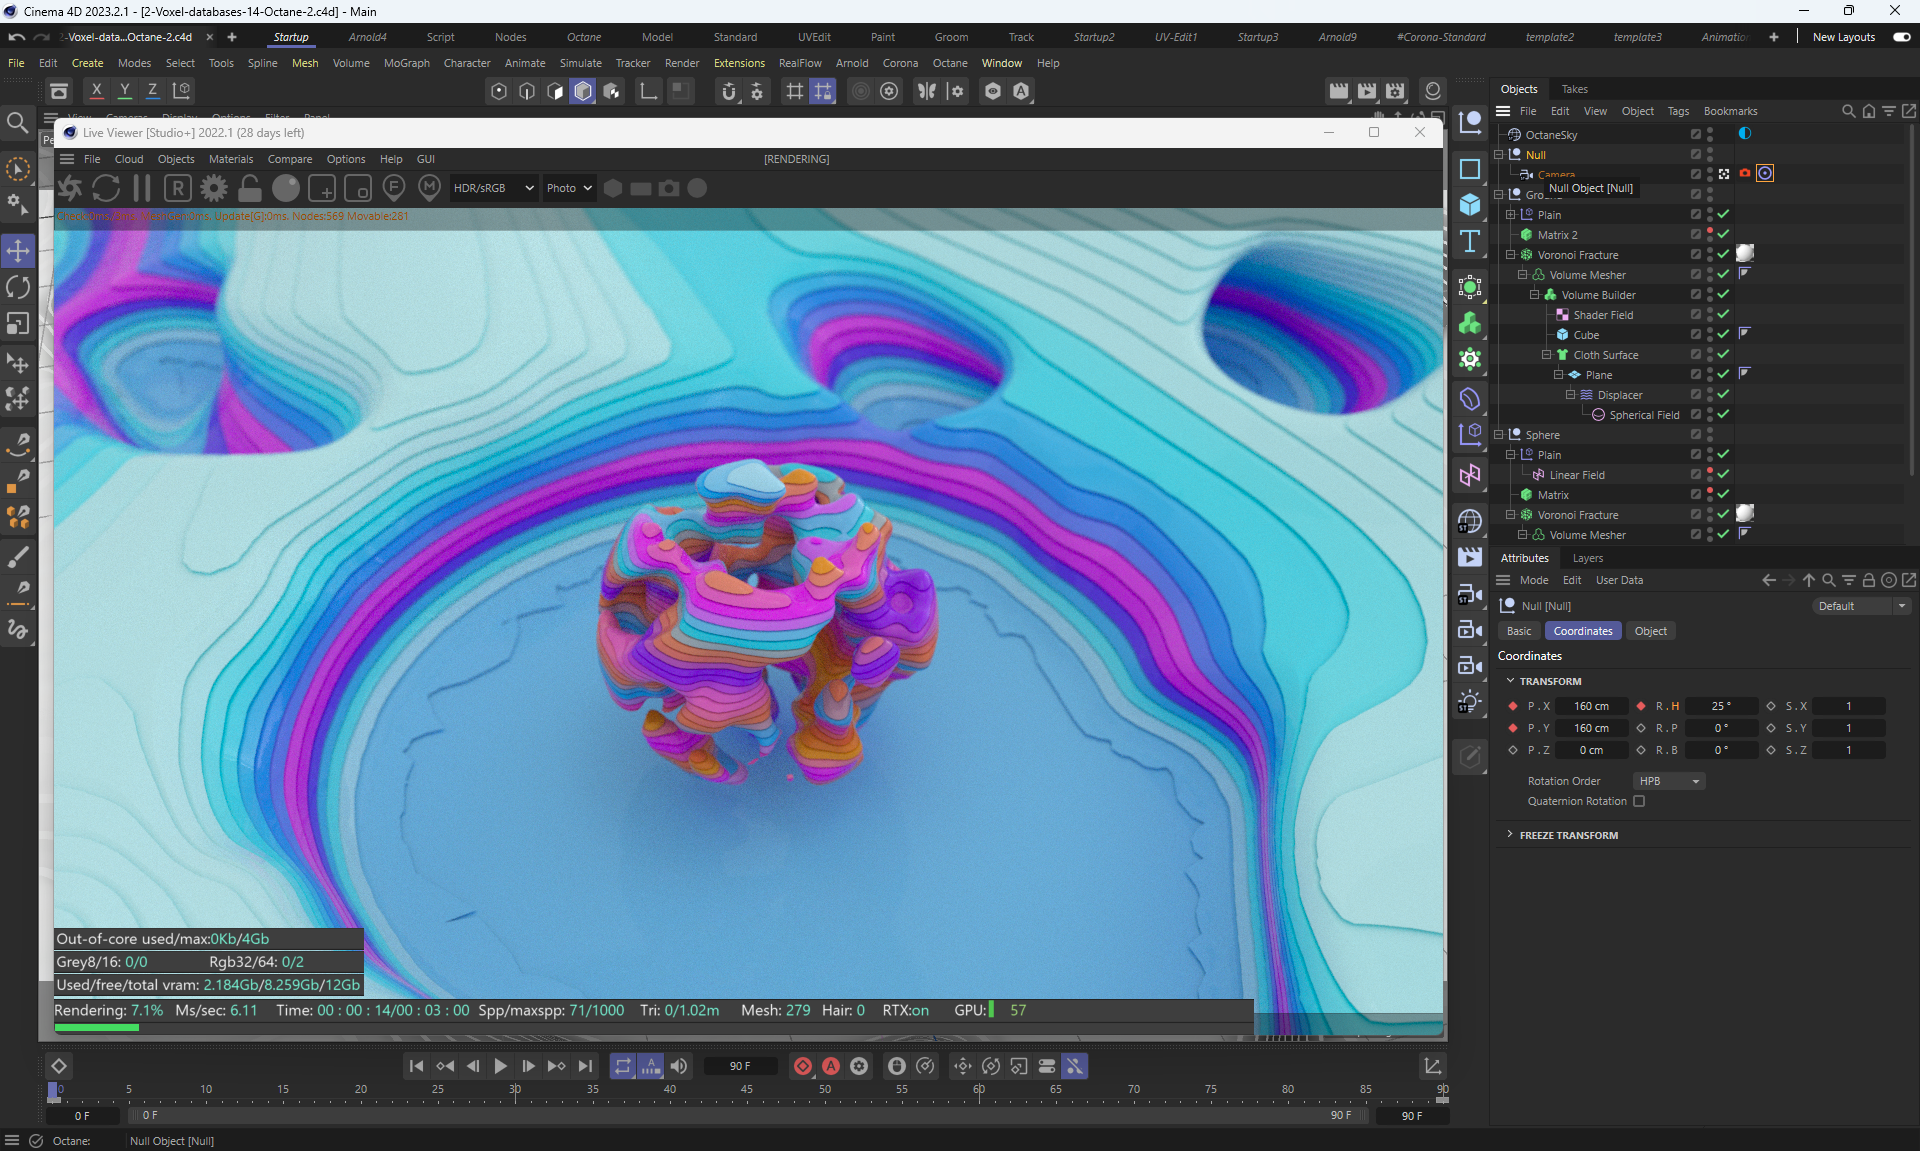
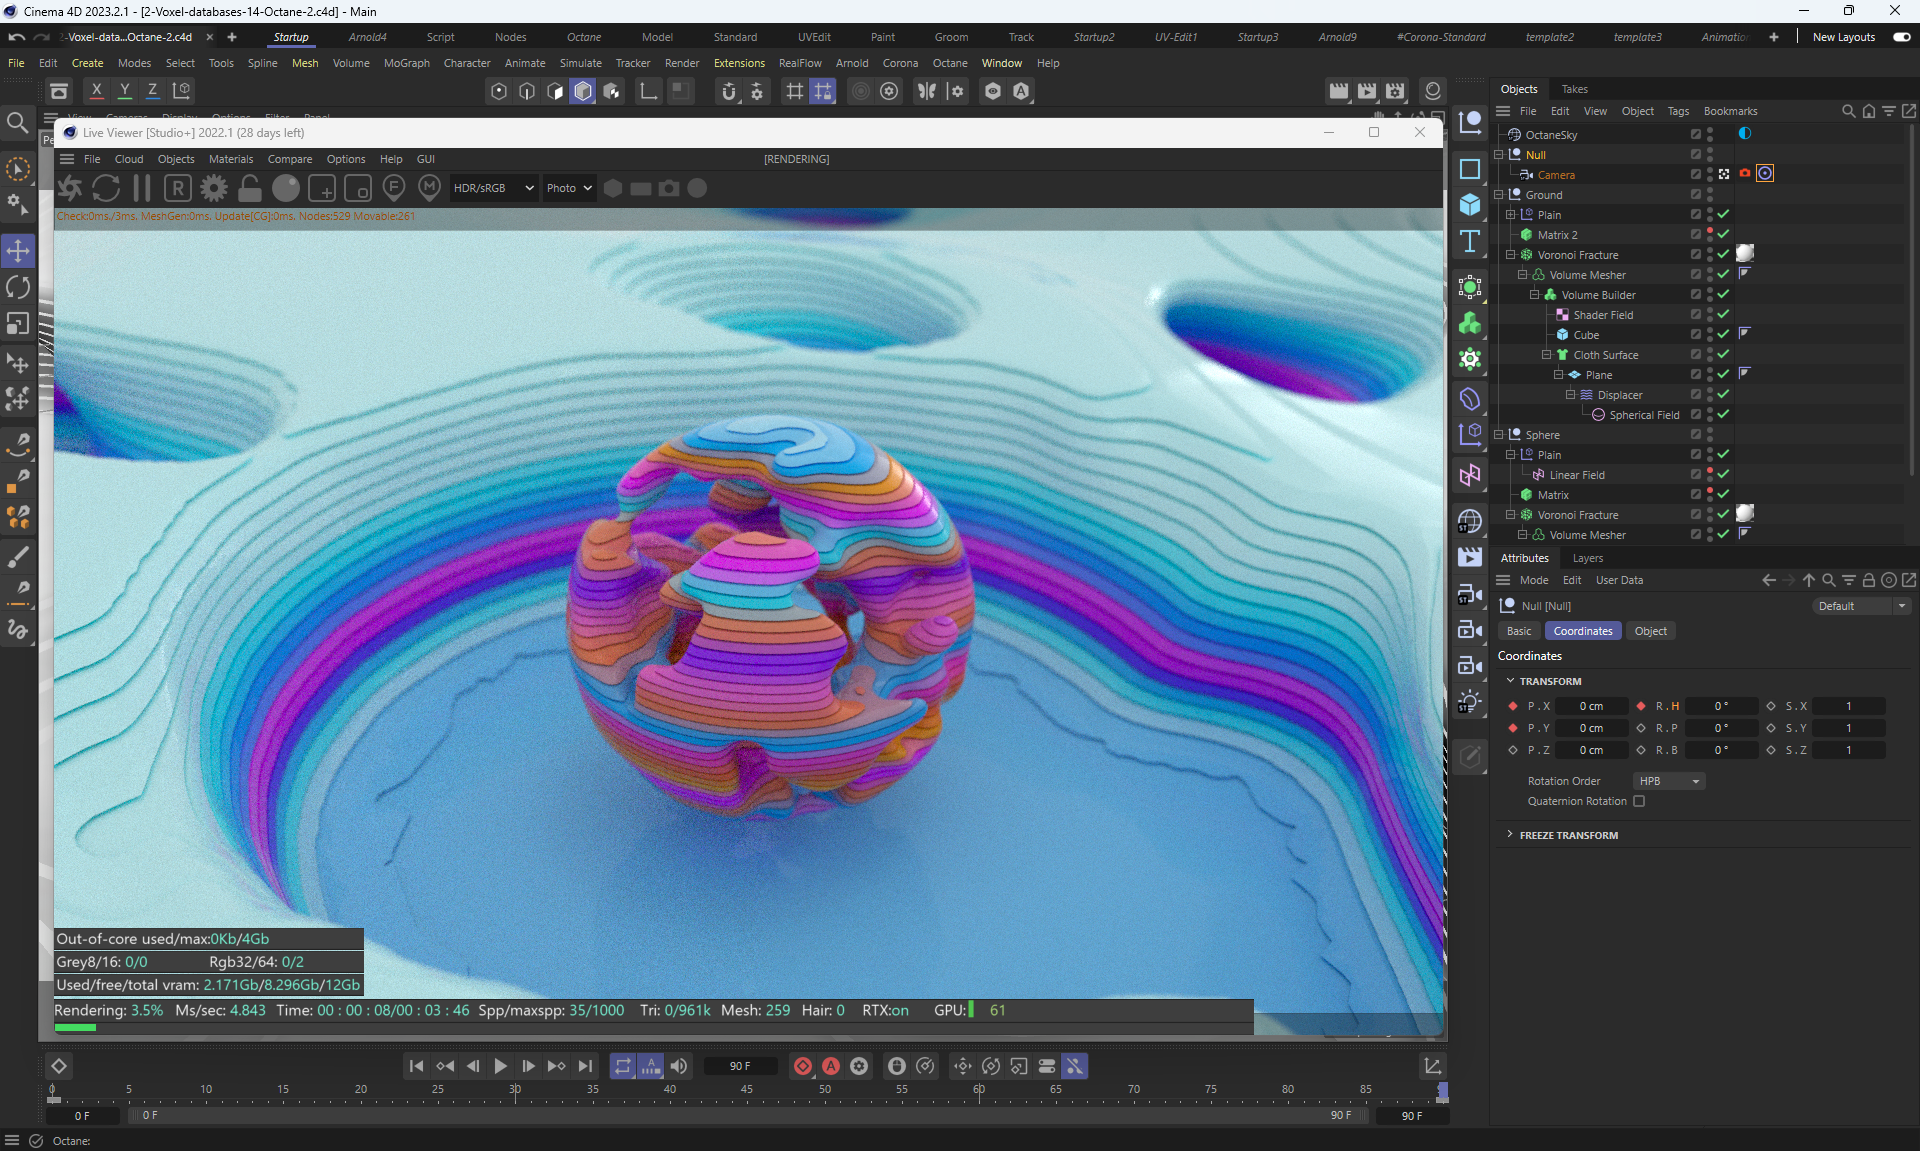
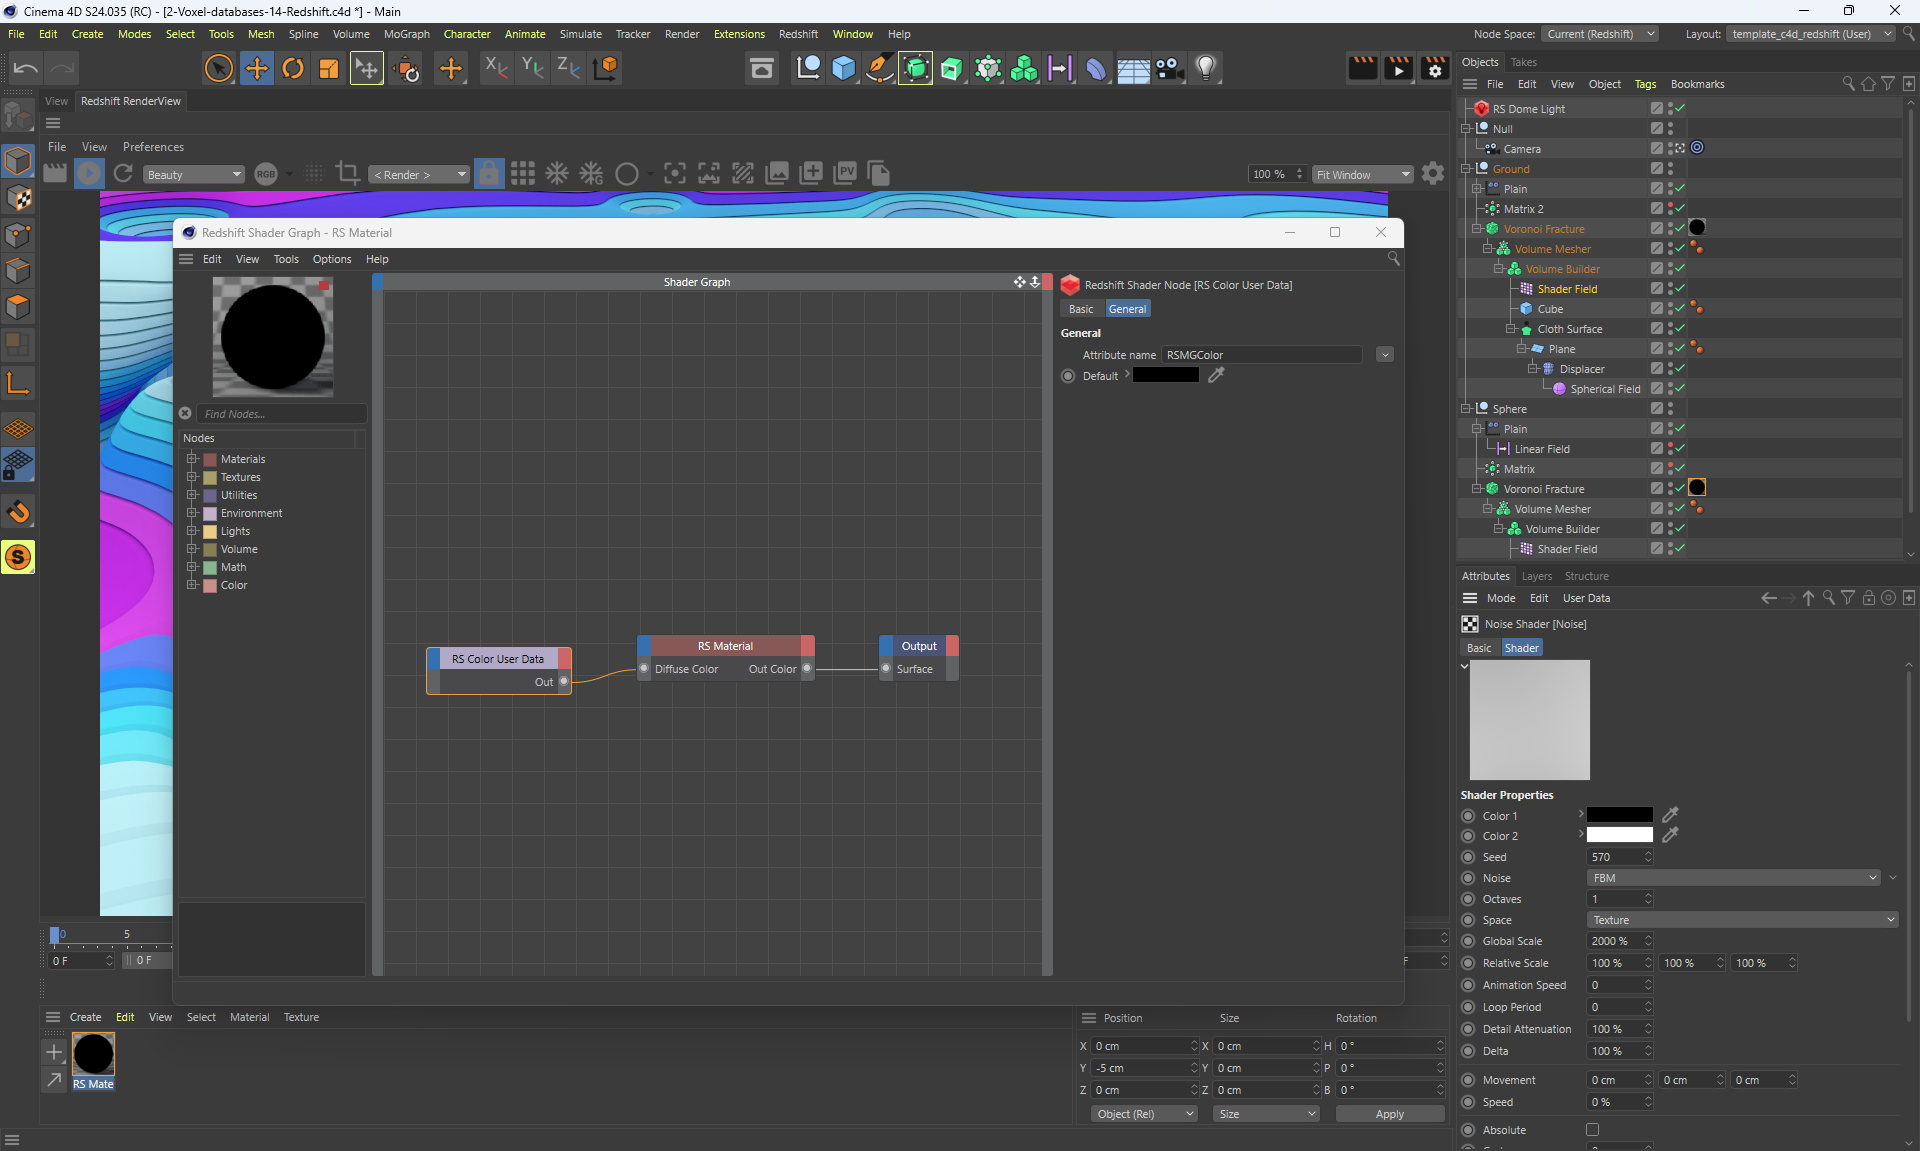
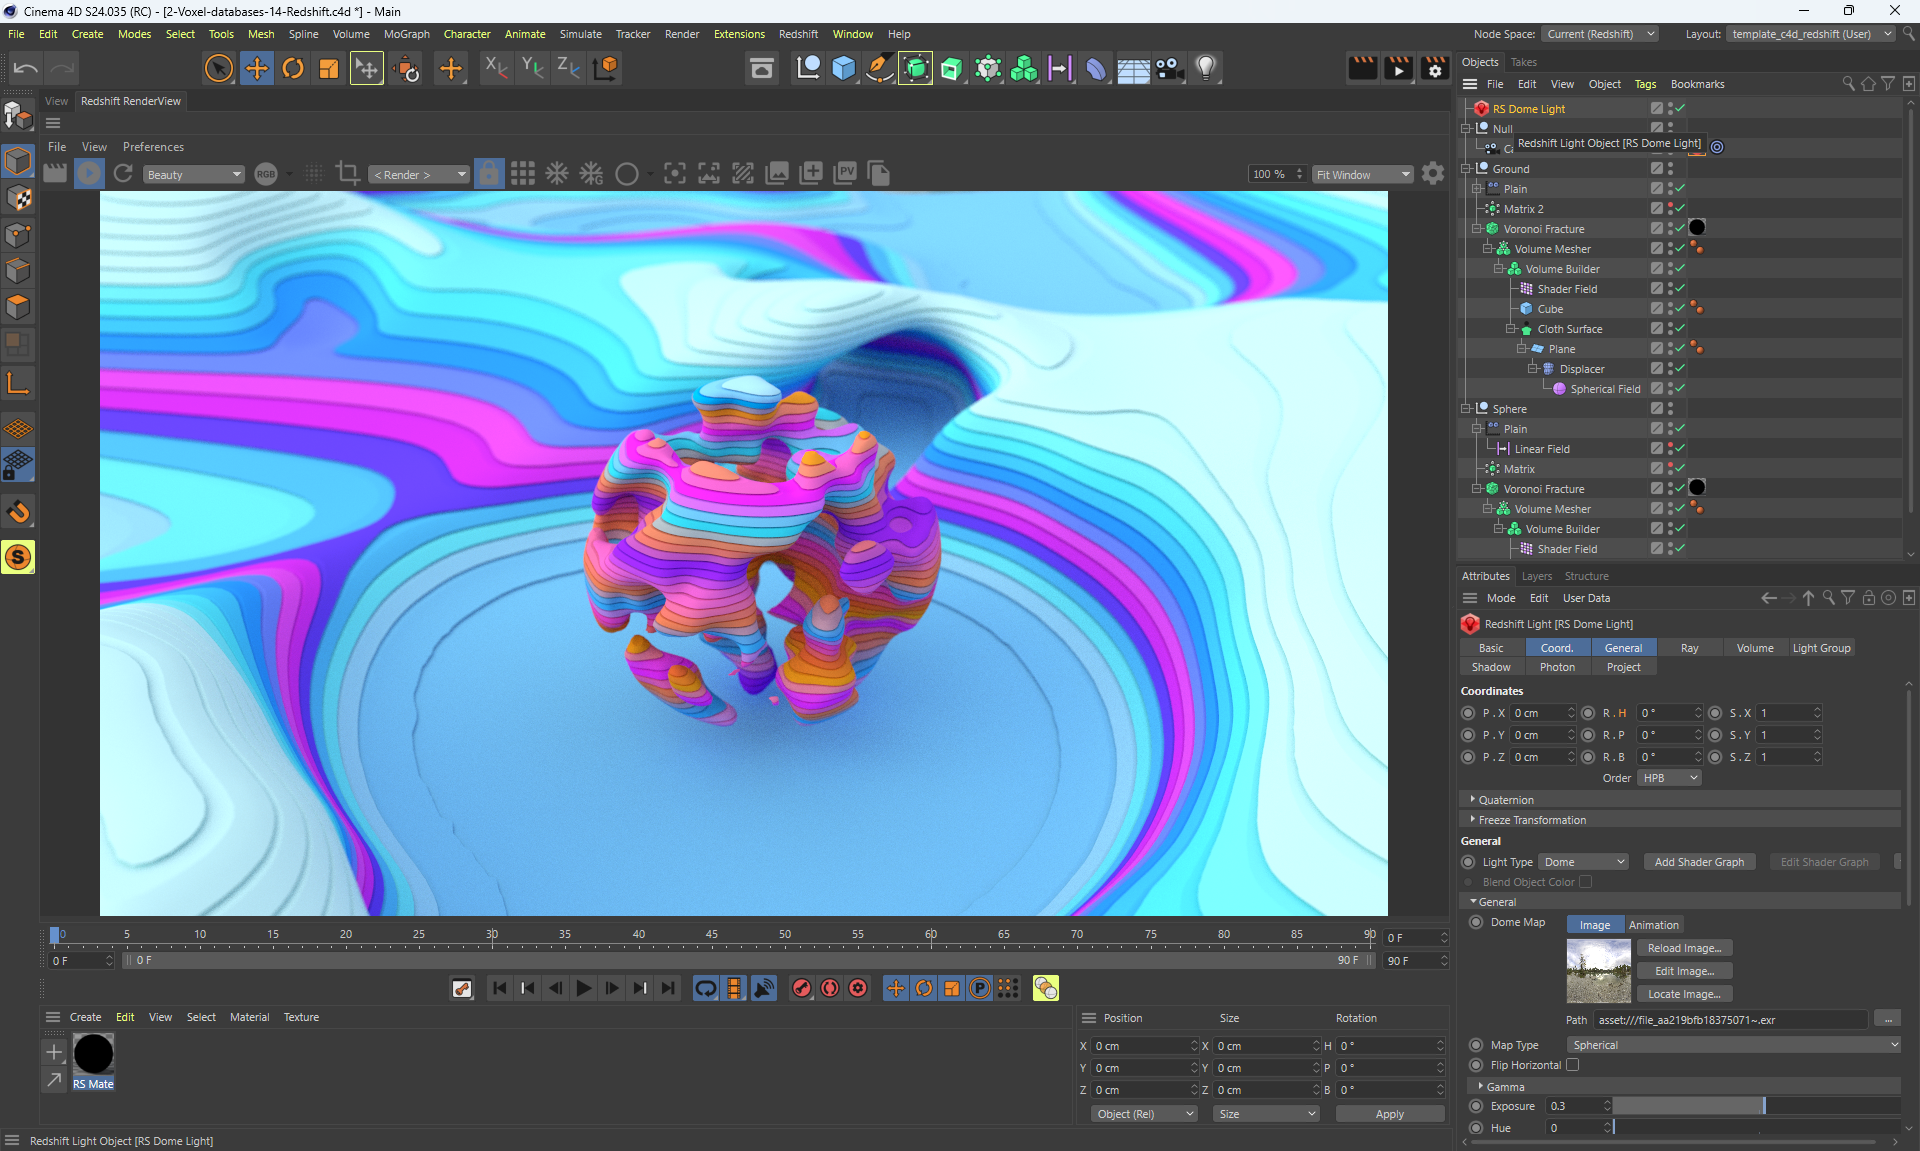
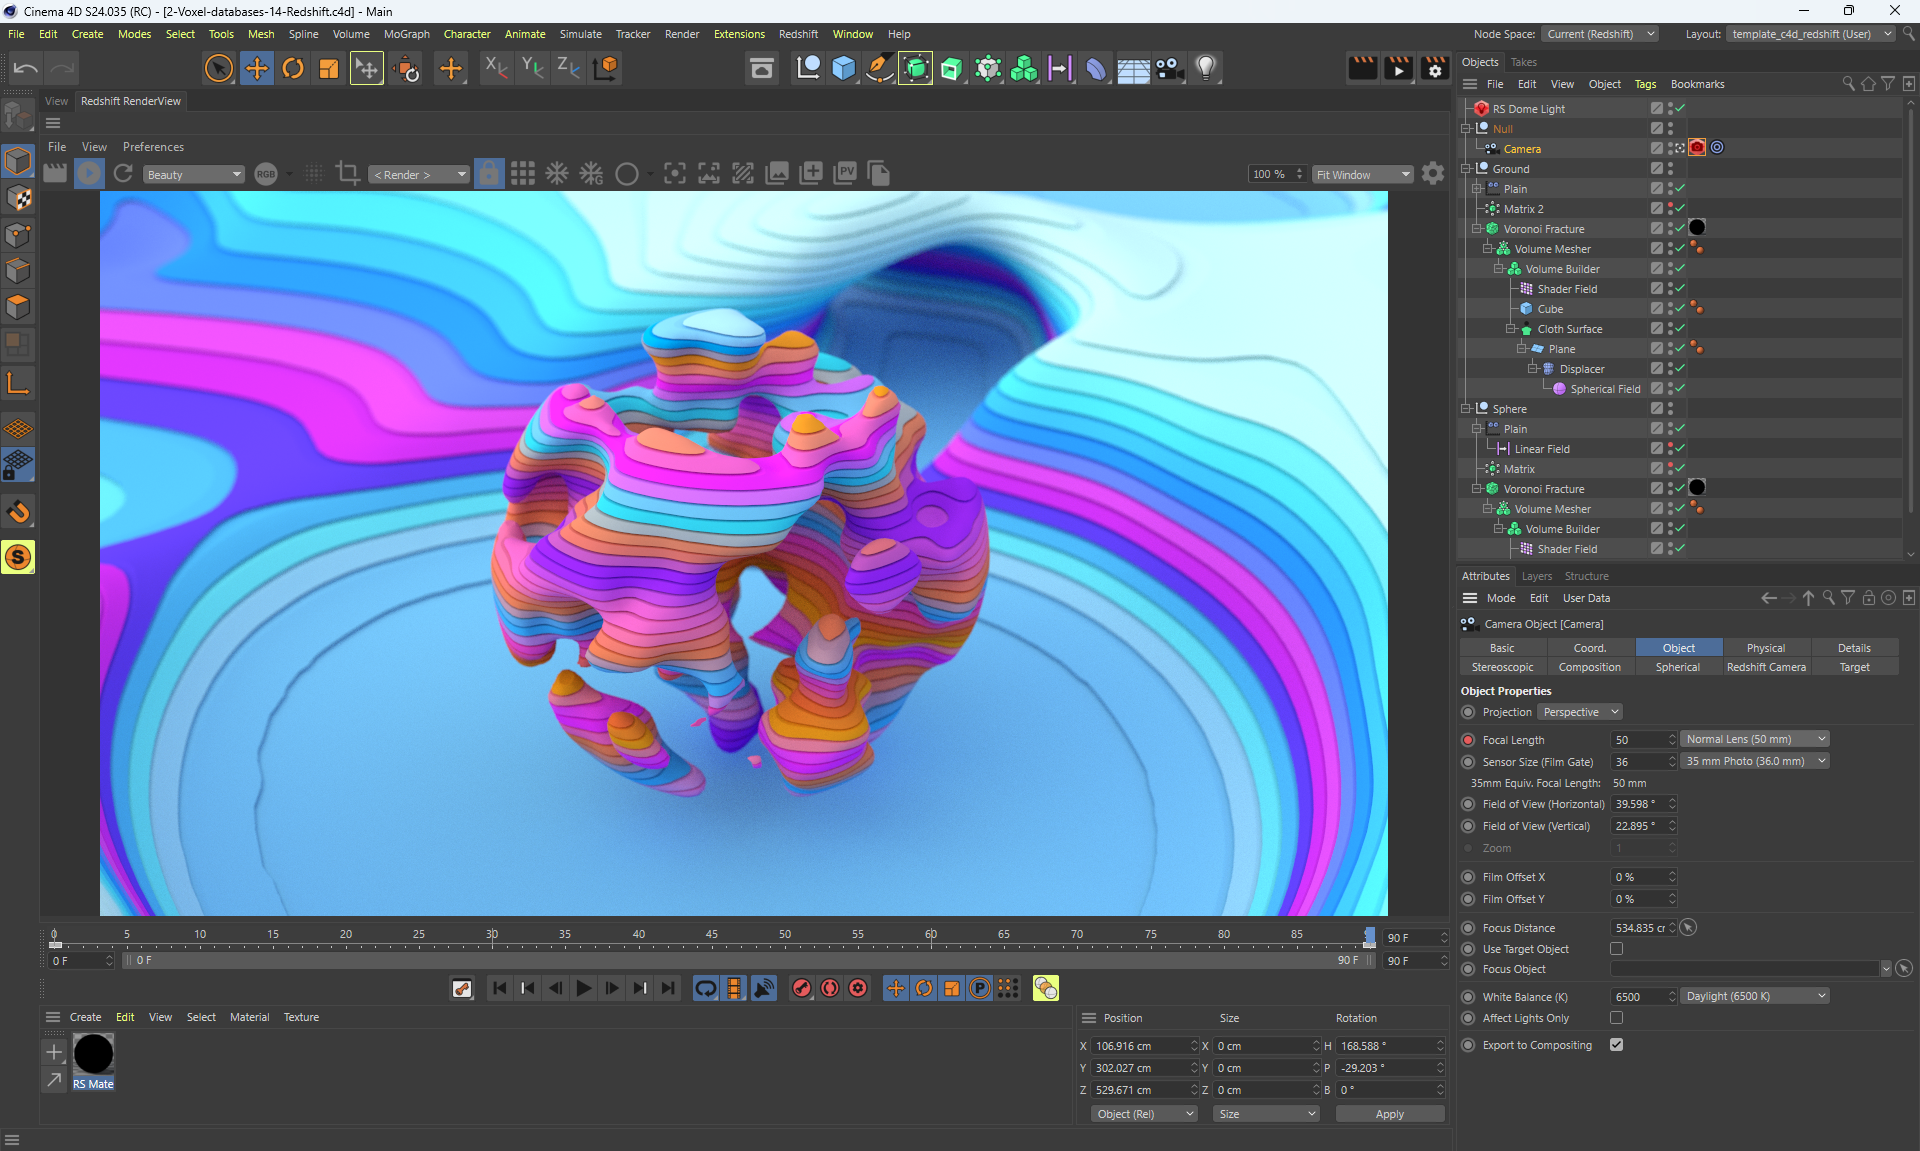
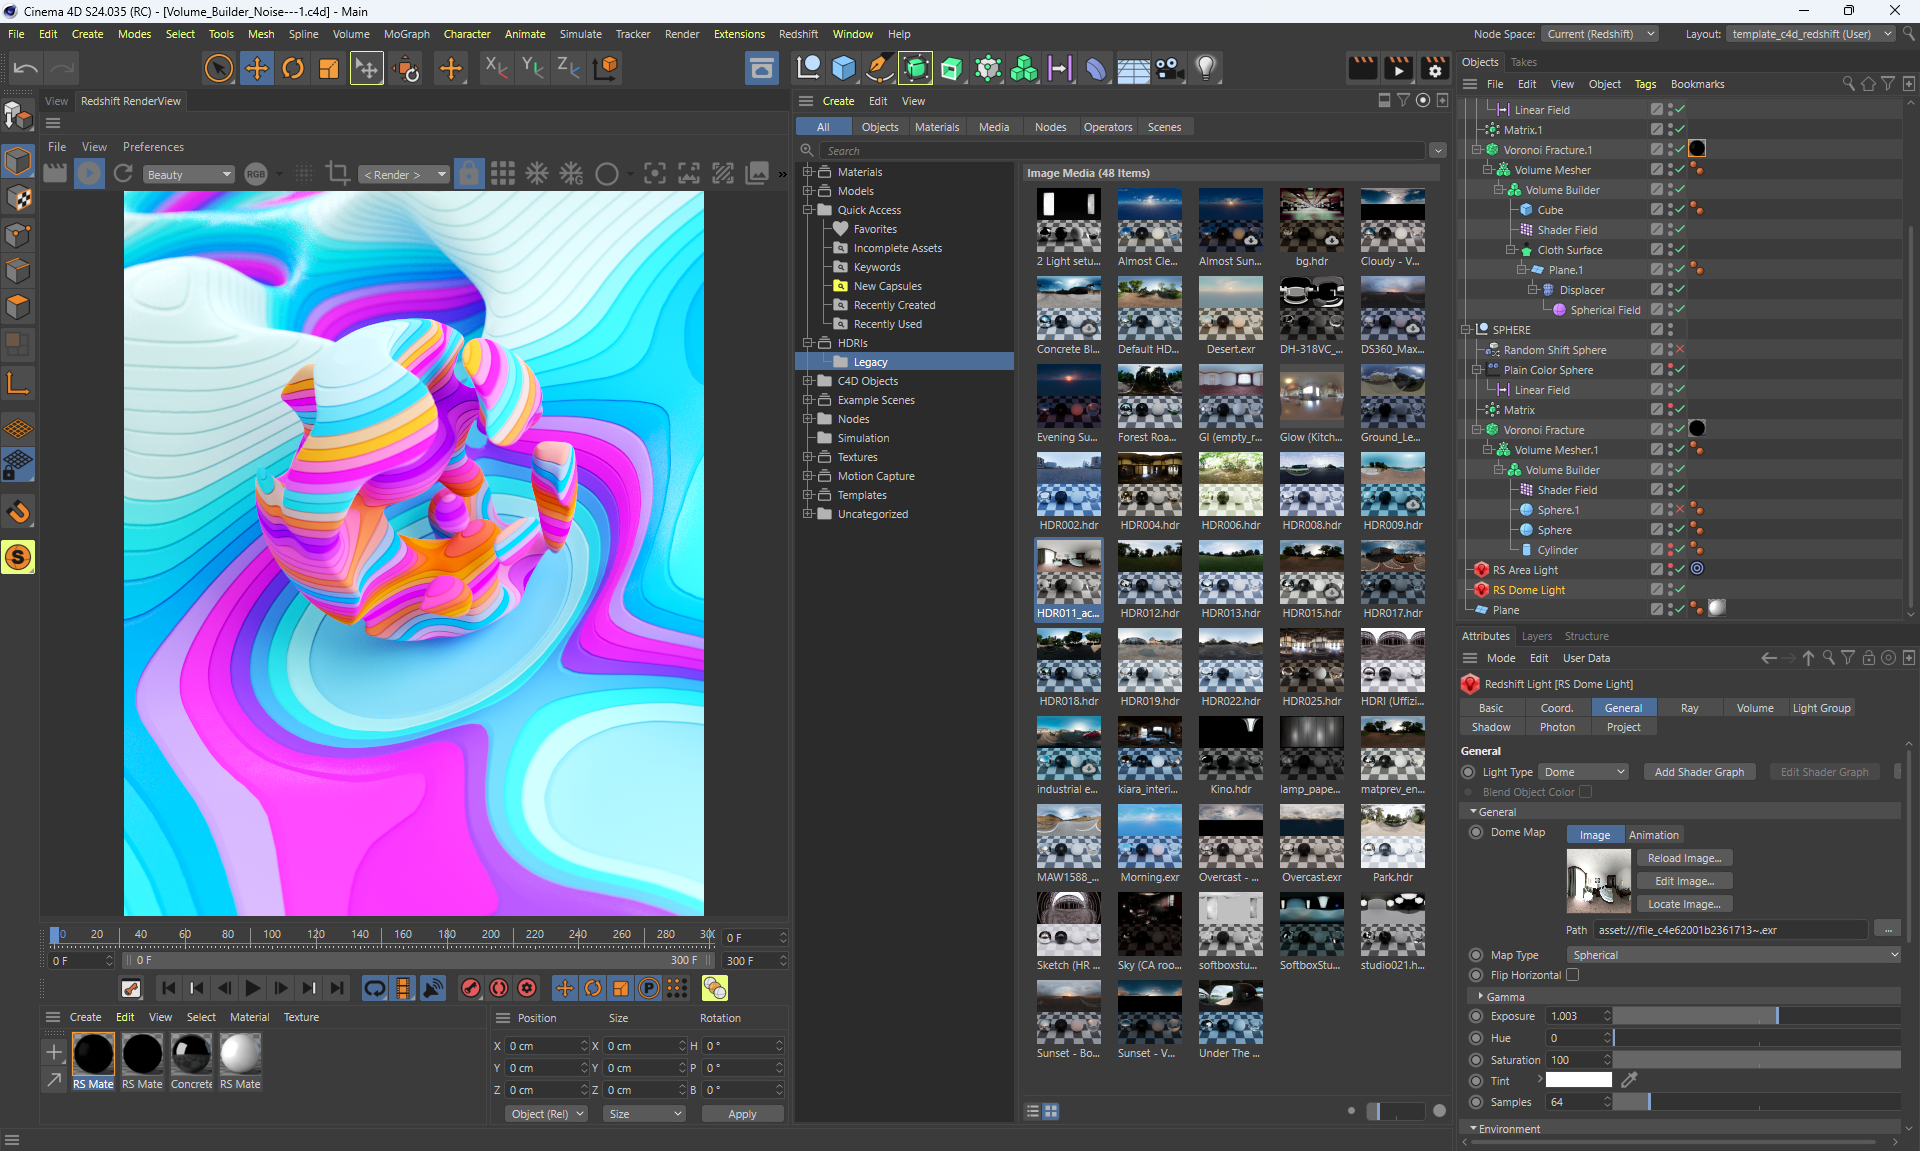
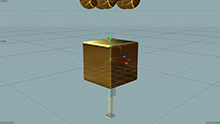
4. Voxels in Cinema 4D
Video1 (5.6mb)
image1
video2 (5.6mb)
image2
video3 (5.5mb)
image3
image автора
I made this scene sequentially according to the author in the lesson.
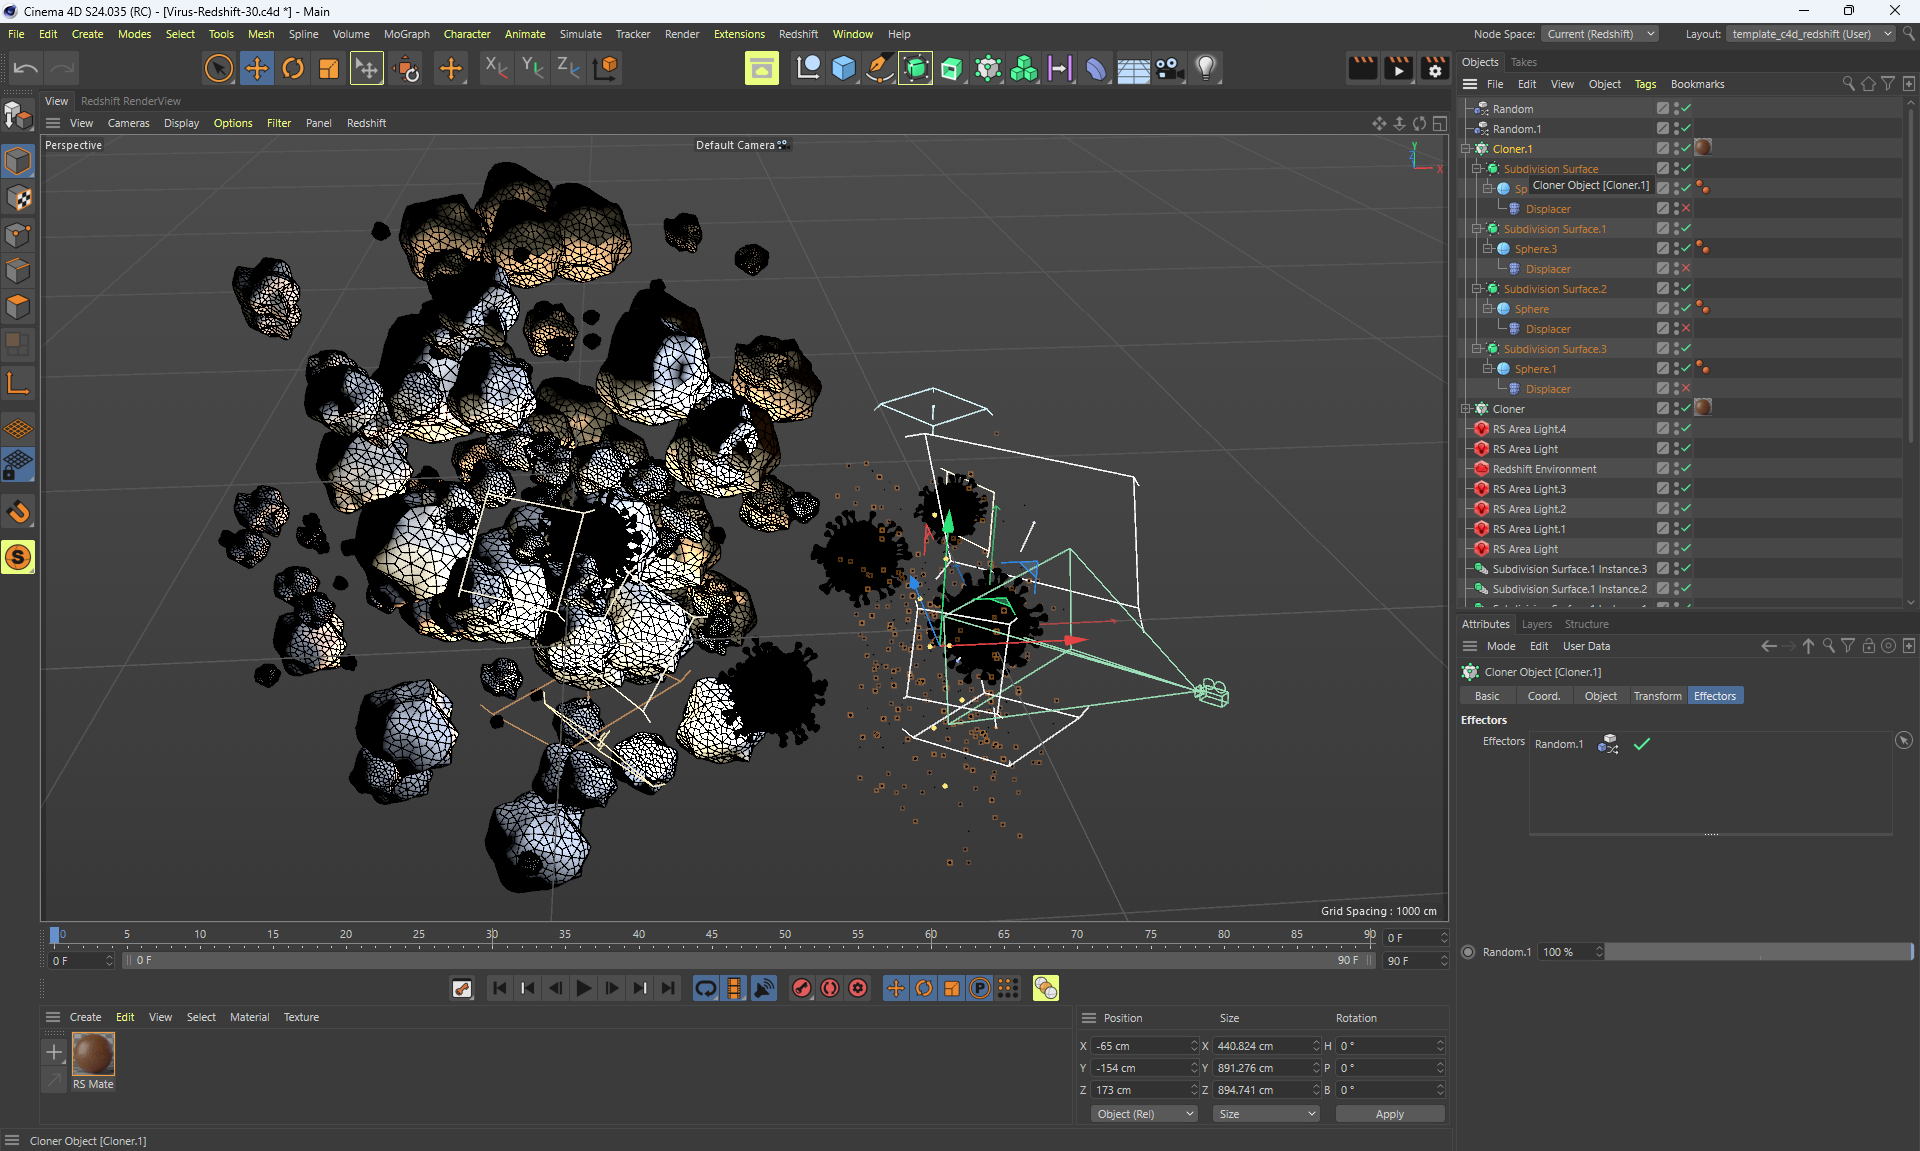
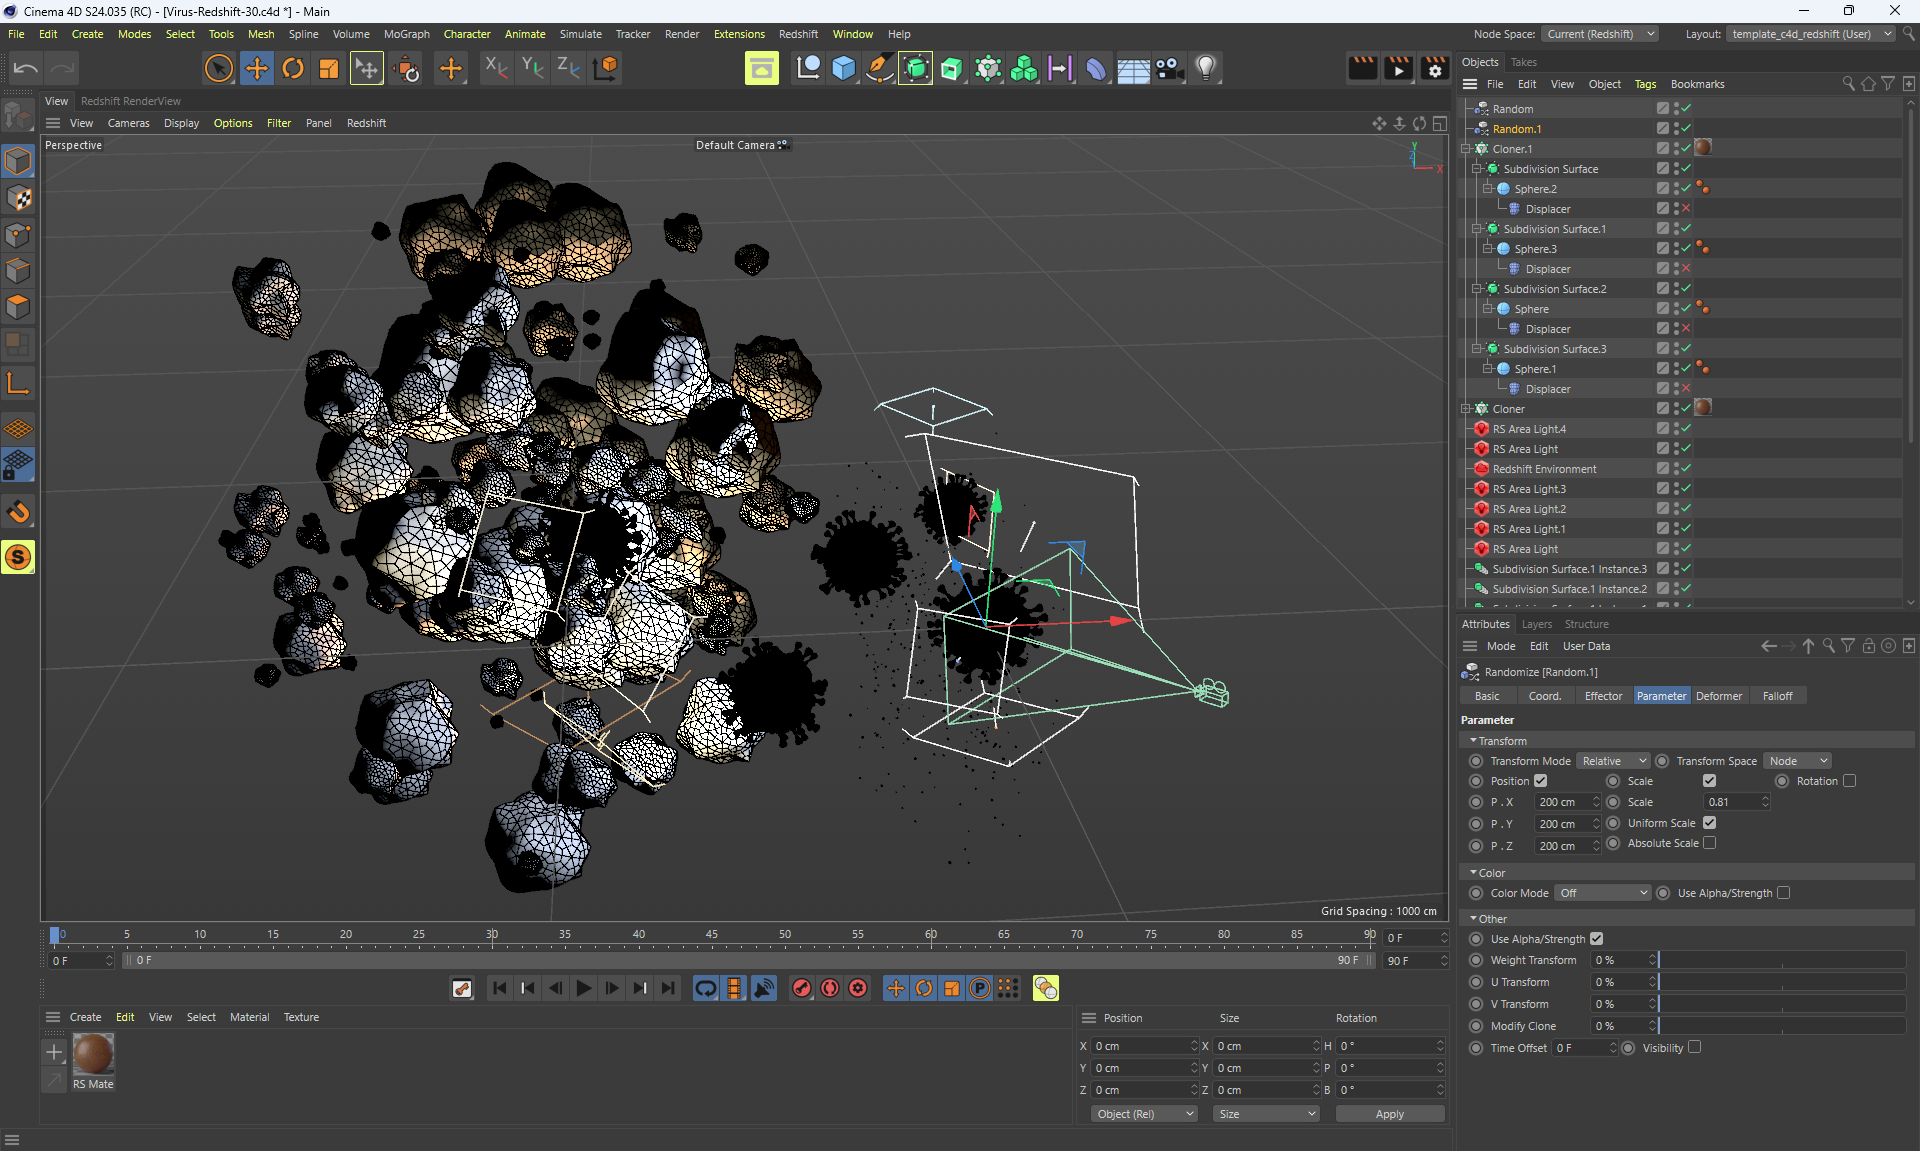
I rendered in Octane and Redshift. There are many subtleties in the scene that can be adjusted, change, improve lighting, change the color palette and other ideas for design and animations.
By experimenting with settings and choosing a good camera angle, you can get interesting designs.
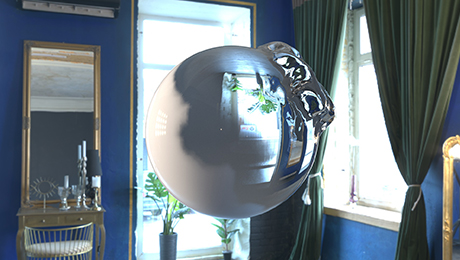
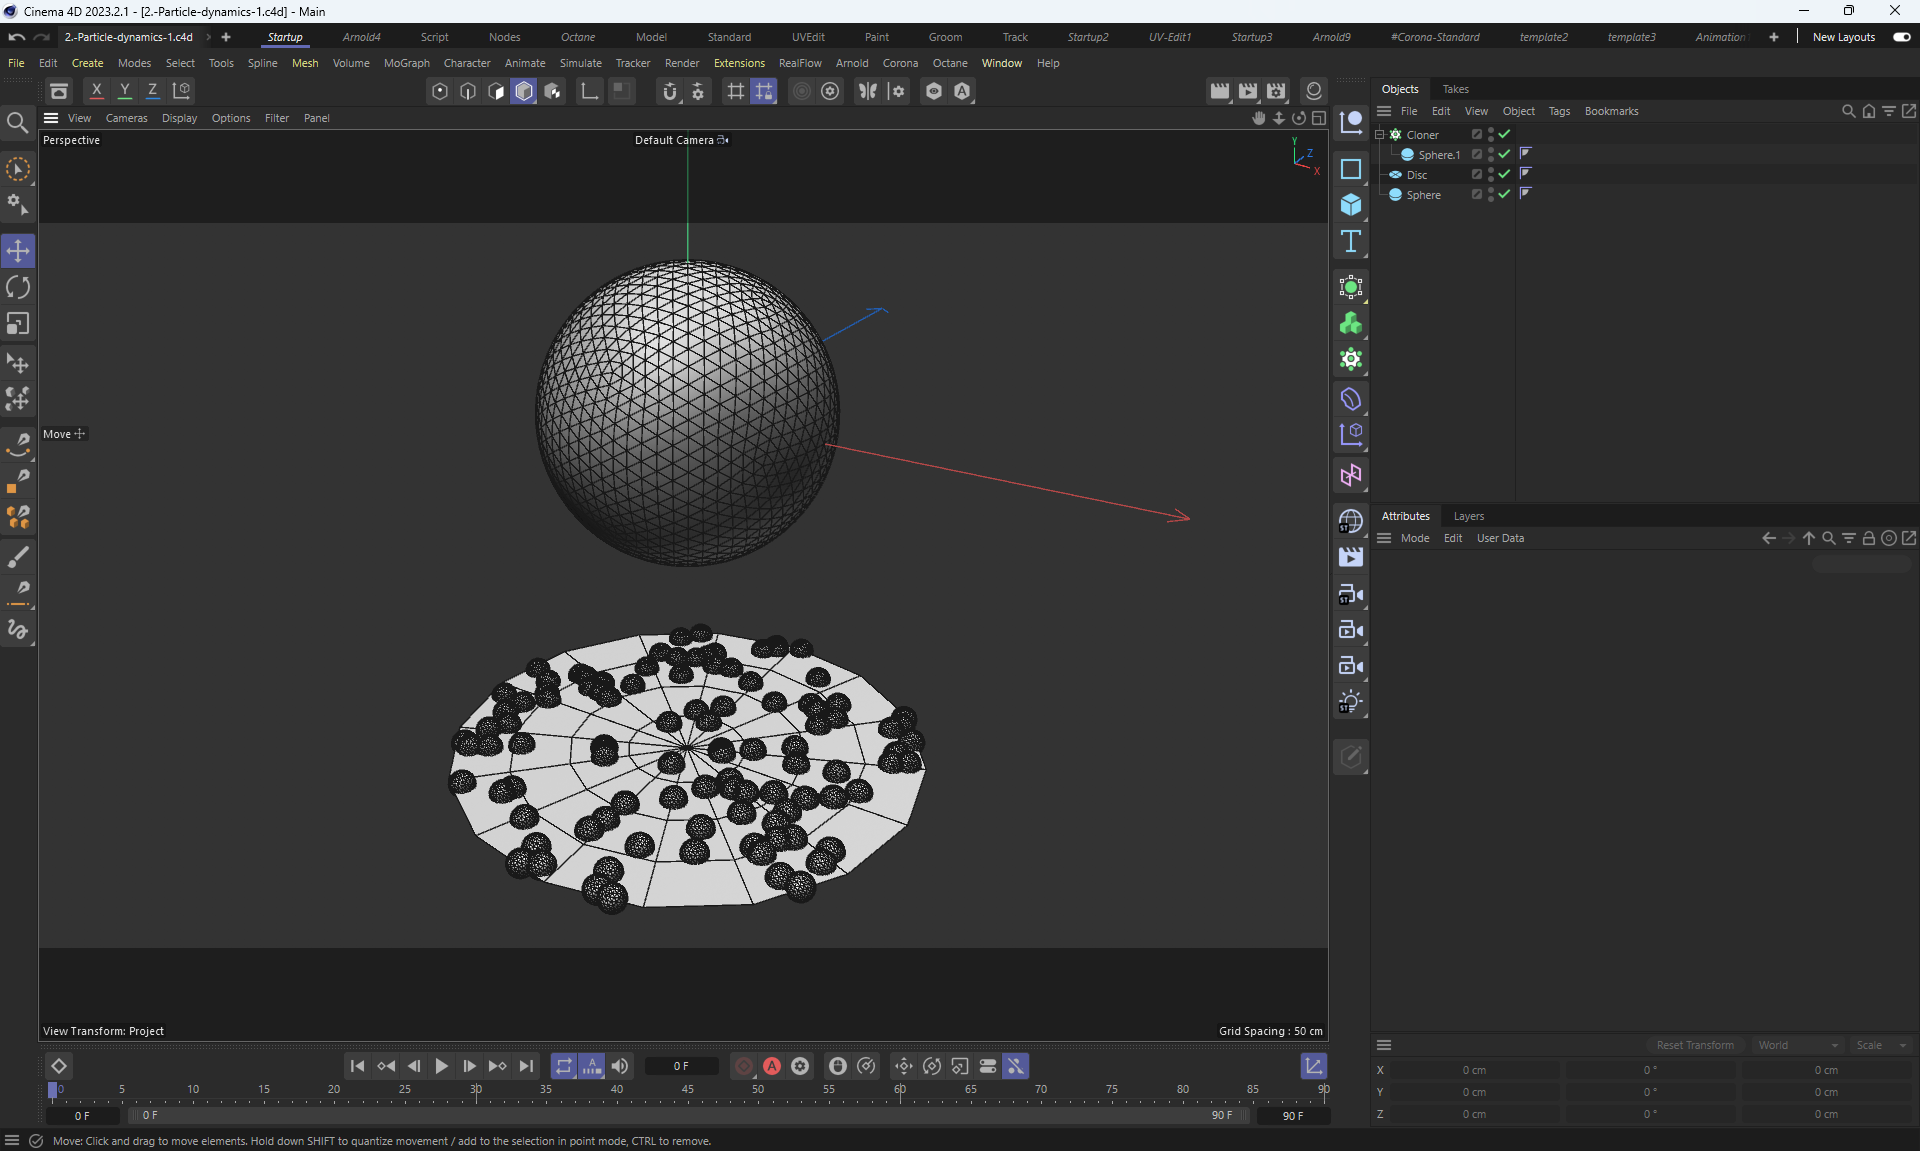
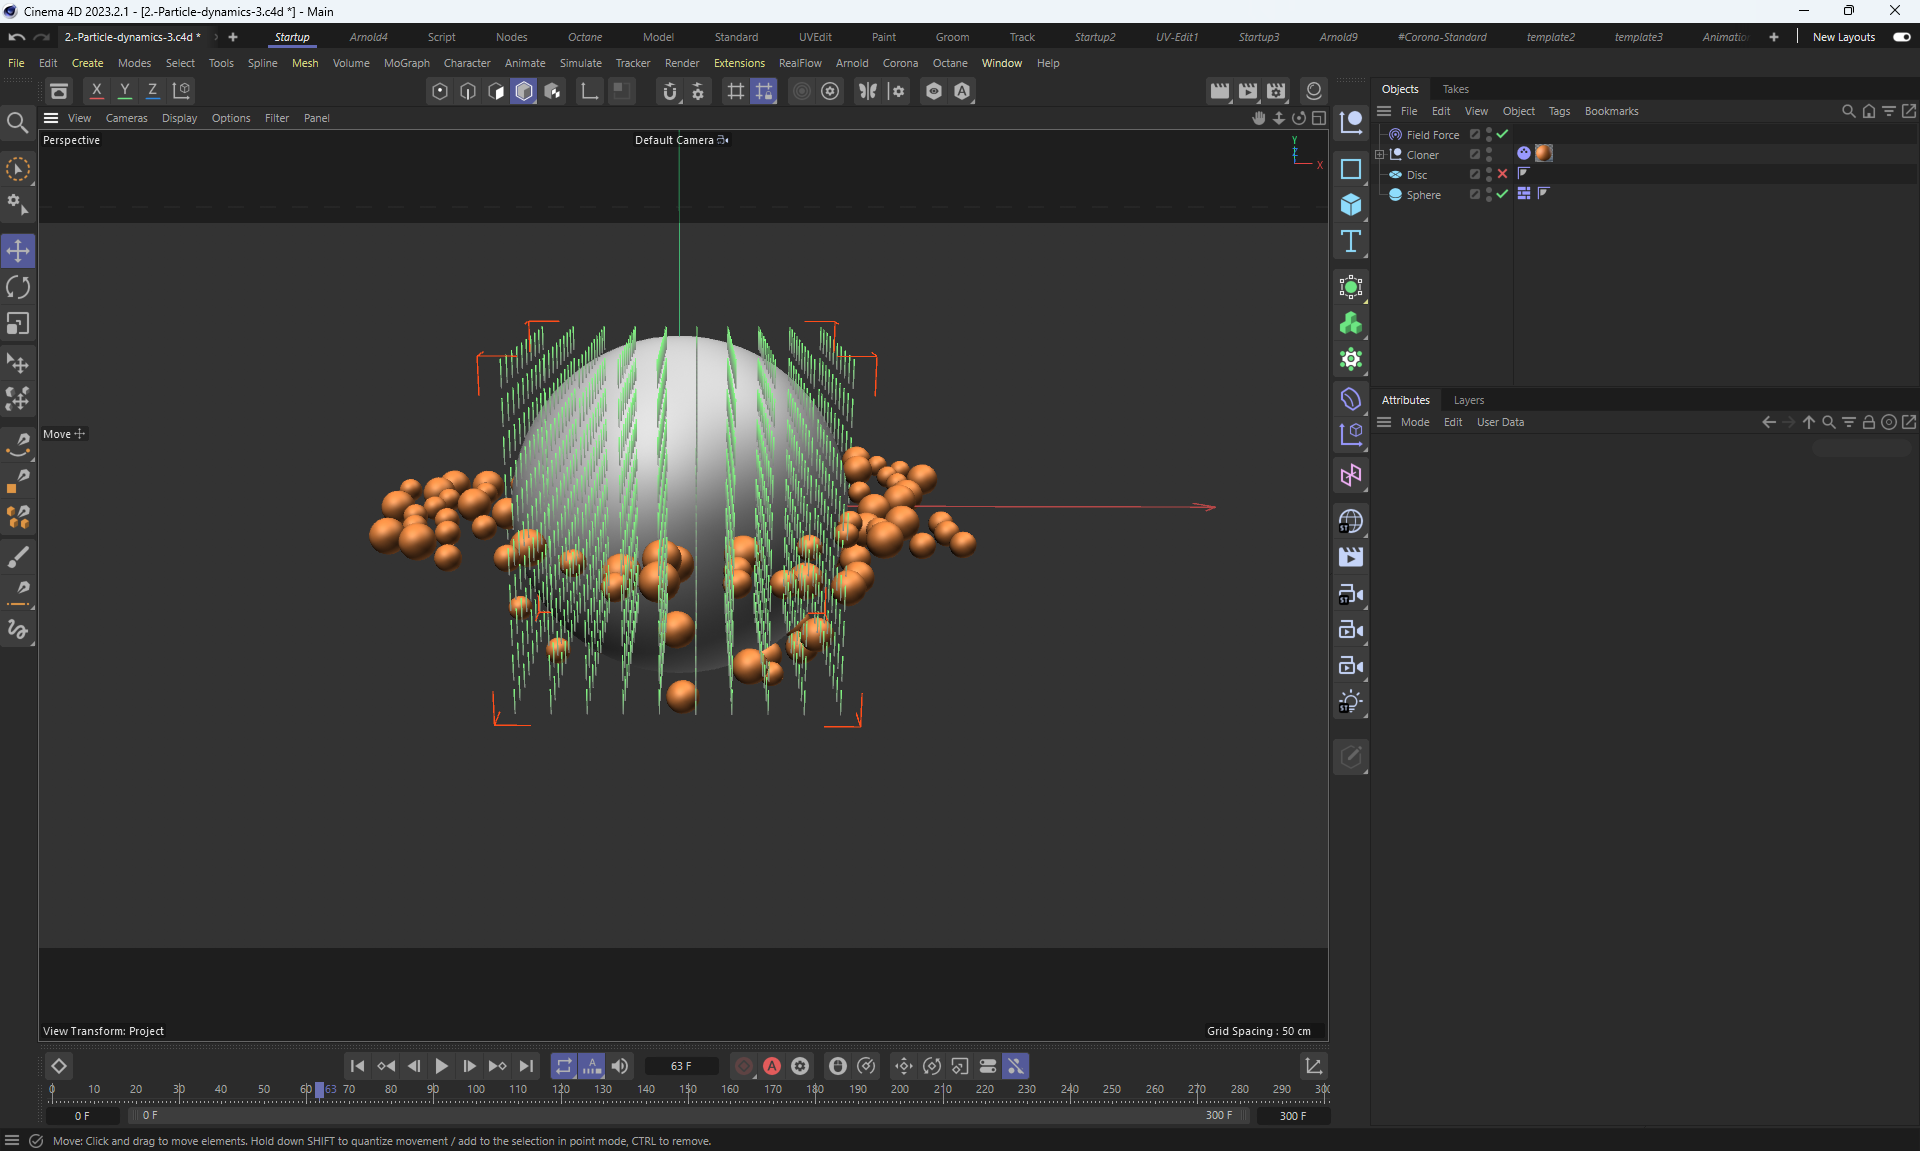
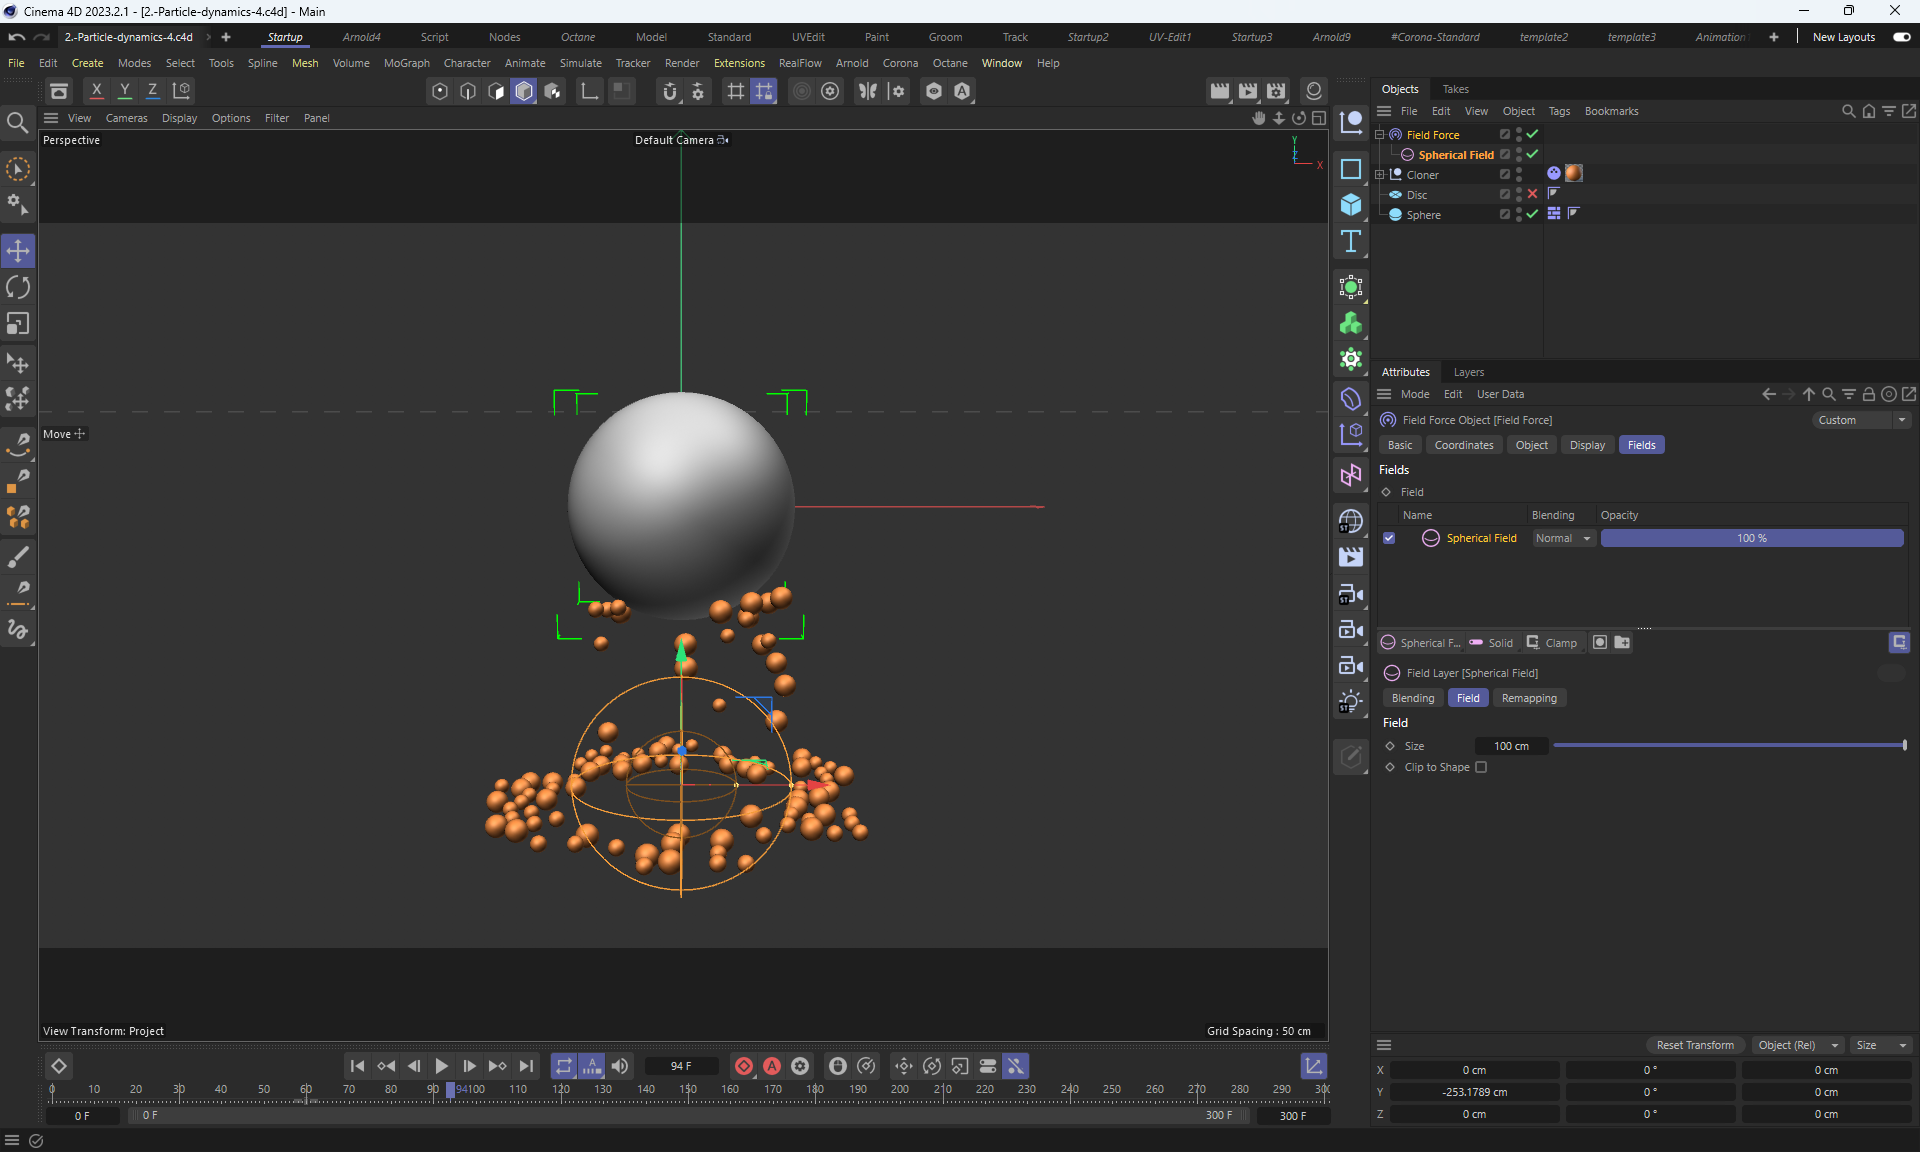
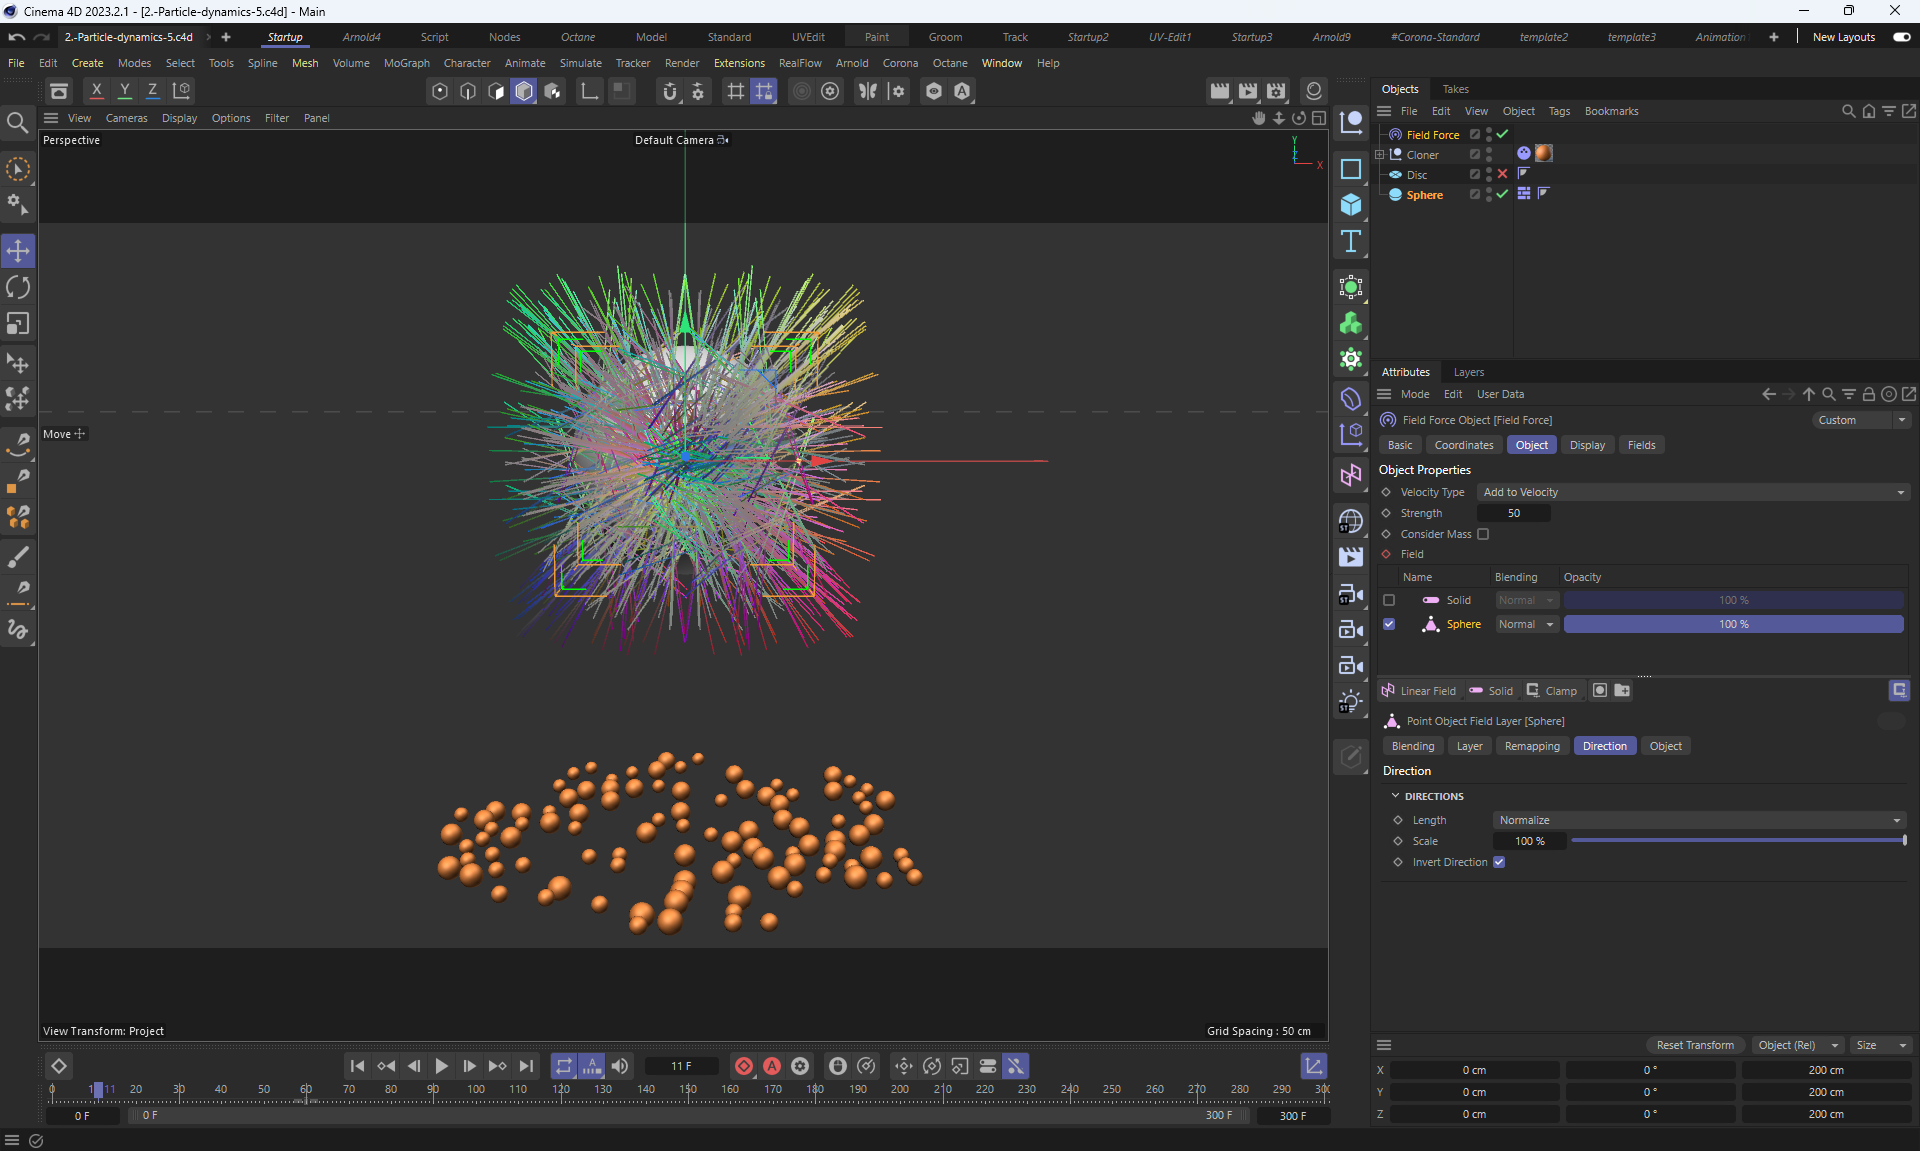
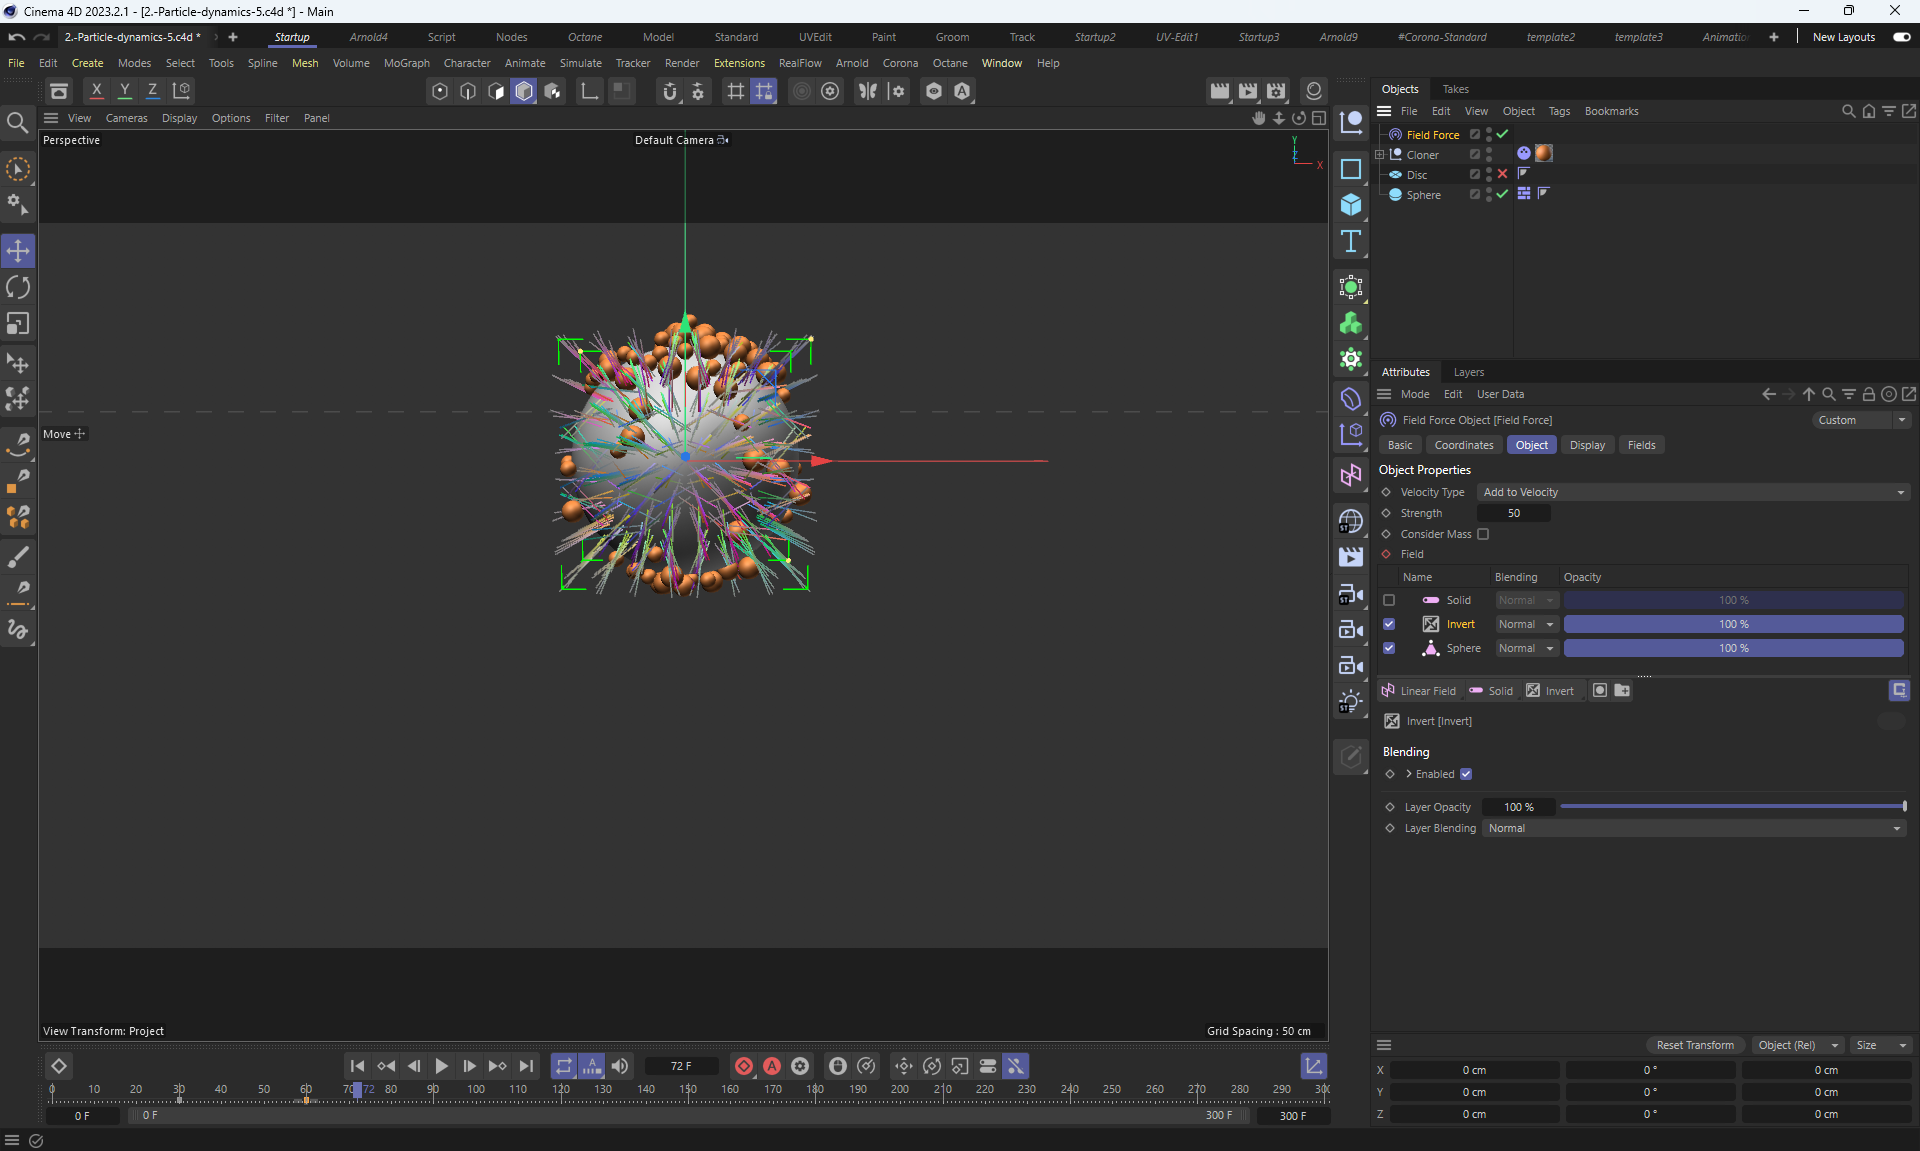
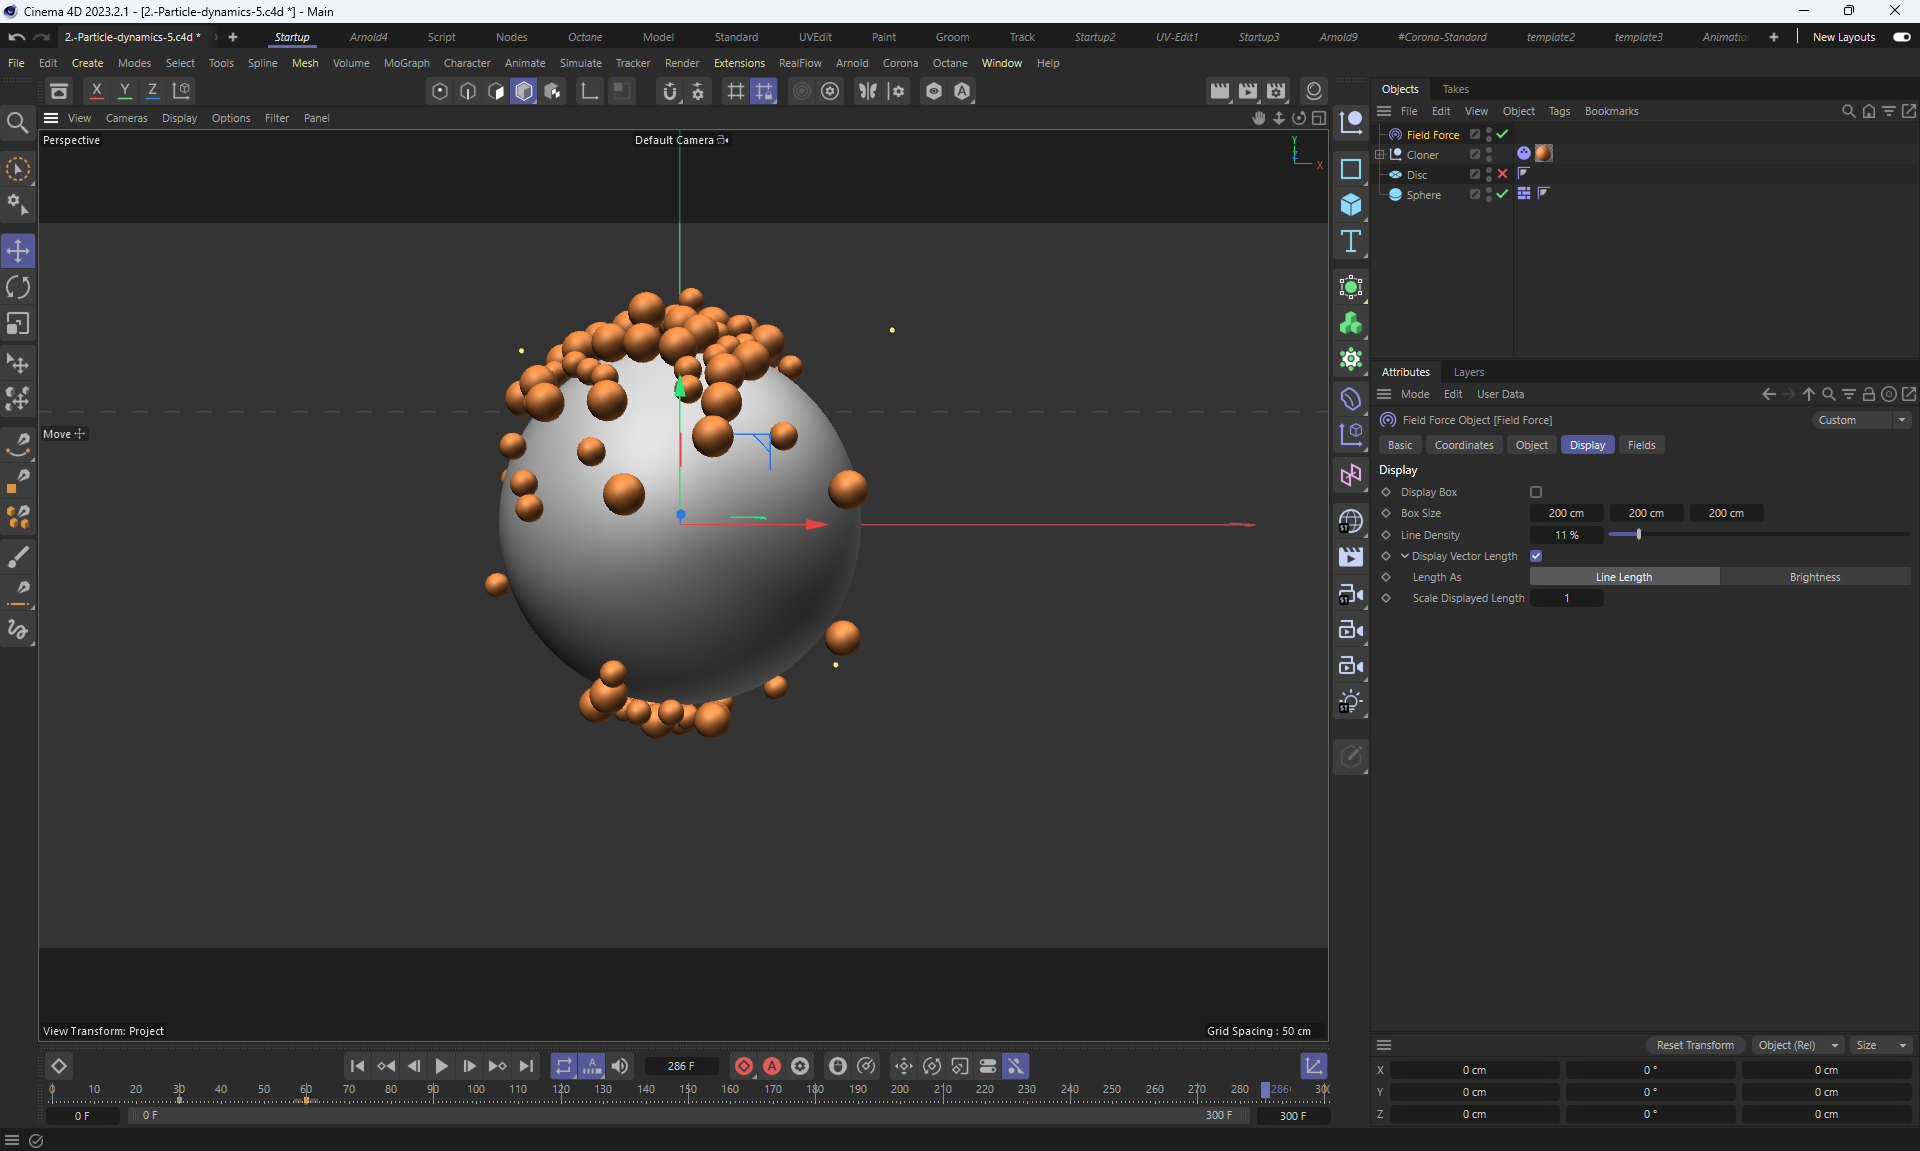
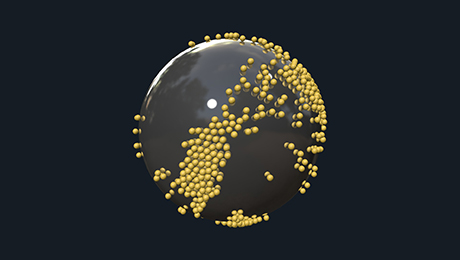
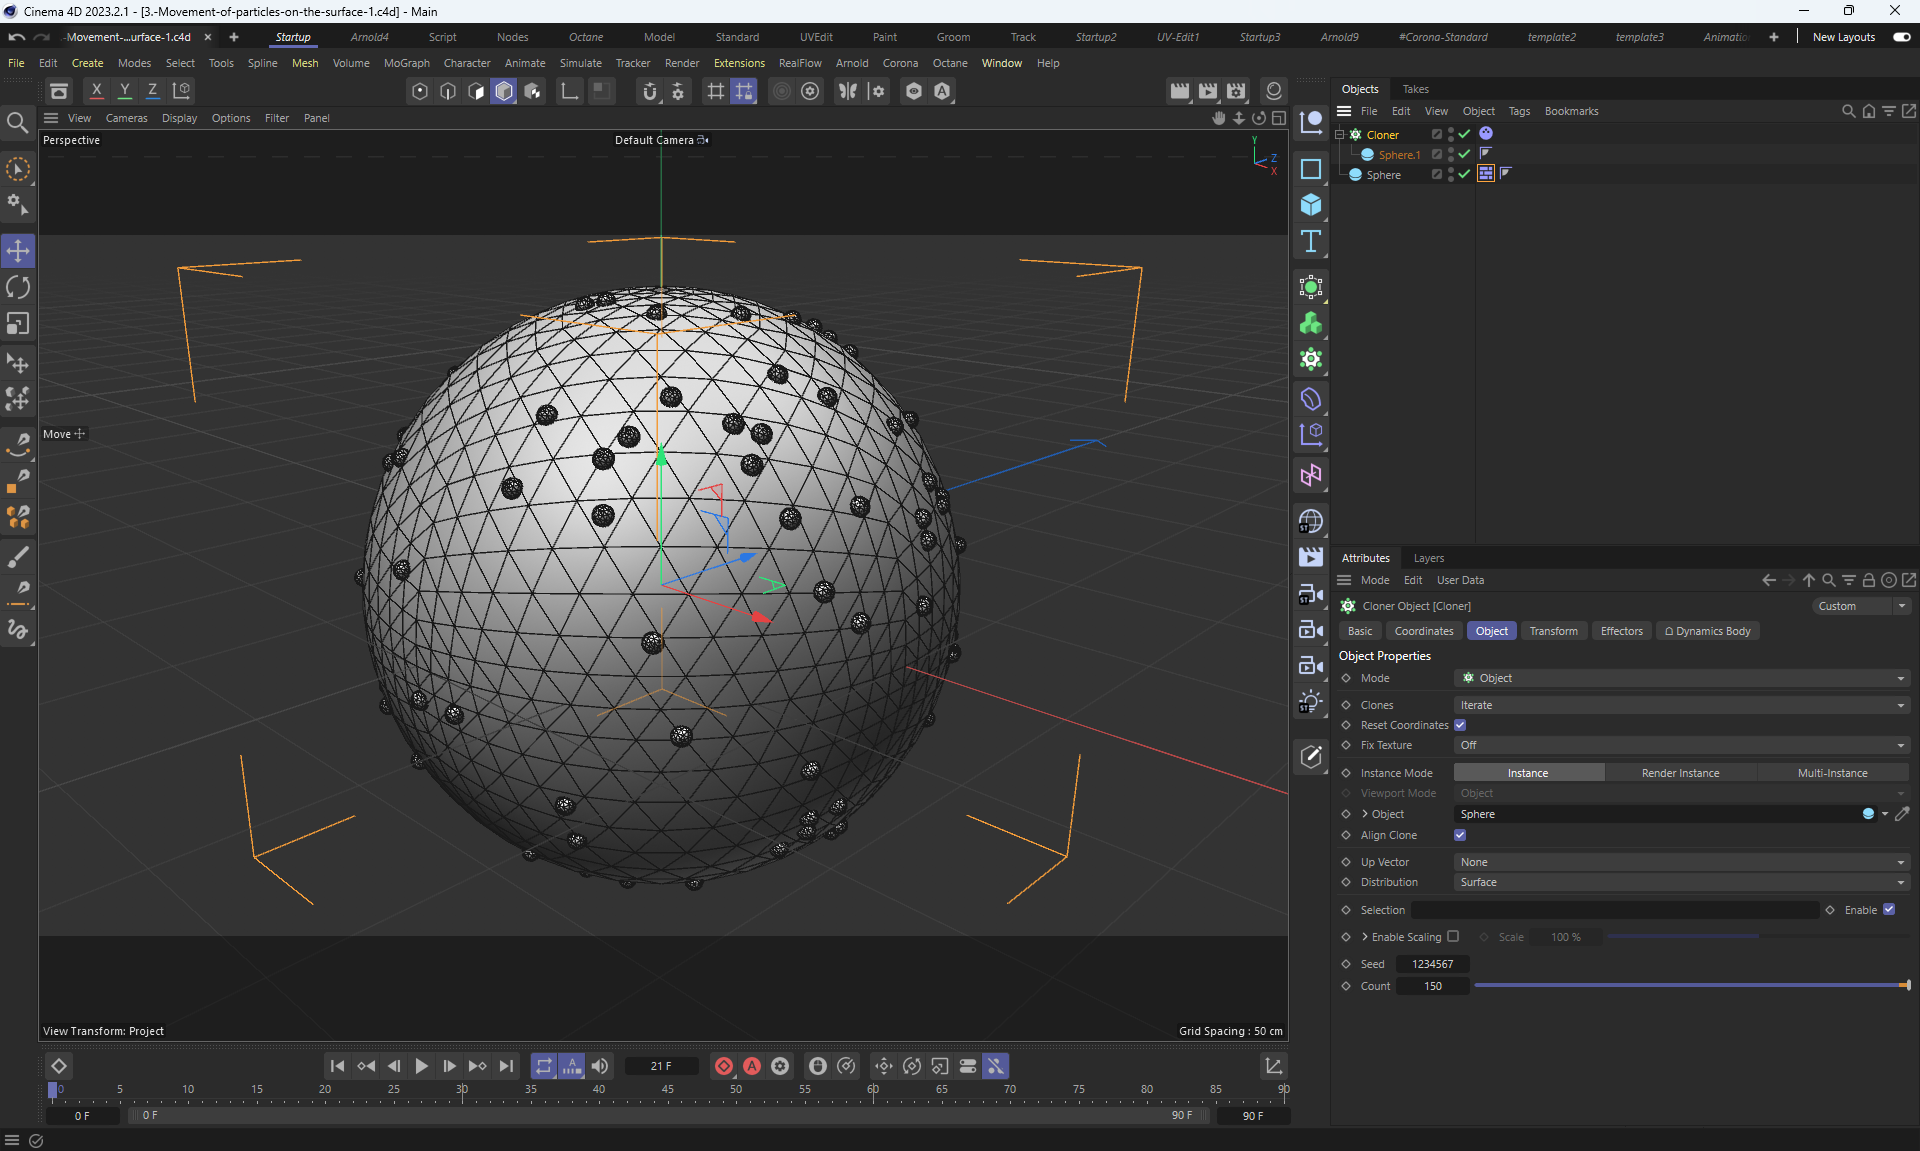
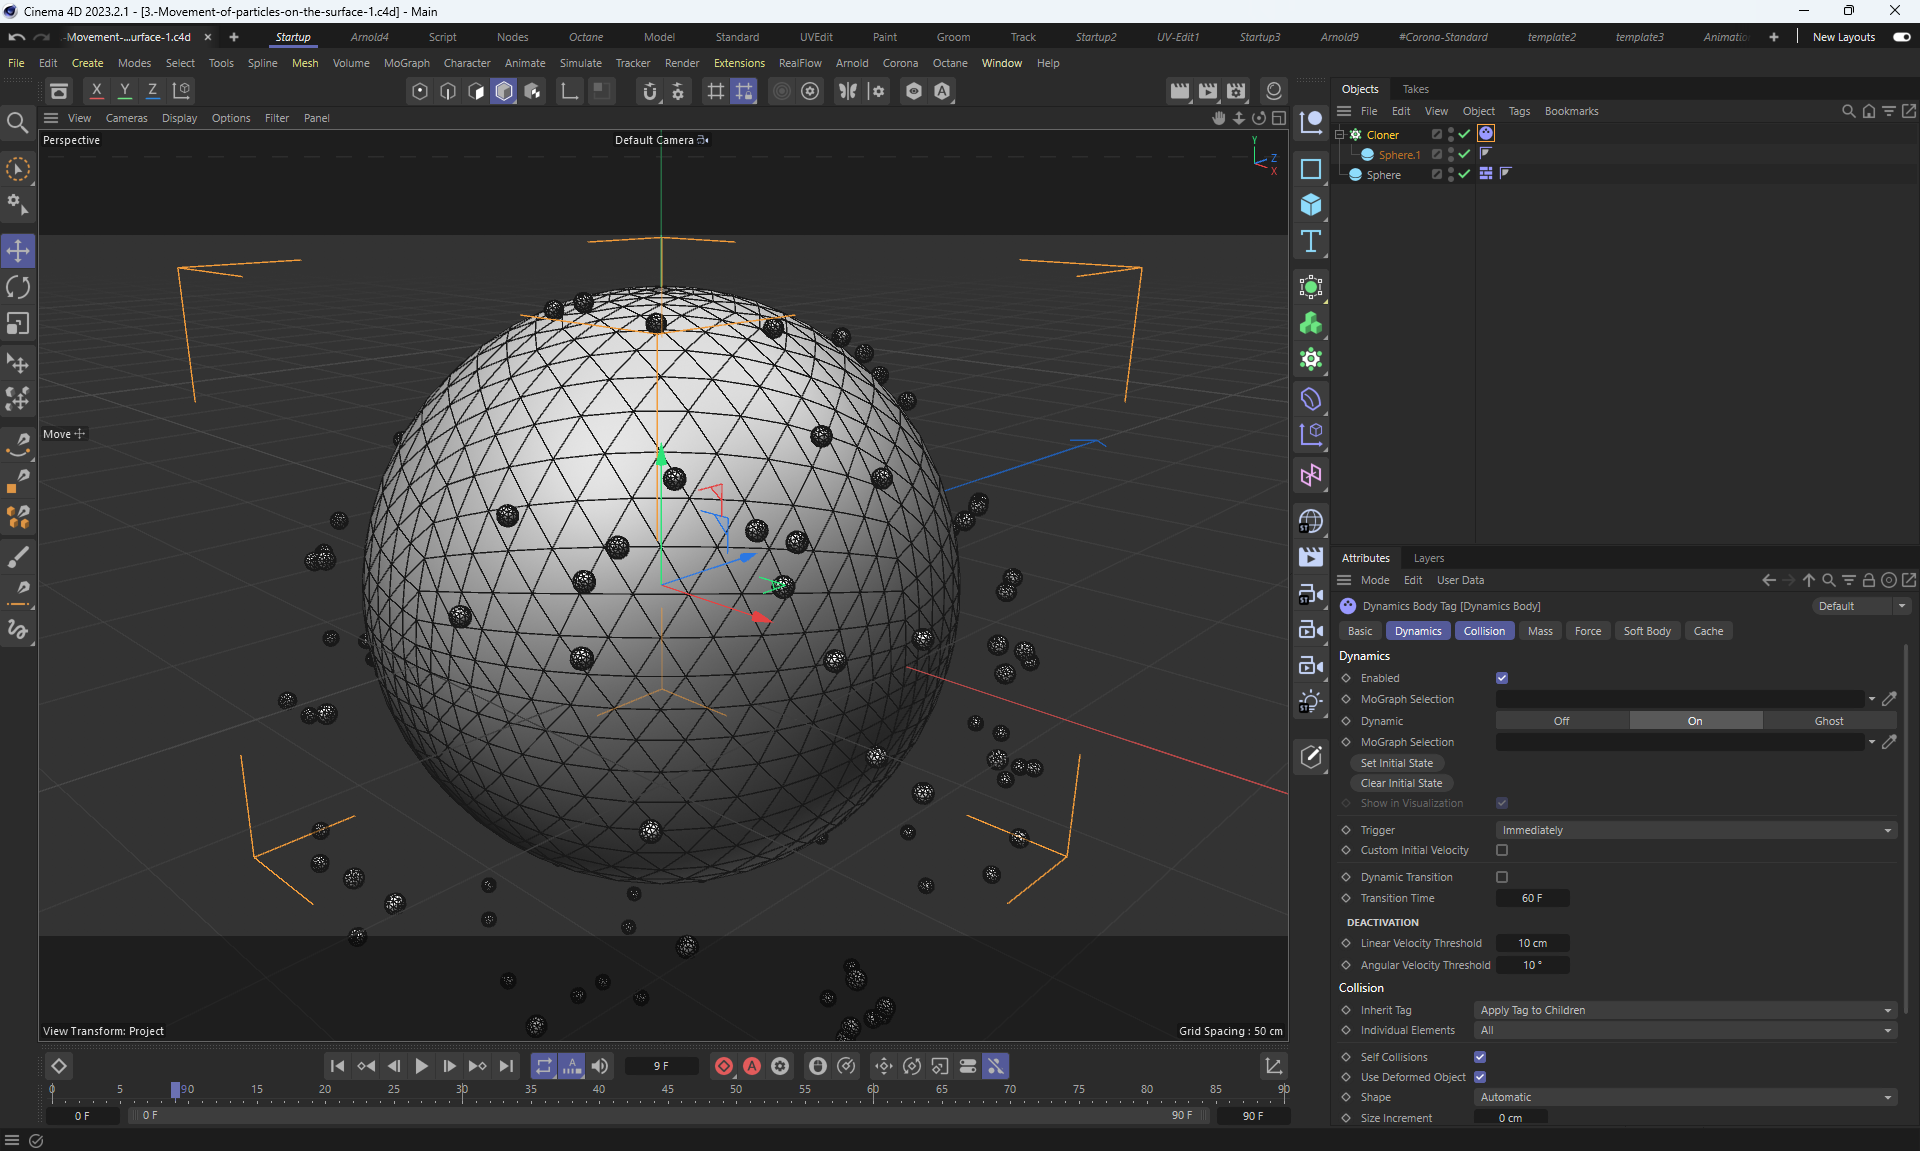
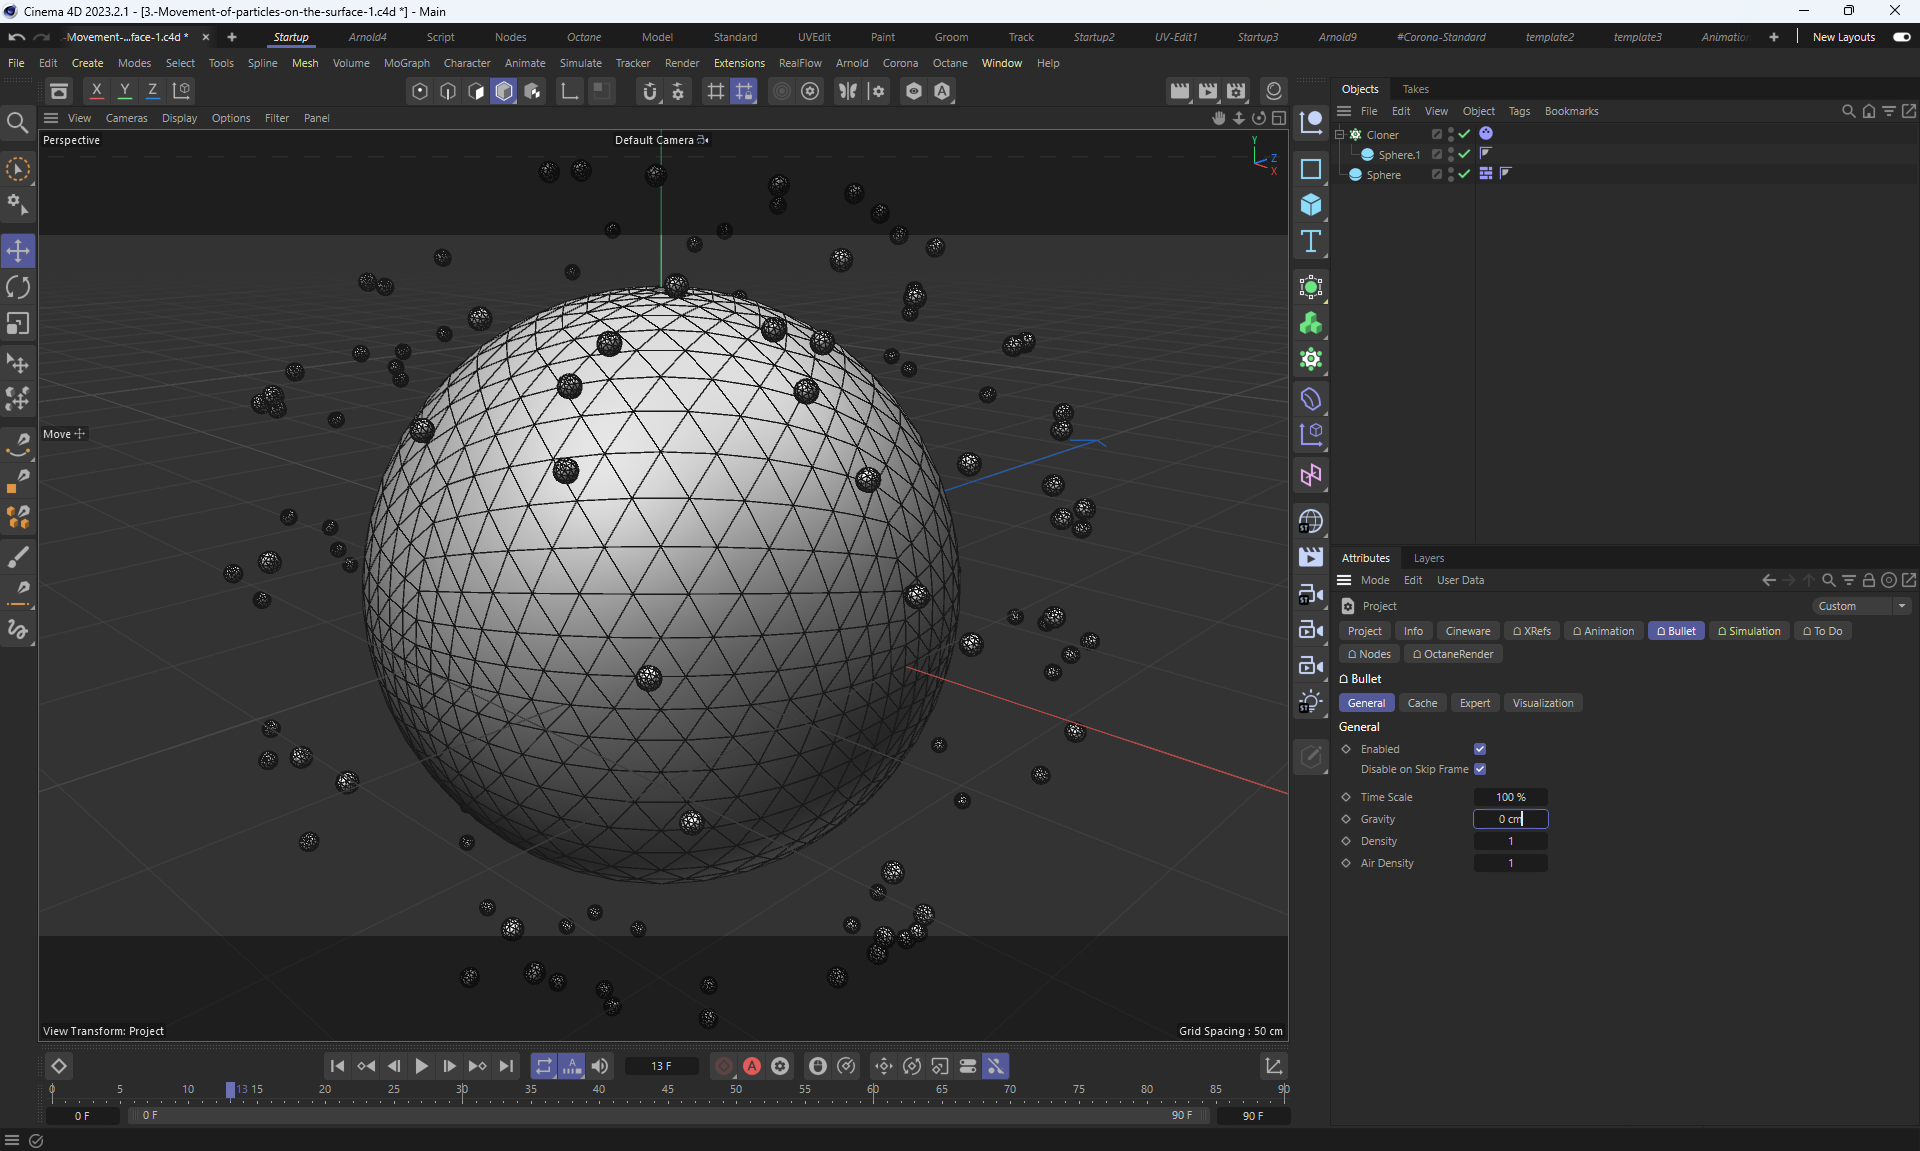
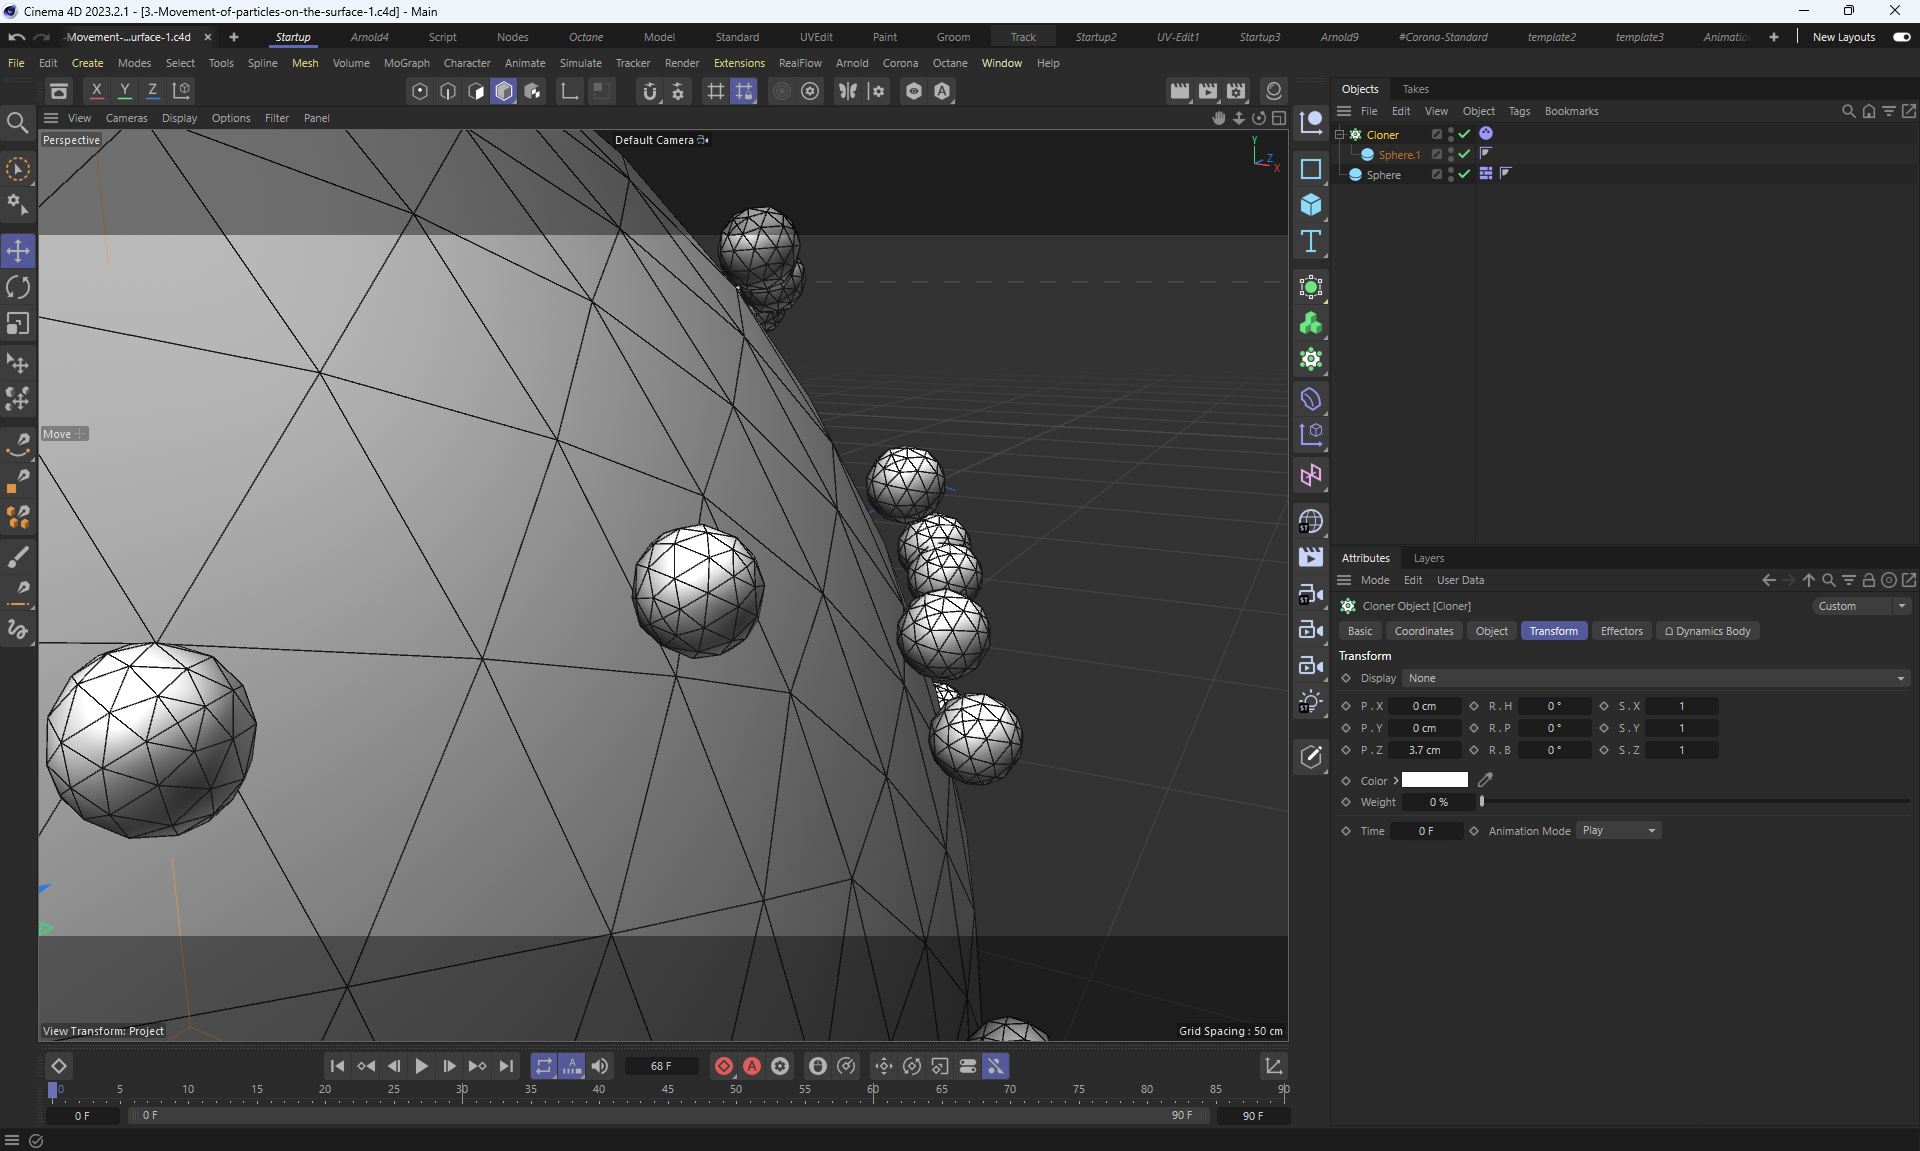
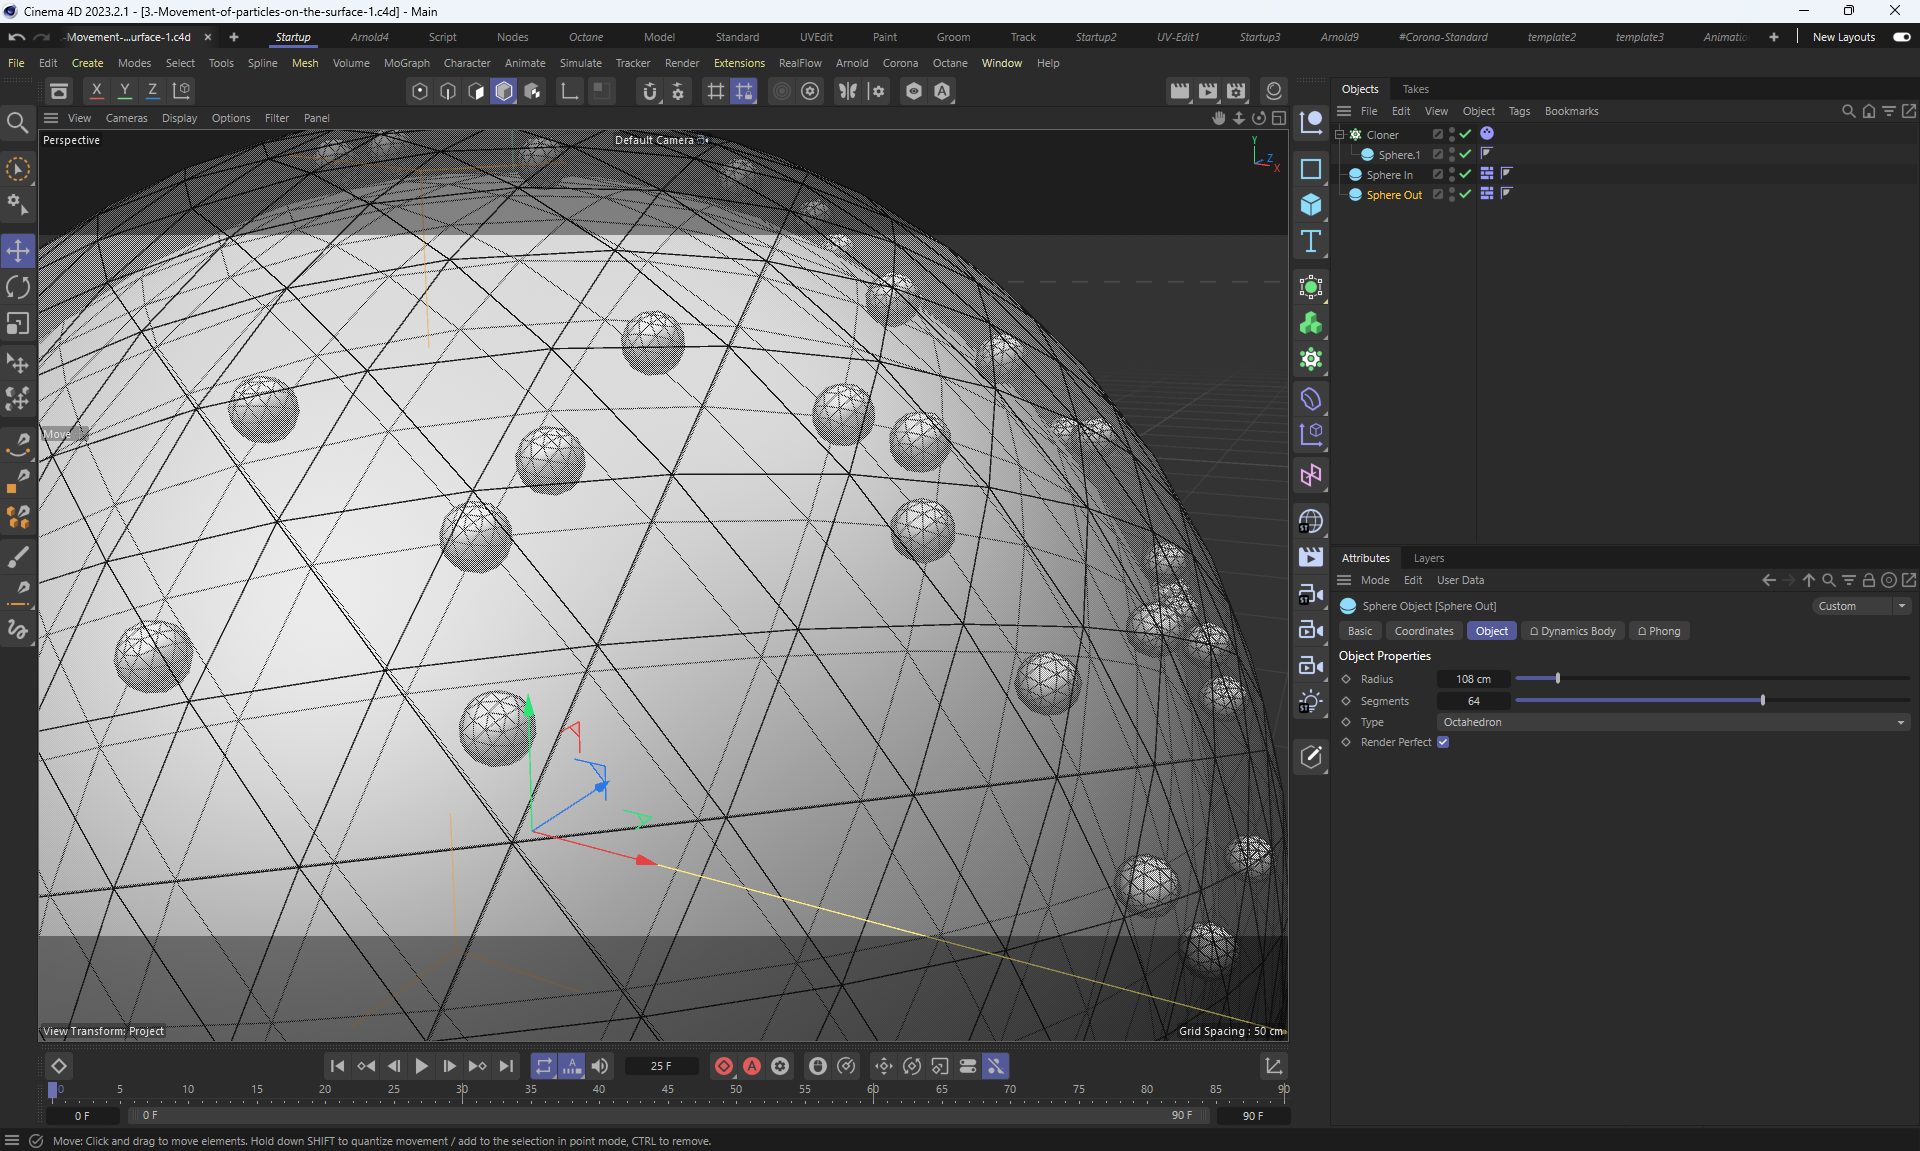
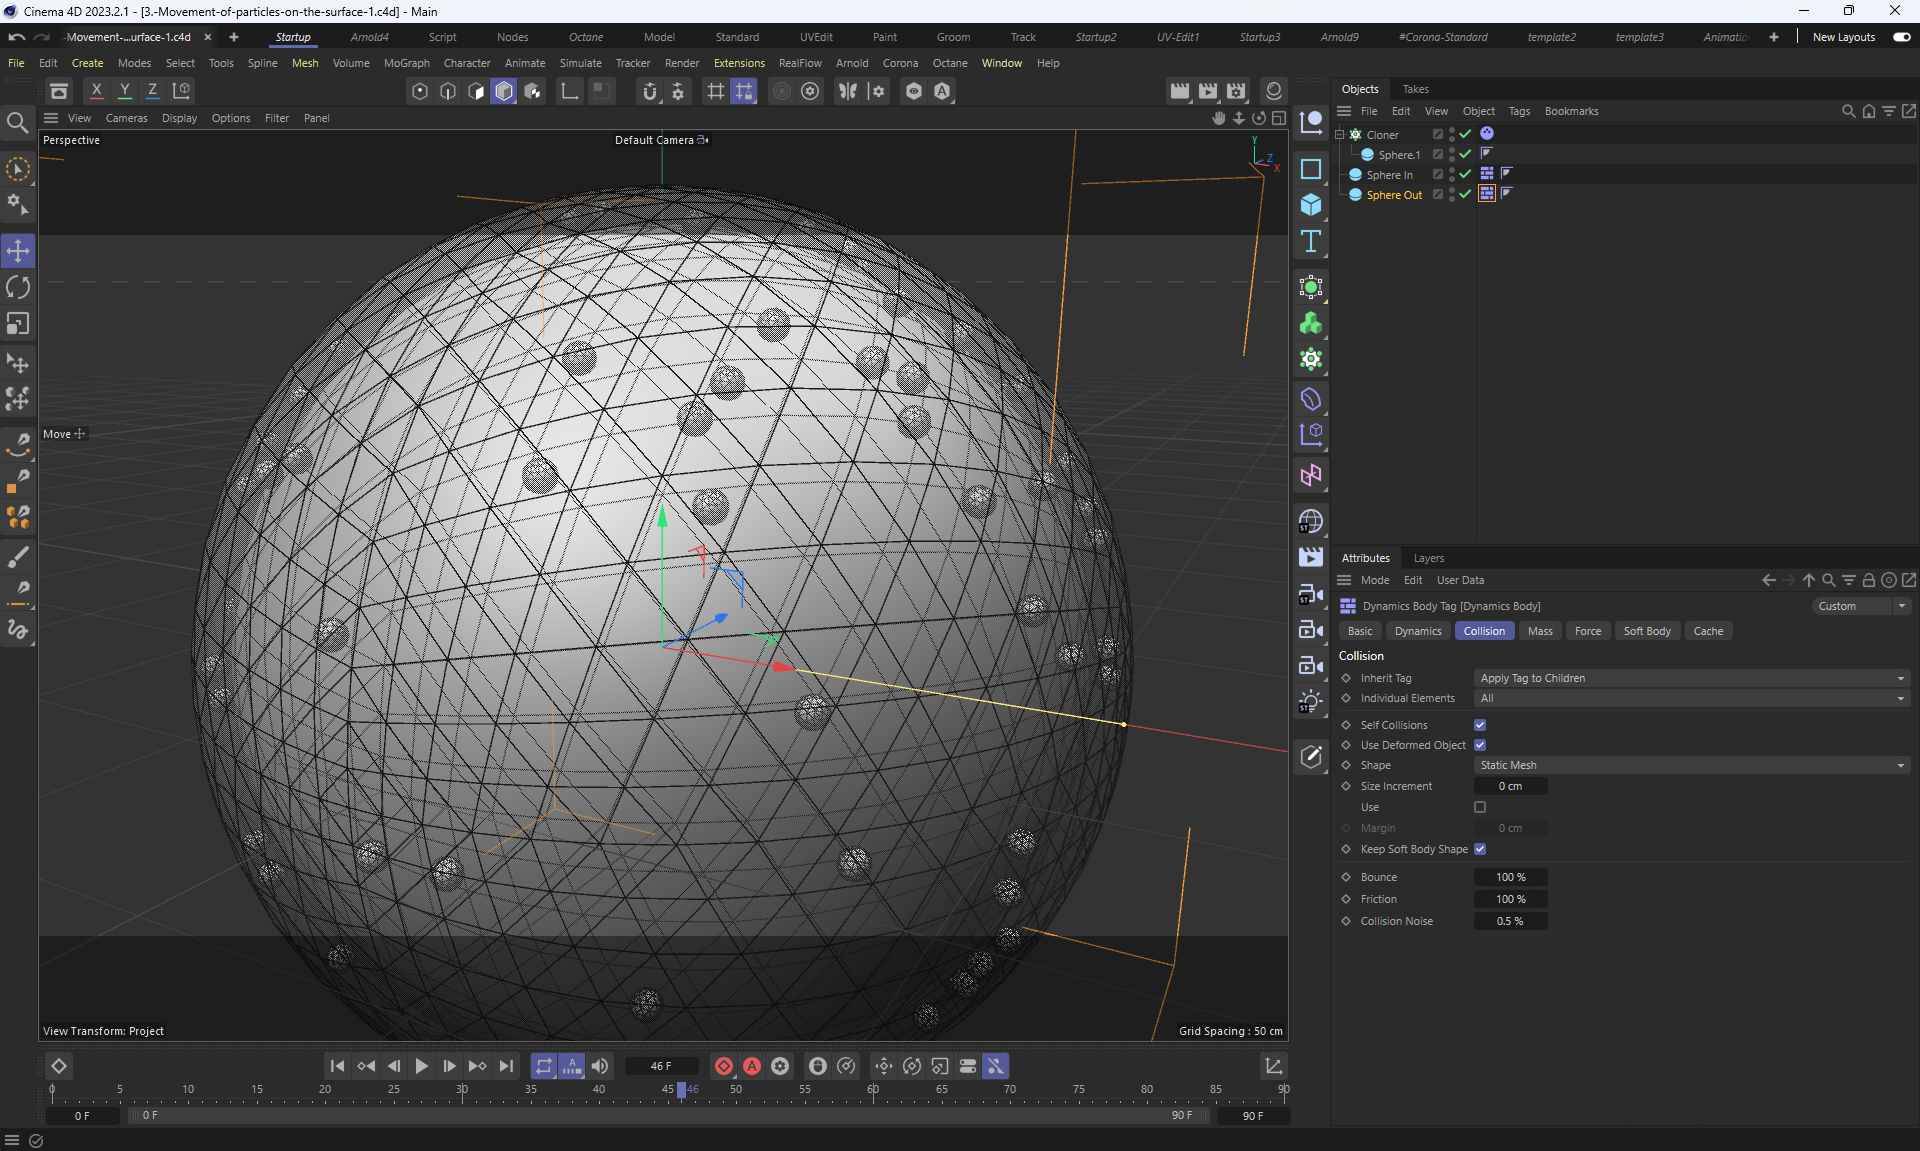
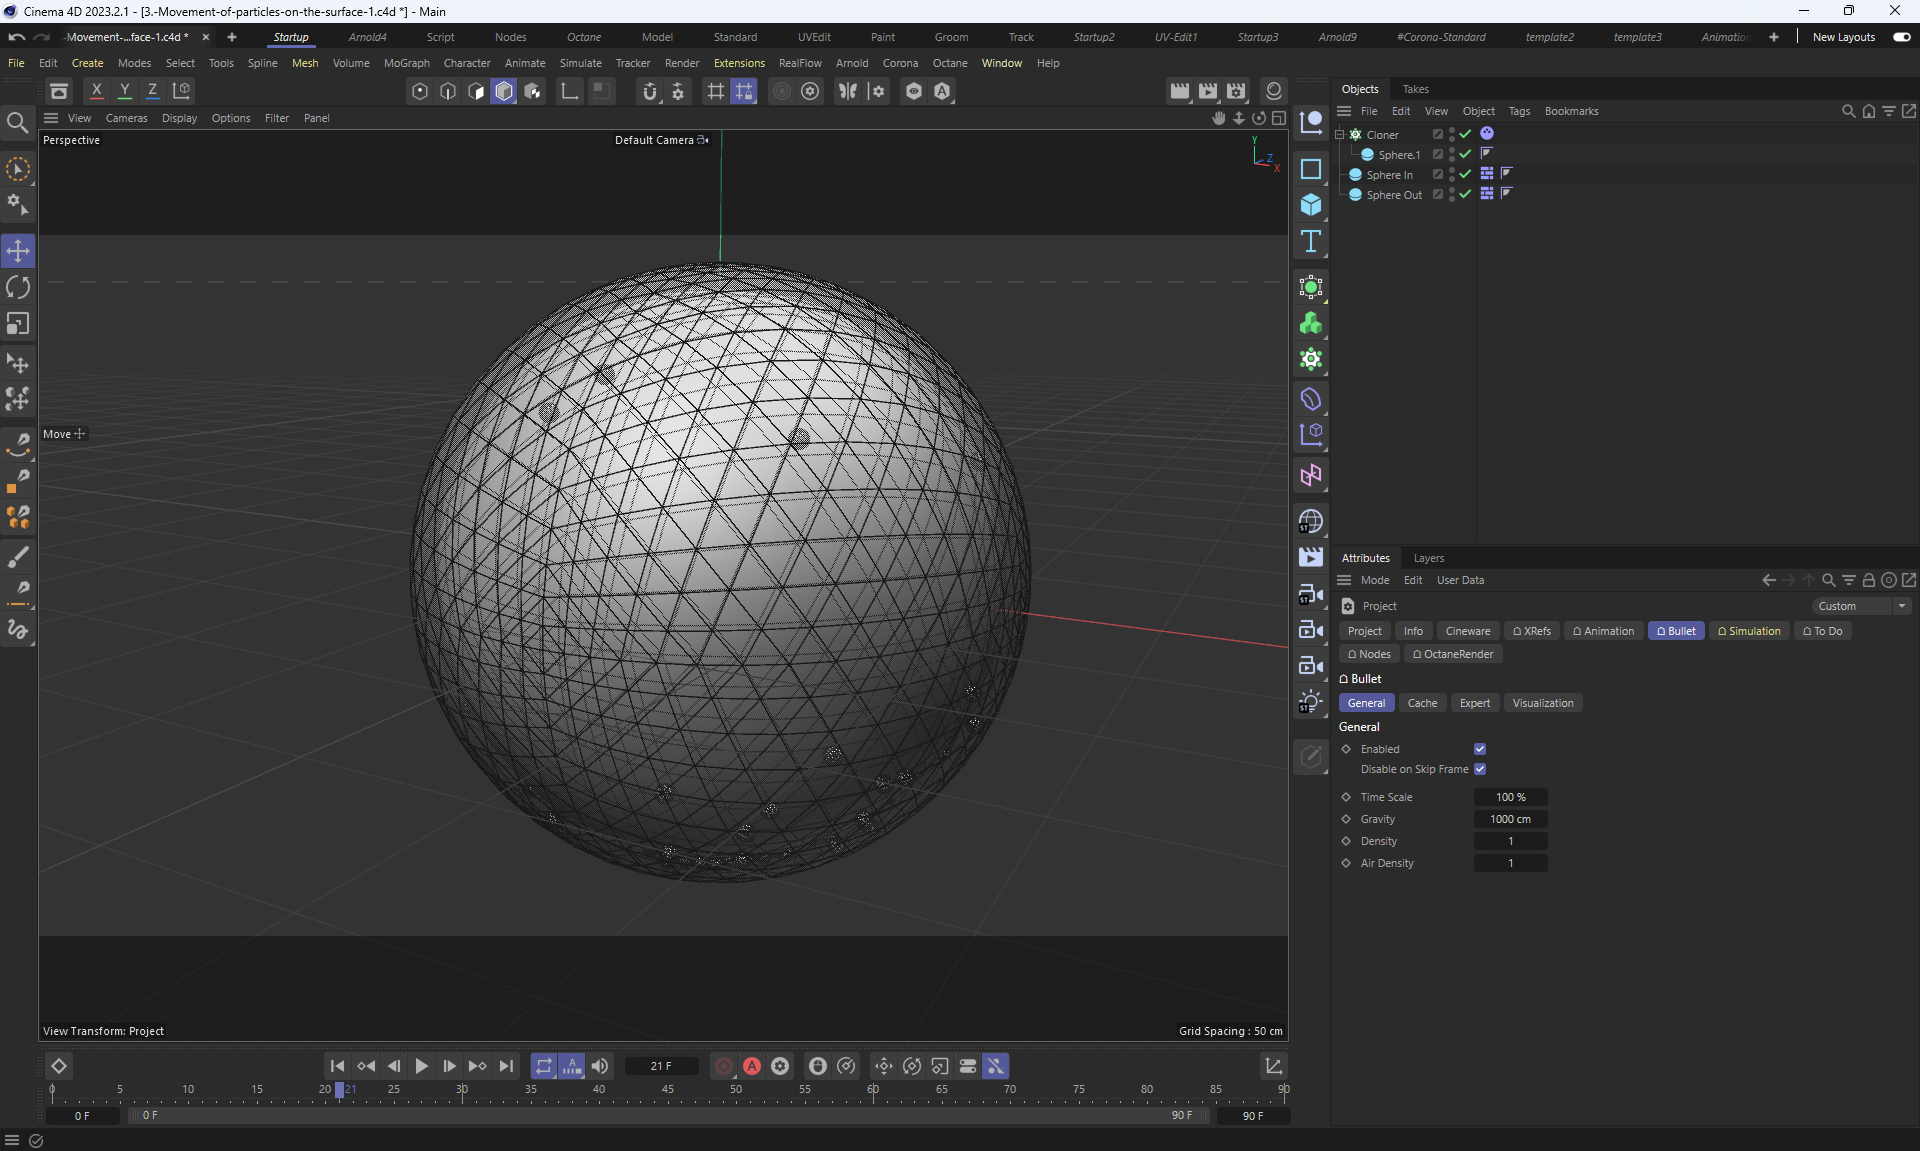
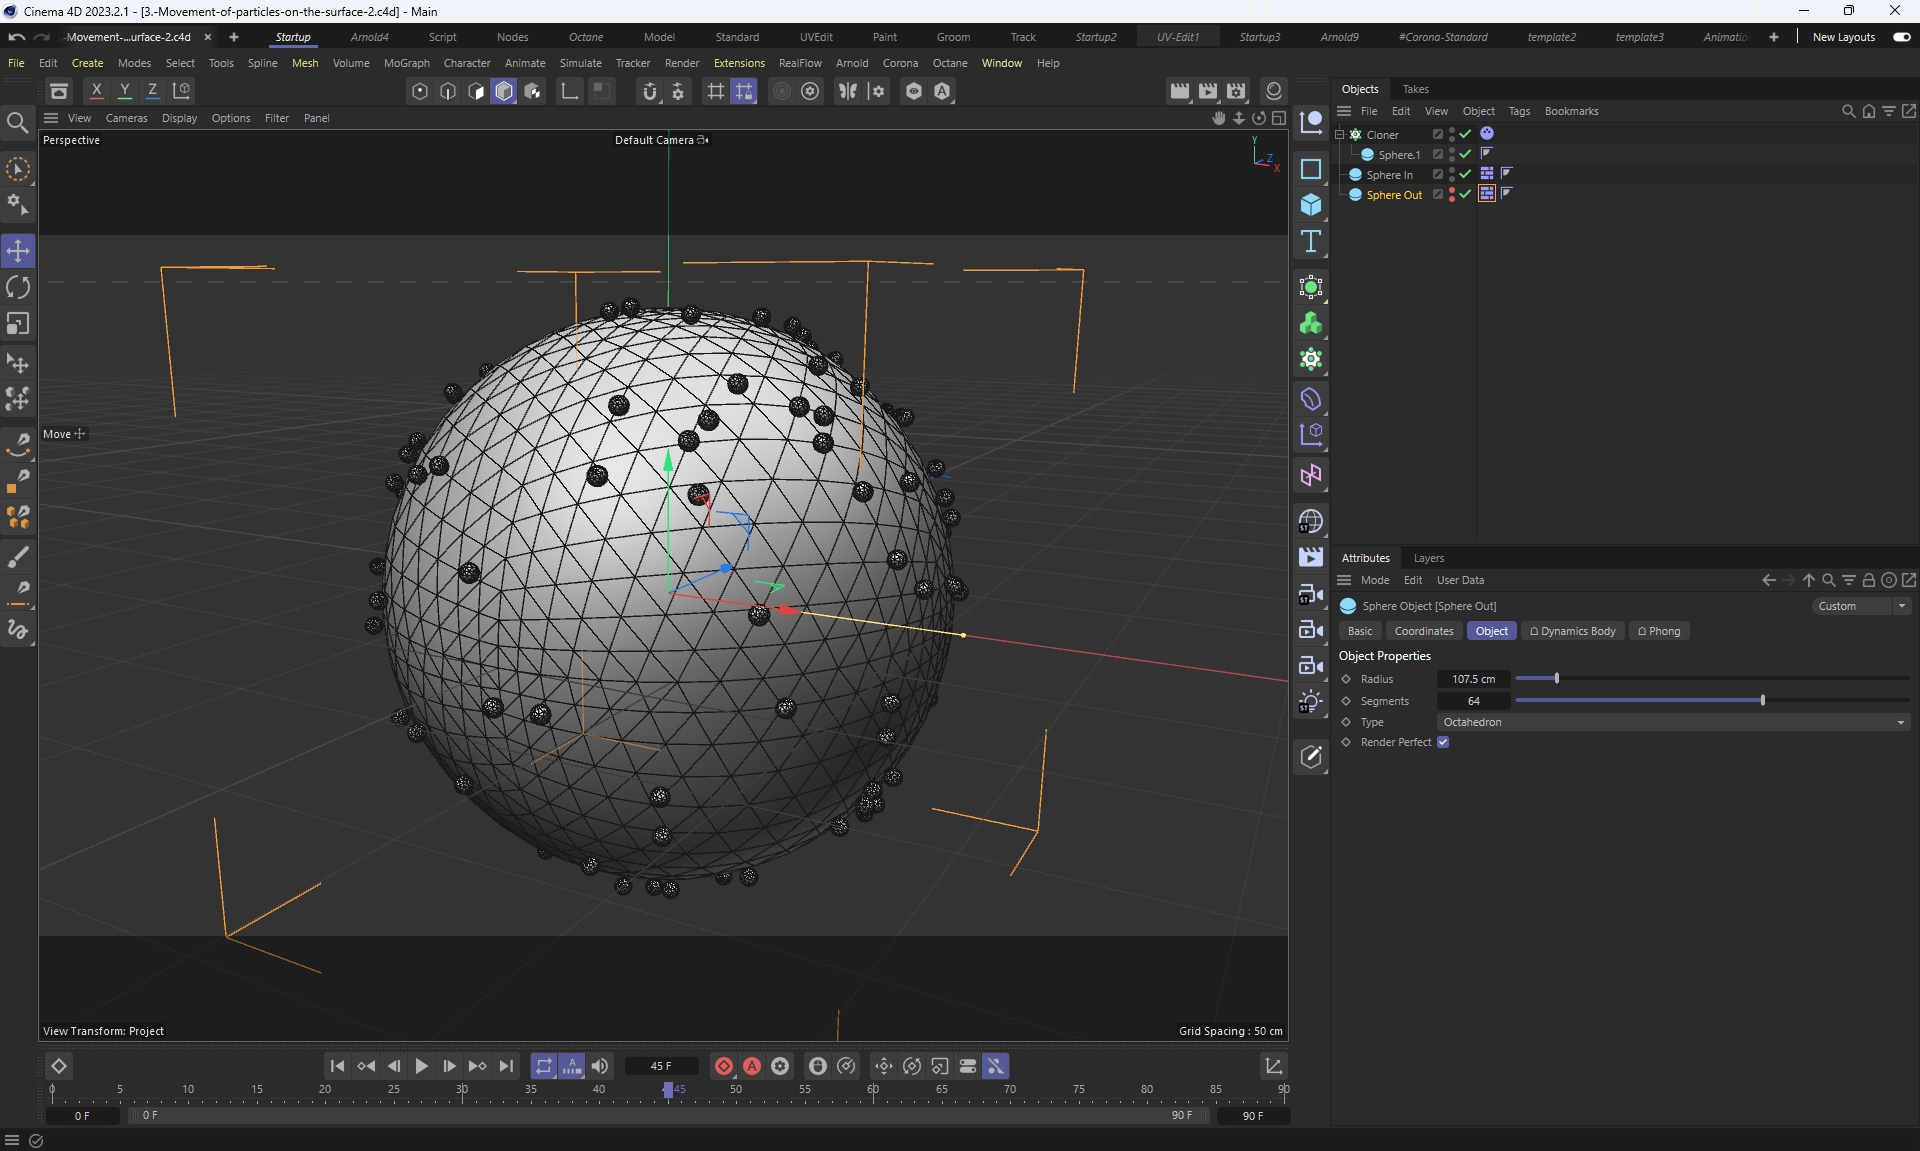
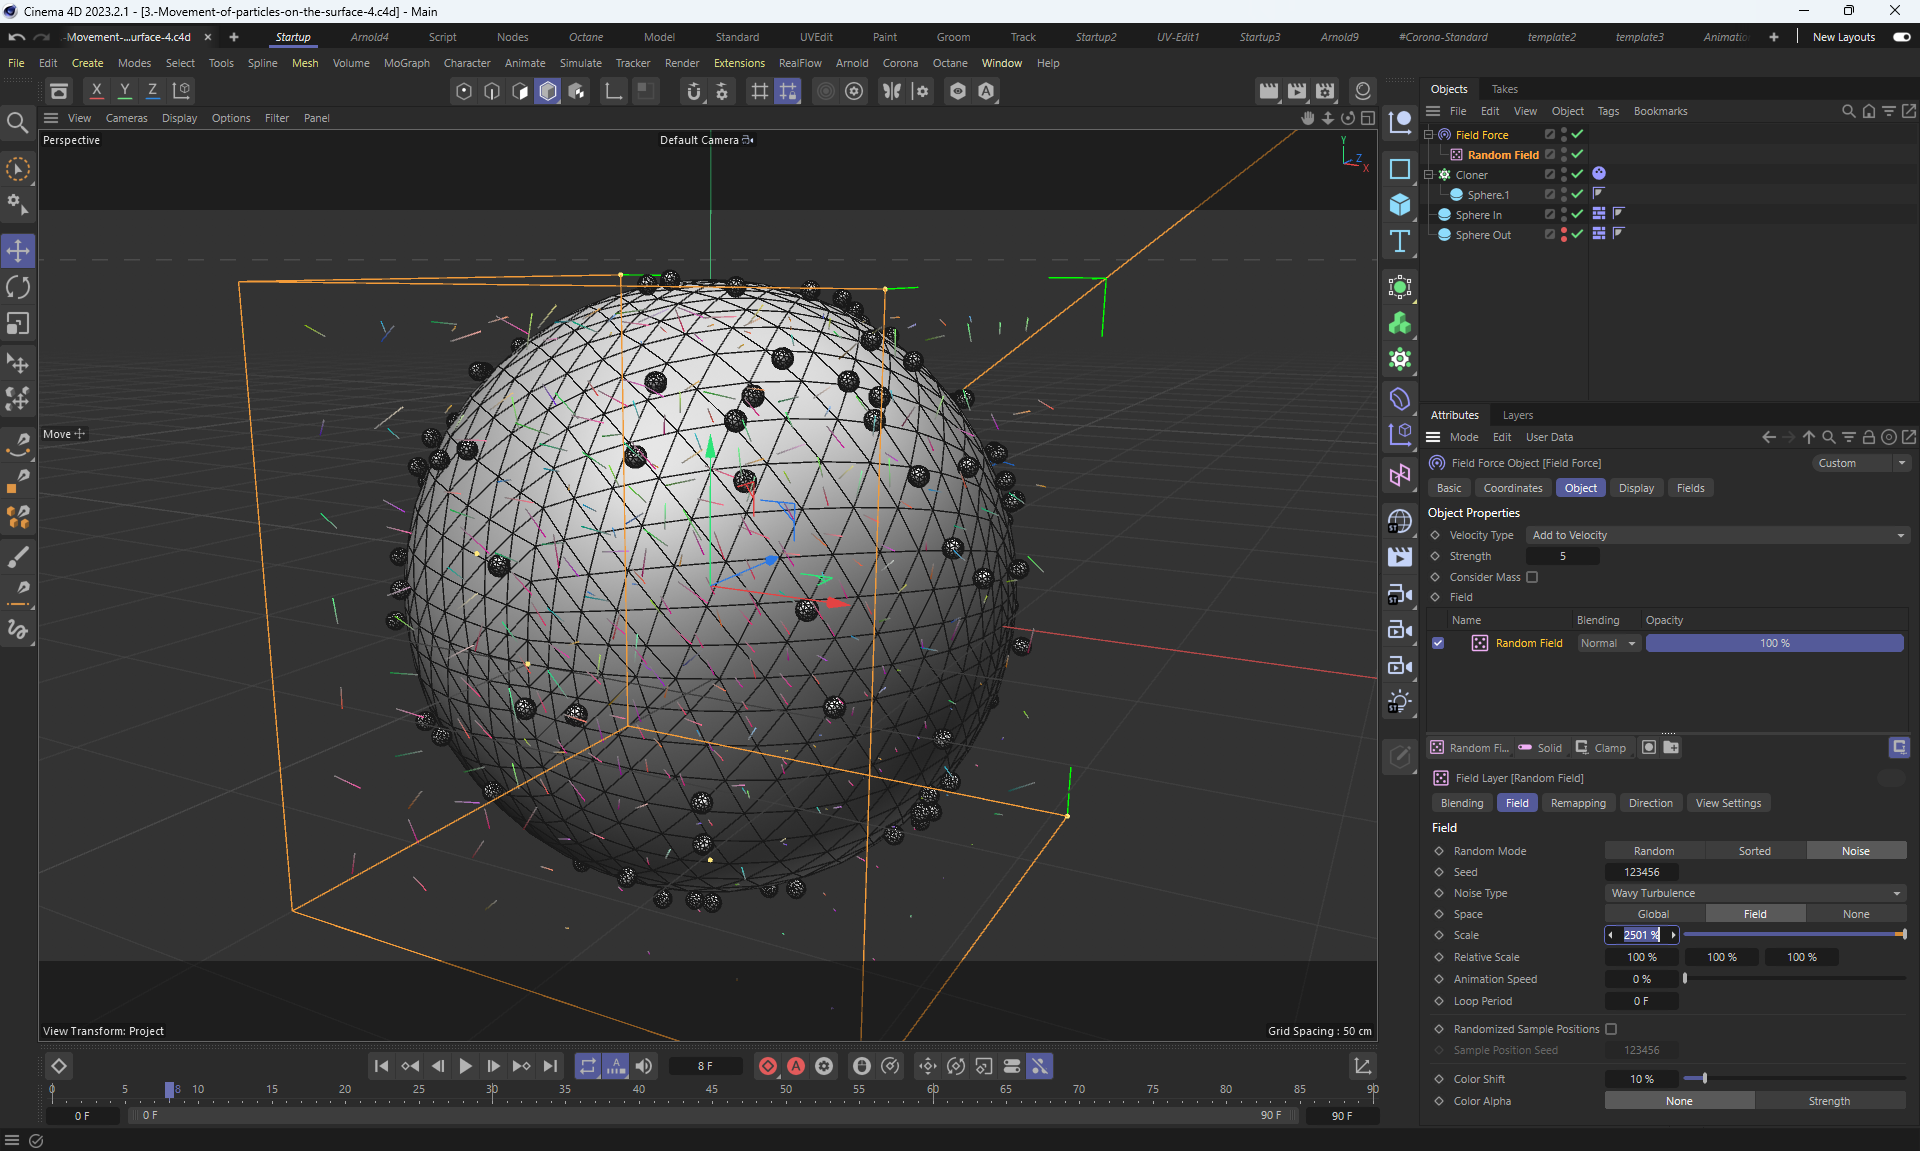
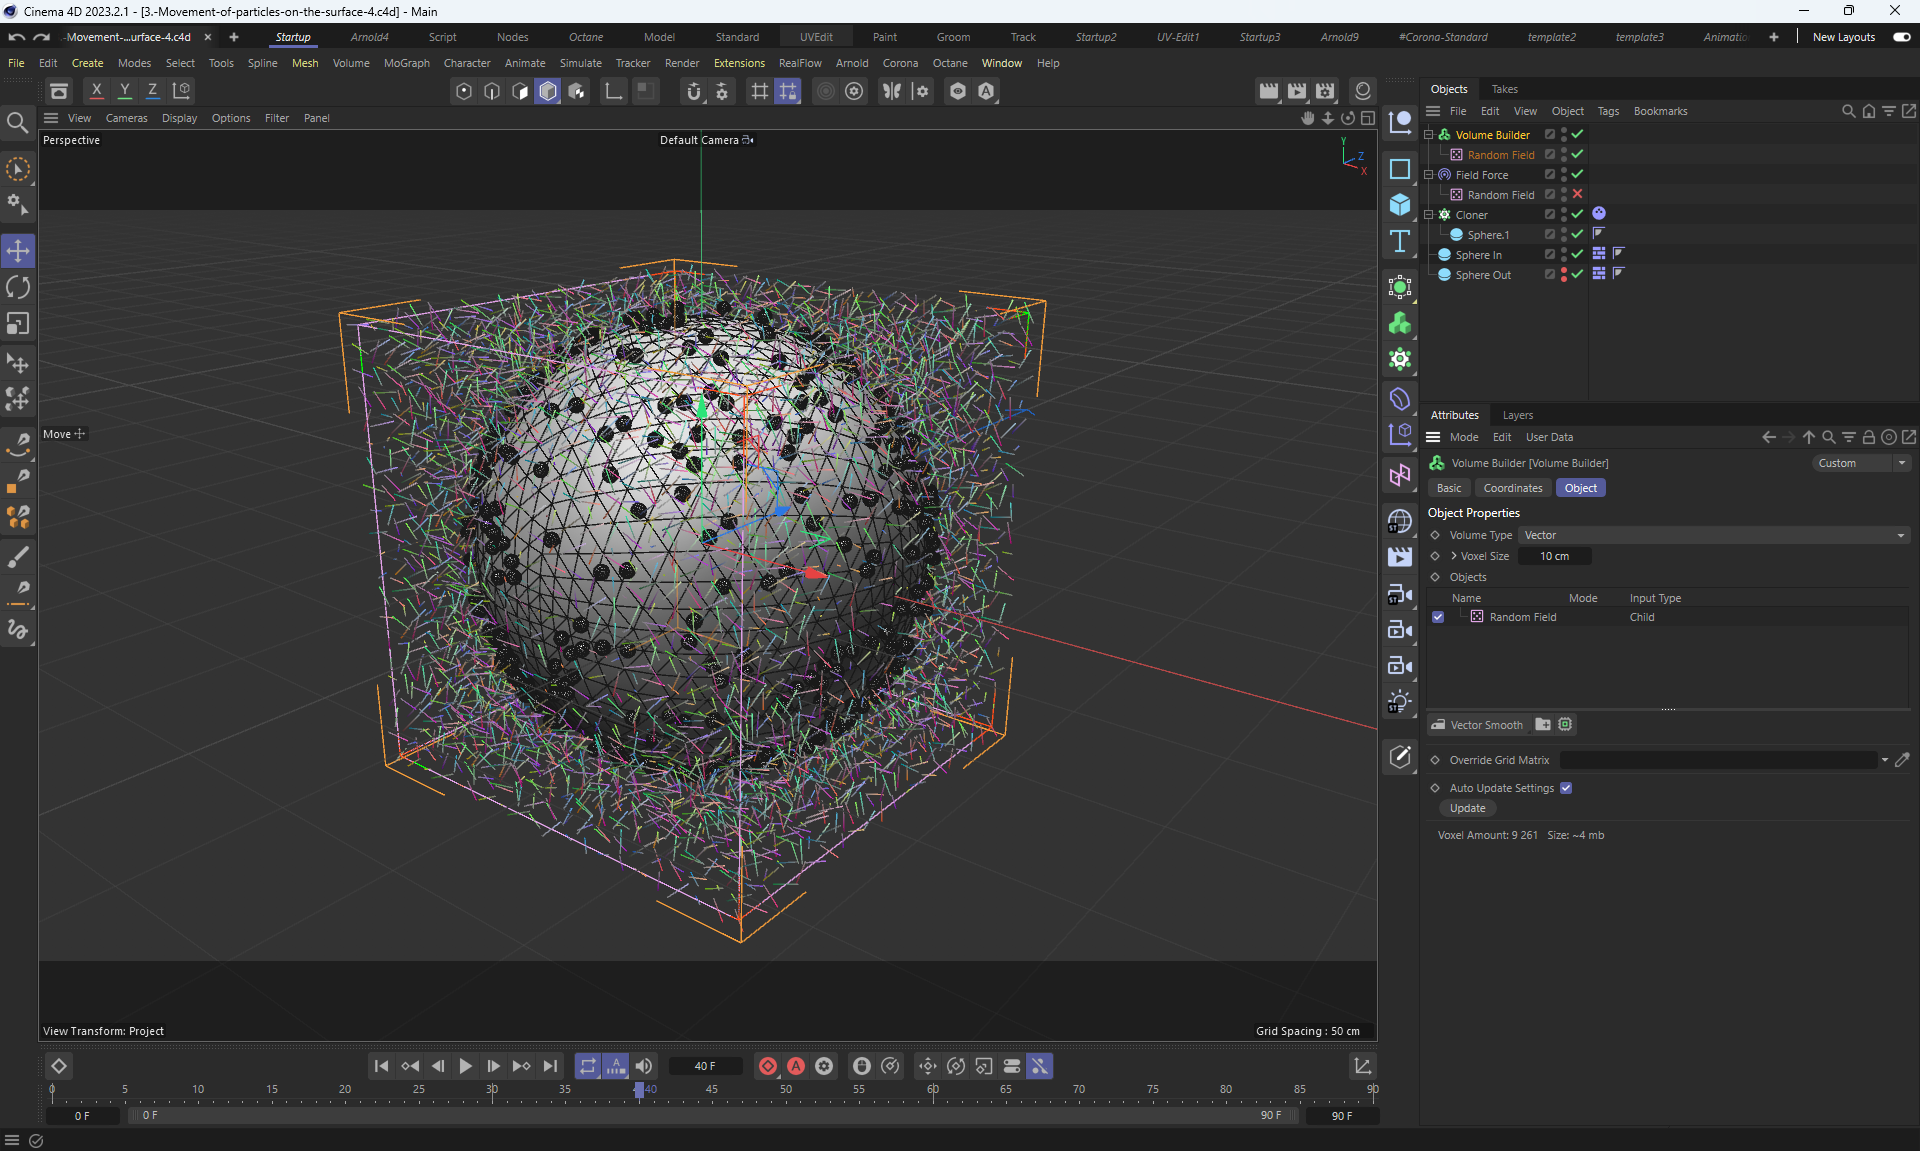
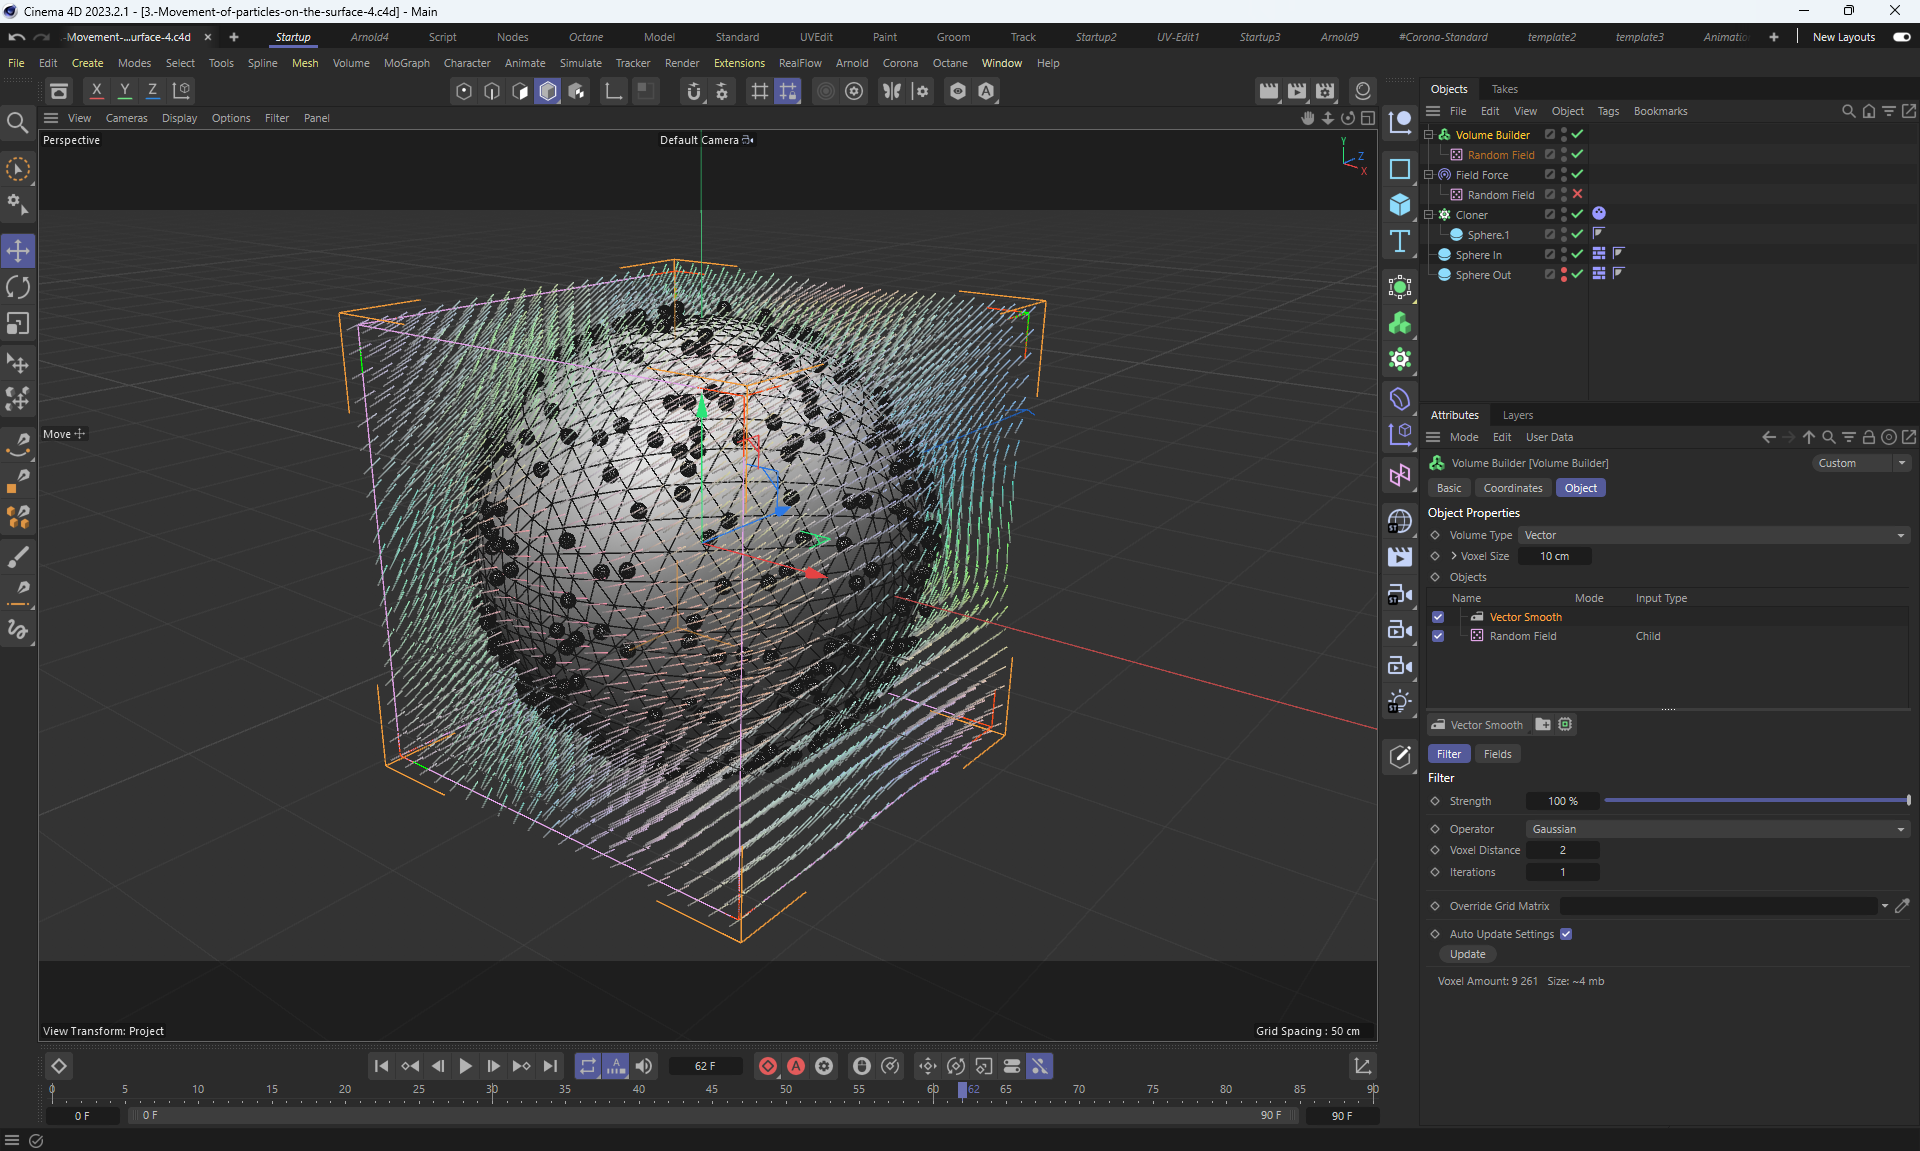
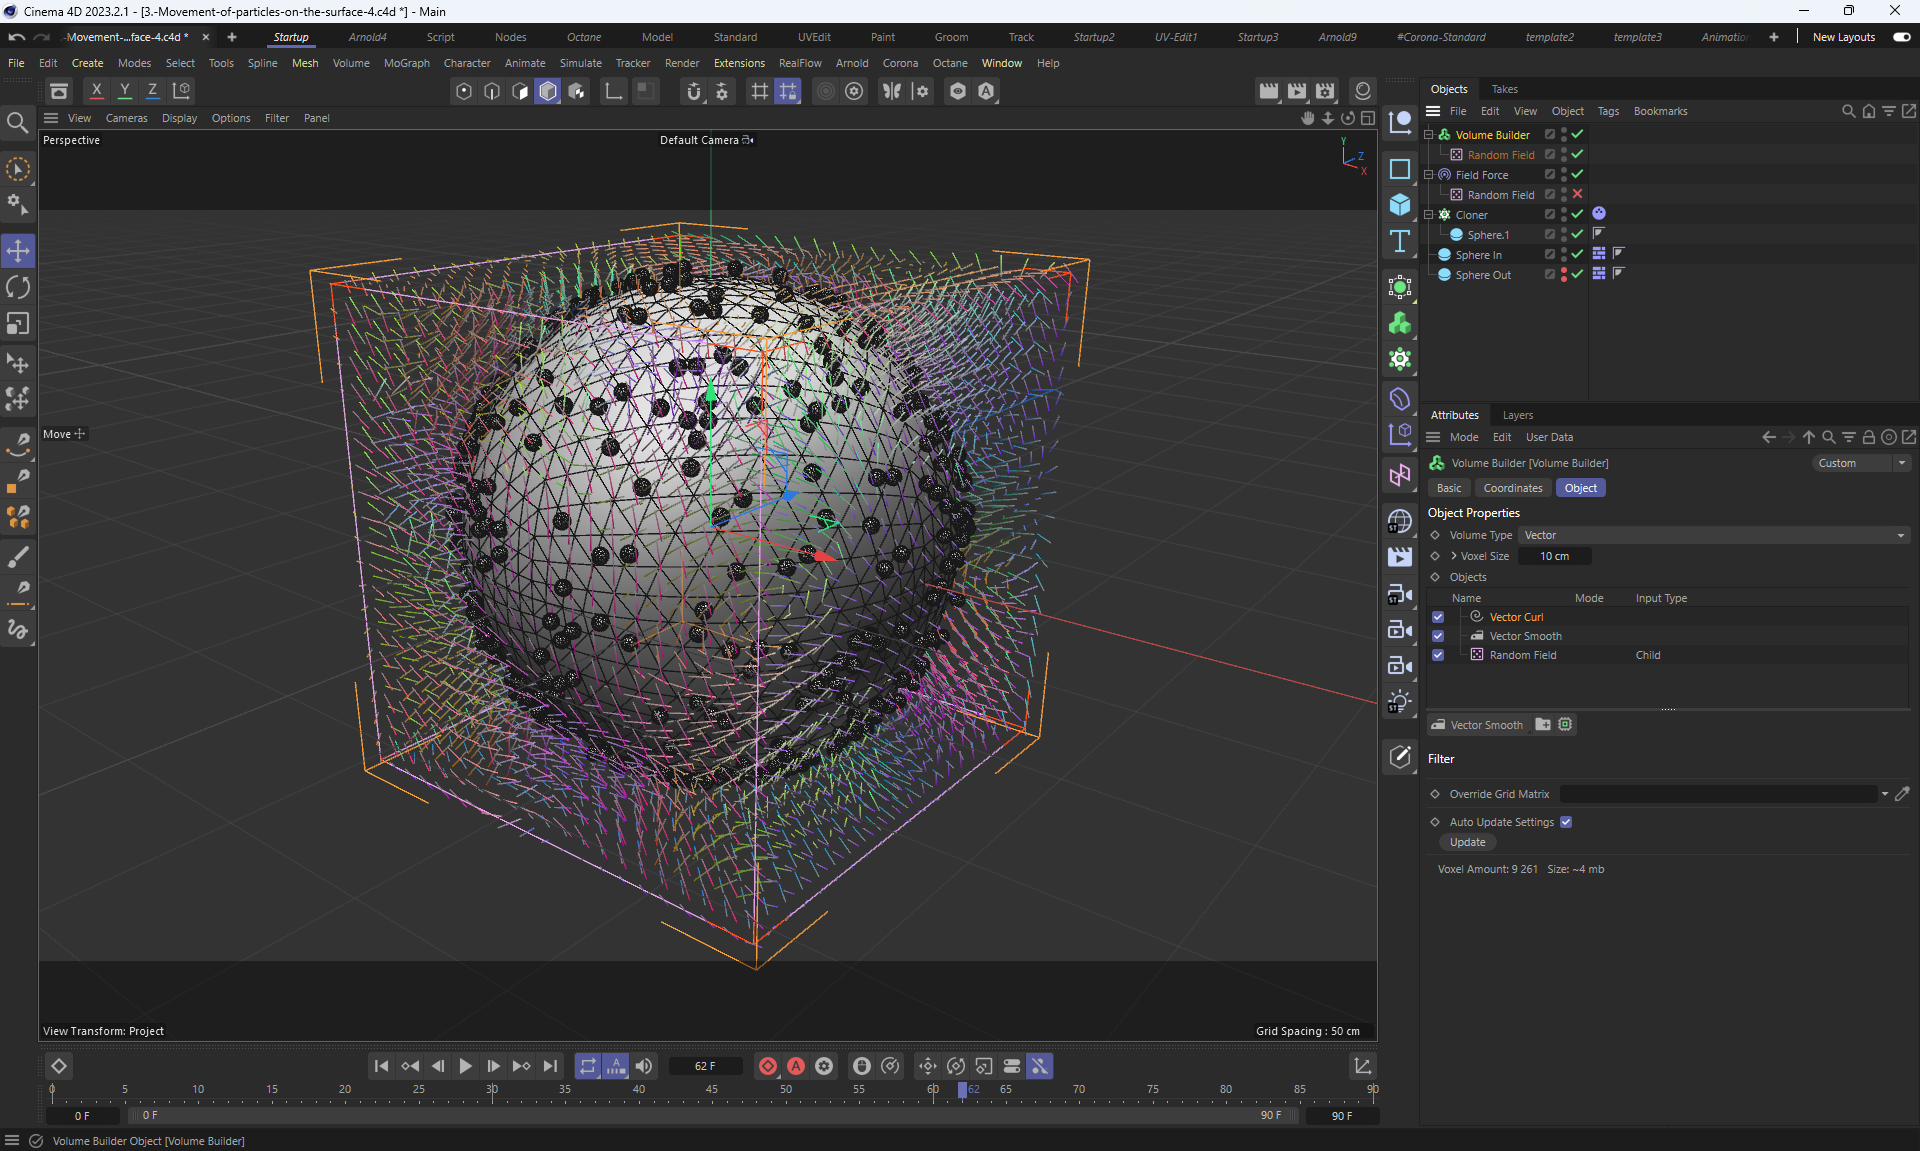
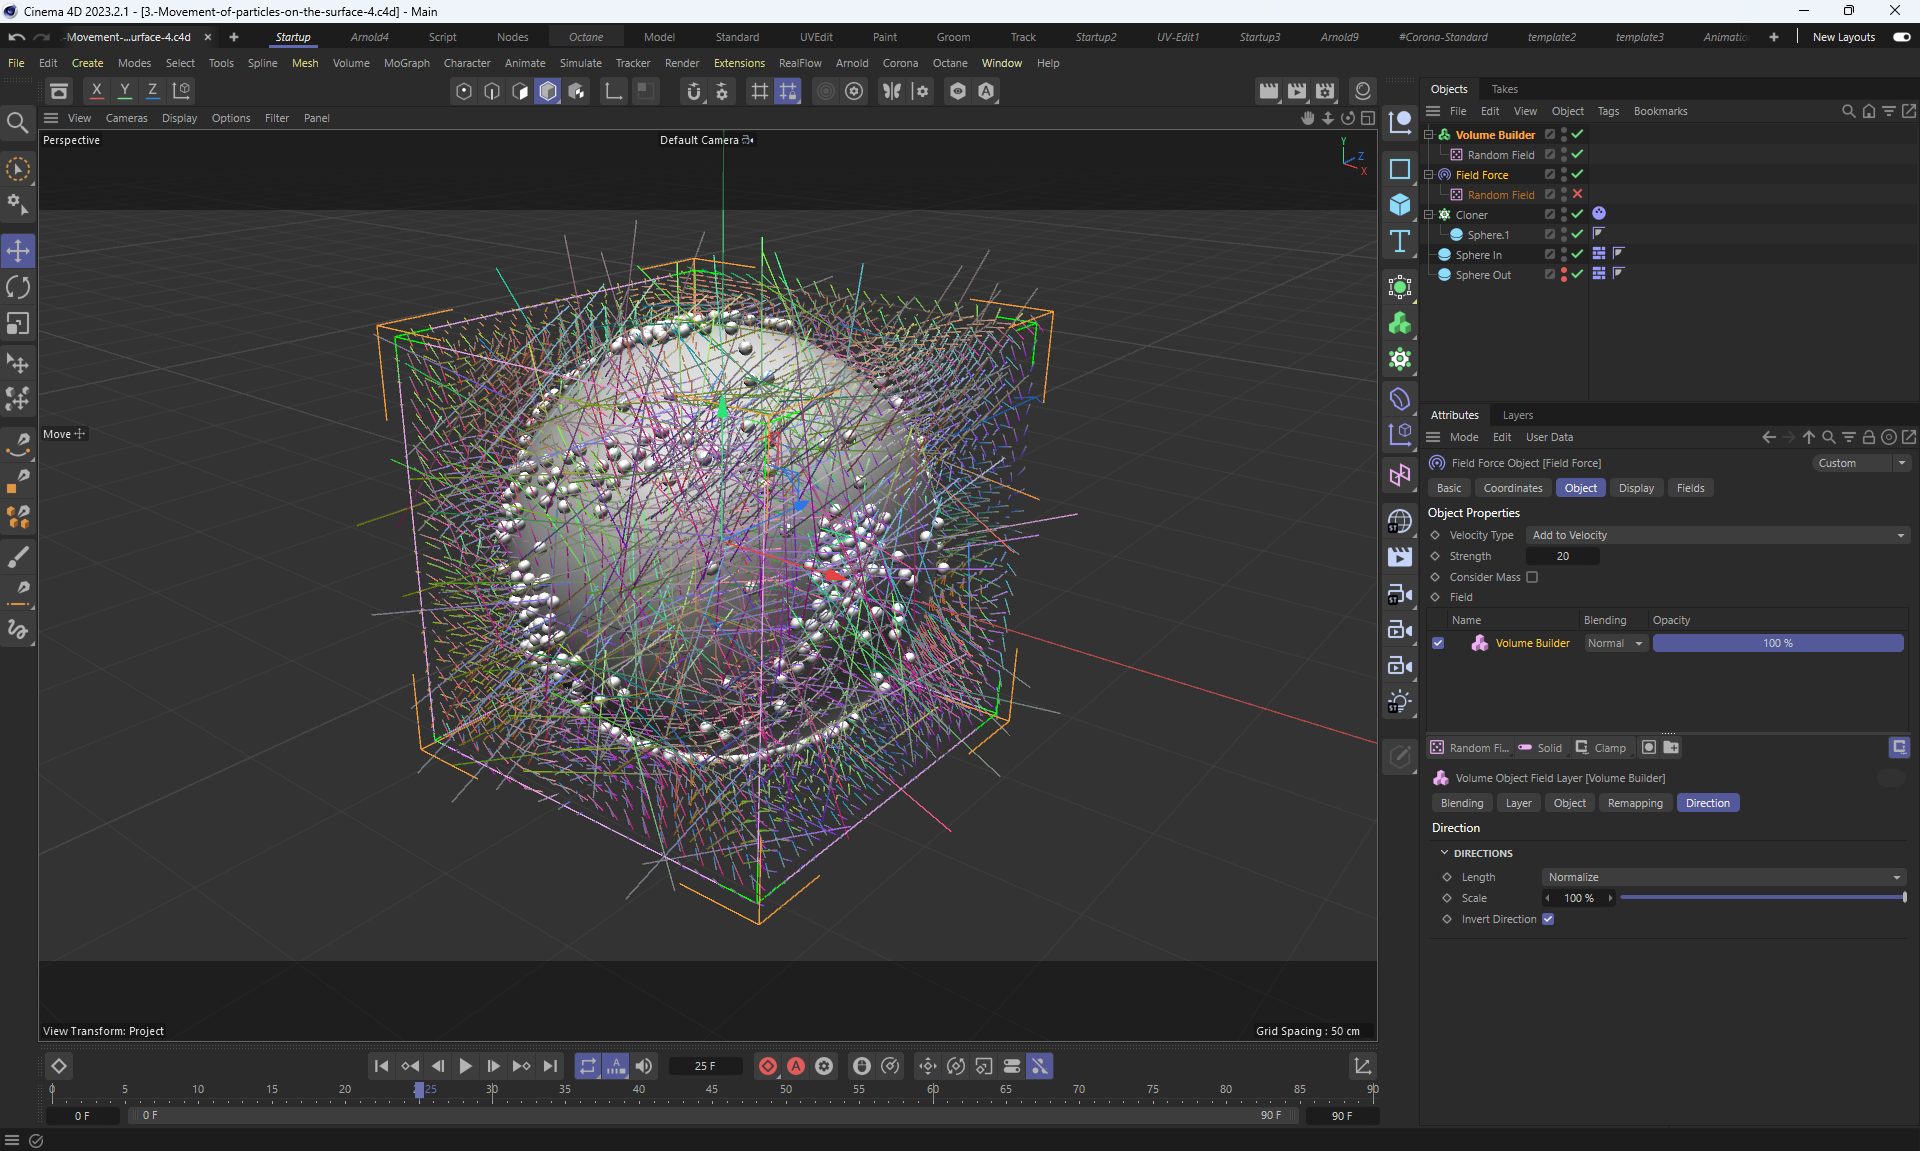
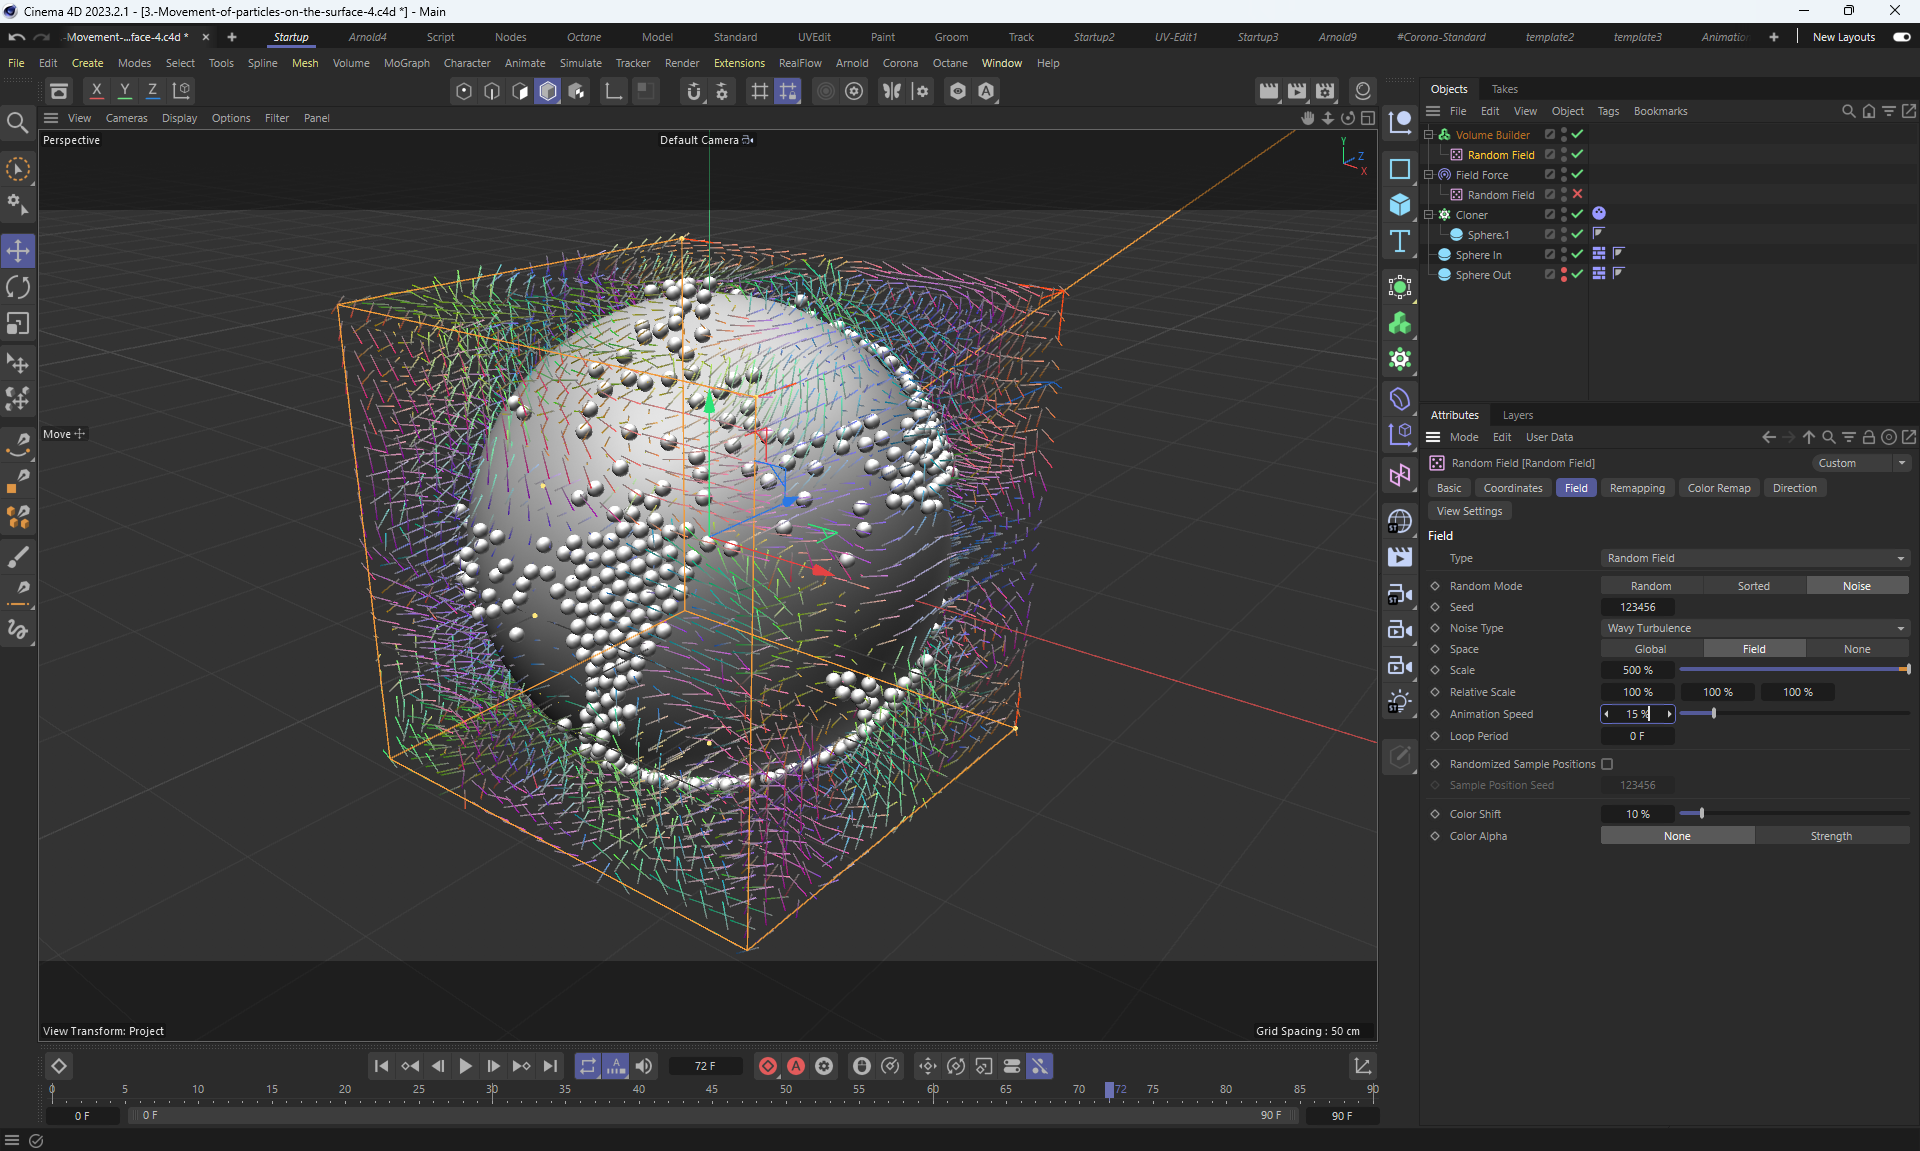
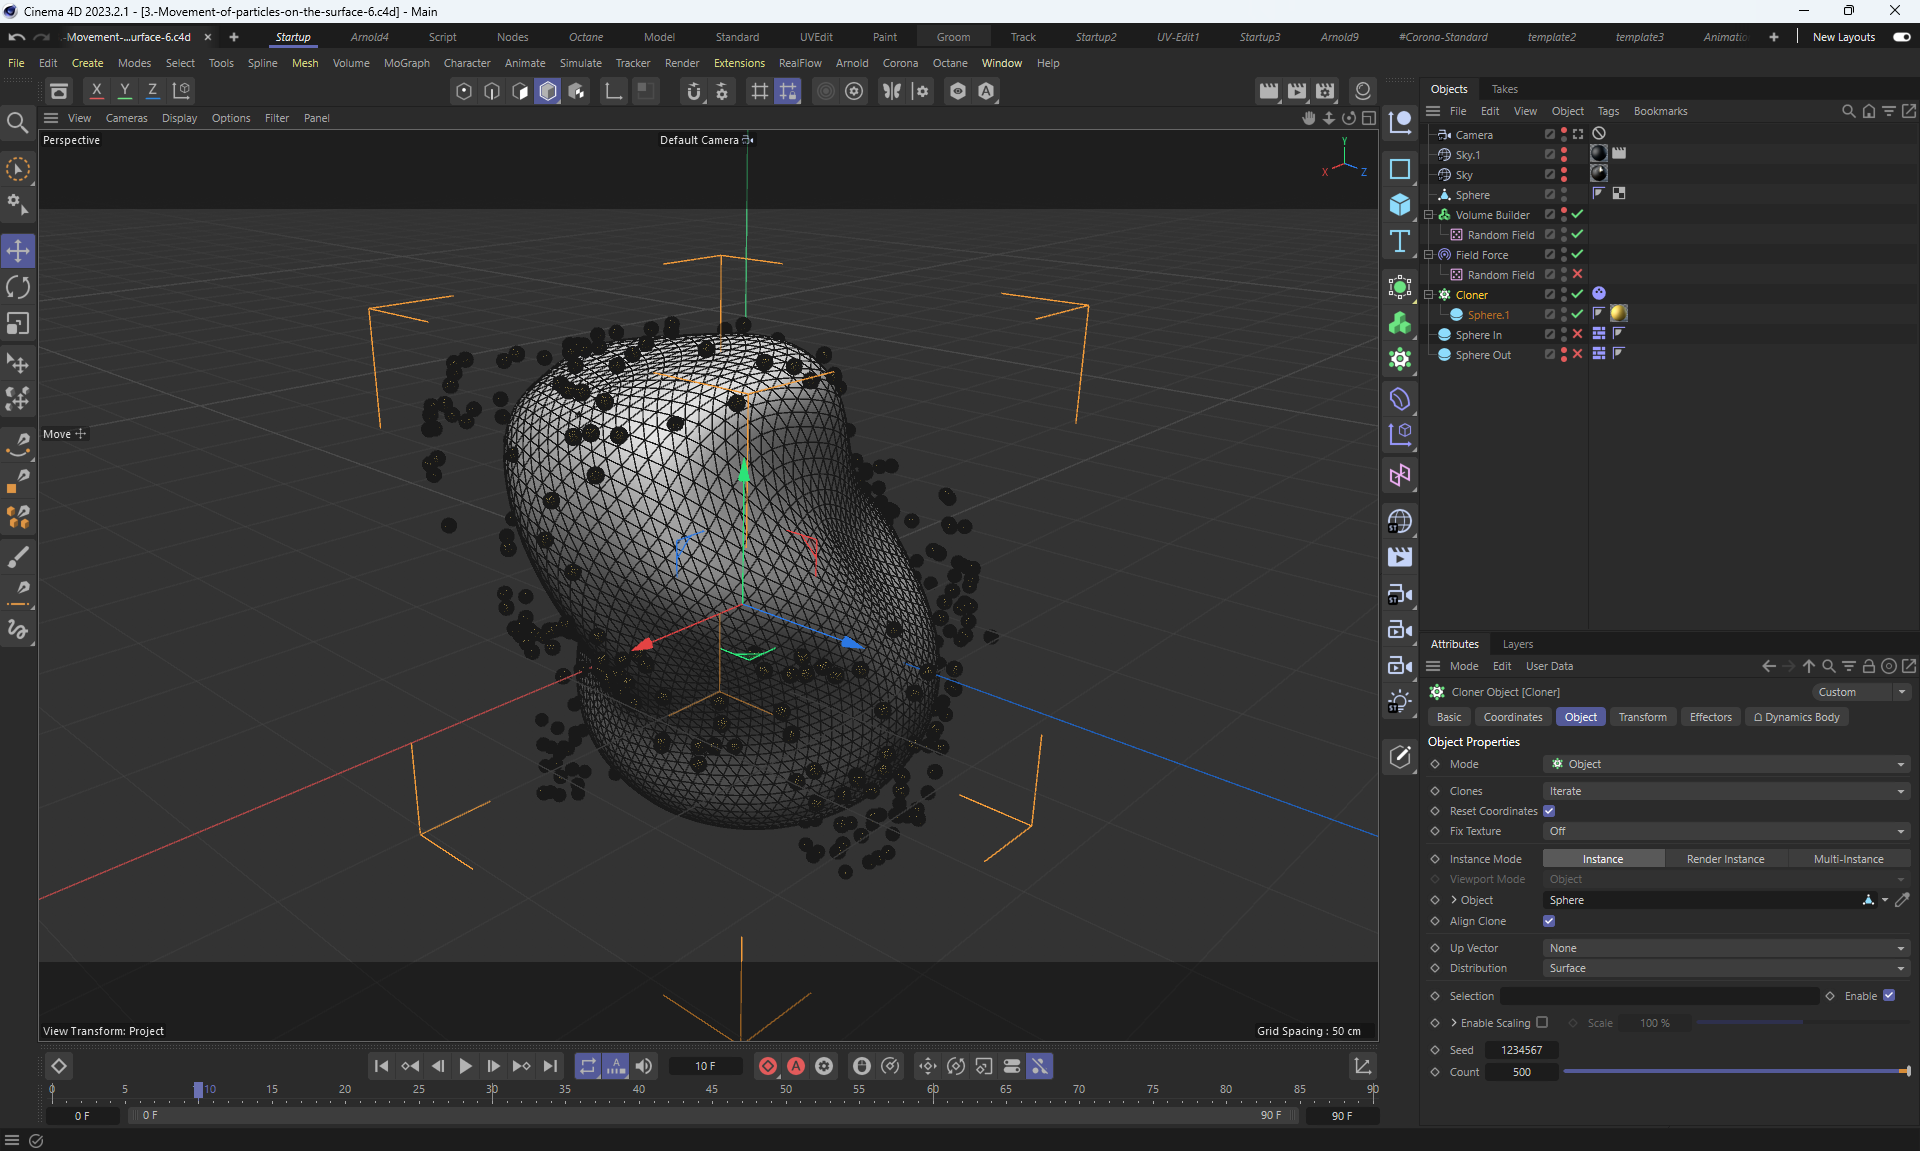
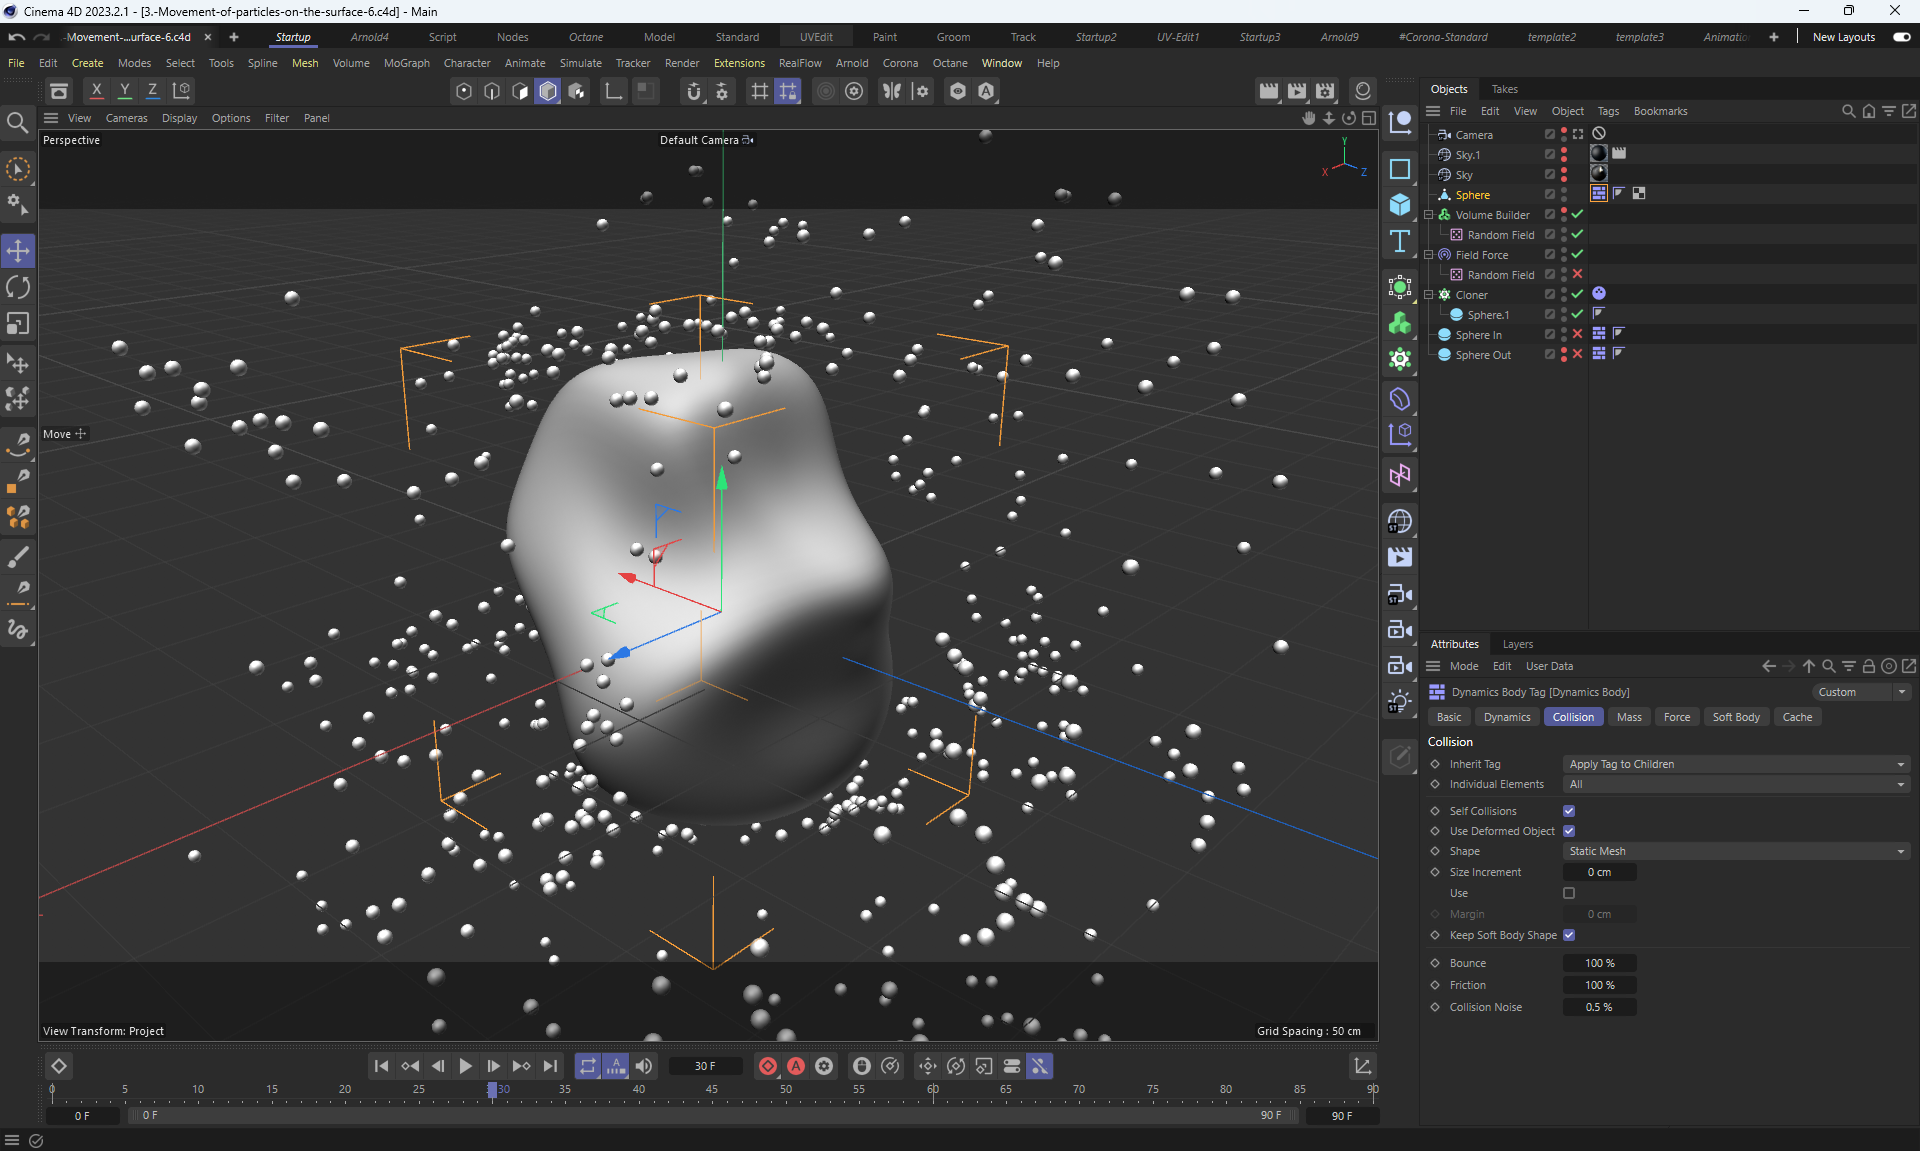
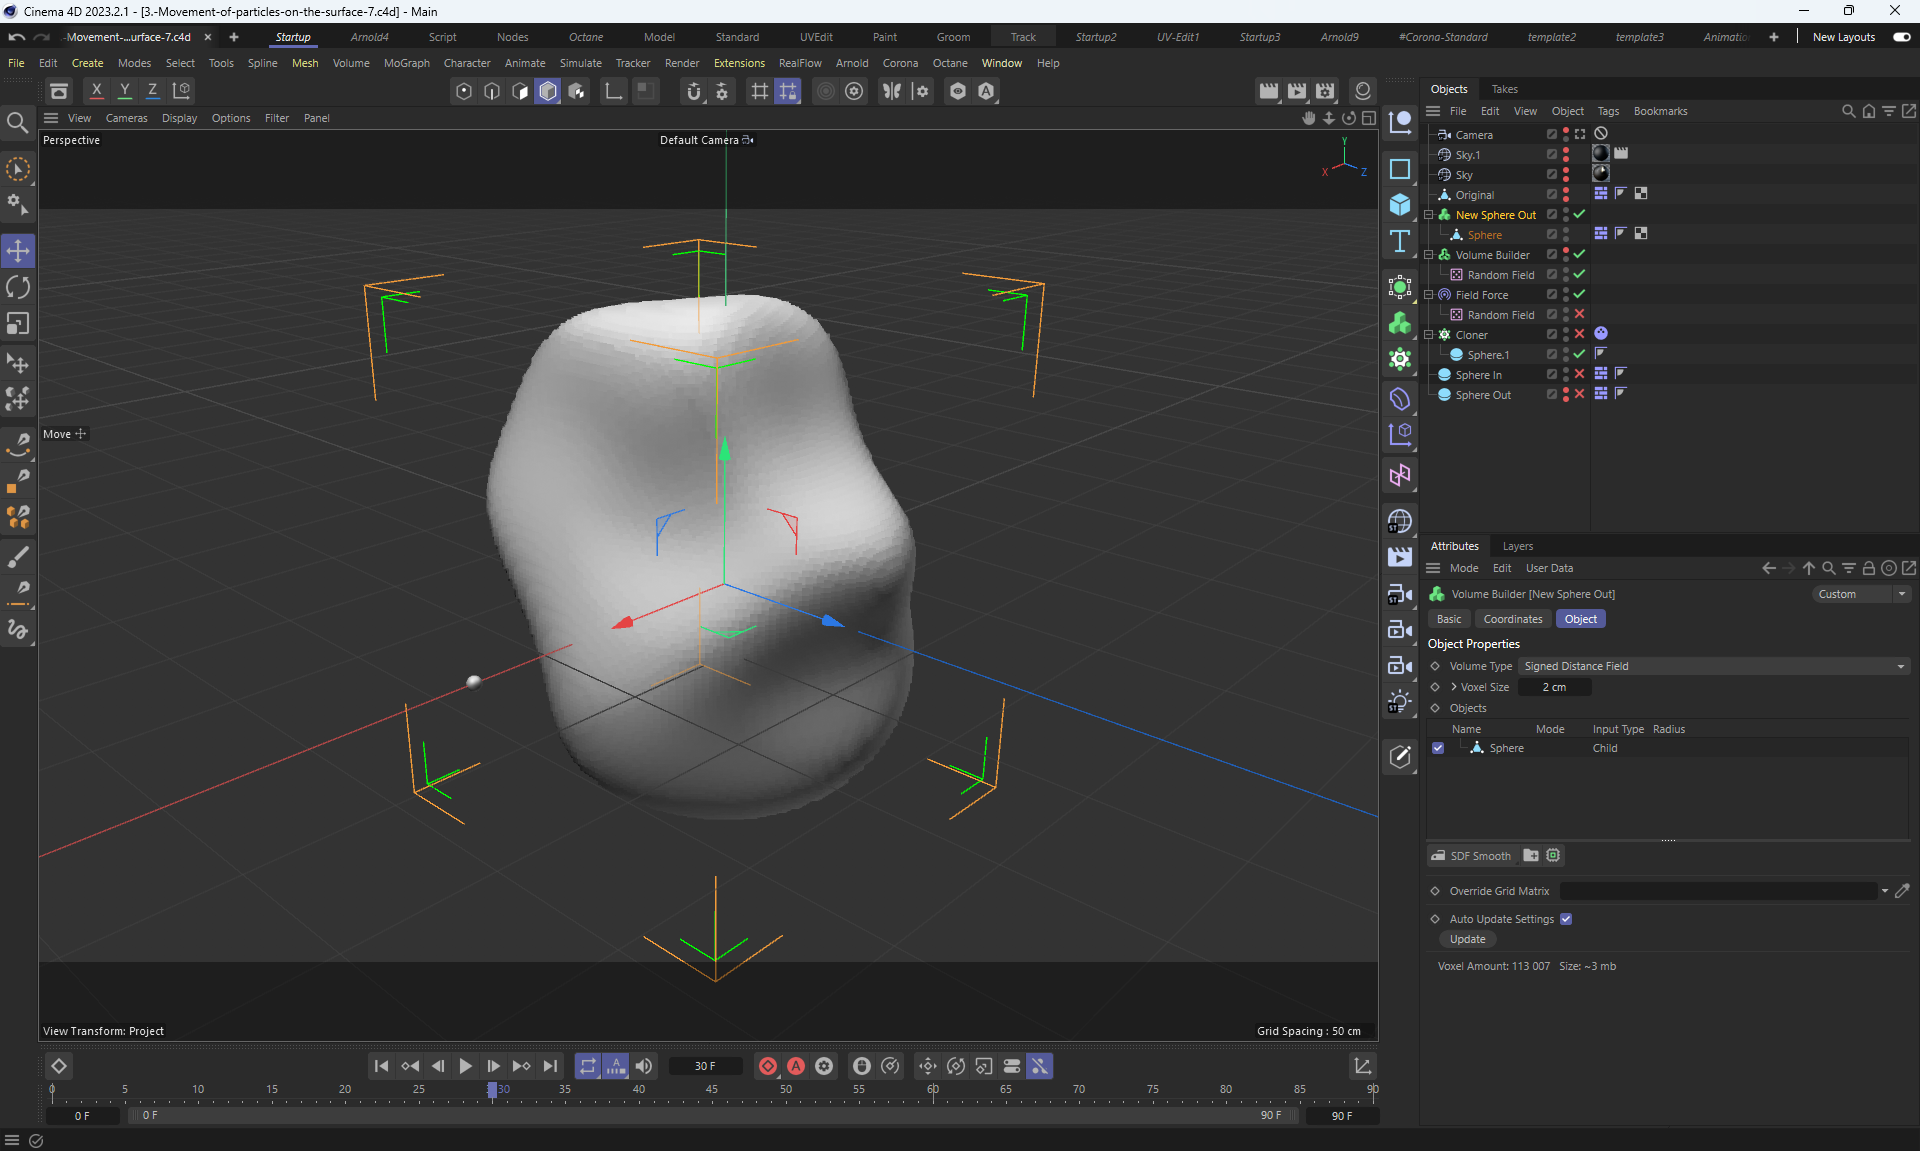
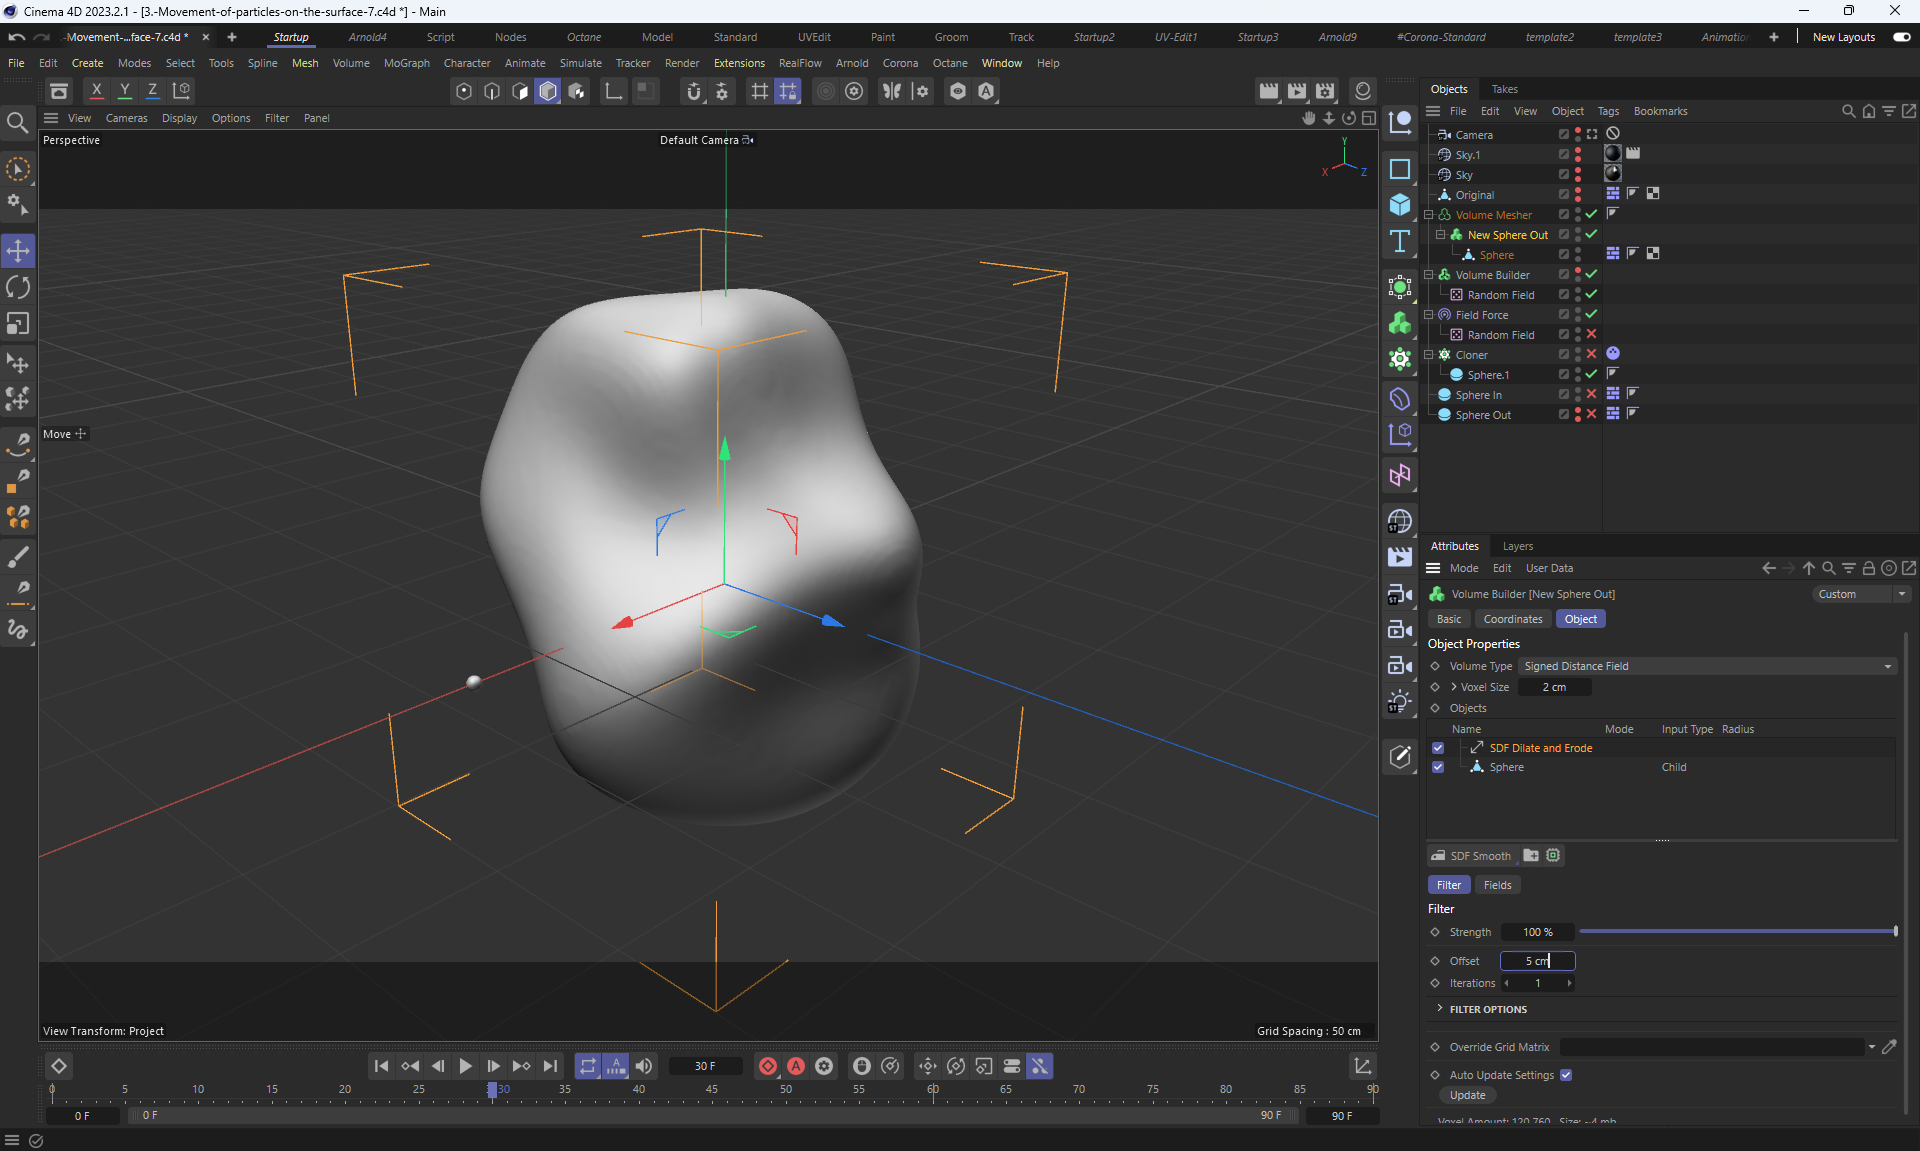
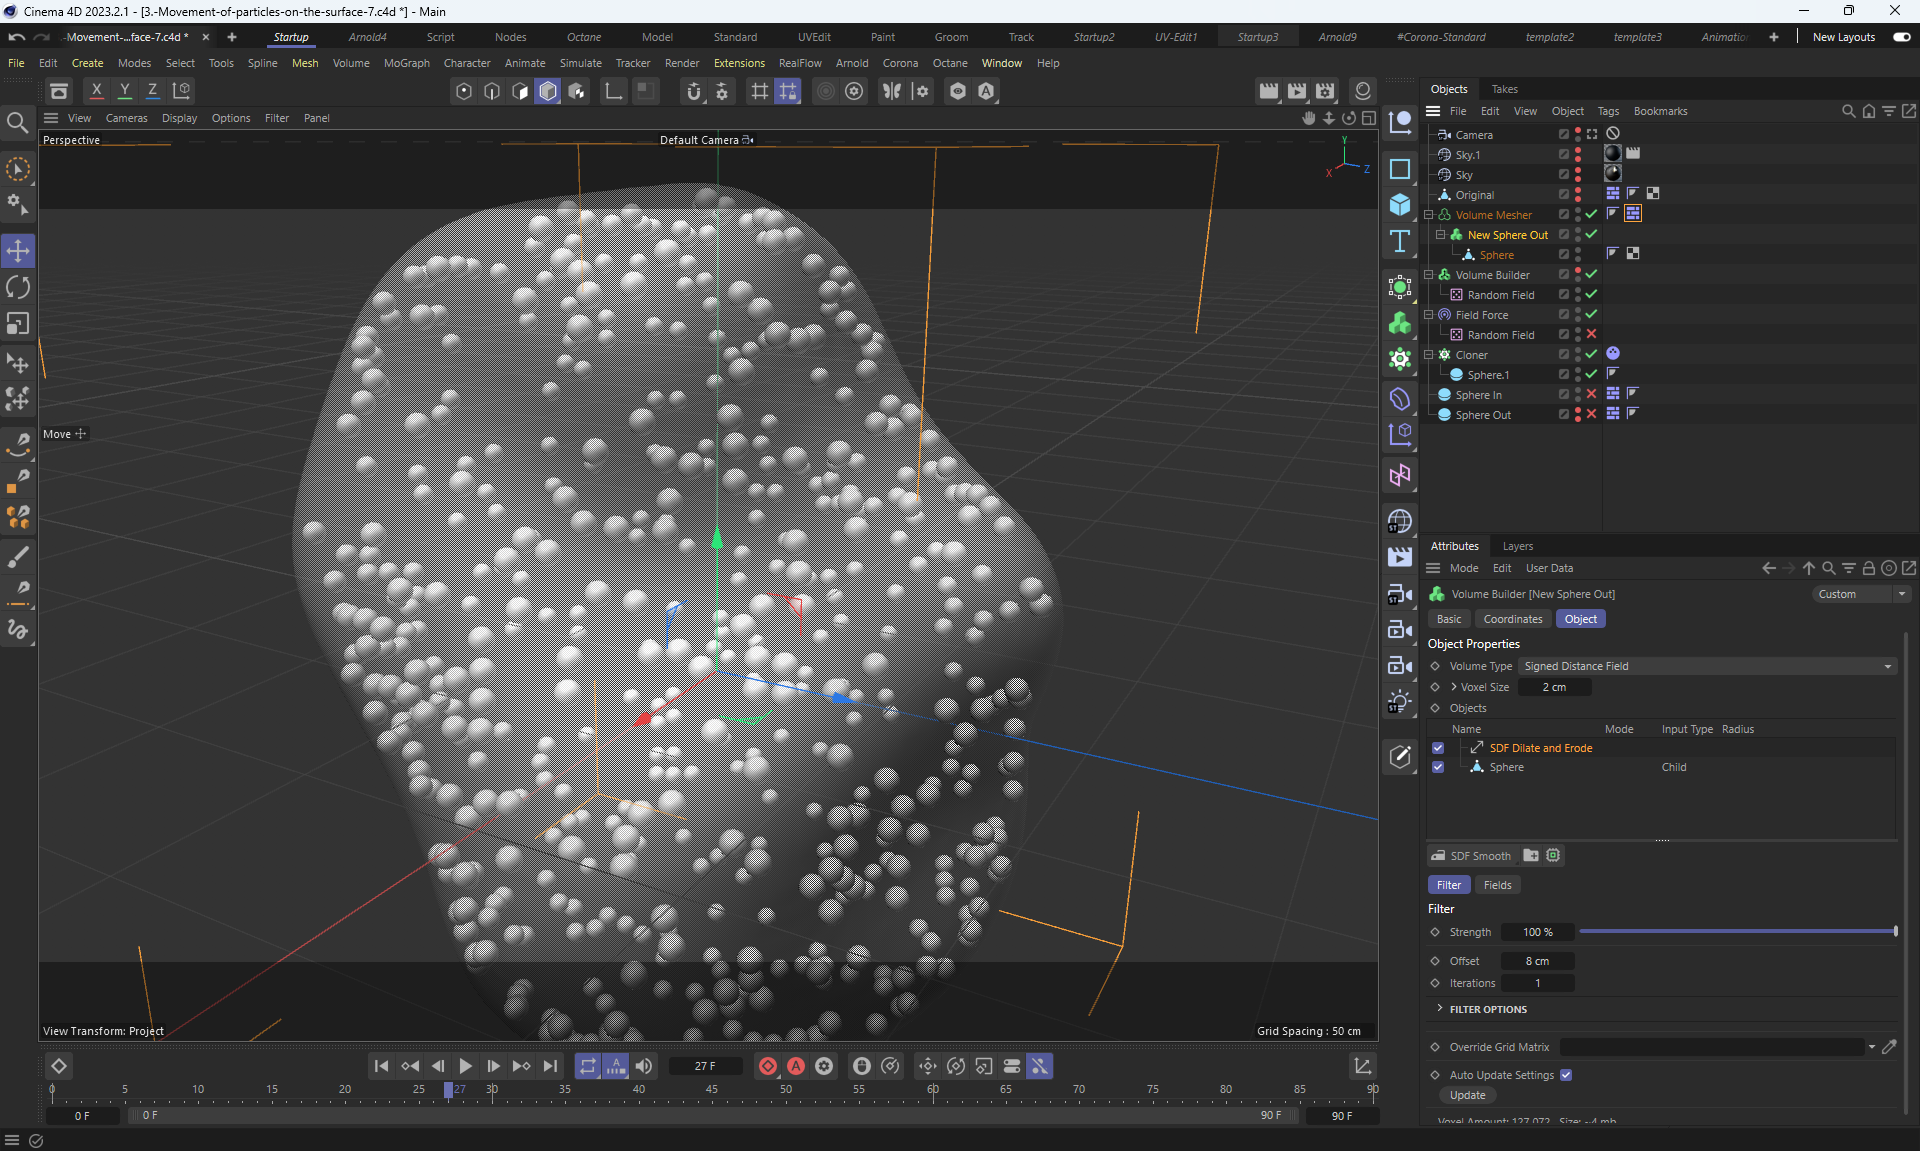
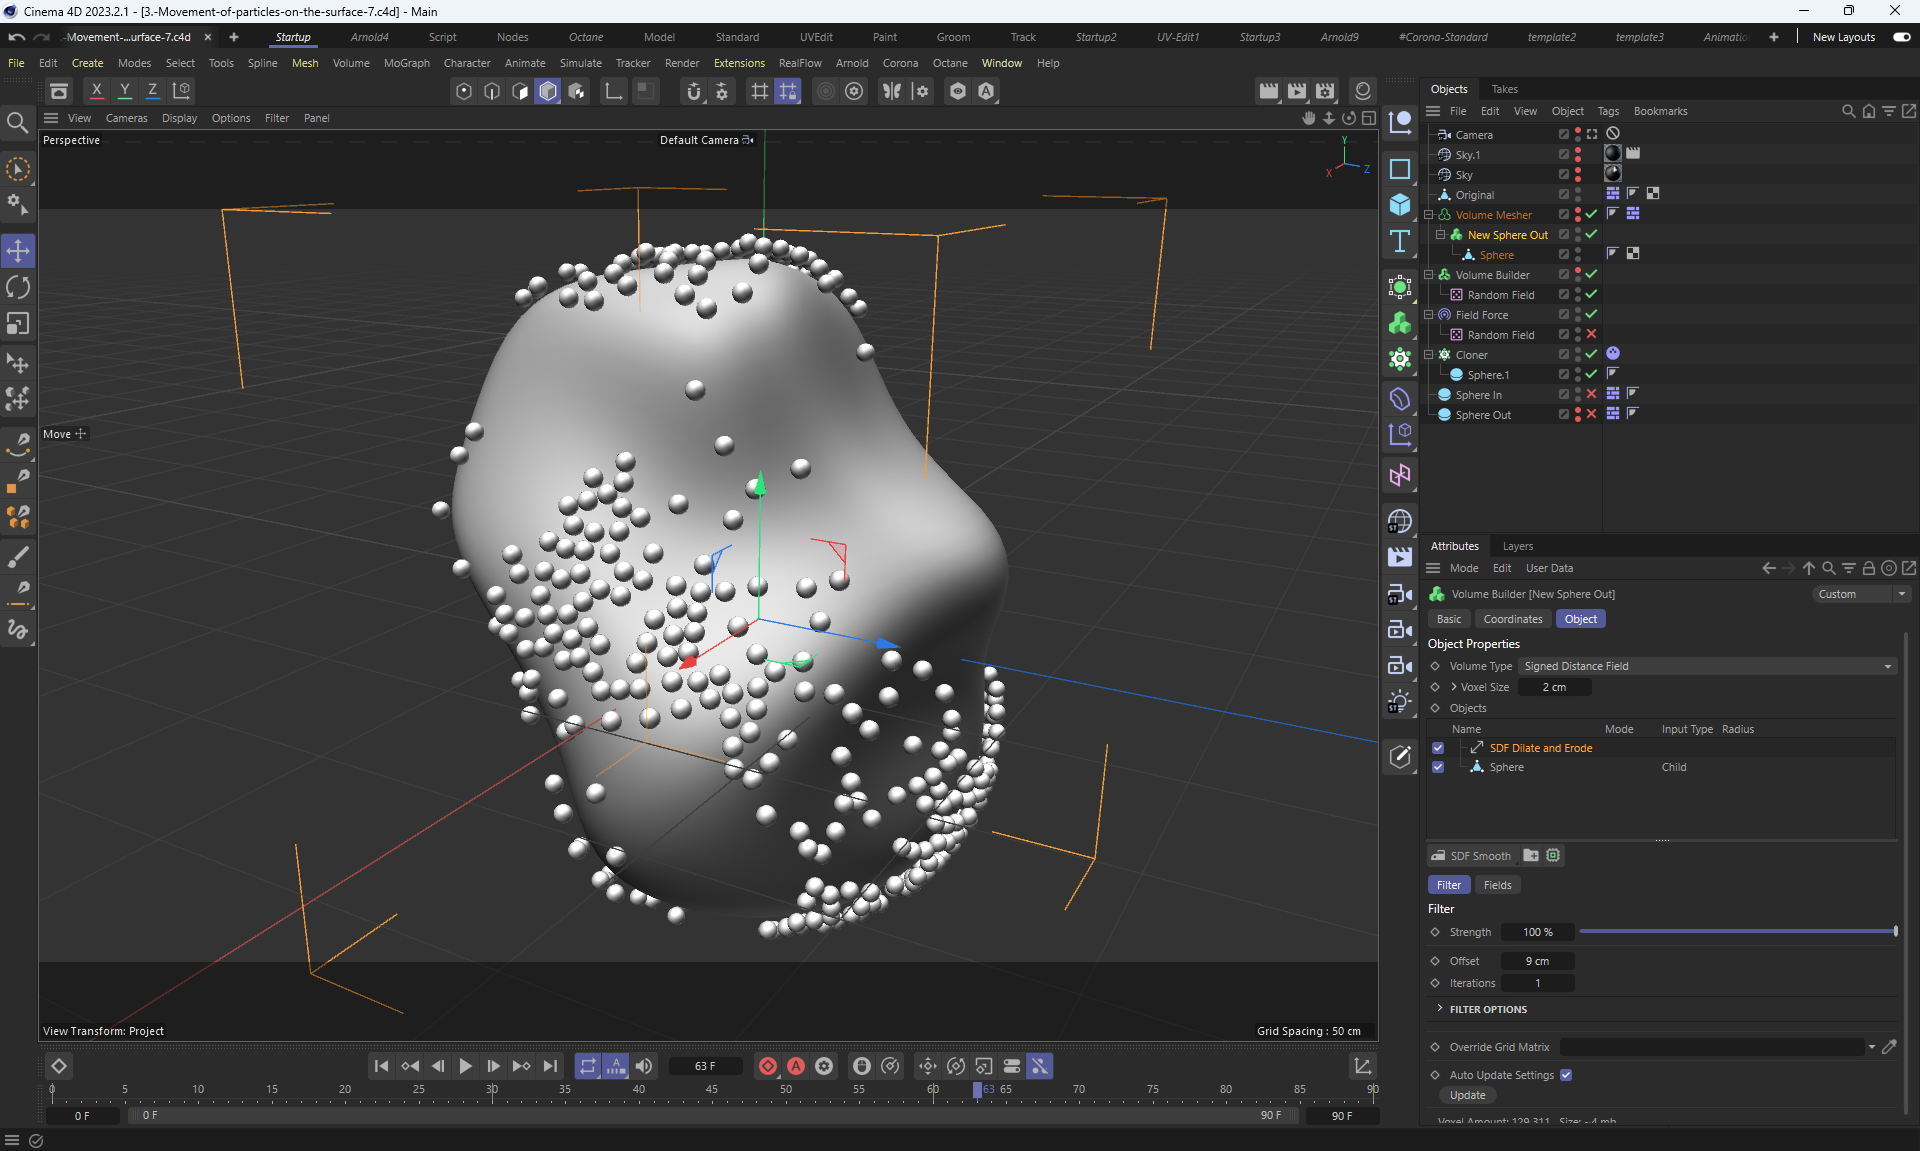
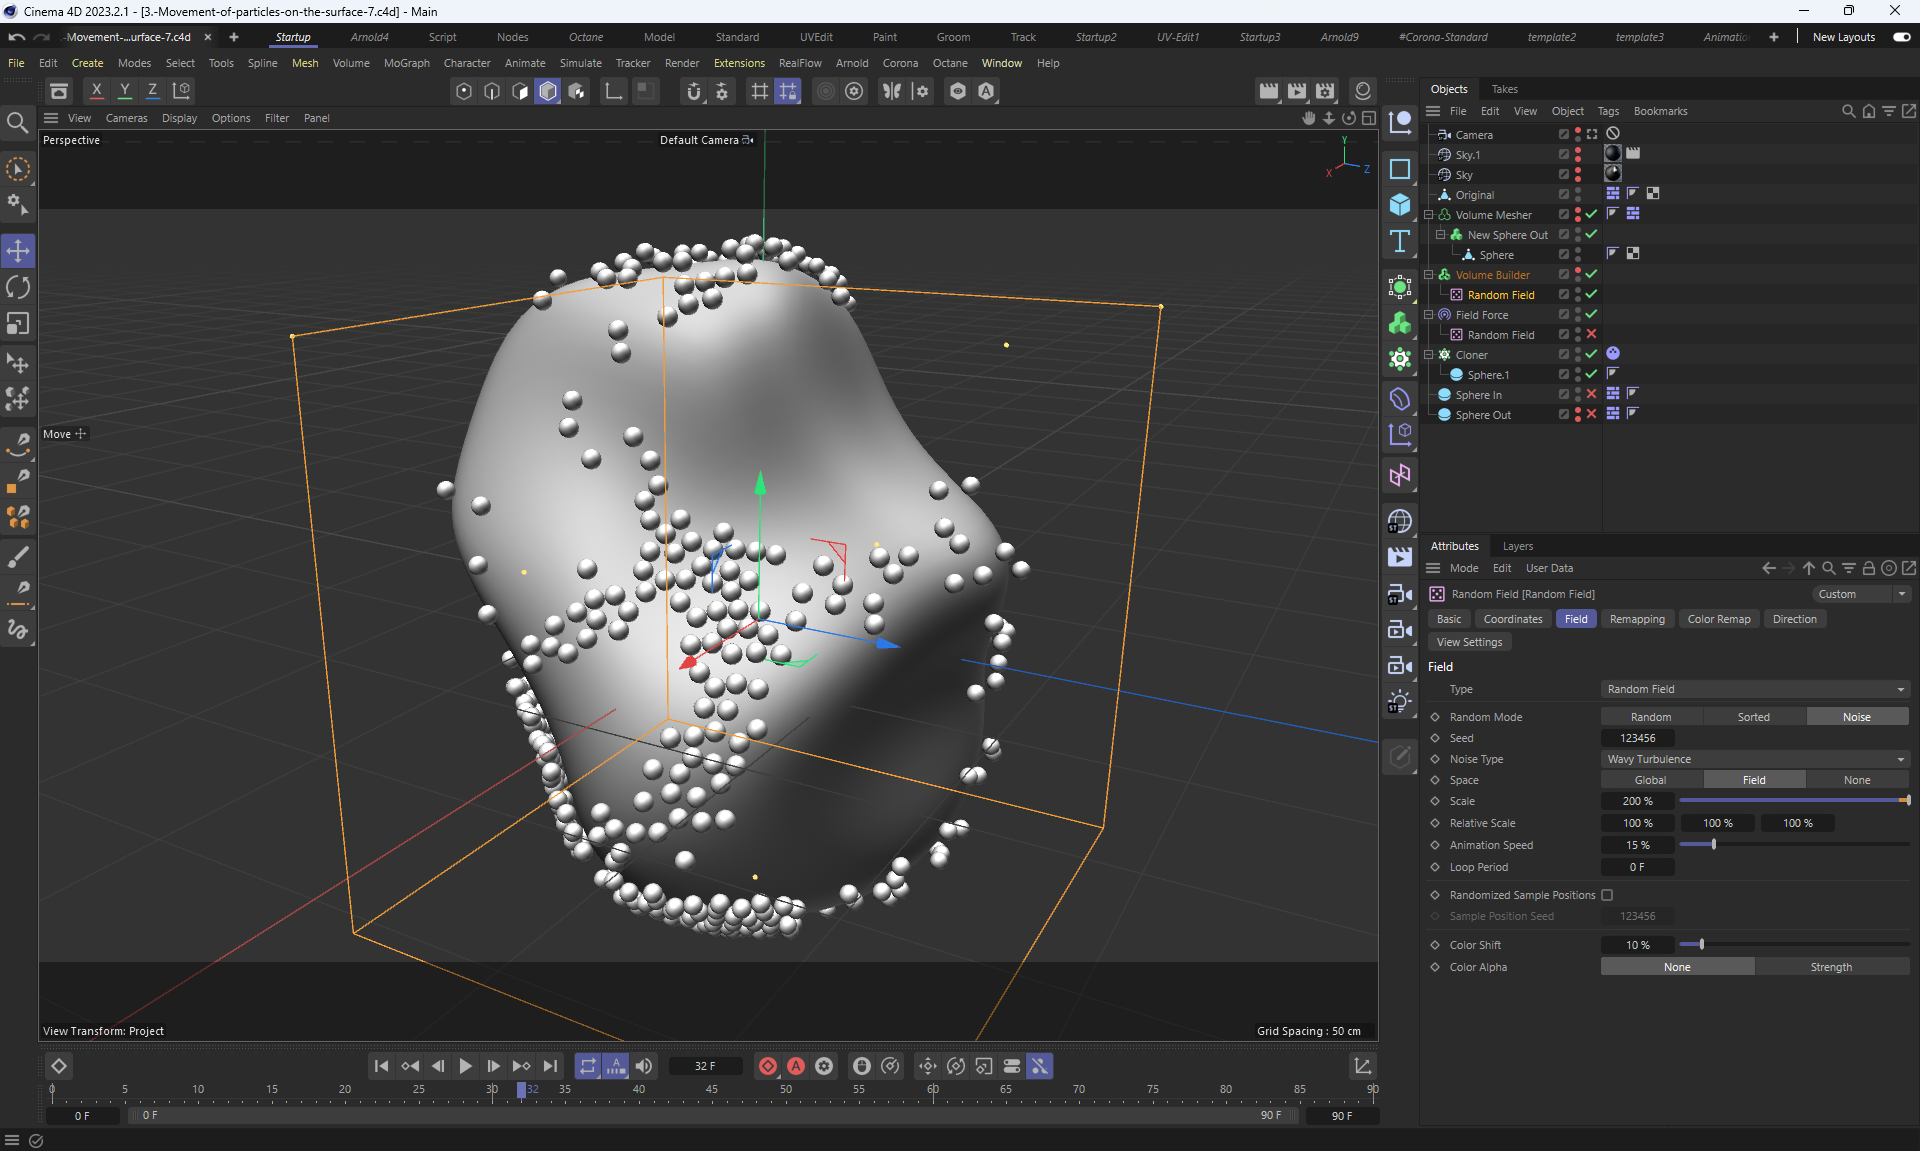
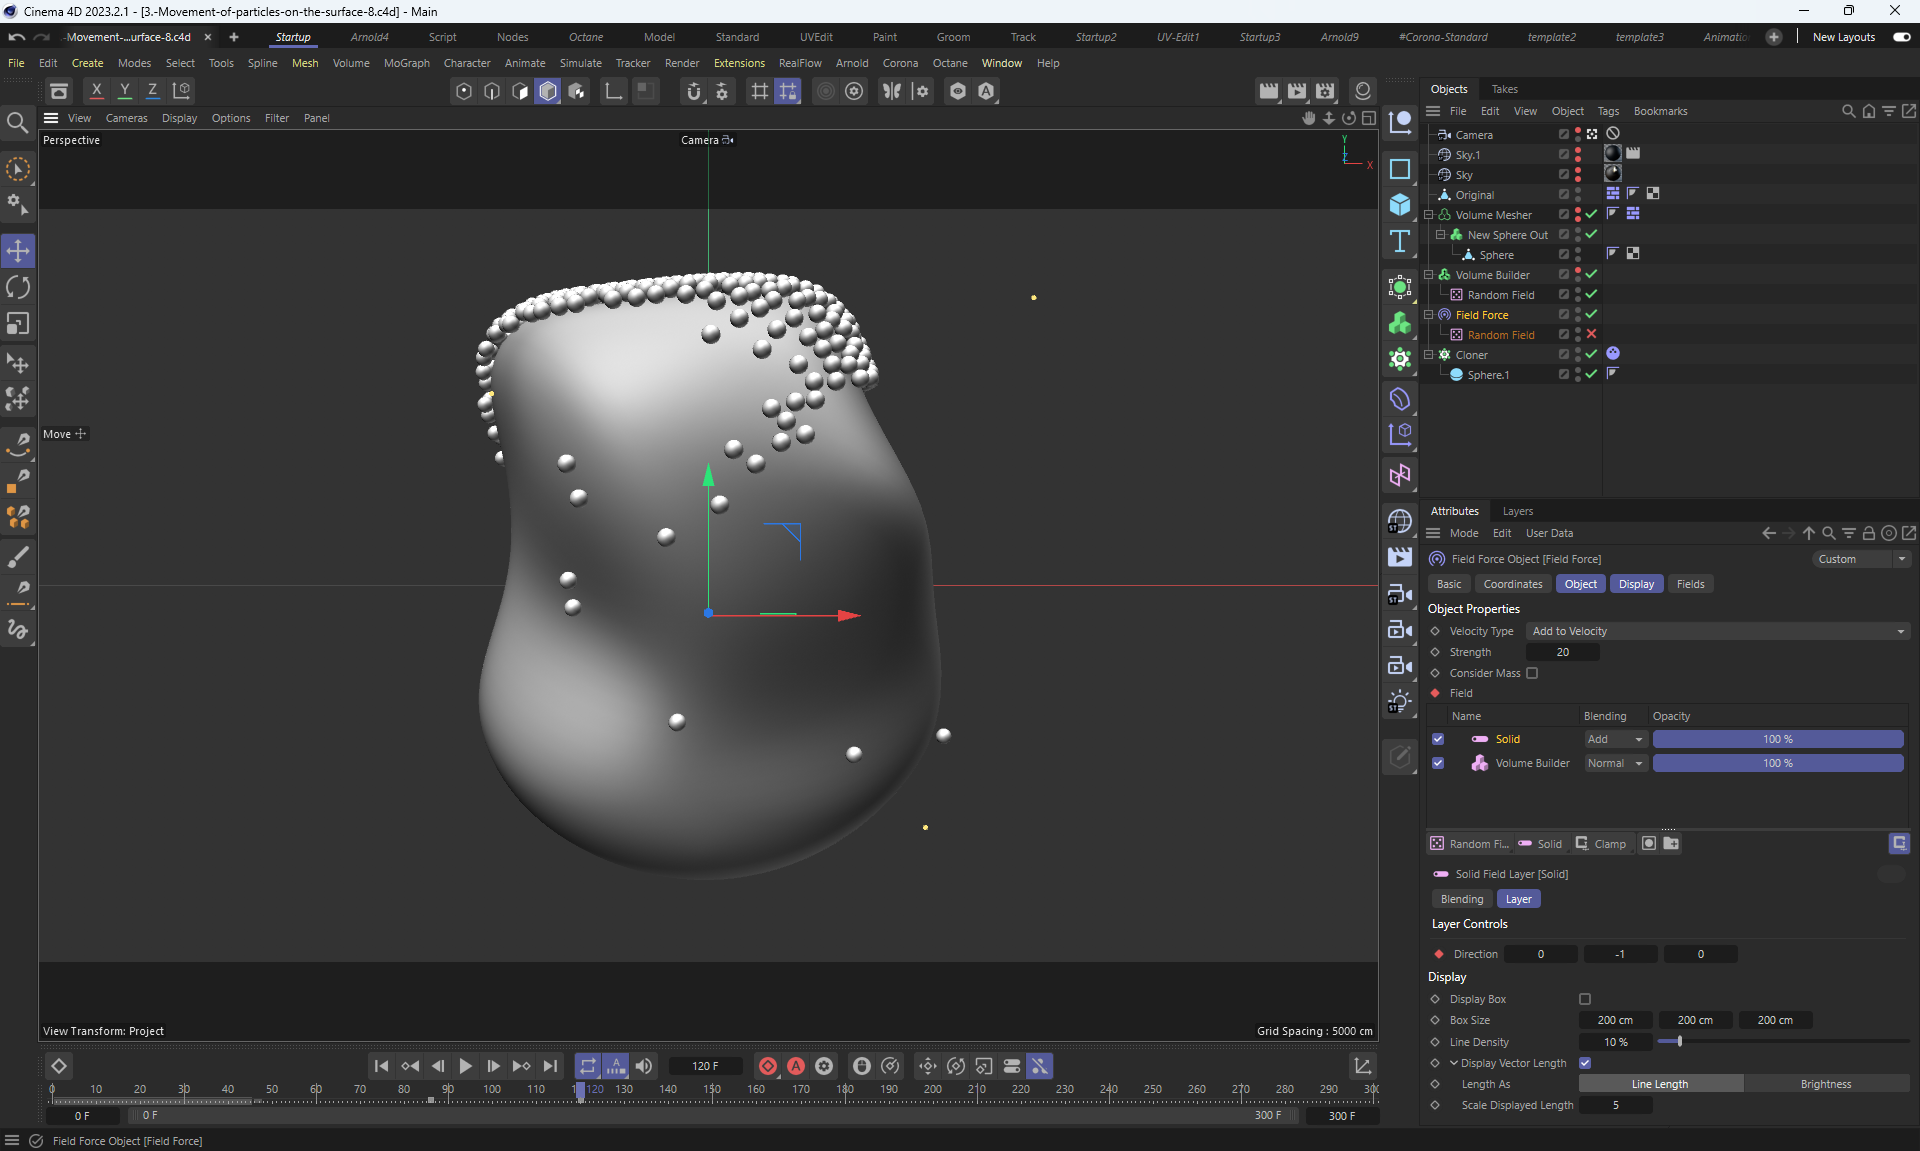
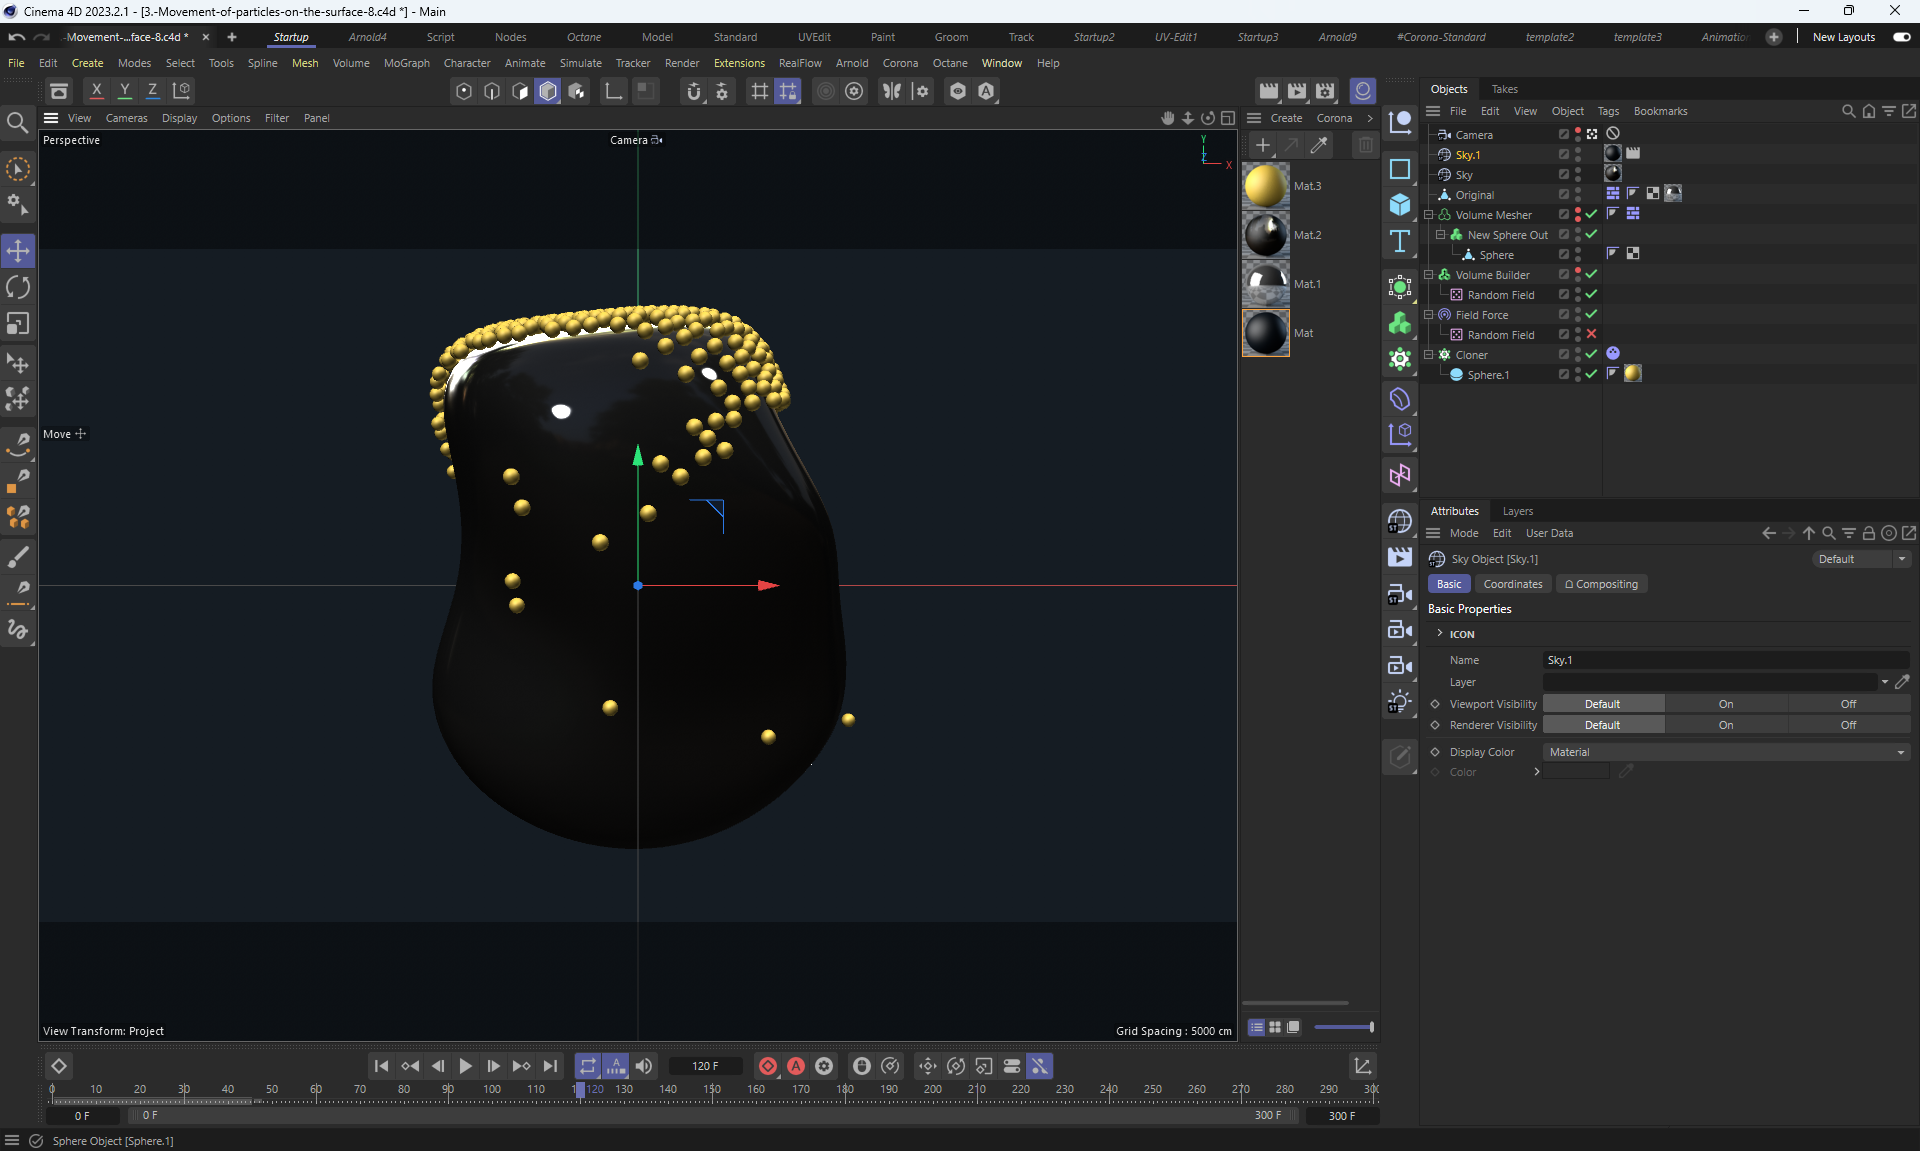
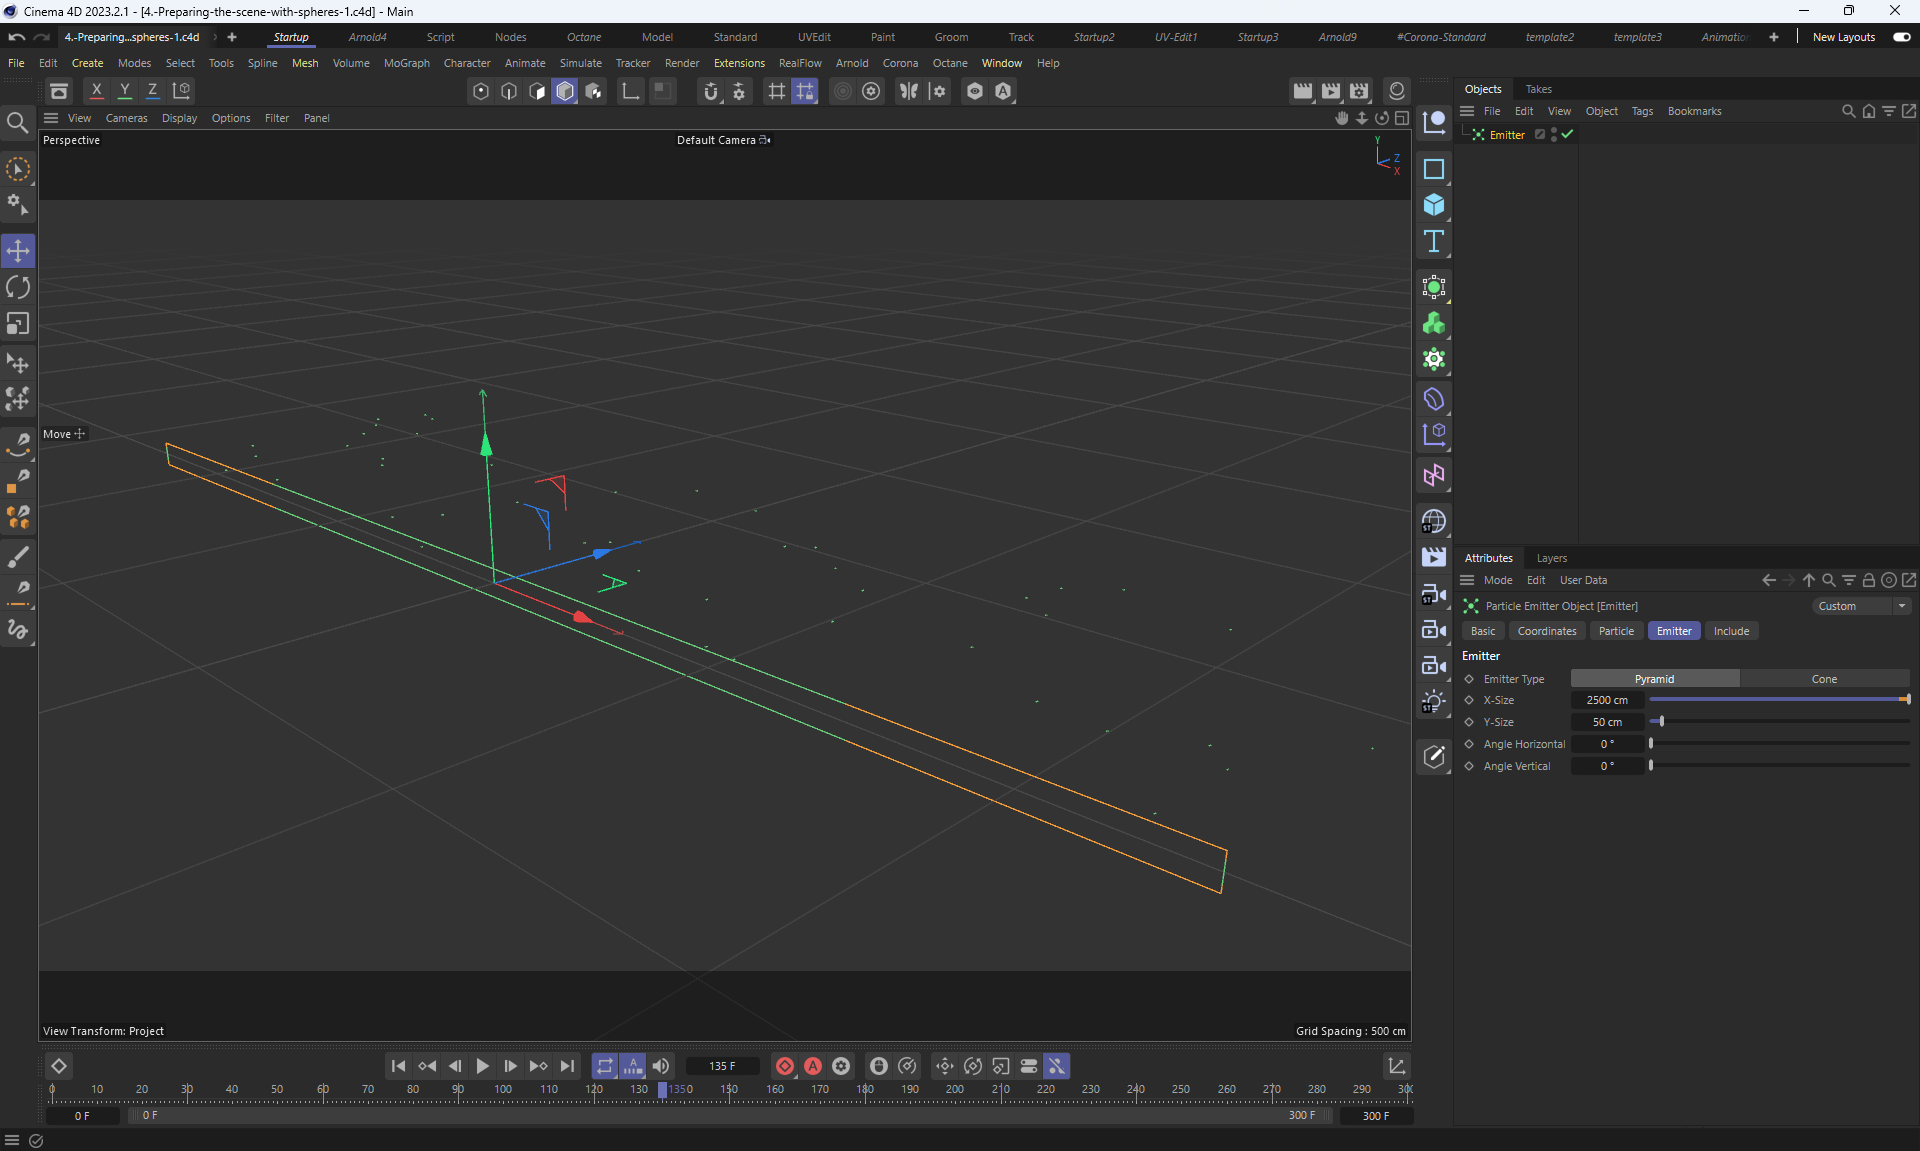
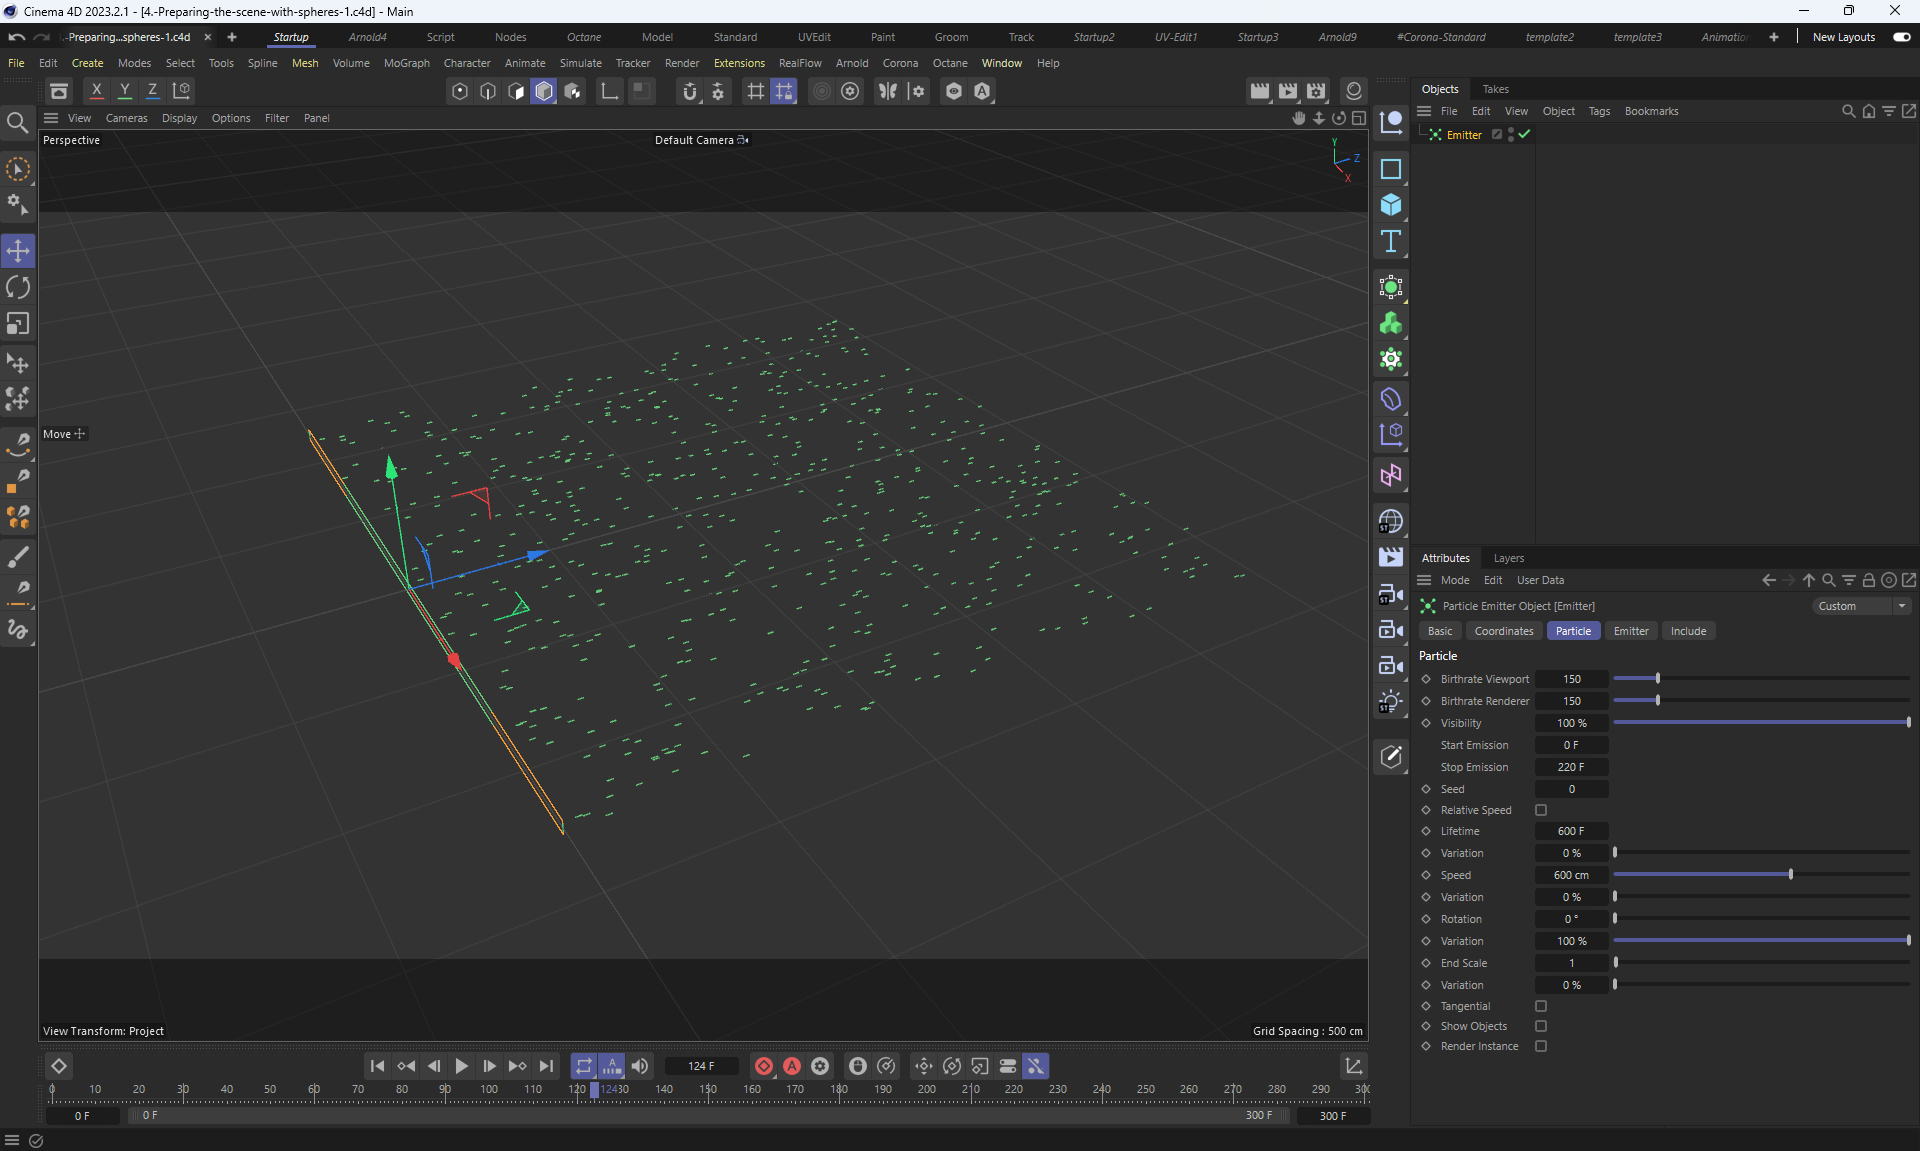
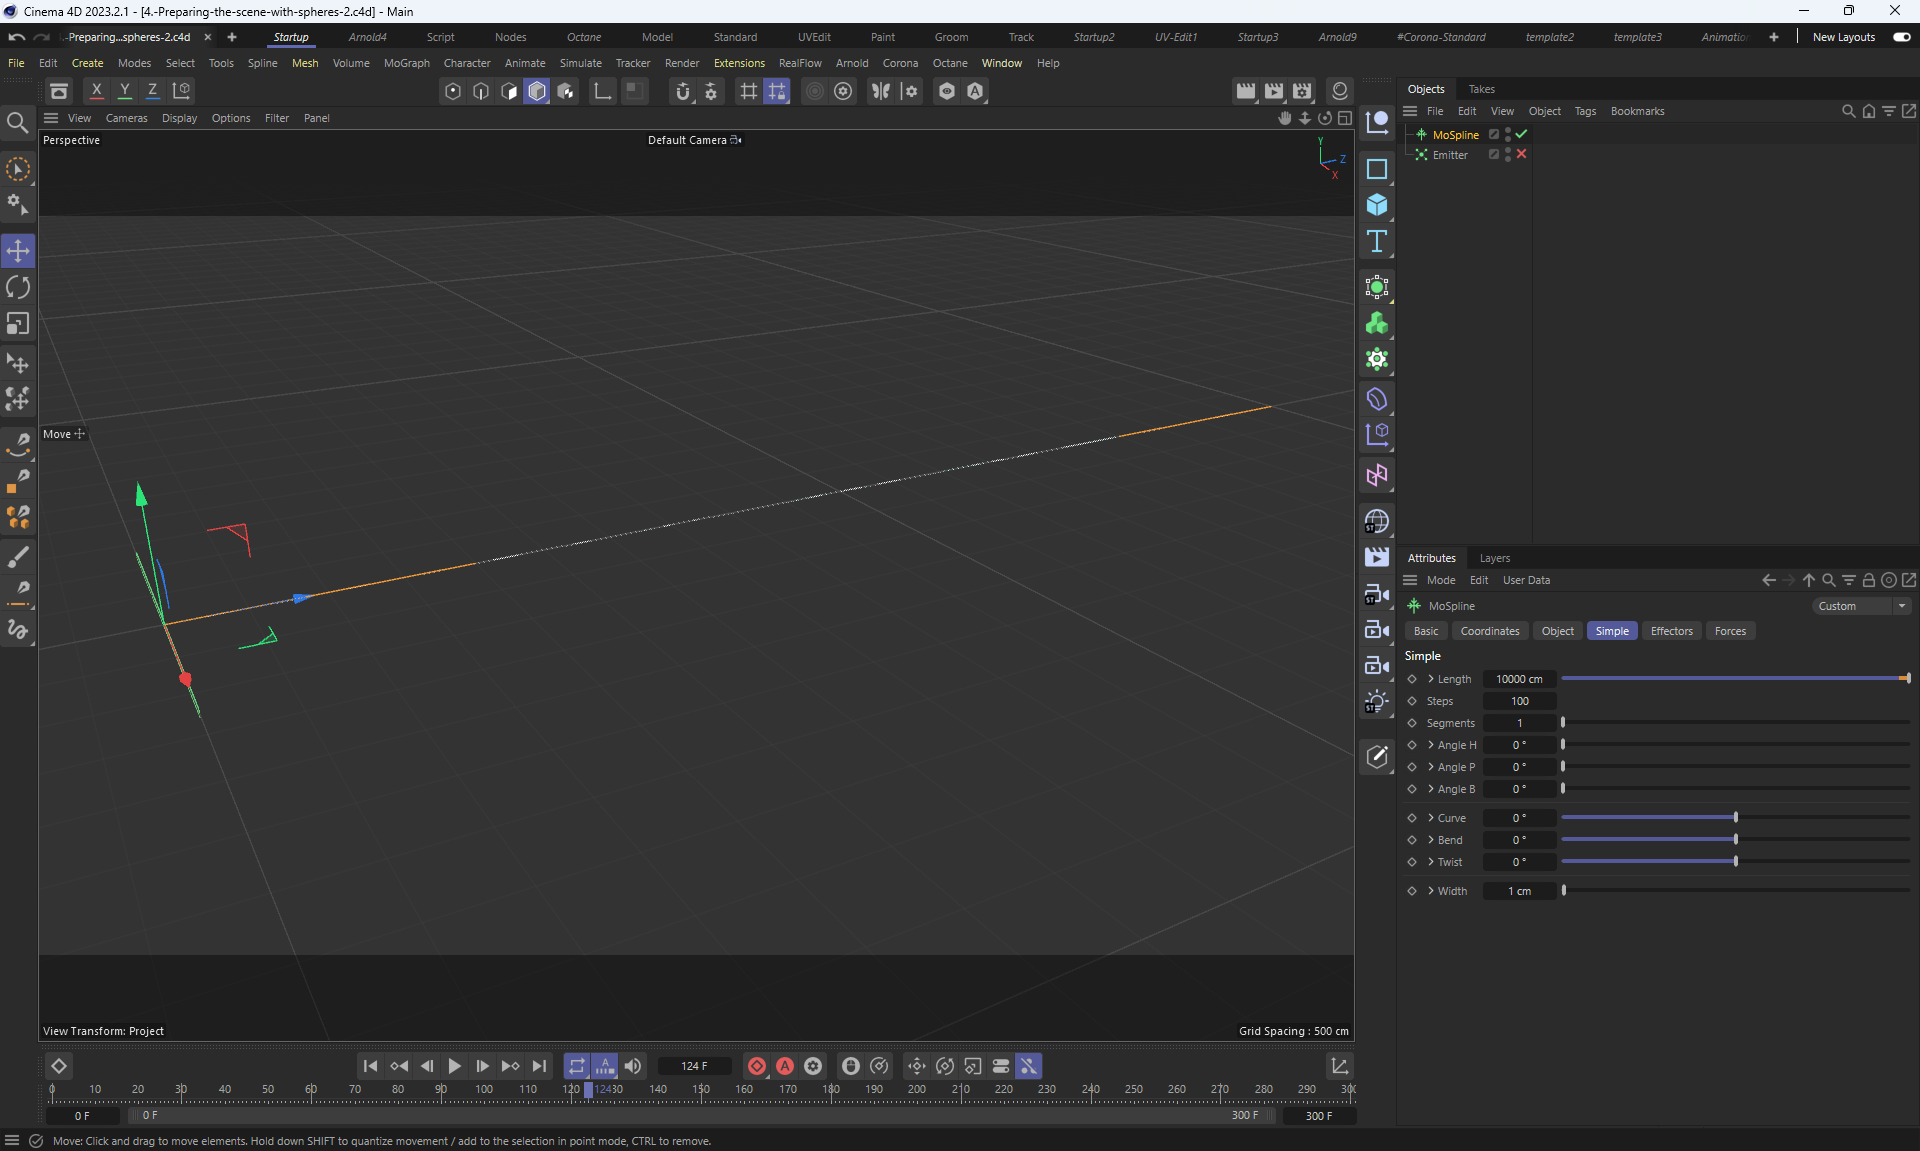
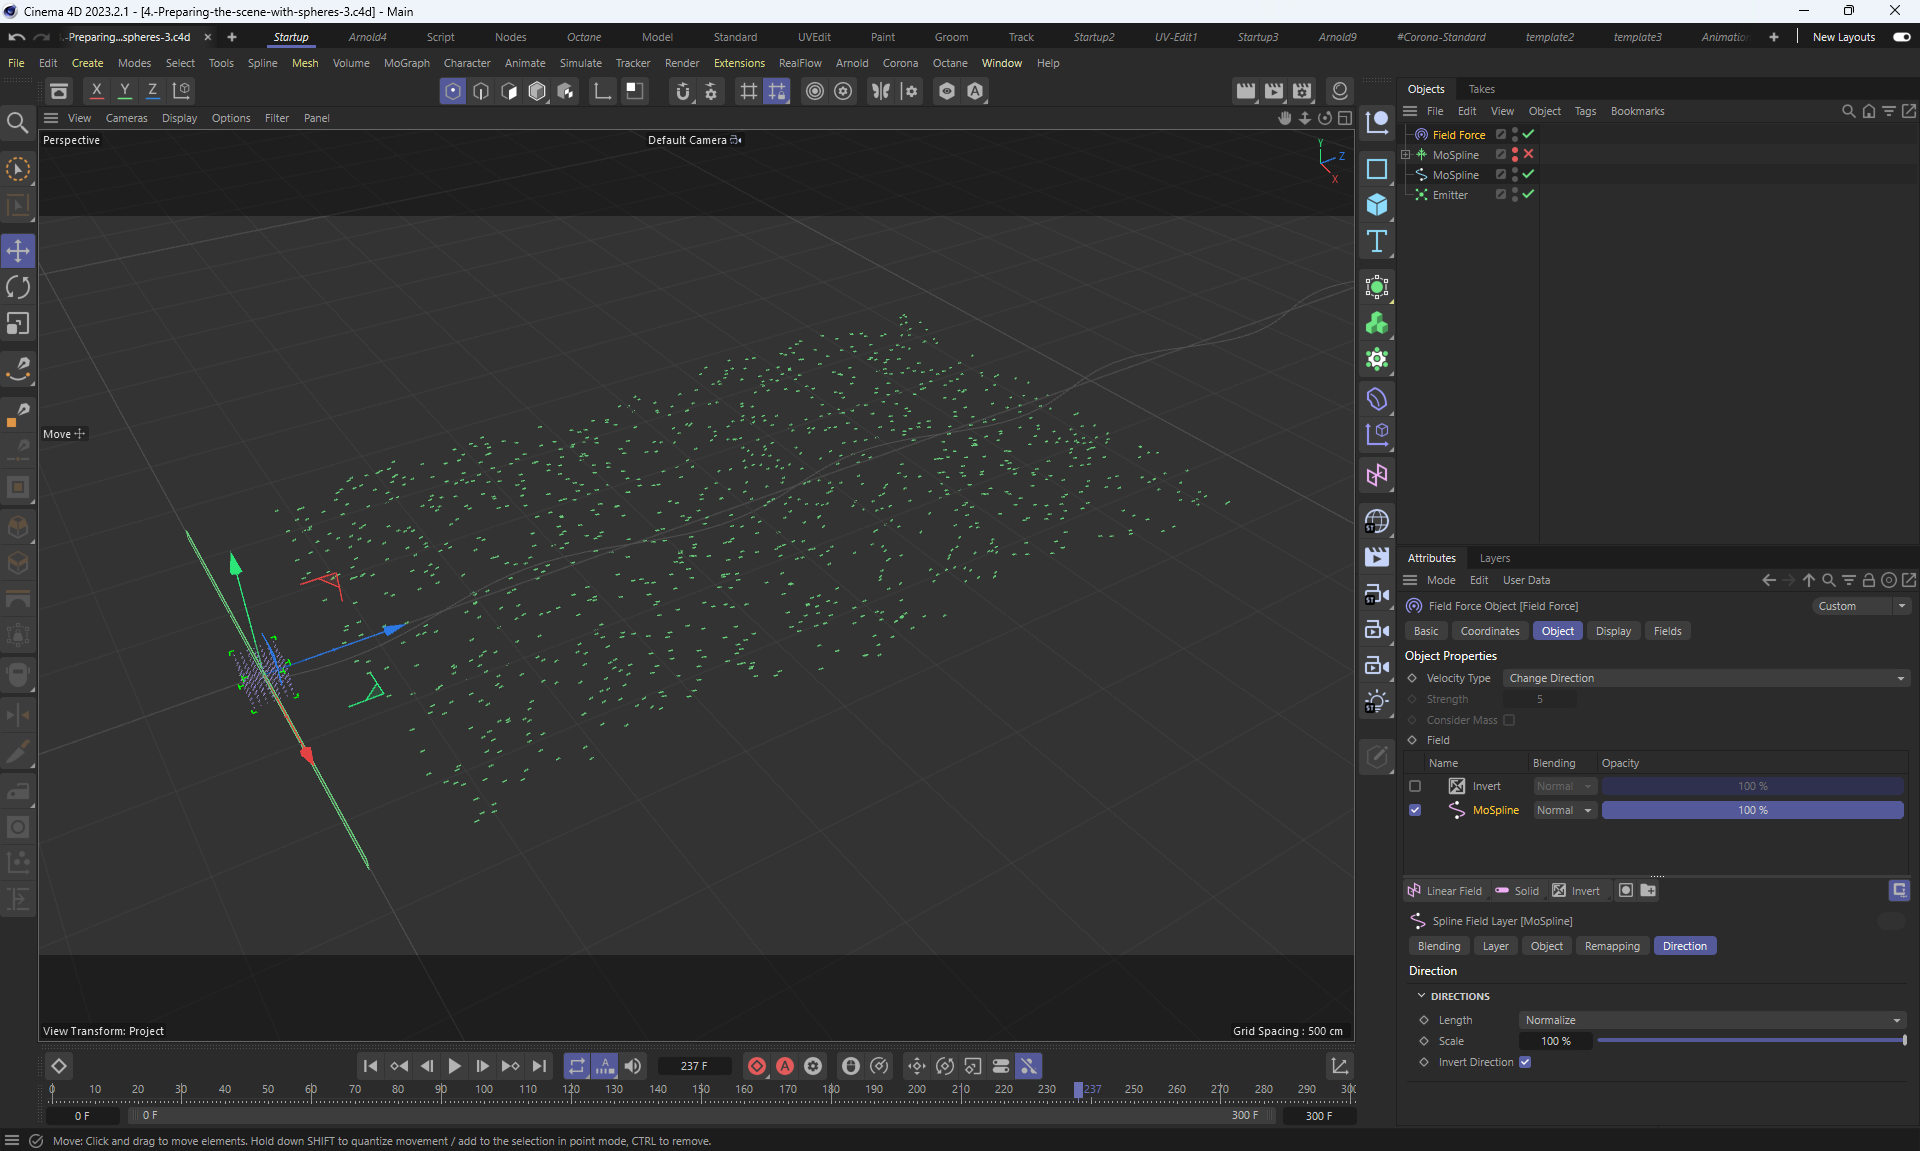
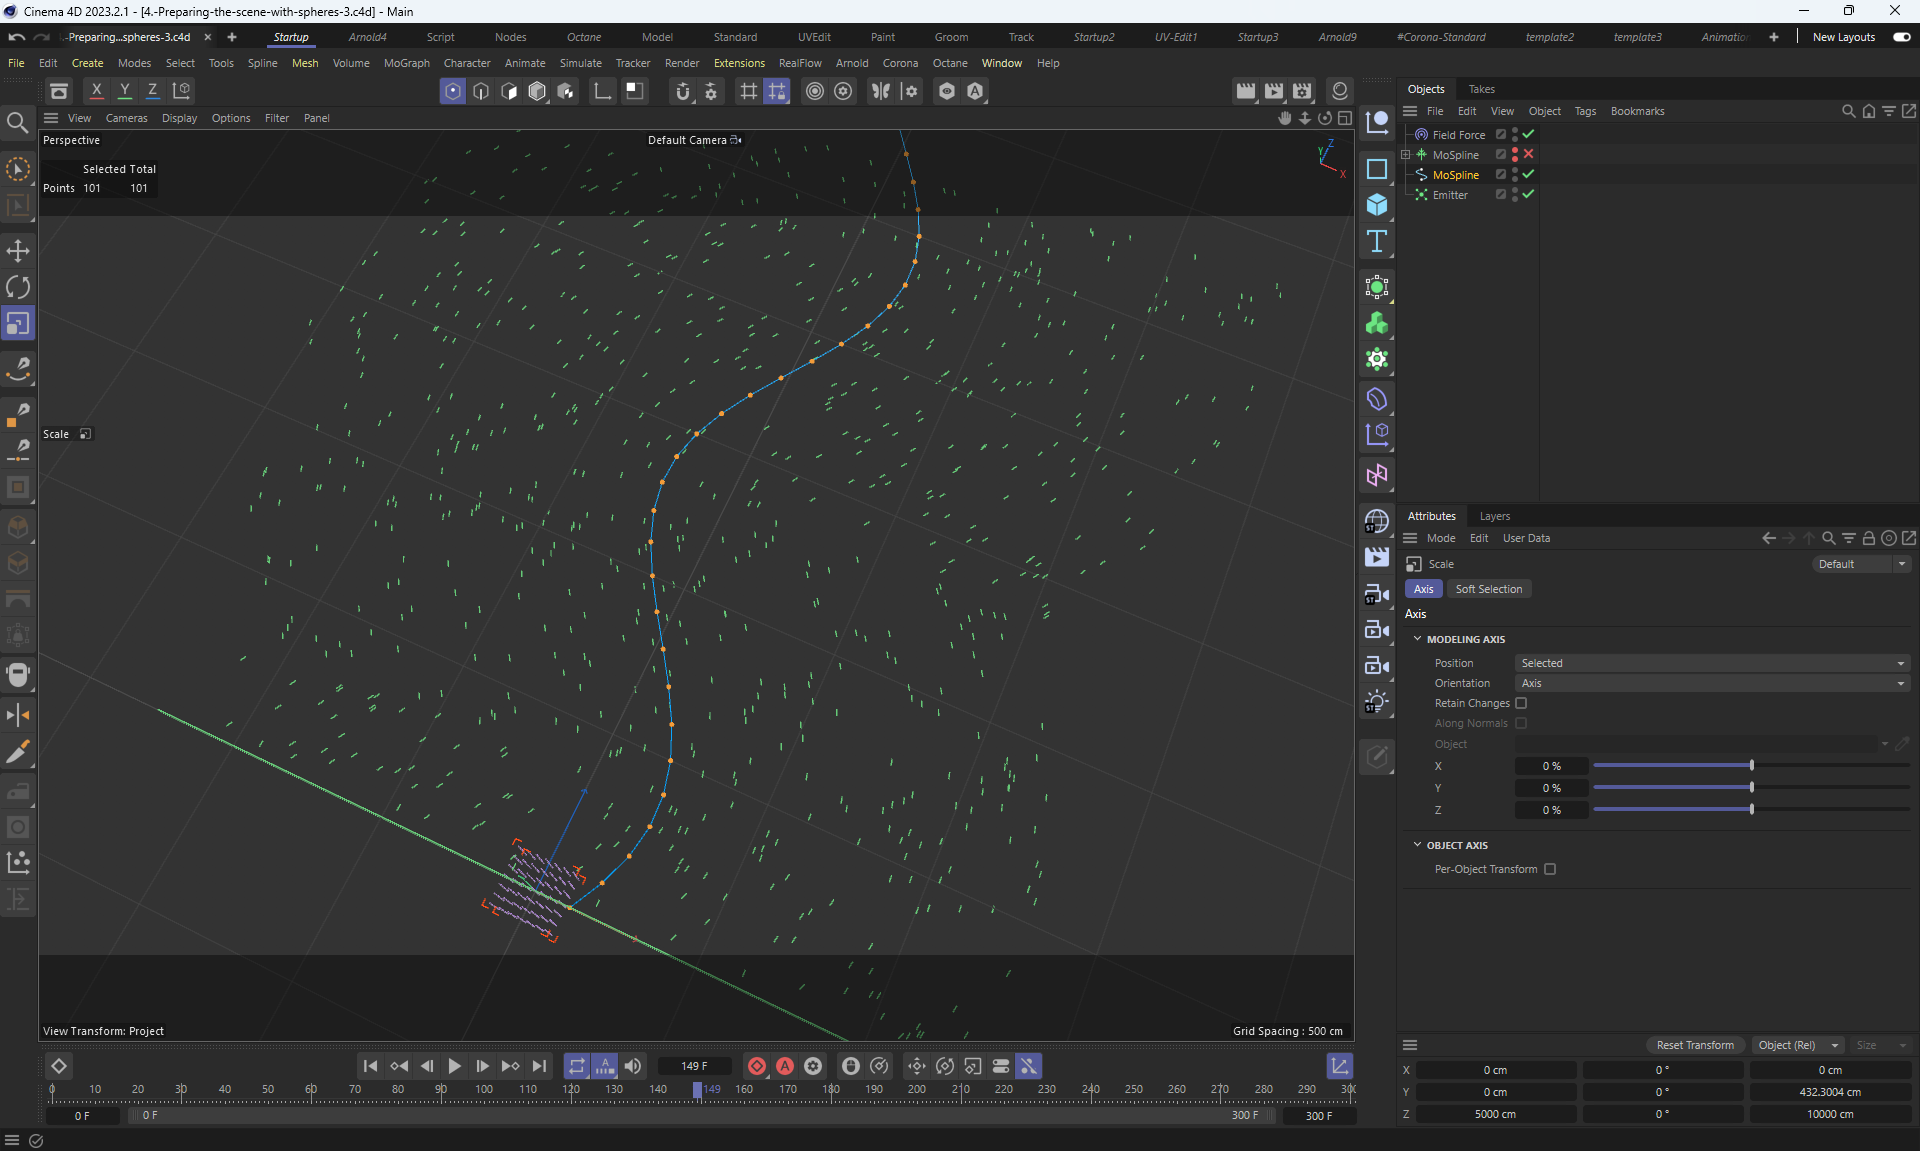
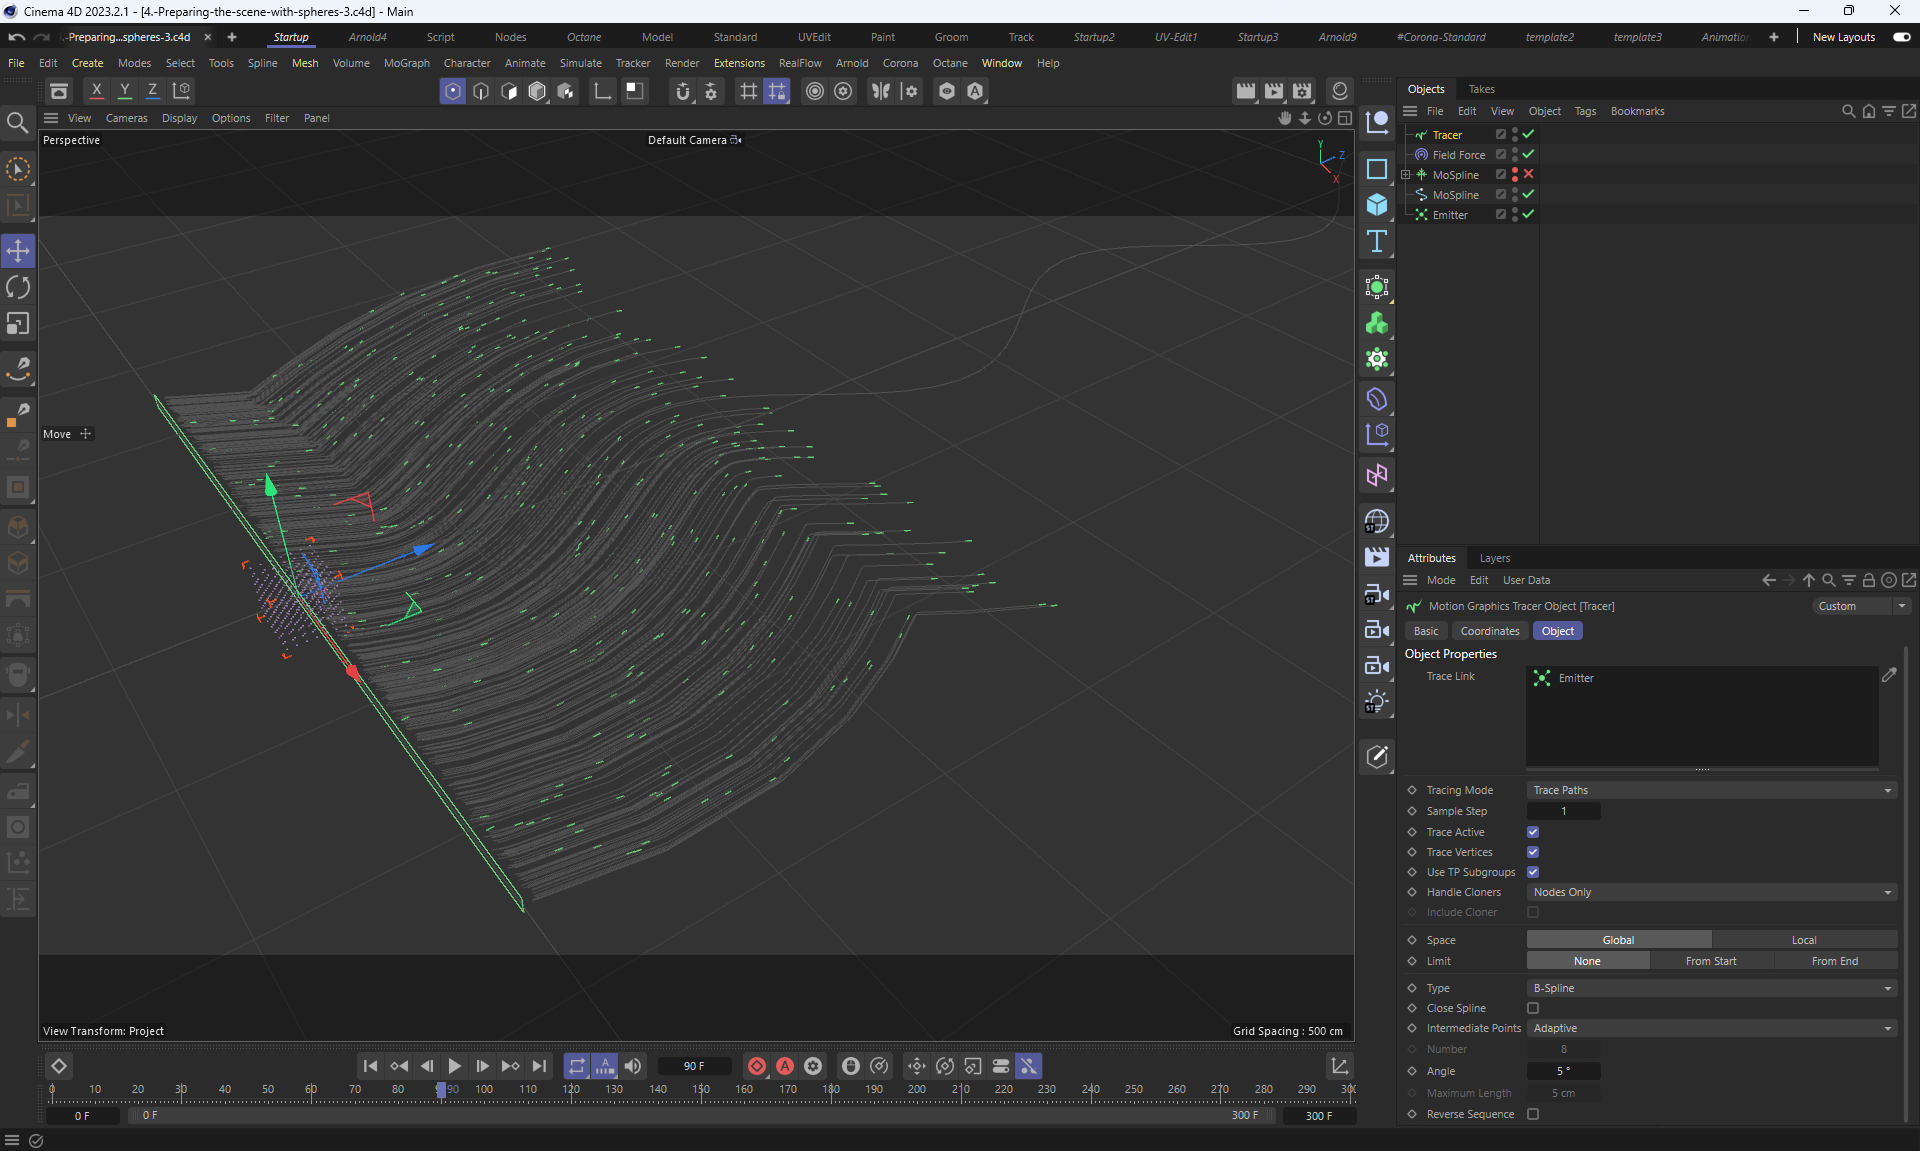
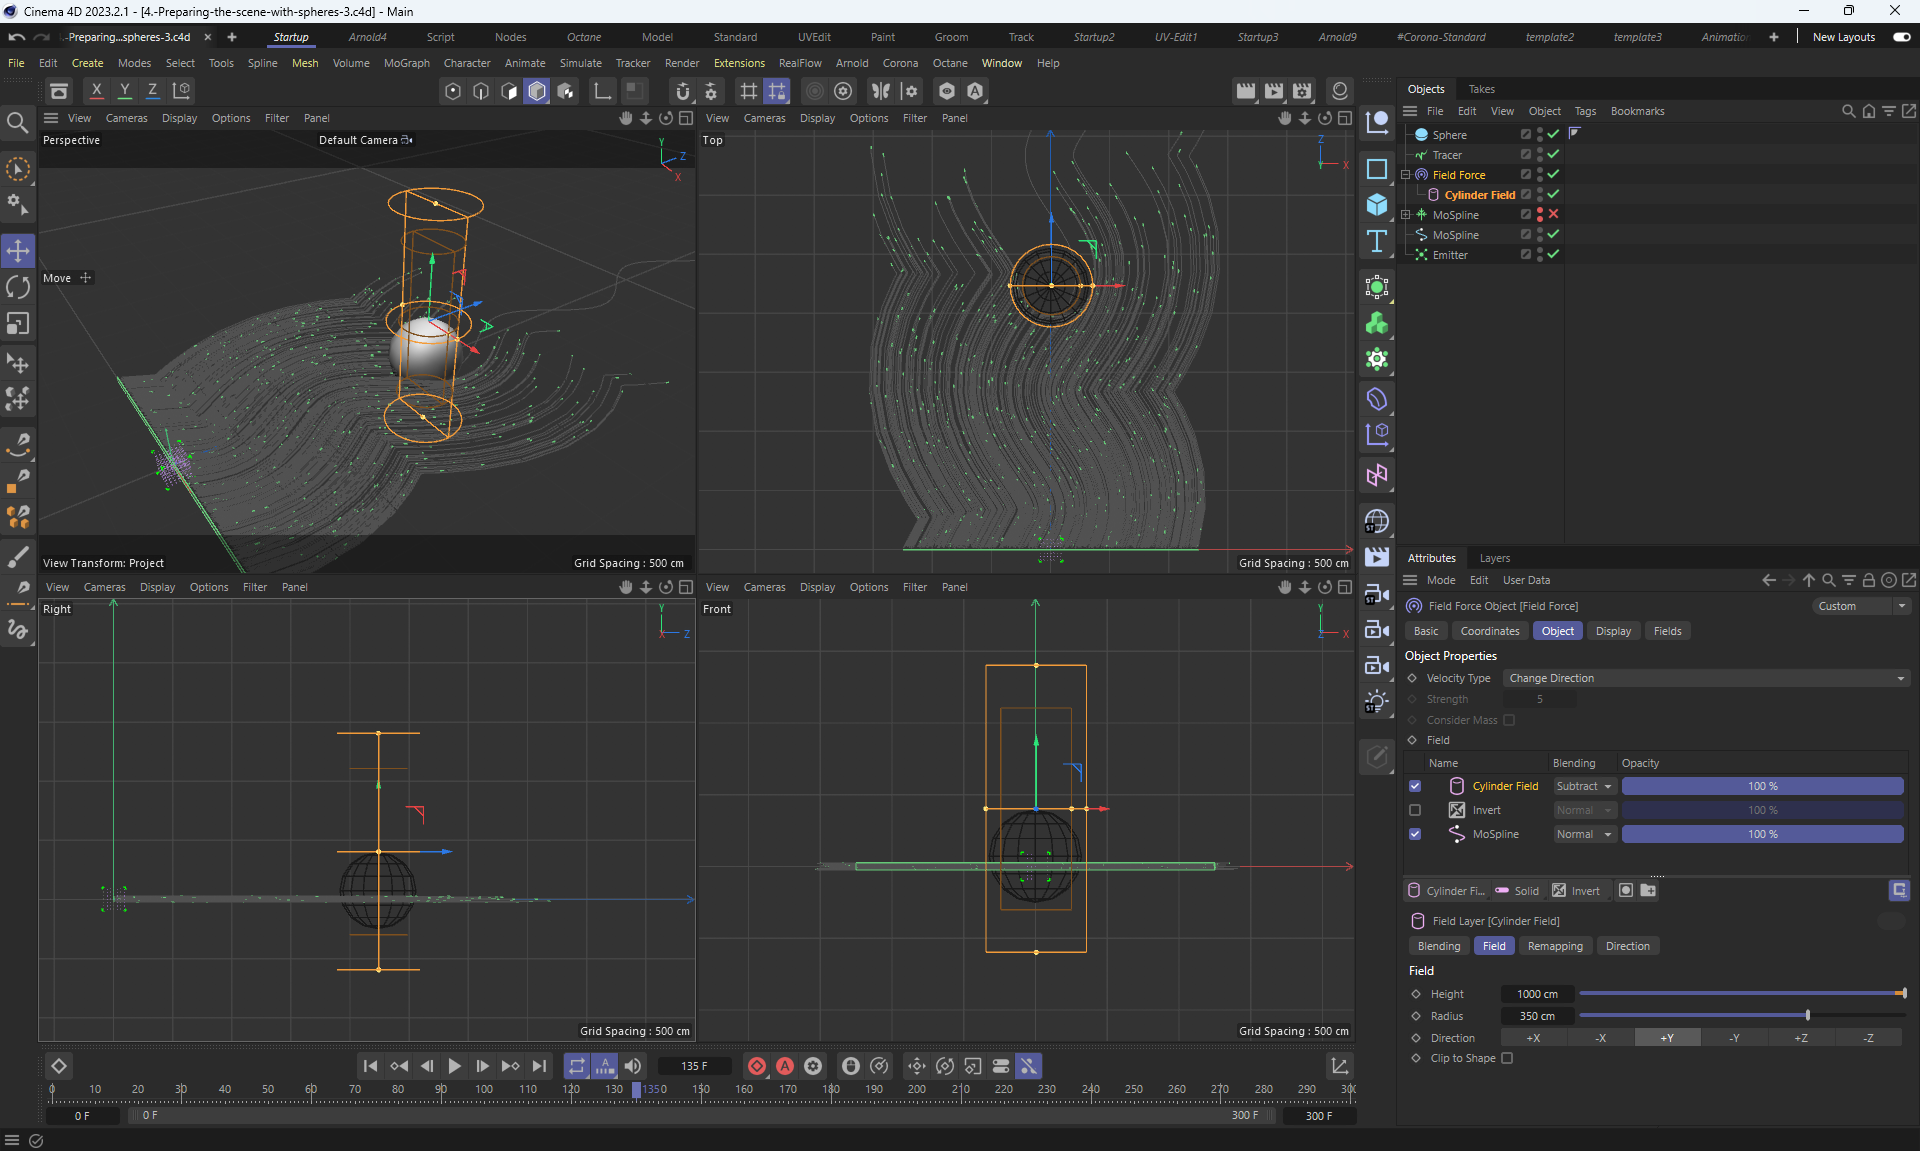
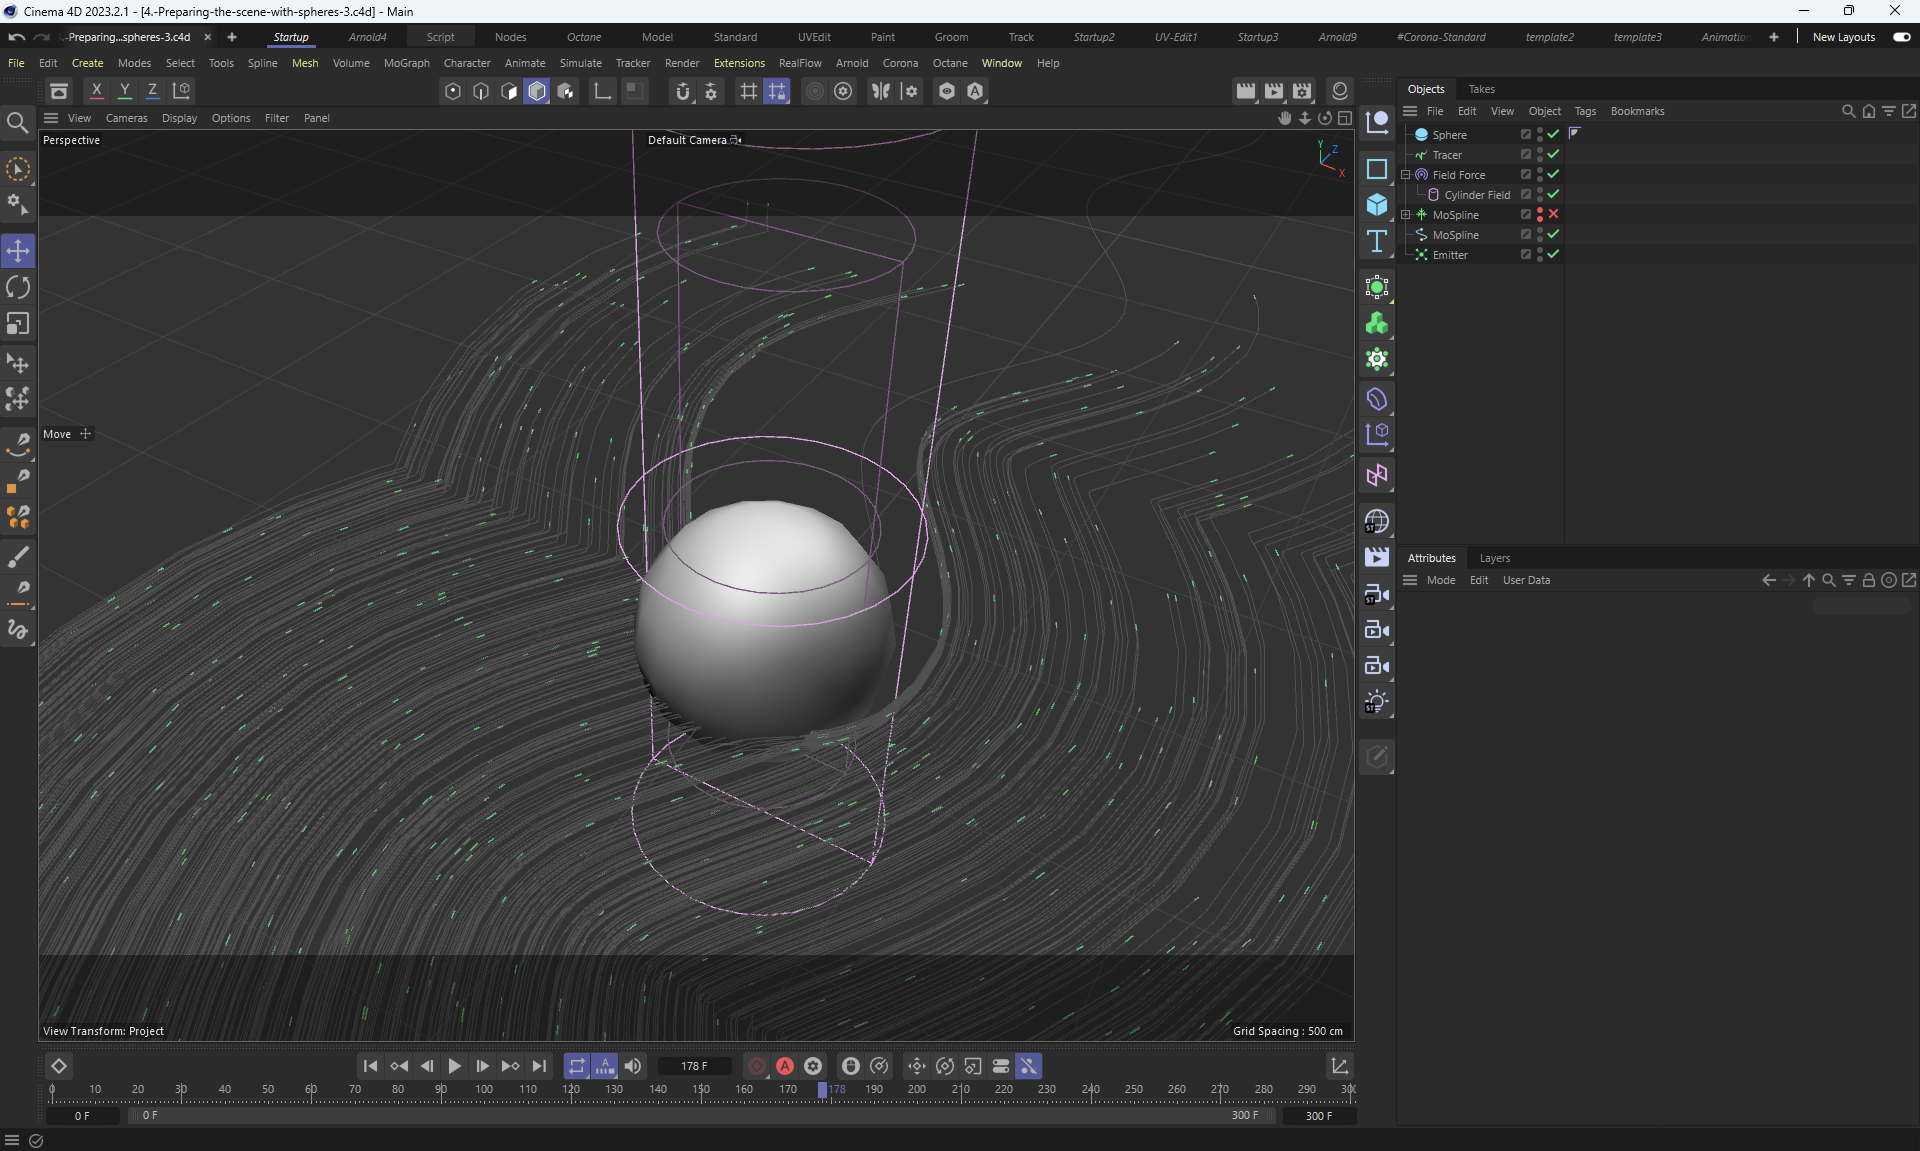
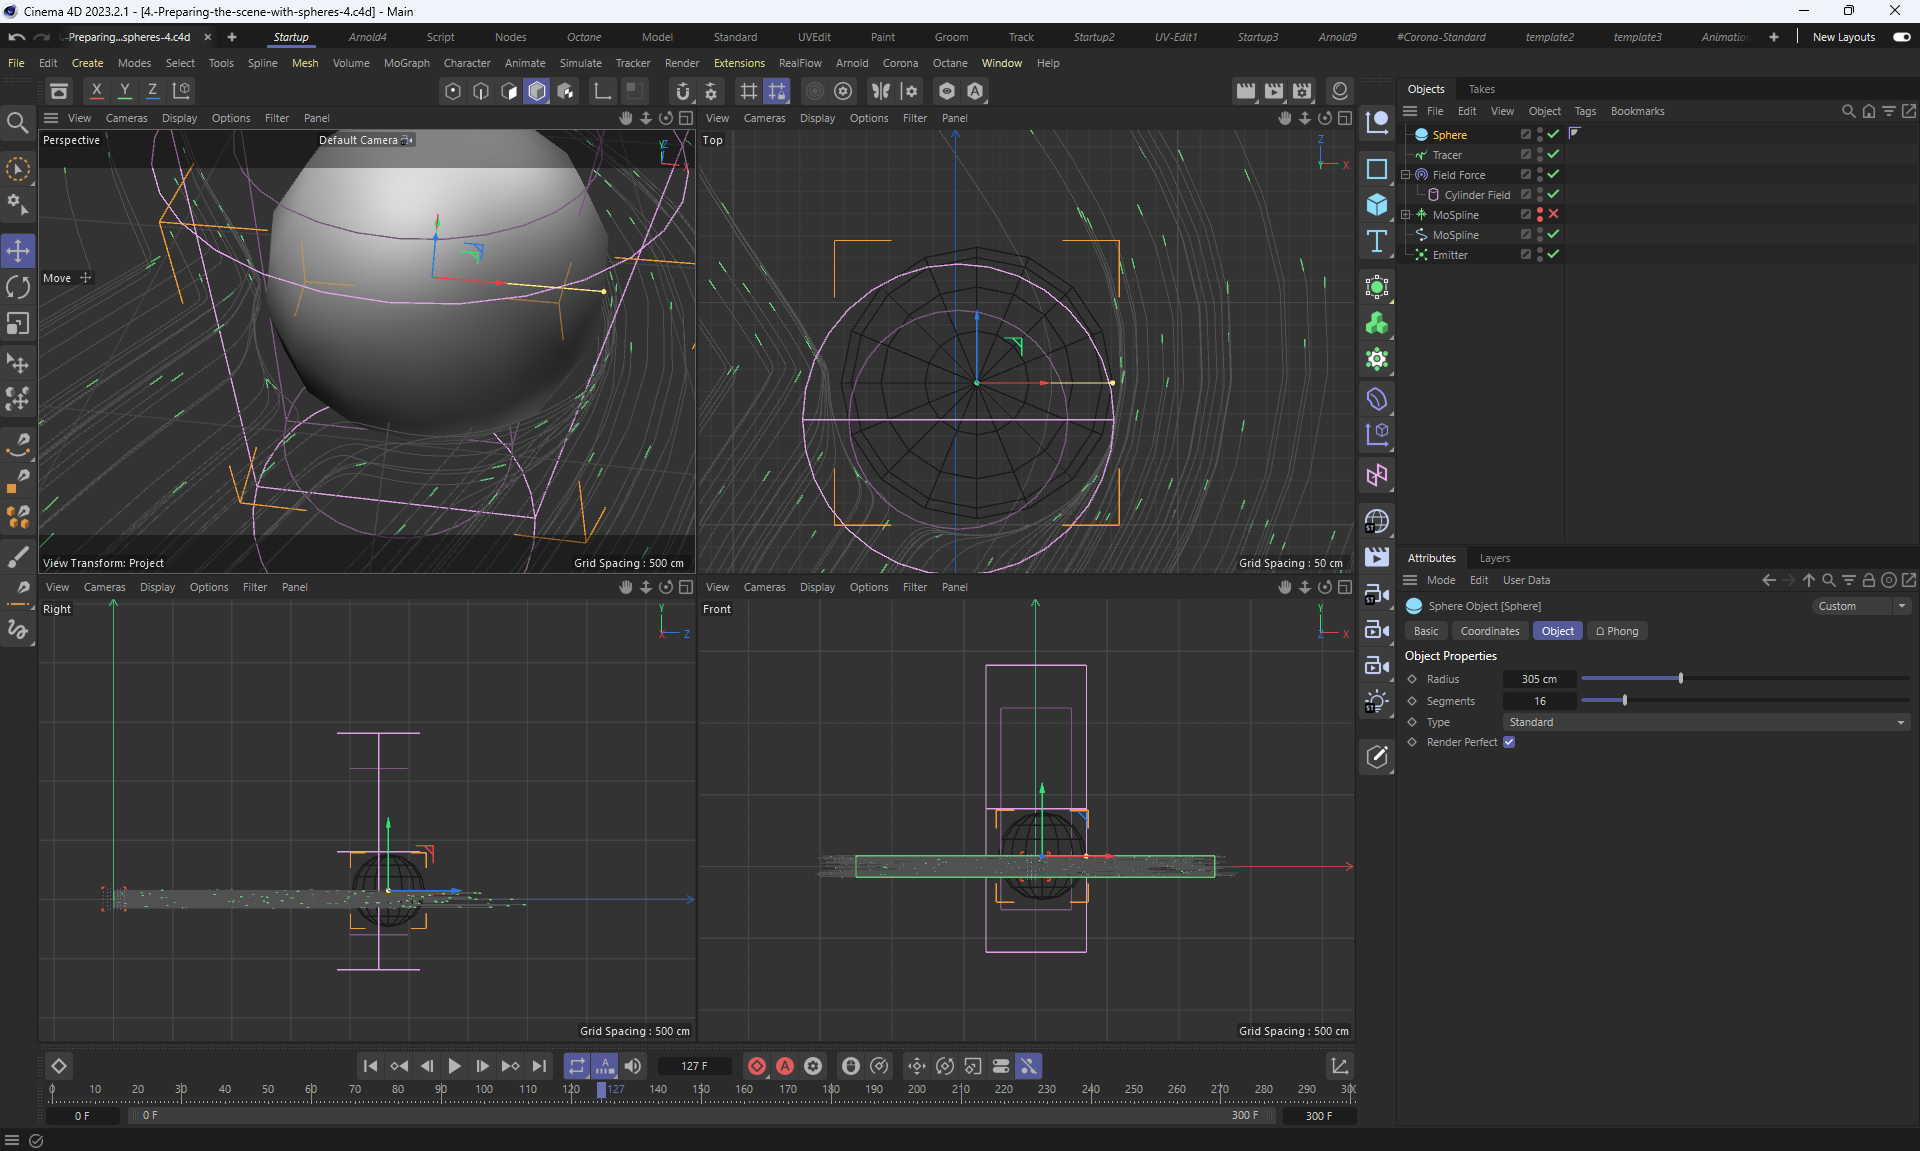
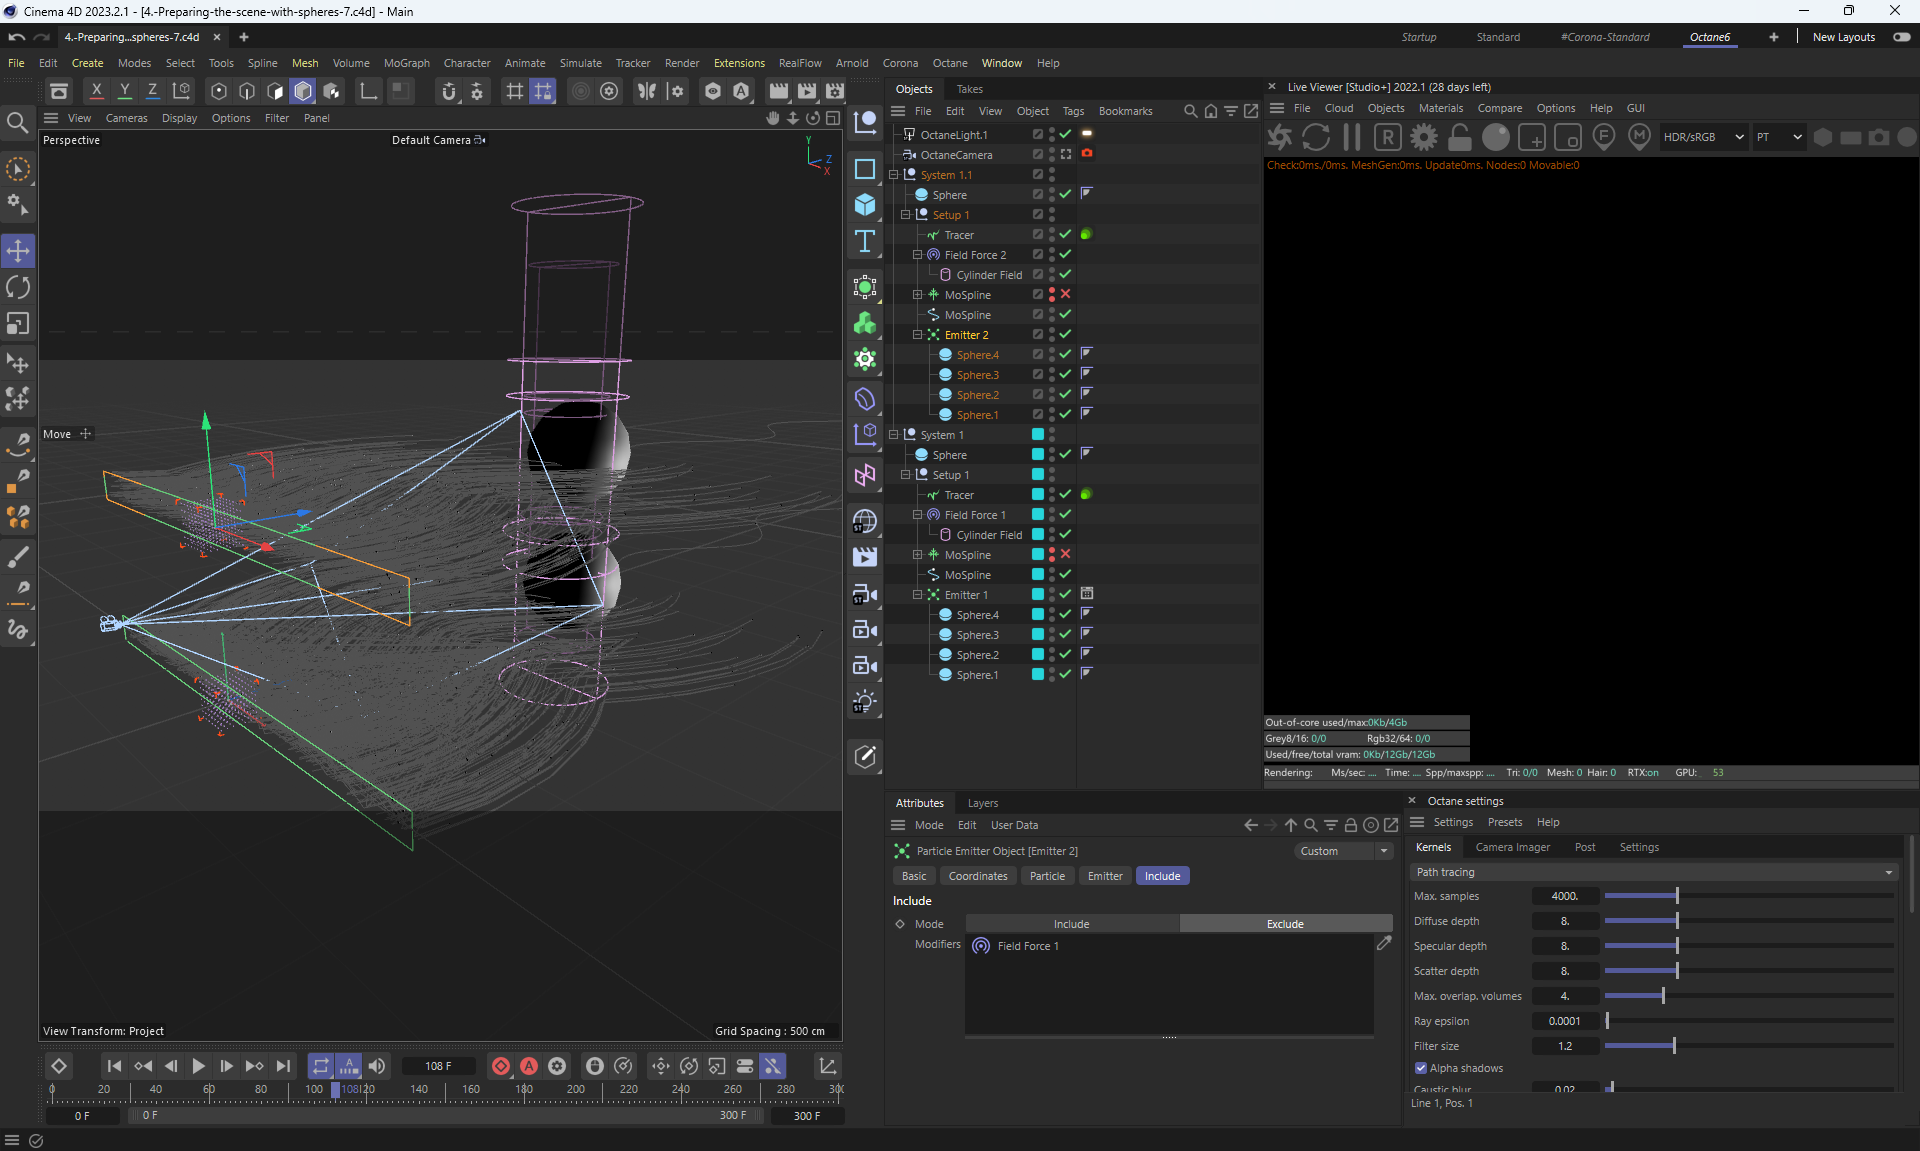
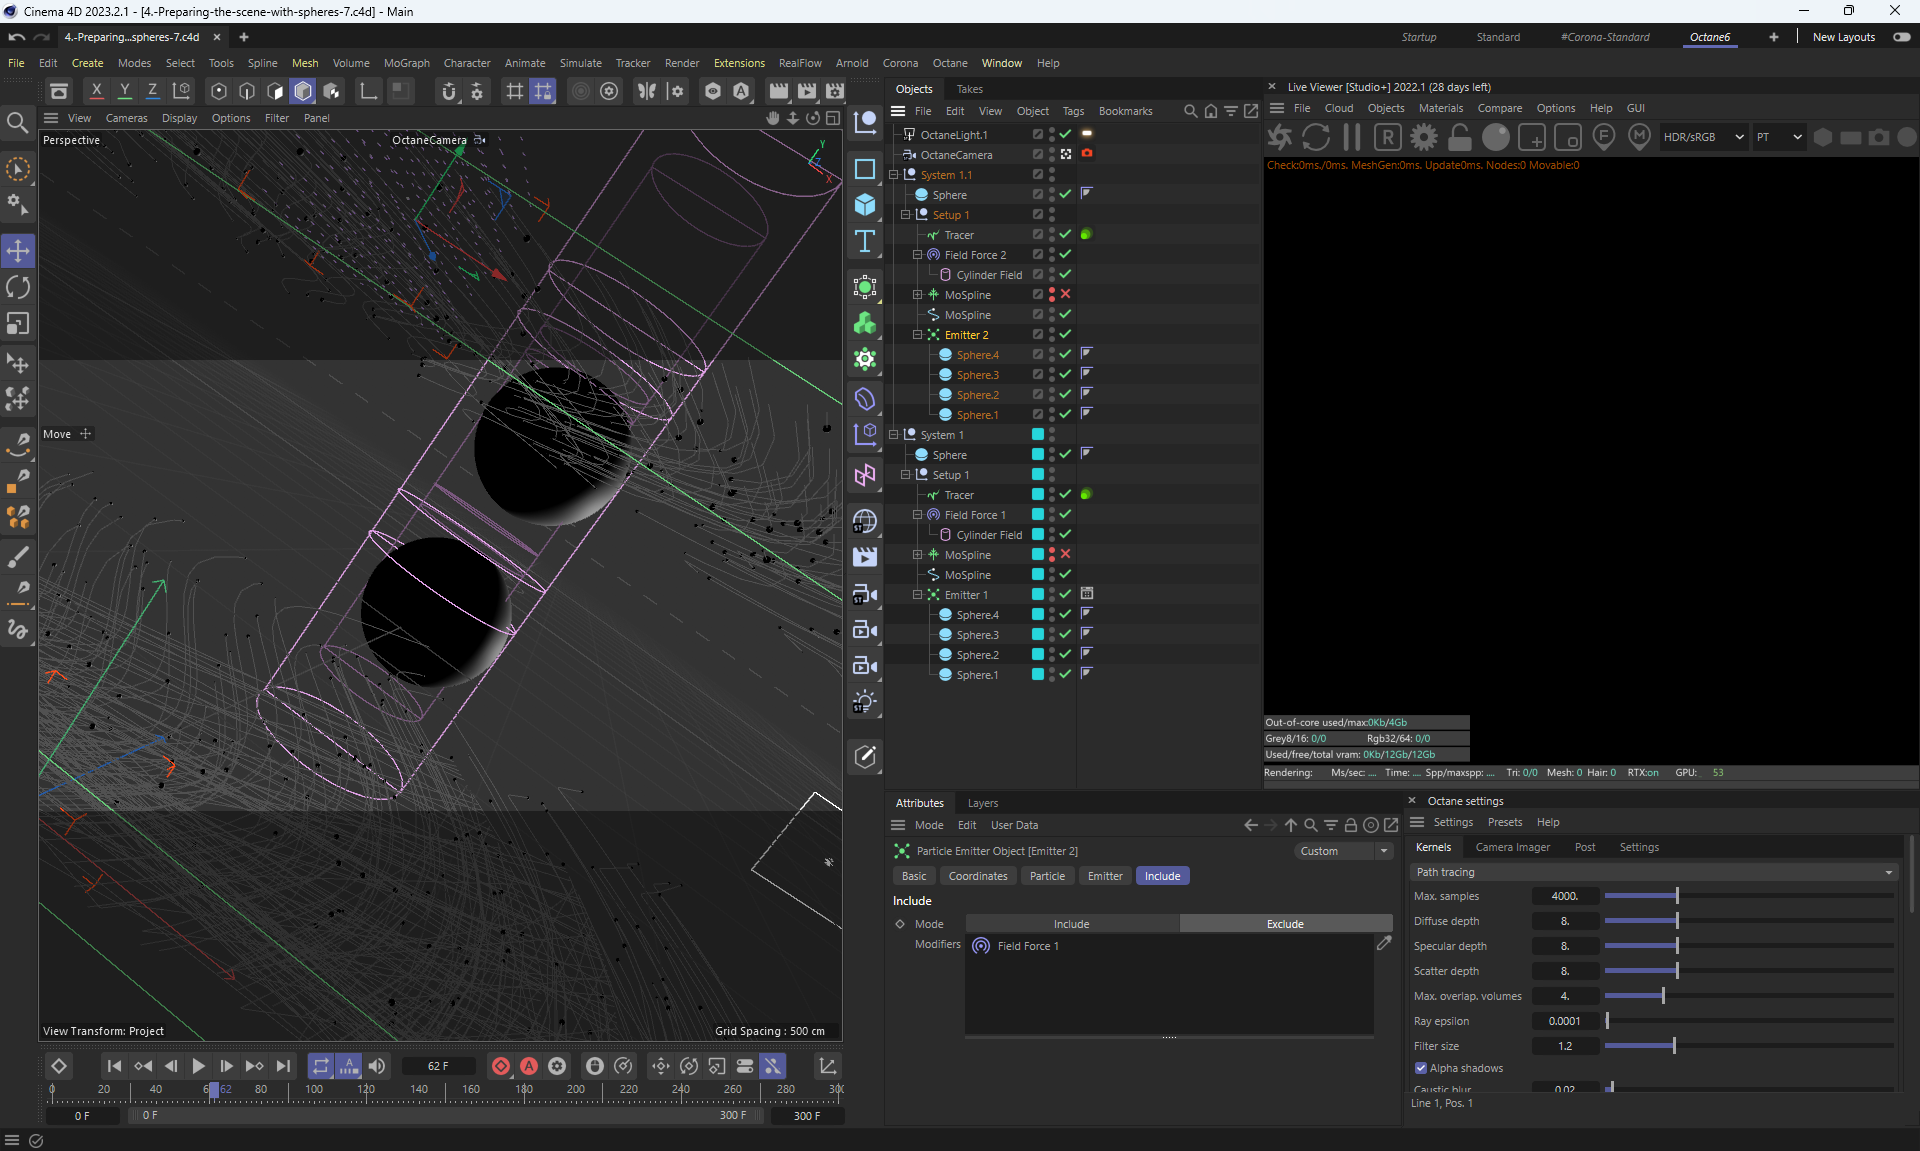
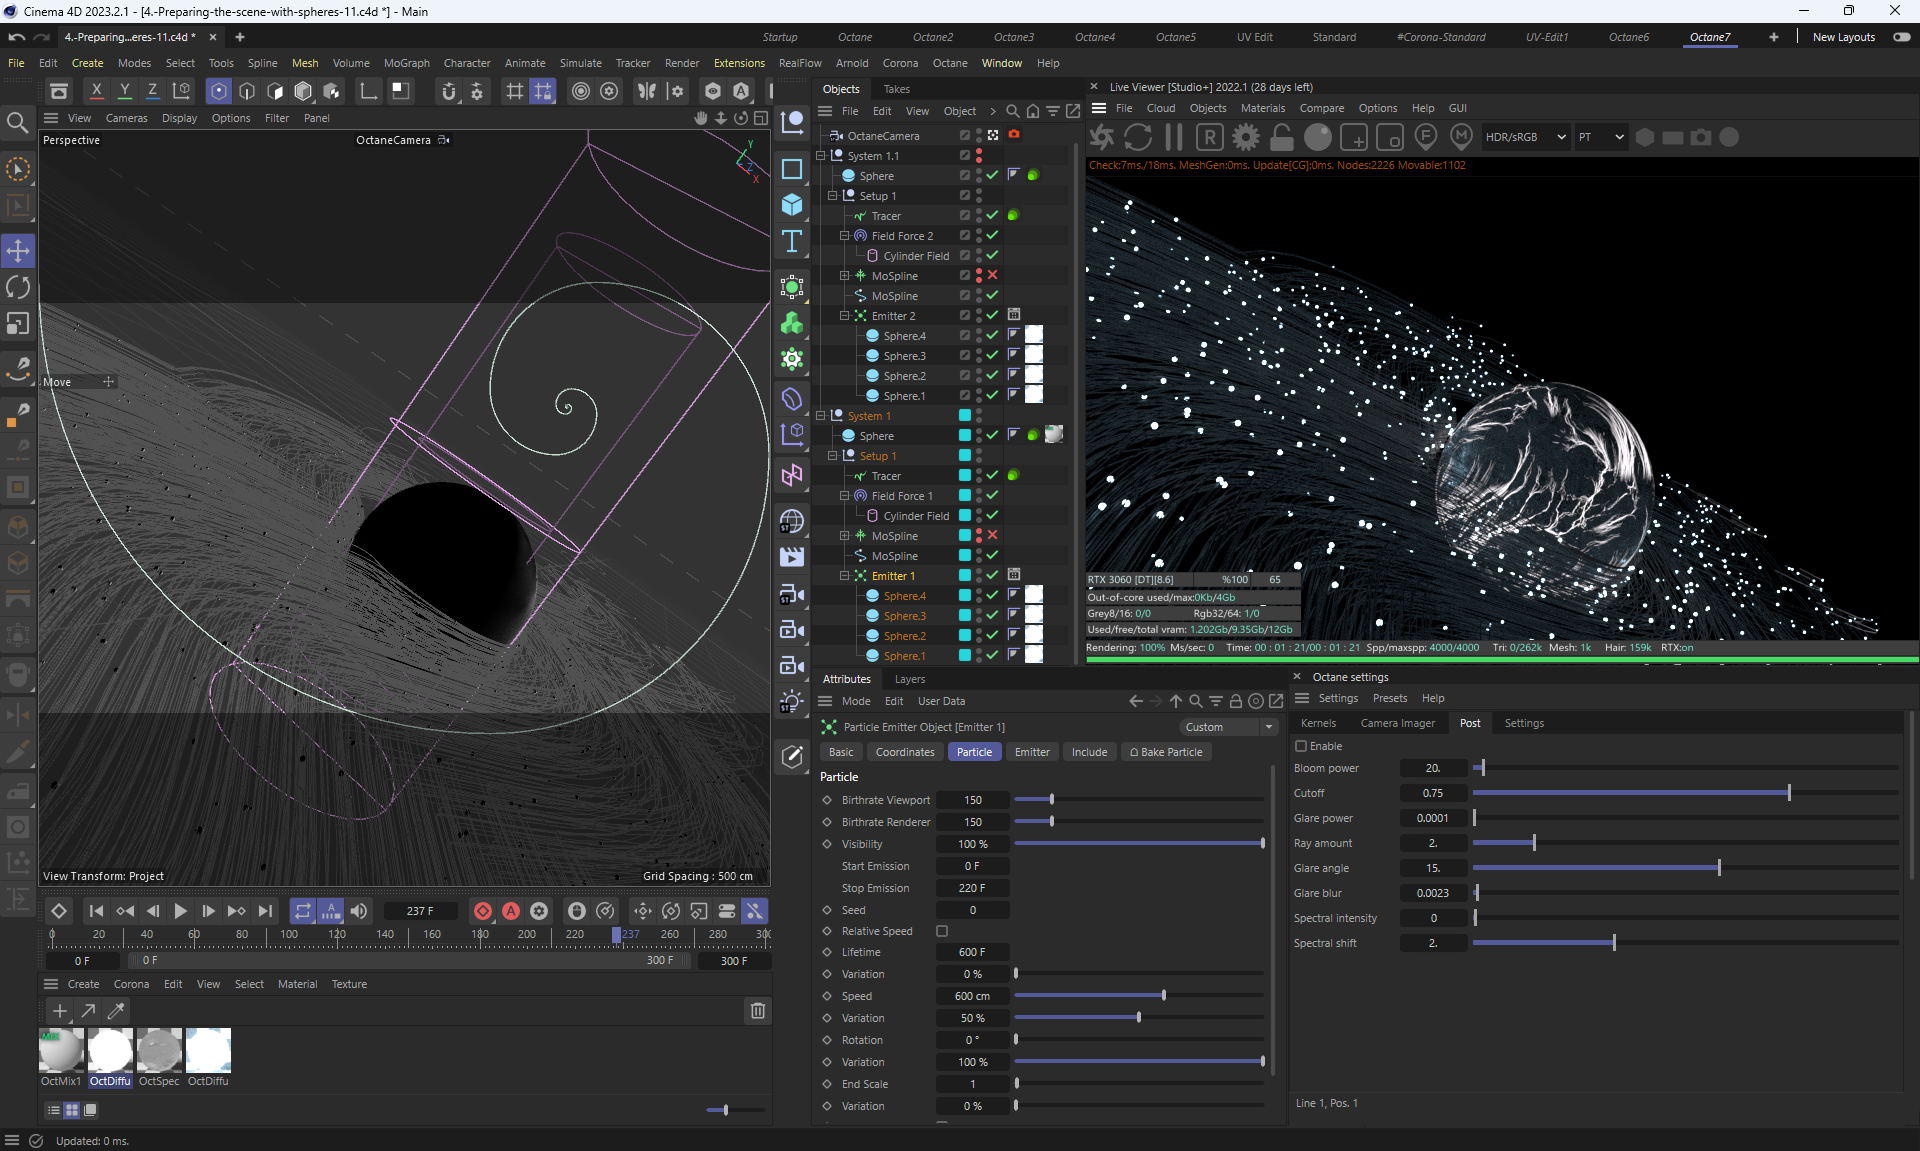
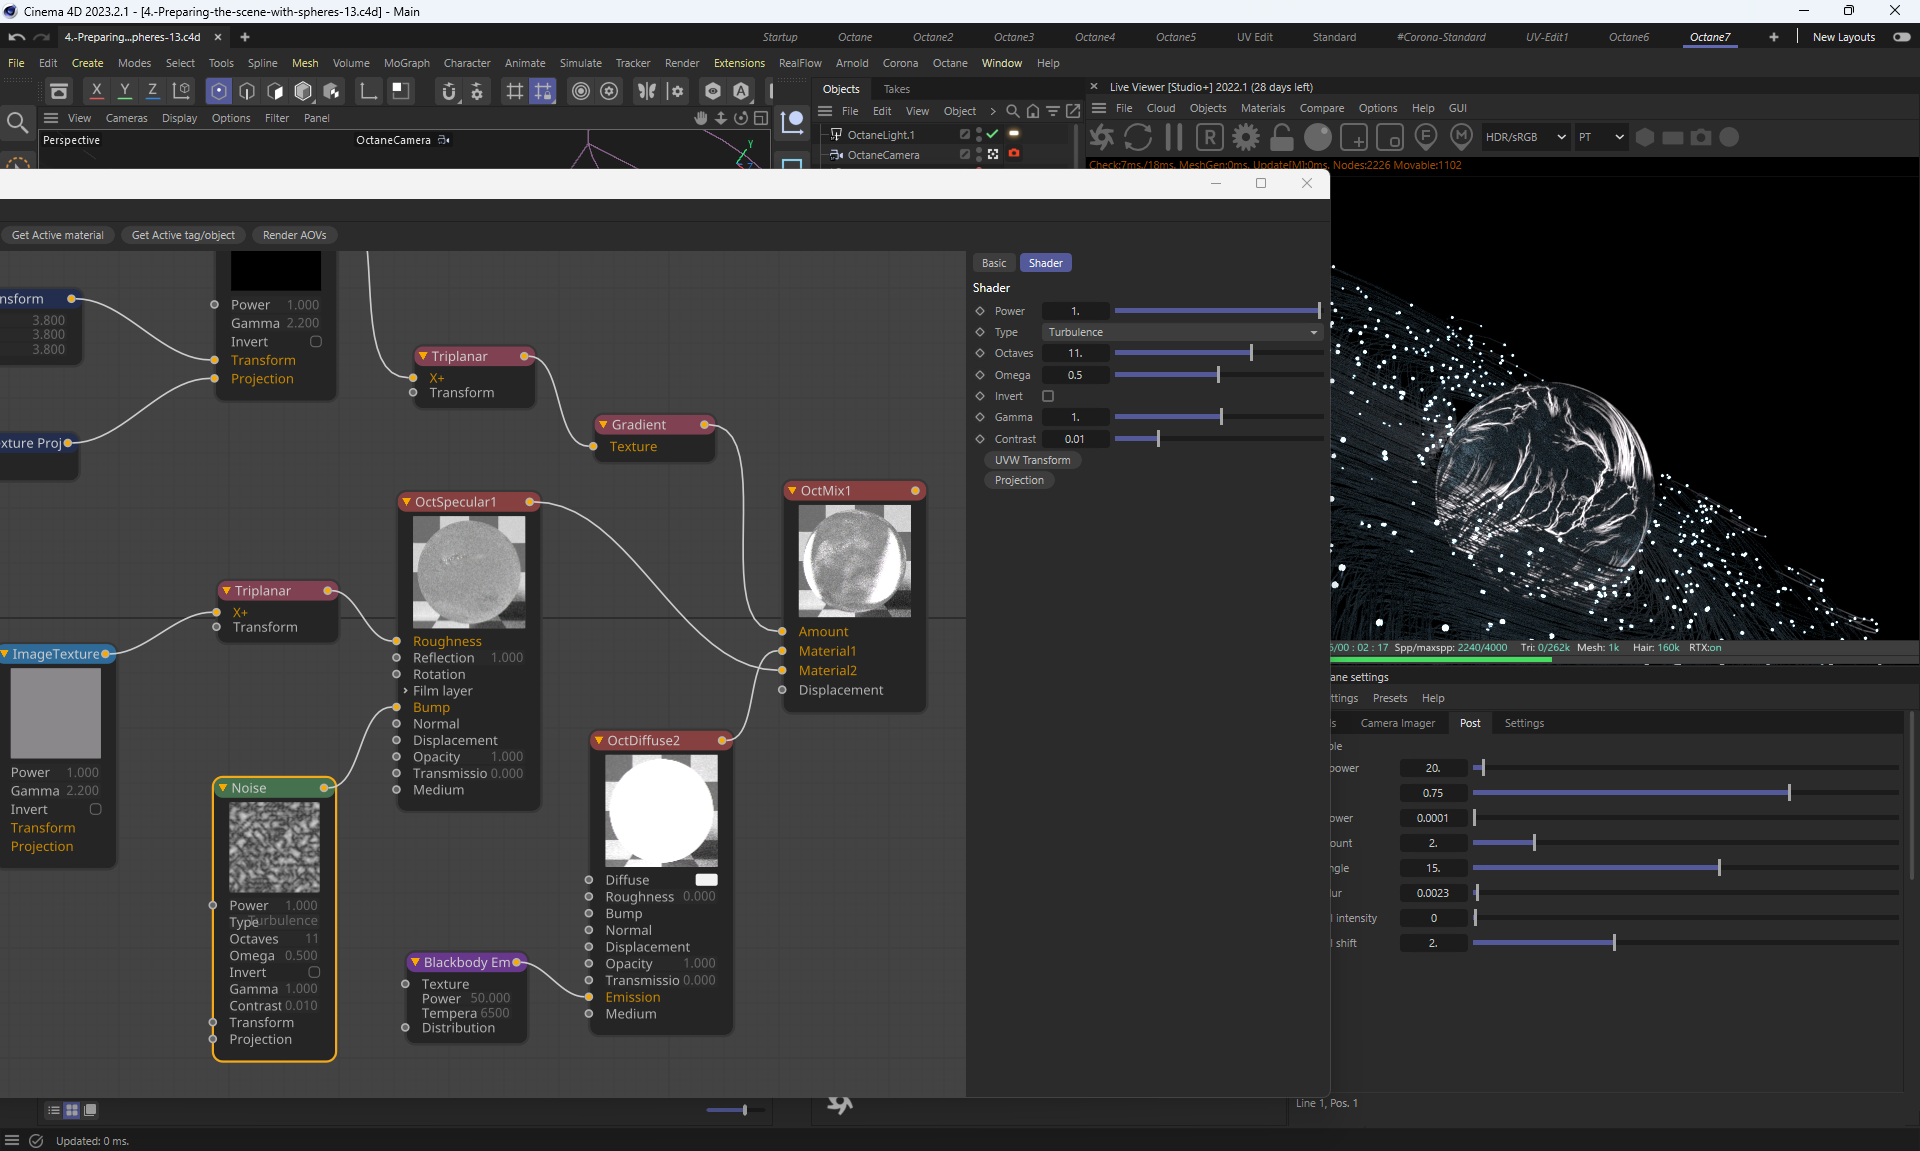
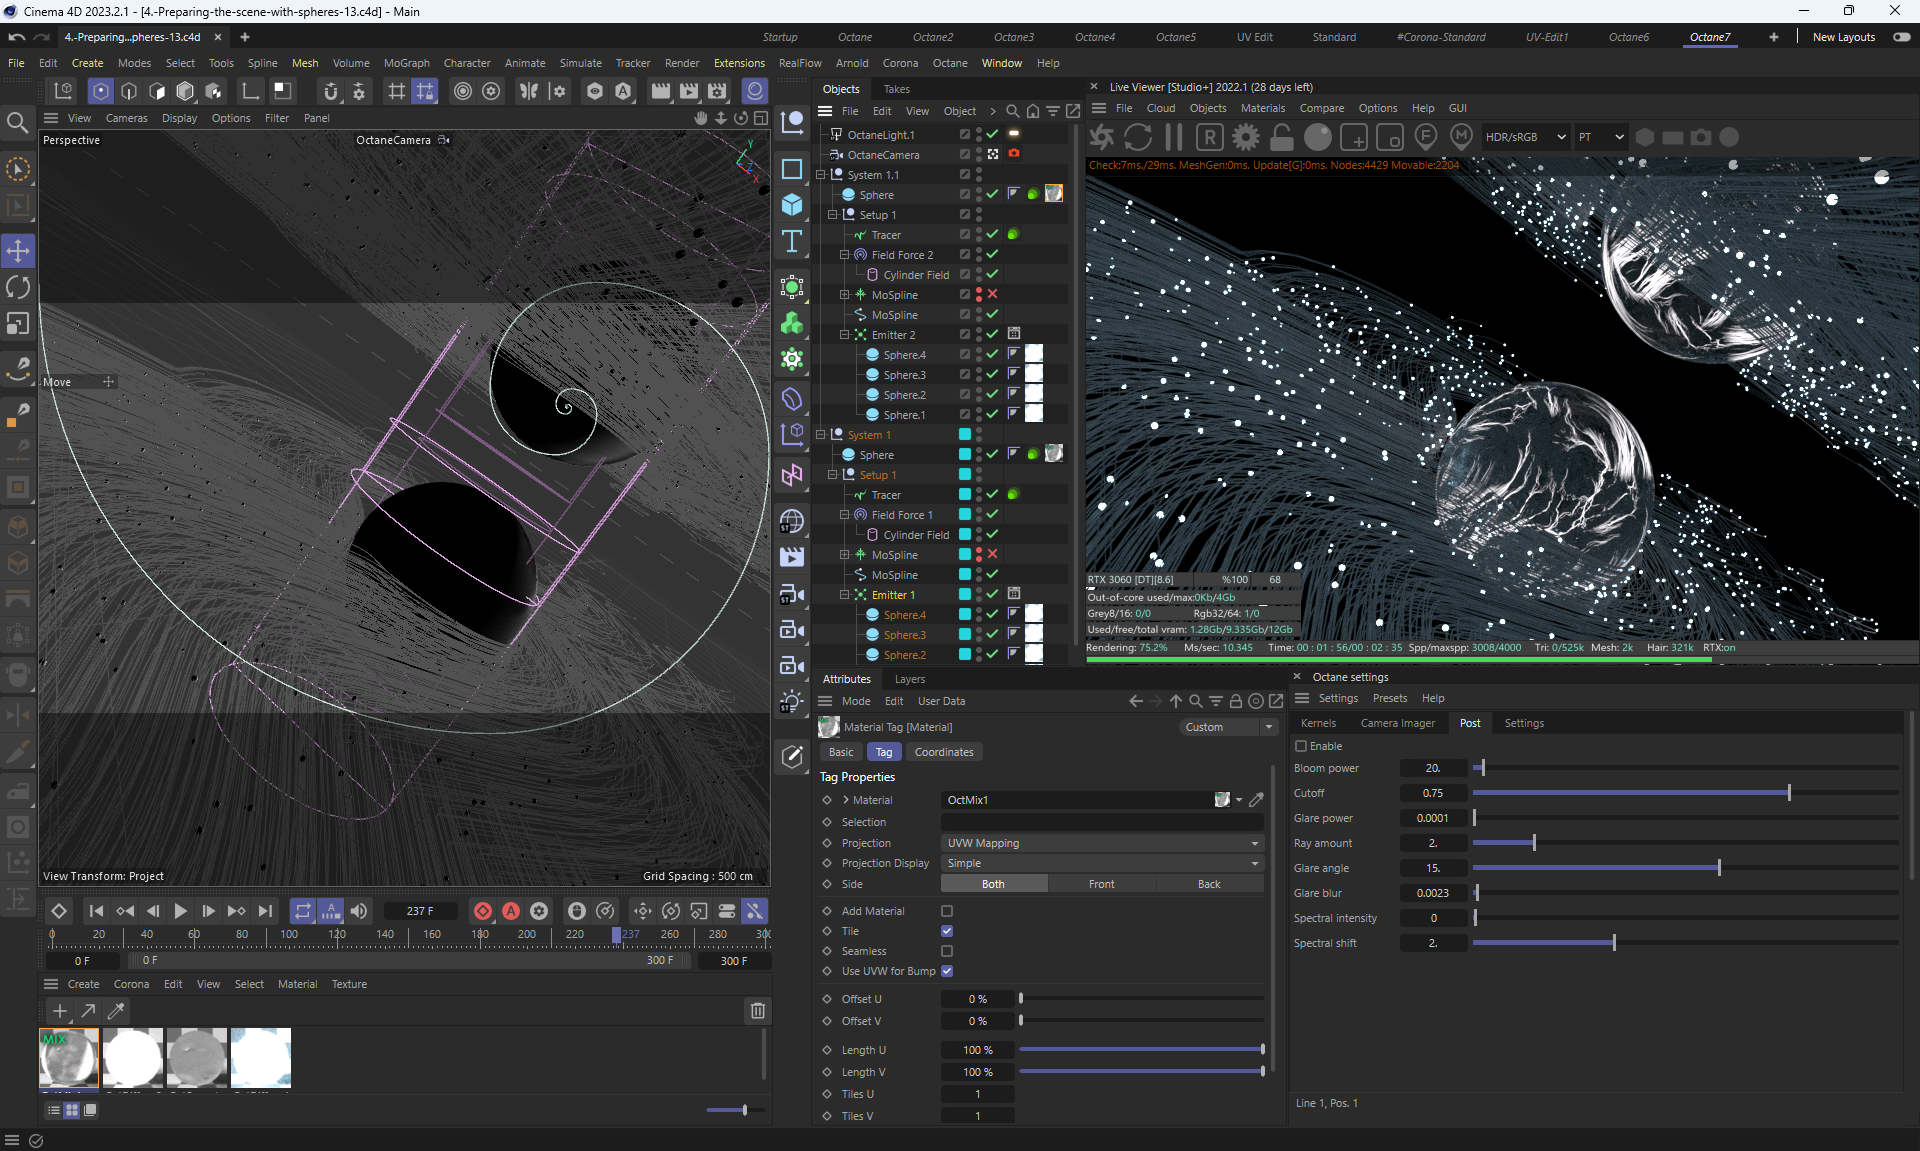
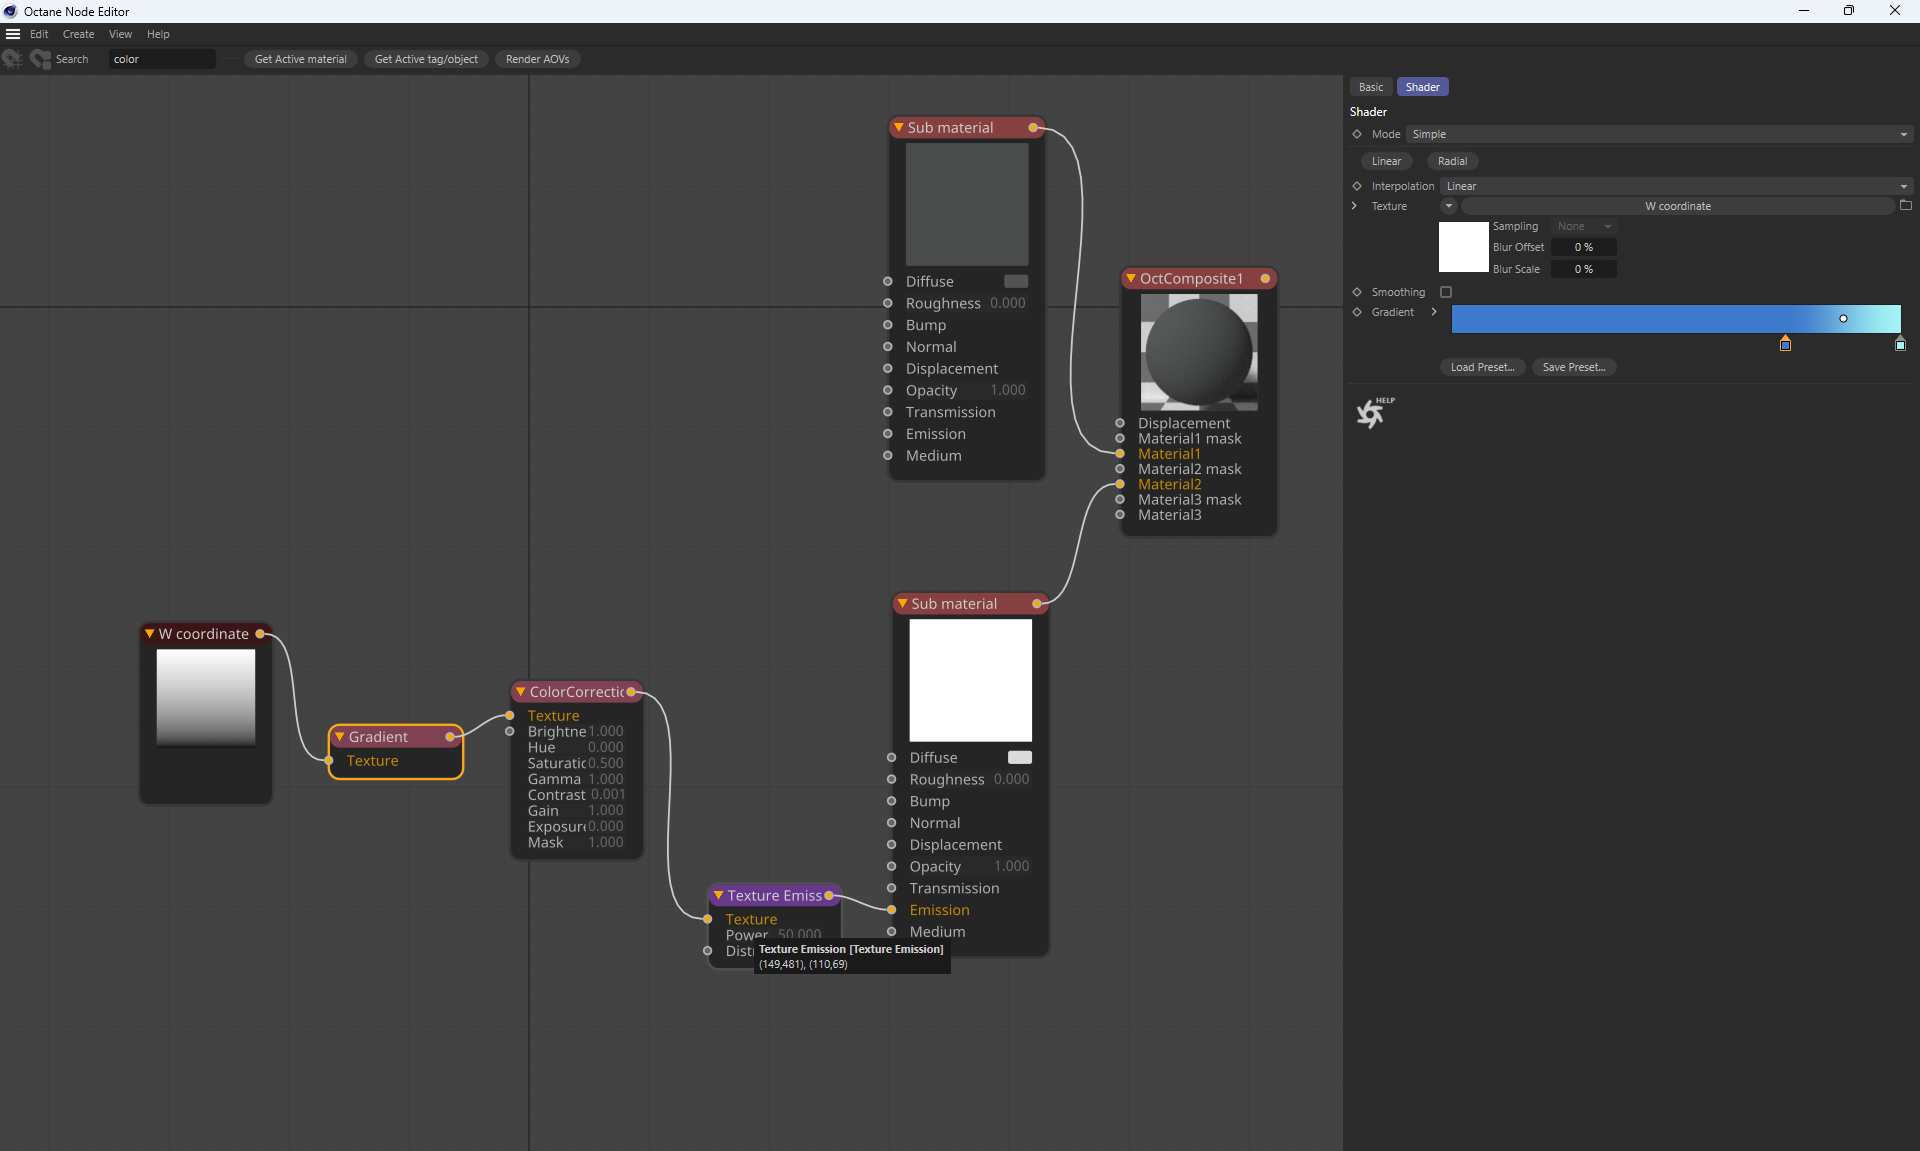
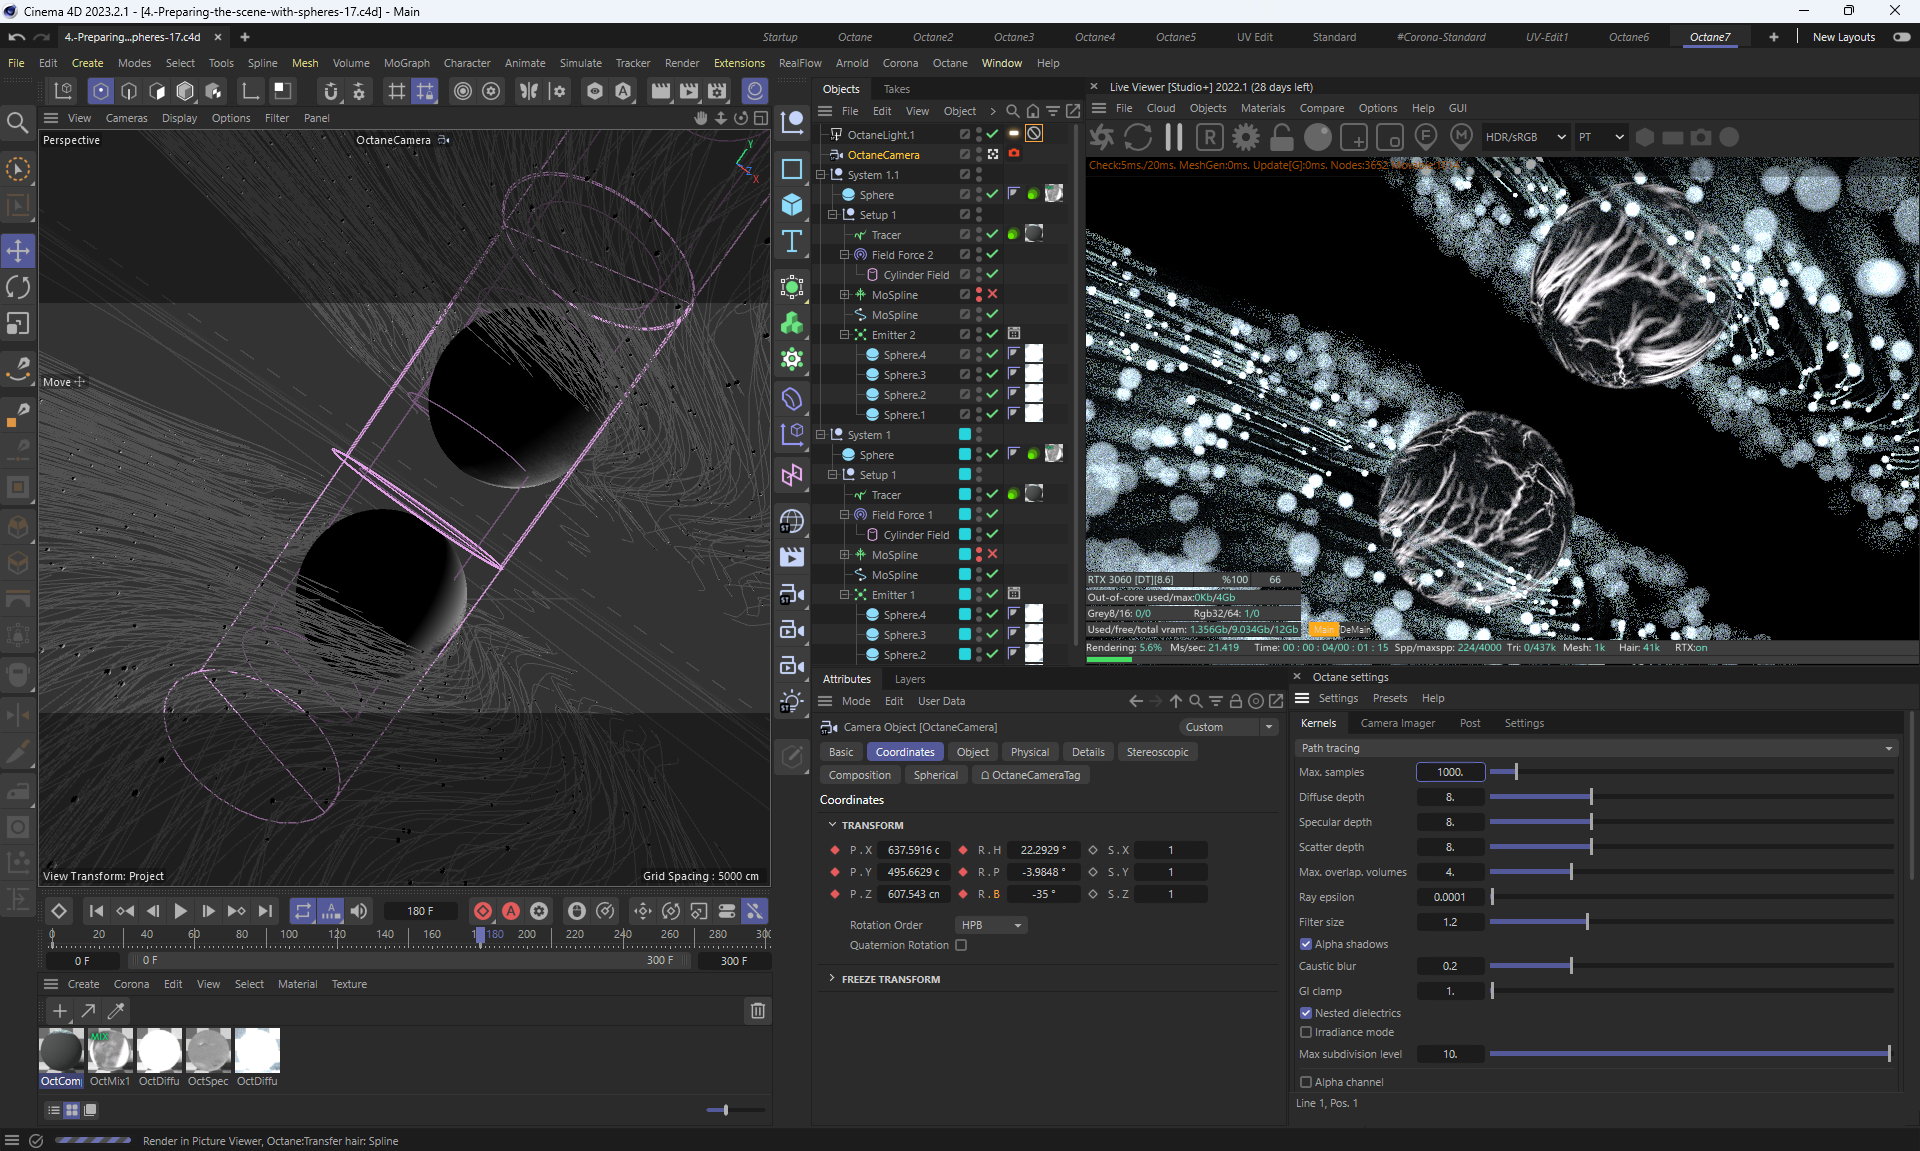
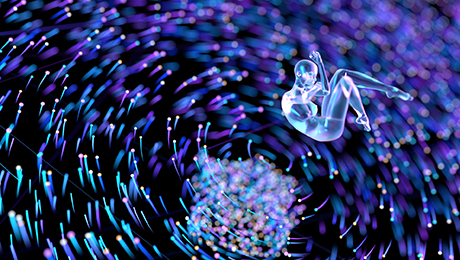
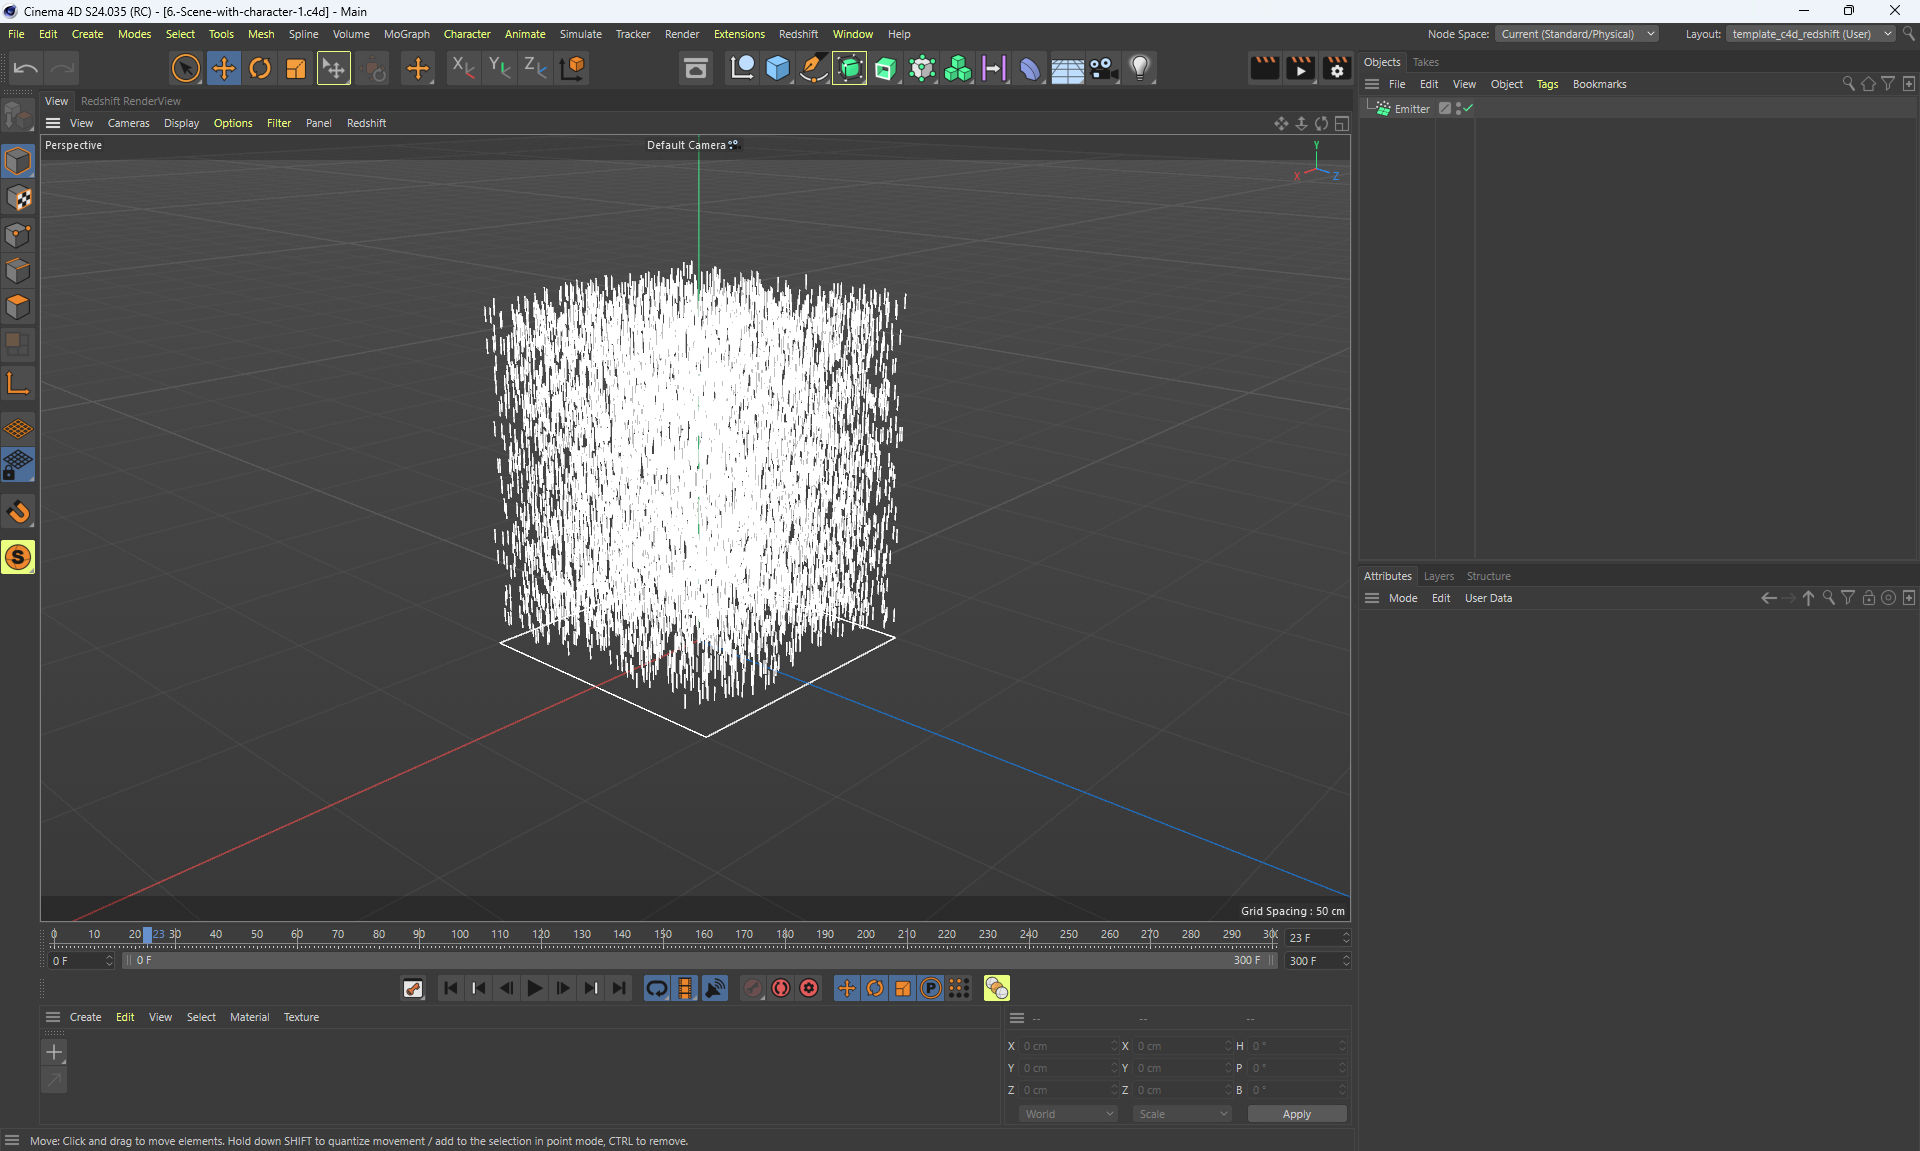
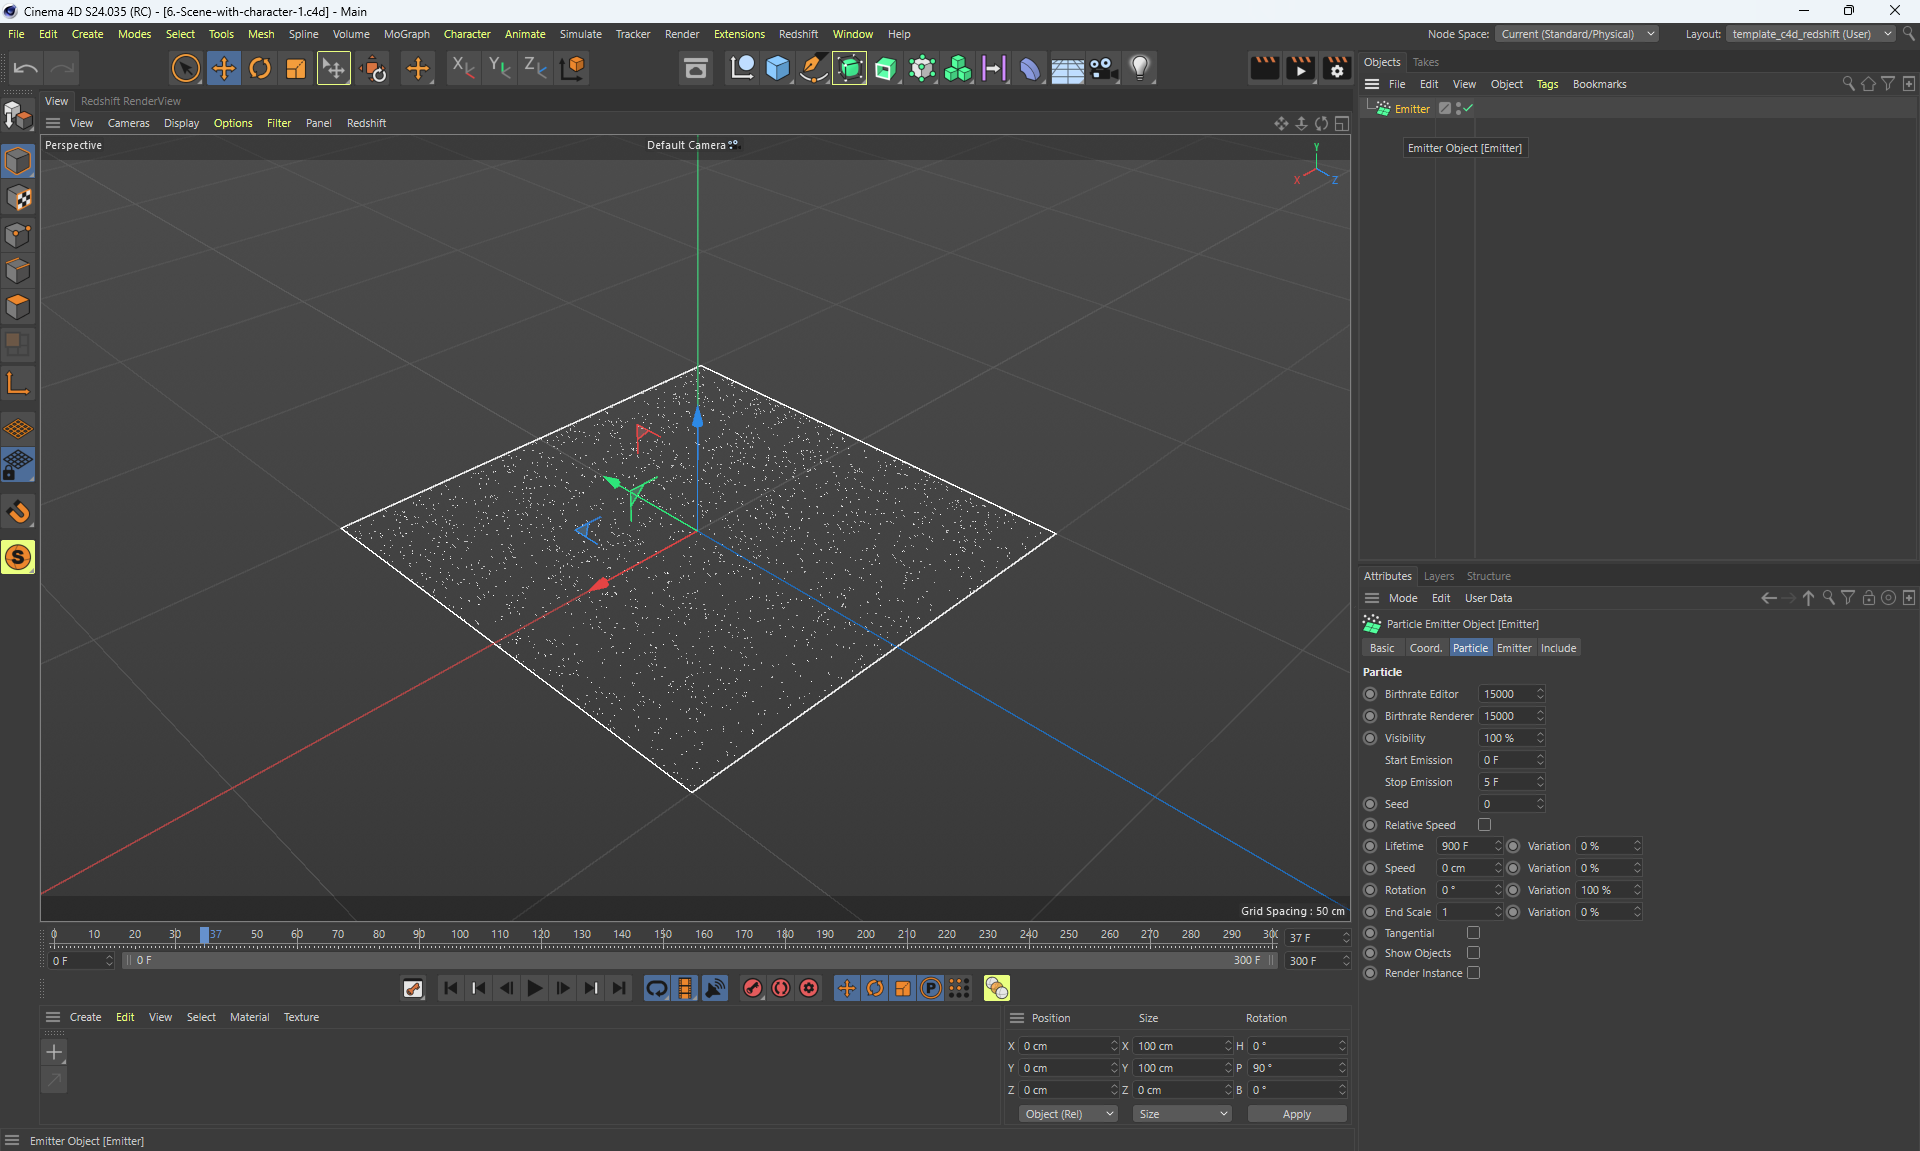
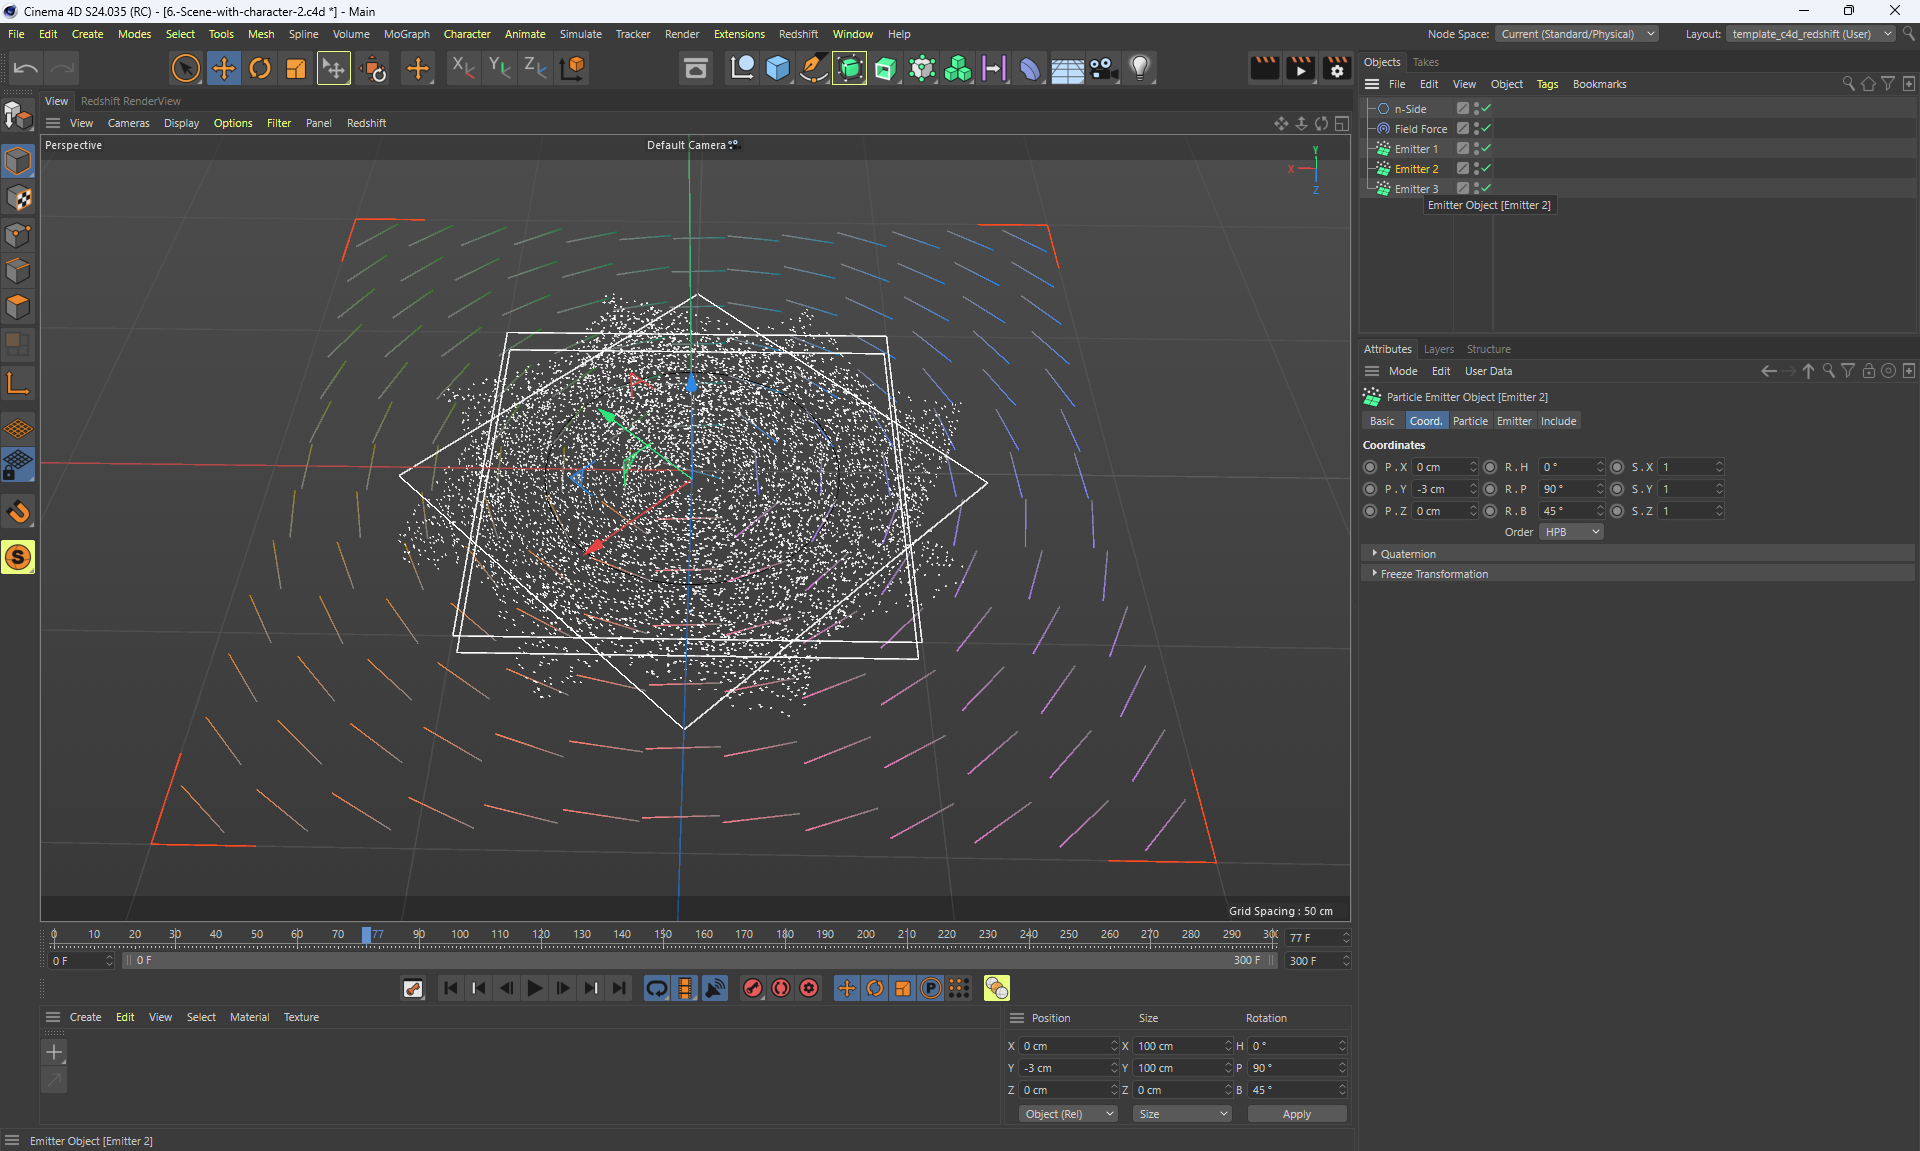
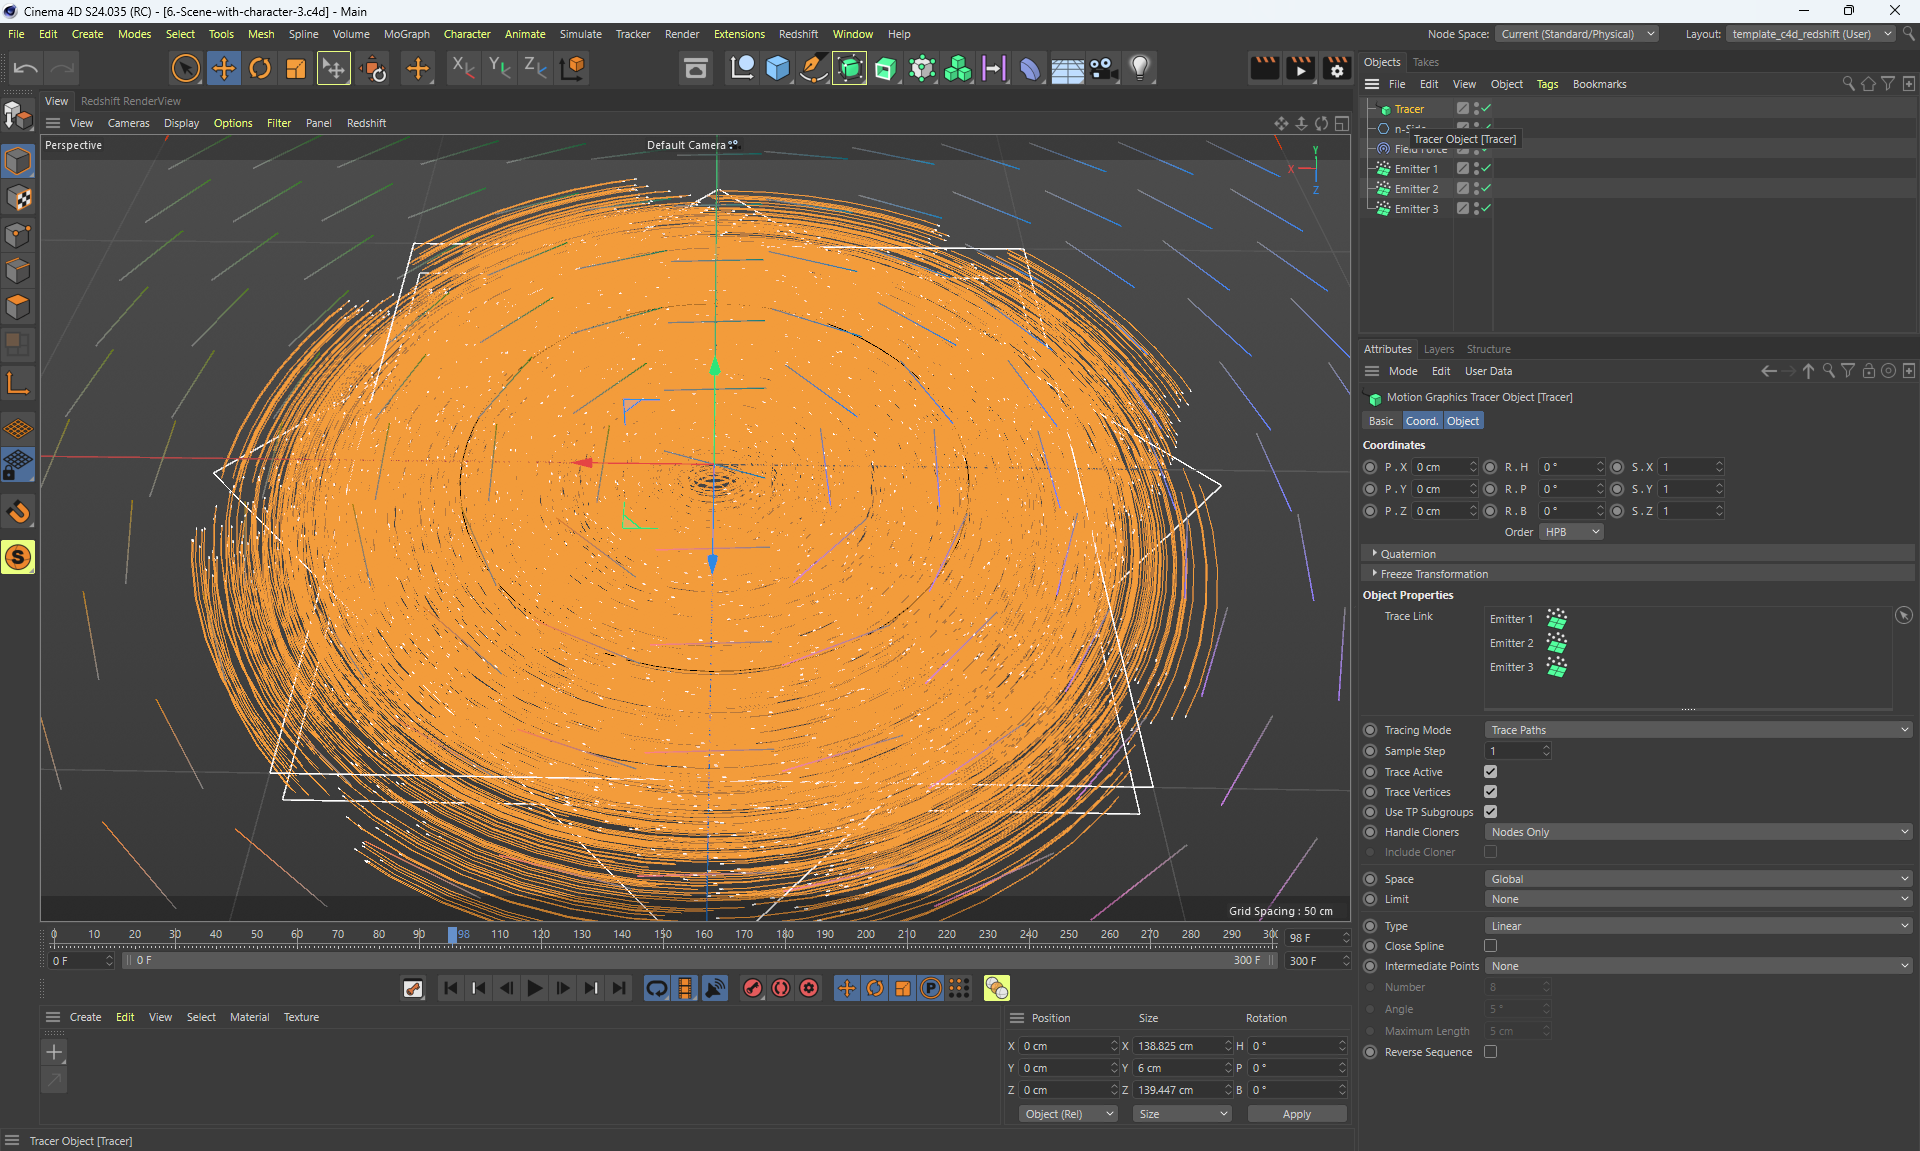
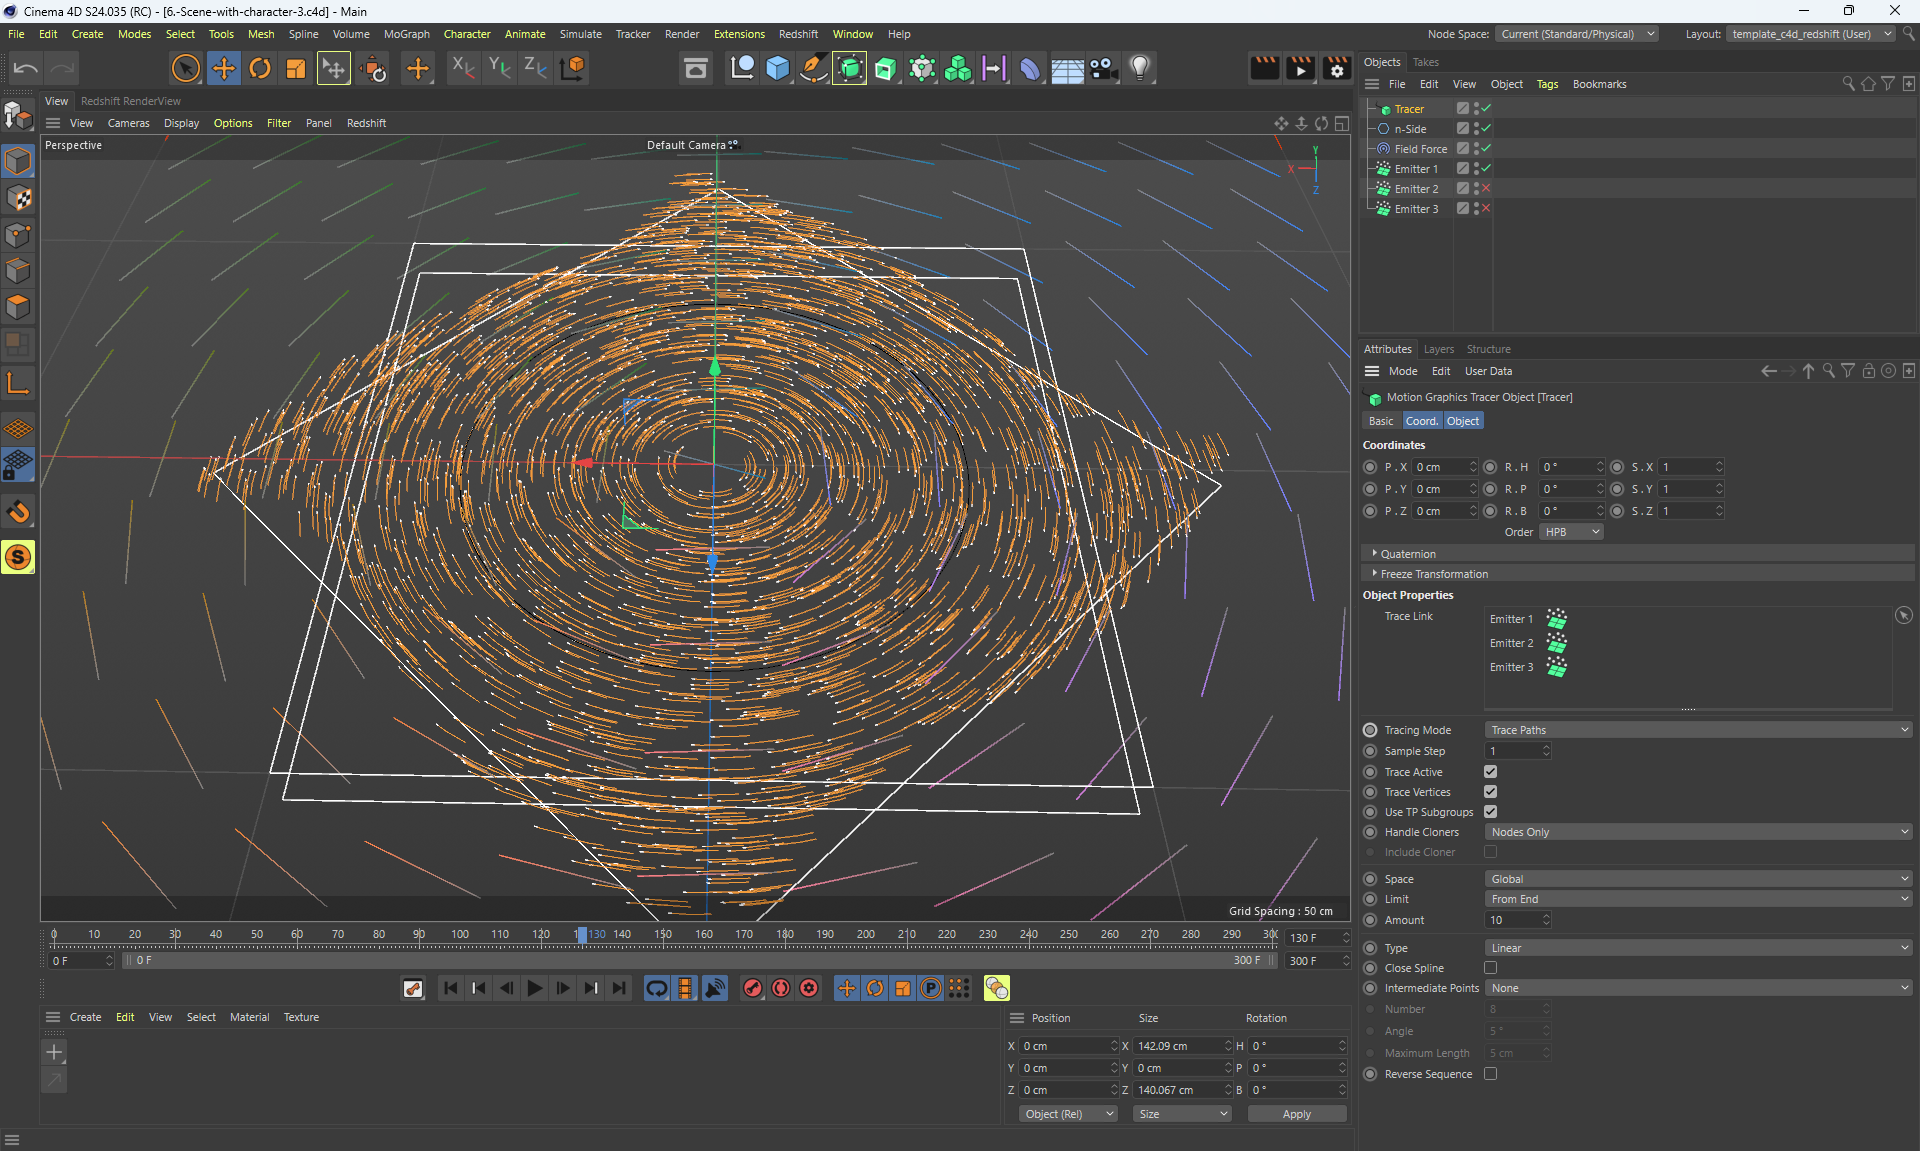
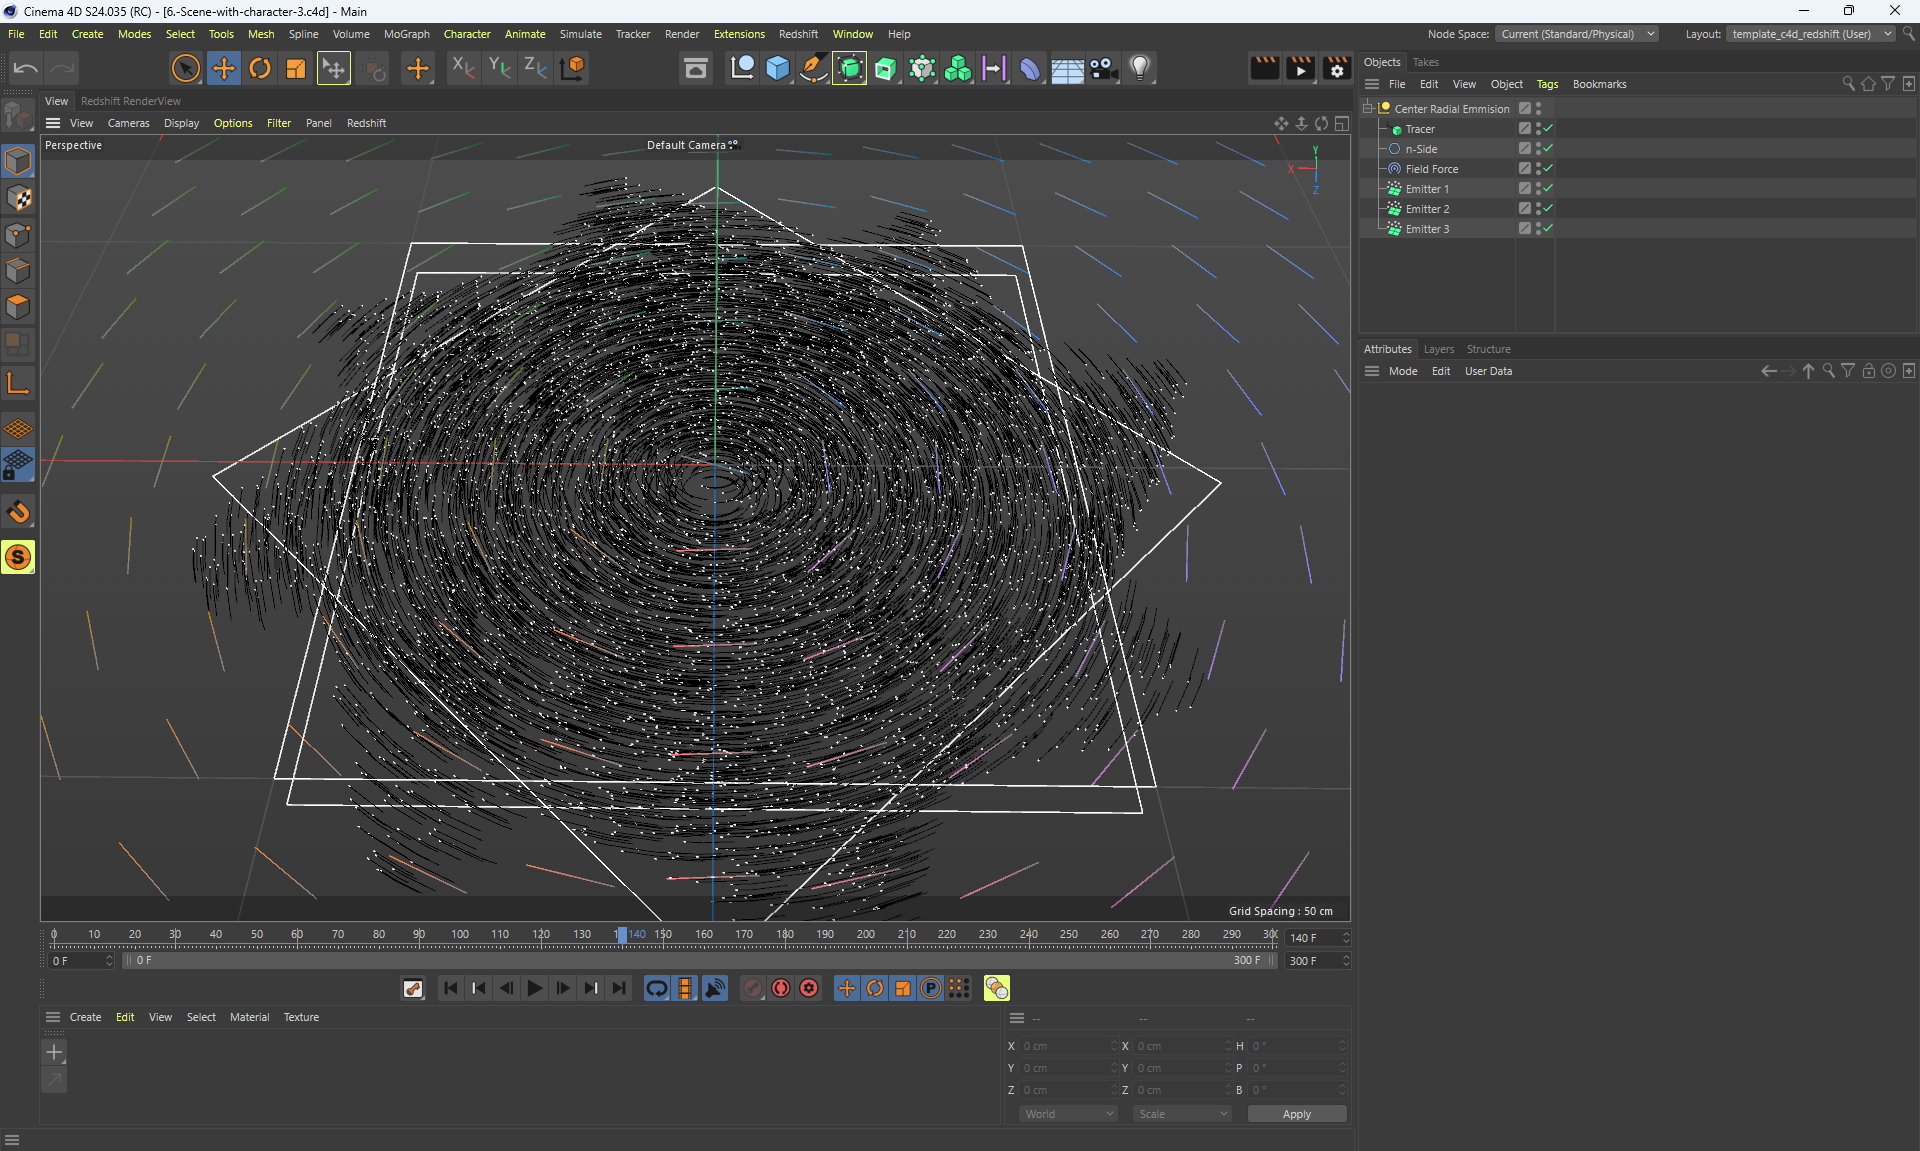
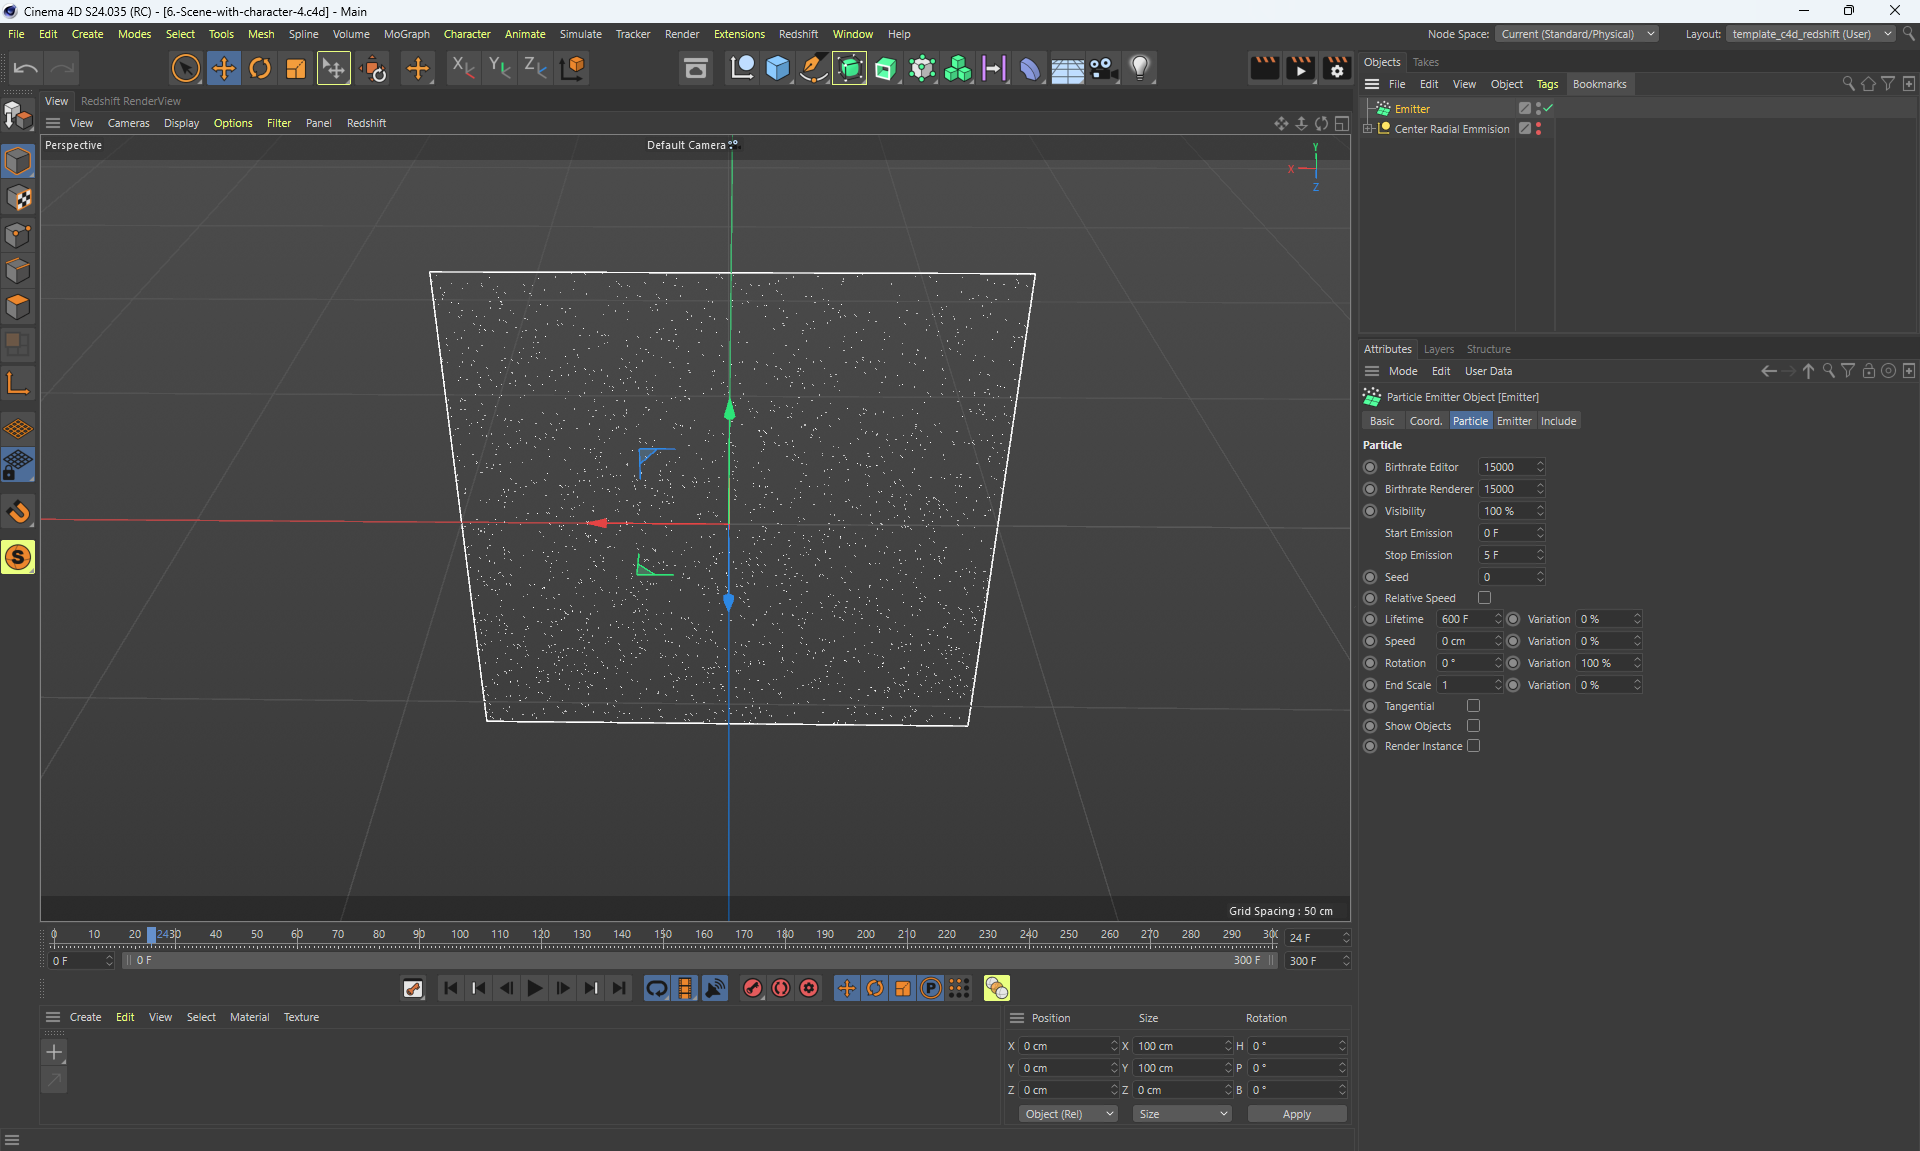
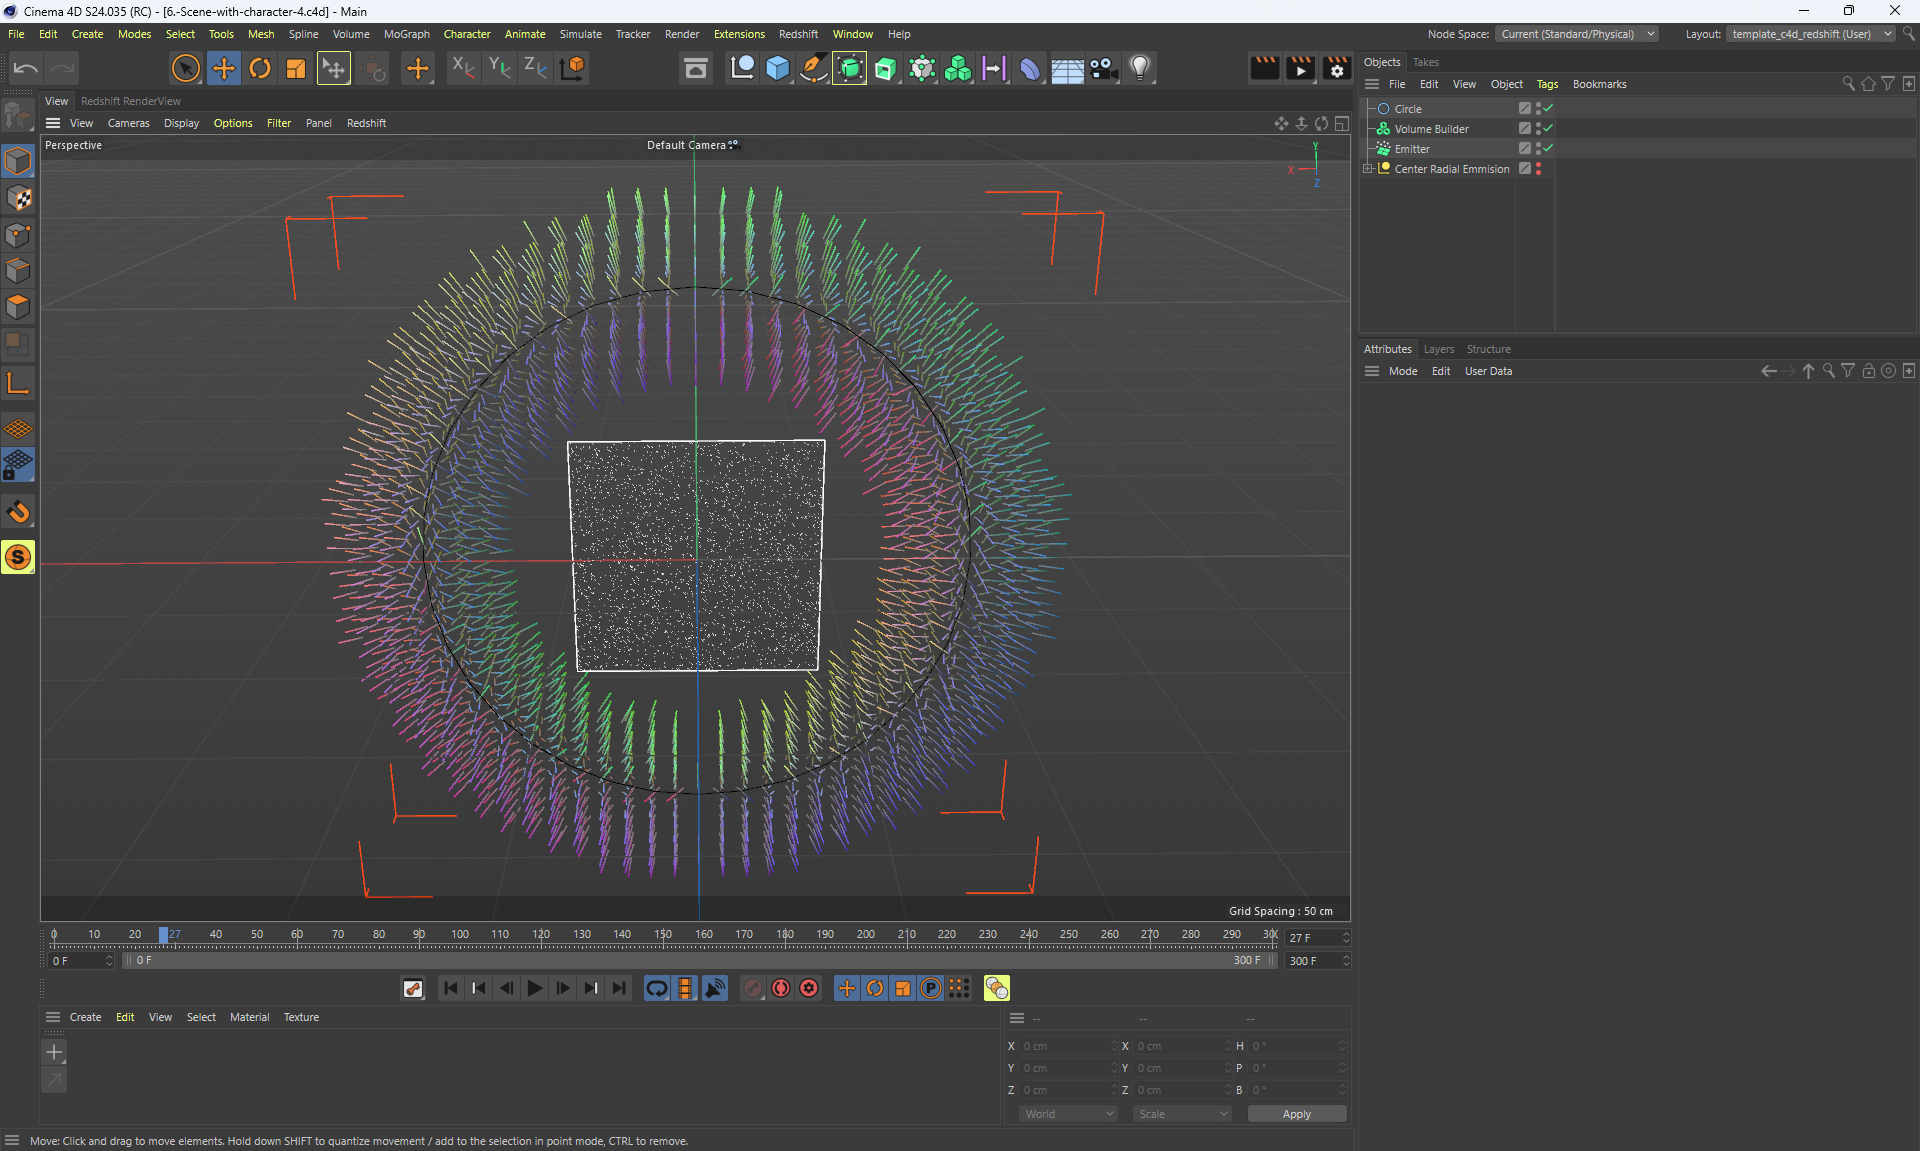
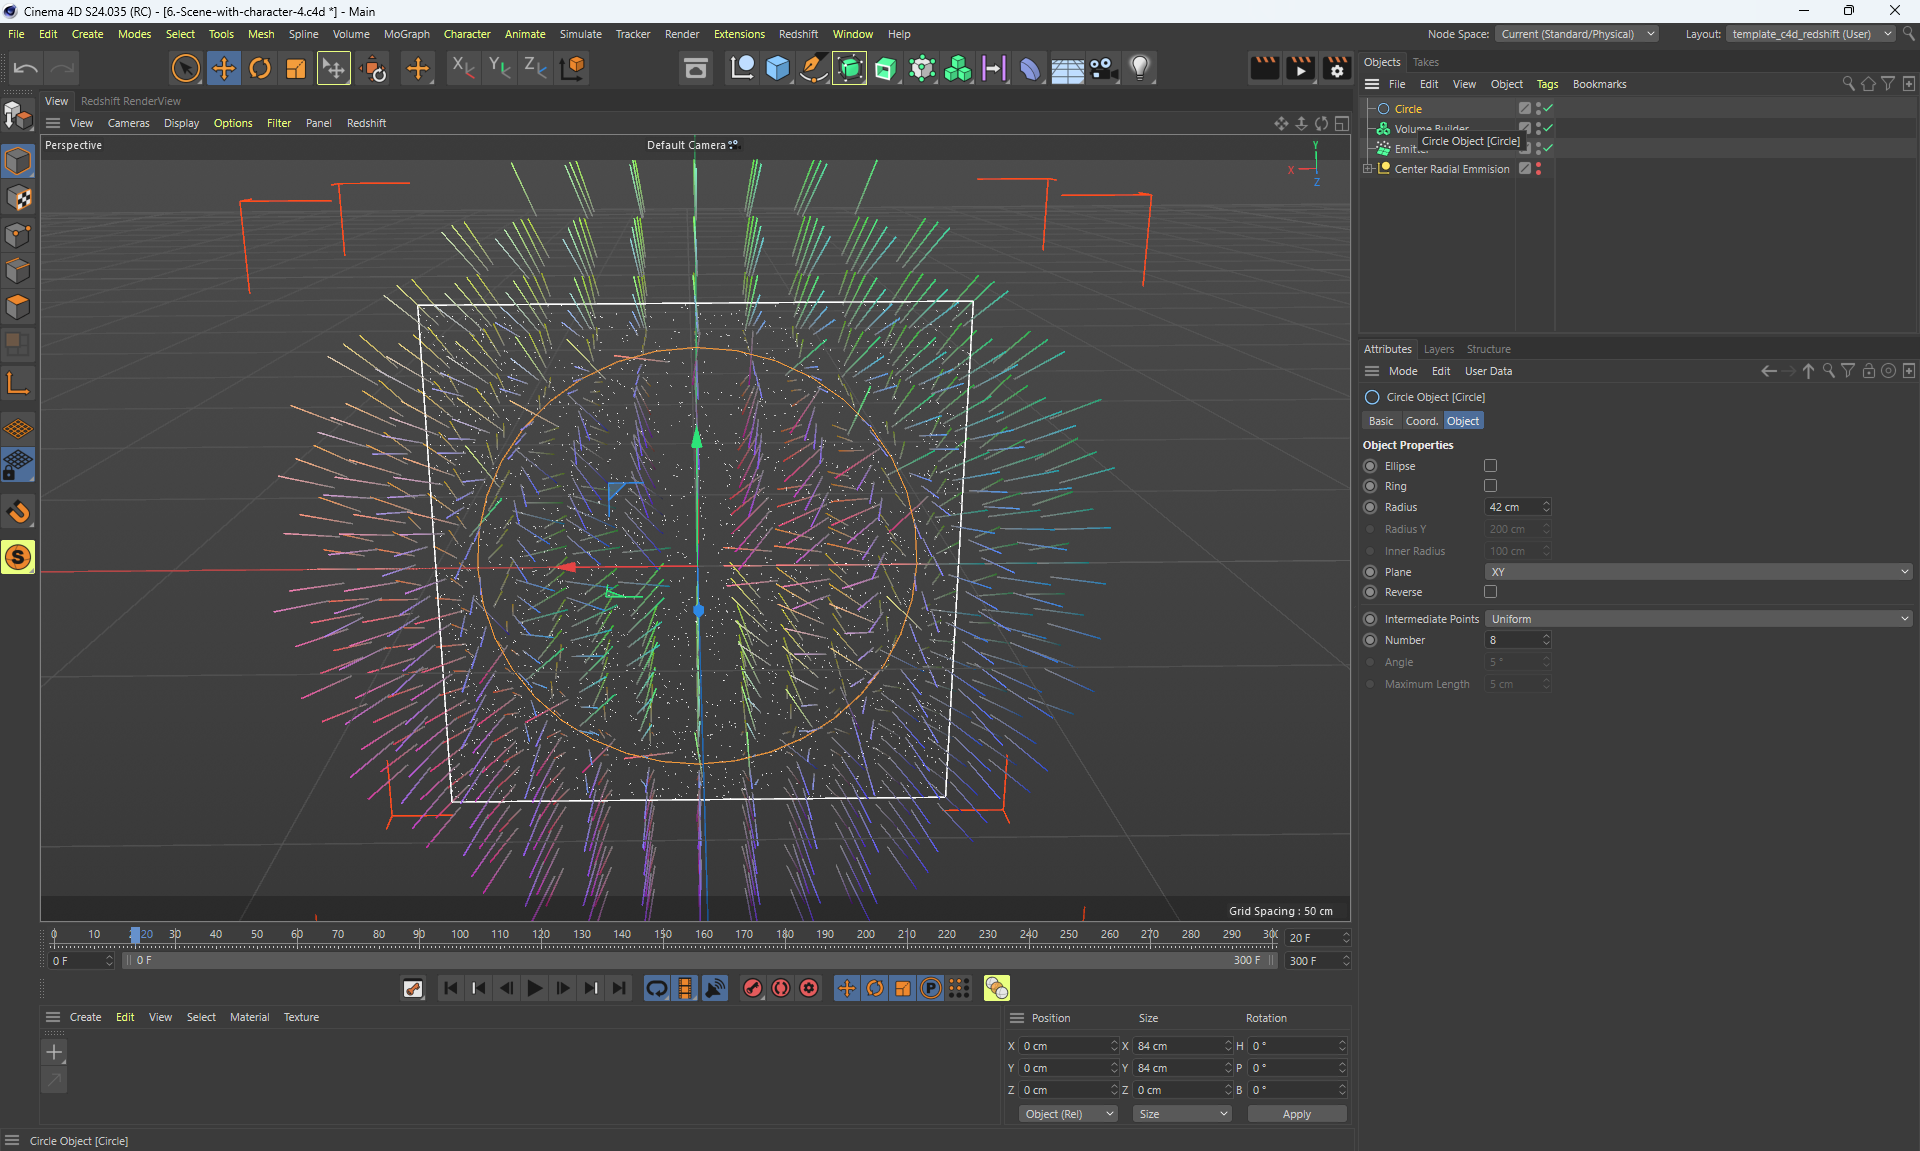
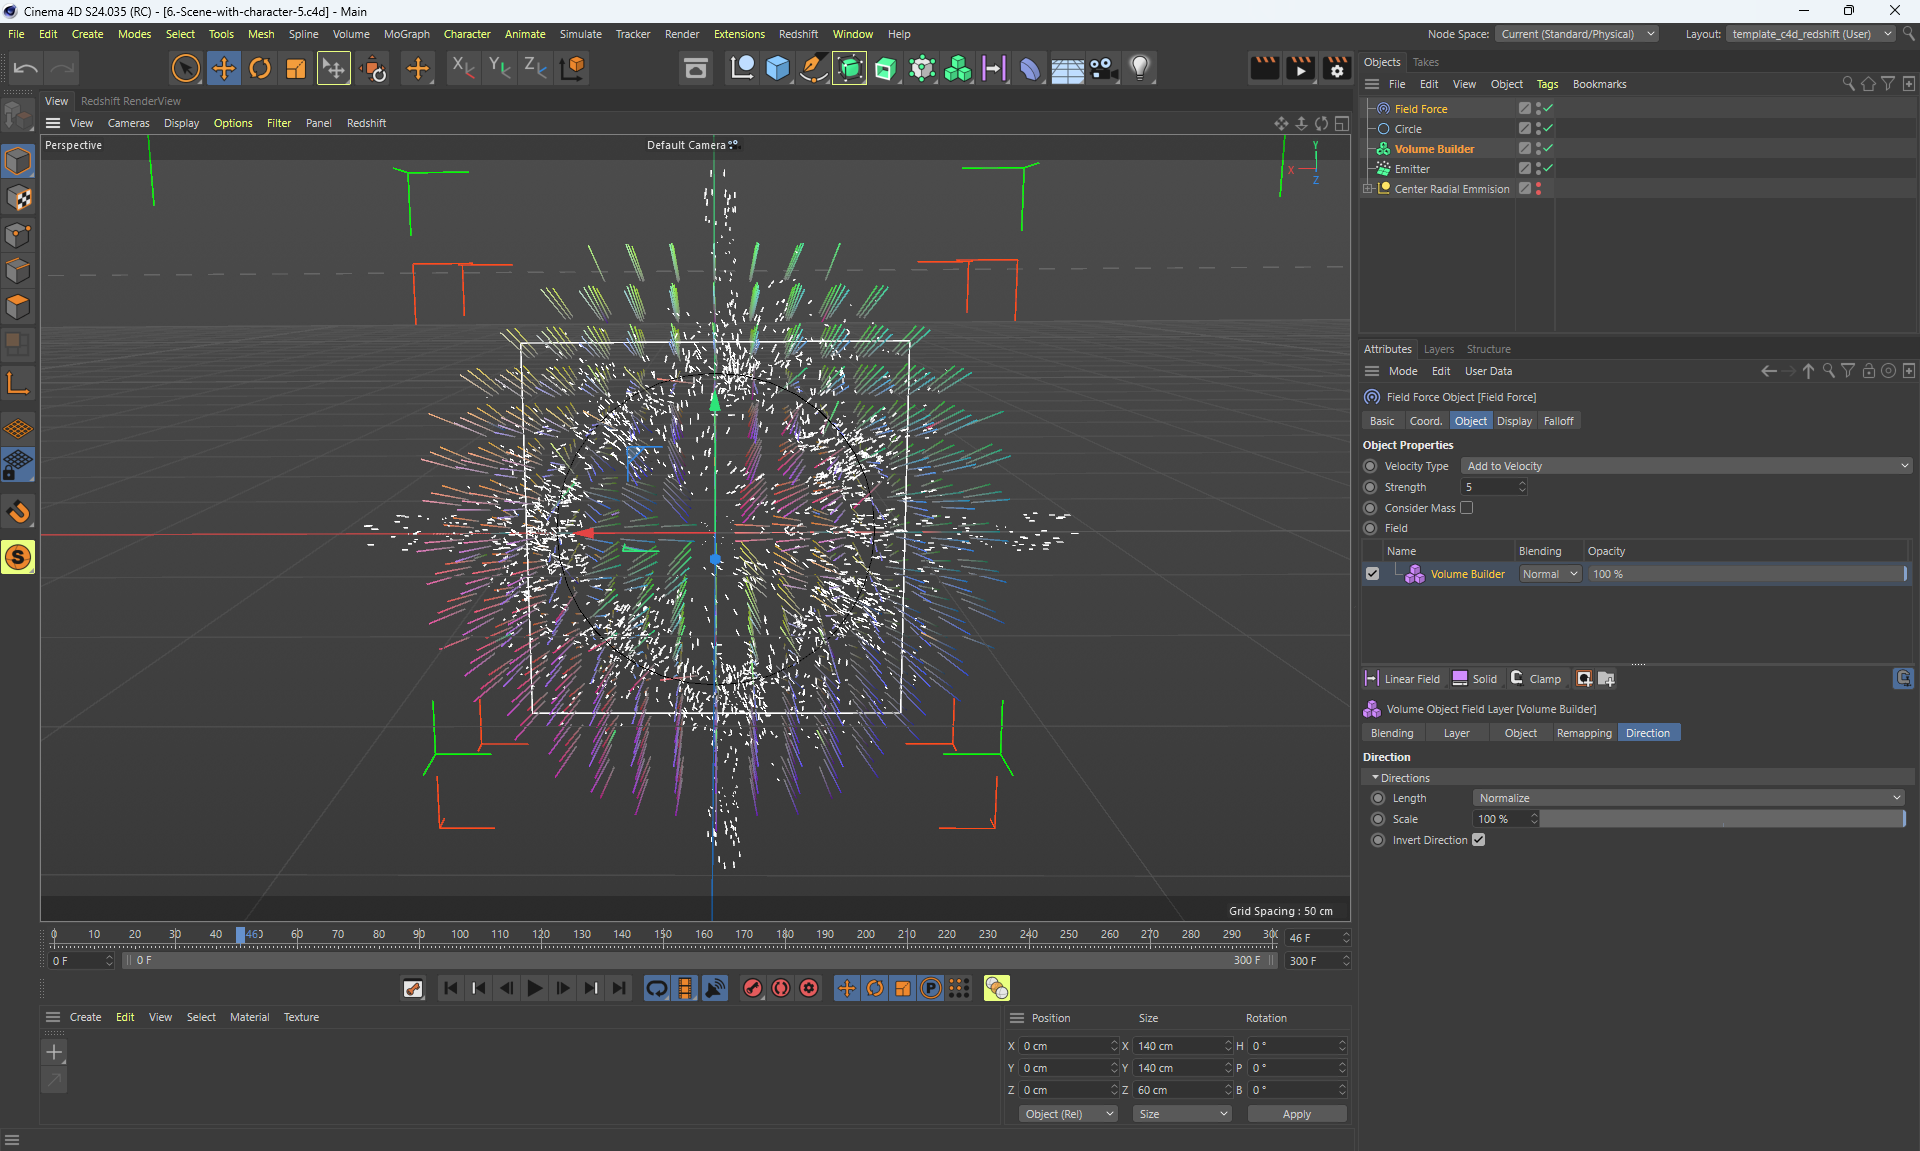
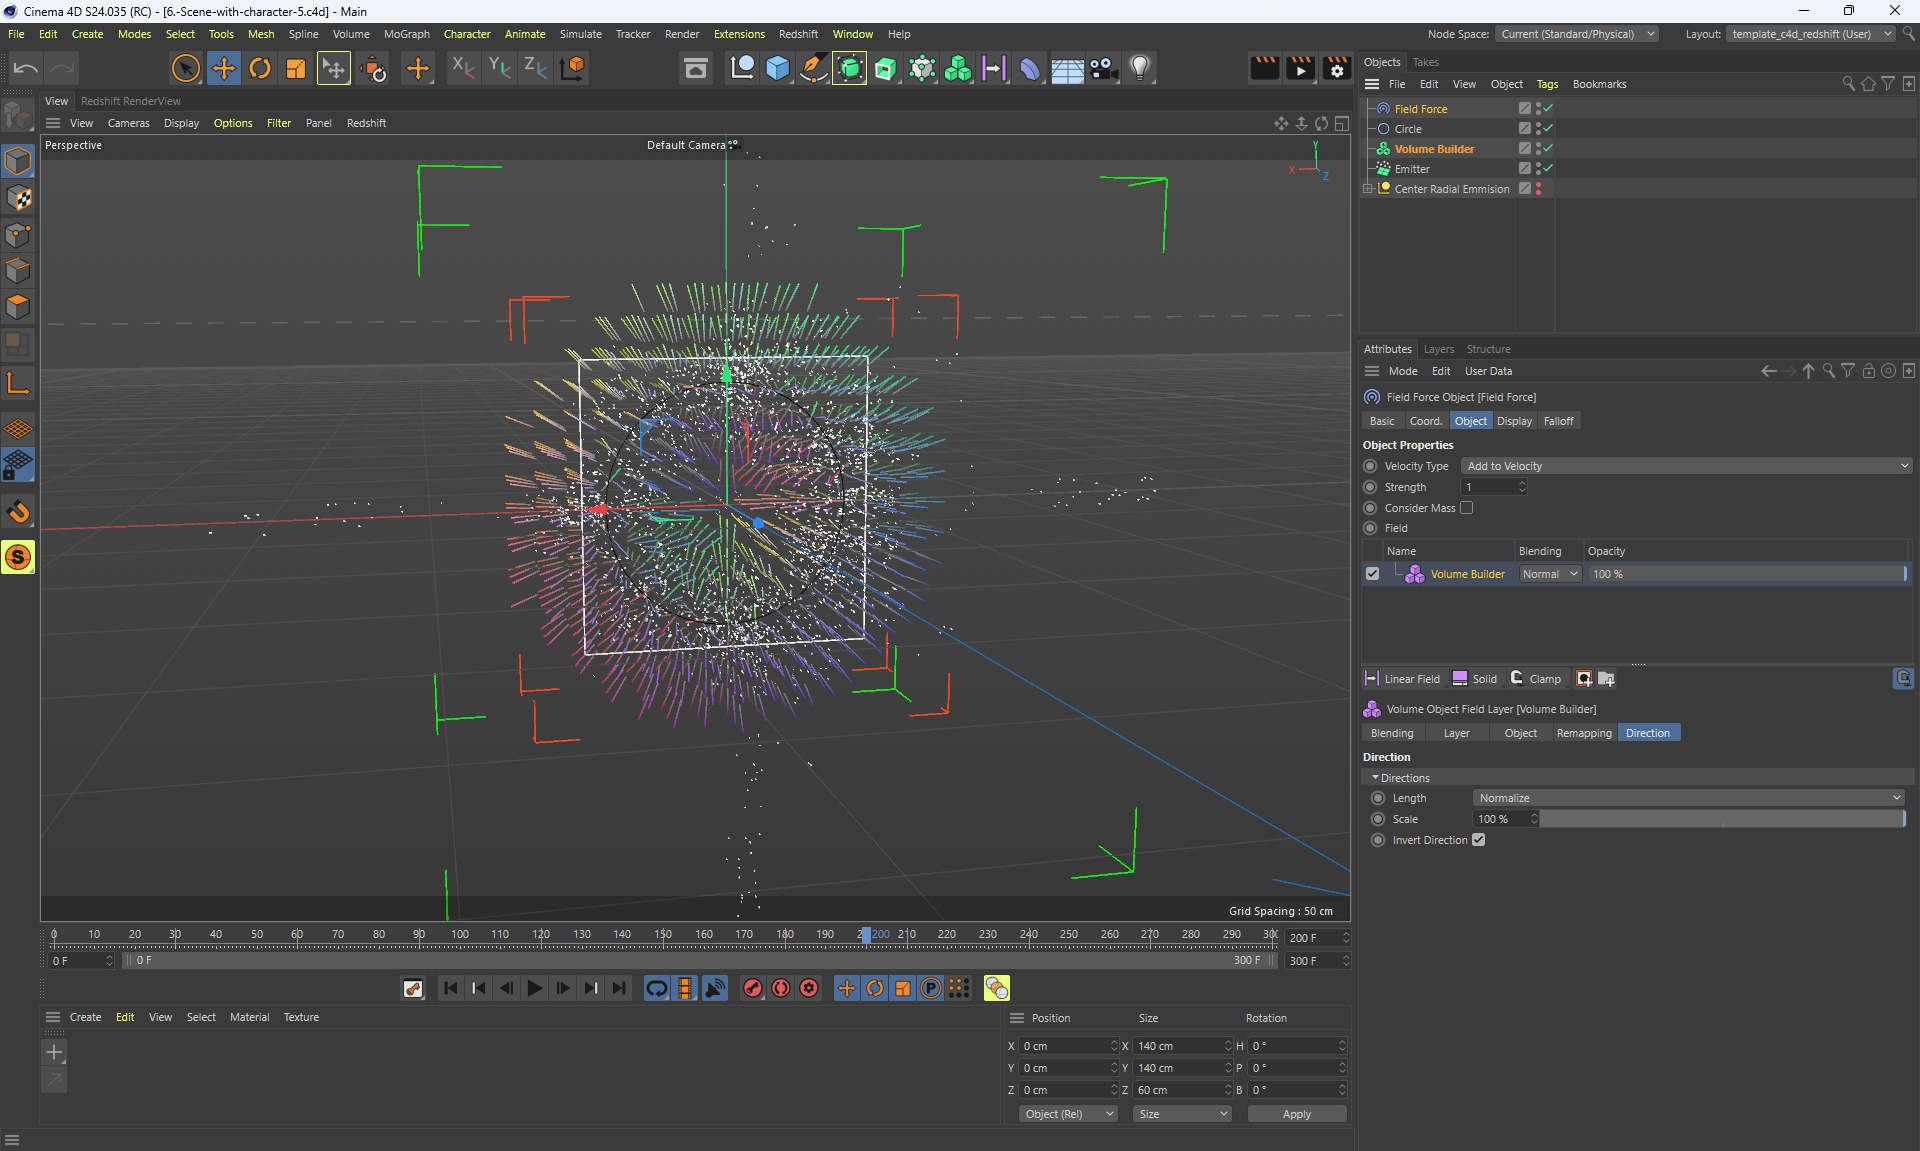
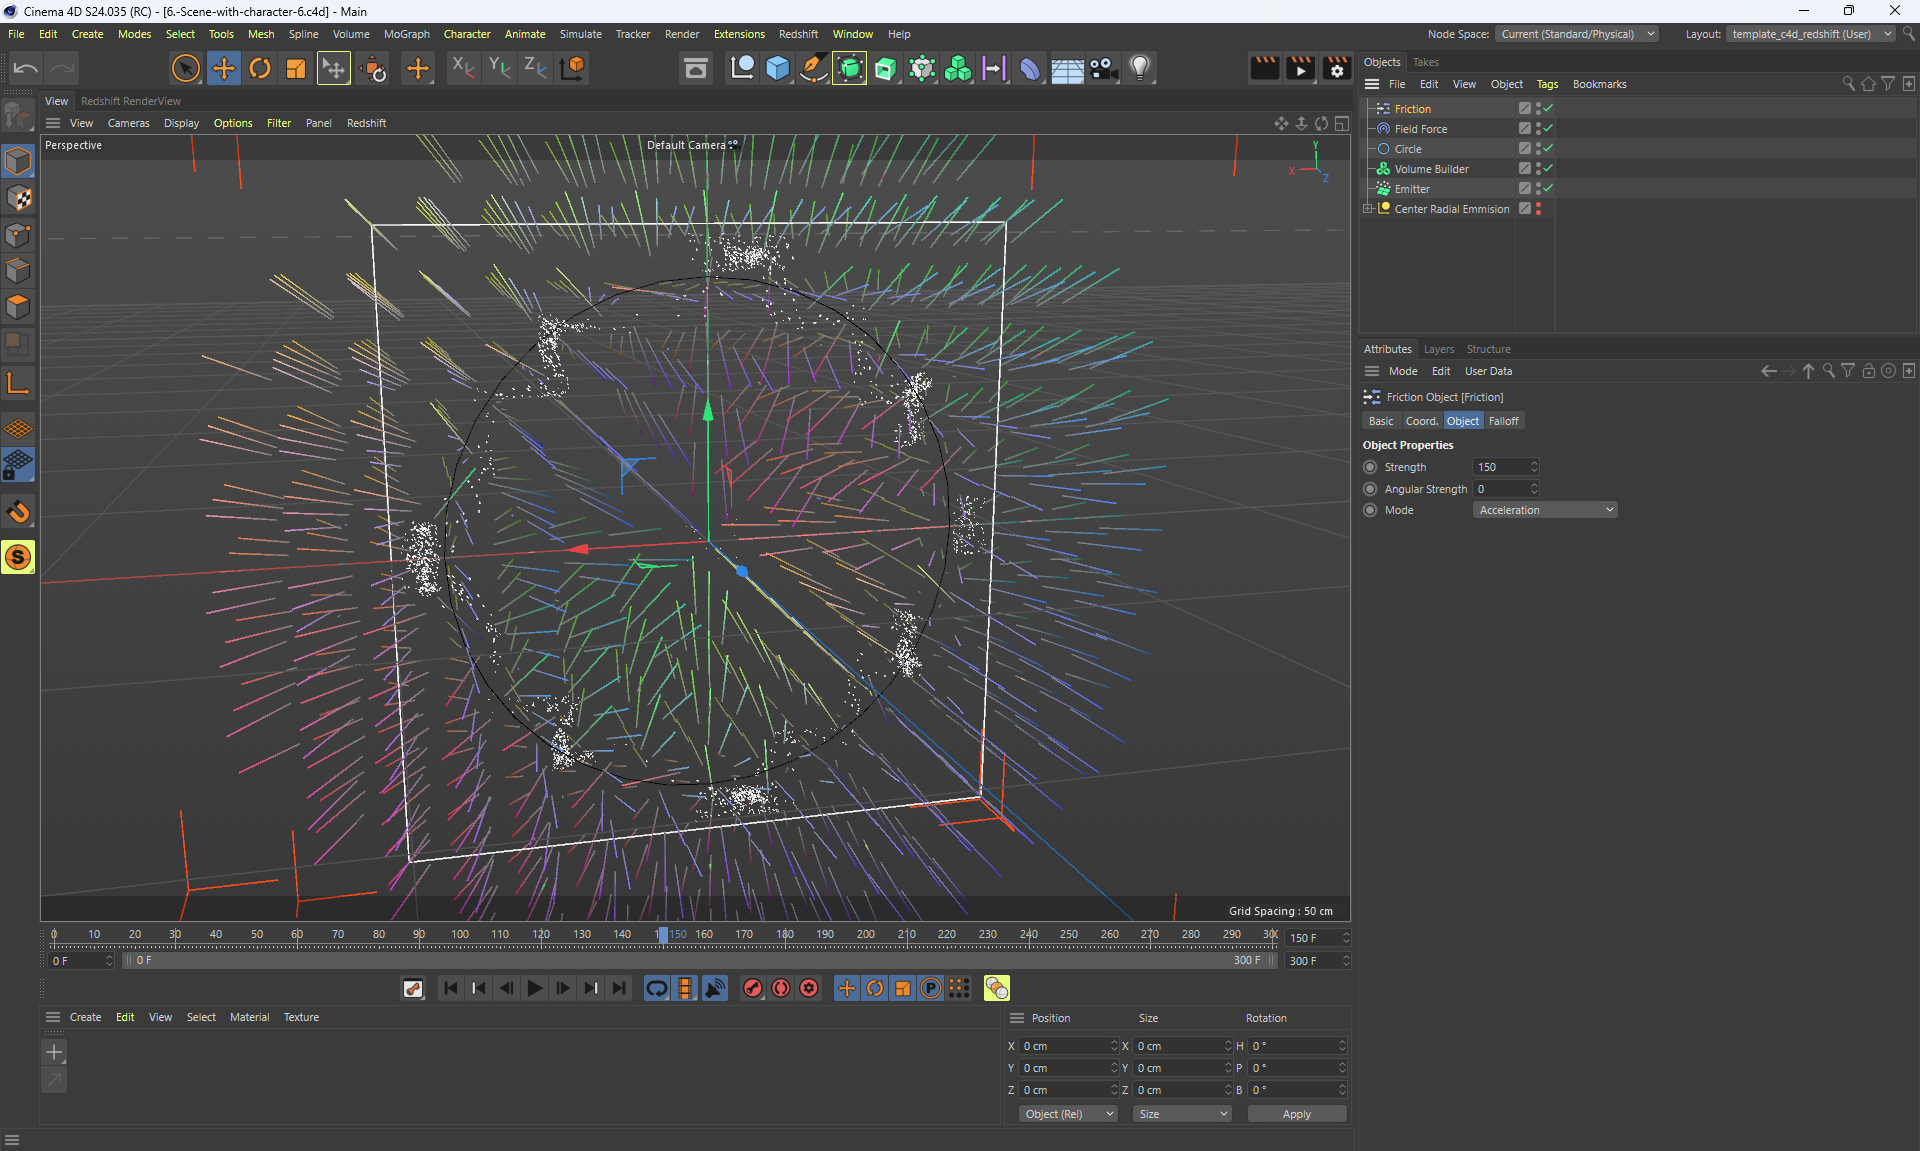
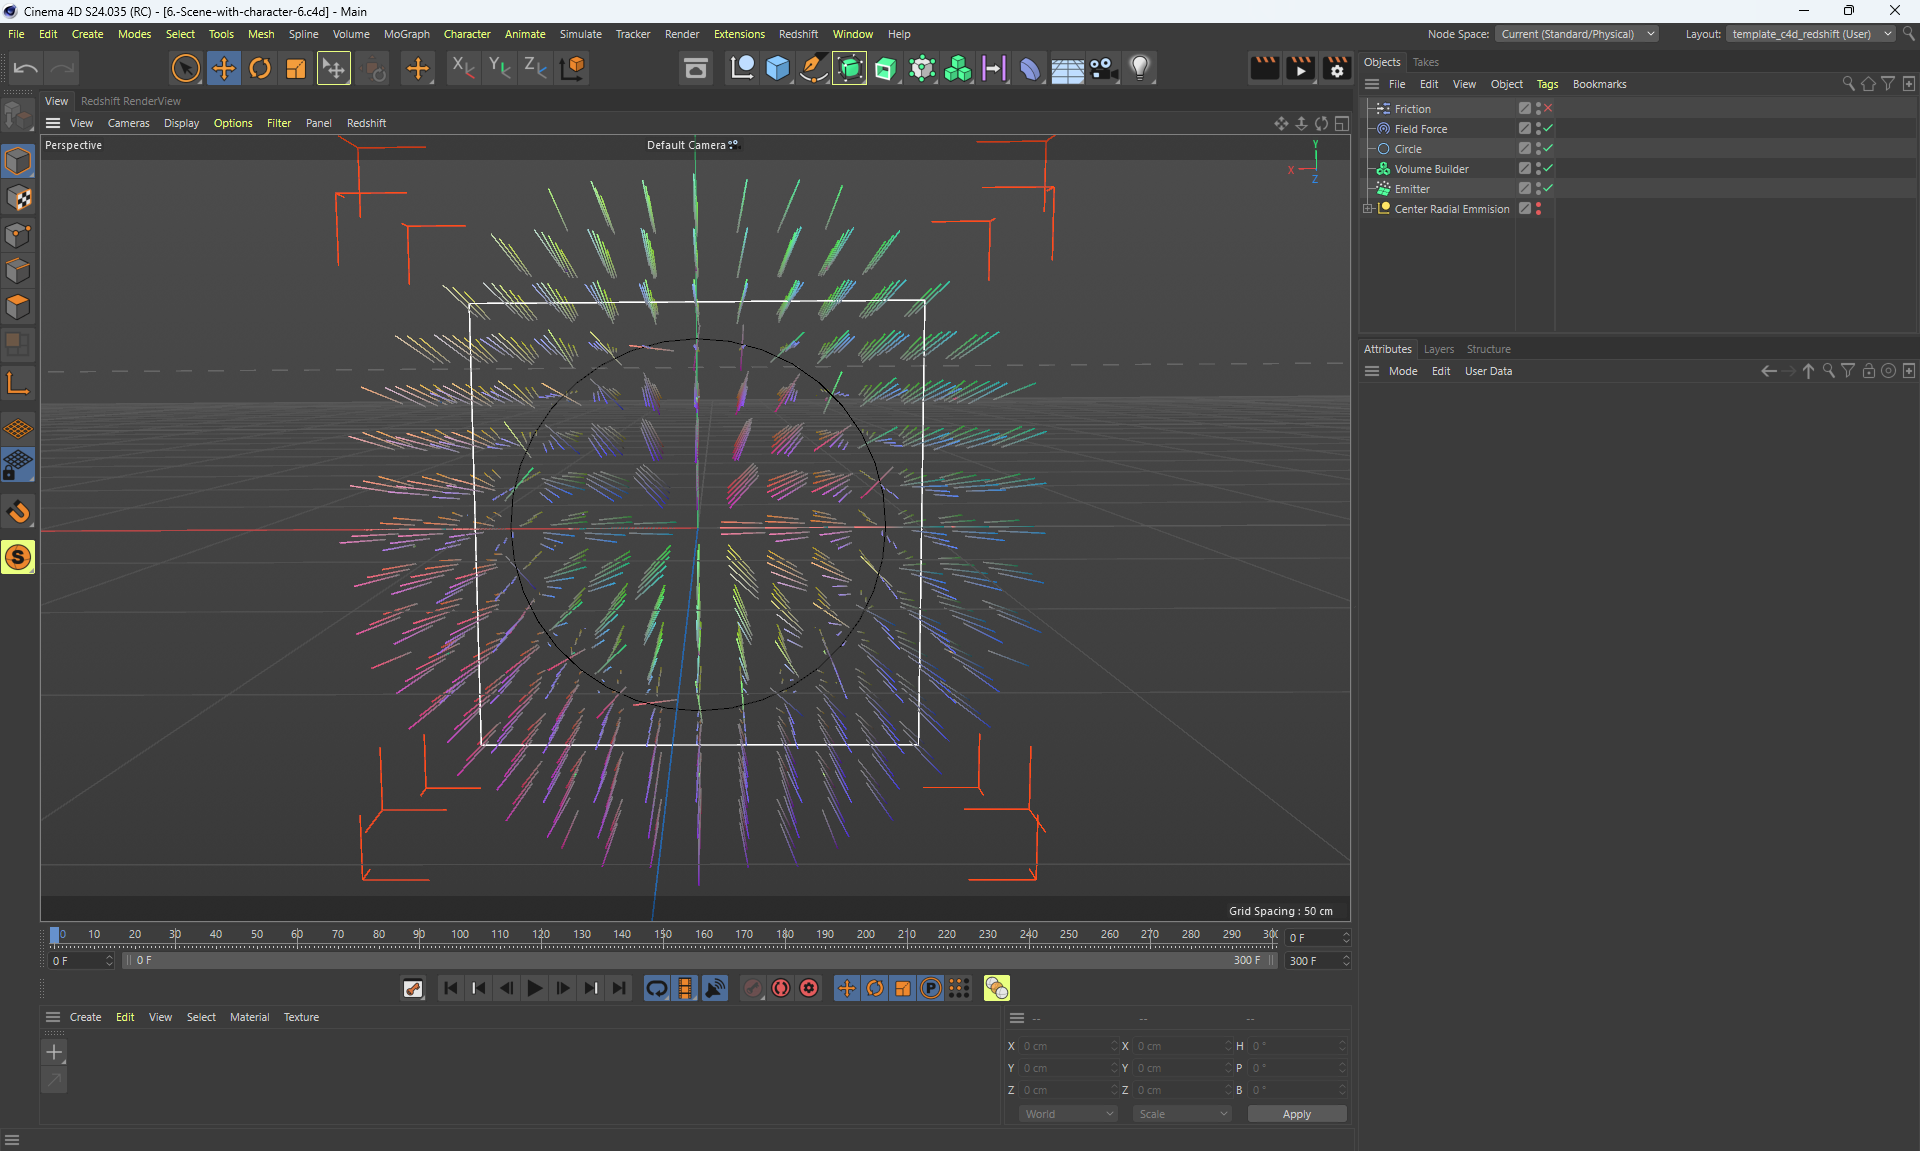
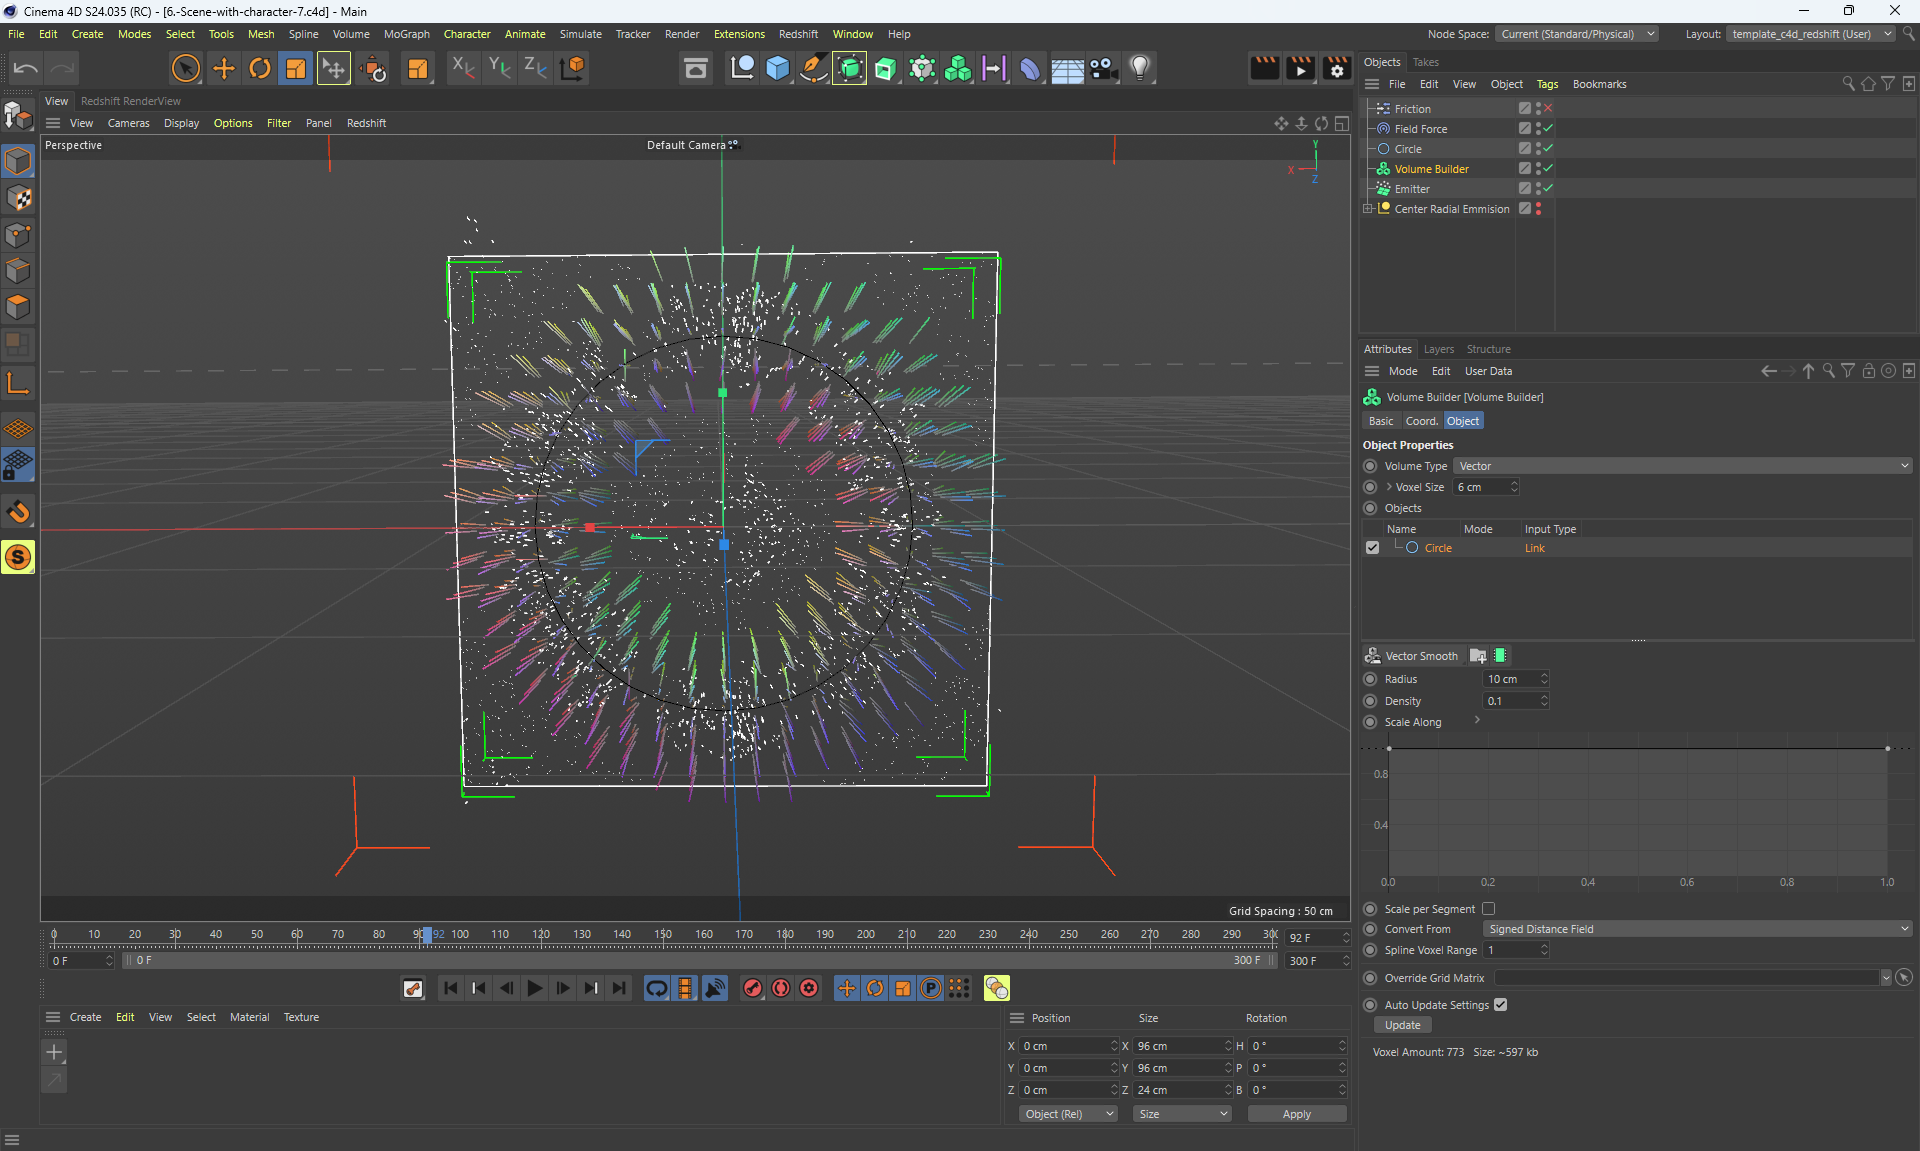
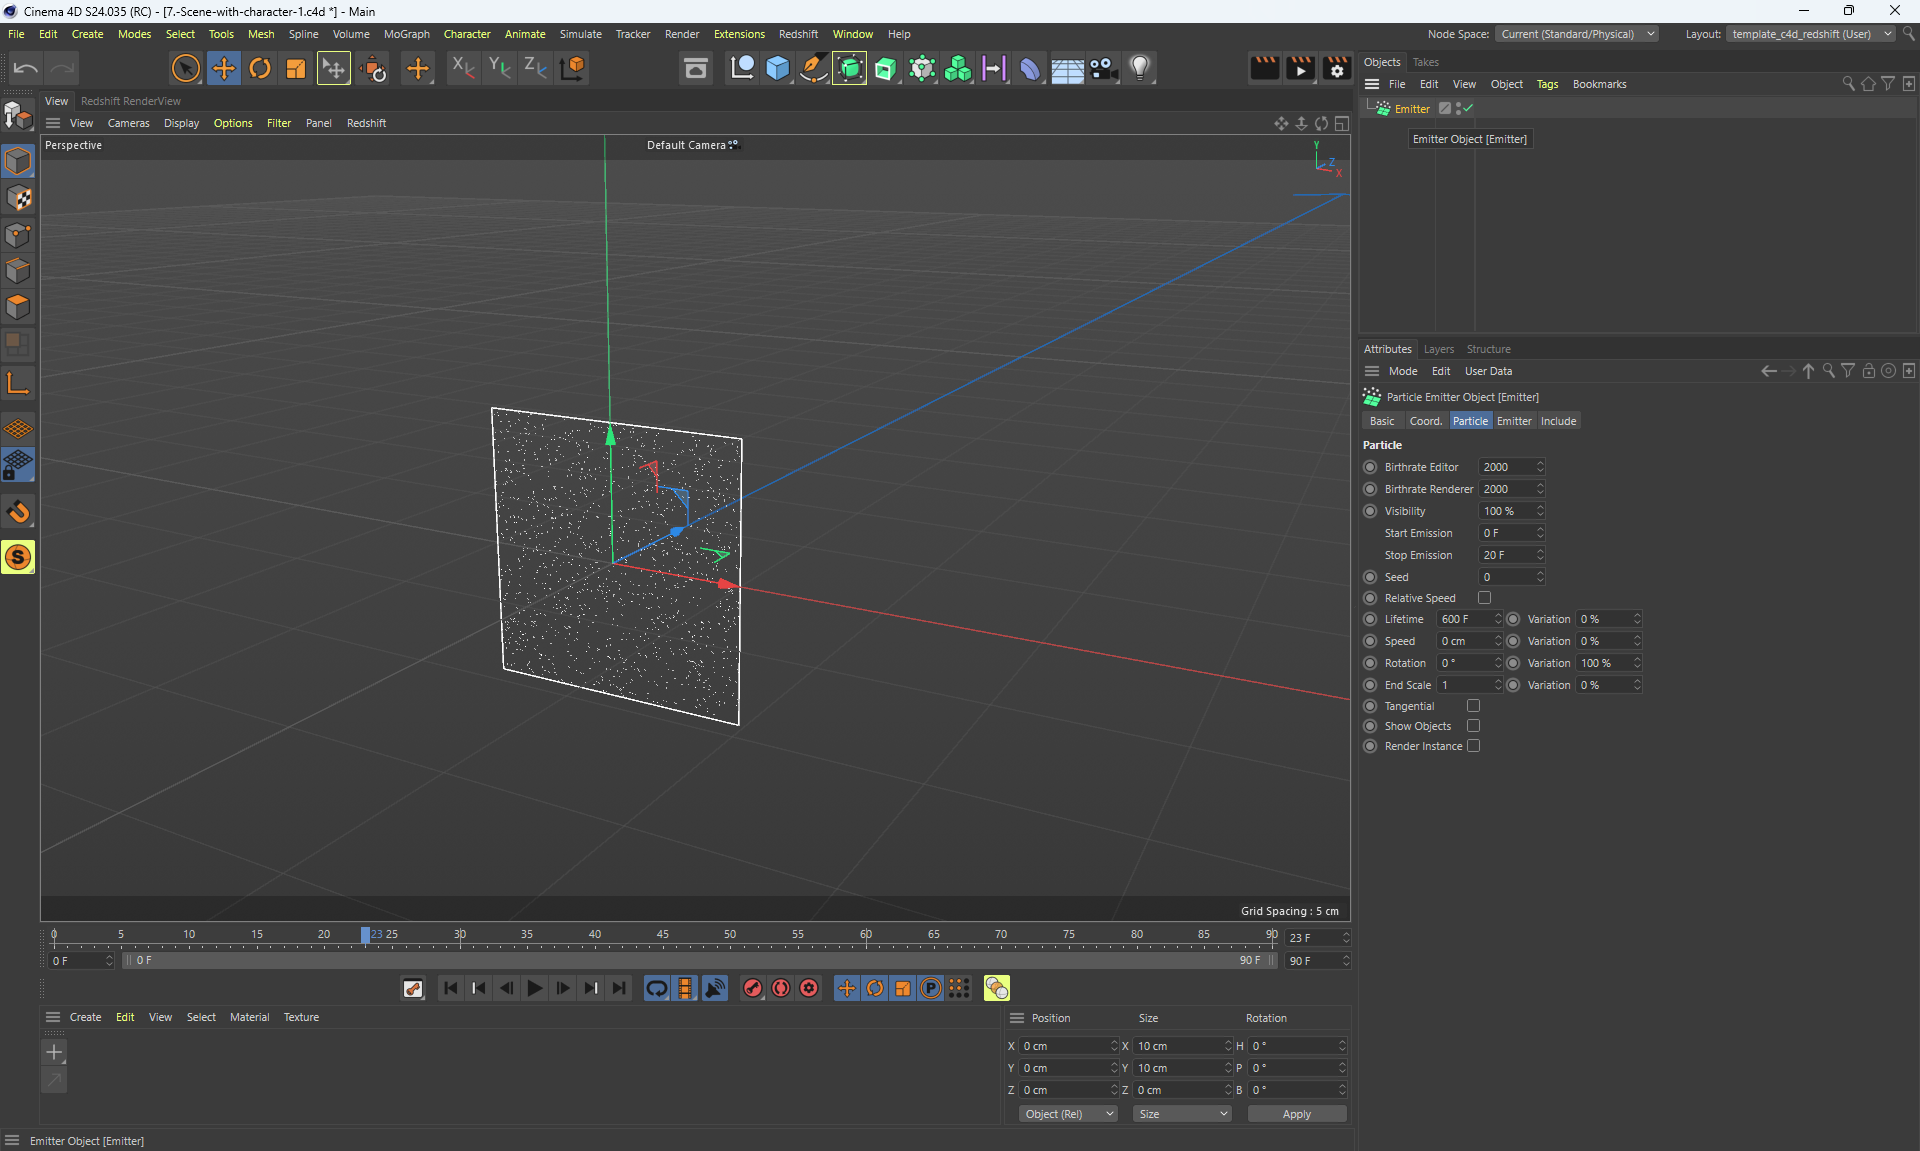
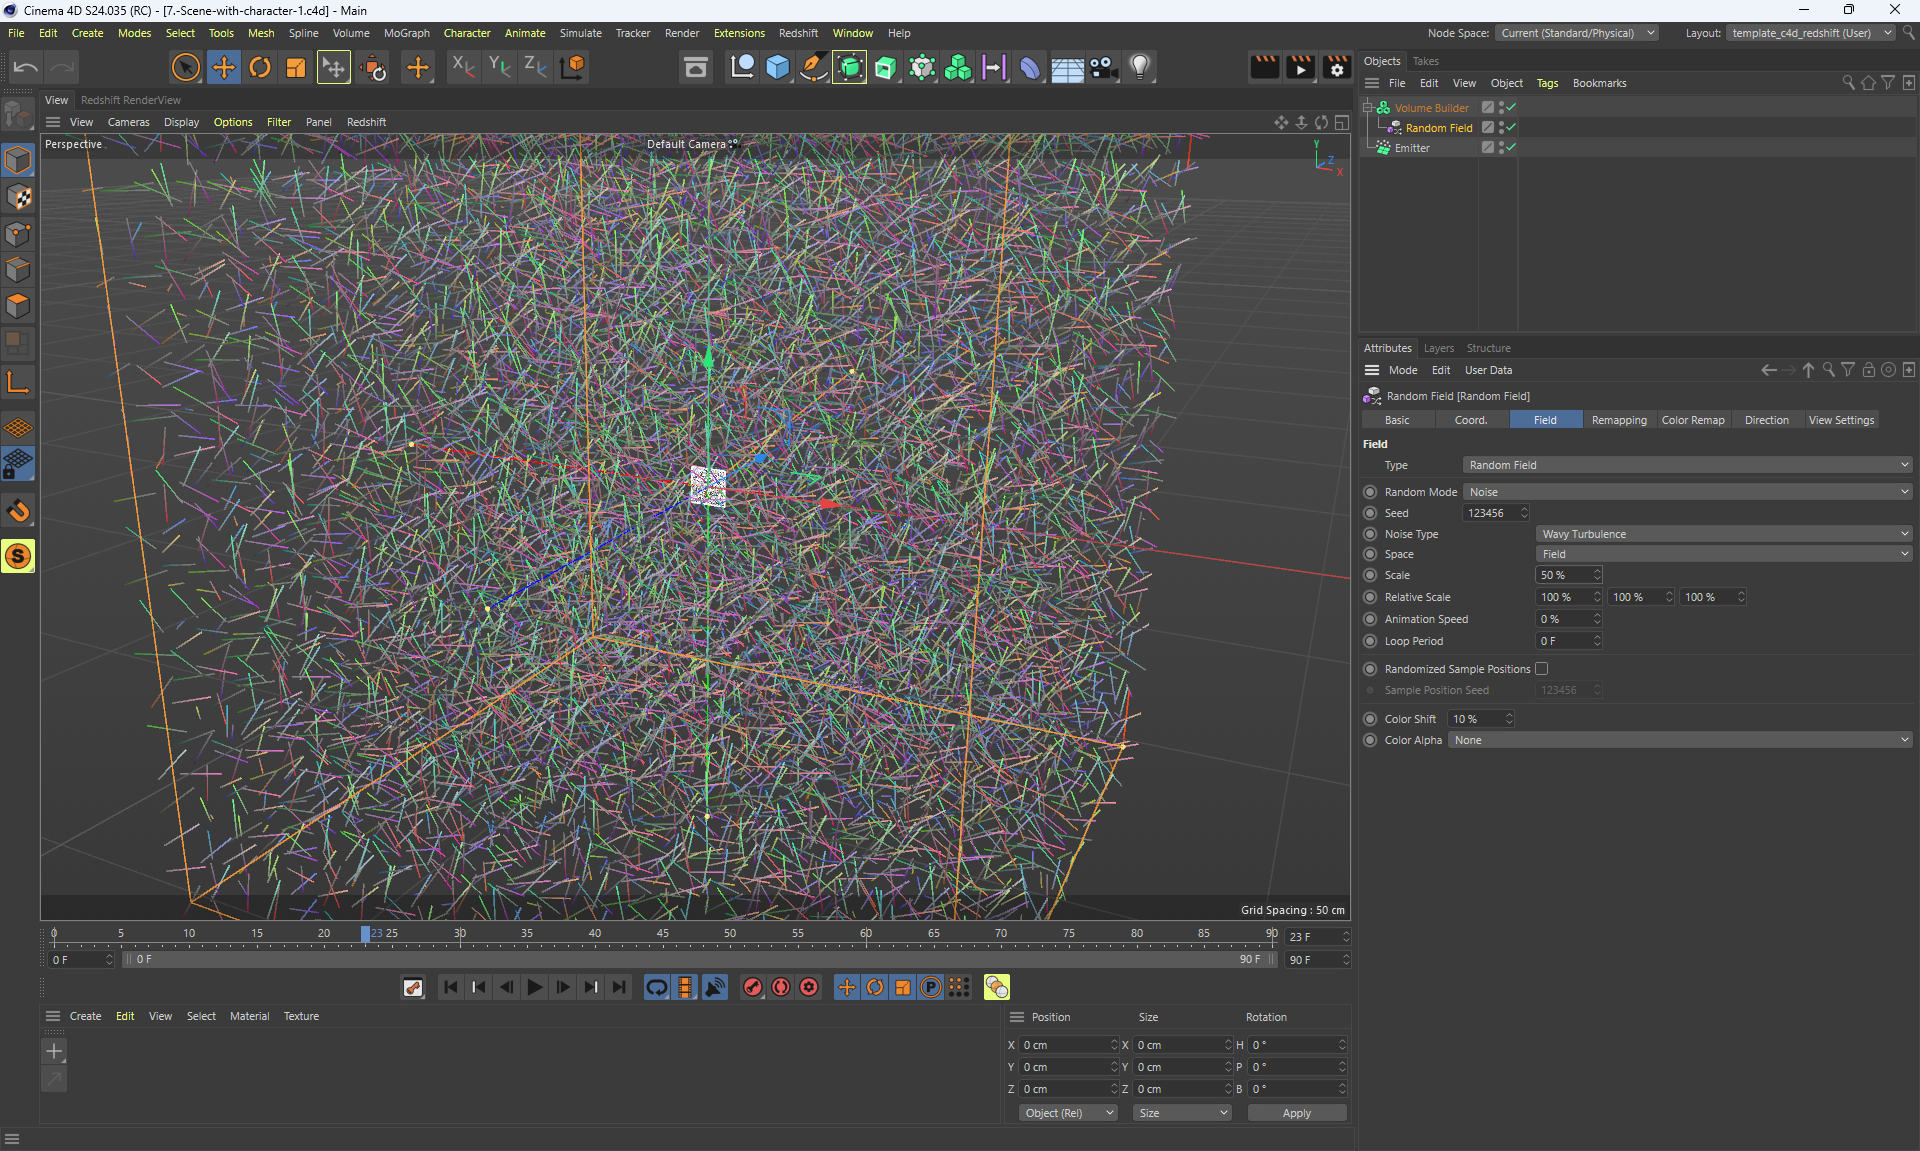
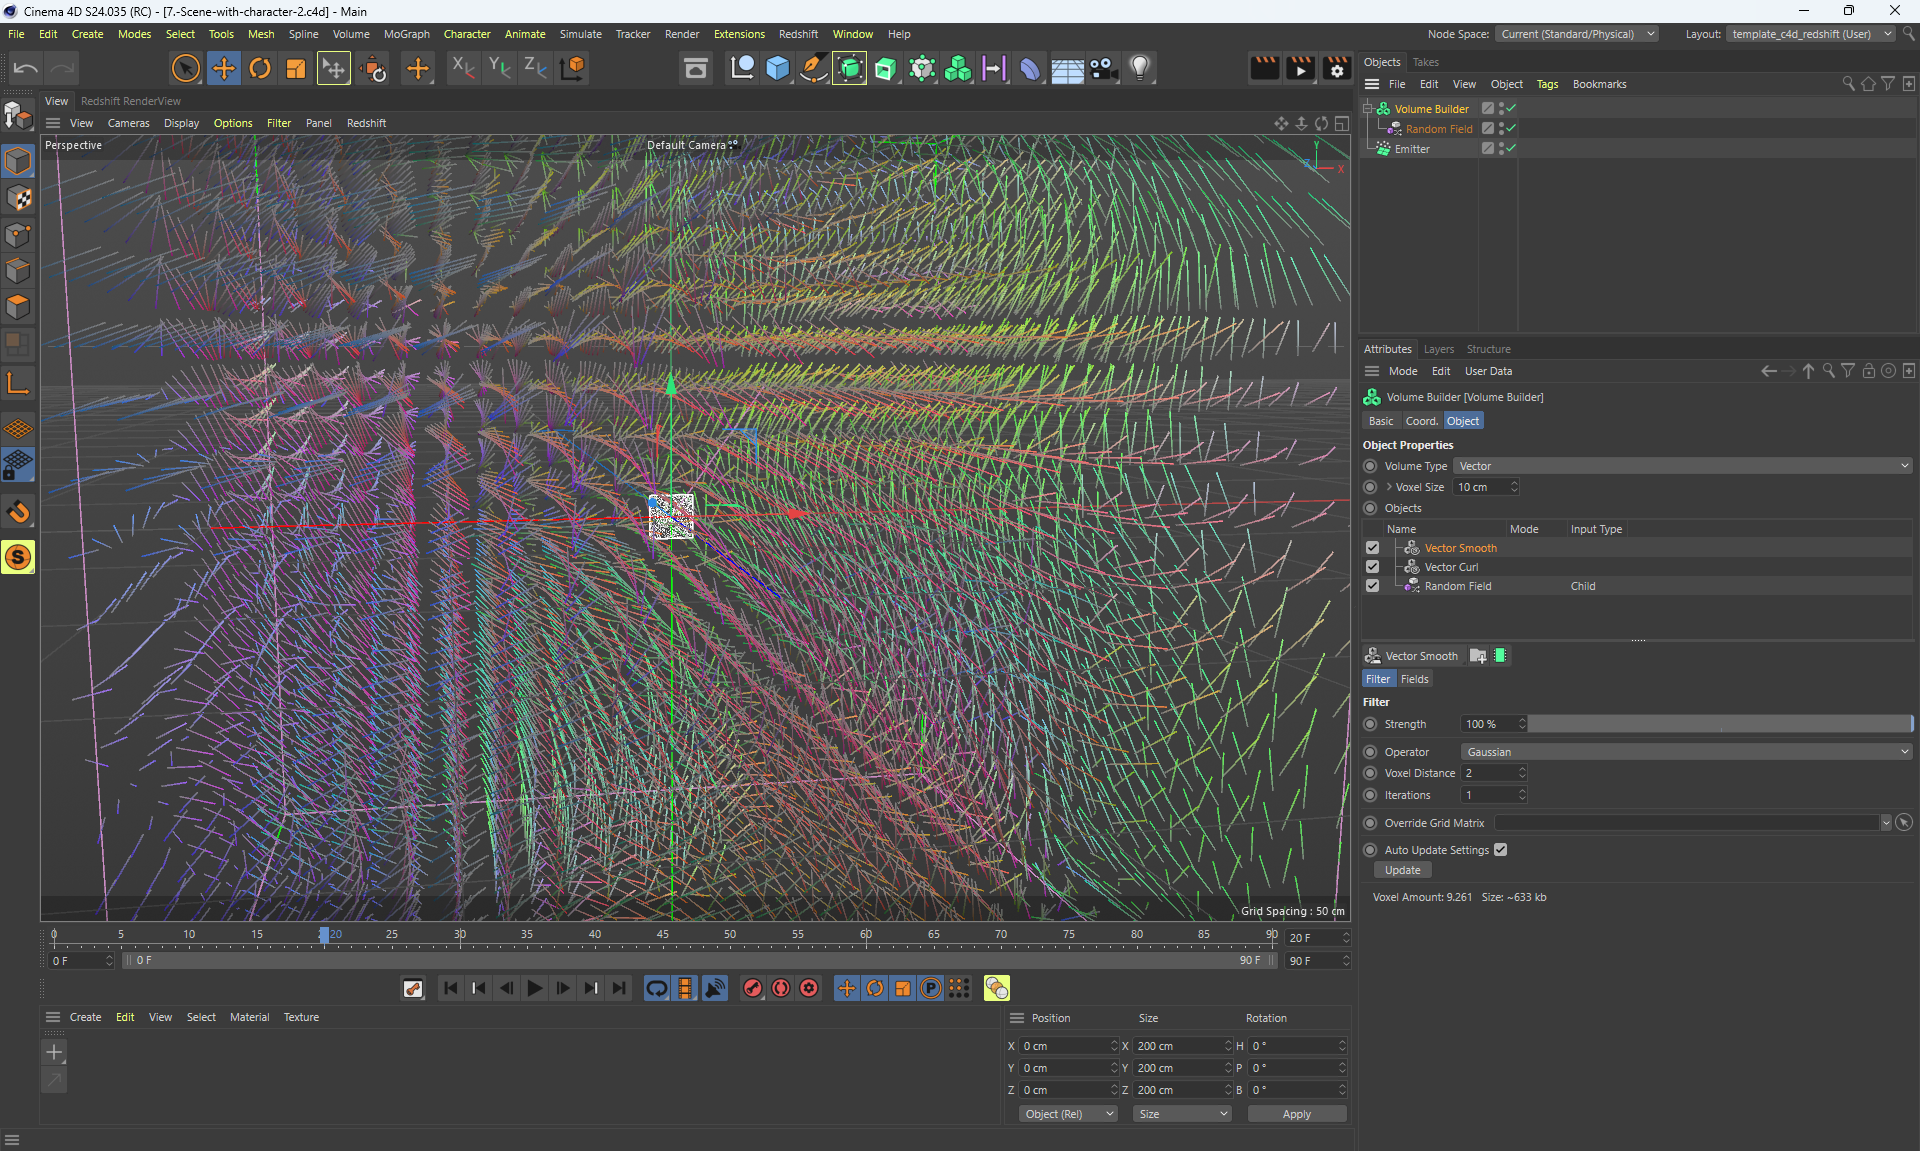
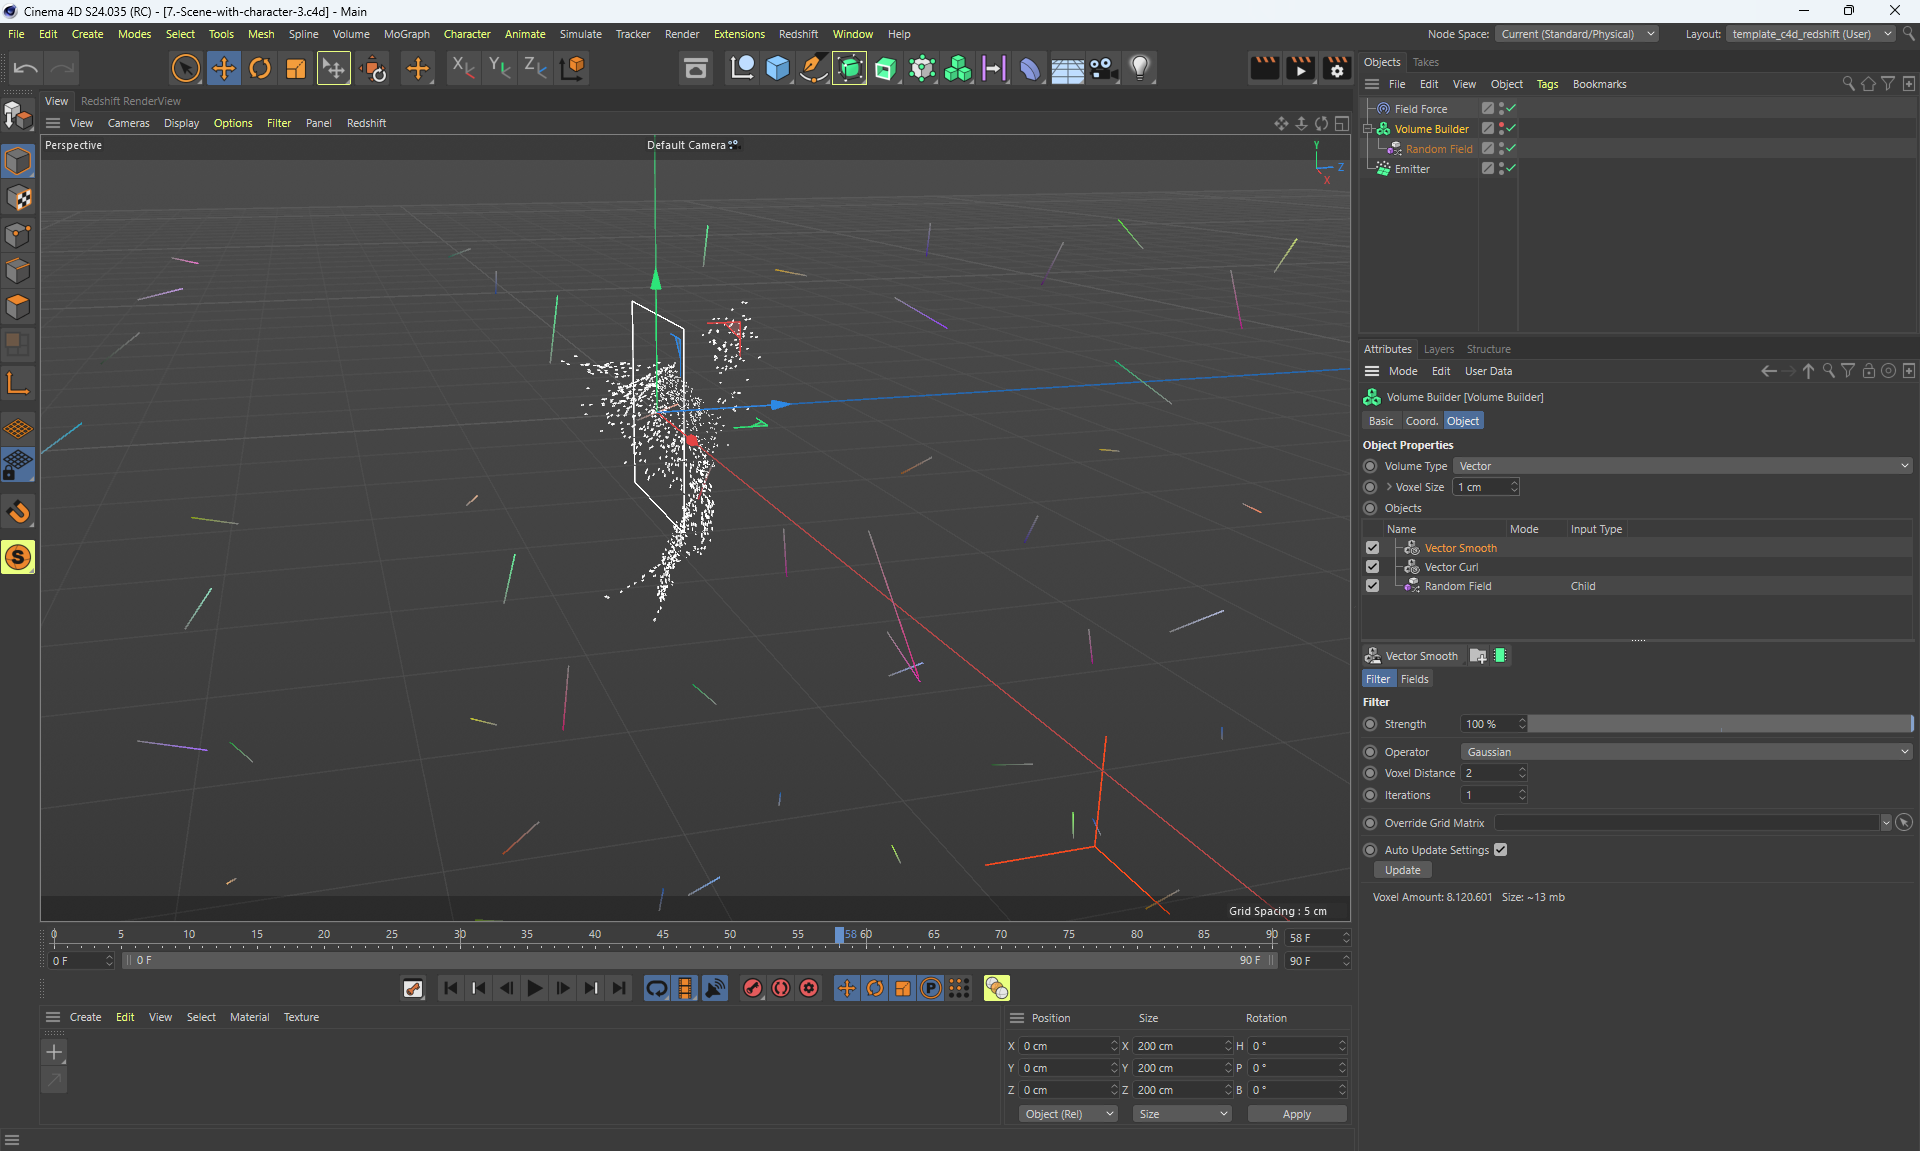
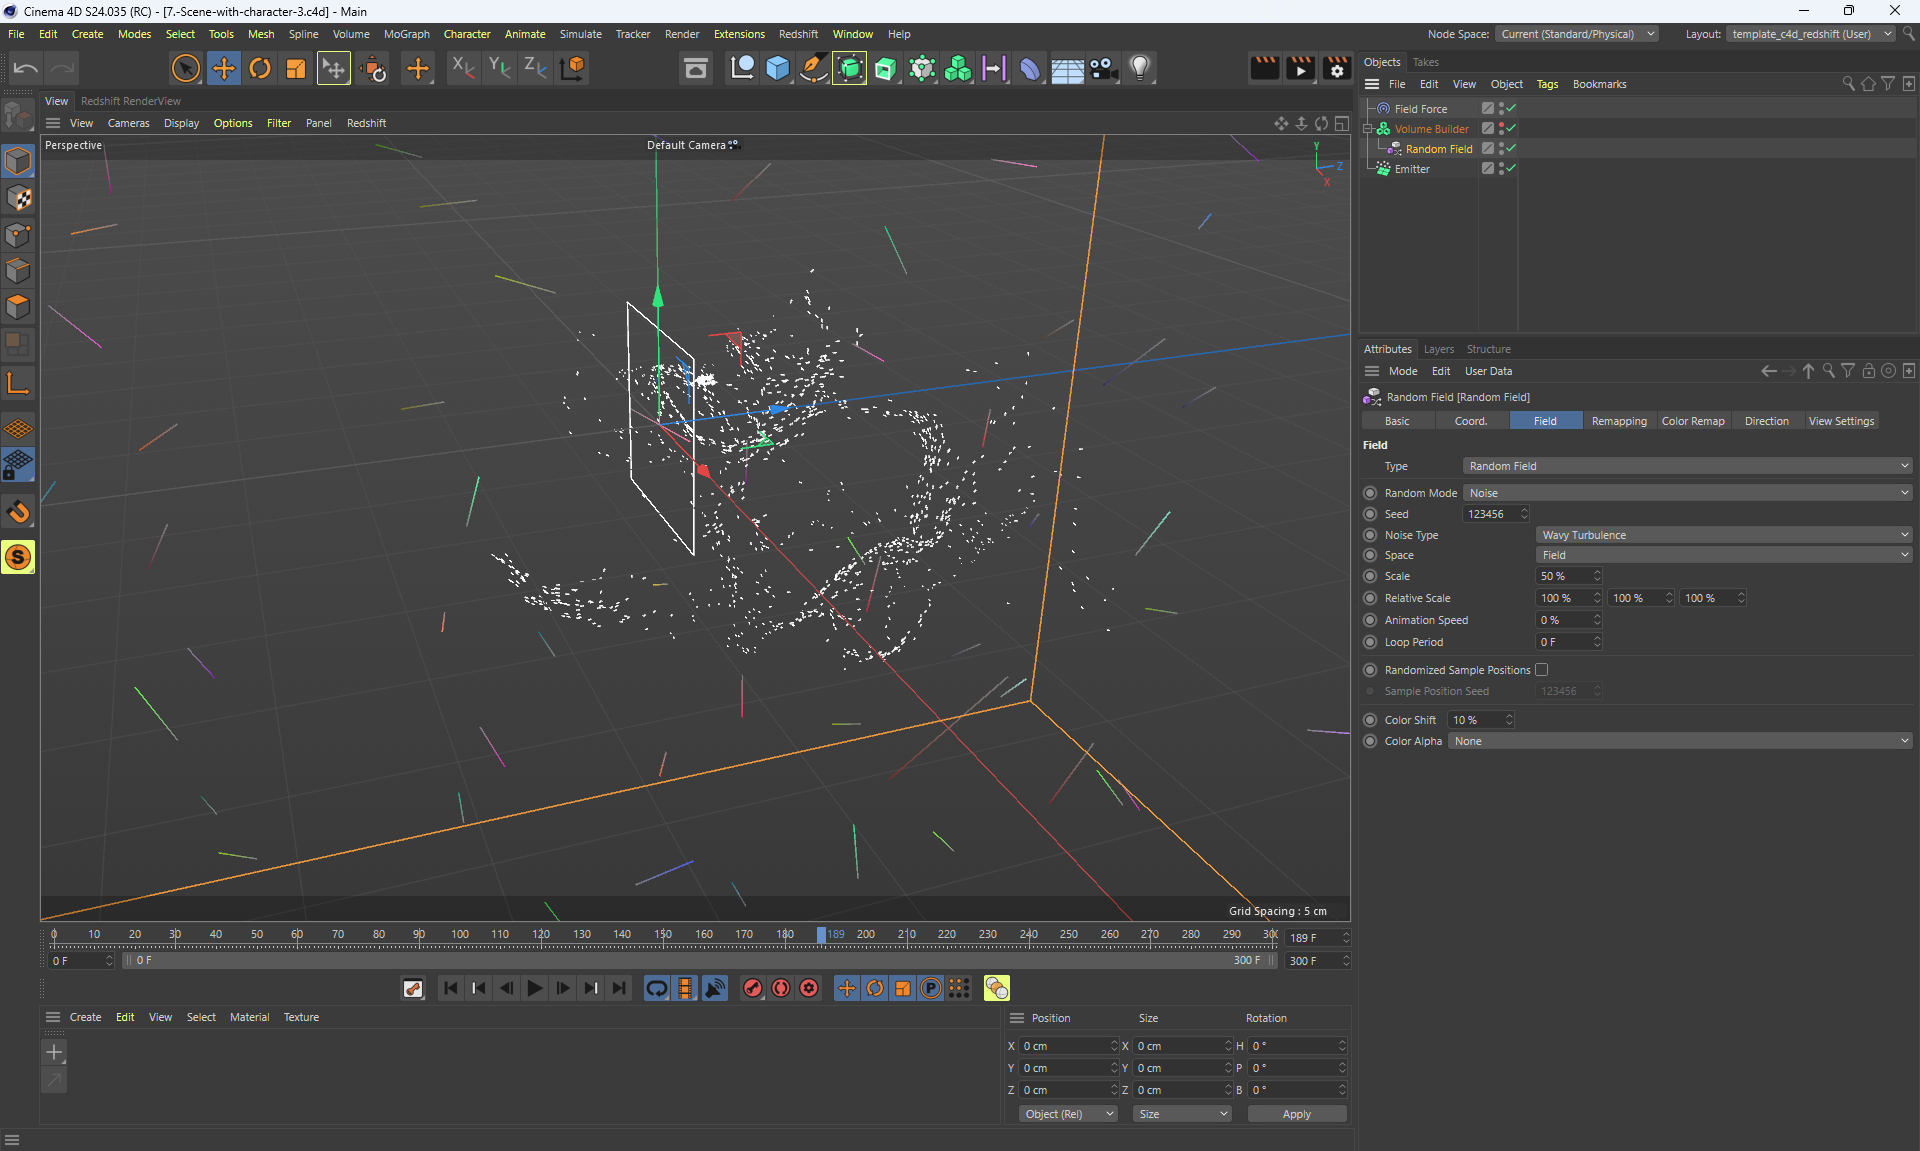
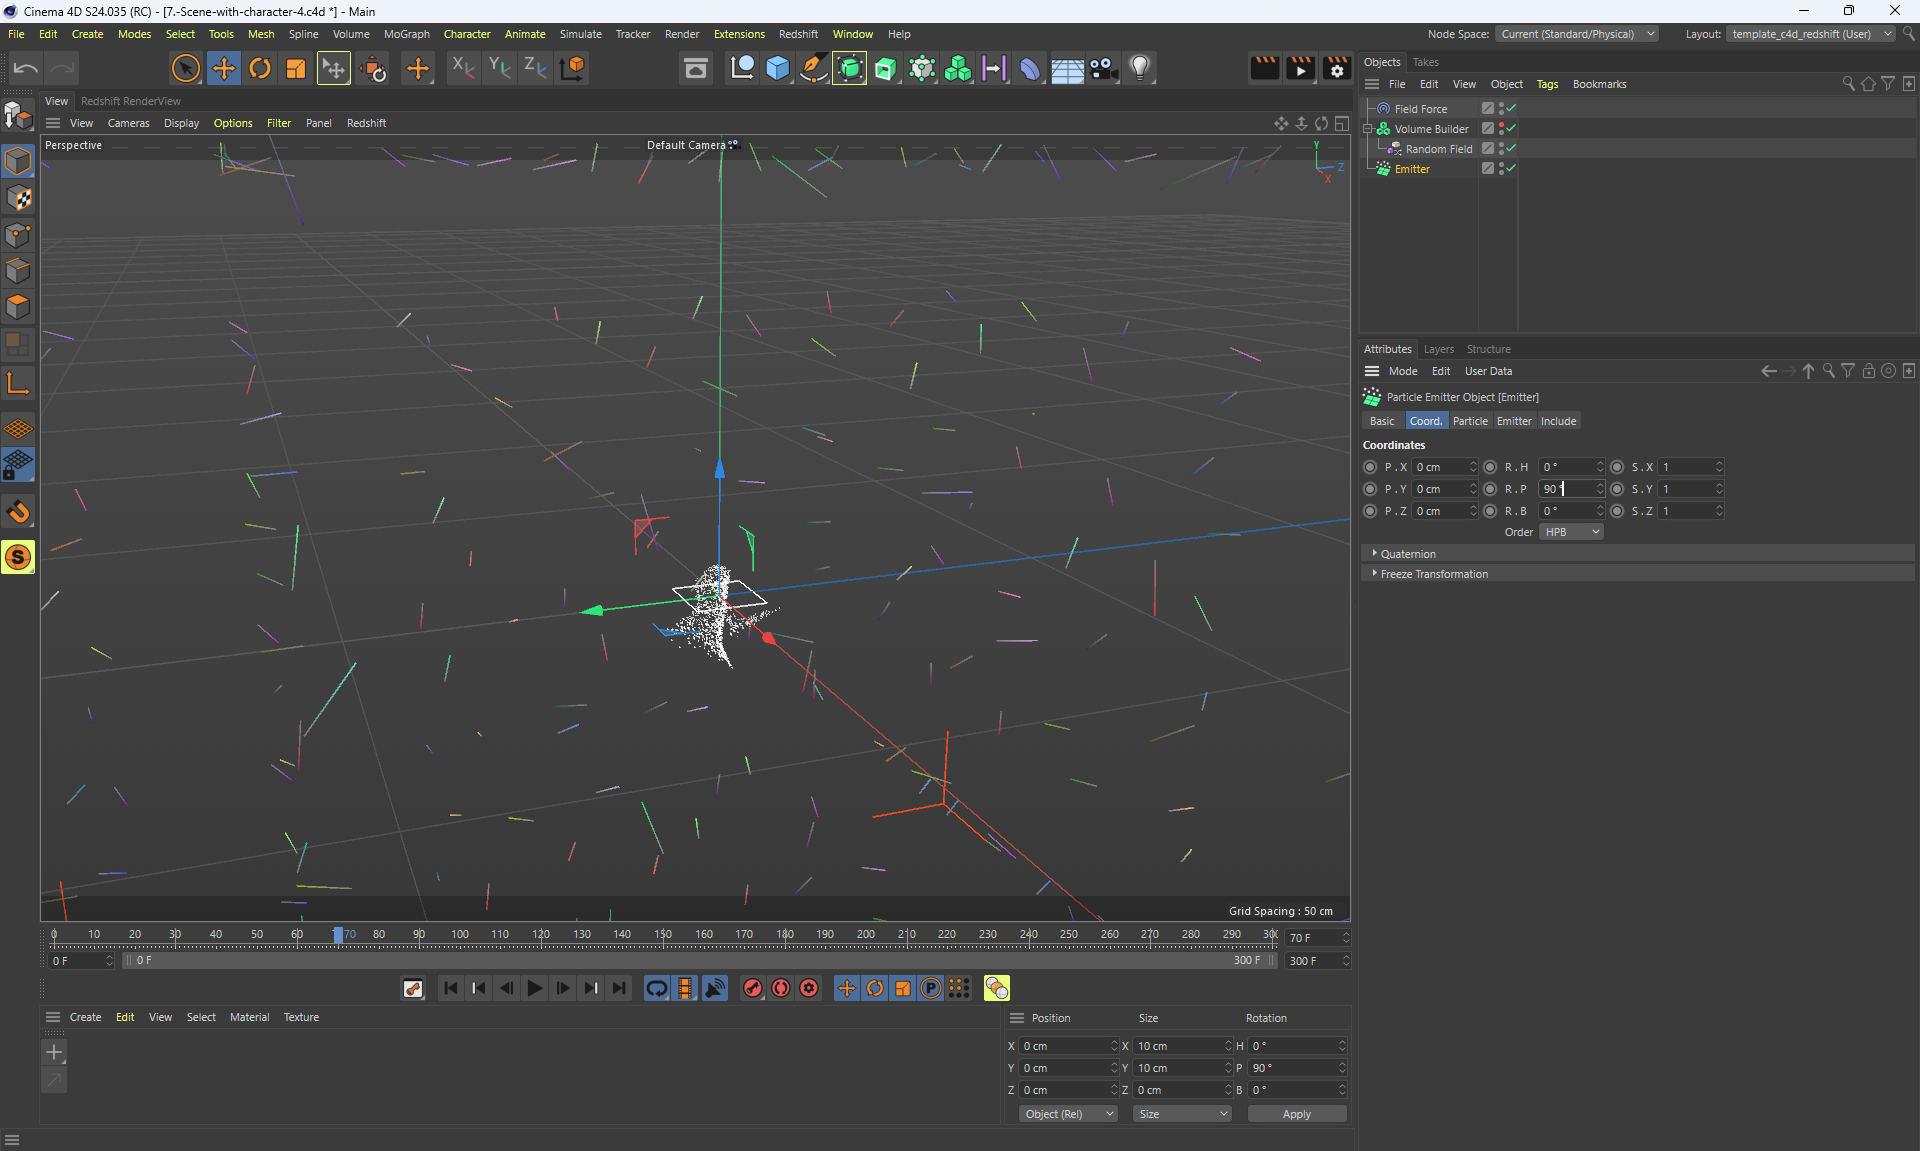
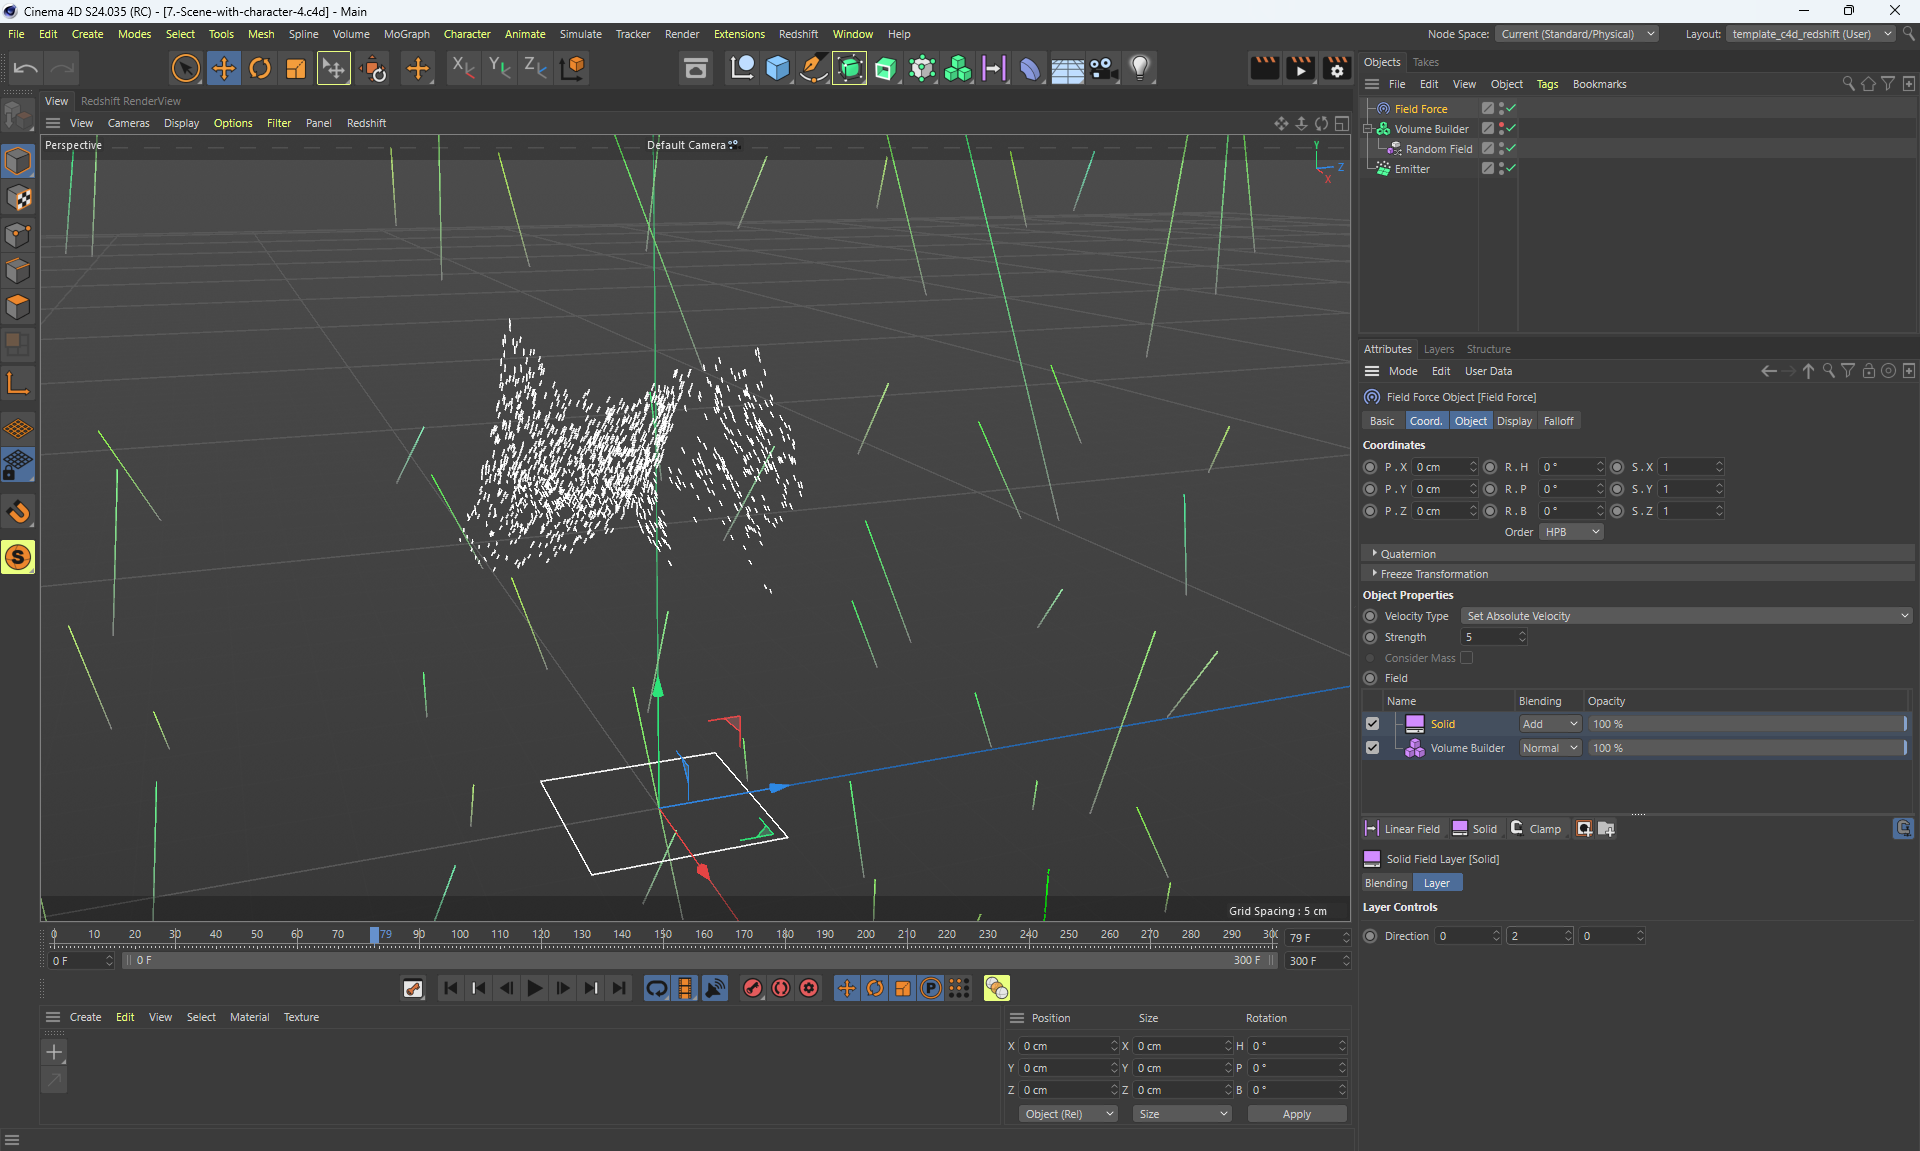
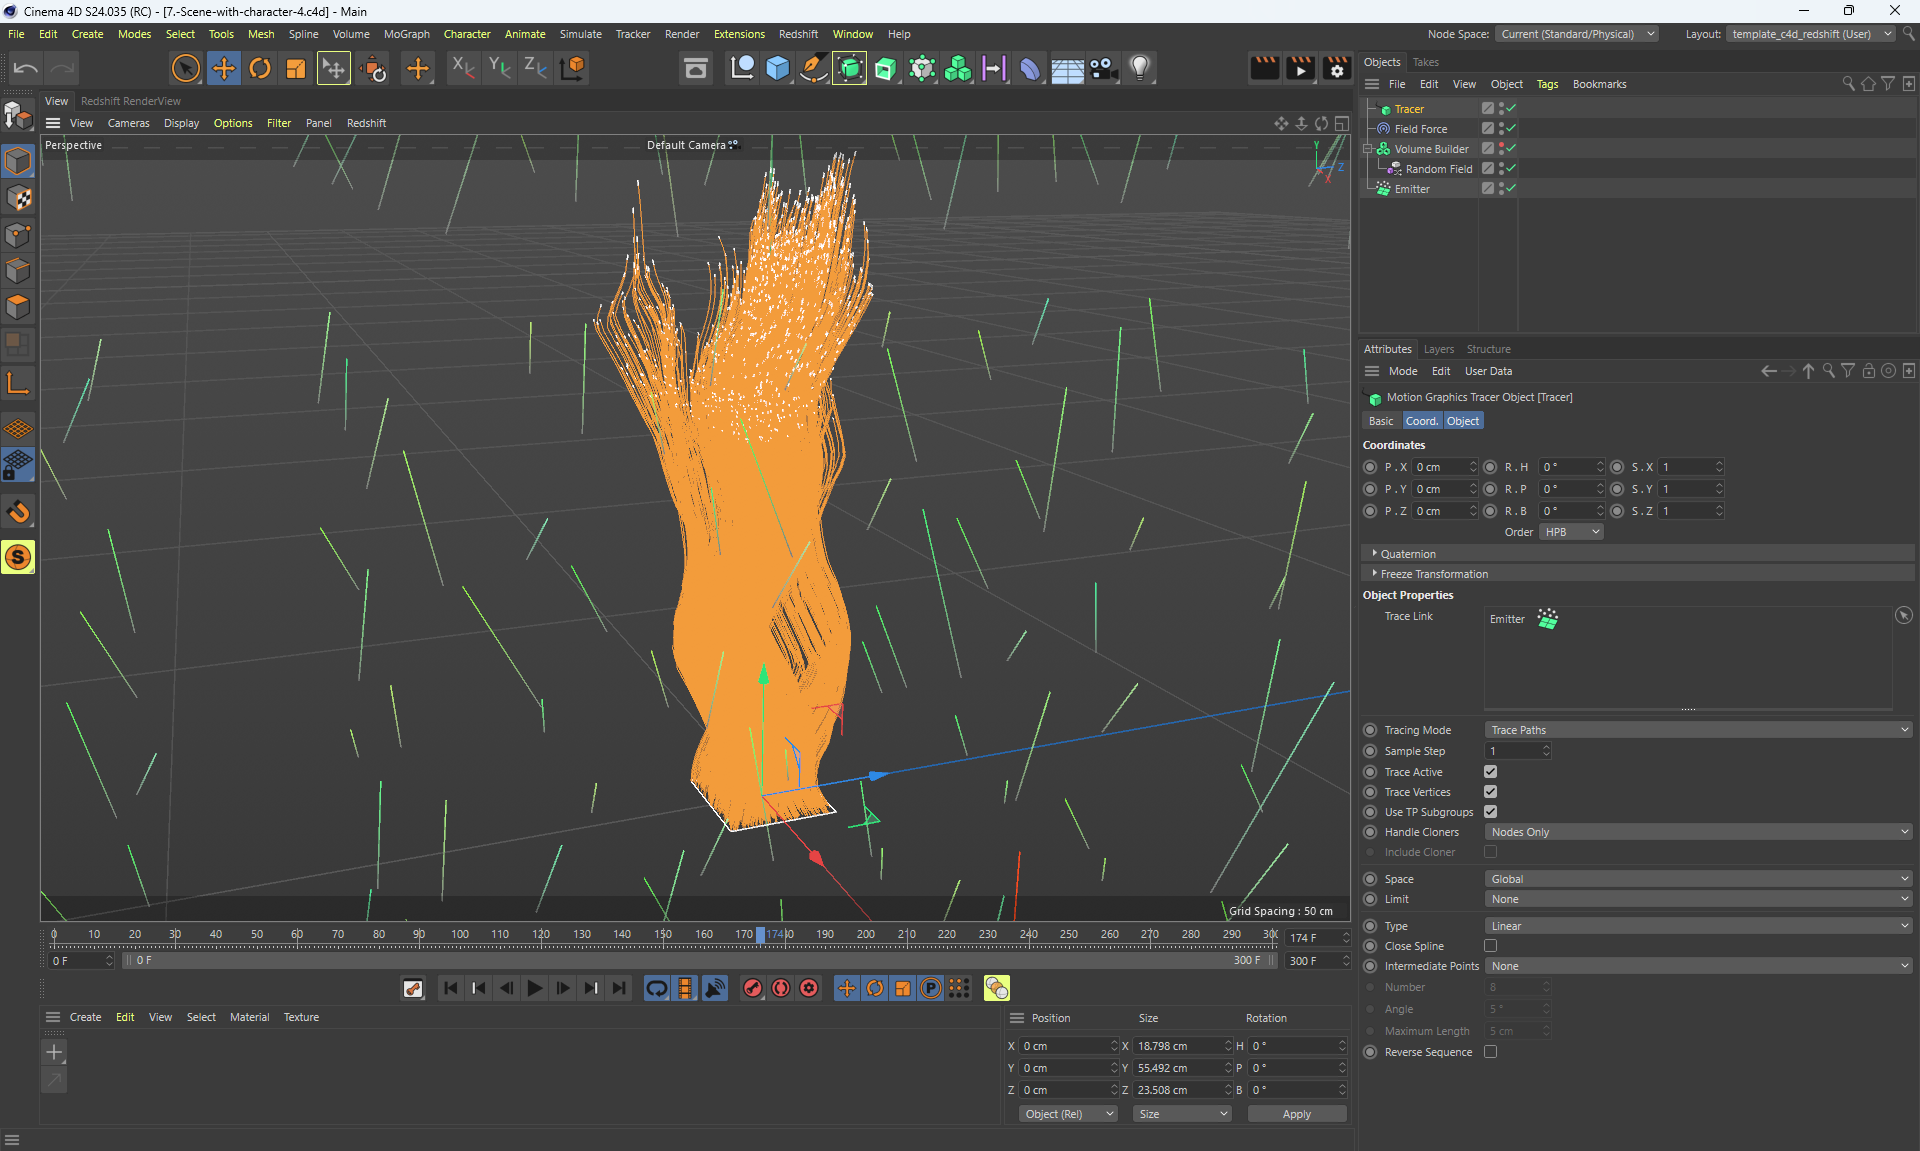
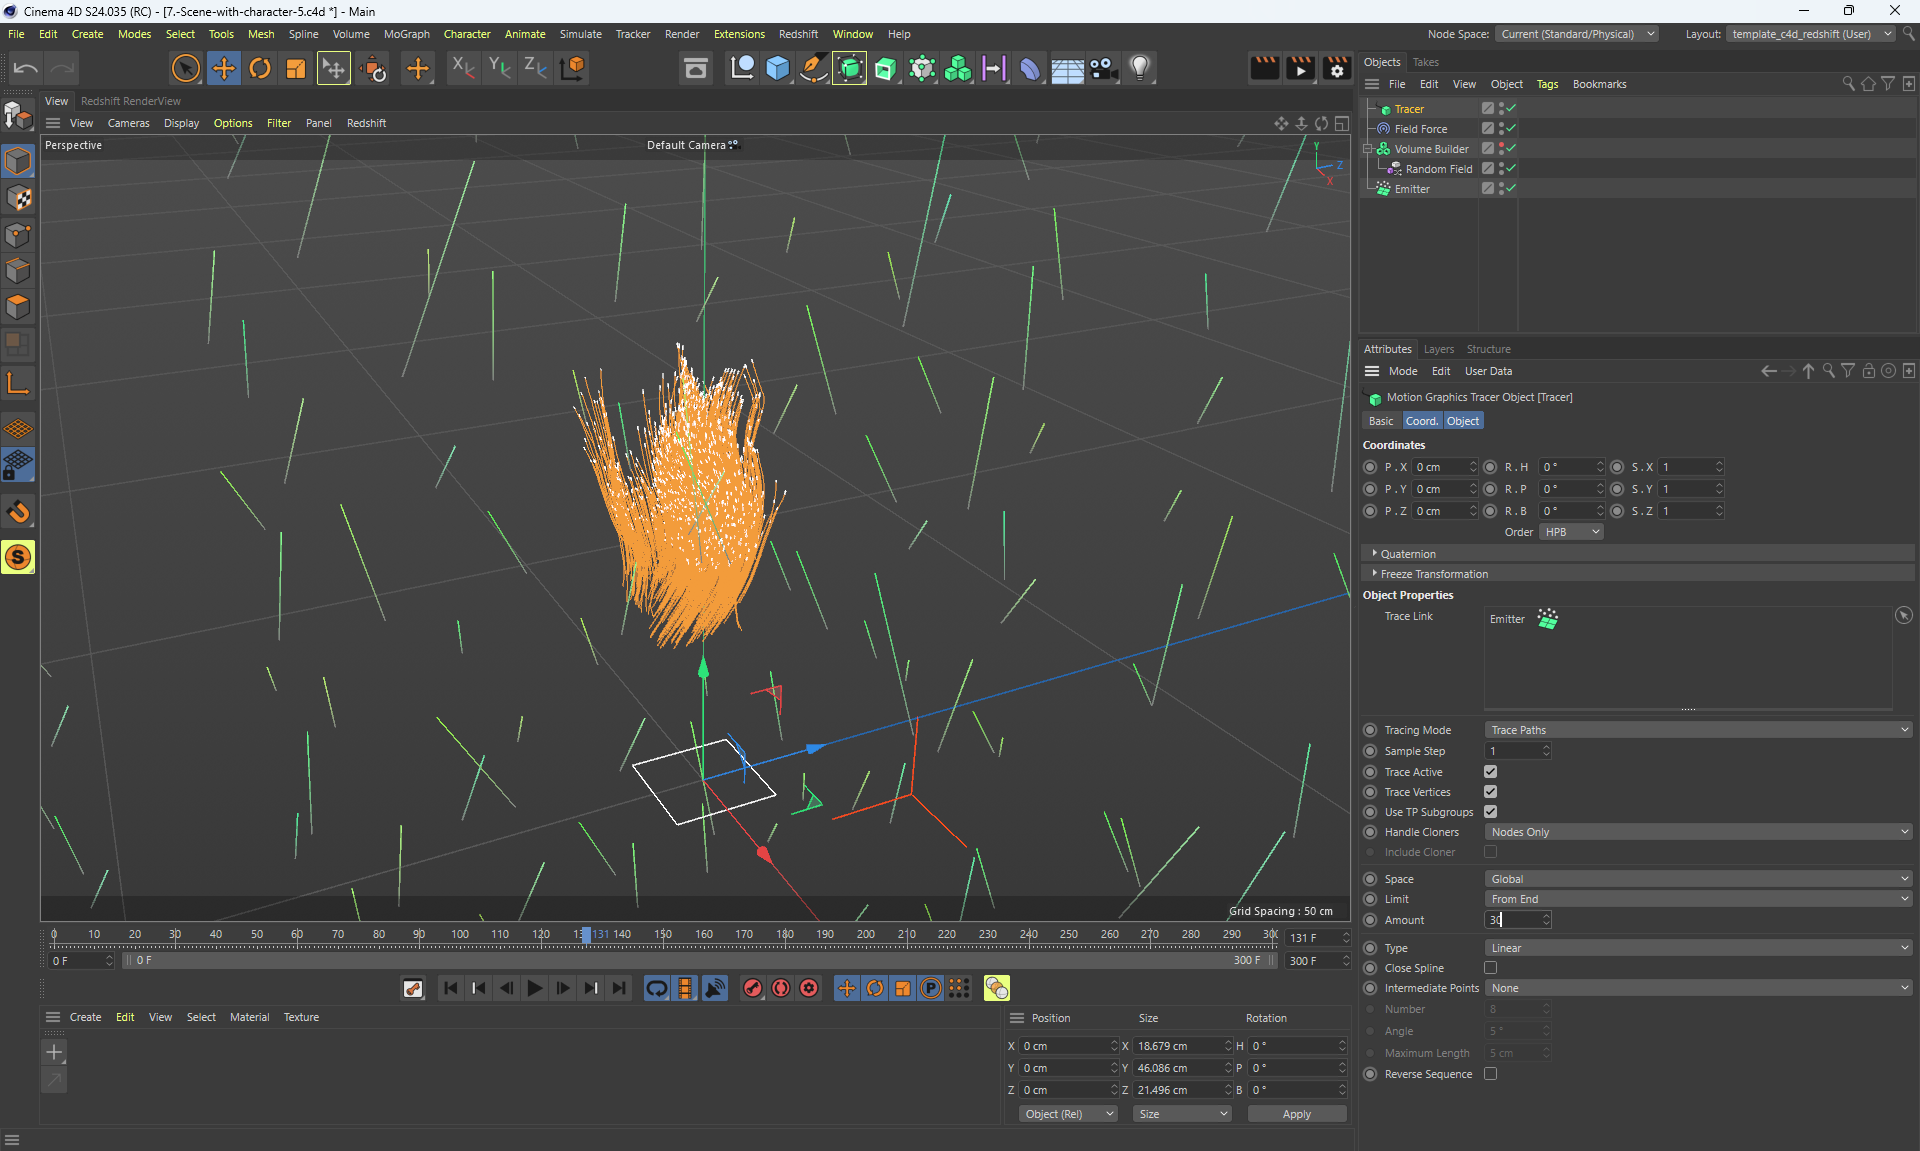
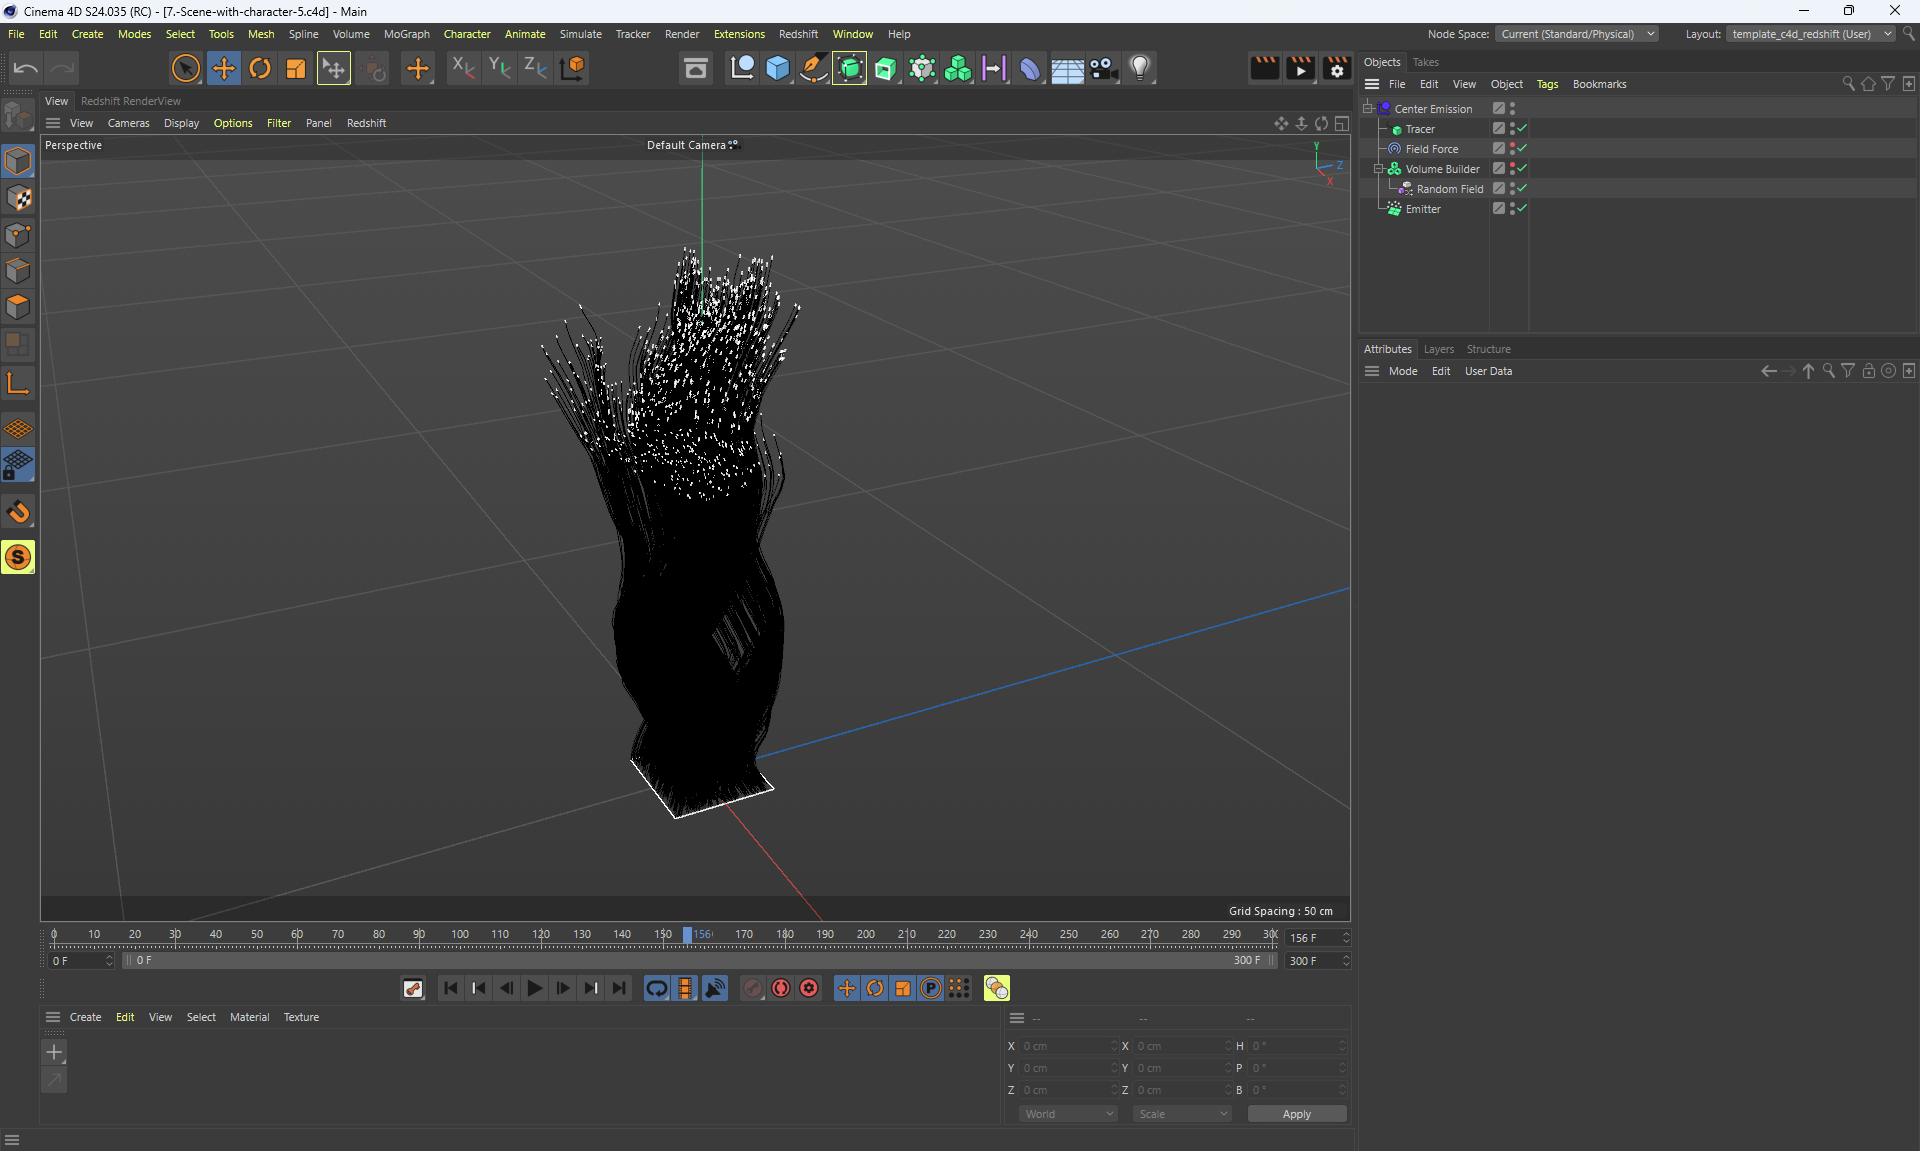
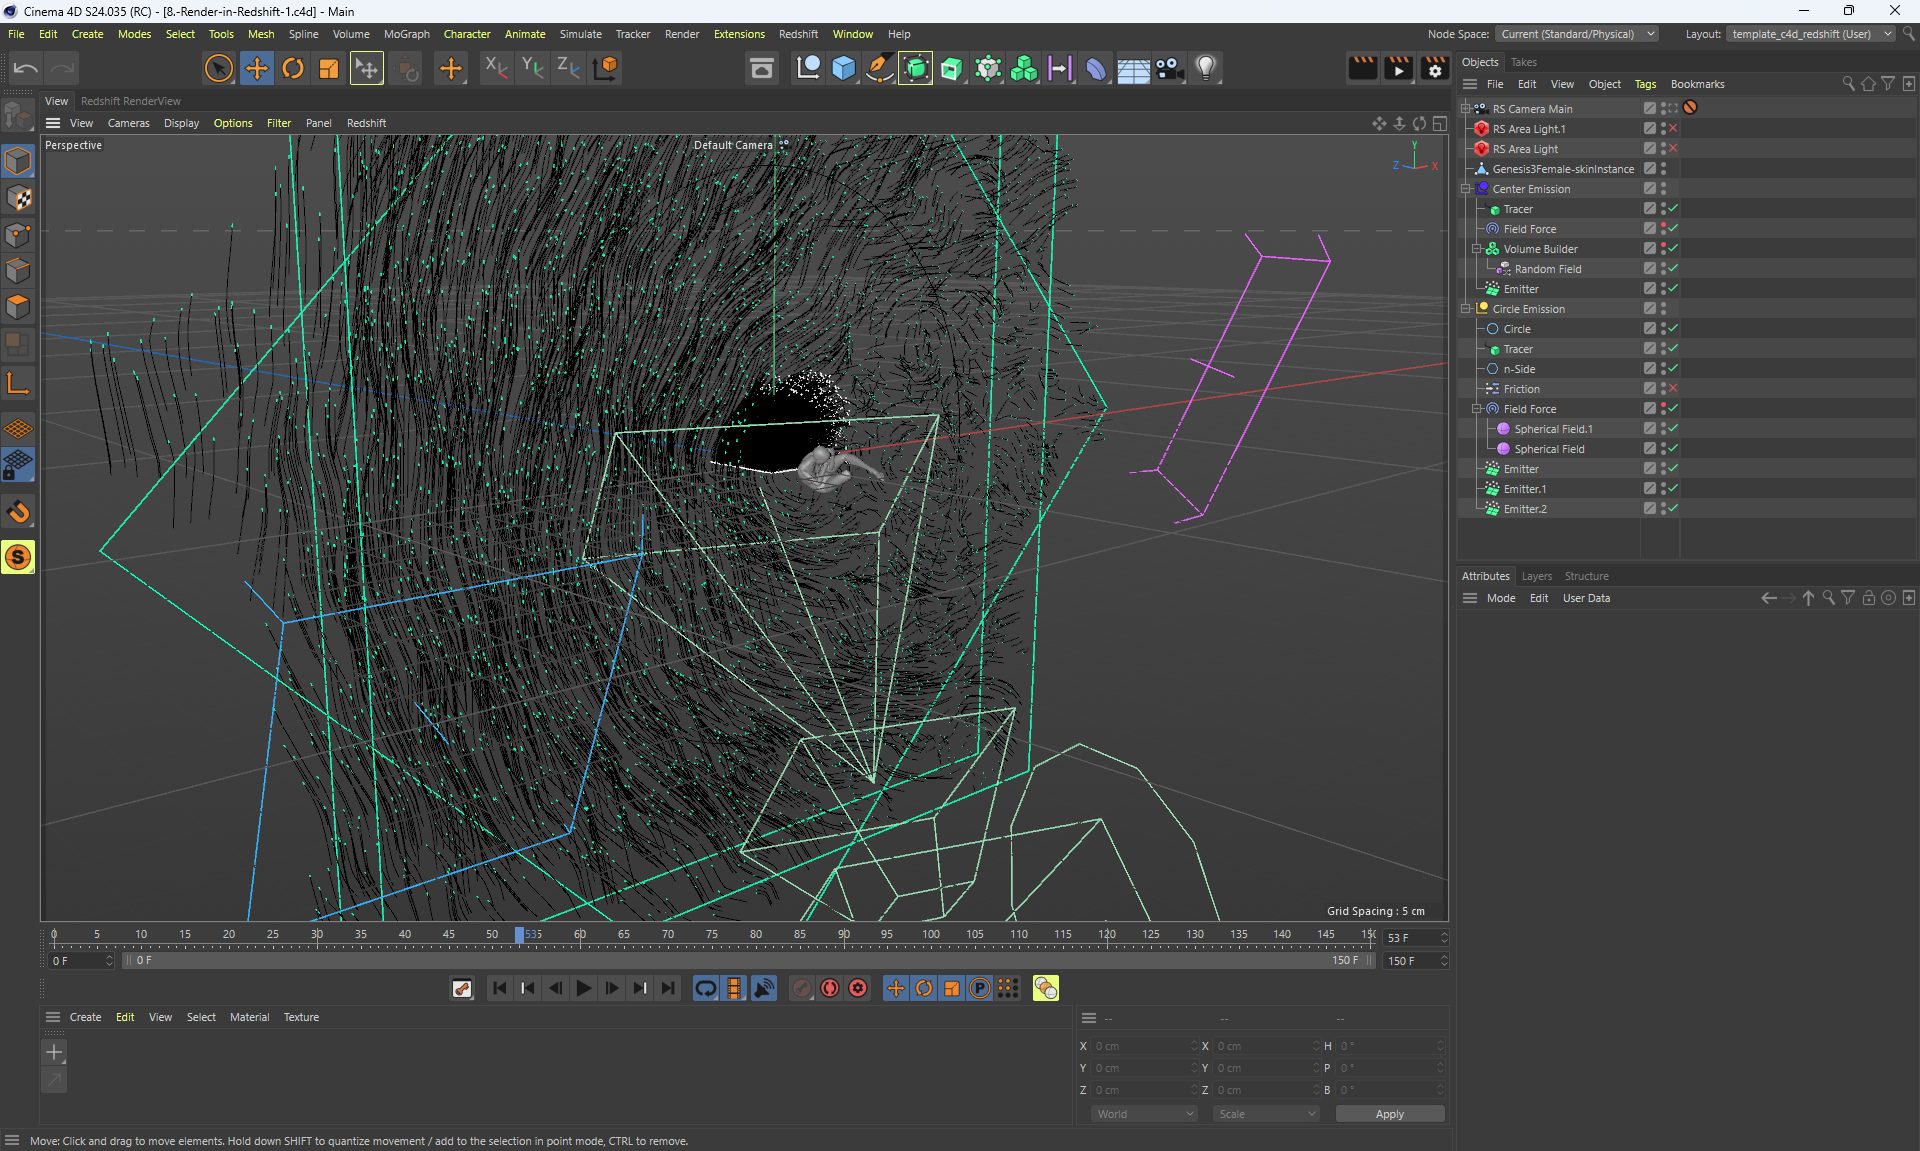
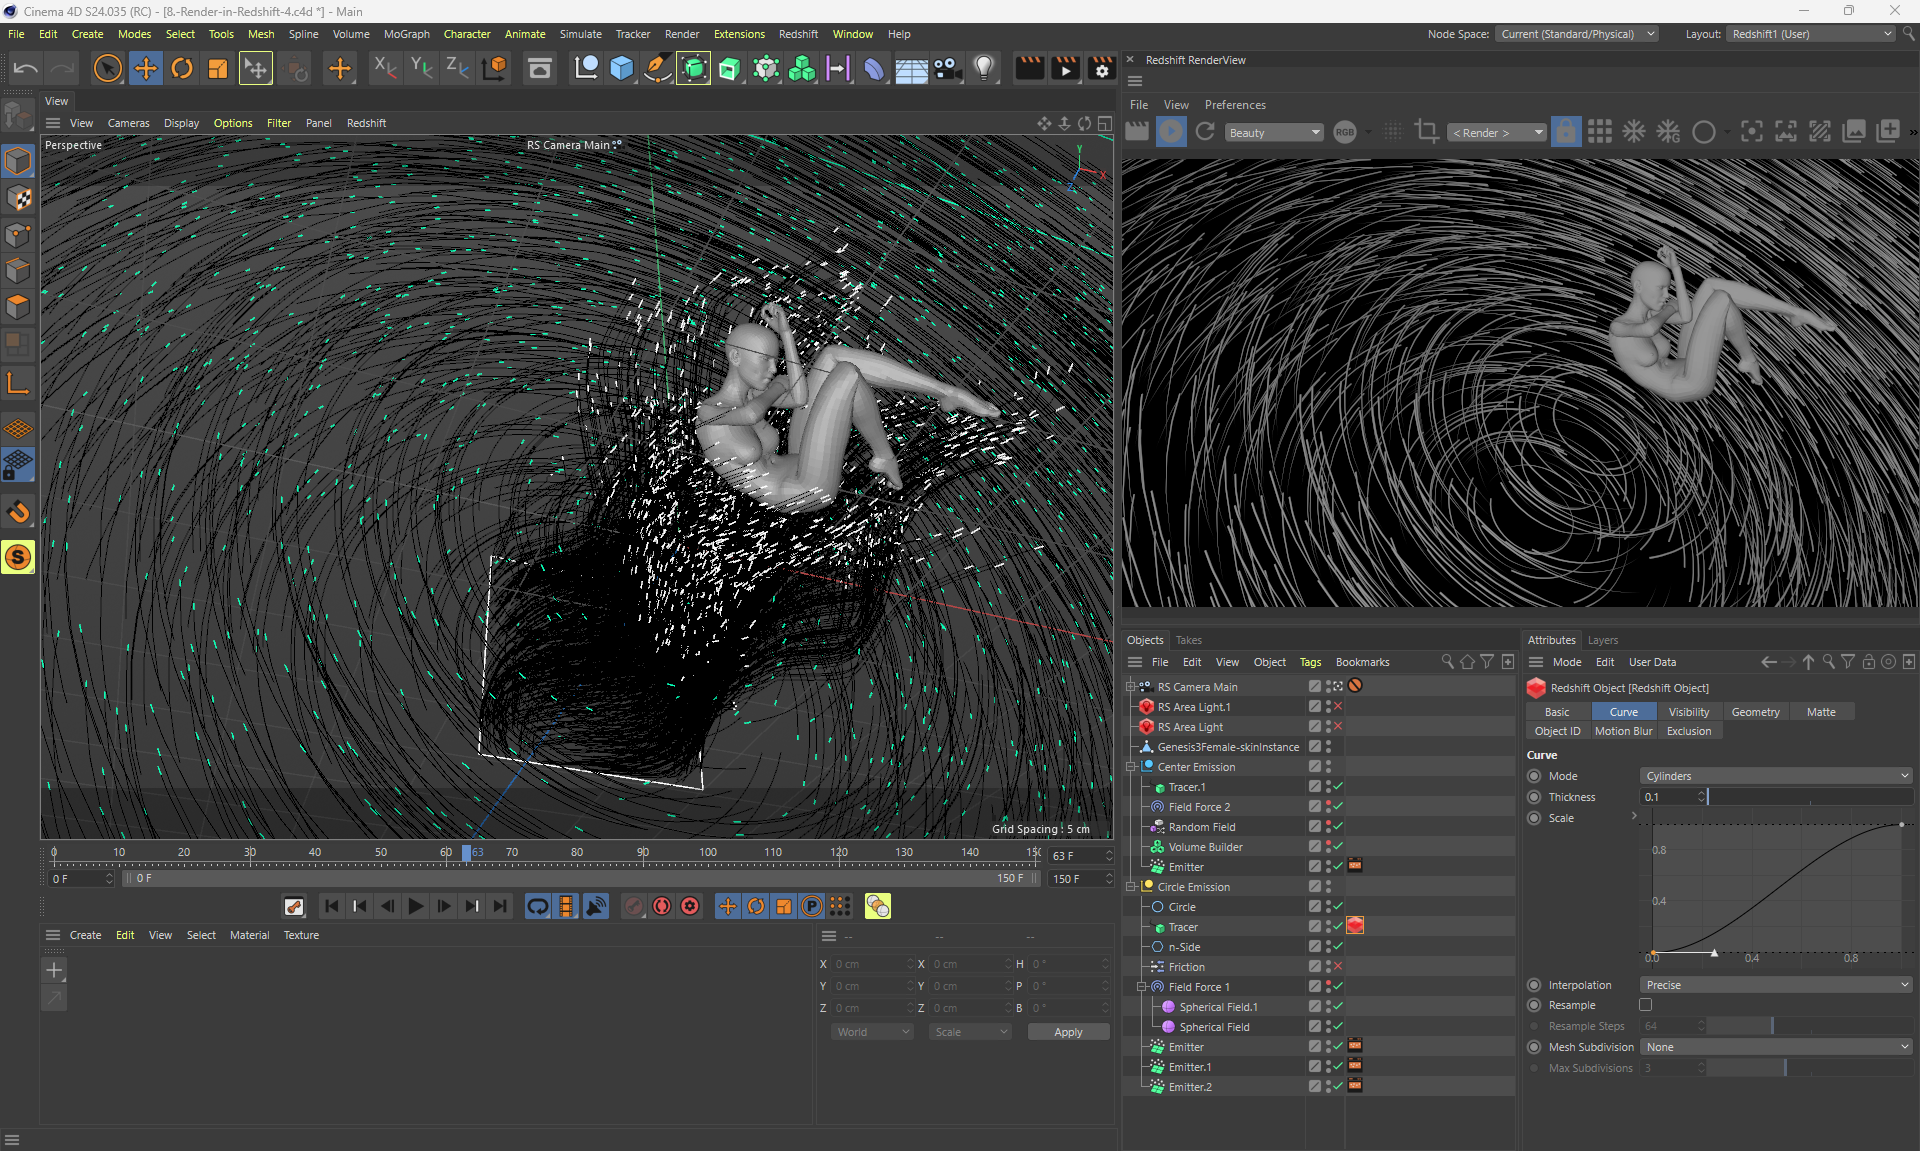
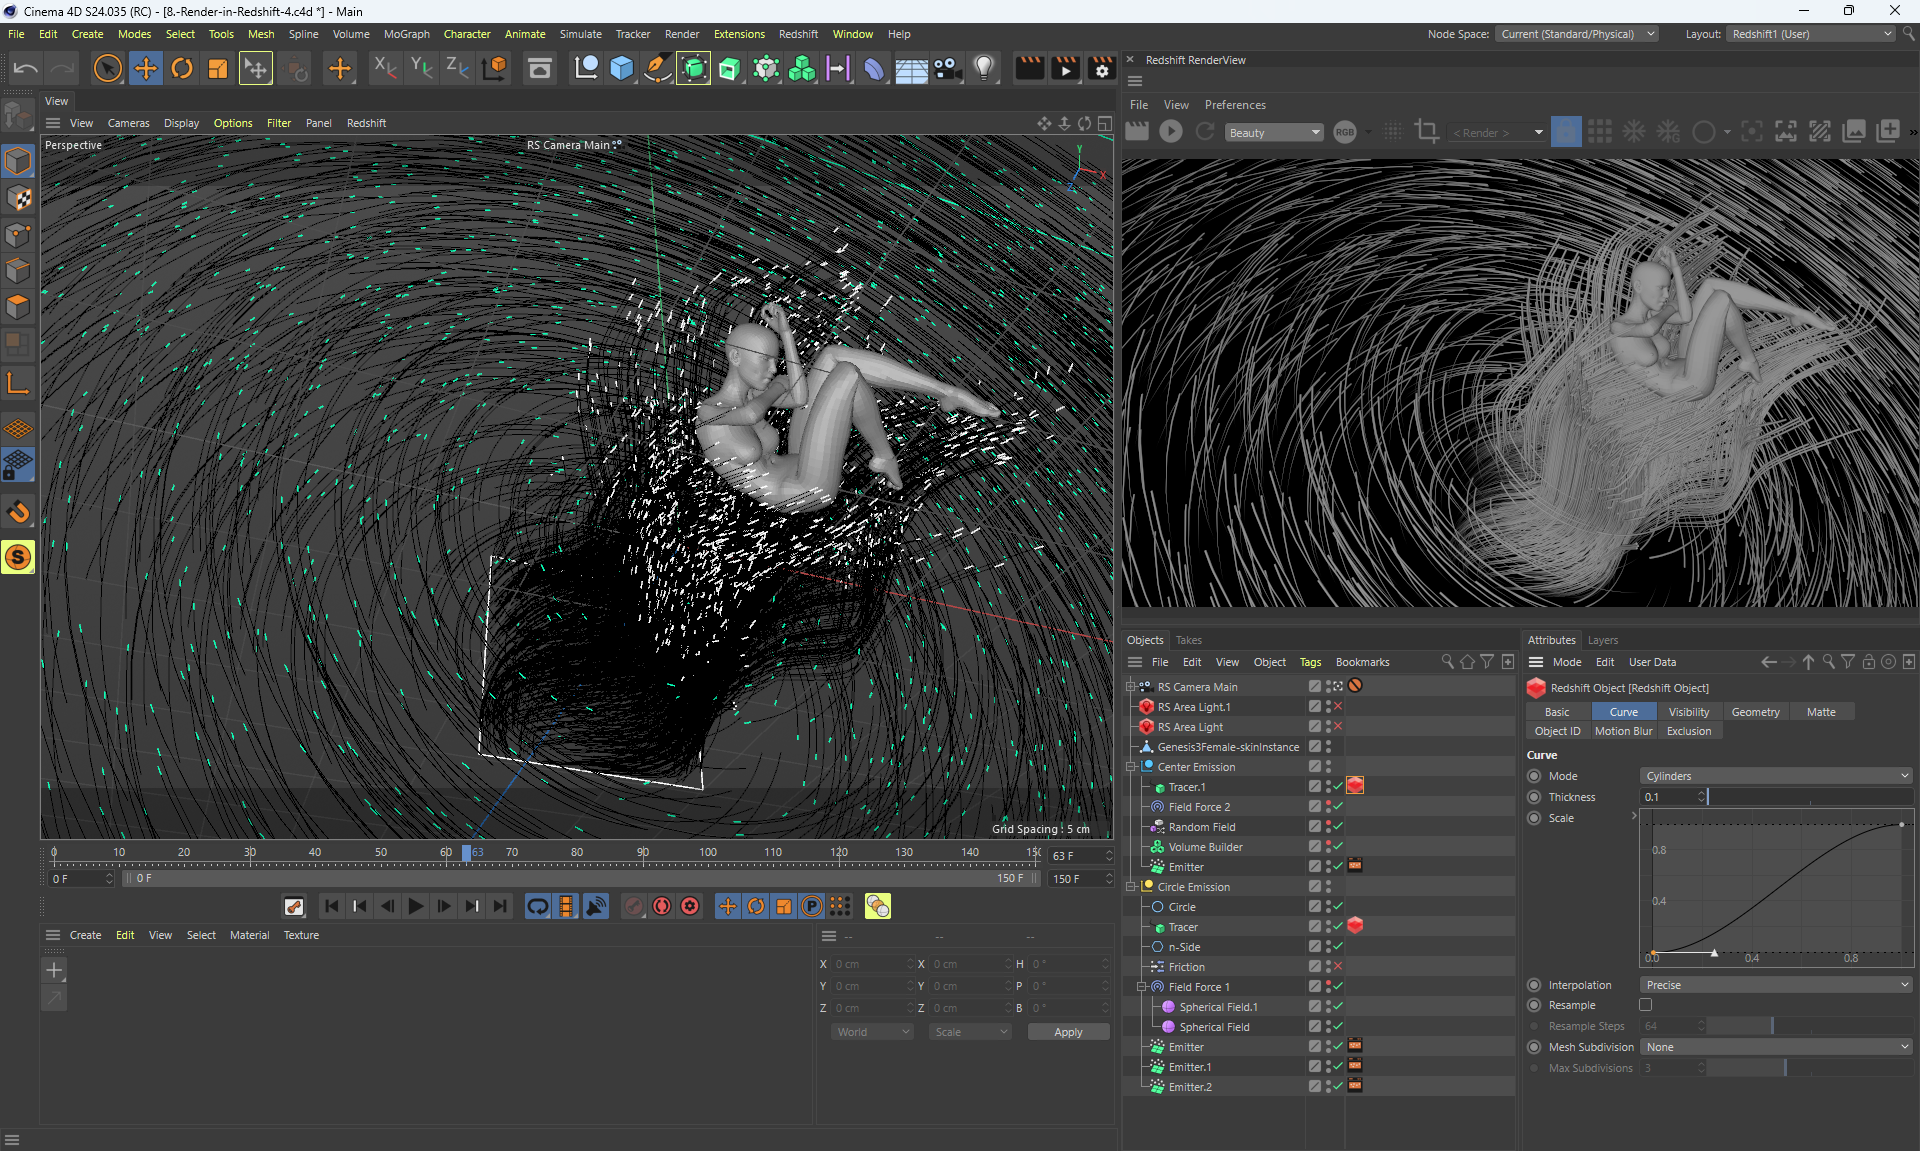
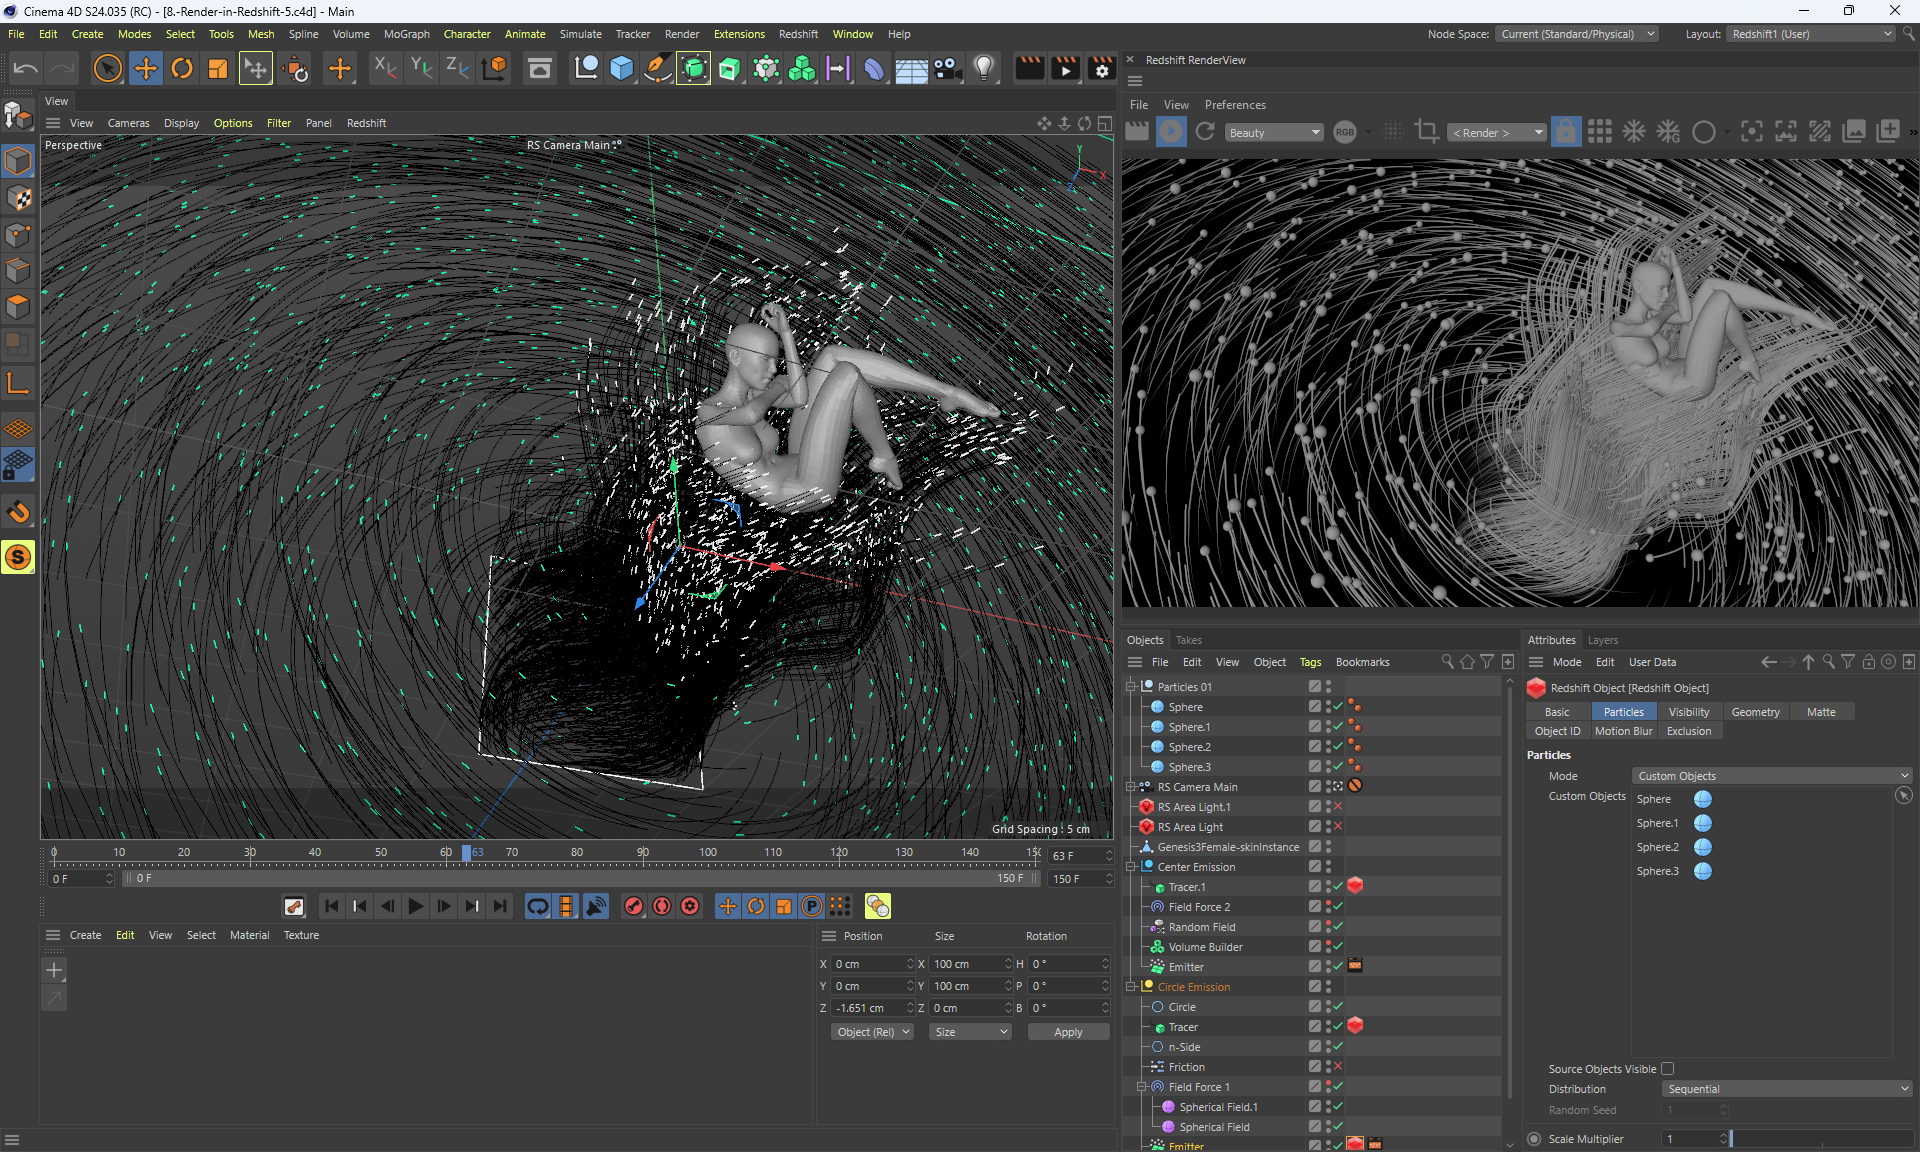
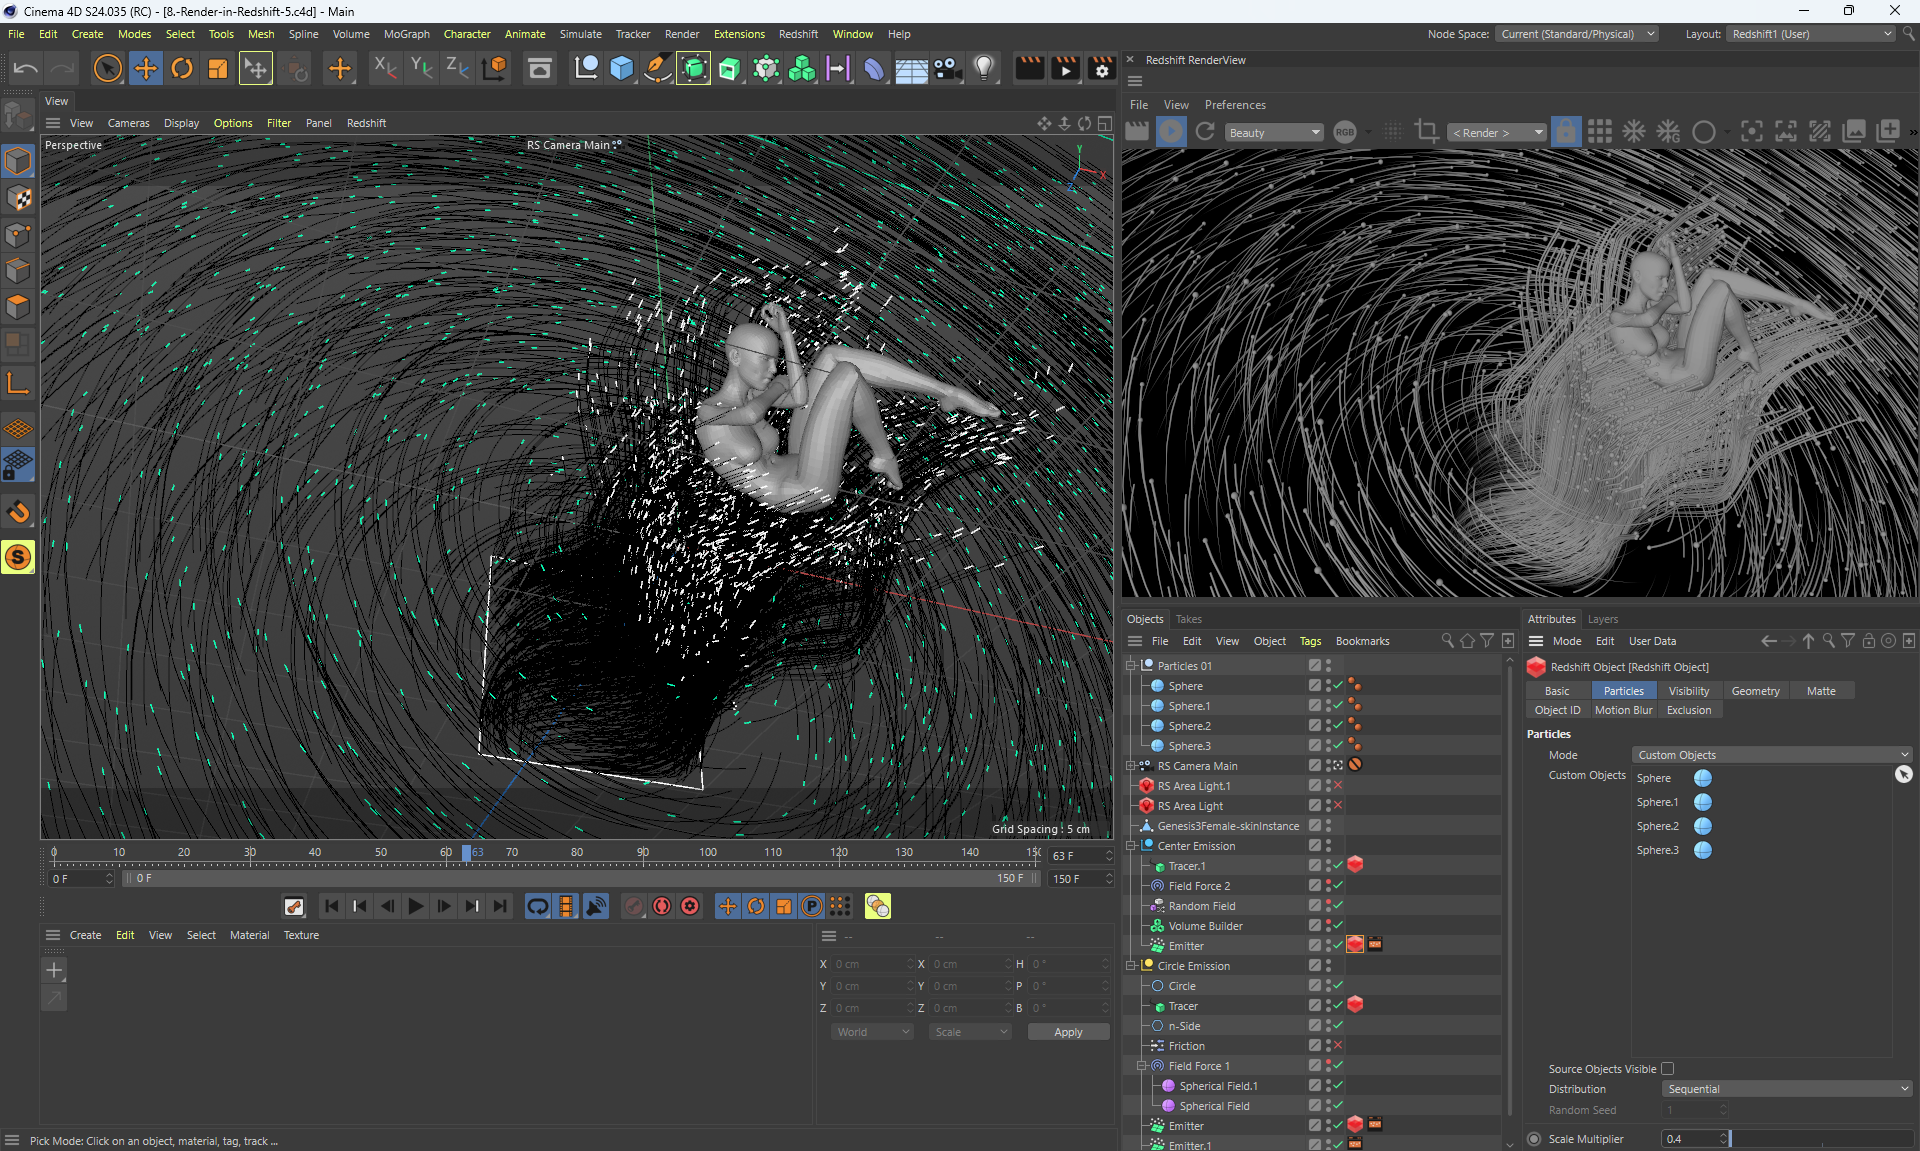
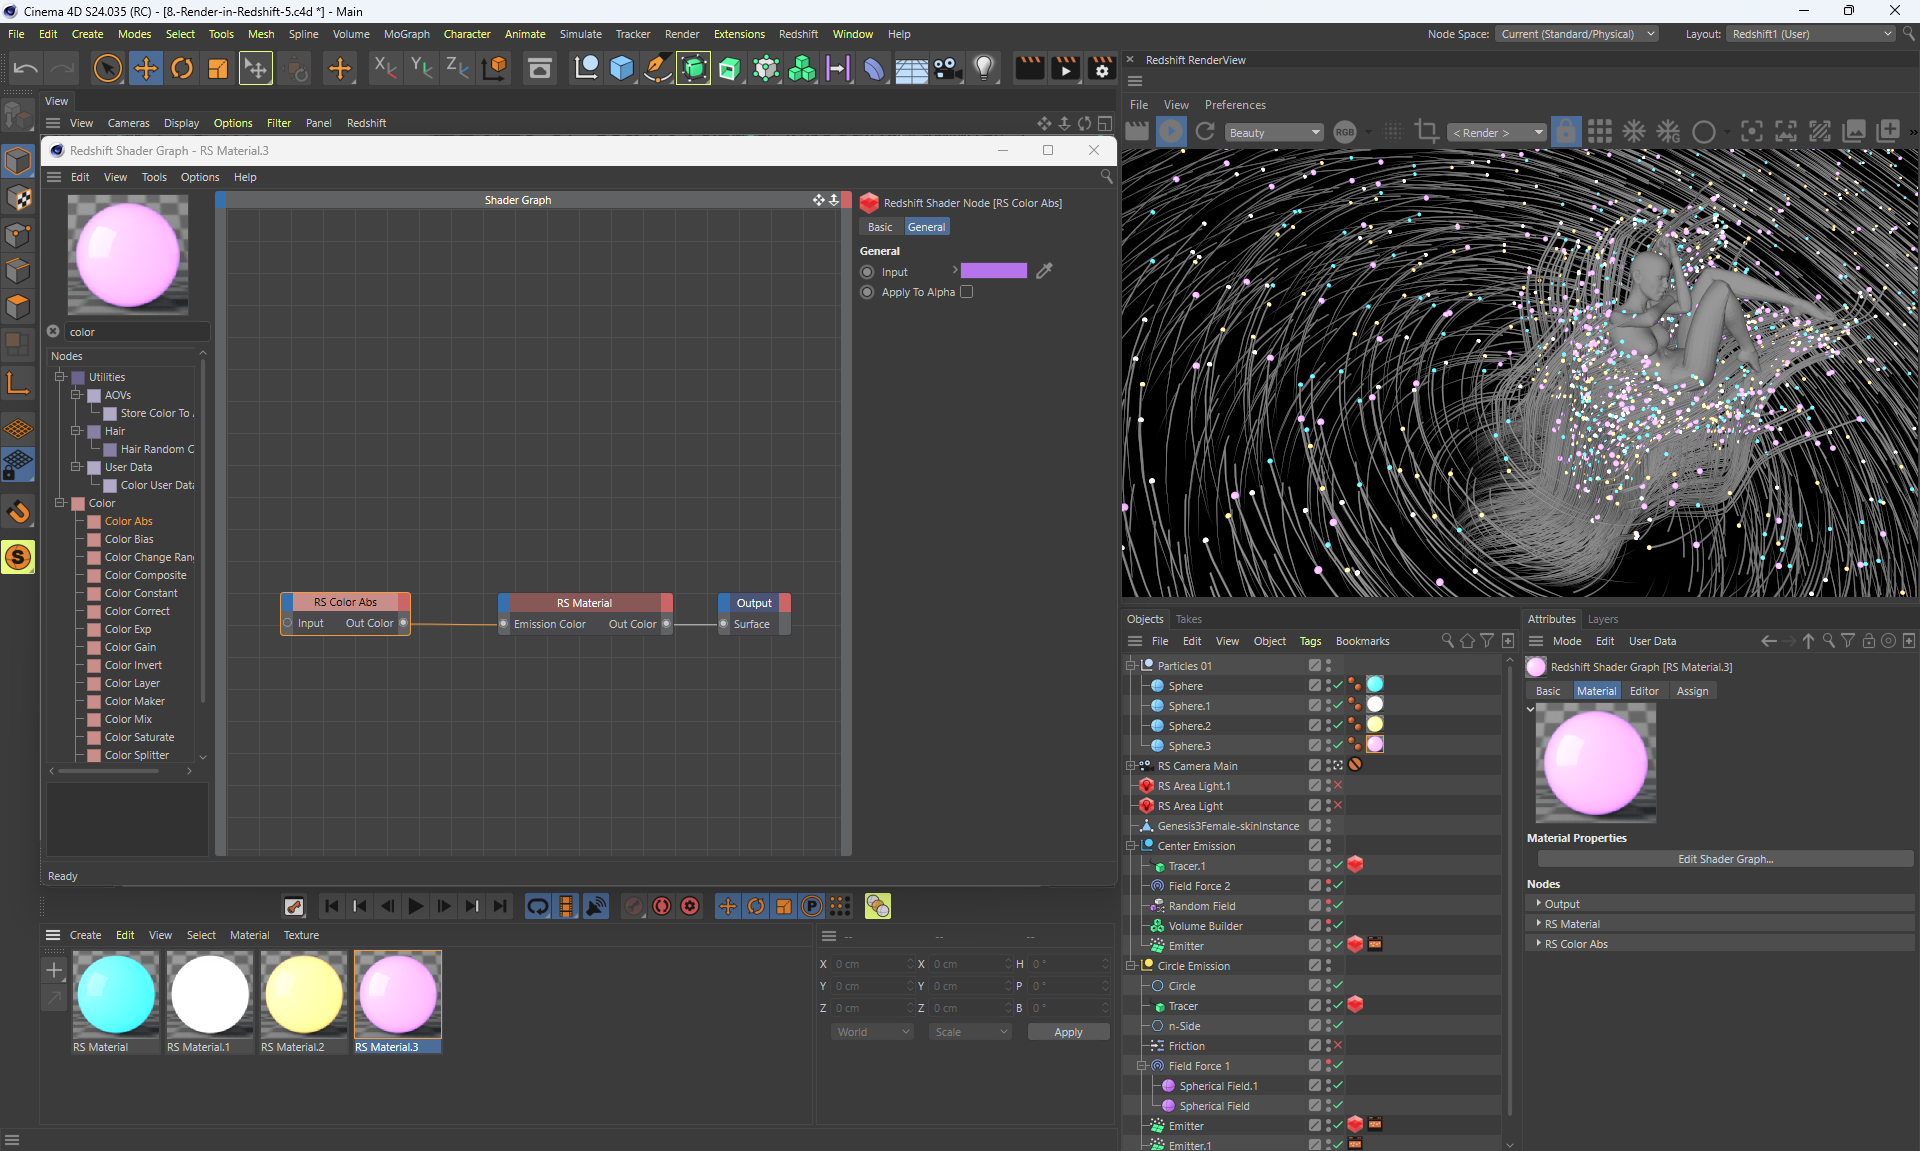
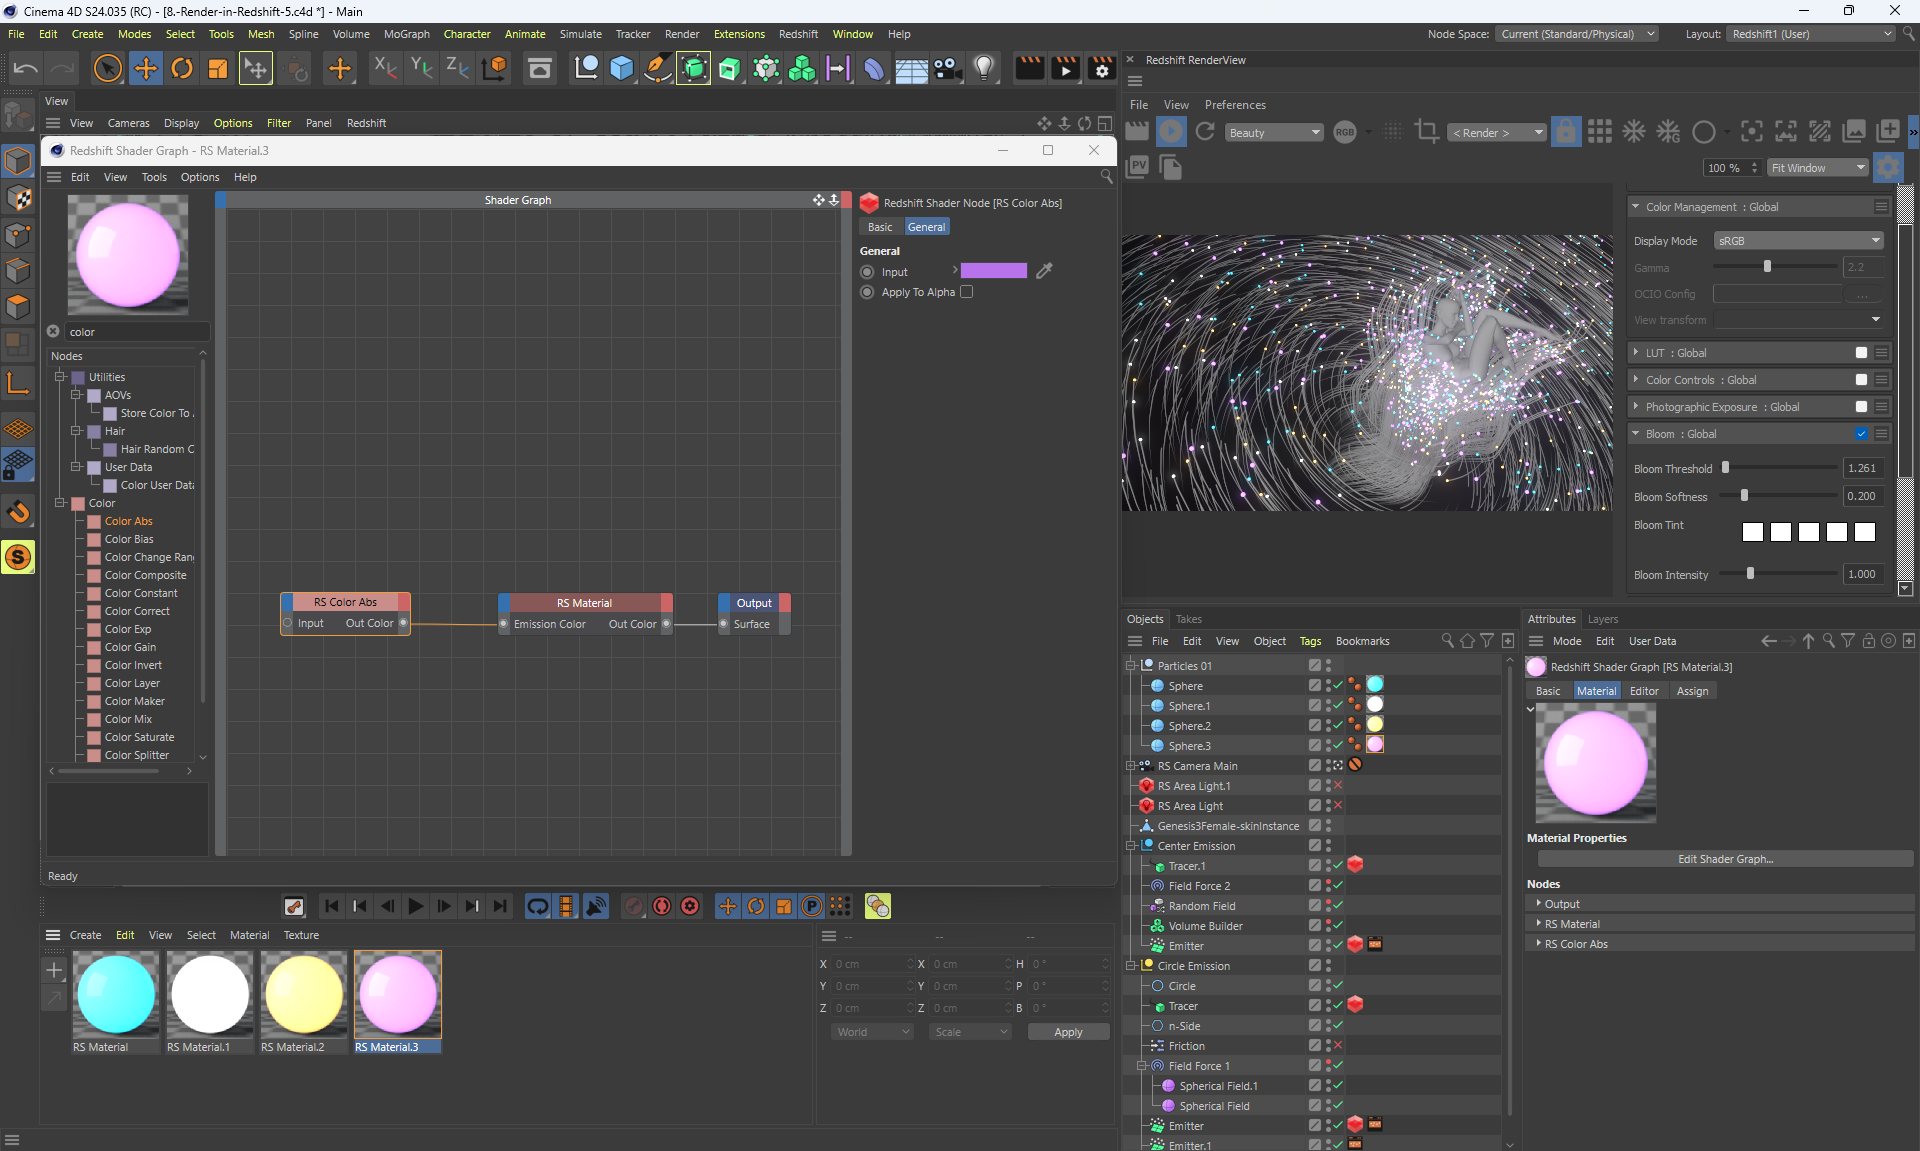
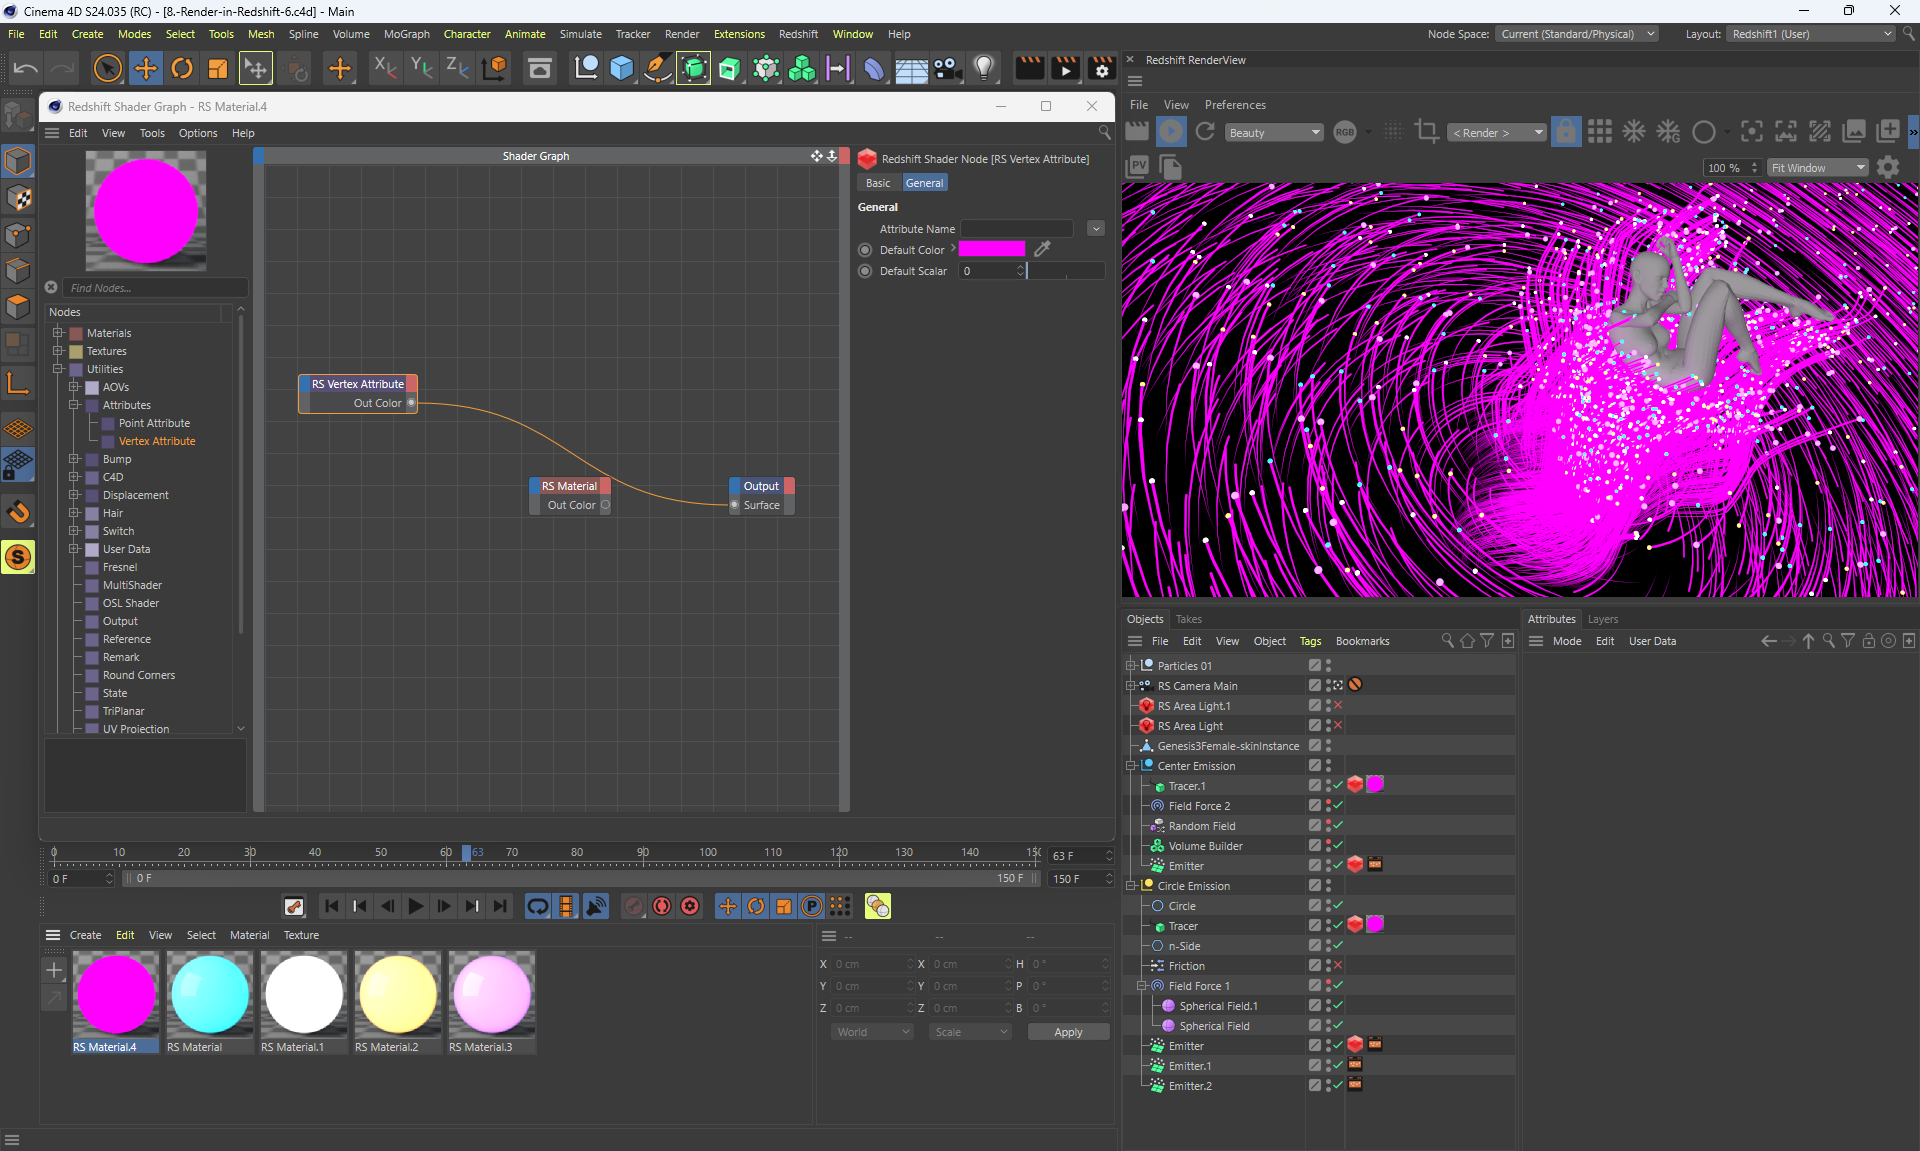
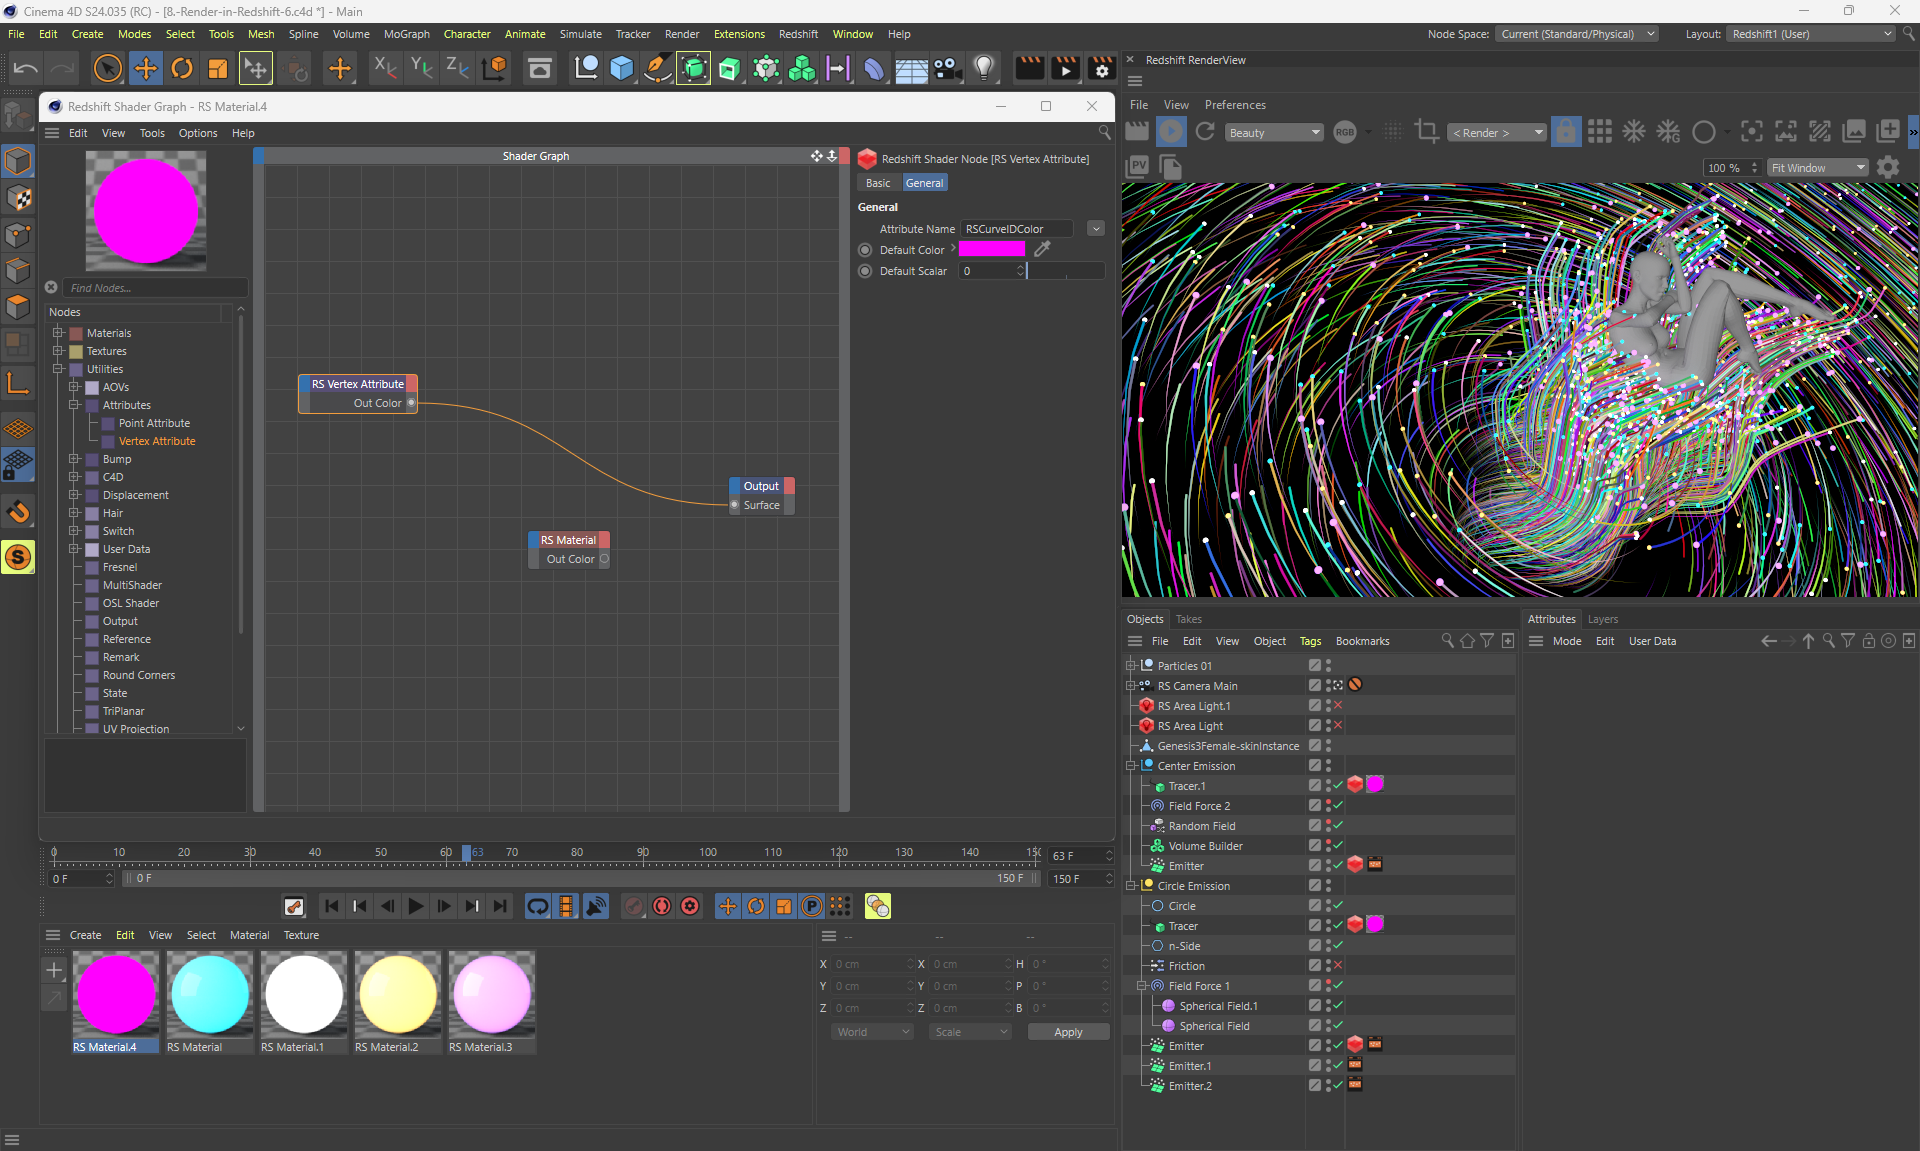
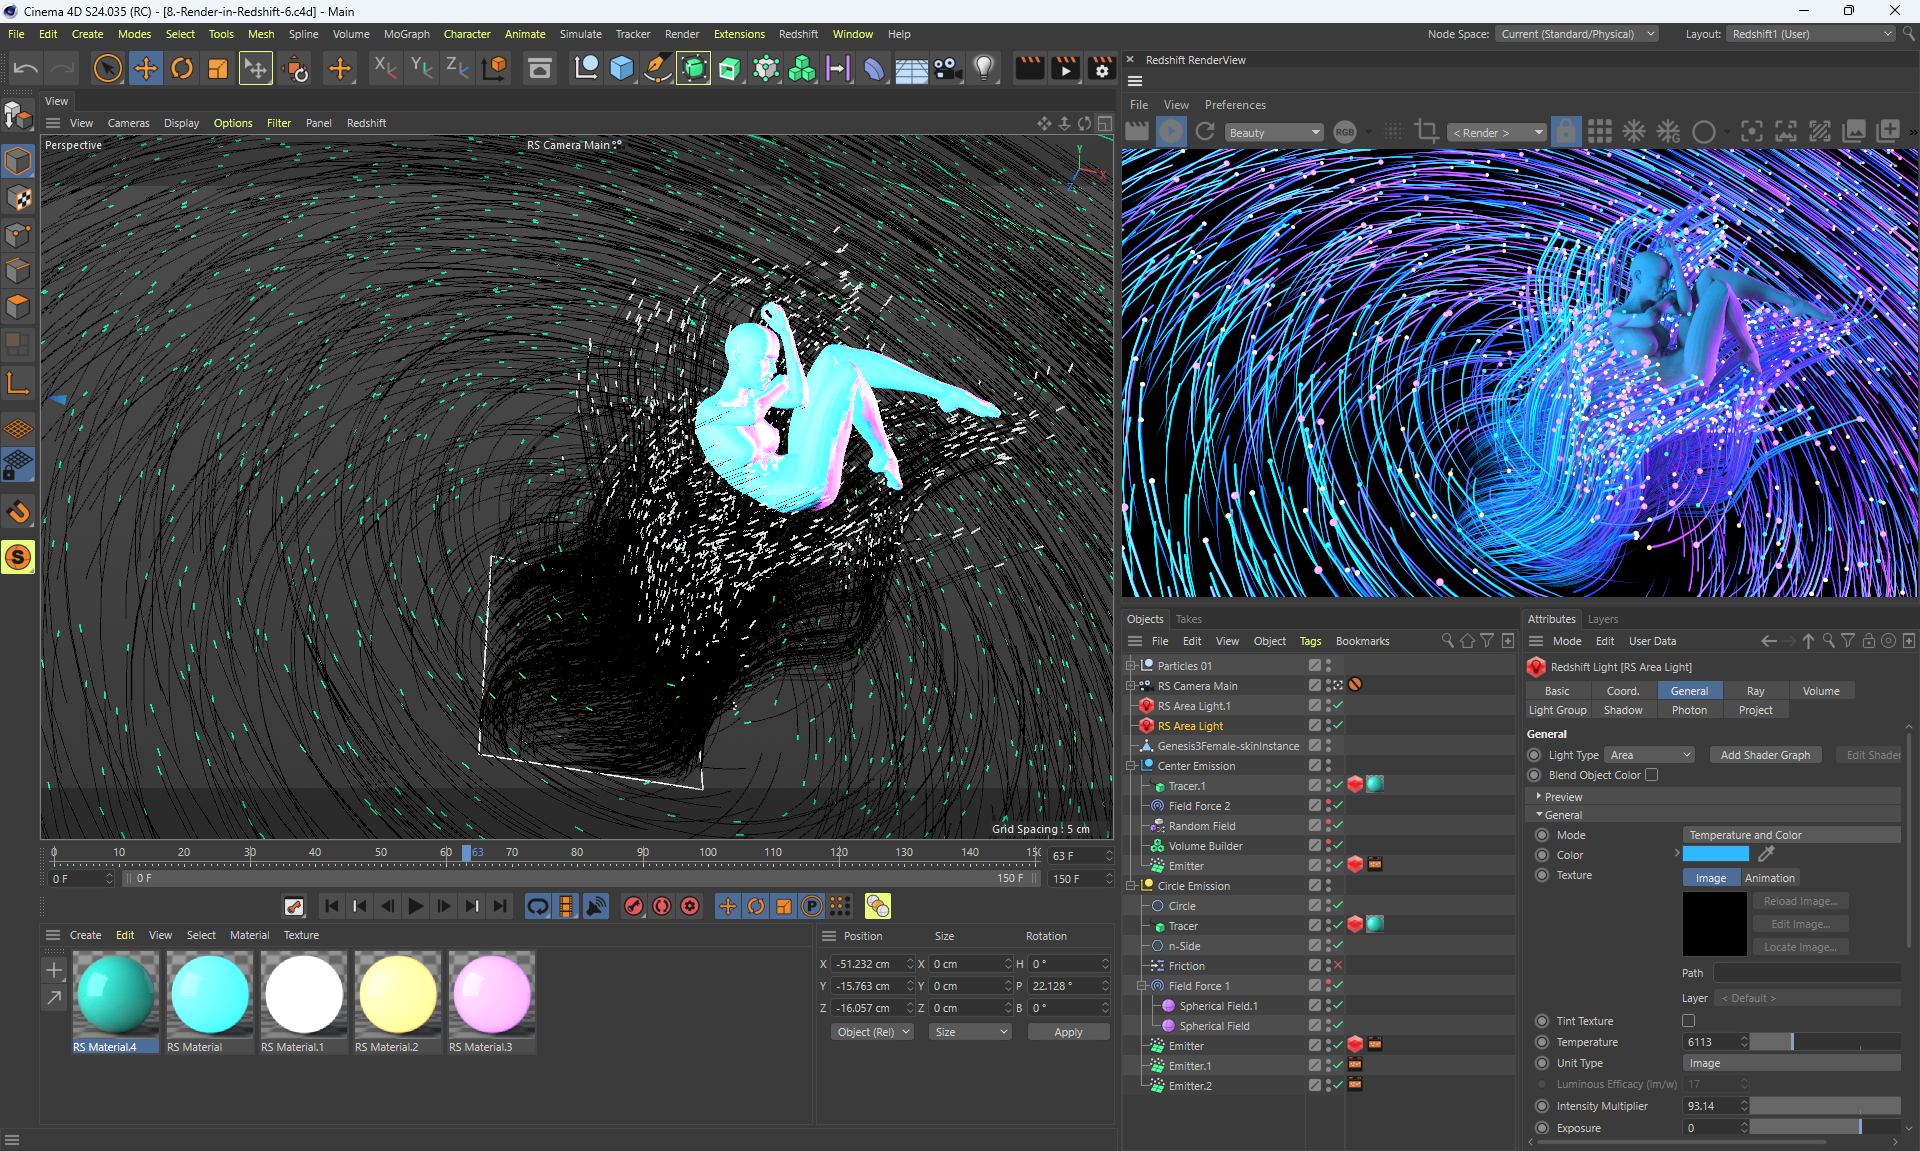
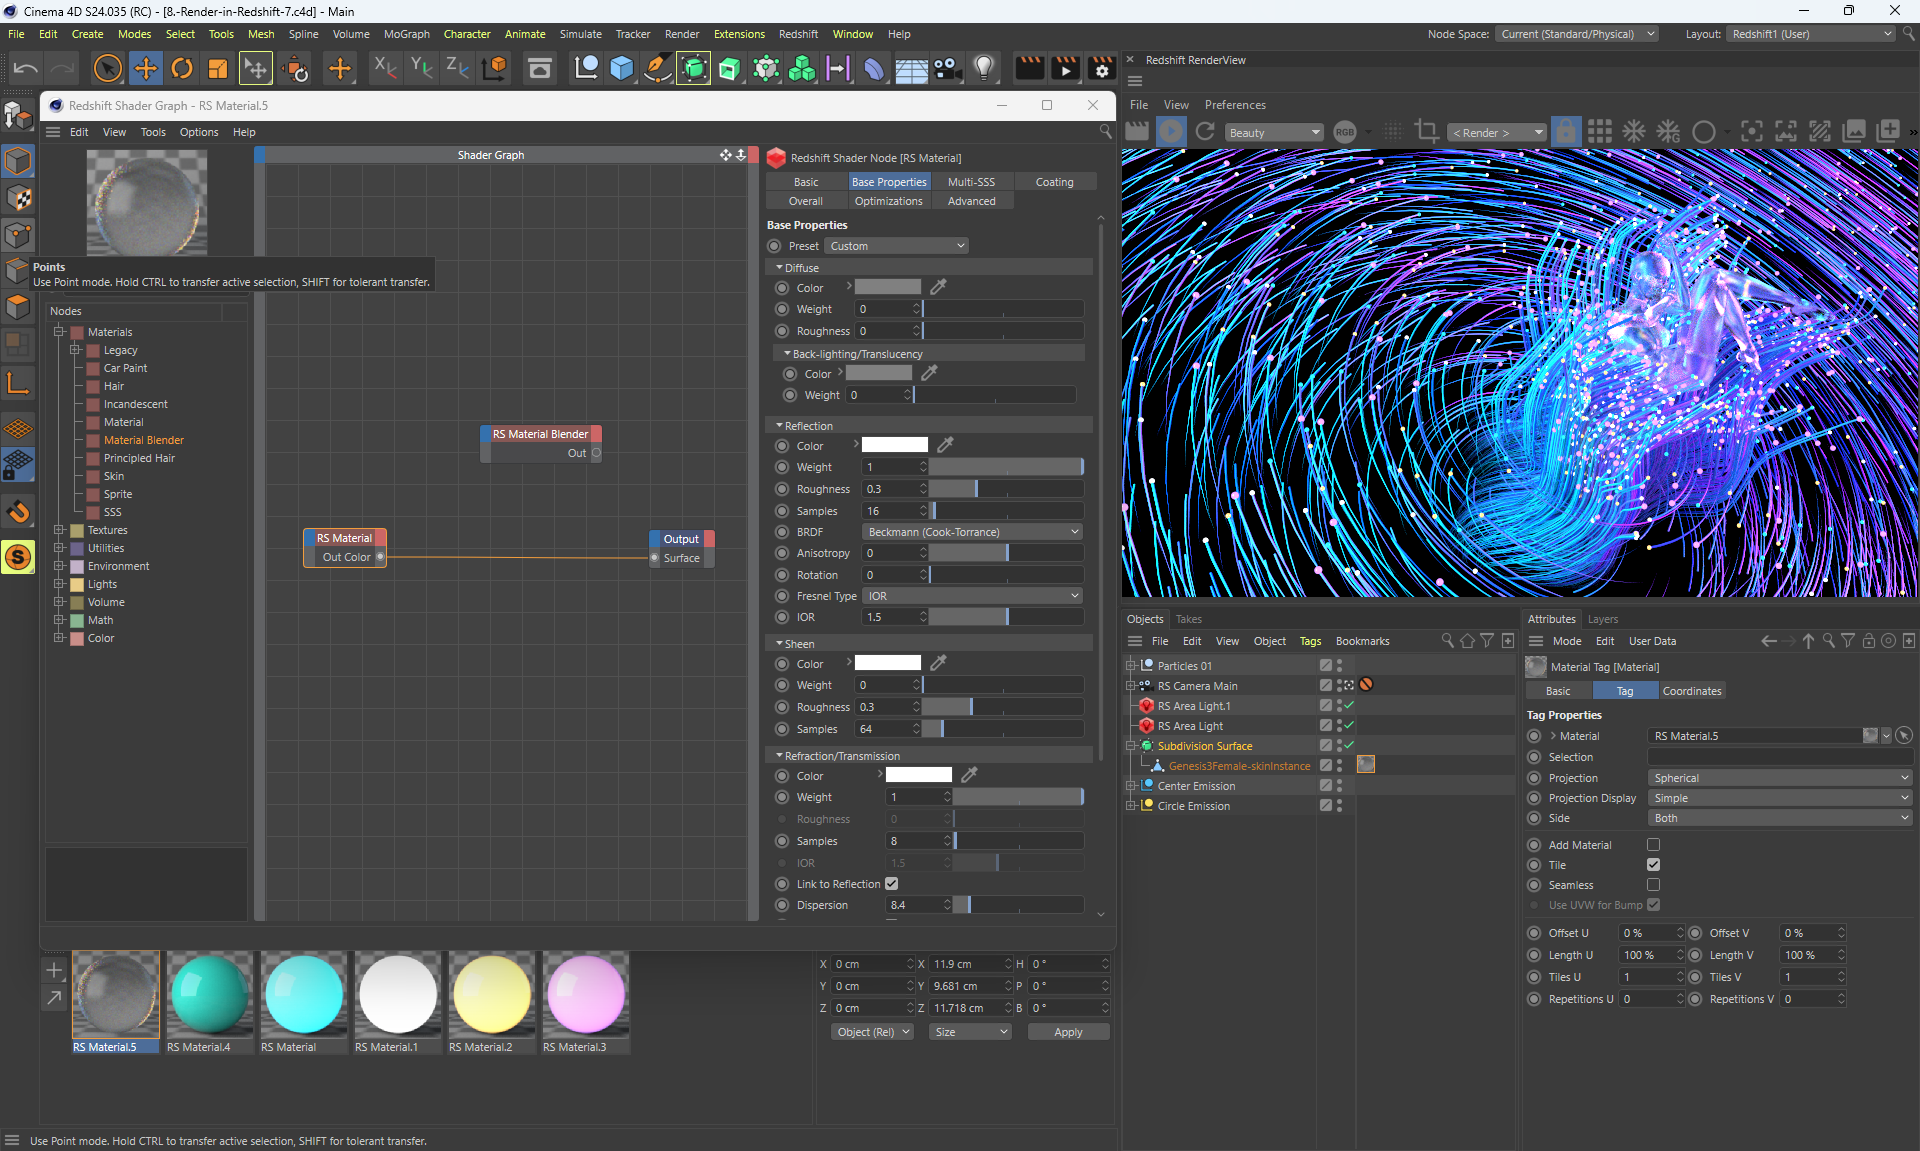
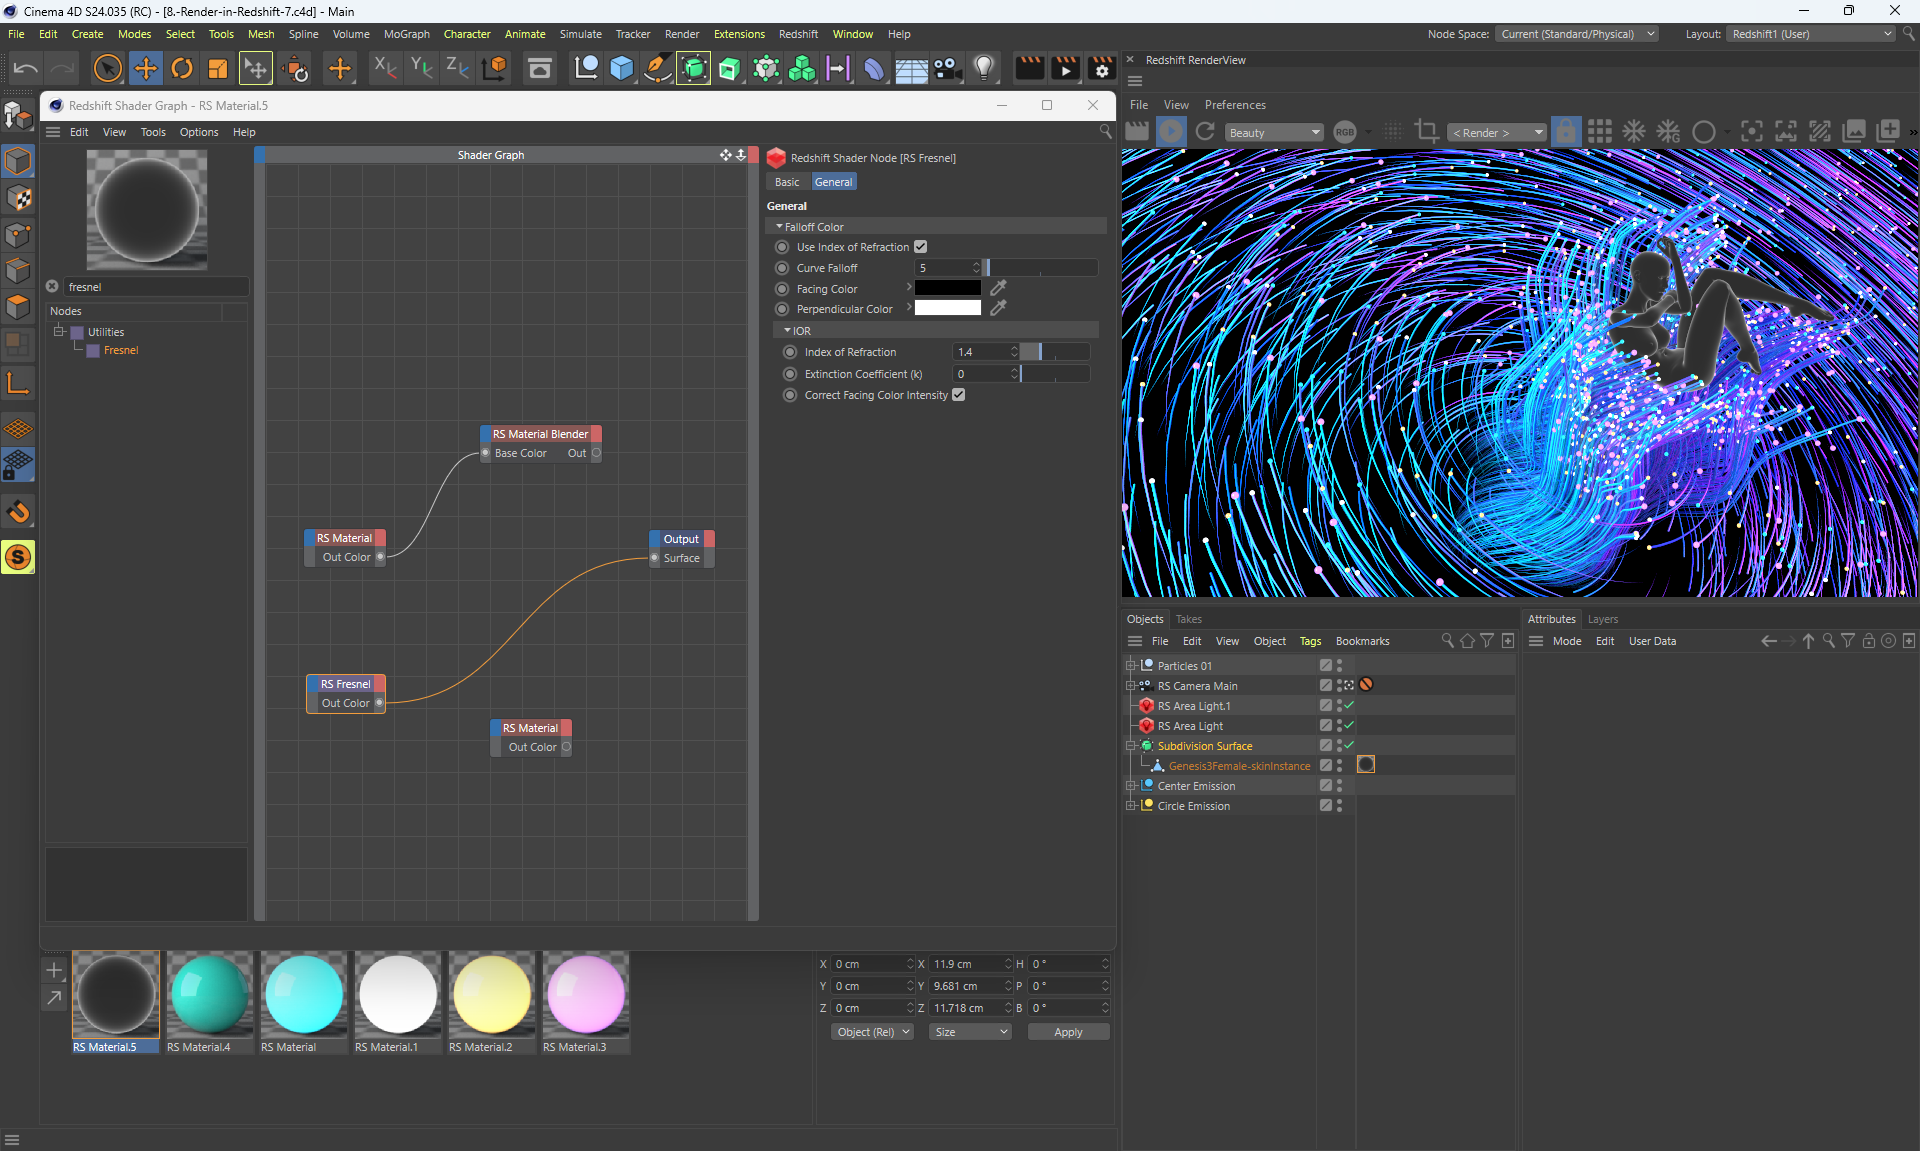
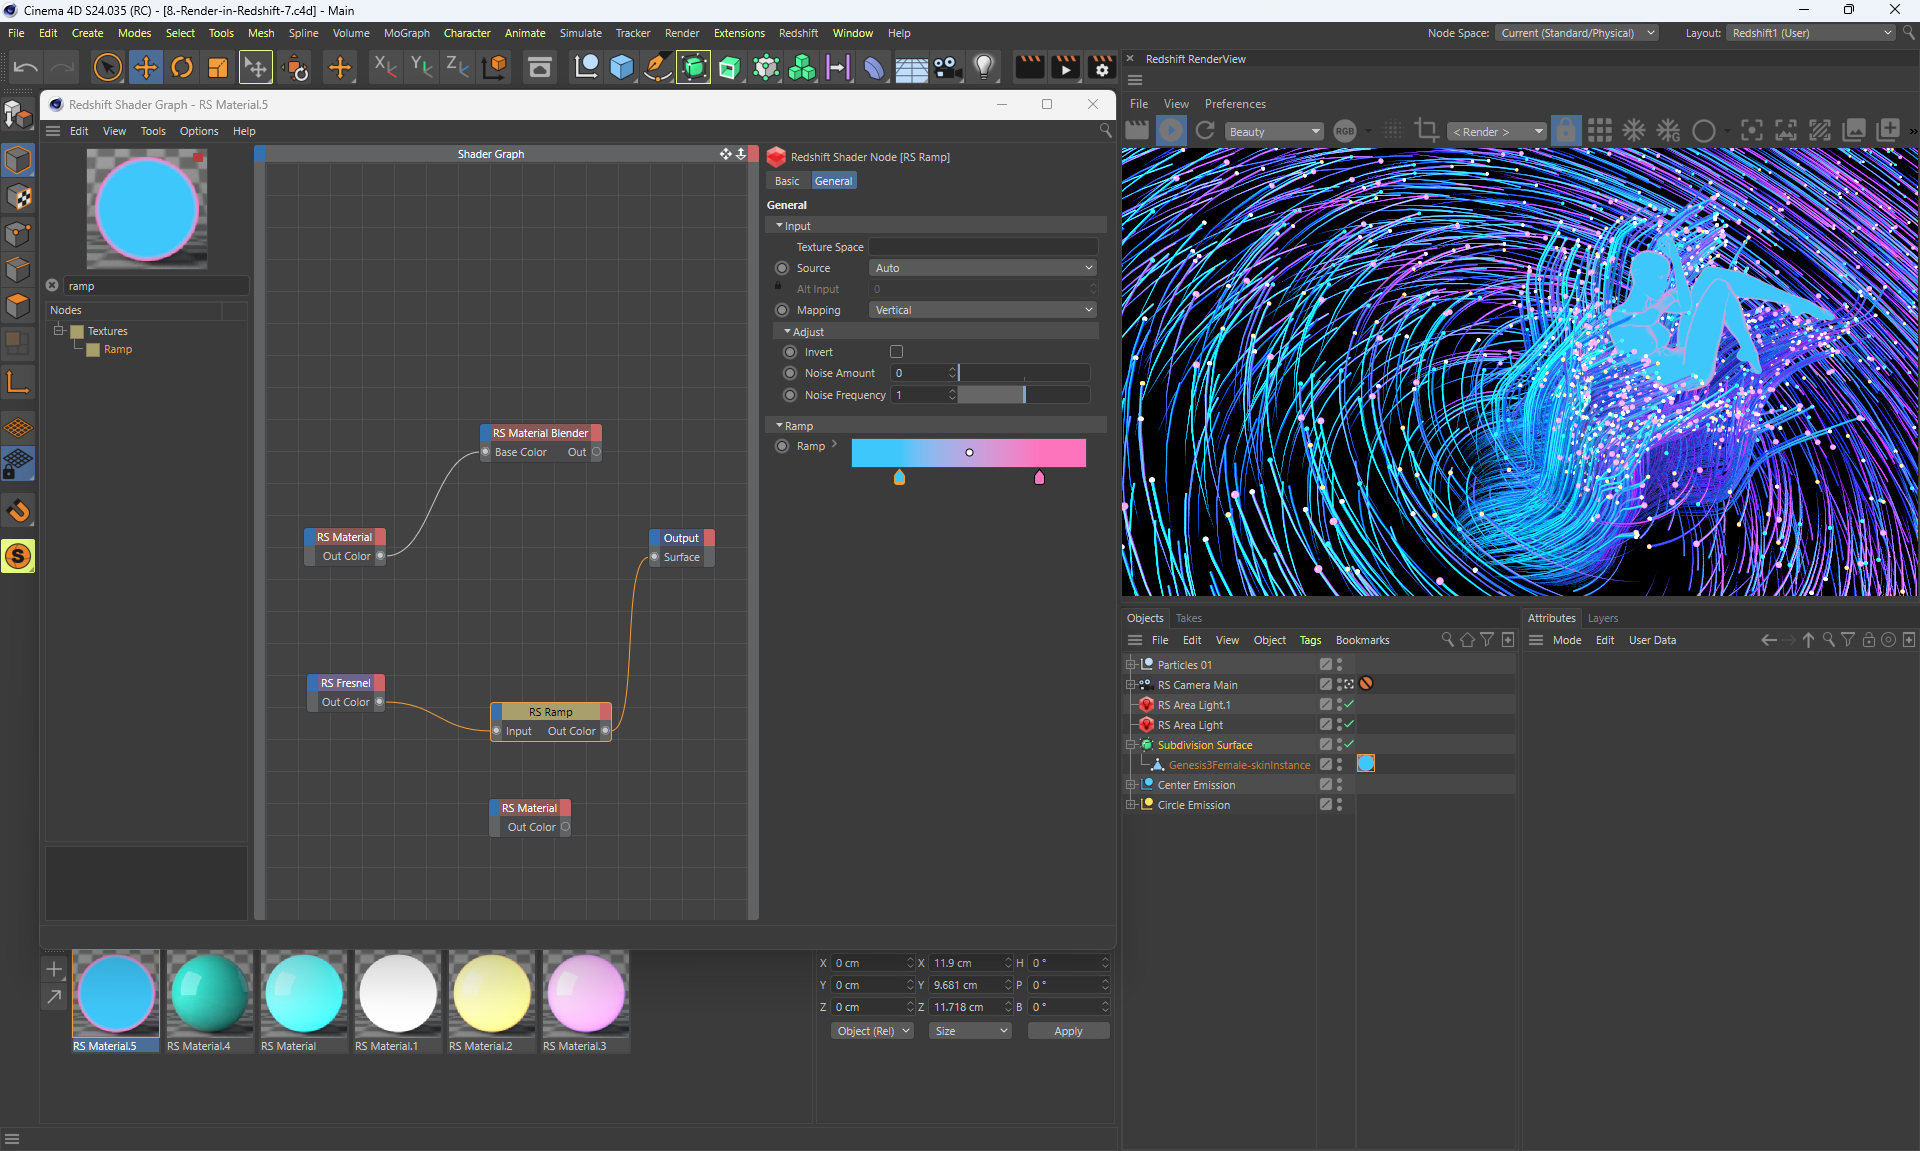
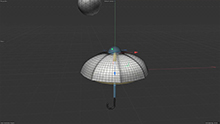
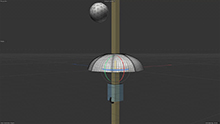
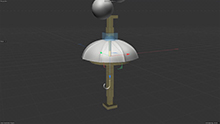
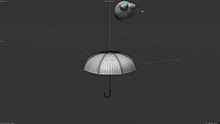
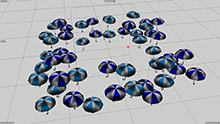
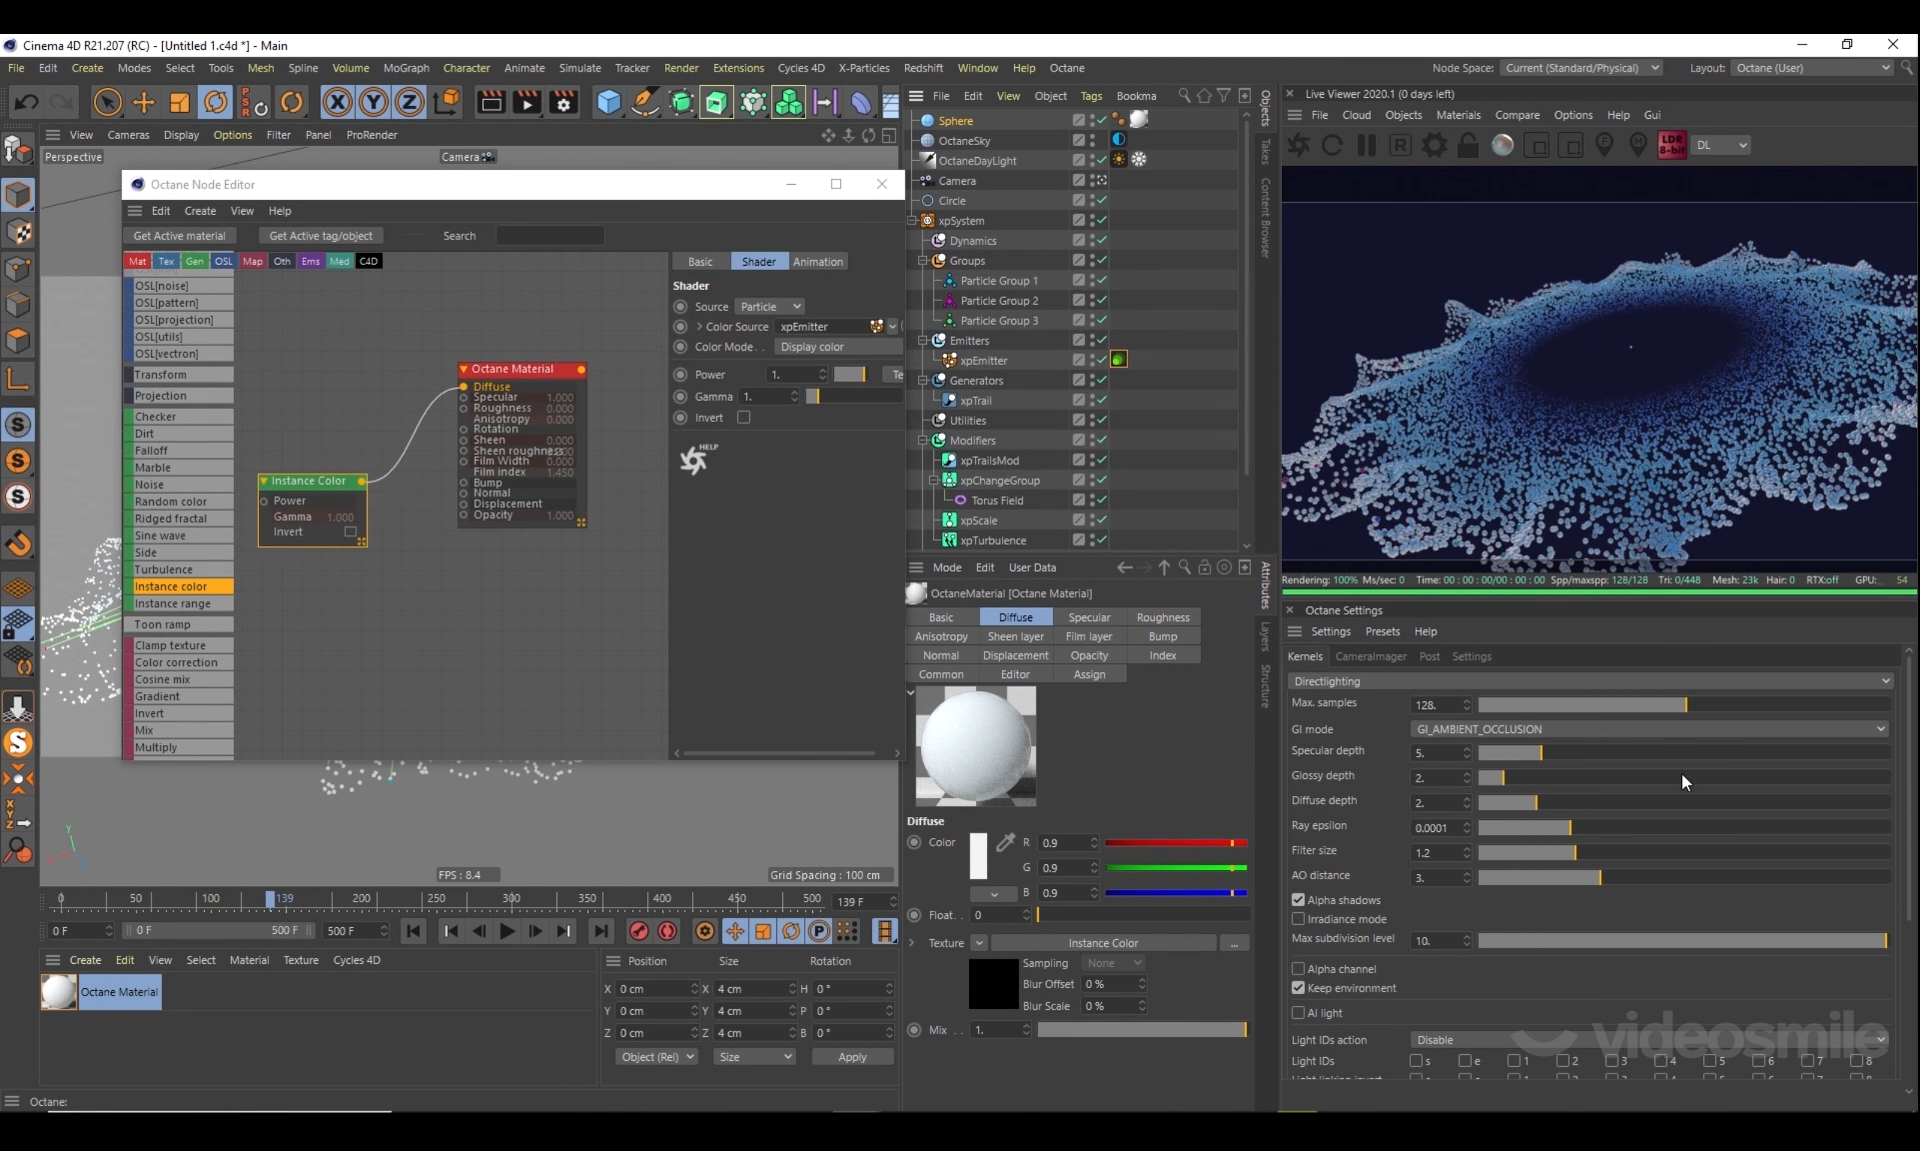
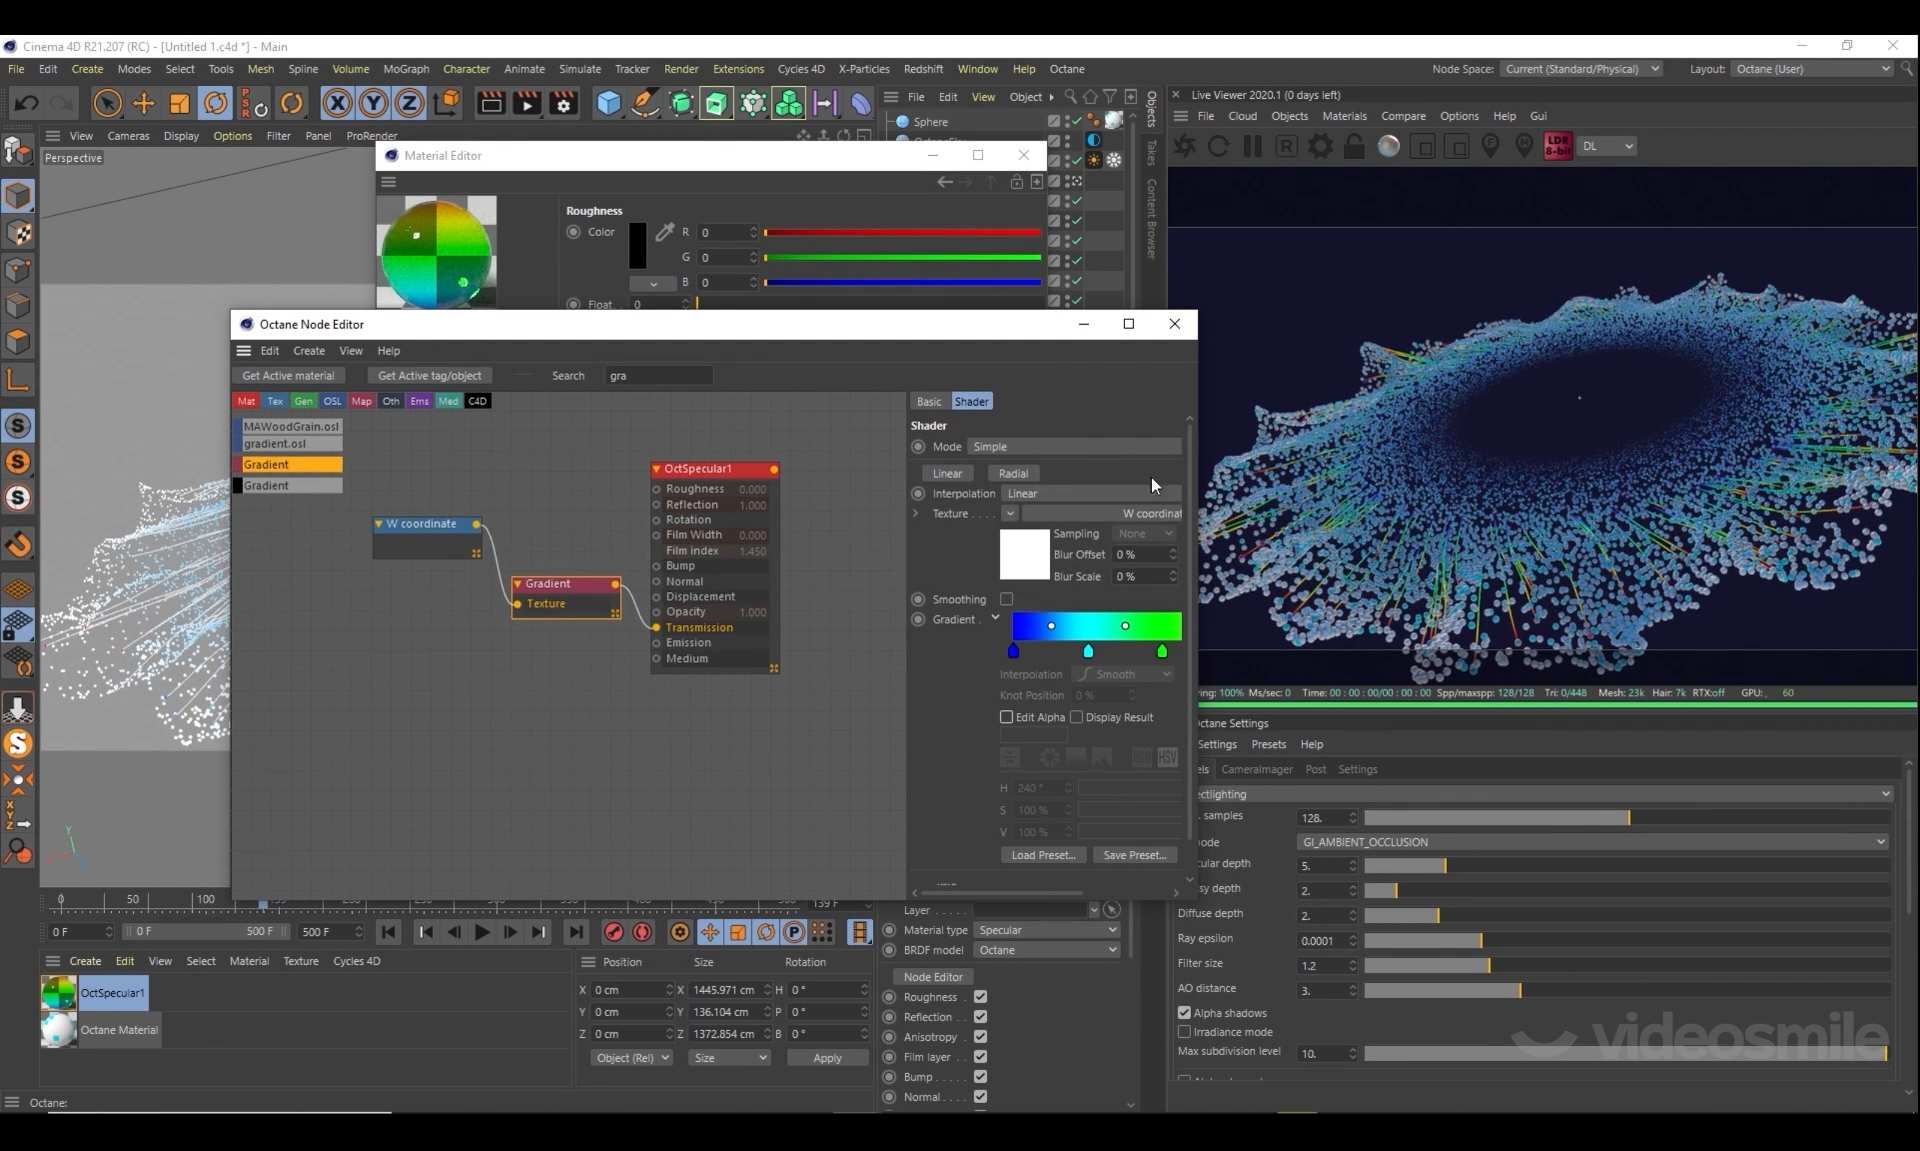
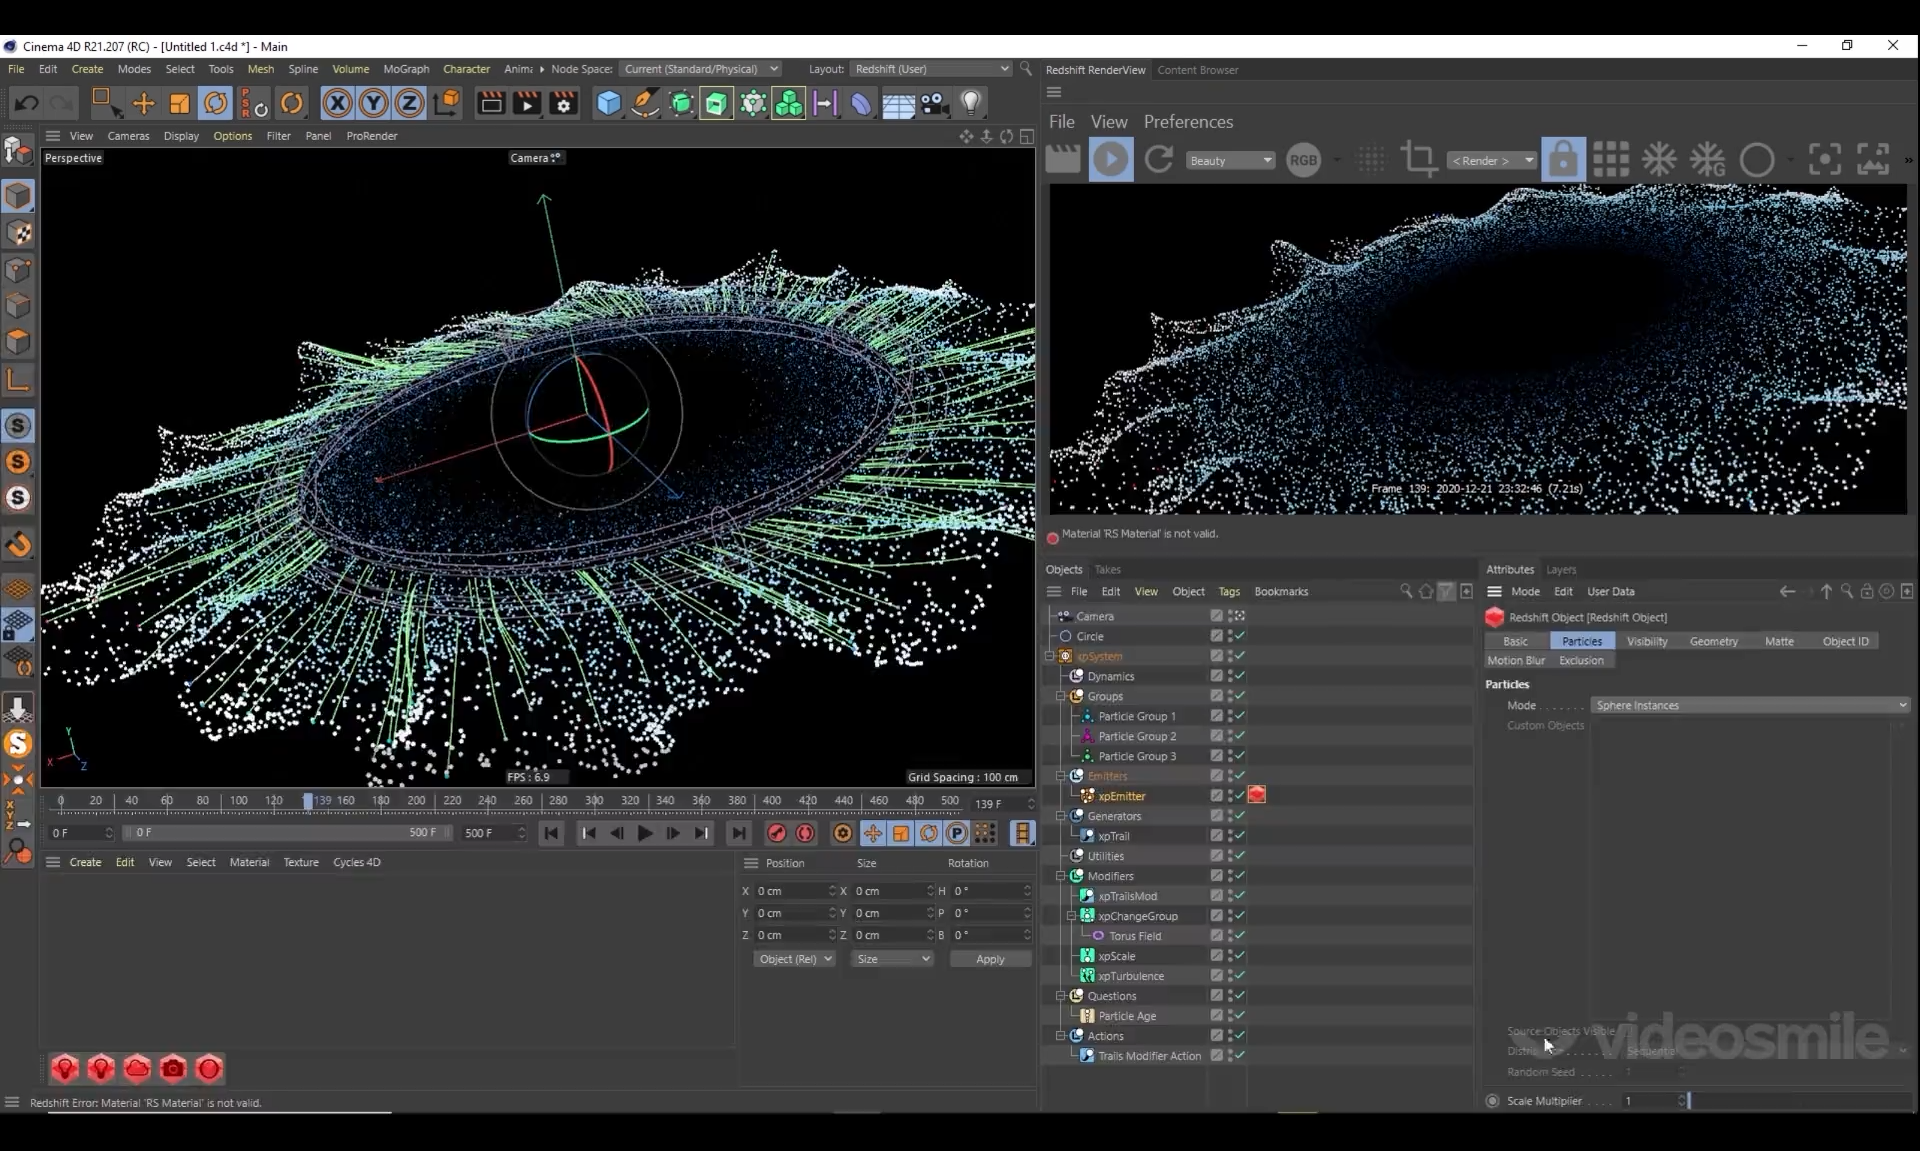
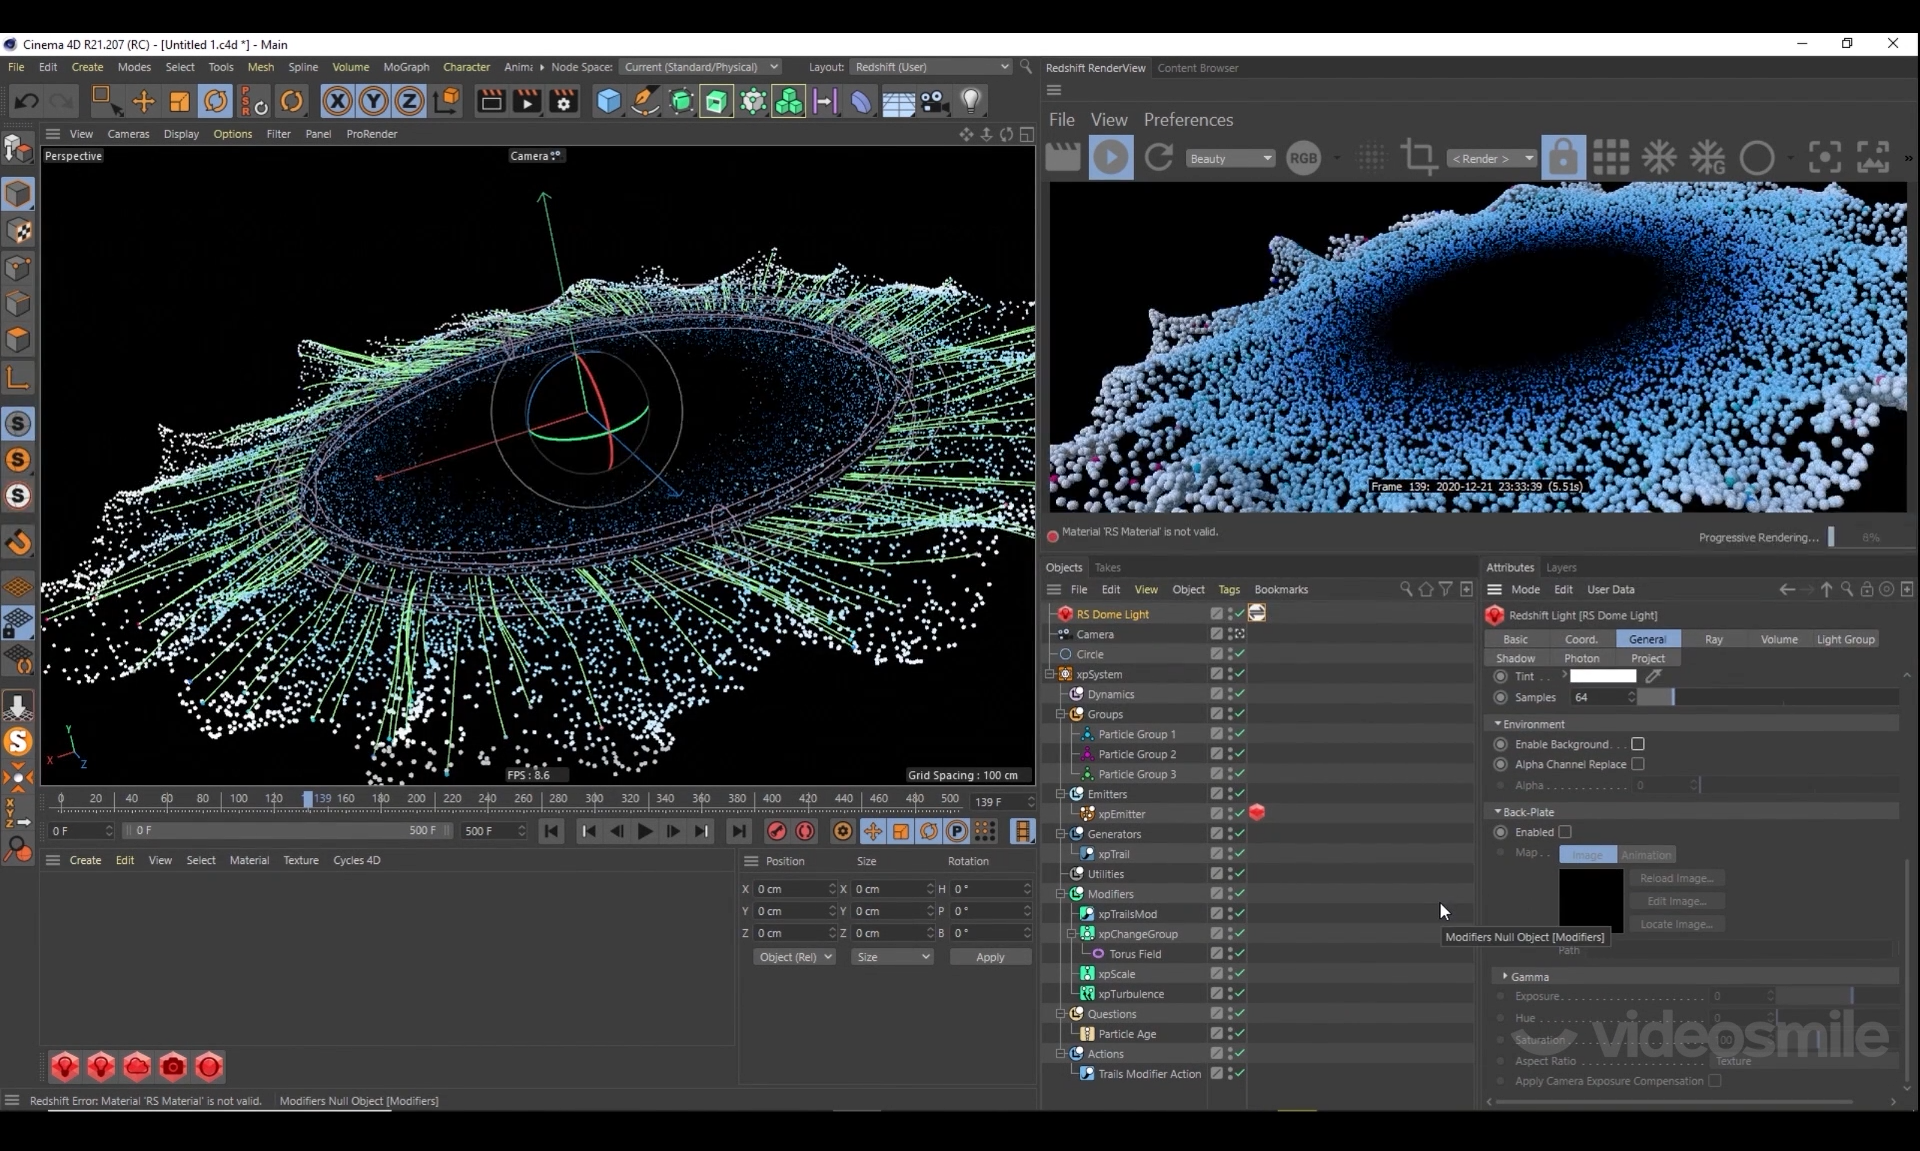
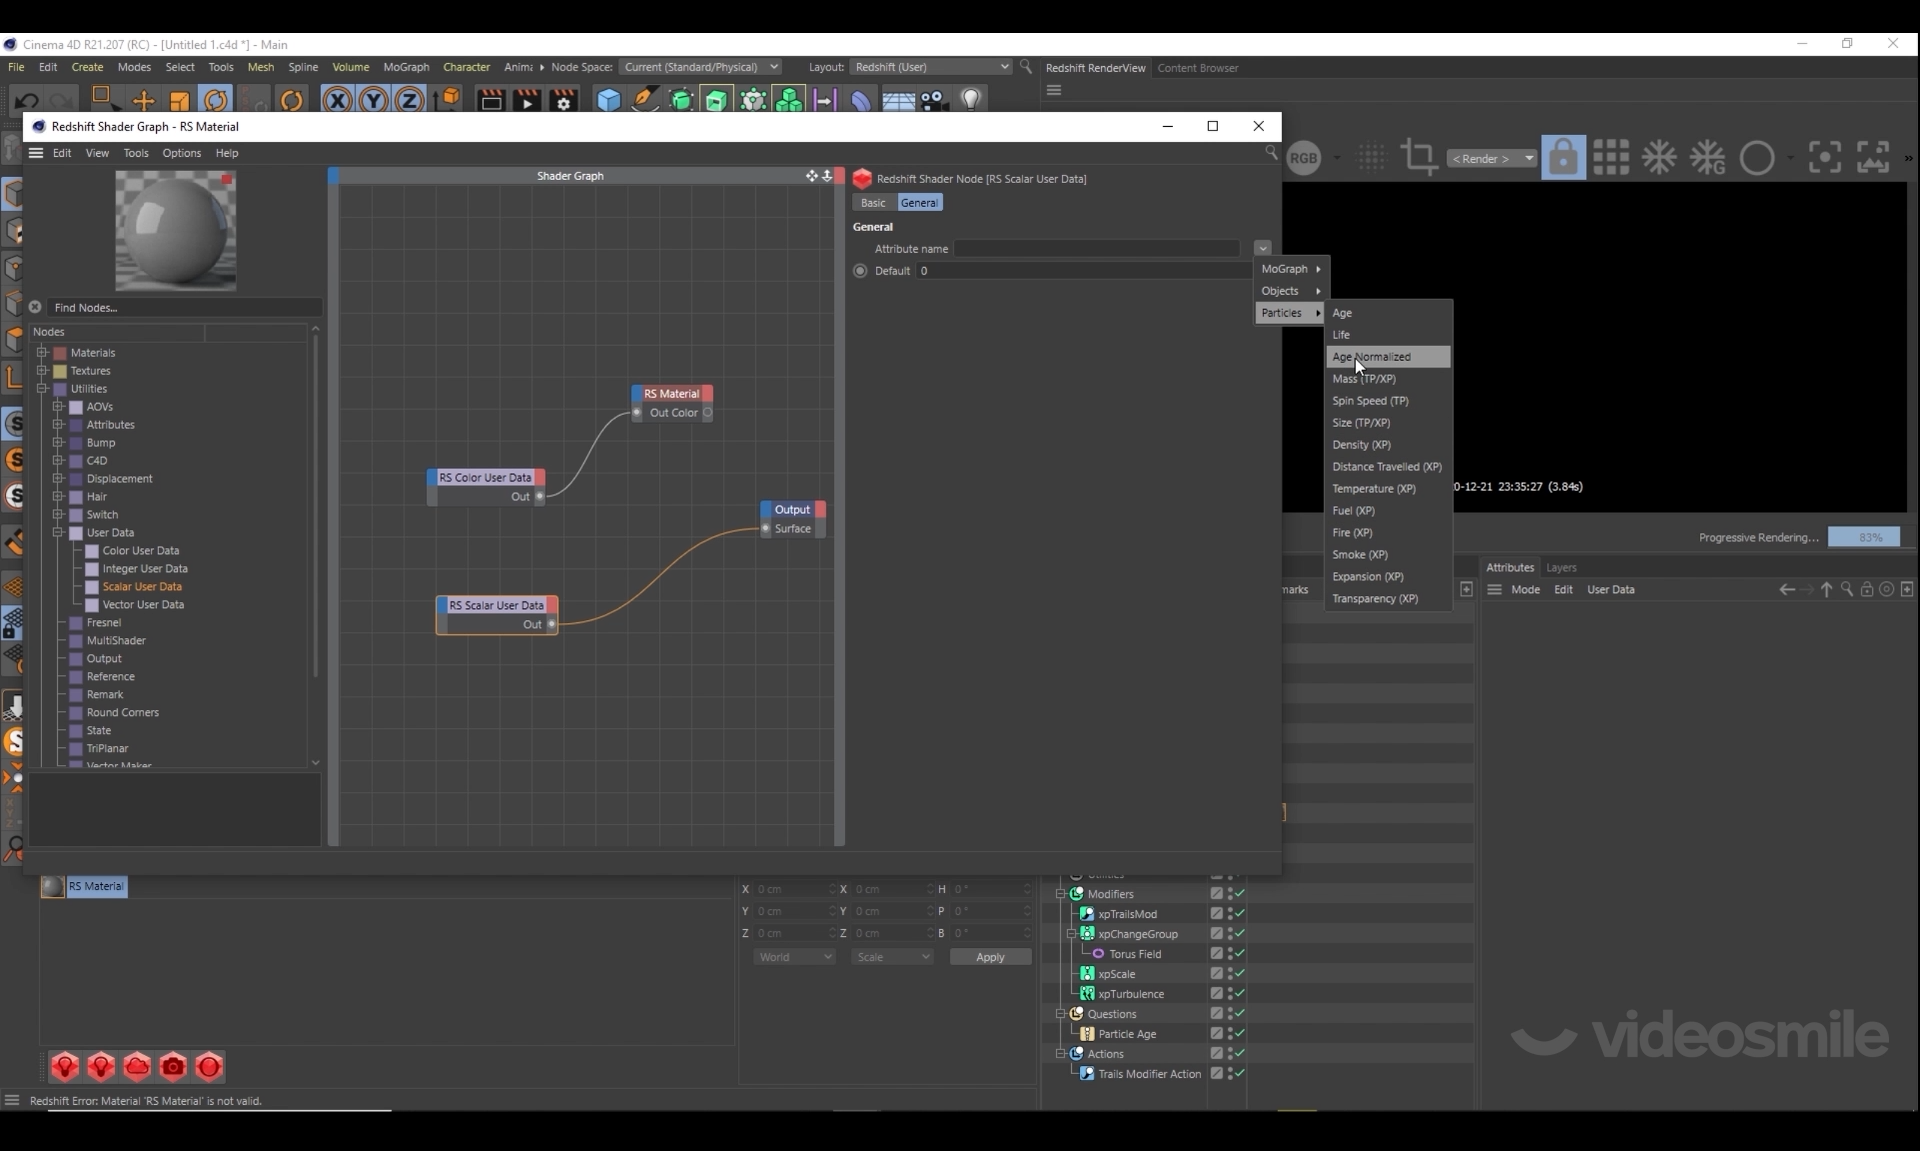
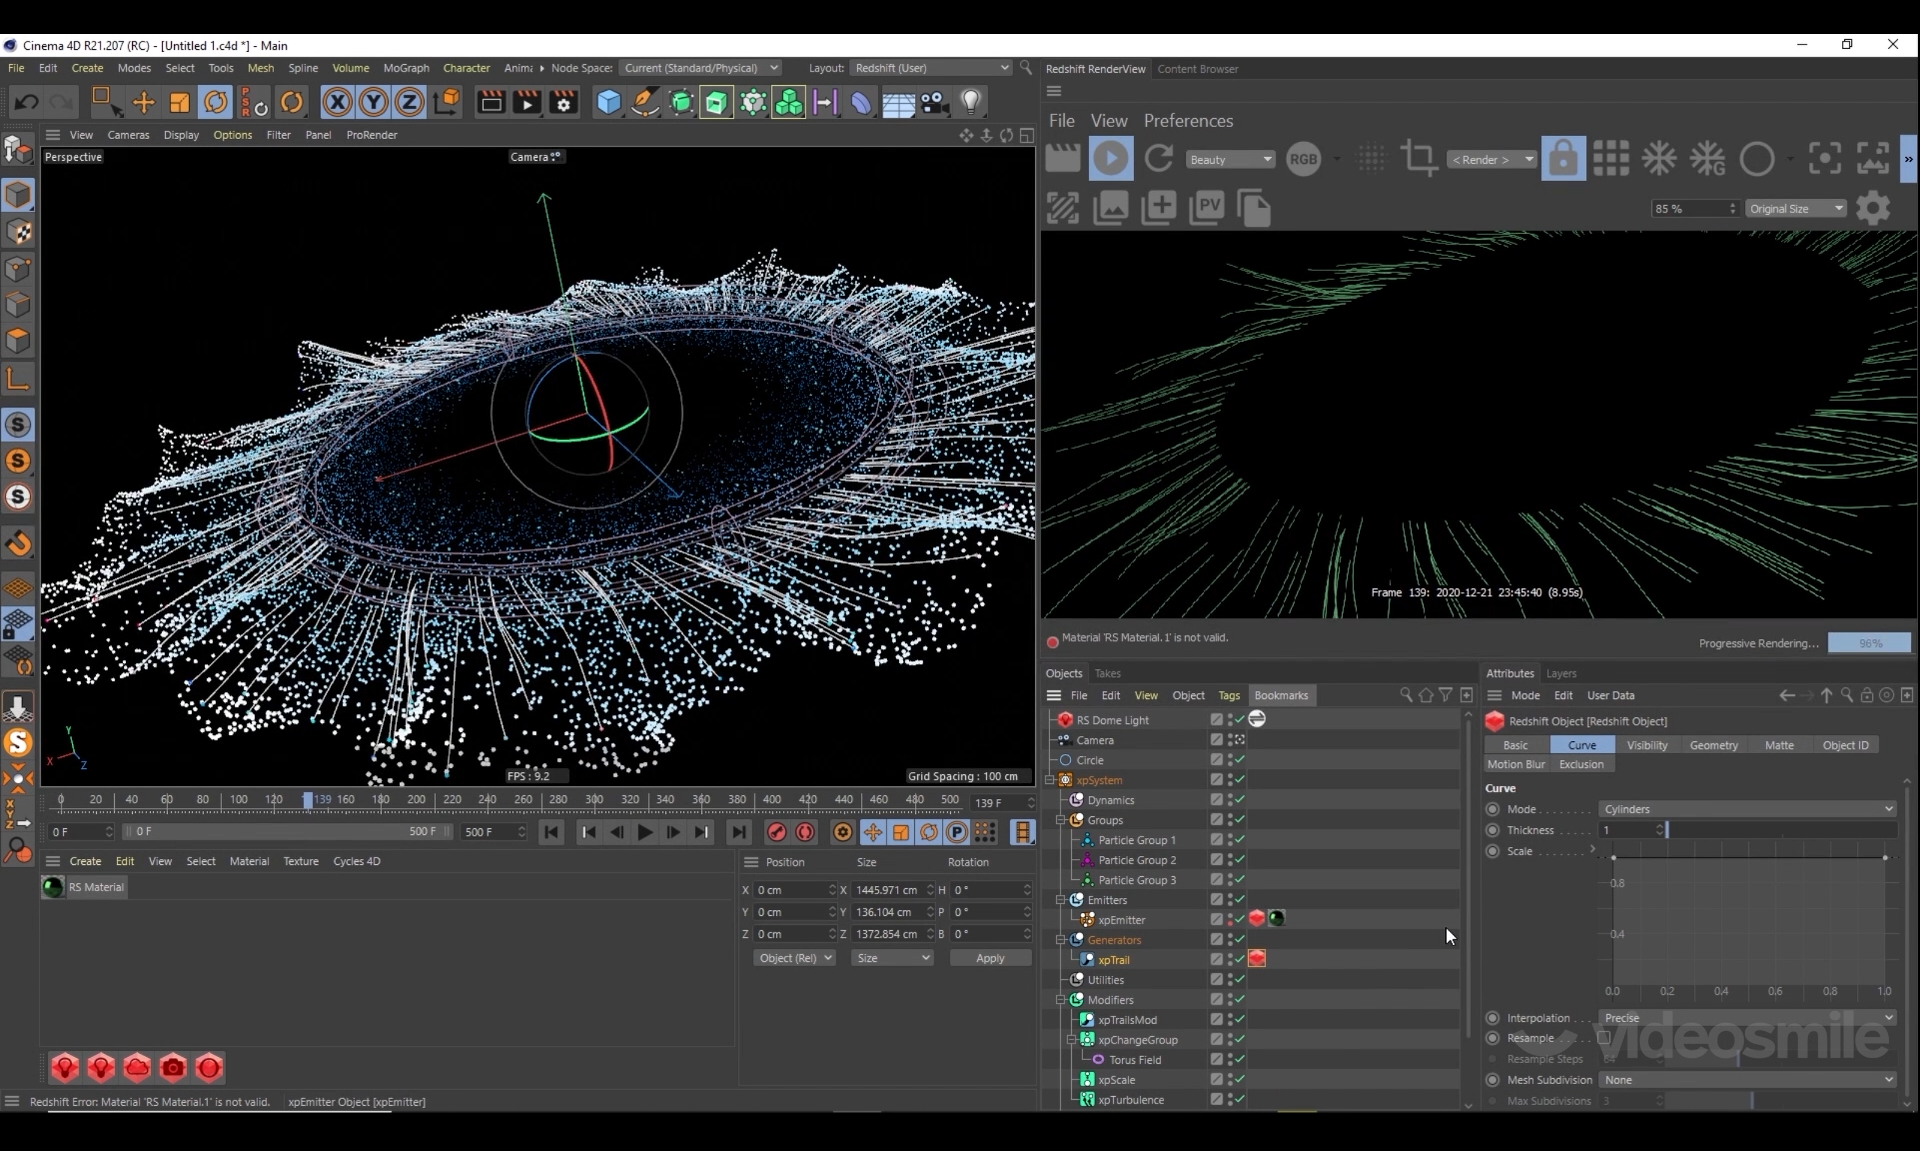
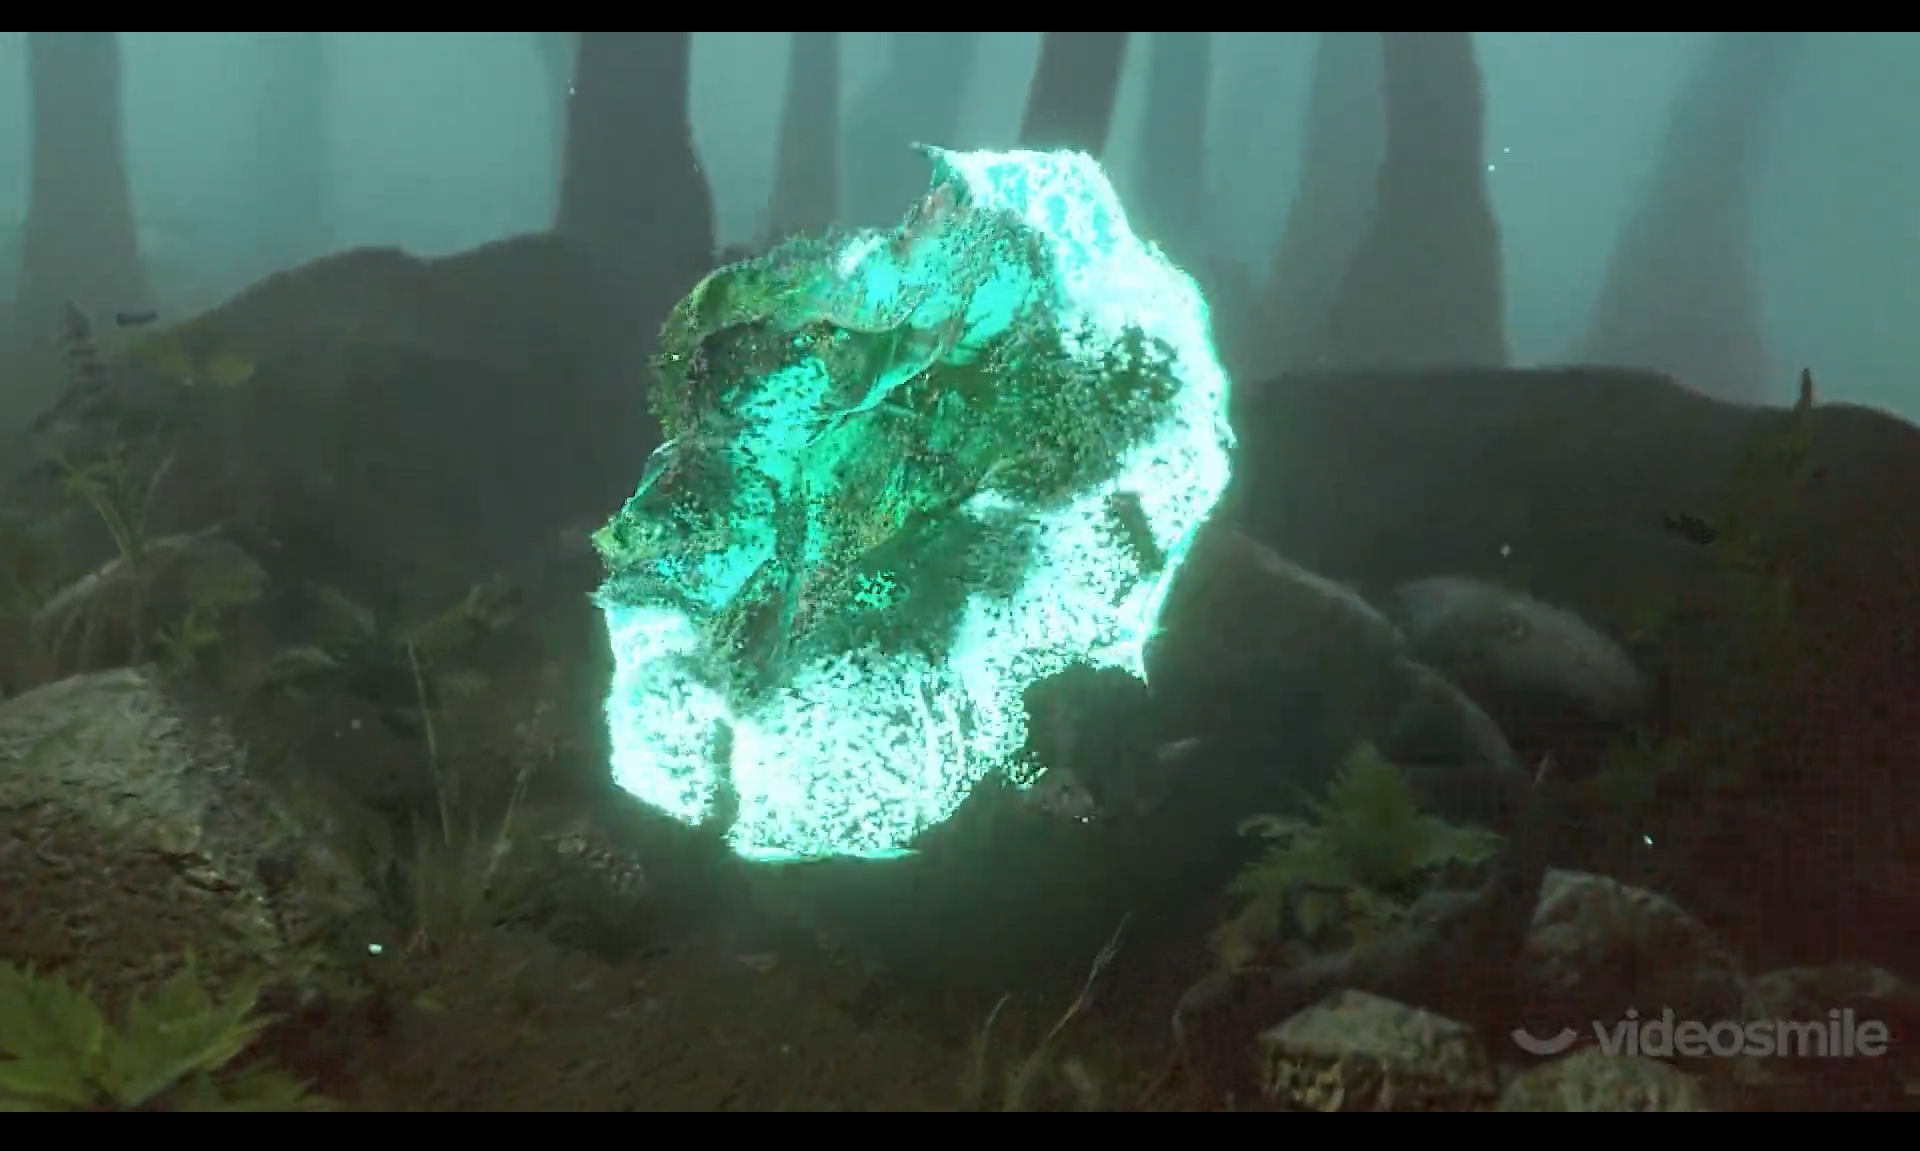
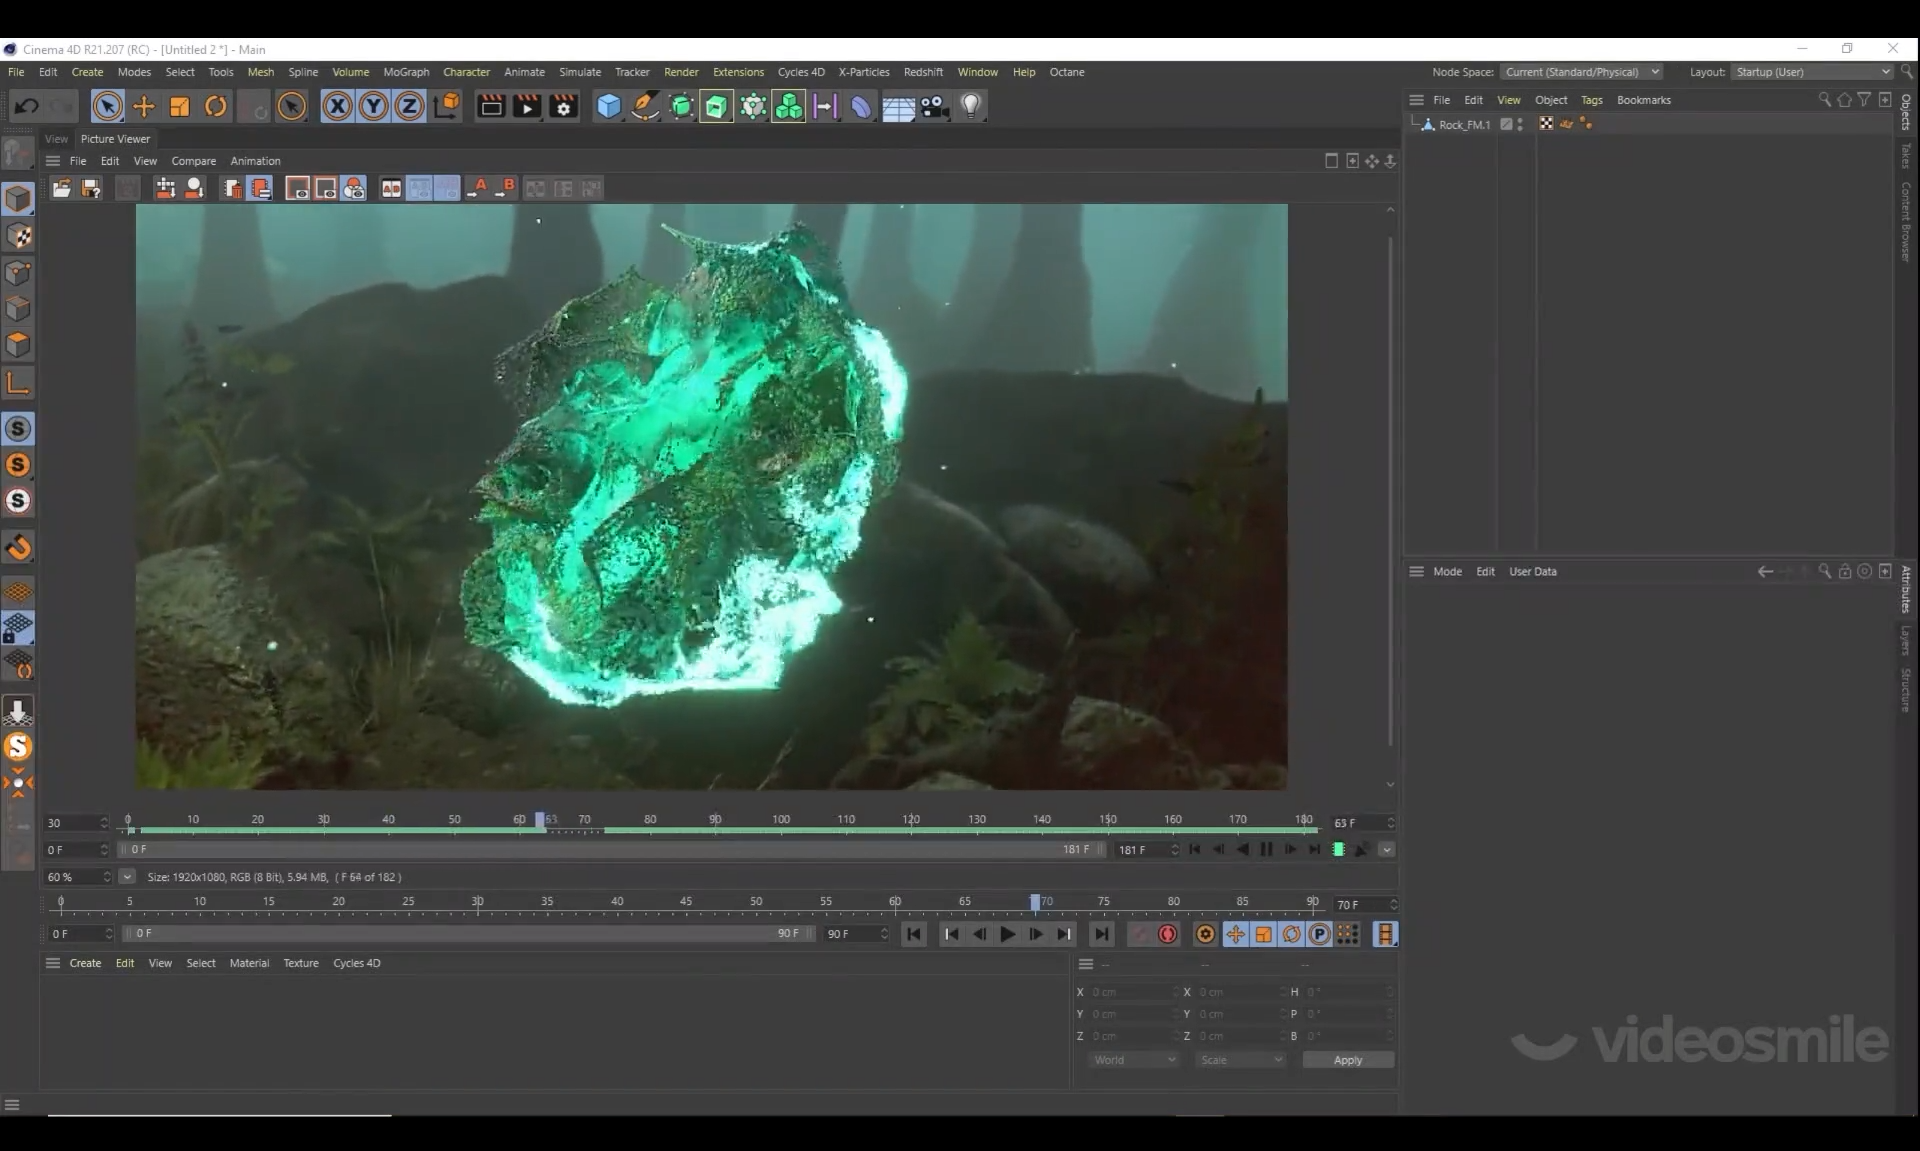
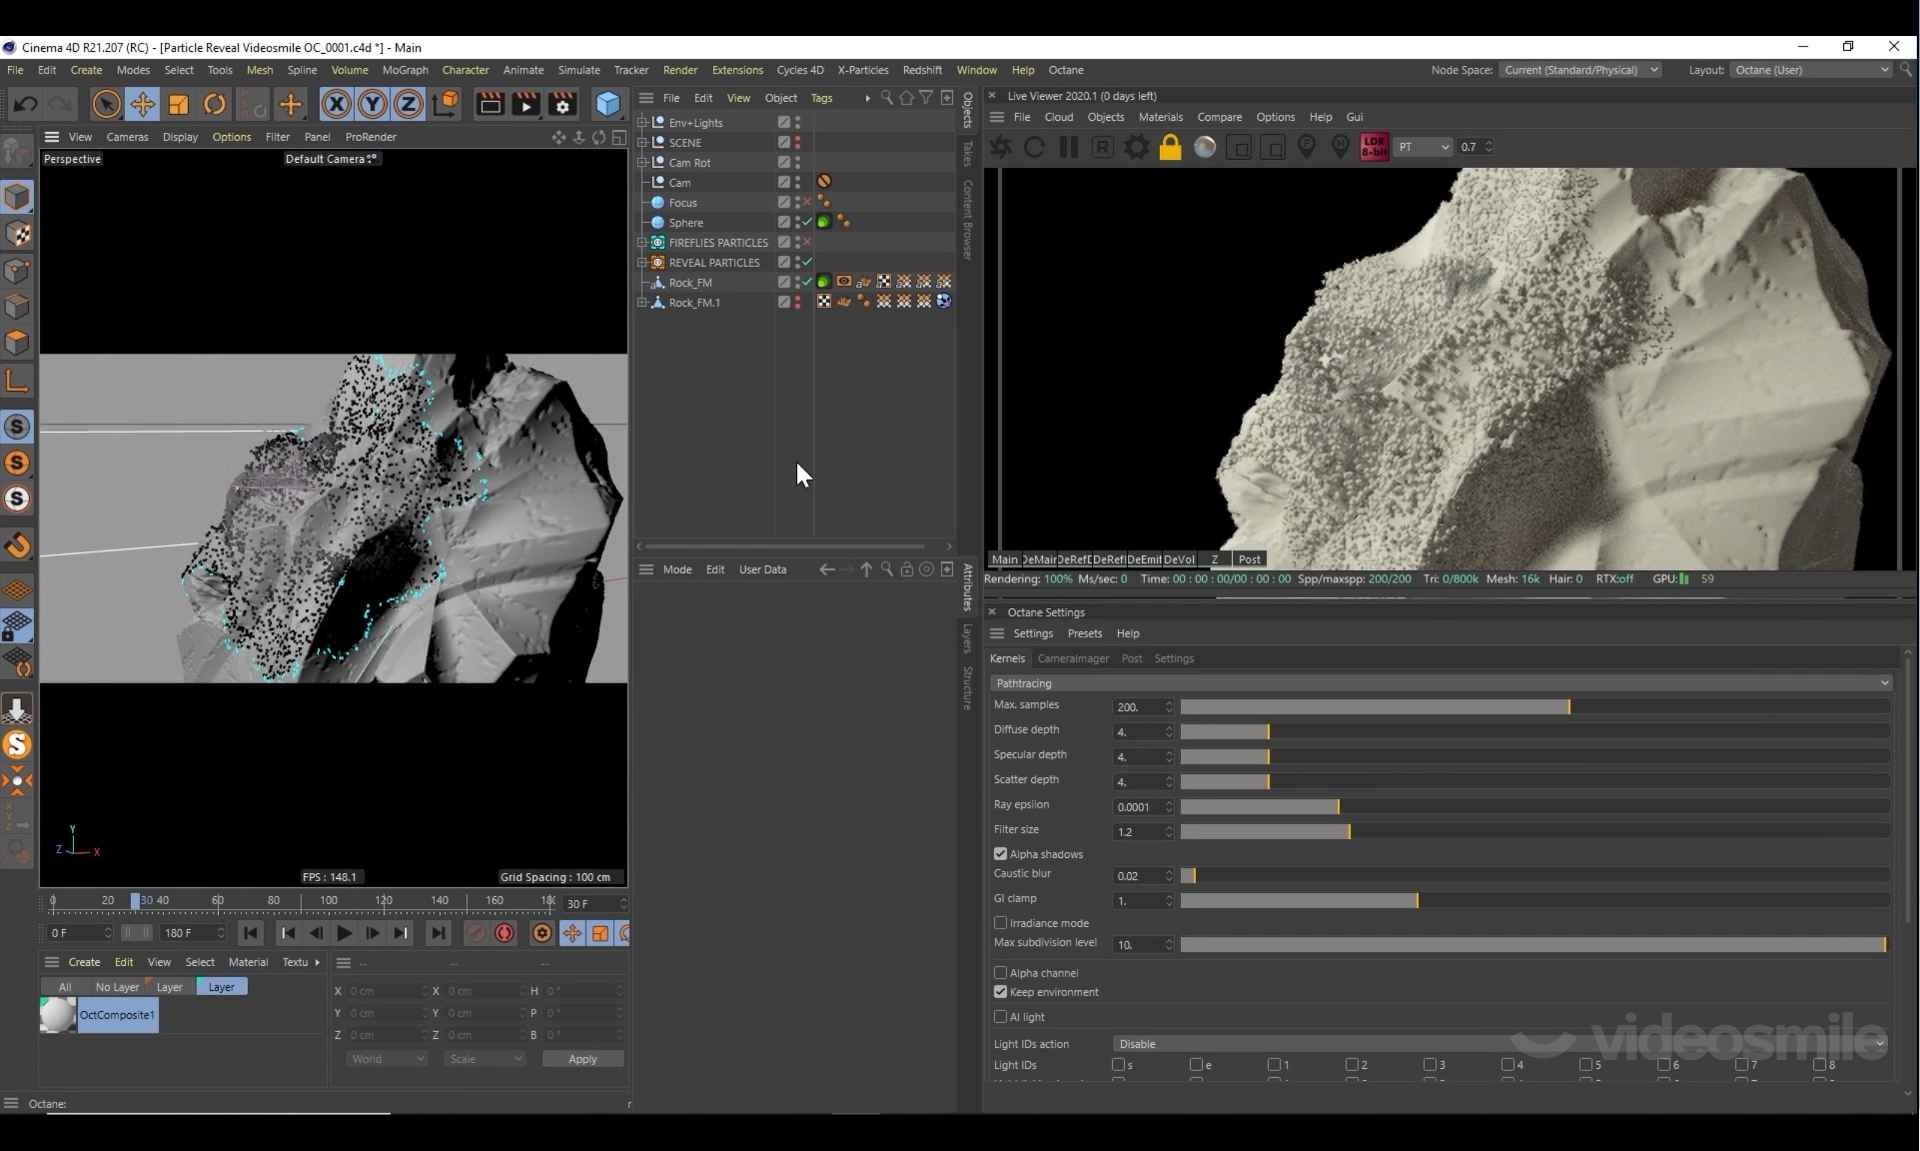
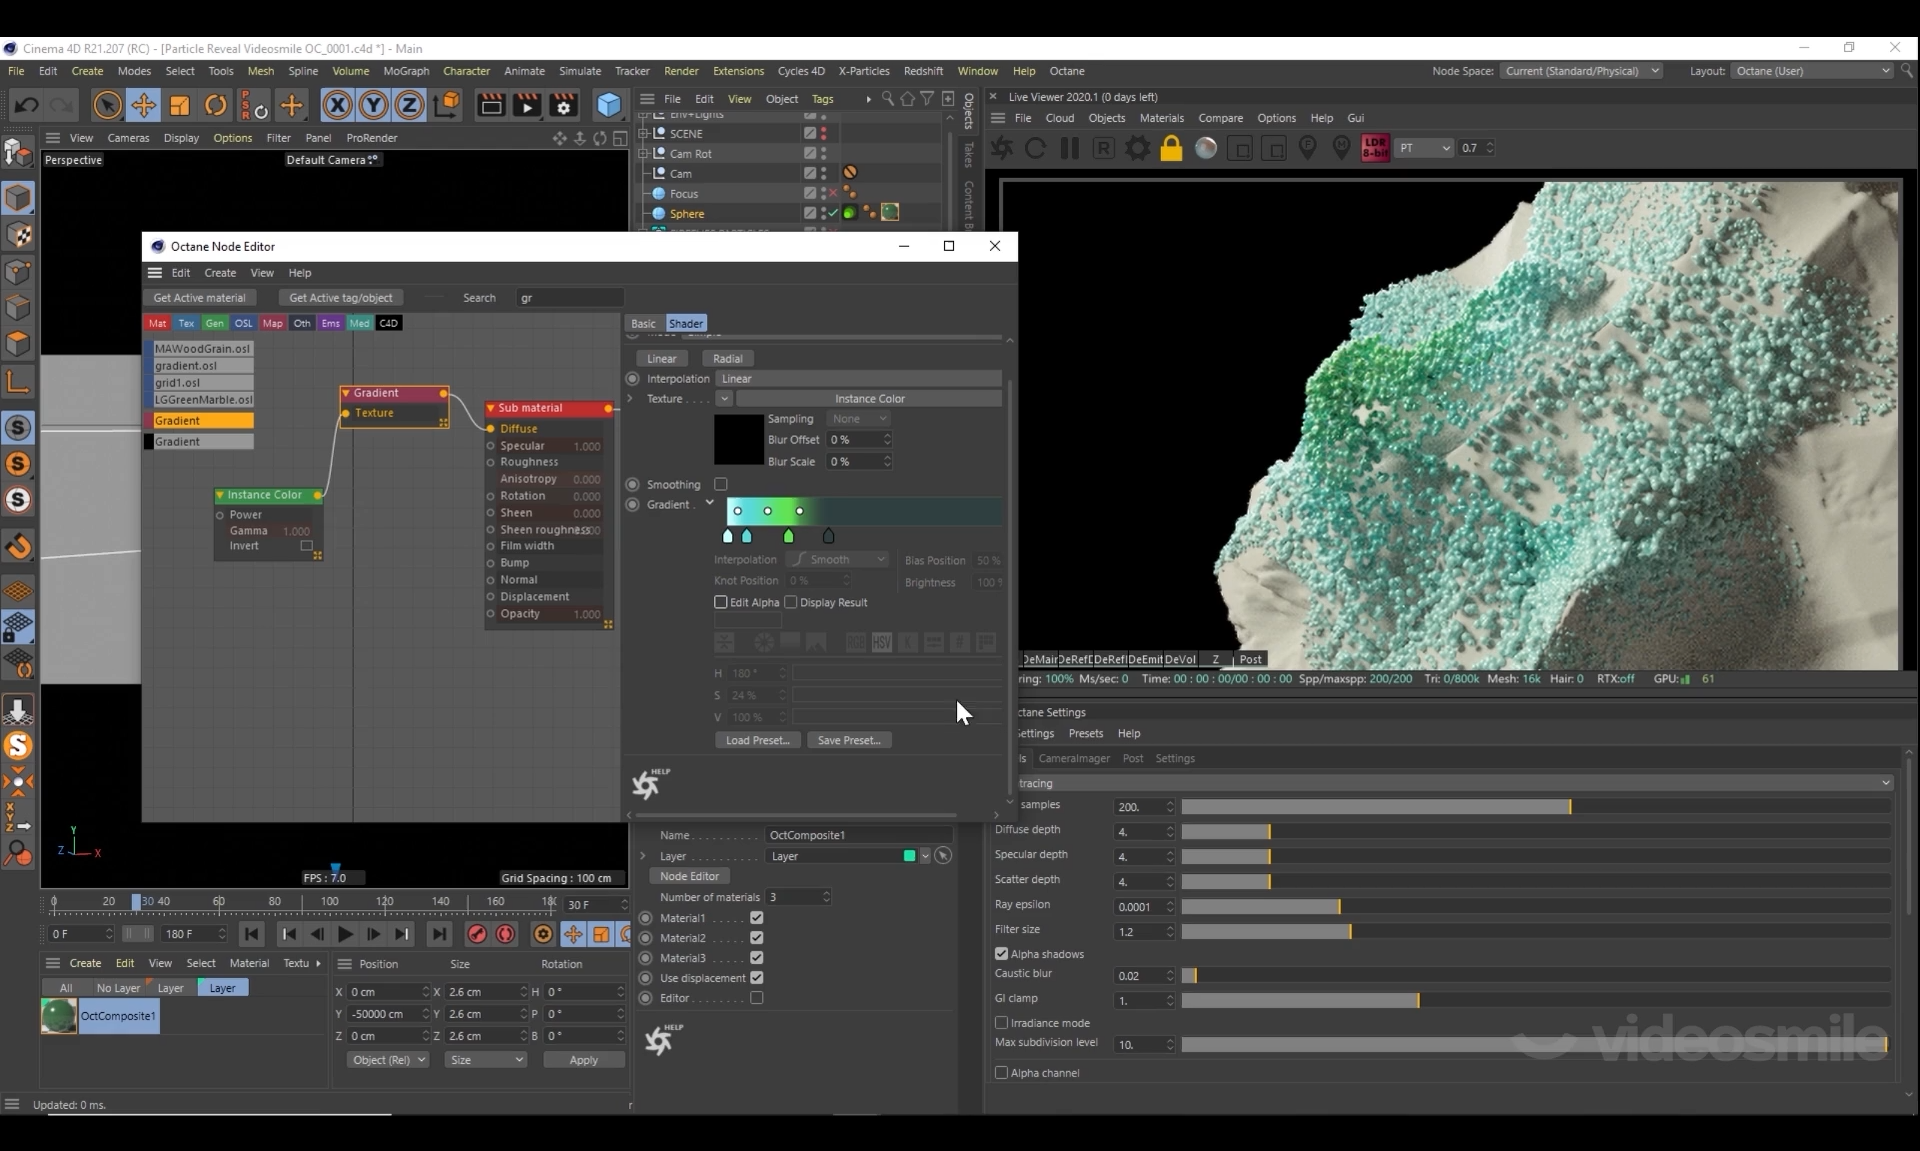
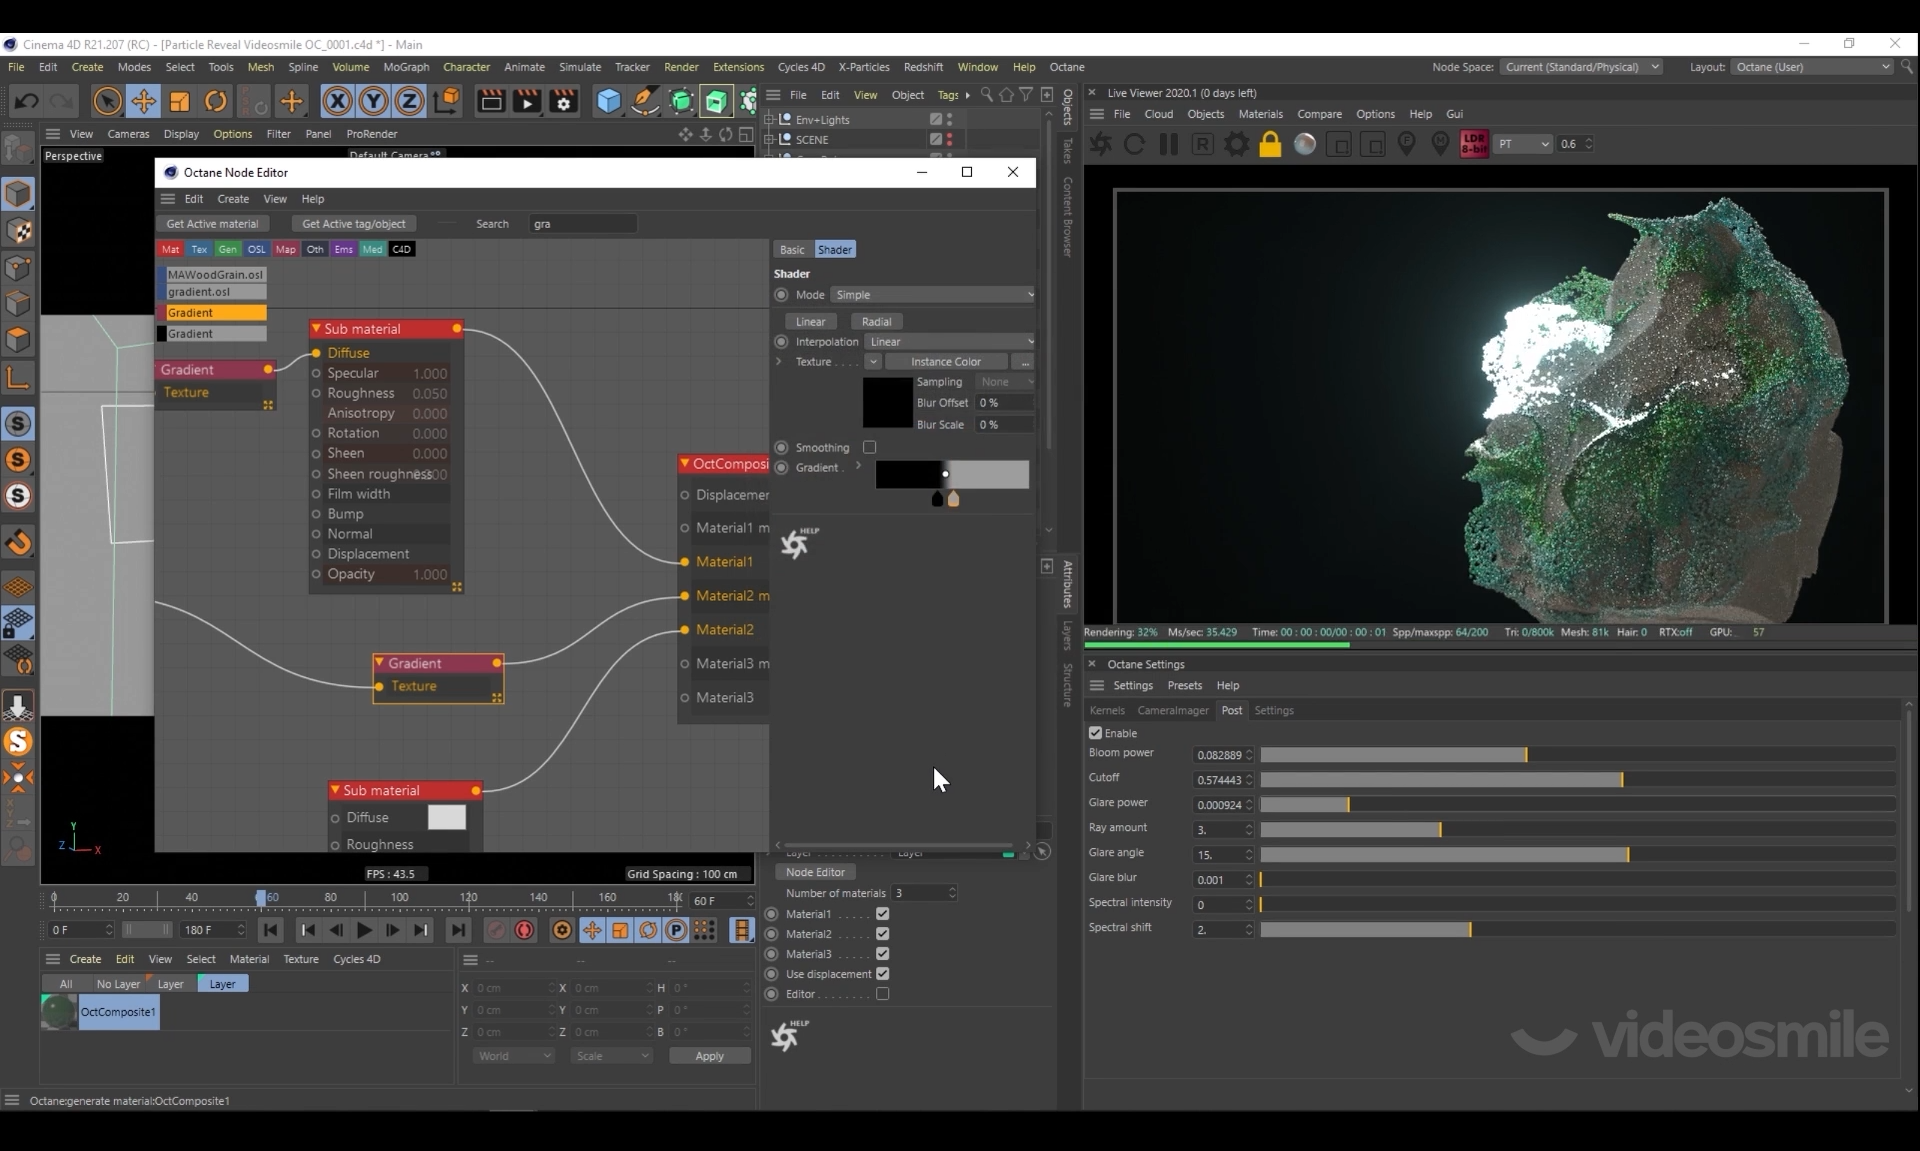
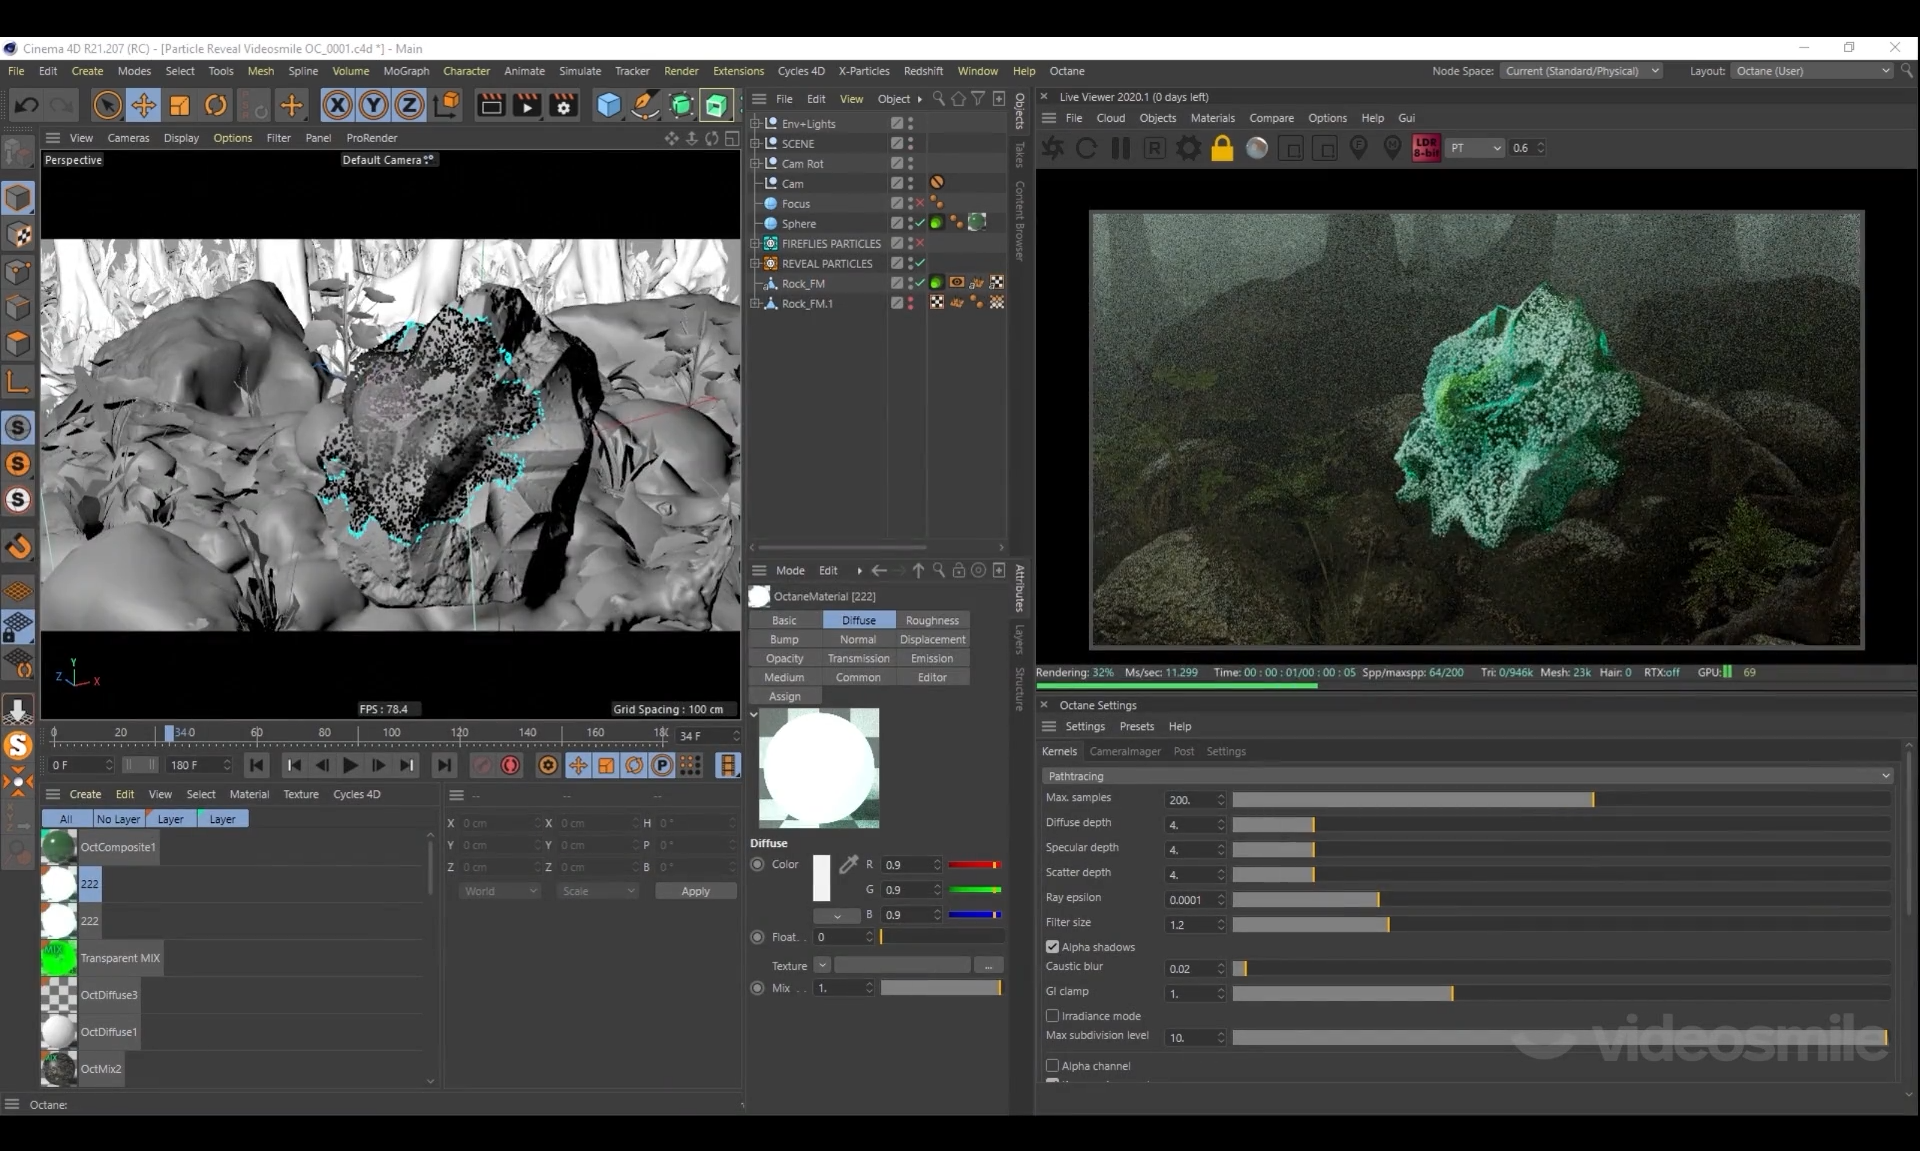
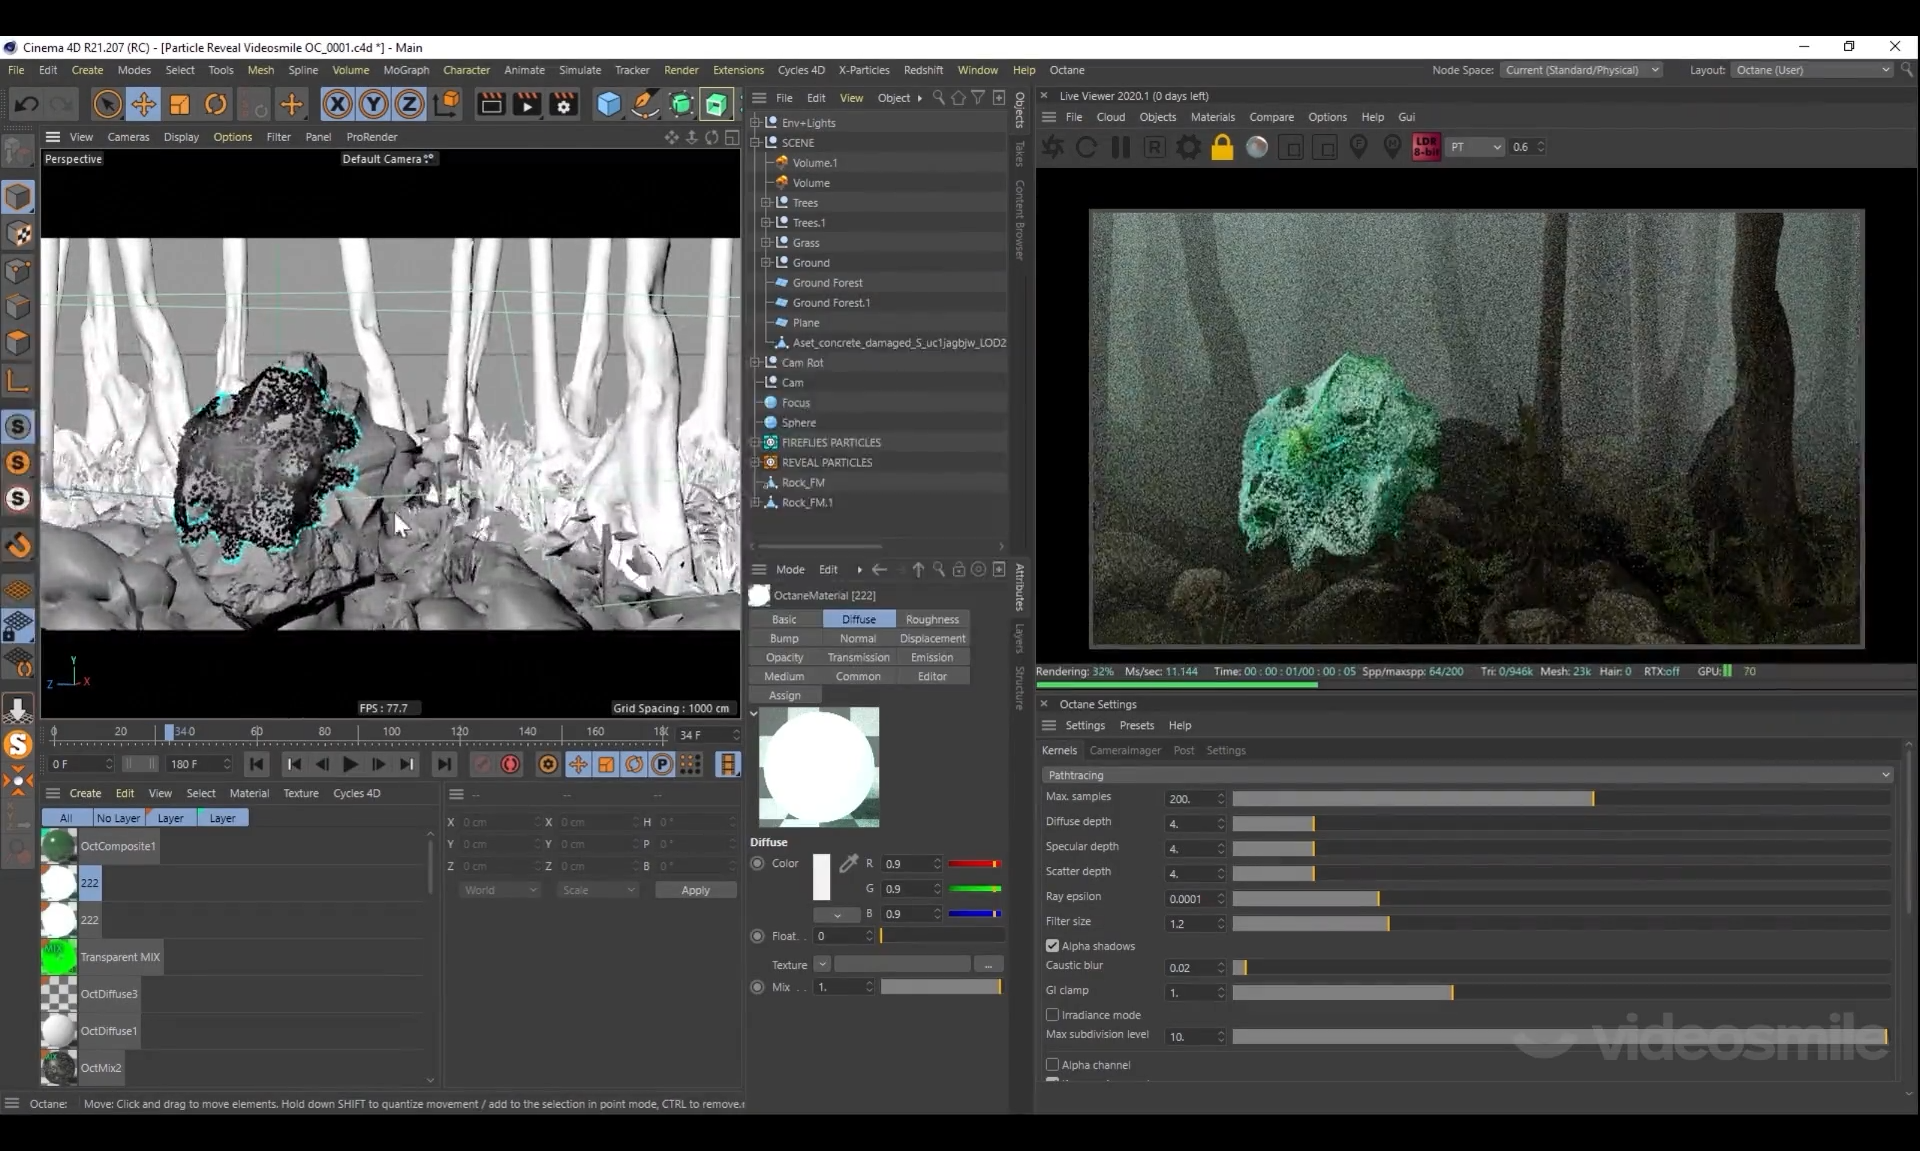
5. Particles in Cinema 4D
Video1 (6.6mb)
image1
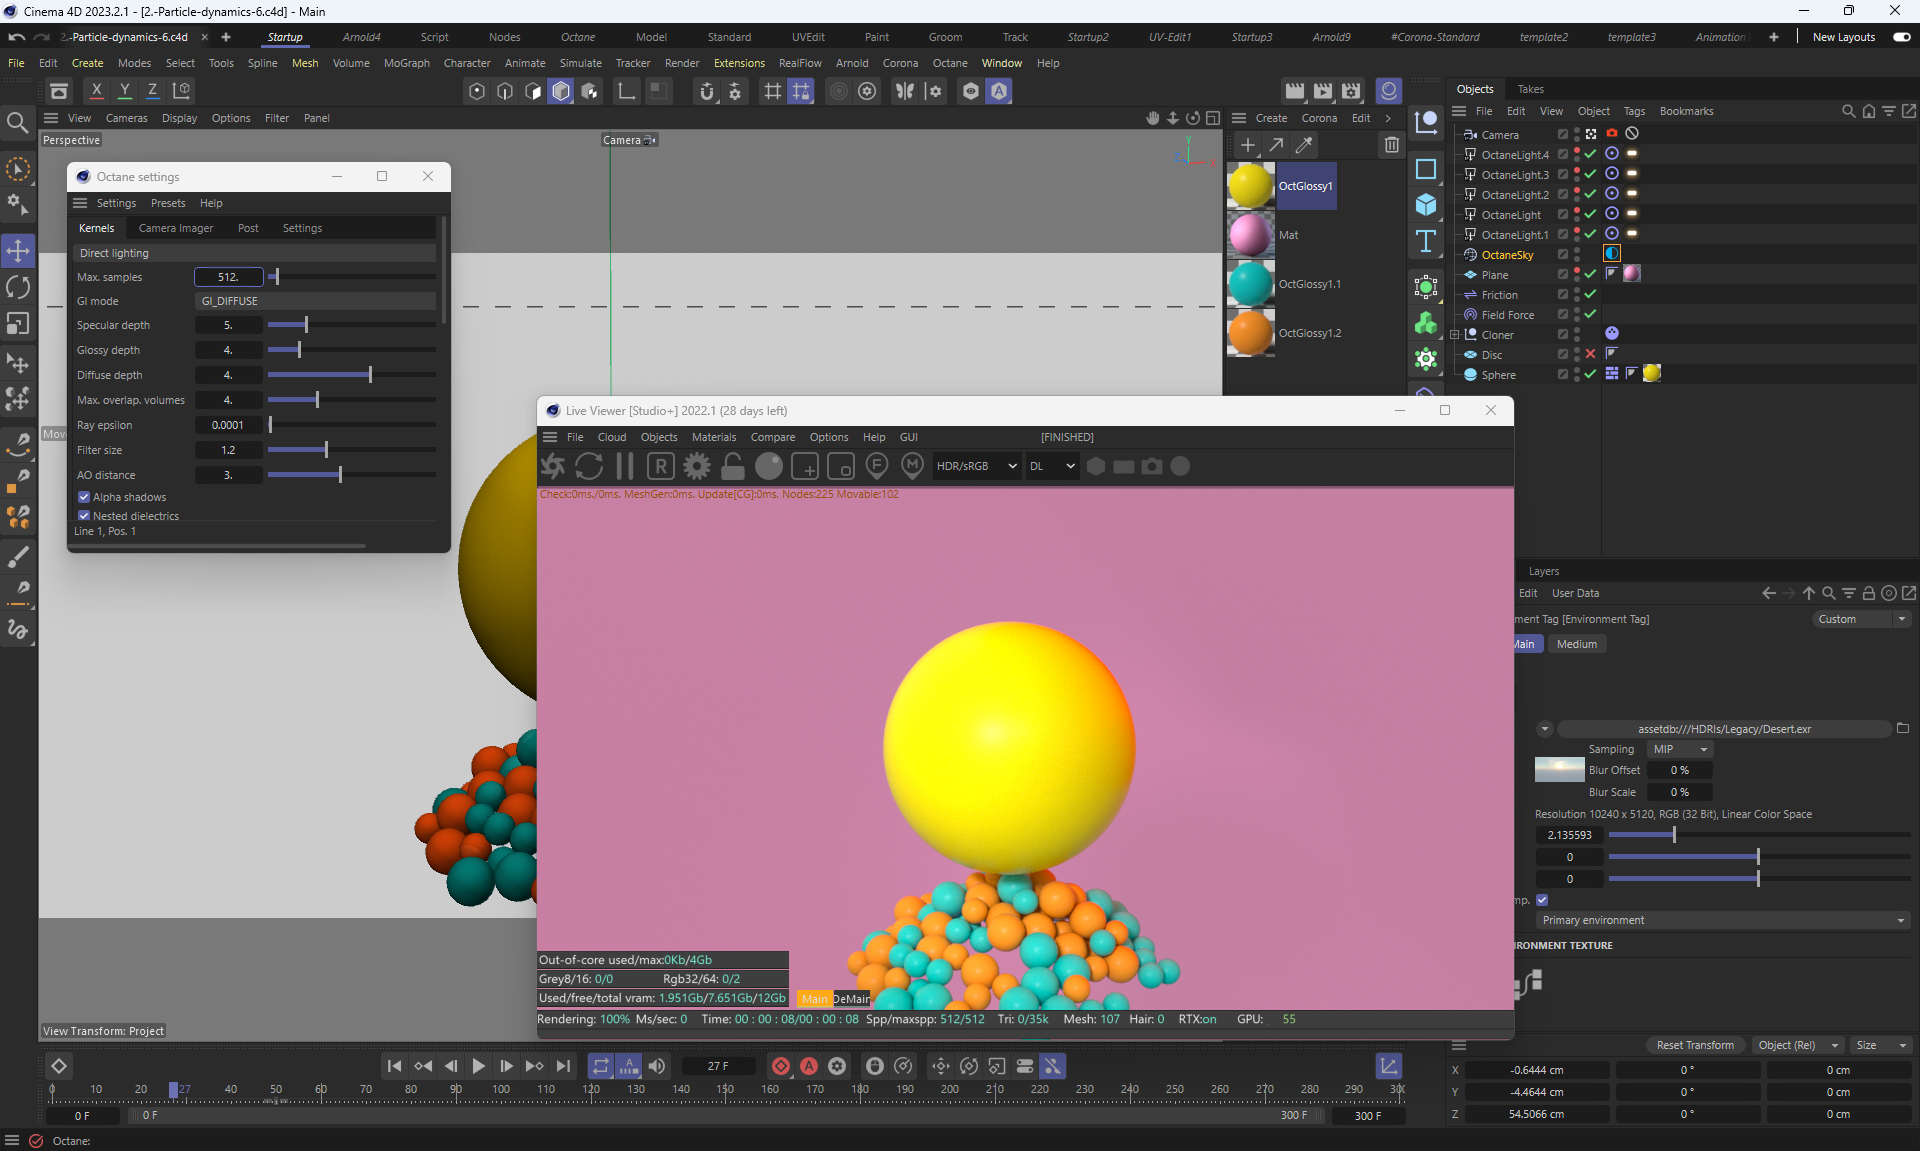
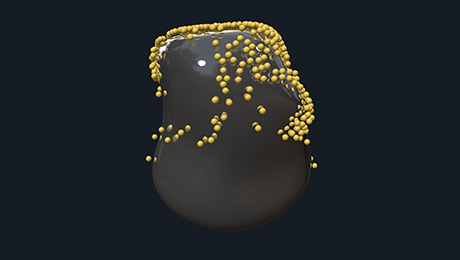
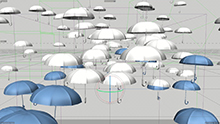
Video1 (5.5mb)
image1
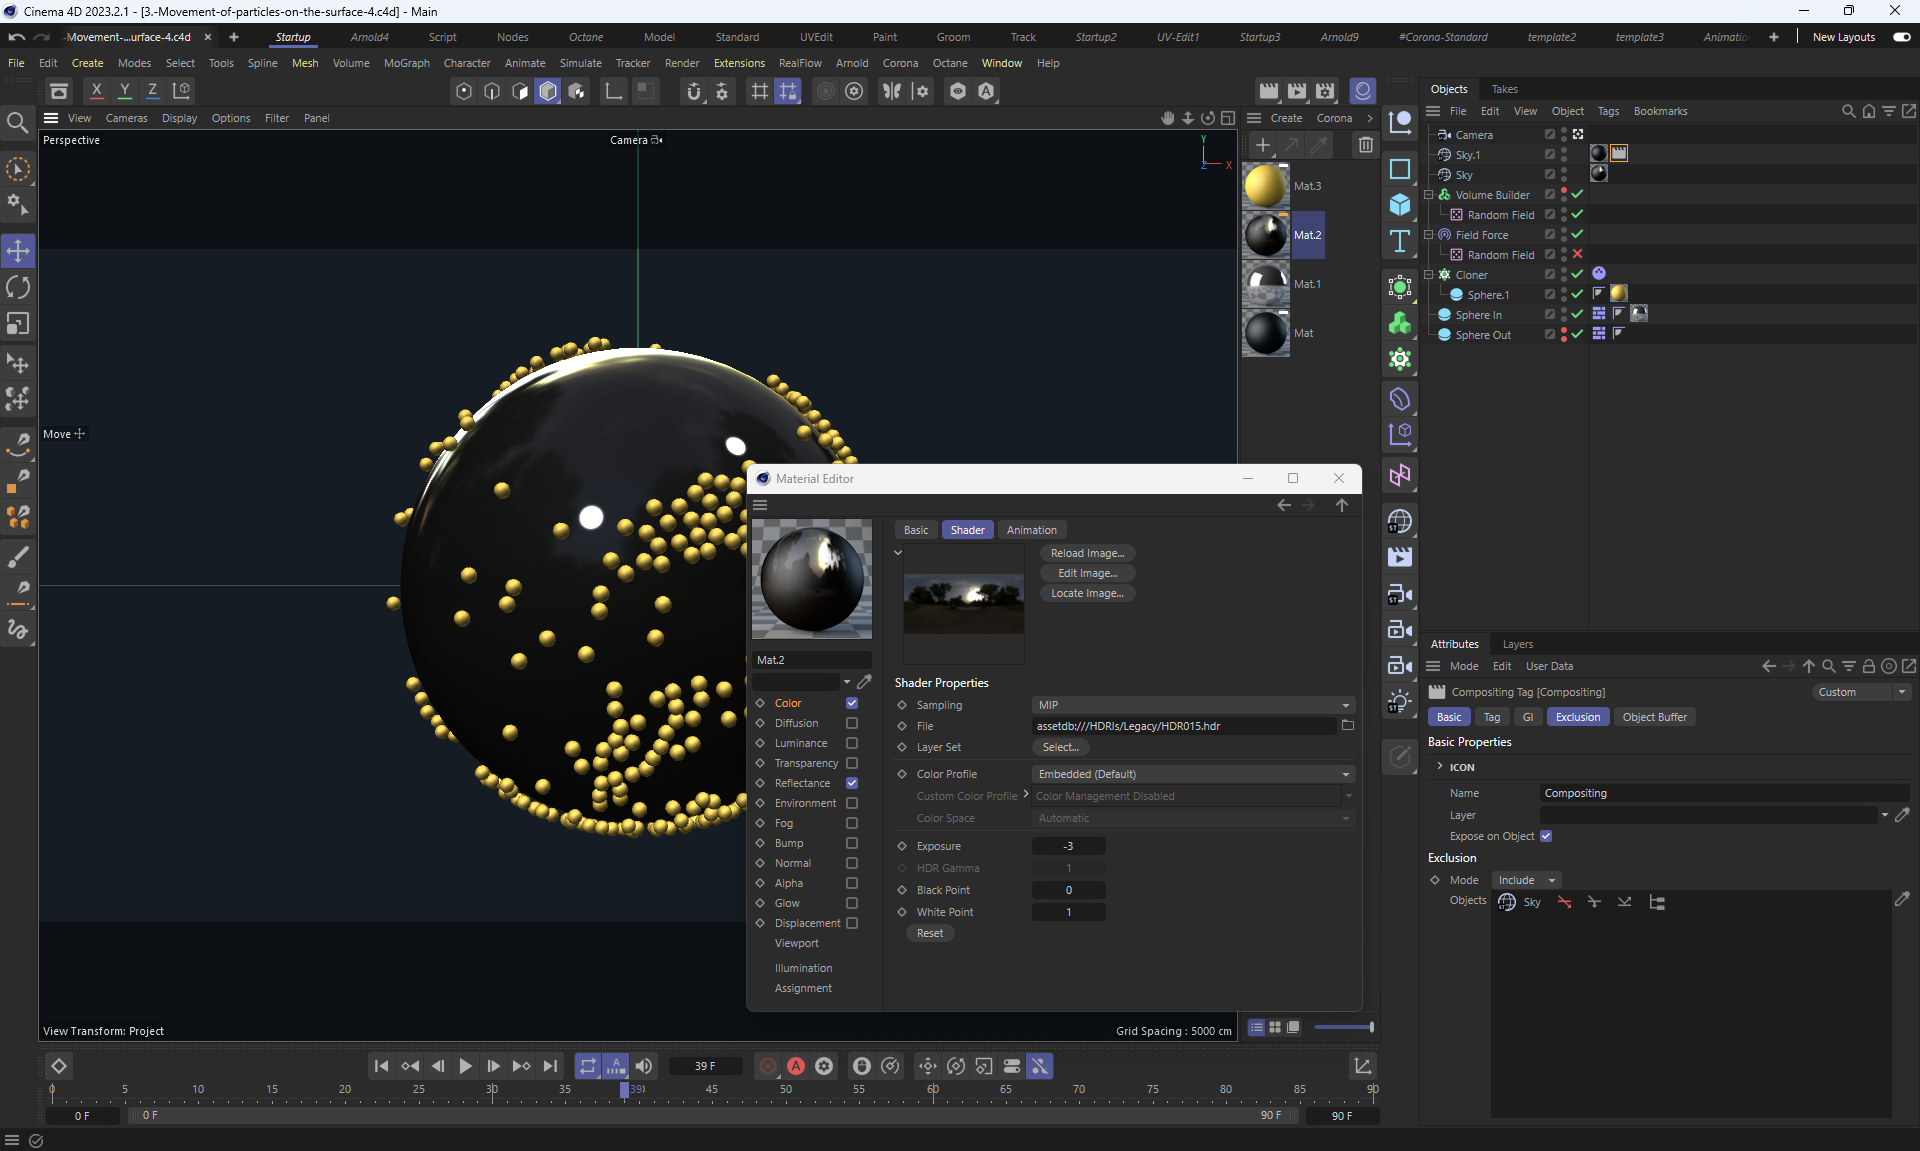
video2 (18.2mb)
image2
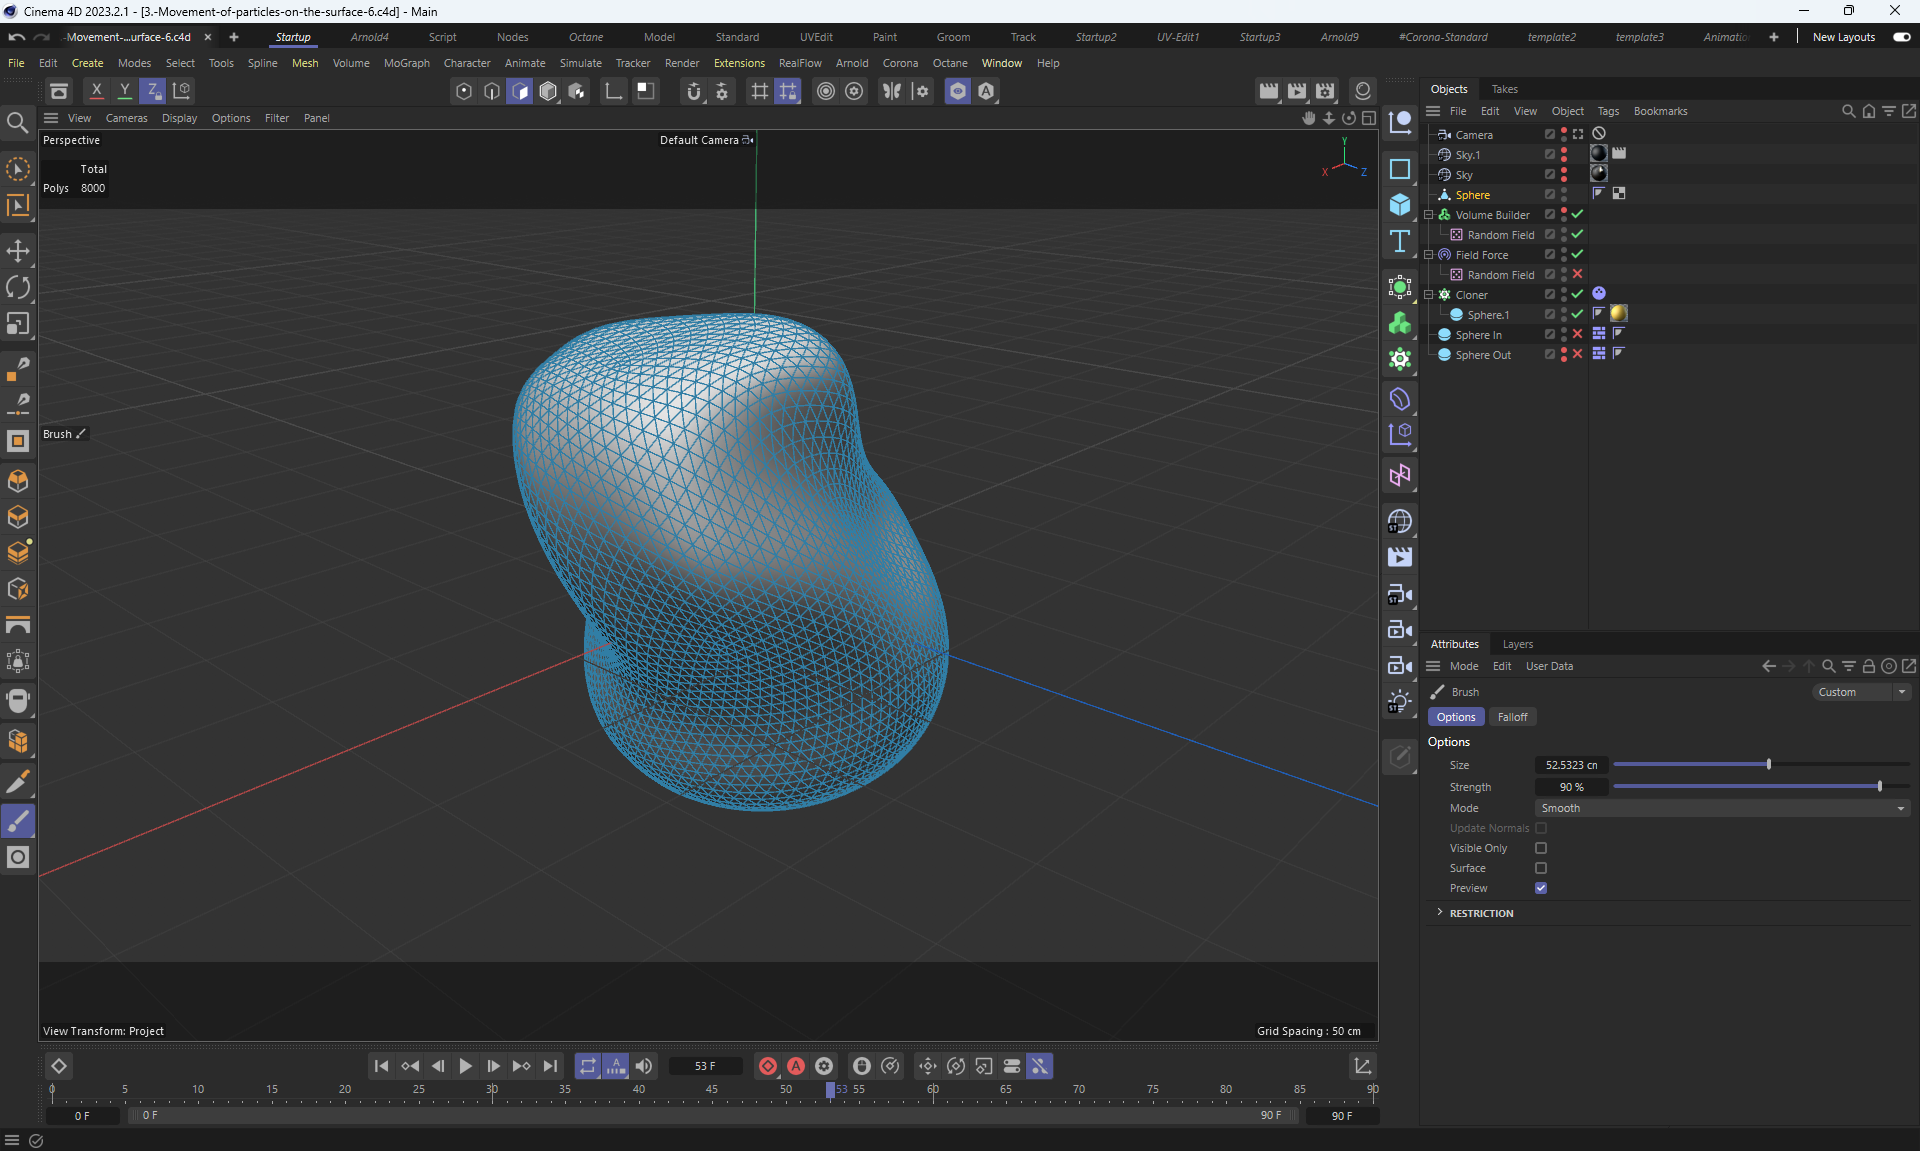
image1
video2 (13.5mb)
image2
Video1 (5.8mb) оригінальне
video2 (9.6mb) slow motion
image1
ChatGPT question
I generated this video from 65 frames, but it was only 2 seconds long, I doubled its duration and added extra frames.
I first tried this solution:
Smooth transition Morph Cut at assembly joints inAfter Effects как в Premiere Pro - AEplug 114
But it works for a few frames and it takes a long time.
I asked ChatGPT several times how to do it, I found the right solution.
Frame Blending & Pixel Motion in After Effects - Explained
Image
I did other lessons with particles on the stream of Mikhail Bychkov, the author of this course.
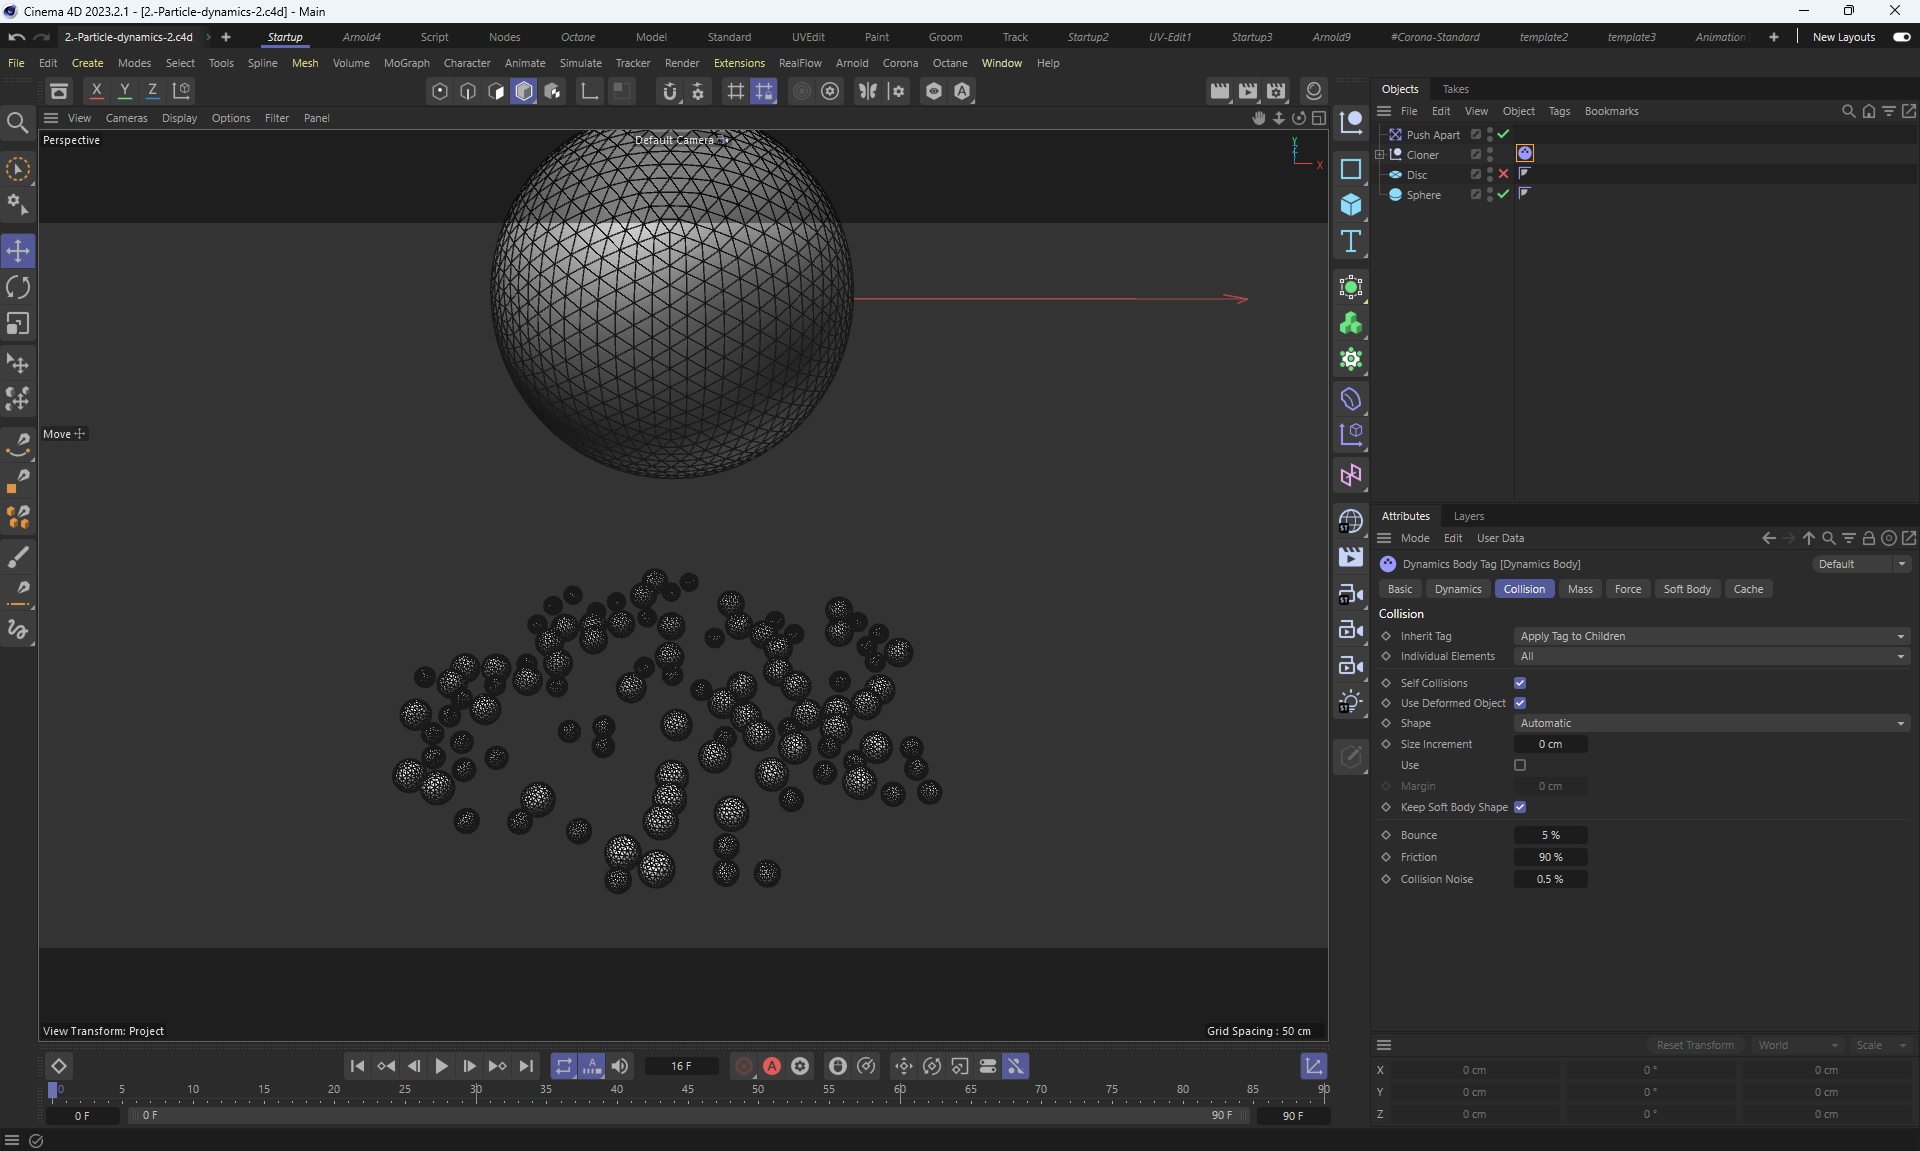
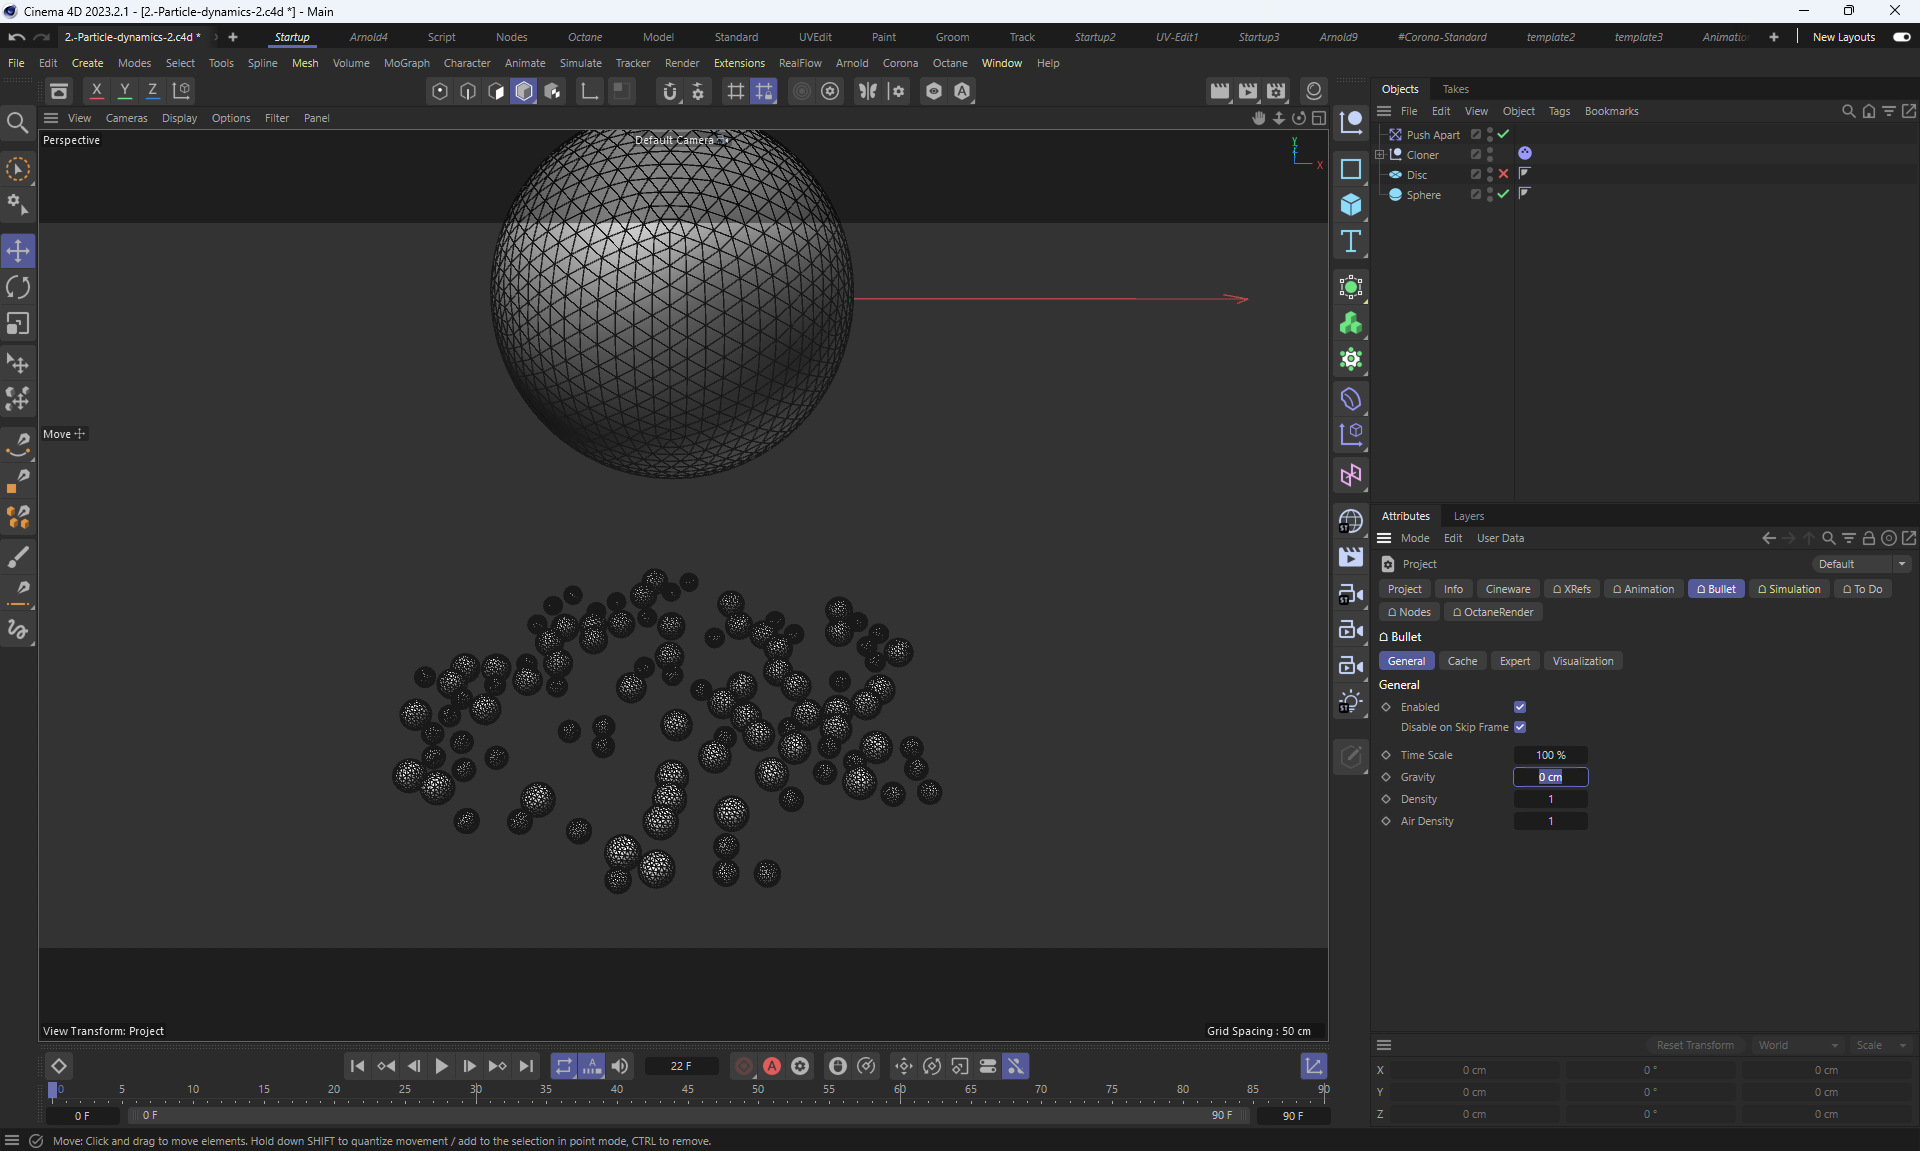
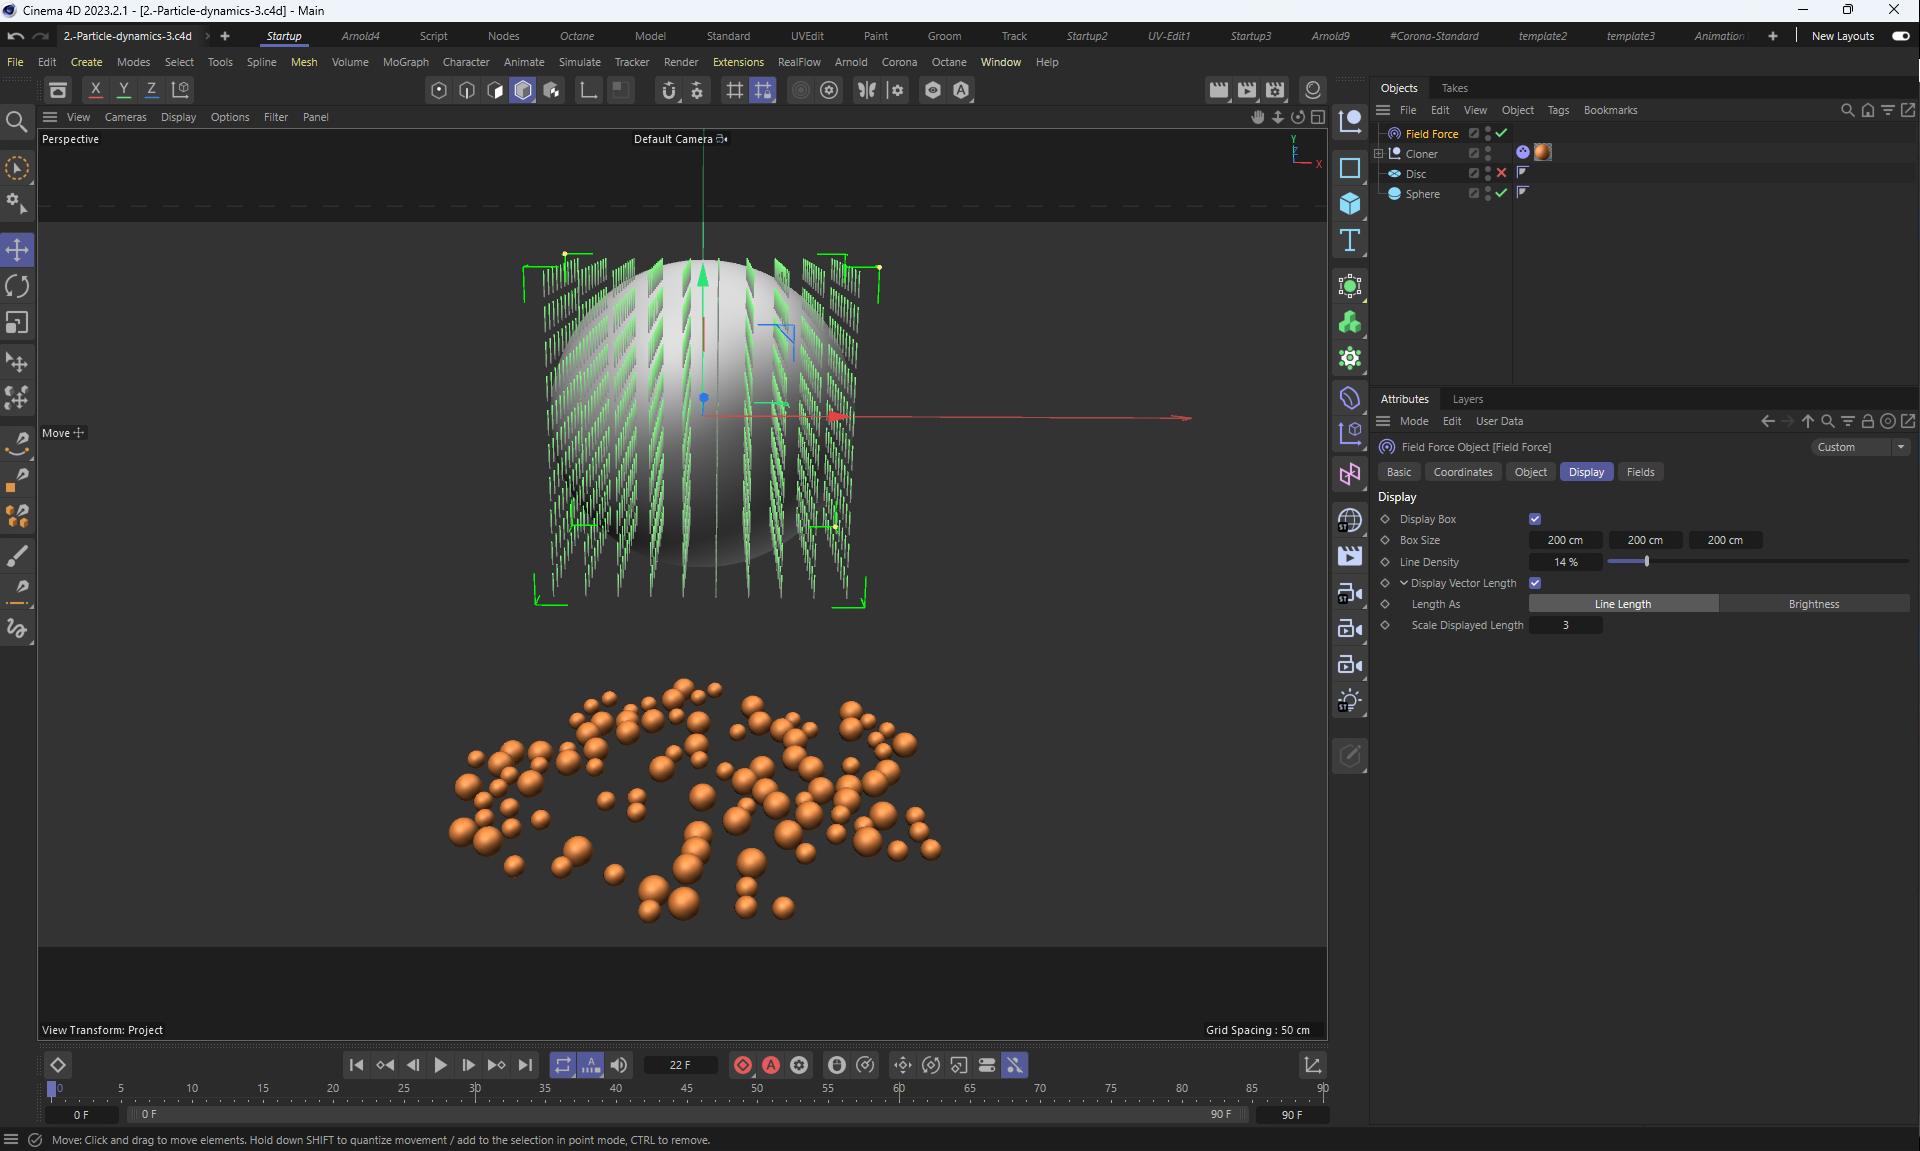
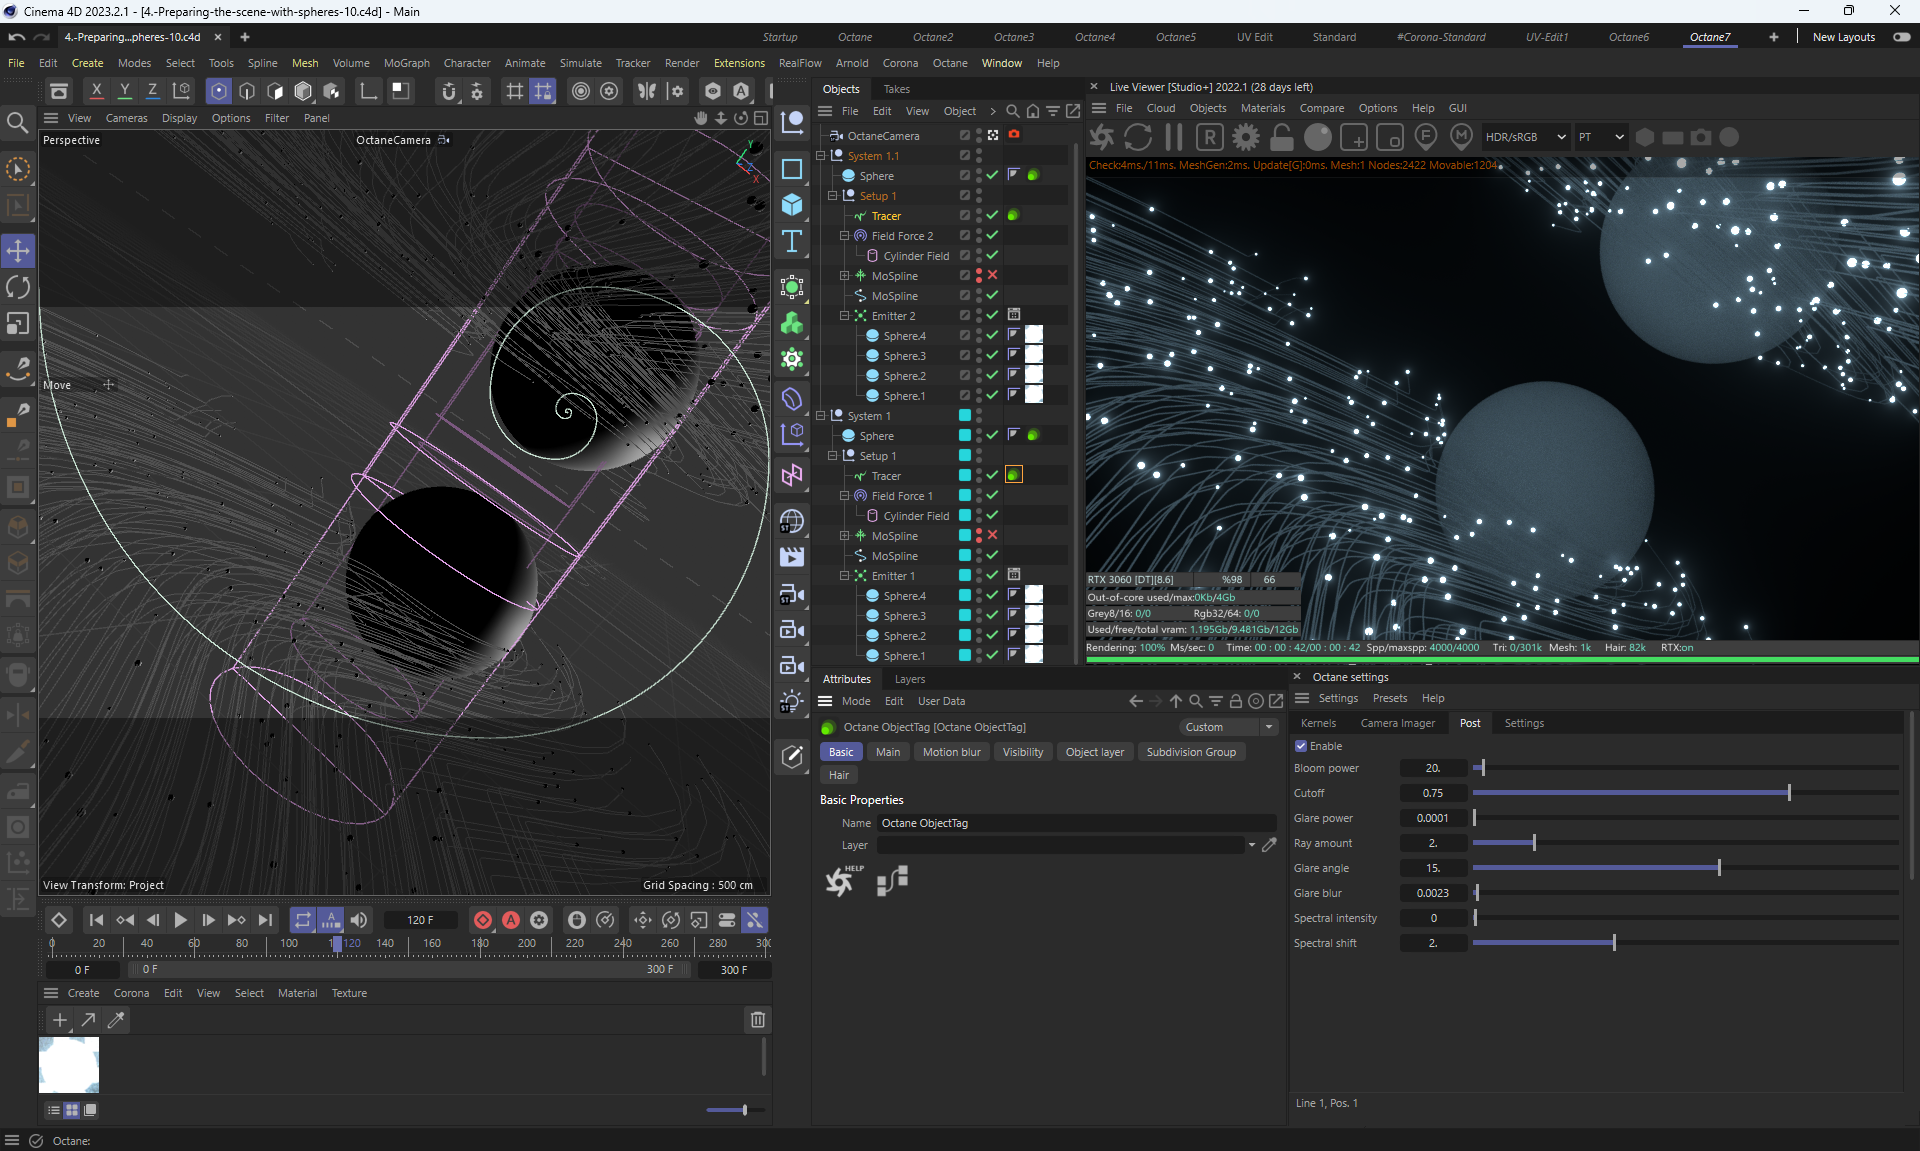
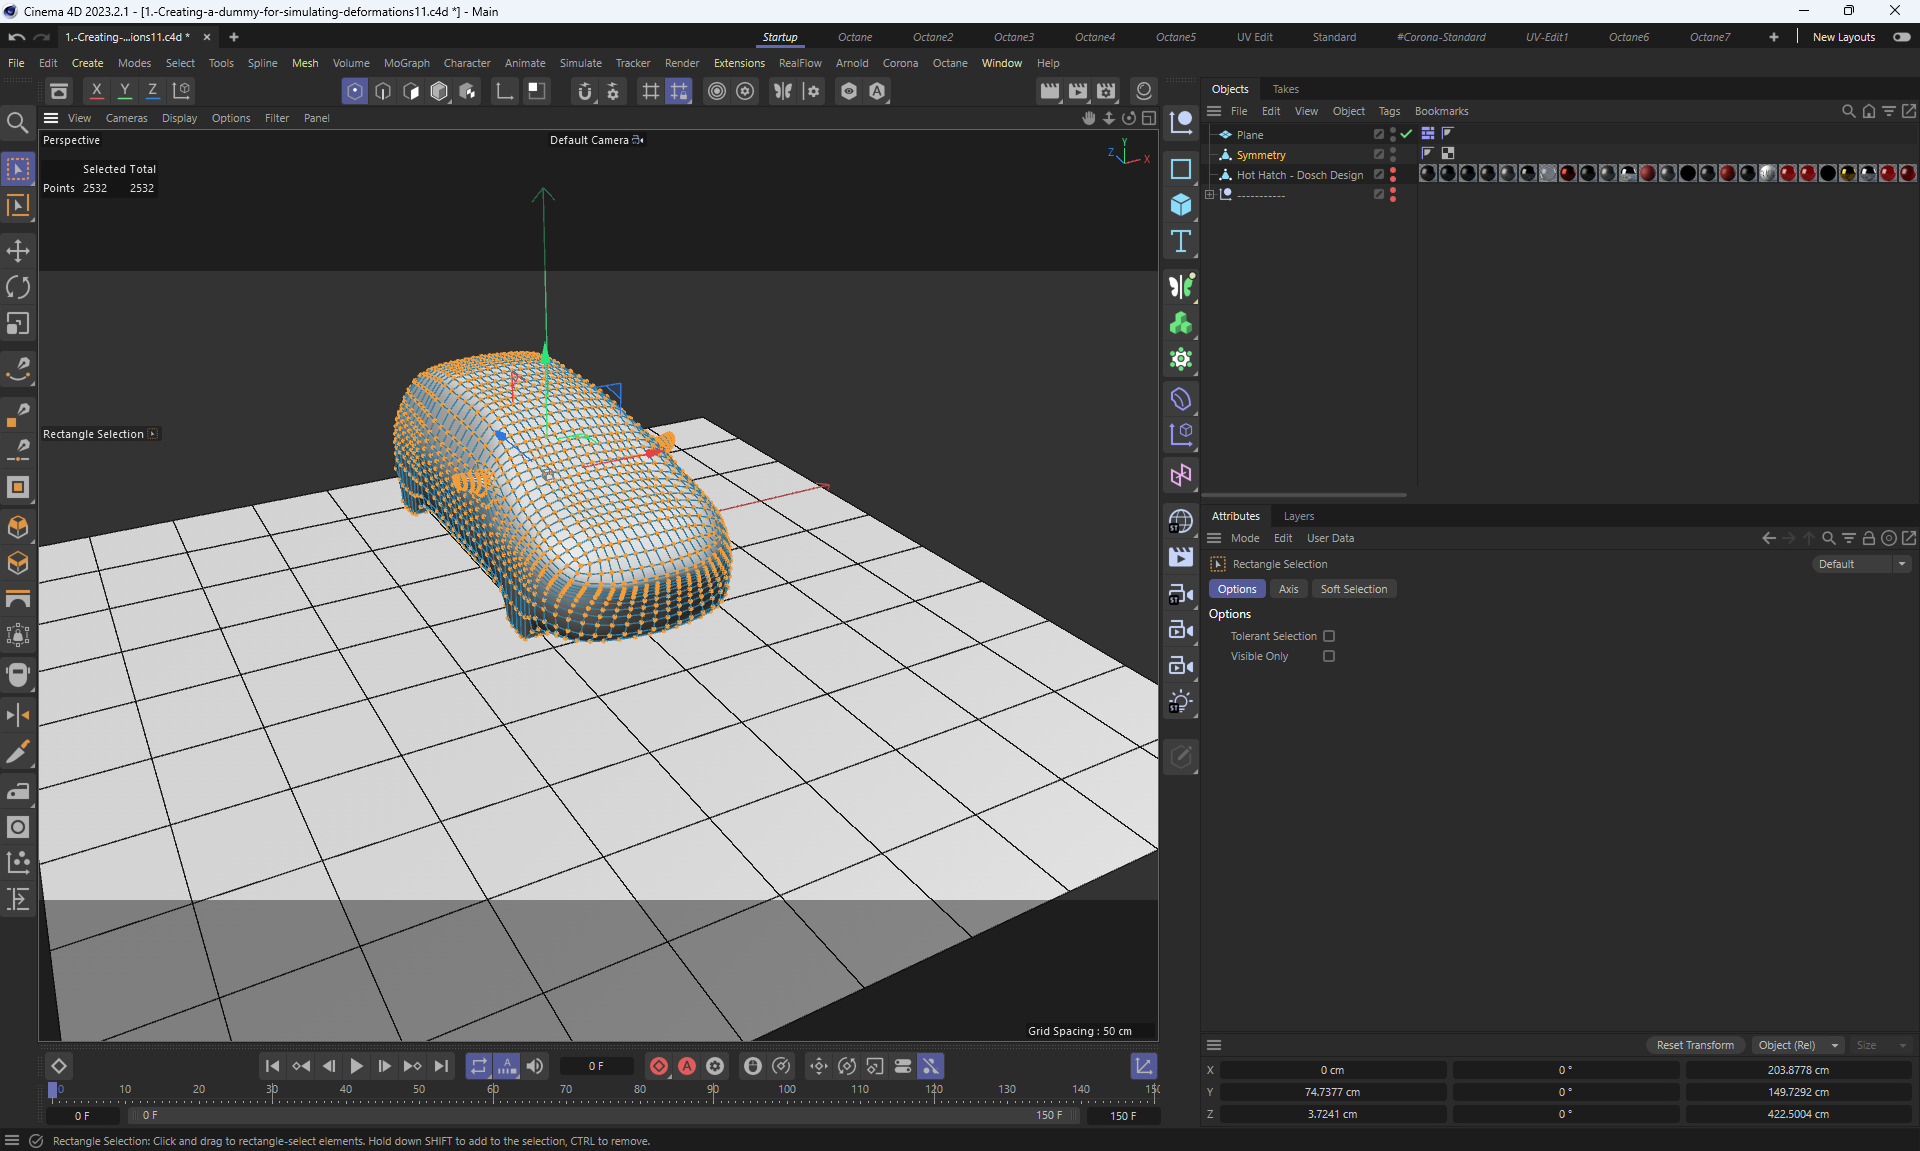
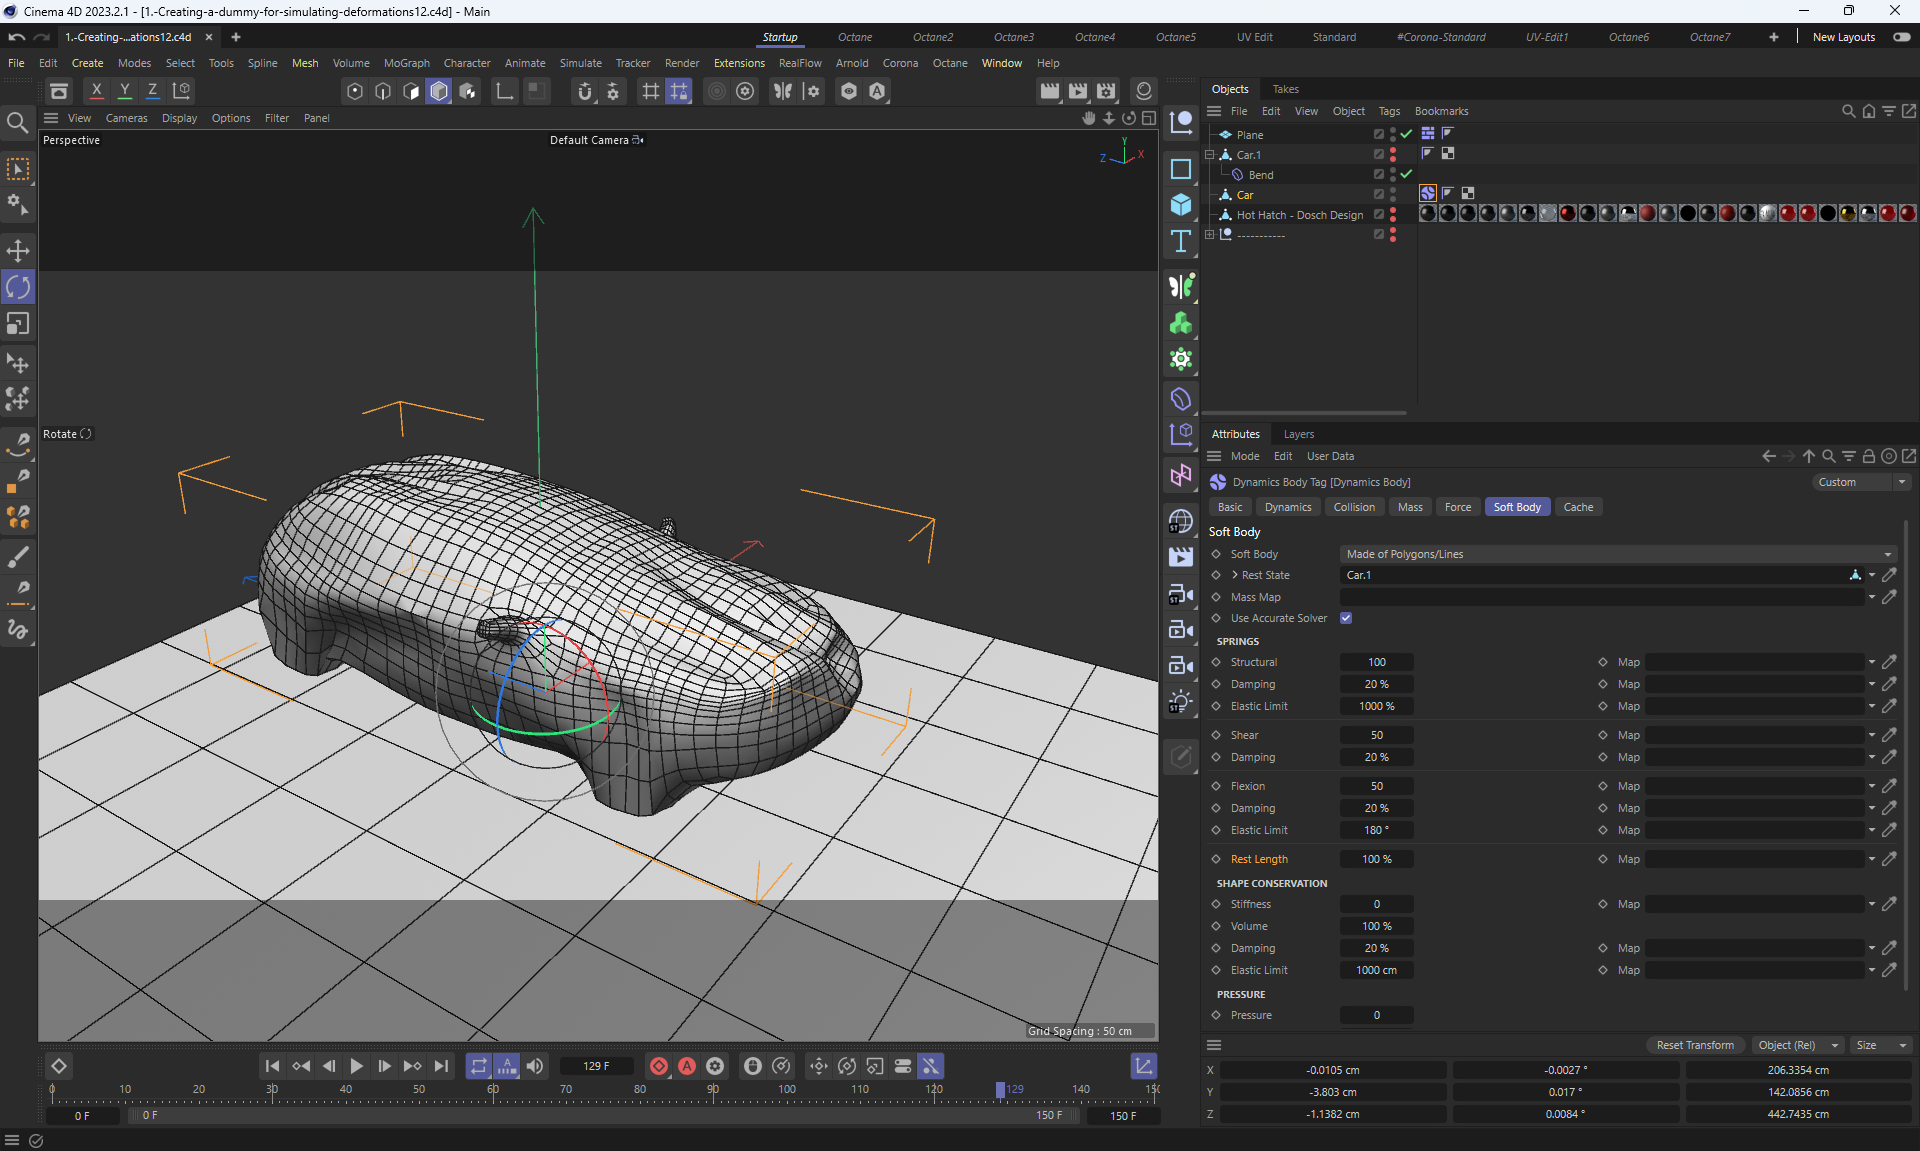
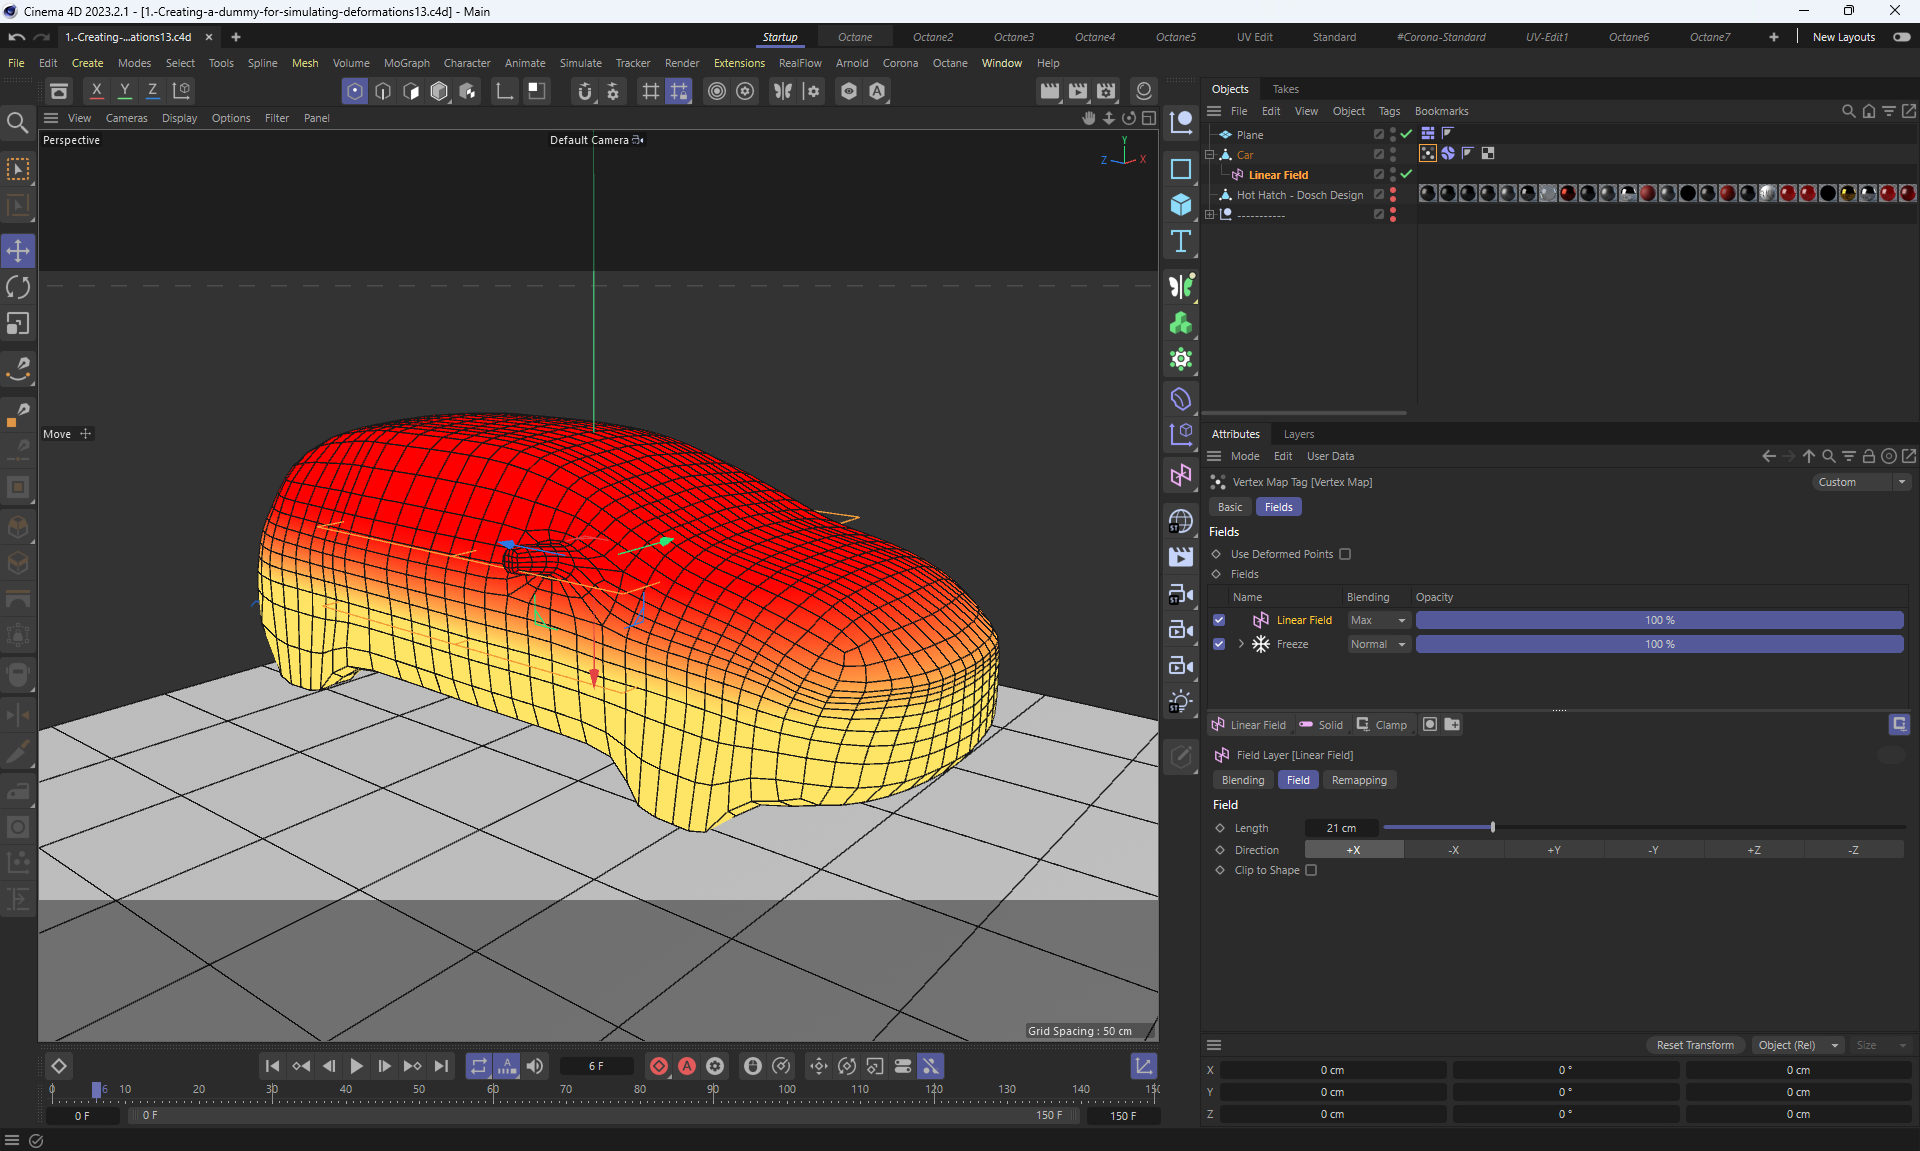
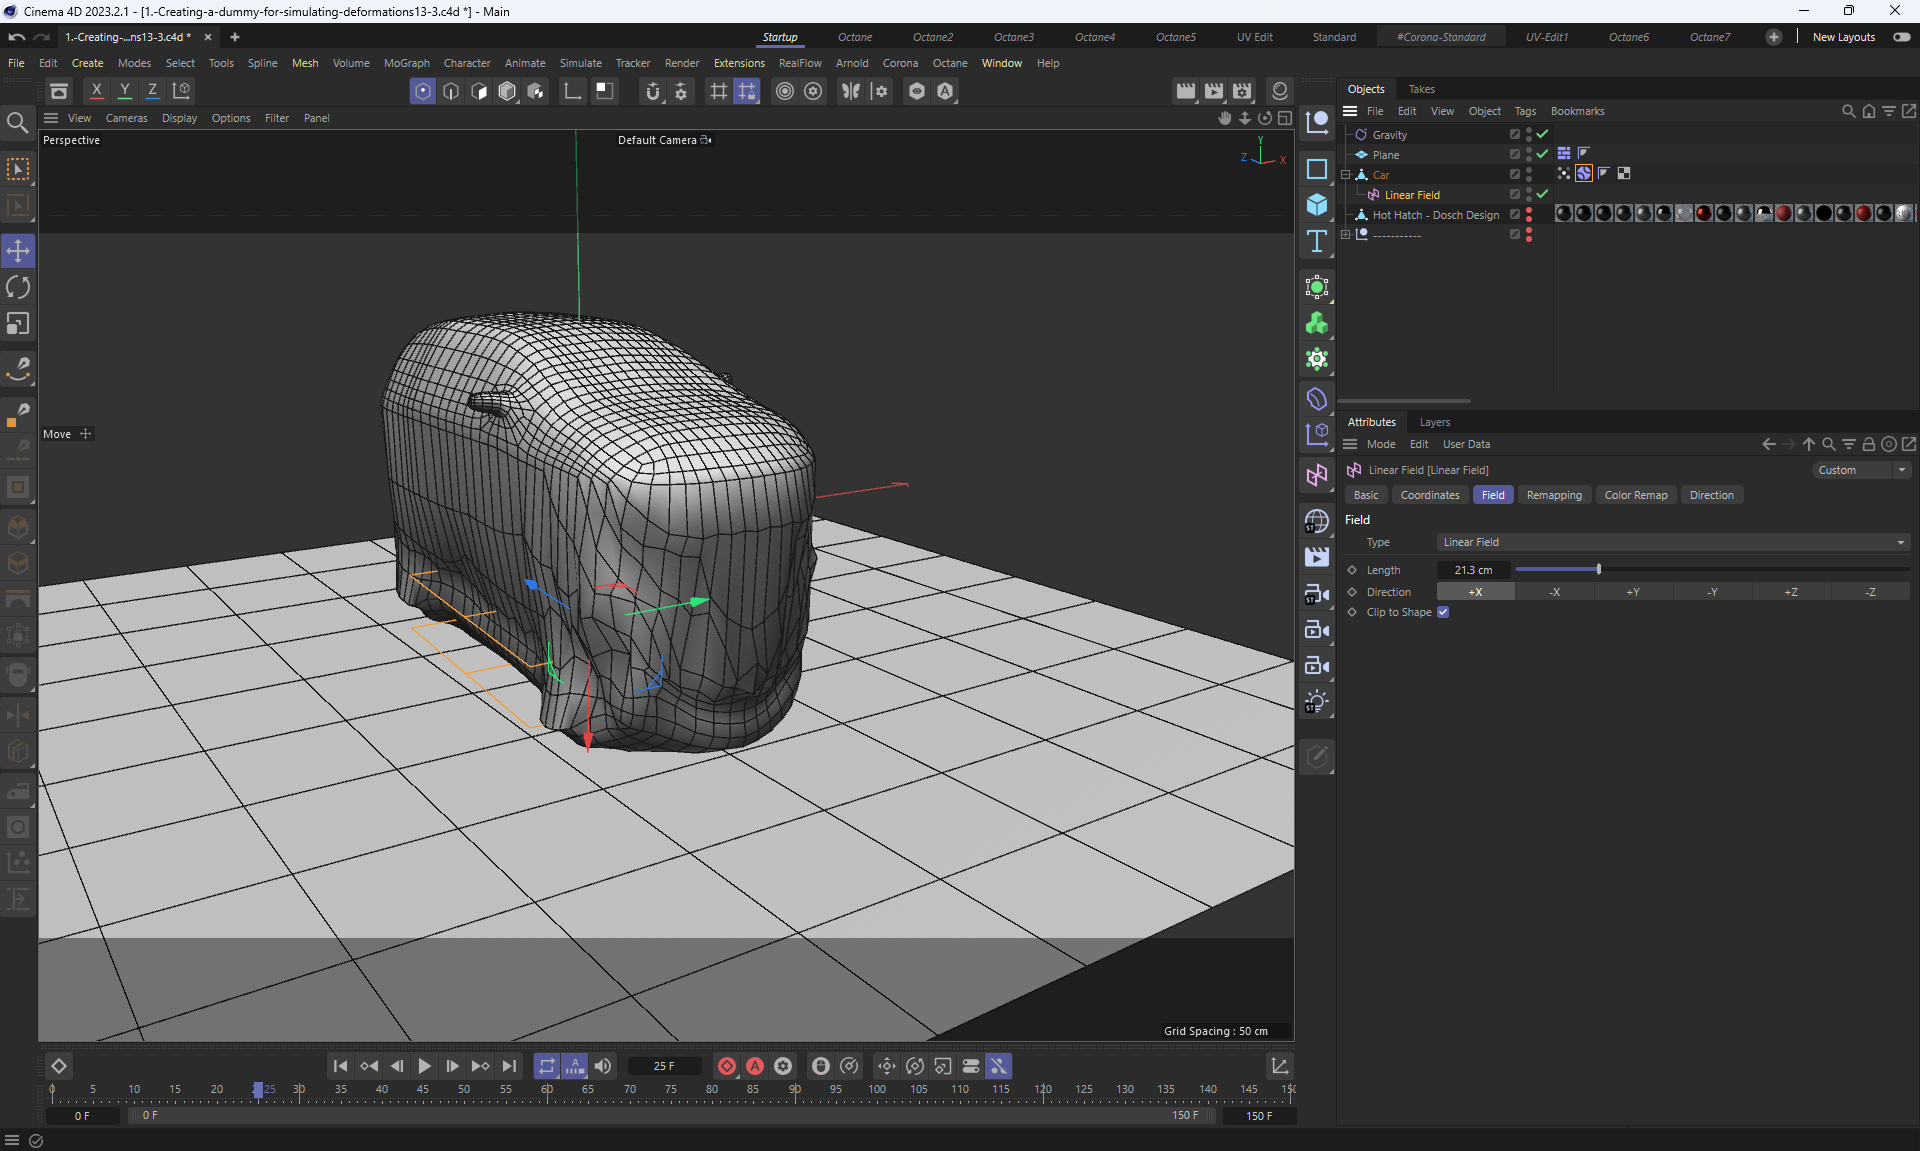
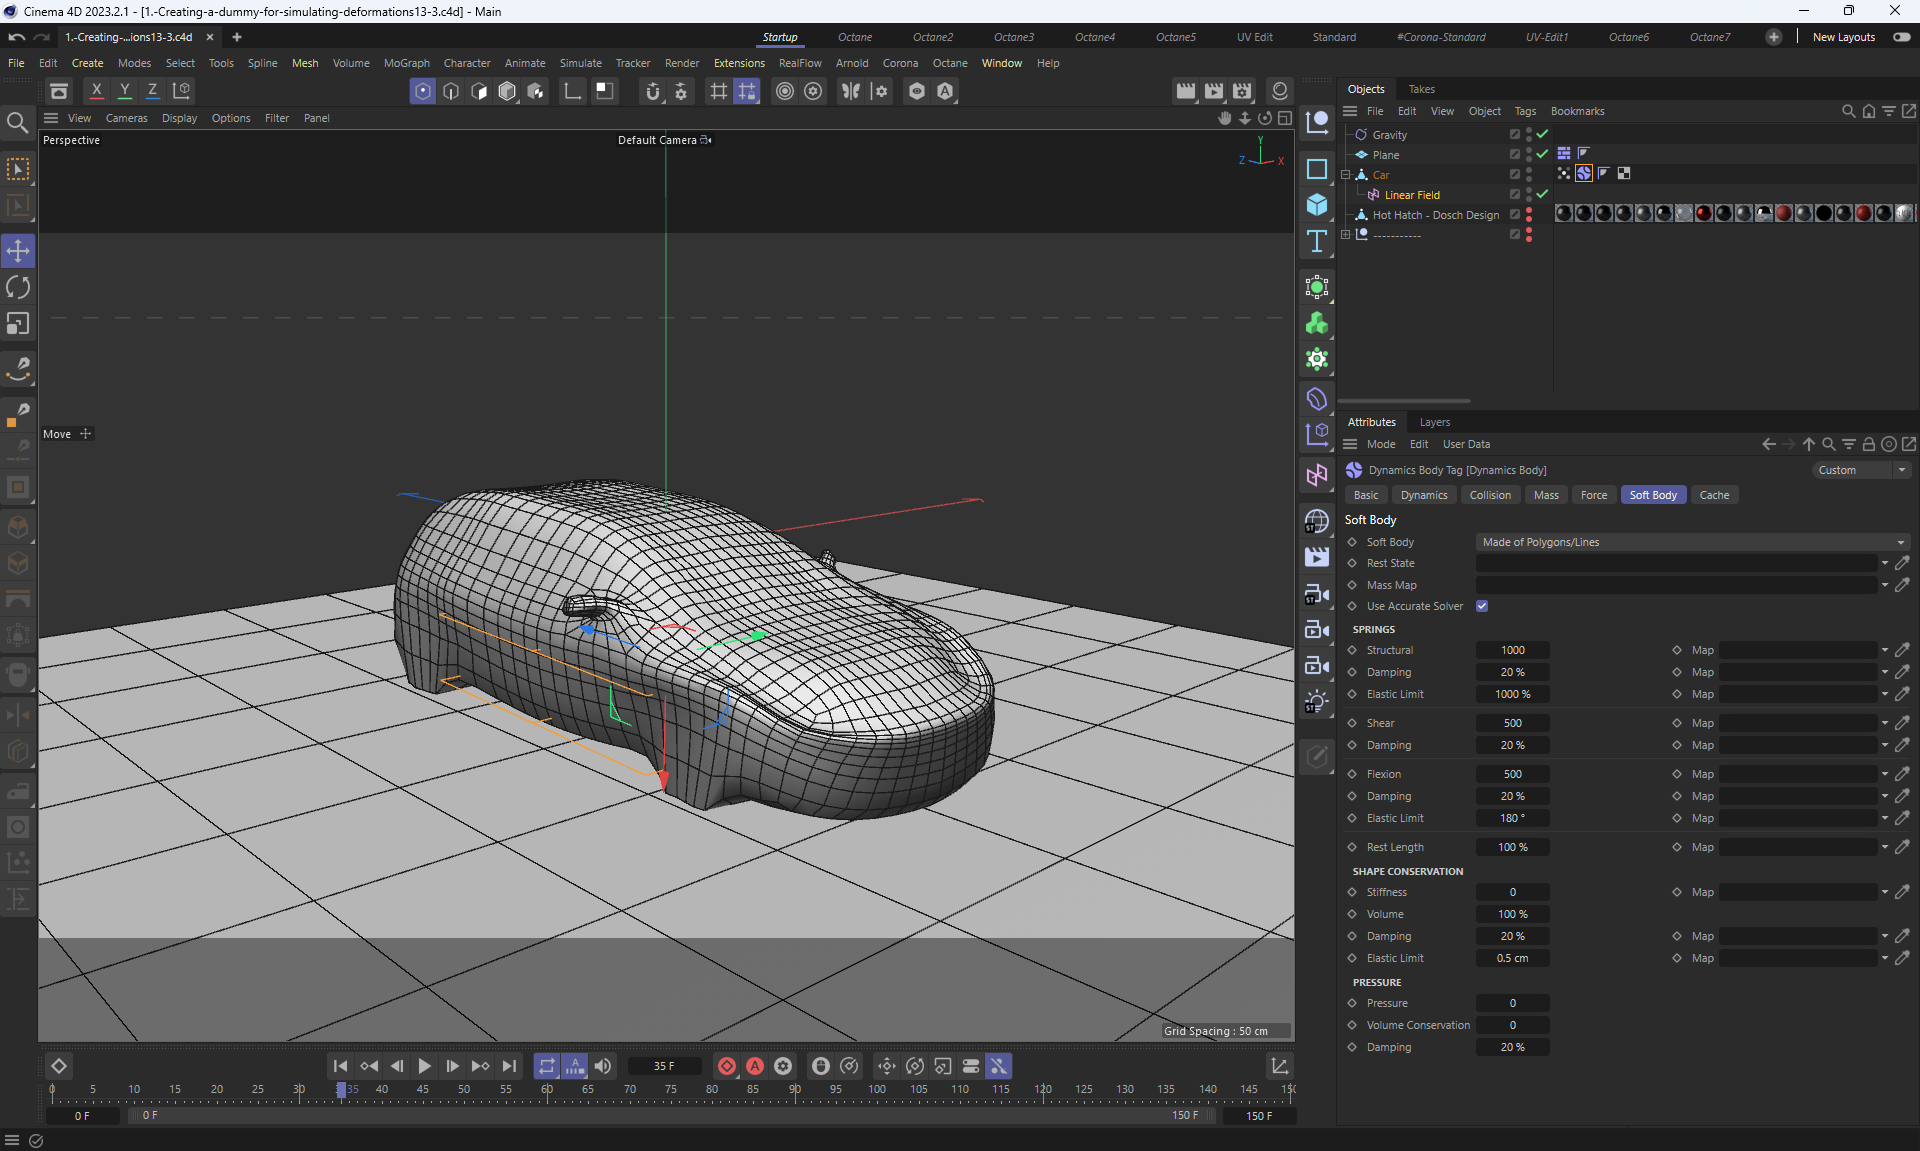
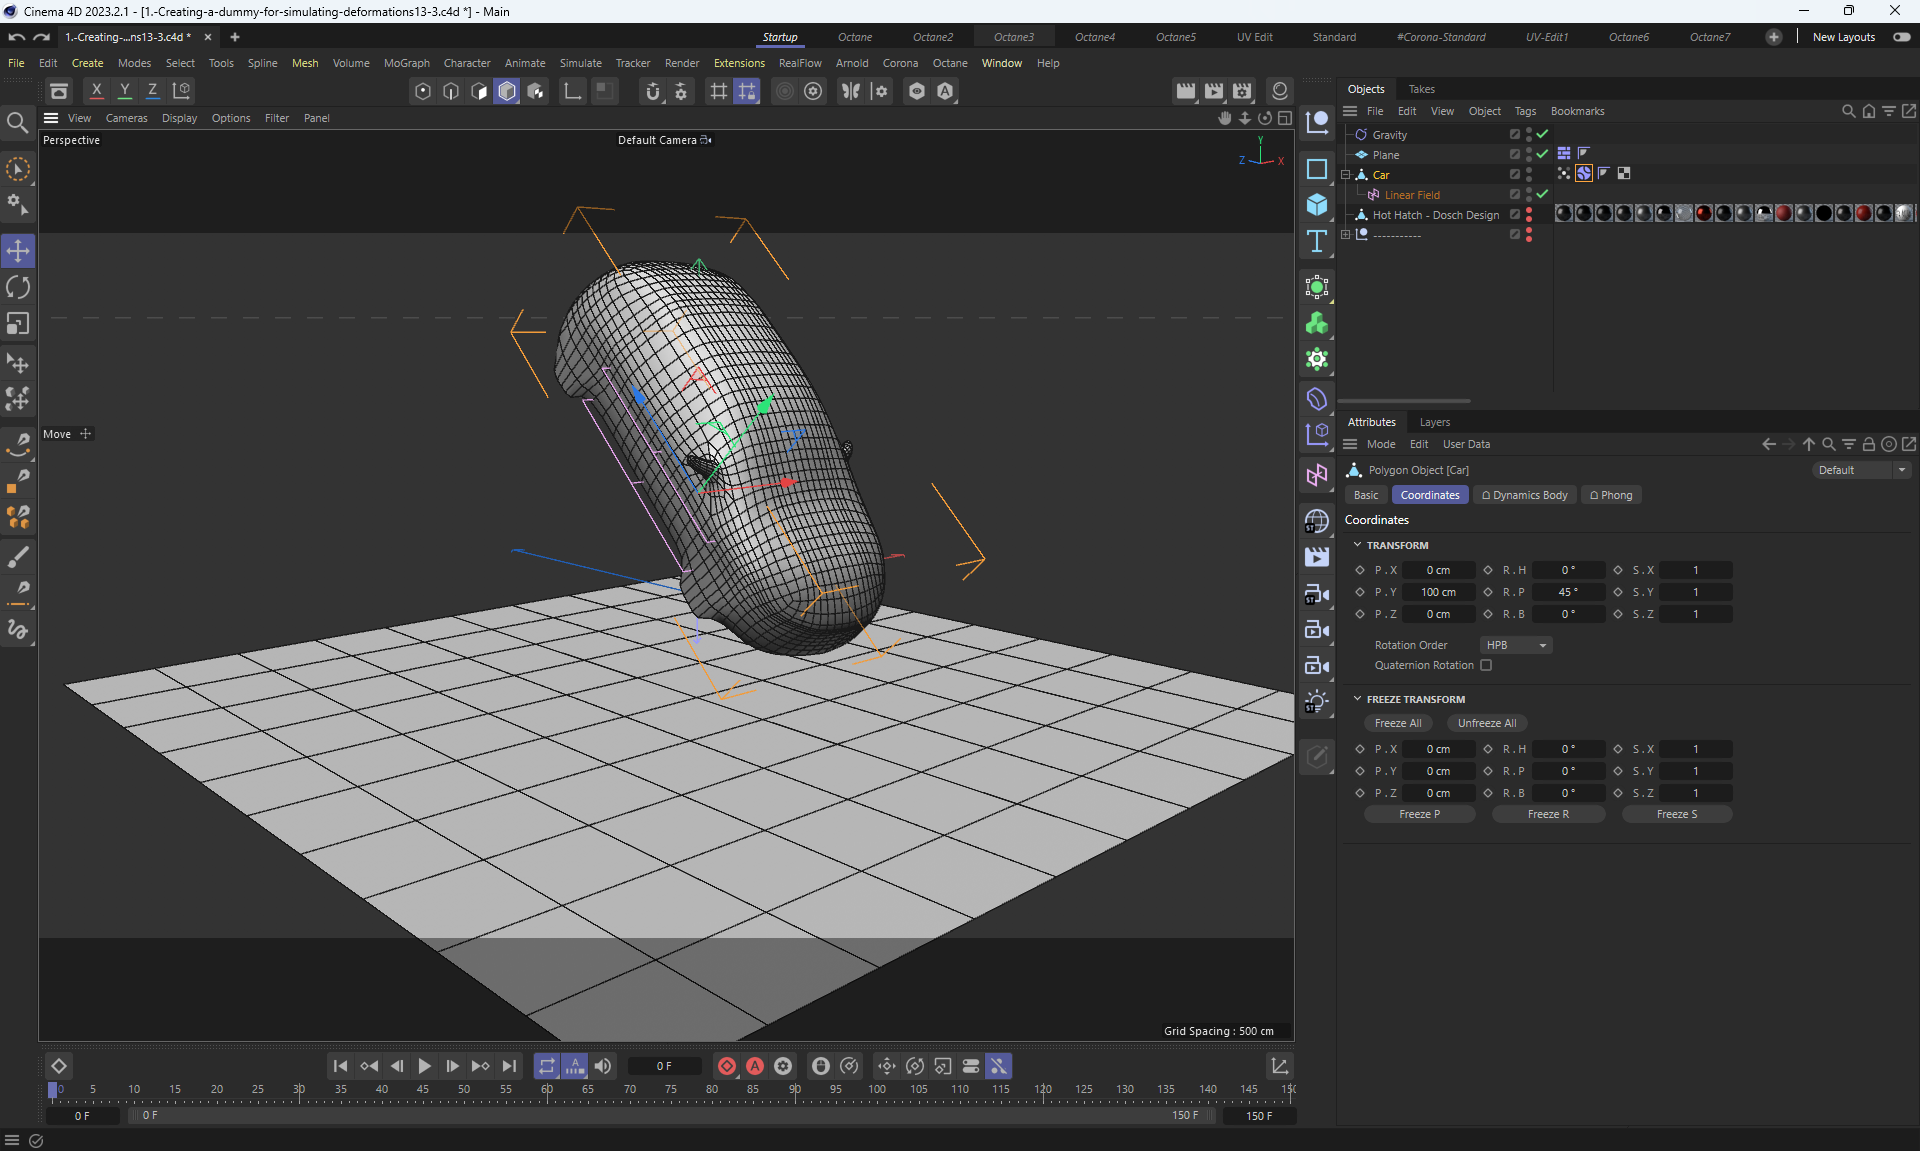
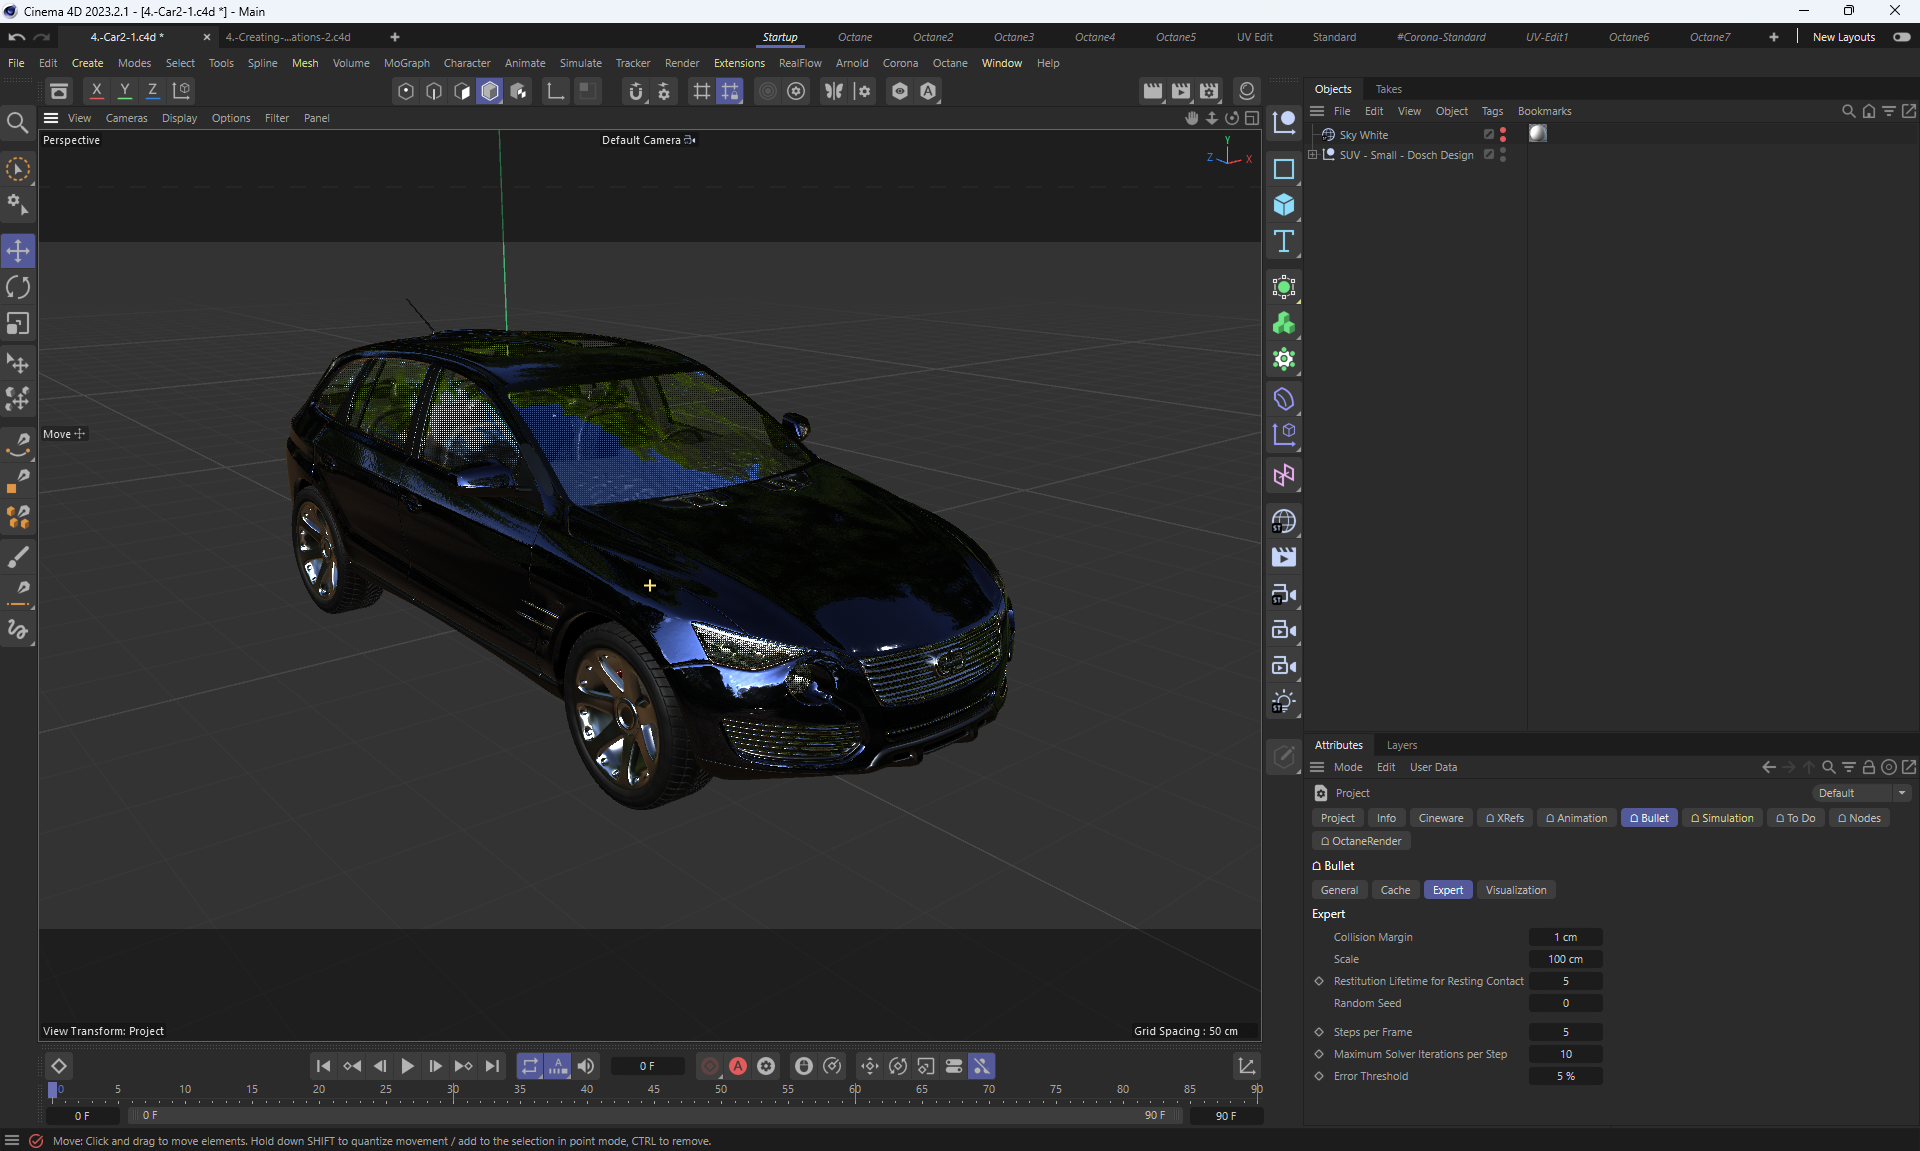
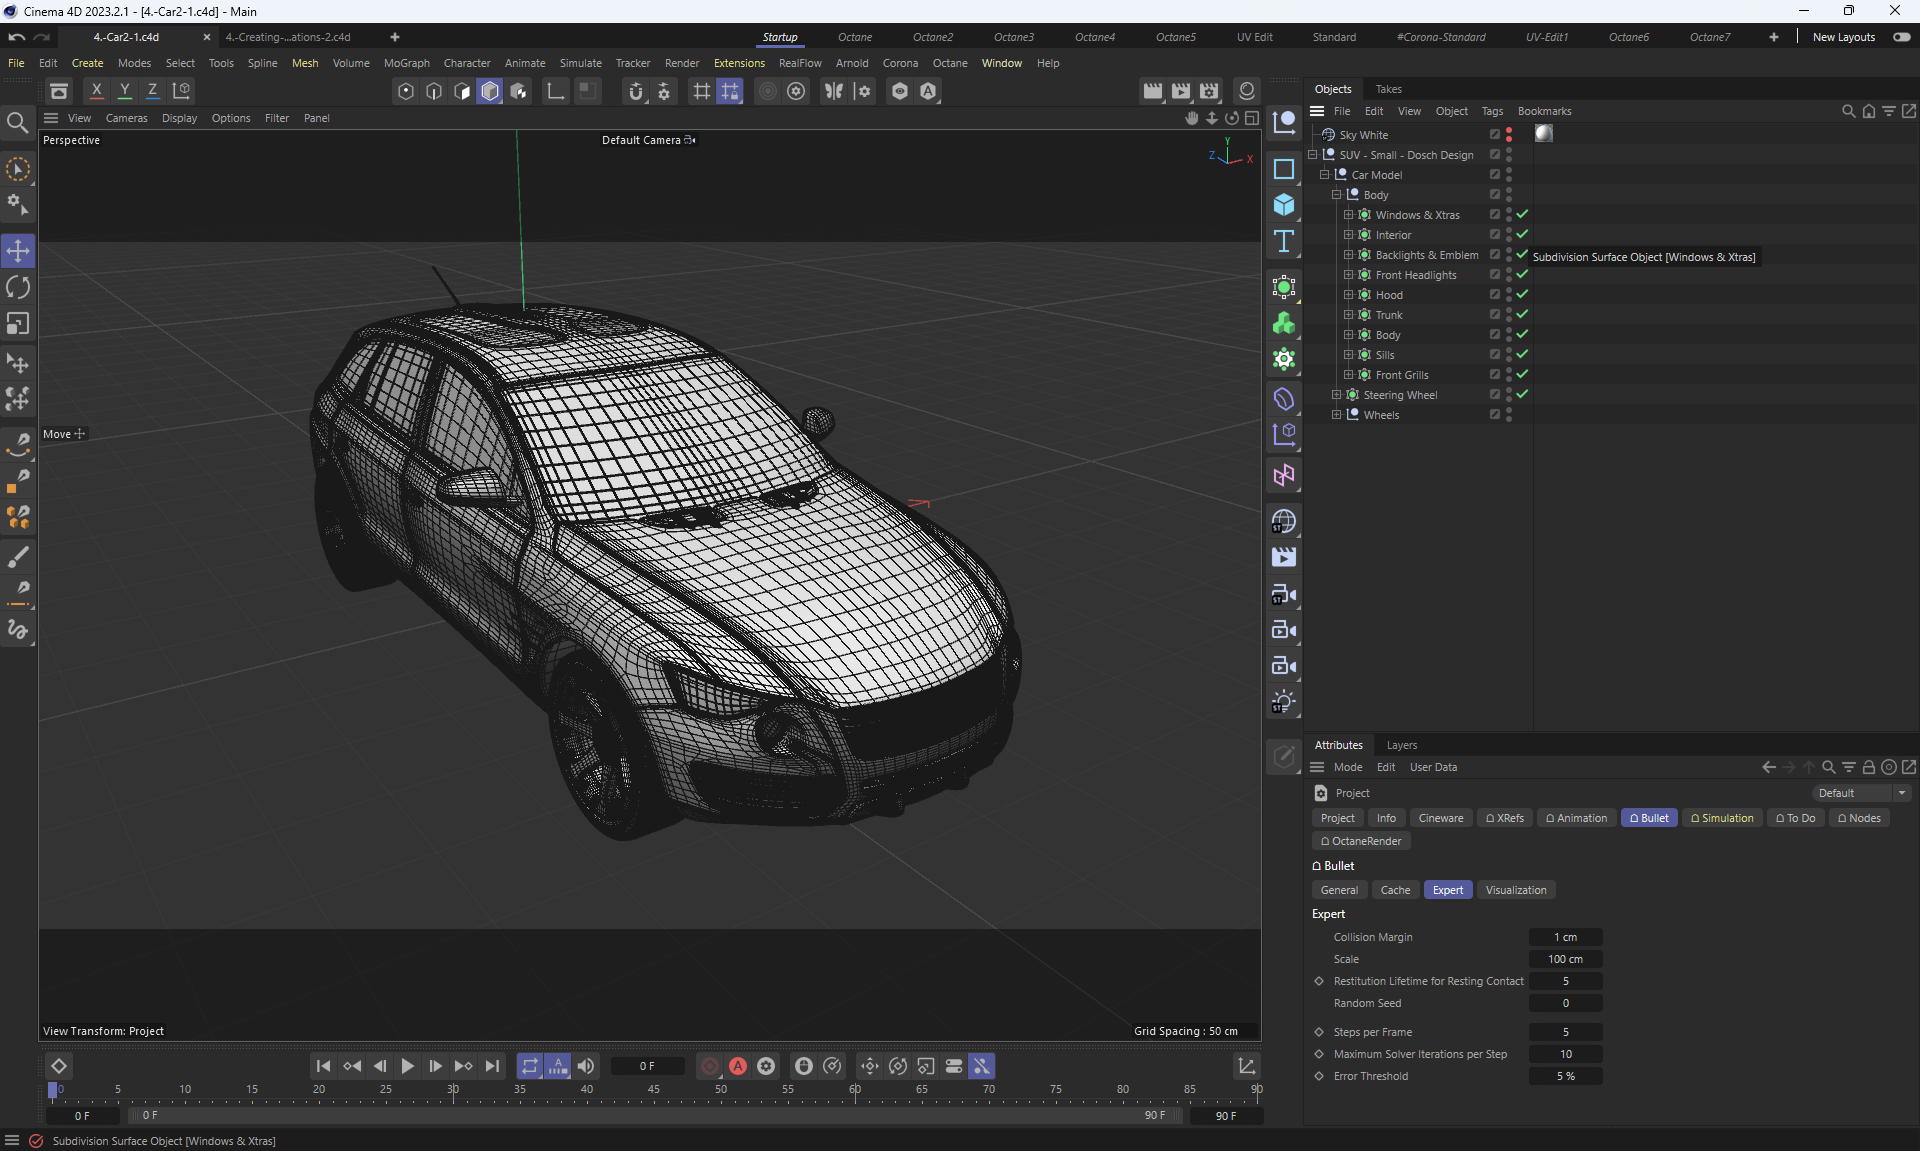
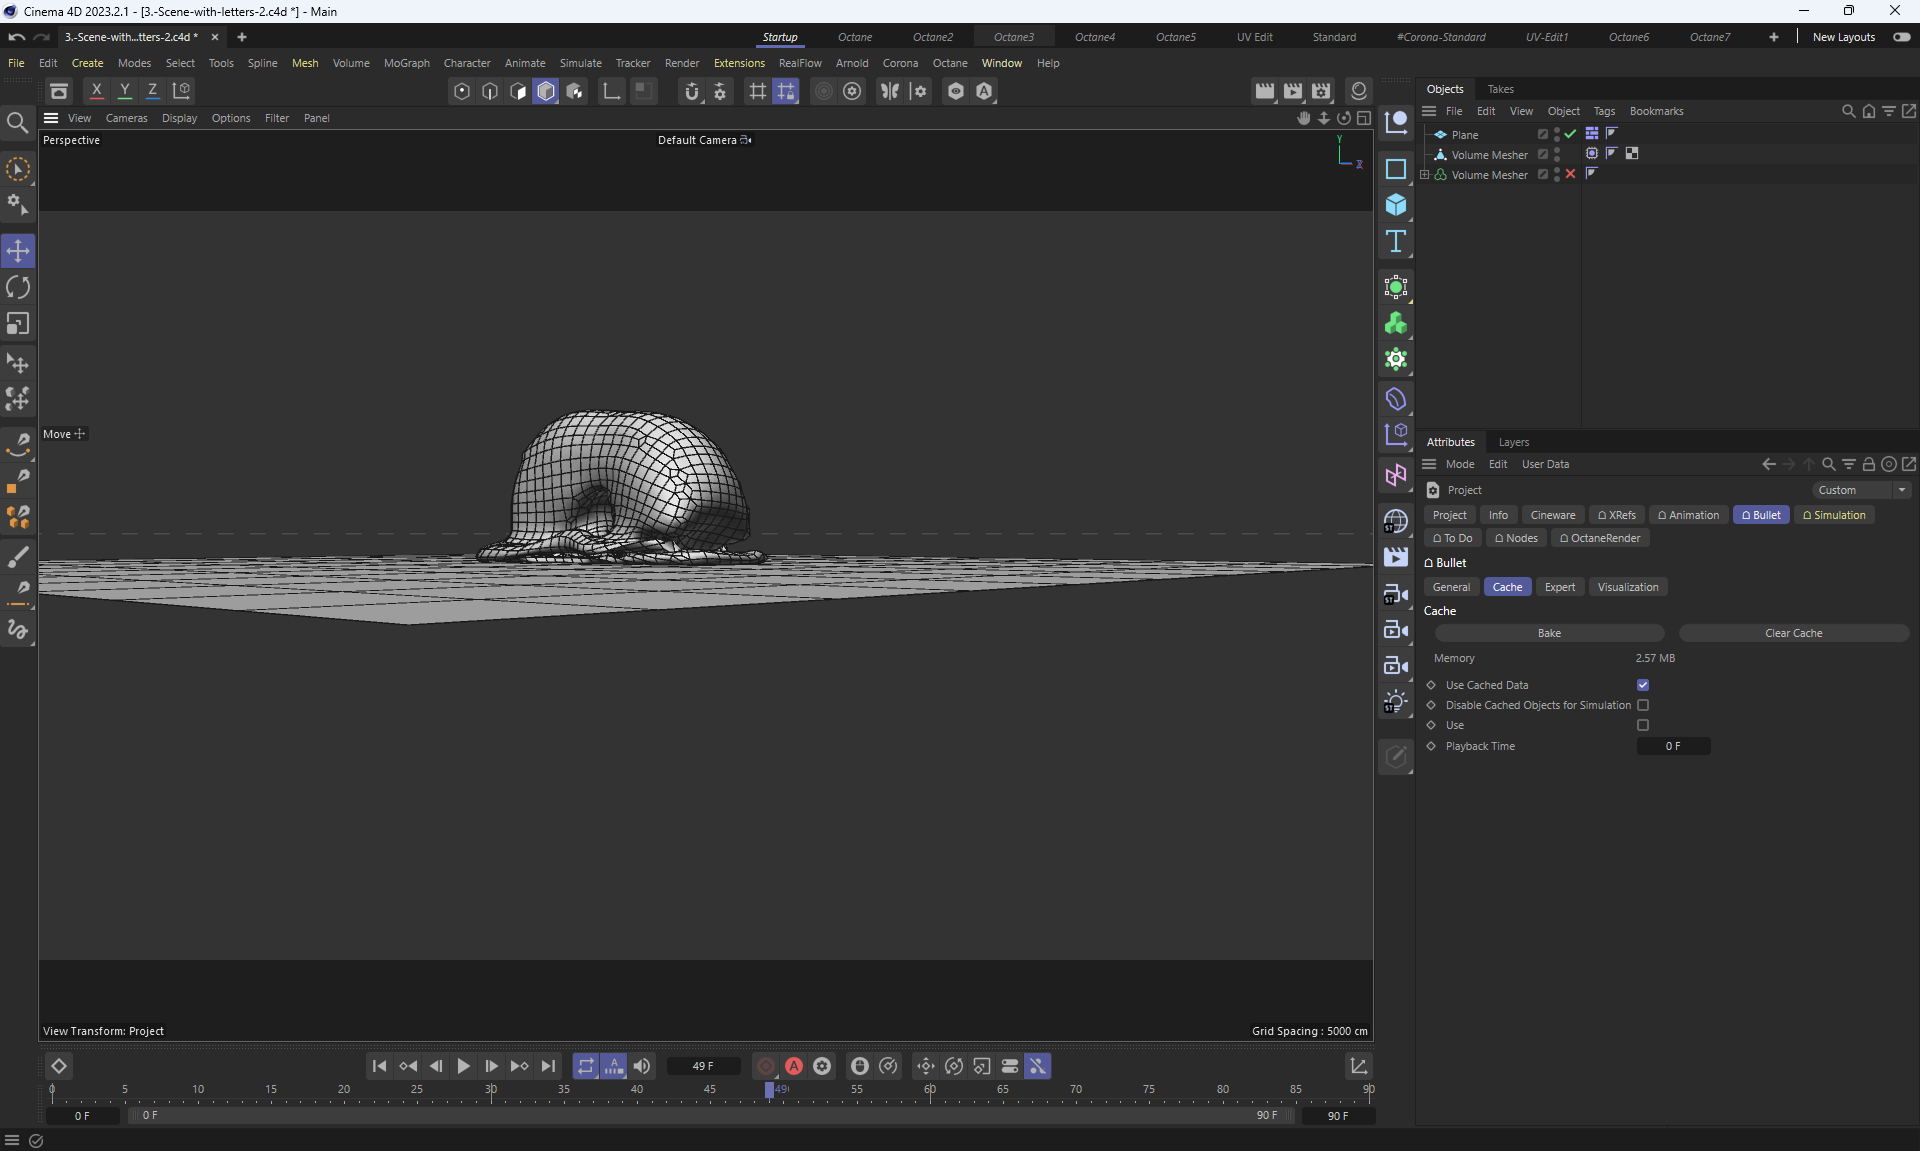
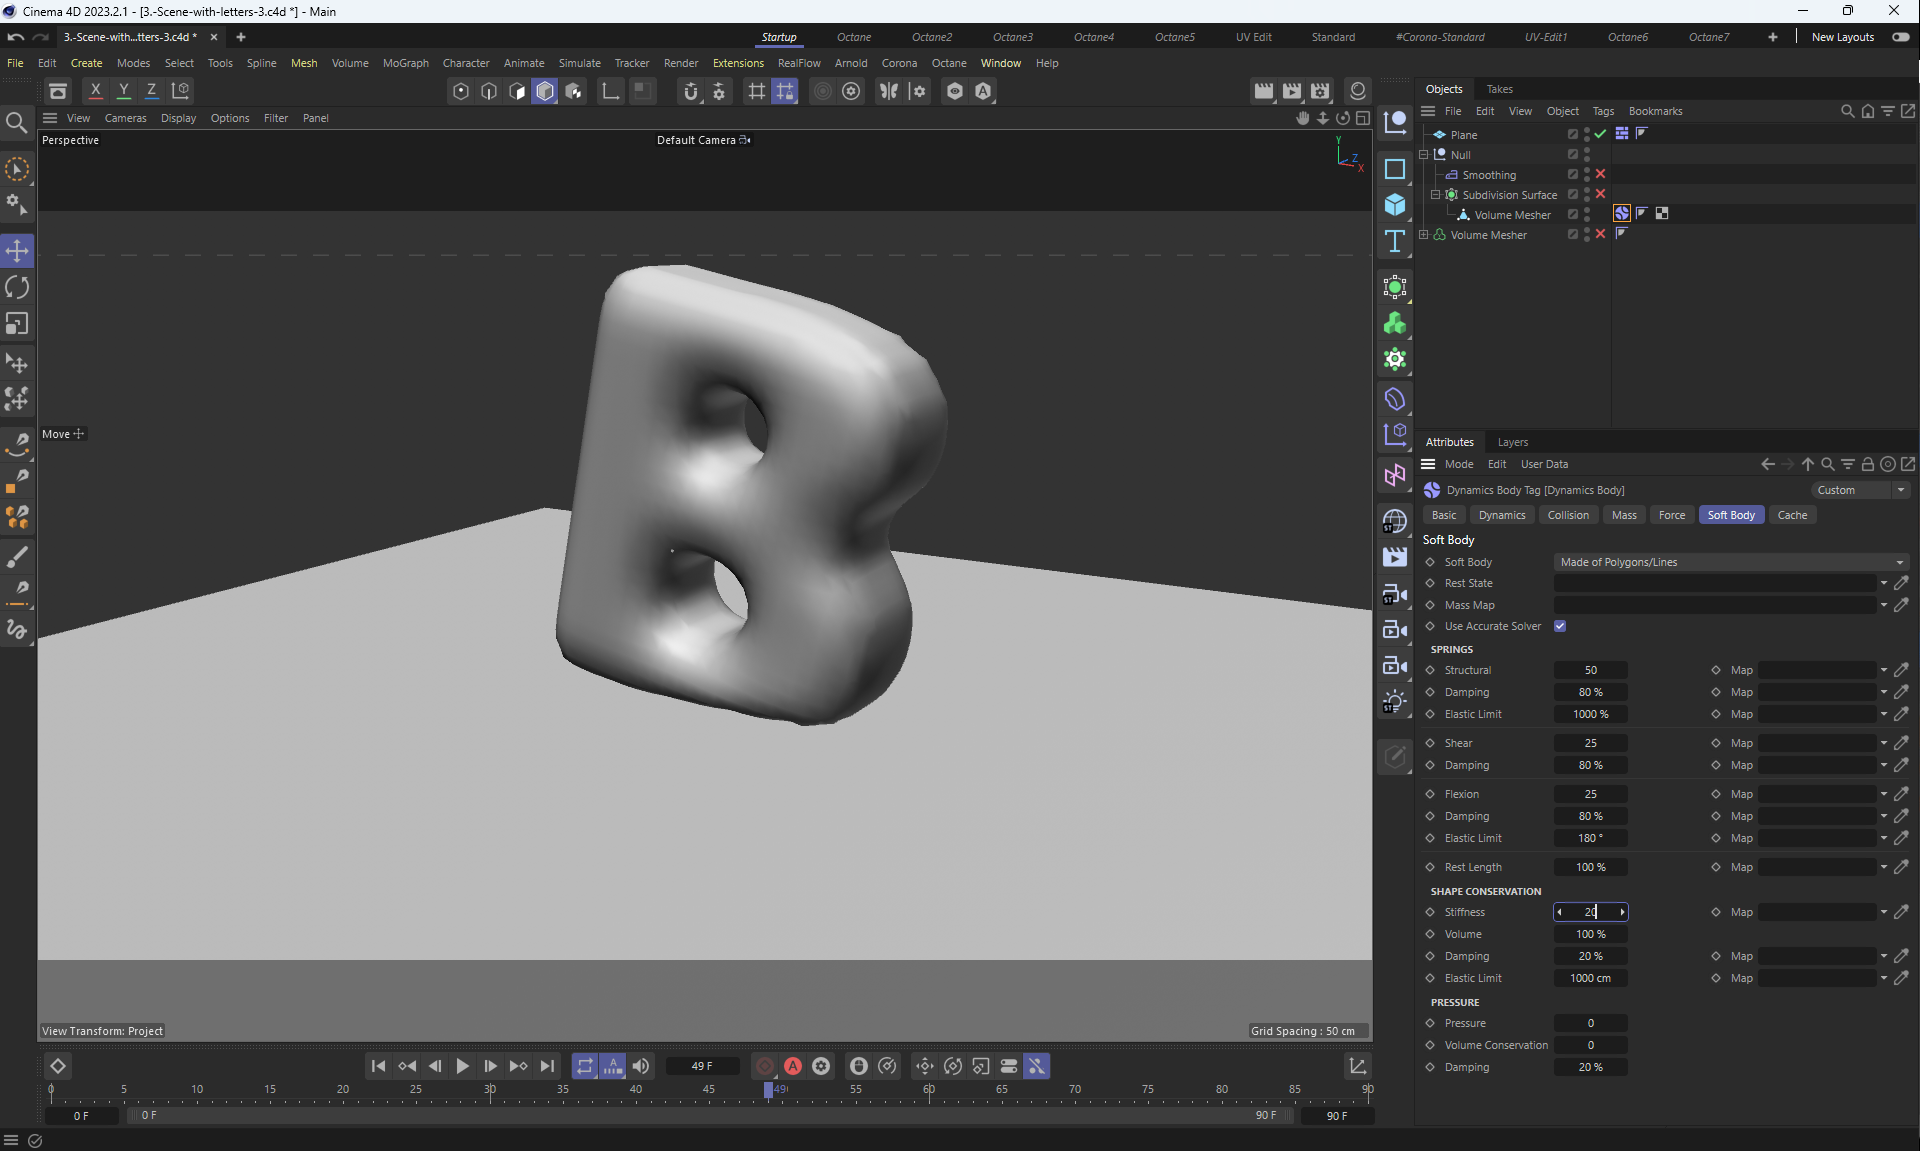
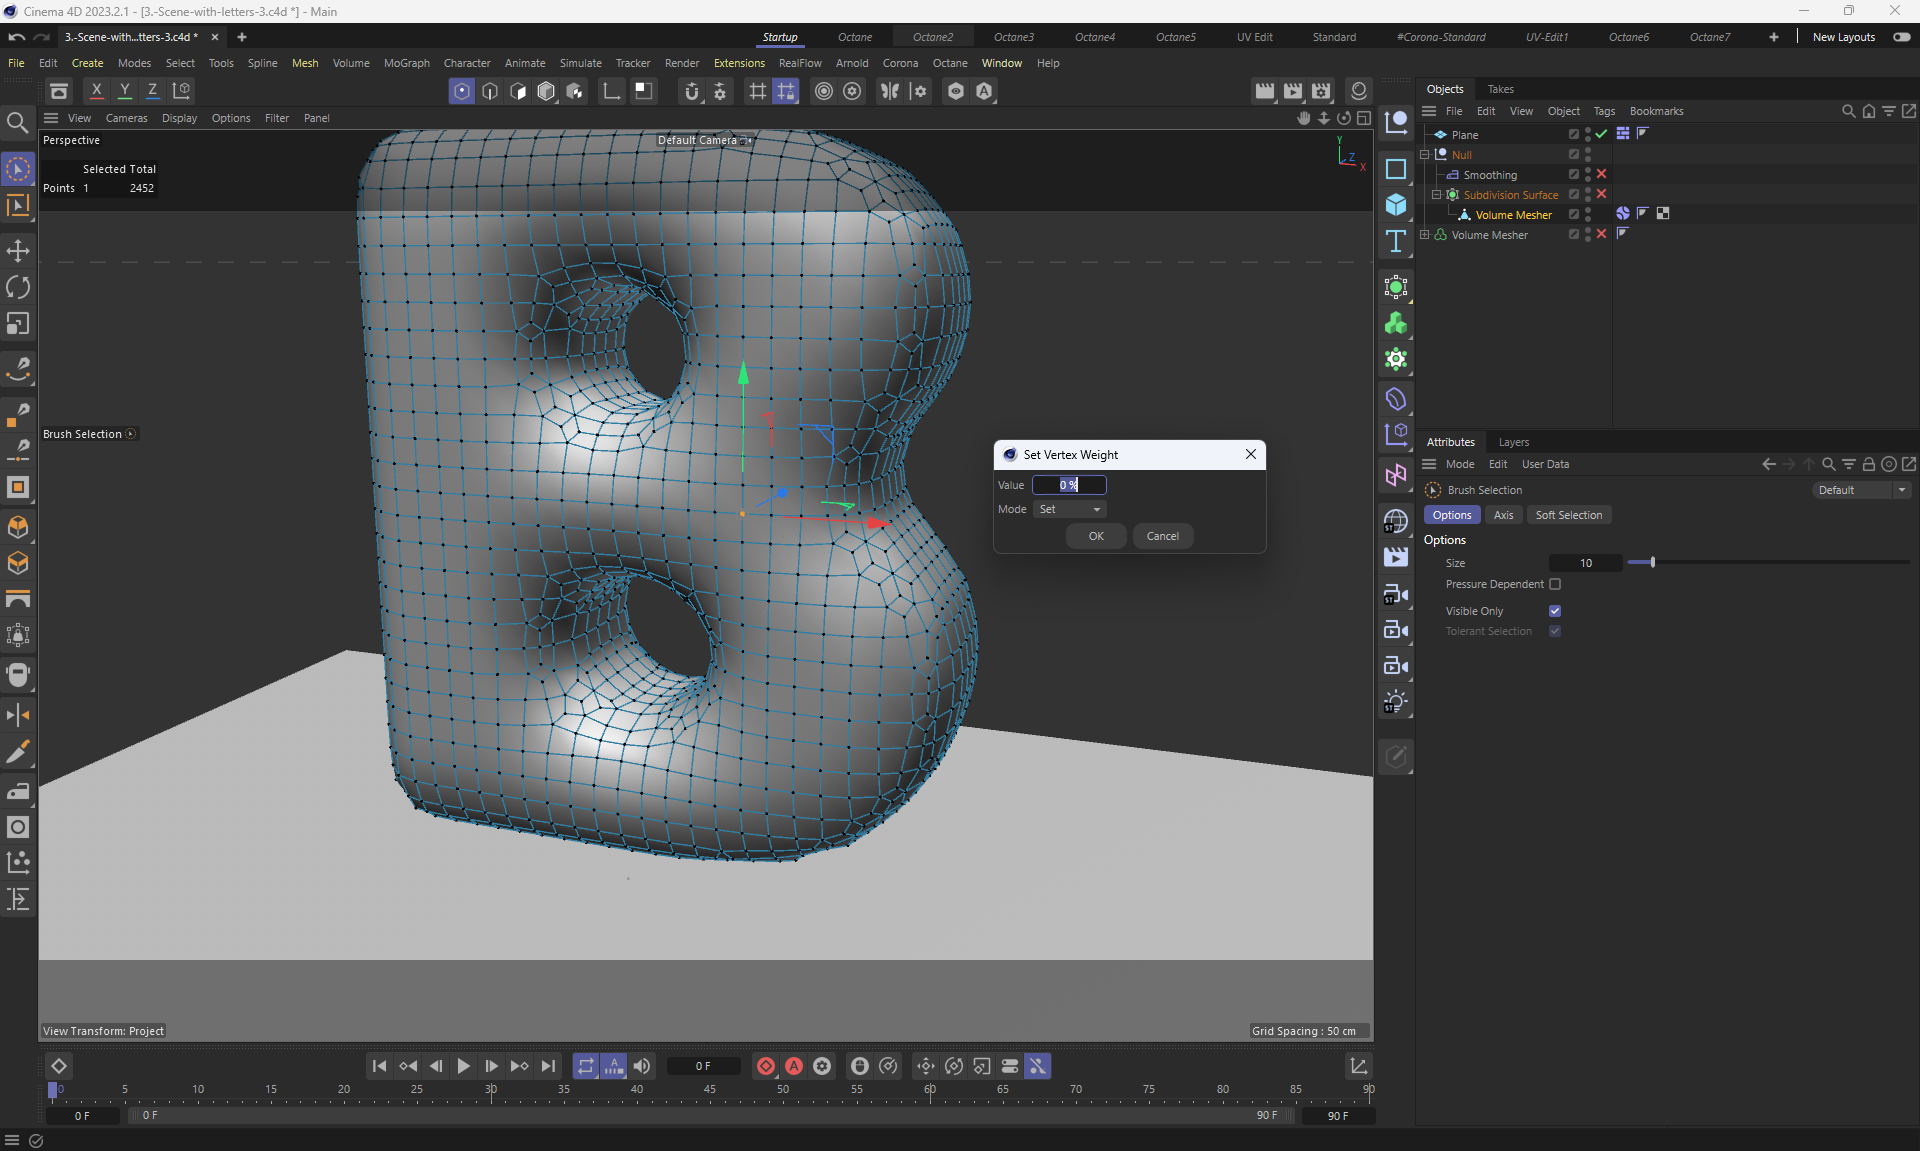
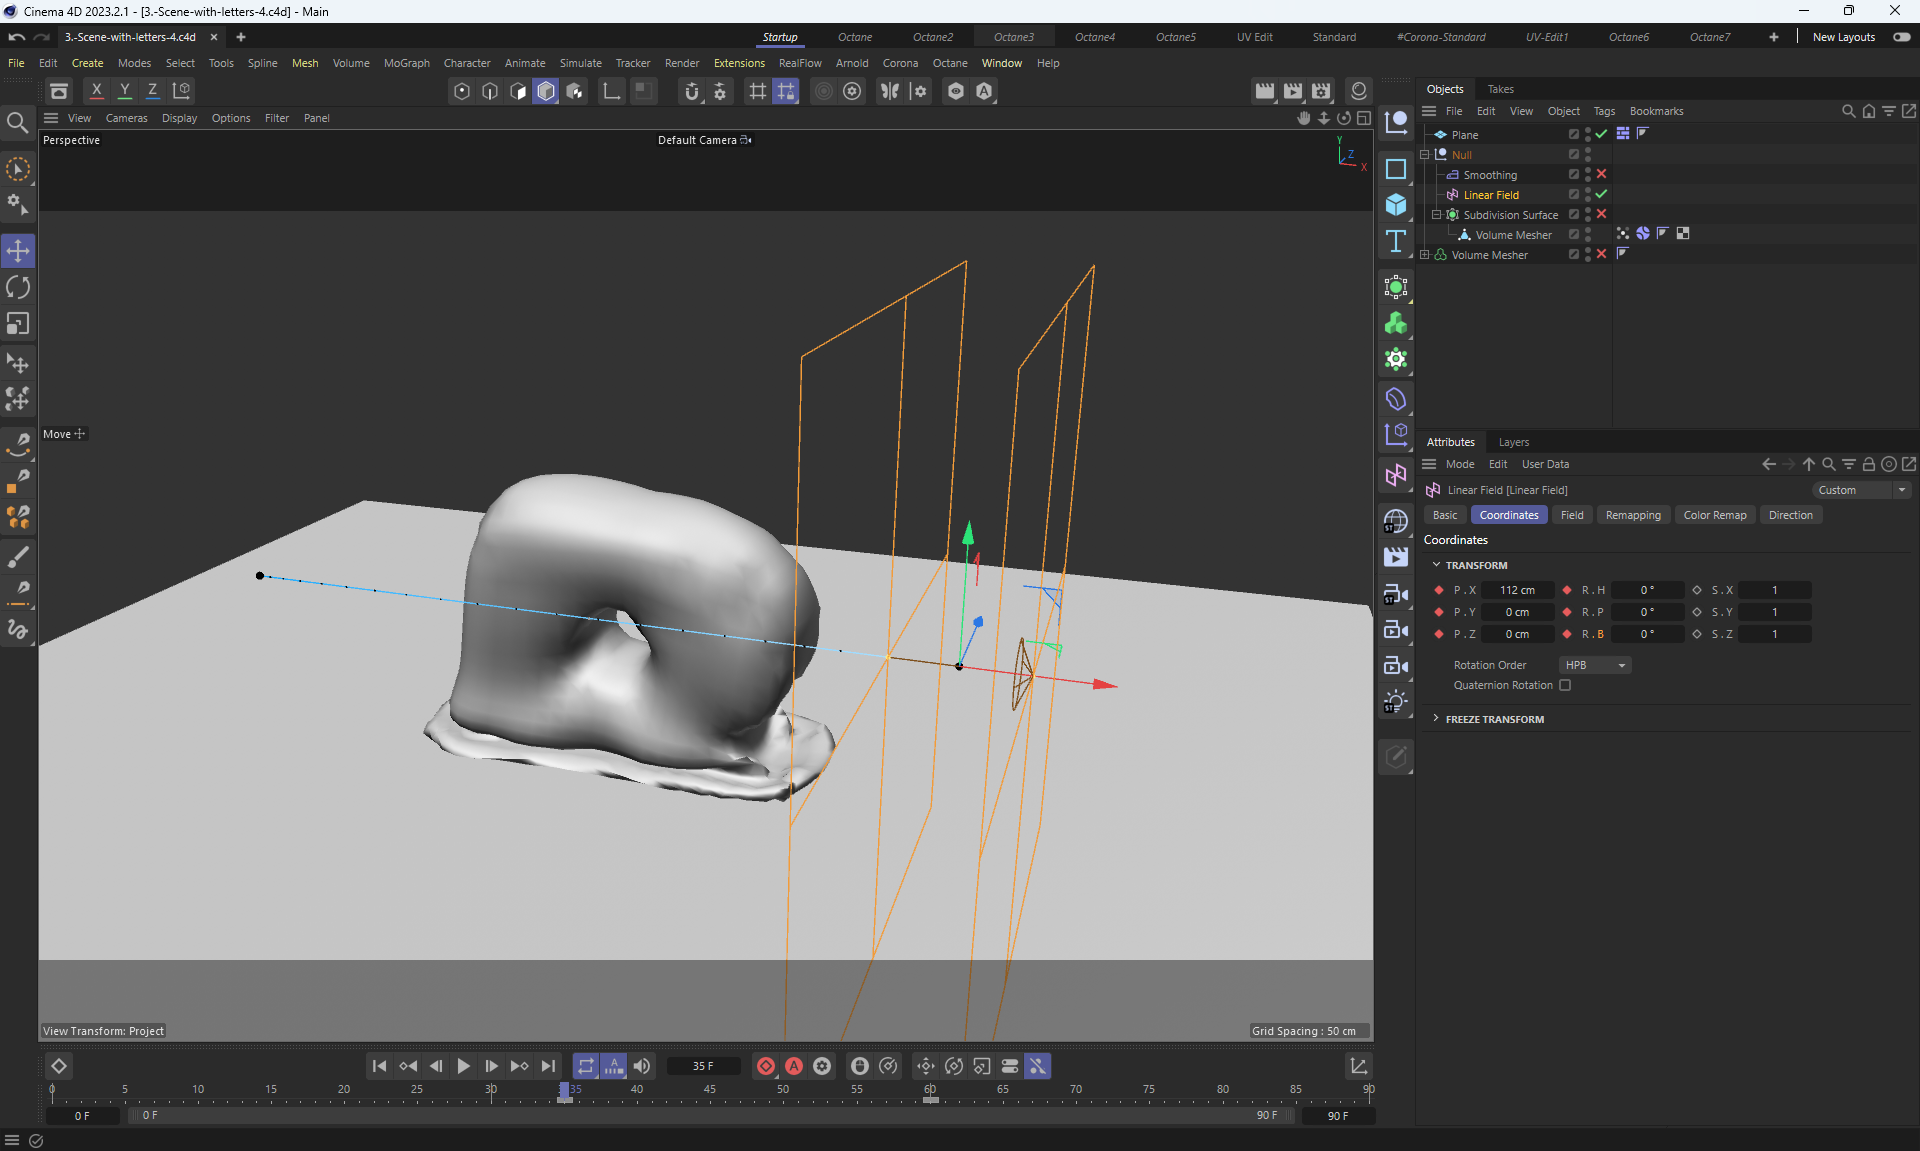
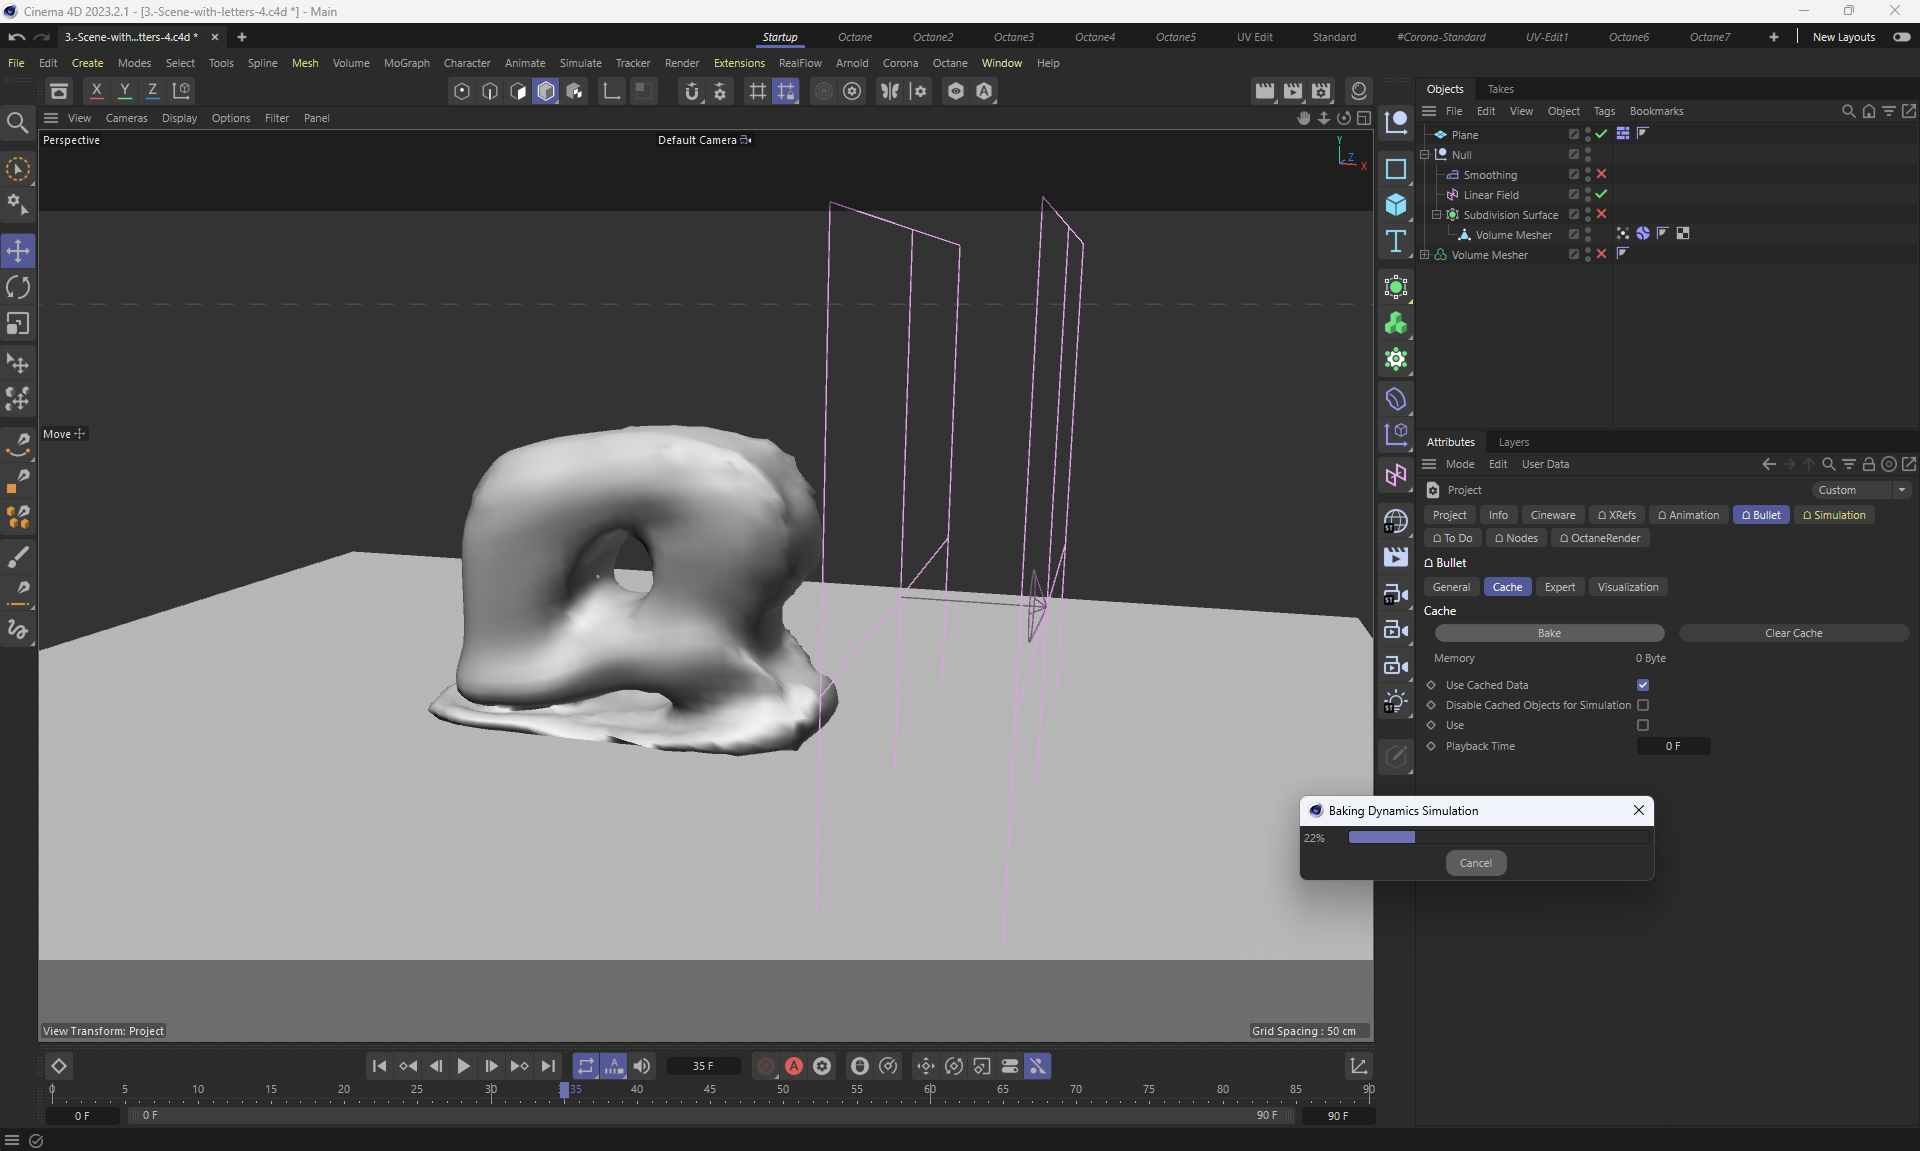
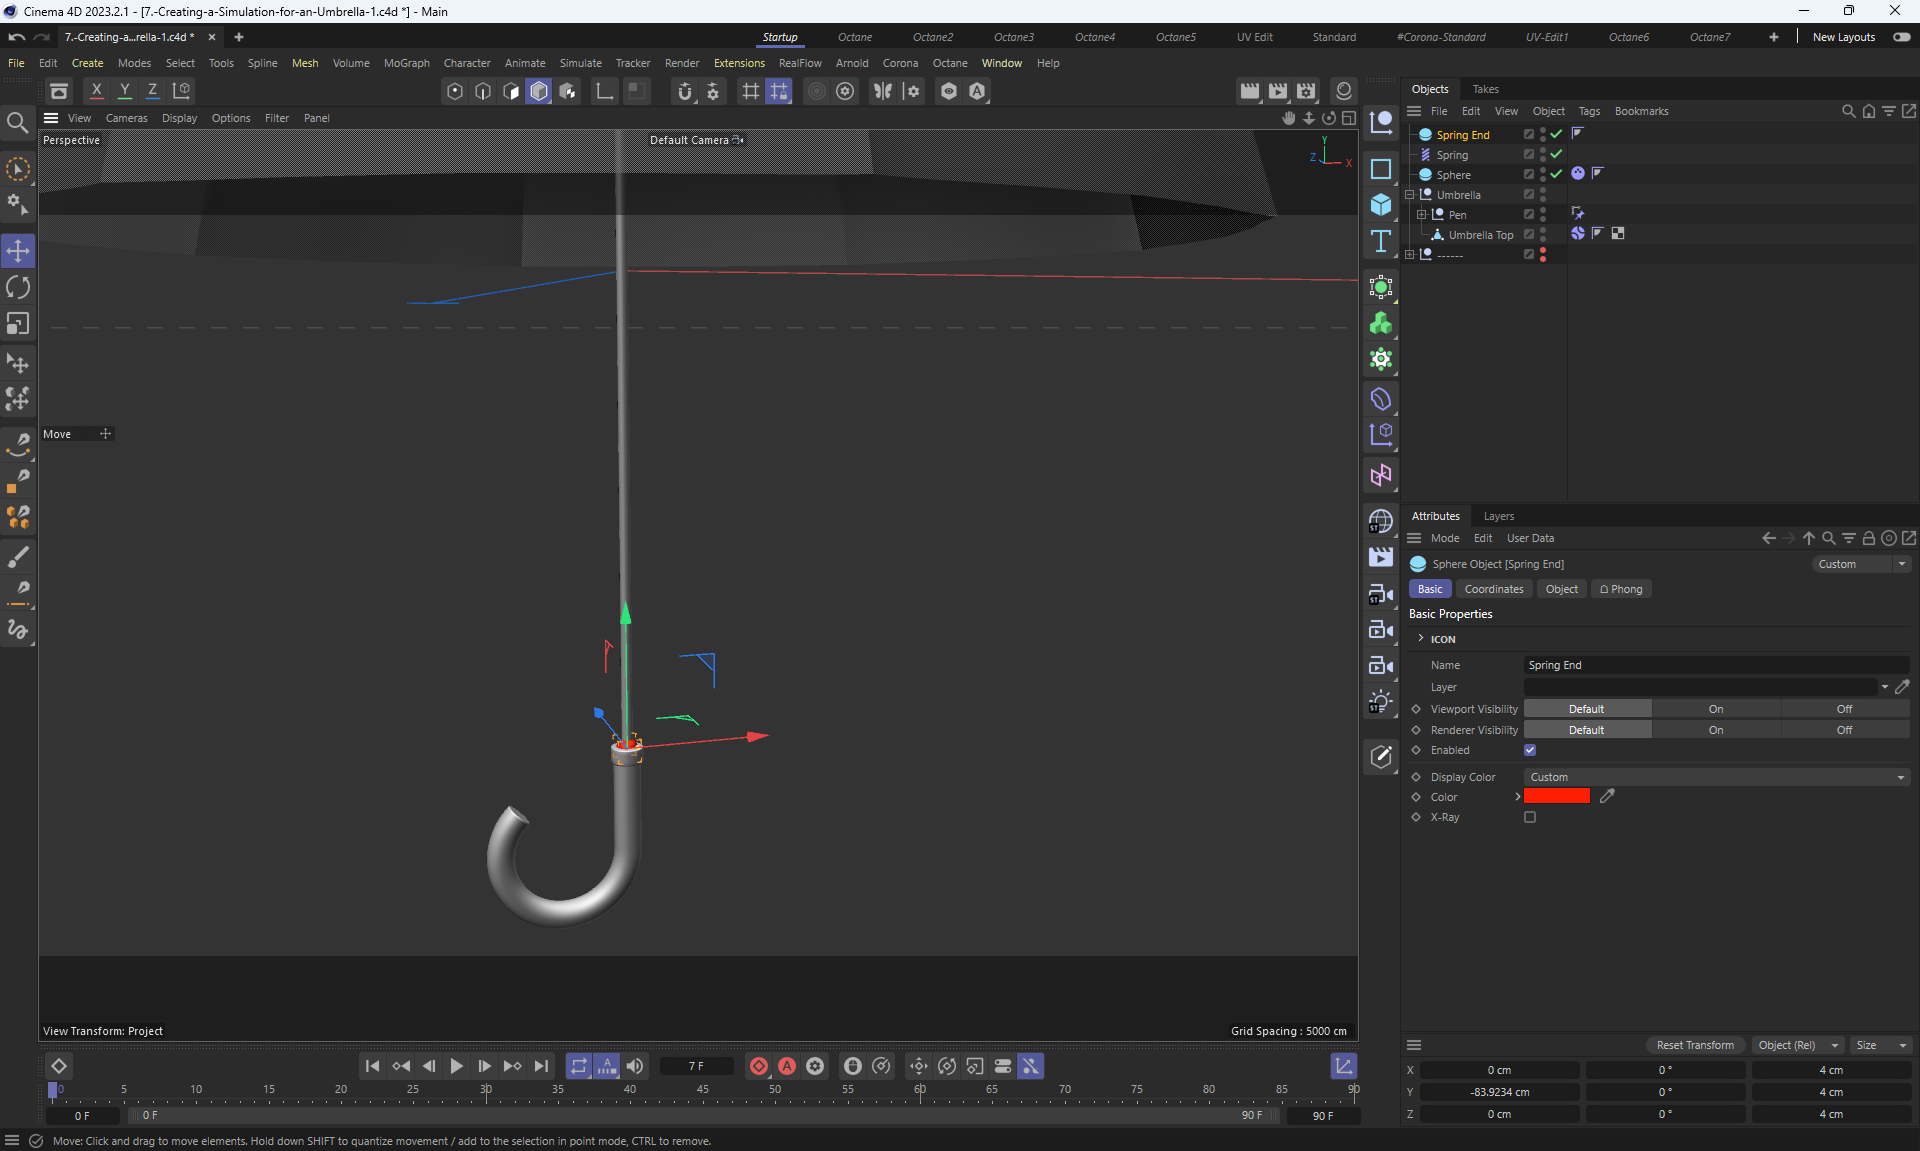
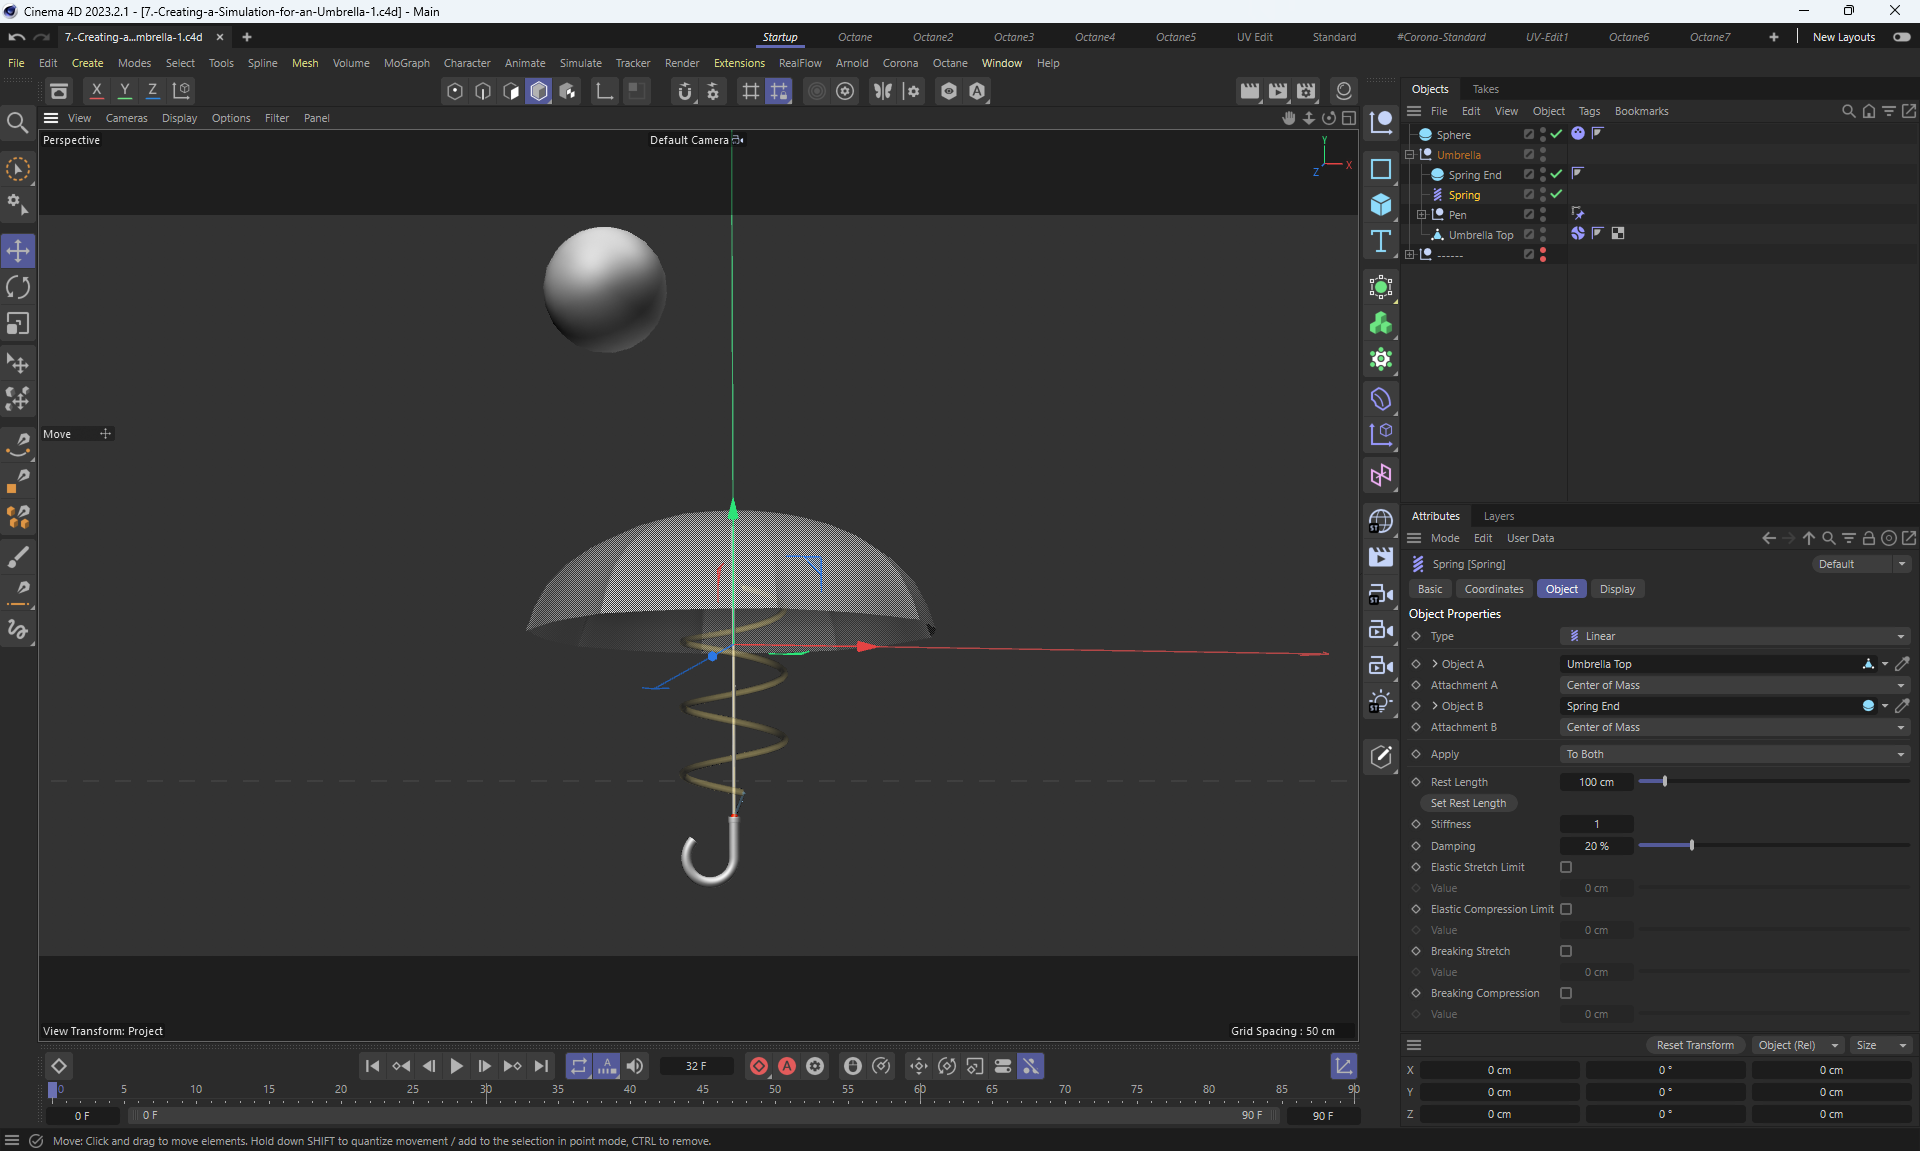
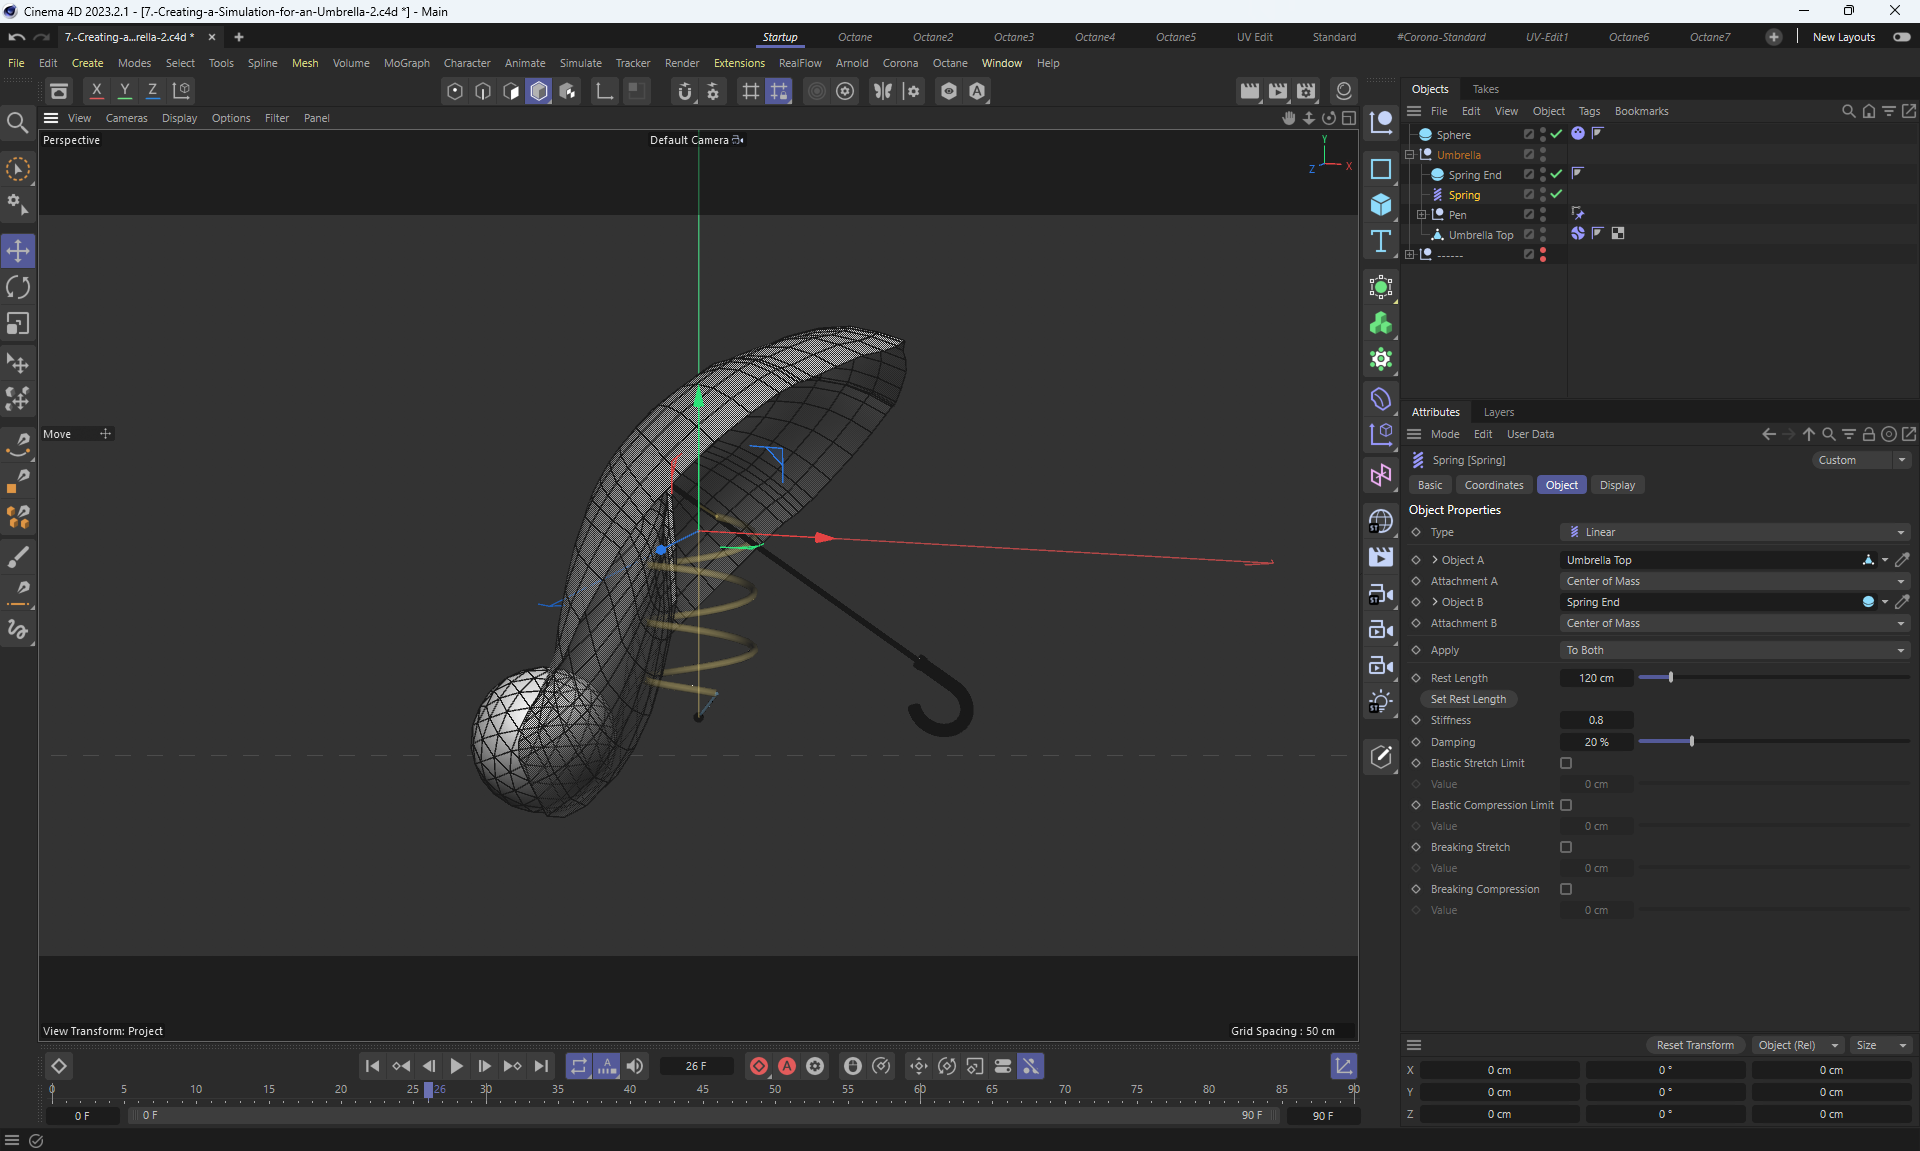
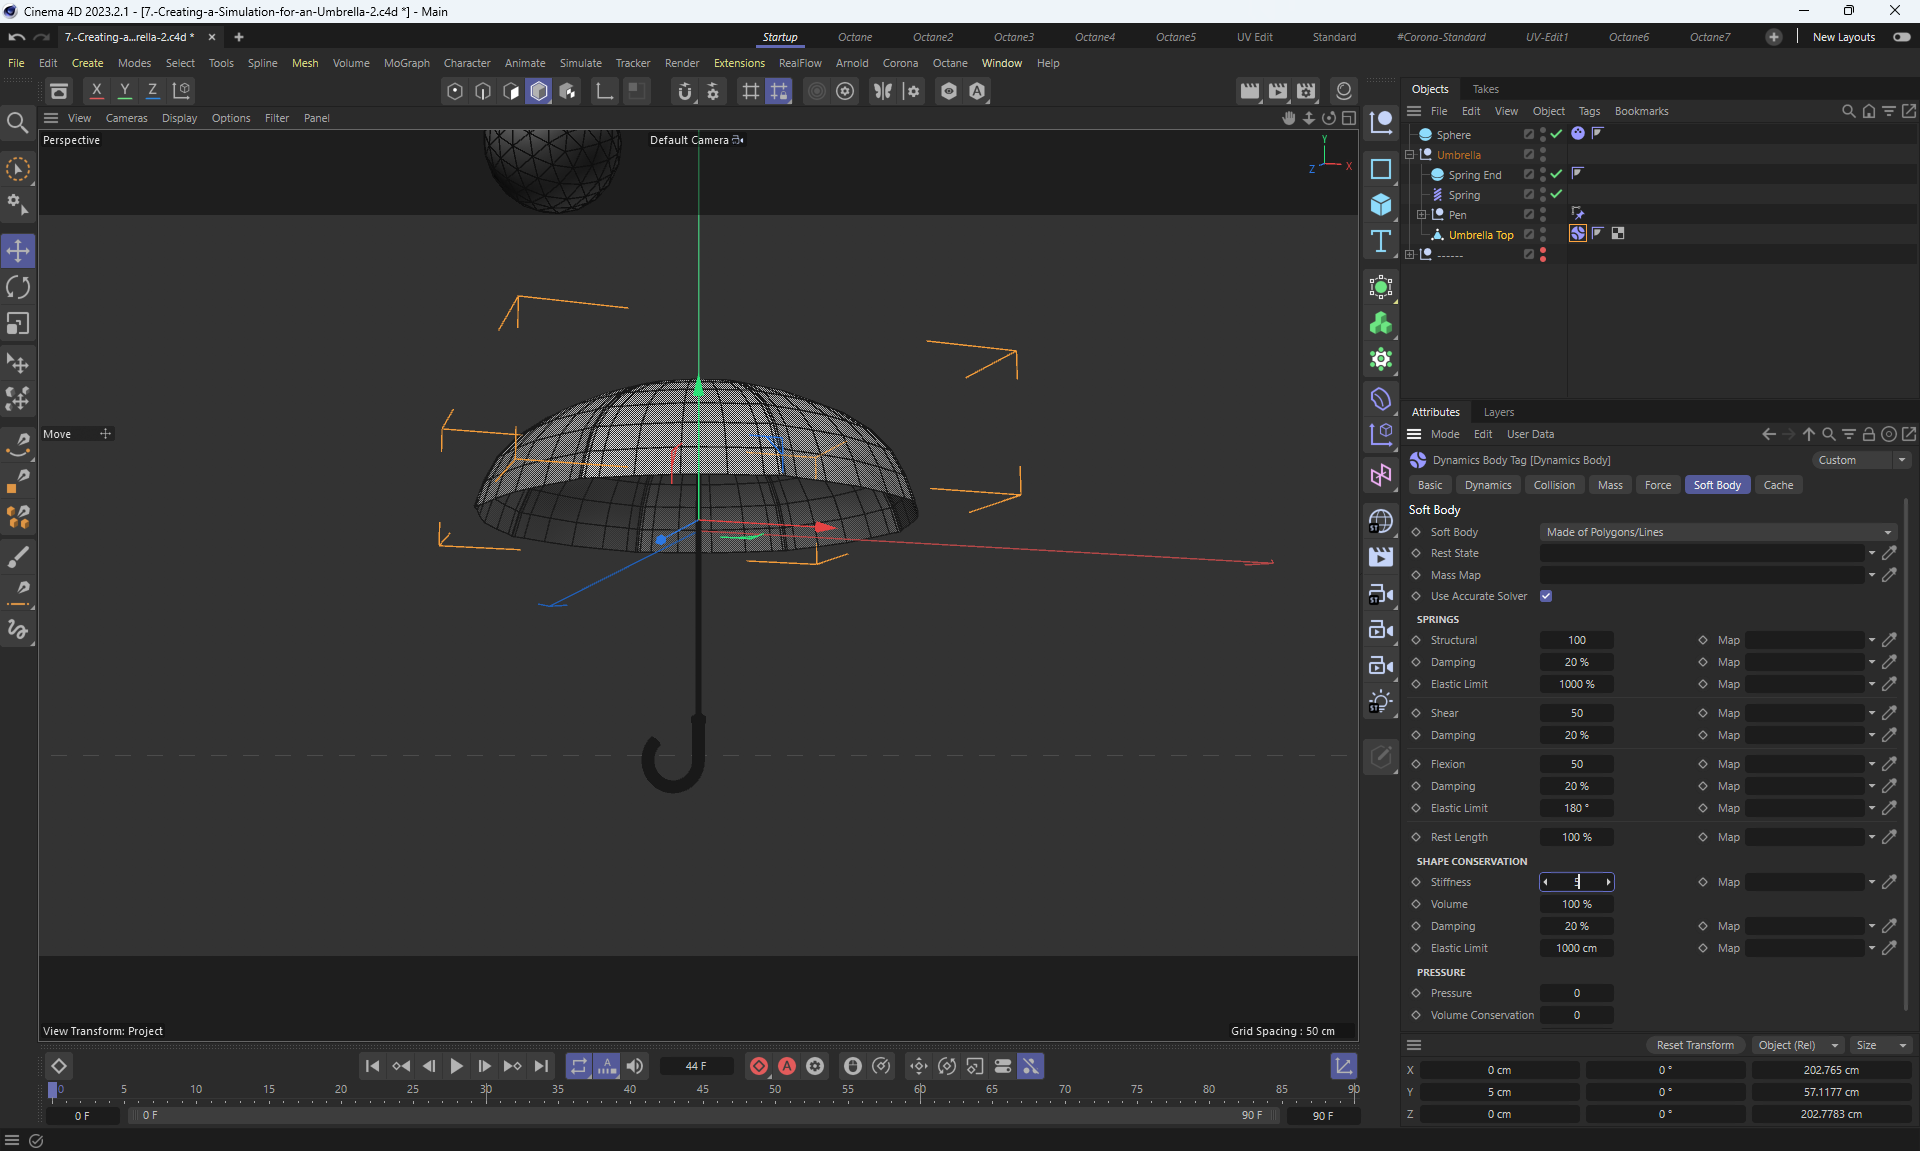
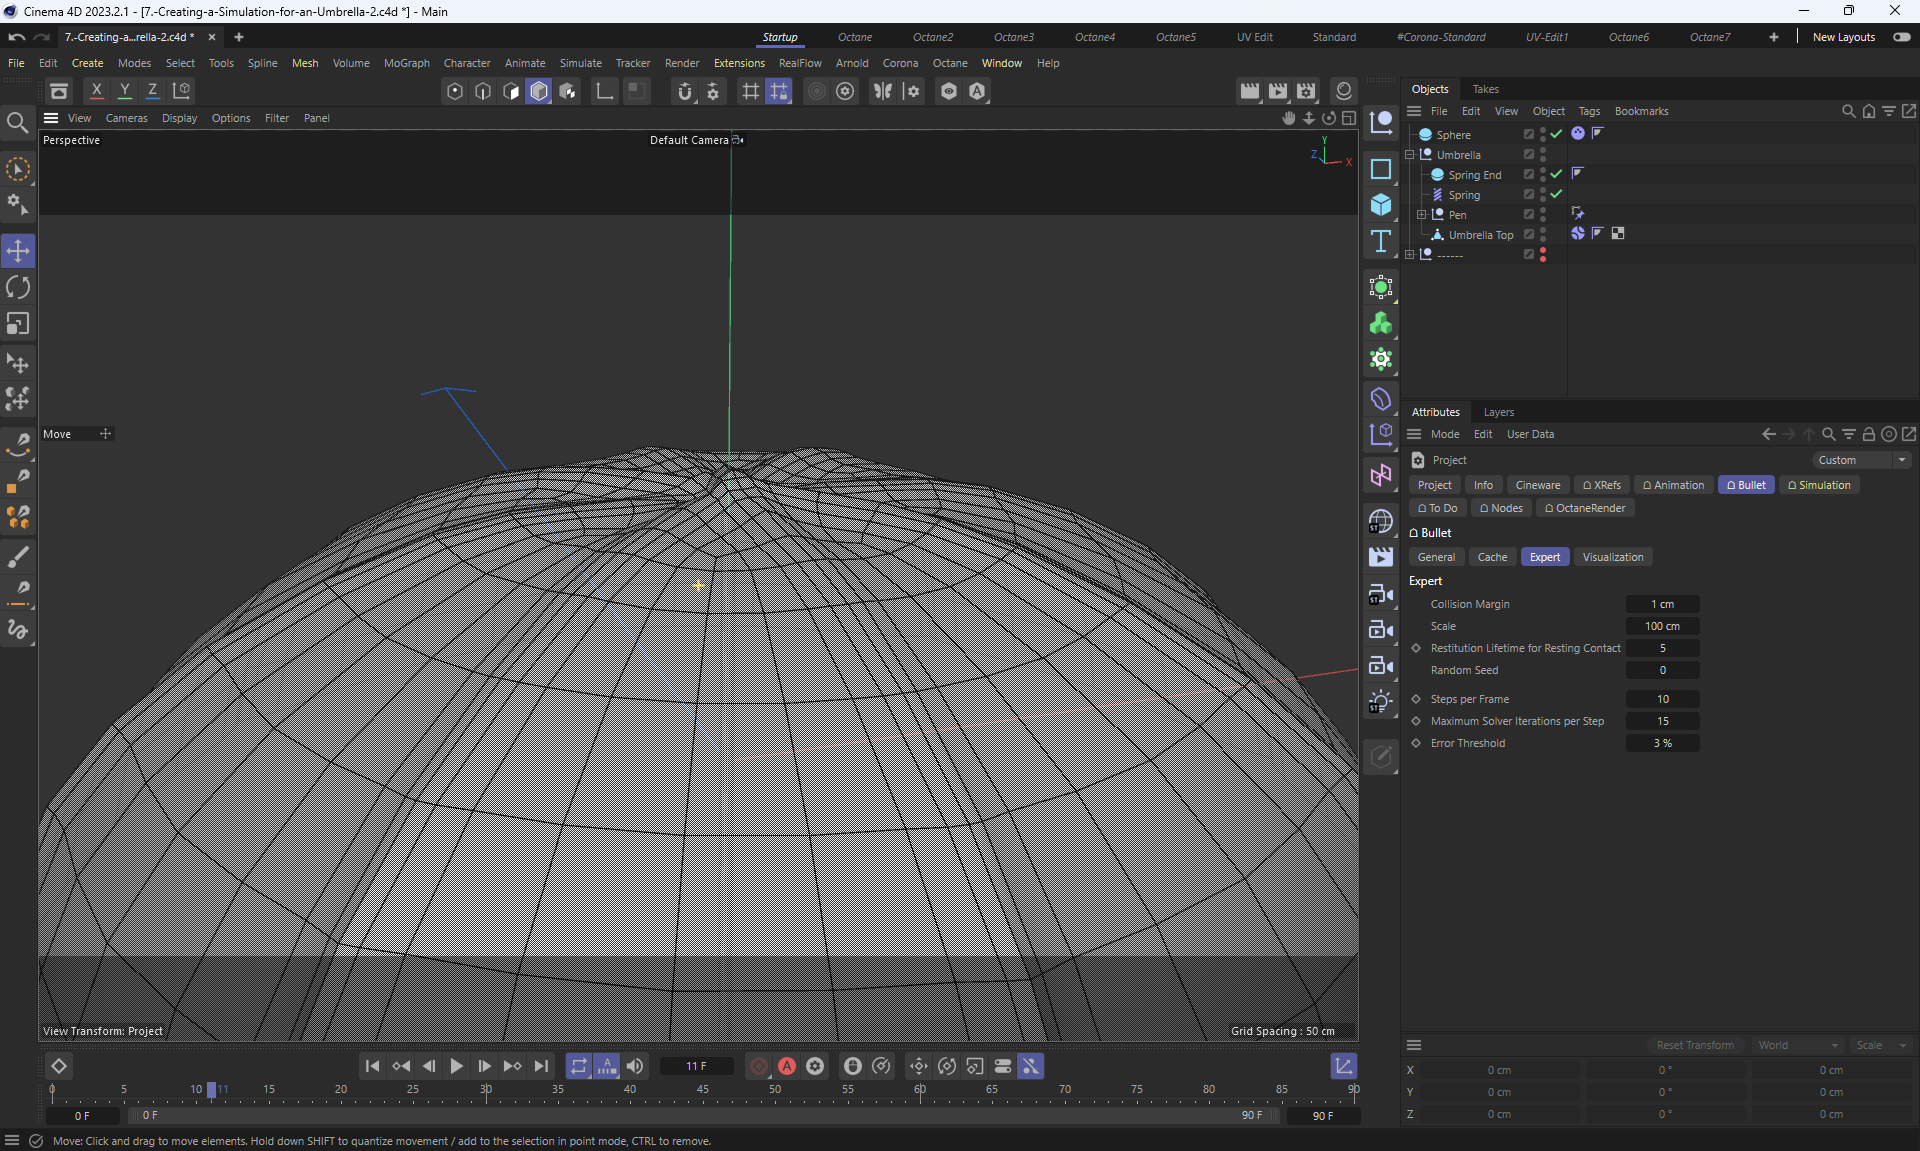
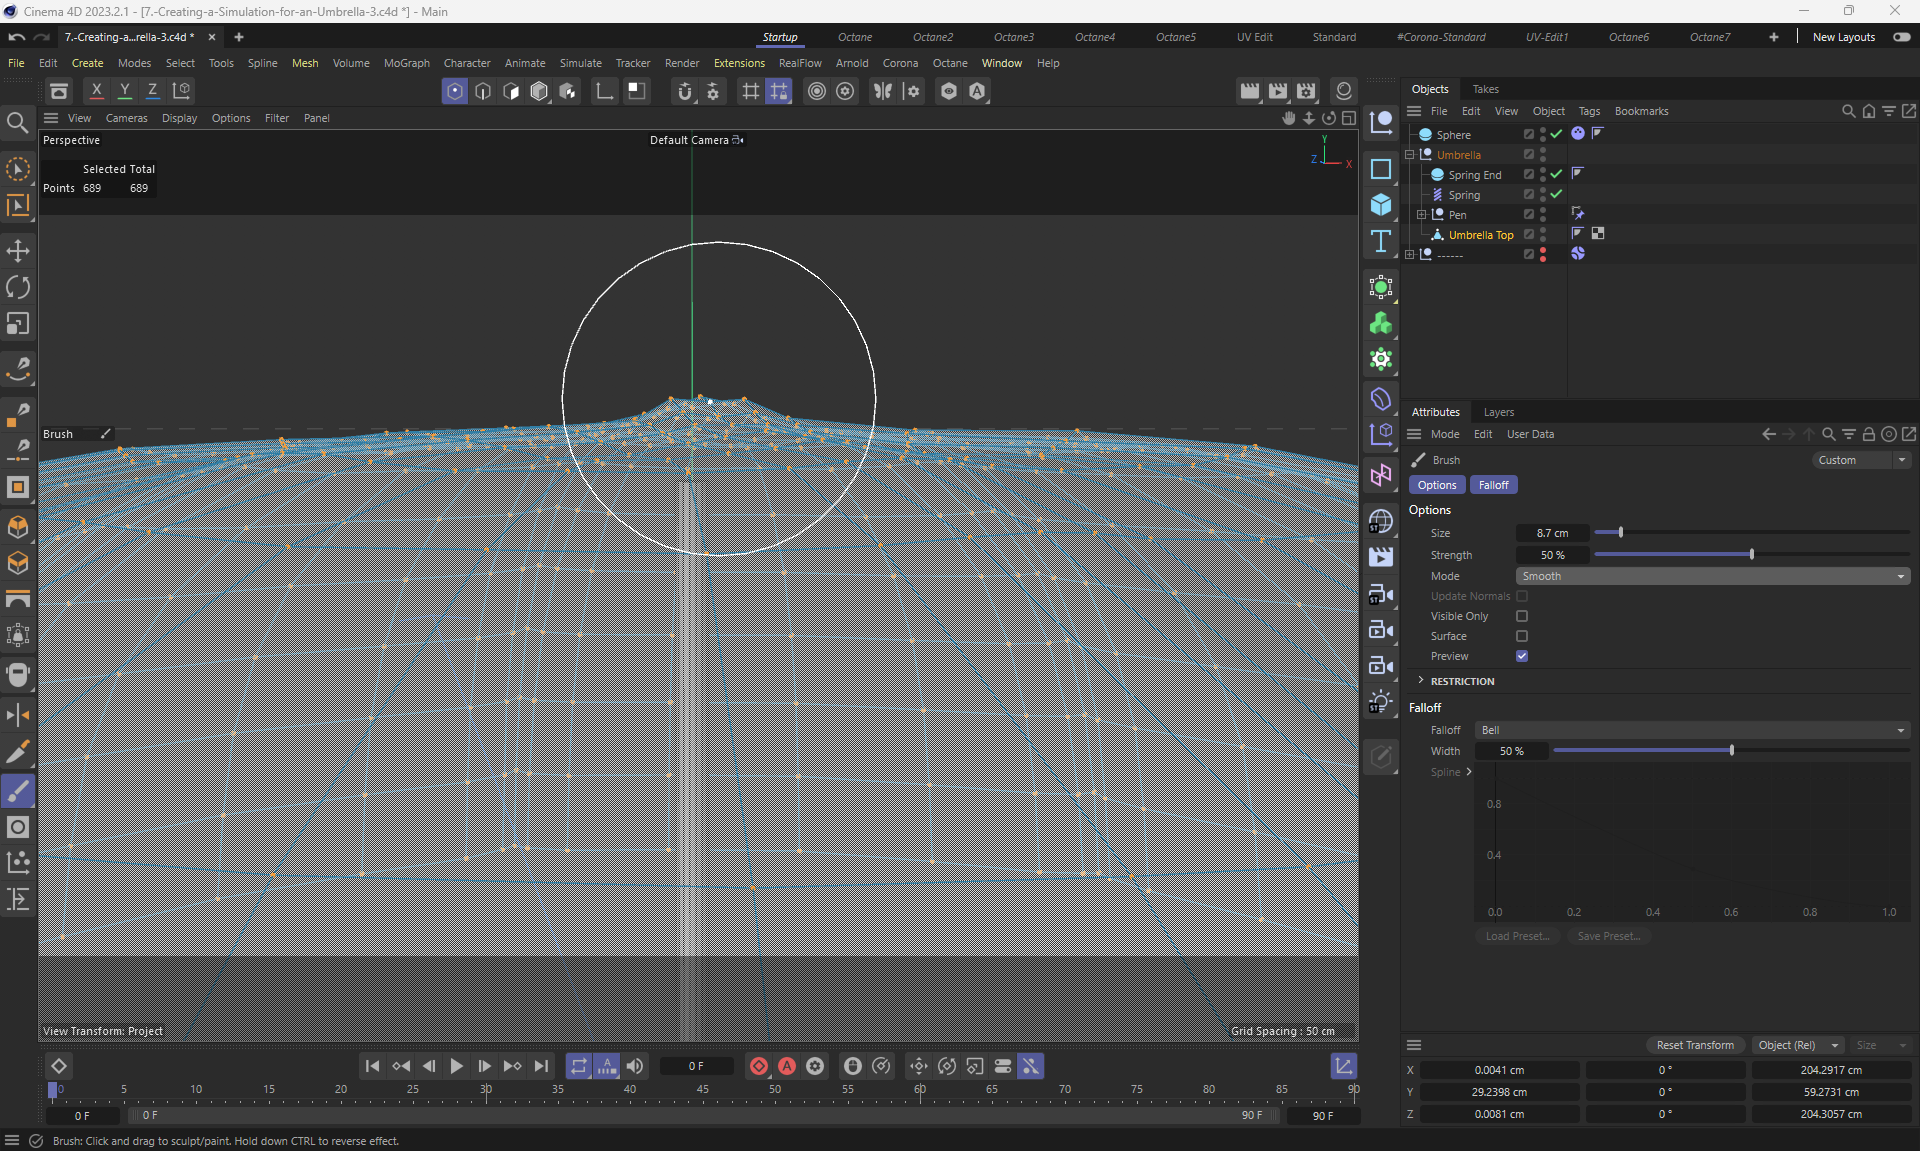
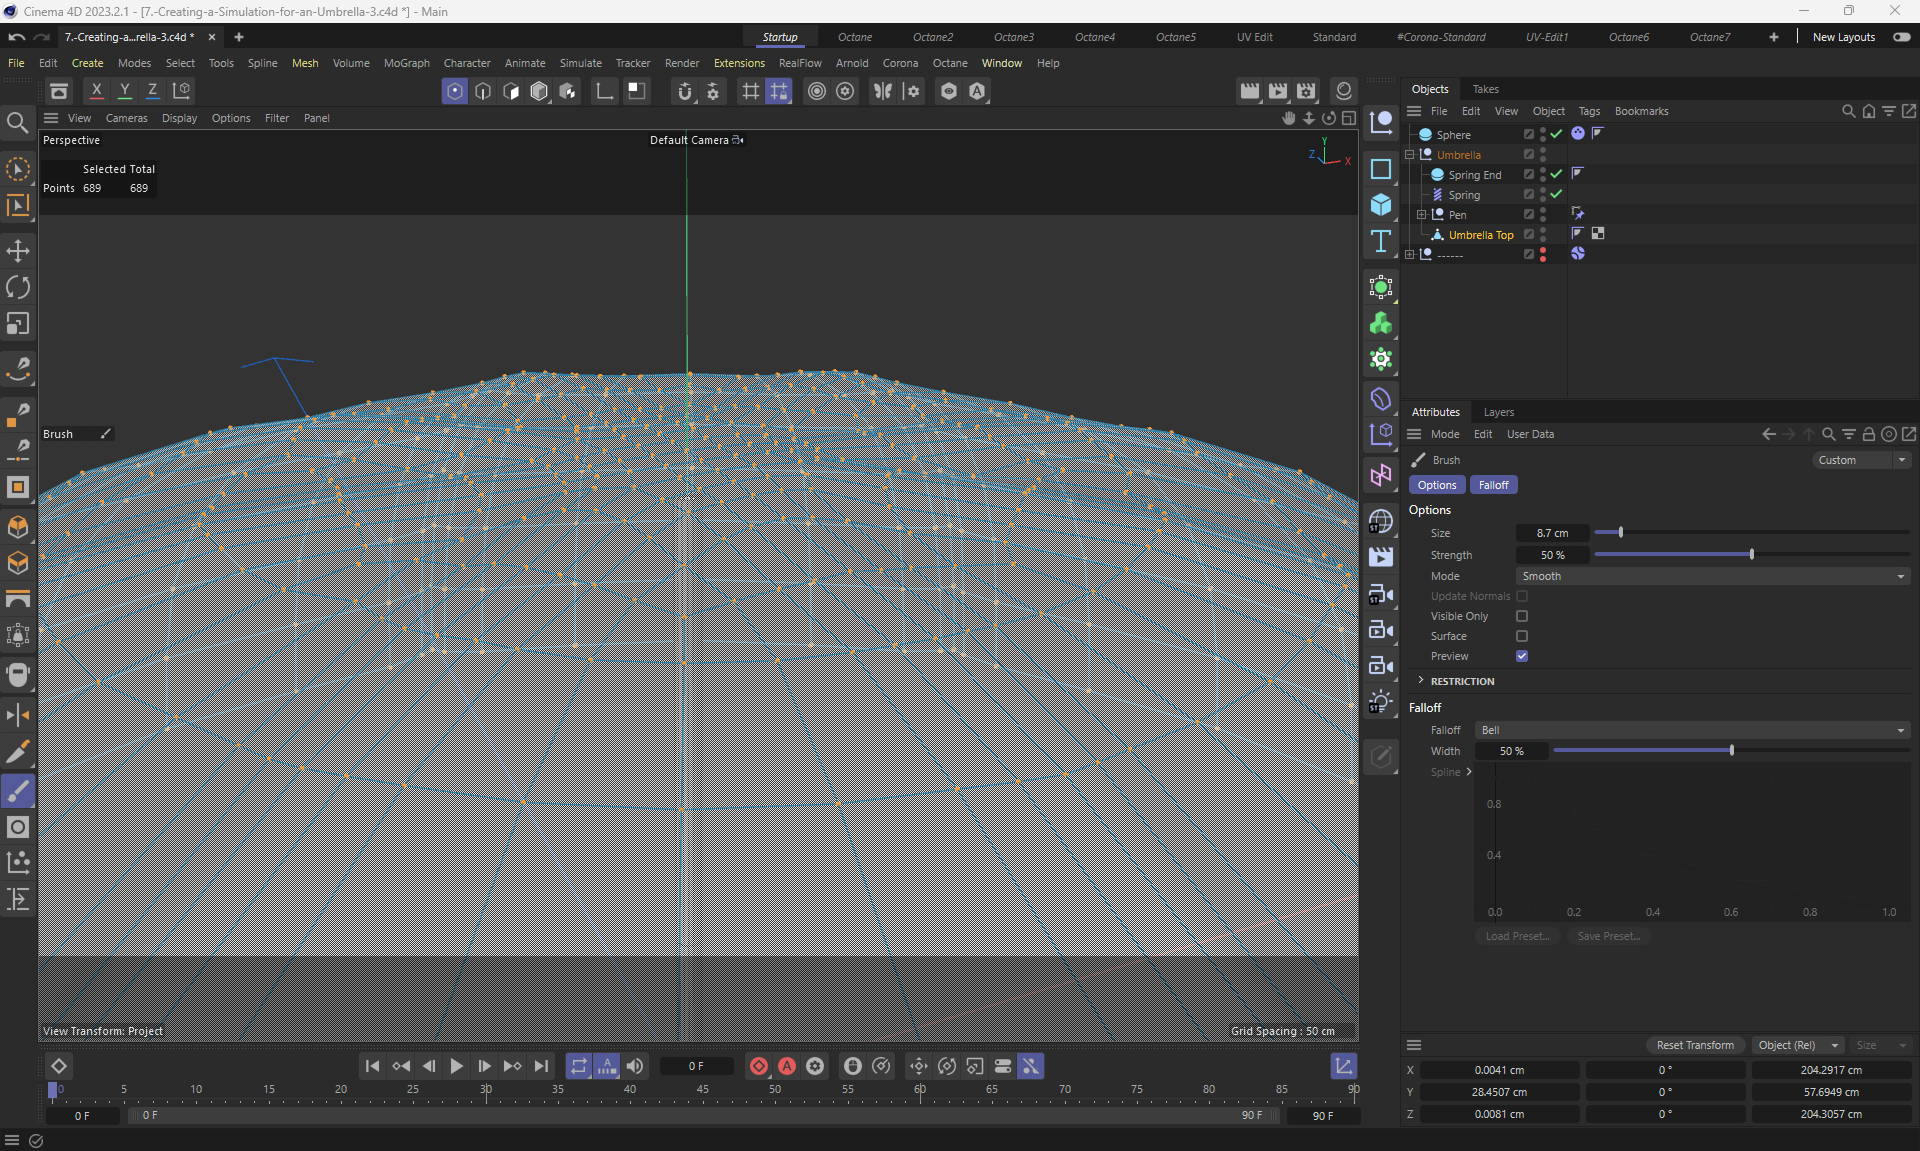
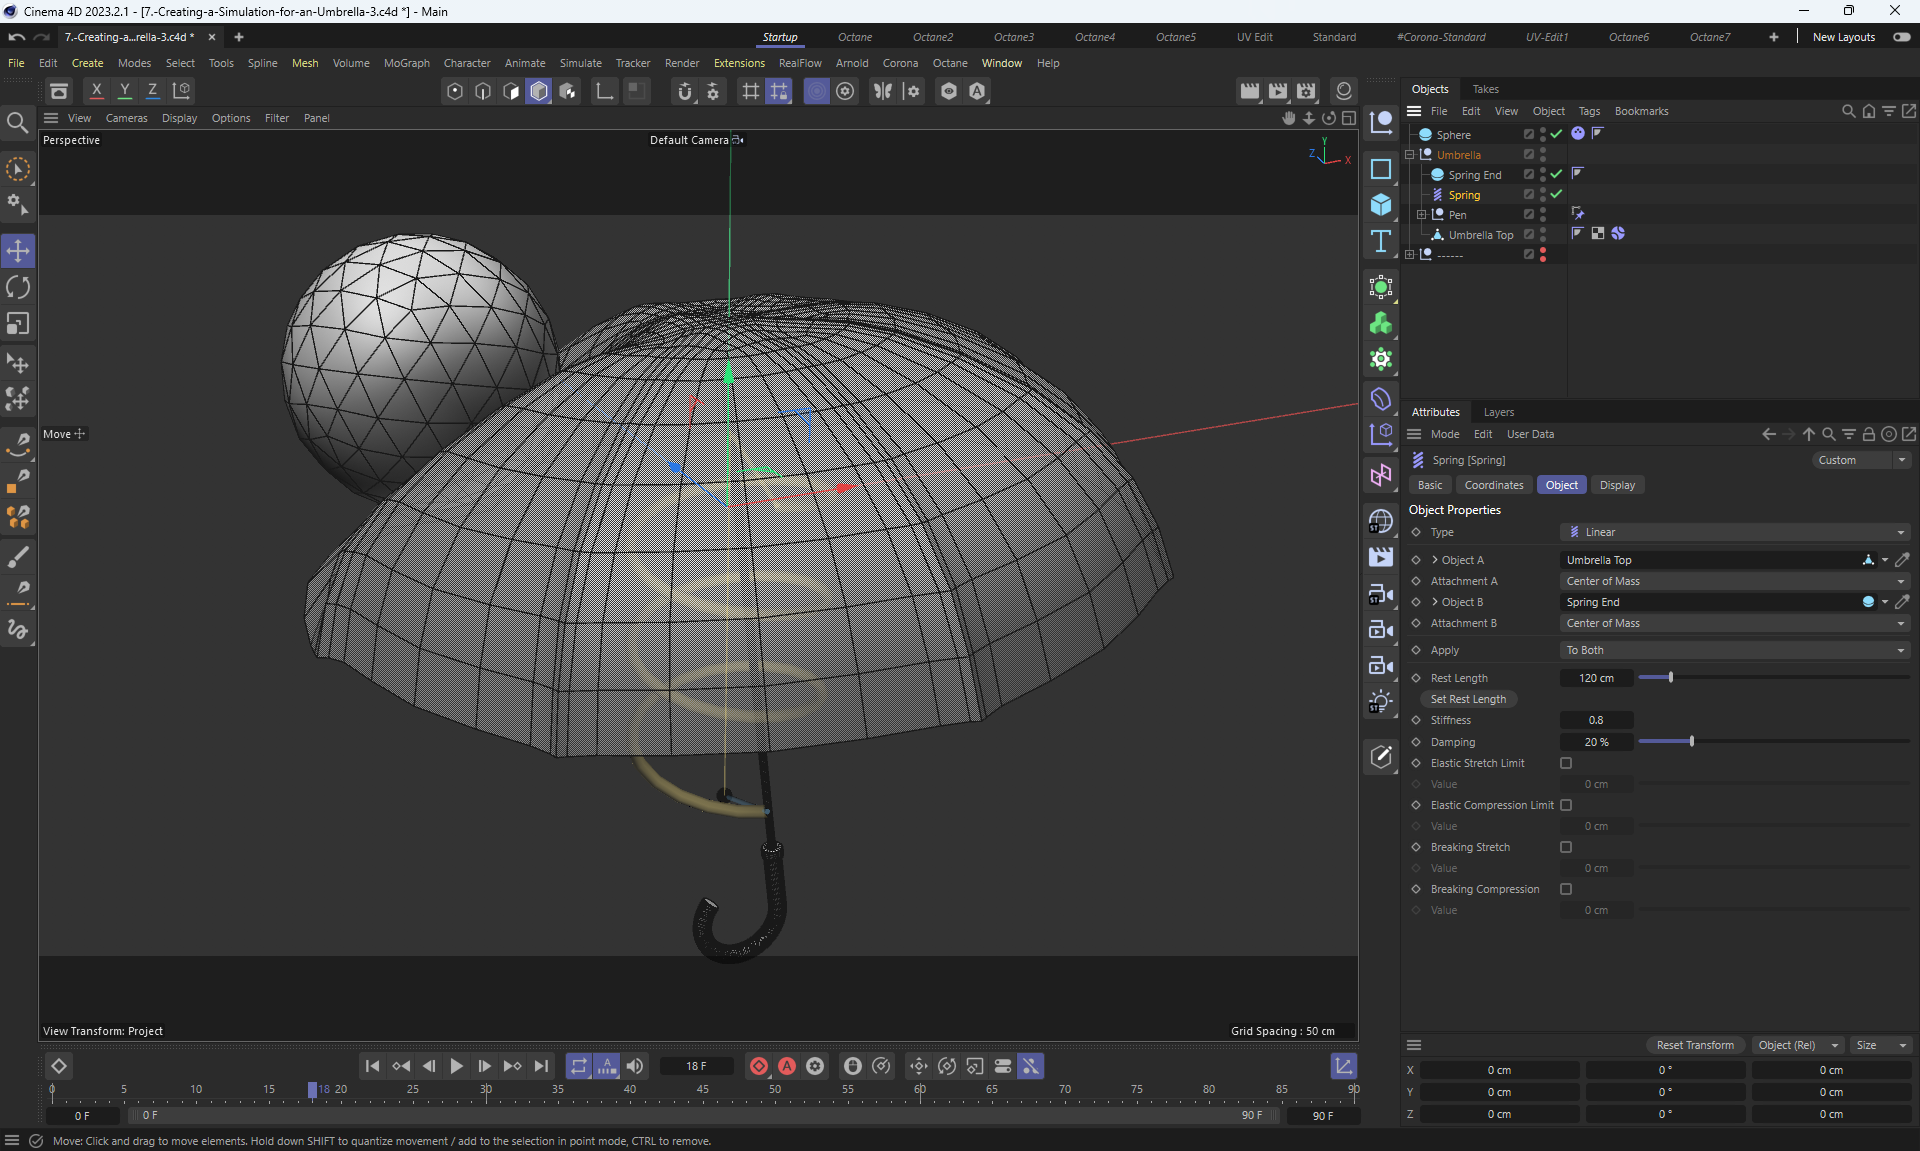
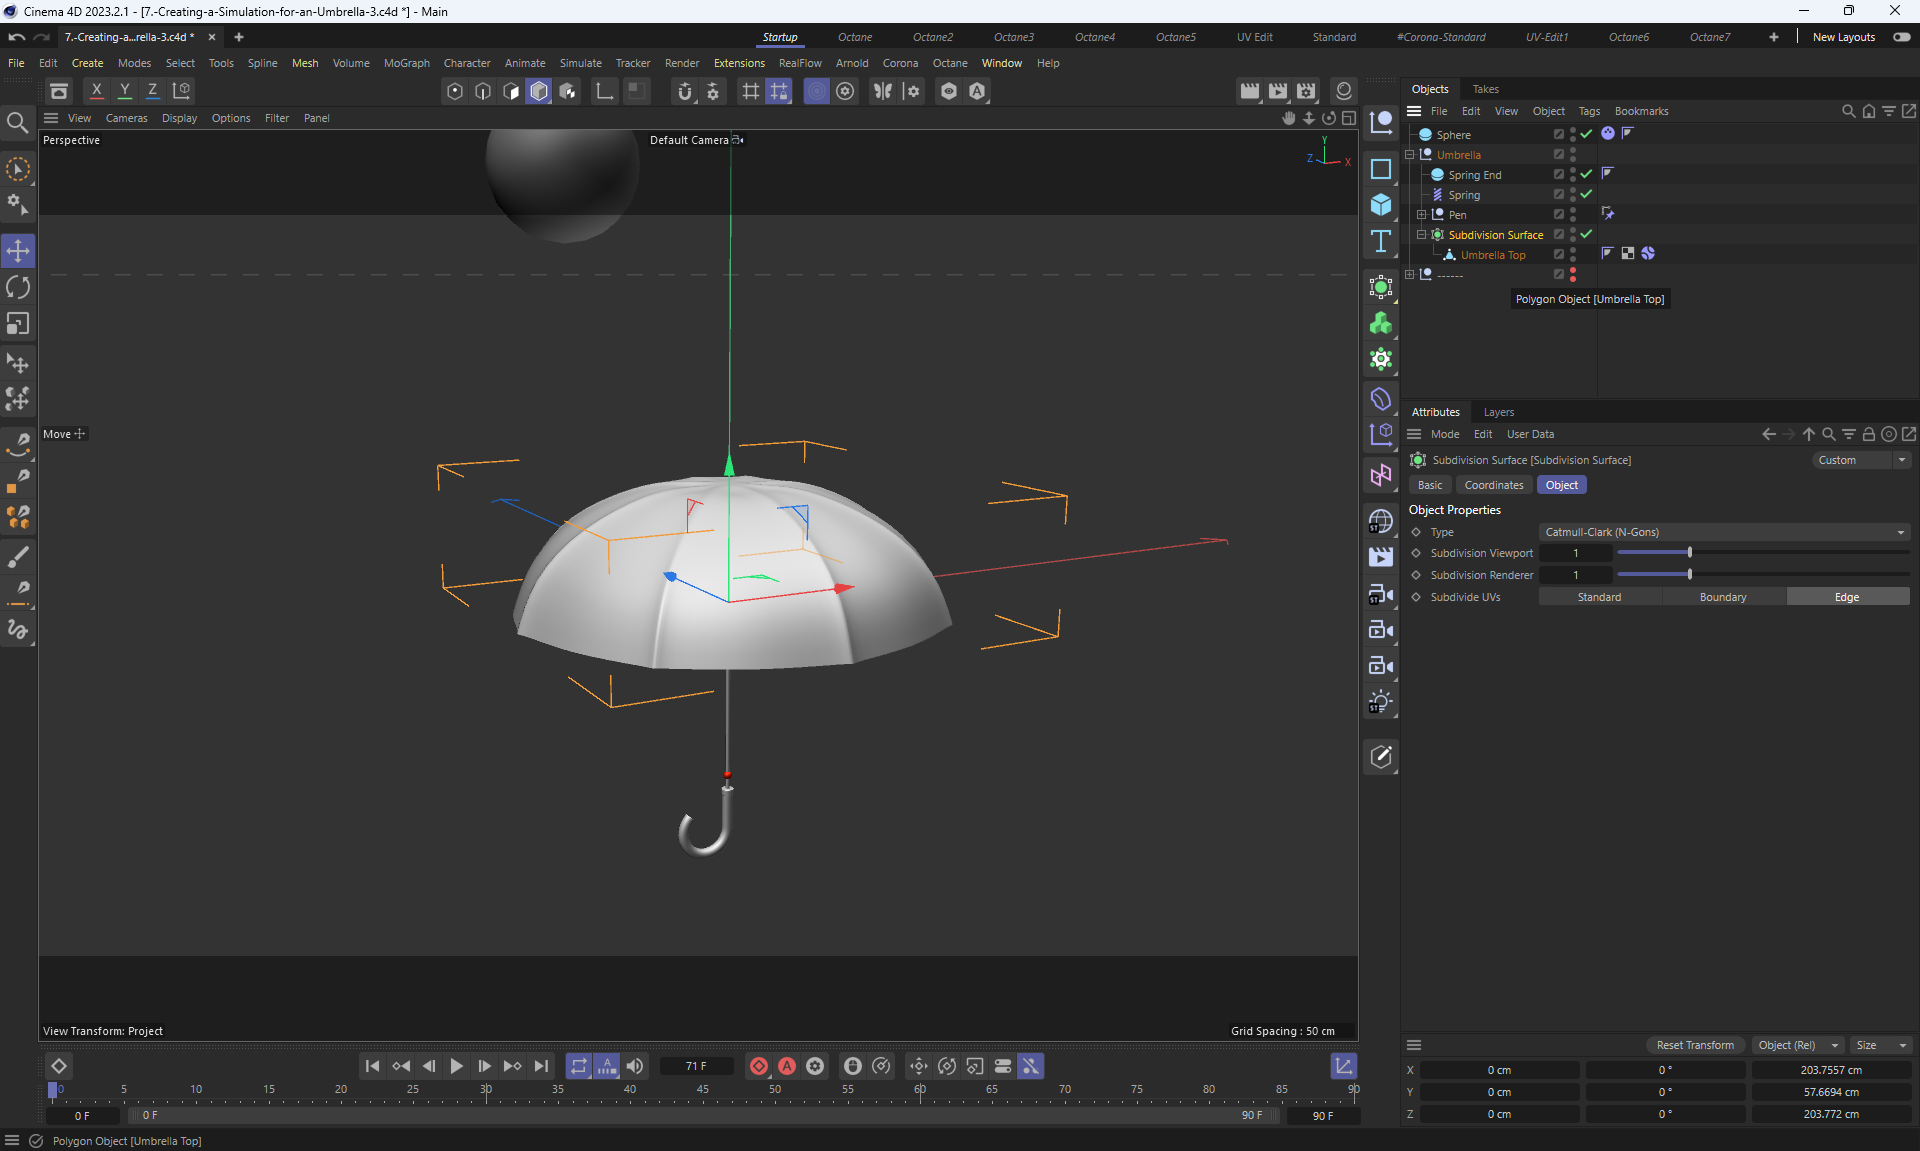
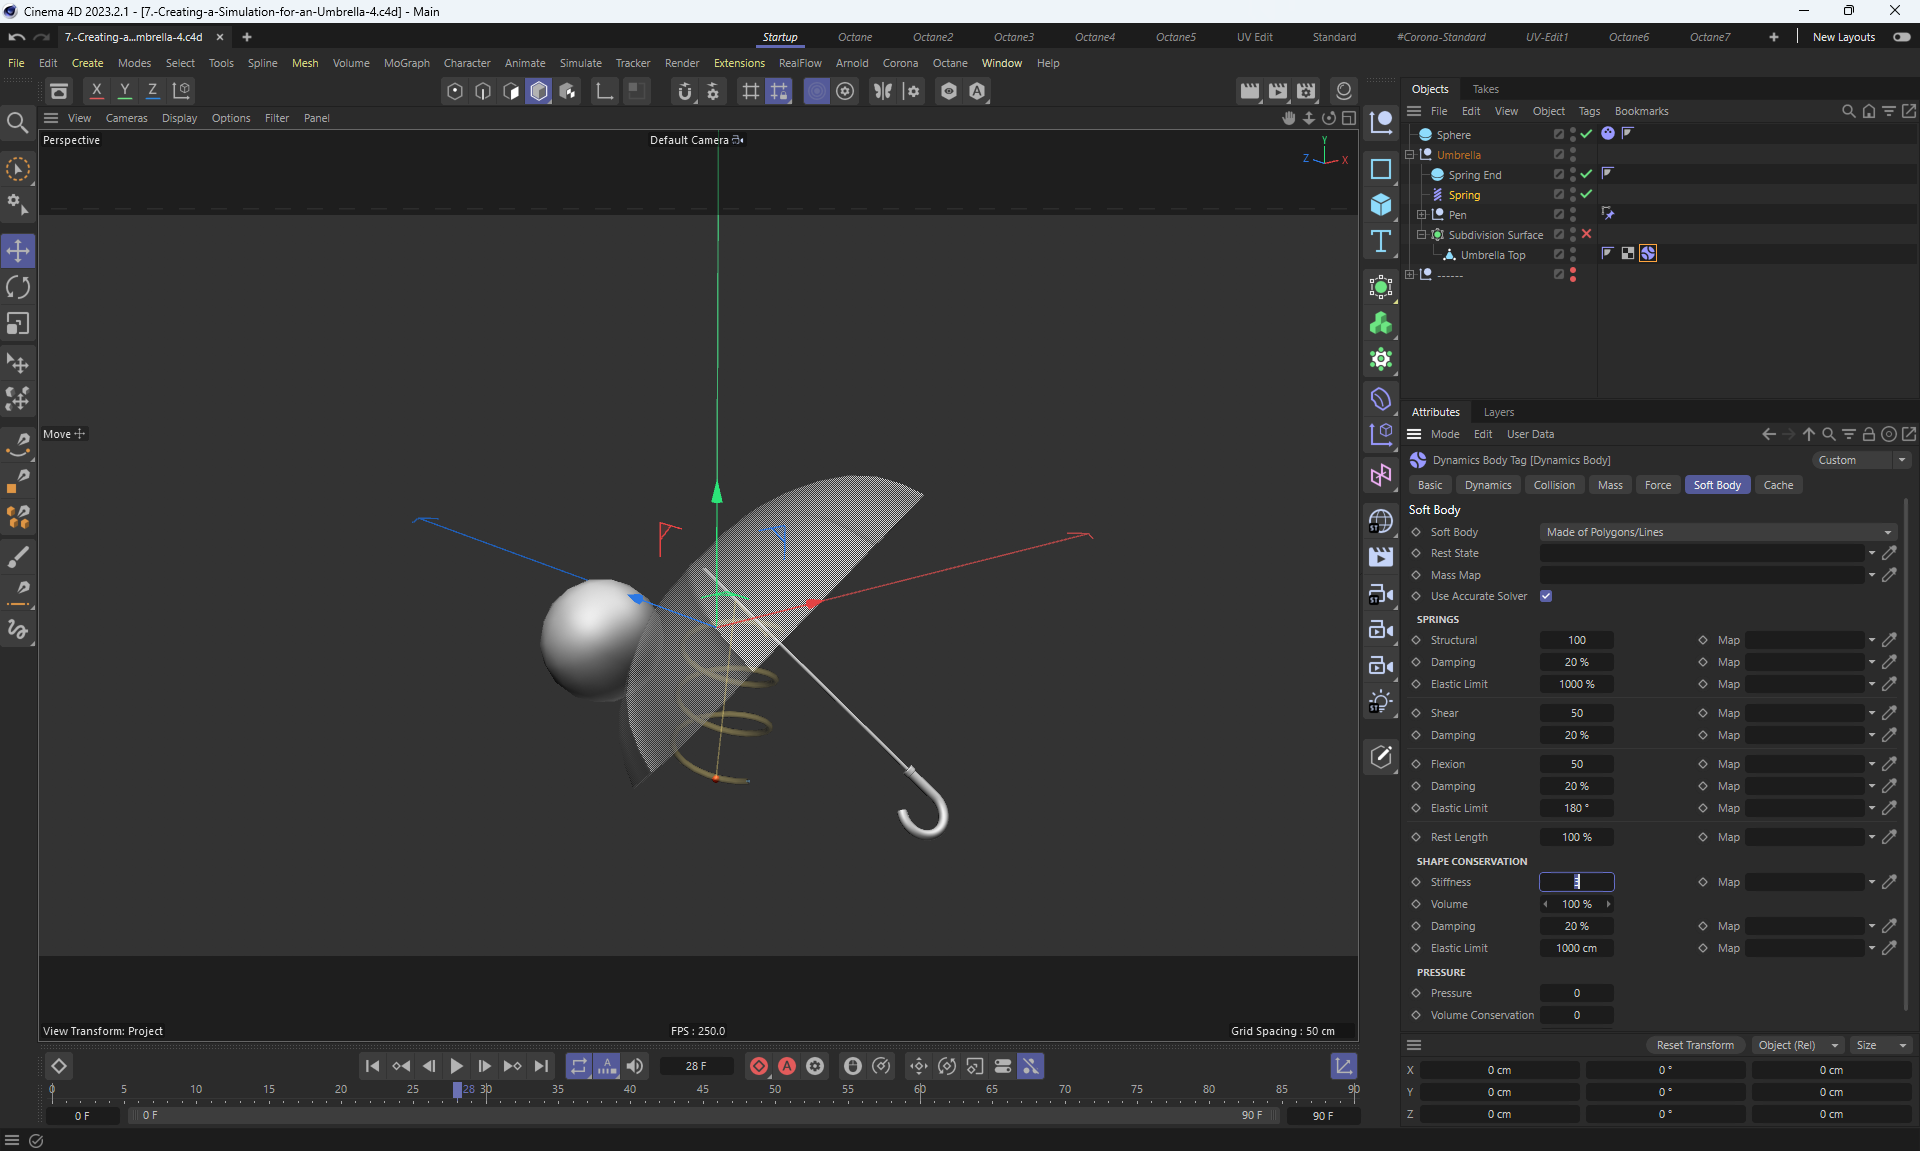
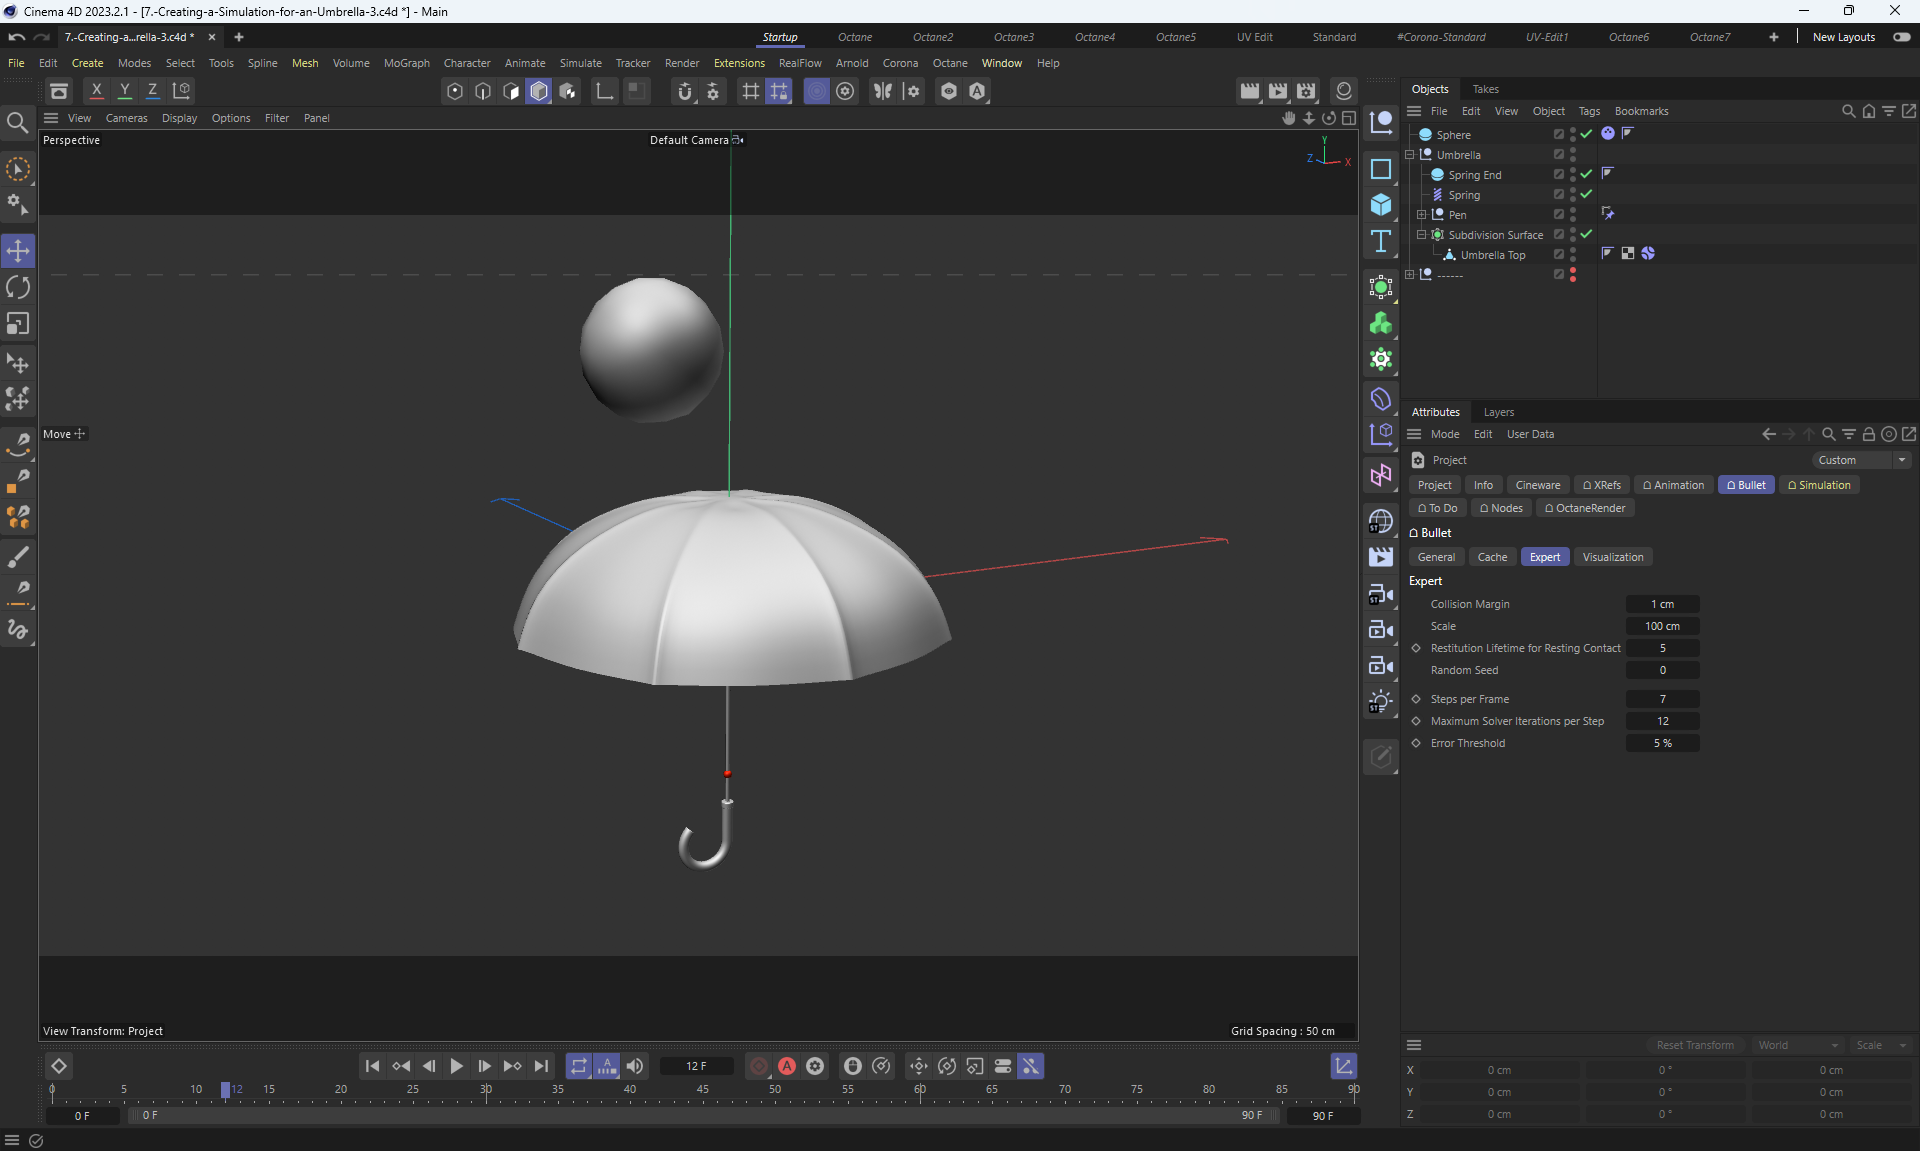
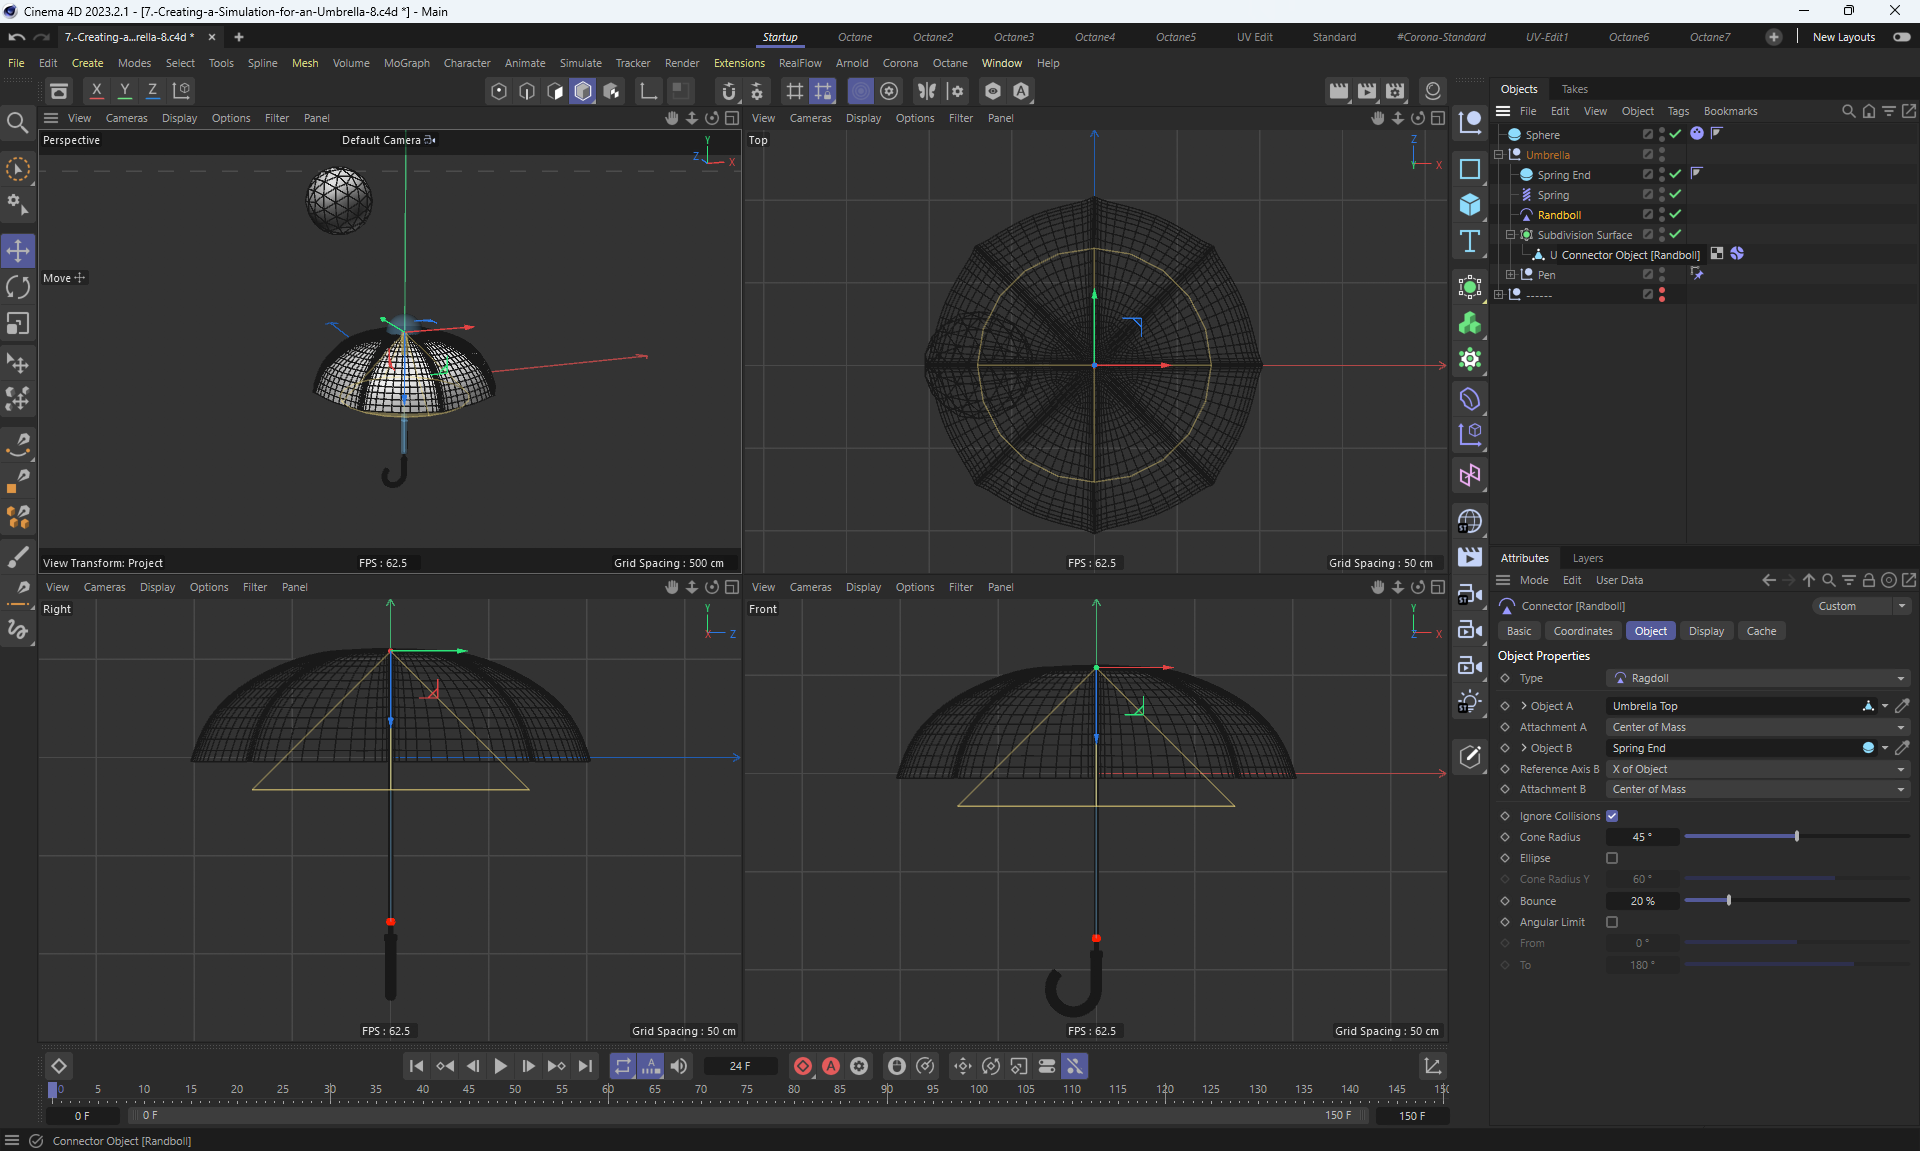
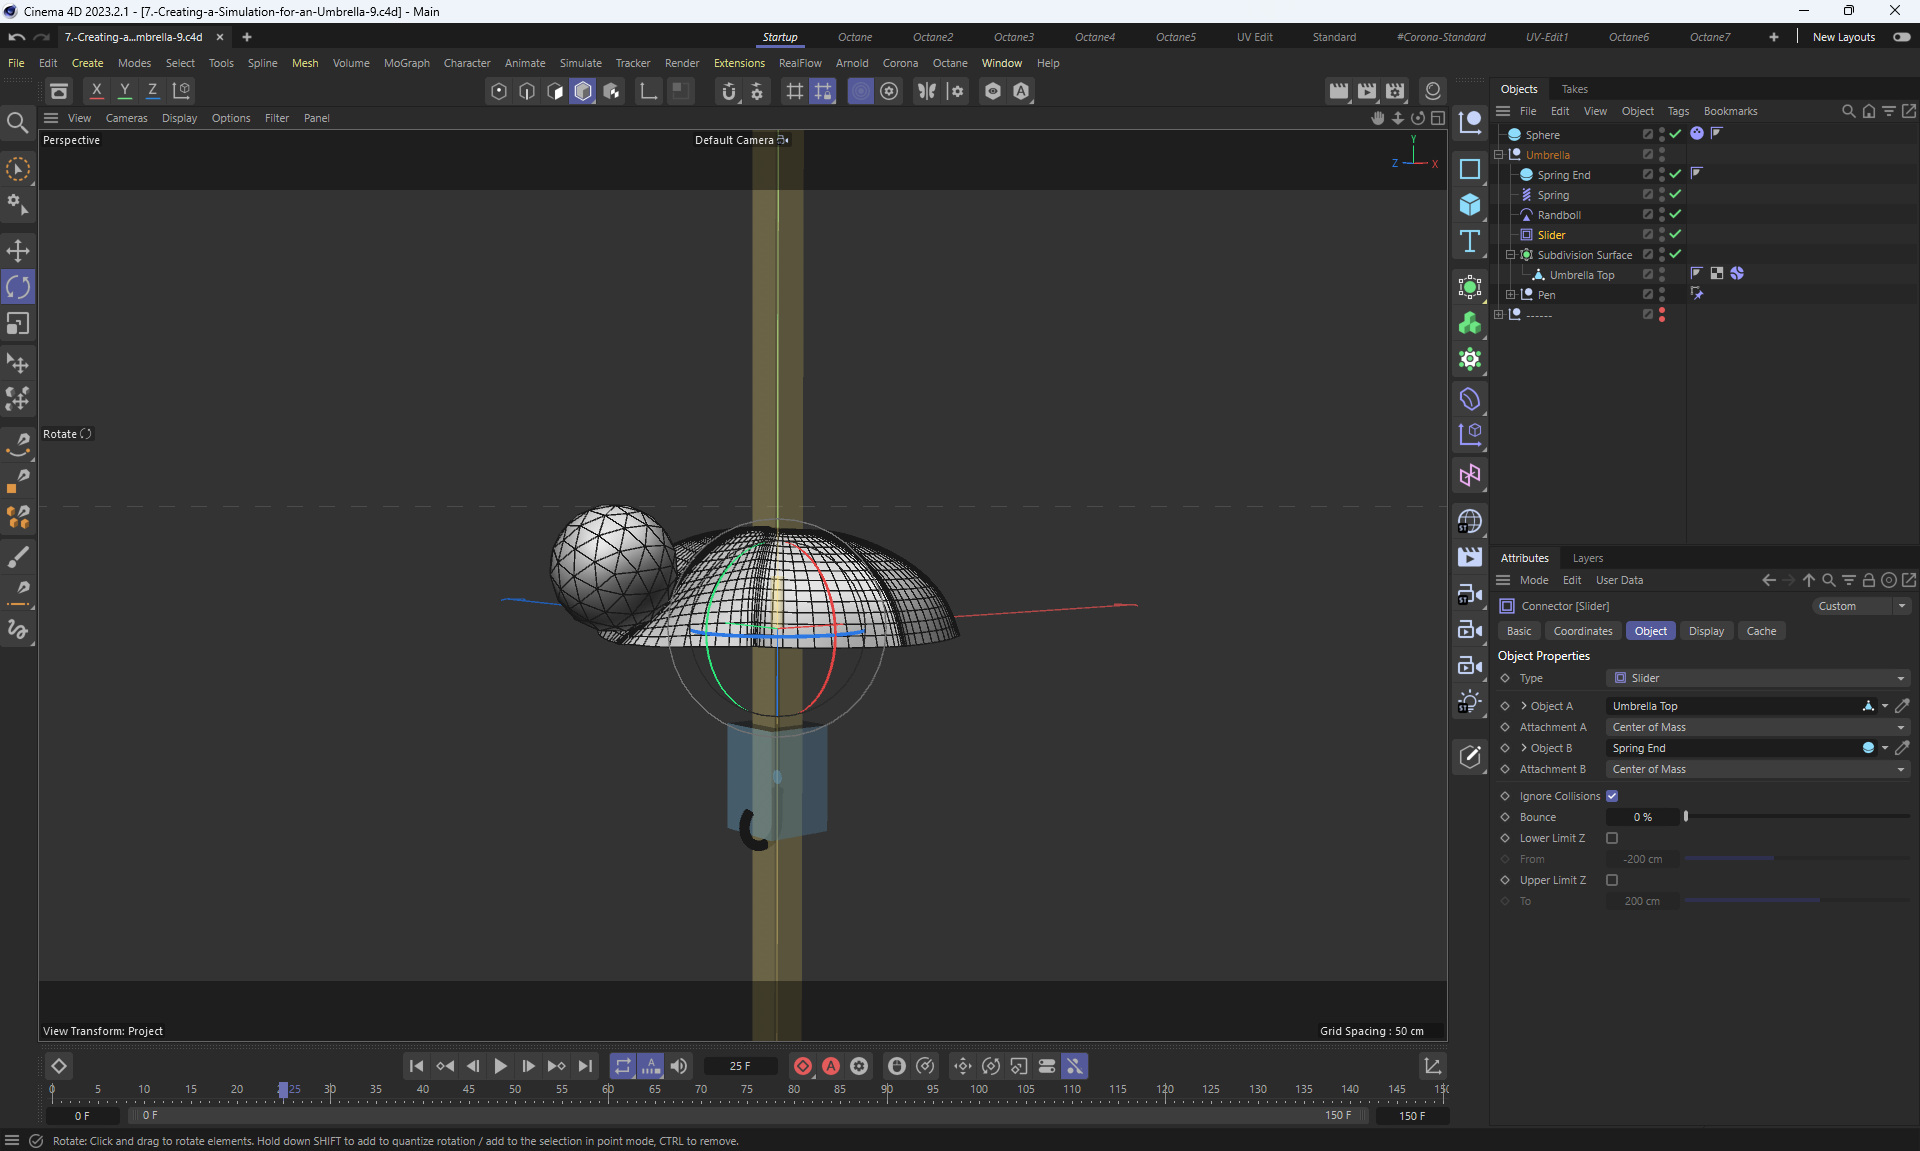
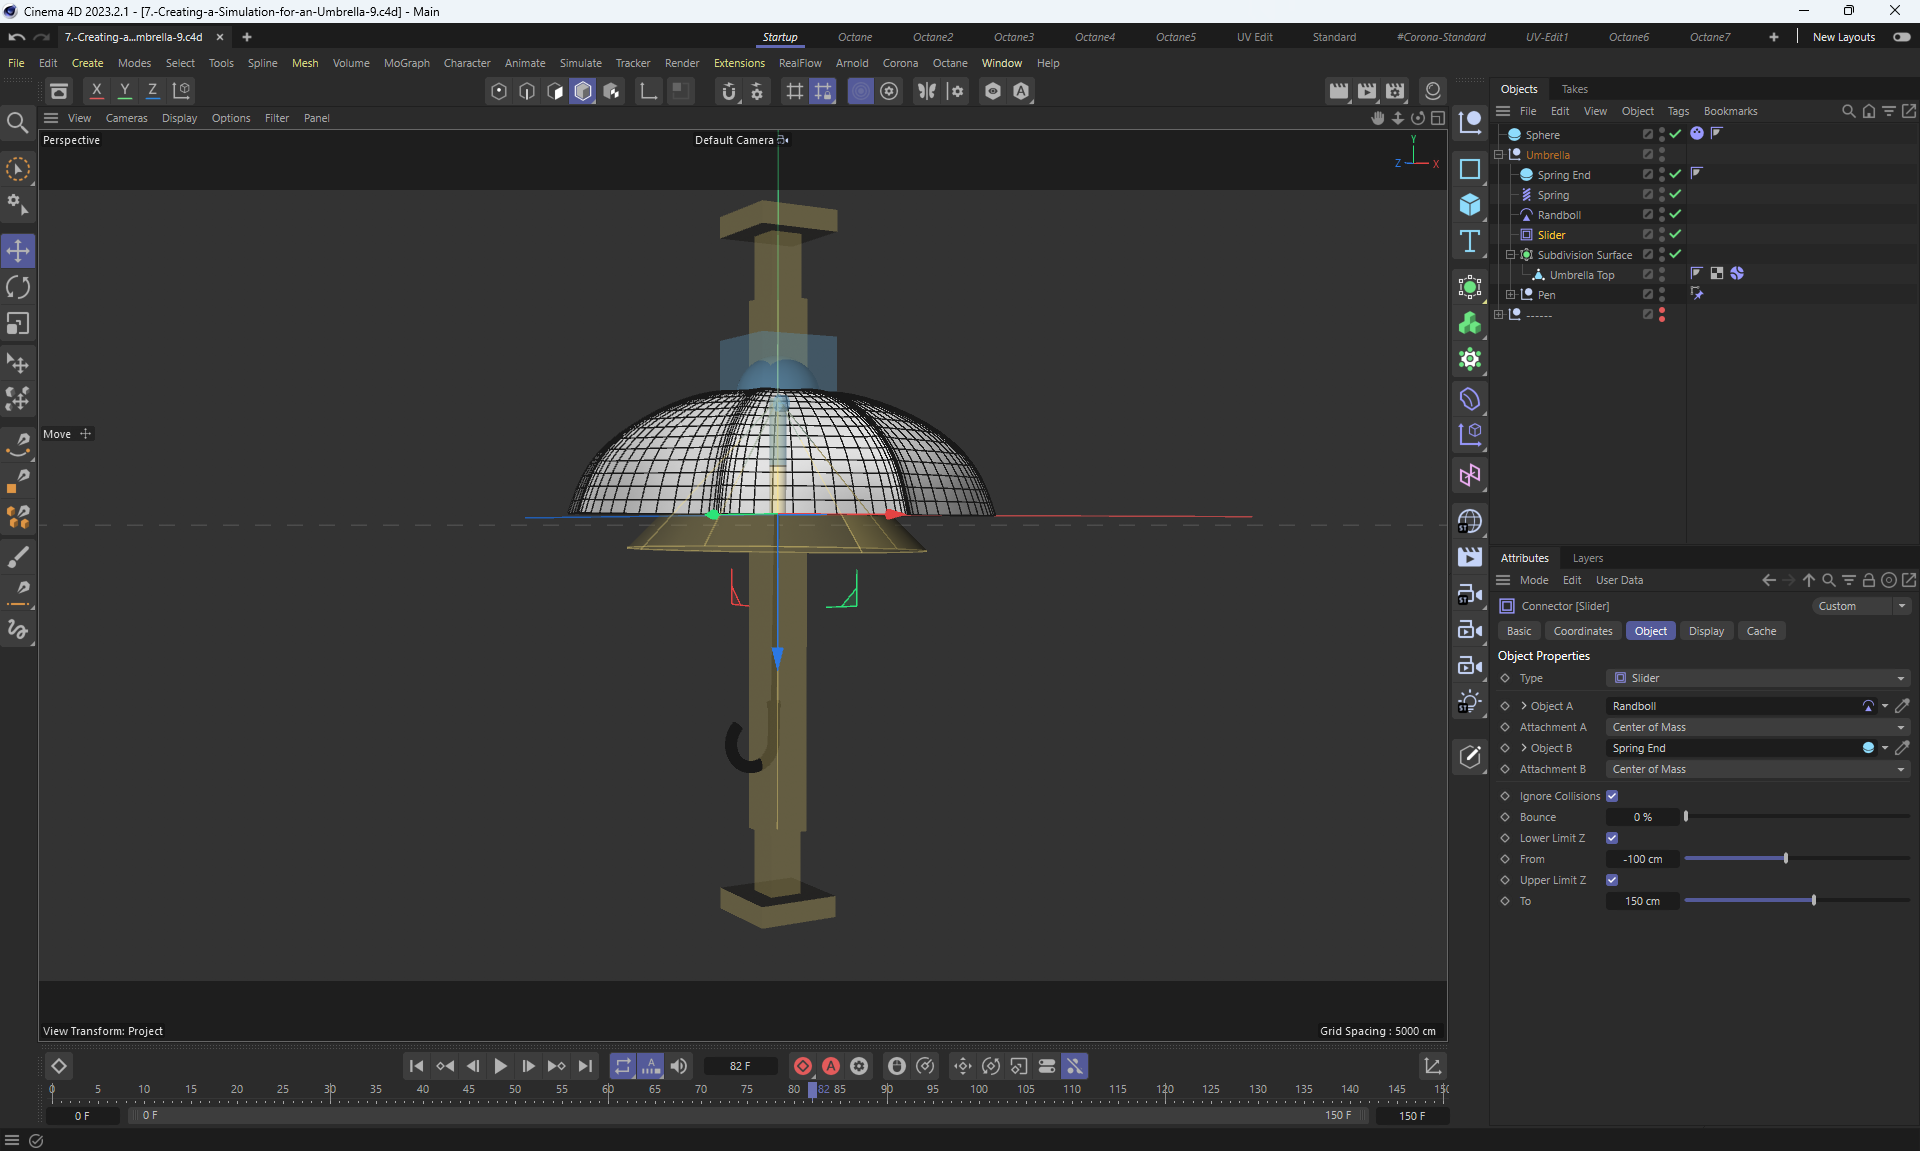
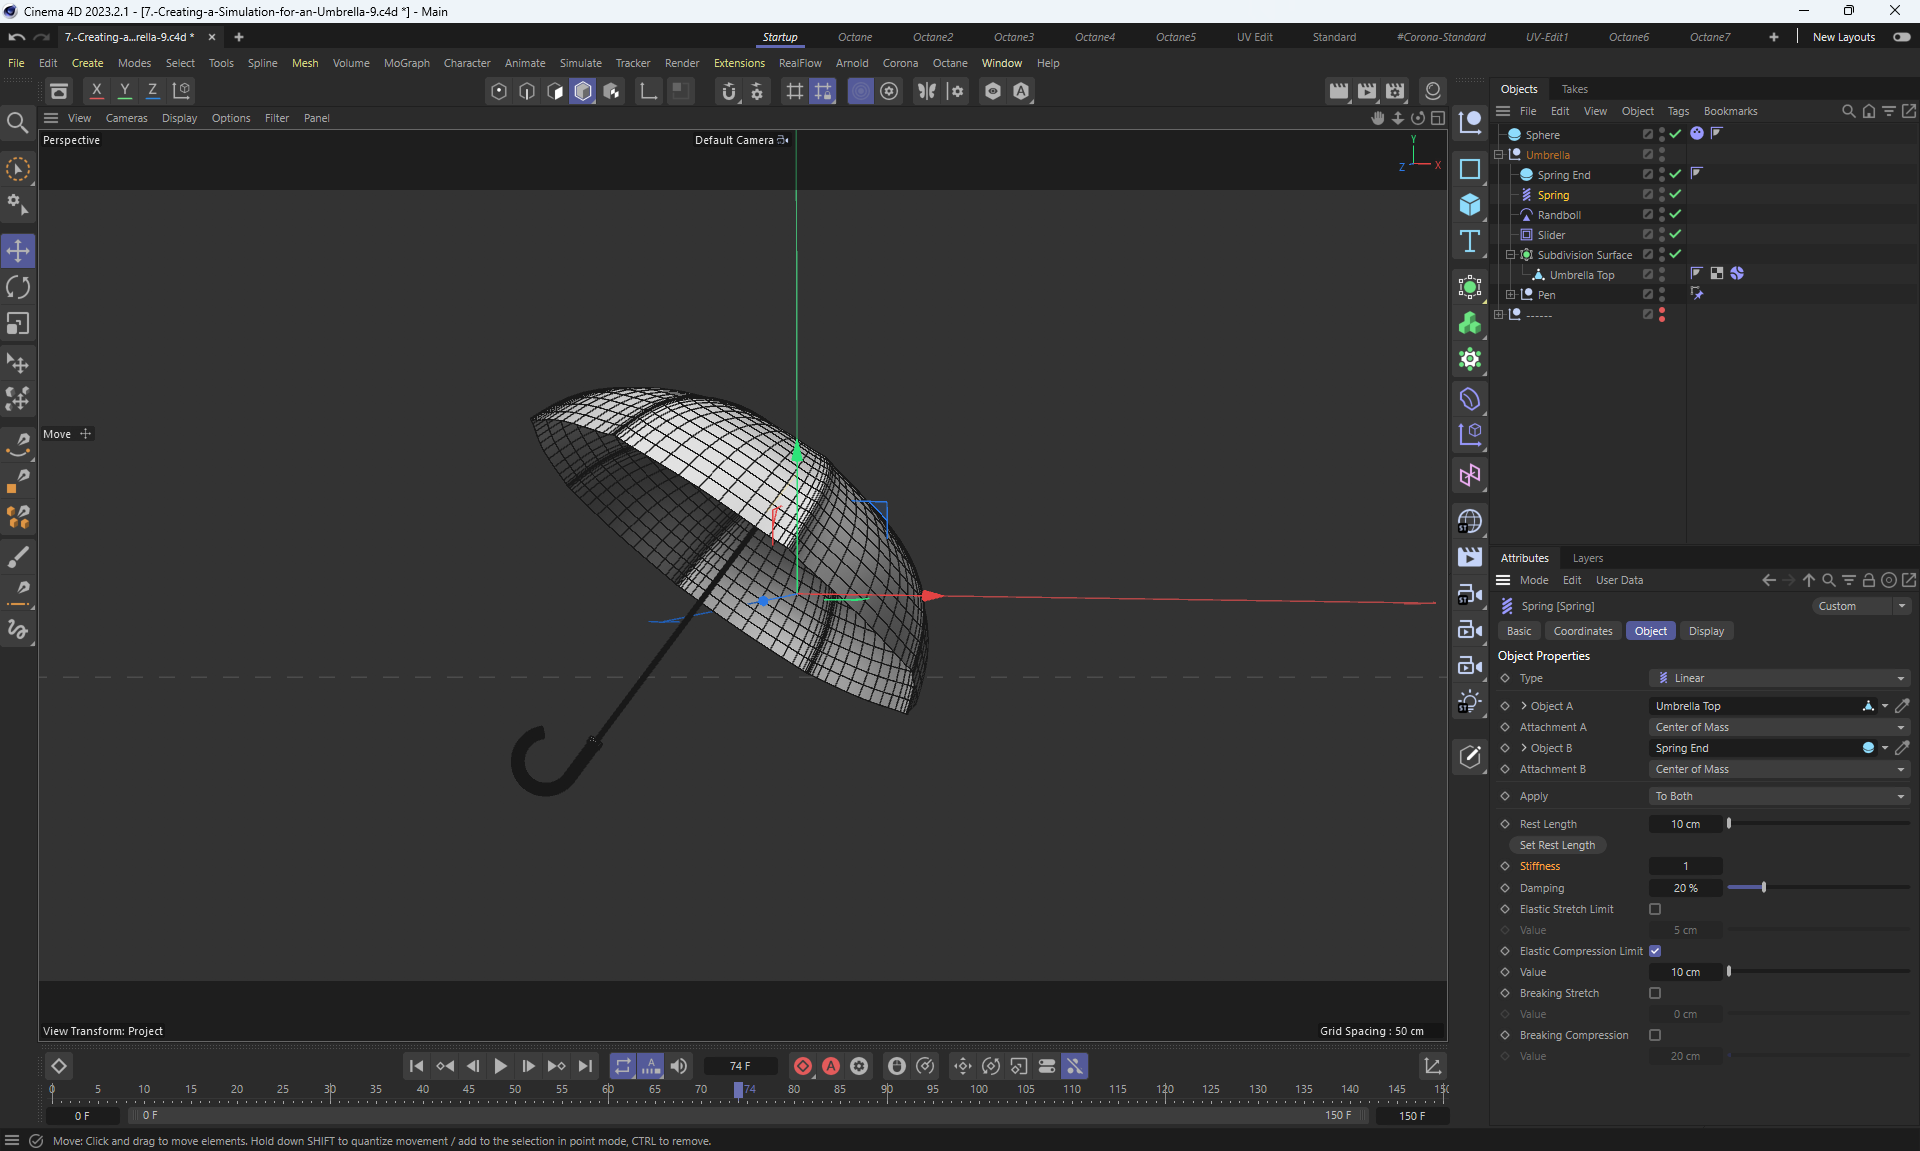
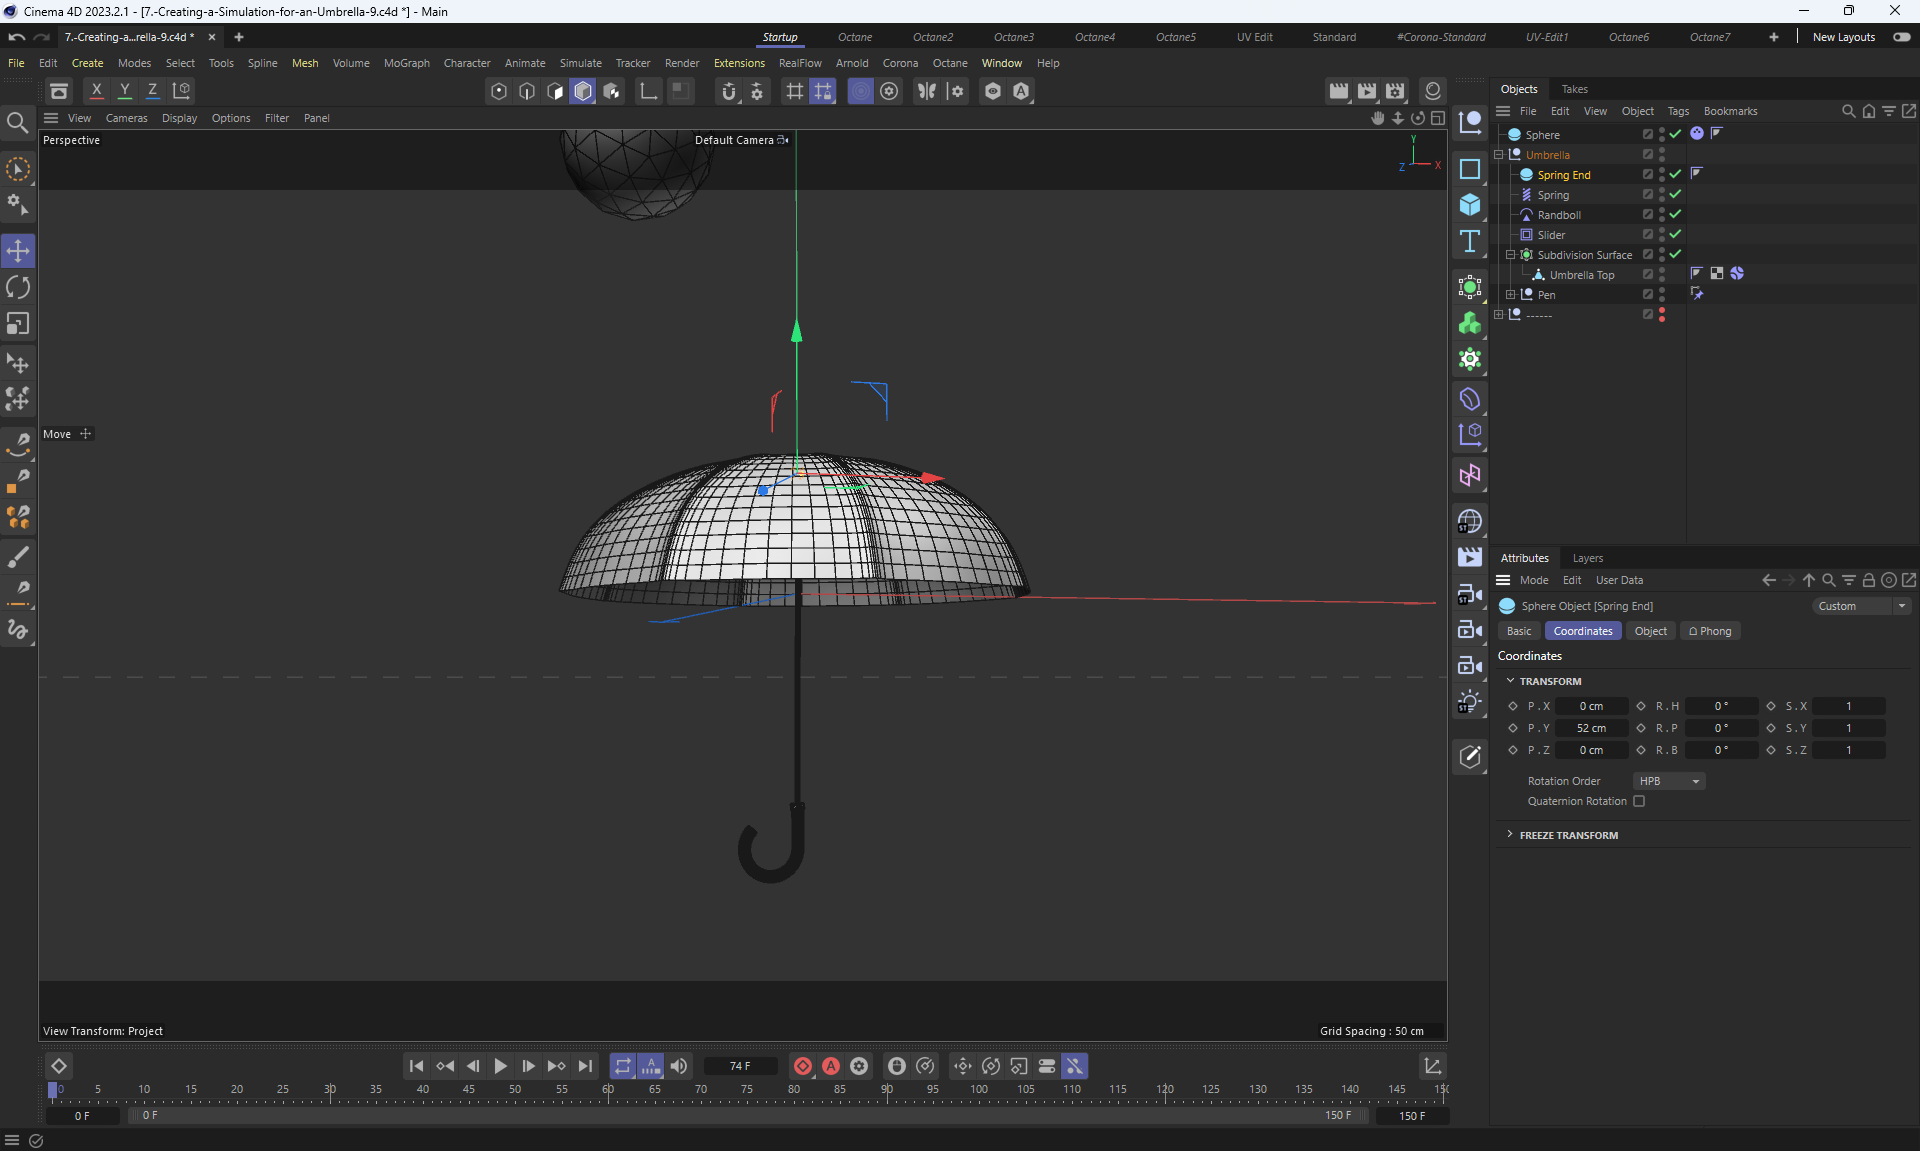
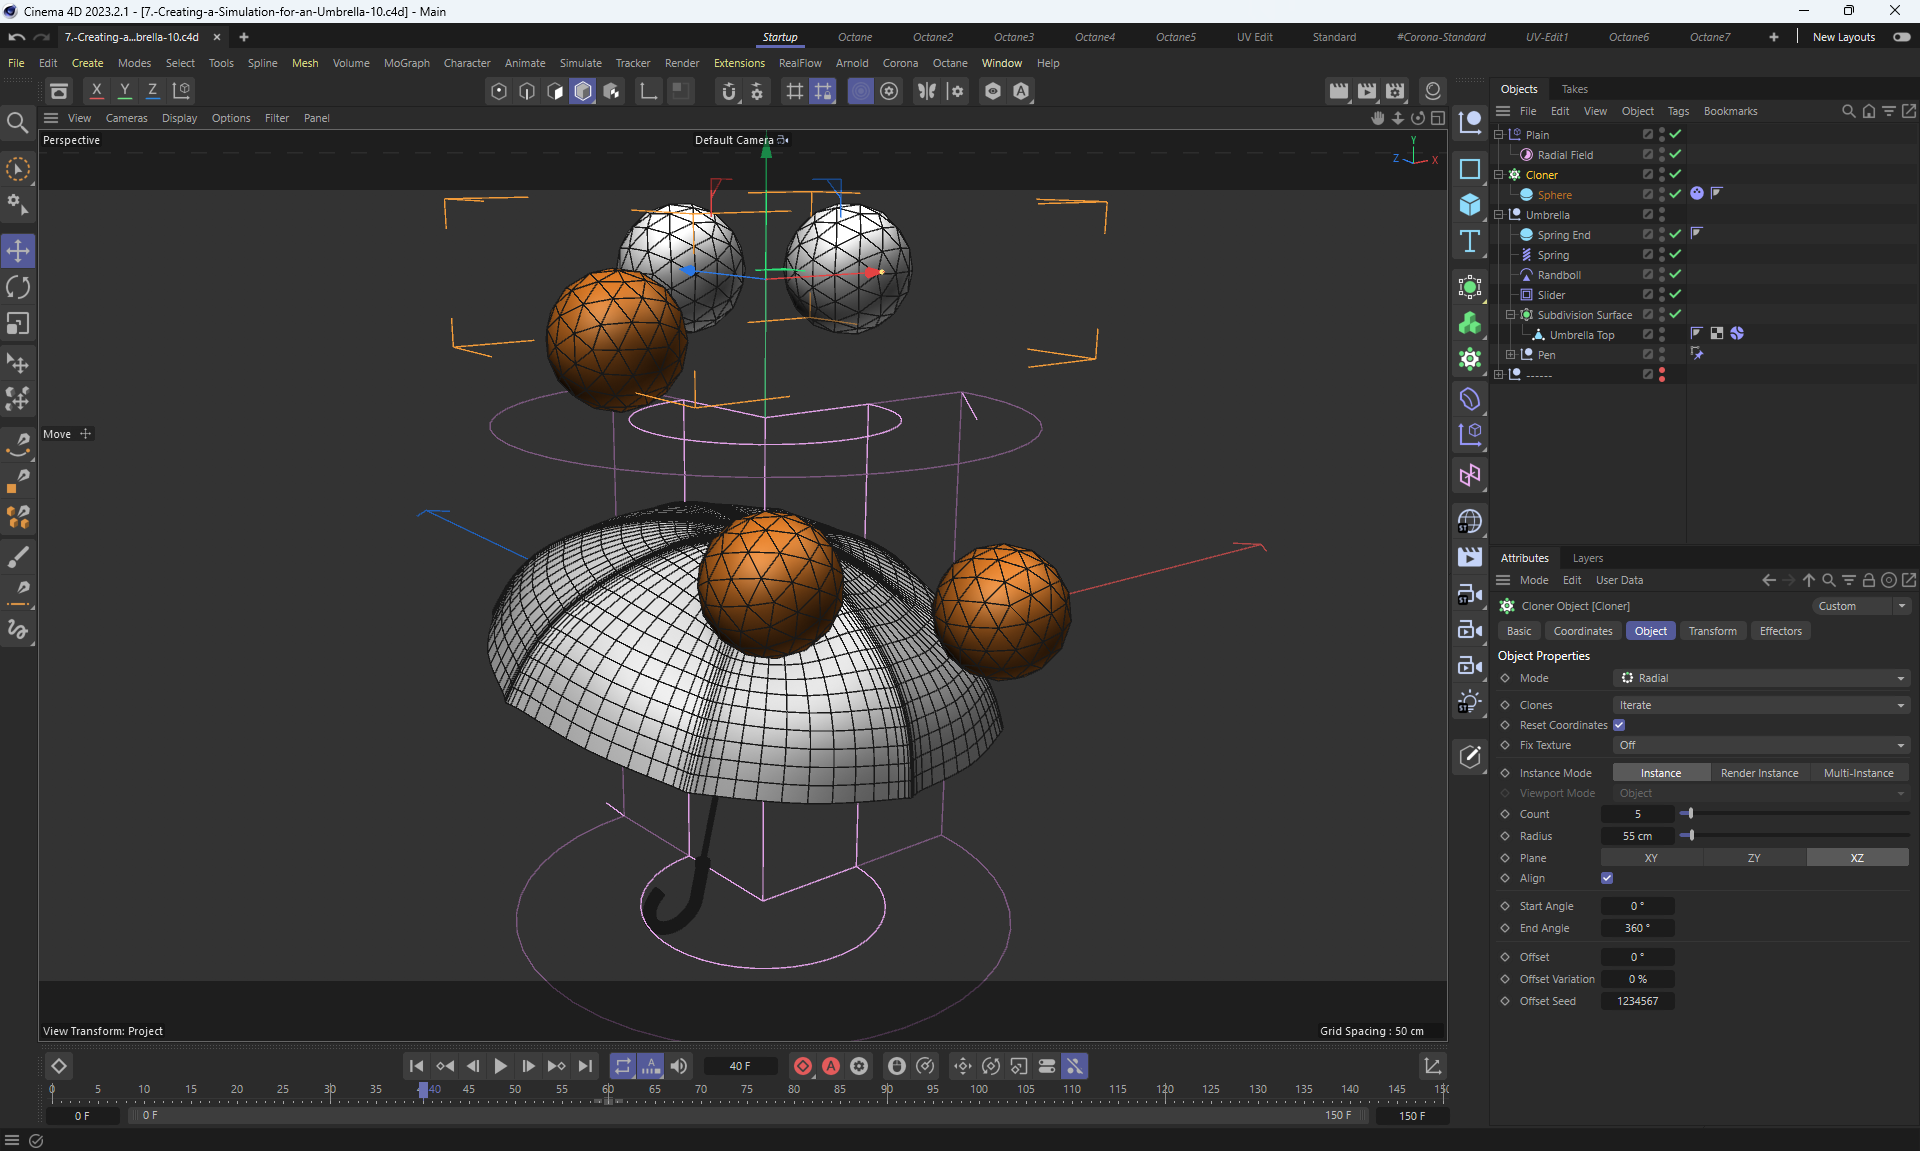
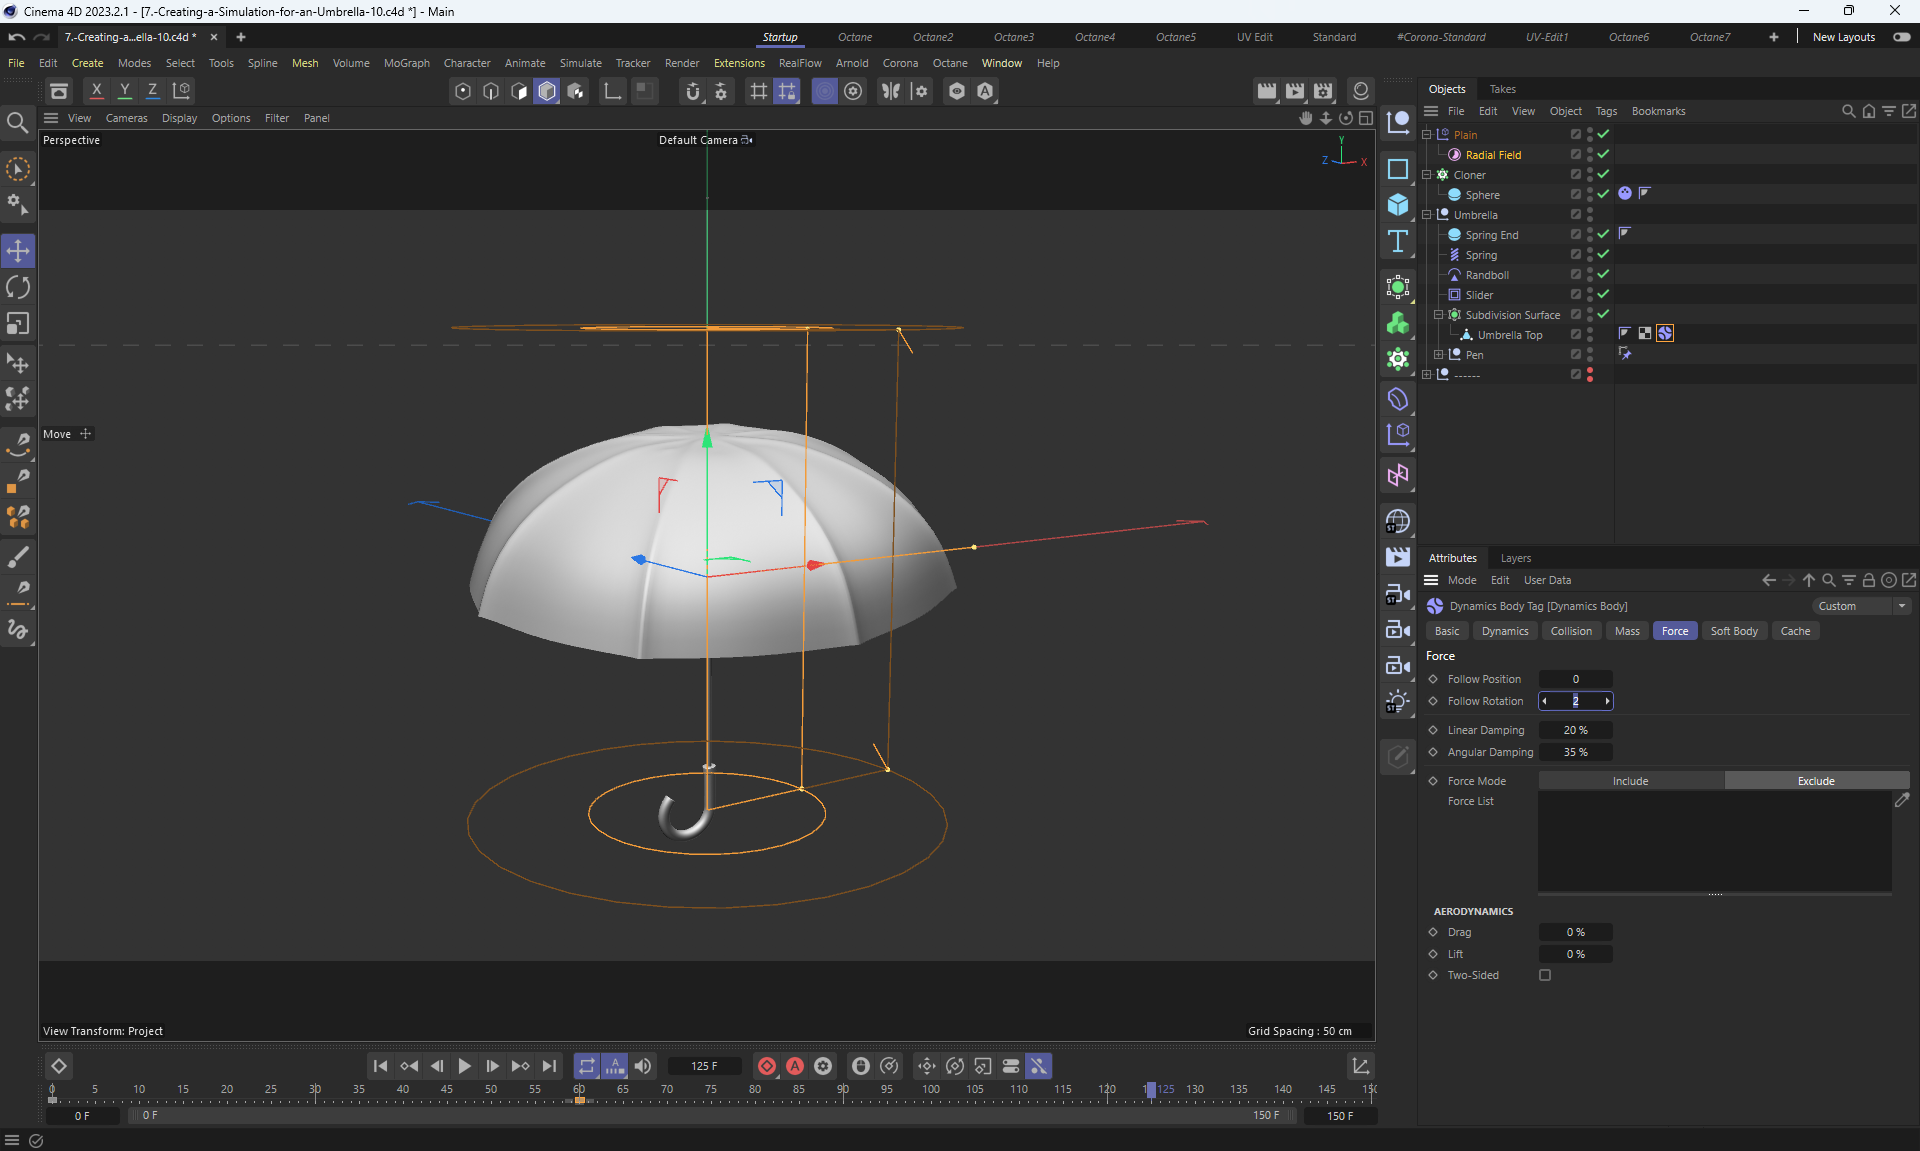
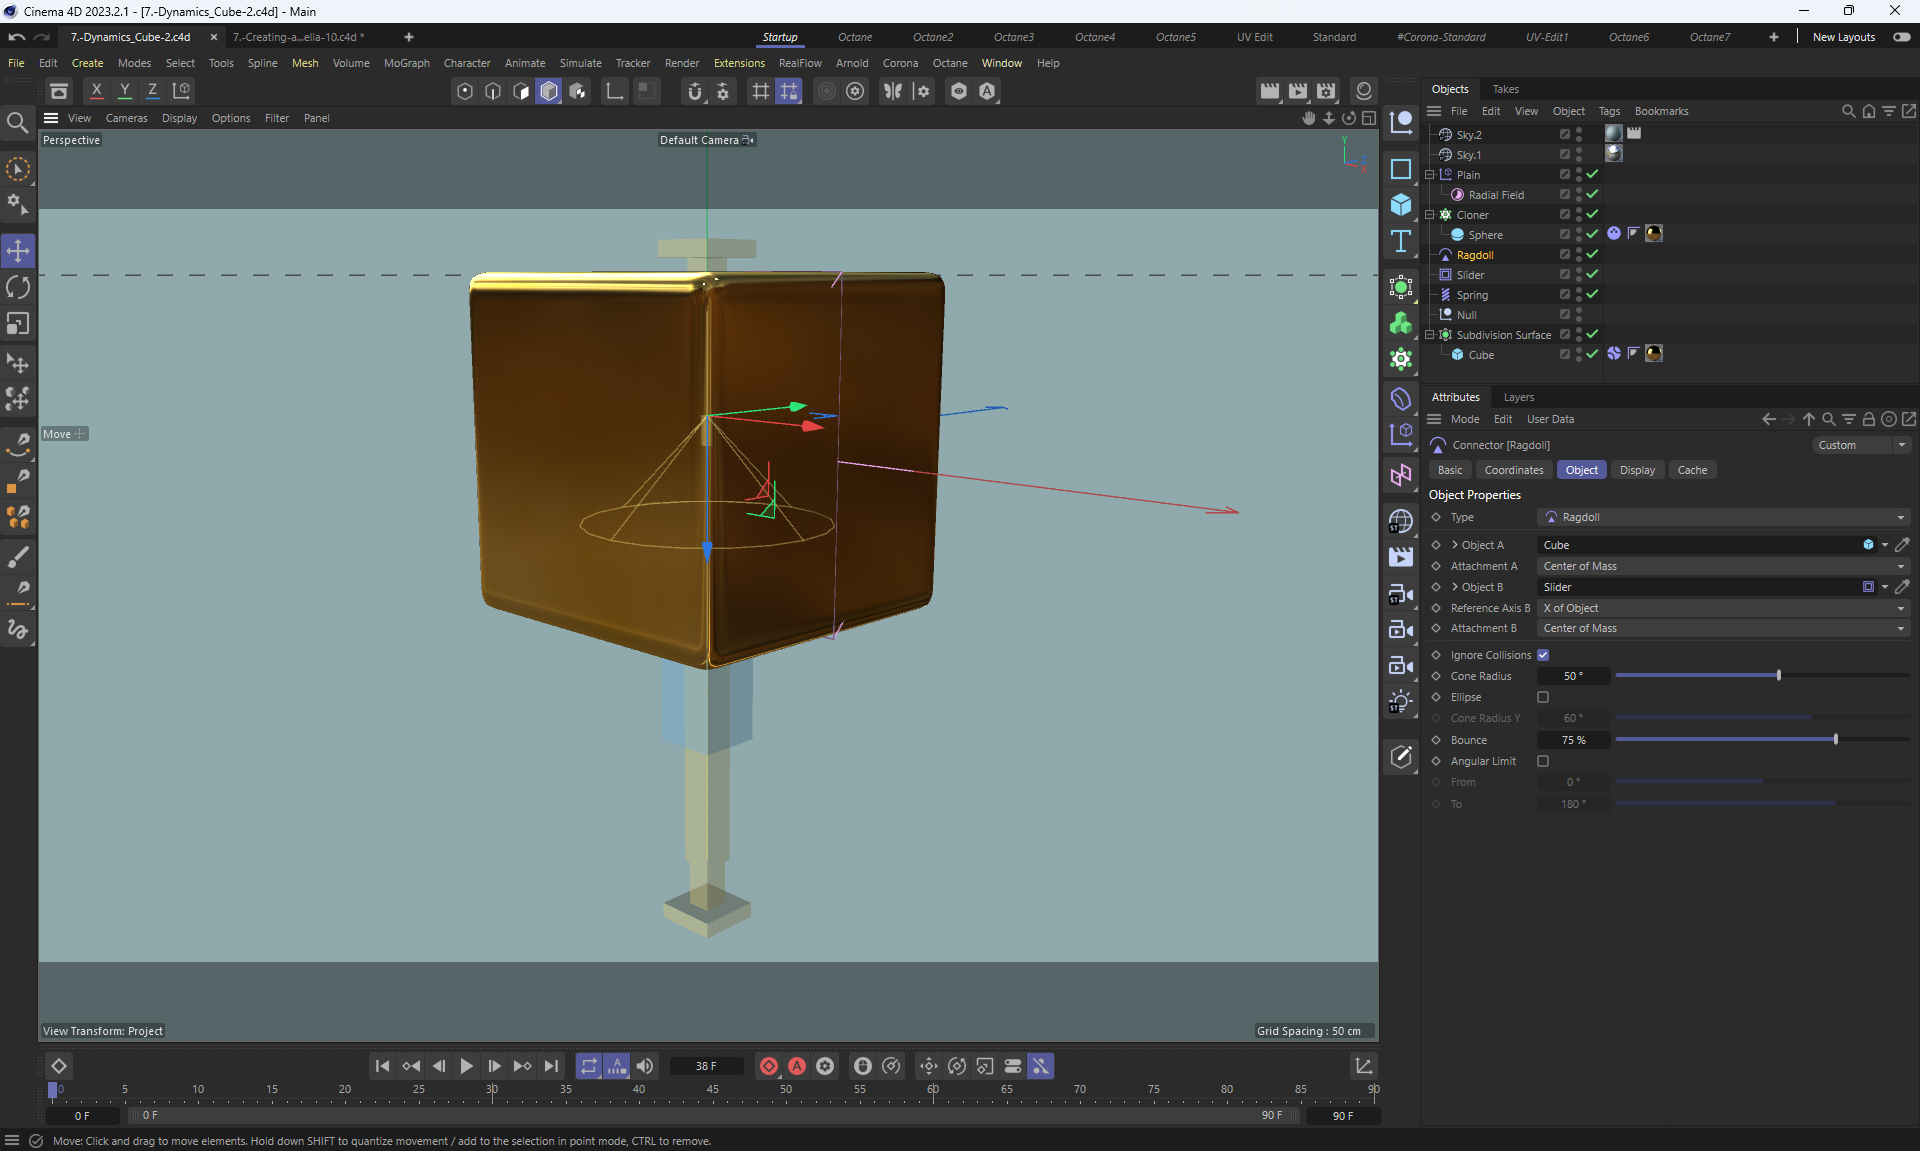
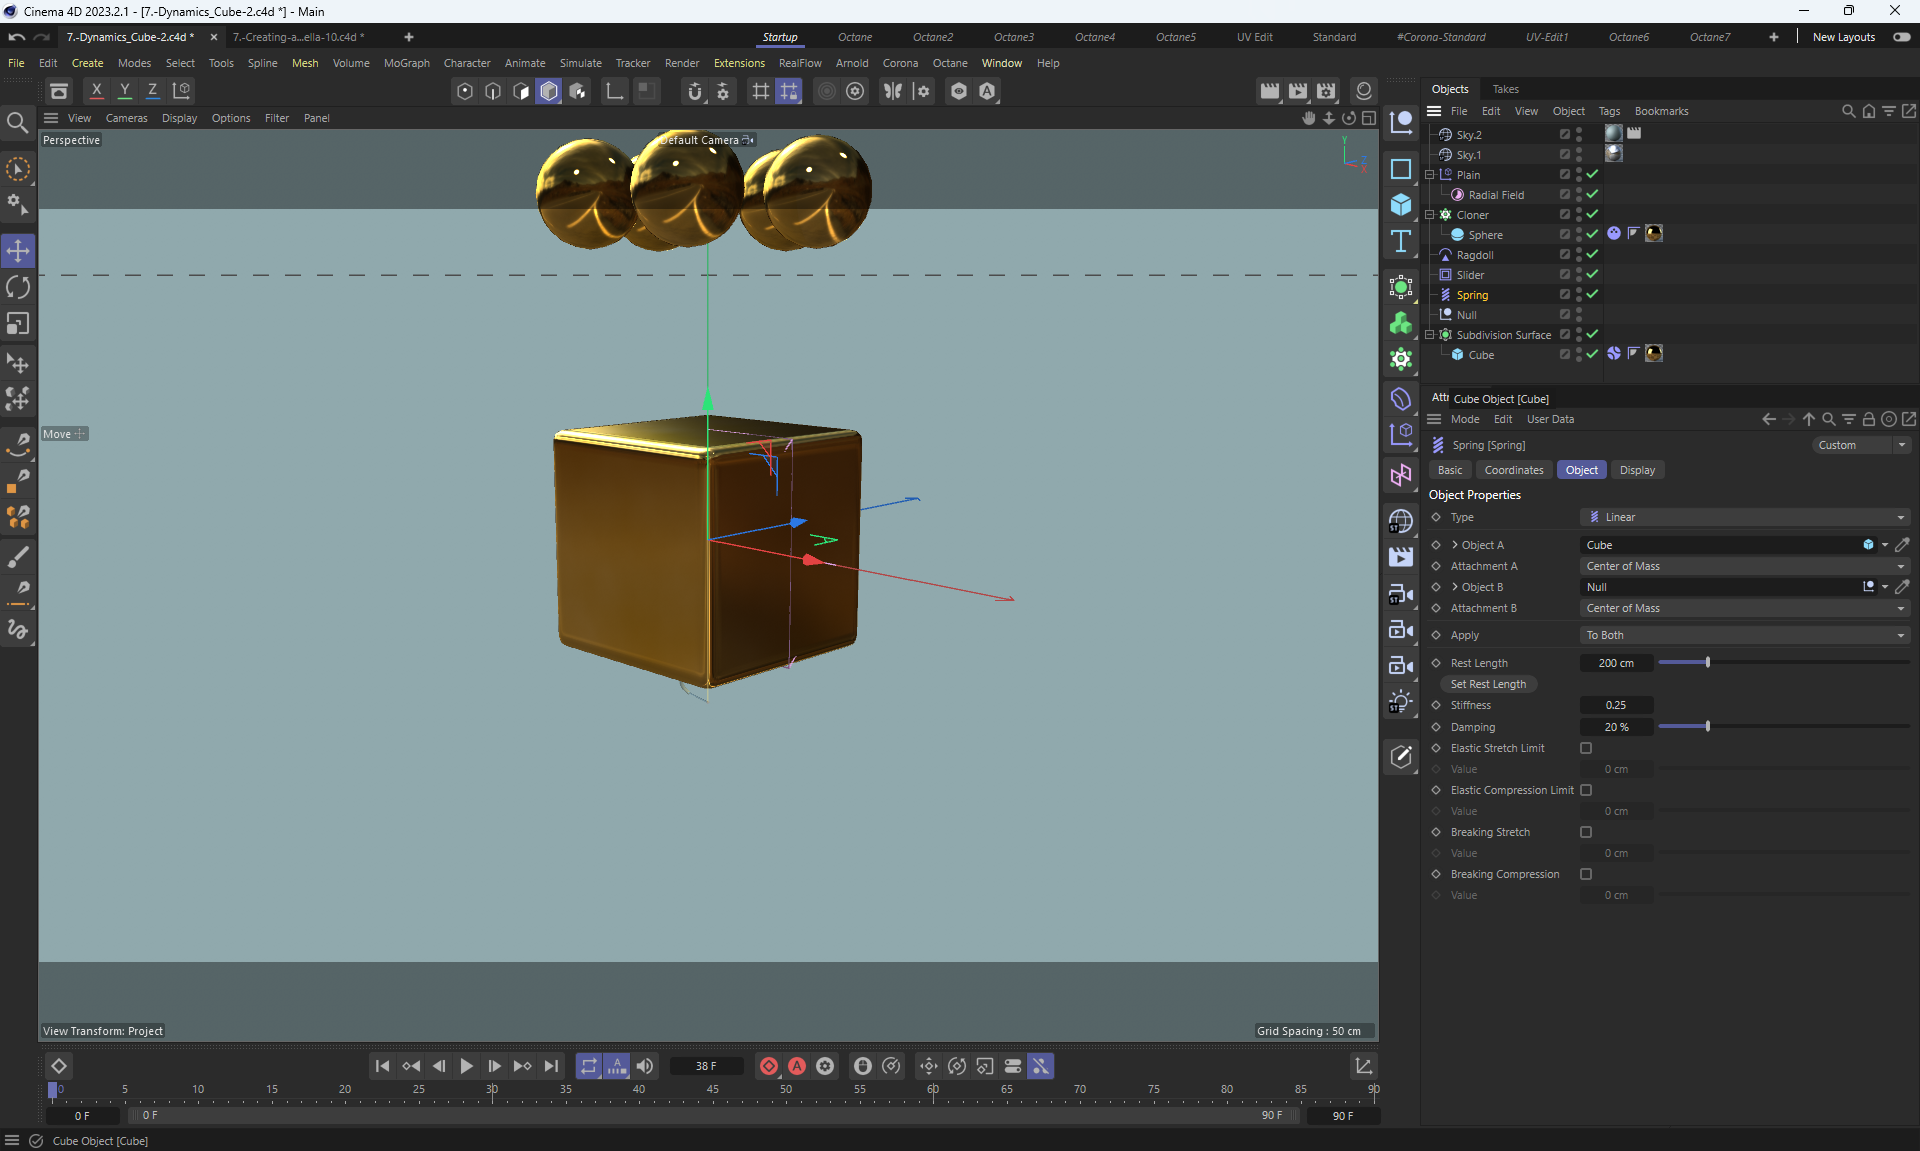
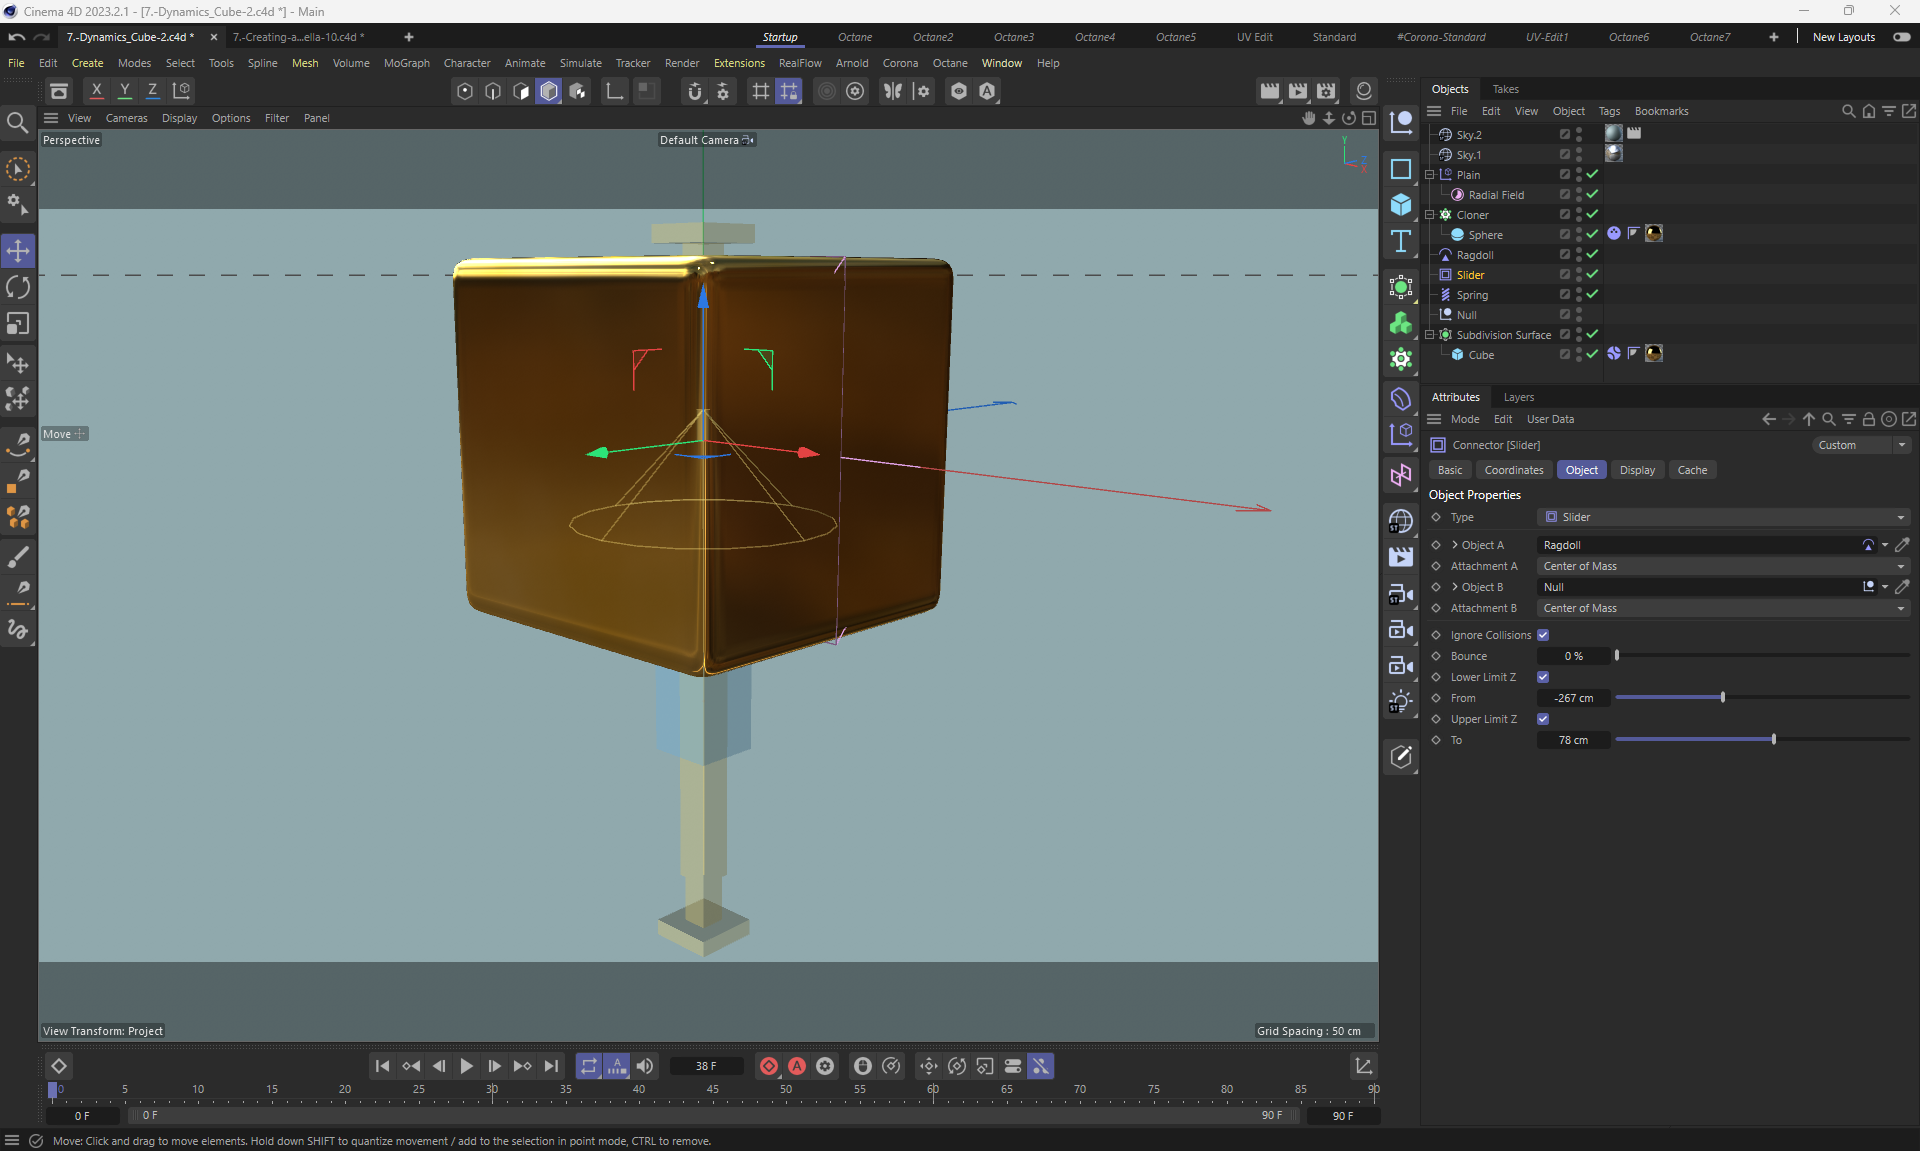
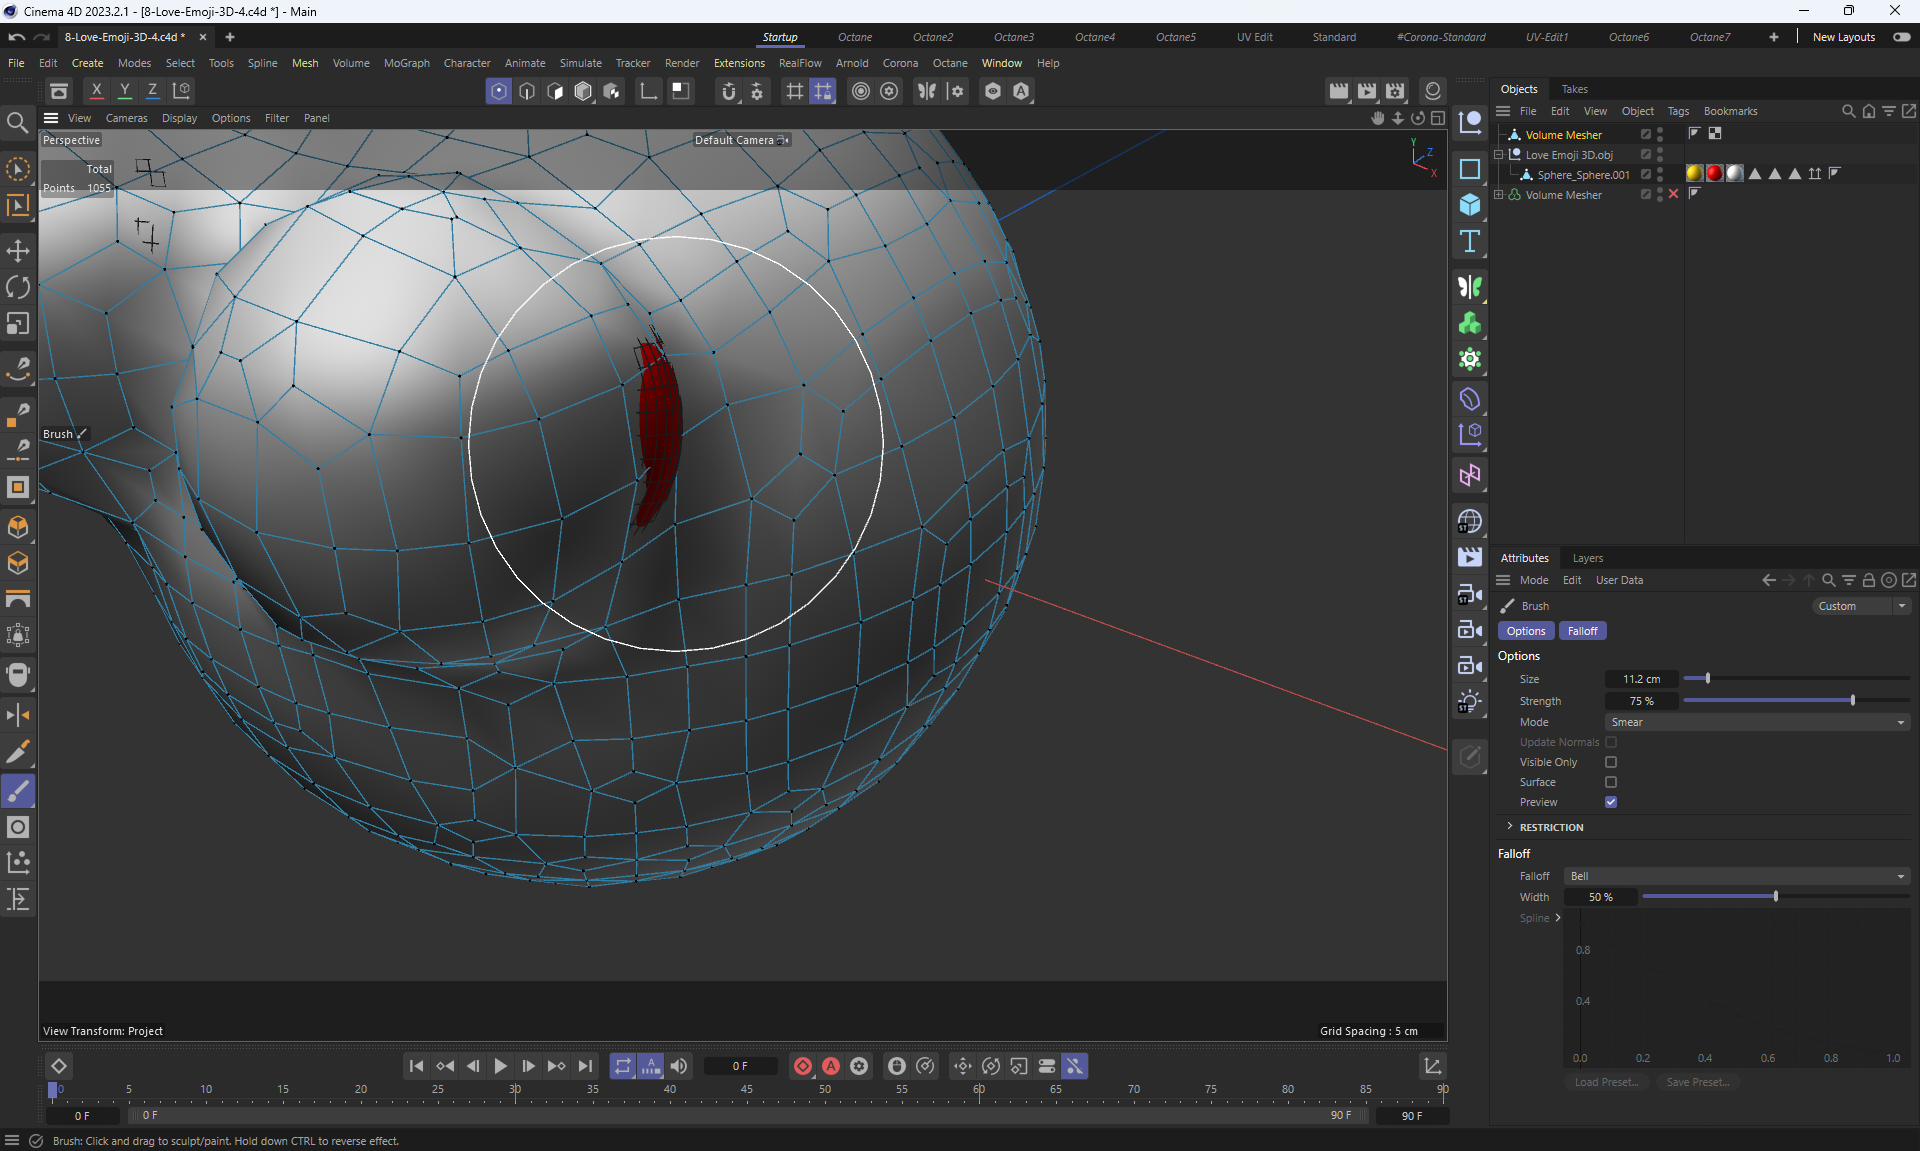
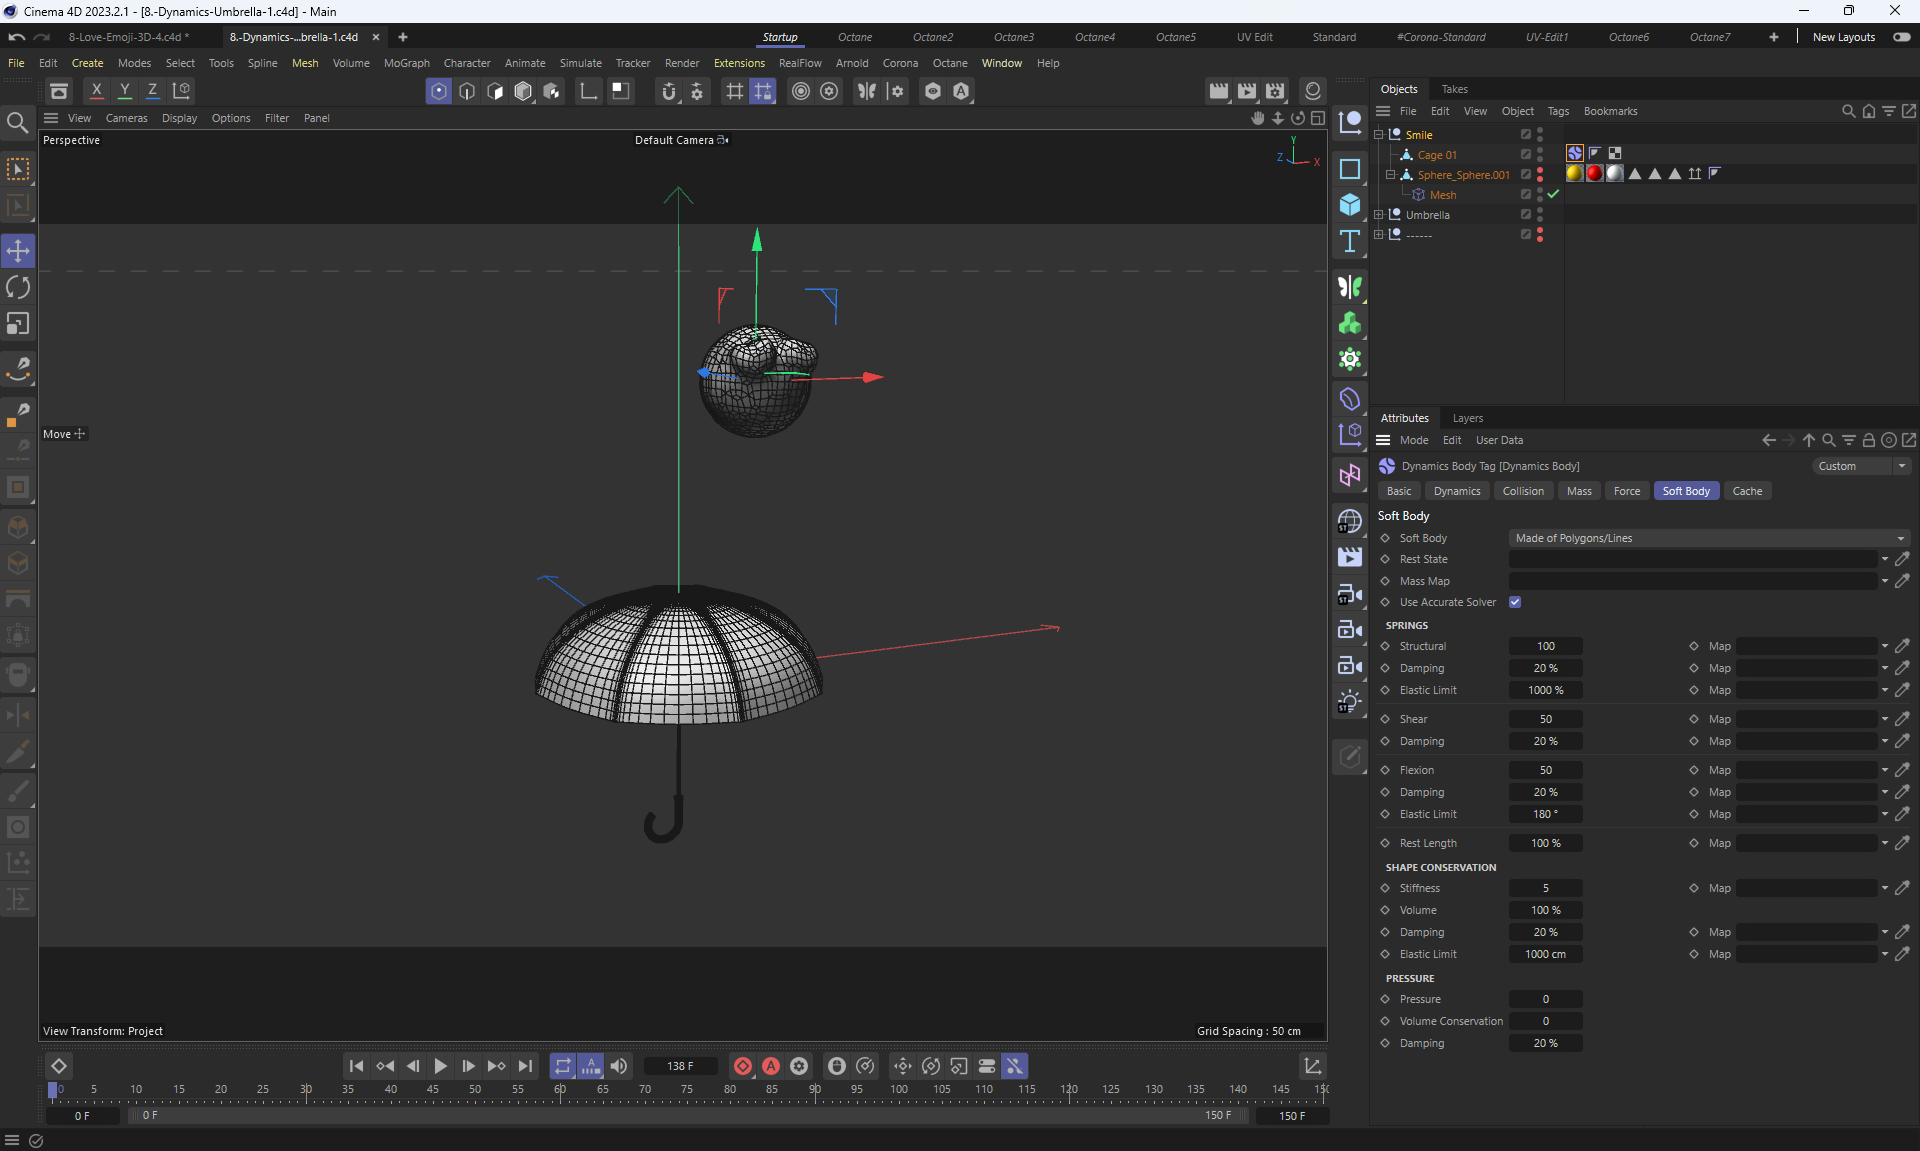
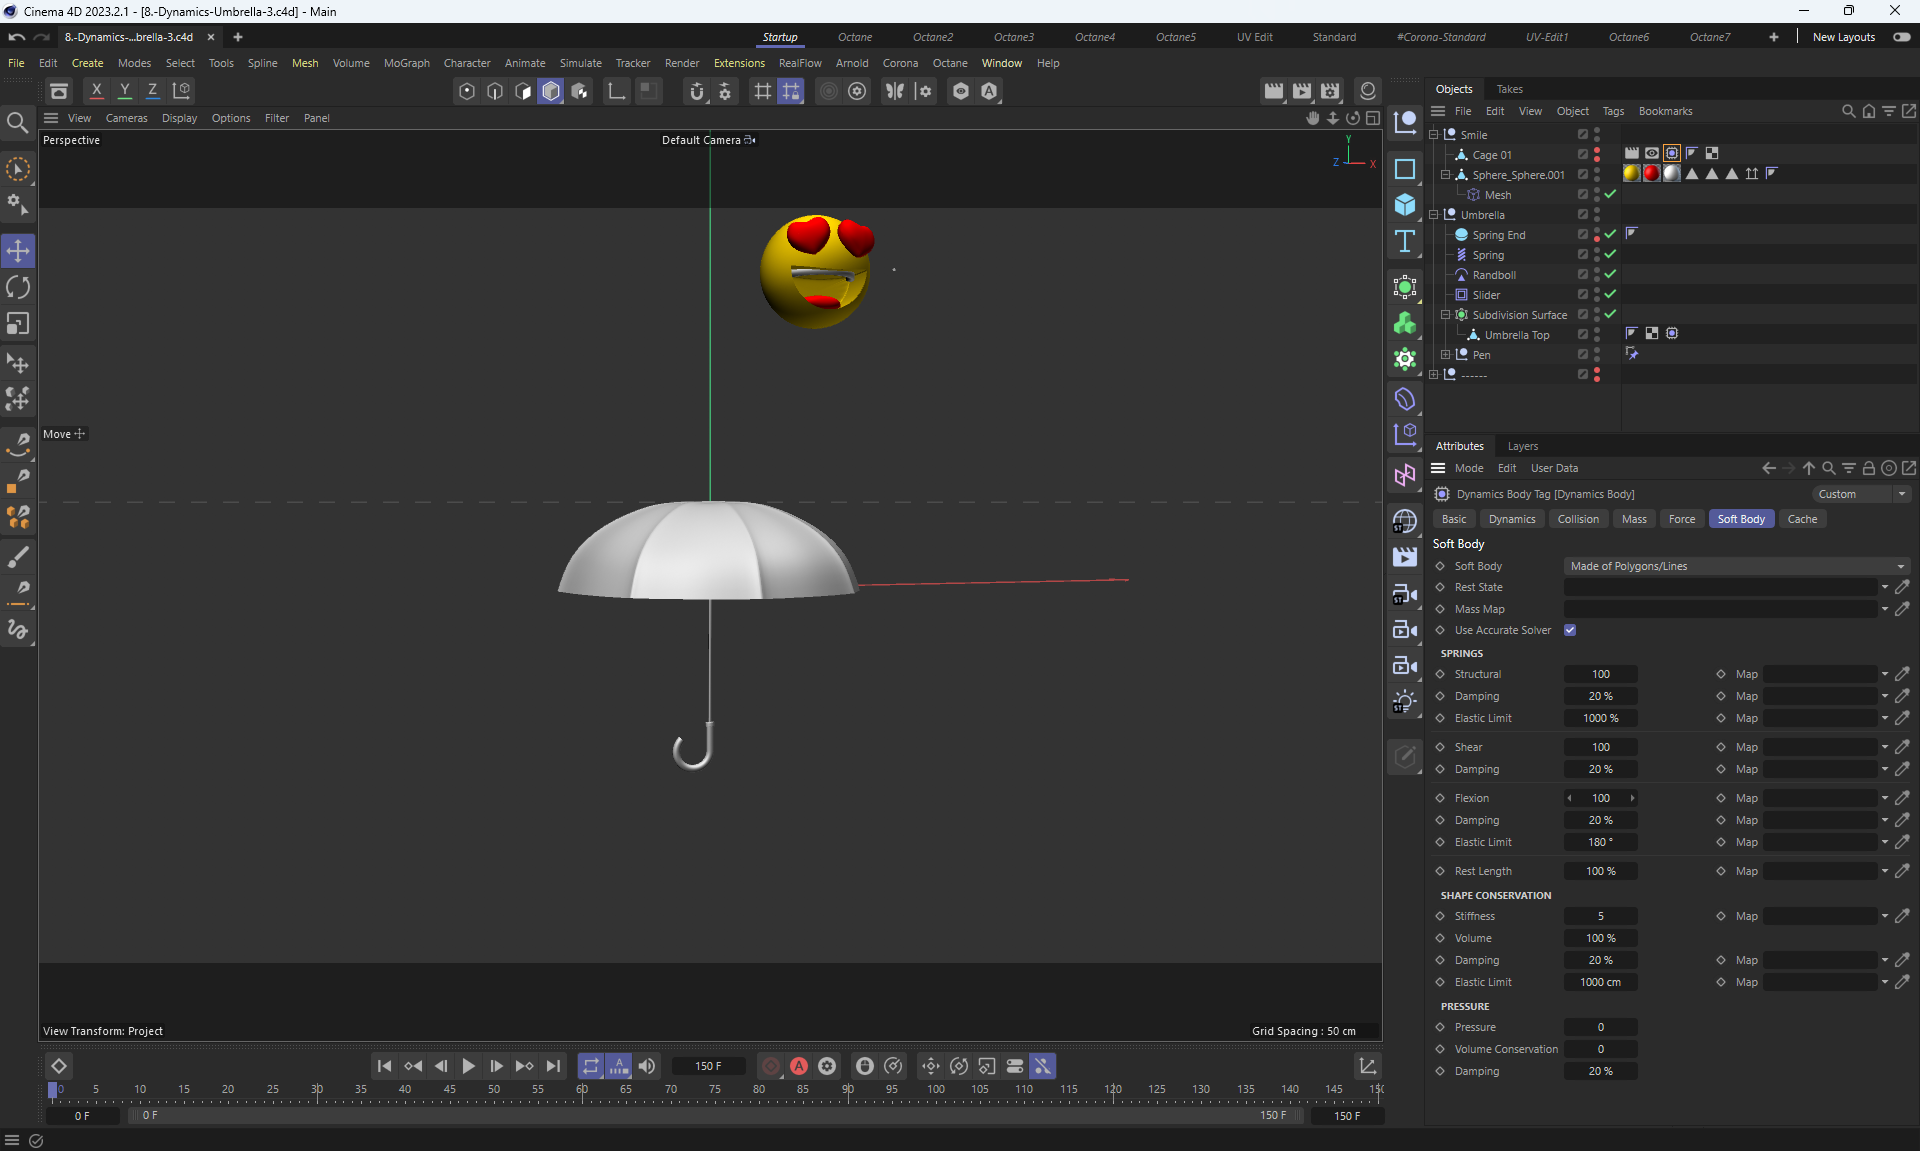
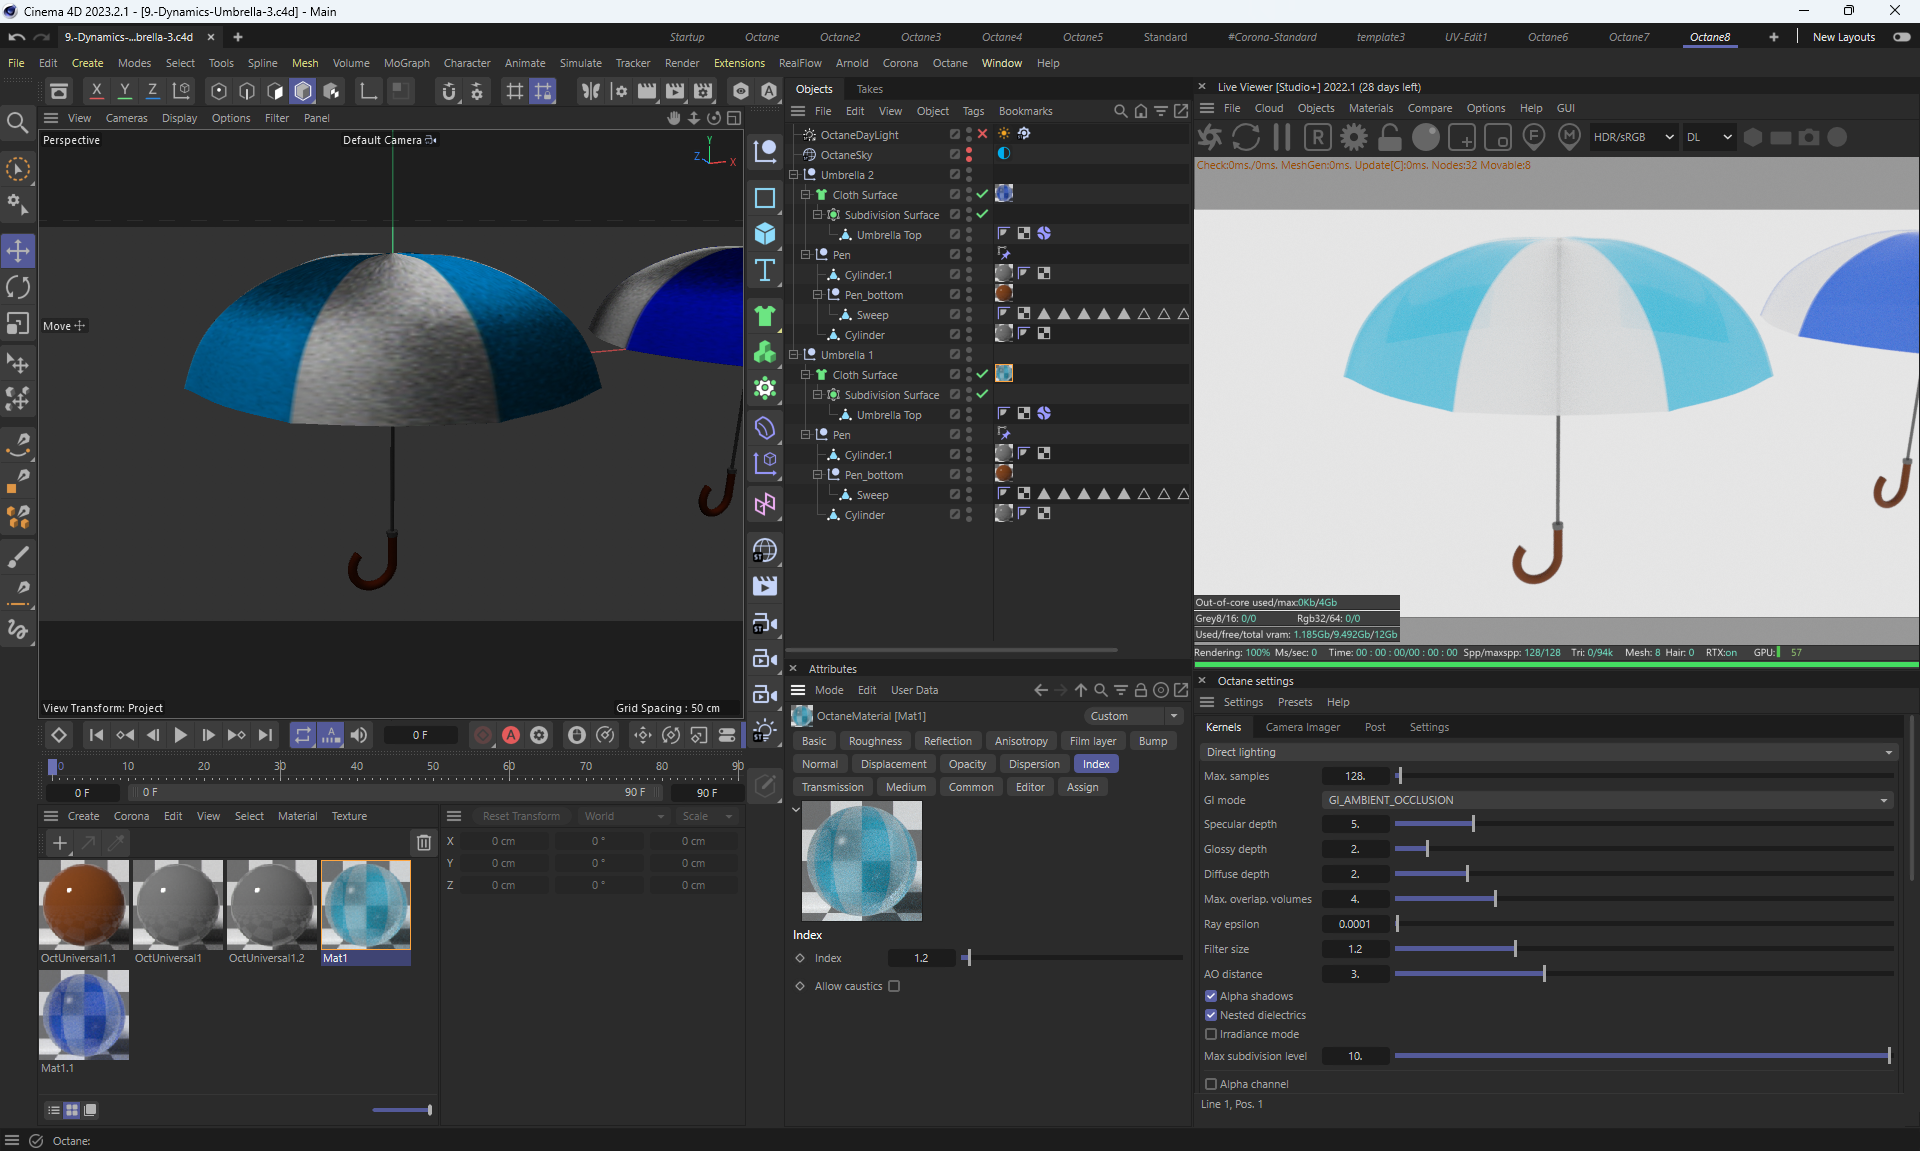
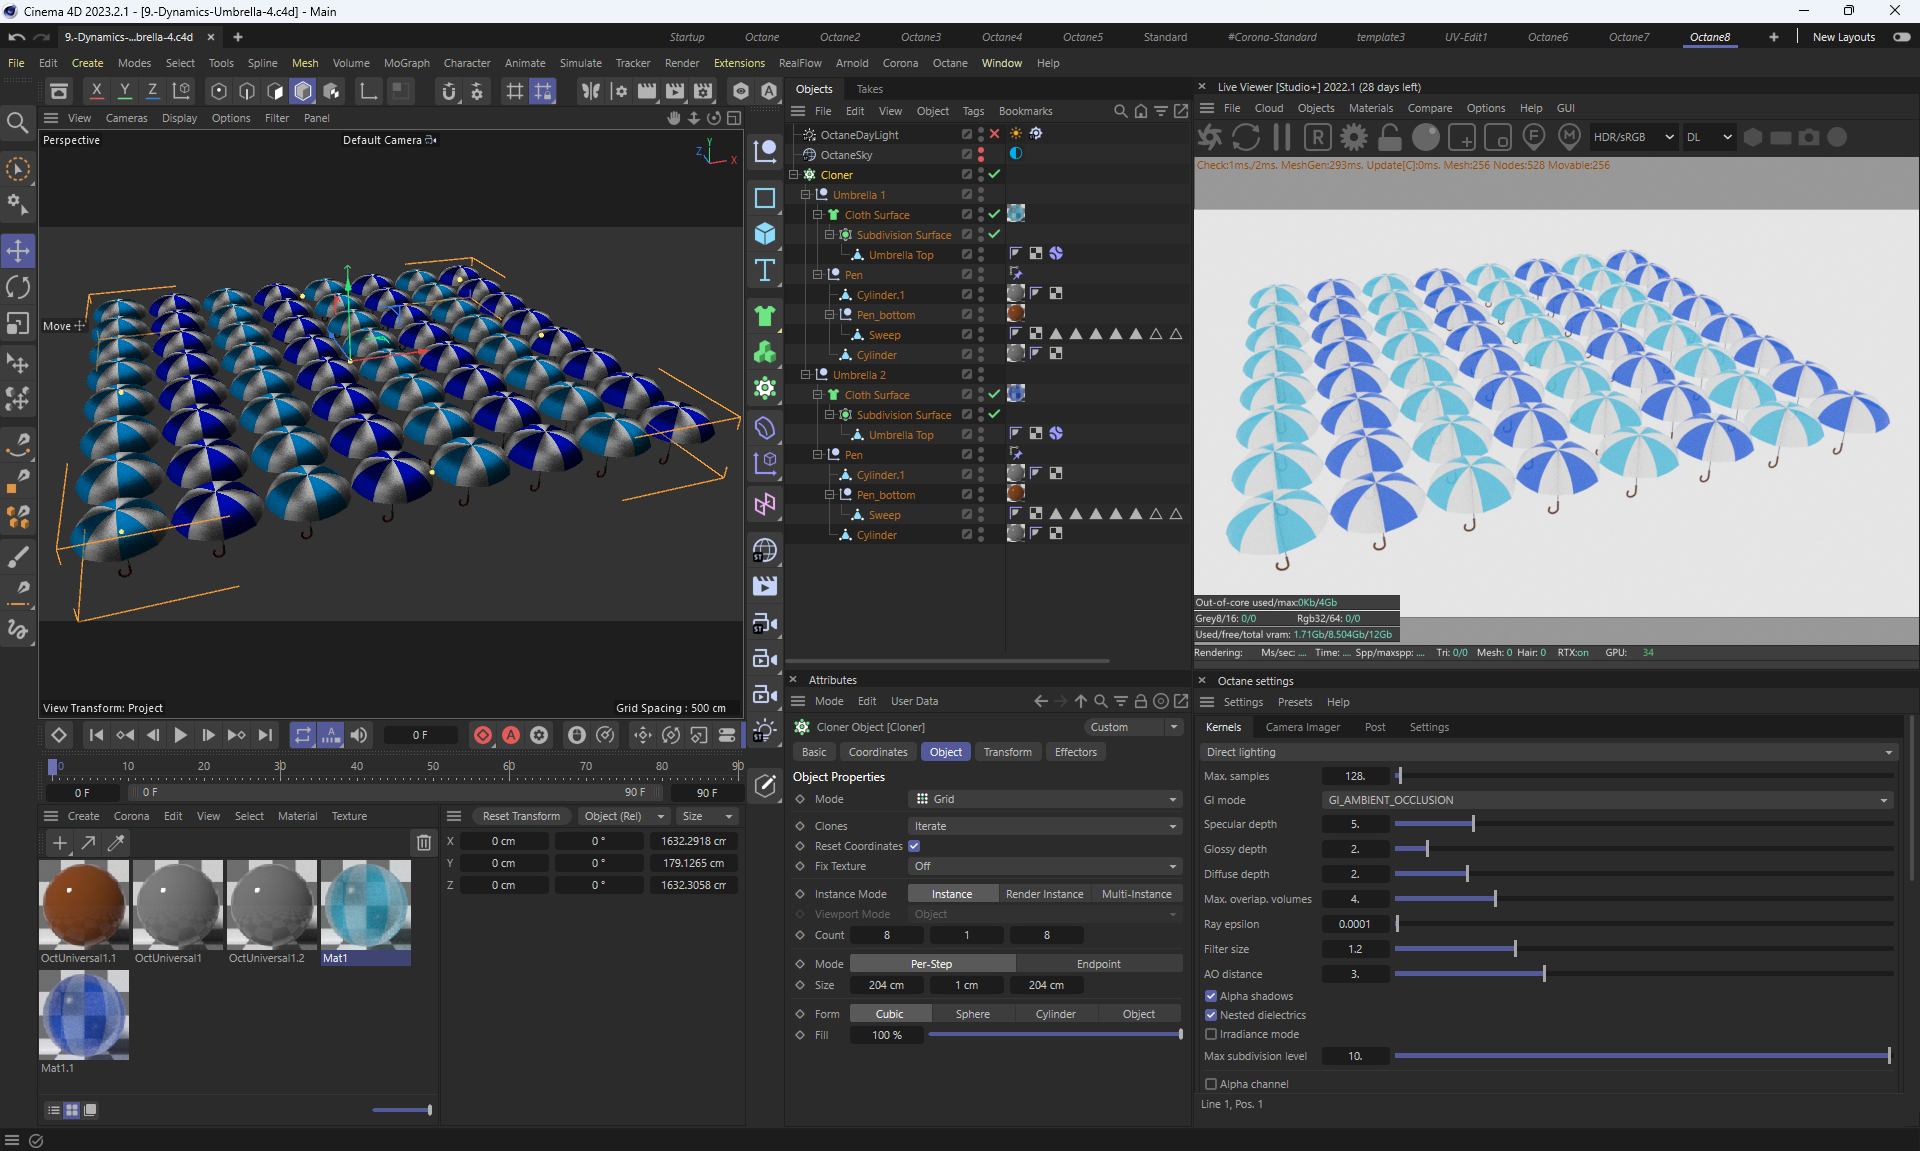
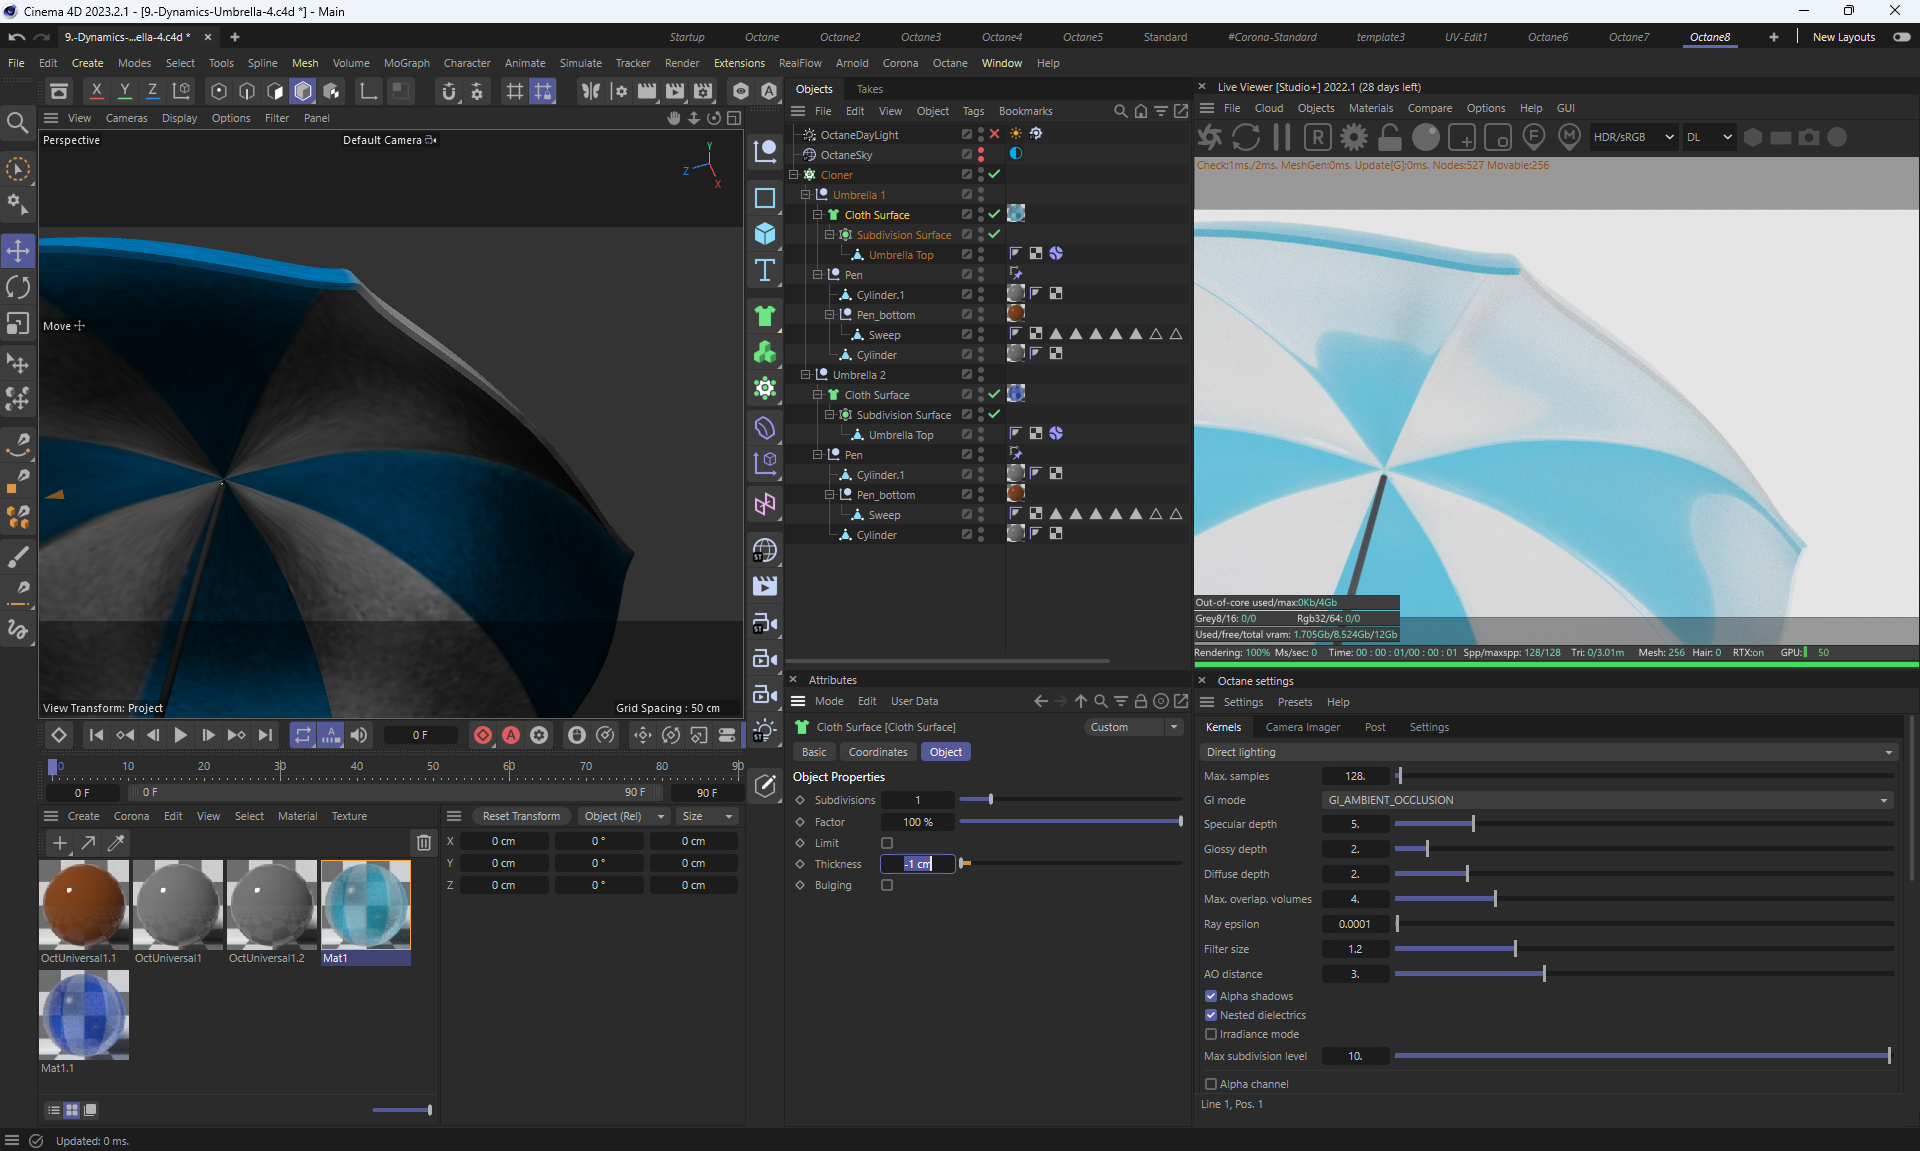
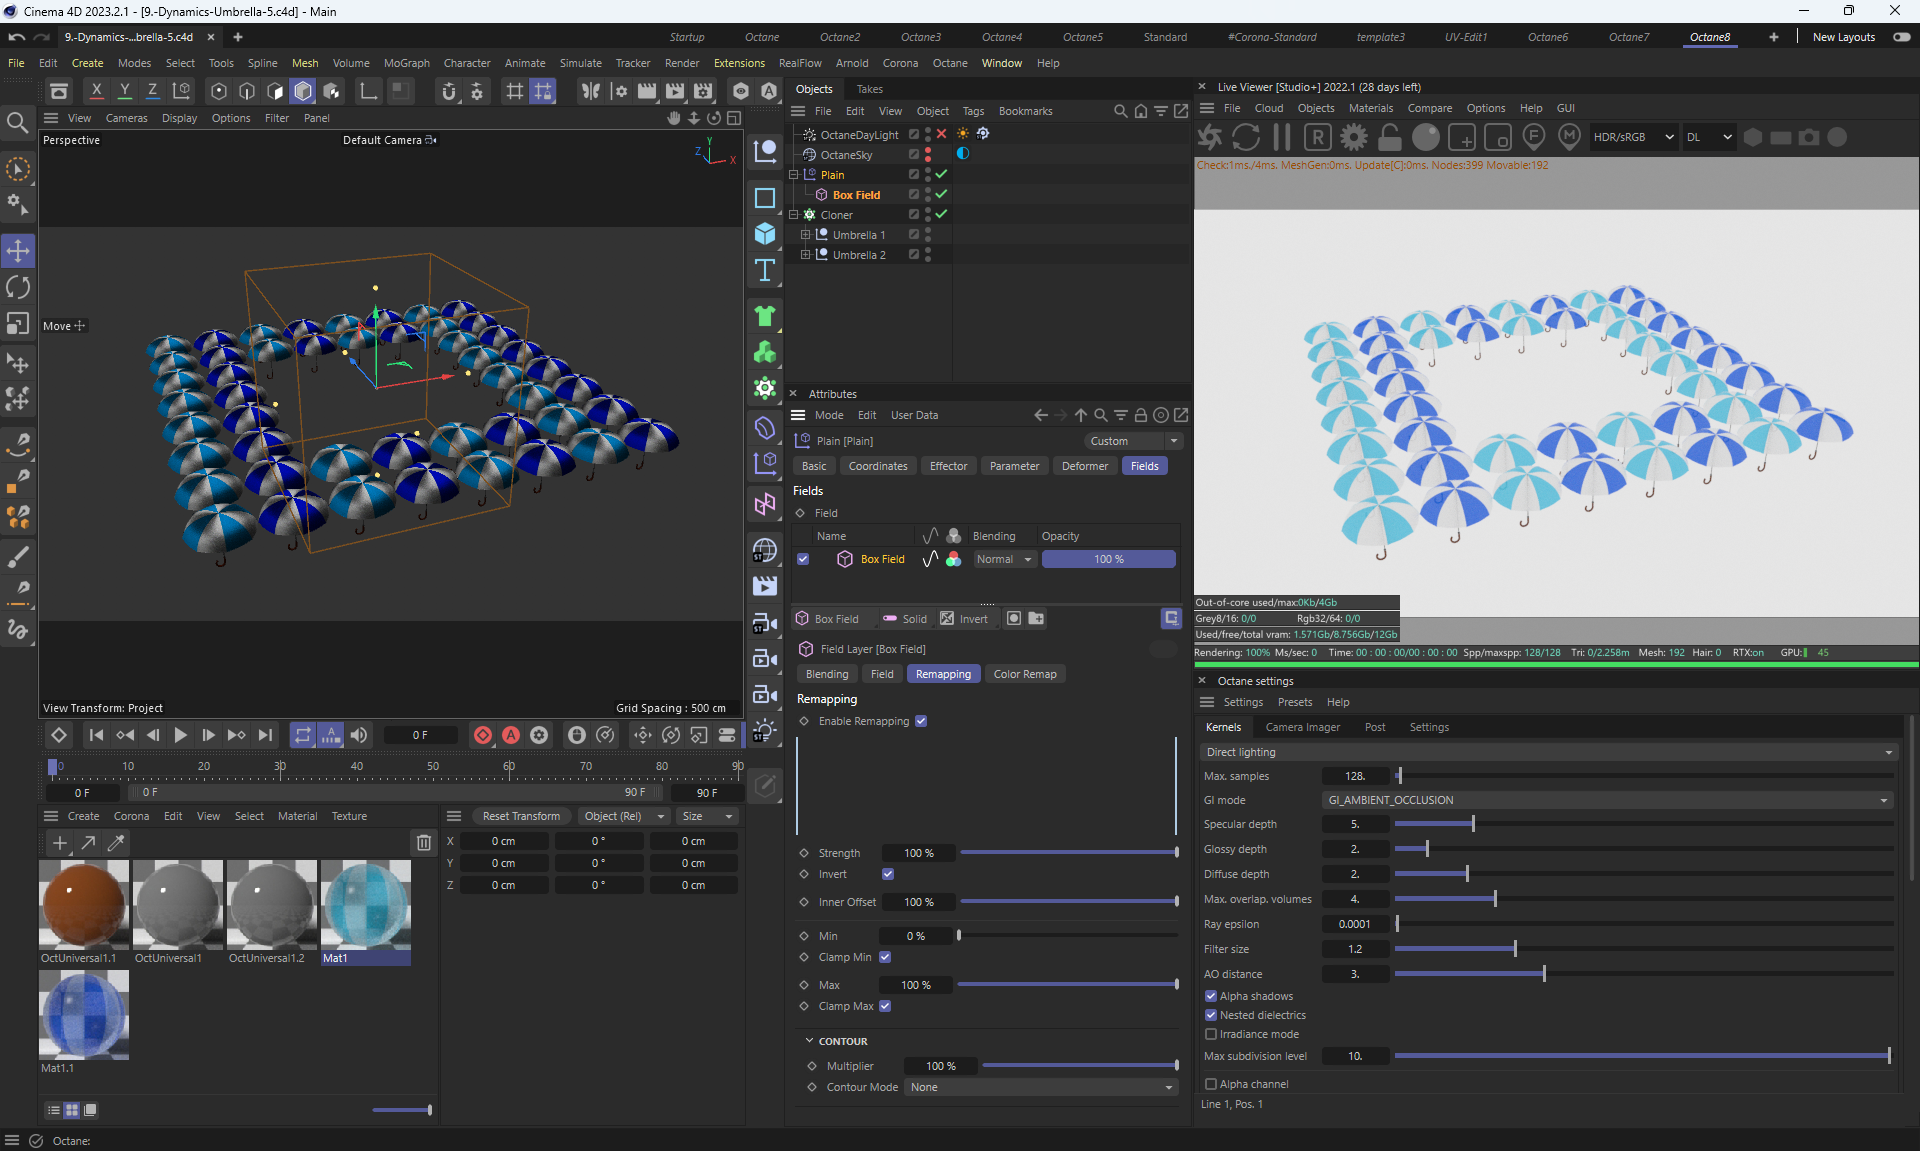
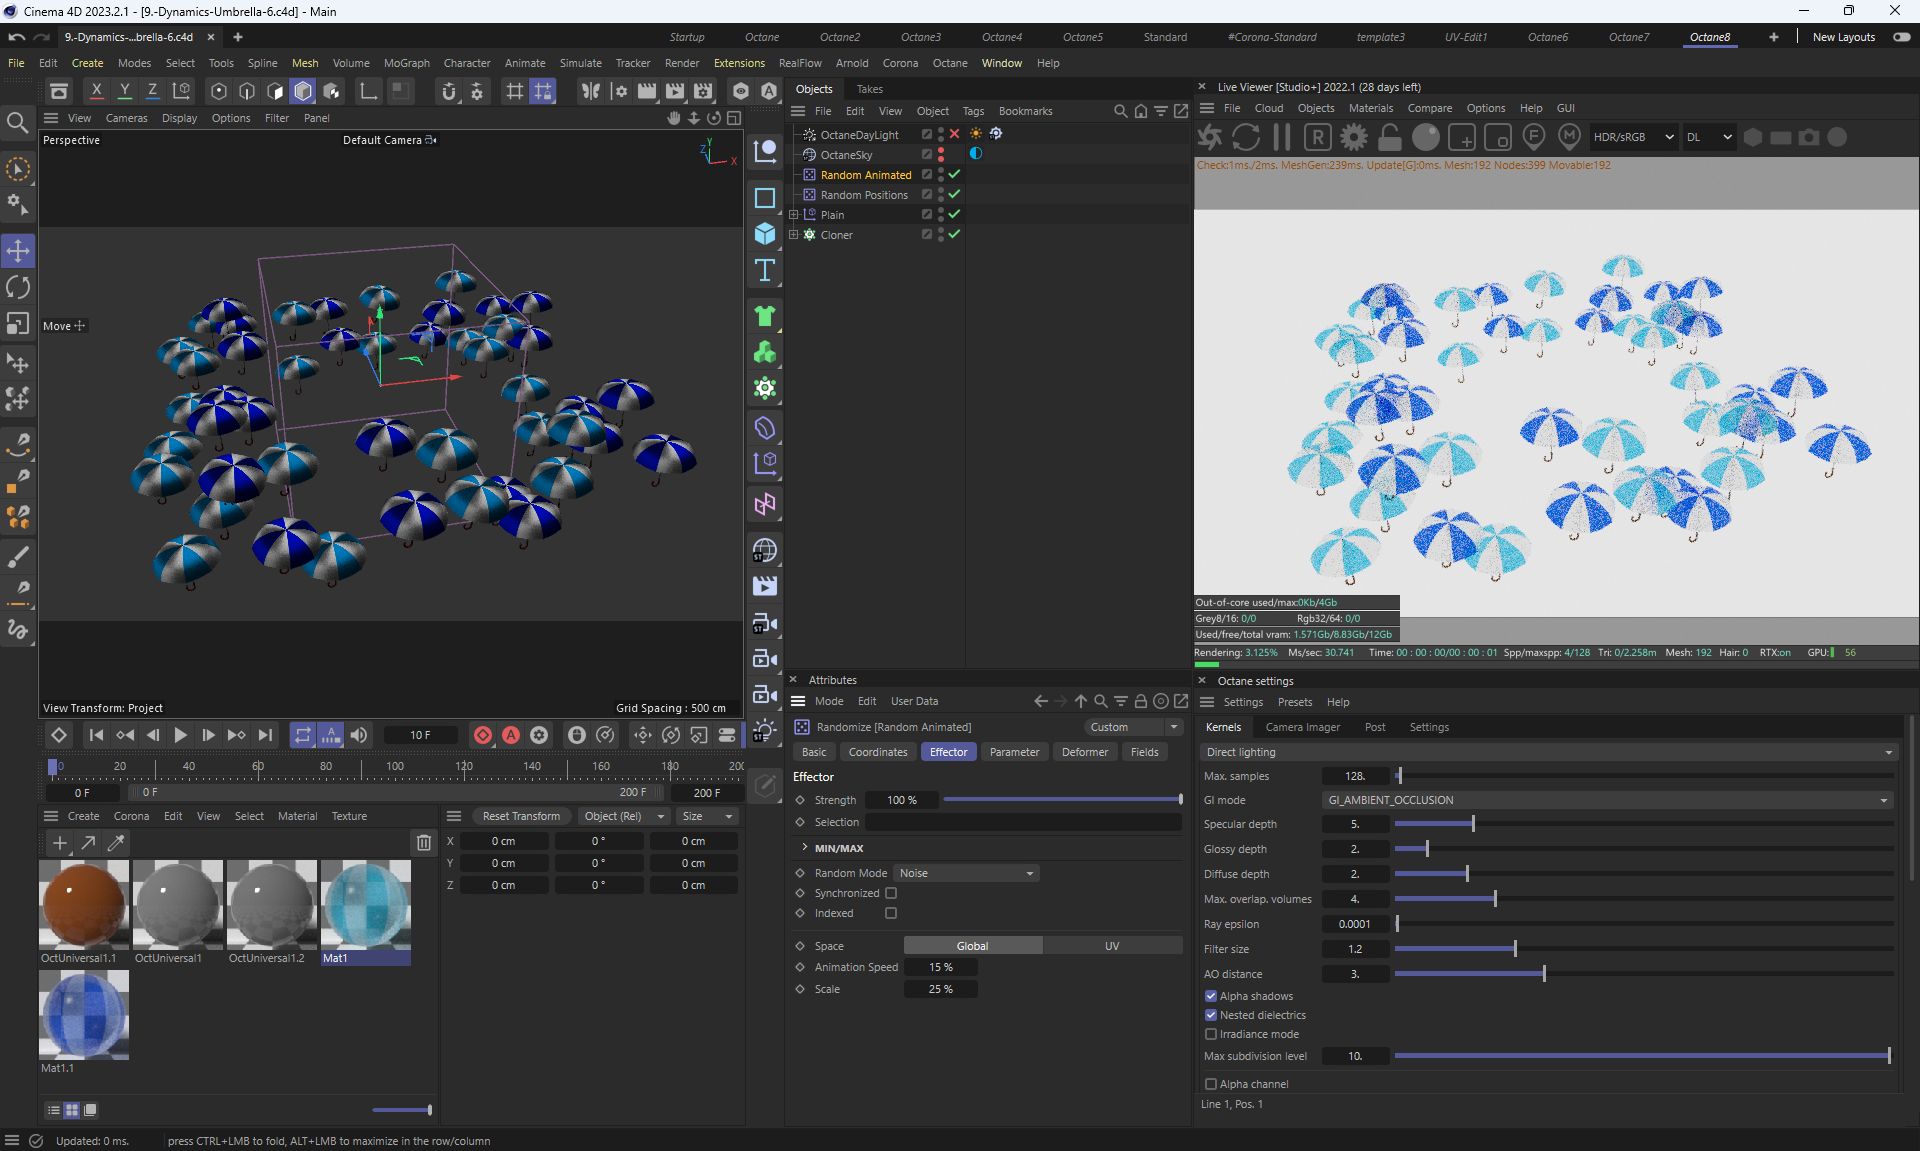
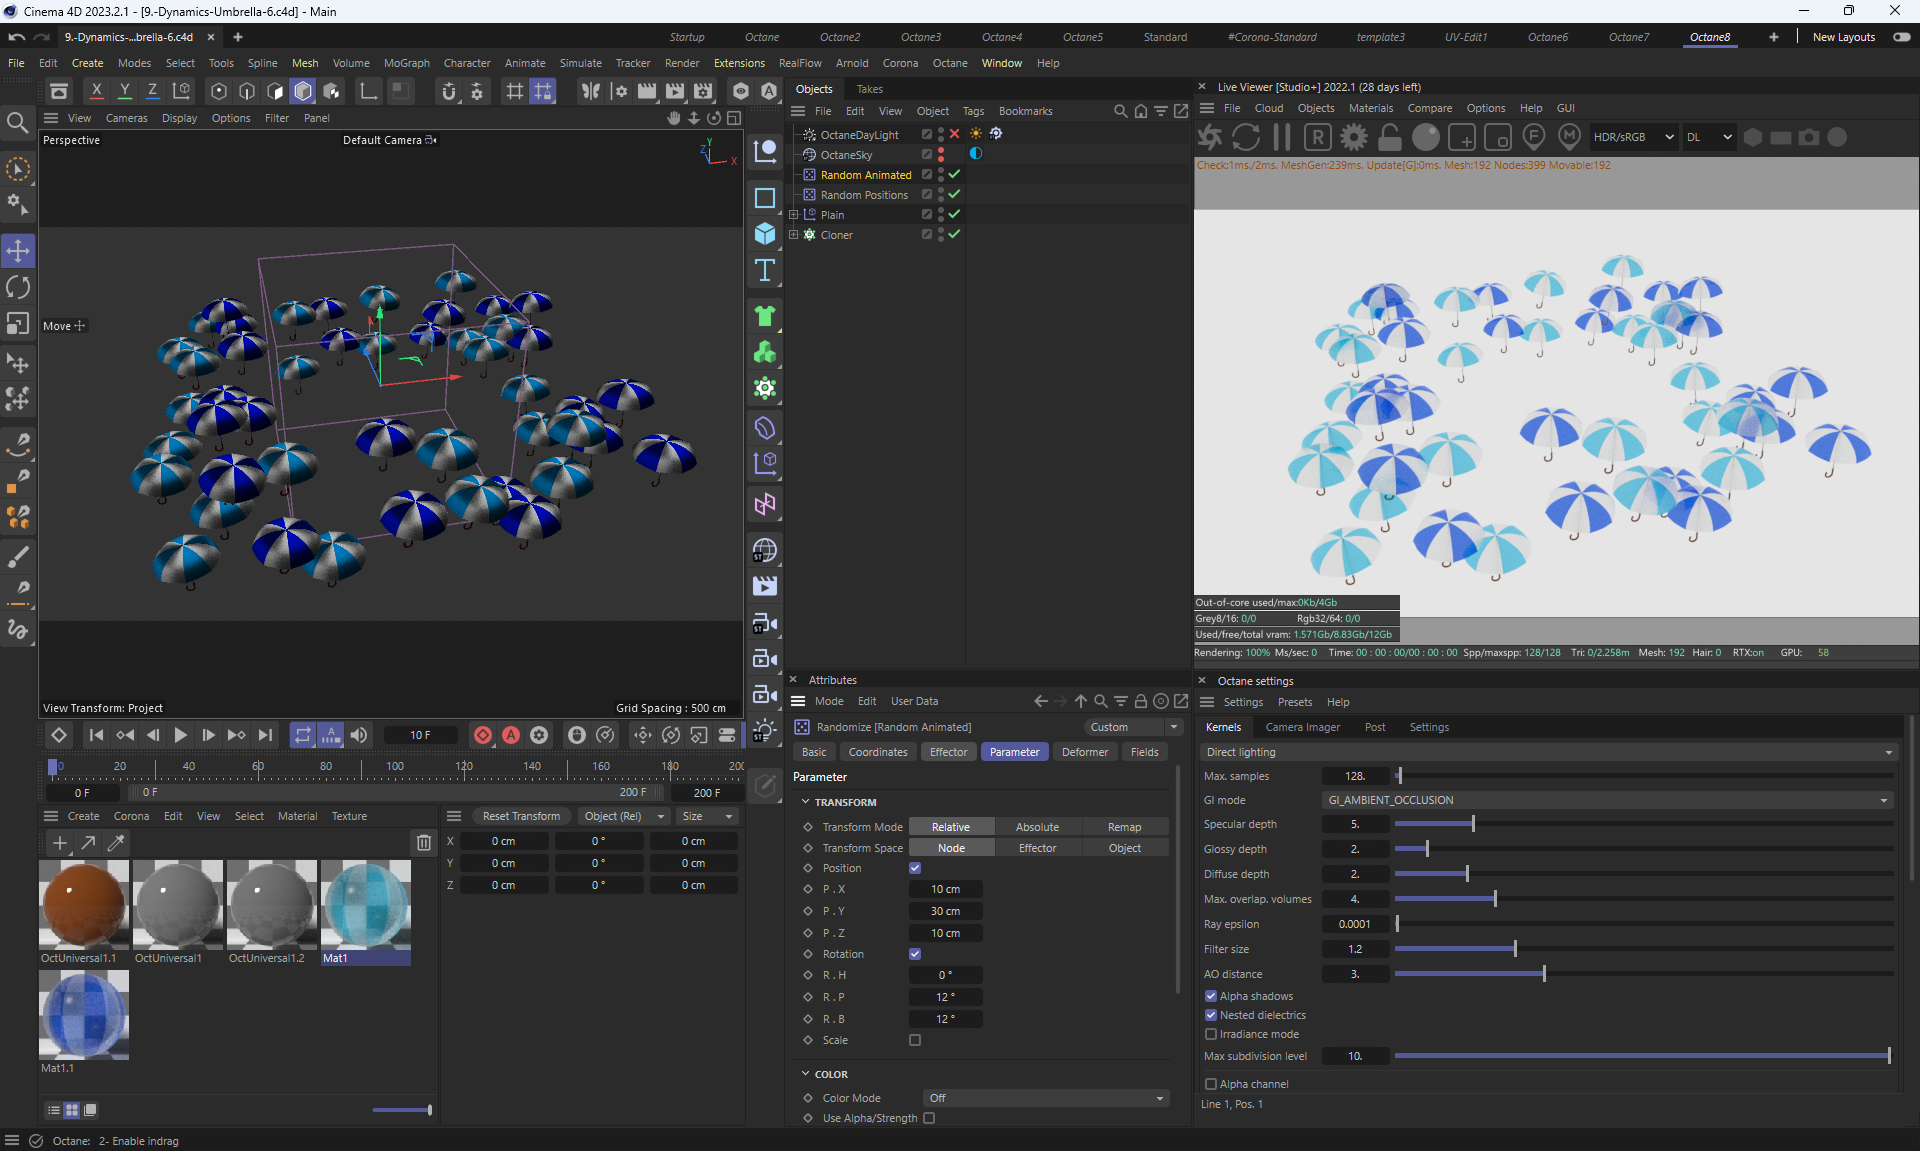
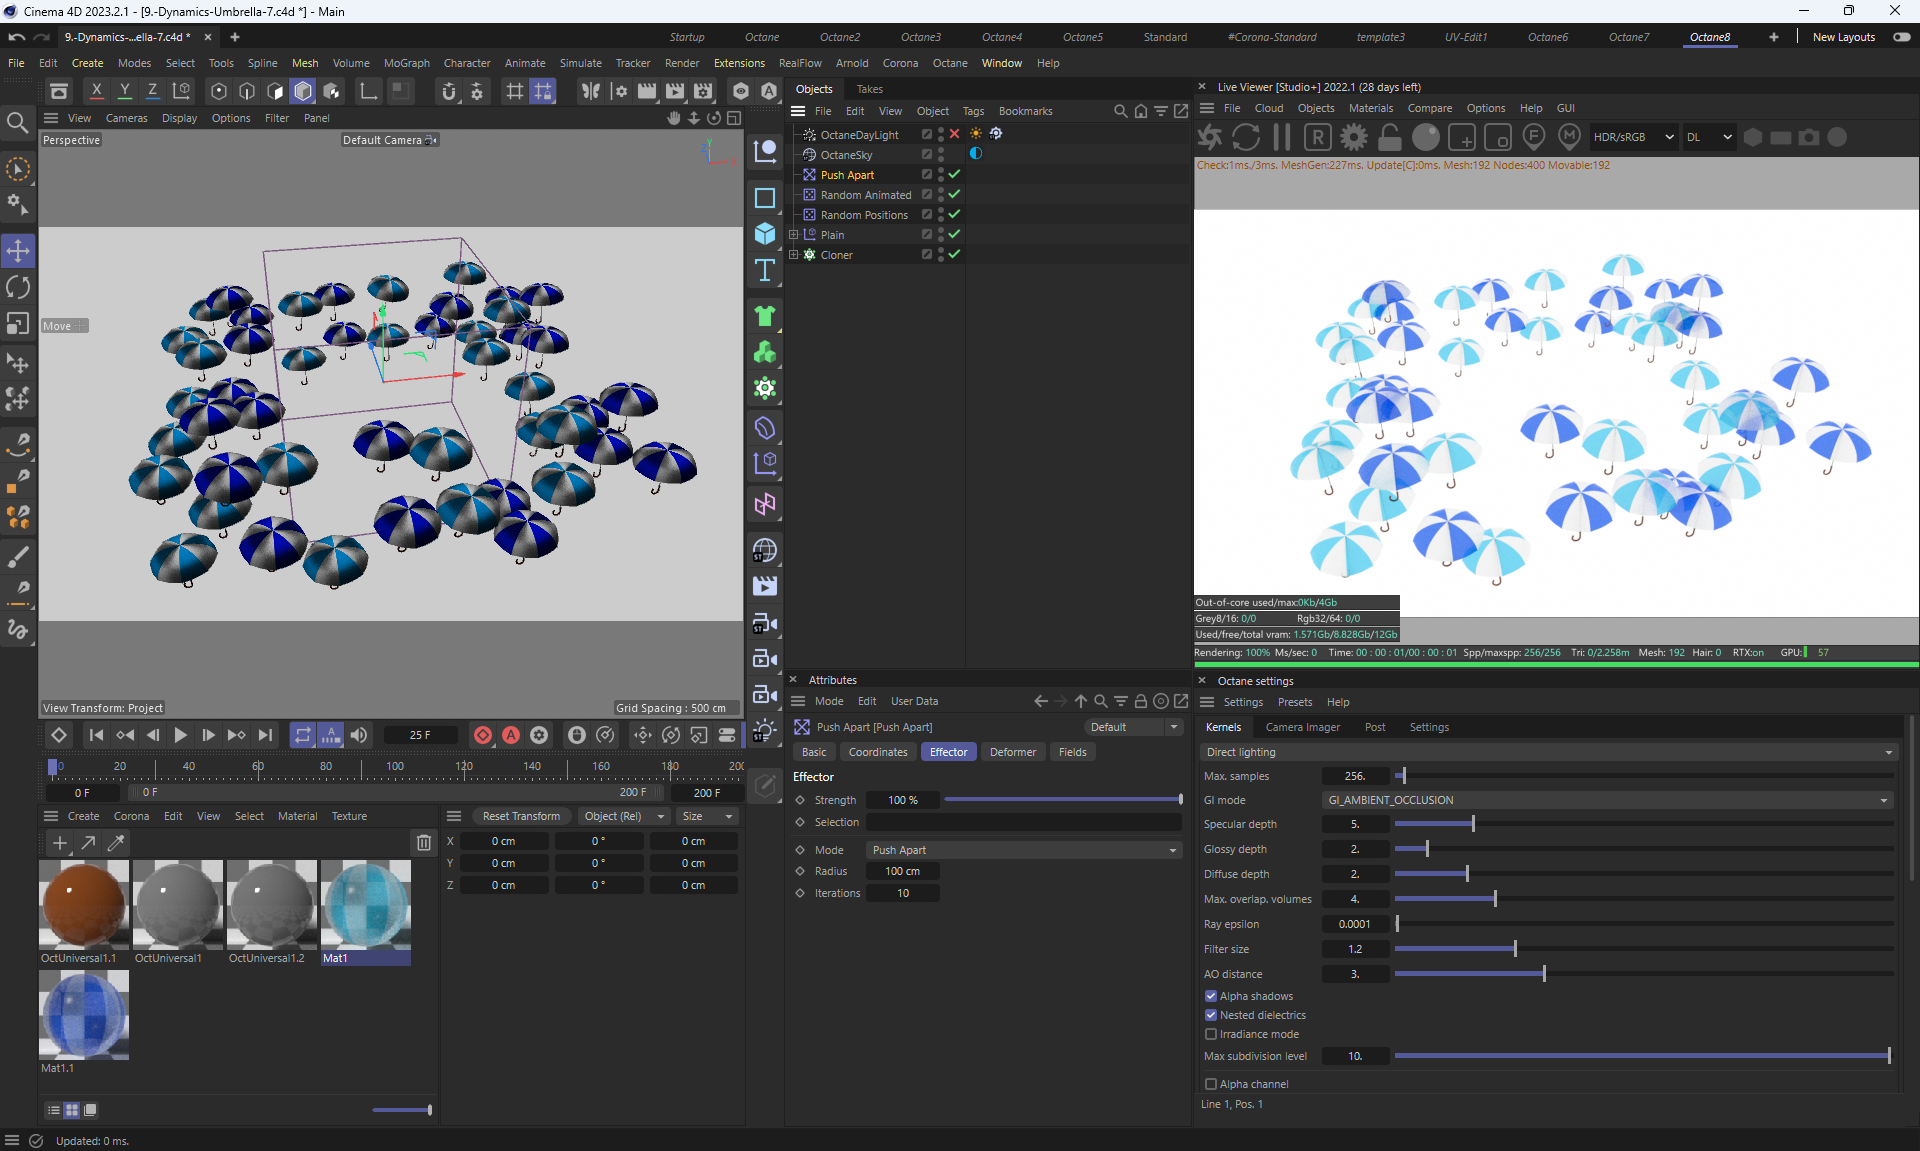
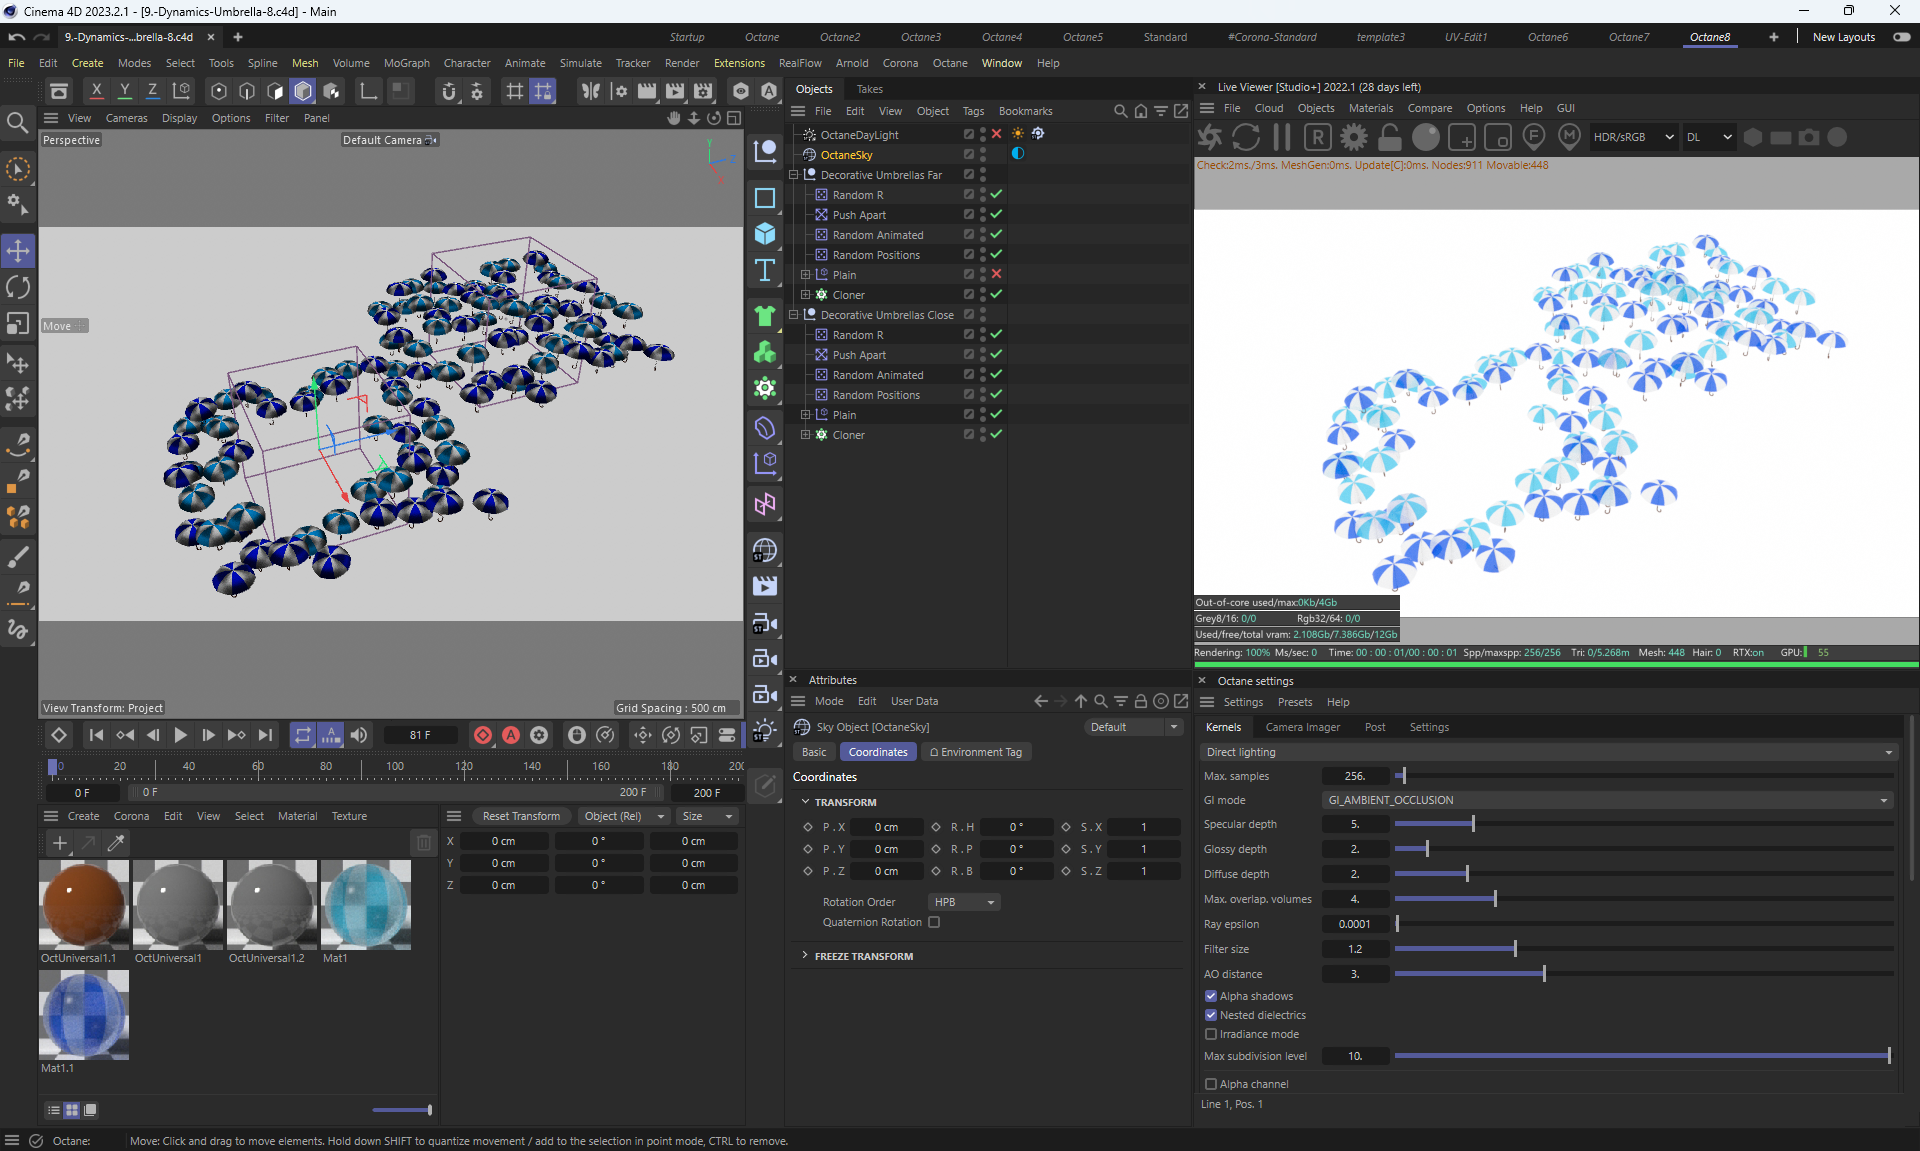
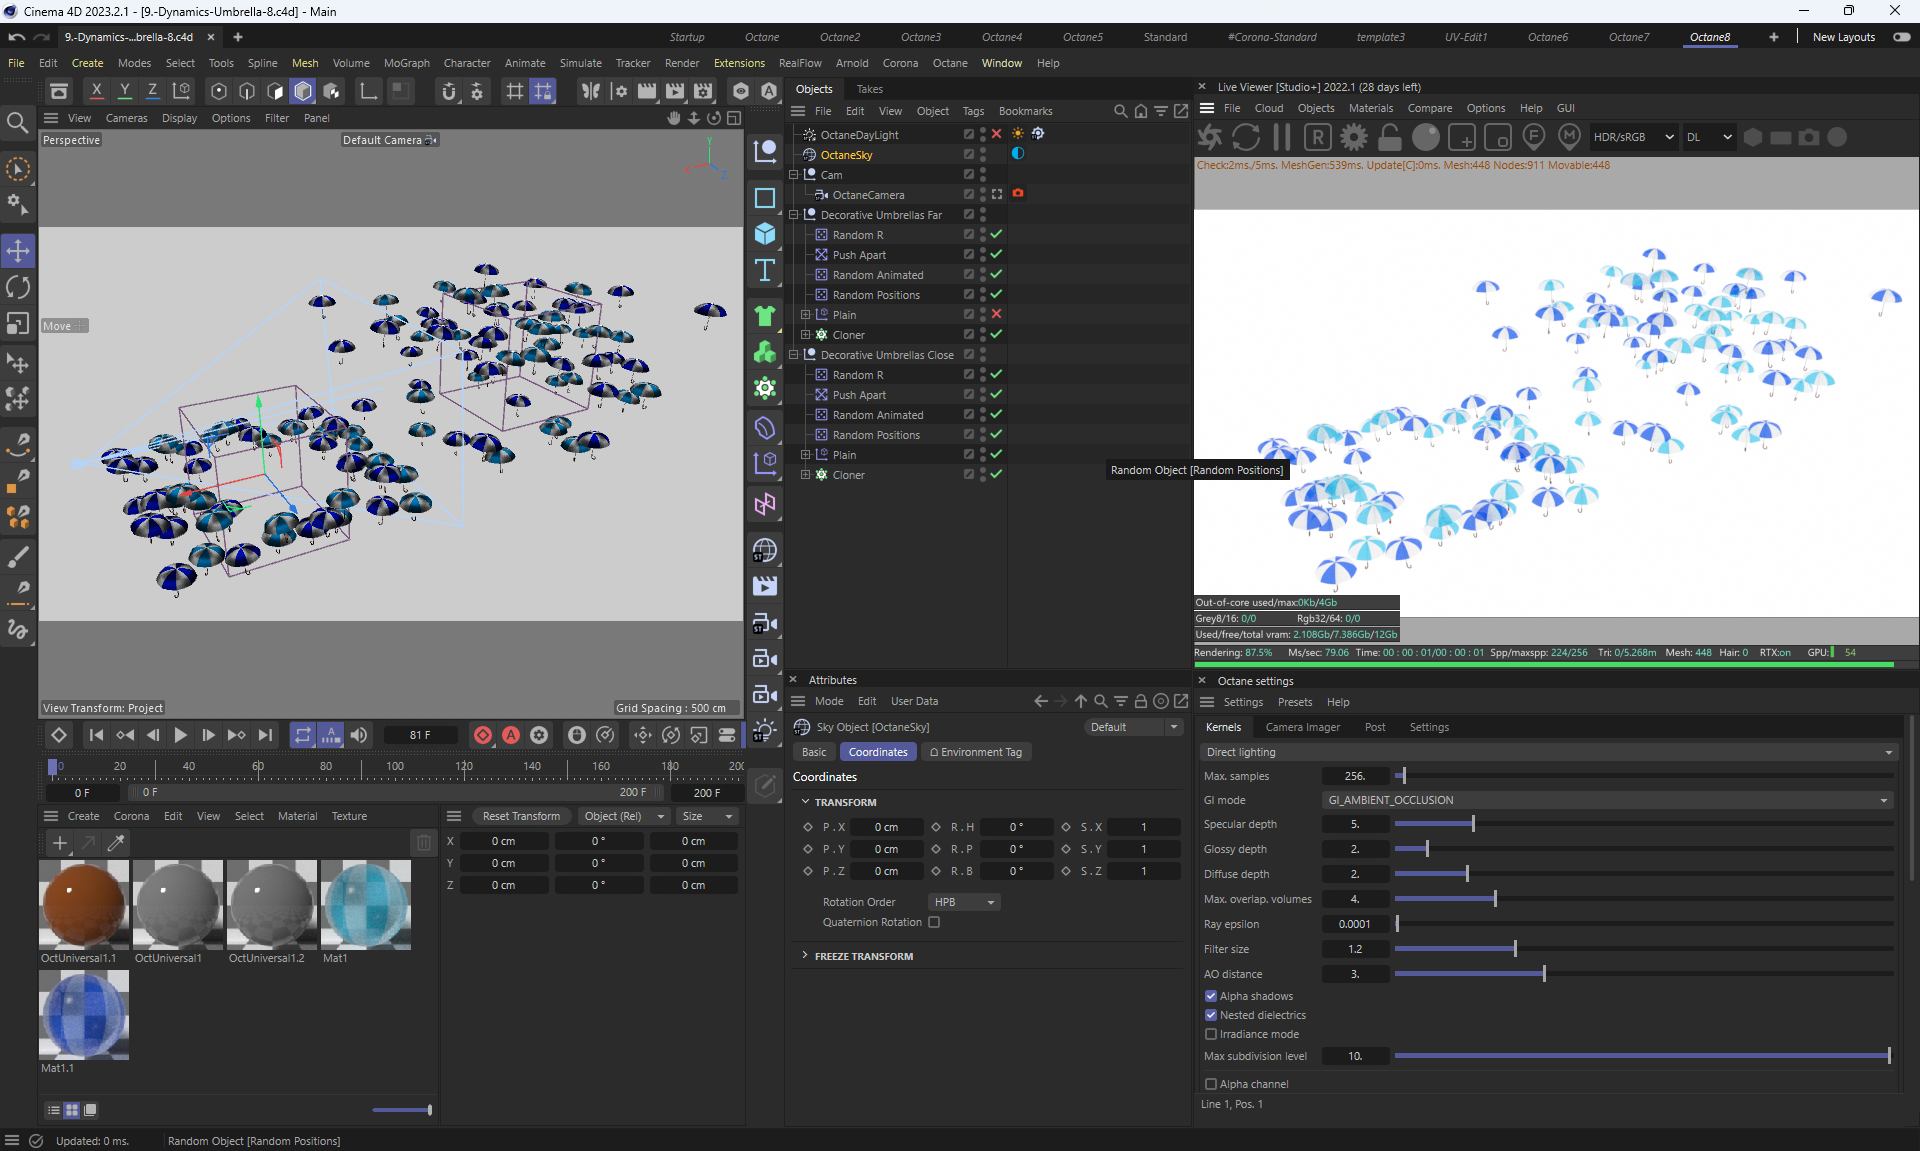
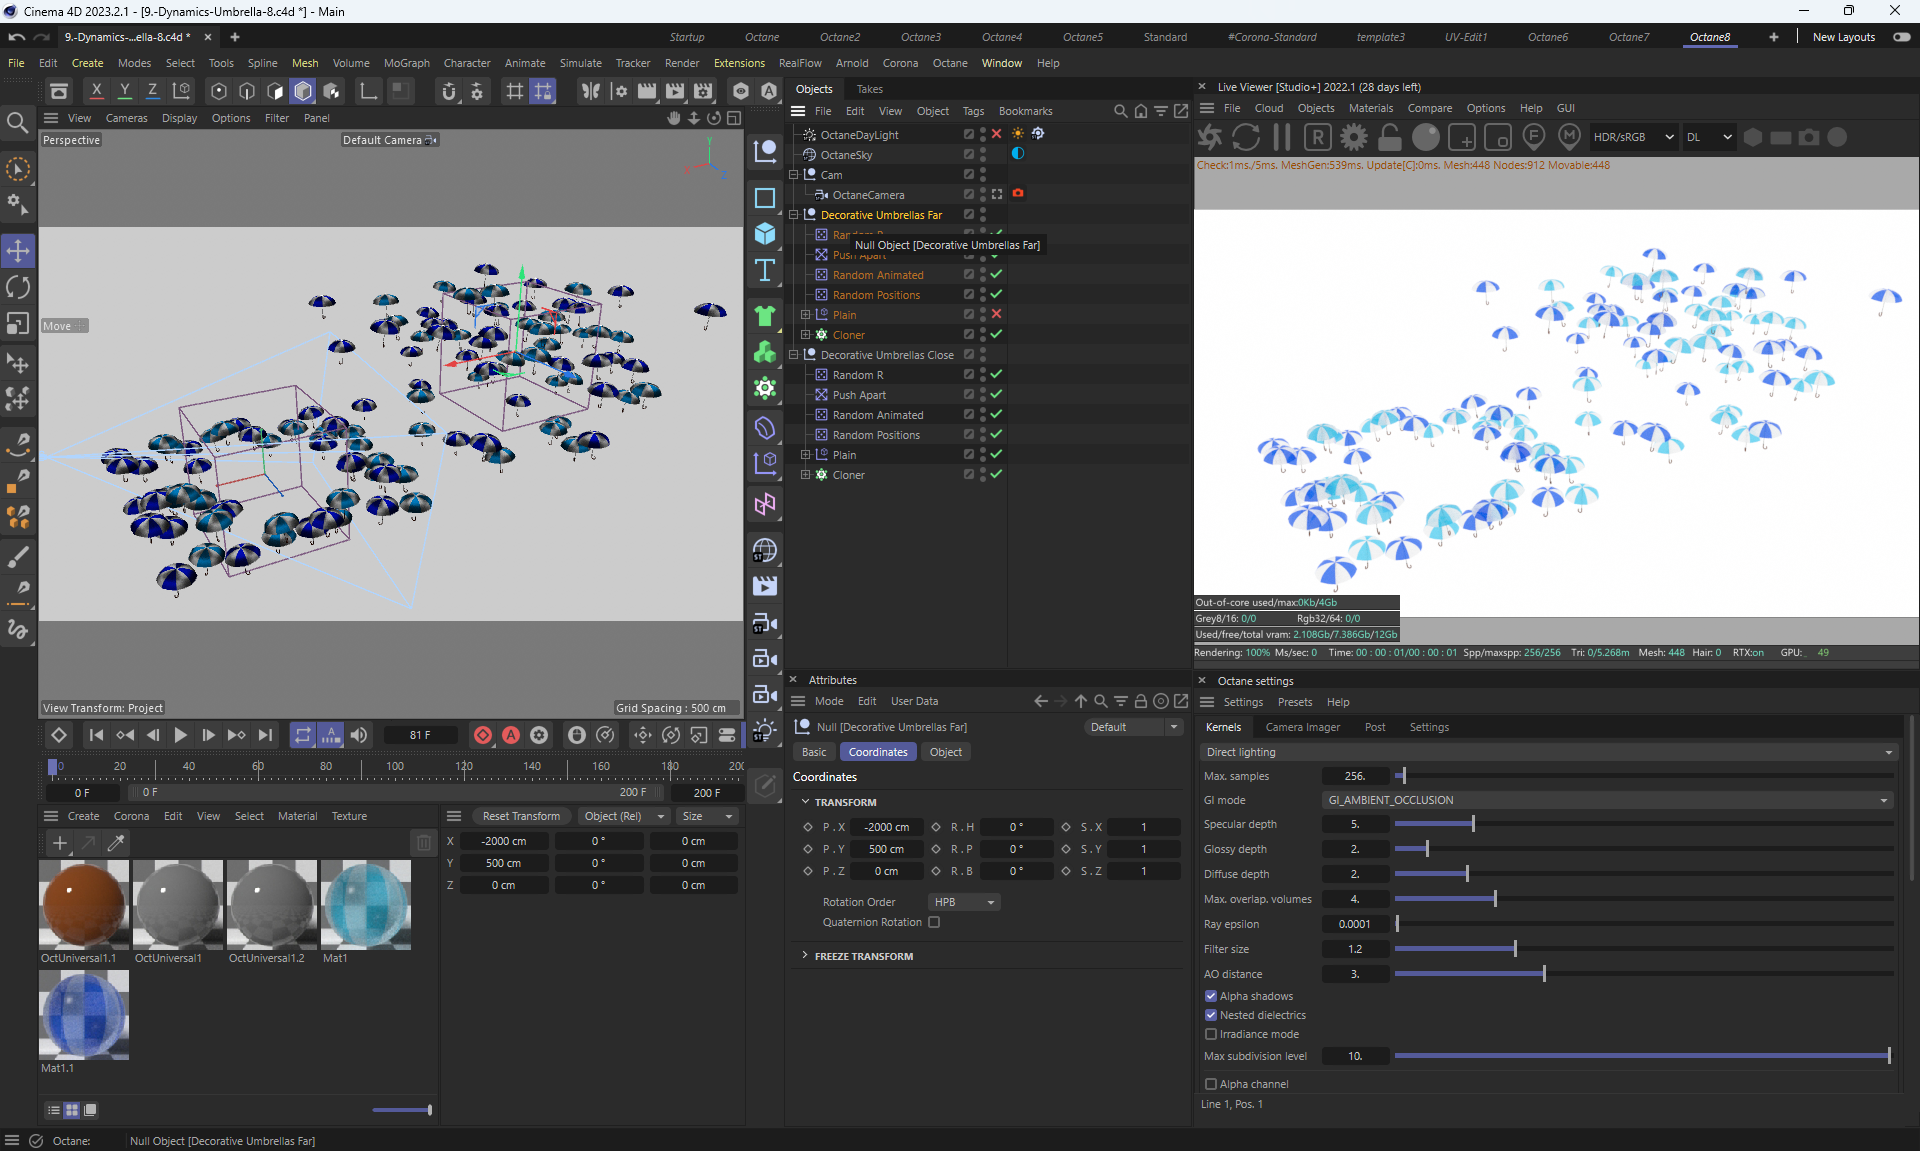
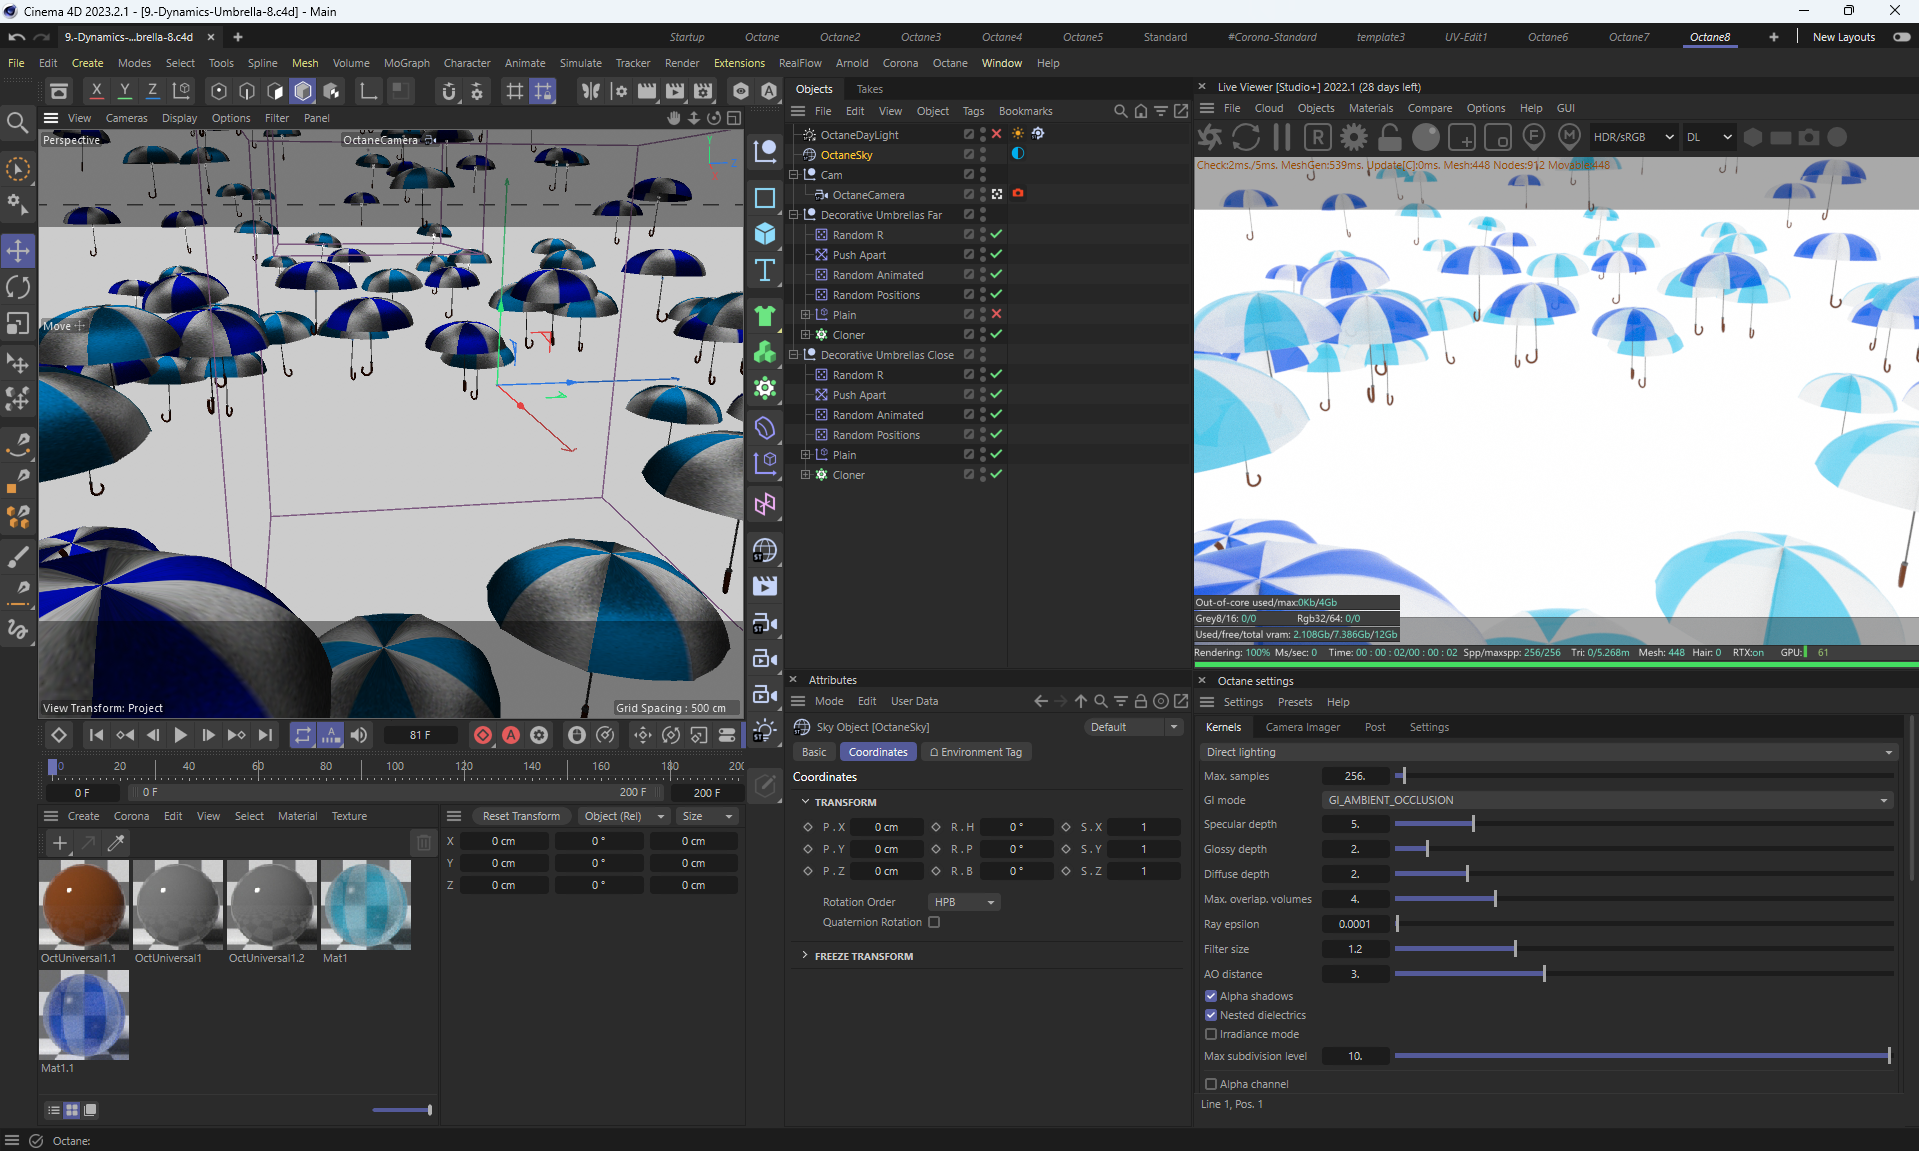
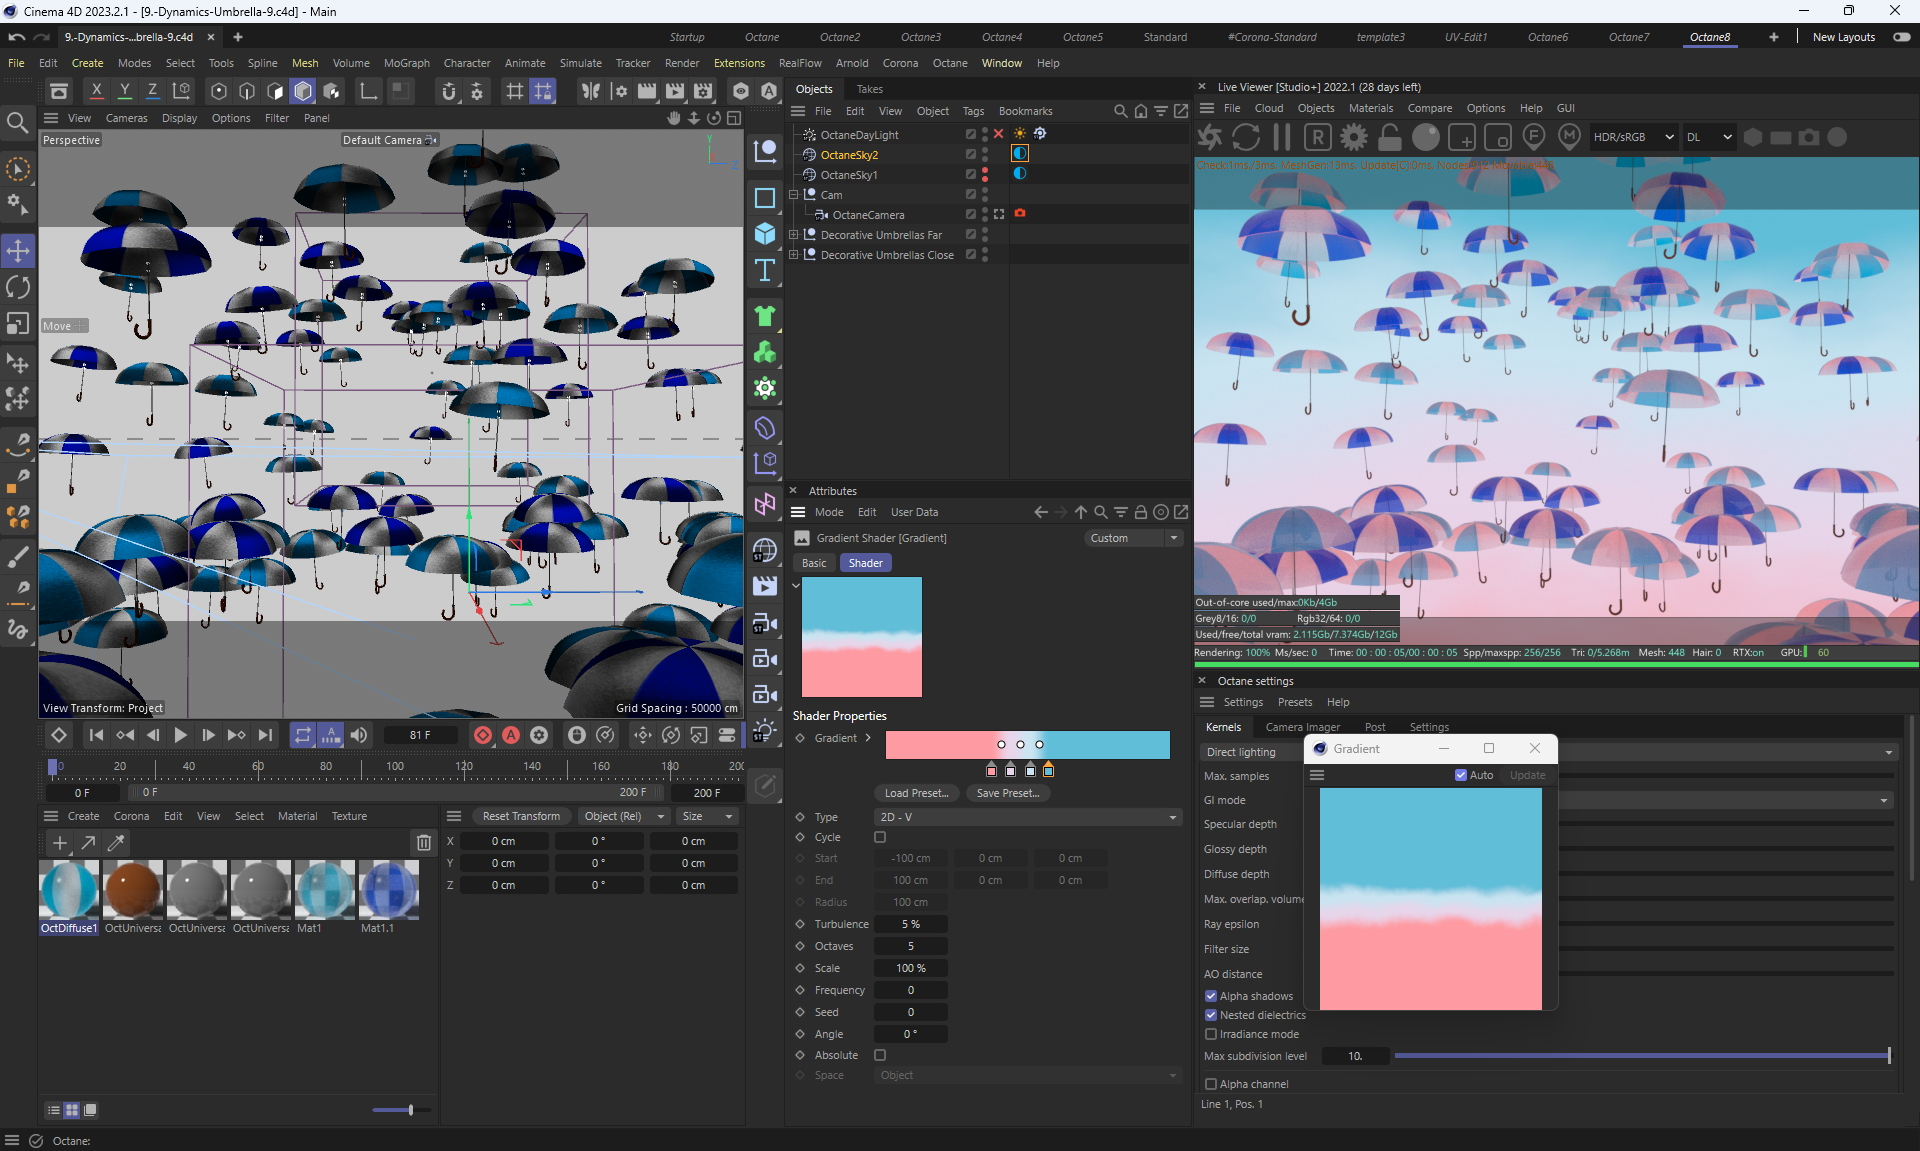
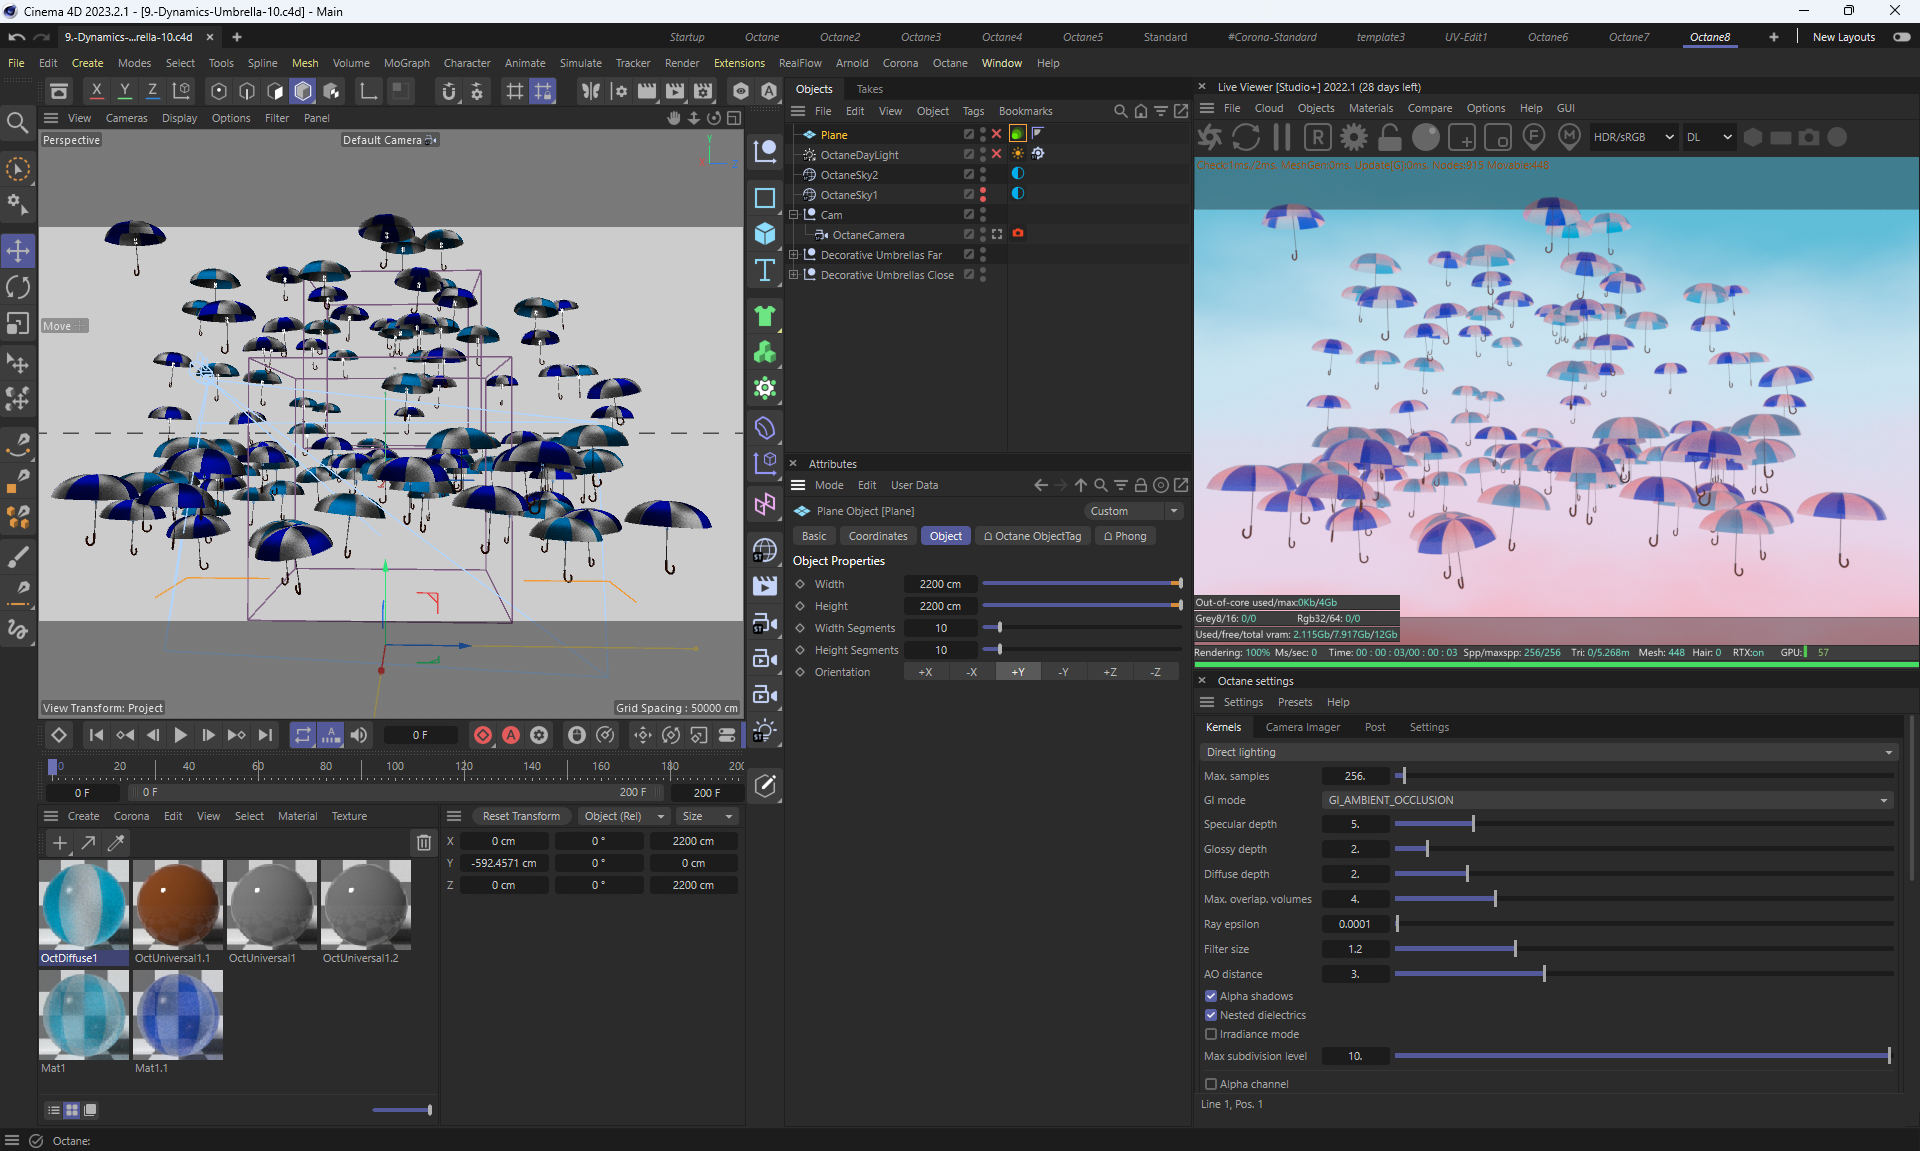
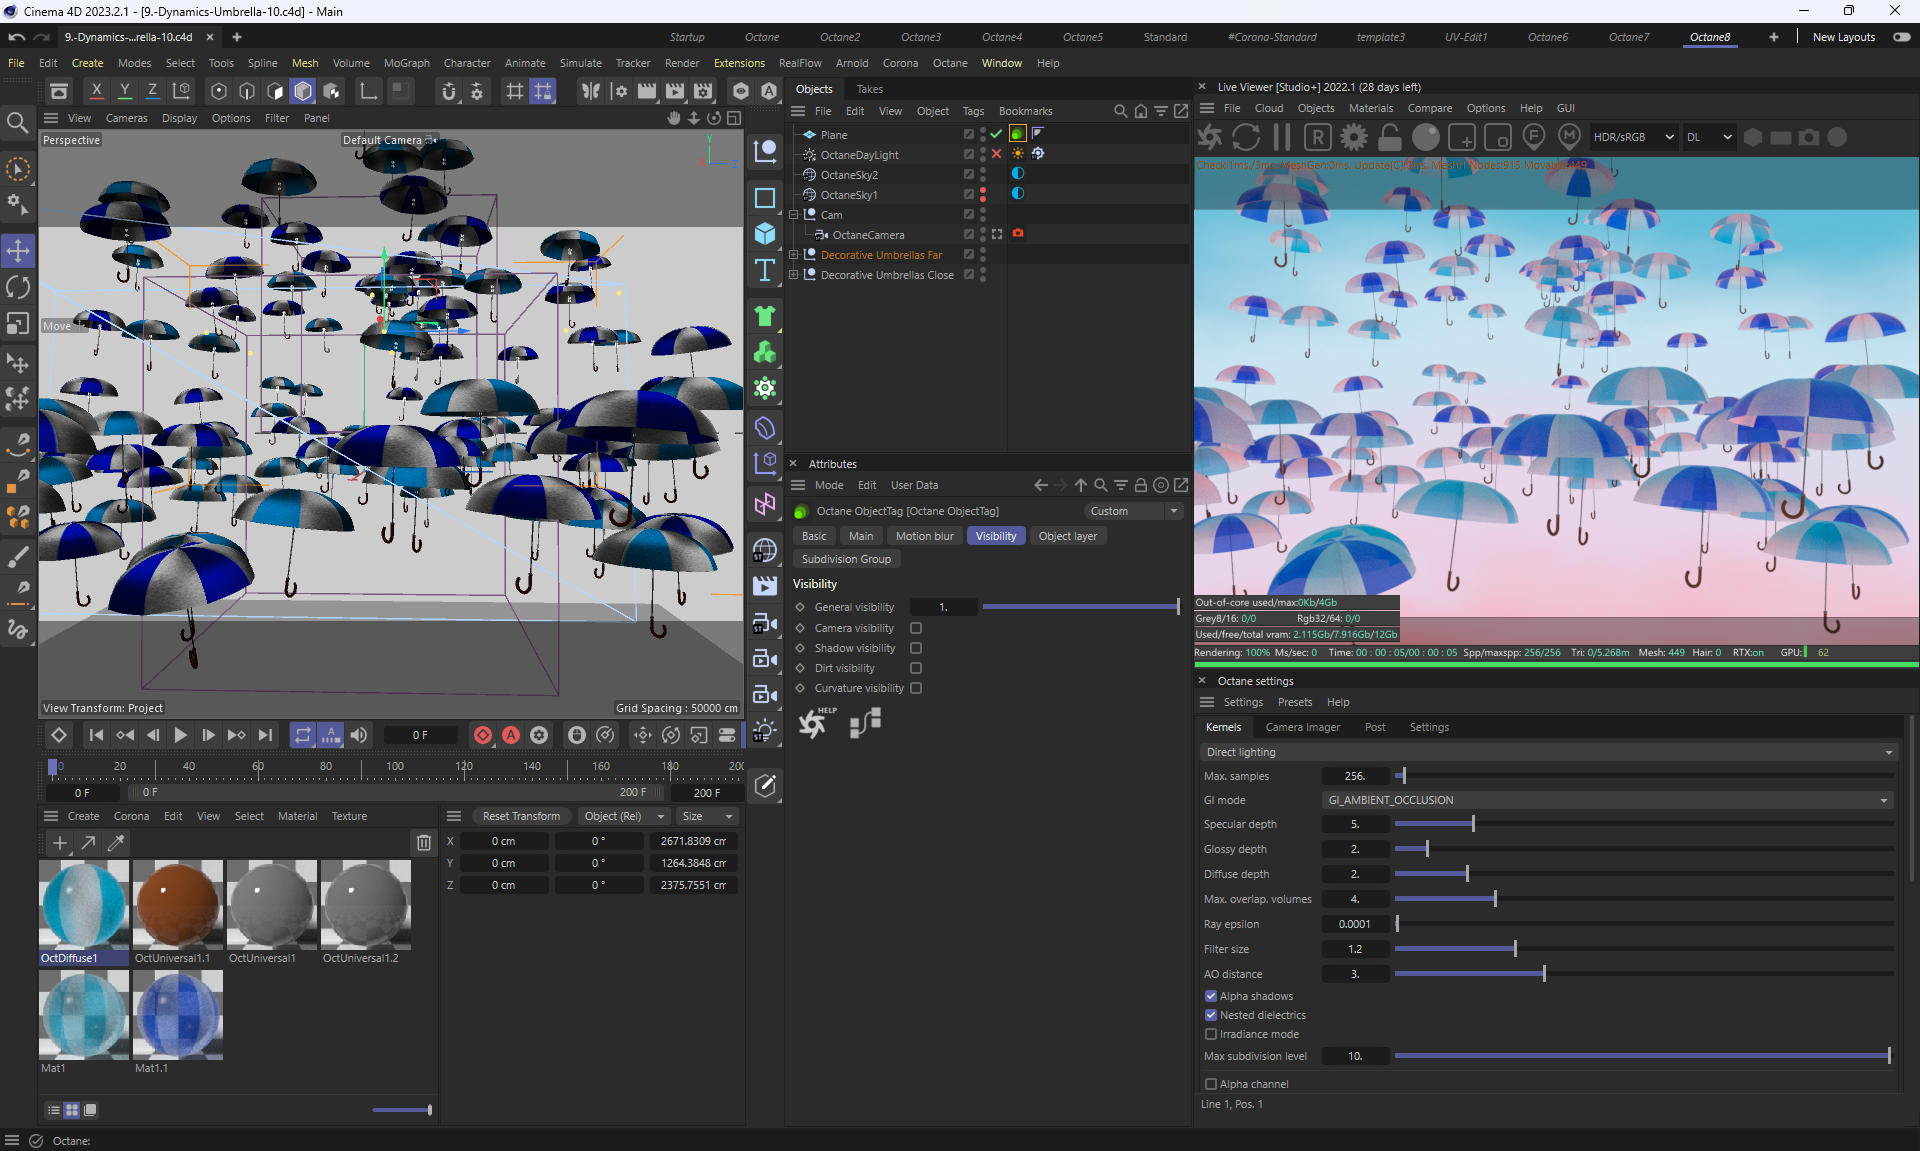
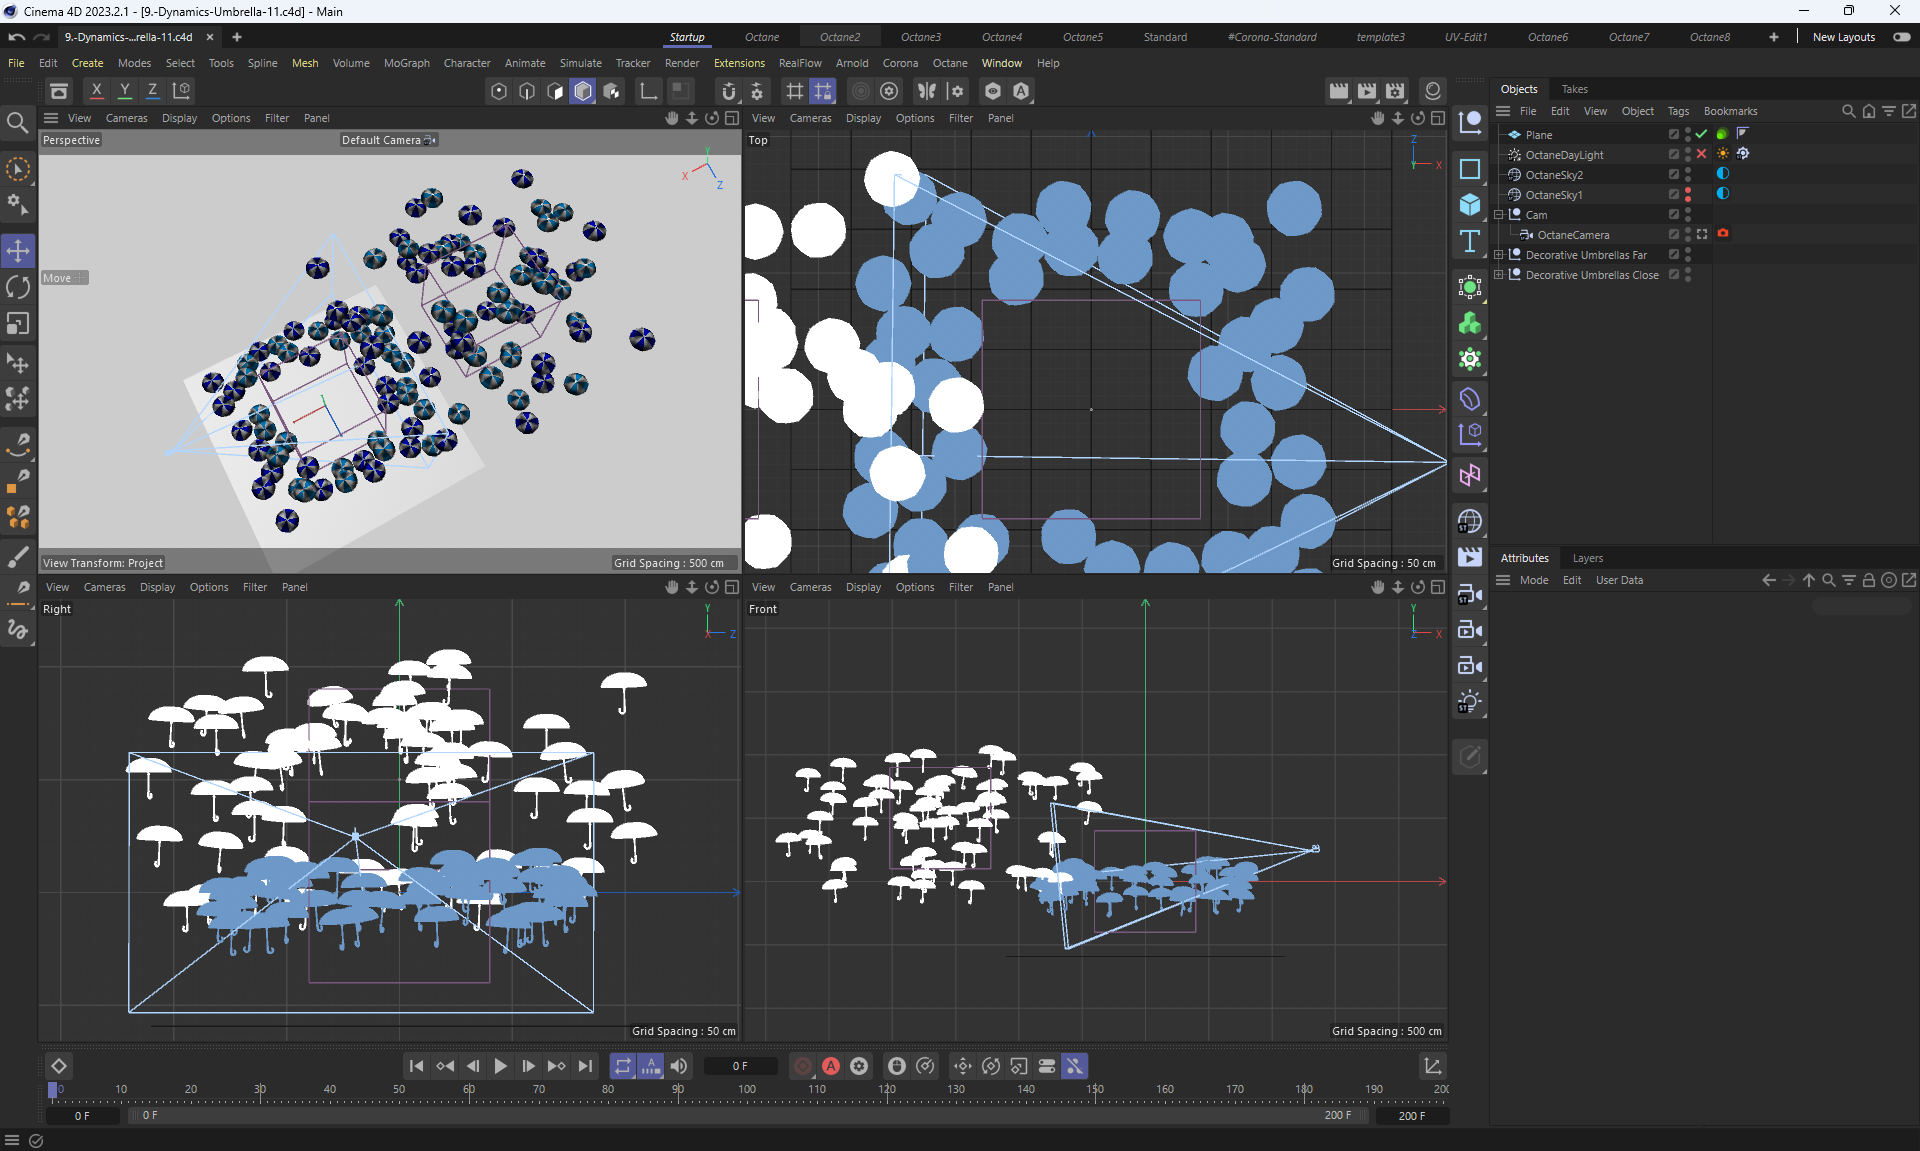
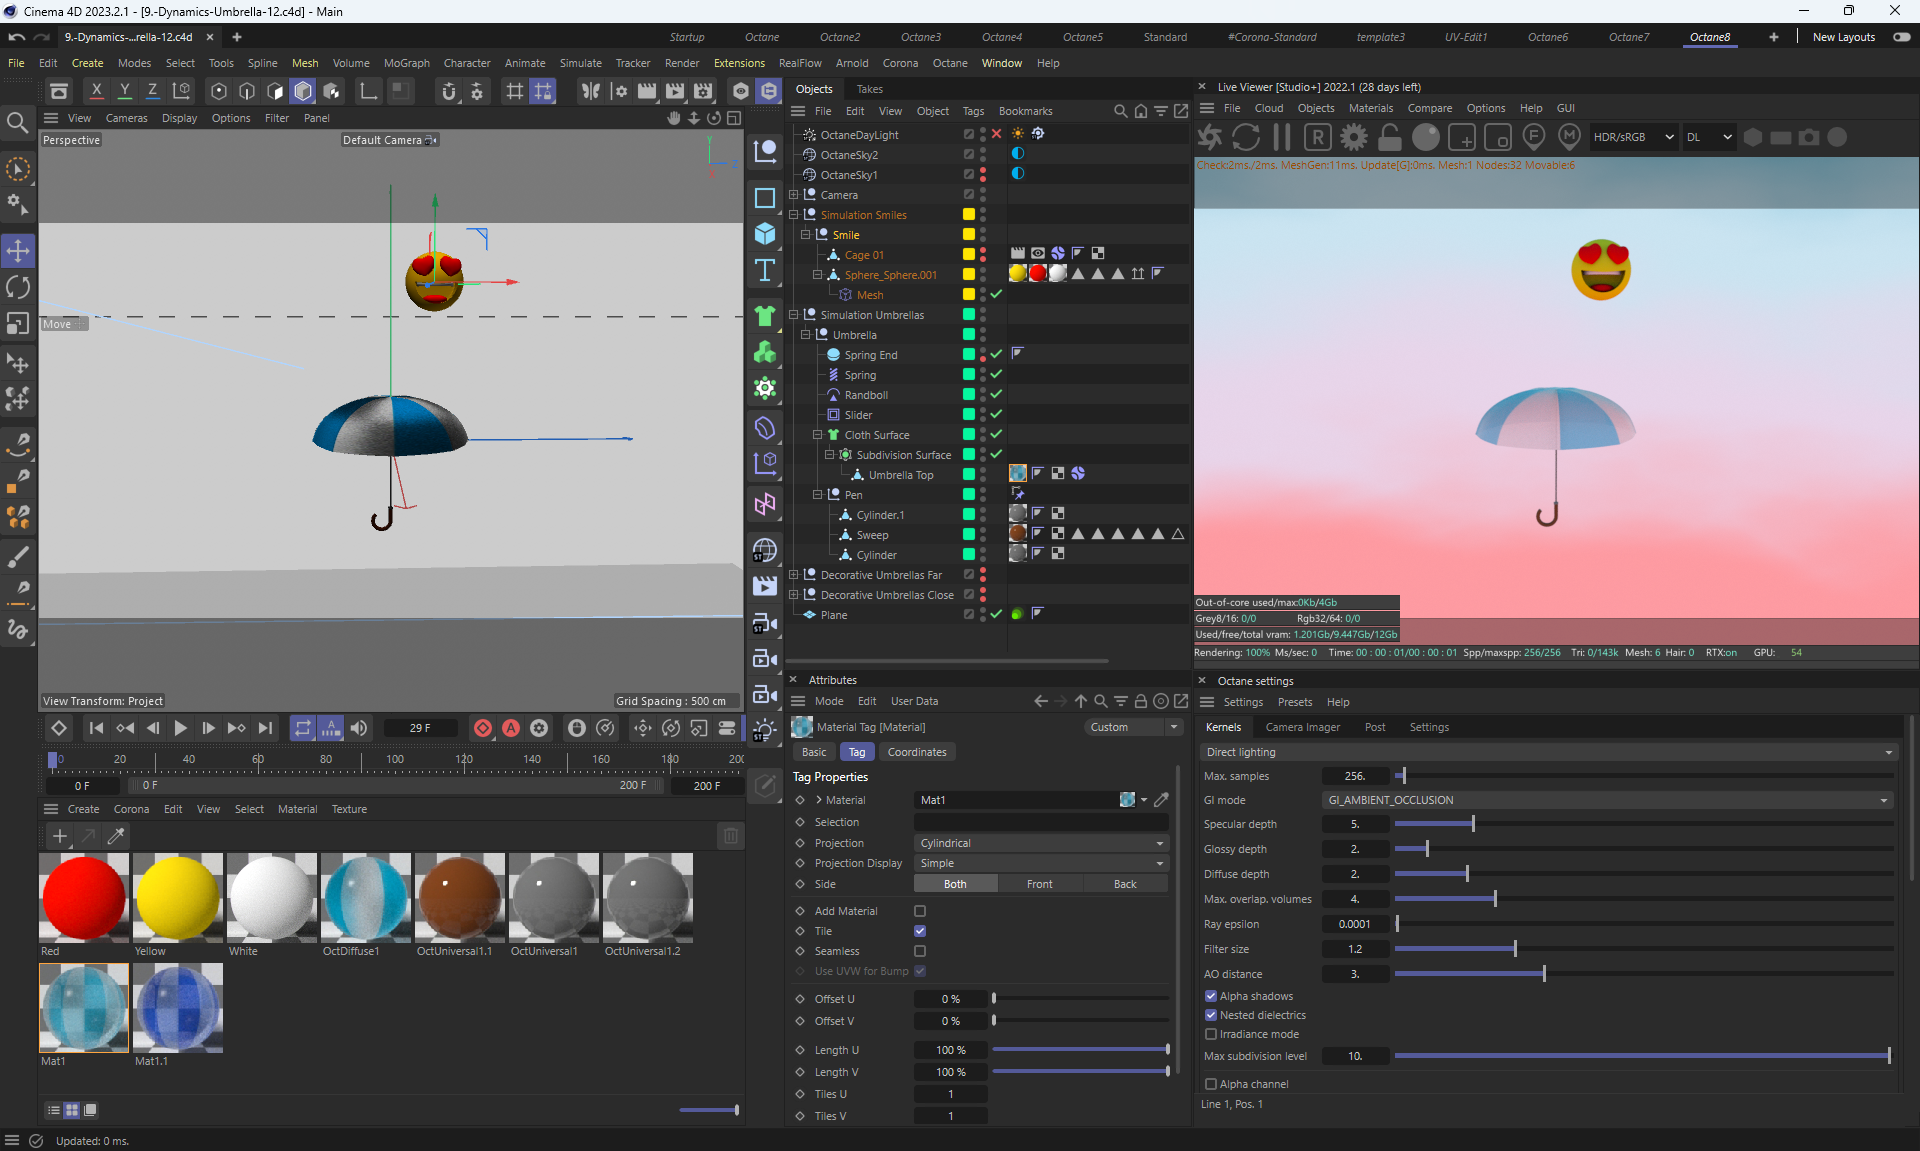
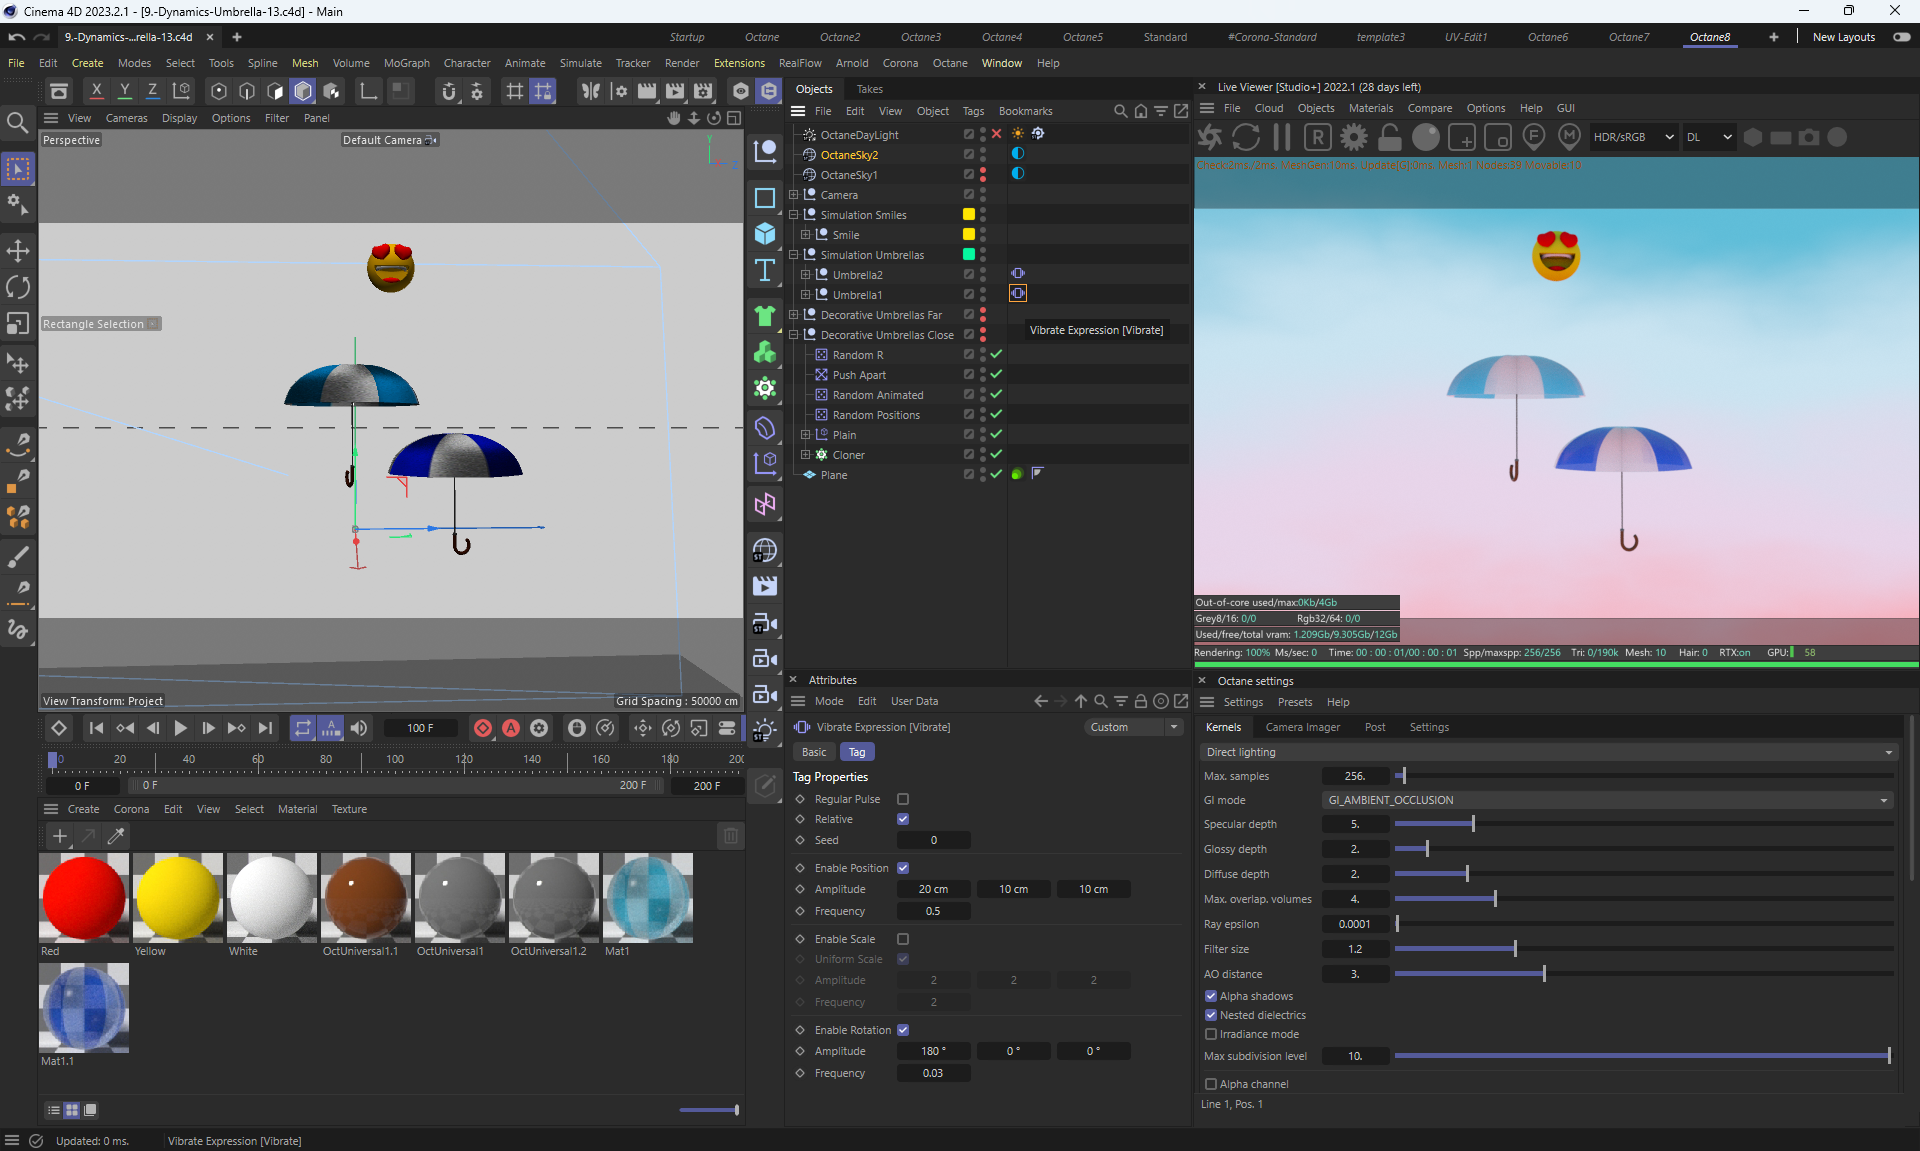
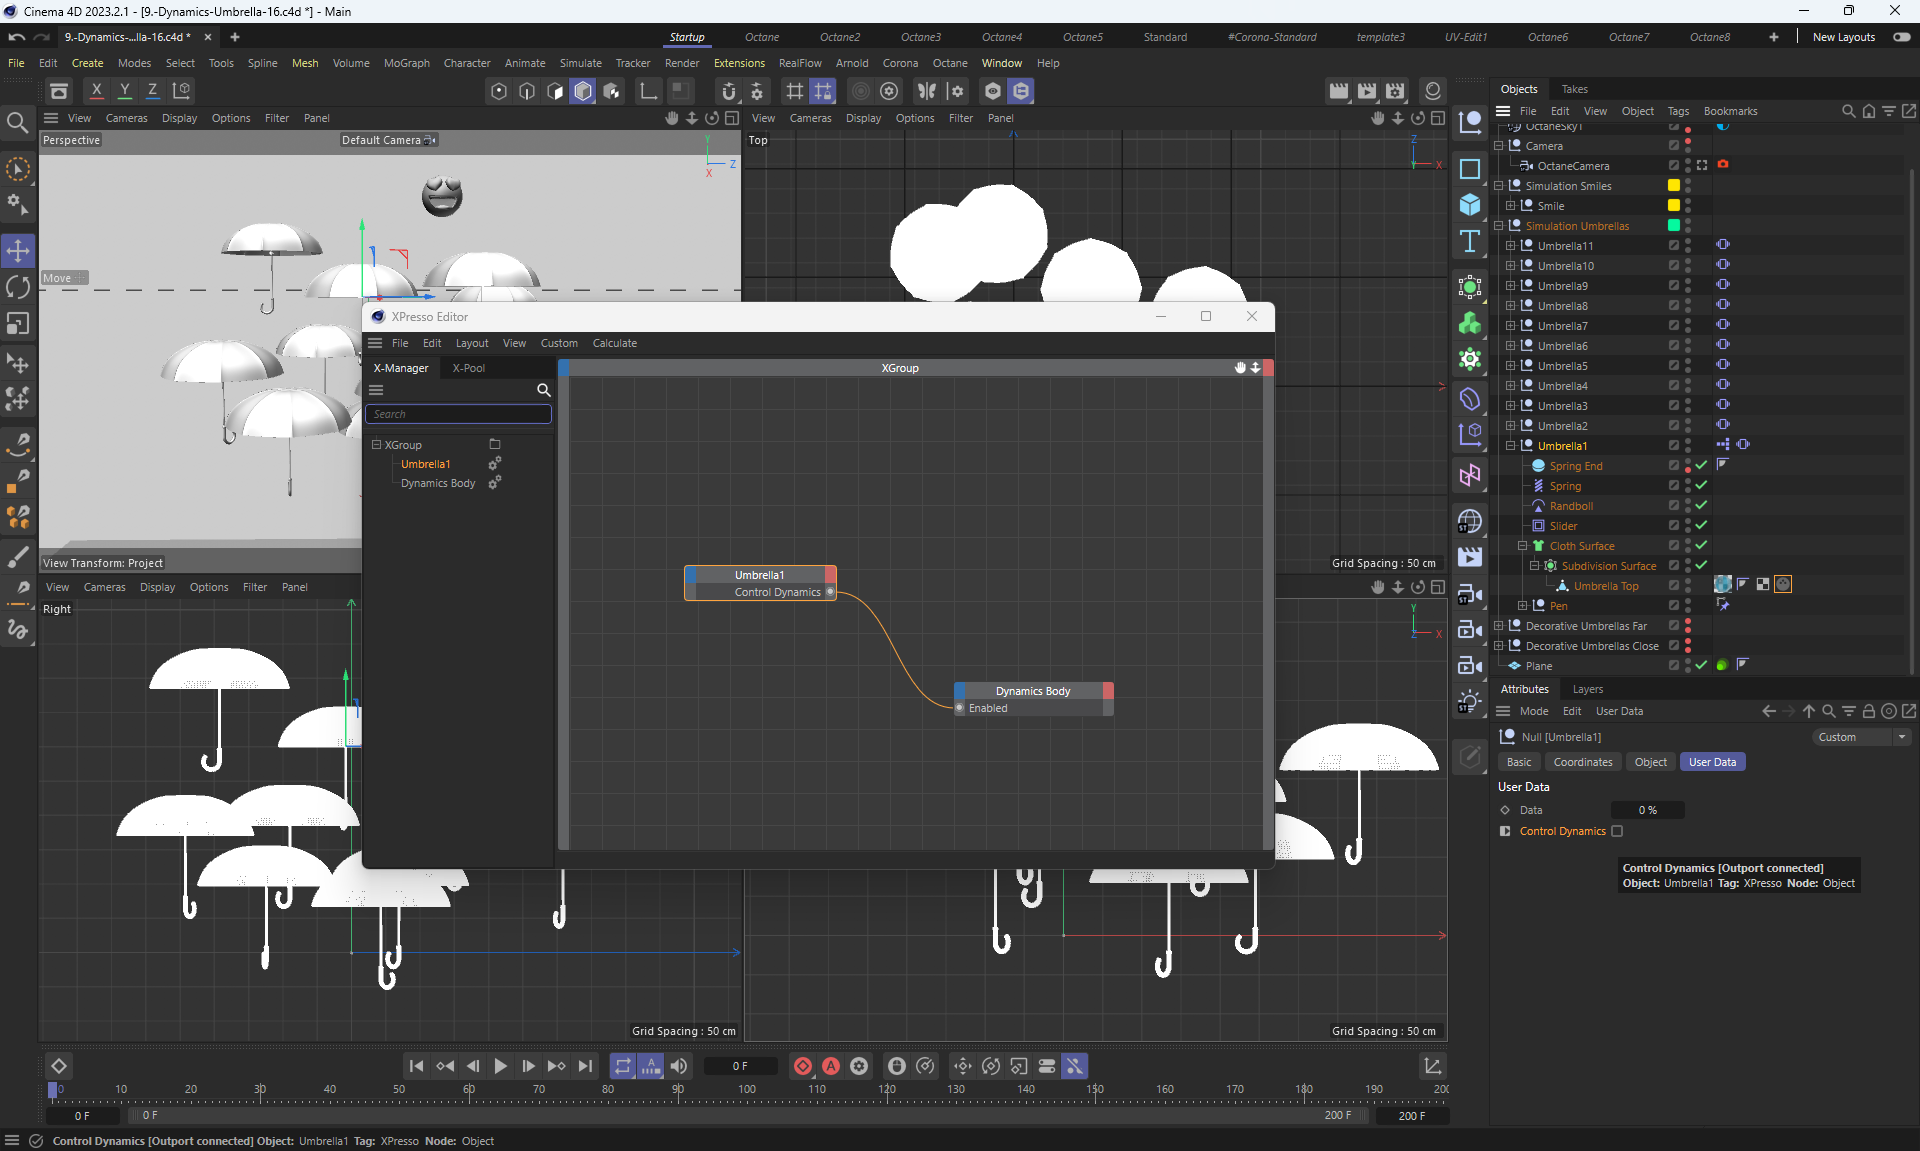
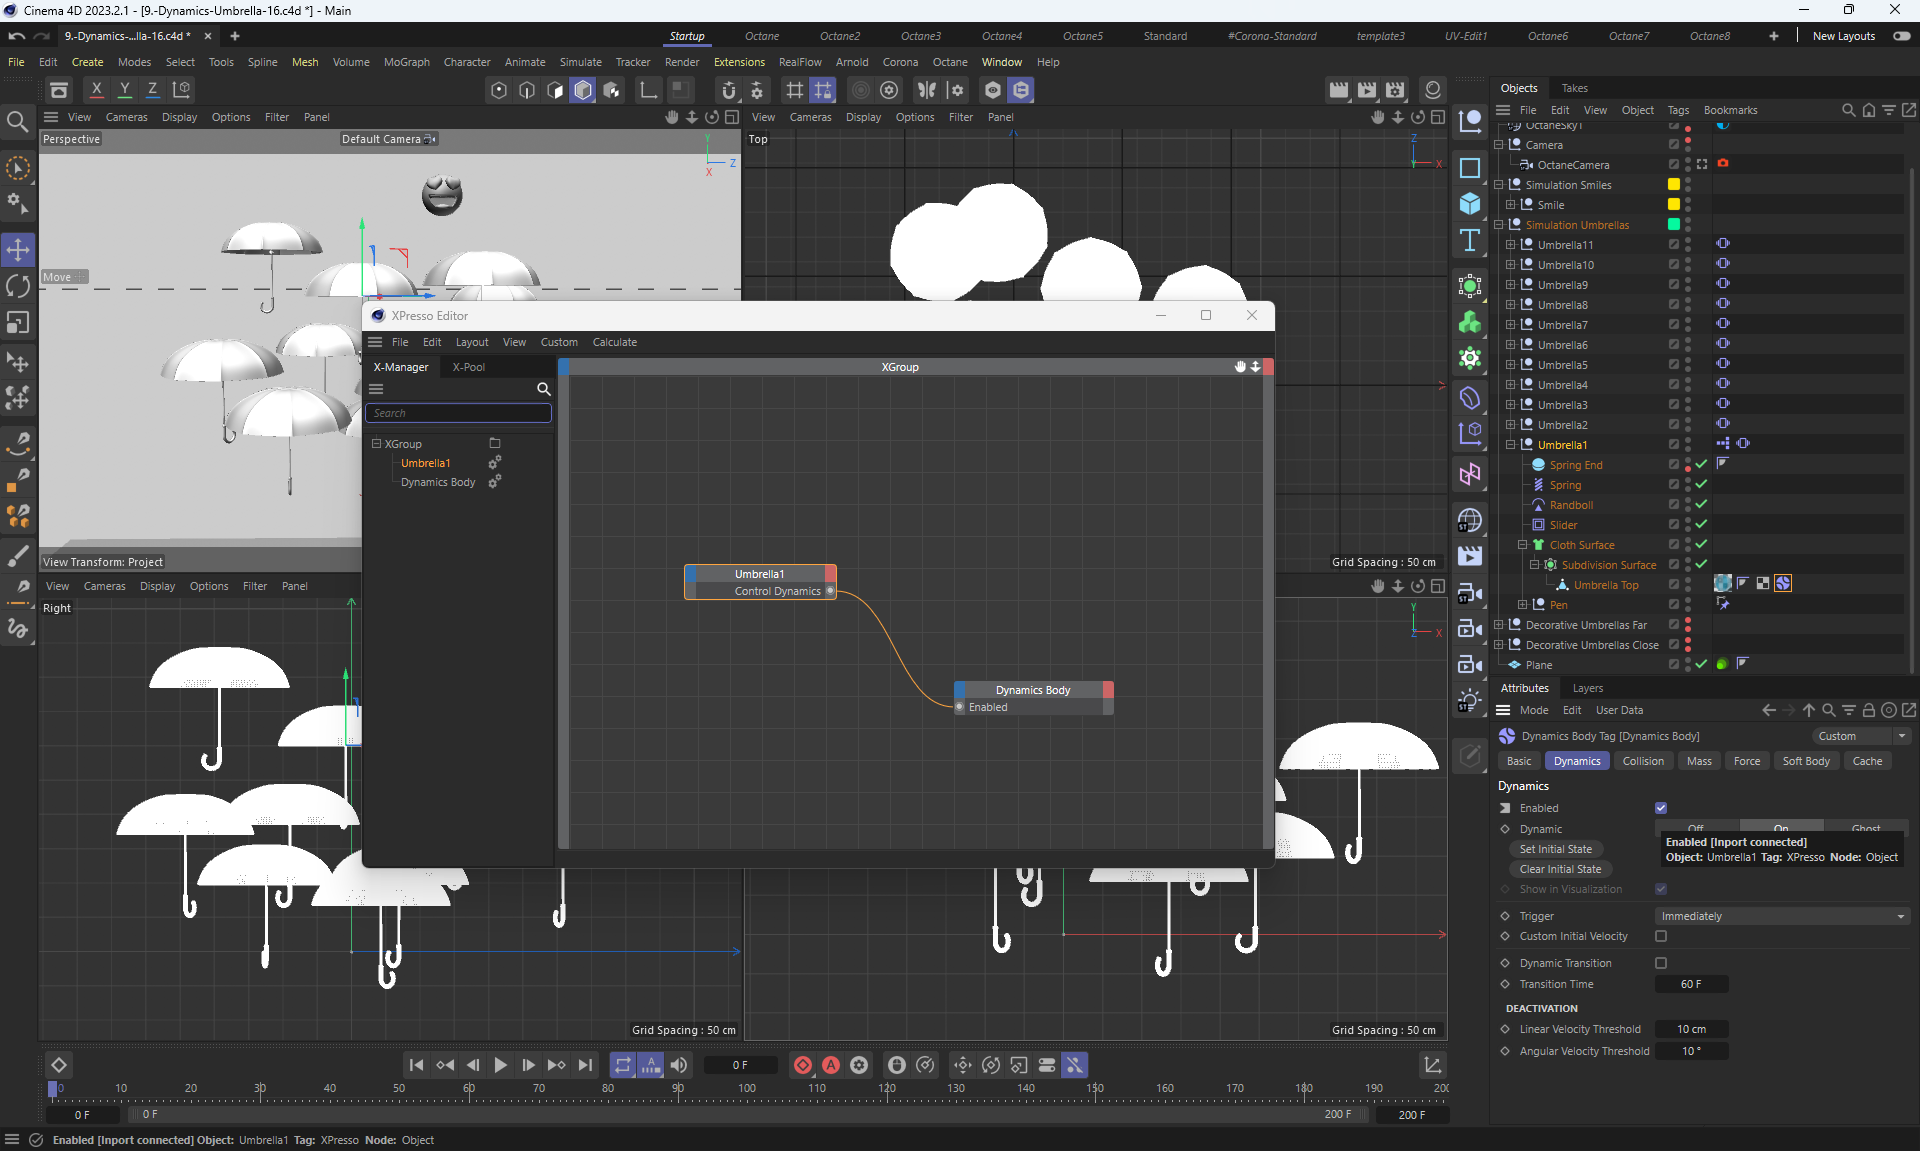
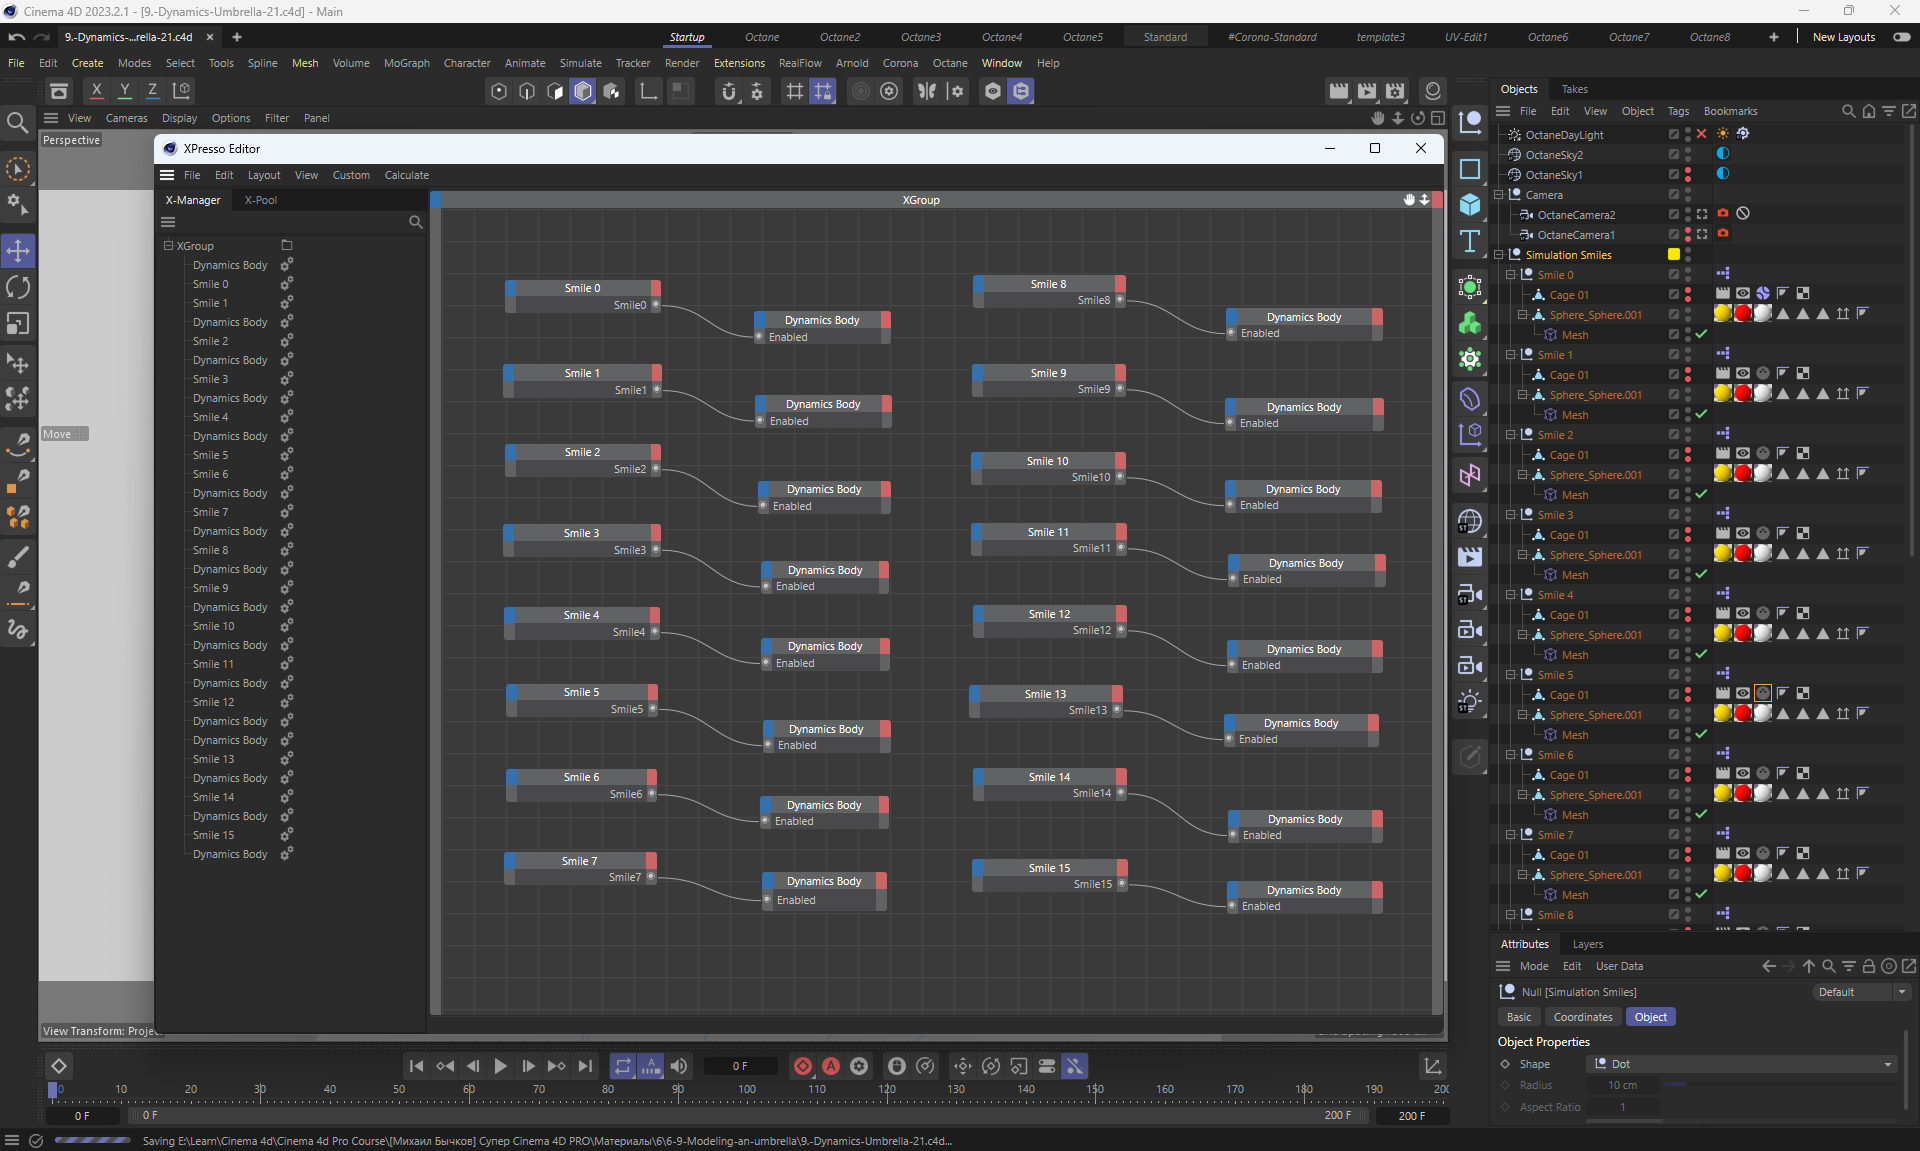
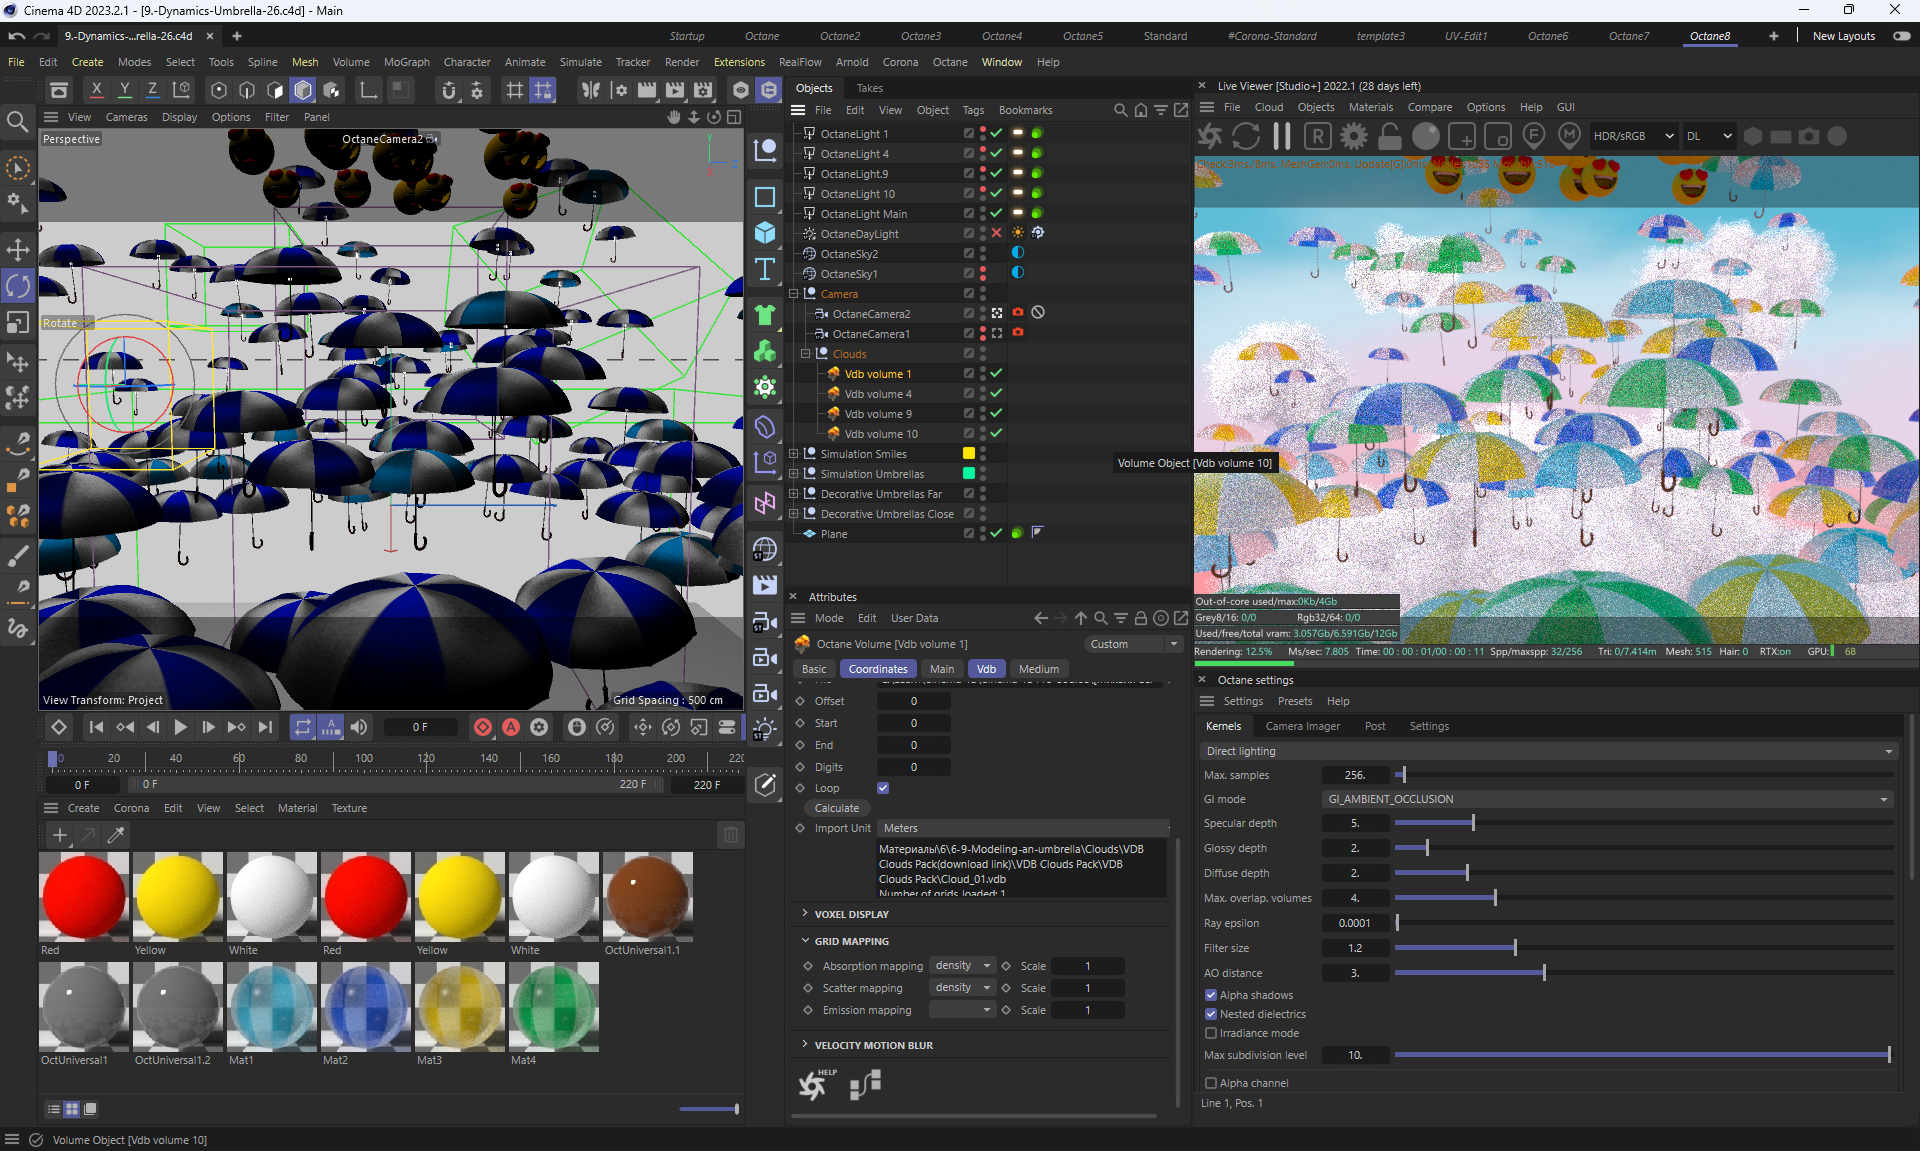
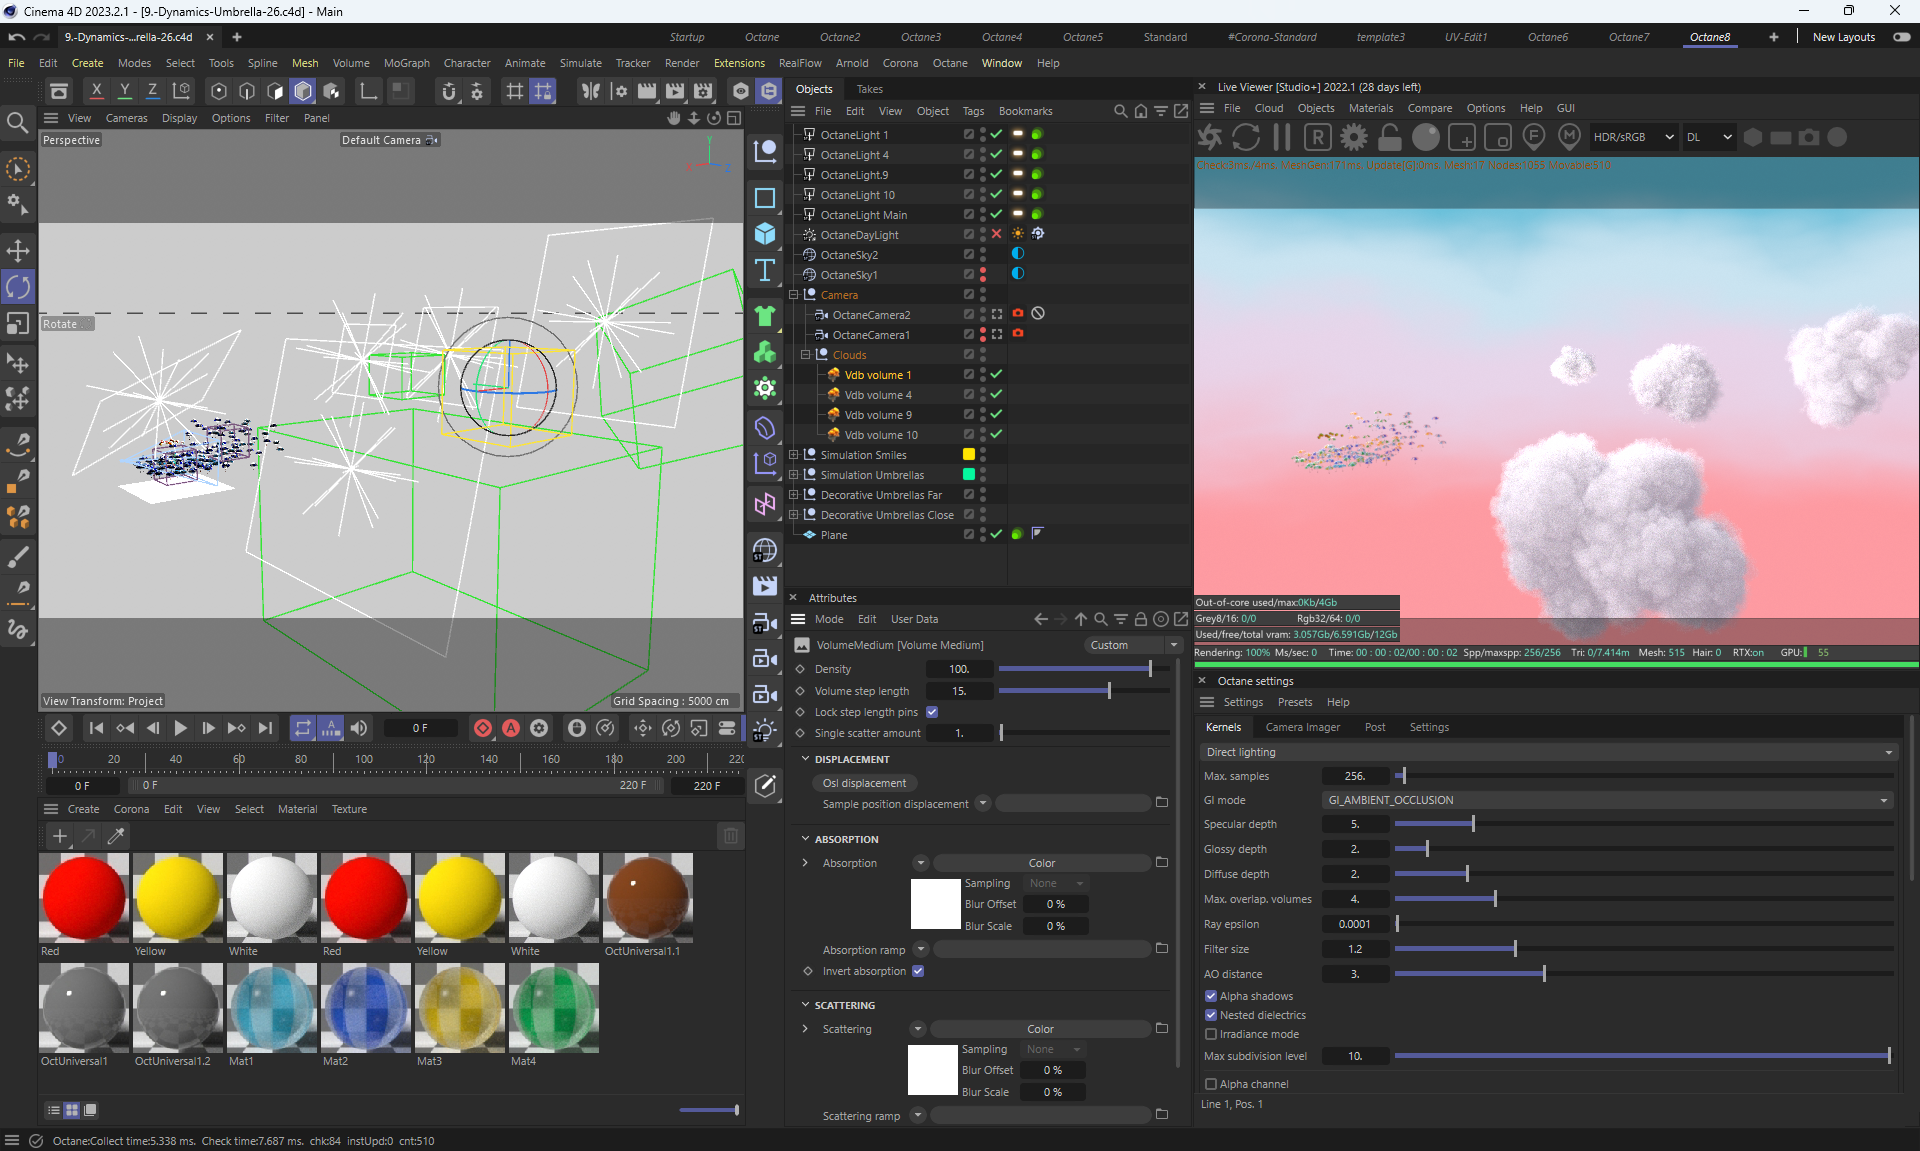
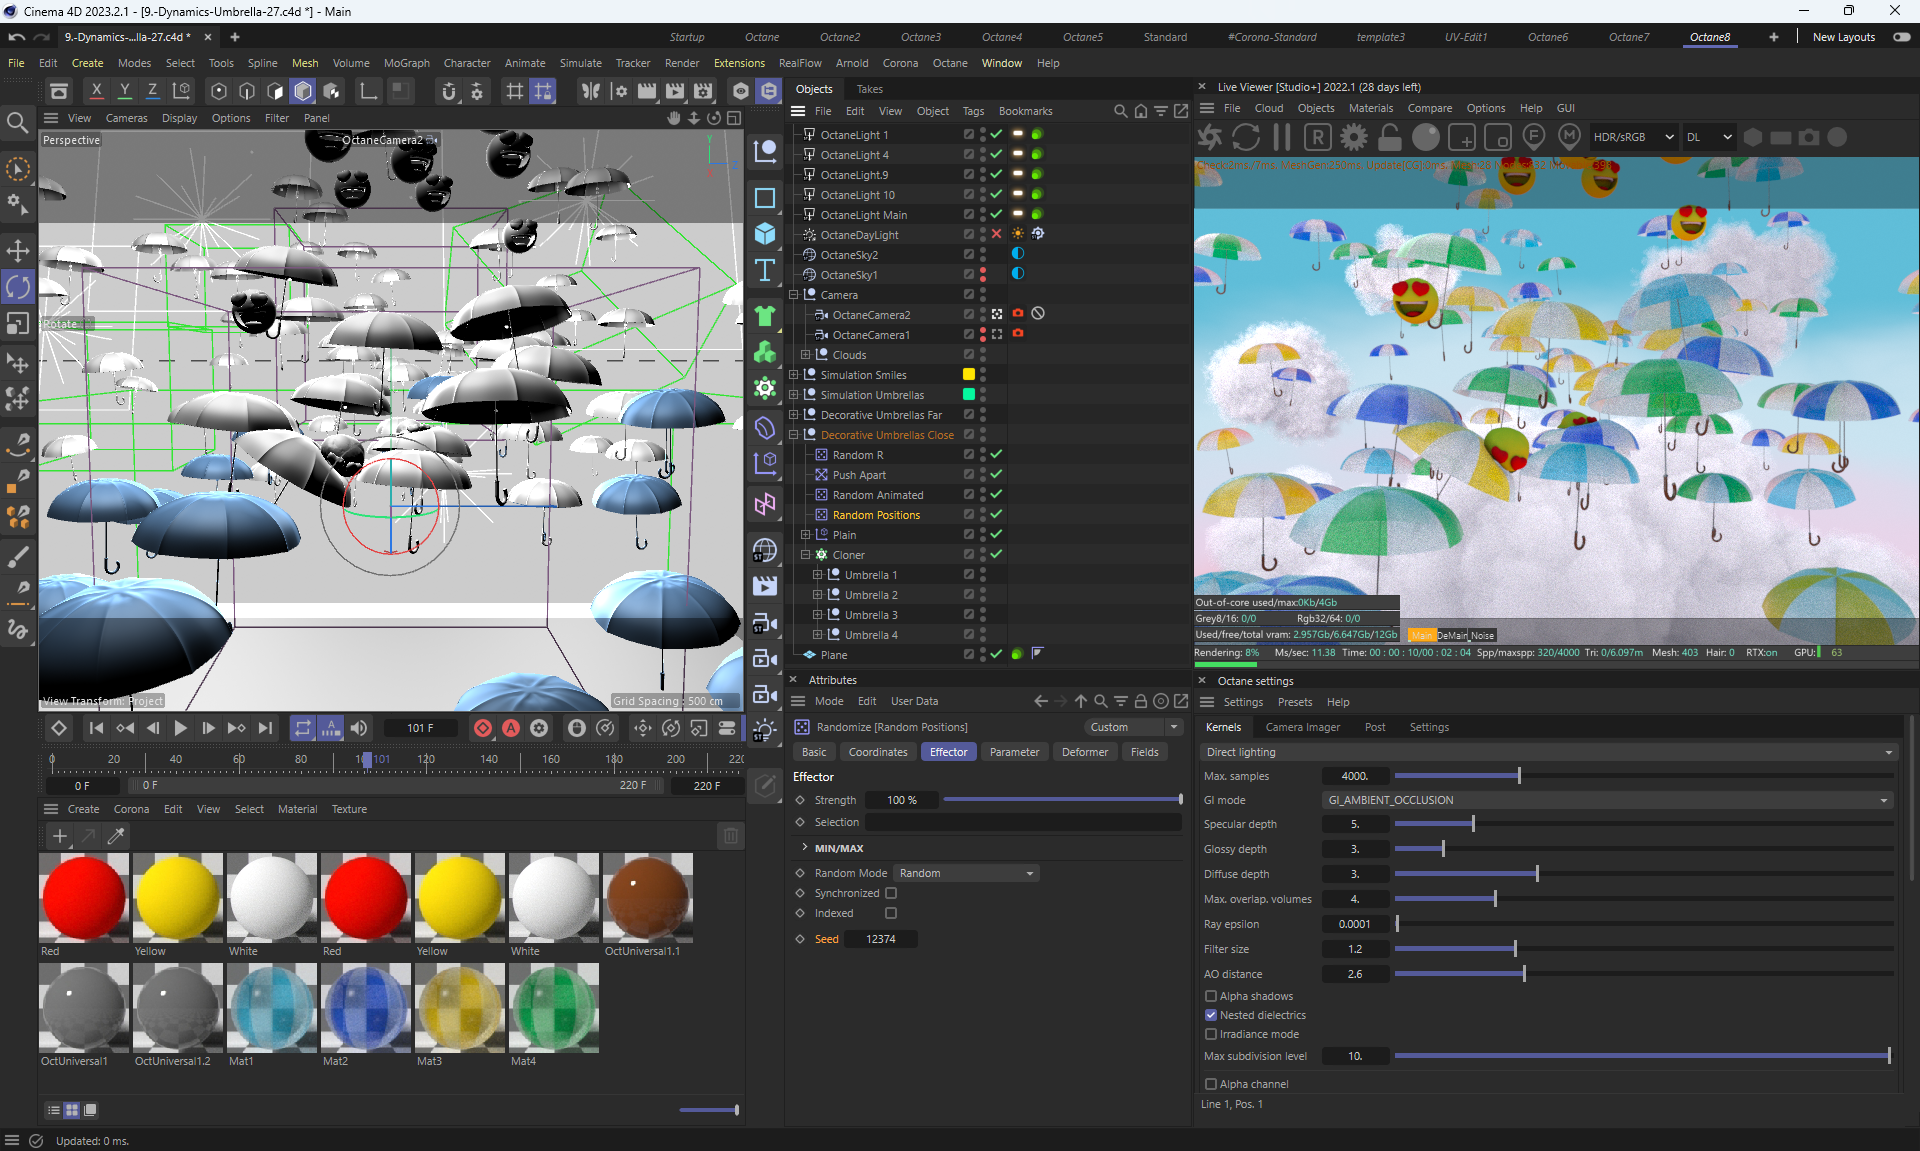
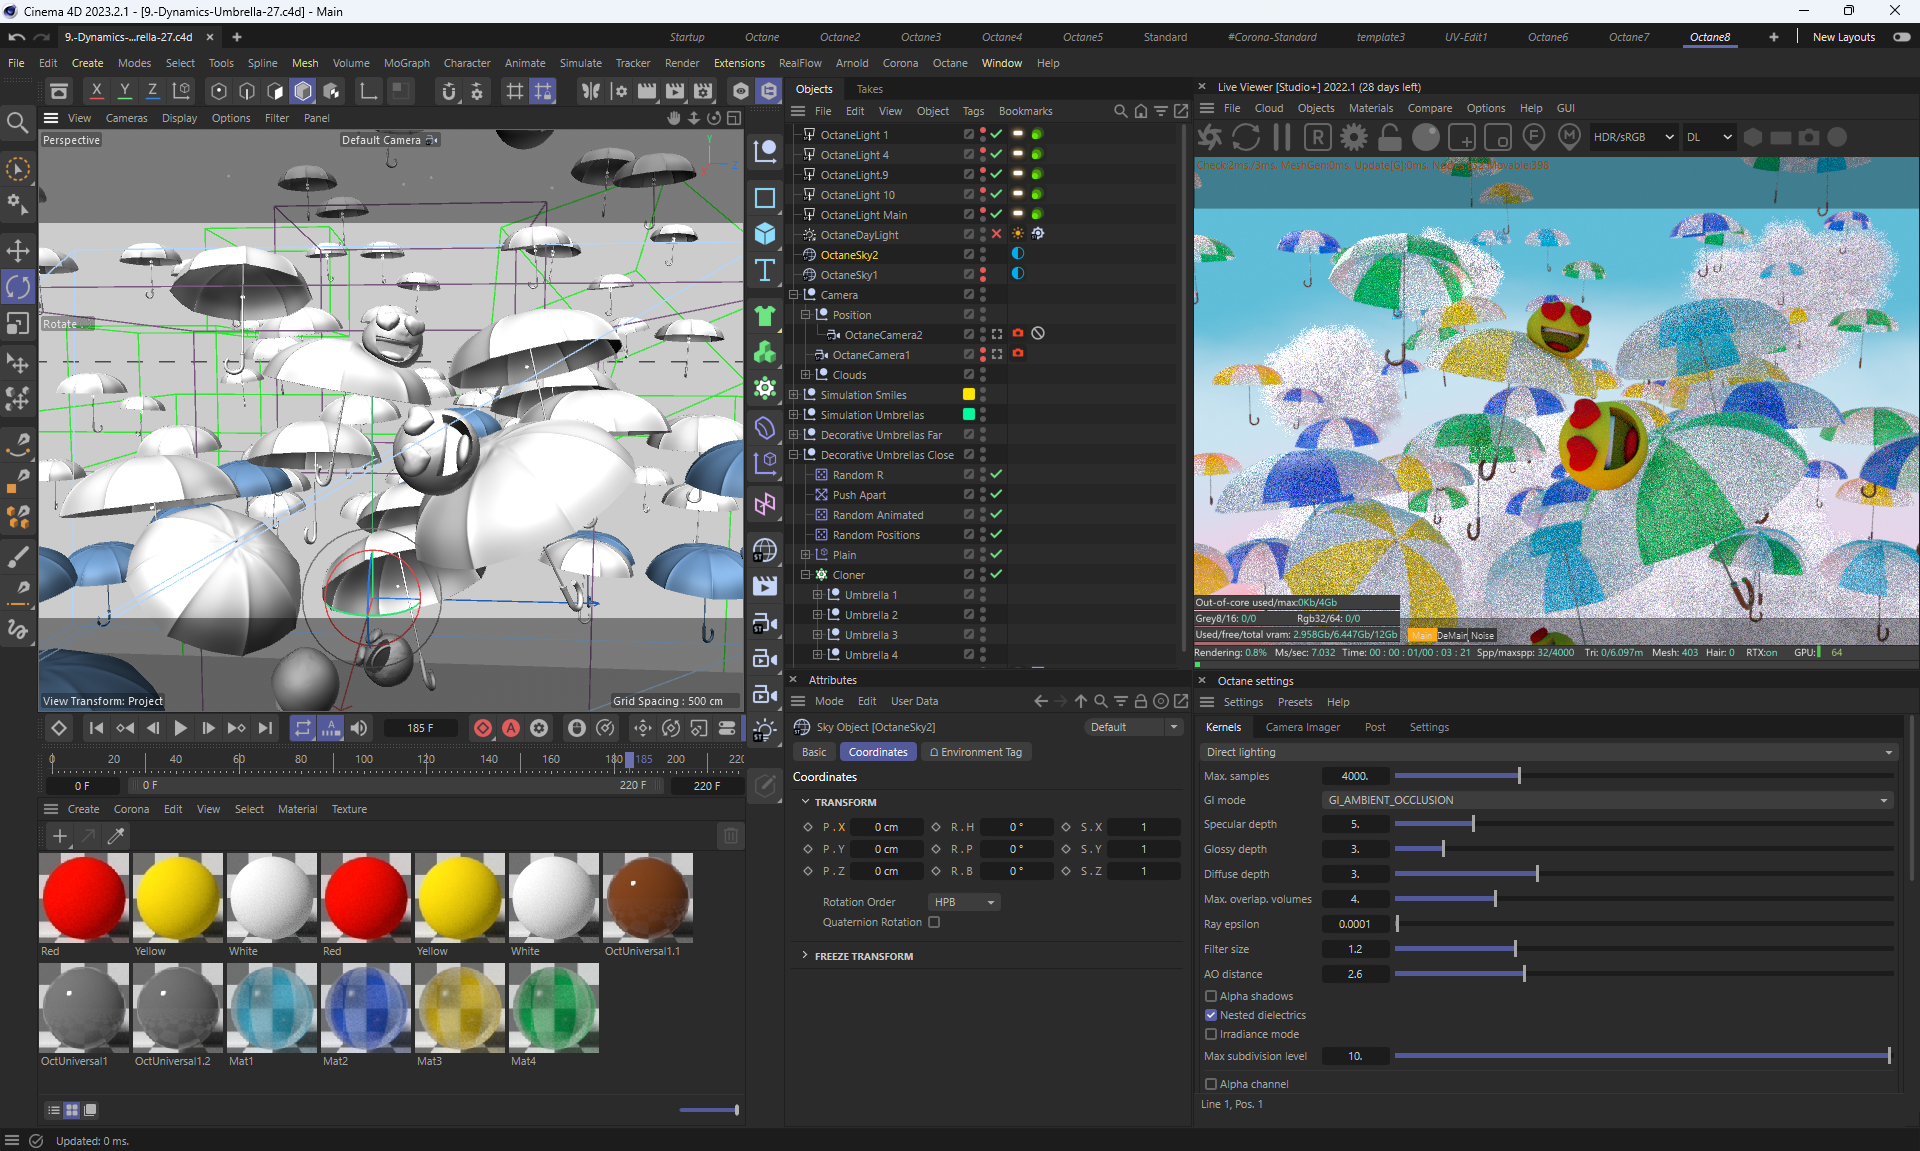
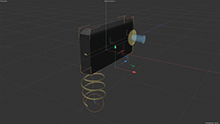
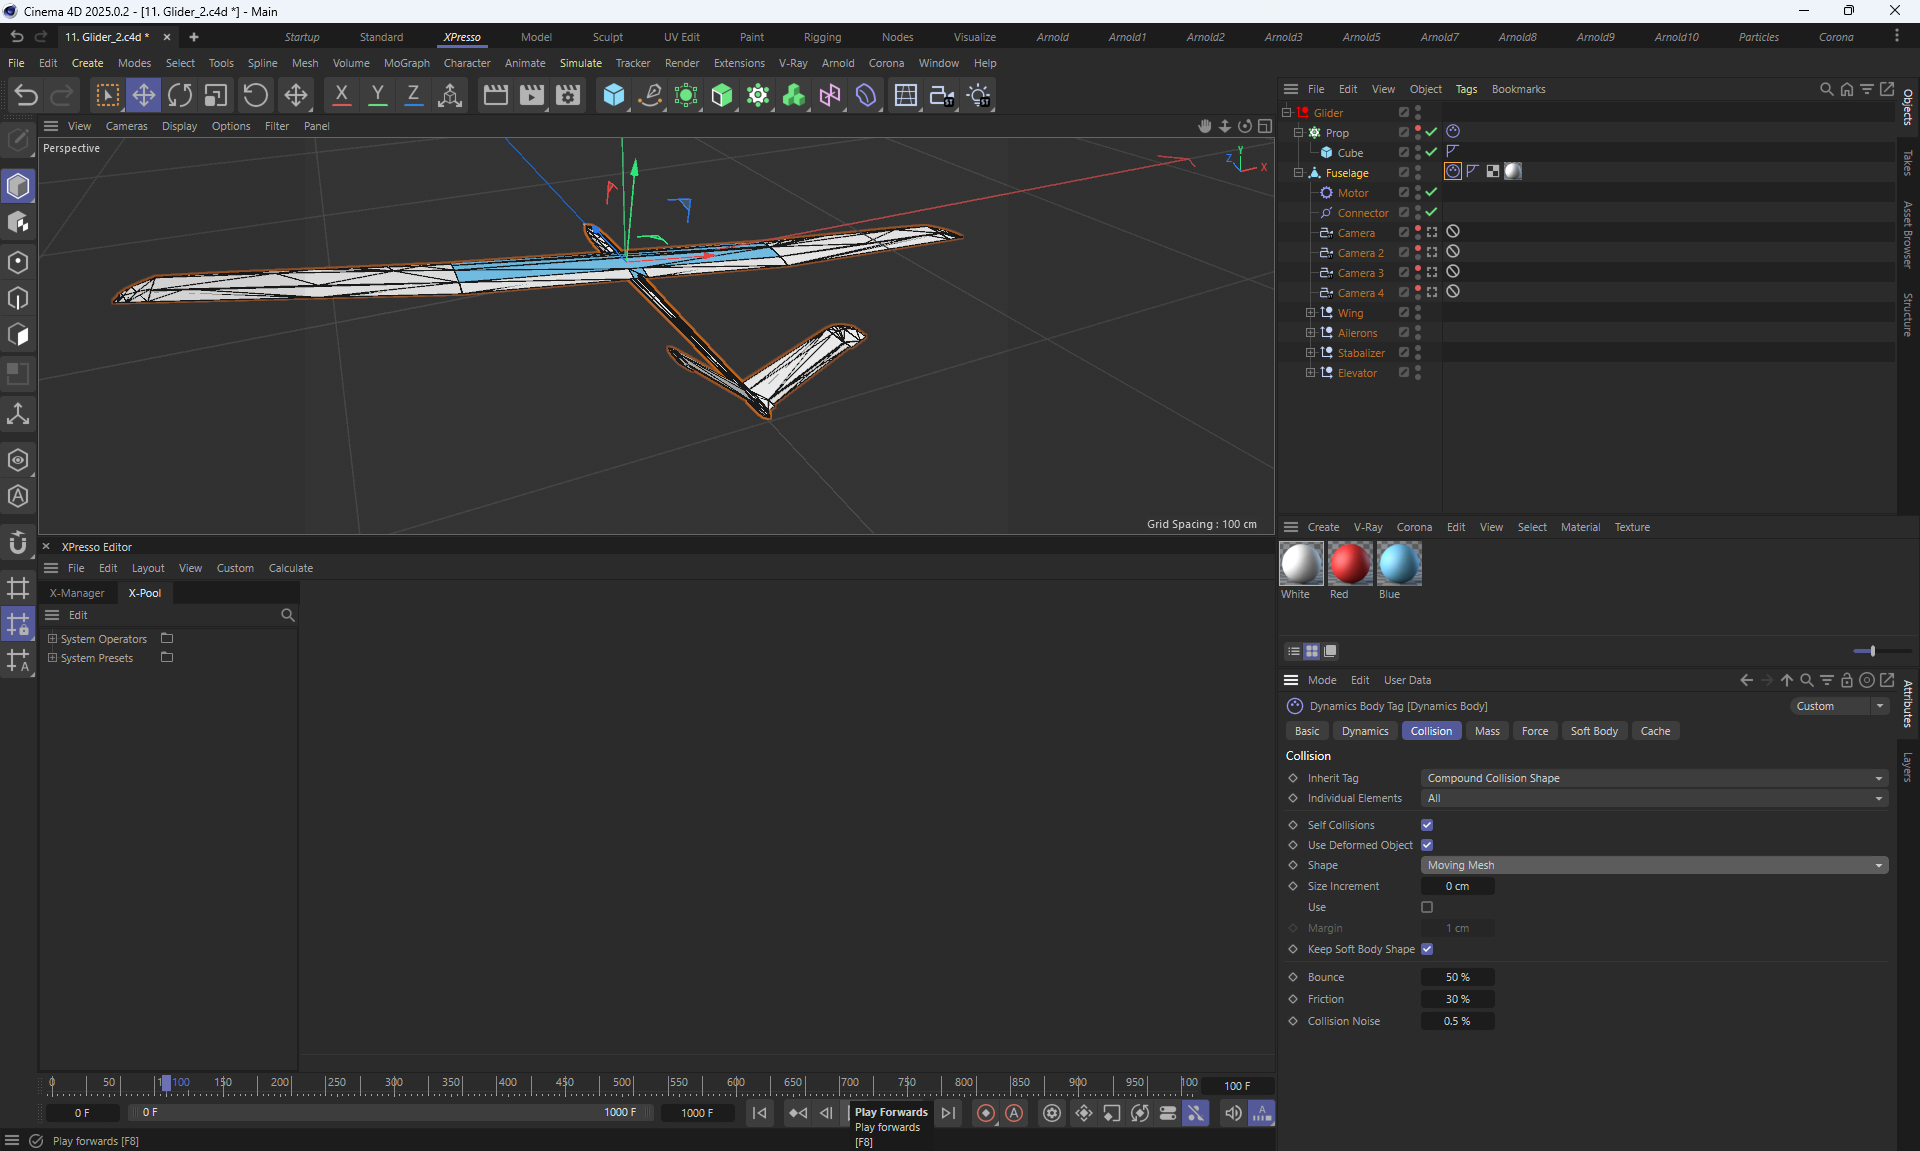
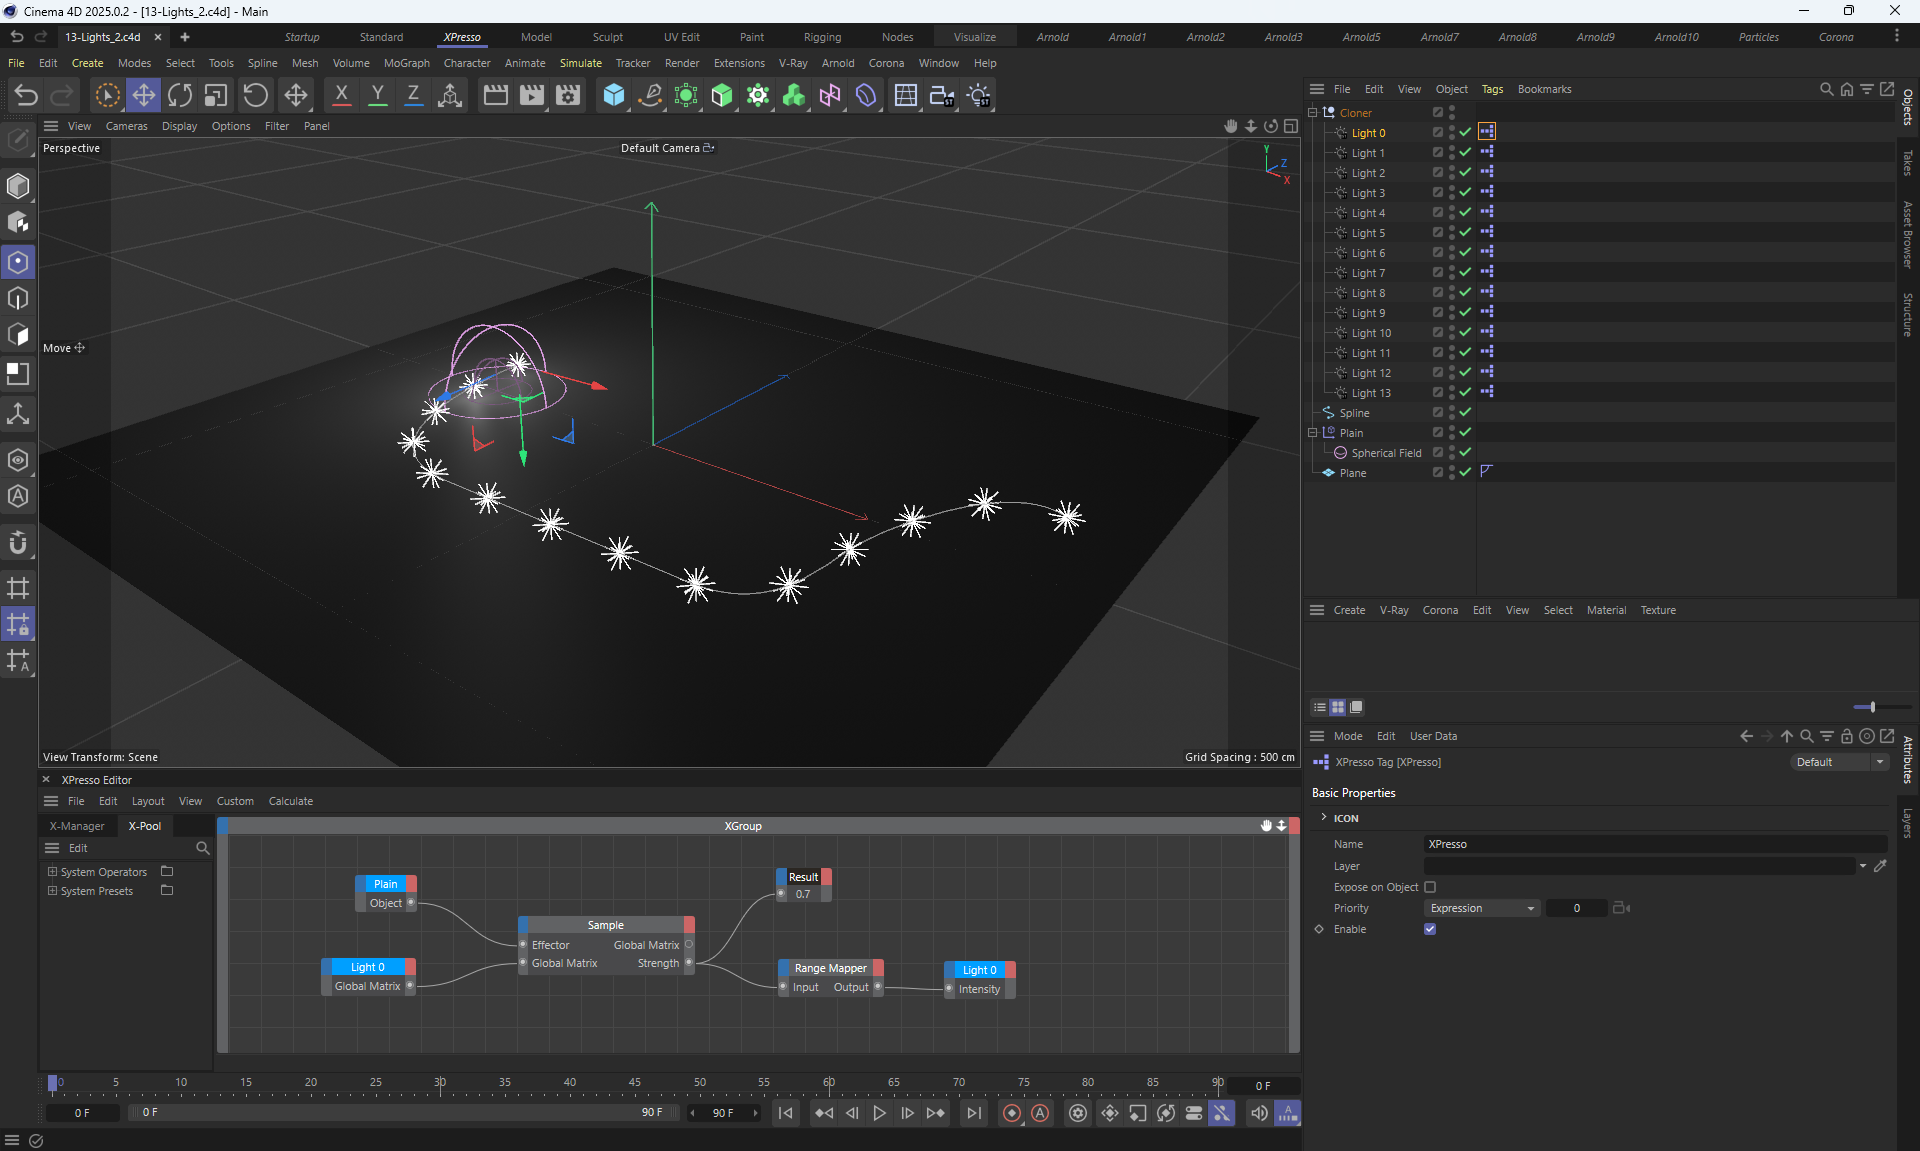
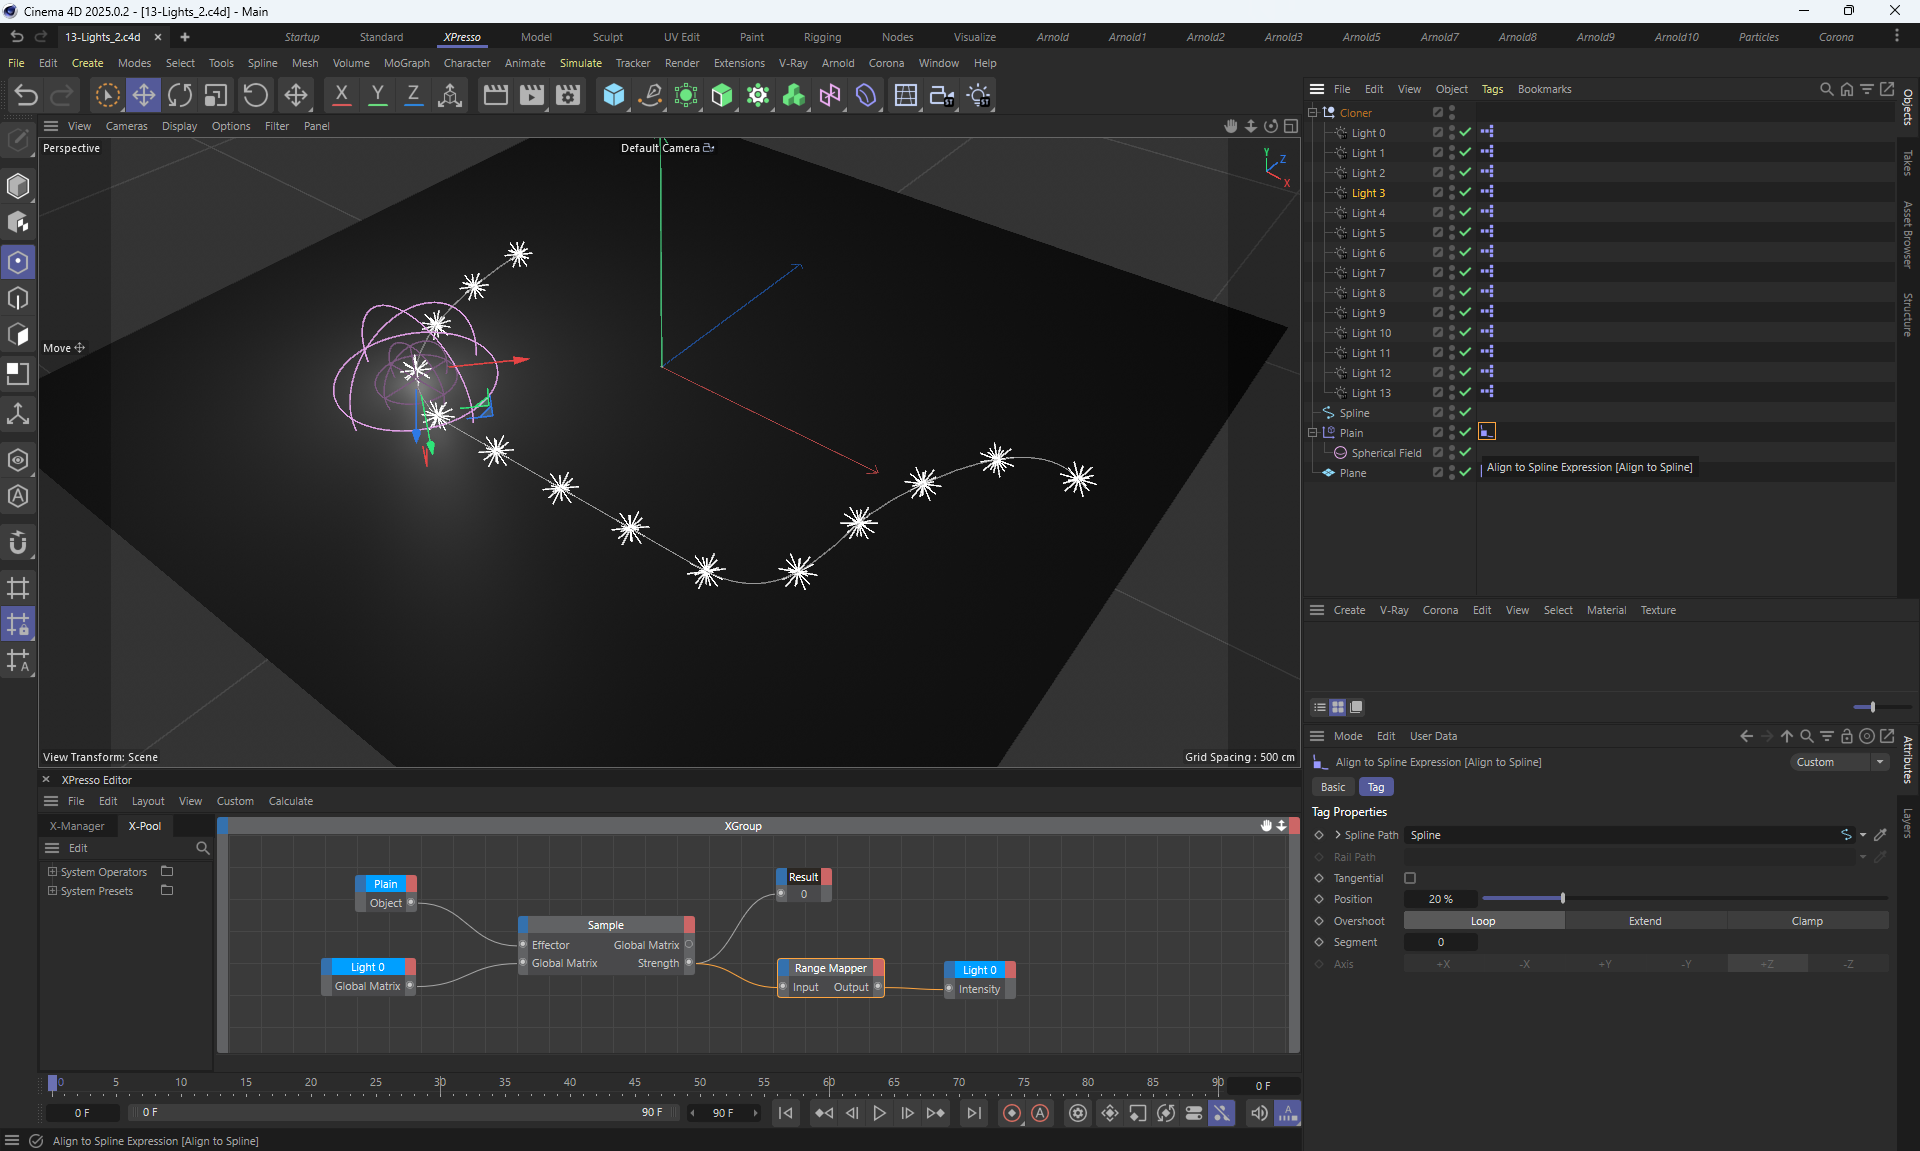
6. Advanced dynamics
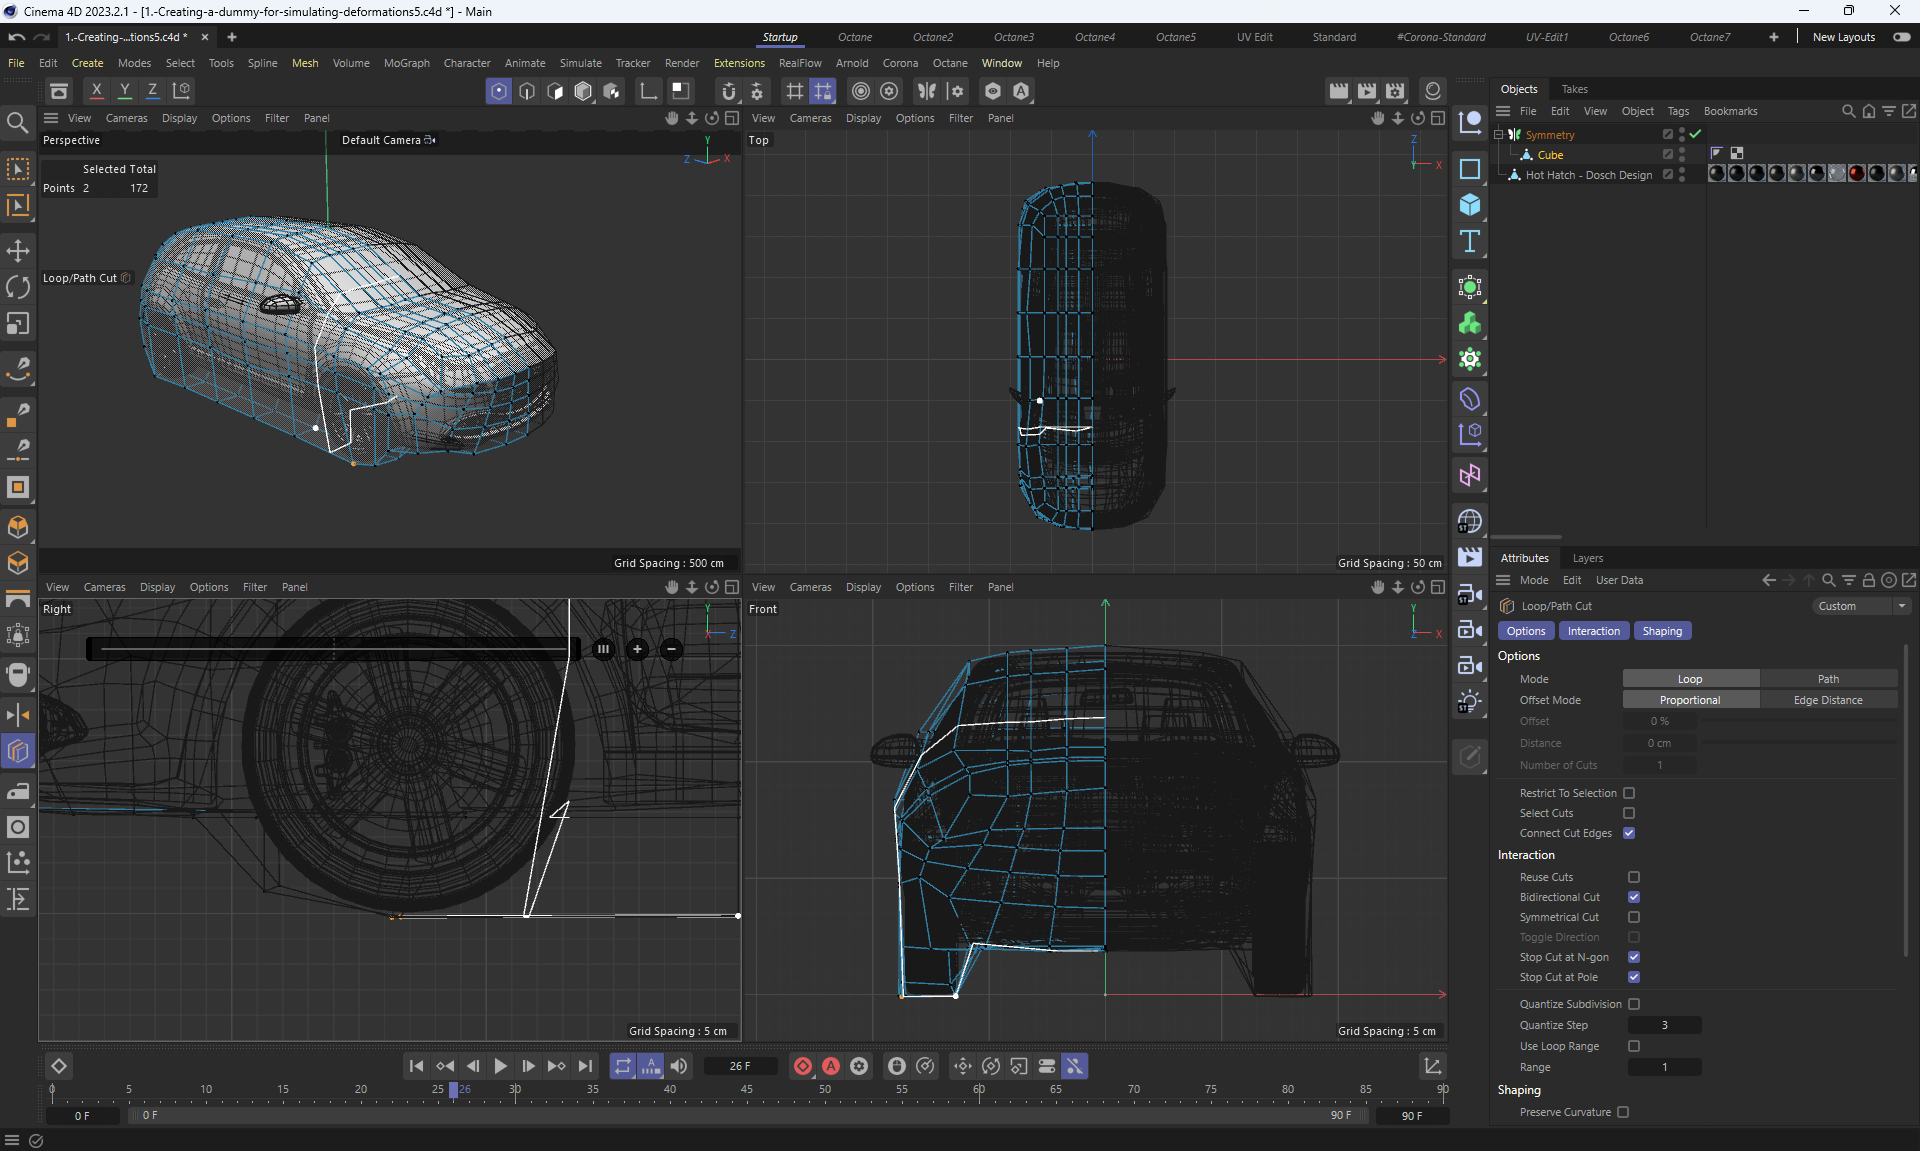
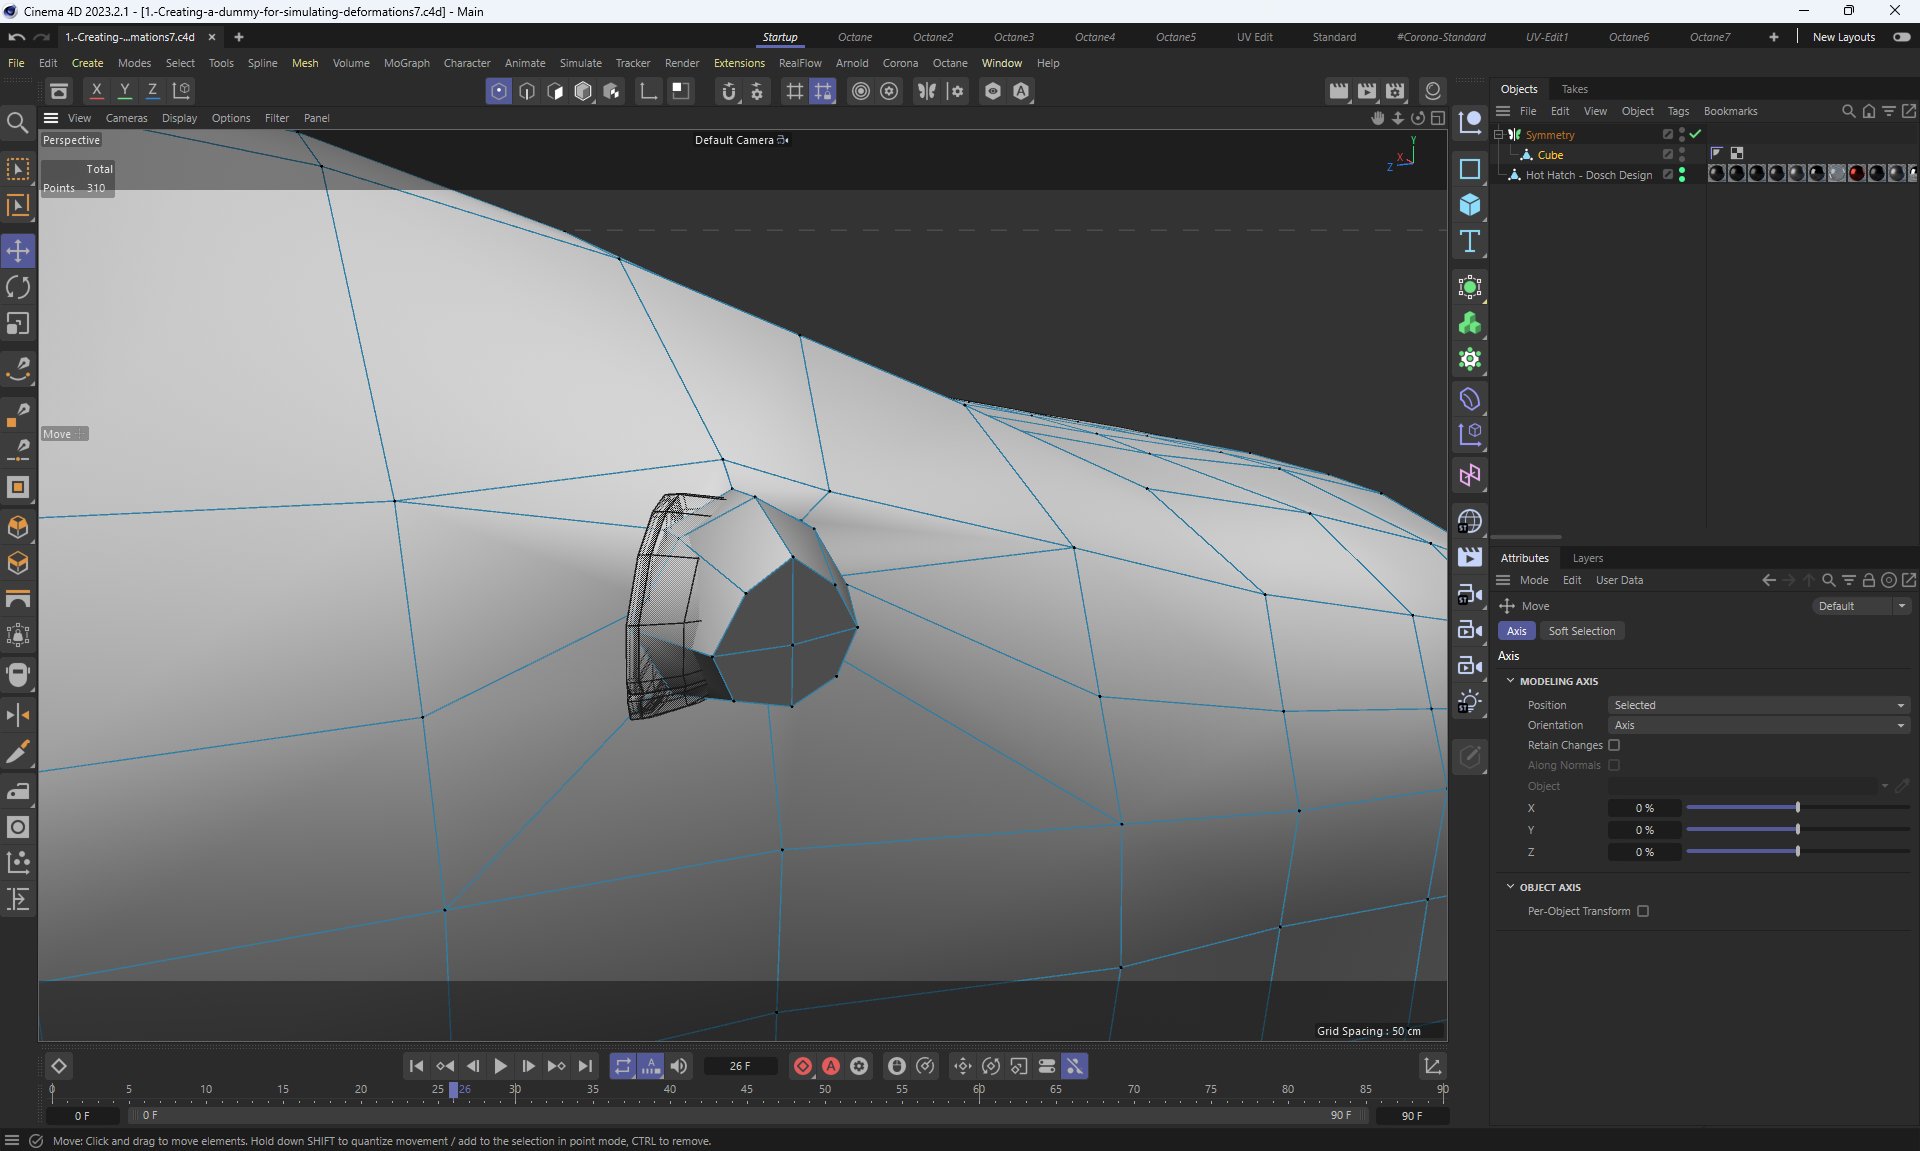
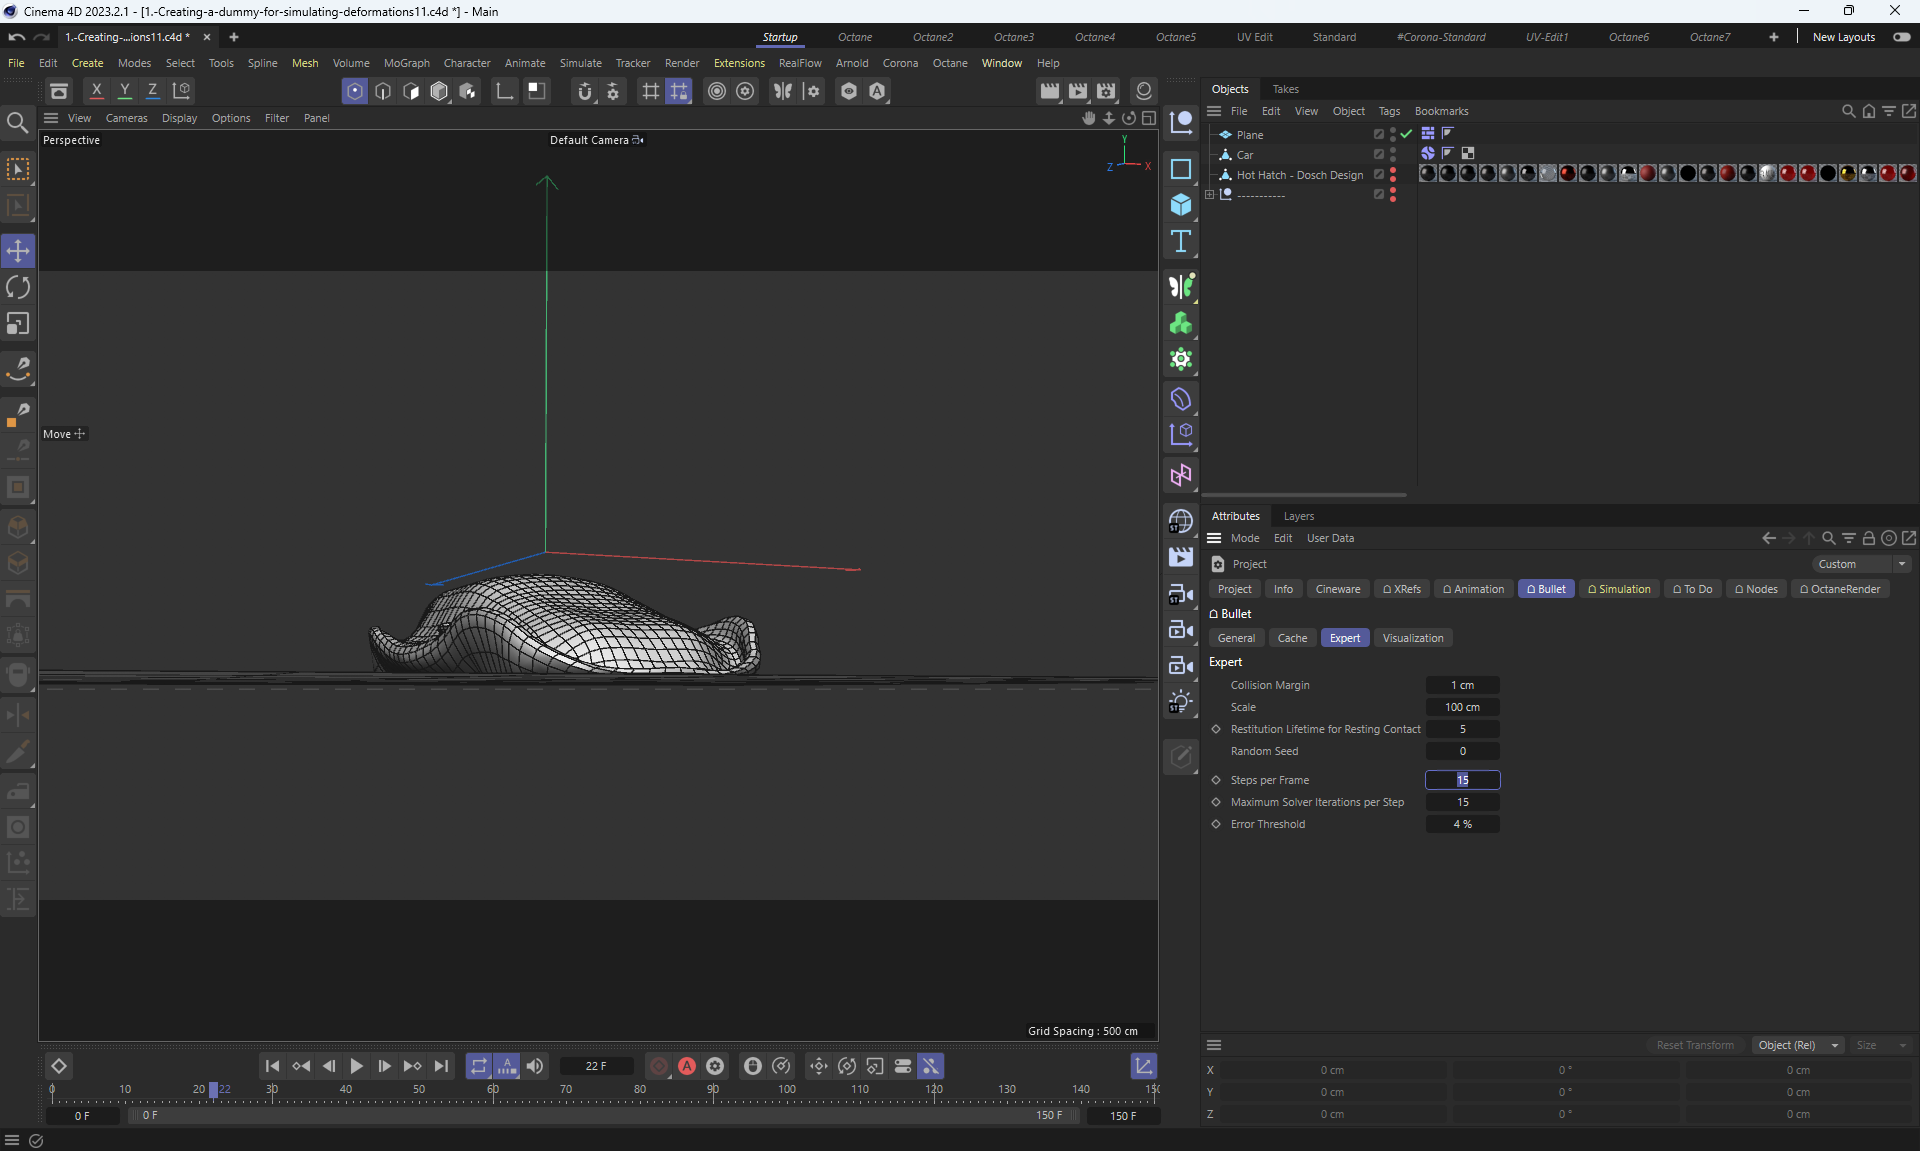
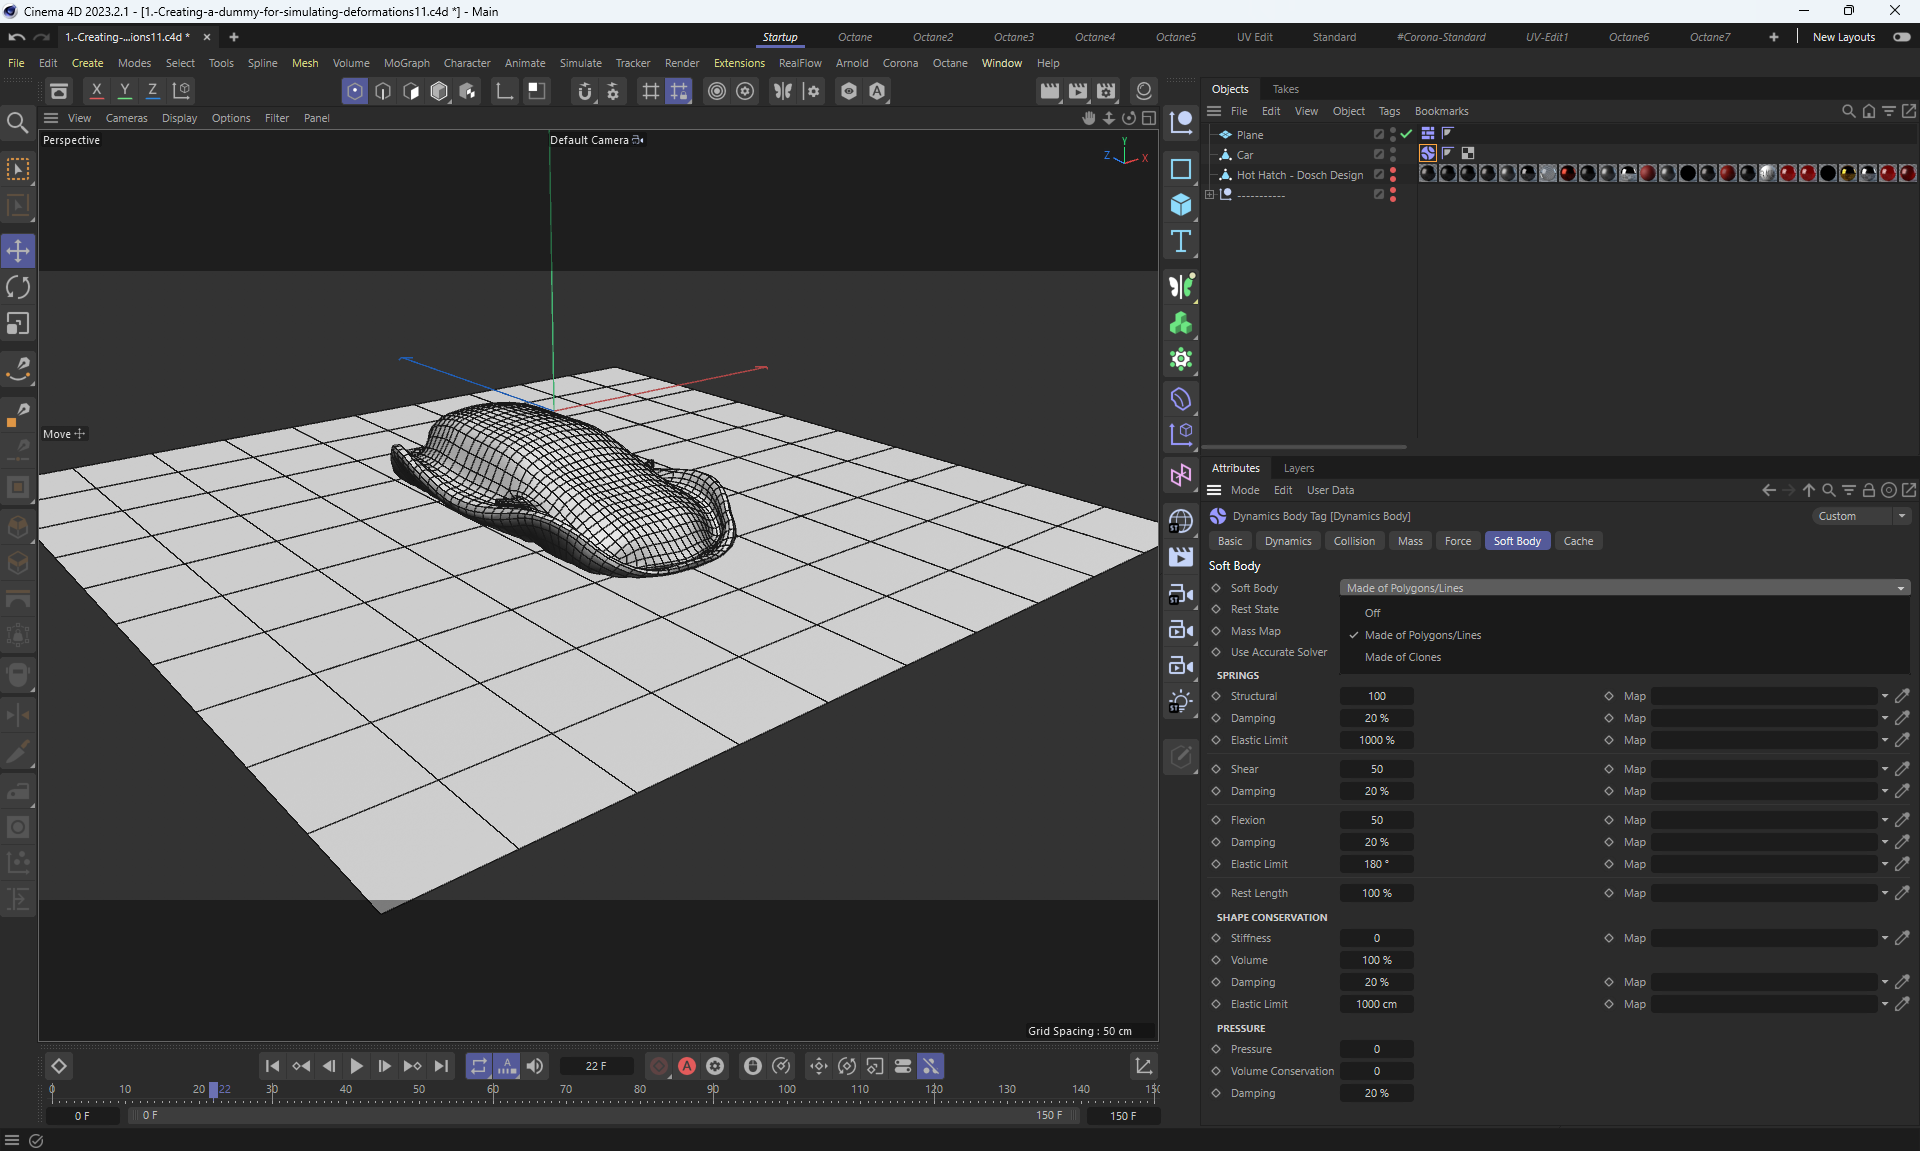
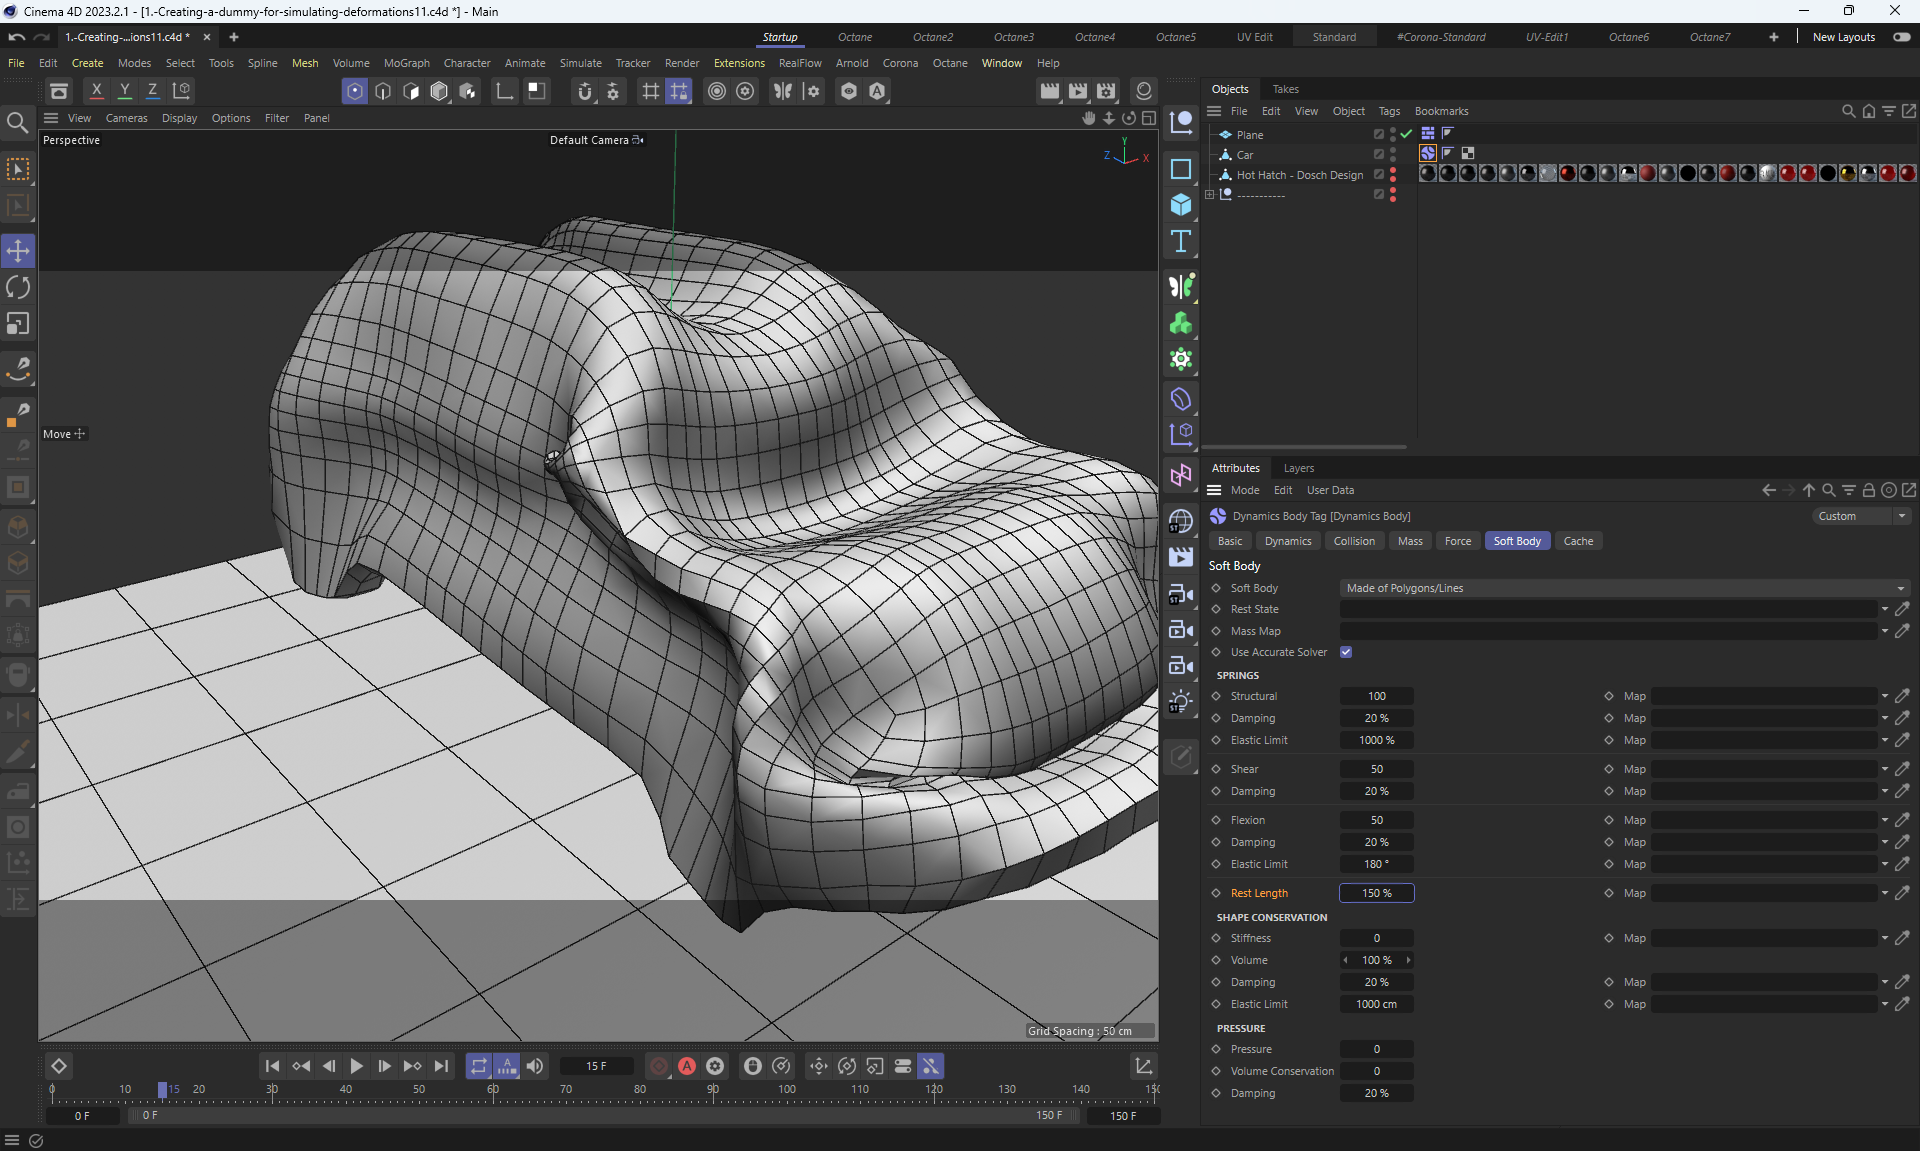
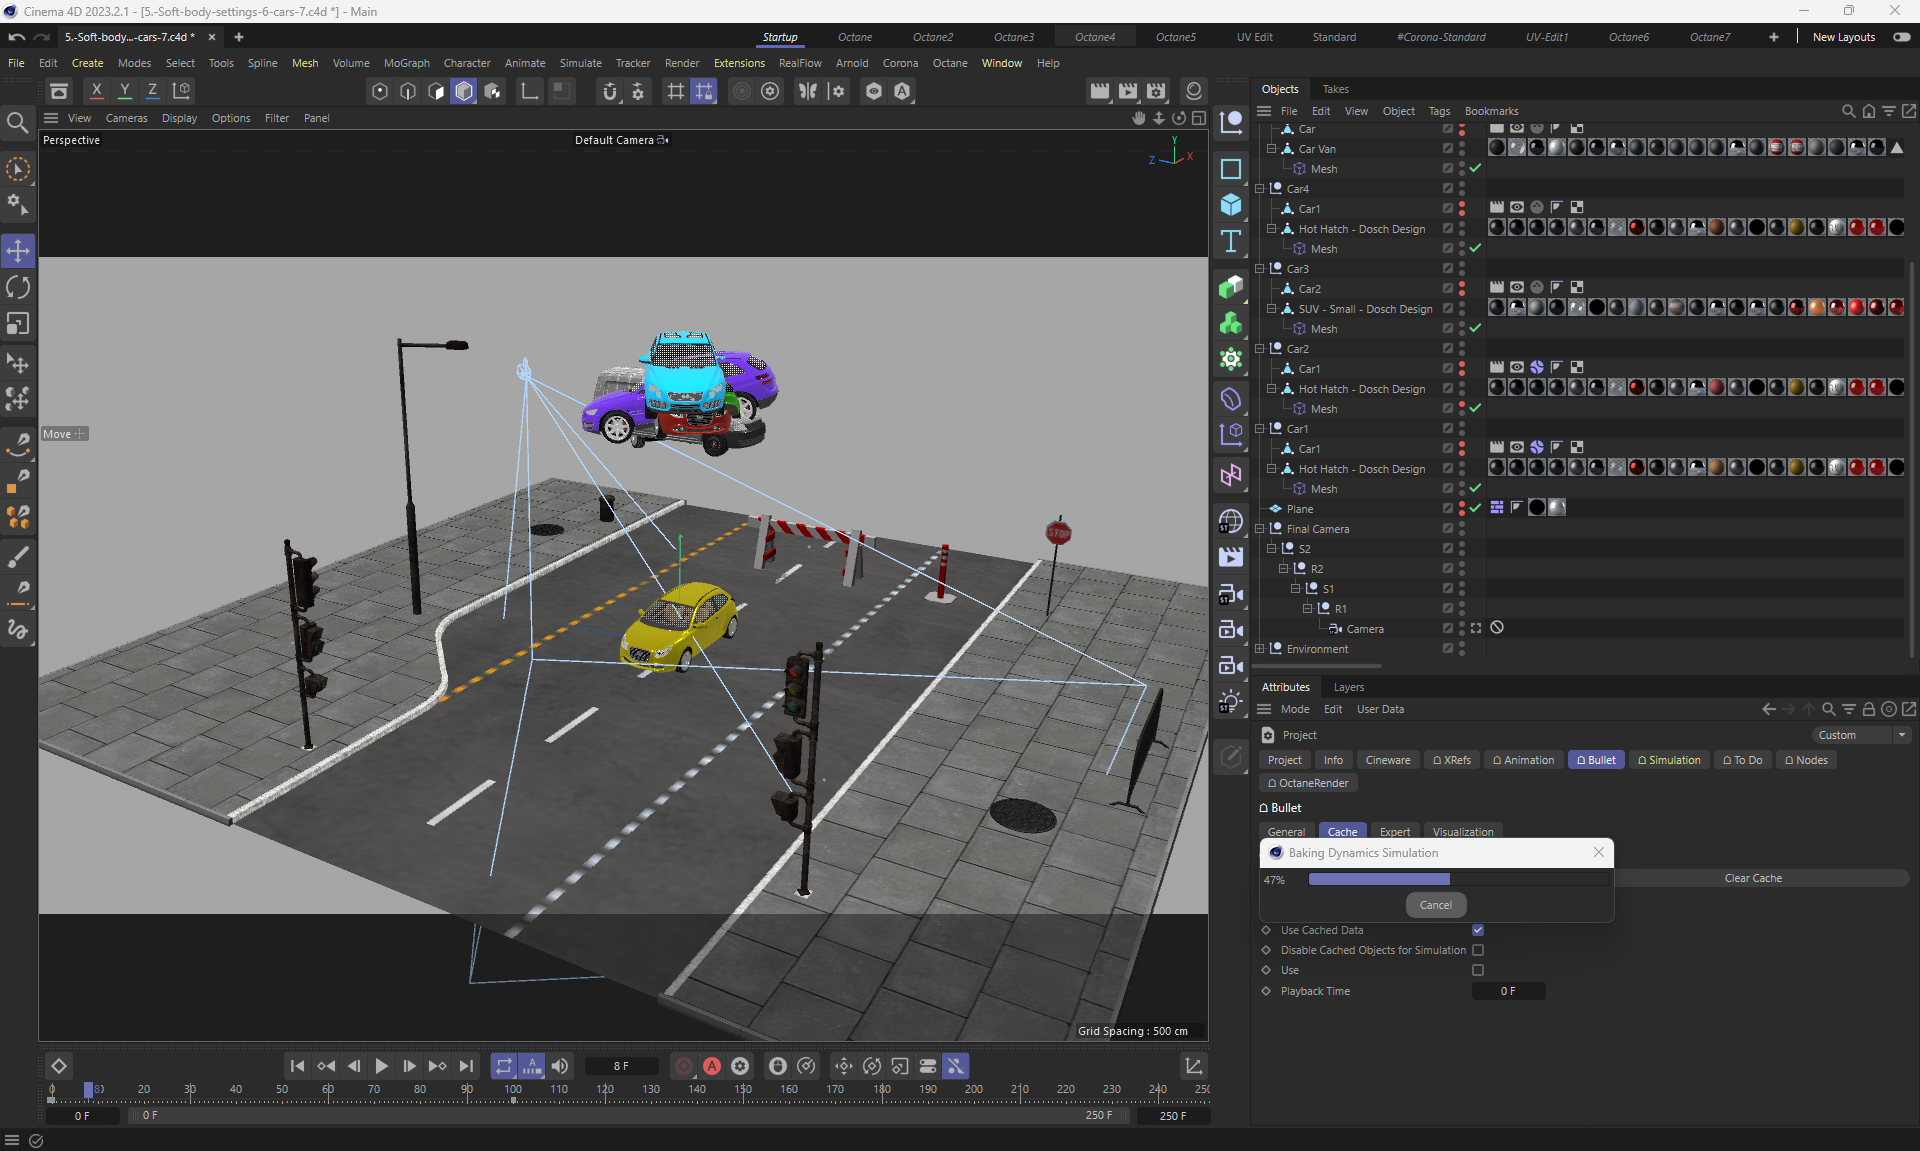
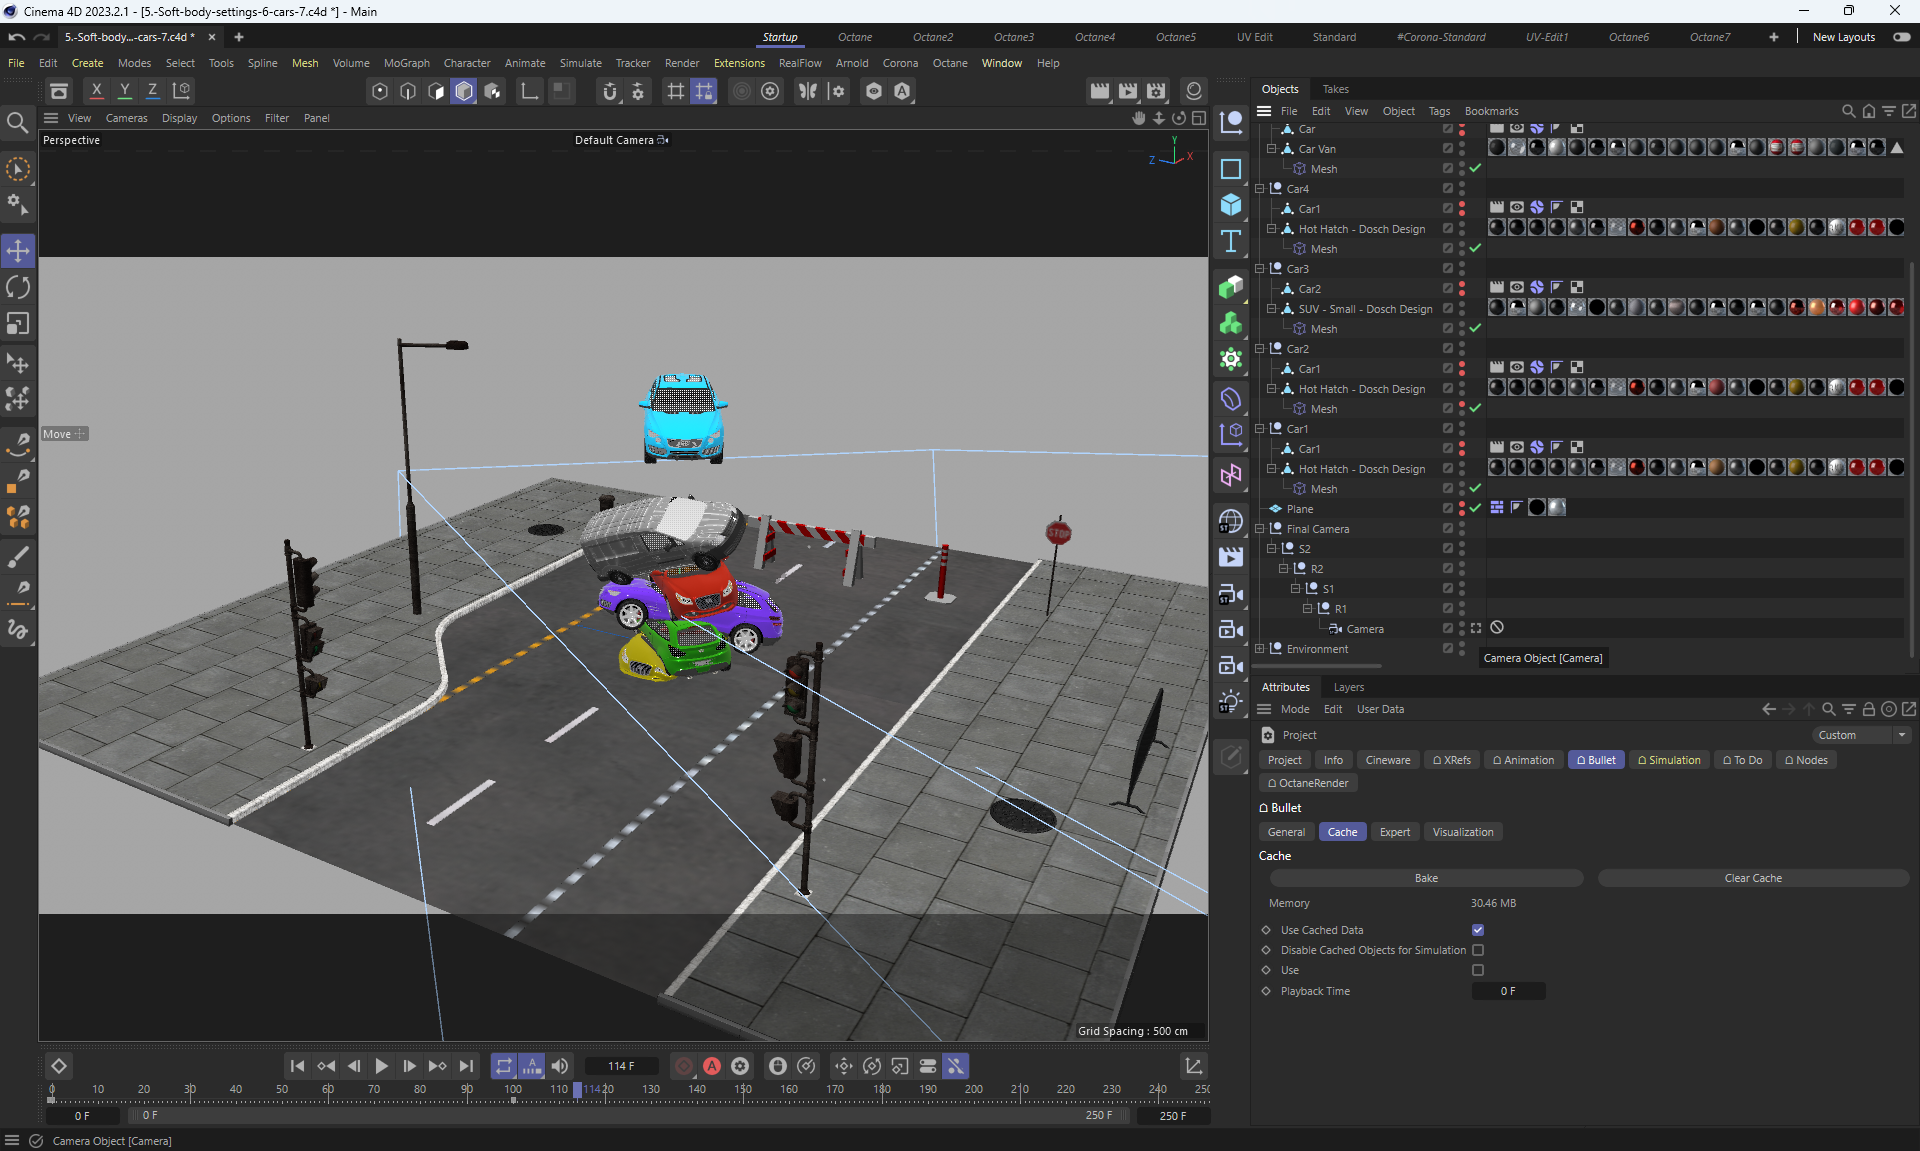
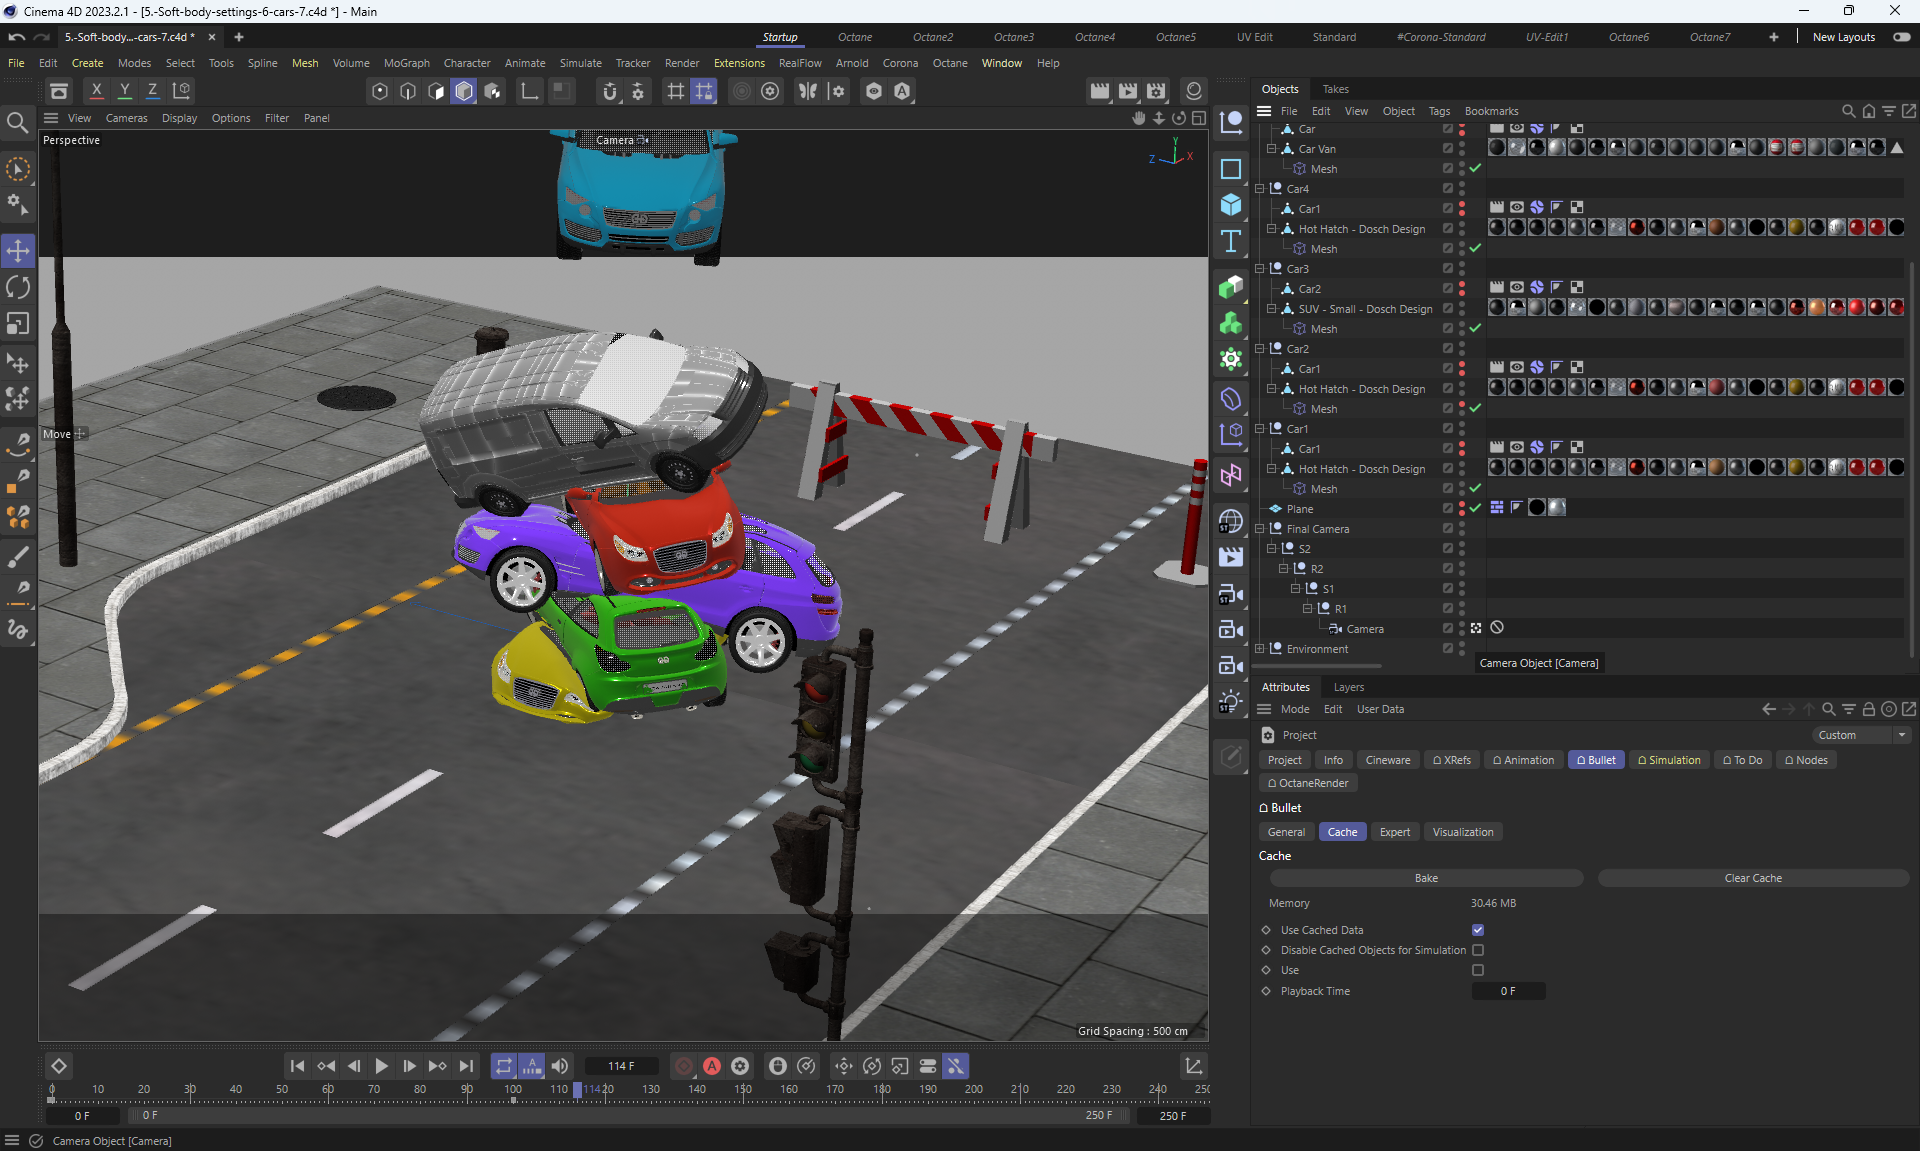
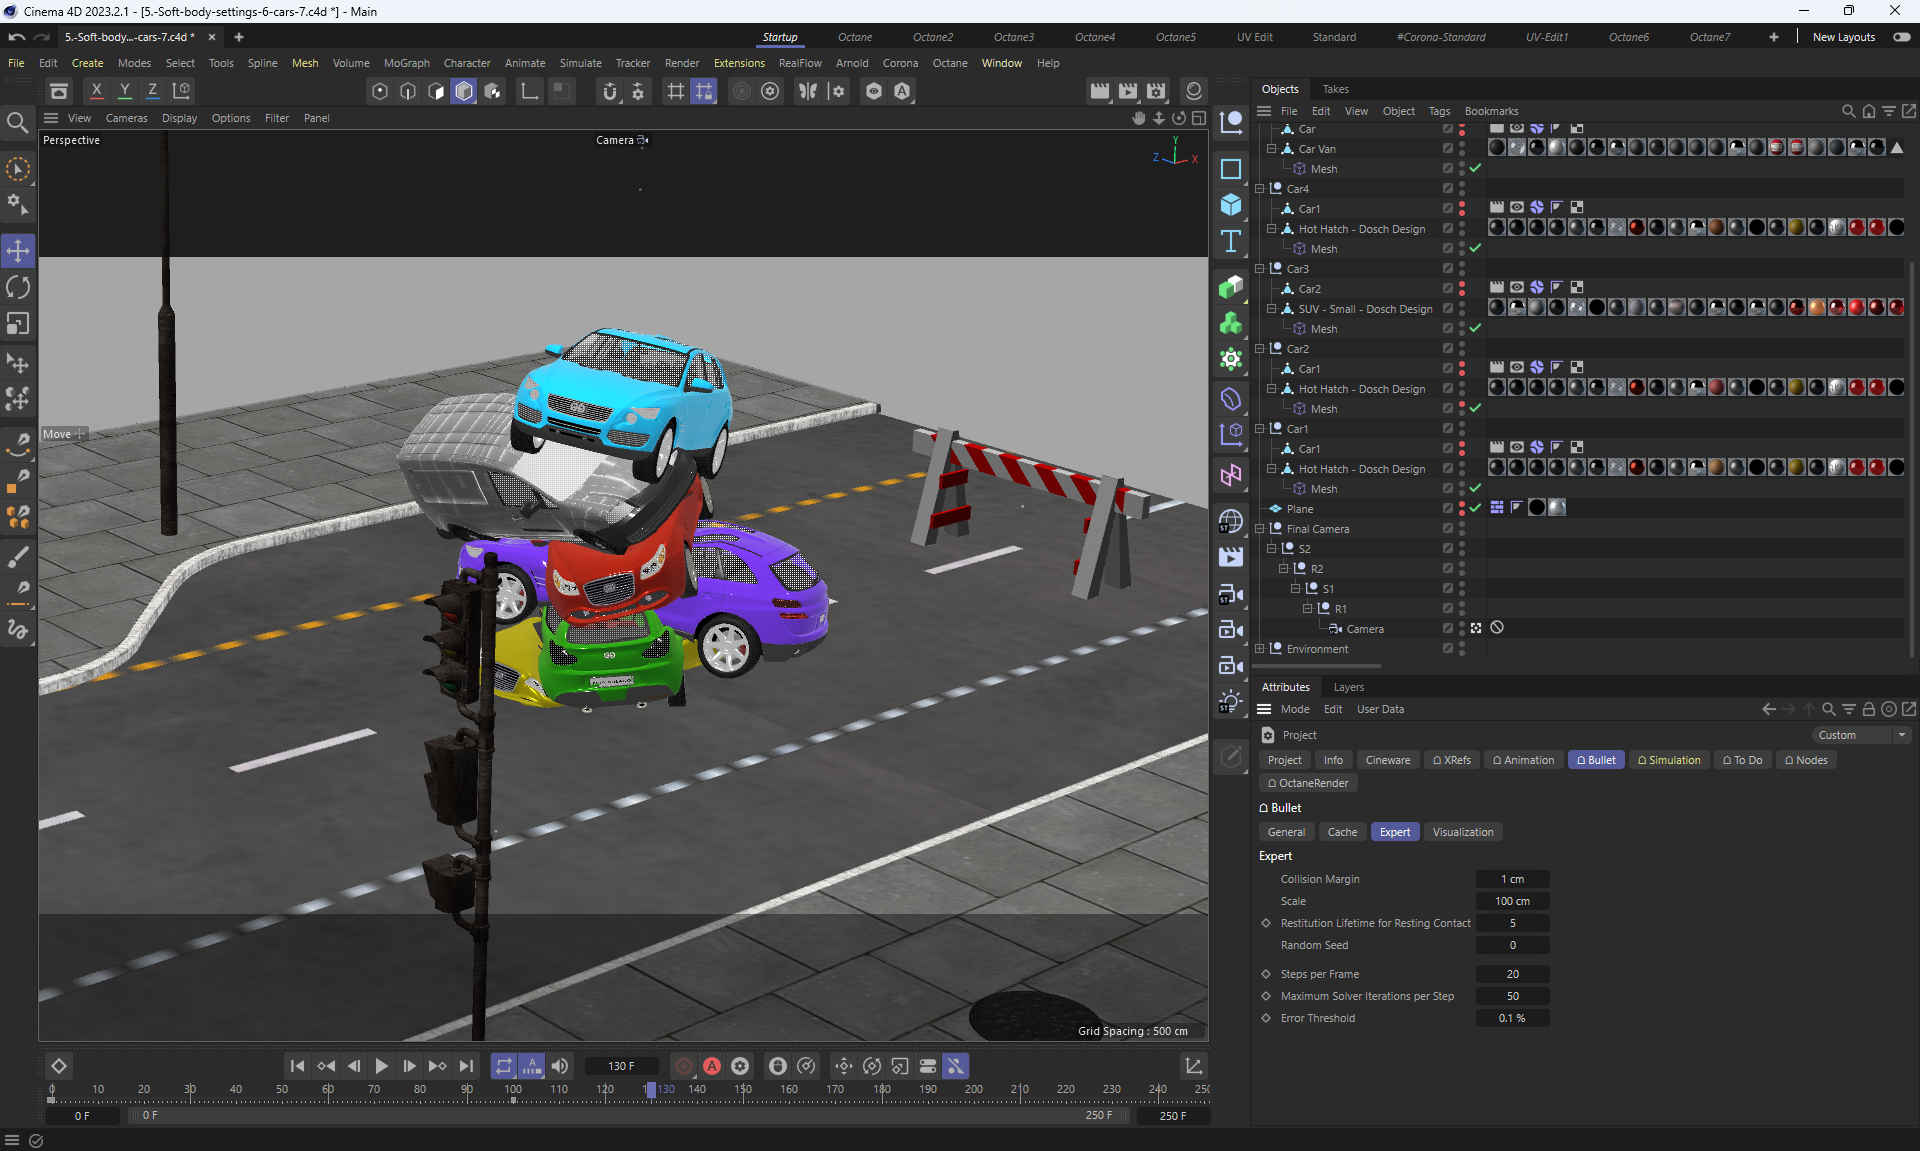
This was a voluminous section without source code. I ran all the scenes during the study, creating soft body animations takes a lot of time.
Depending on the different project settings Steps per Frame, Maximum Solver Iteration per Step and Error Threshold, the project animation can be better, worse or even run incorrectly and crash, these settings affect the speed of animation testing.
With complex deformations and high calculation accuracy settings, the scene starts to freeze, there is no smoothness of scene playback during testing.
To do this, you need to bake the project, you need to wait a while until the animation is baked and then this scene can be played in normal mode without freezing. But it is not possible to bake the project after each change, this slows down and complicates the work when creating soft body animations, if you first need to test many settings.
The Four Most Important Settings for Softbodies
Video (9.7mb)
Video1 (4mb)
Video2 (4mb)
Video1 (6mb)
more details about this animation

he author used
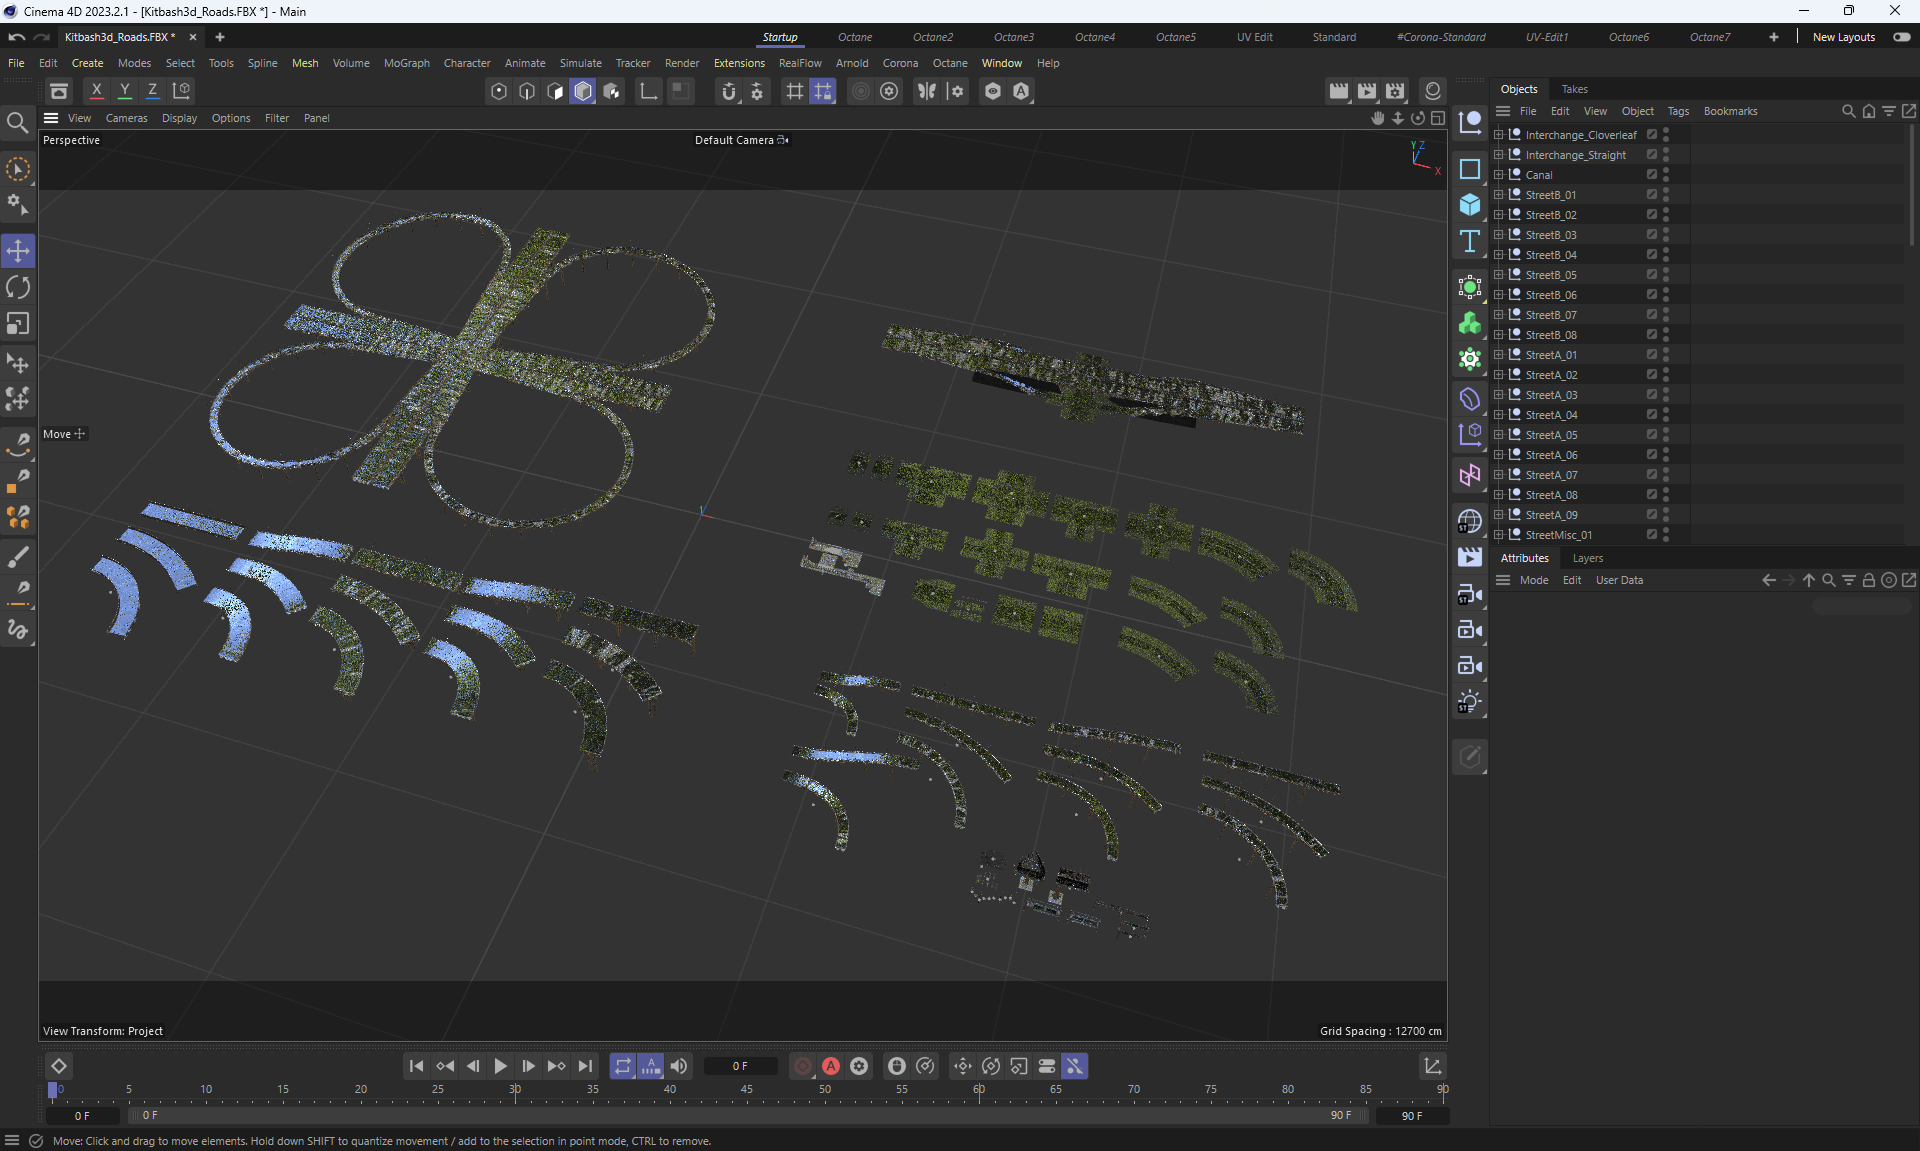
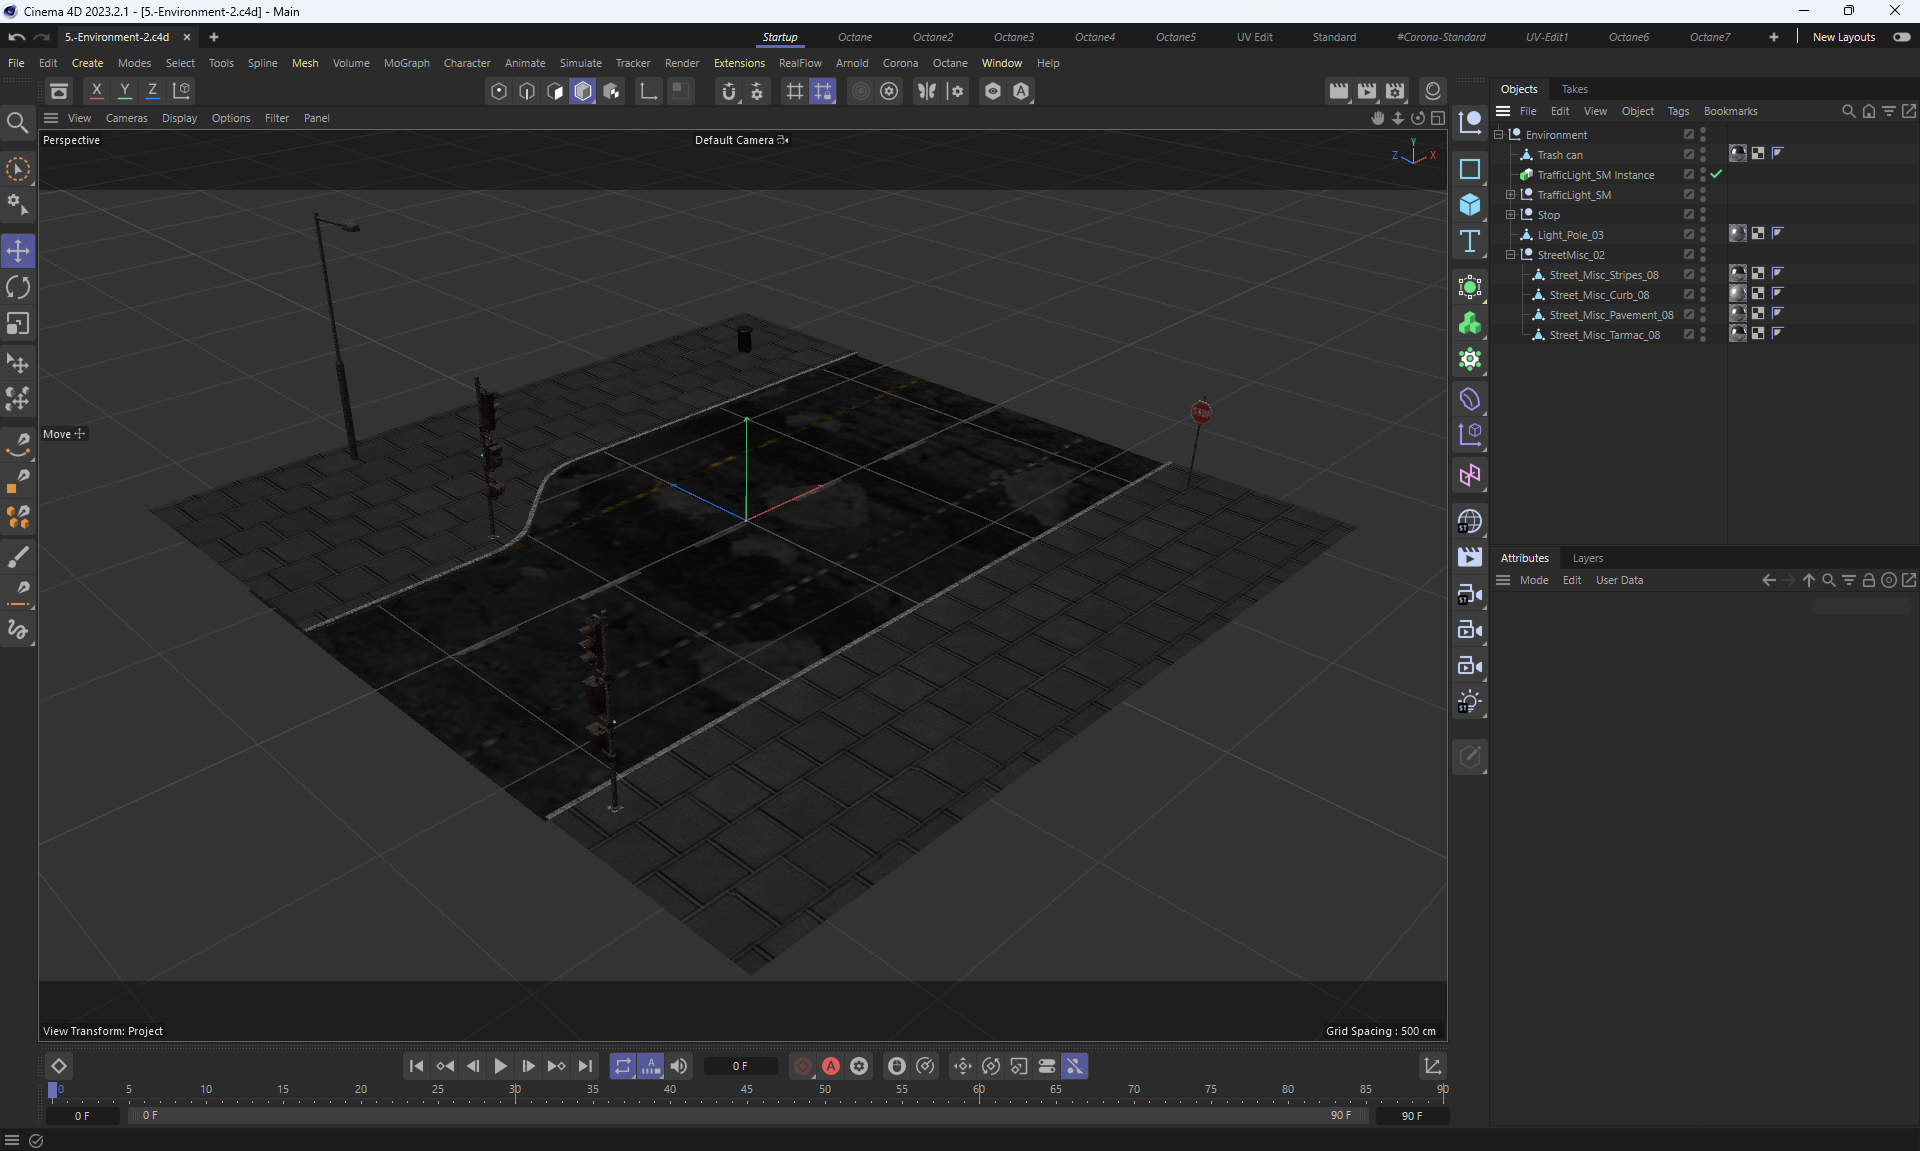
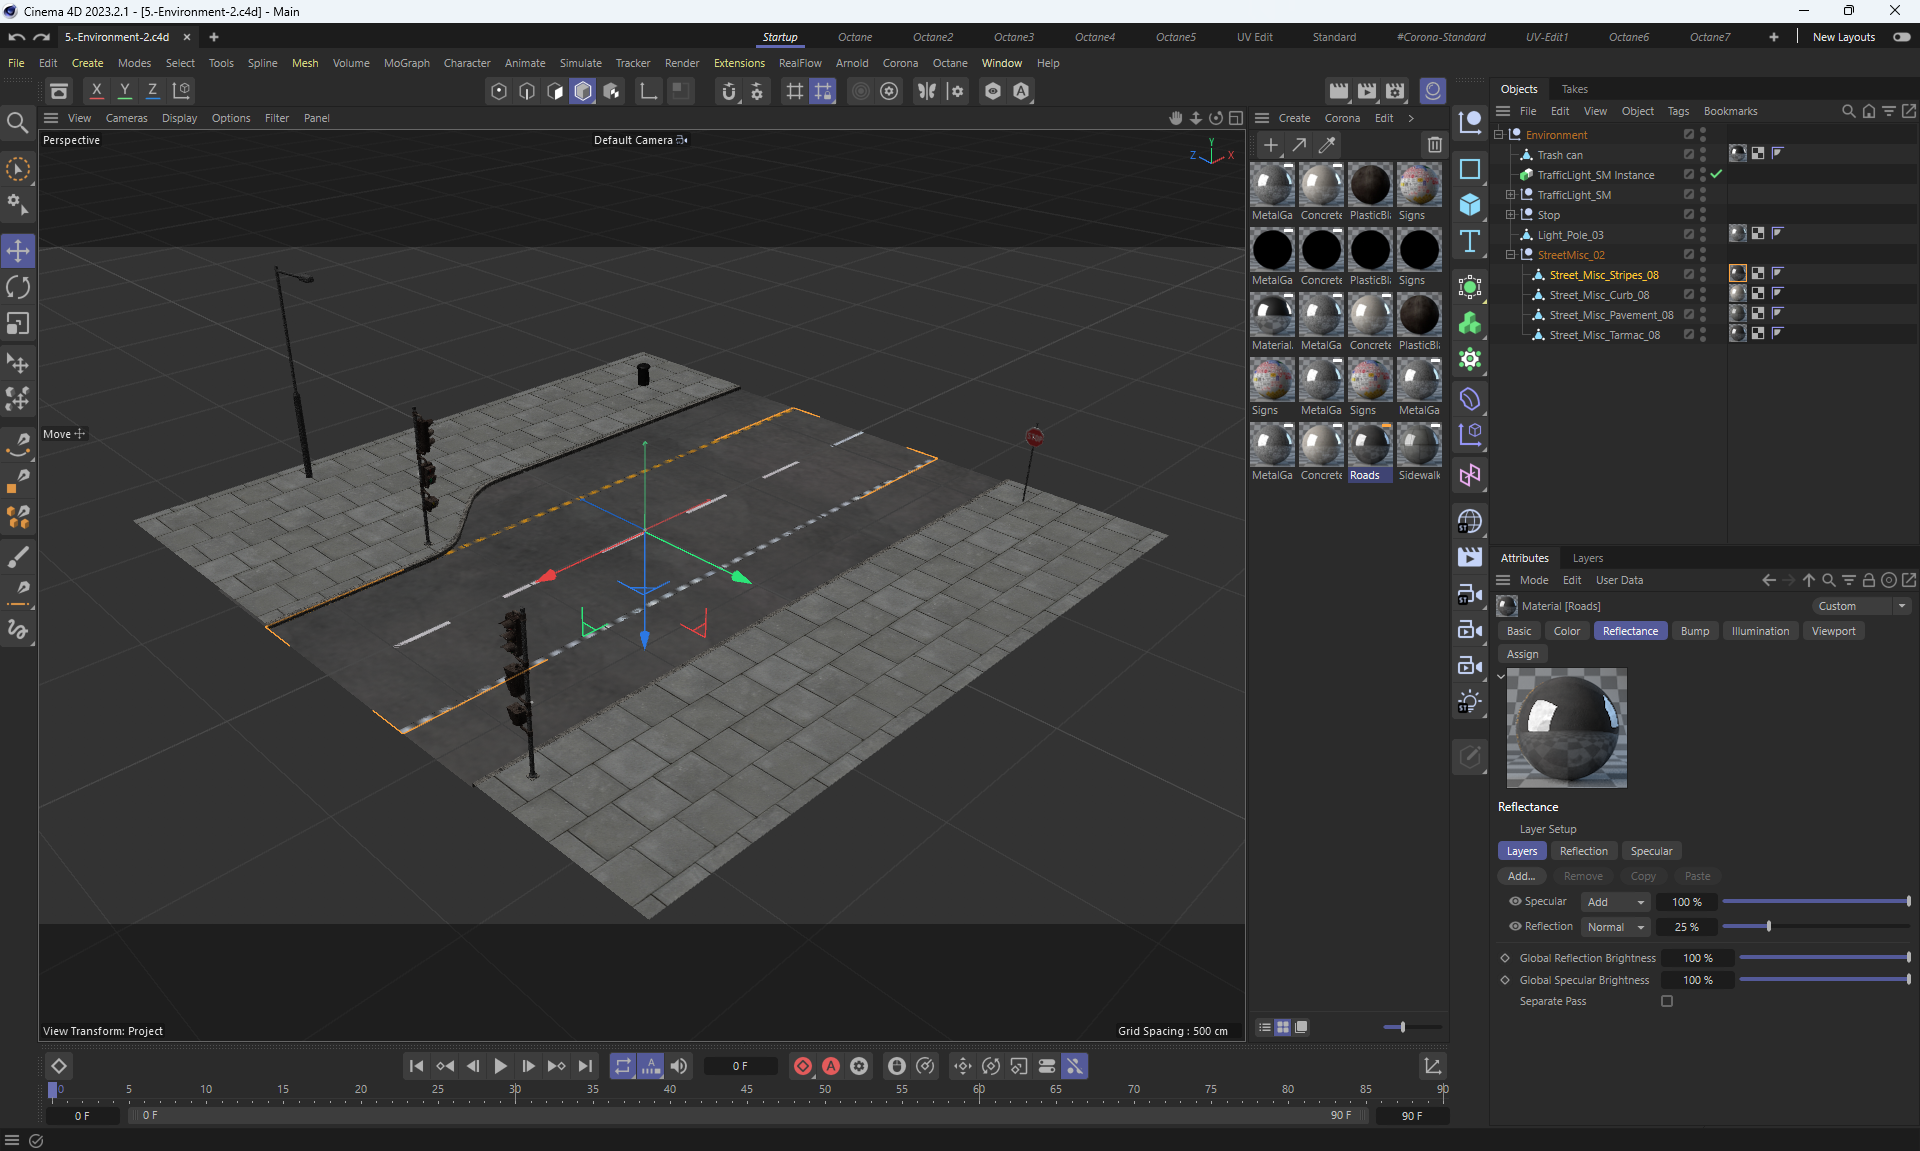
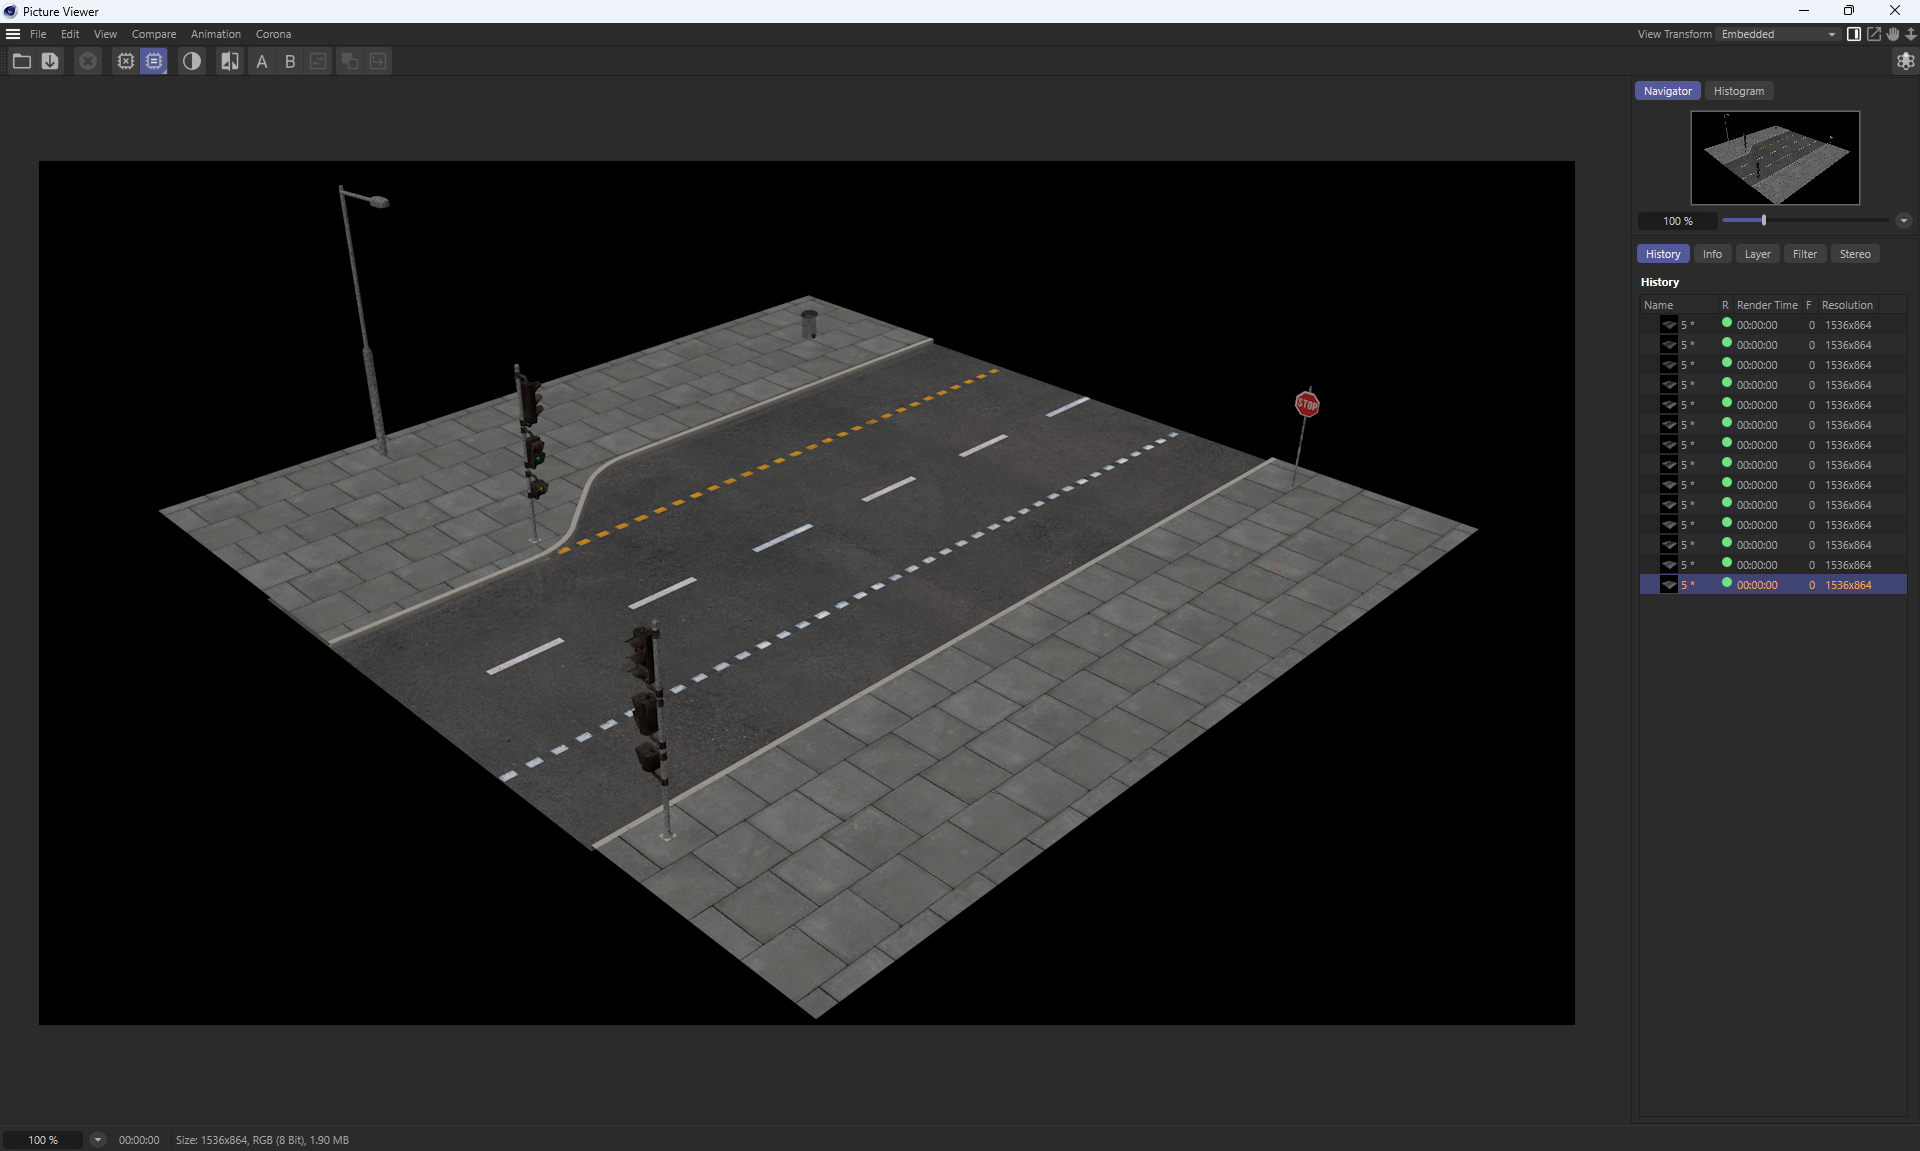
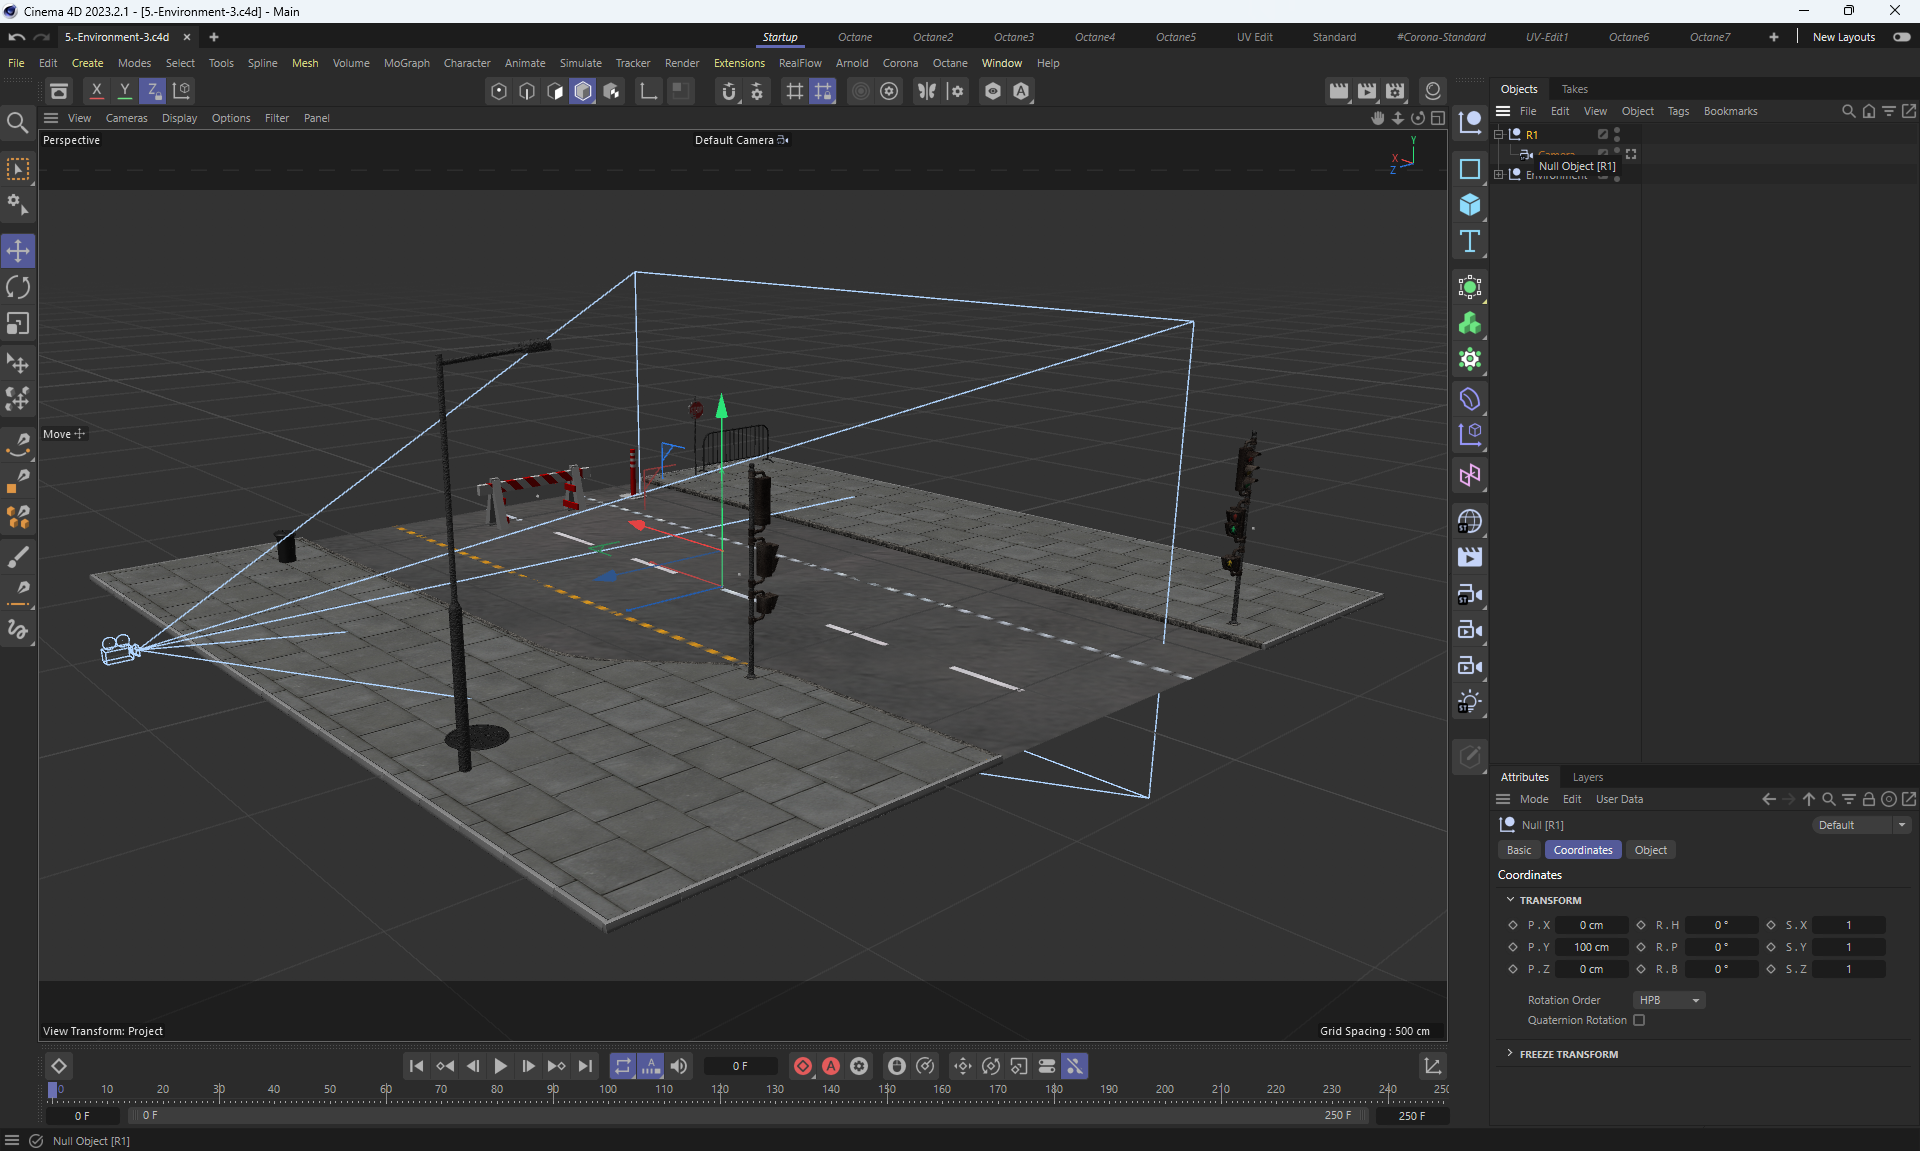
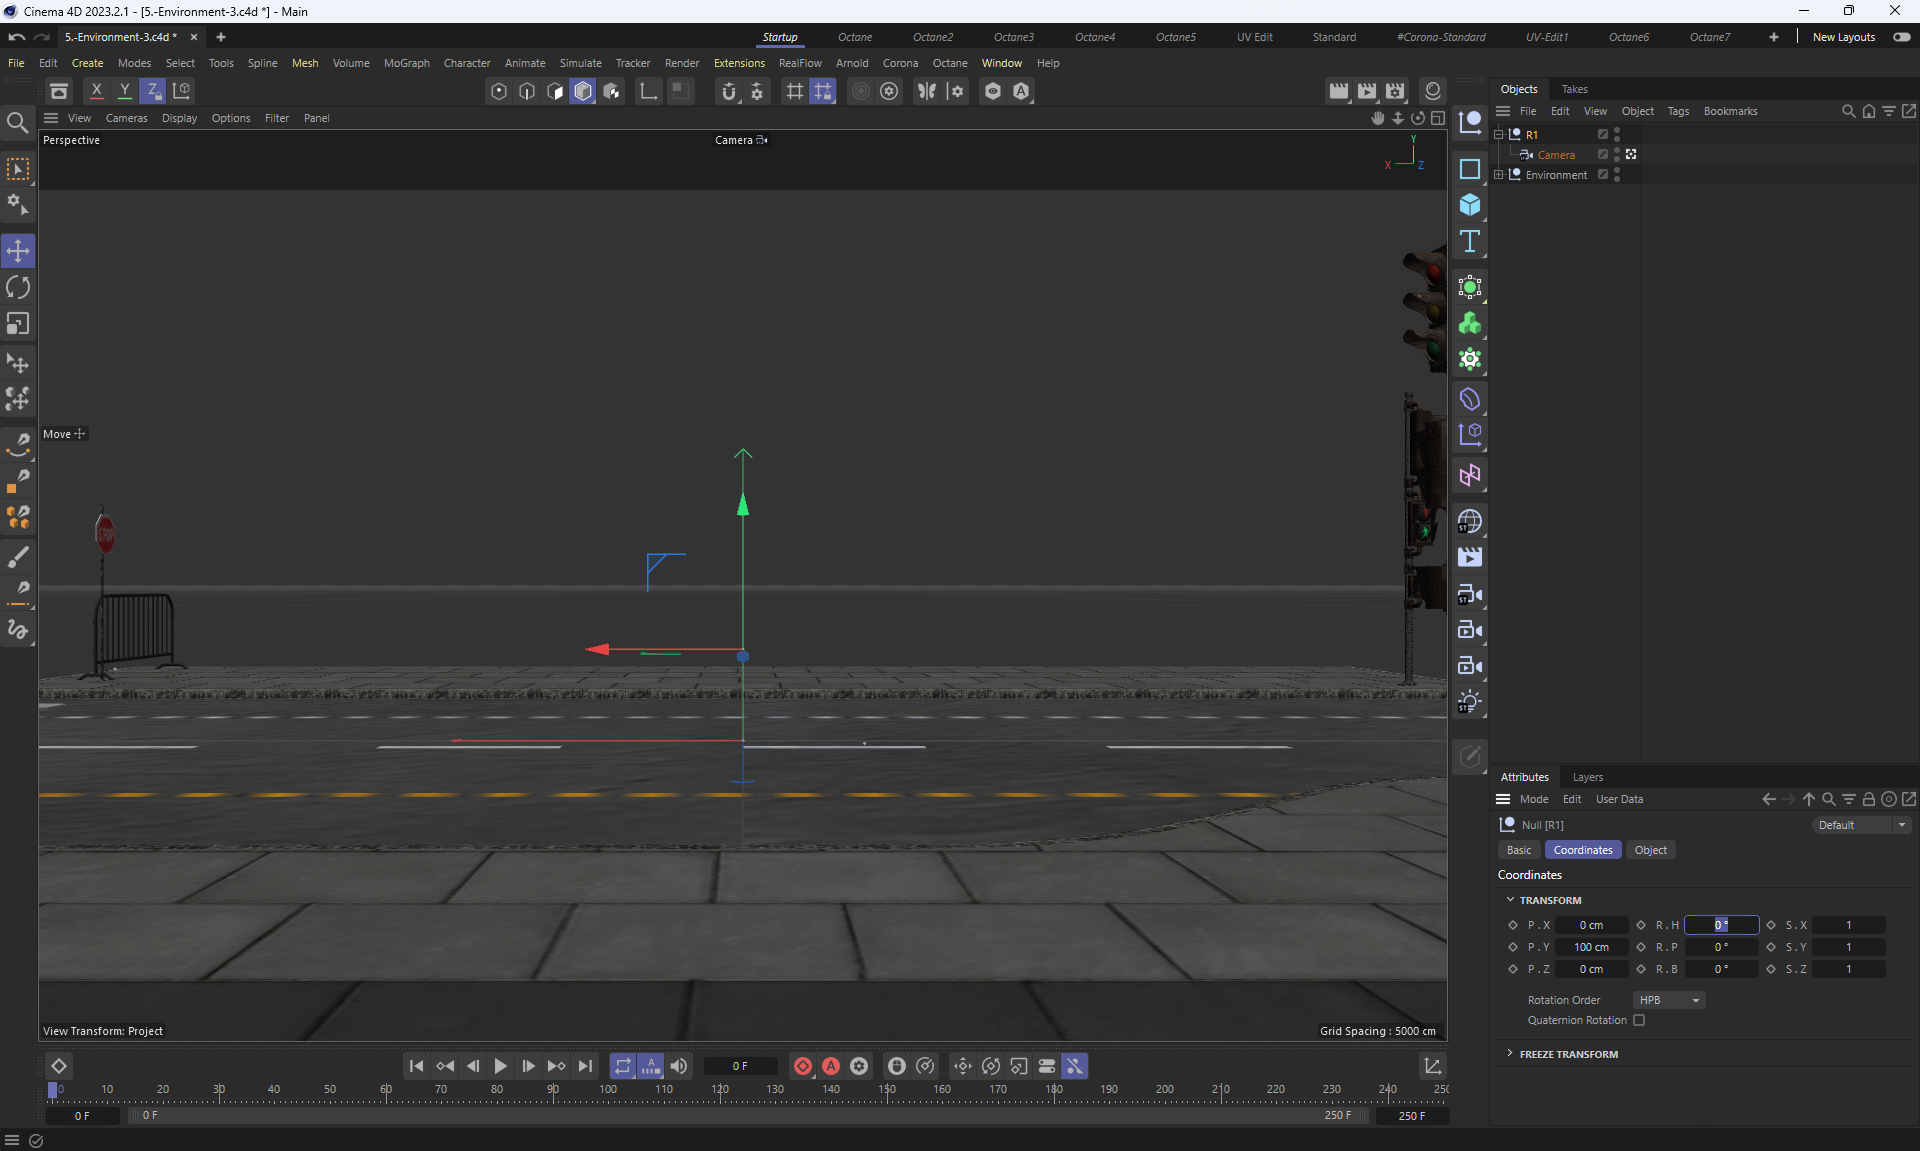
landscape of roads and objects
I found this landscape Kitbash3d roads
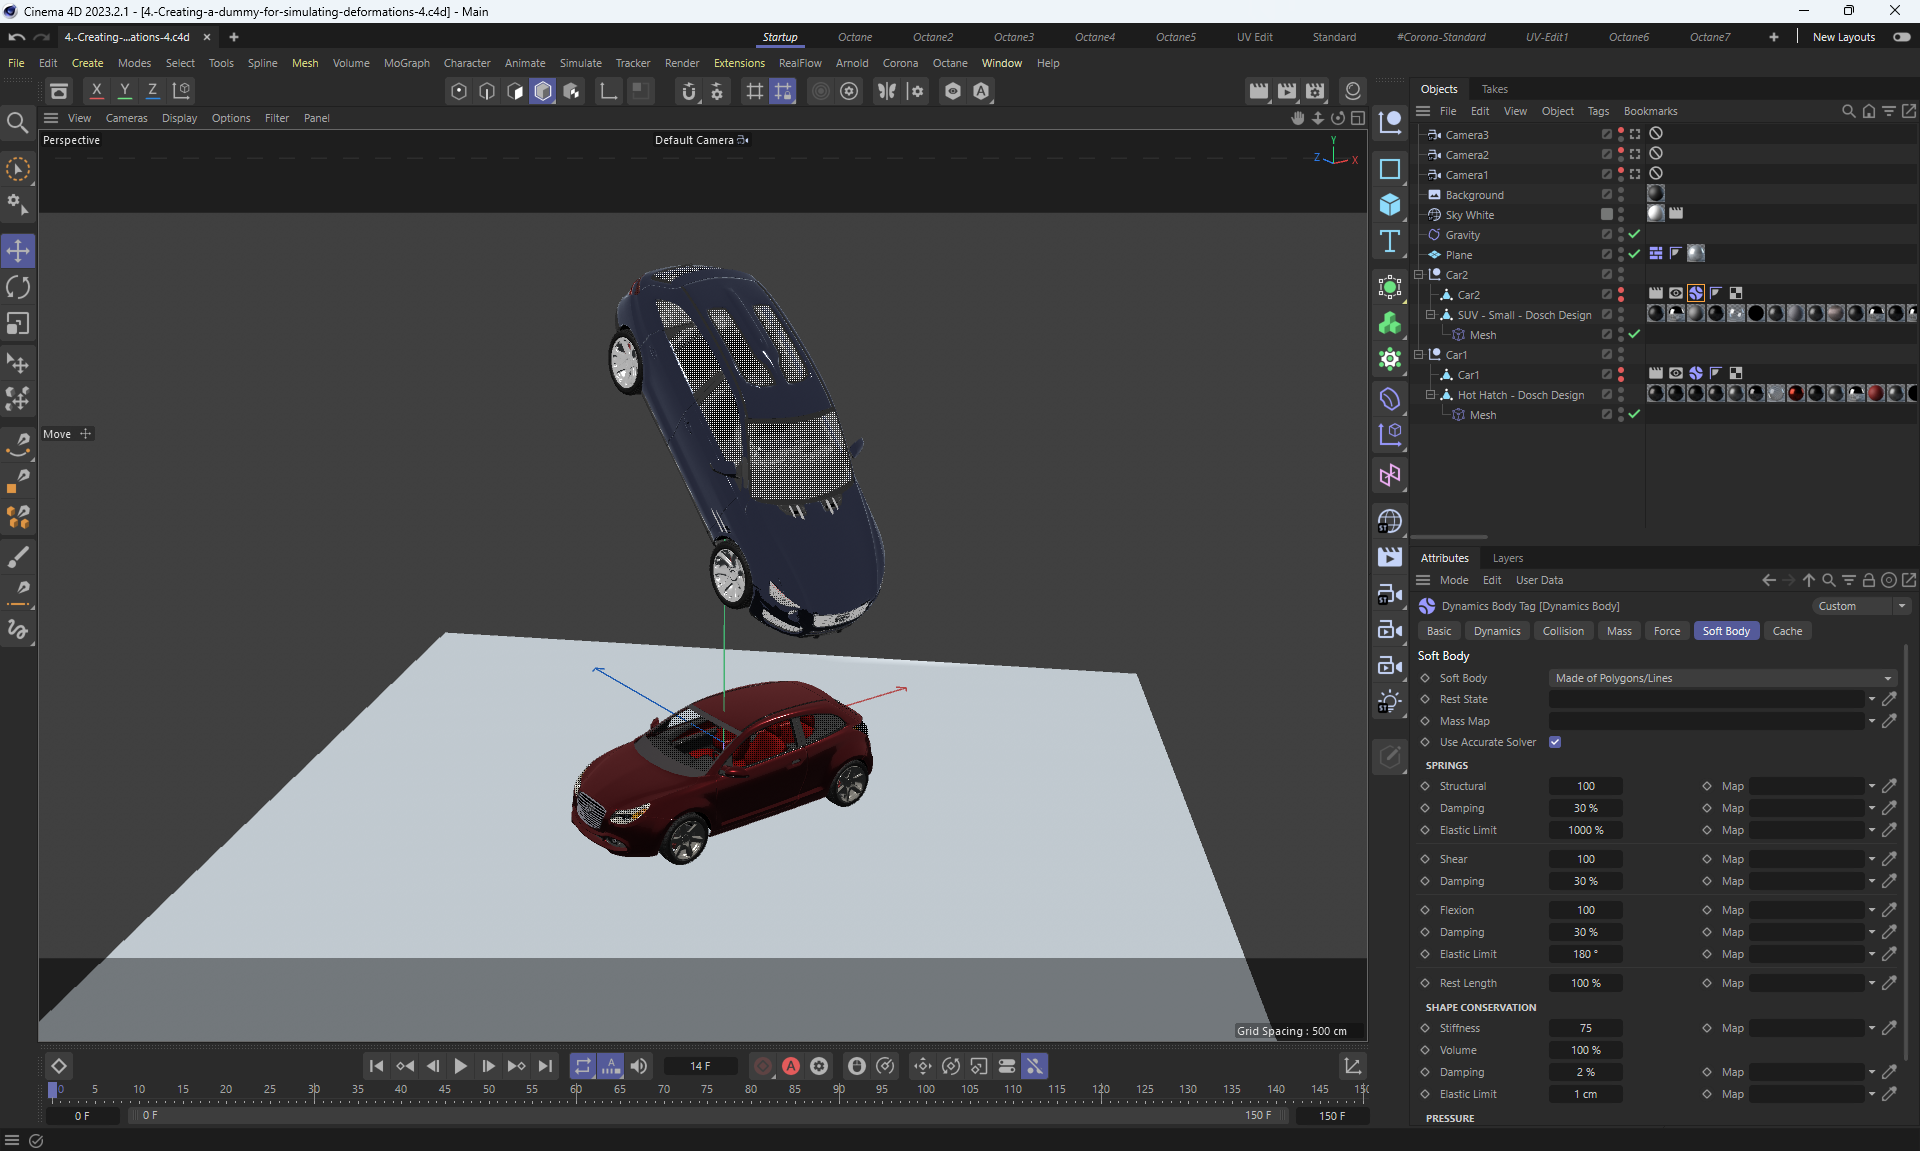
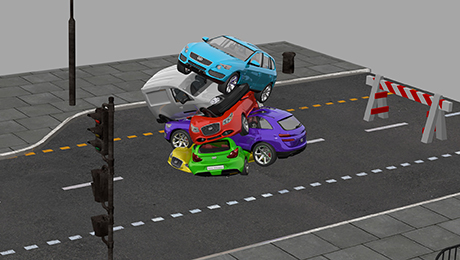
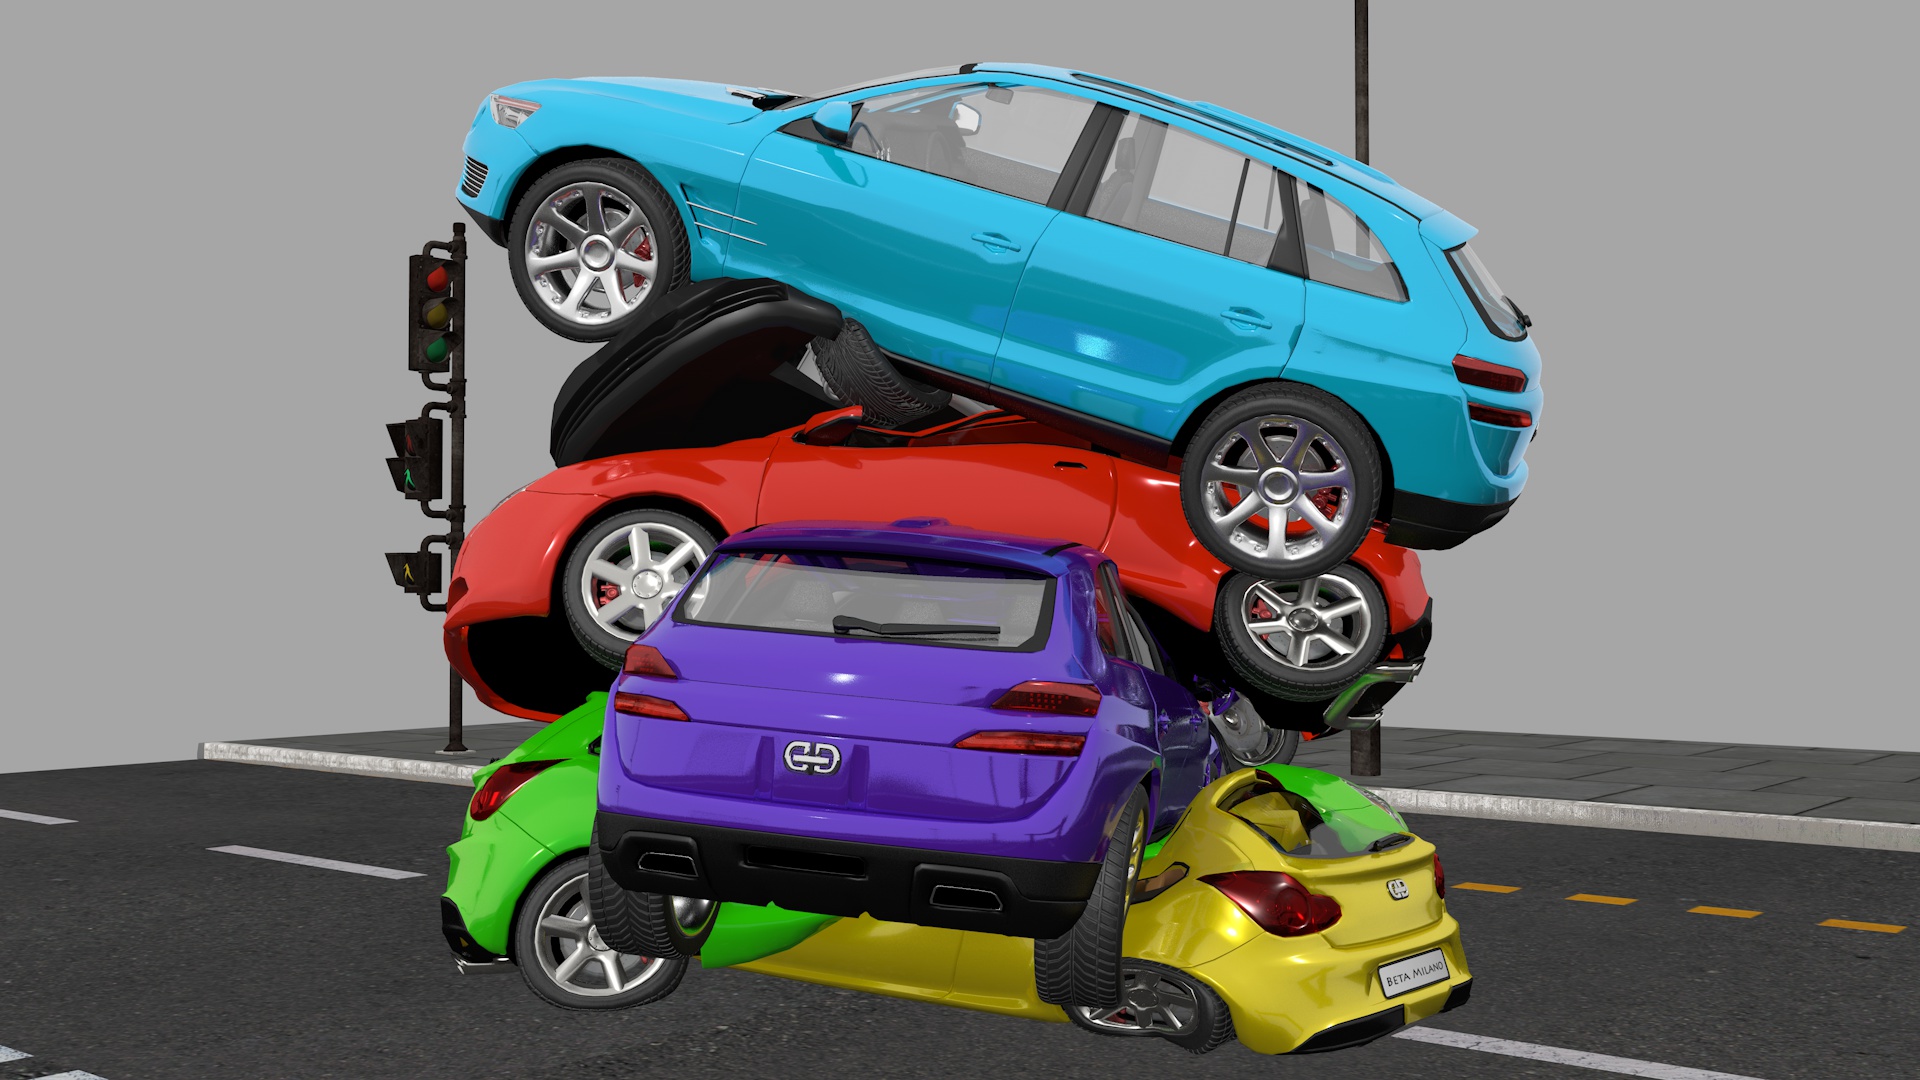
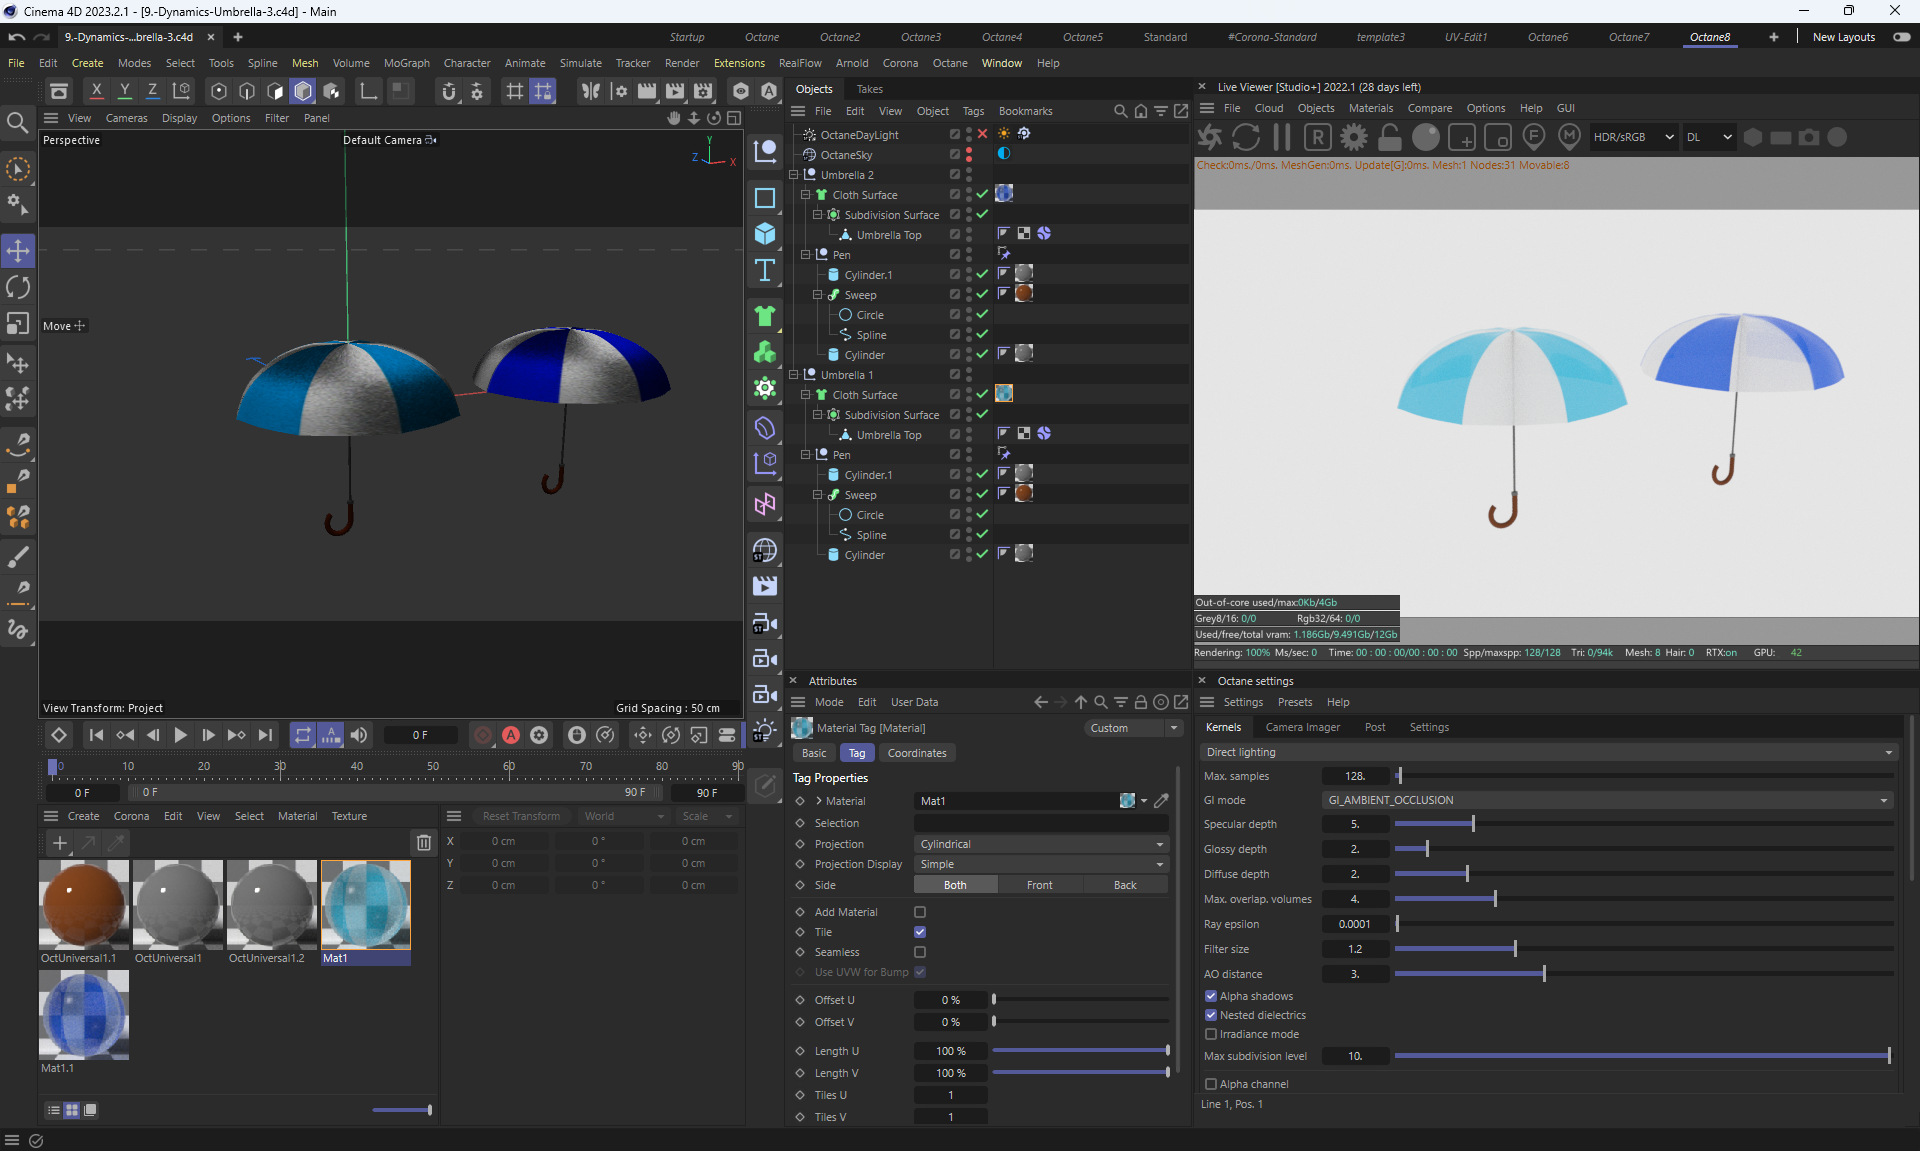
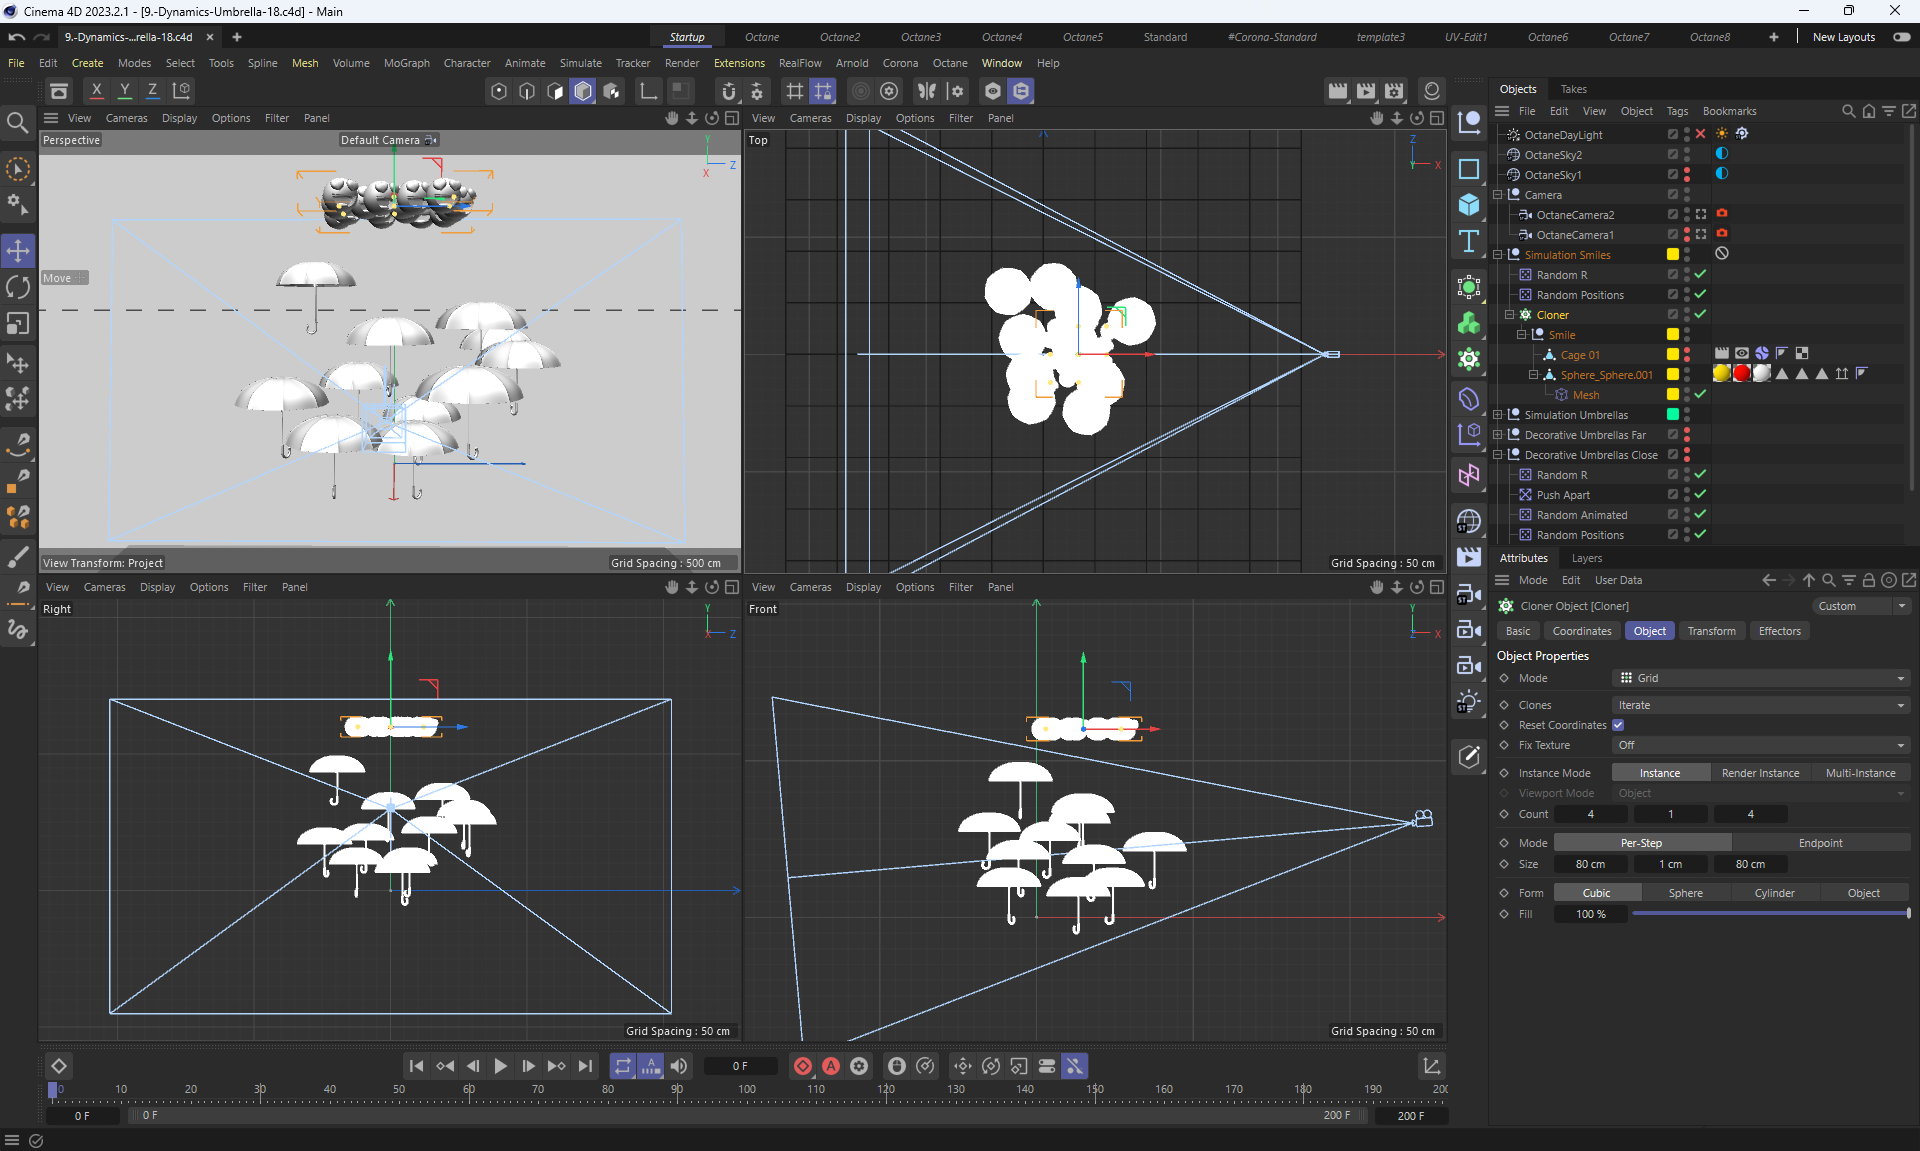
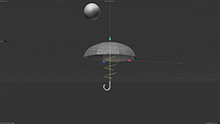
This animation was the author's task at the end of this section. There were no sources.
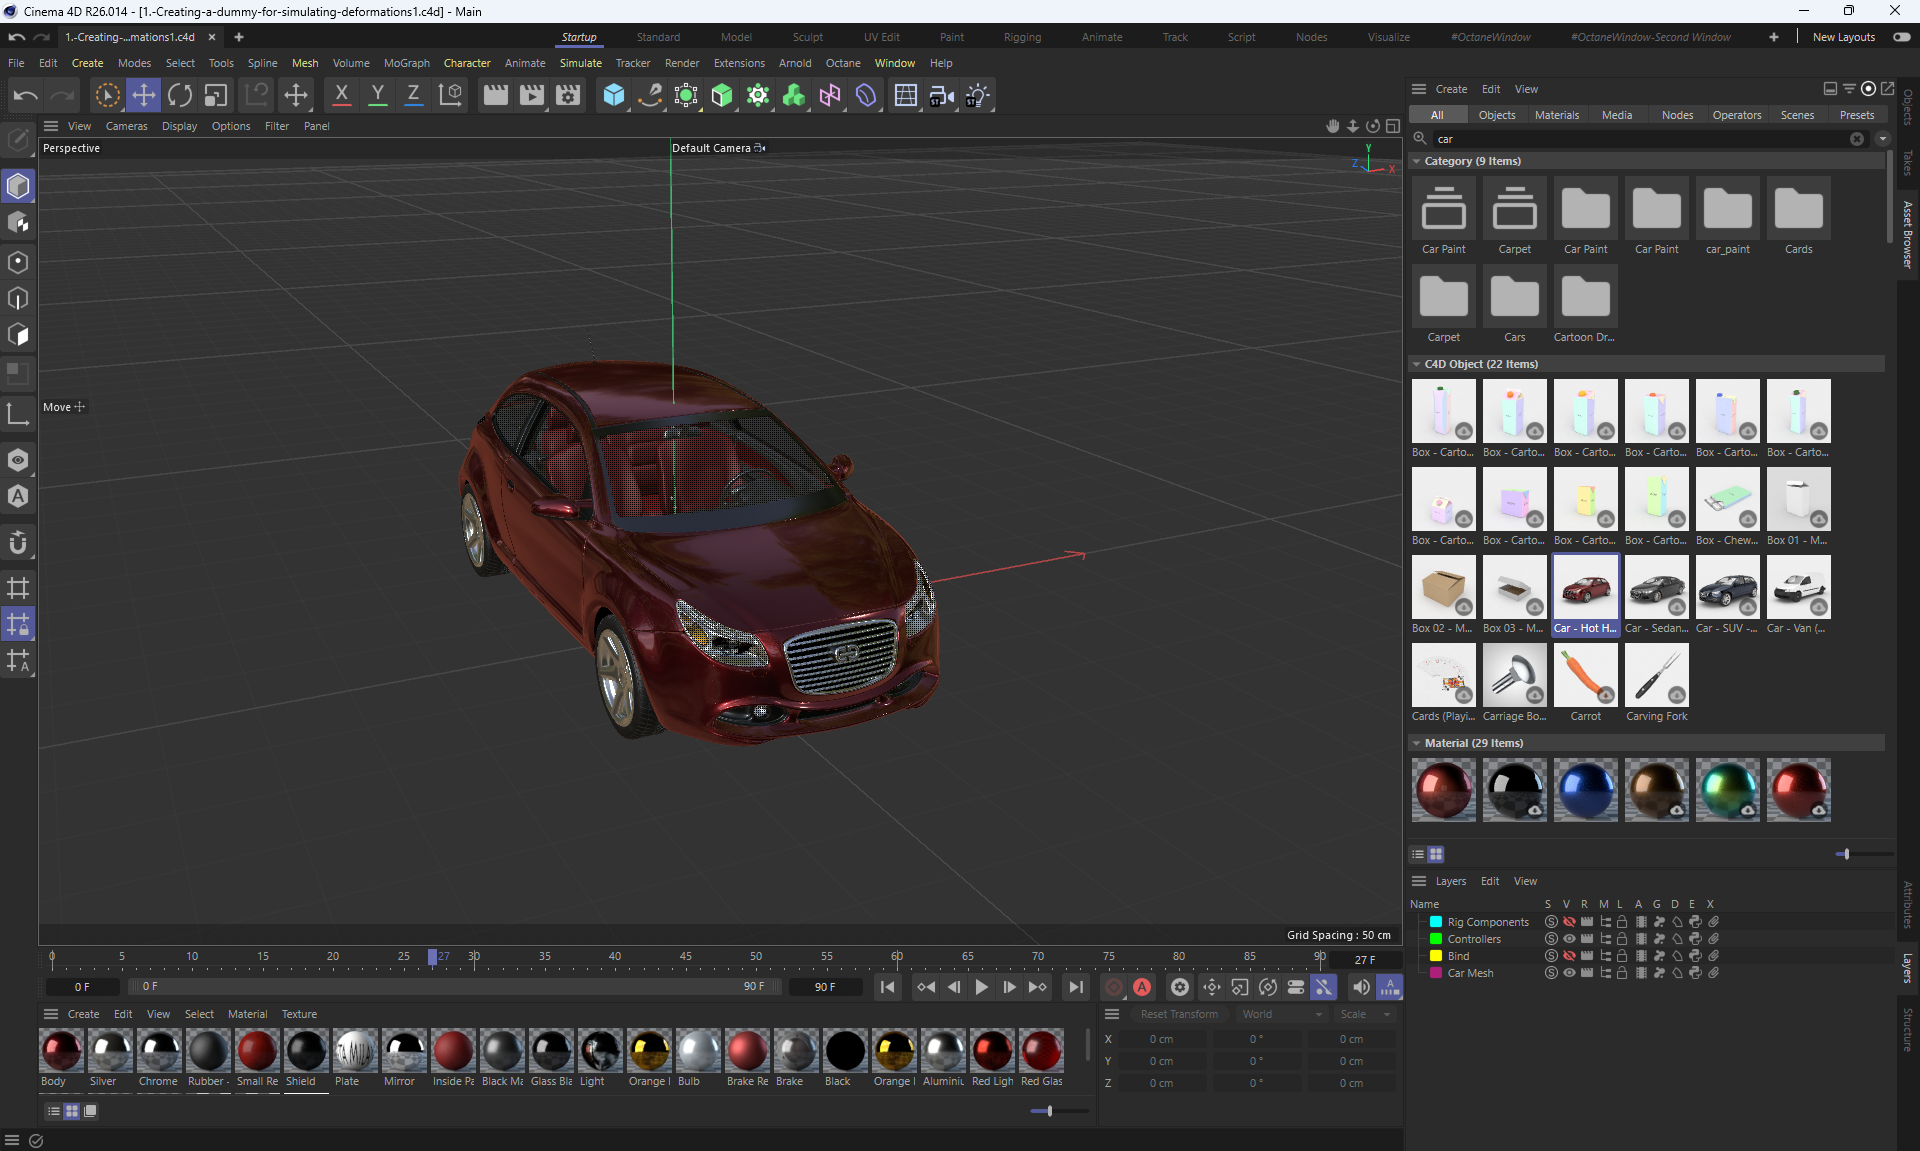
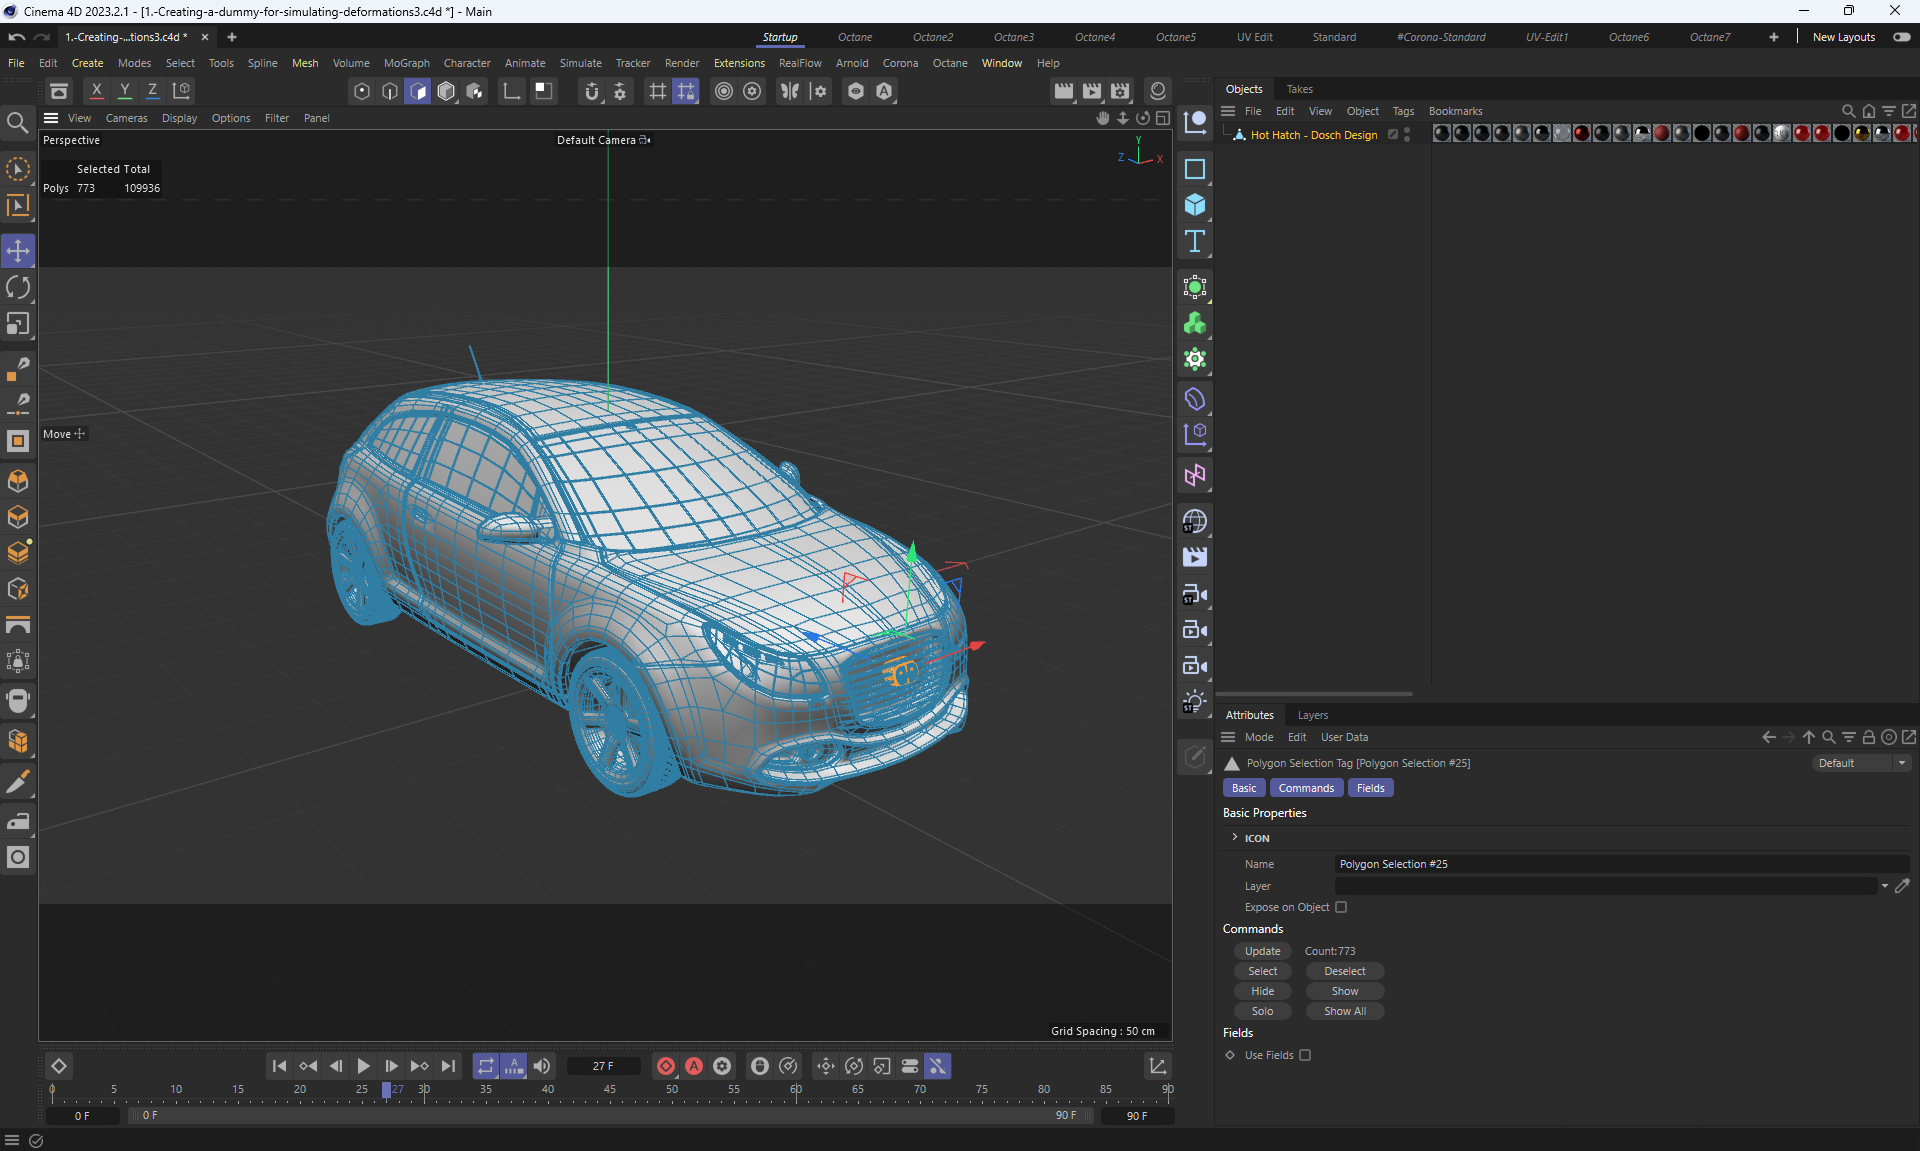
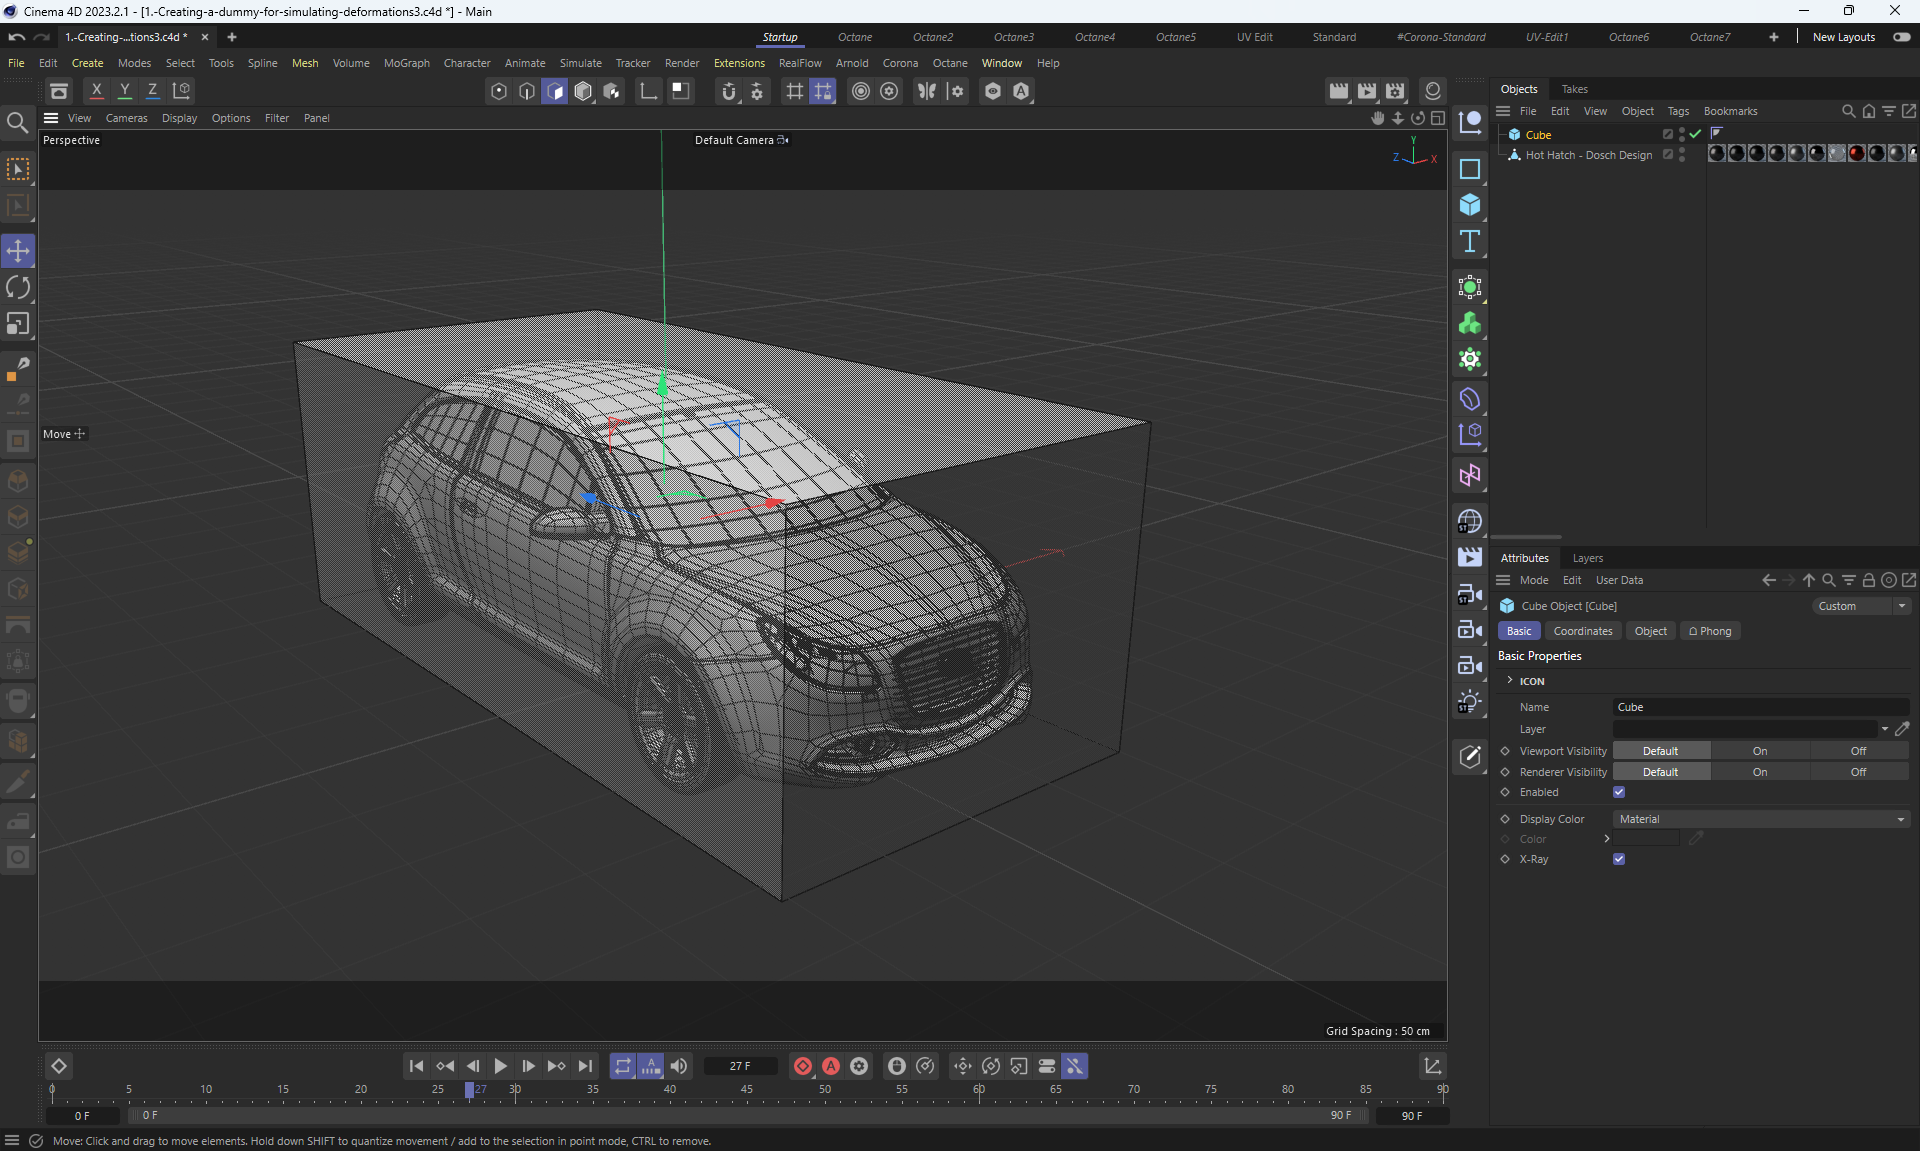
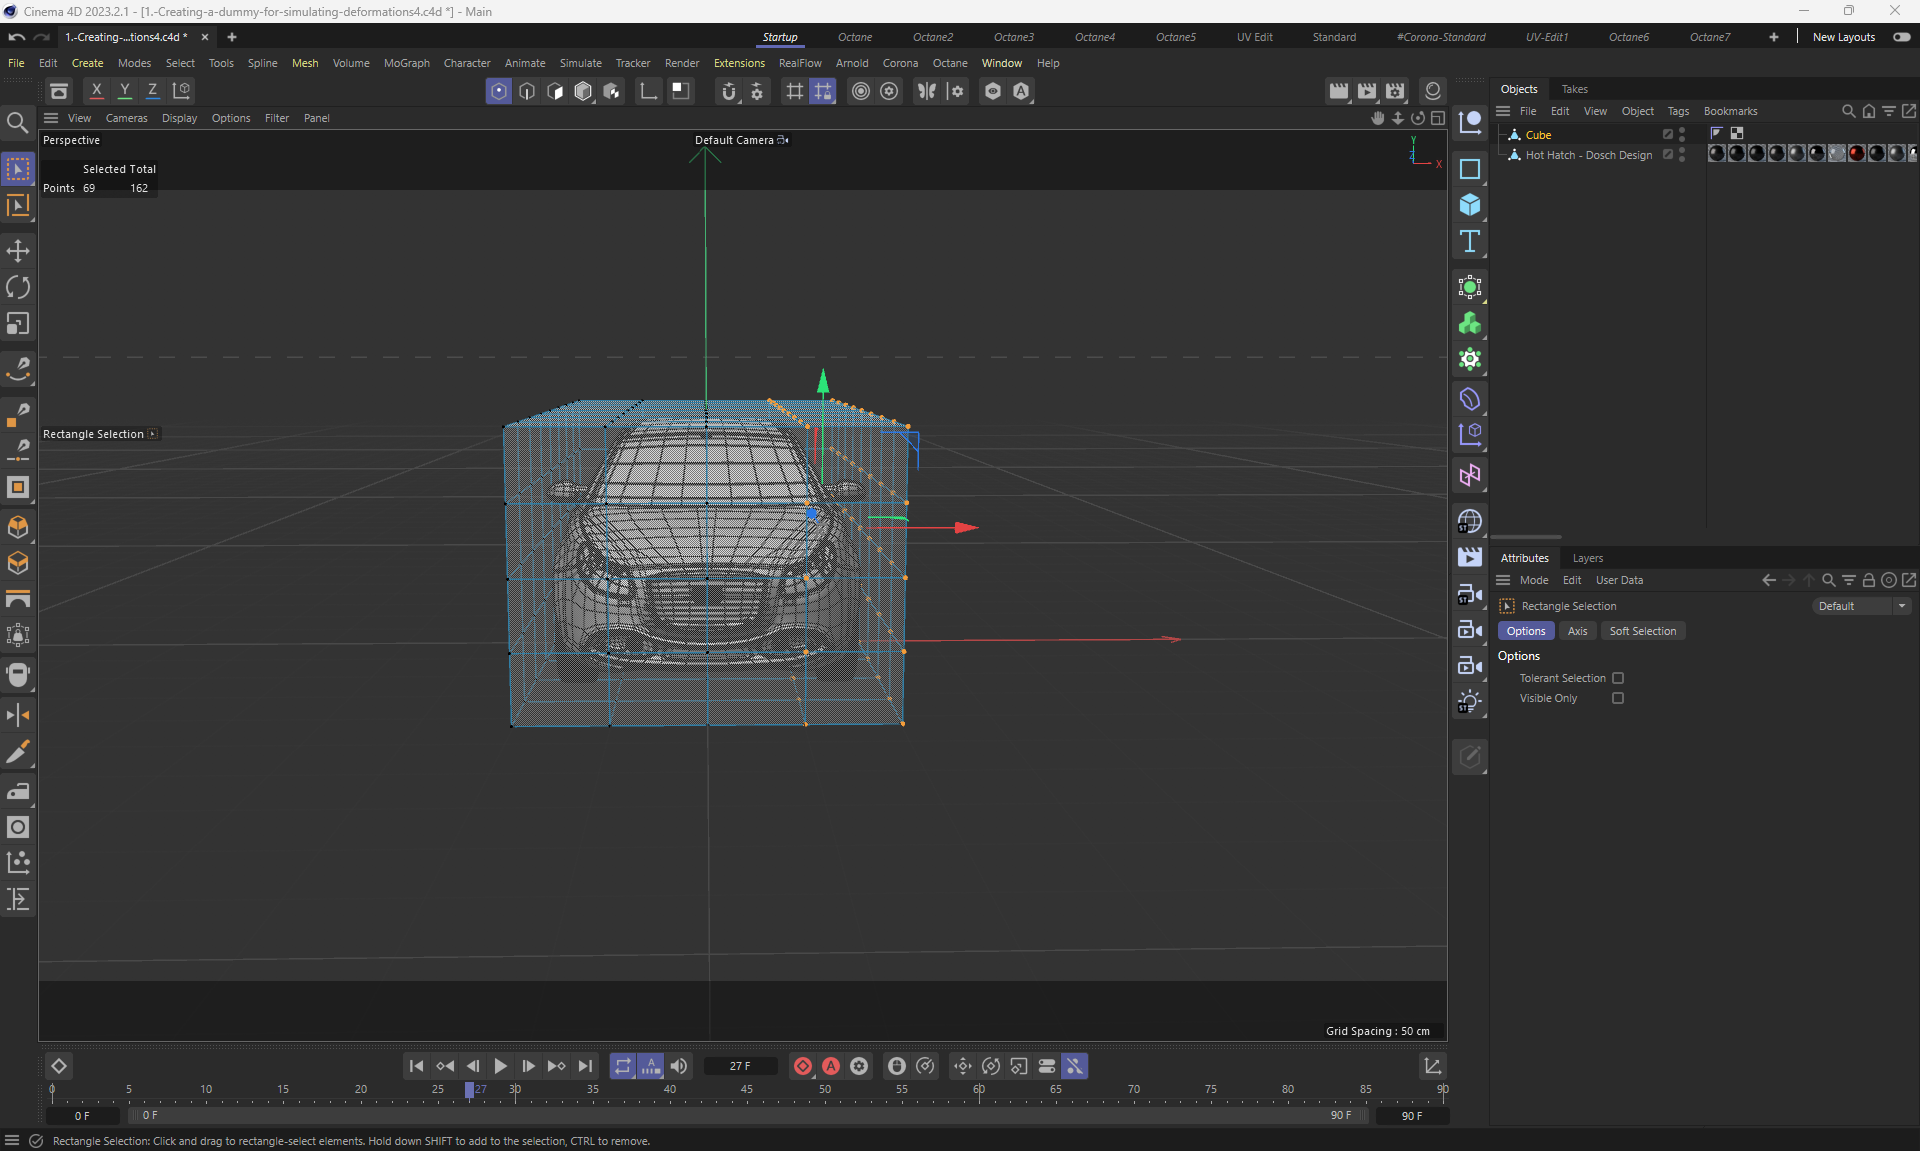
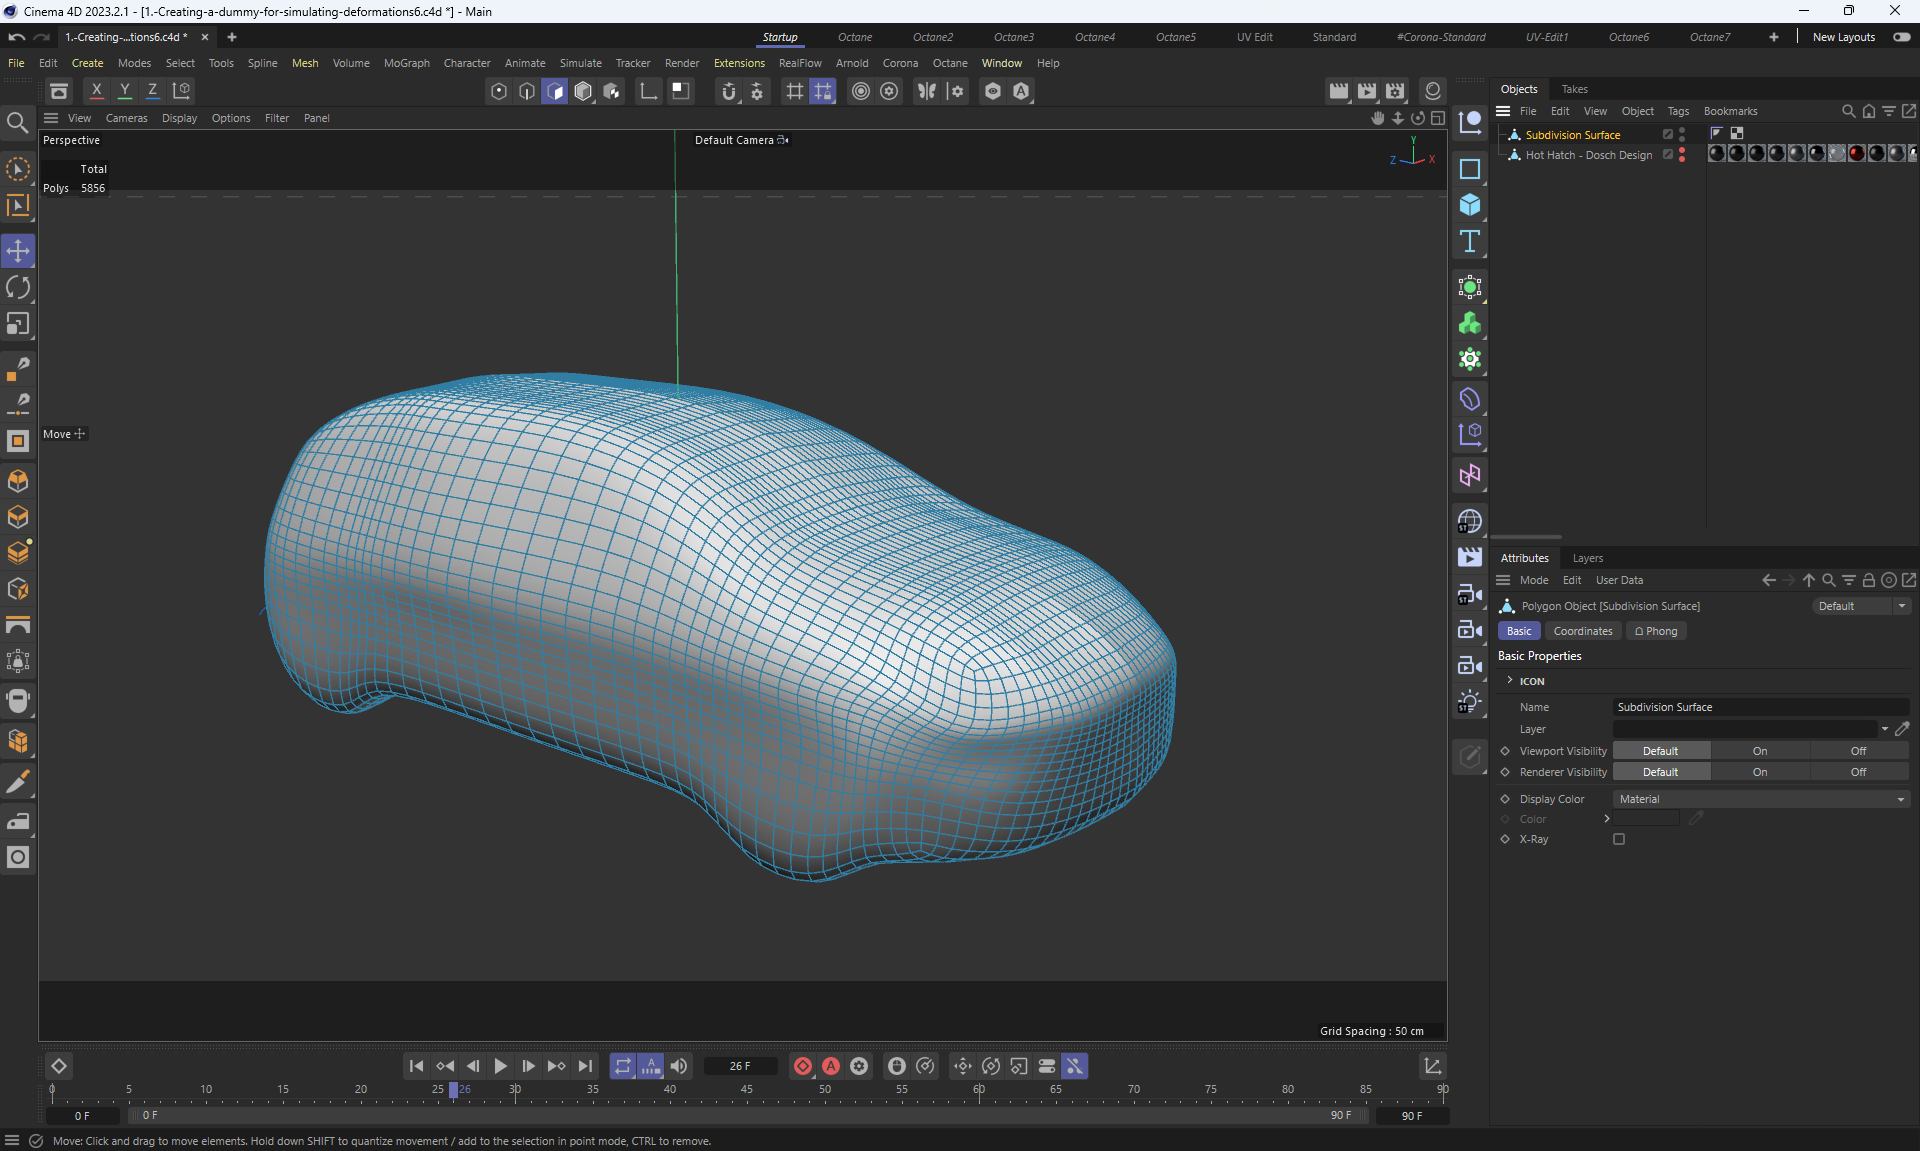
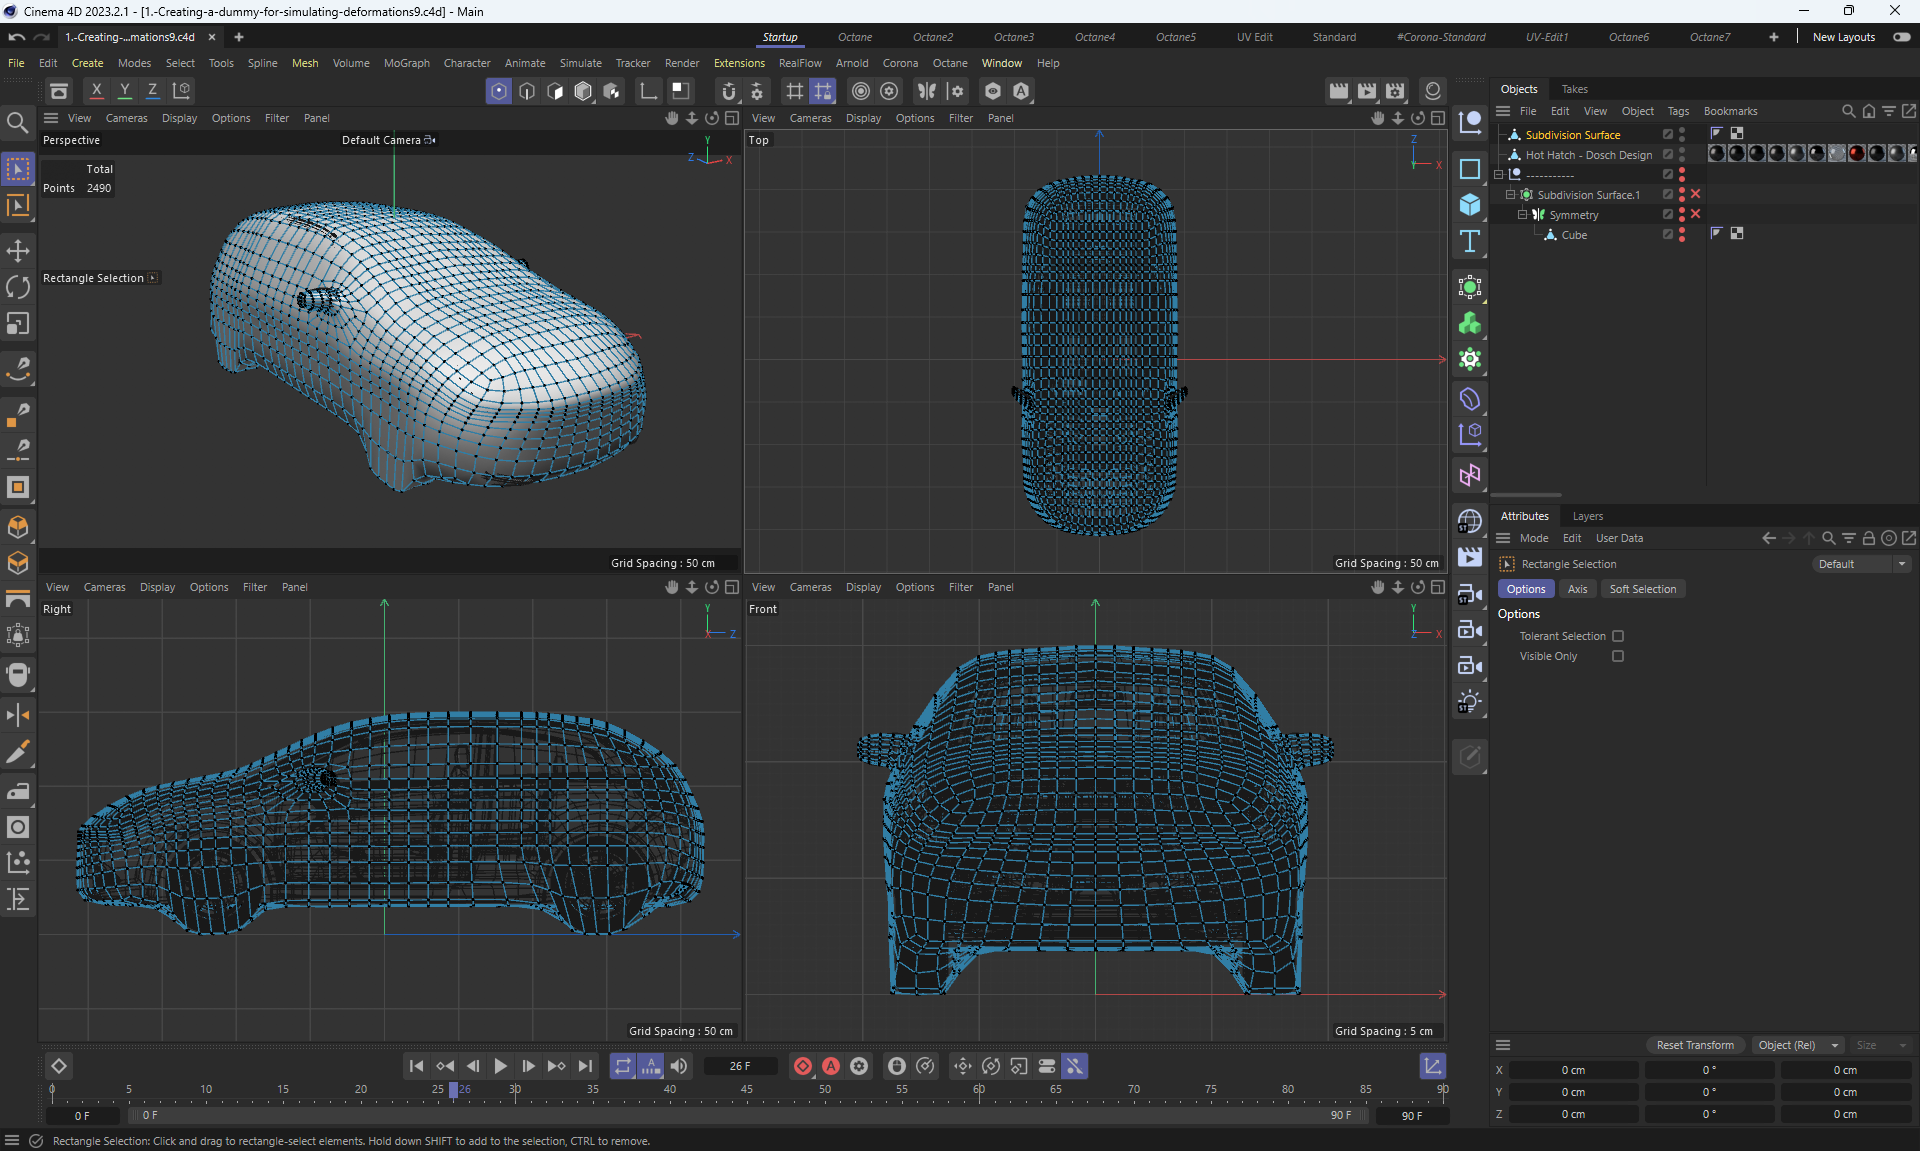
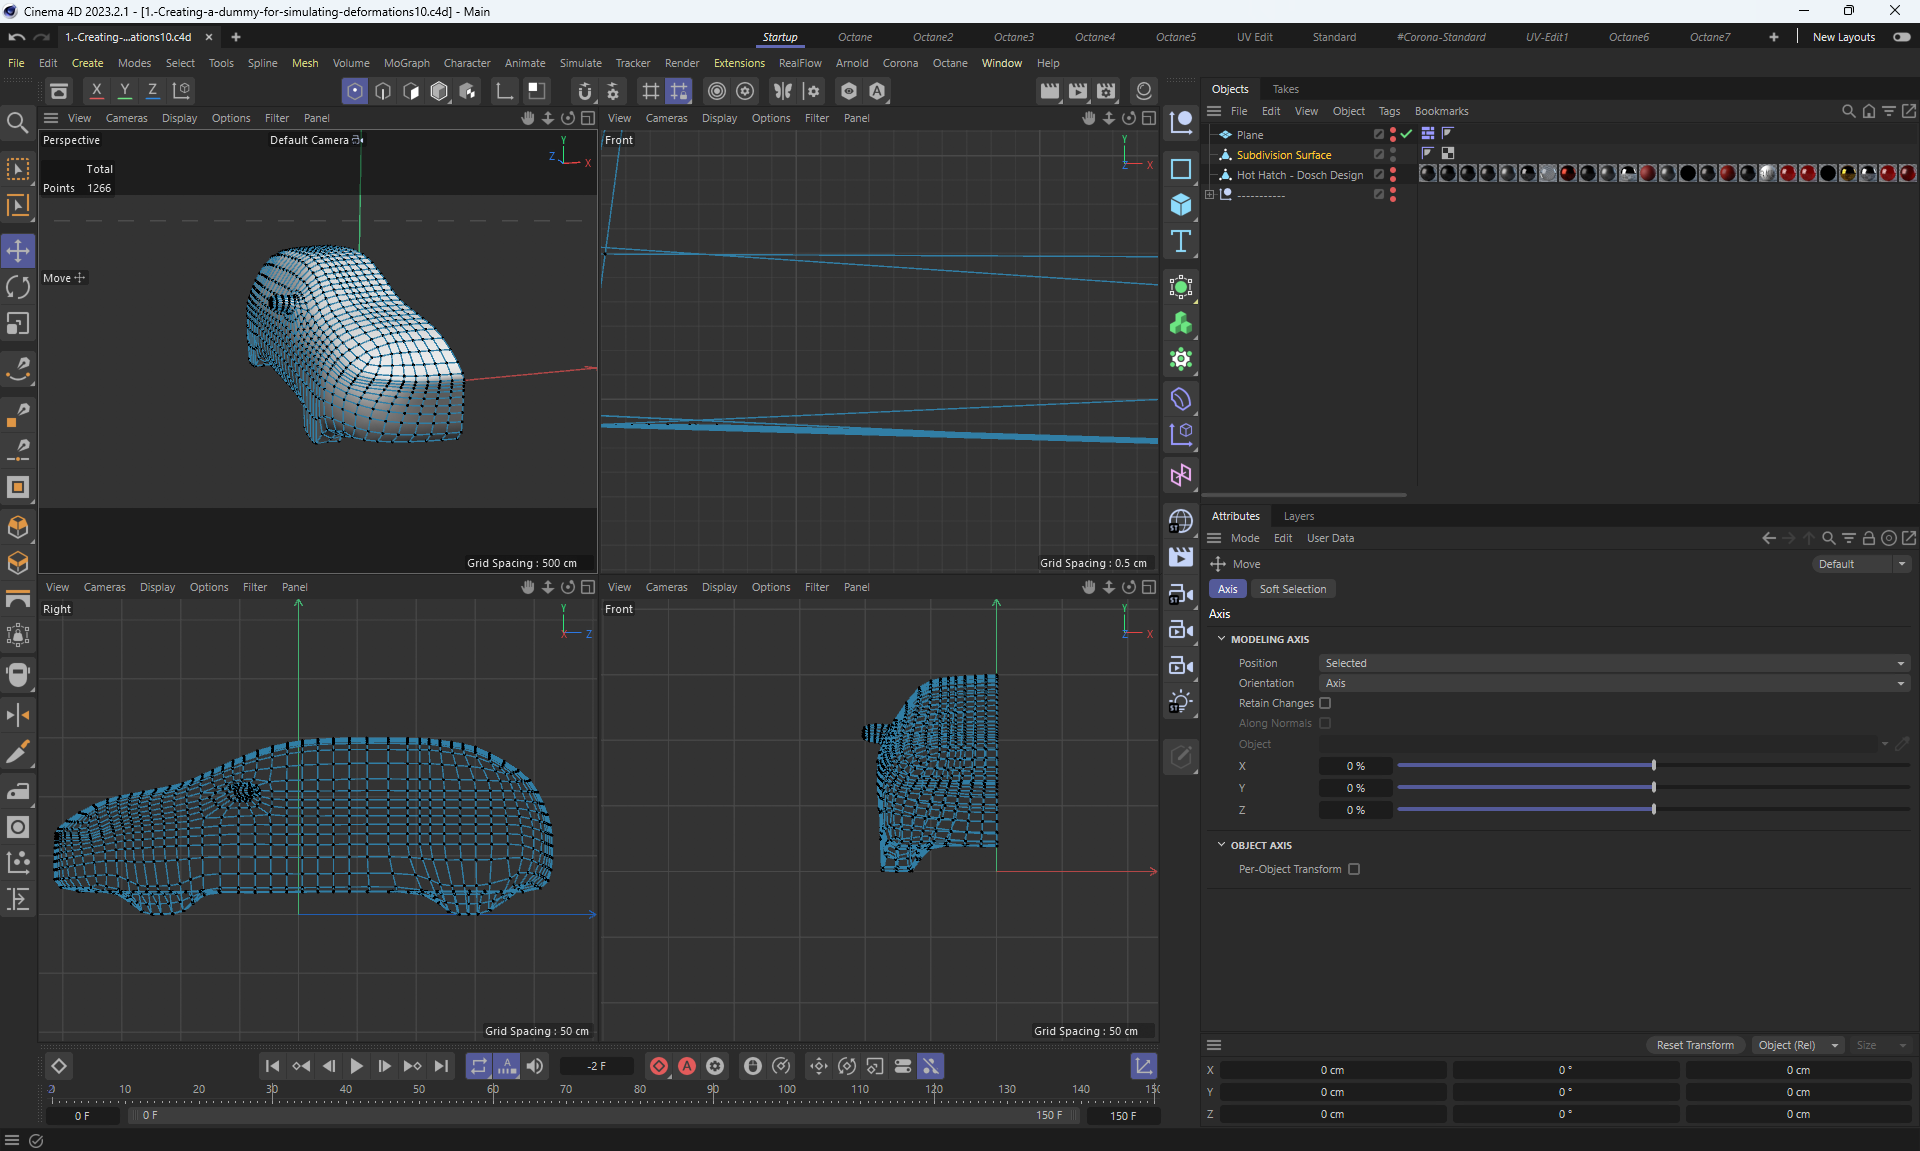
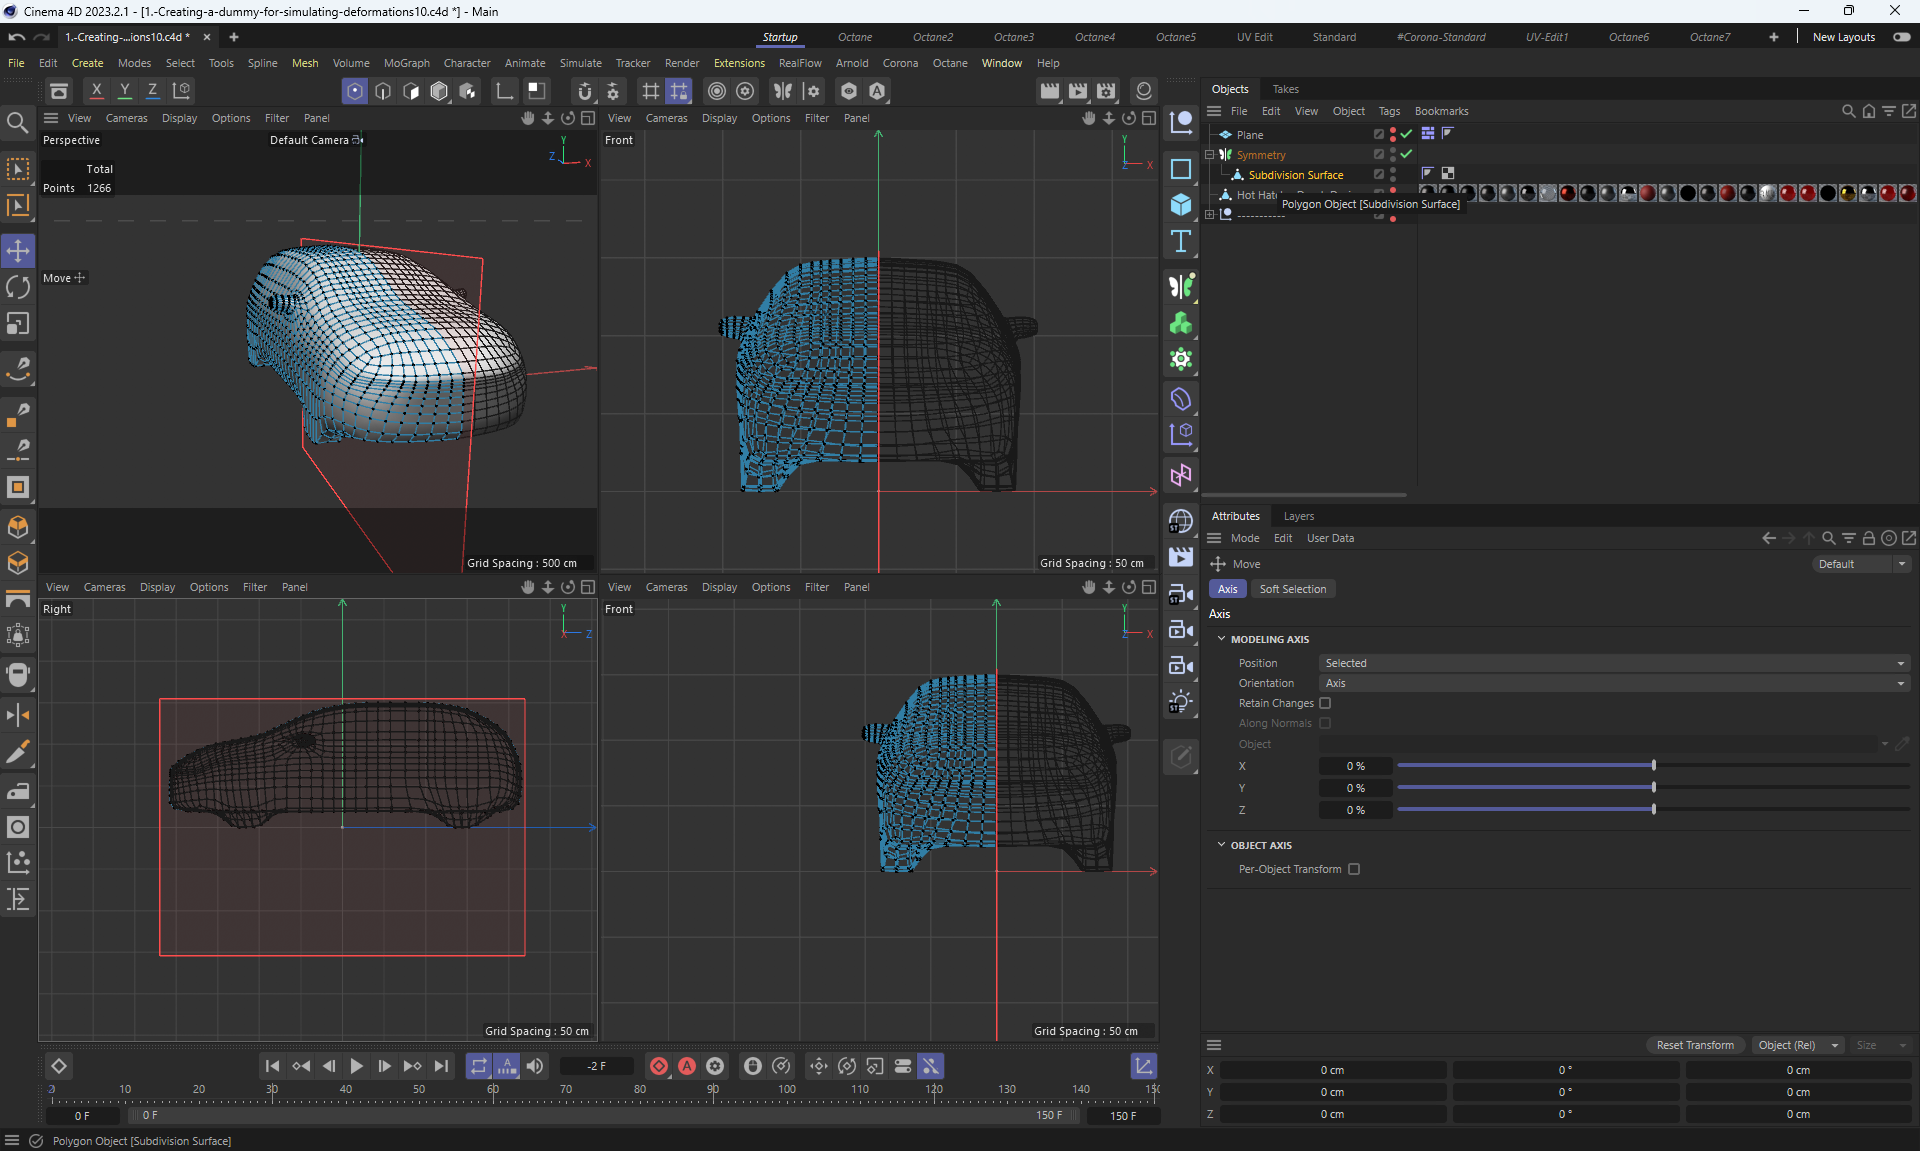
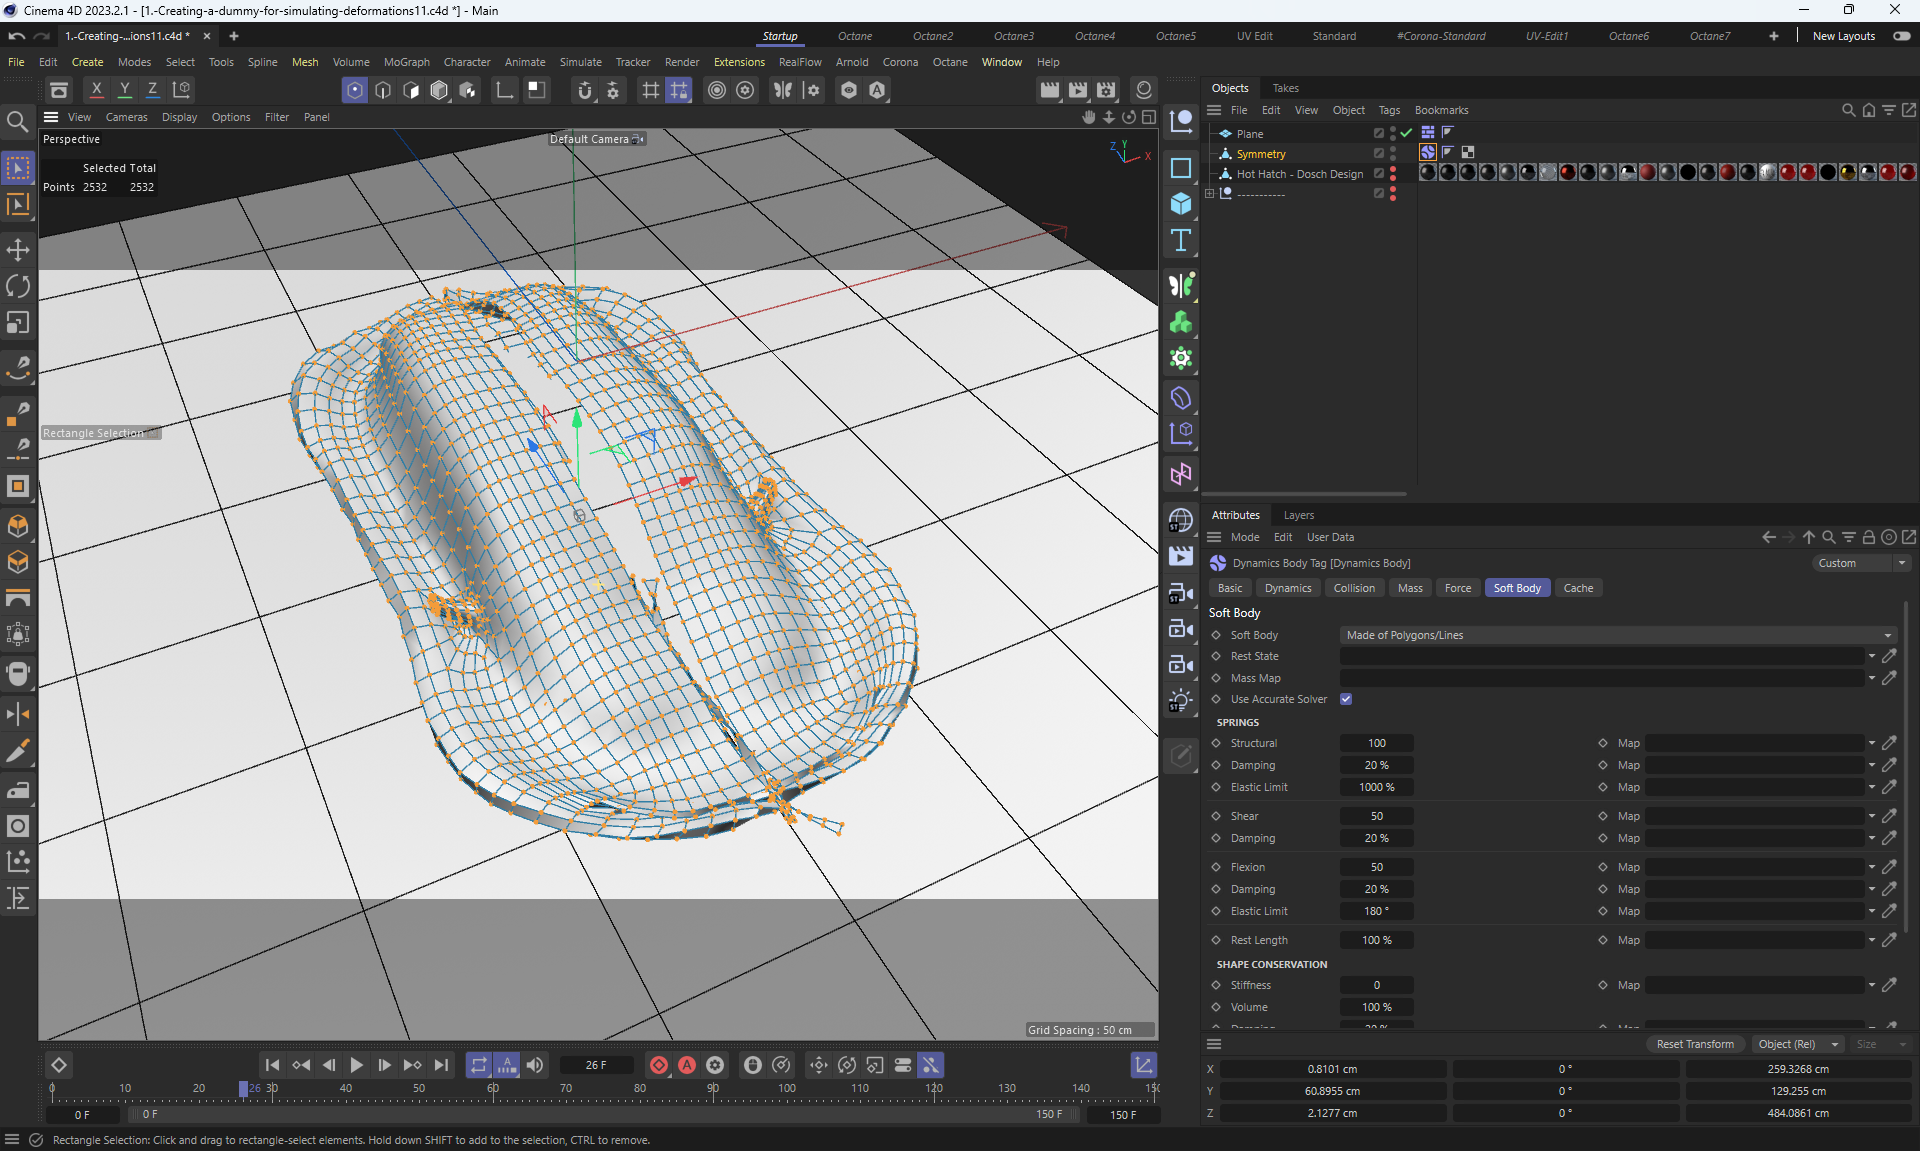
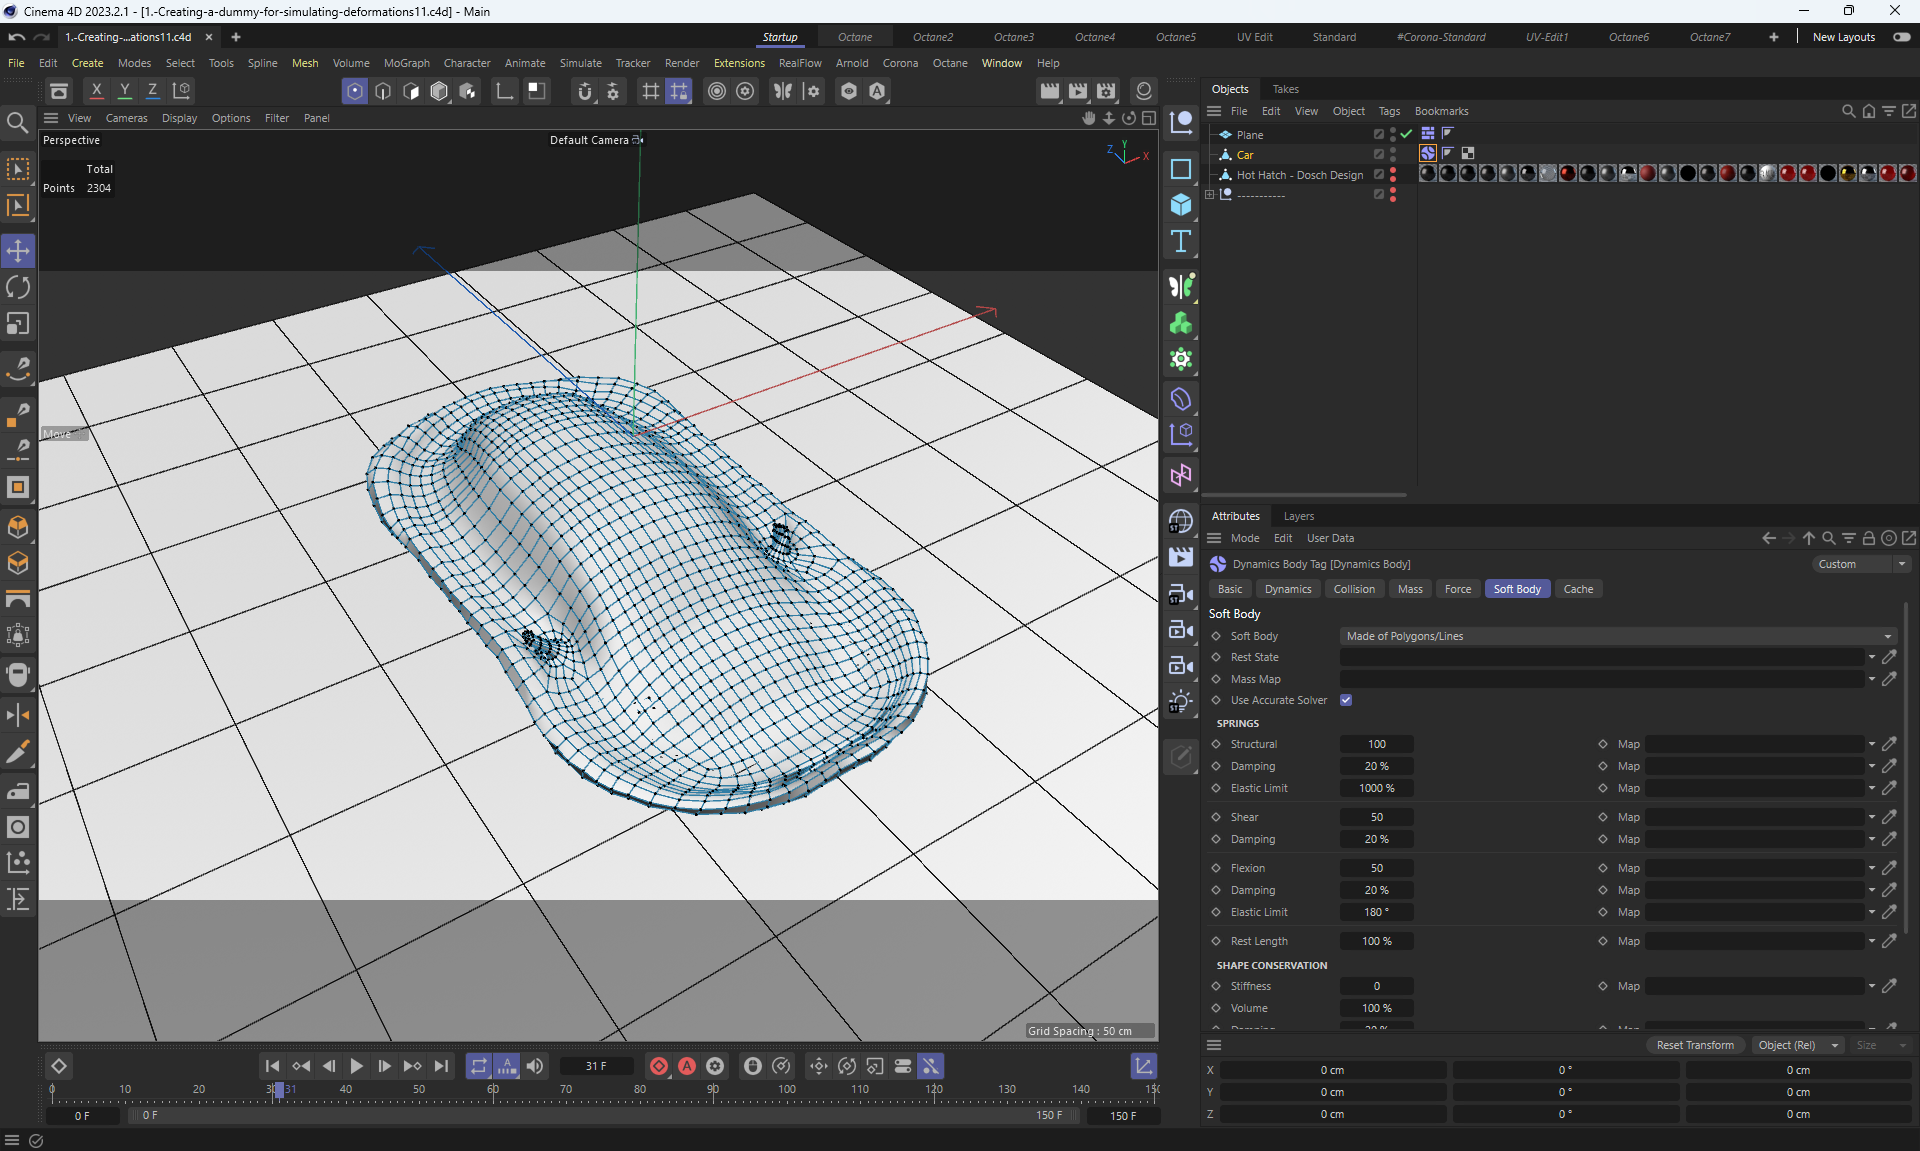
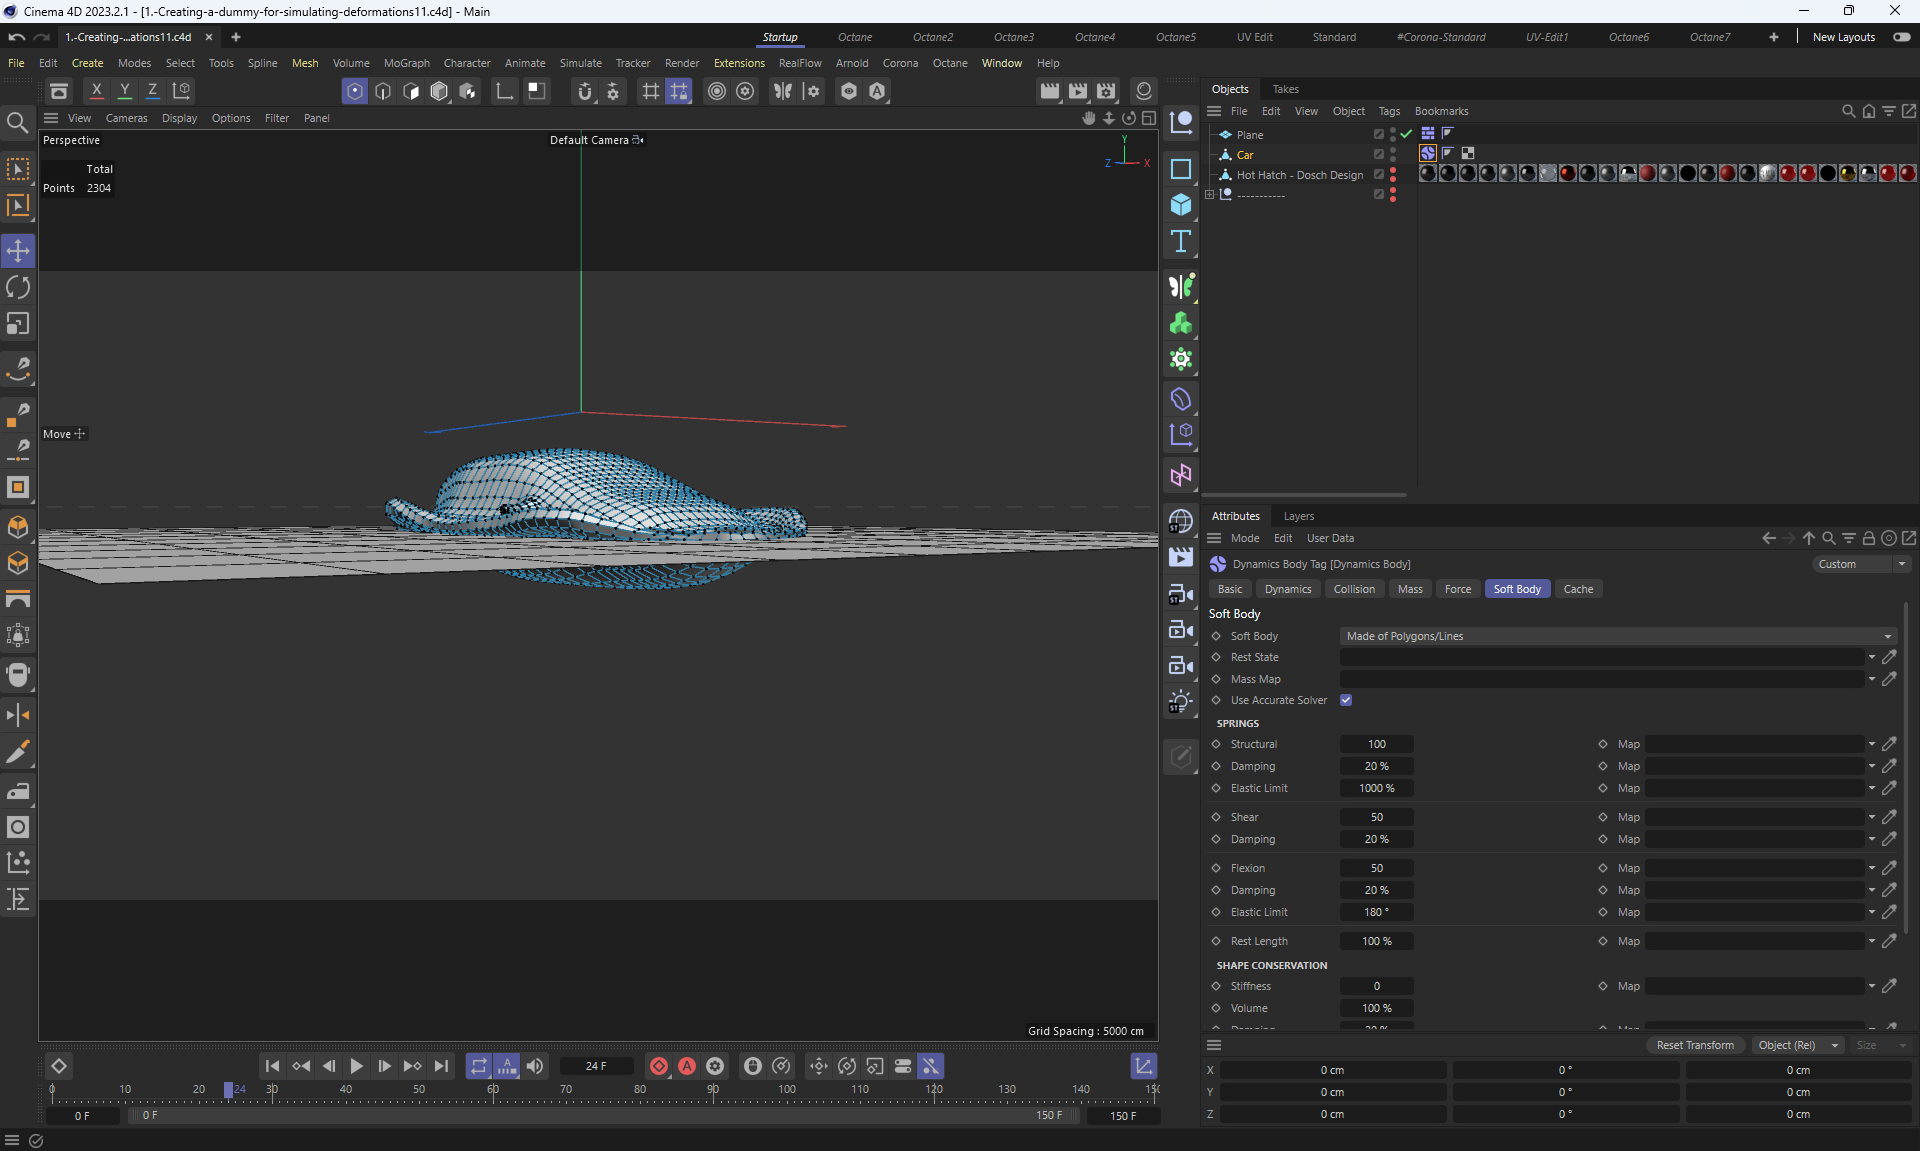
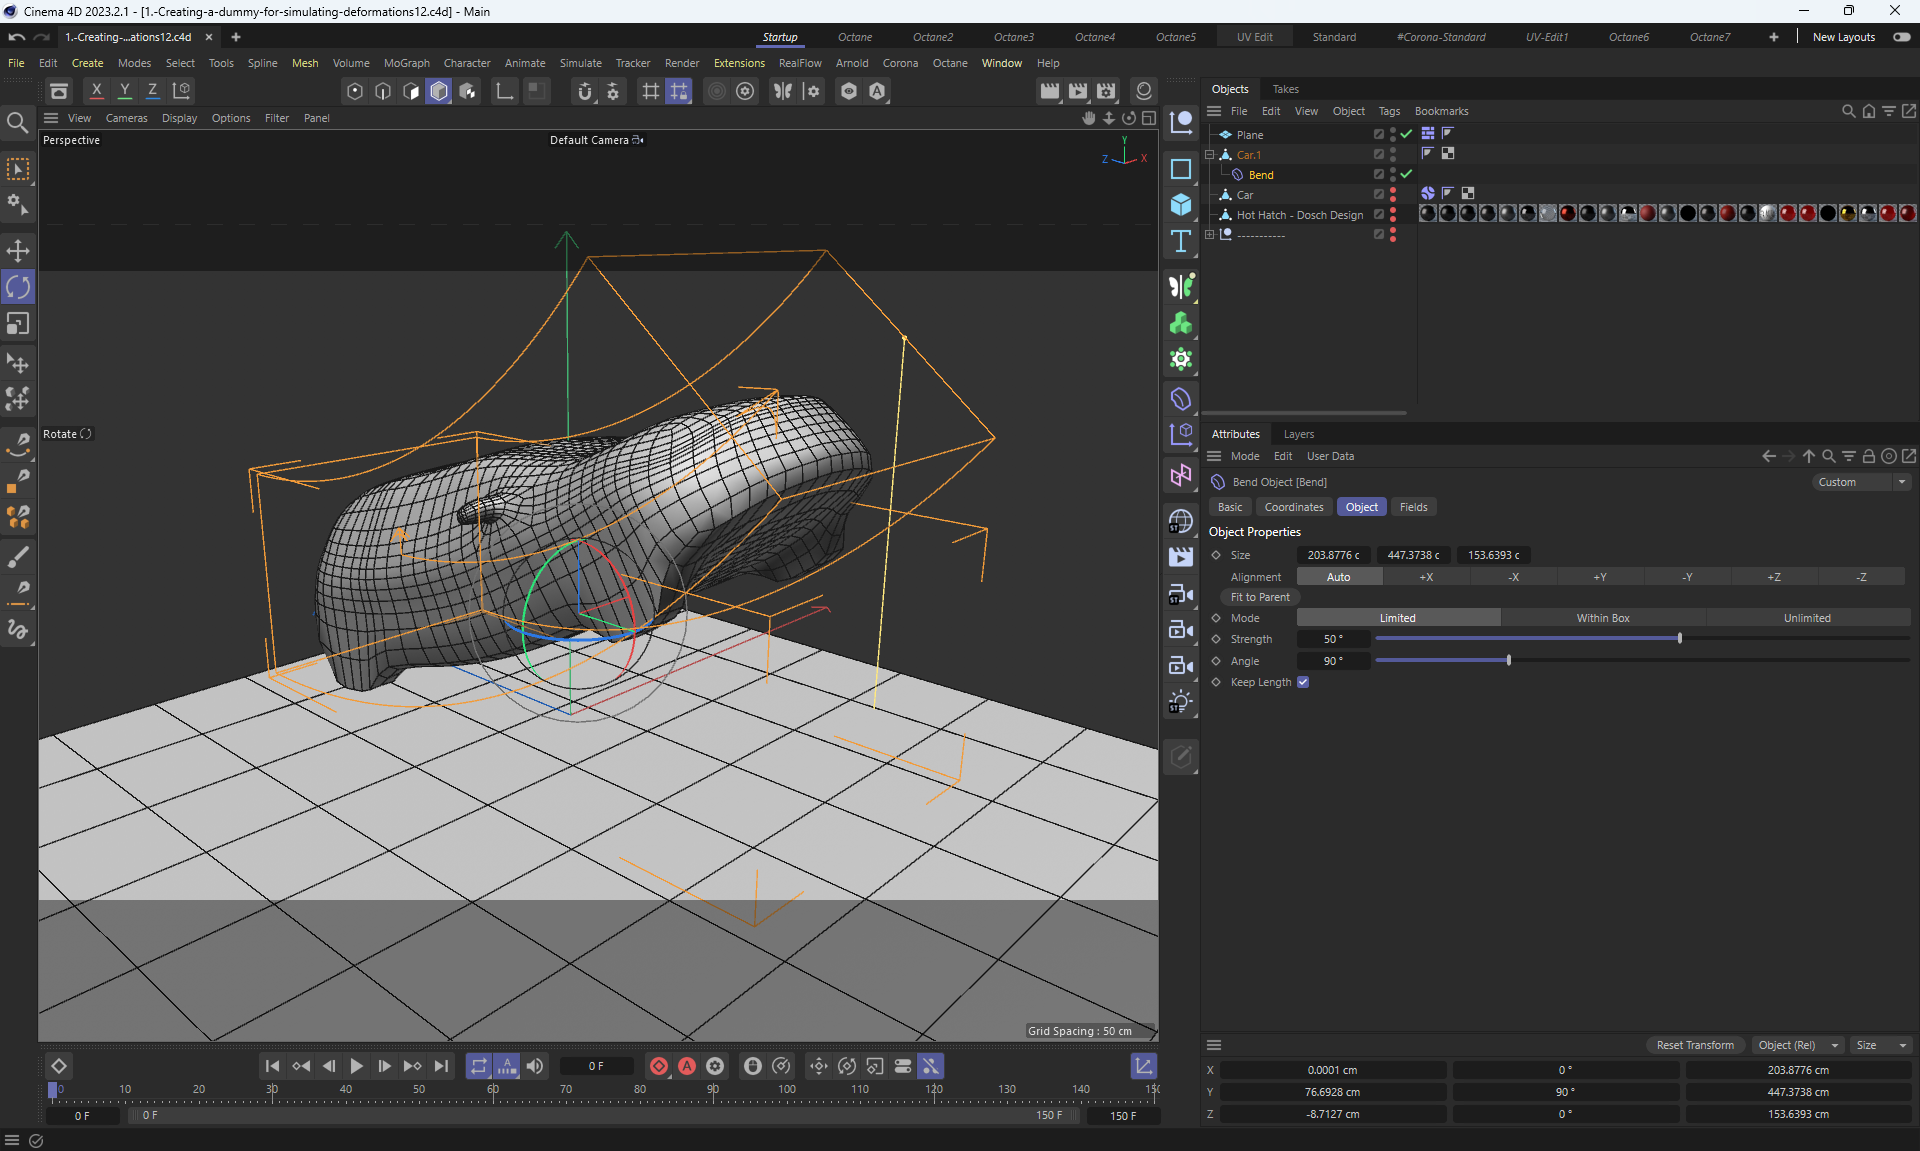
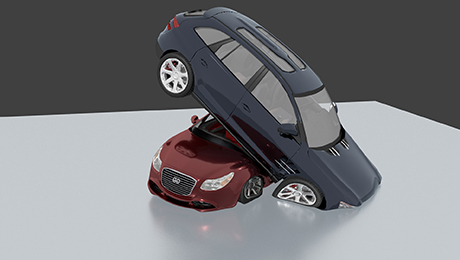
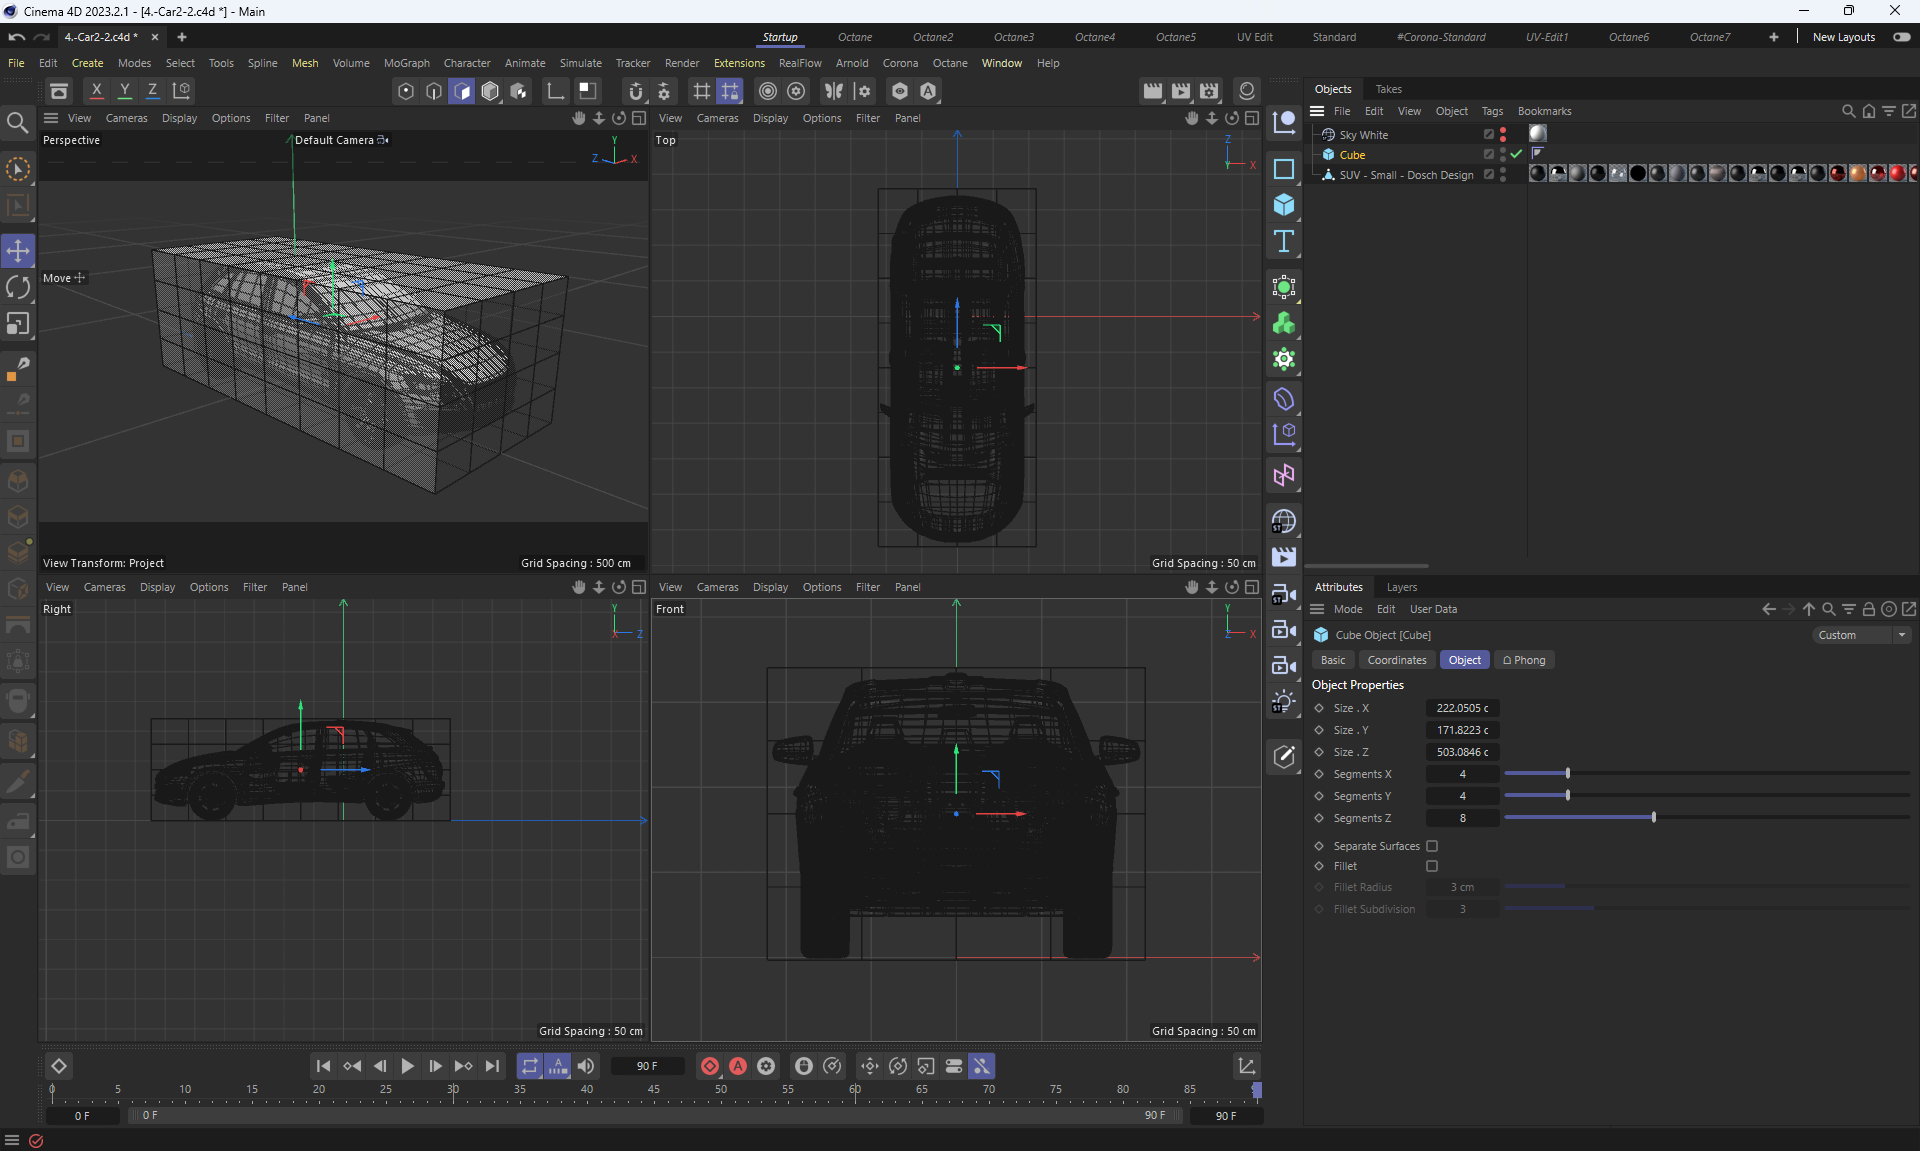
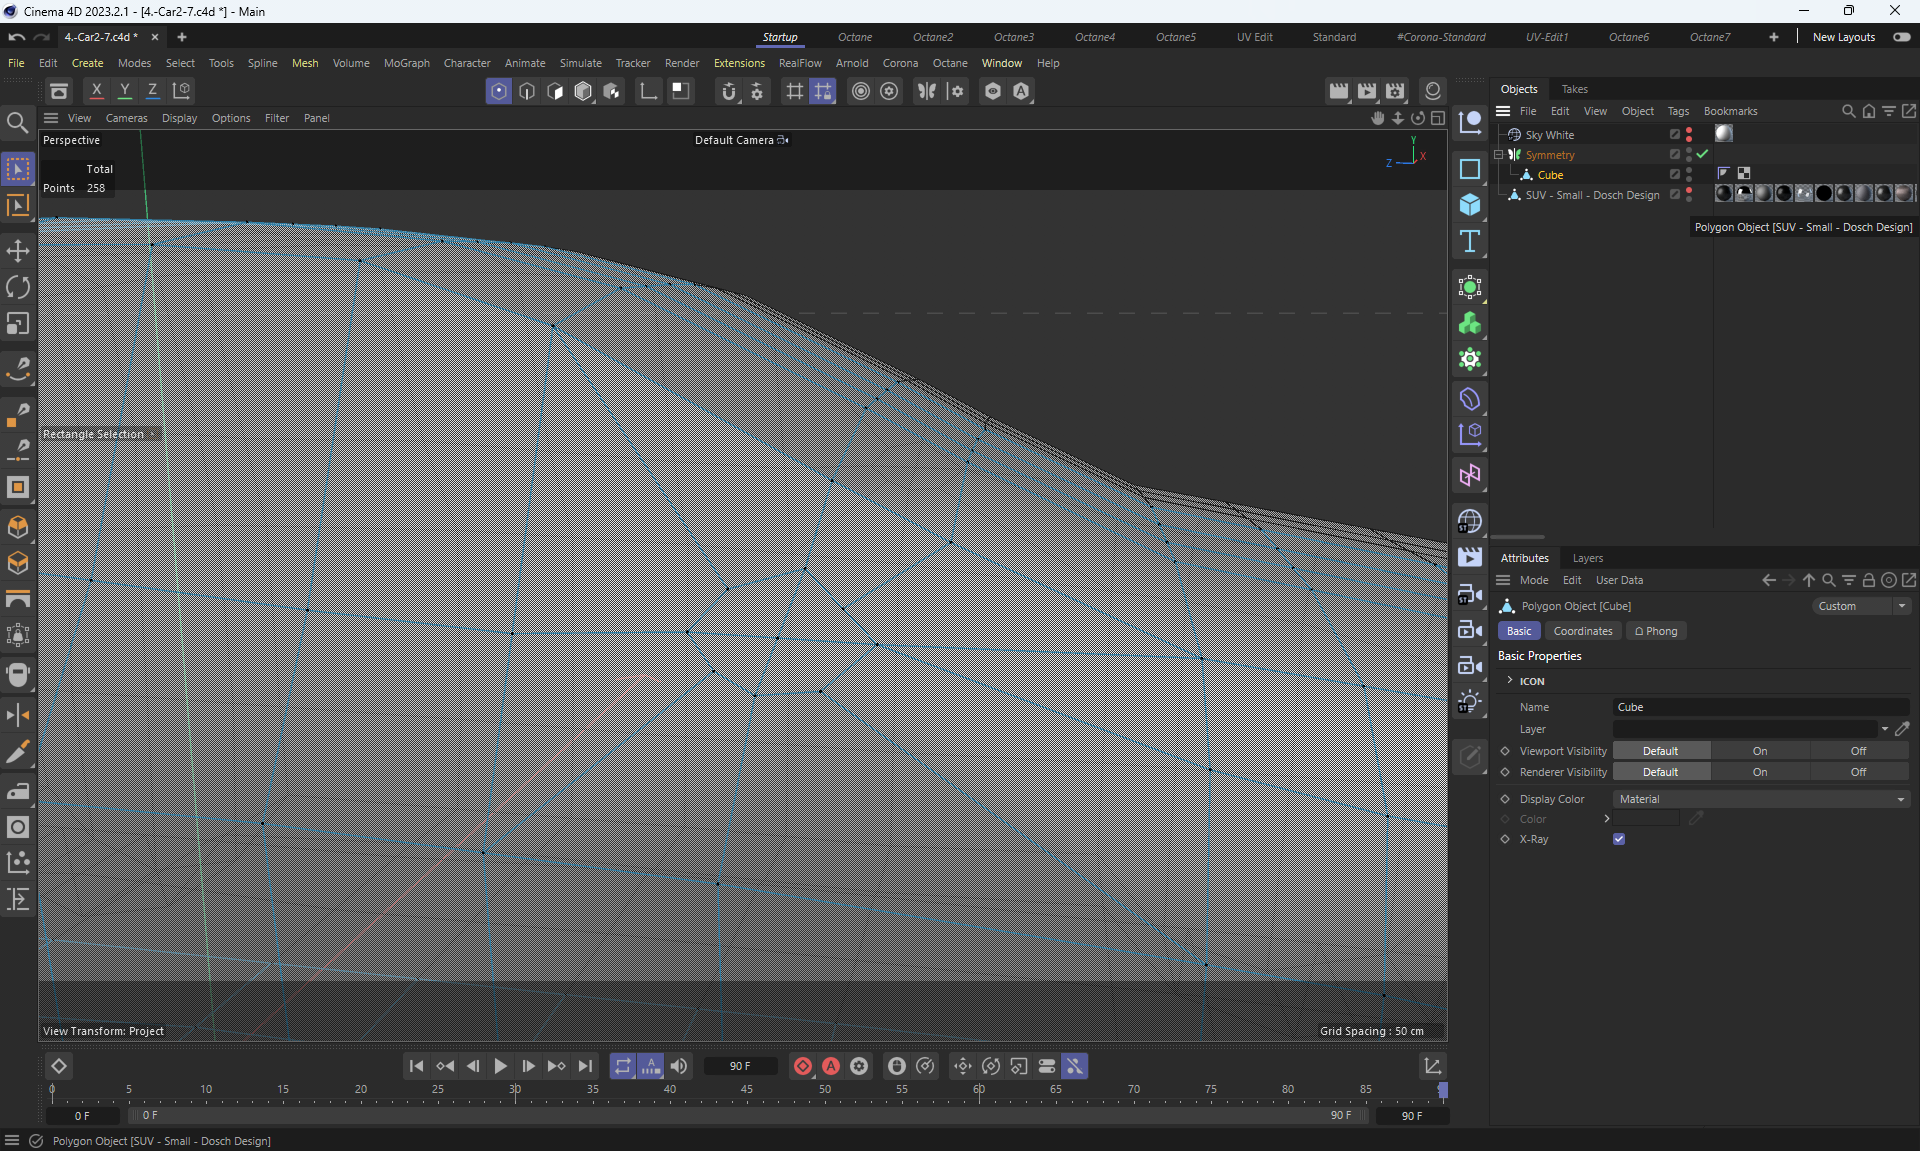
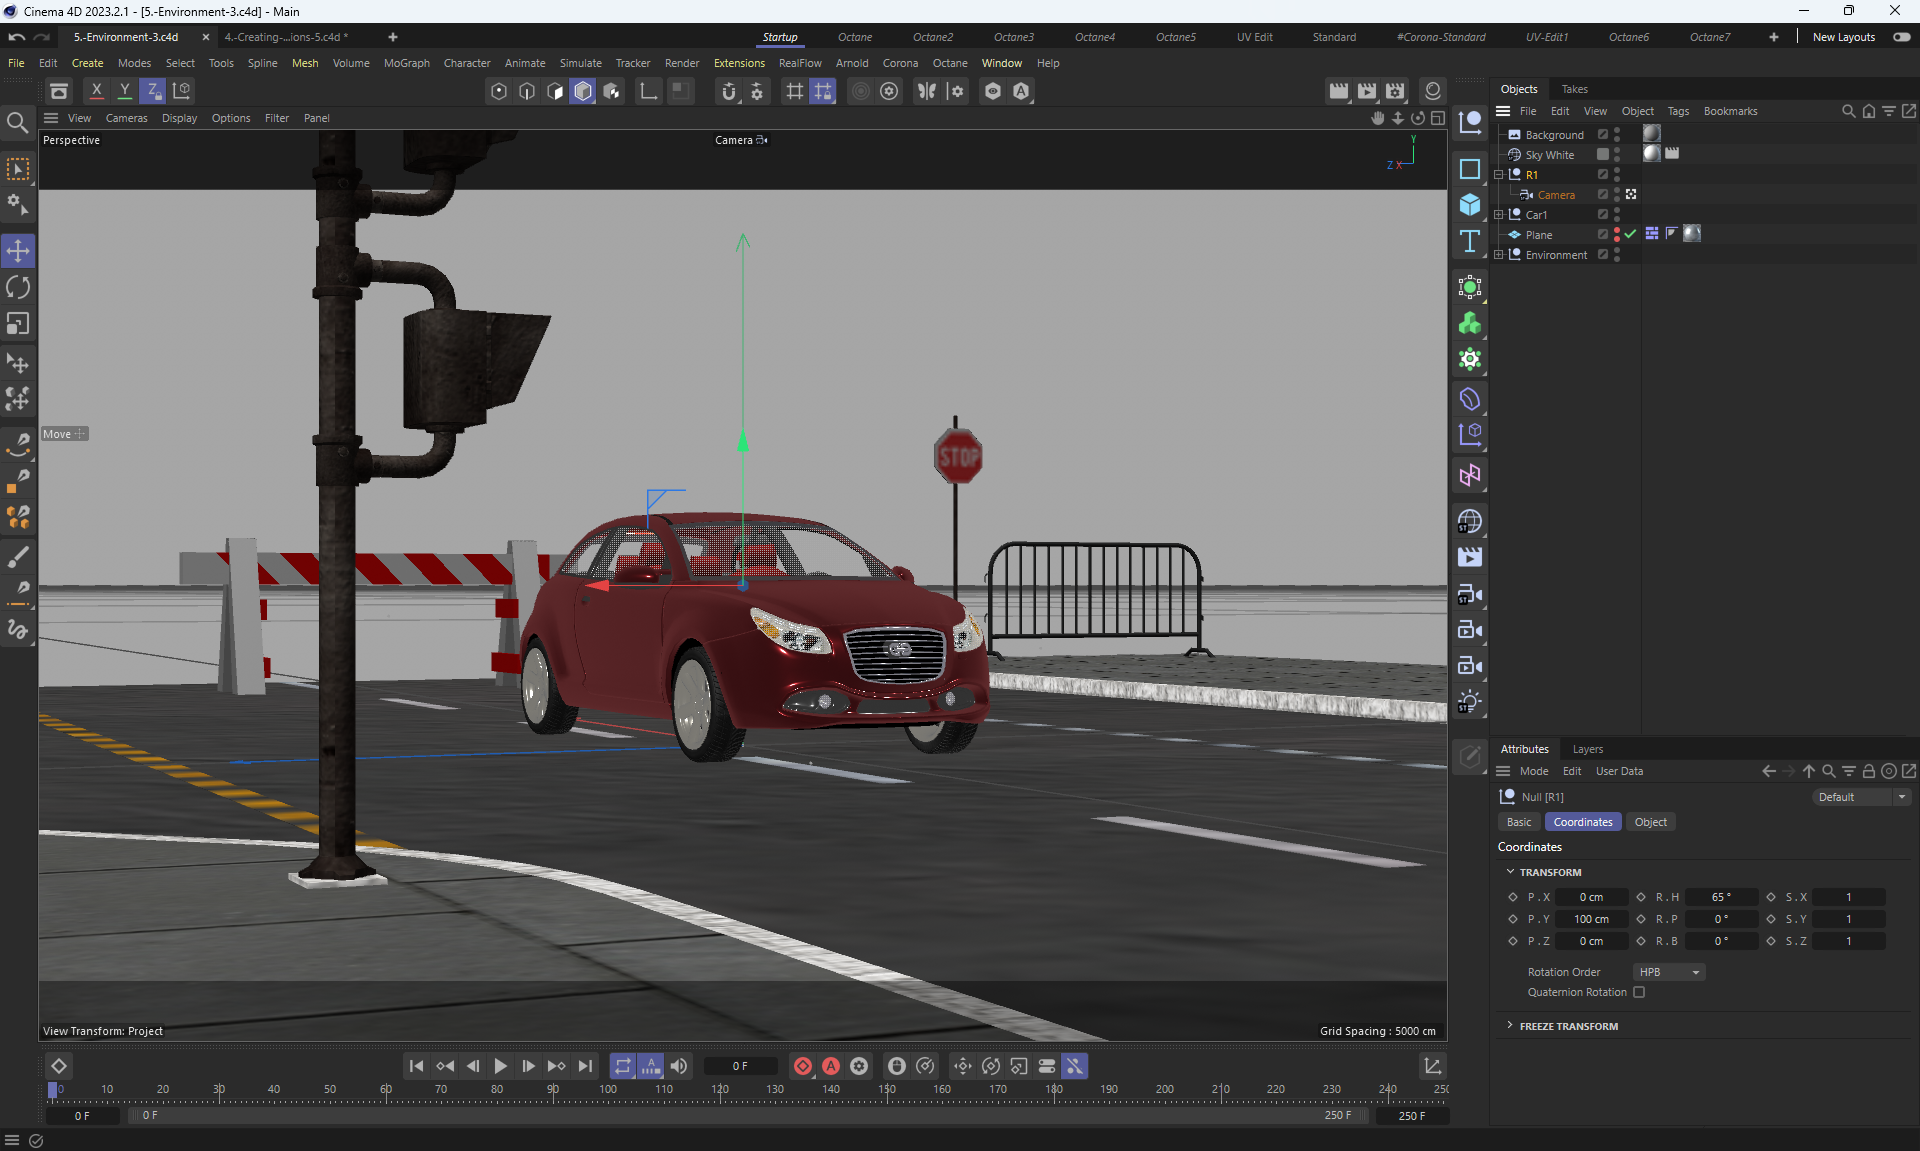
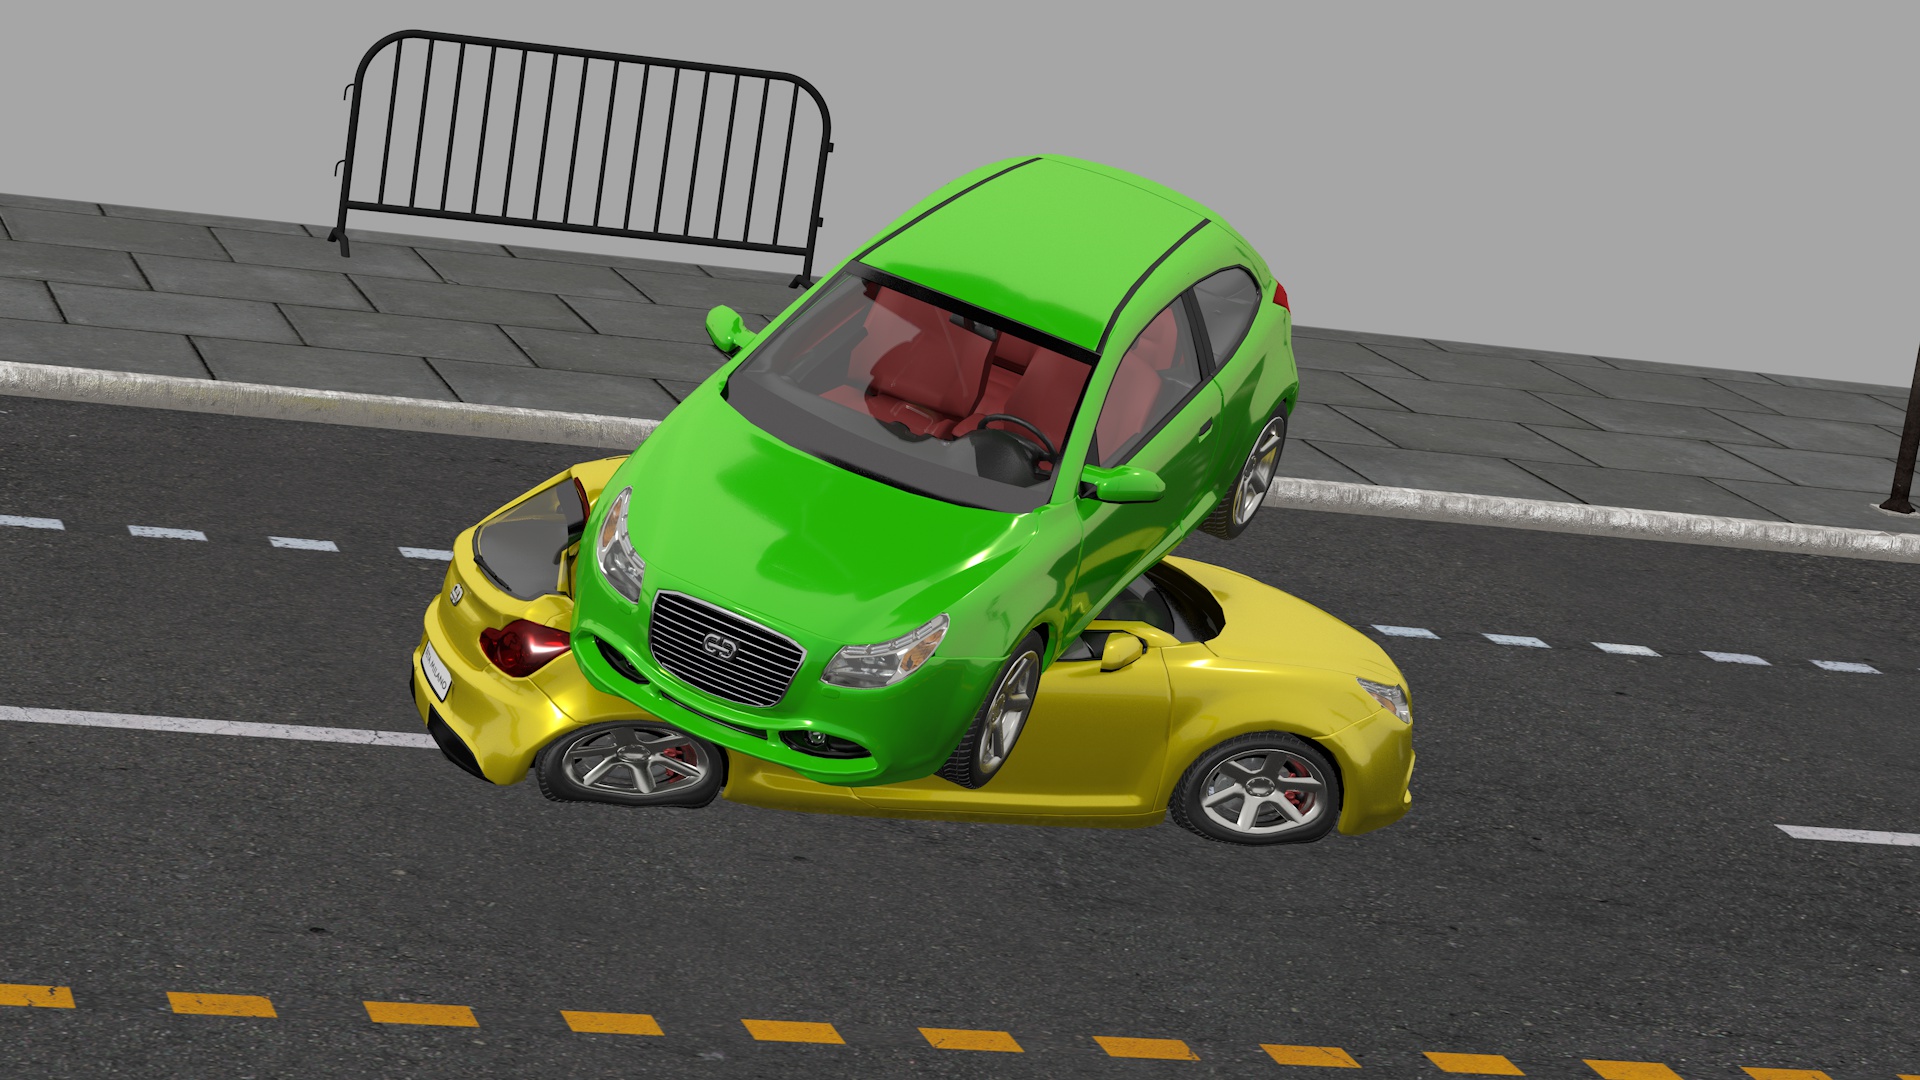
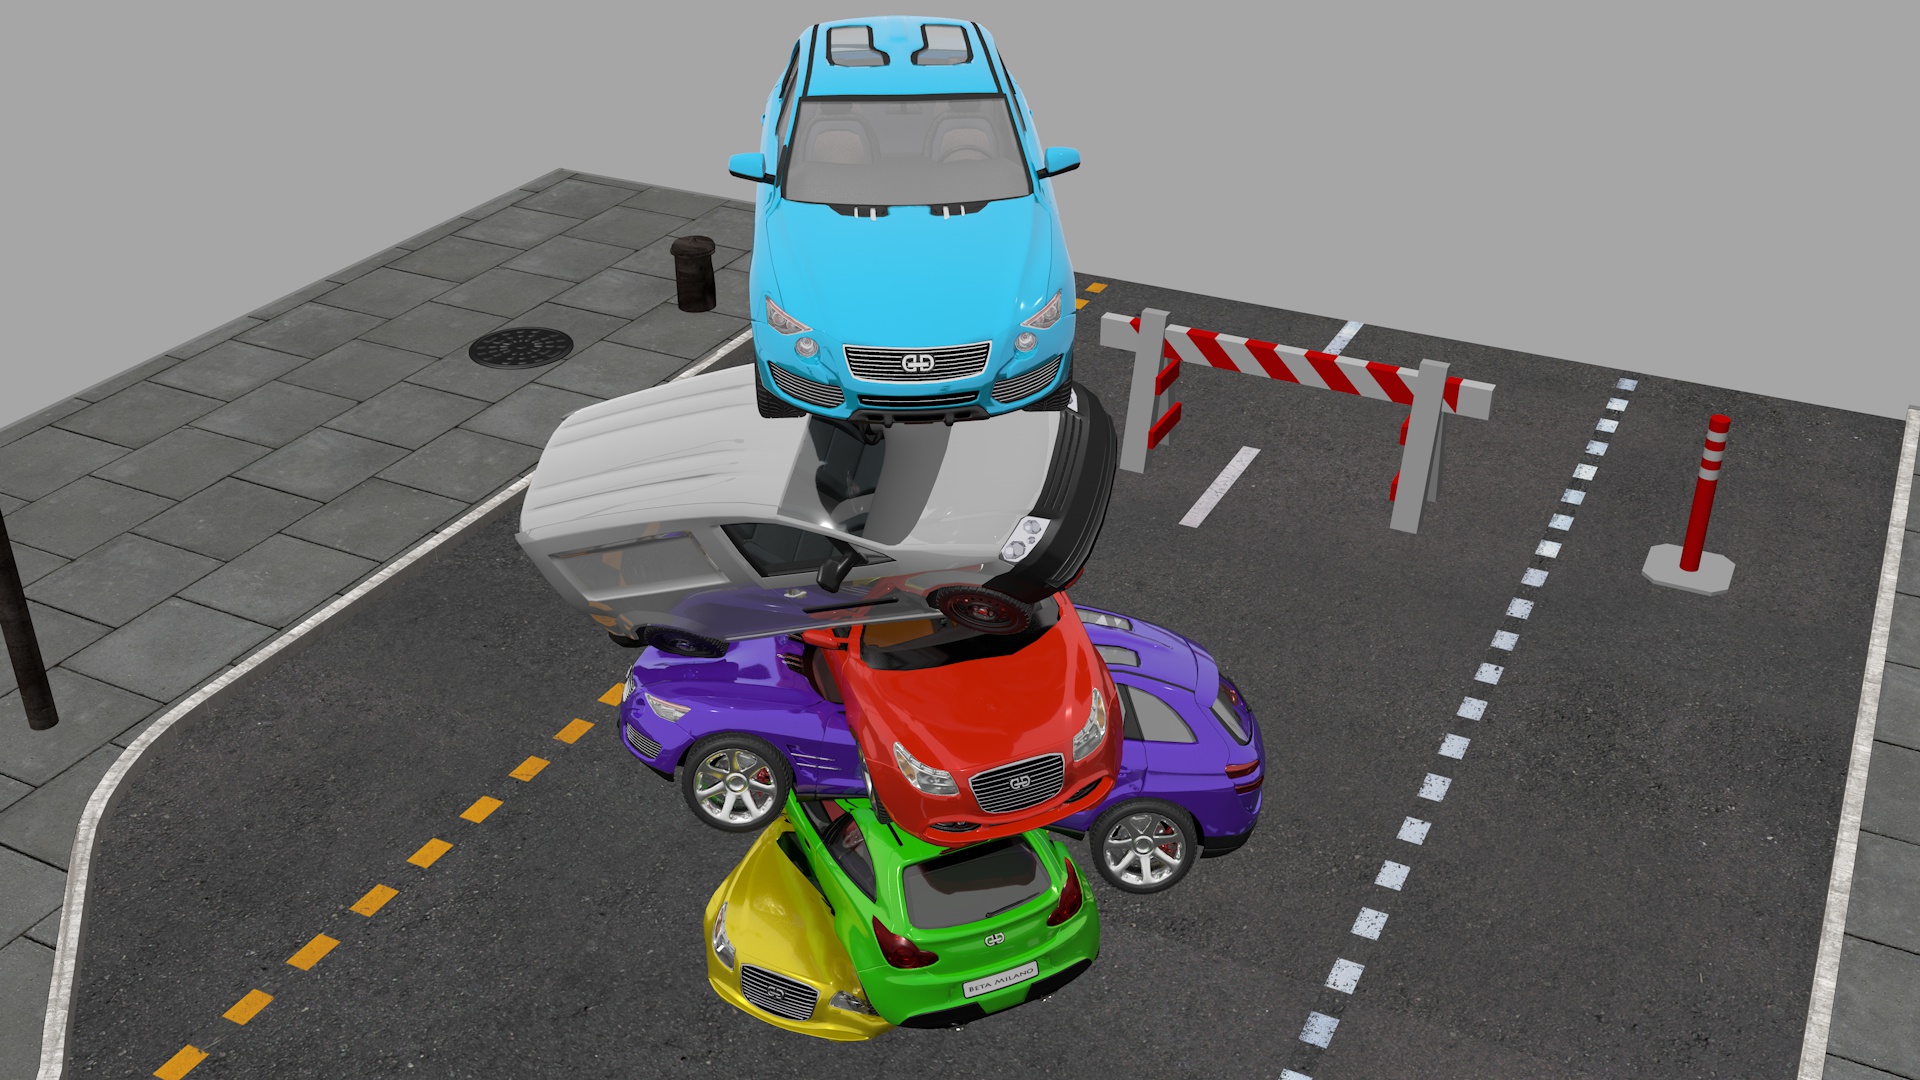
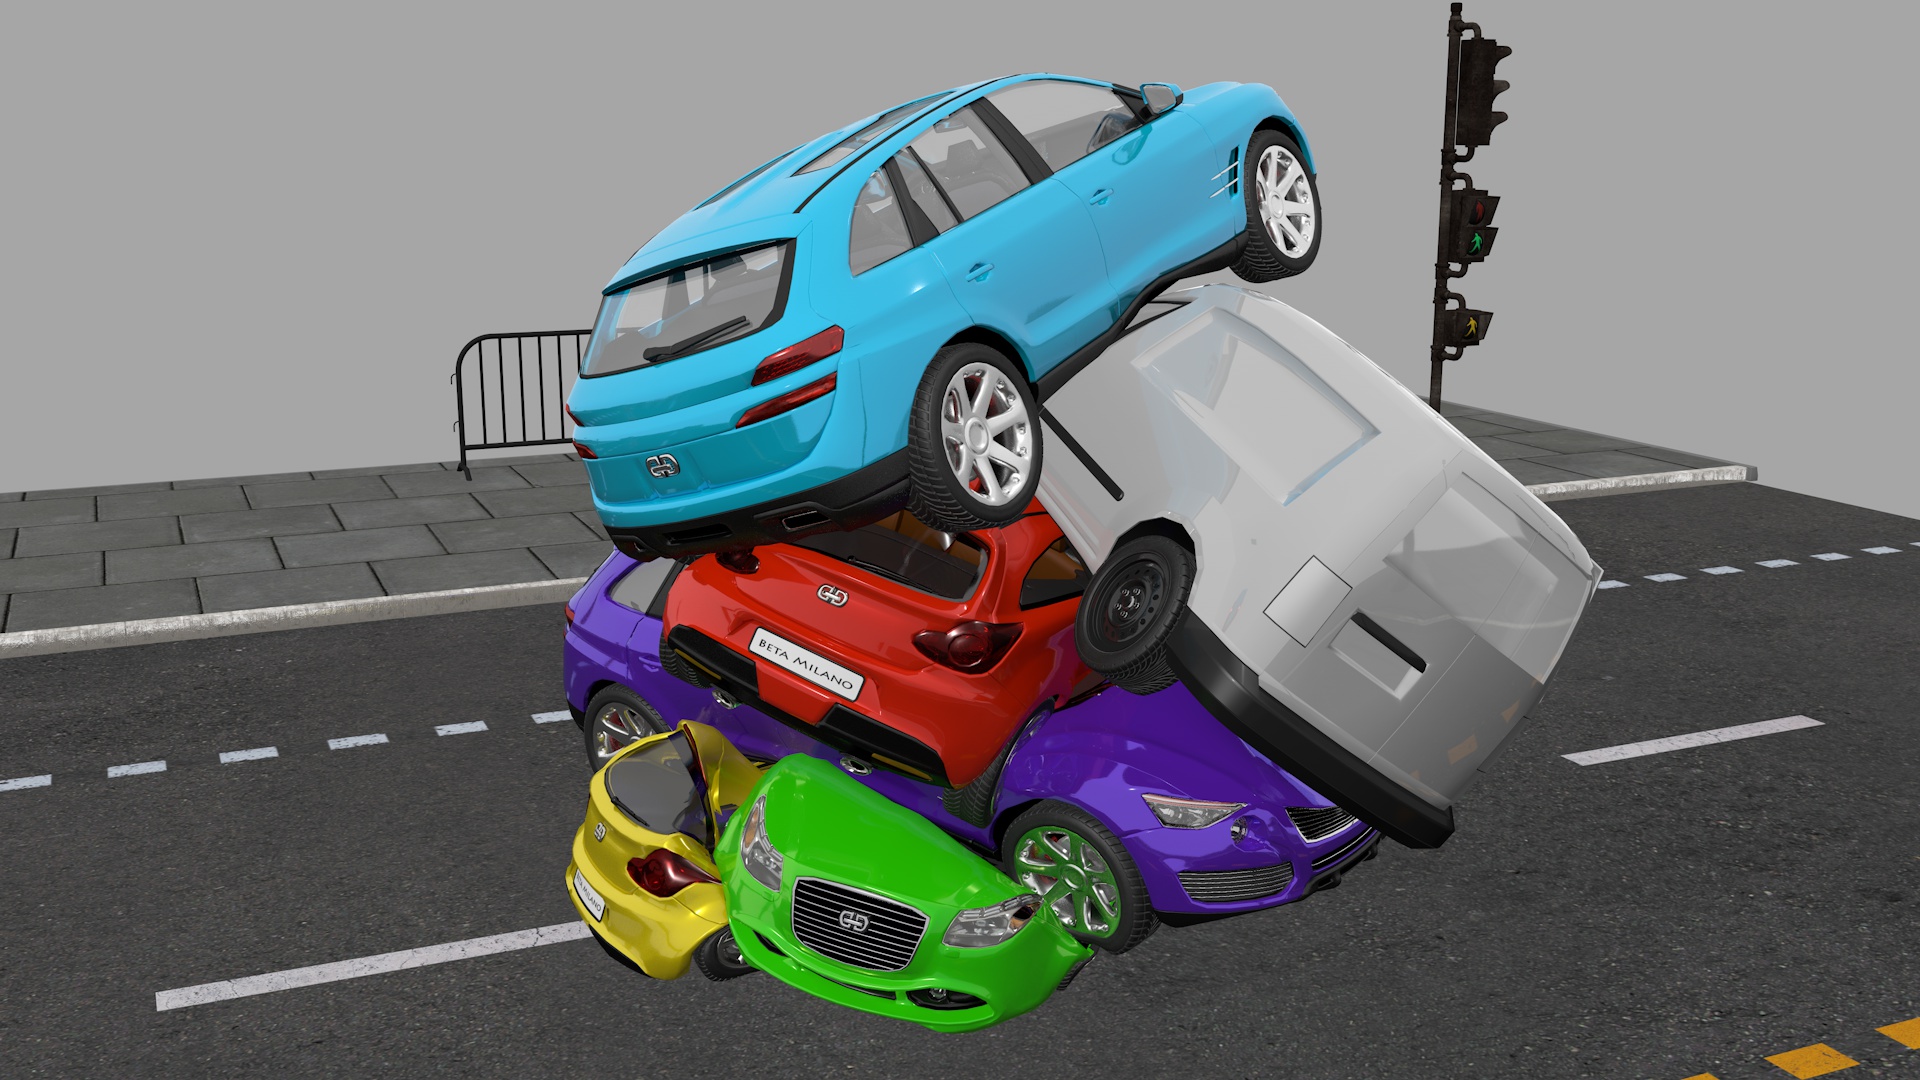
I created the animation of the falling cars and the exterior of the scene from scratch while studying the animations of body collisions.
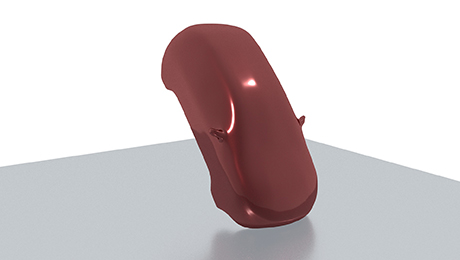
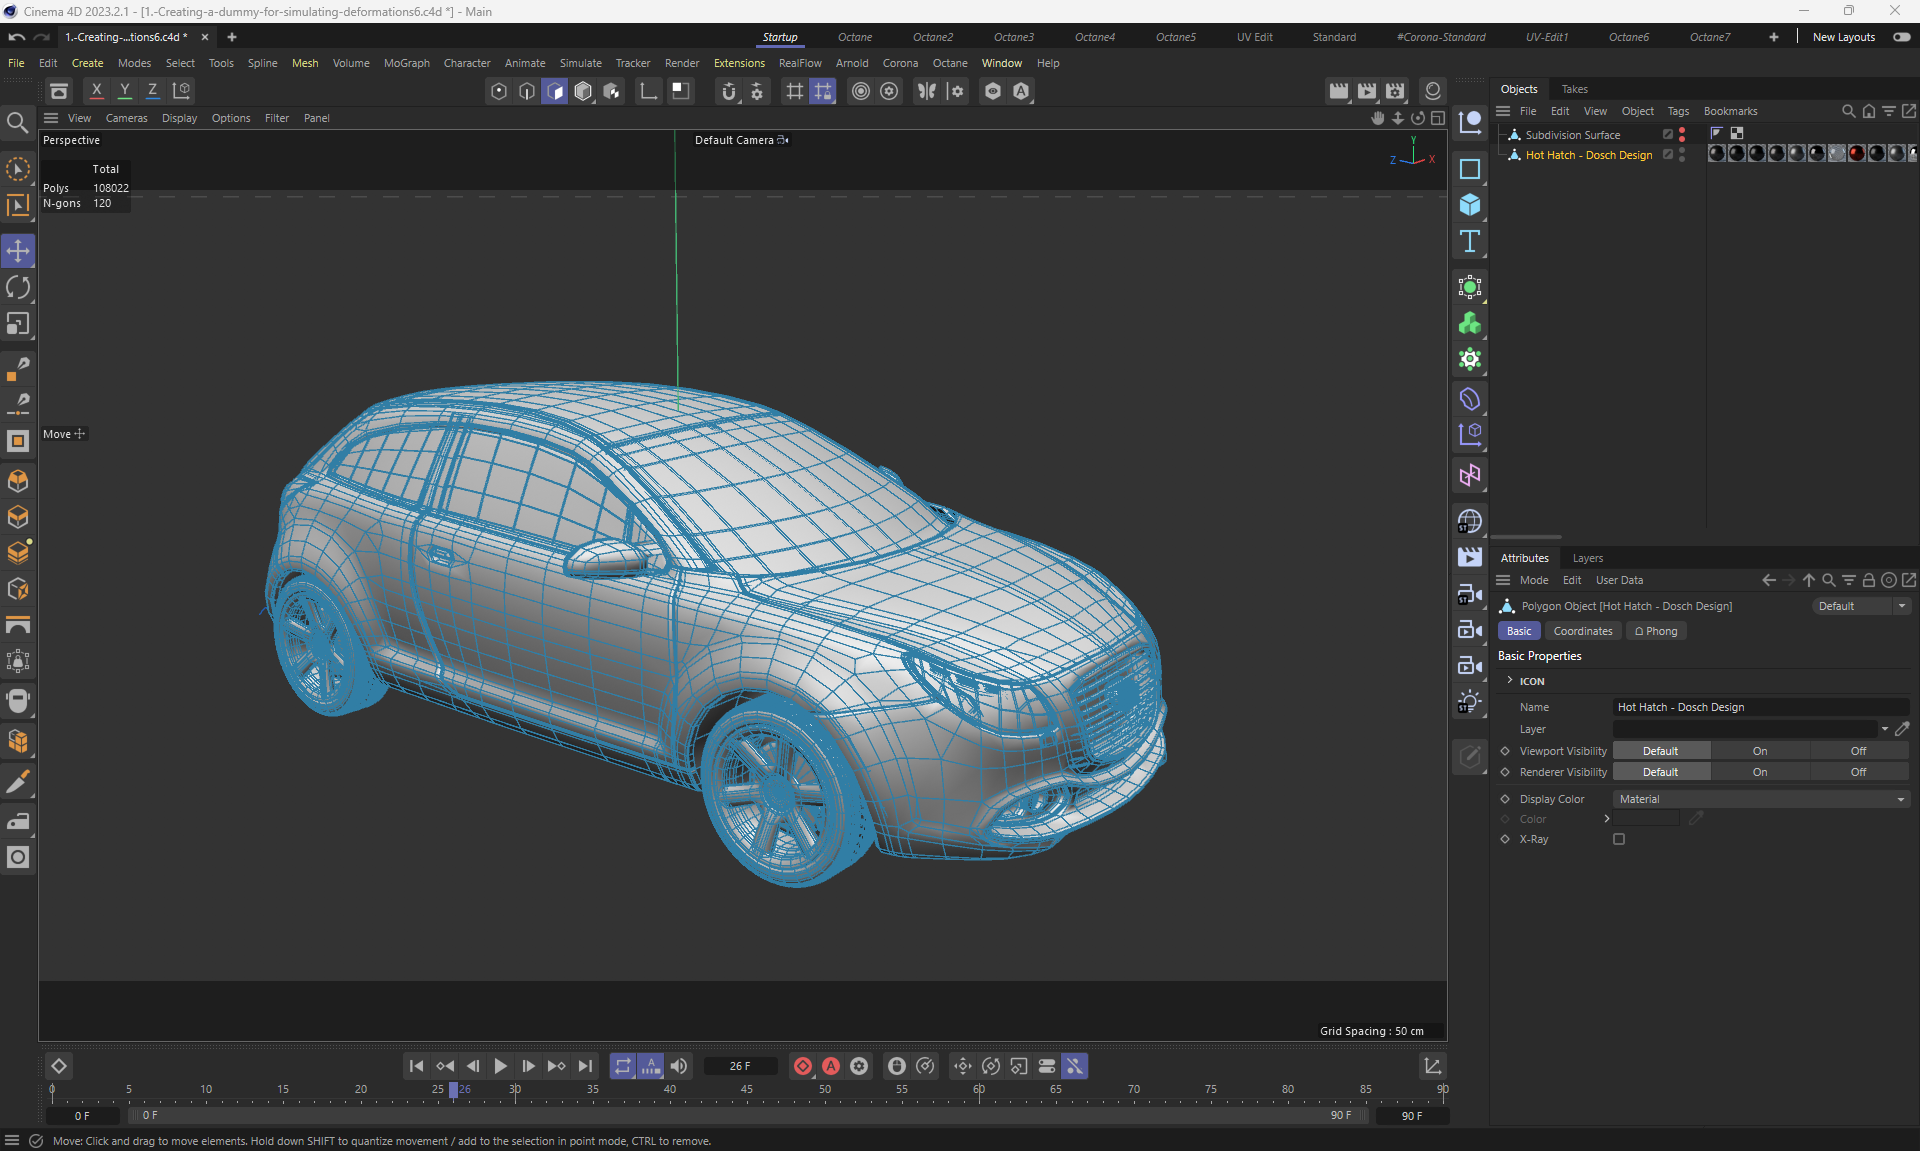
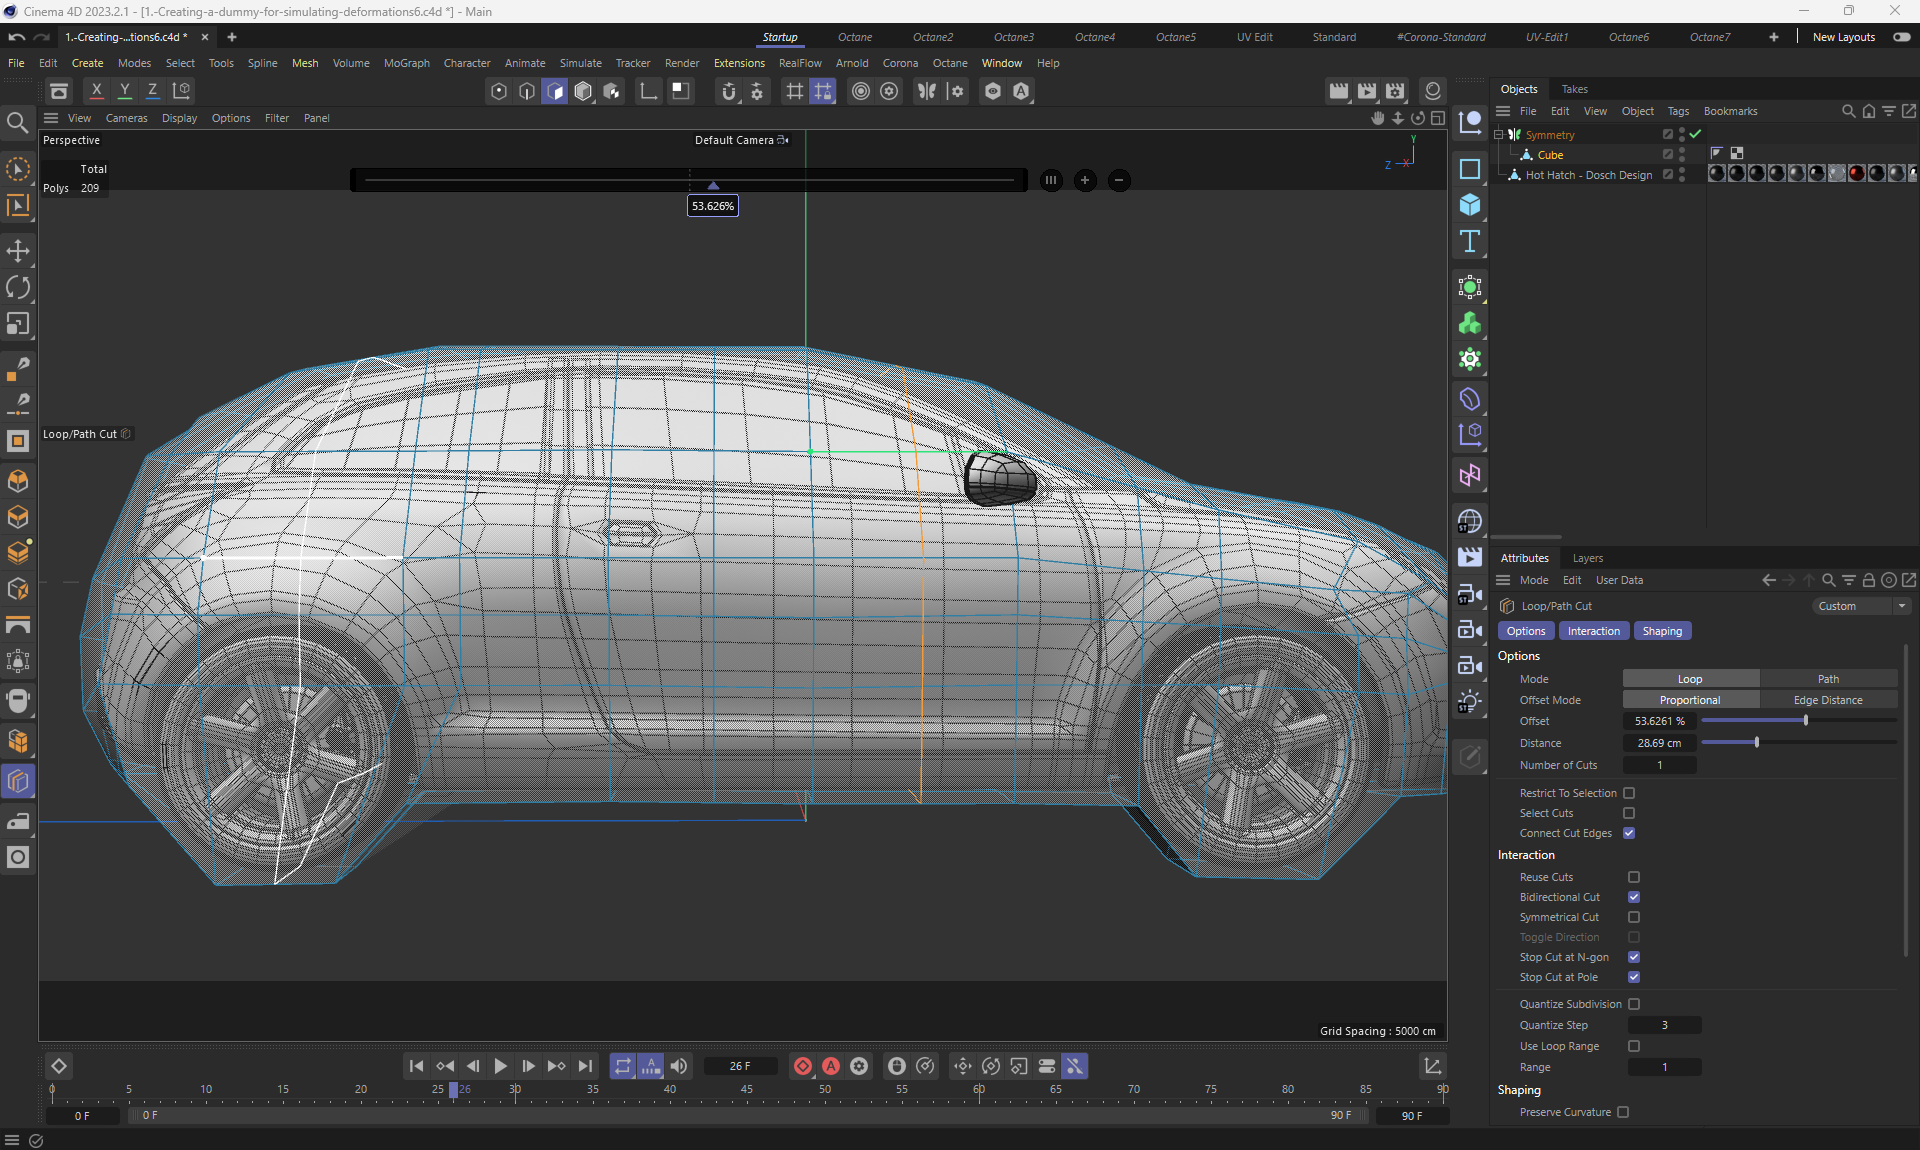
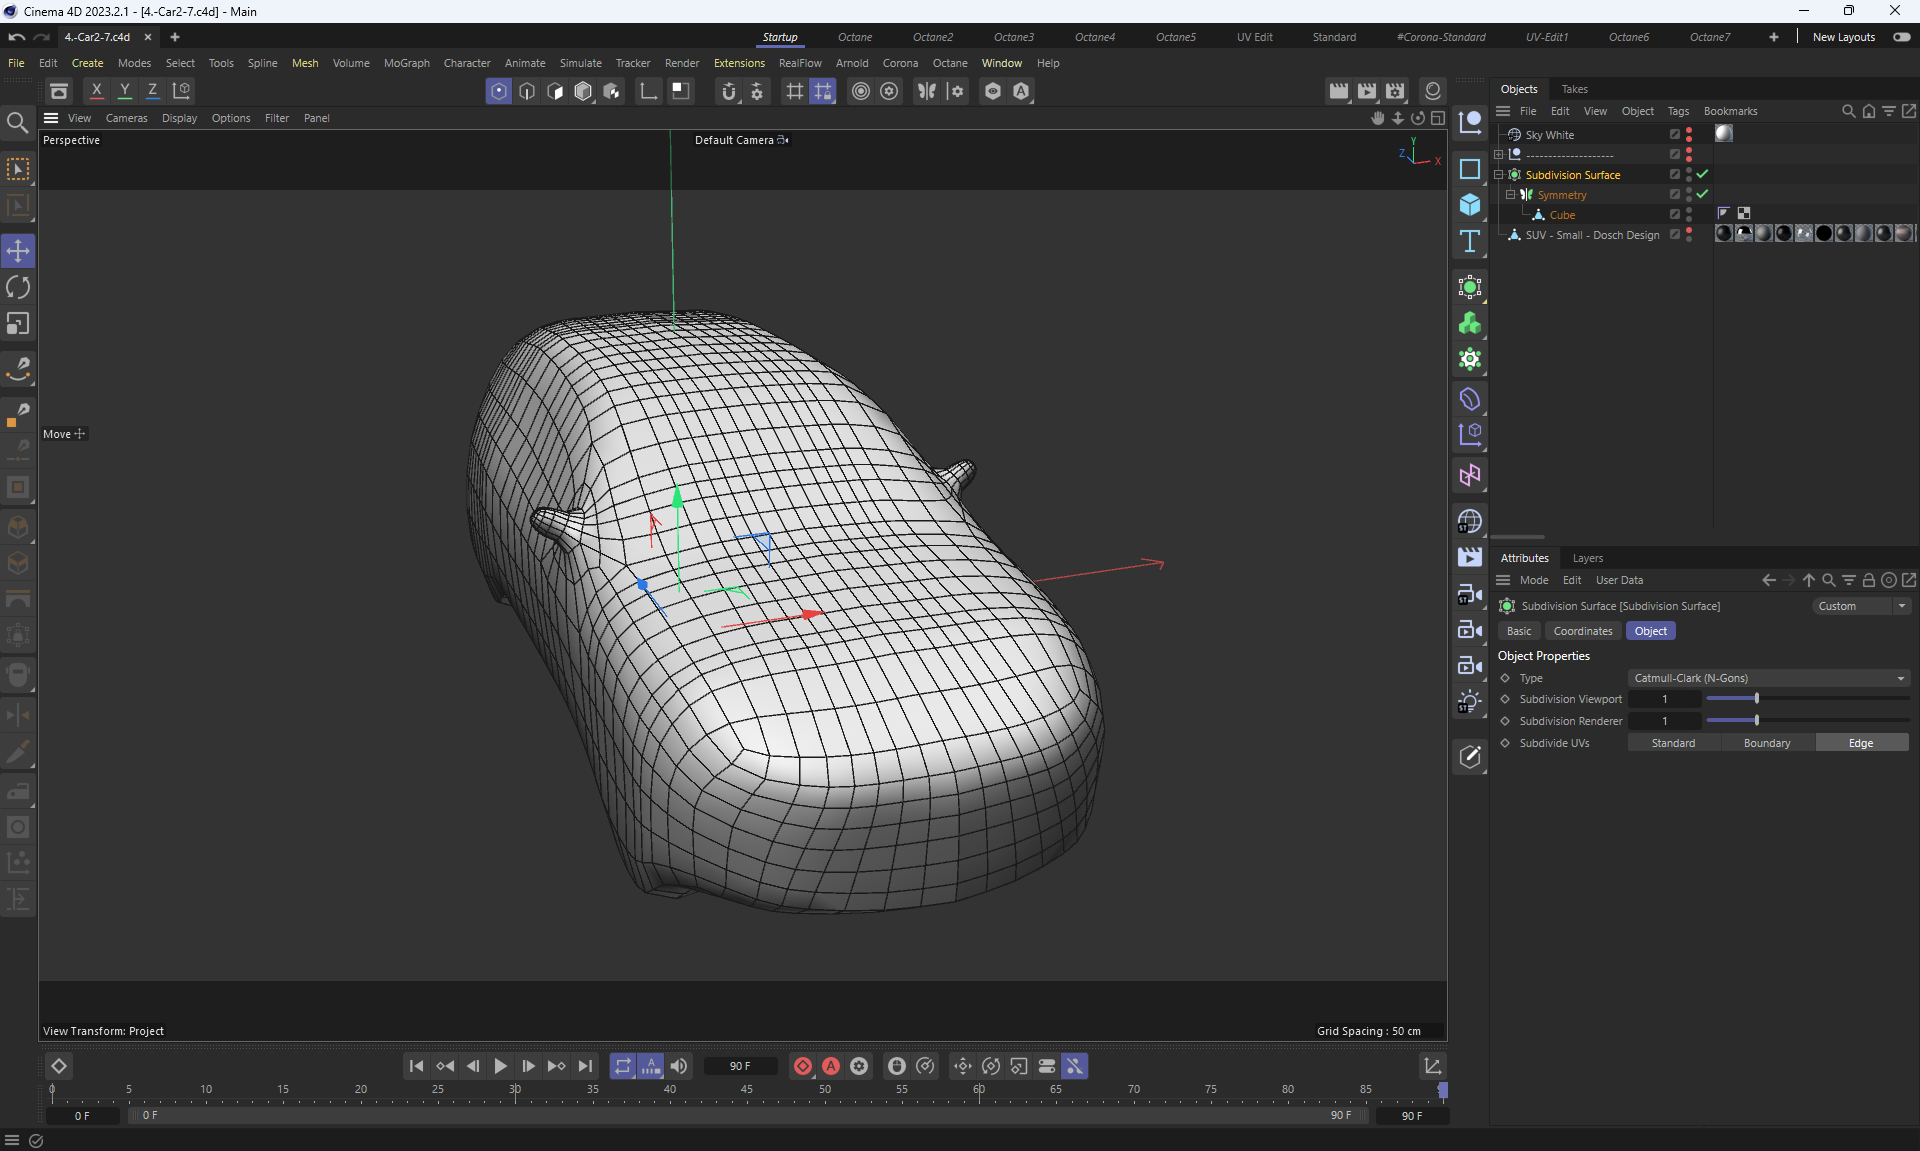
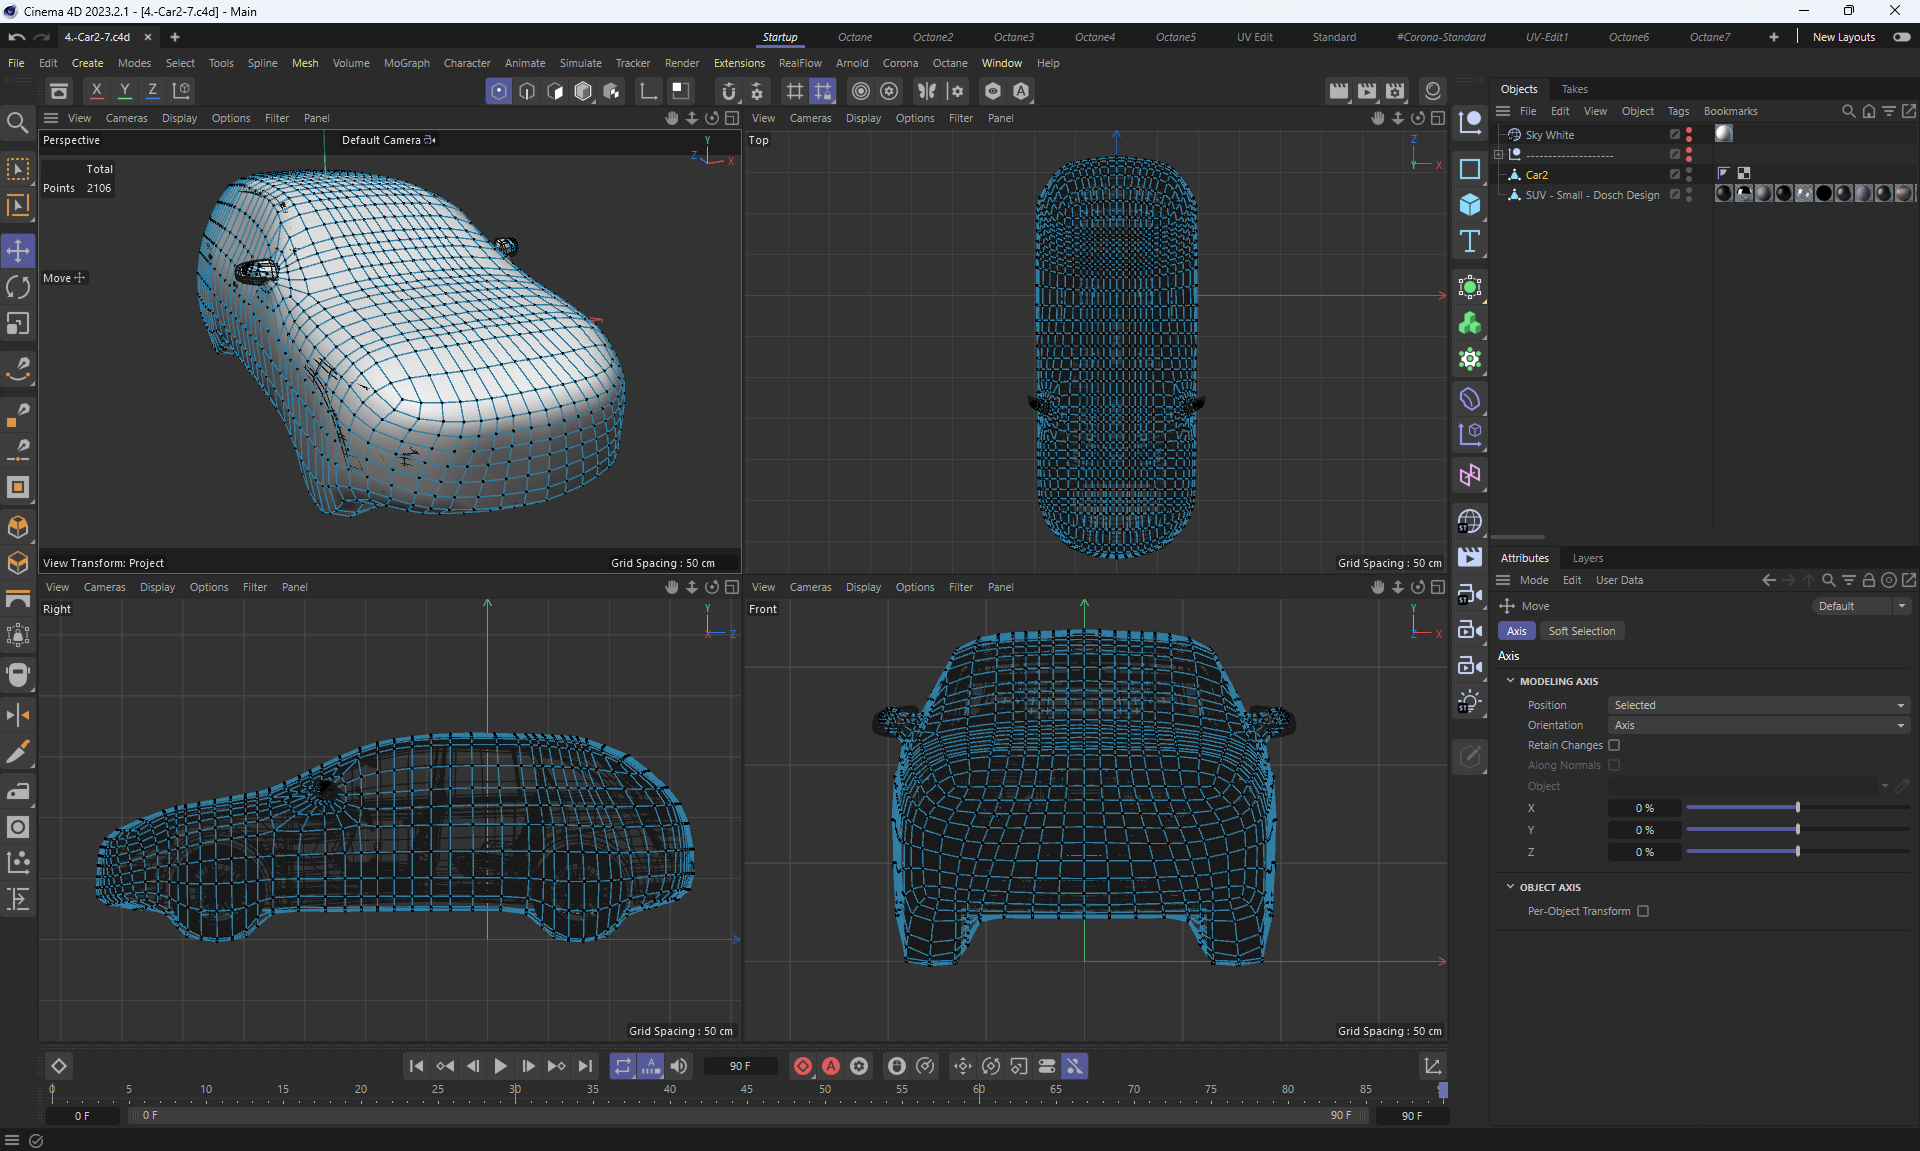
I modeled 3 rough "blanks" of the car.
The cars turned out to have about 2 thousand polygons compared to 1.3 million polygons in the car source.
This allows you to create car collisions and simplify calculations.
I tested different settings, there were cases when in a scene with small differences in the Soft Body settings and general settings, parts of the car began to tear incorrectly, deform in different directions for no reason. There were also cases when, when several cars fell to the ground, the car collision animation was performed correctly, but when other cars were added, they began to fall under the ground. Also, caching the animations of 6 cars took several hours.
There are many subtleties in the Soft Body settings, for example, if you lower the elasticity, the cars start to collapse like soft bodies, and if you overdo it a bit with the different elasticity settings, the cars start to spring back, restoring their shape.
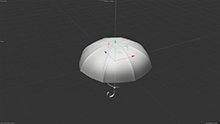
Video (15.3mb)
image1
image2
image3
image4
image5
more details about this animation
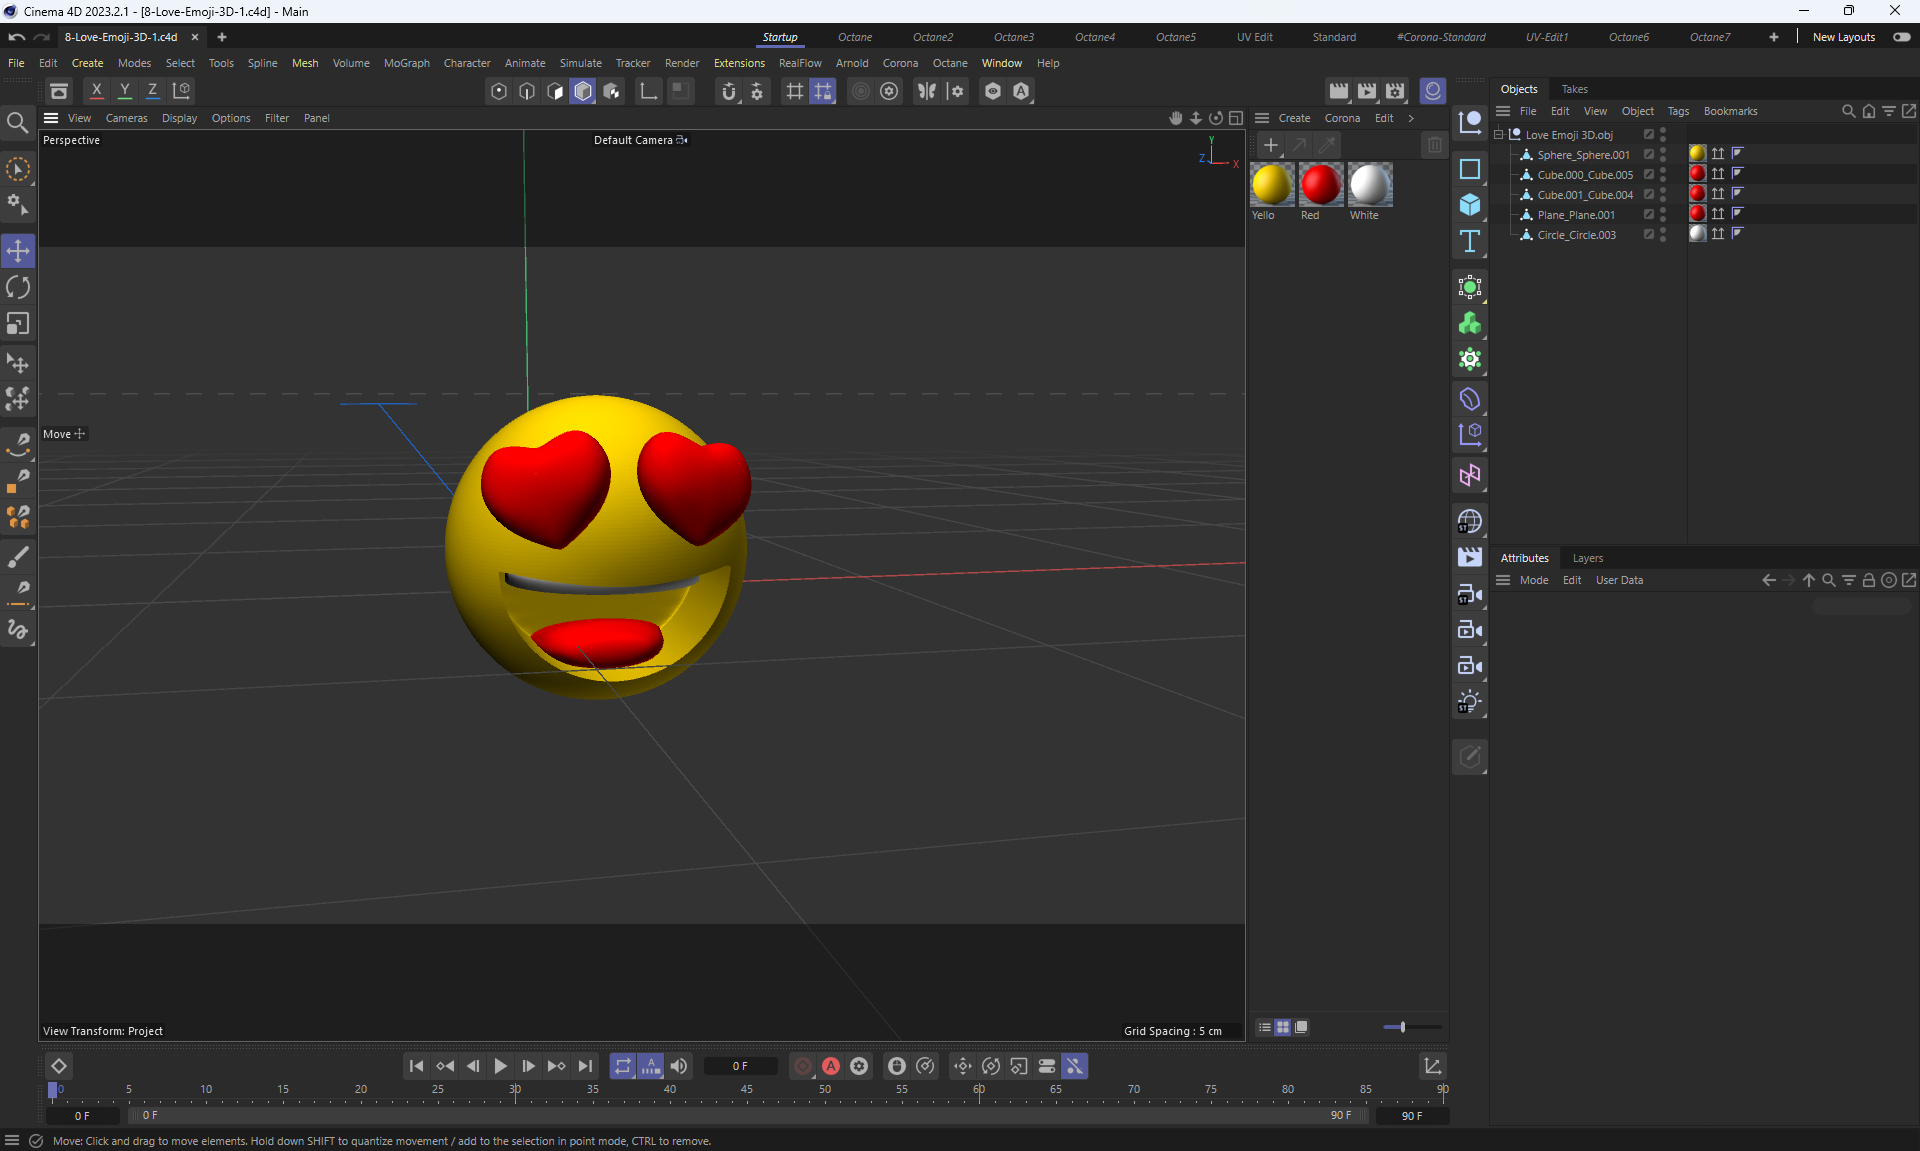
I created the scene from scratch, it was a very extensive lesson, there were no source materials.
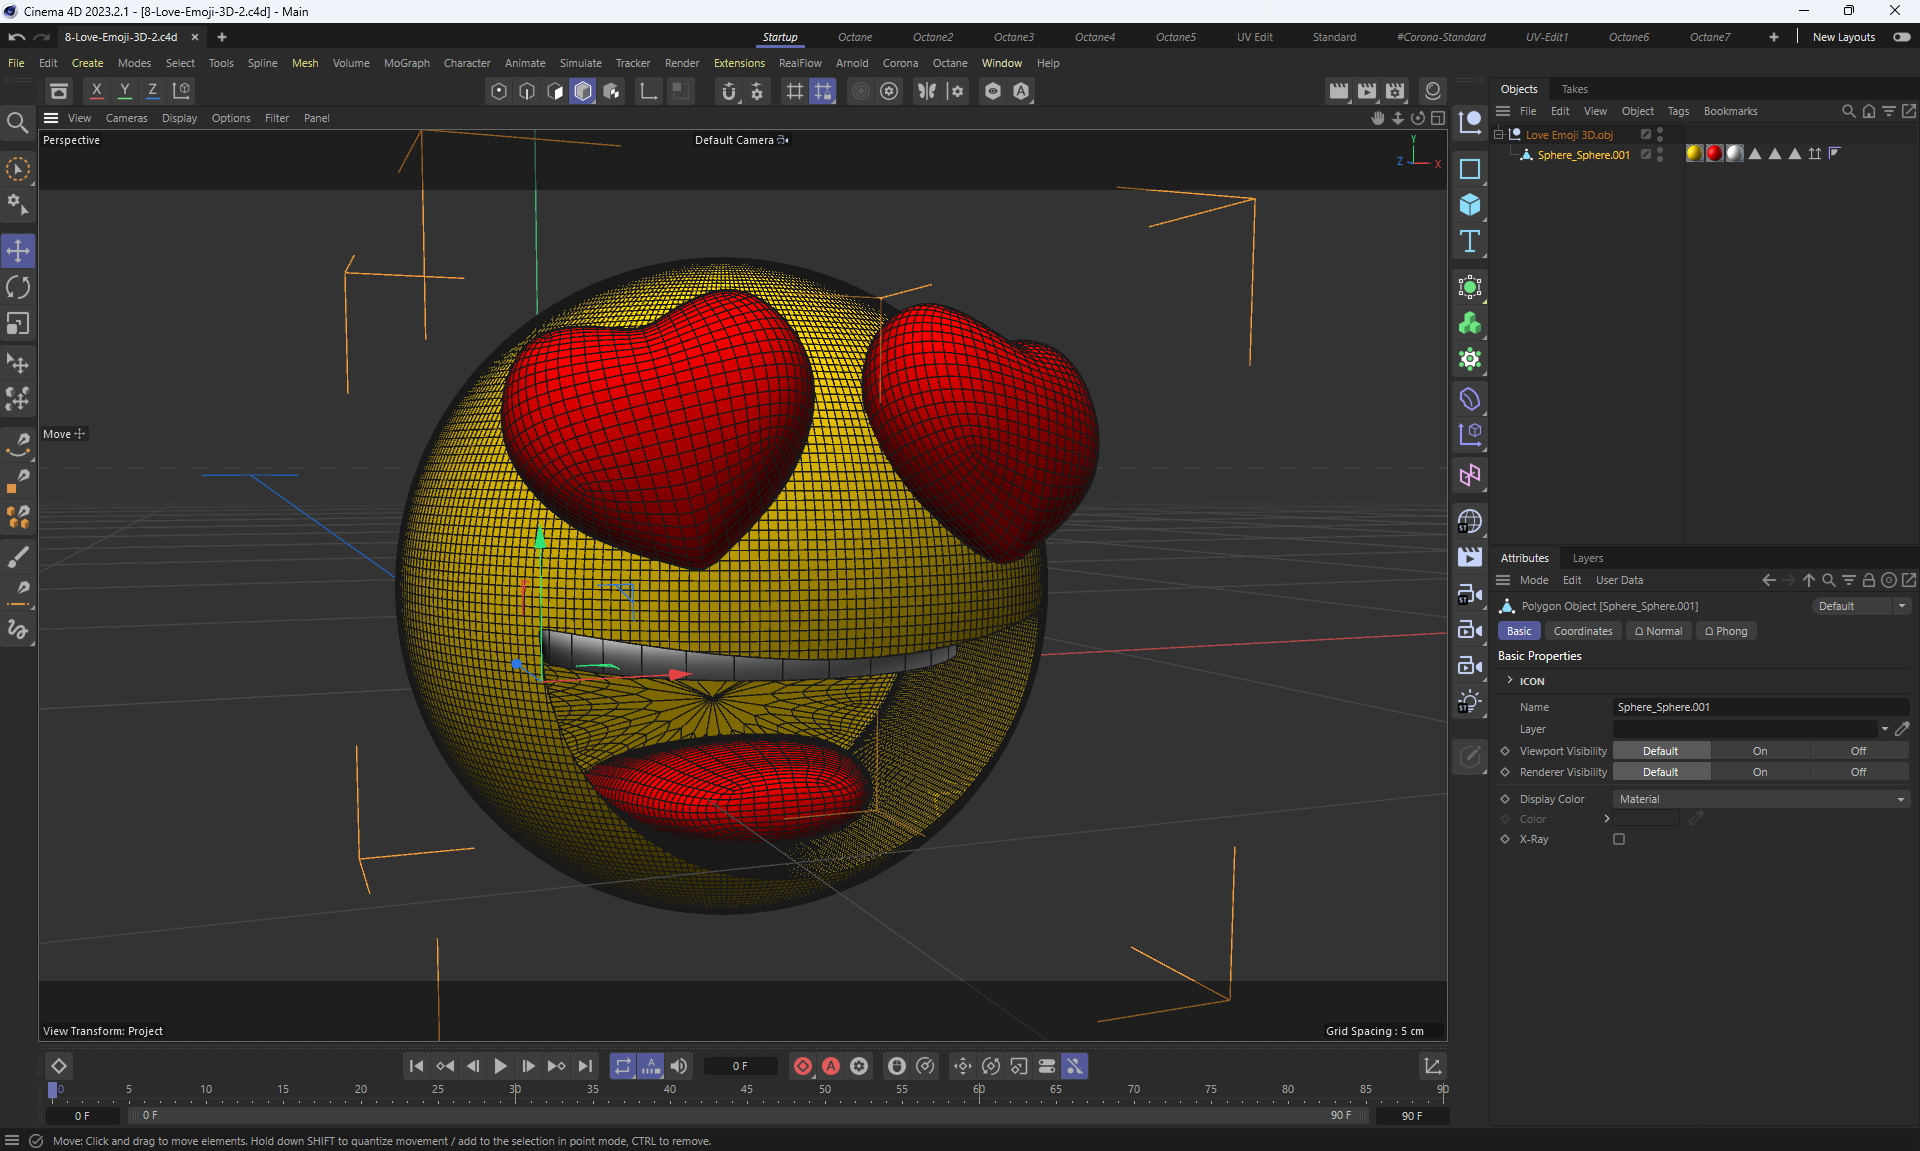
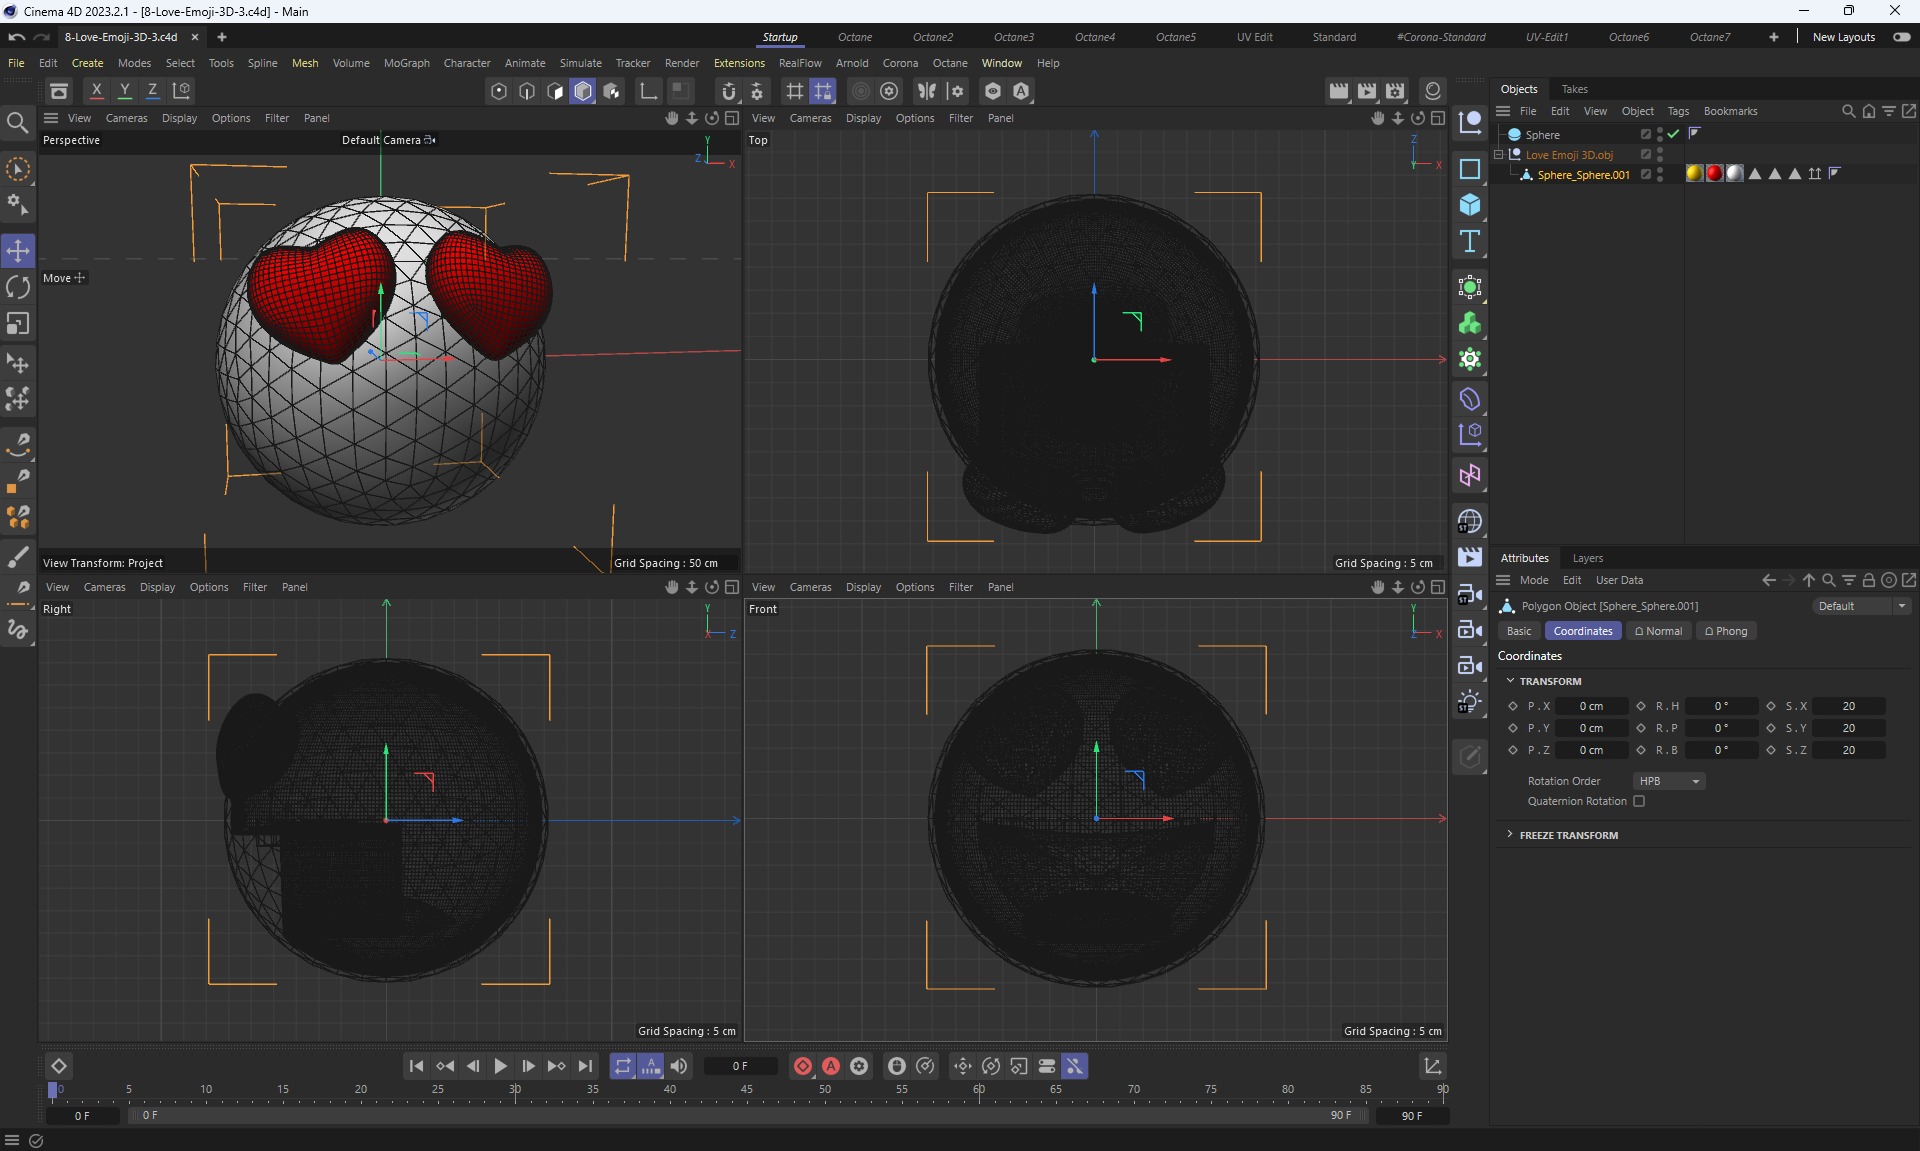
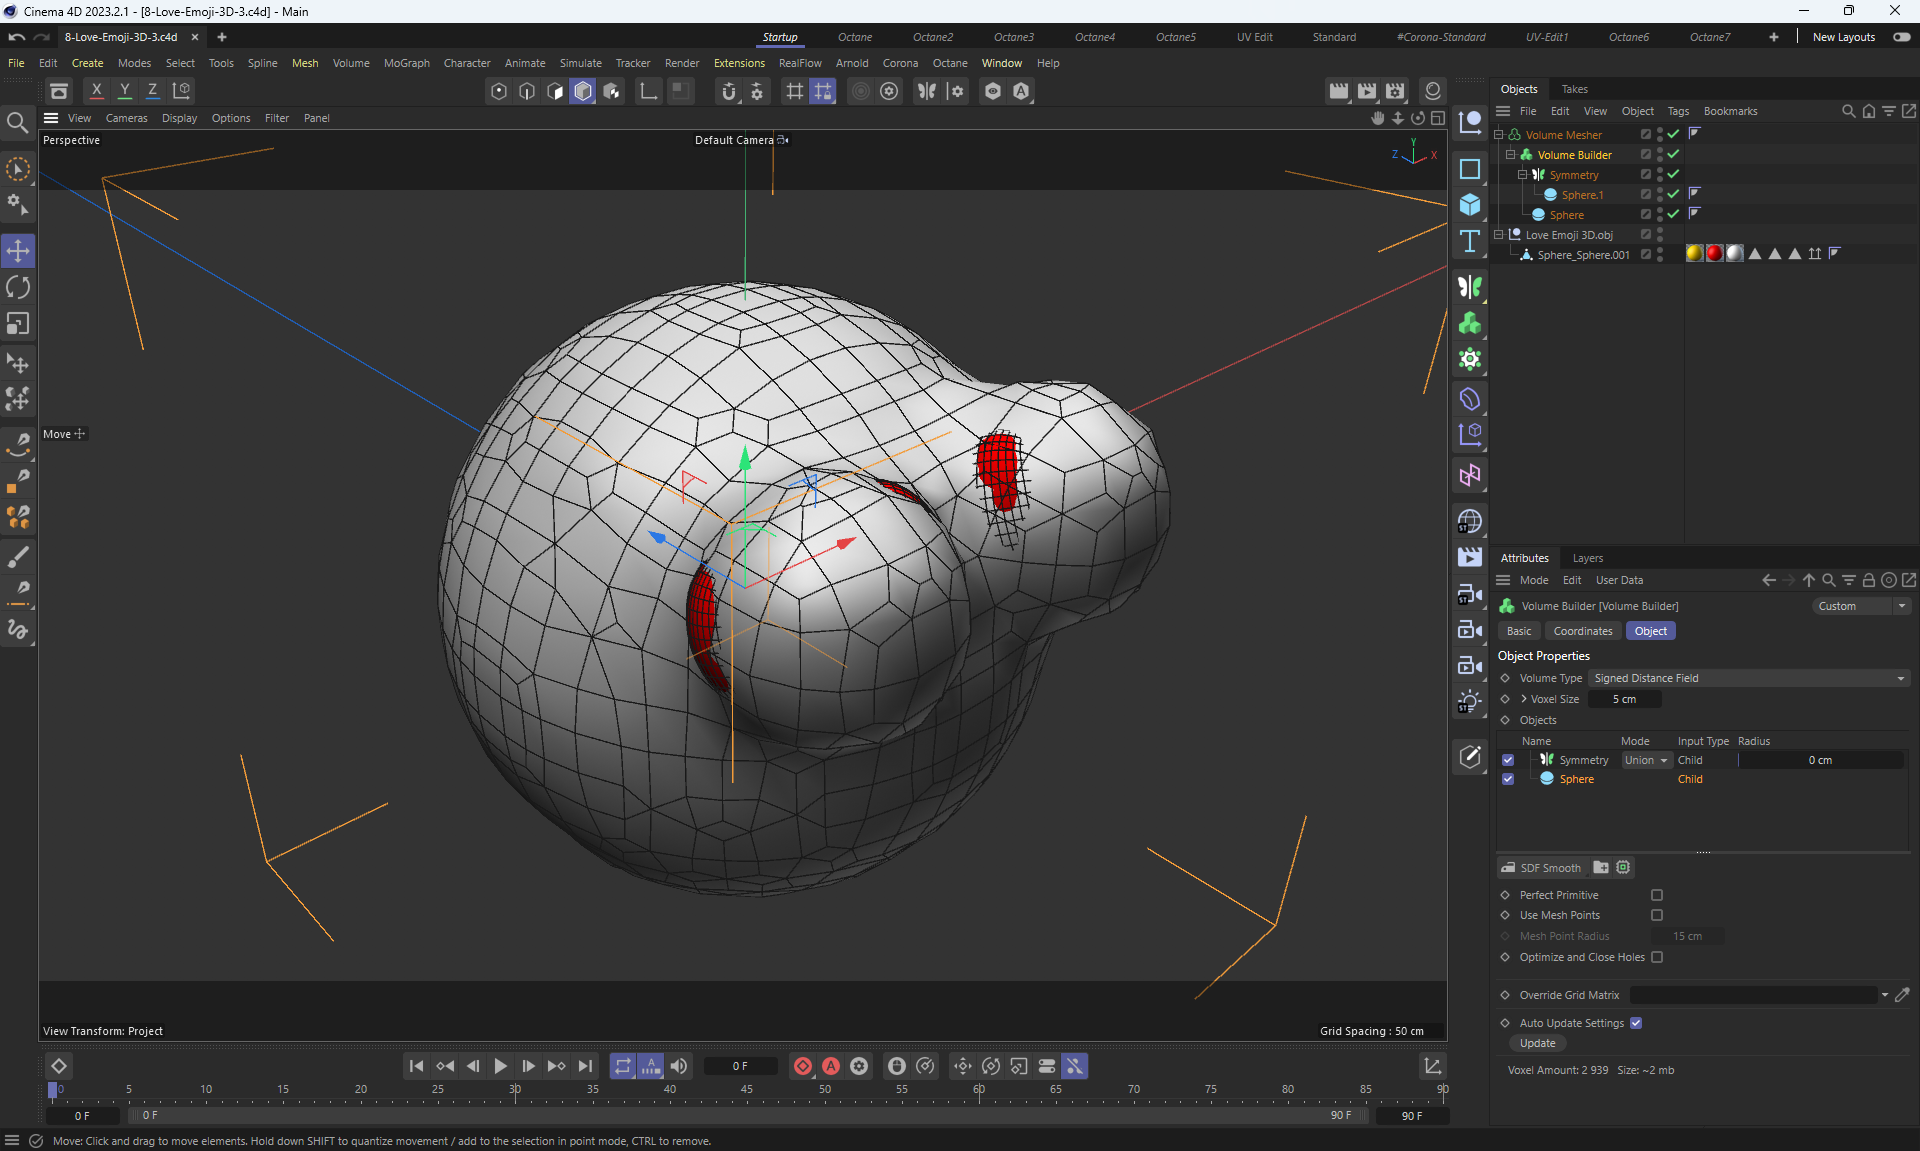
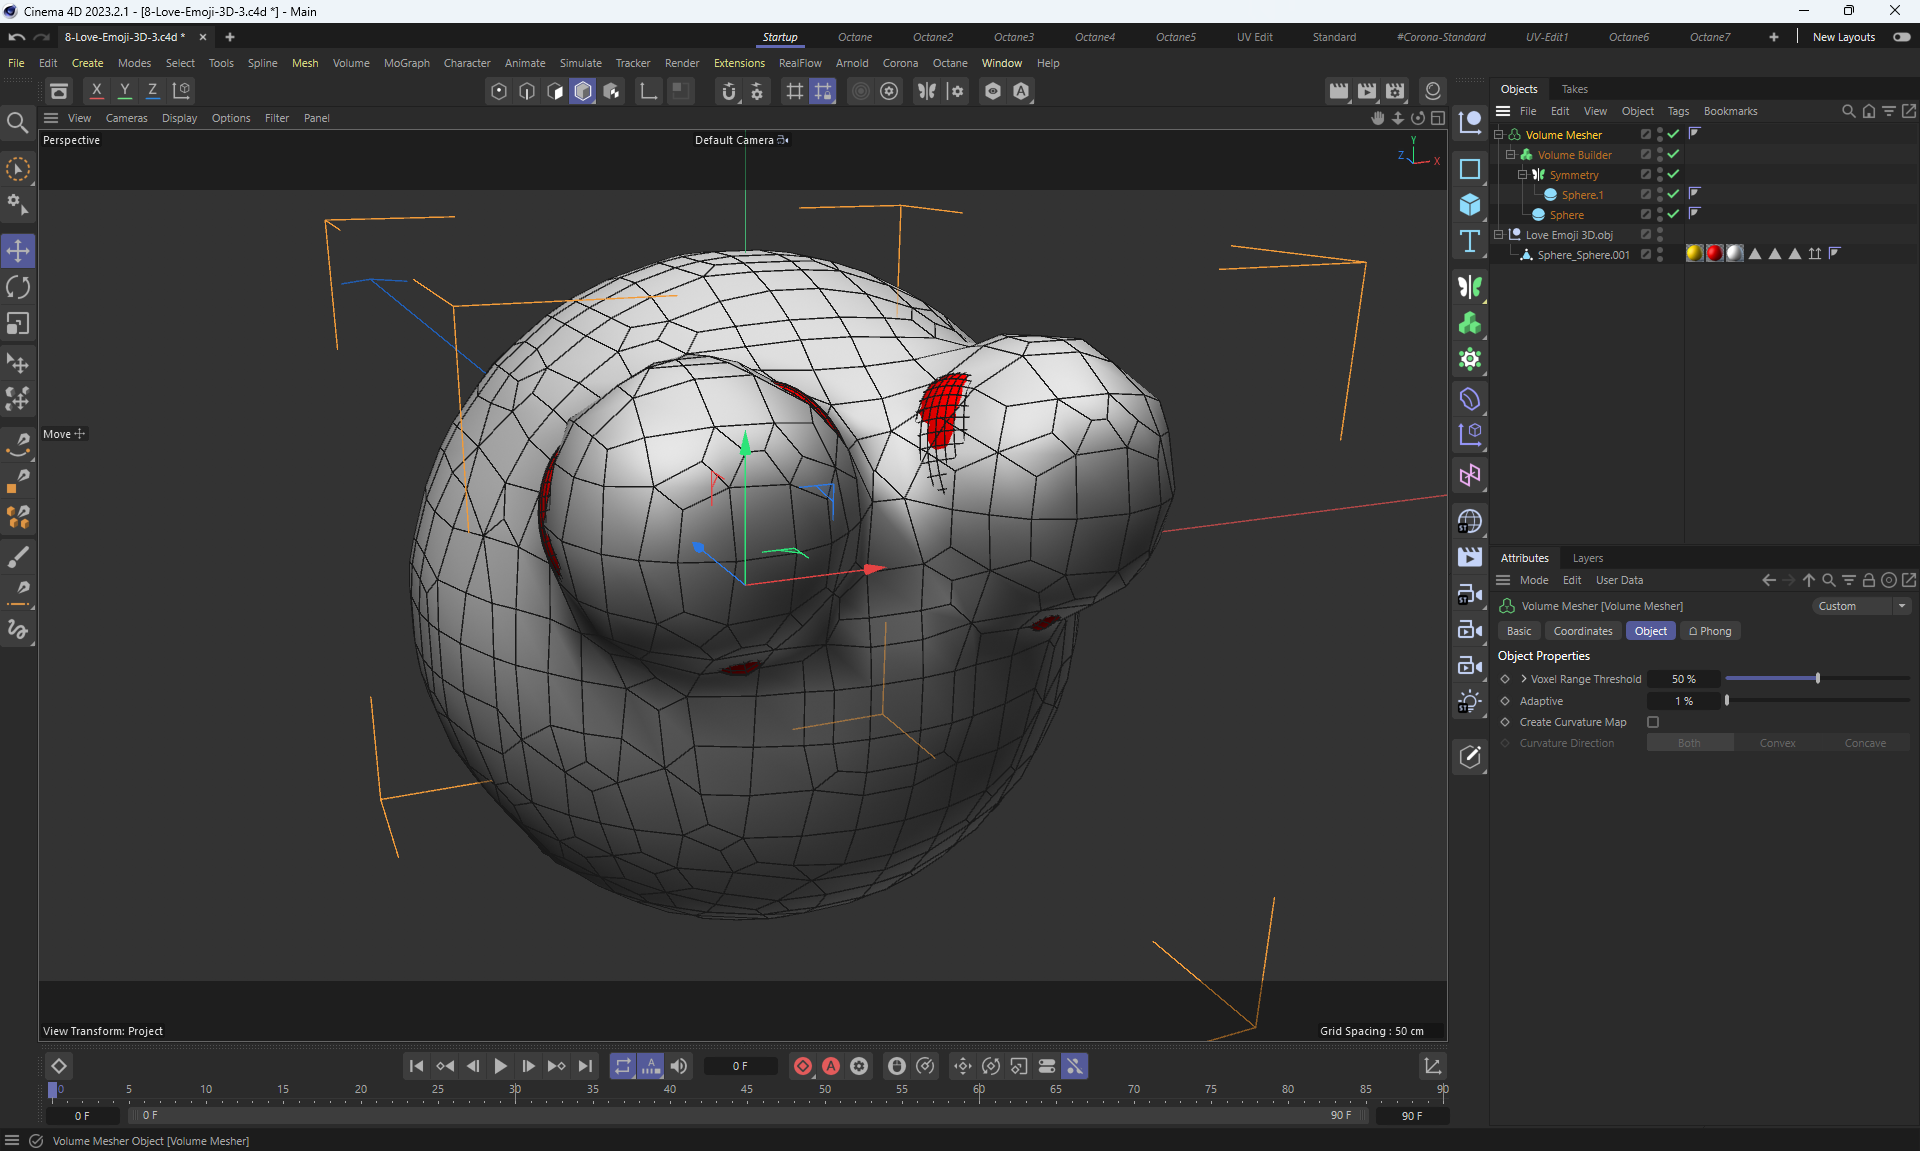
Smiley source
I searched for the sources of the clouds, I found:
10 VDB Clouds.zip
Video1 (1.6mb)
Video2 (1.8mb)
Video3 (1.9mb)
Video4 (4.7mb)
Video5 (1.3mb)
Video6 (2.2mb)
Video7 (4.8mb)
Video8 (2.9mb)
Video9 (2.2mb)
Video10 (2.6mb)
Video11 (6mb)
Video12 (0.6mb)
Video13 (6.5mb)
image1
image2
image3
image4
image4-Video (12.2mb)
image6
image6-Video (5.7mb)
image7
image7-Video (5.7mb)
Video8 (7.2mb)
Final Video (14mb)
Final image1
Final image2
more details about this animation
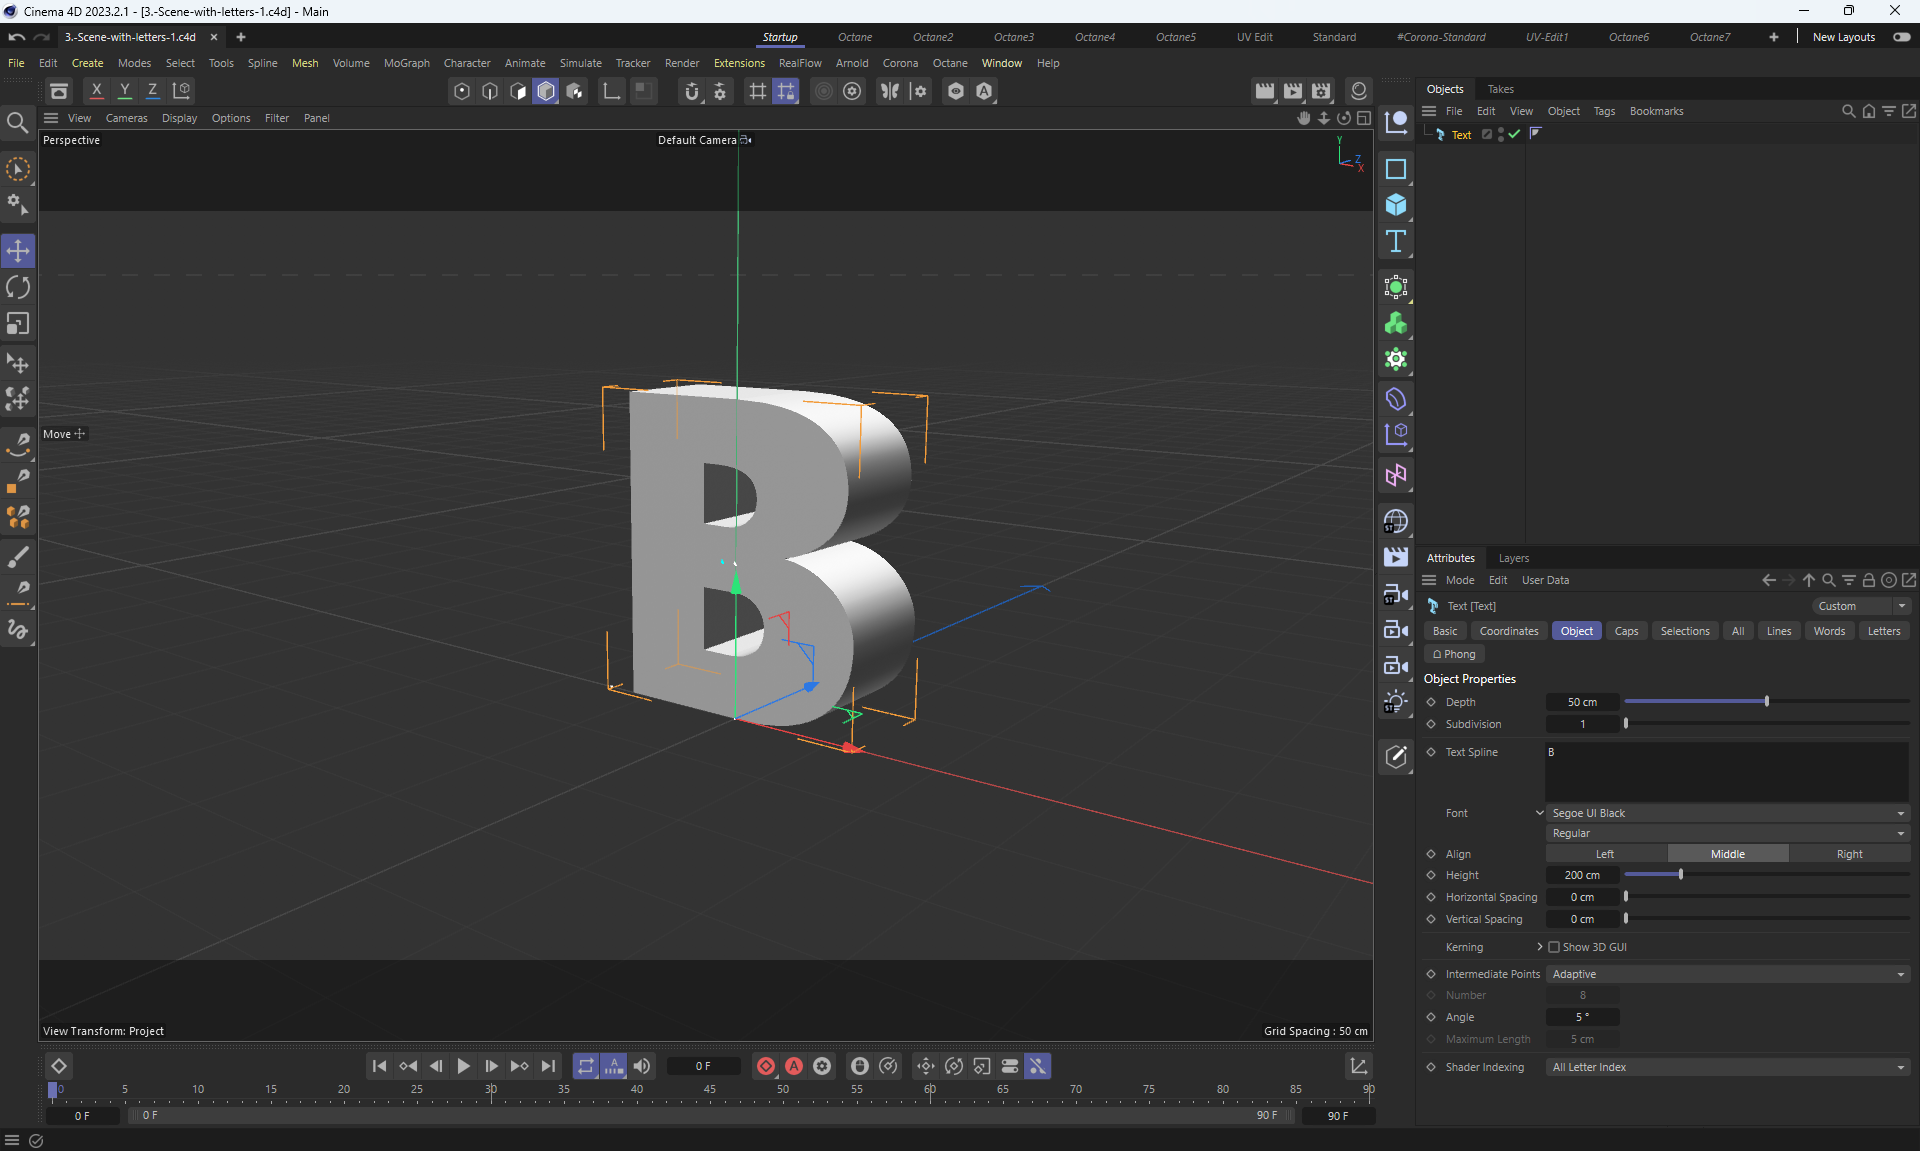
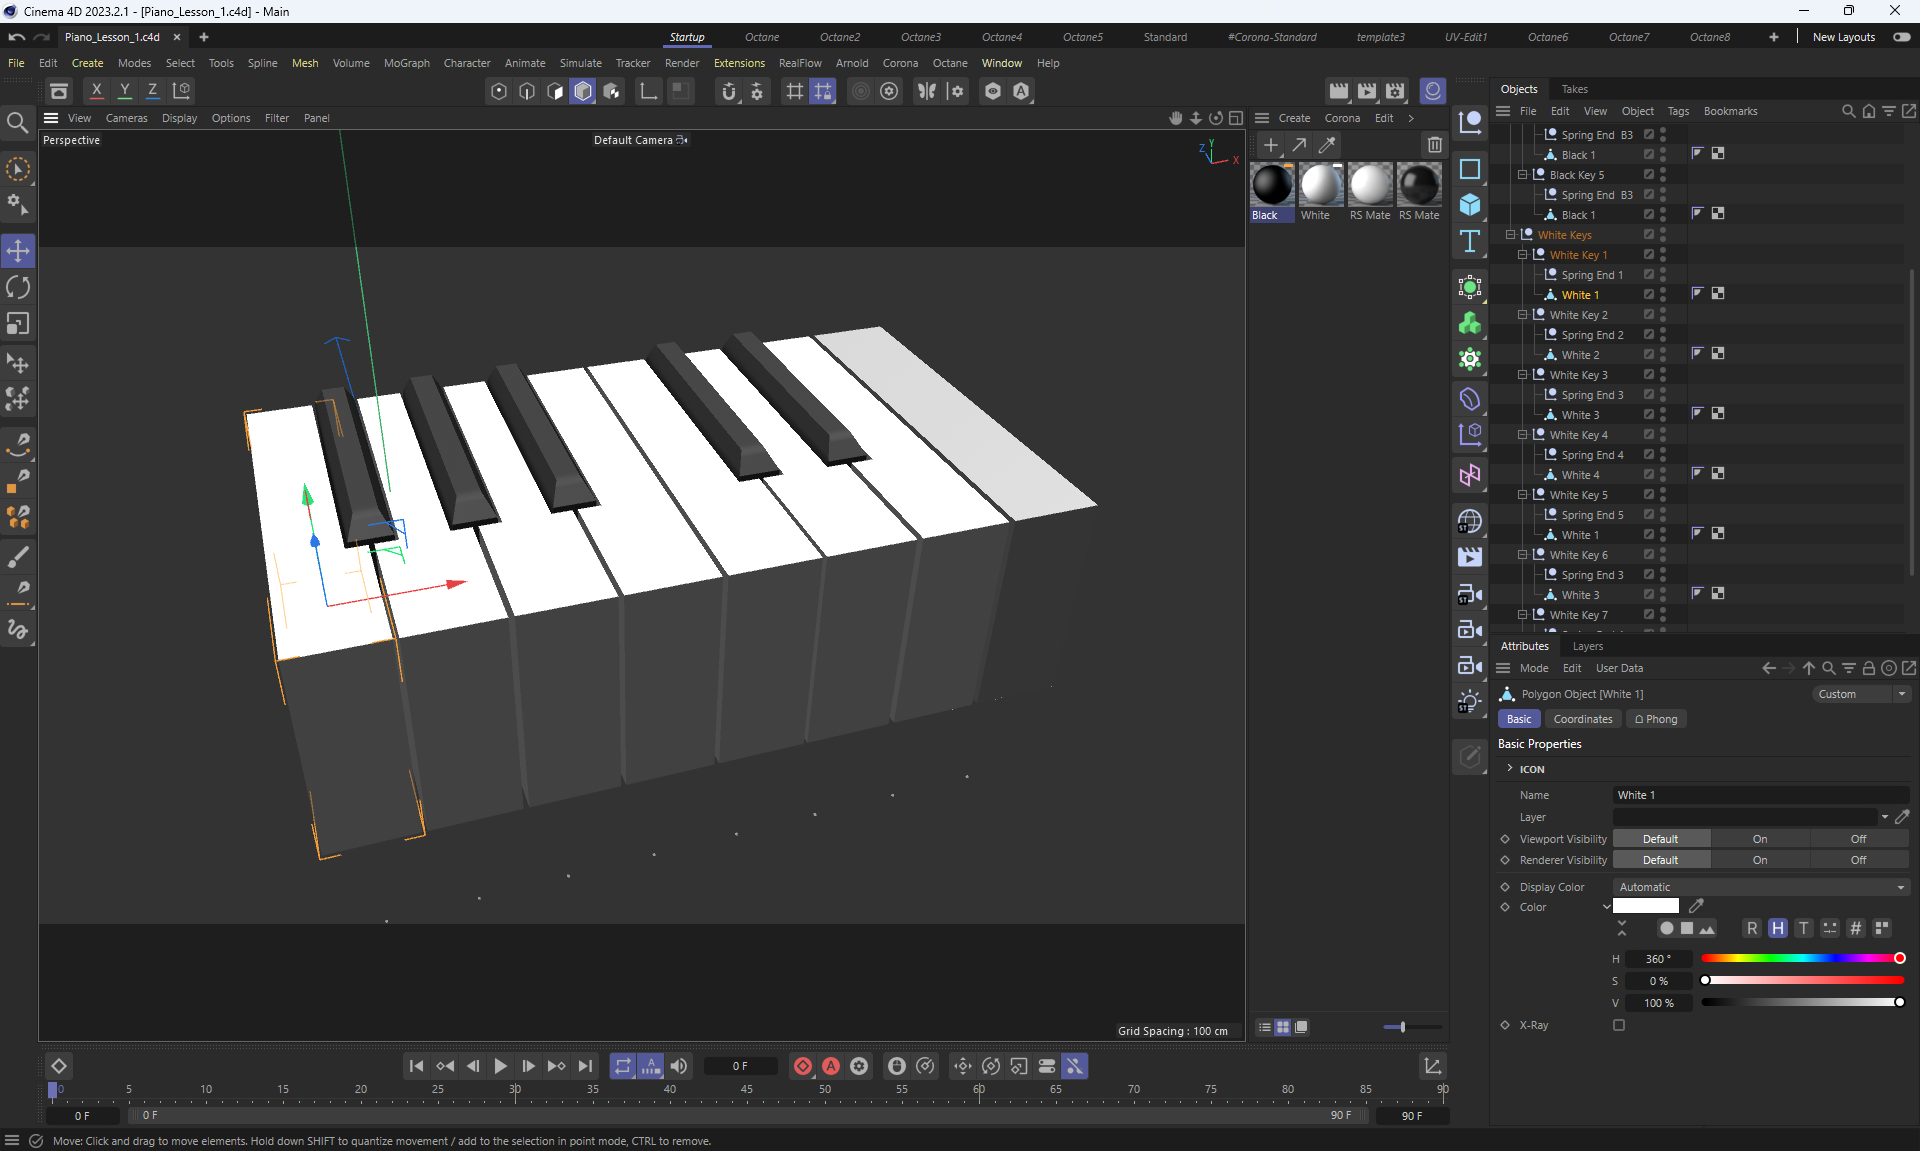
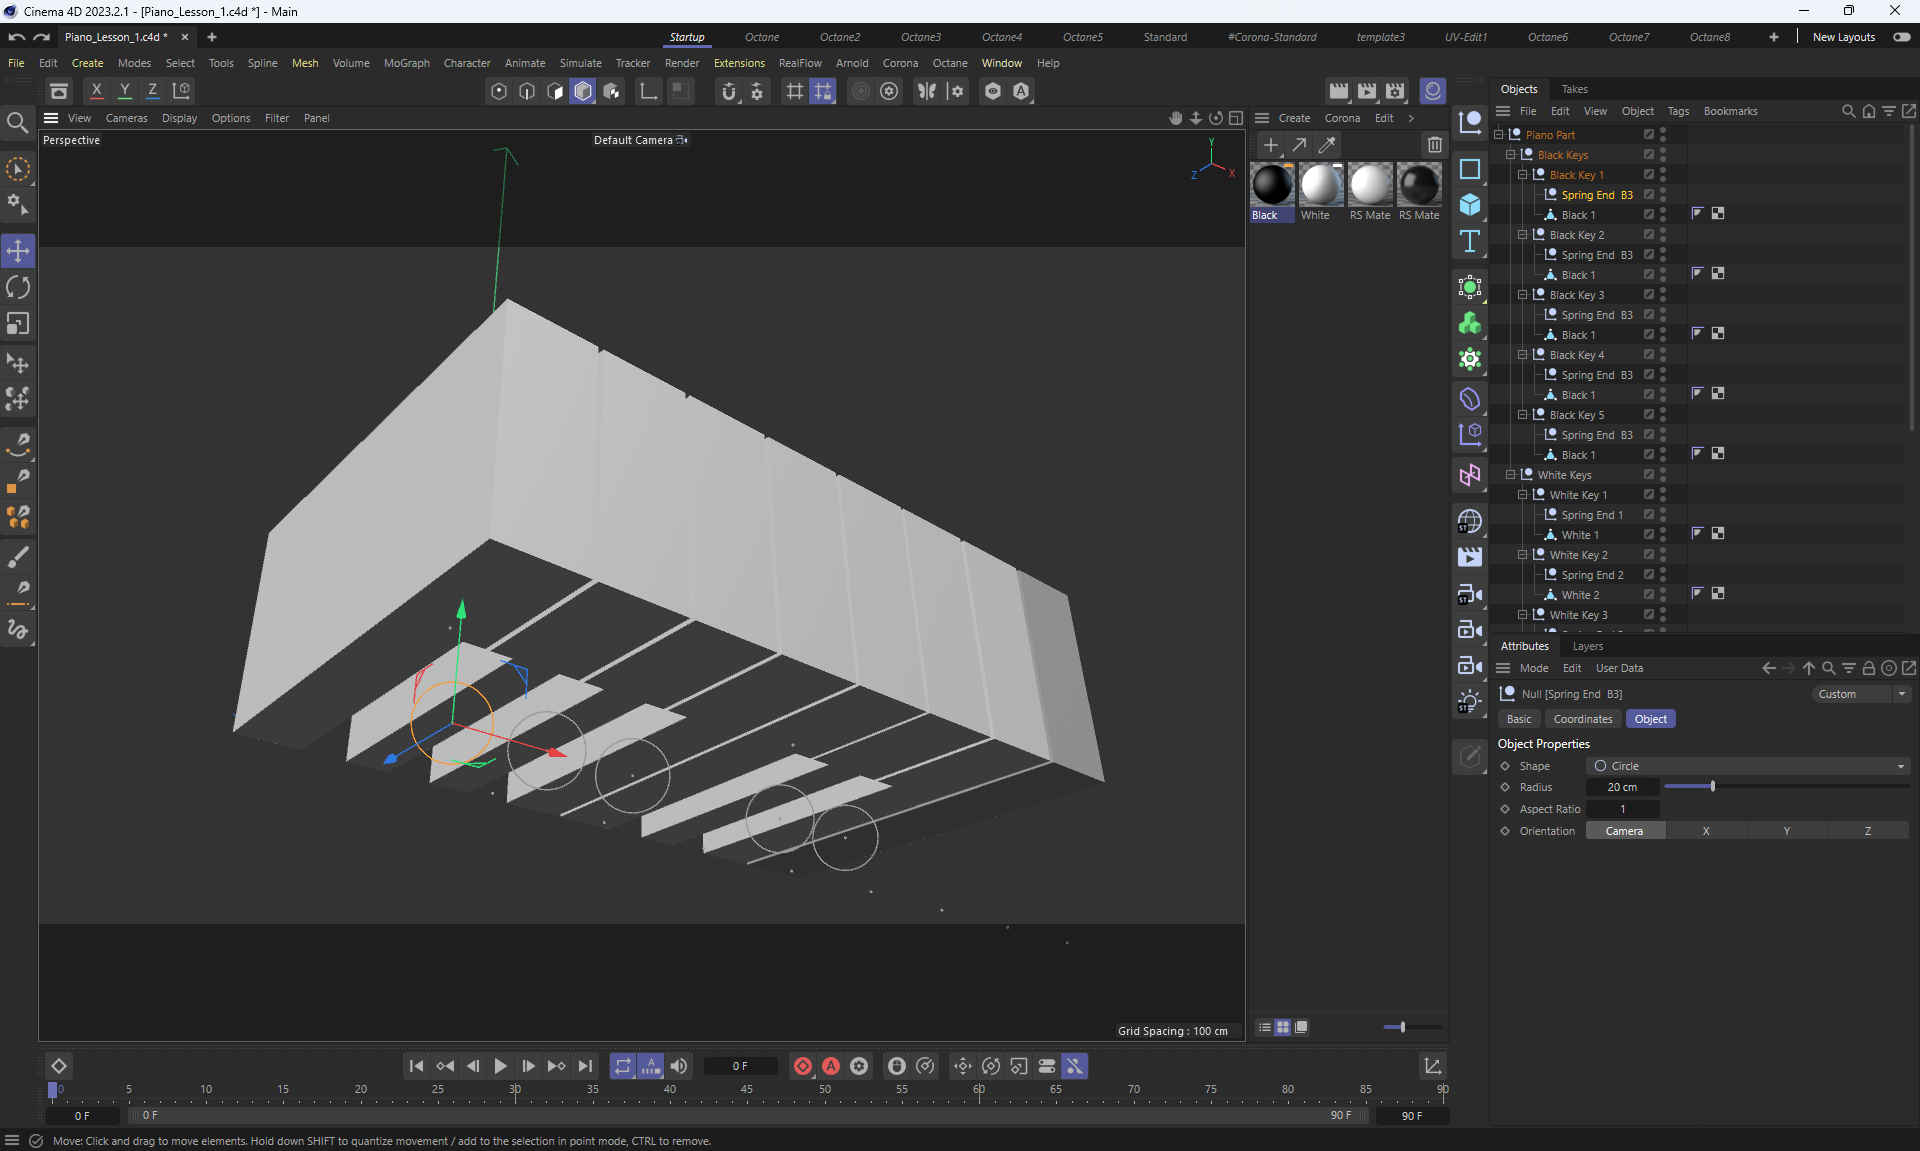
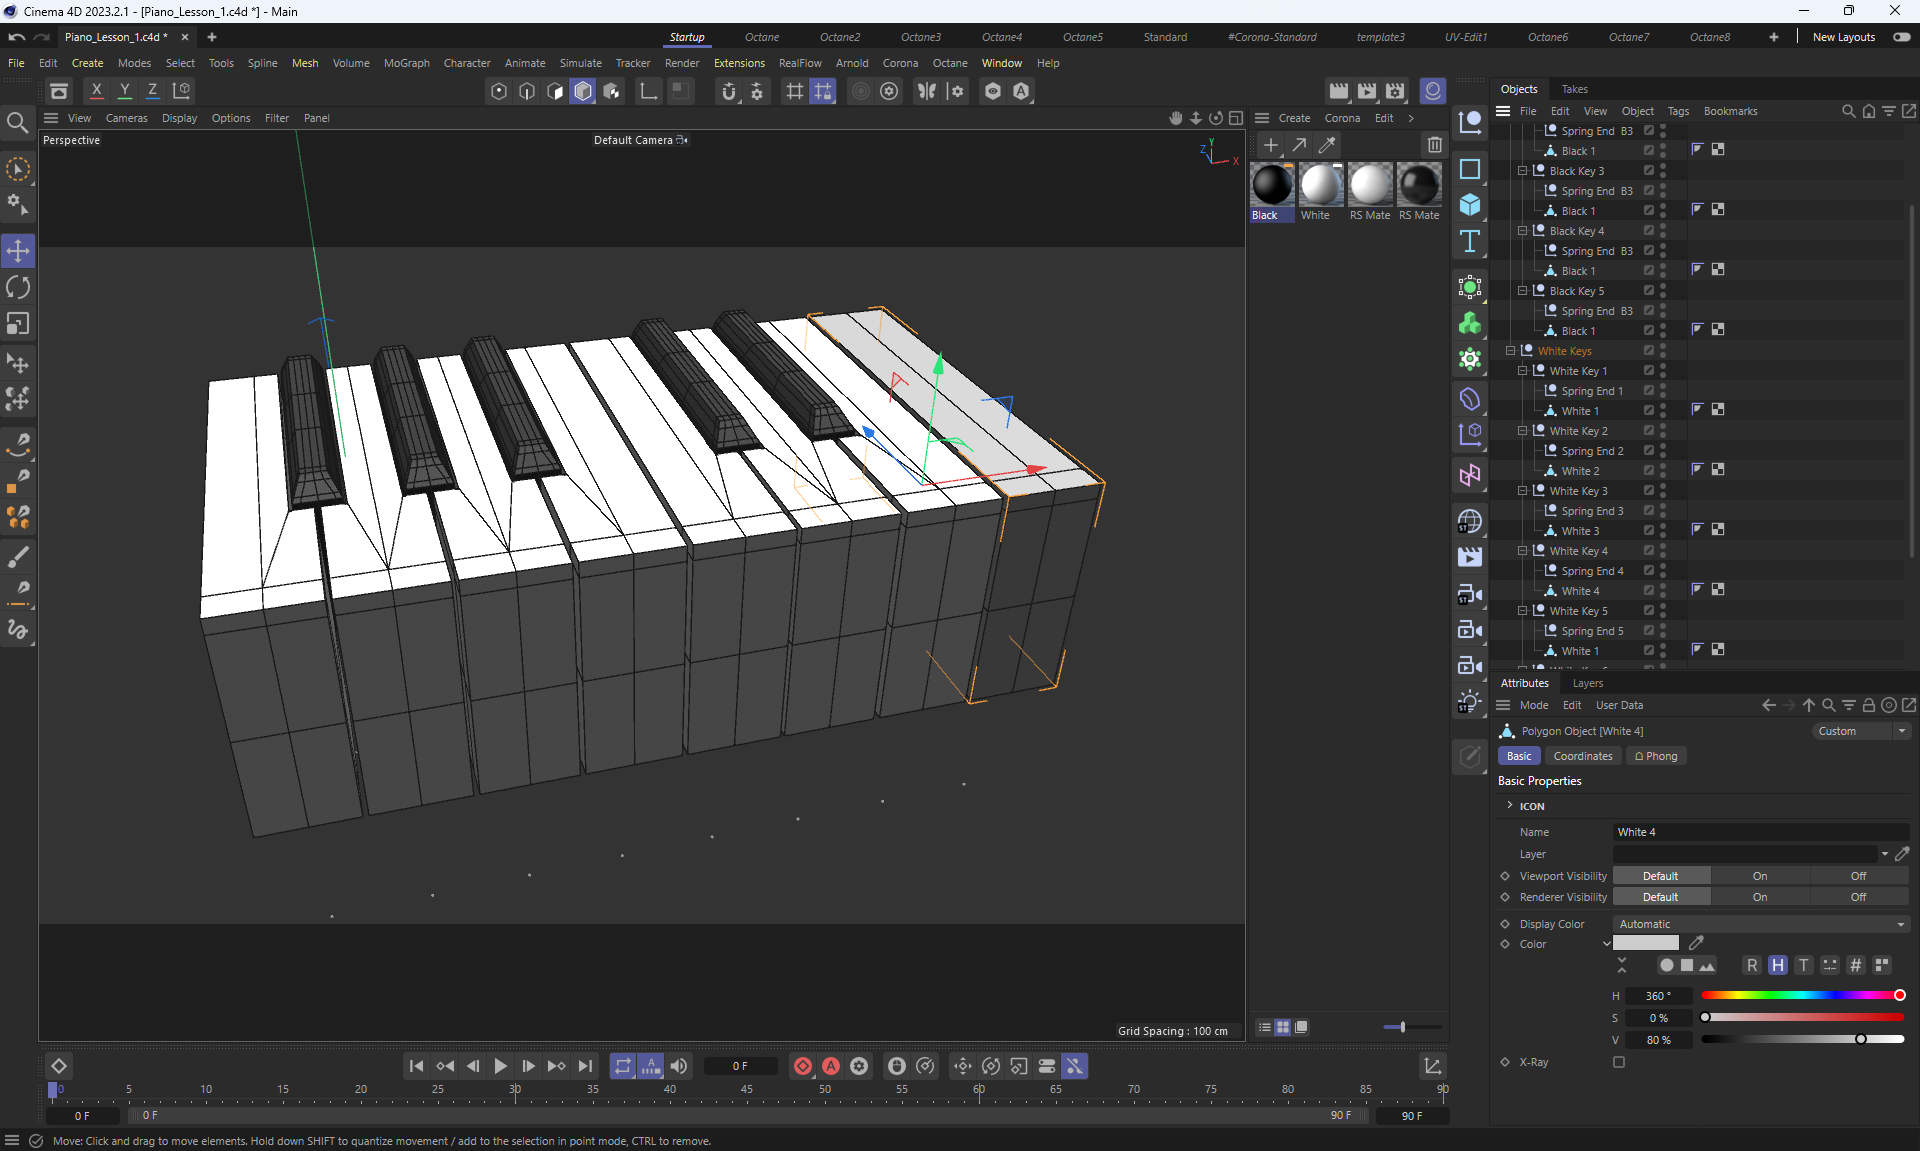
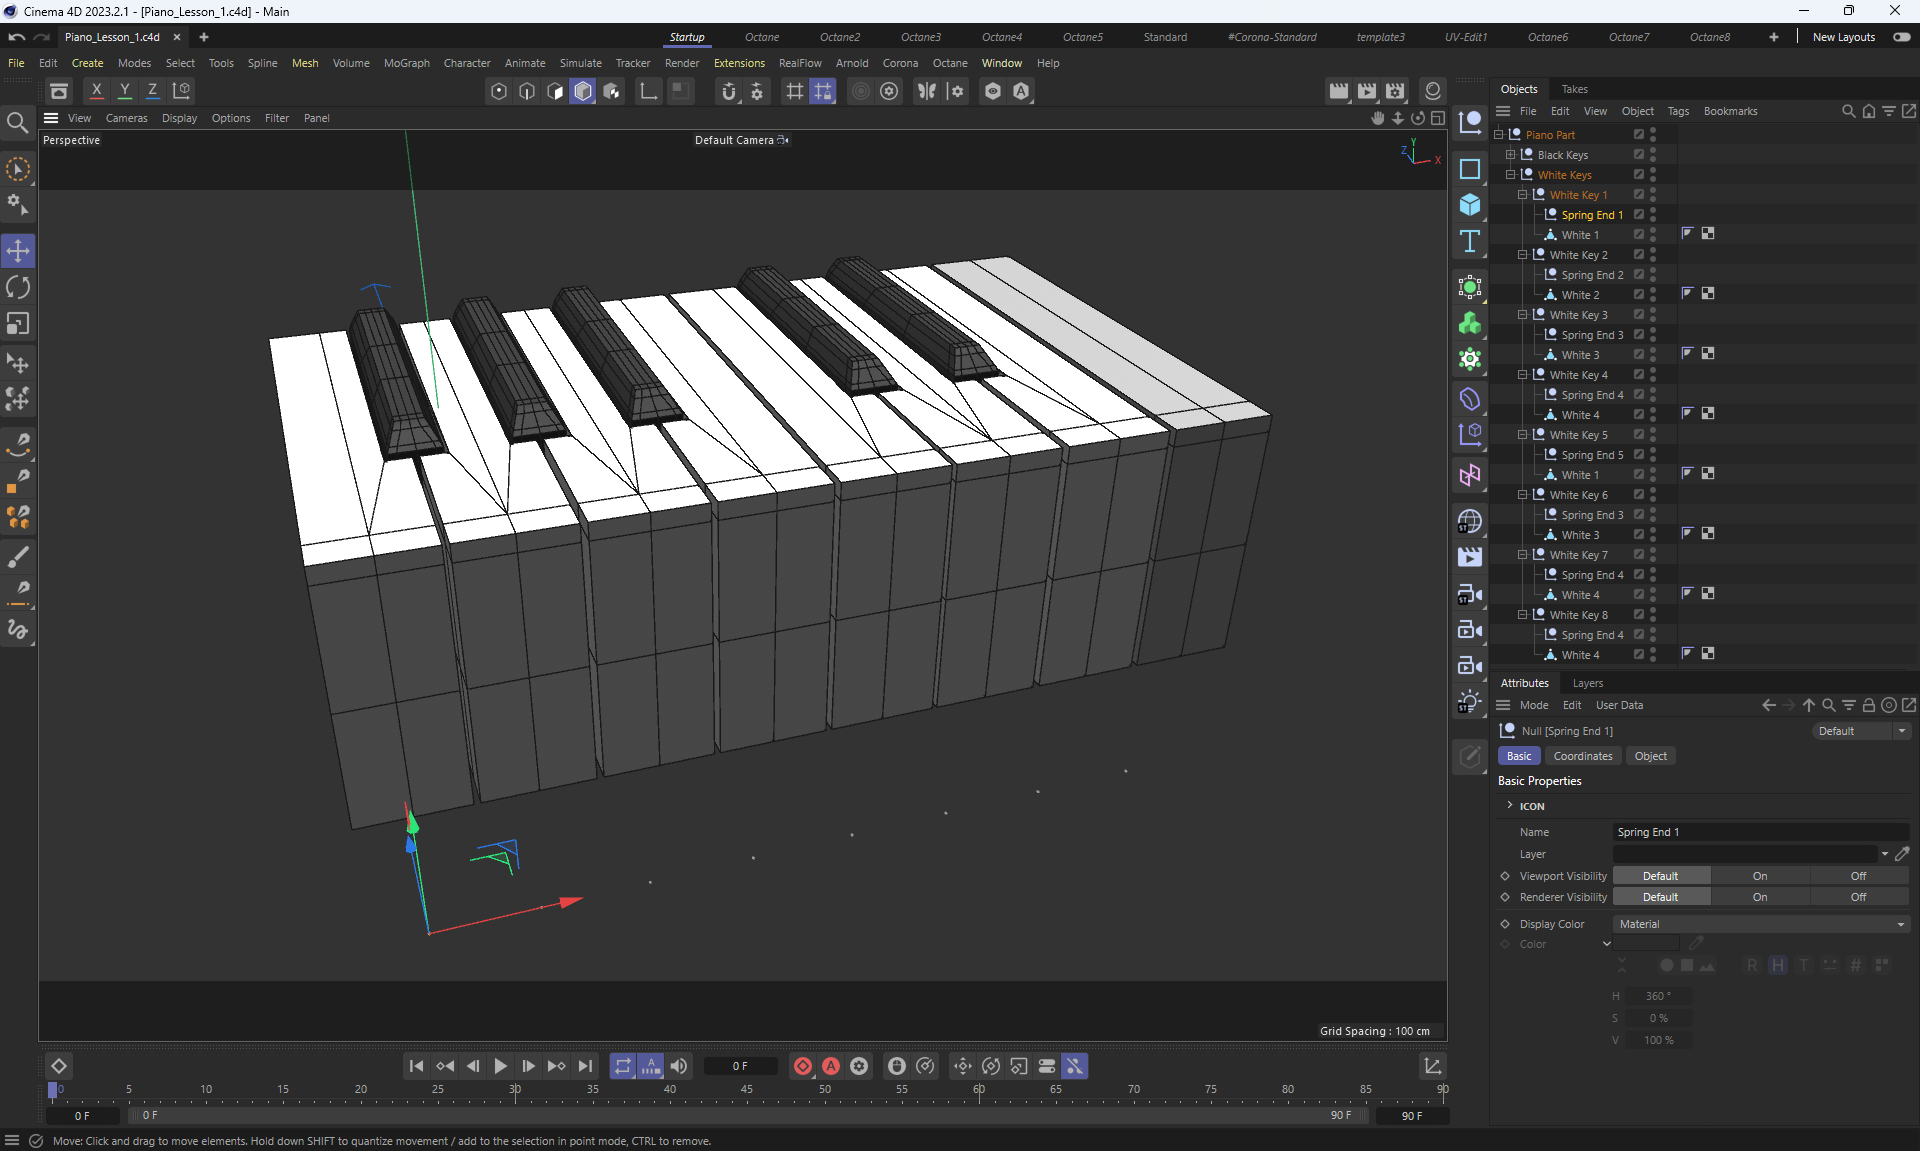
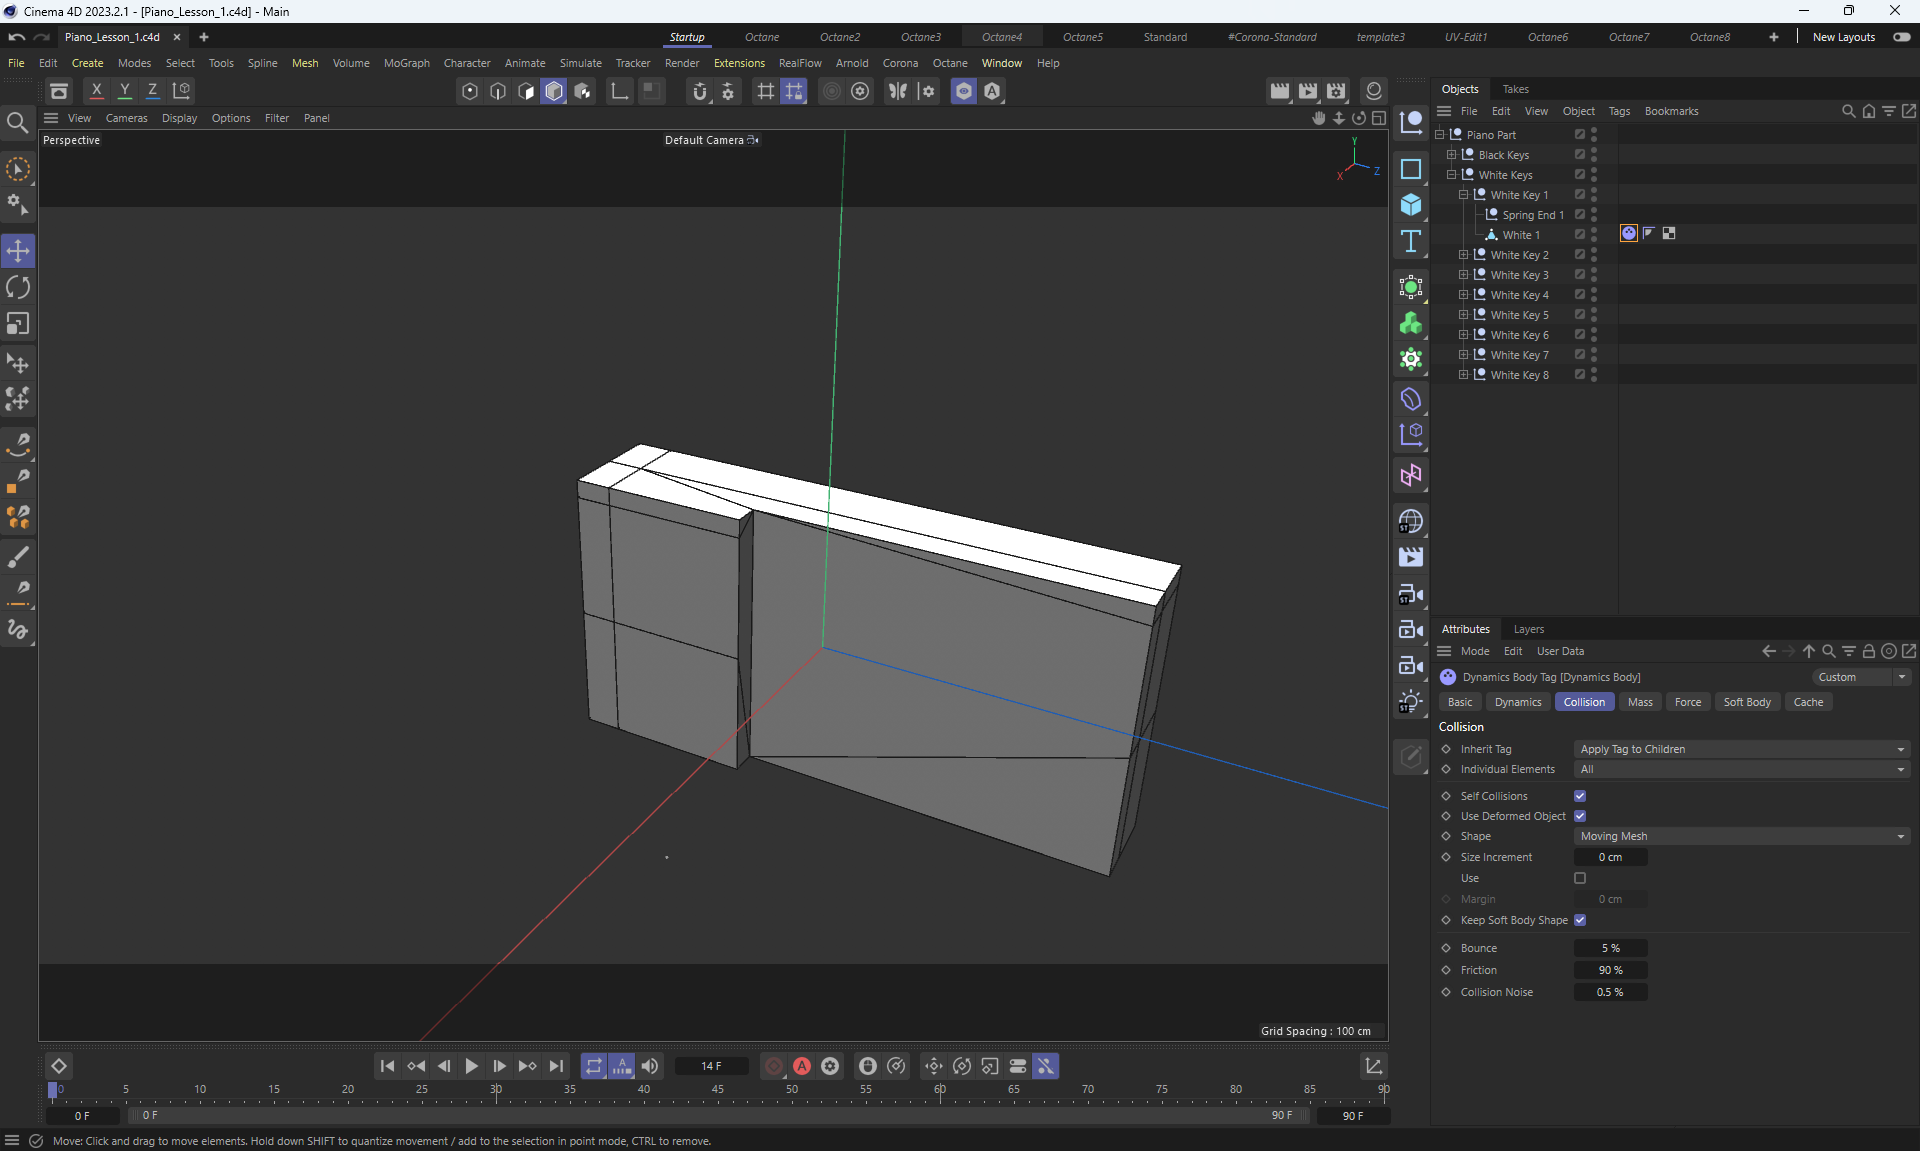
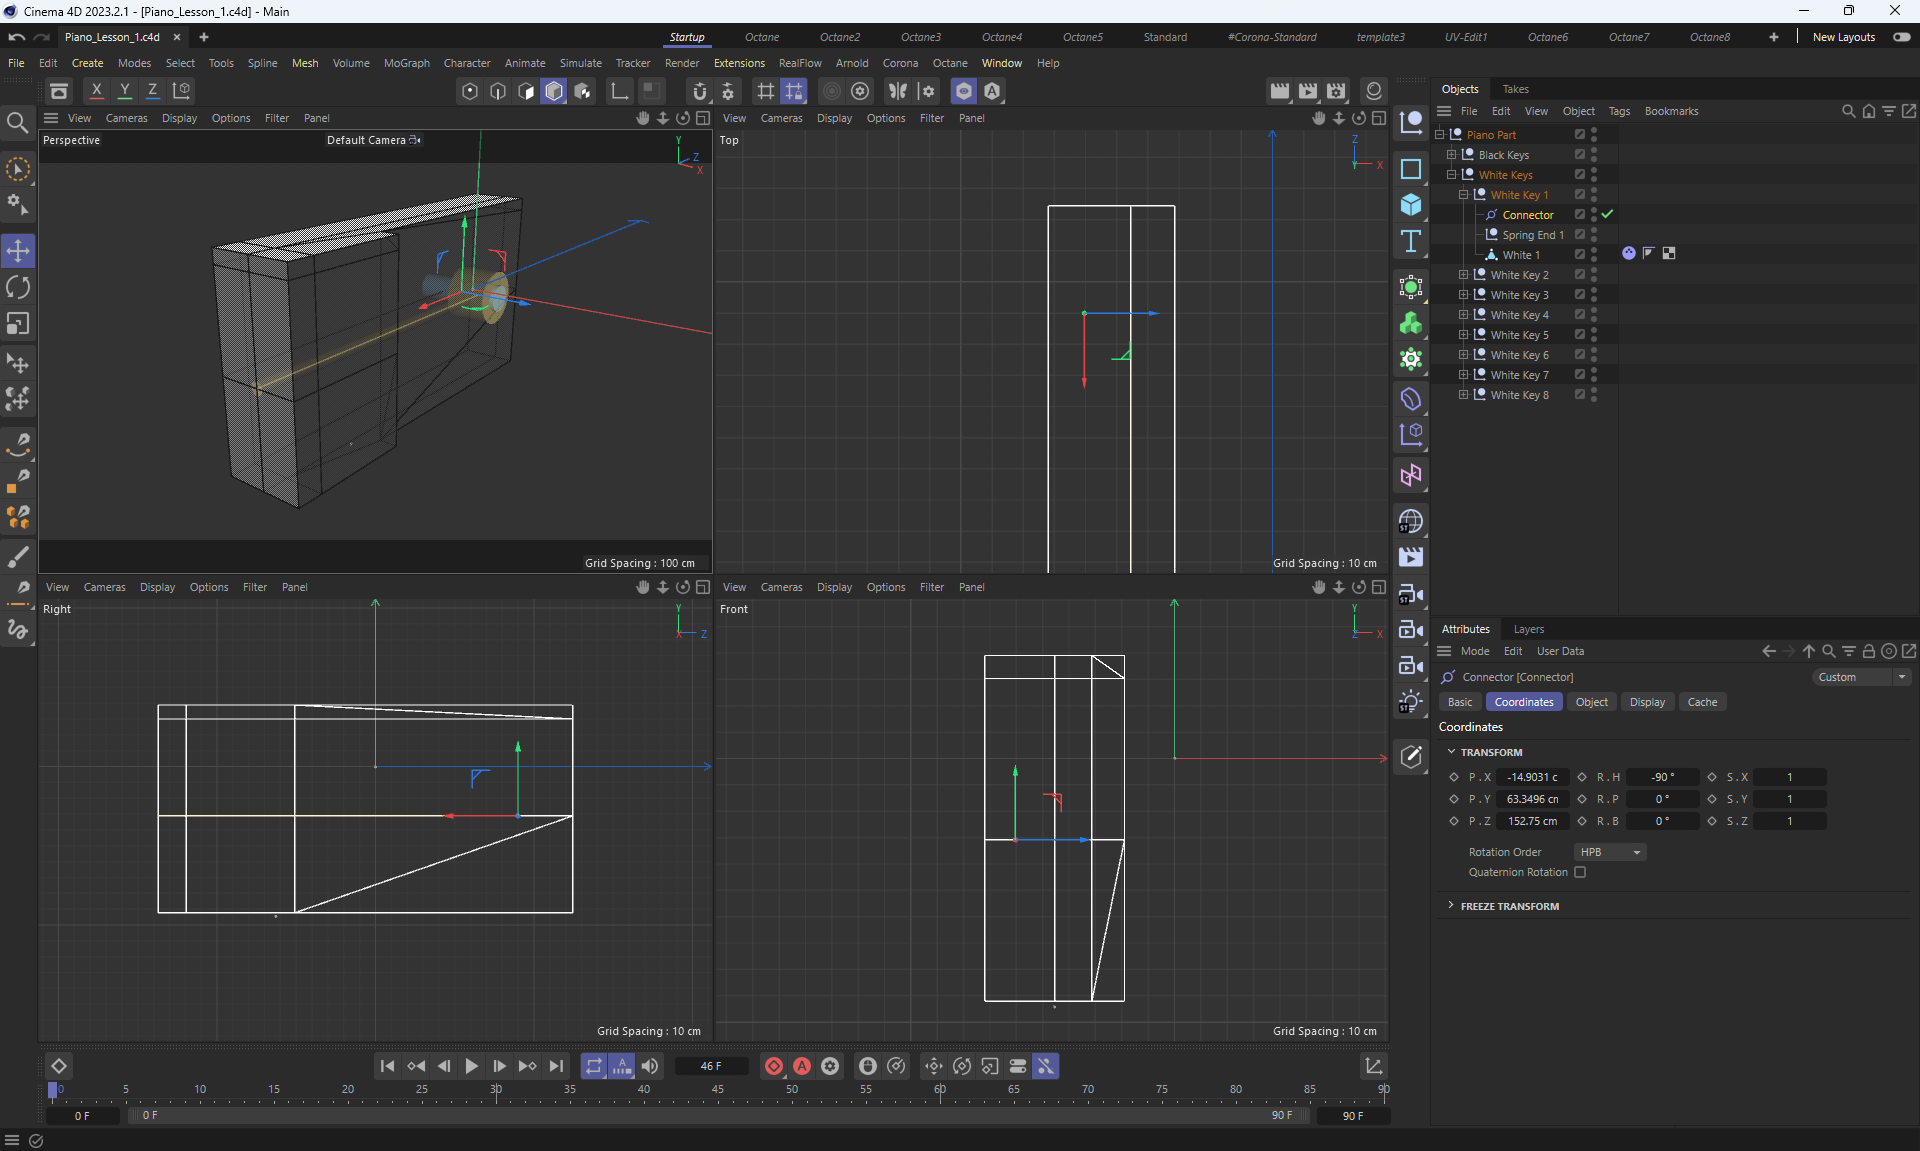
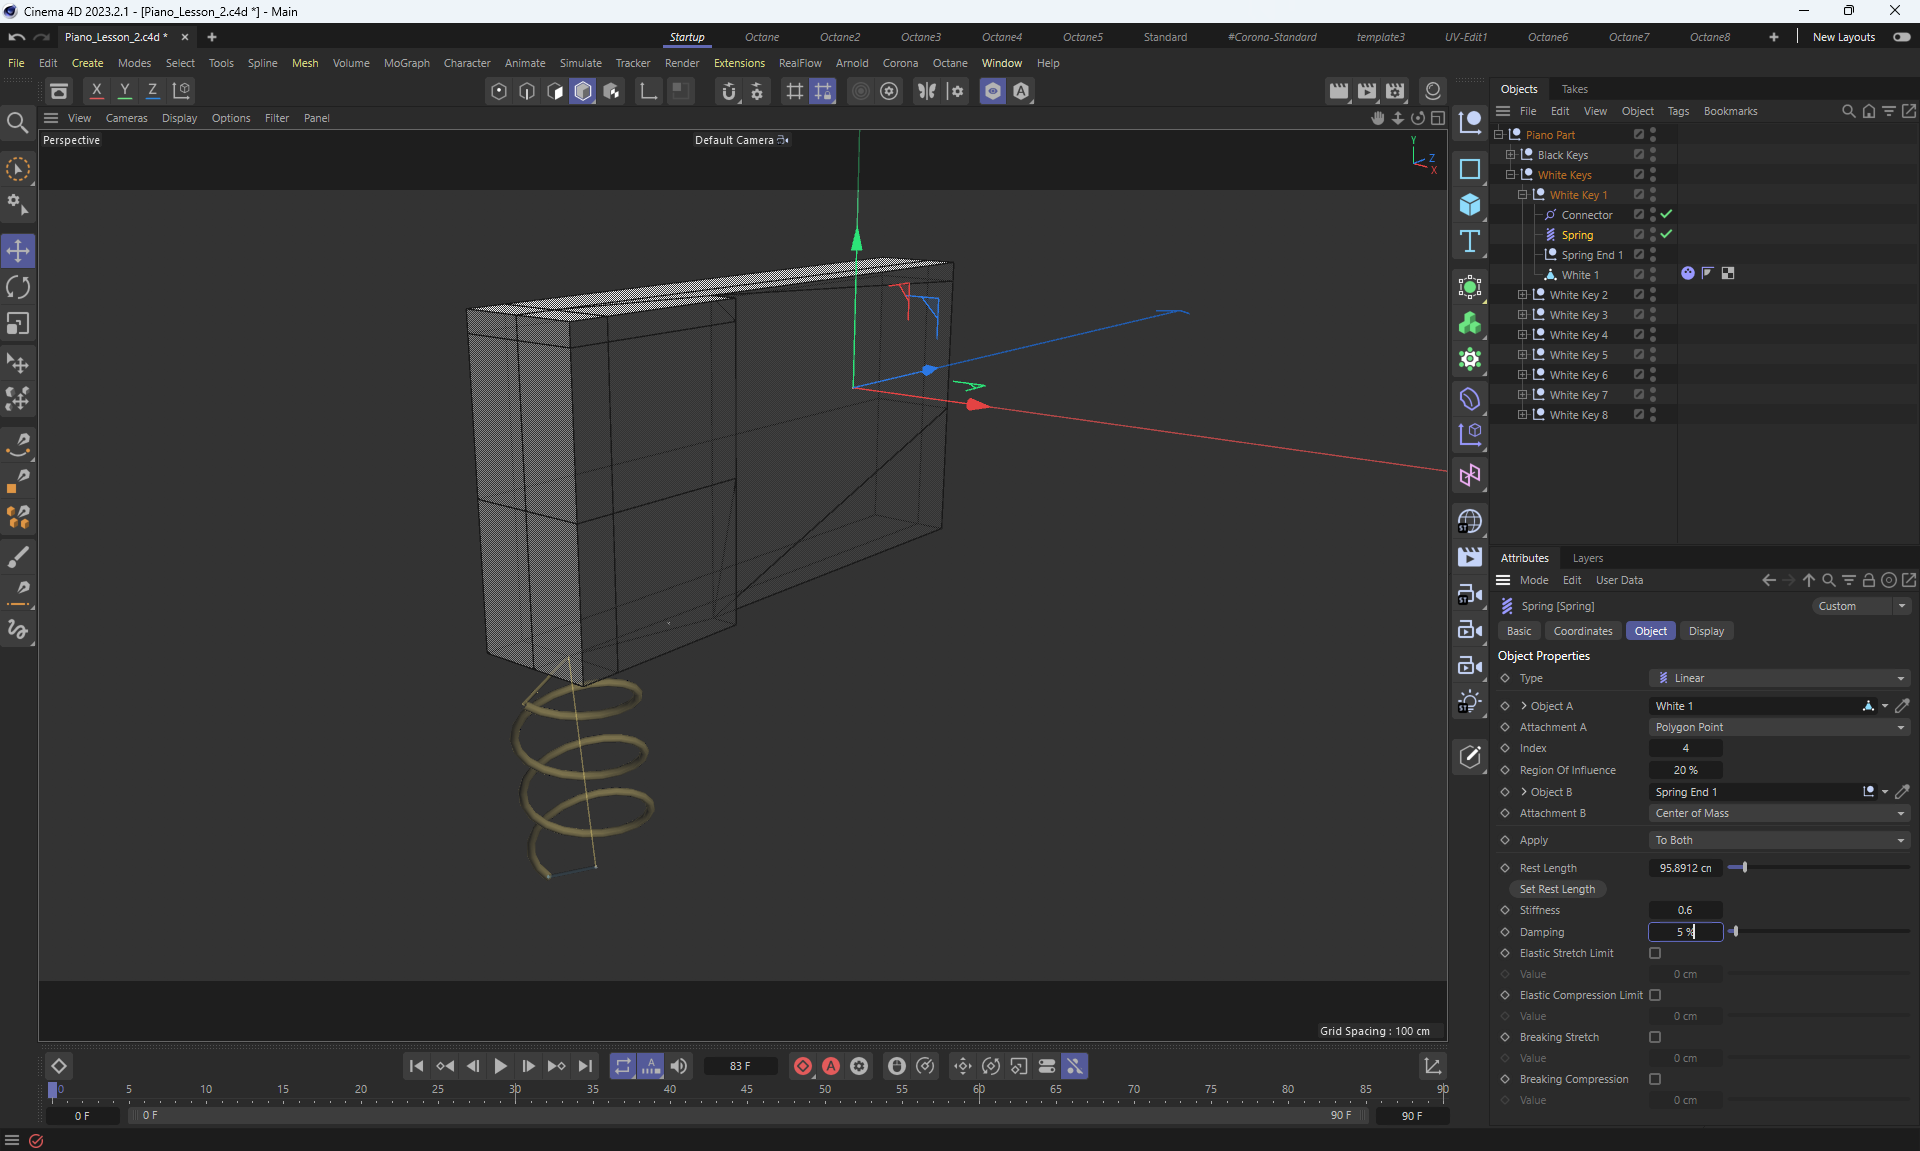
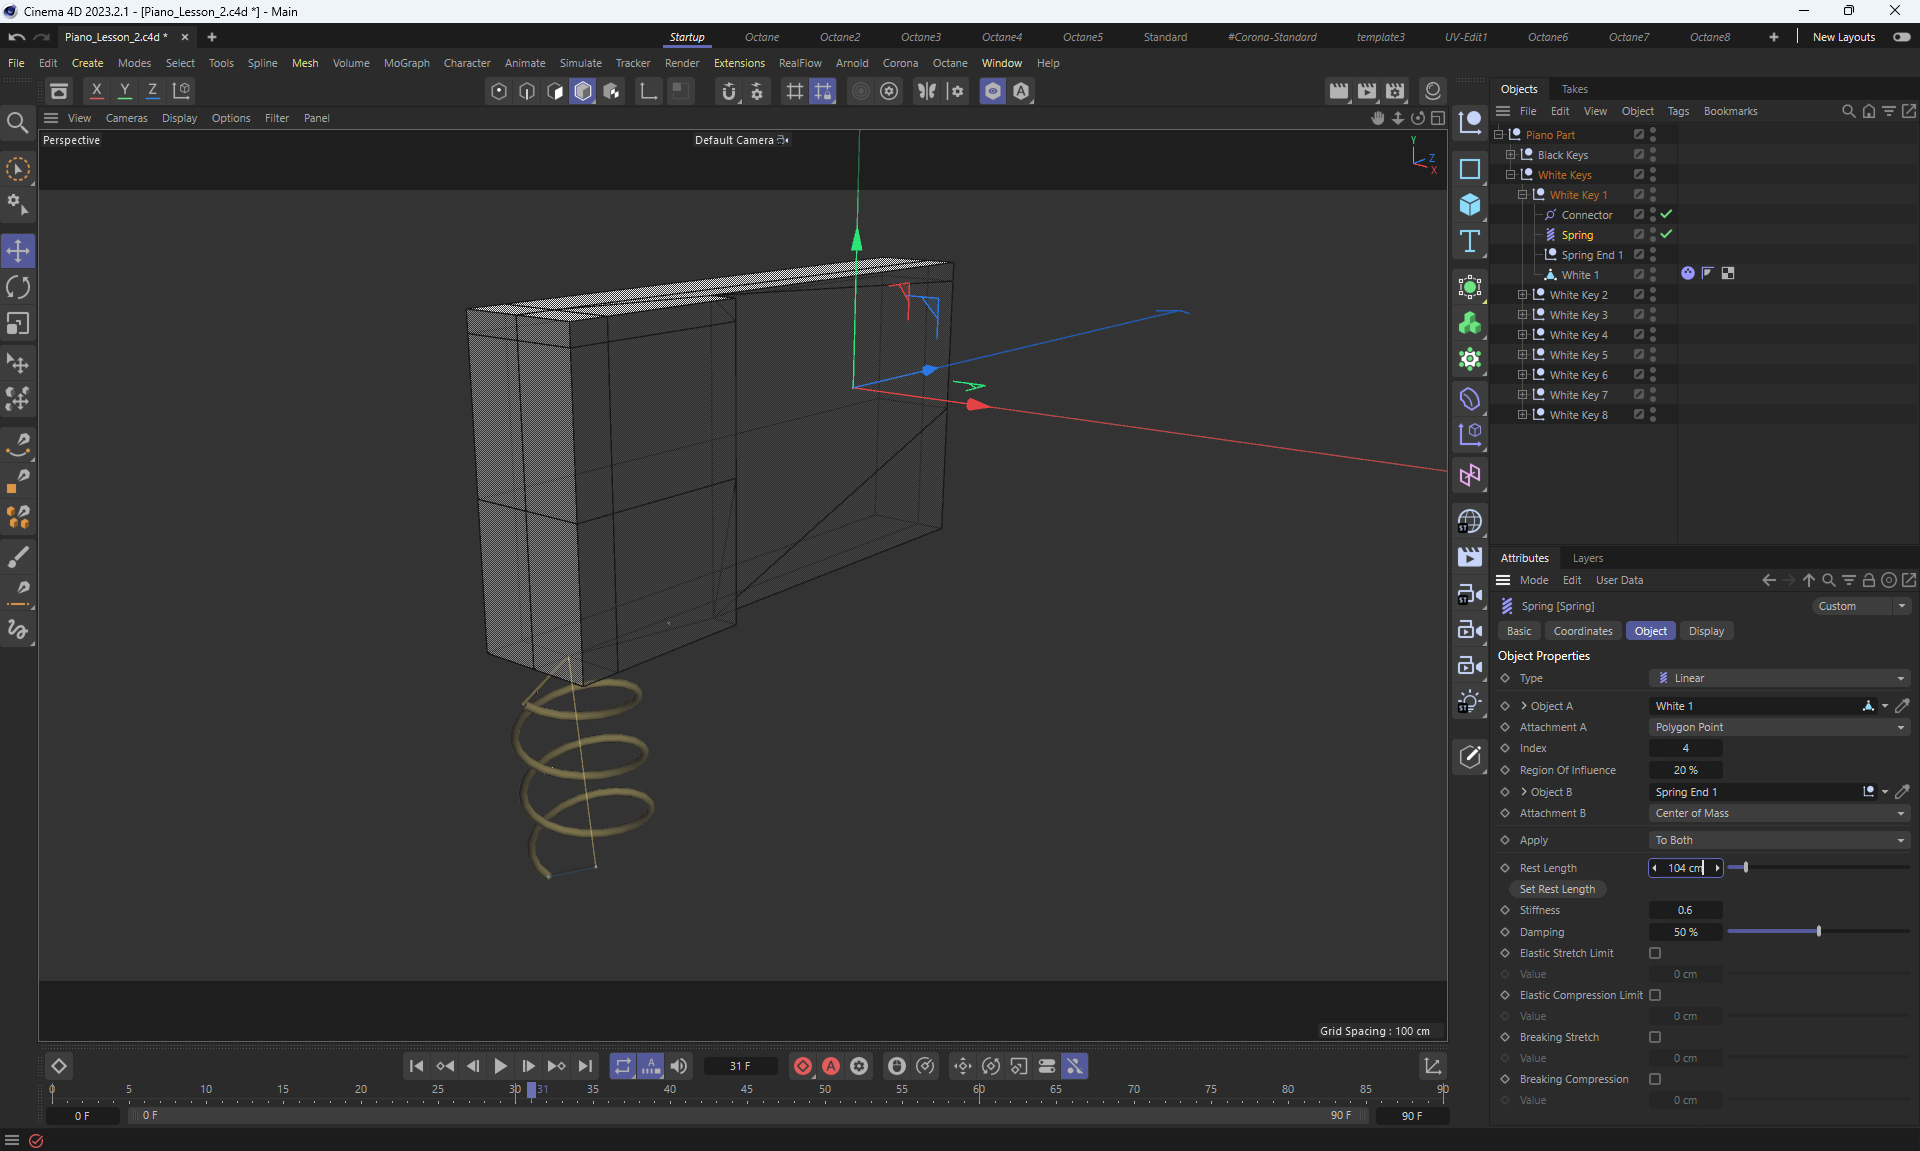
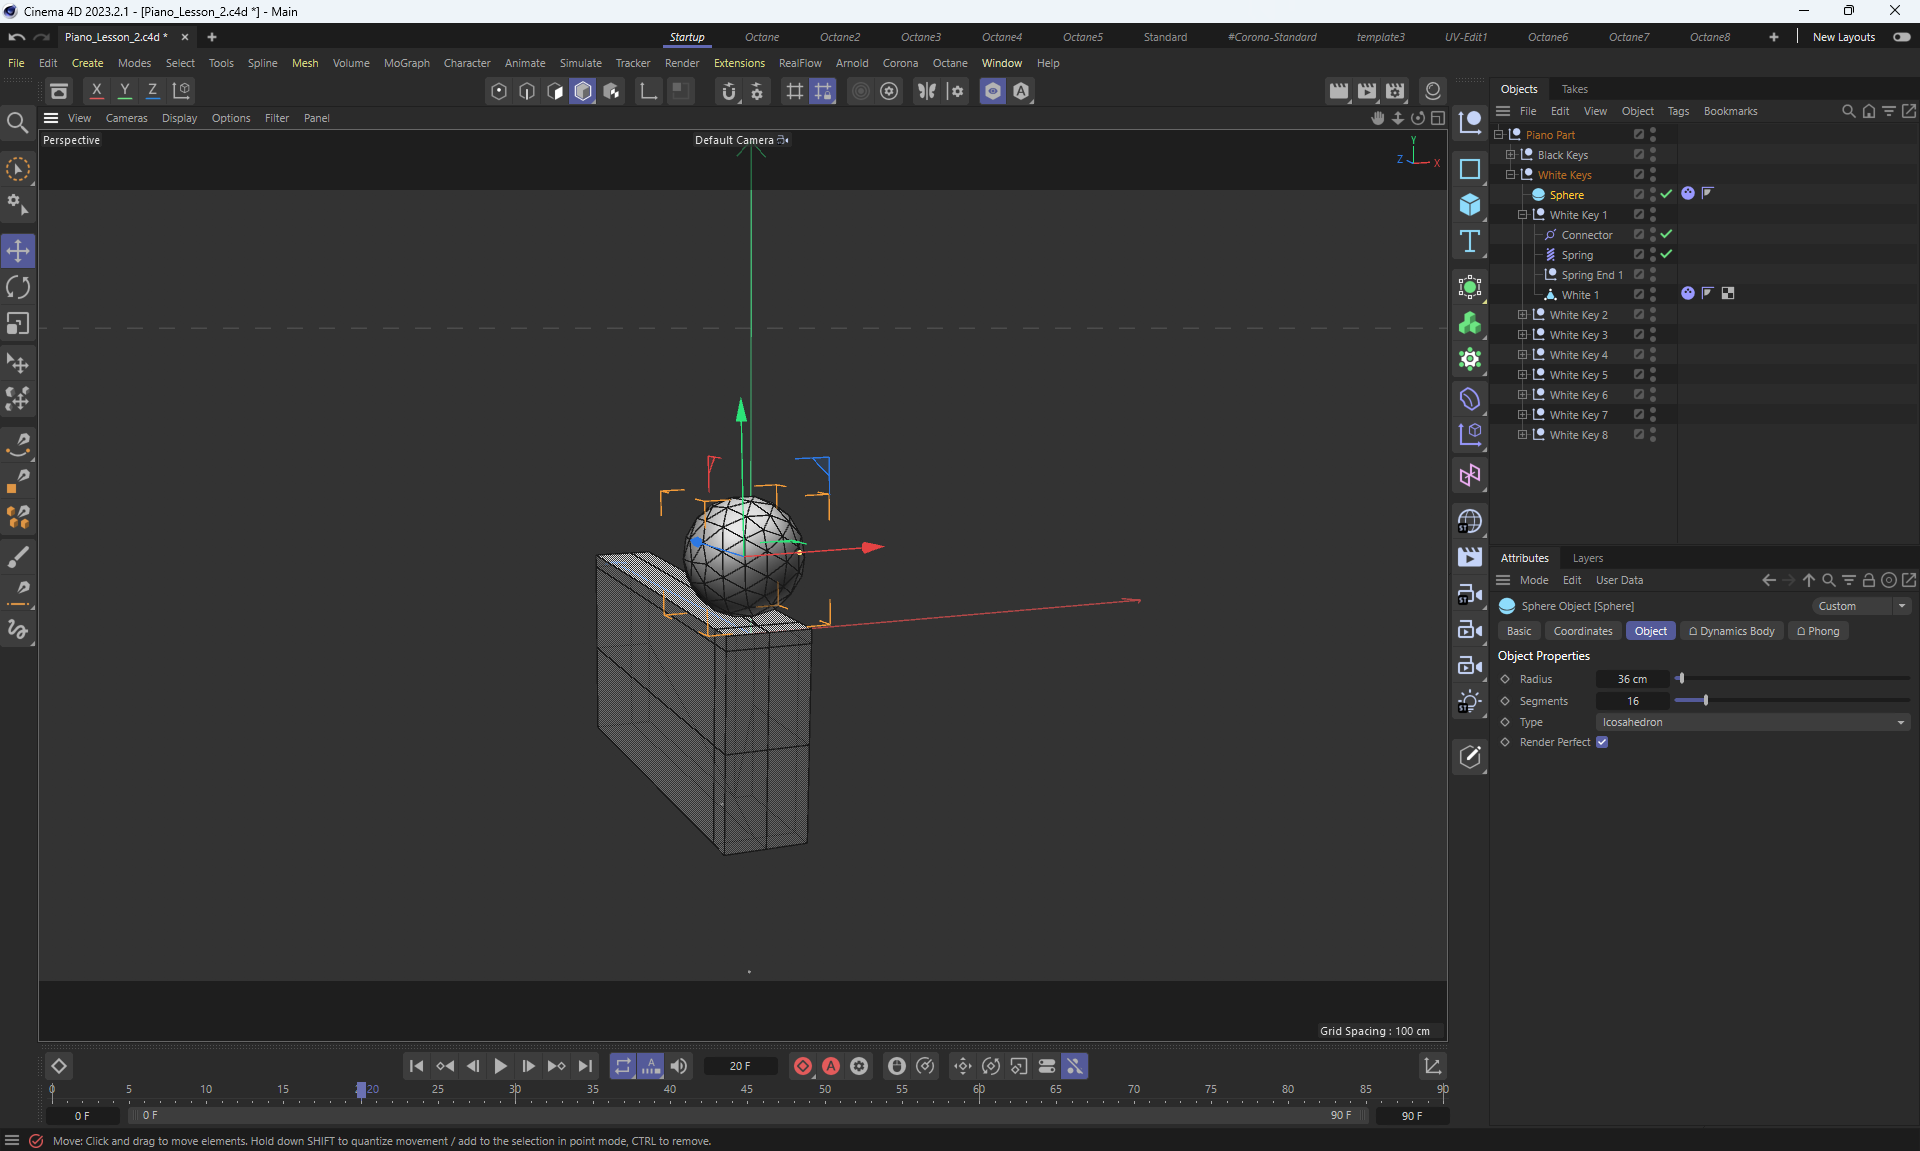
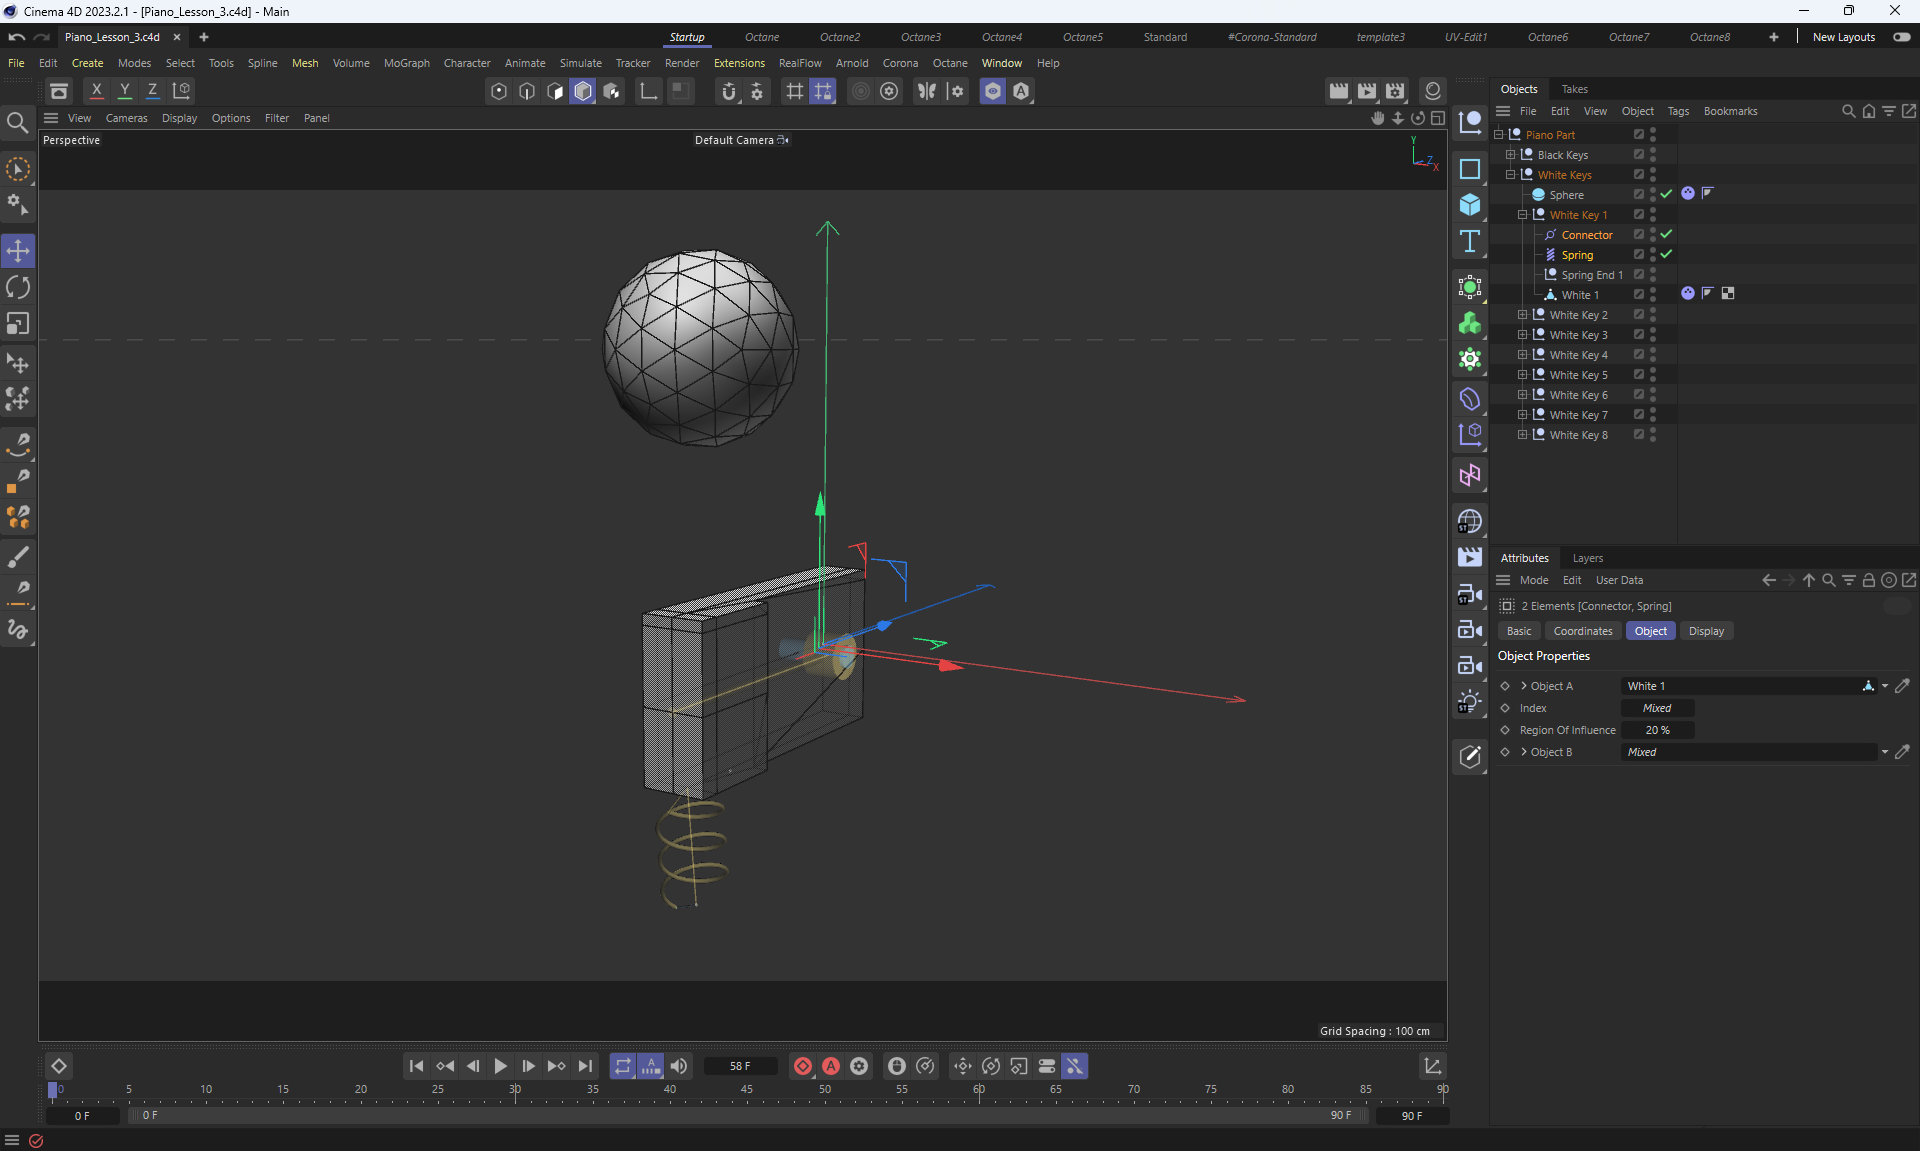
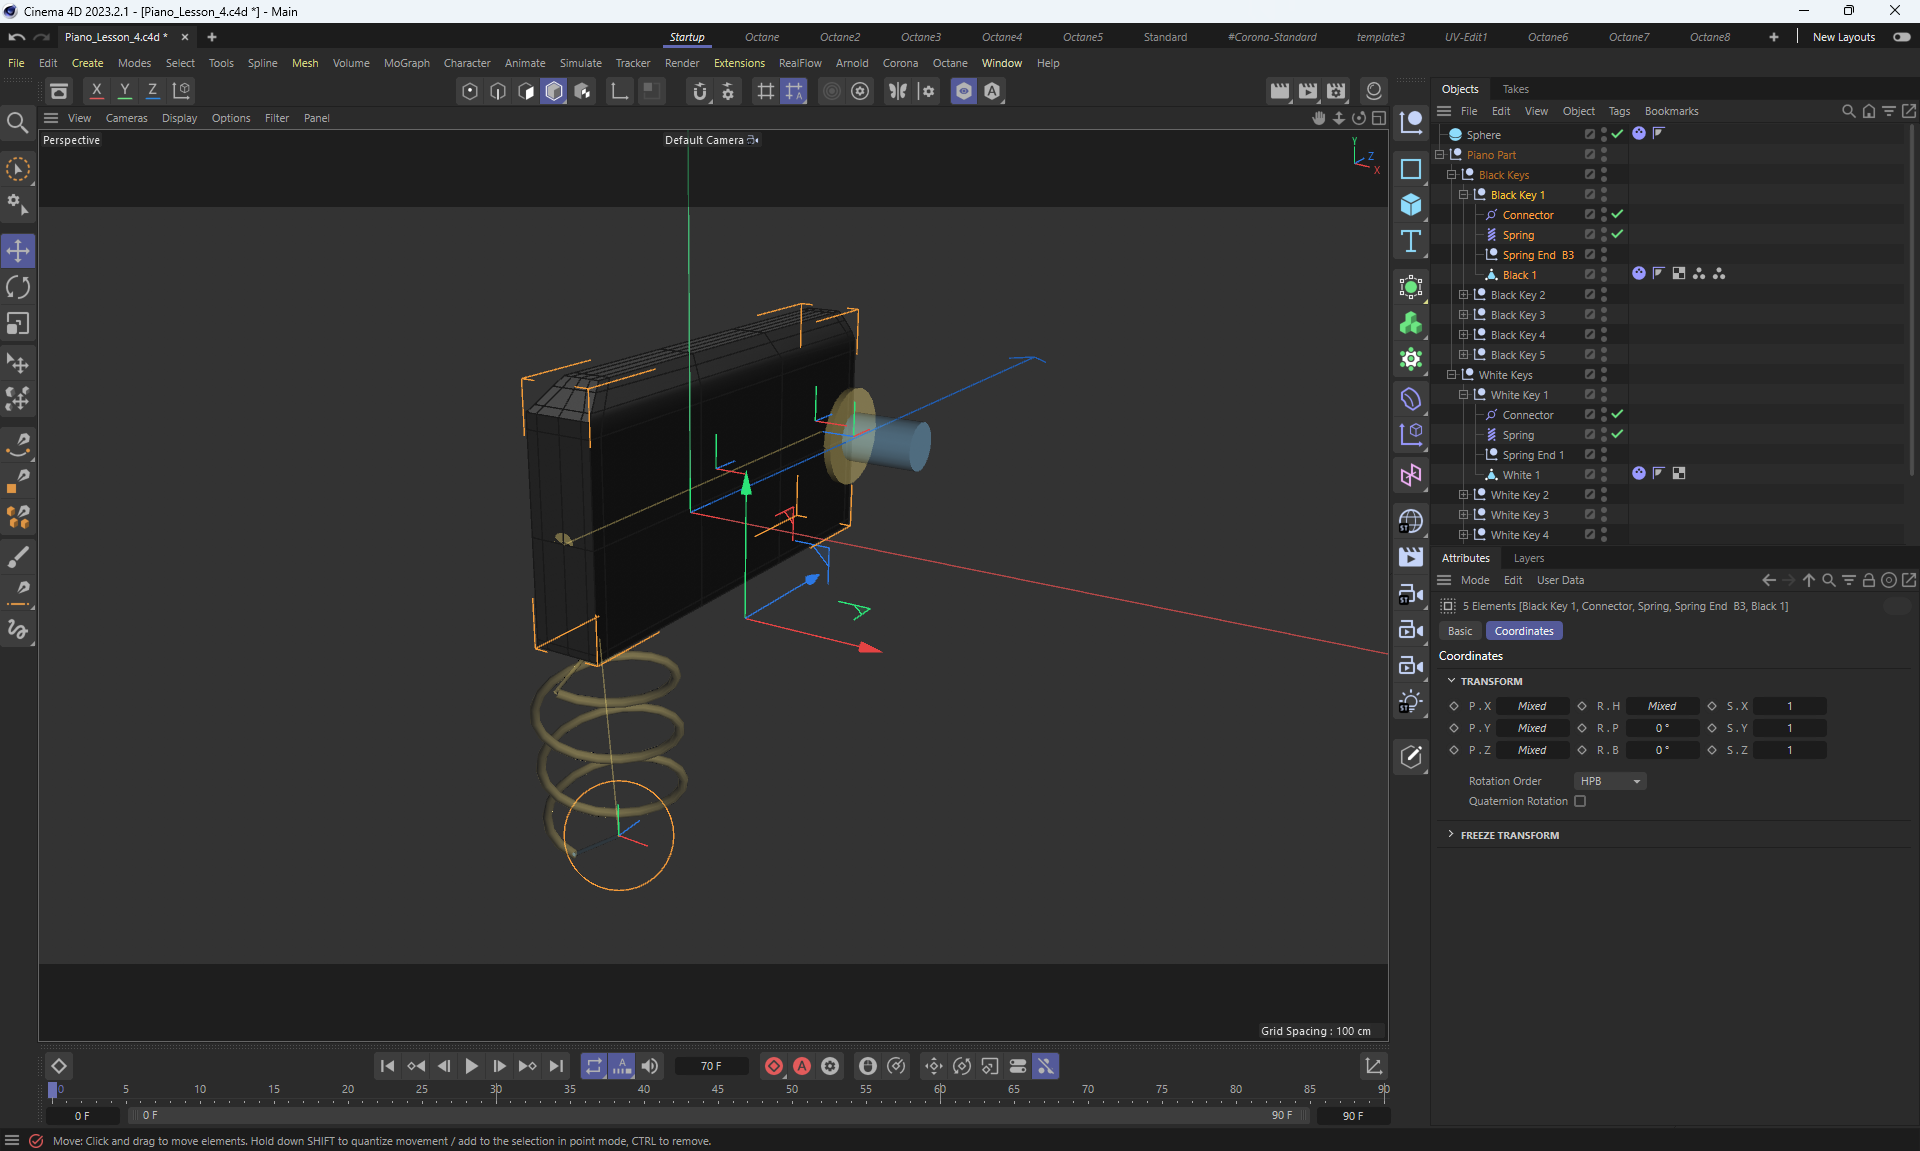
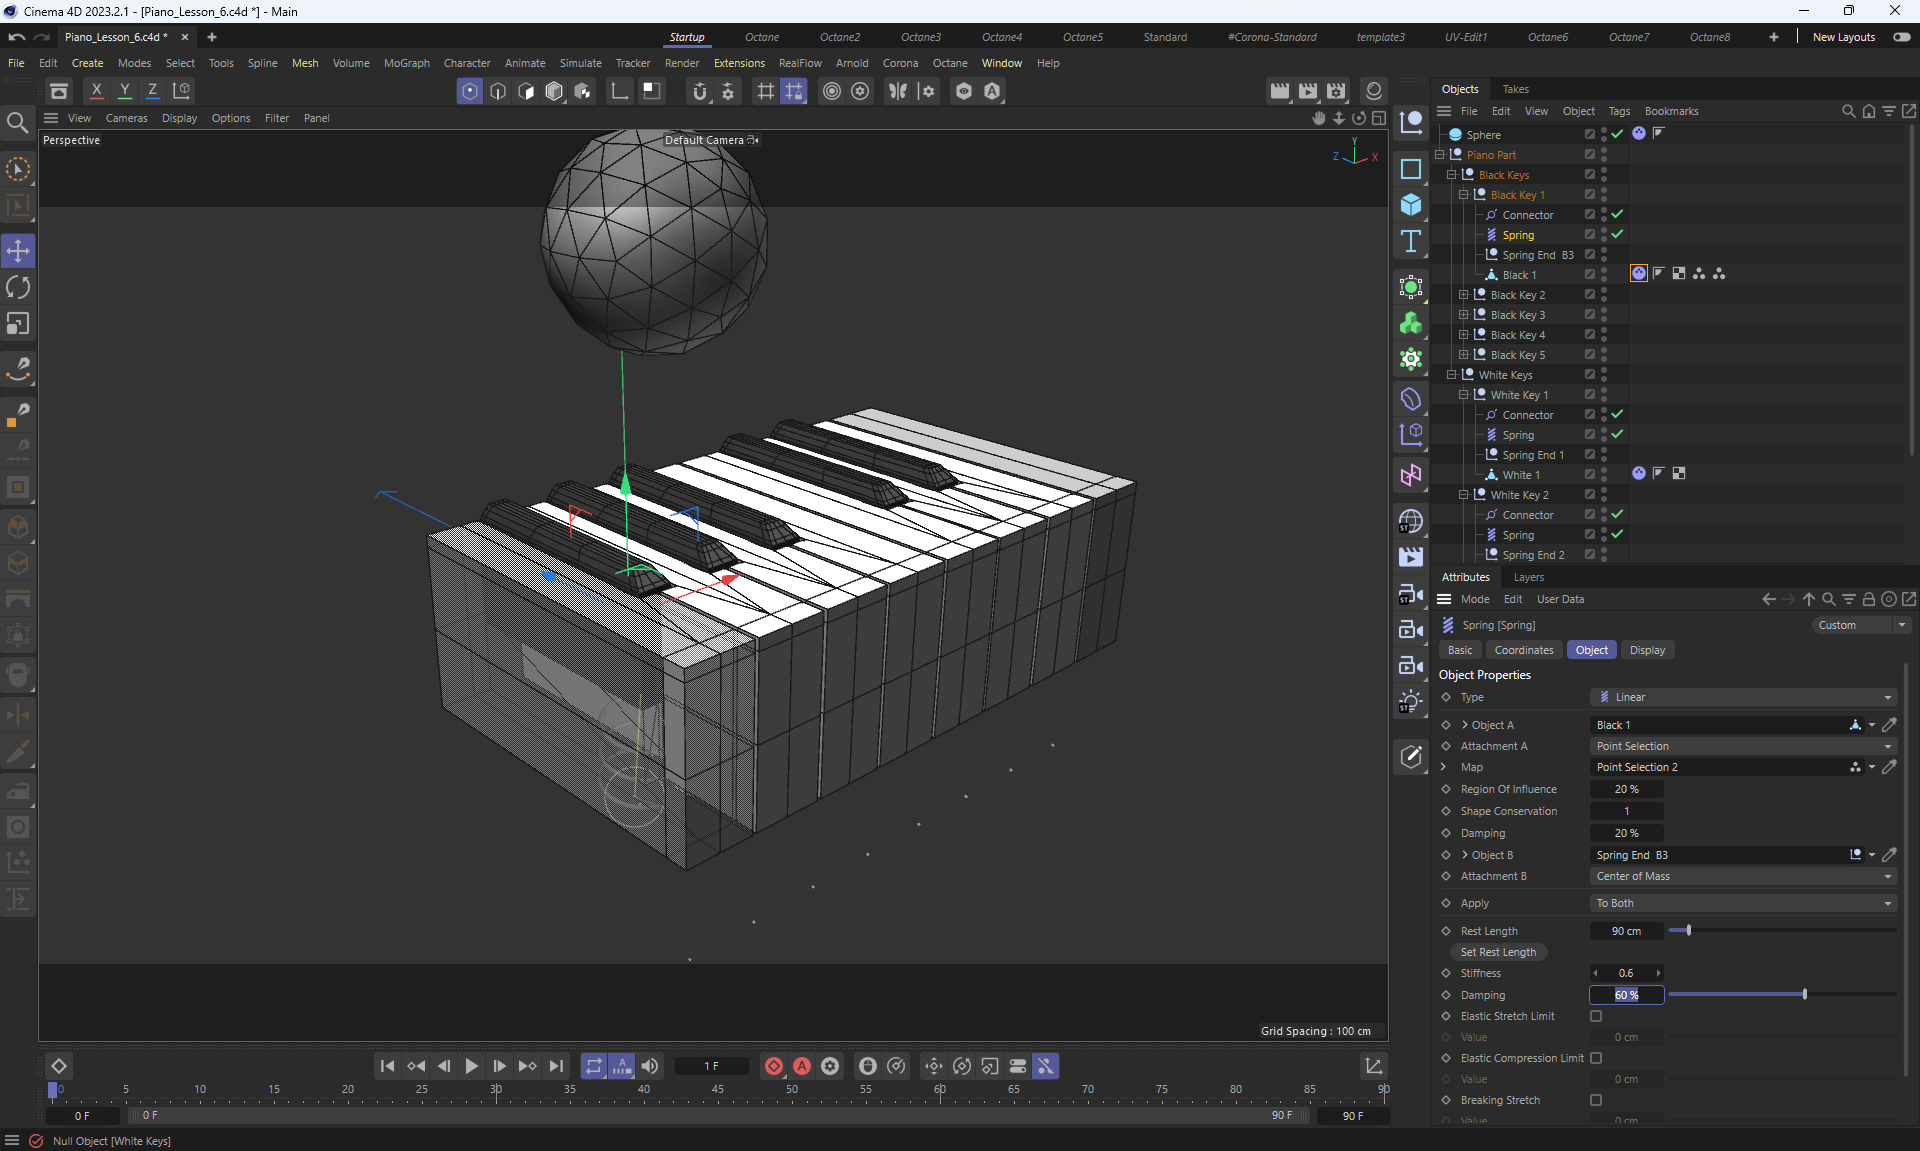
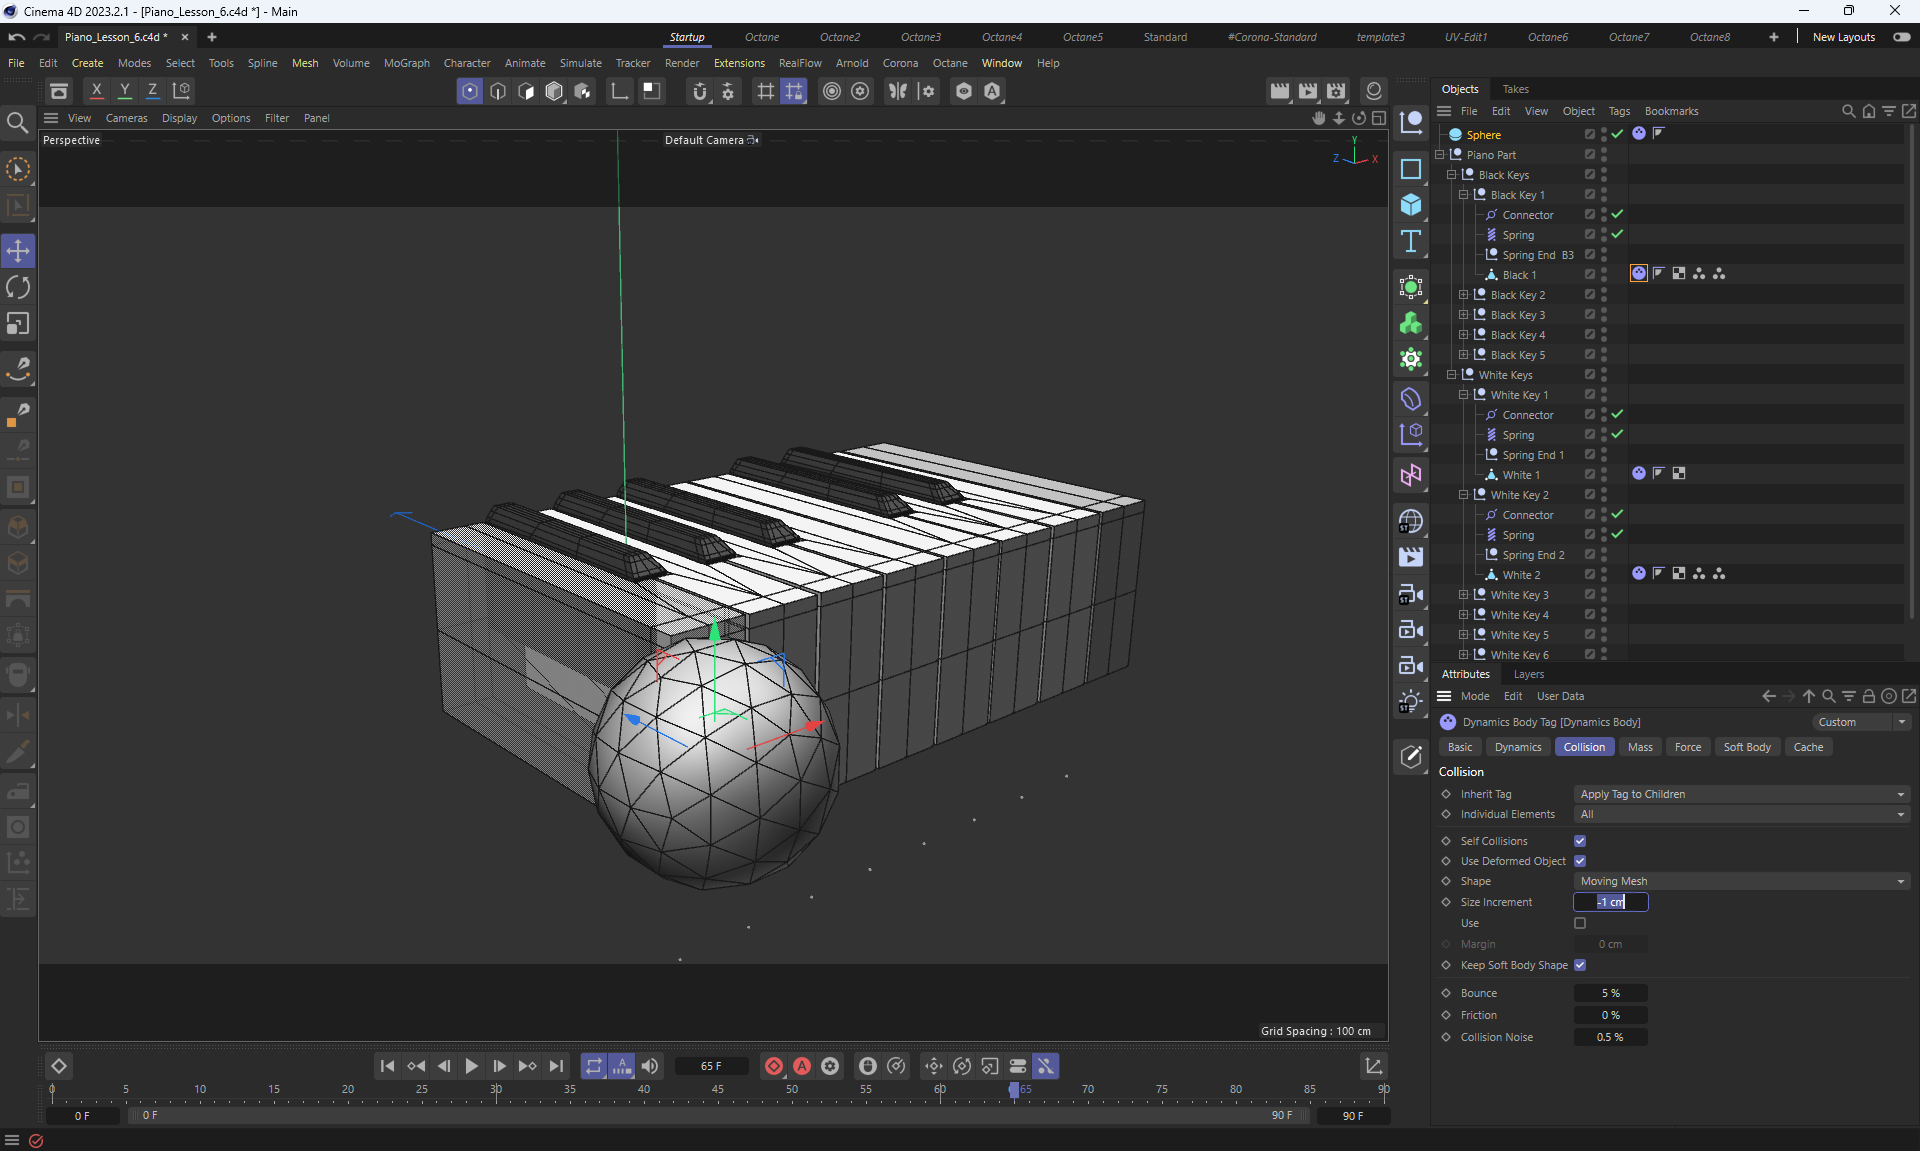
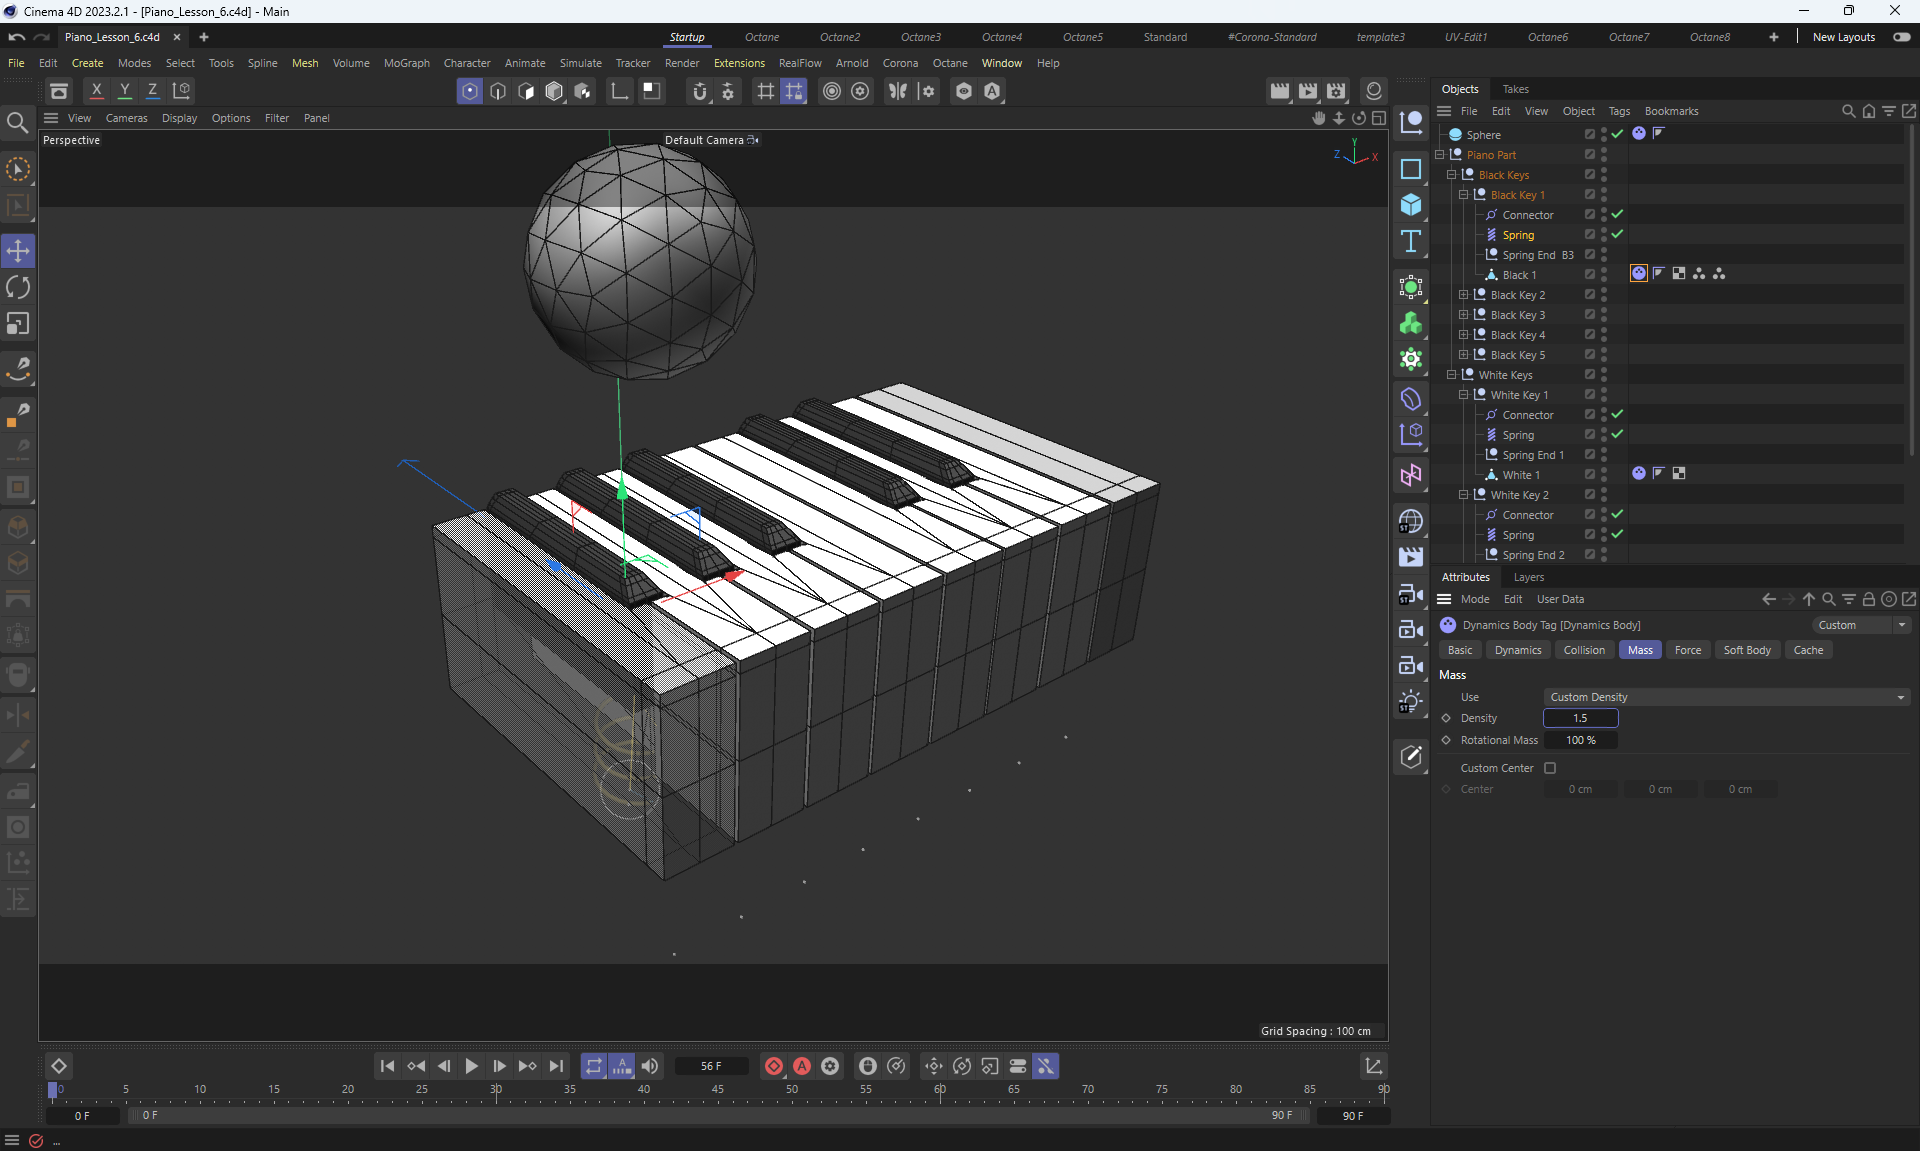
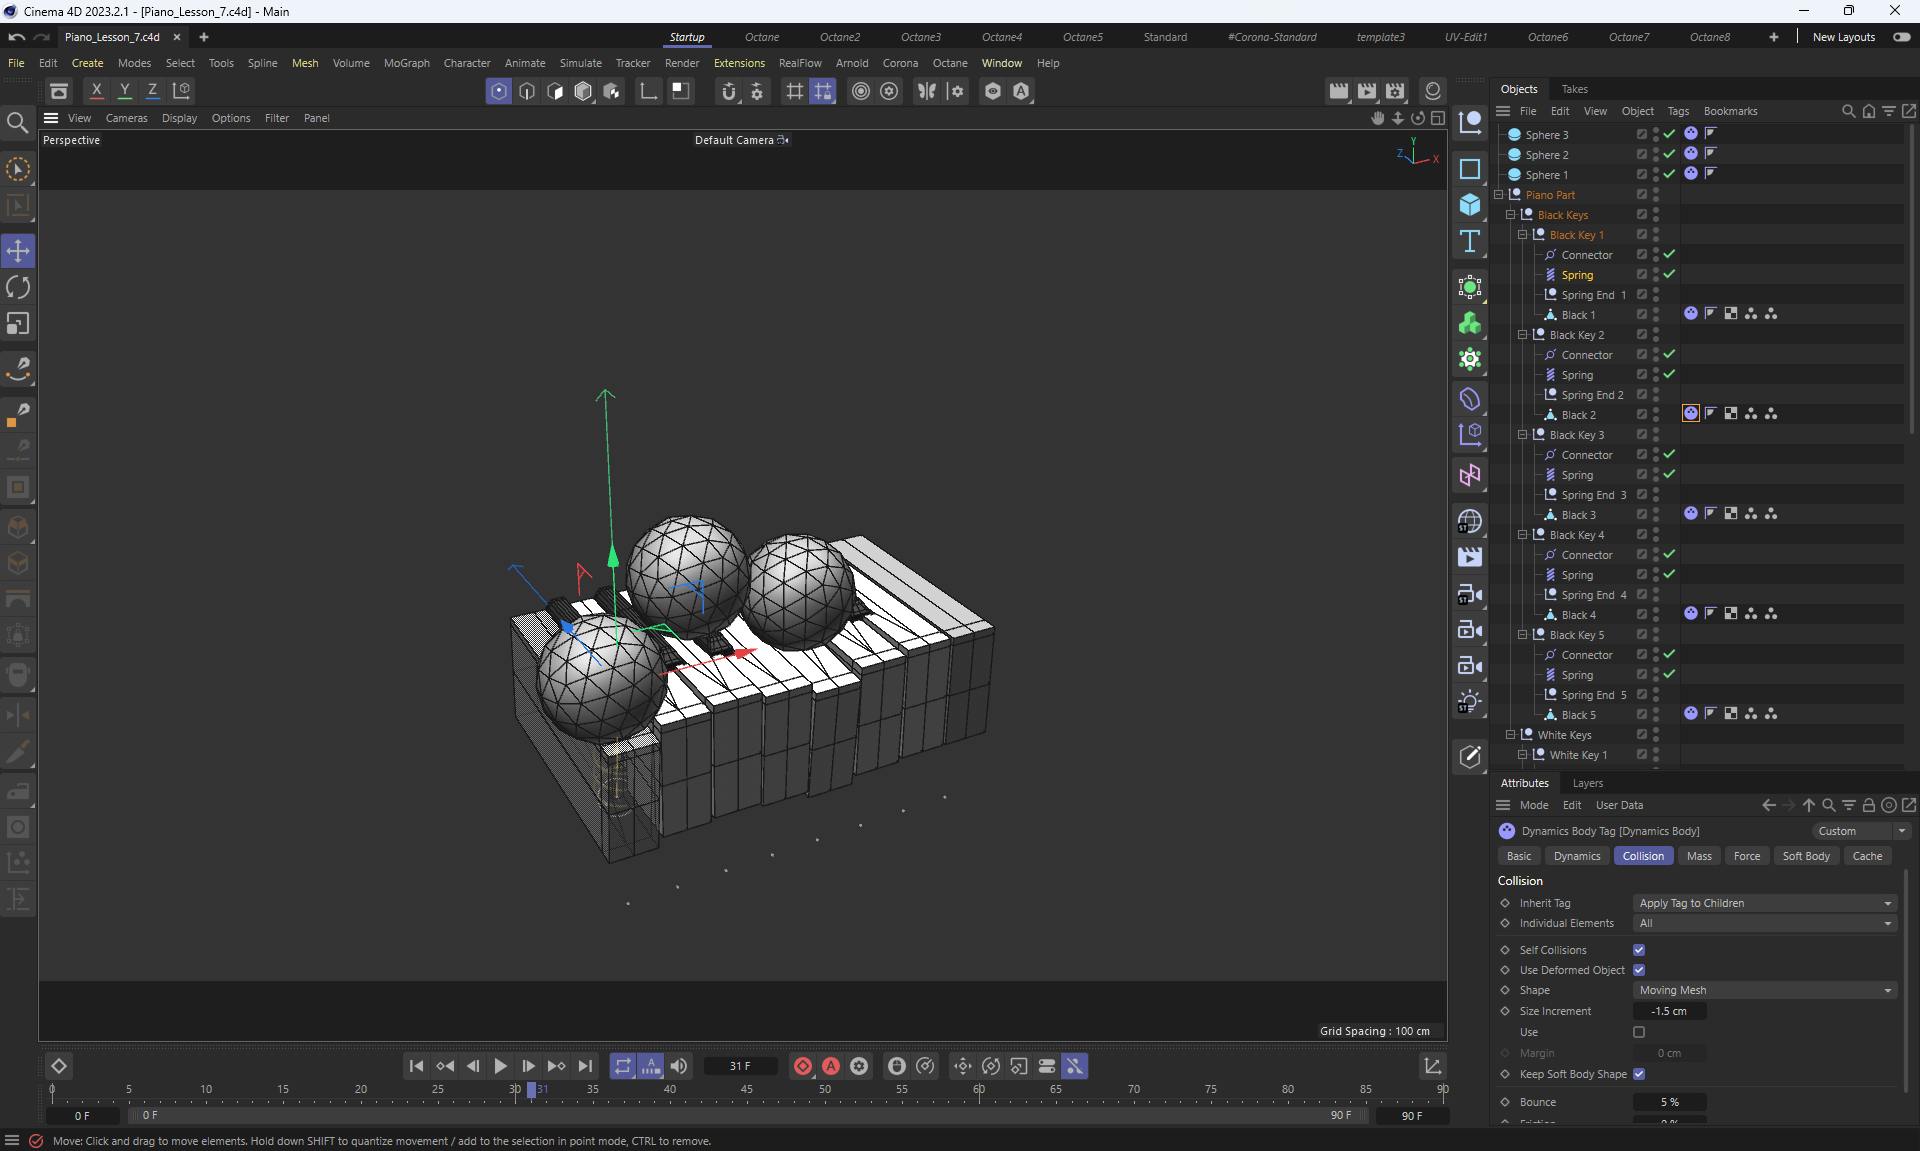
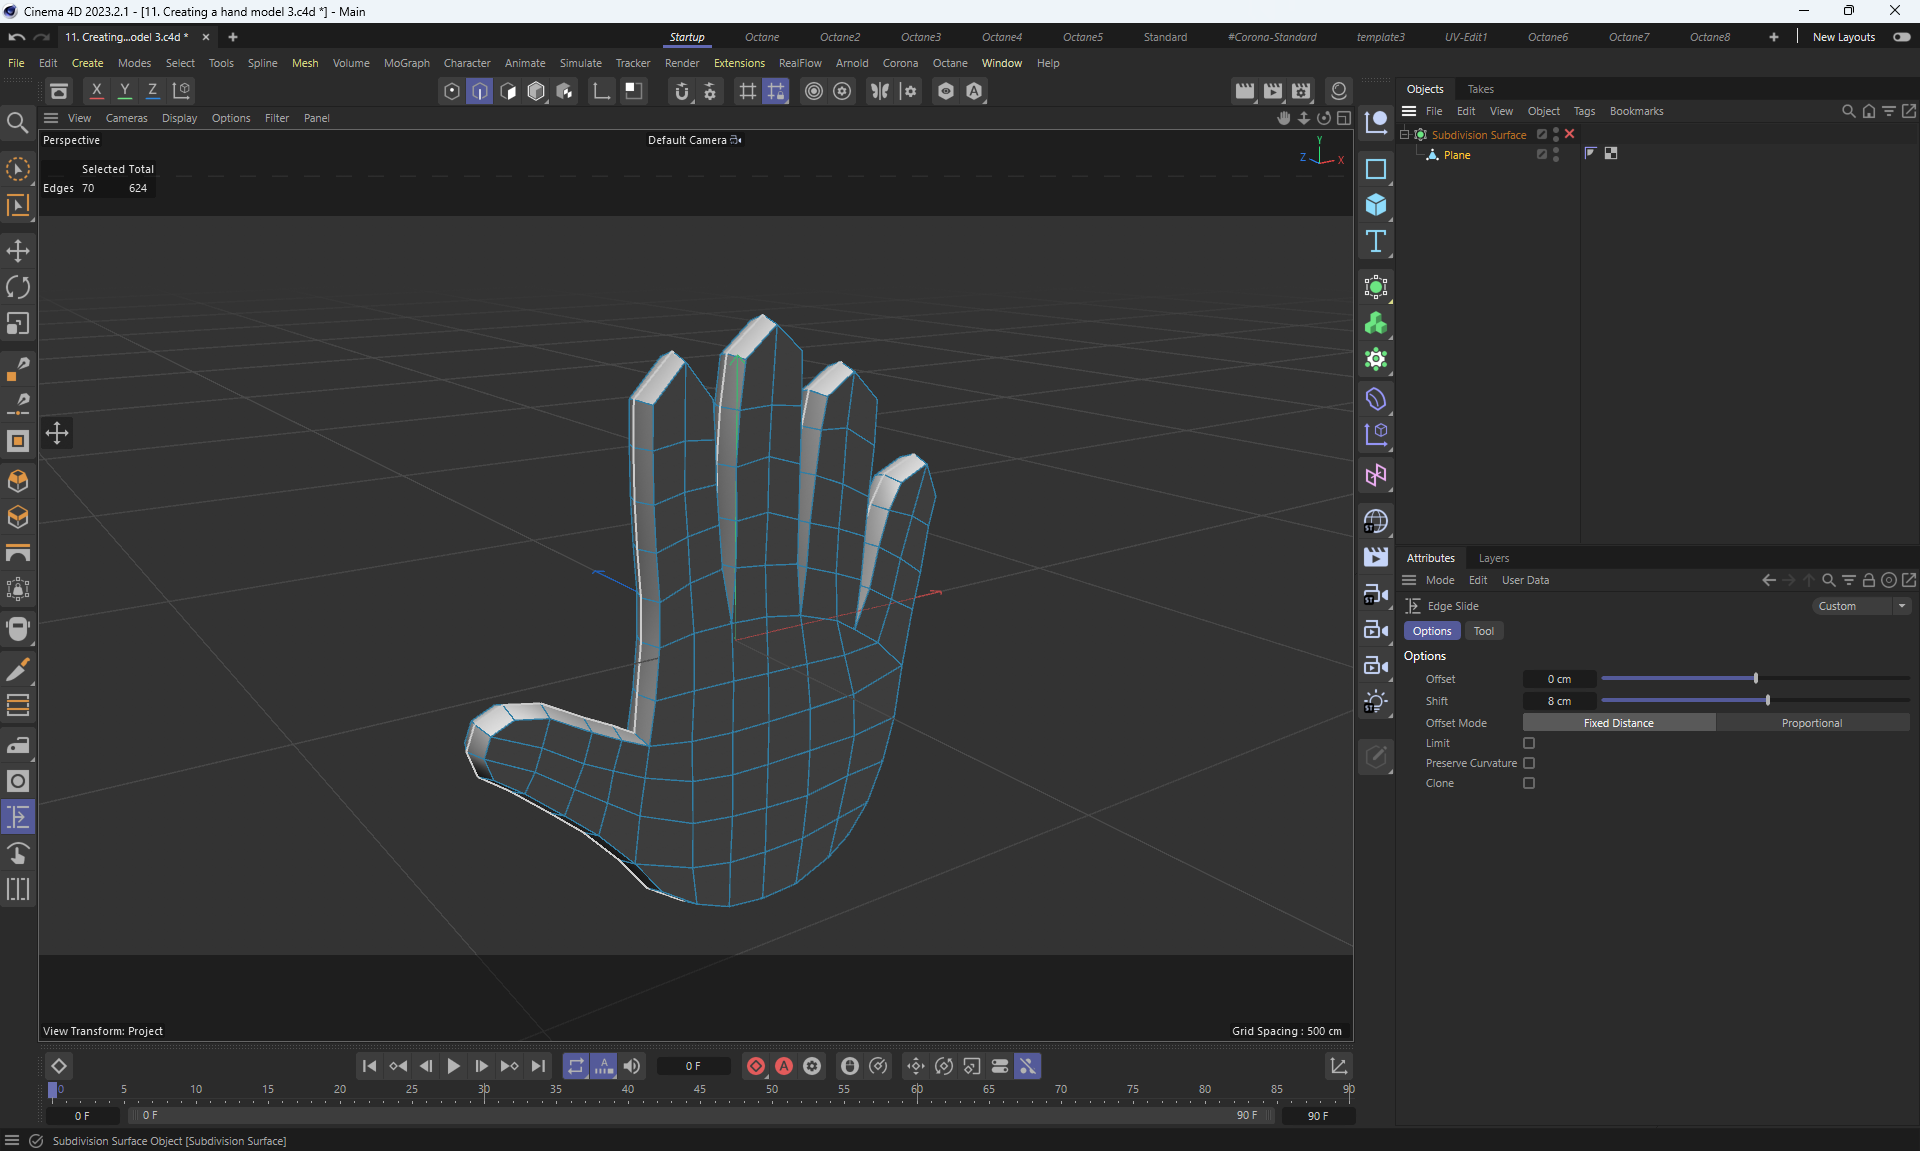
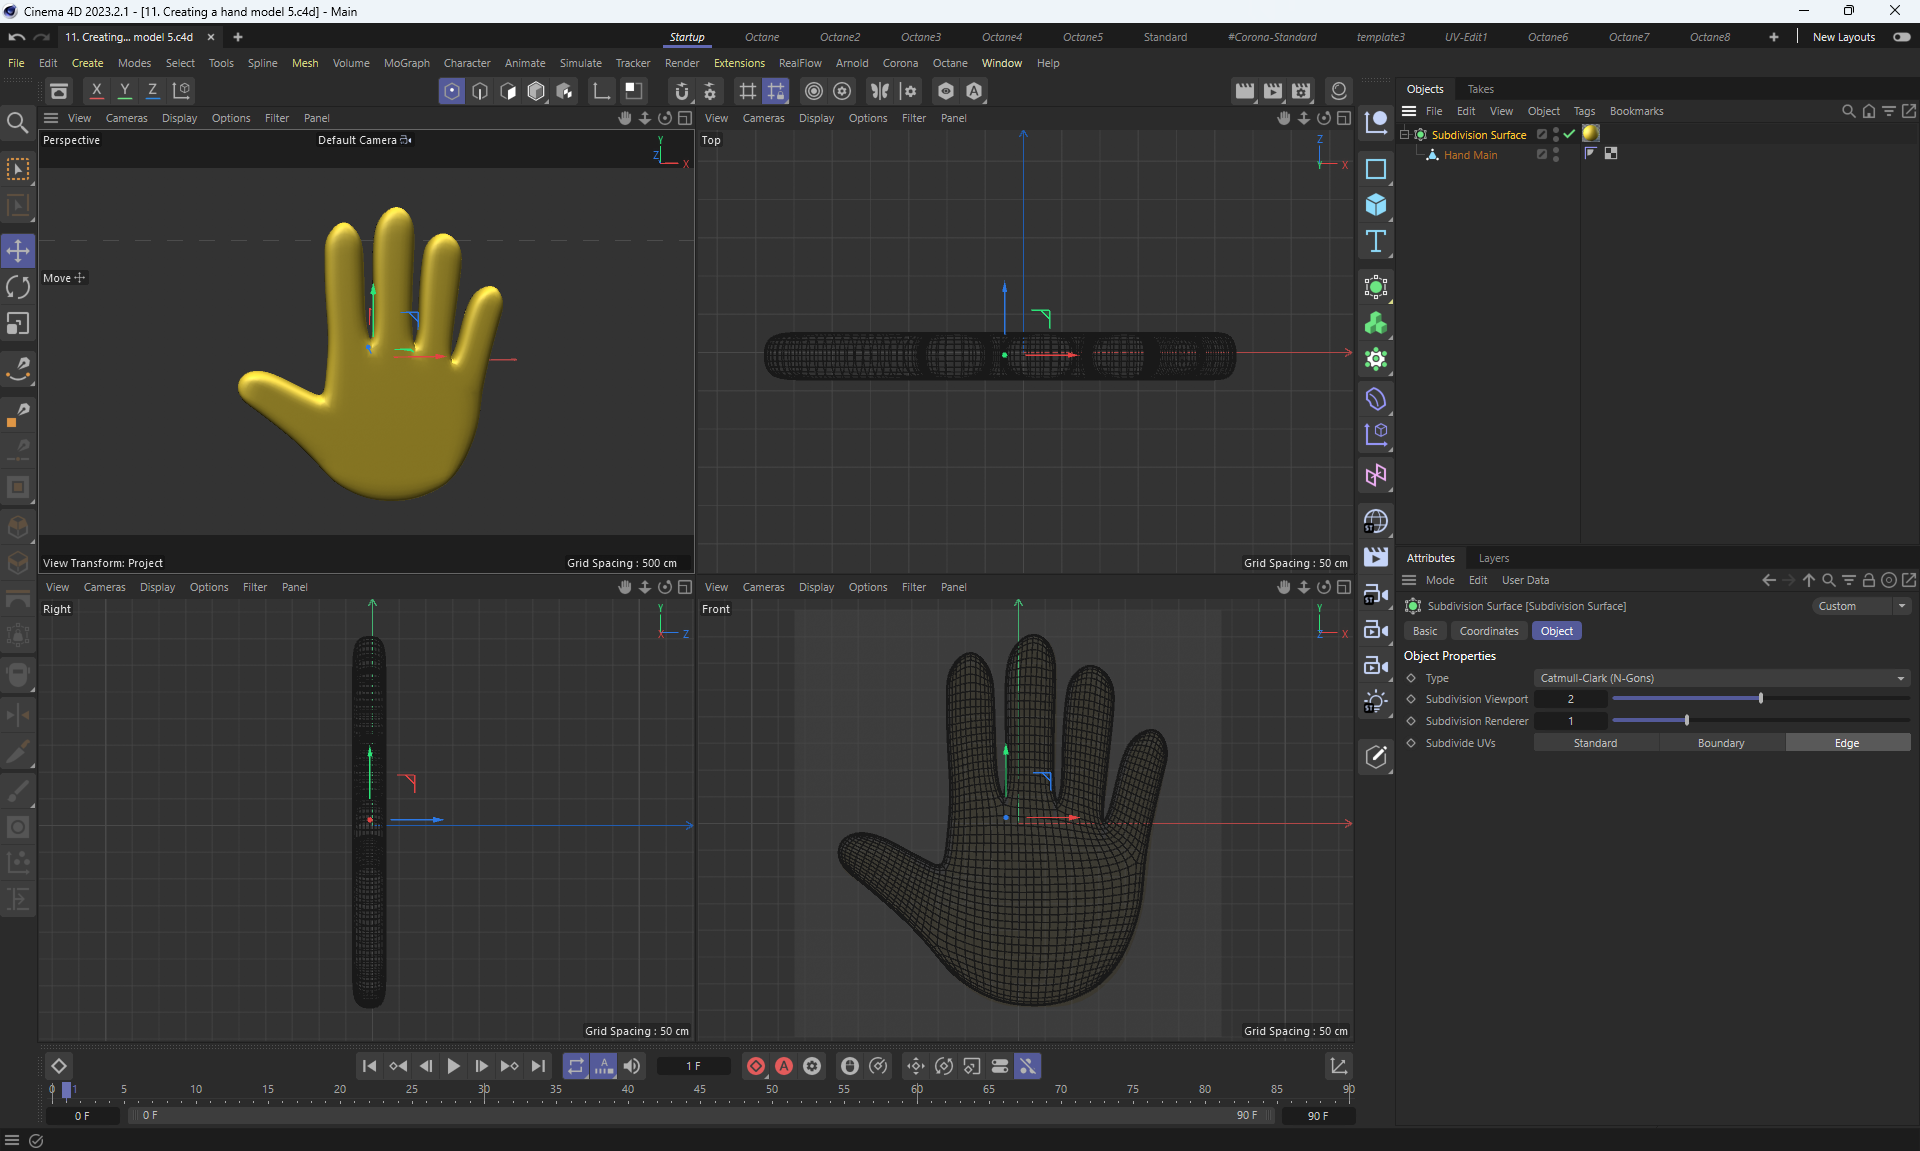
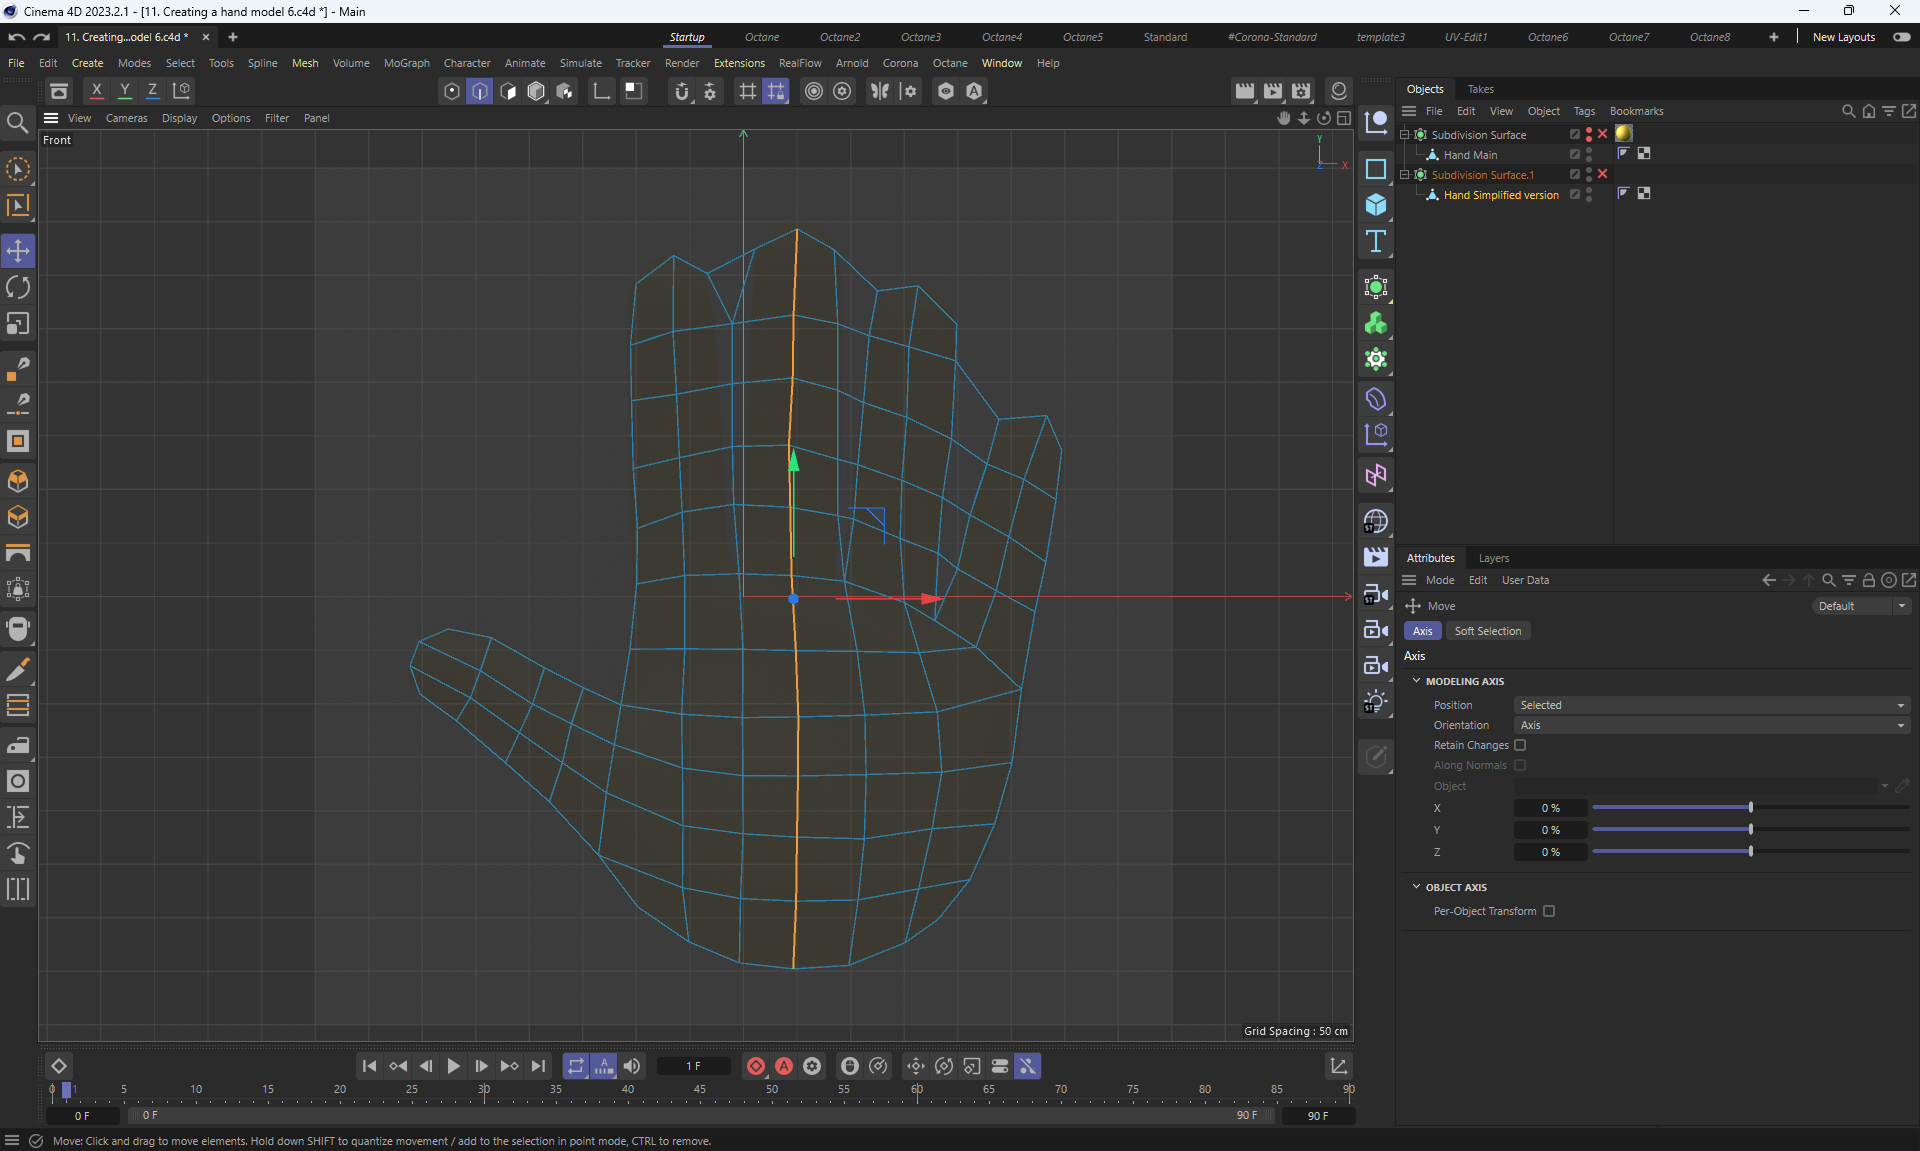
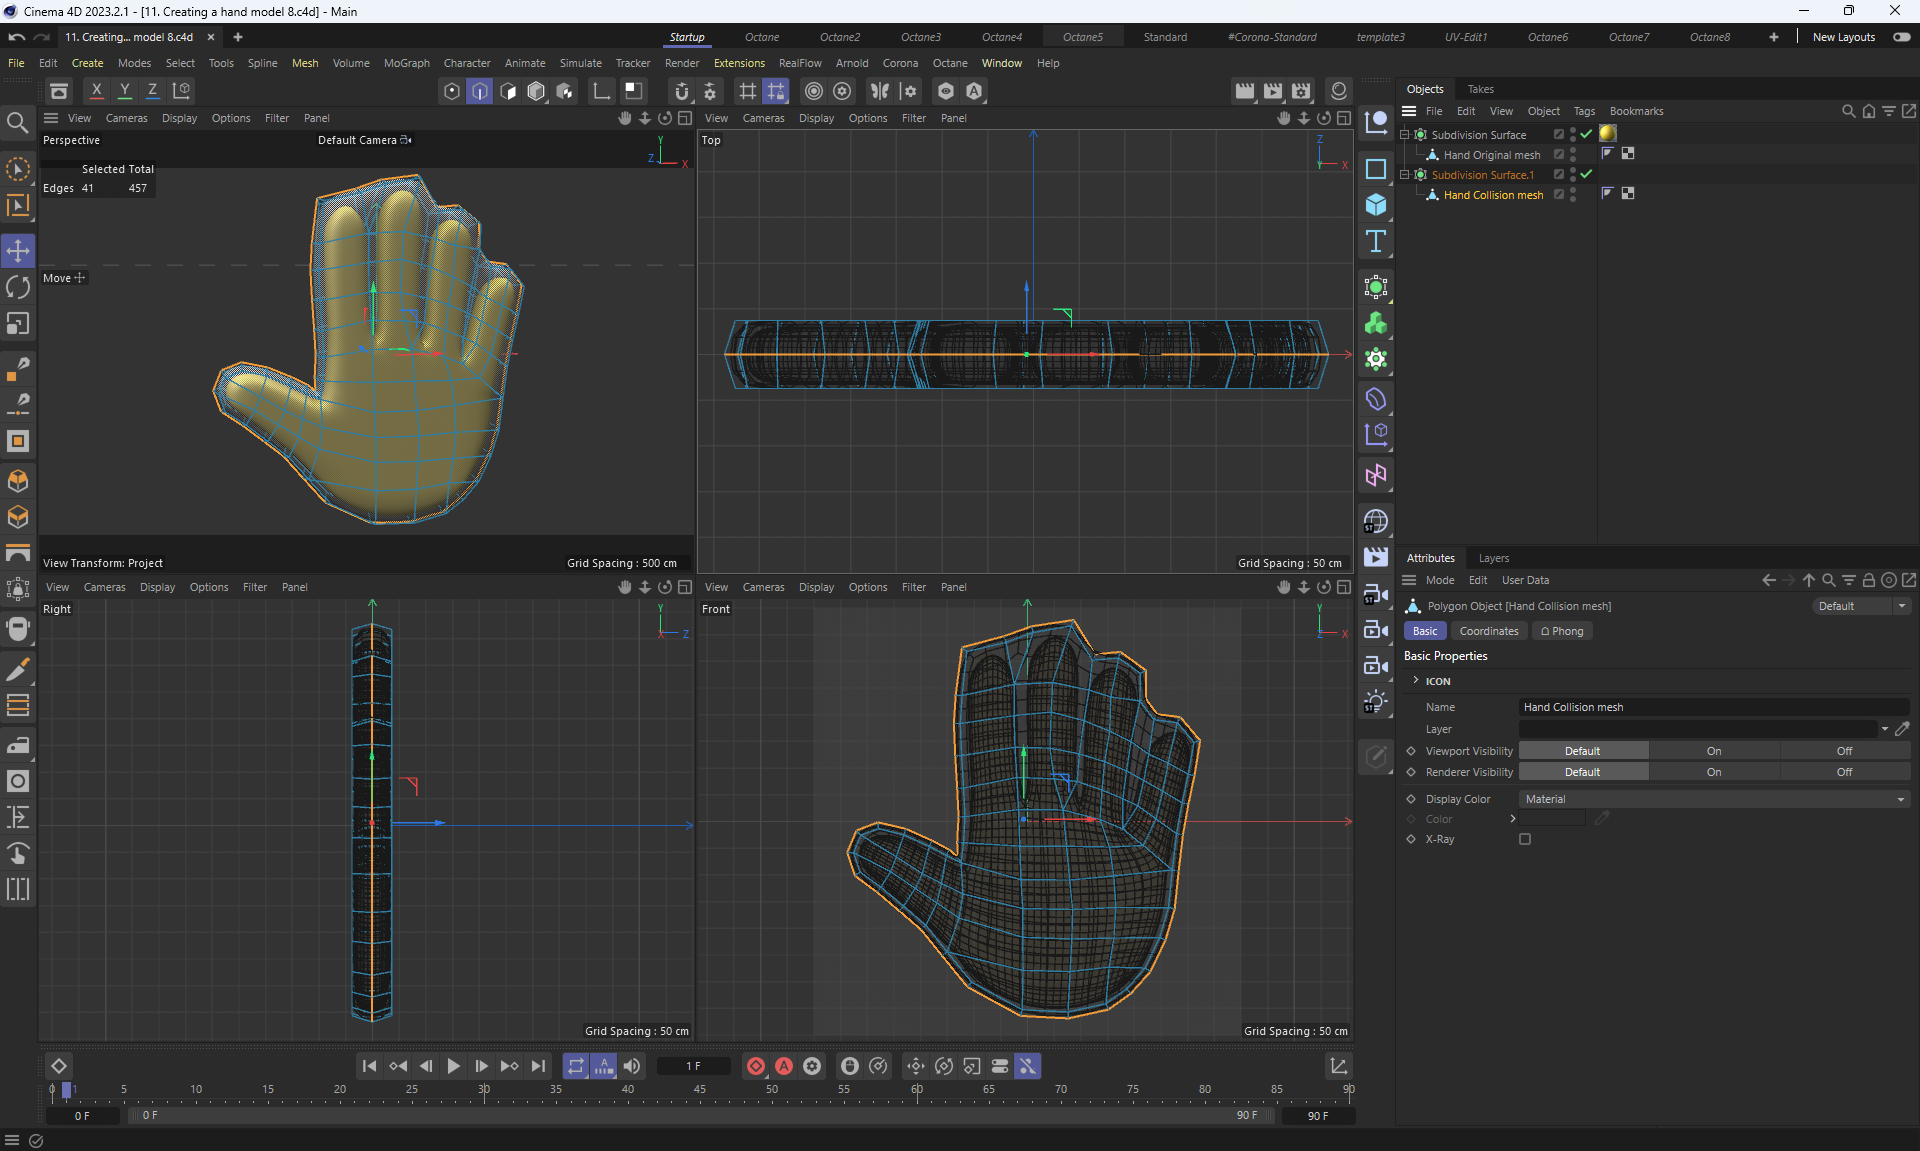
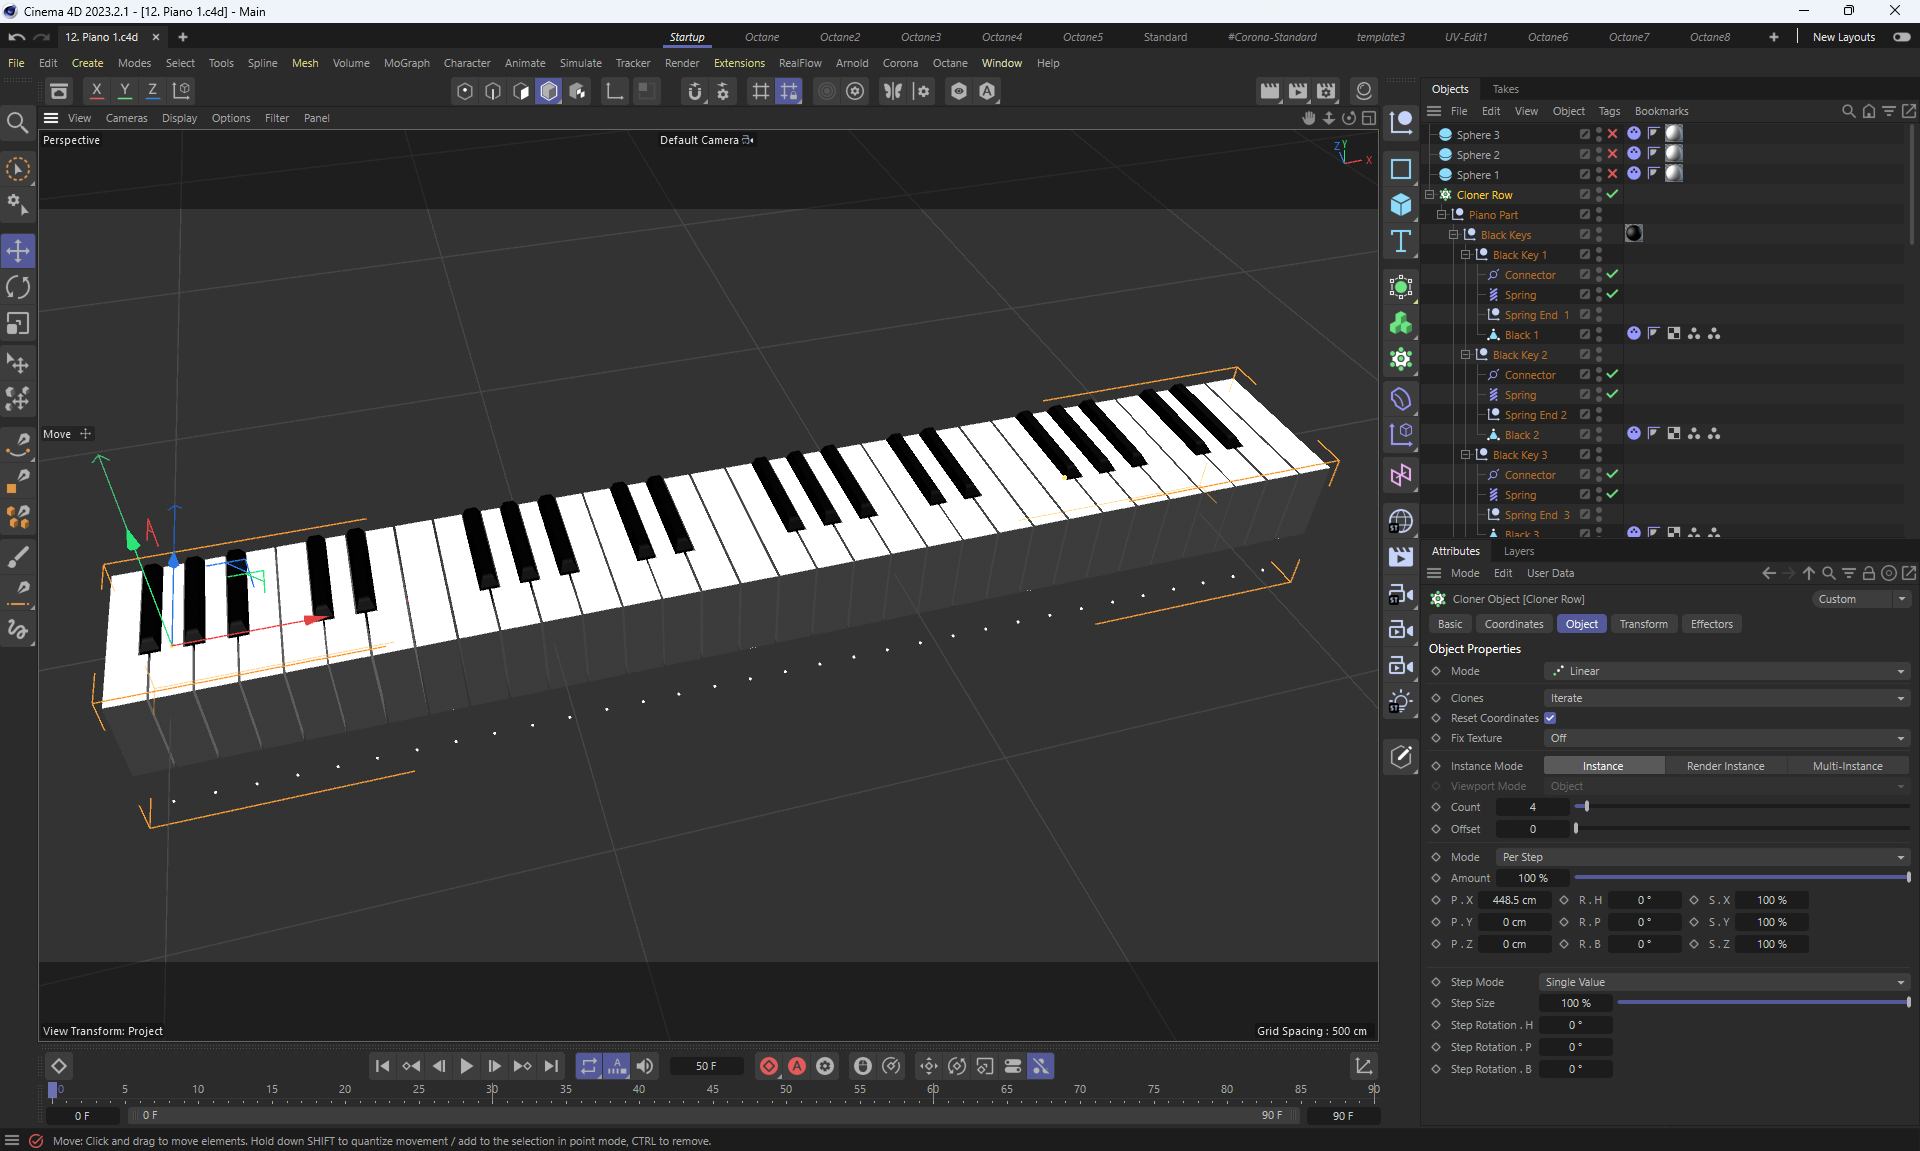
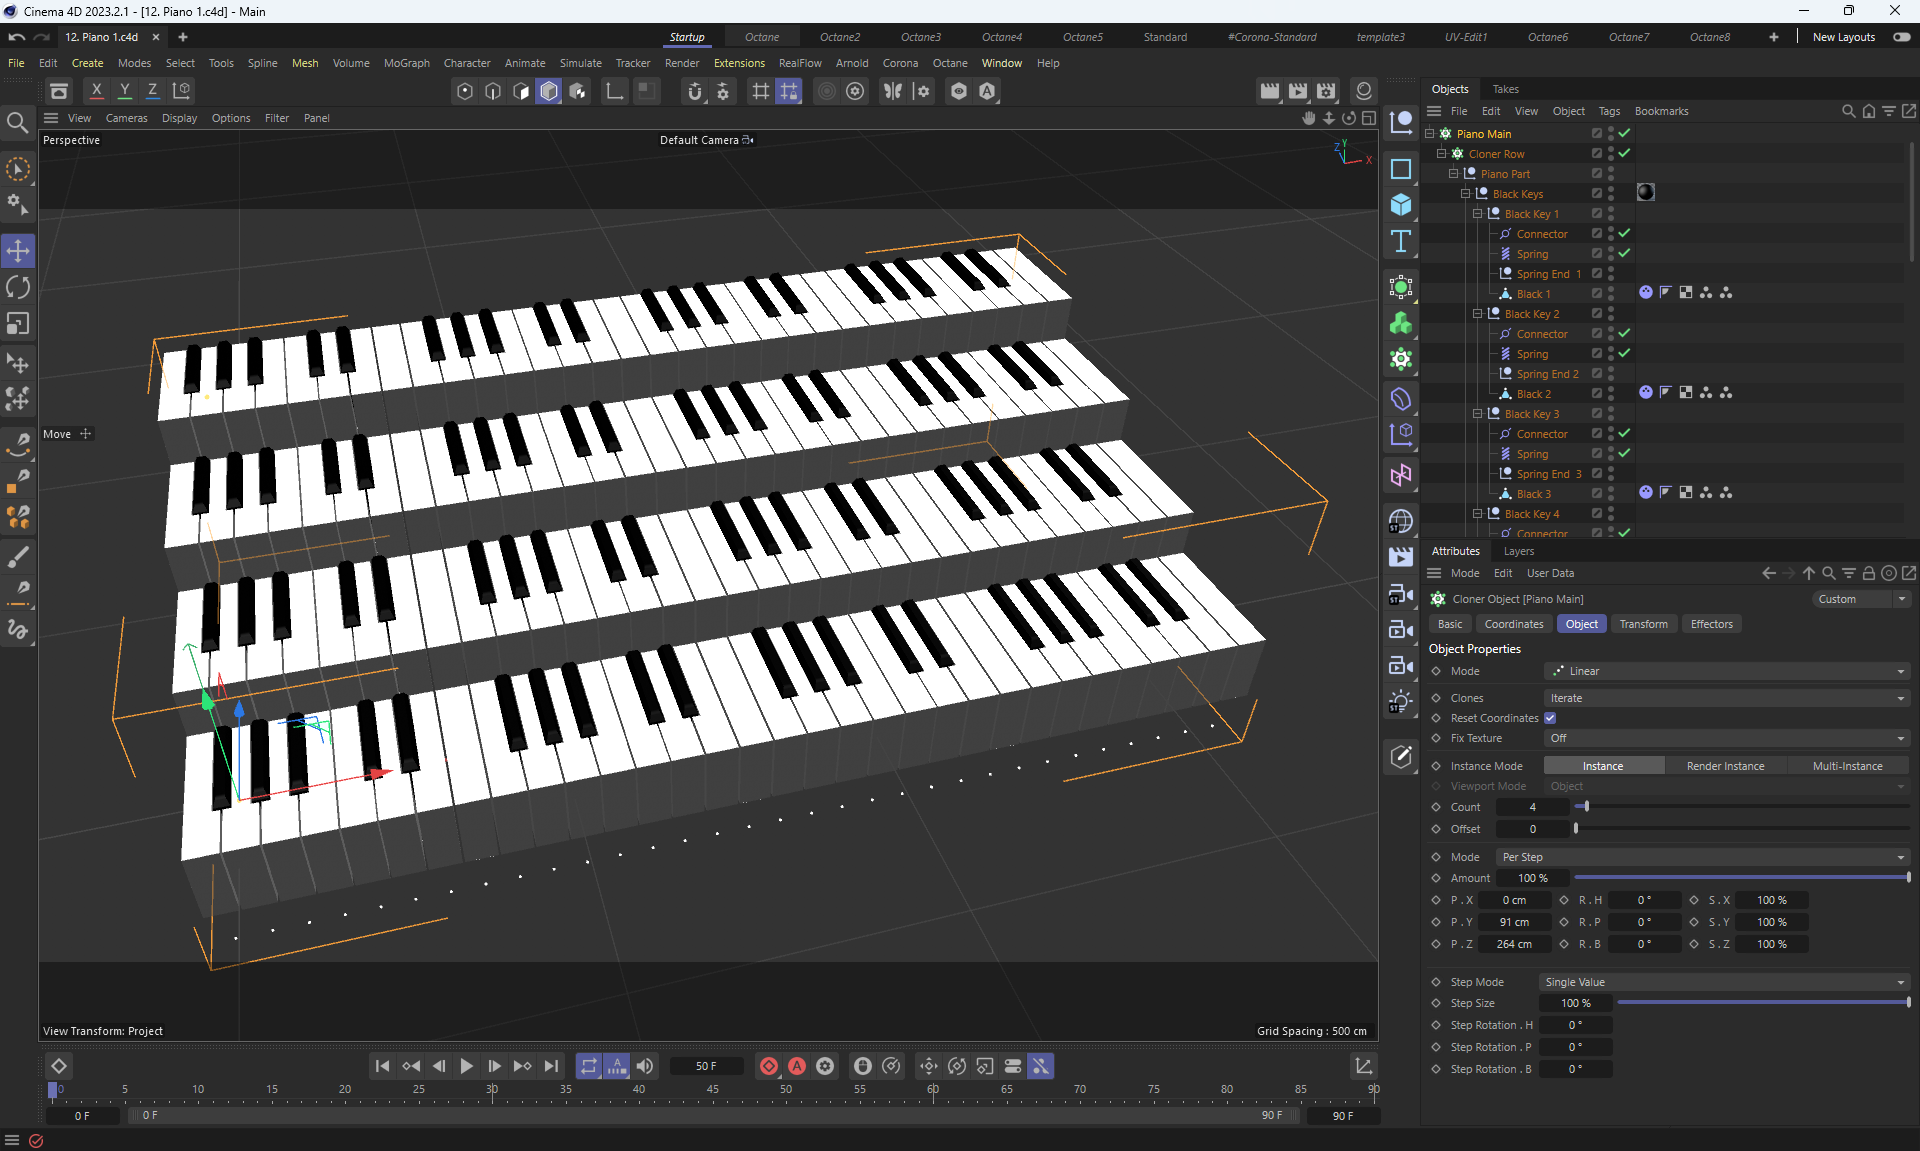
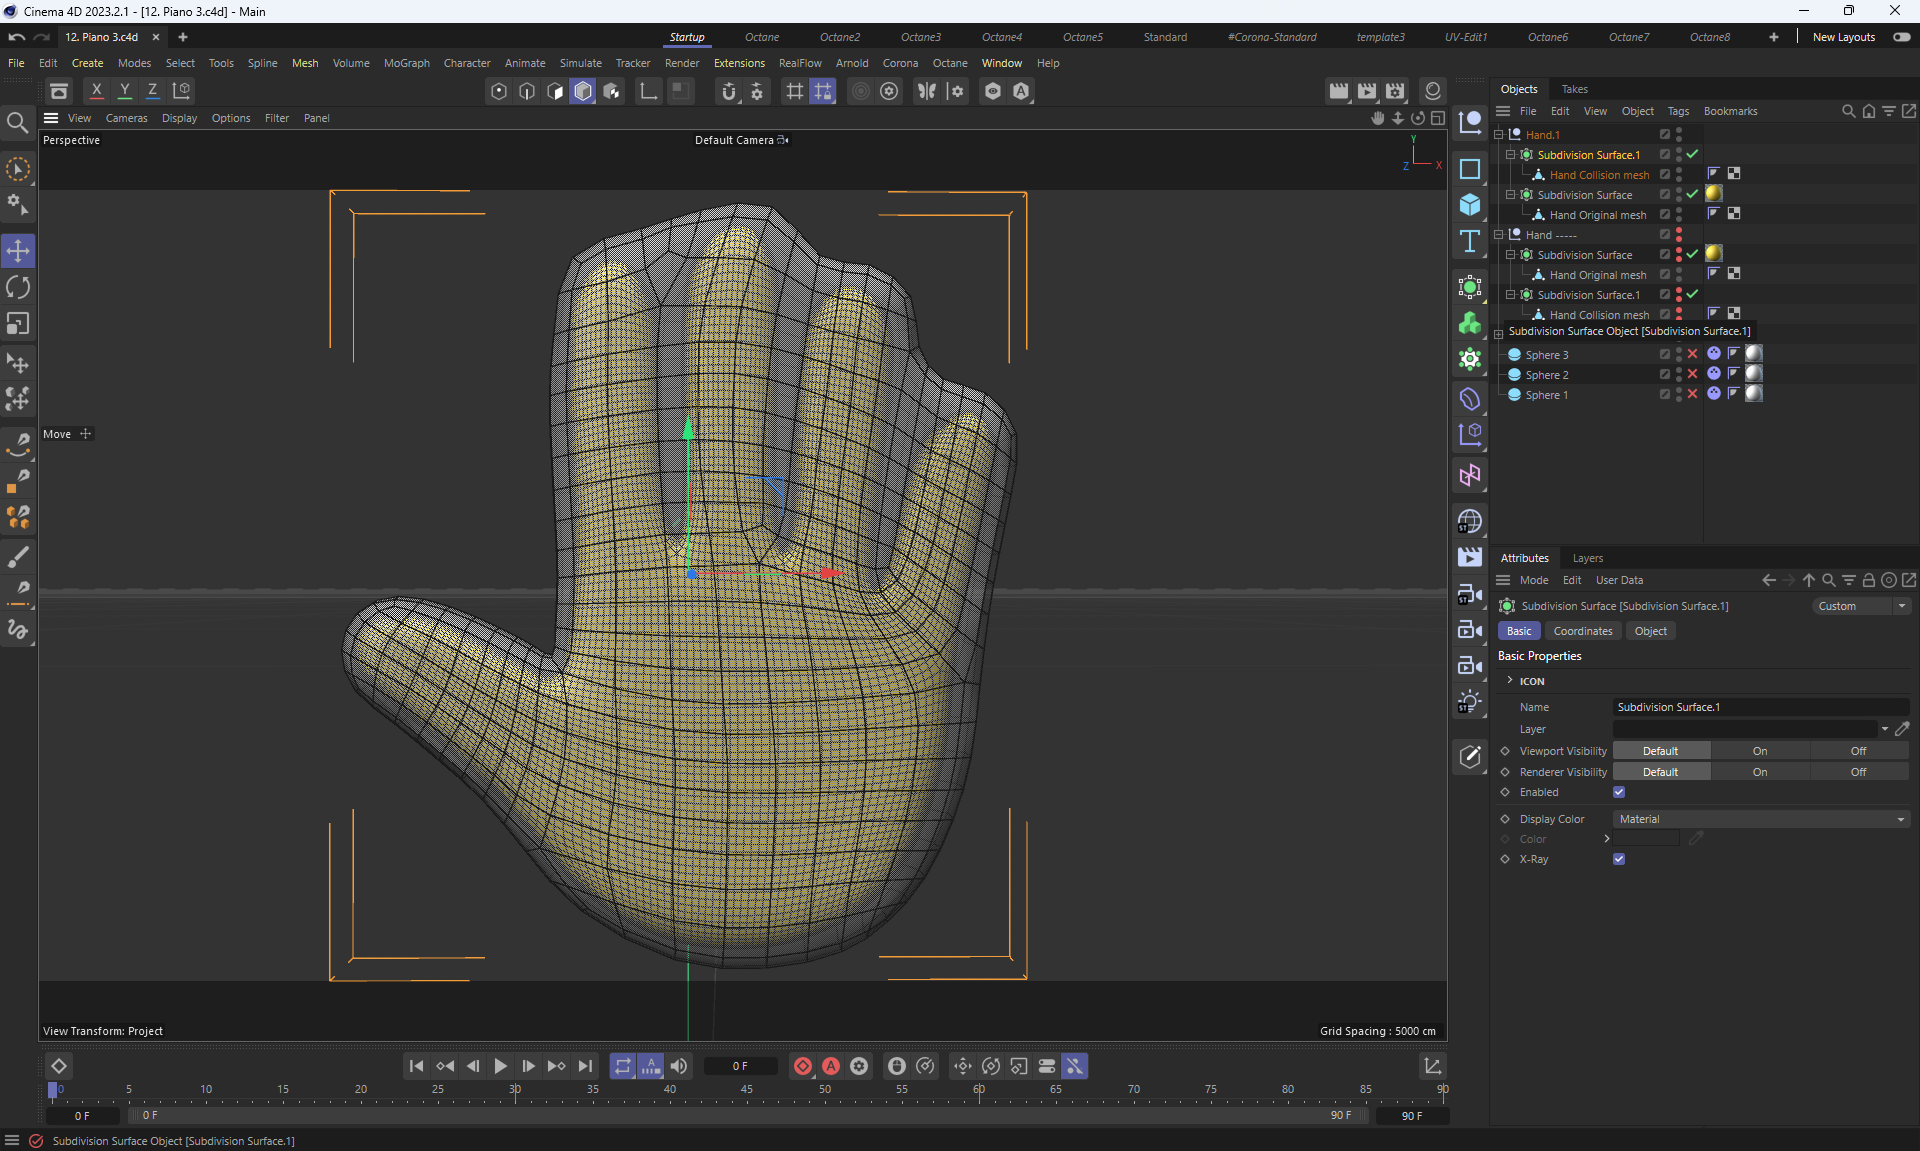
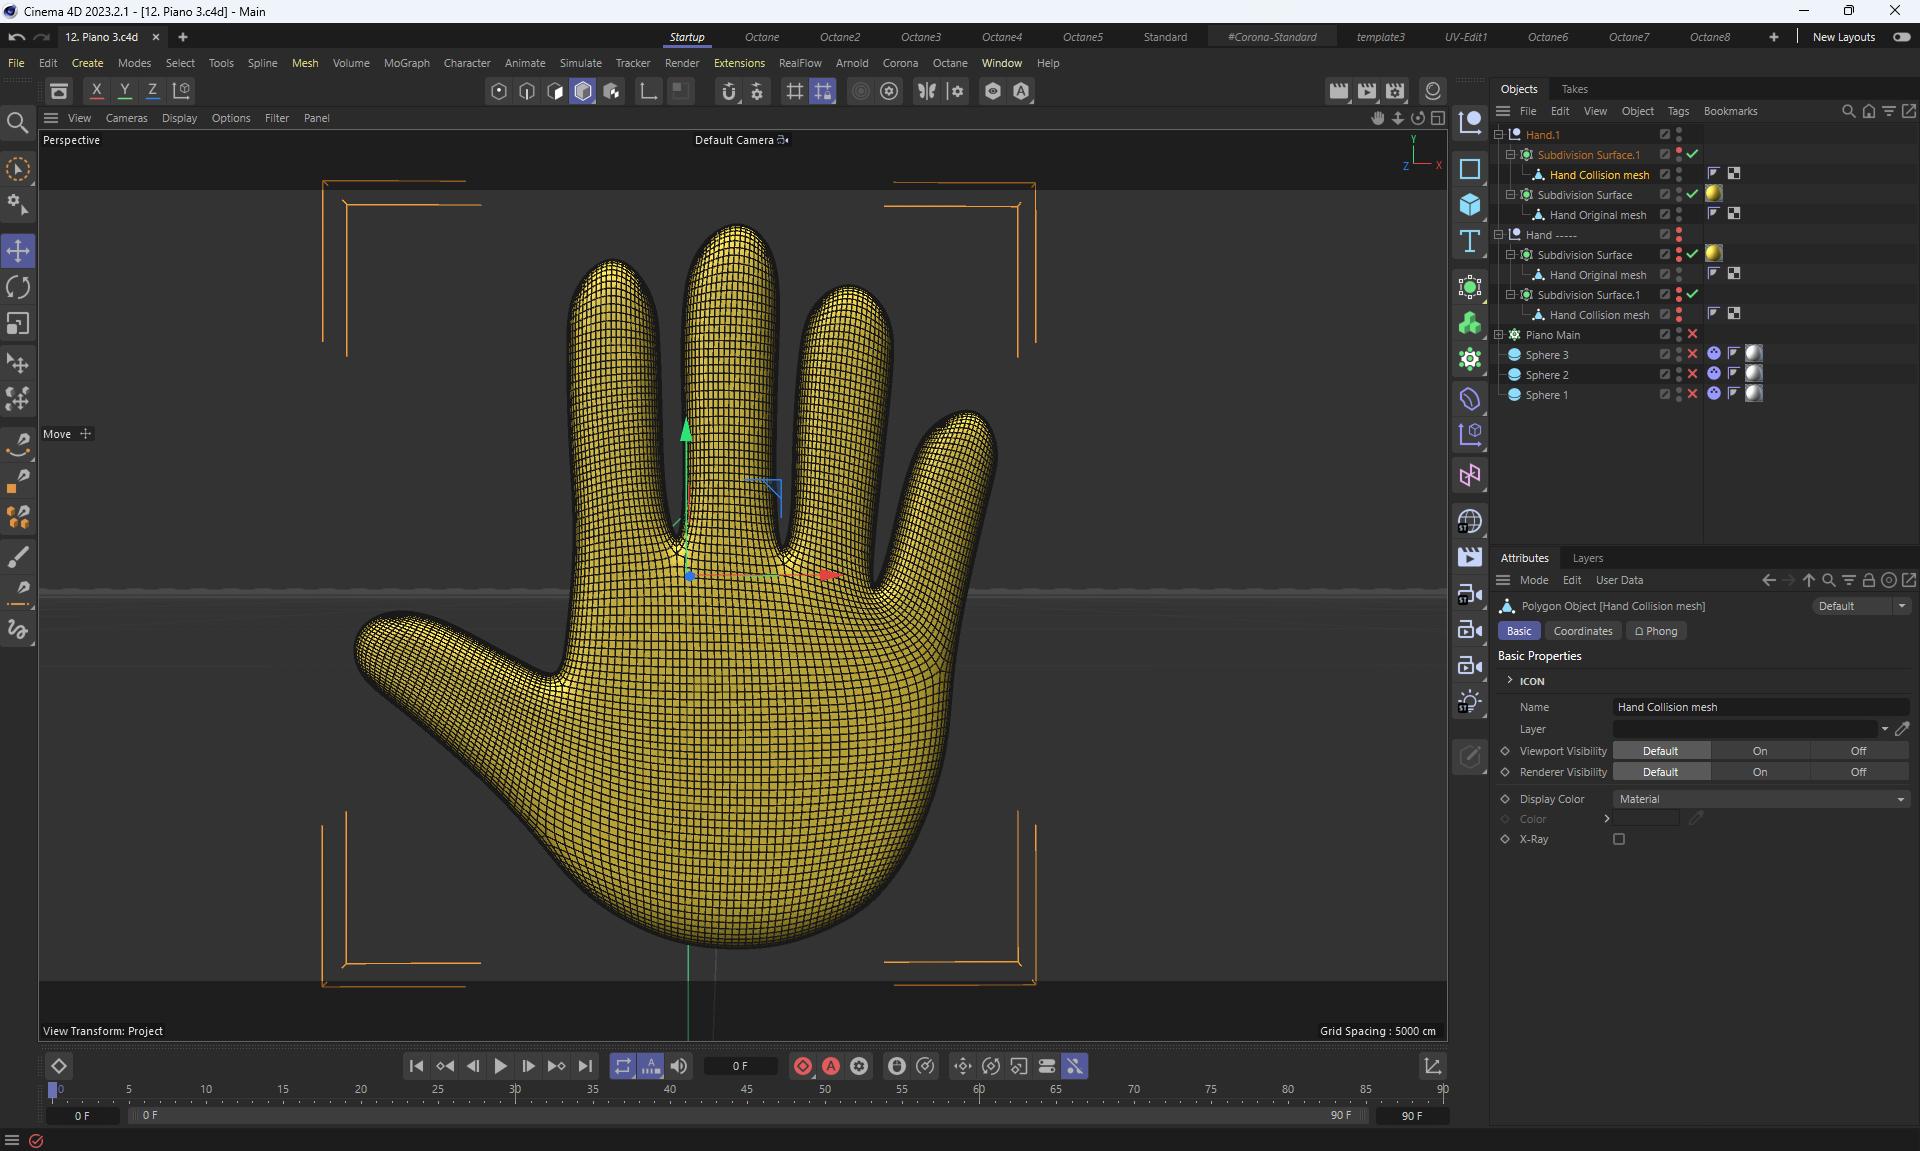
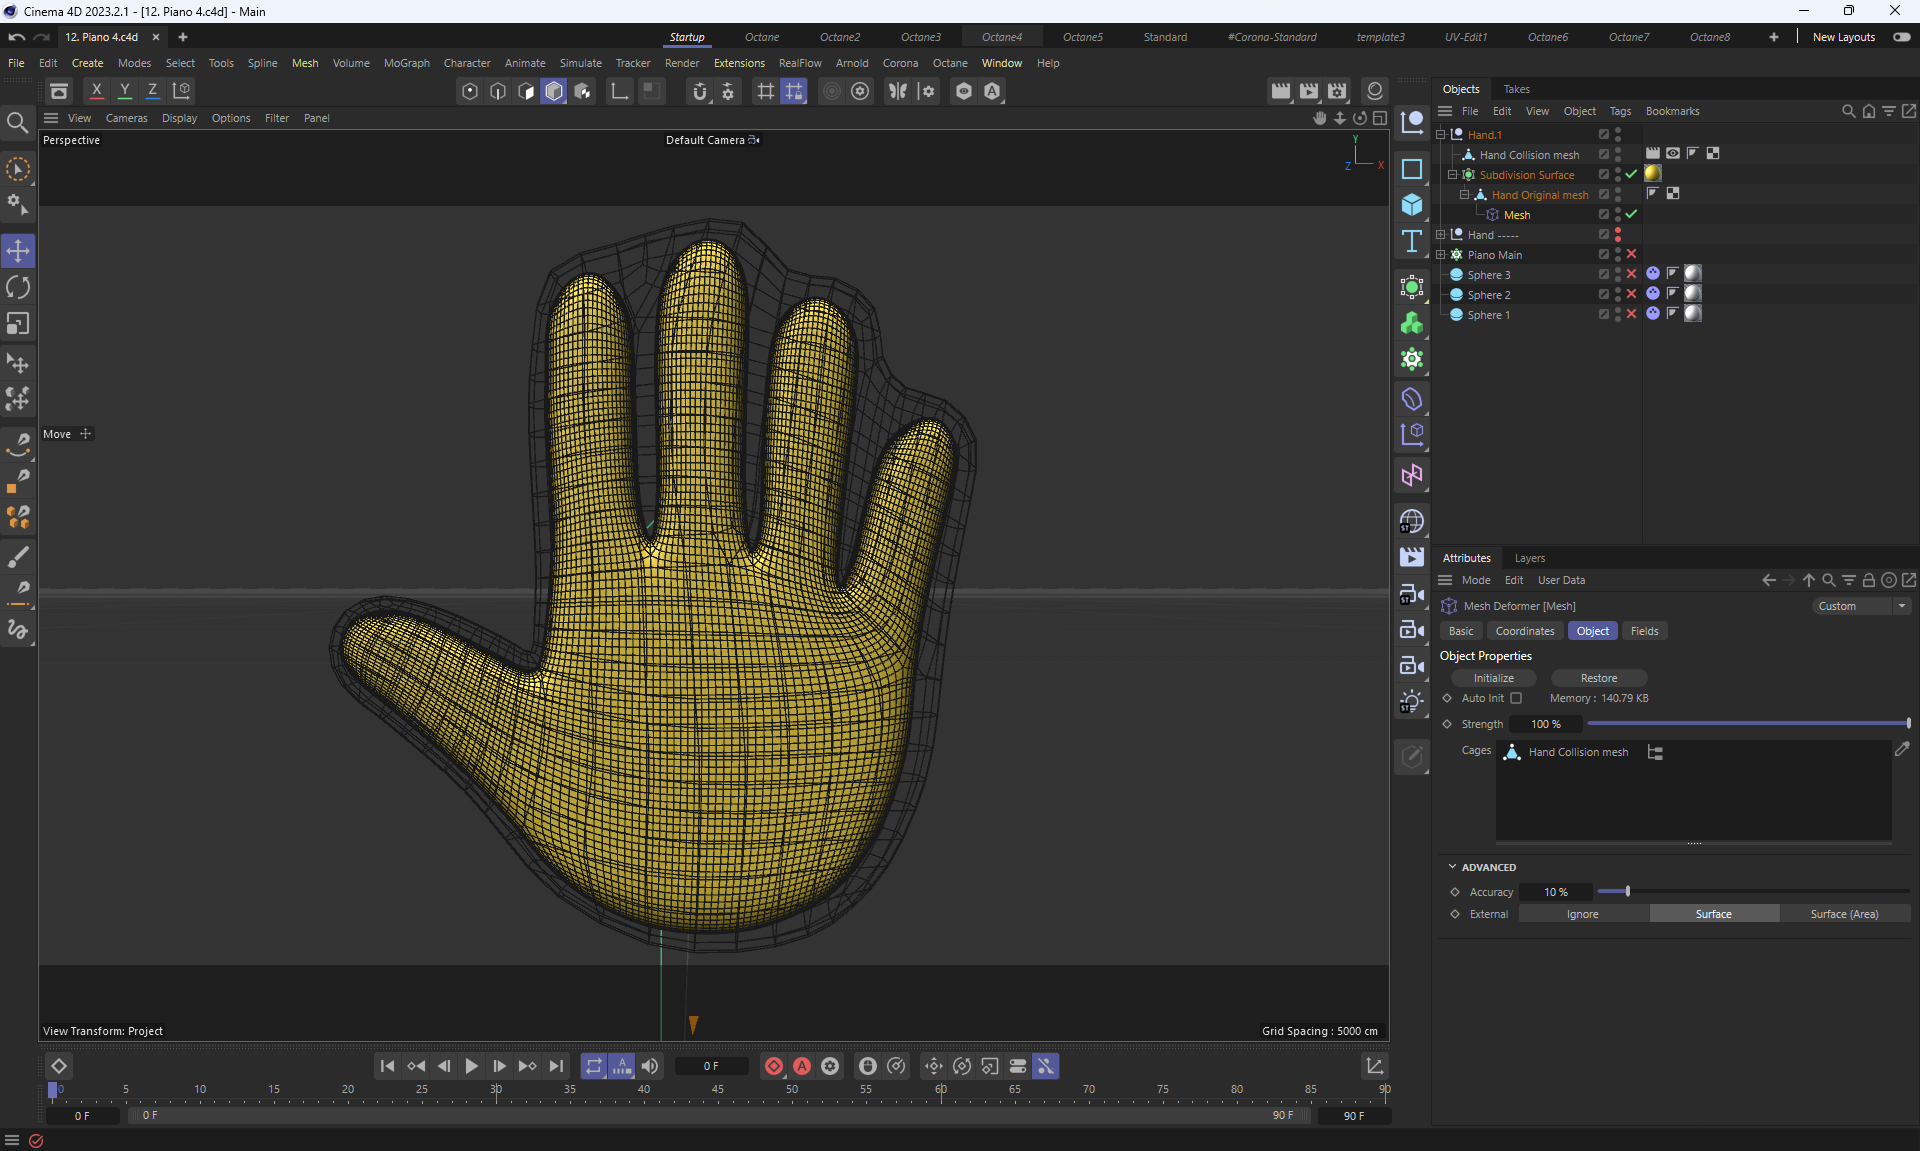
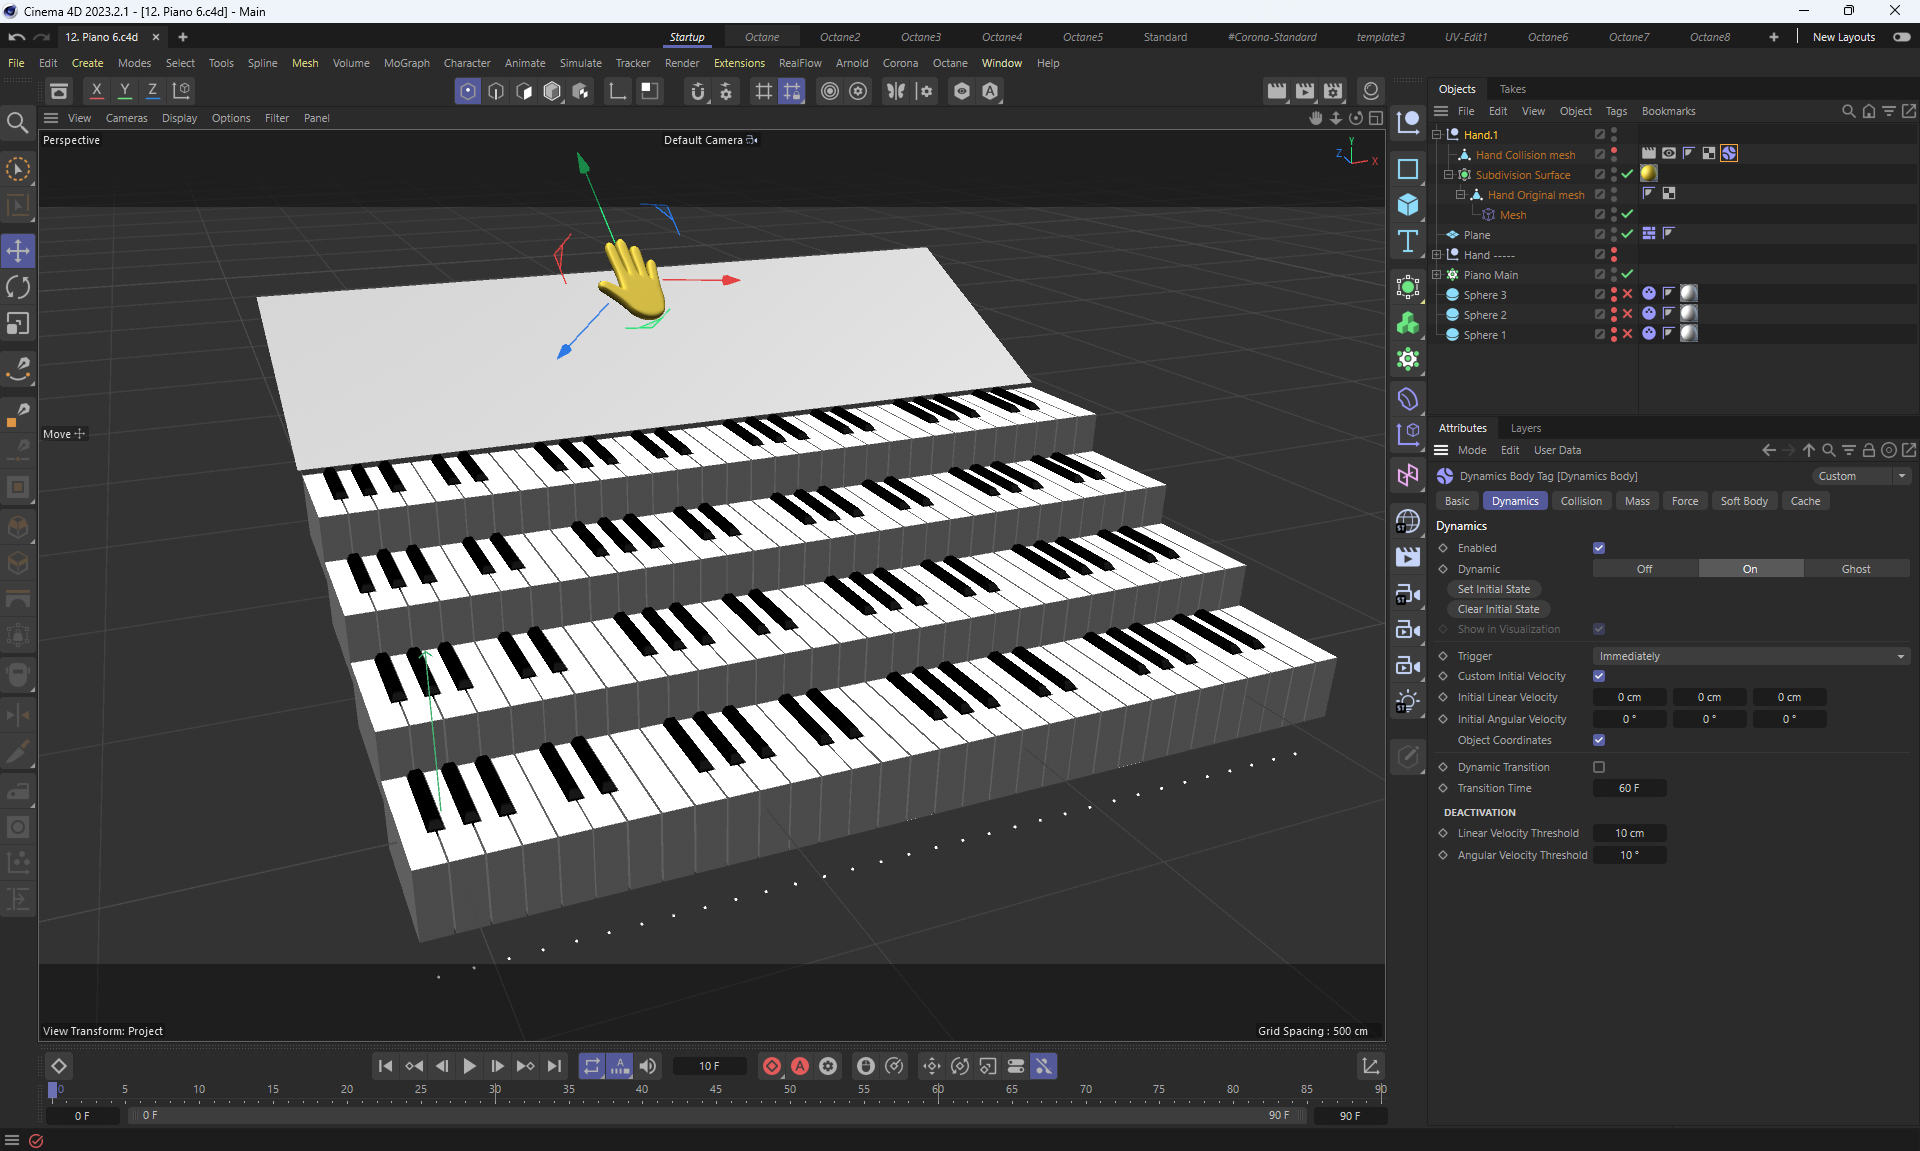
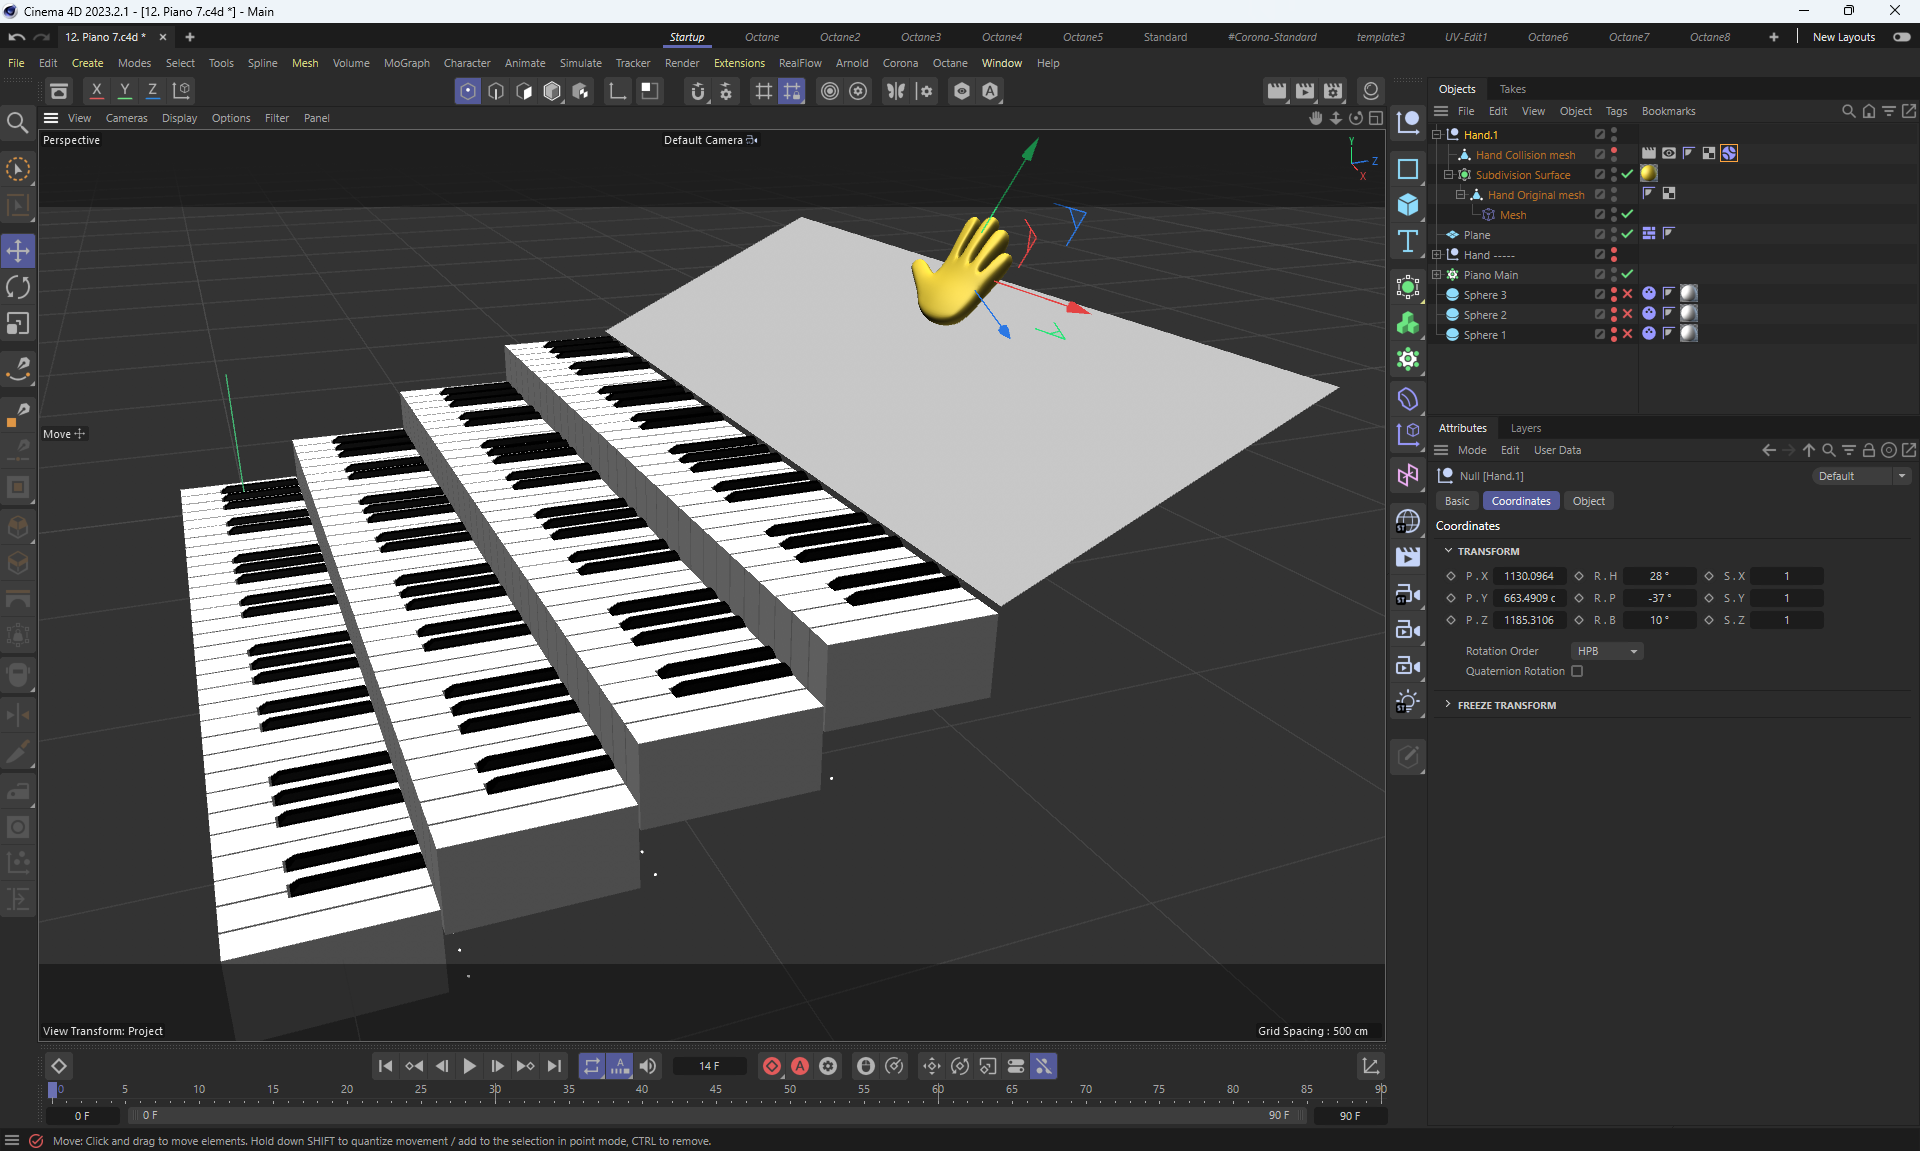
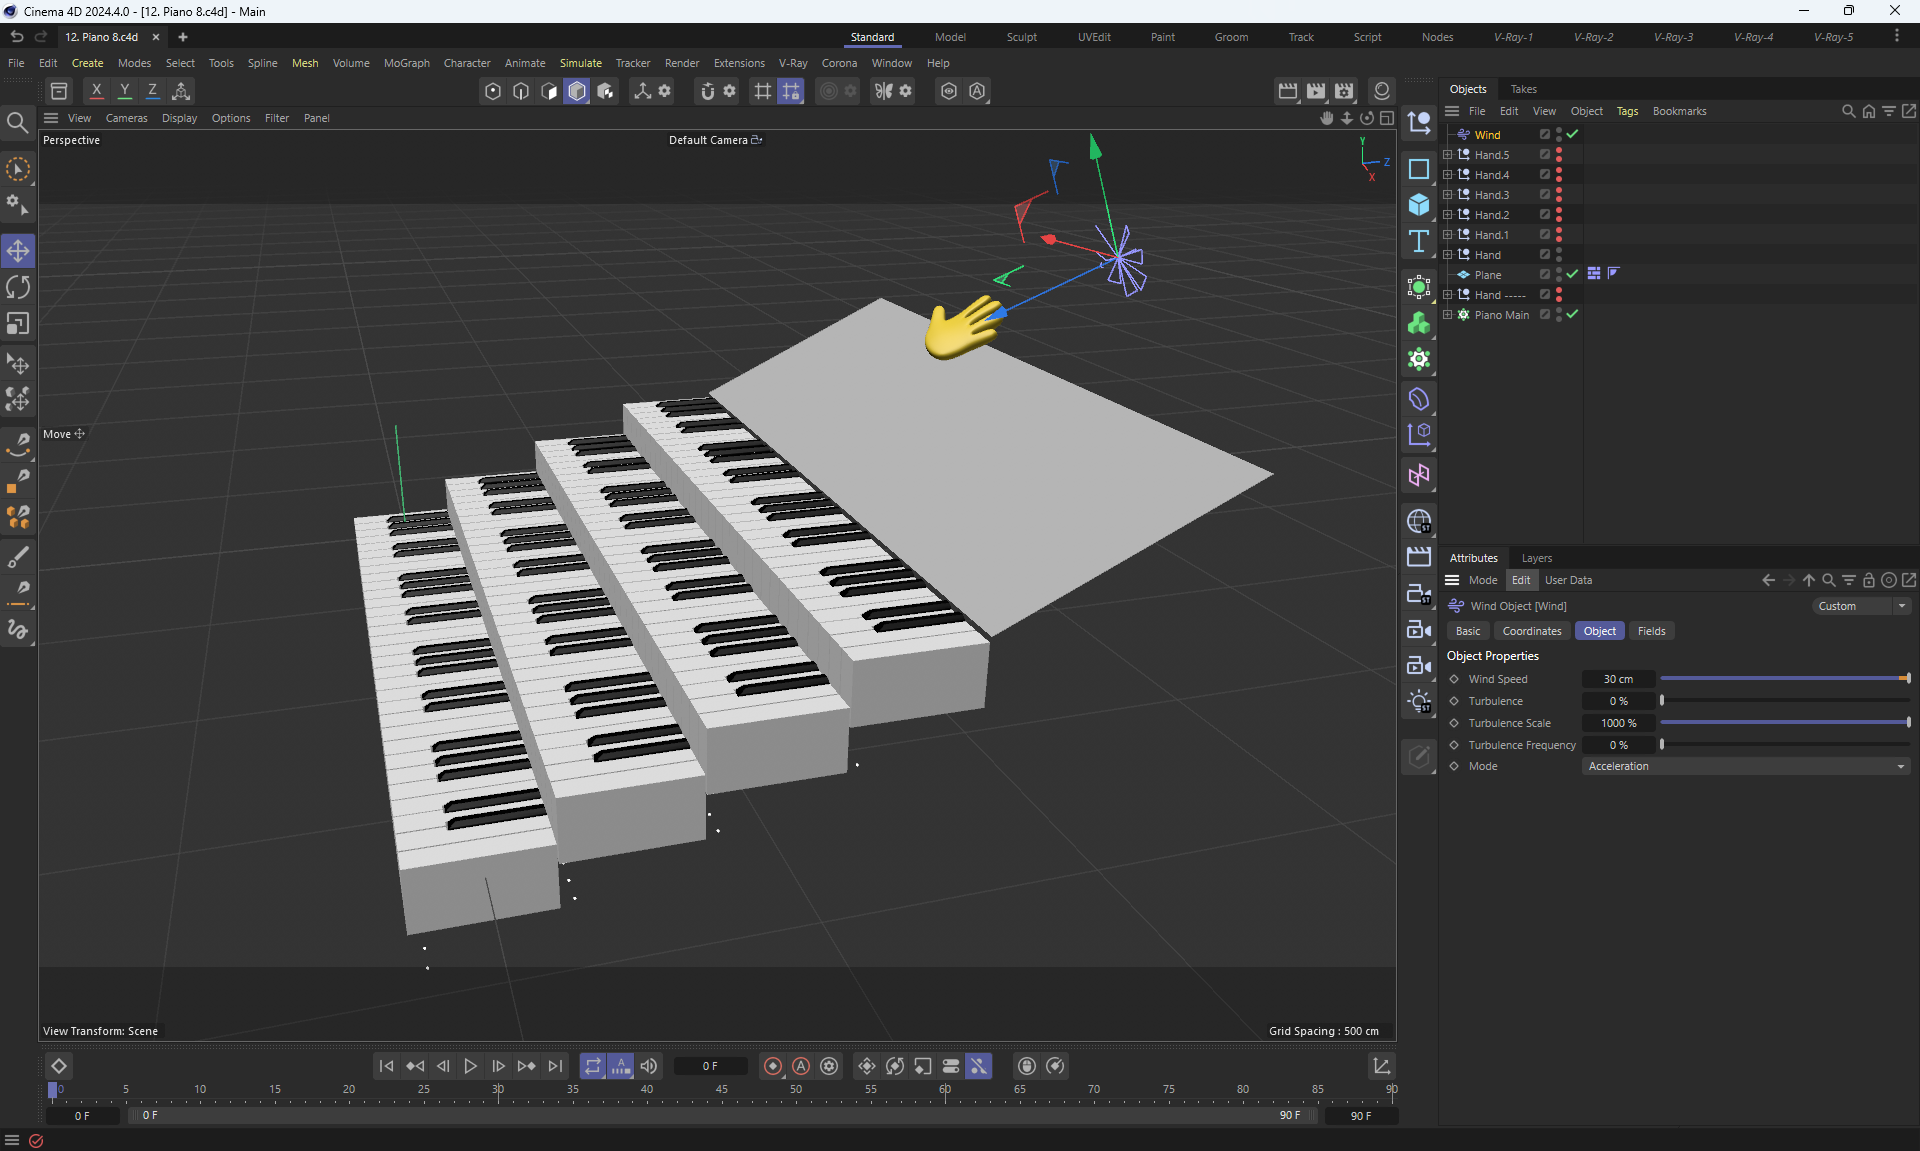
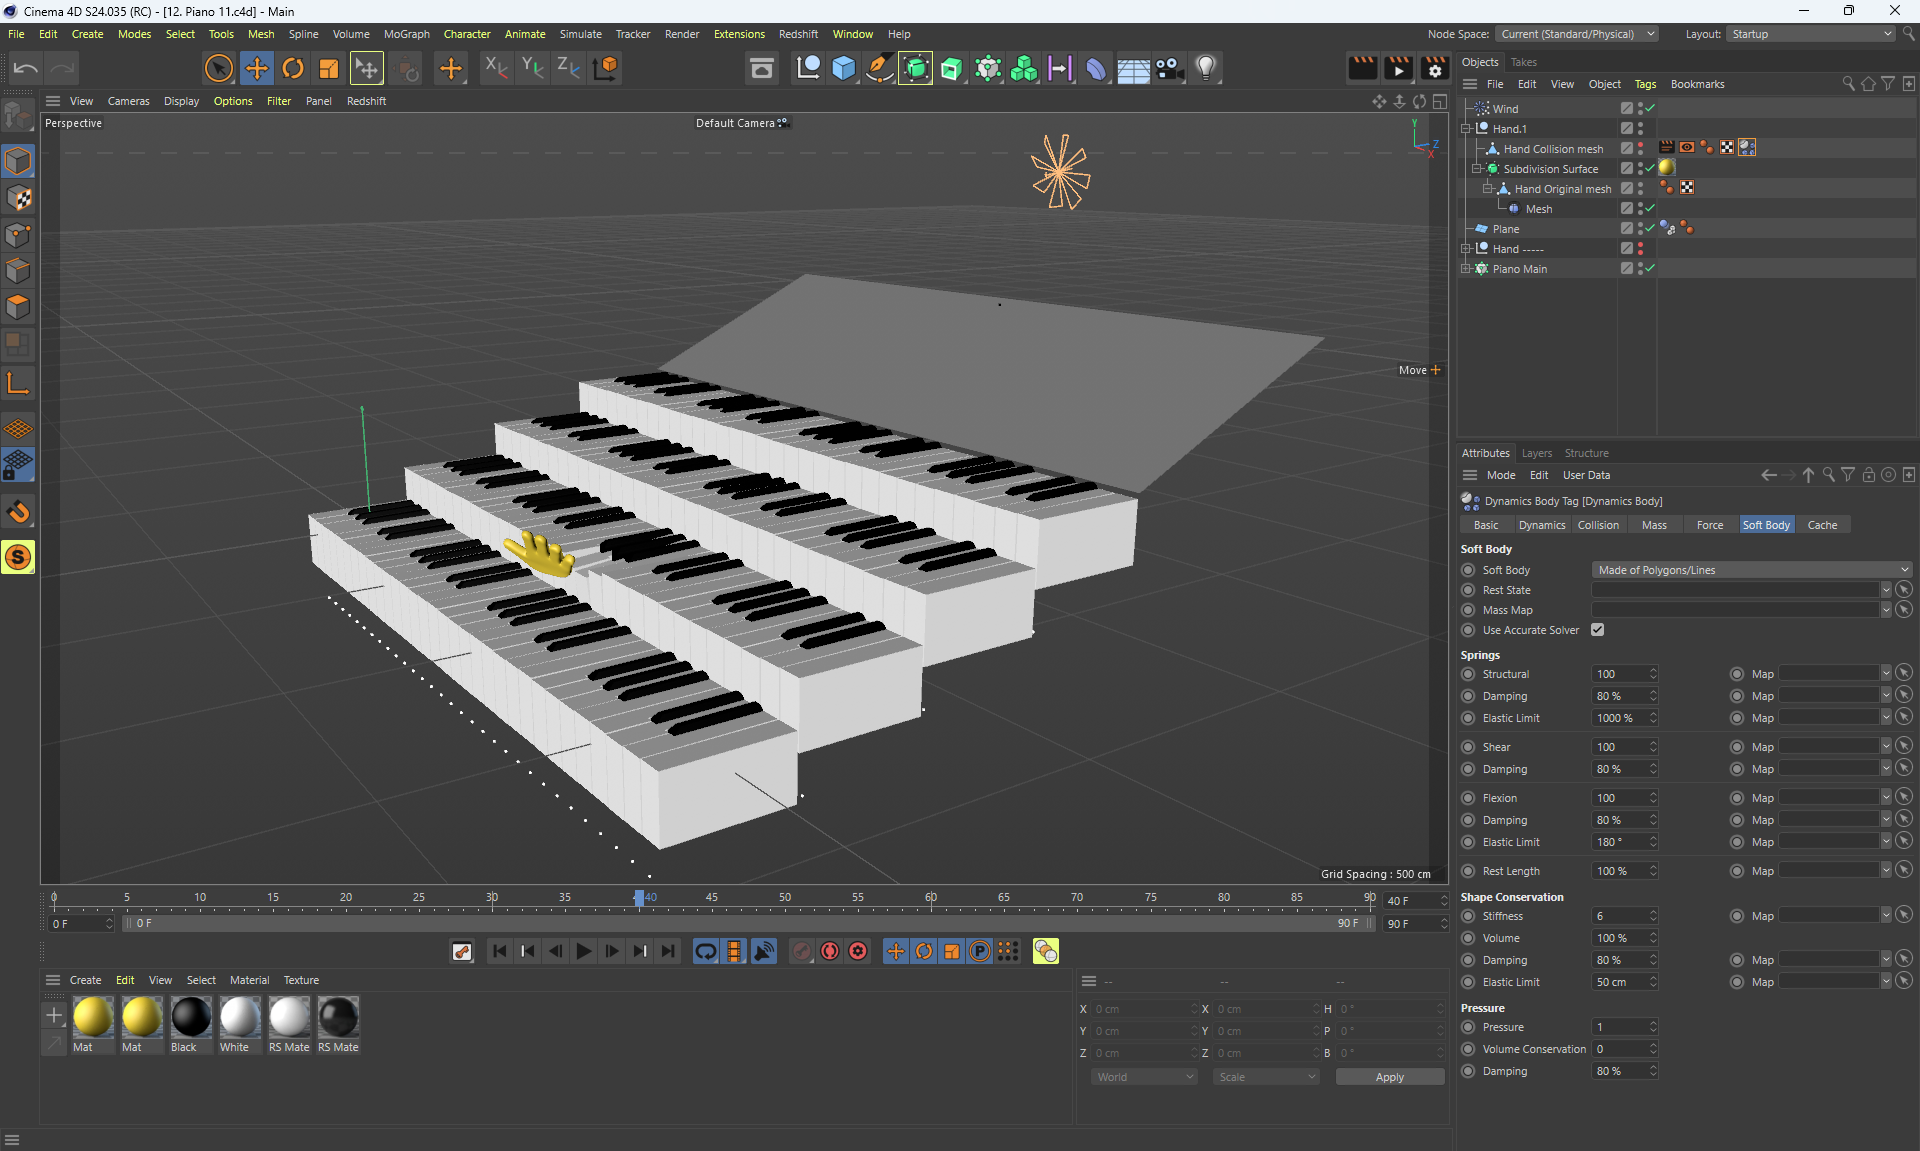
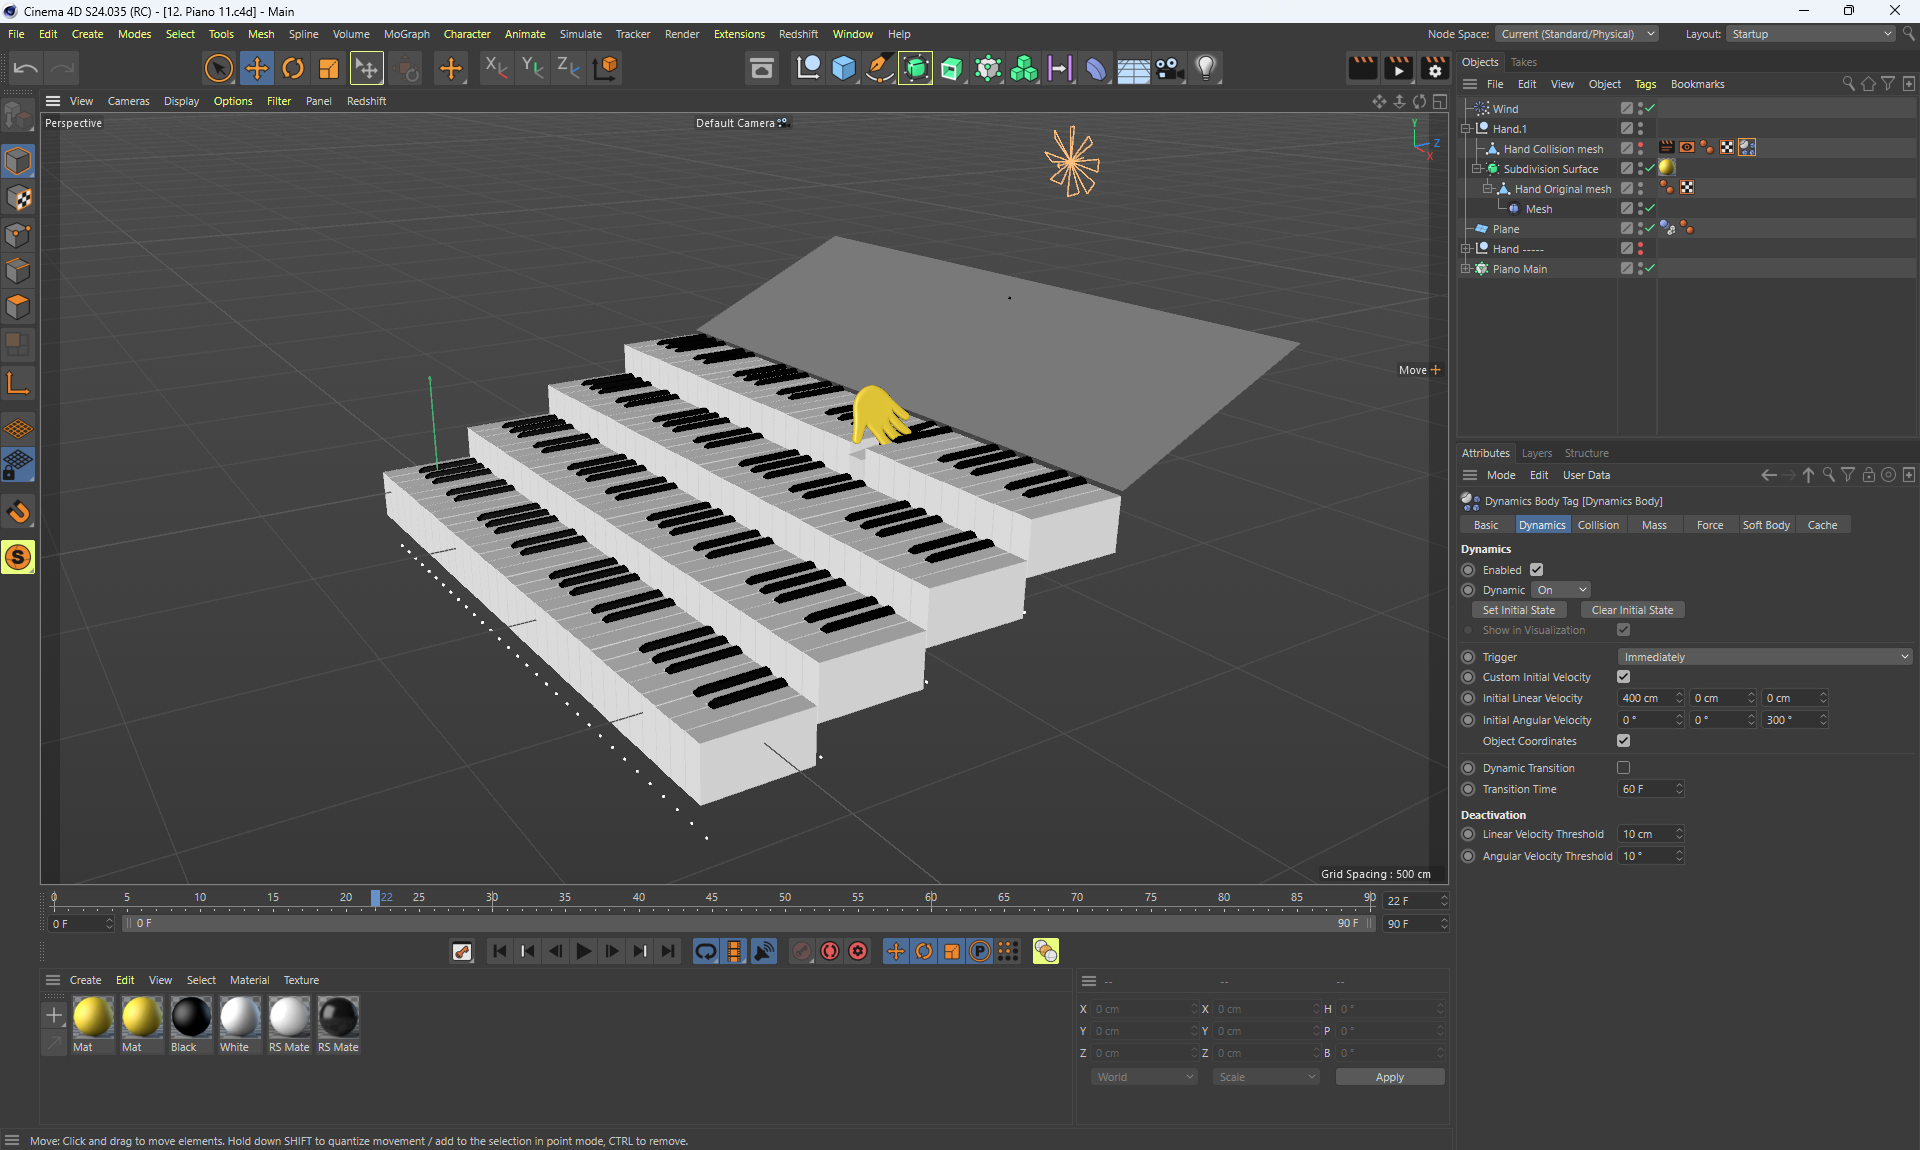
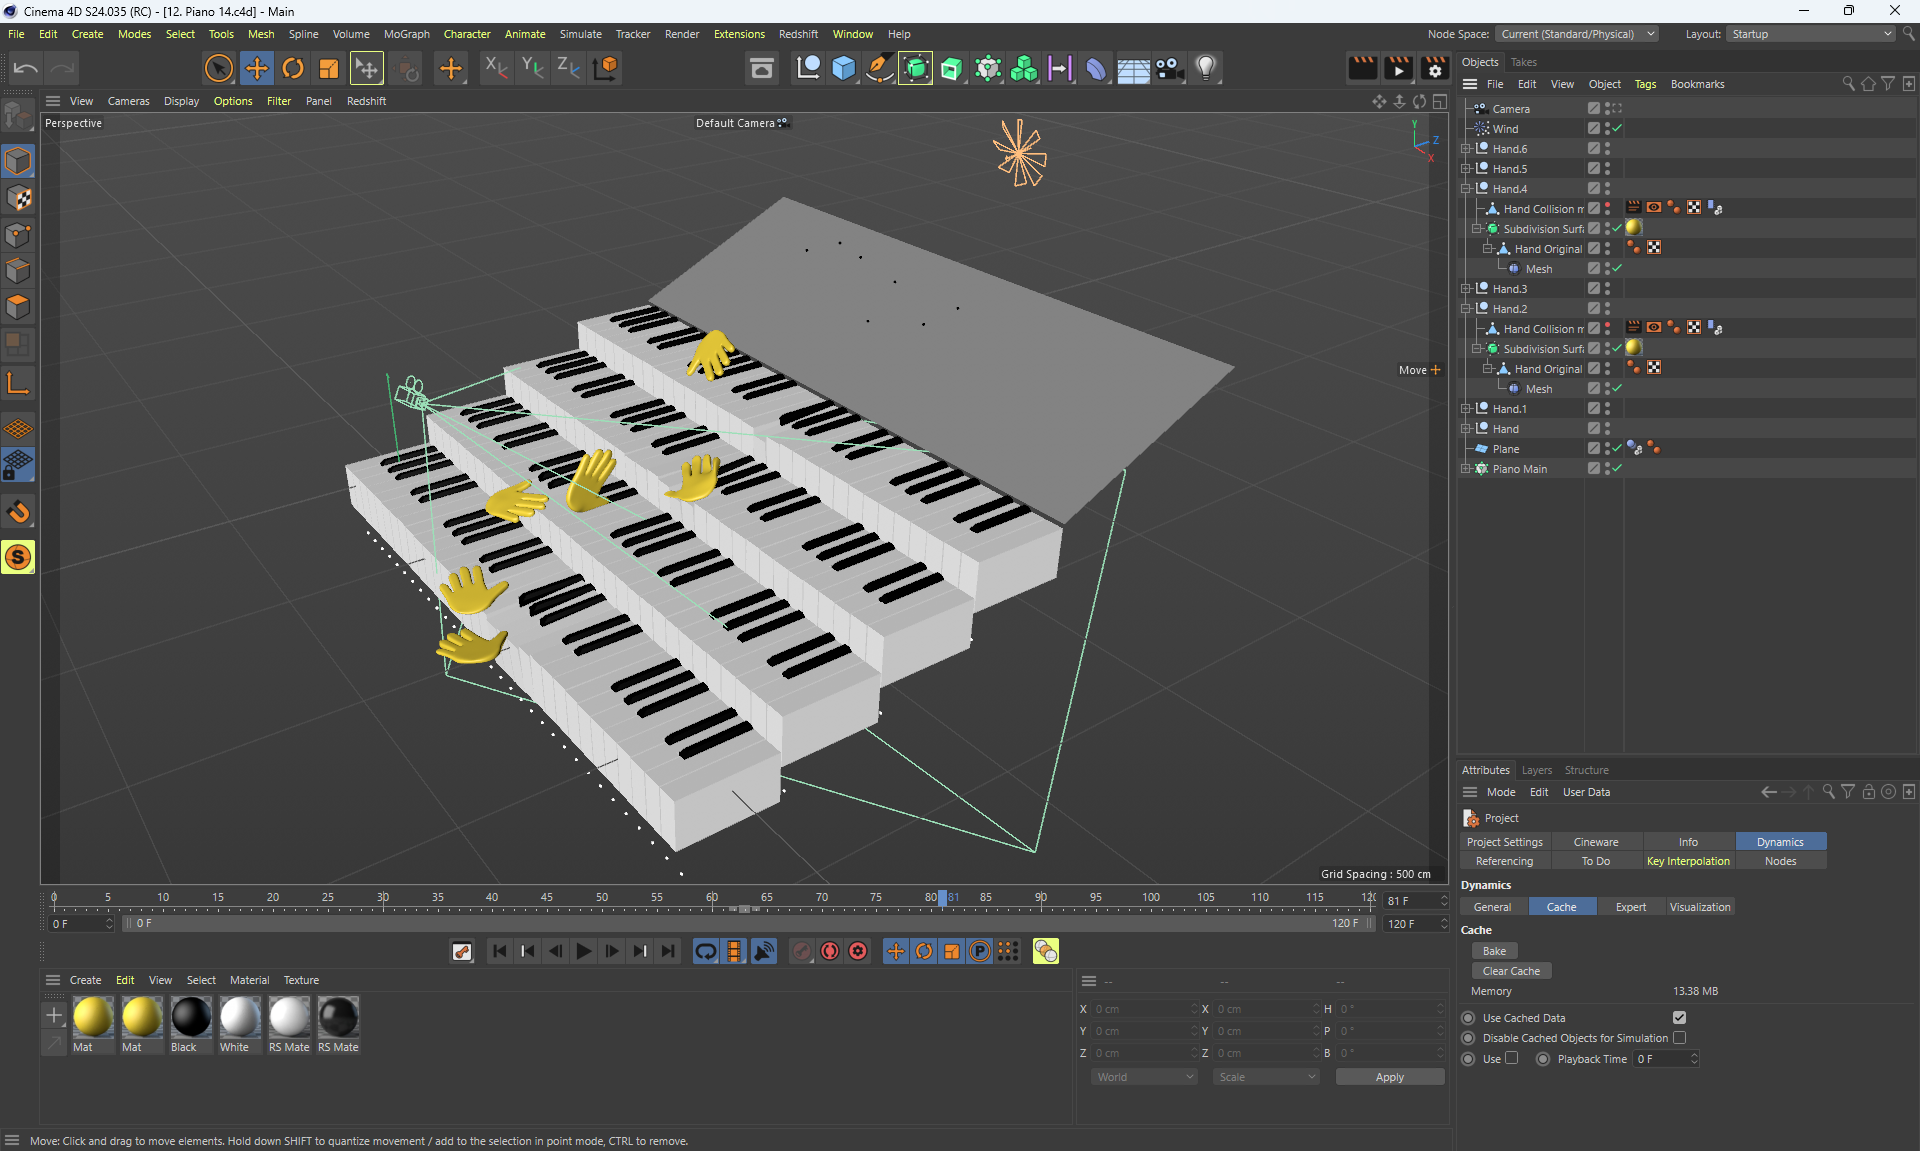
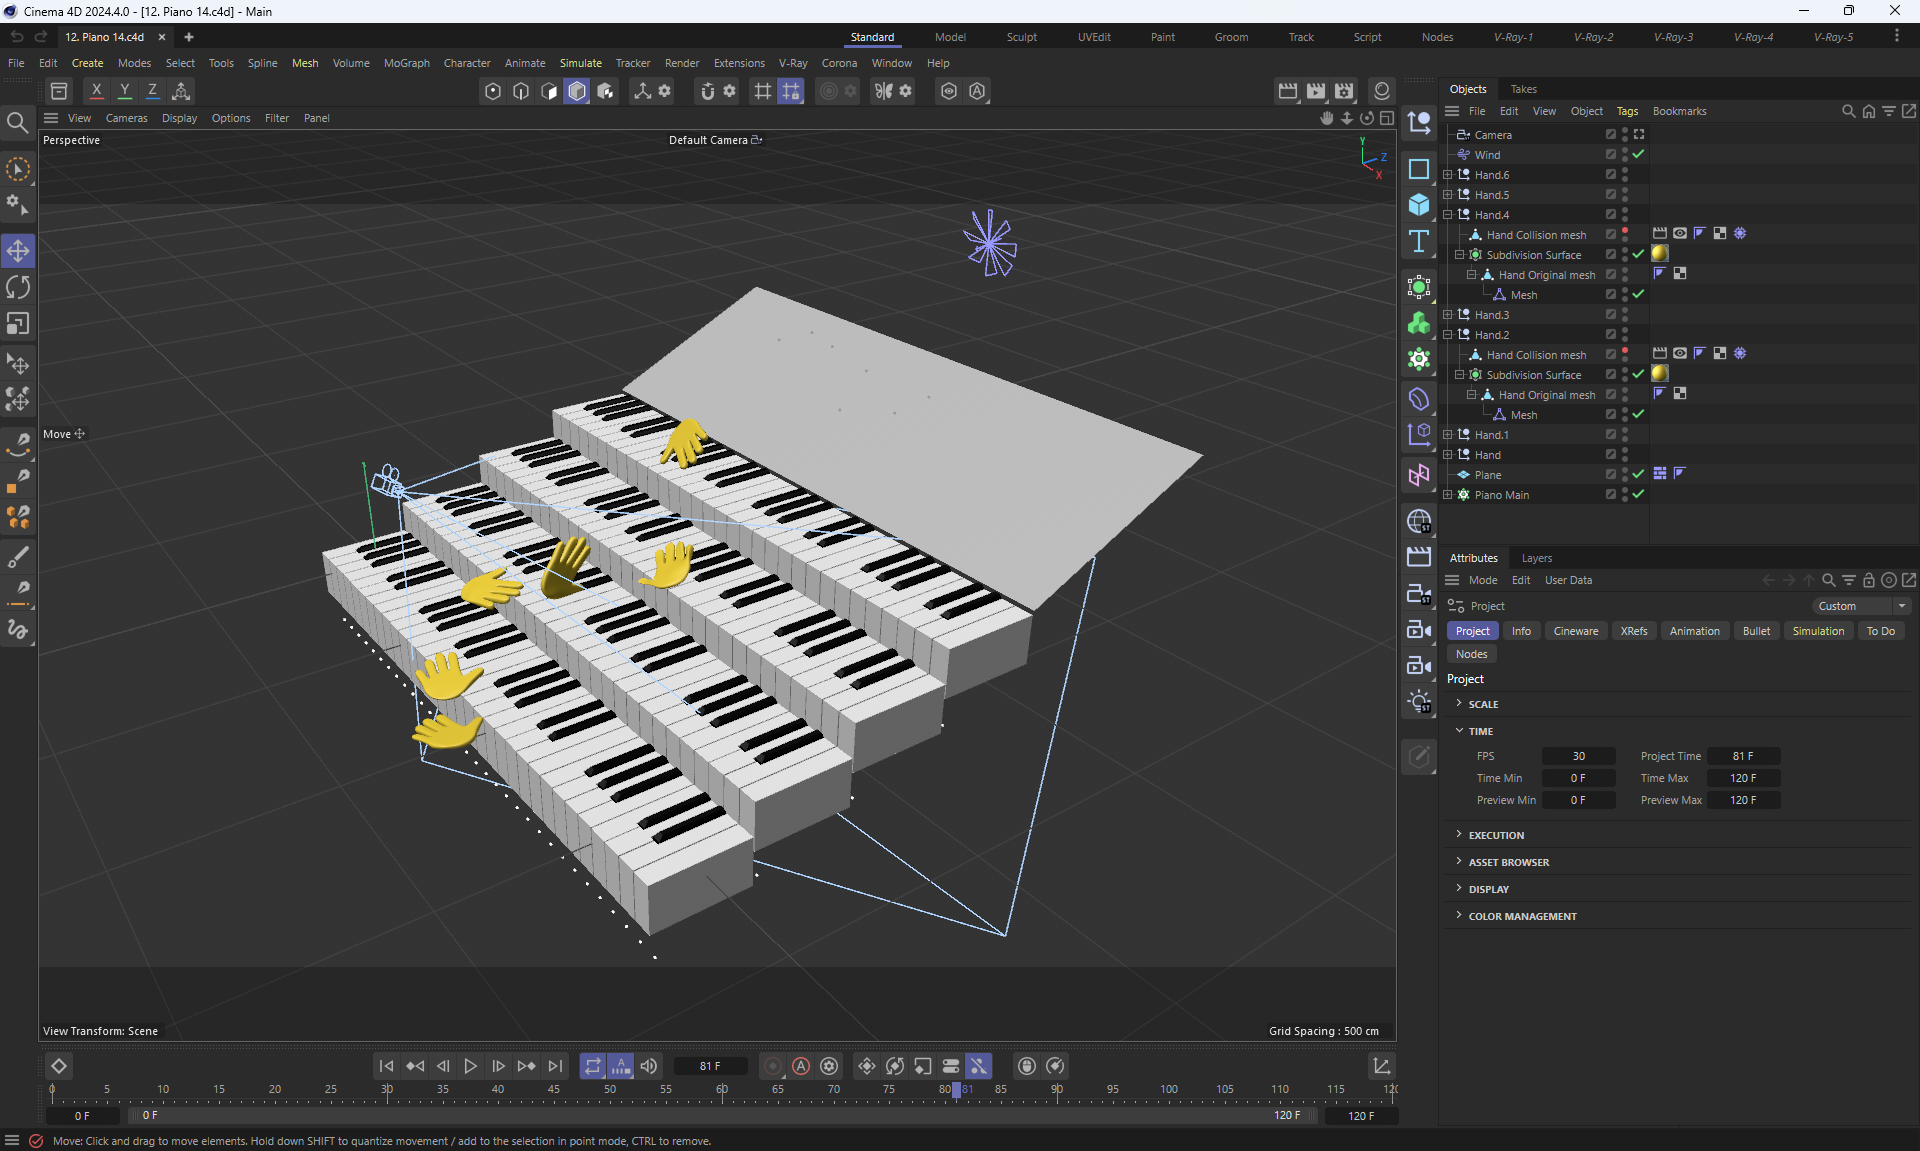
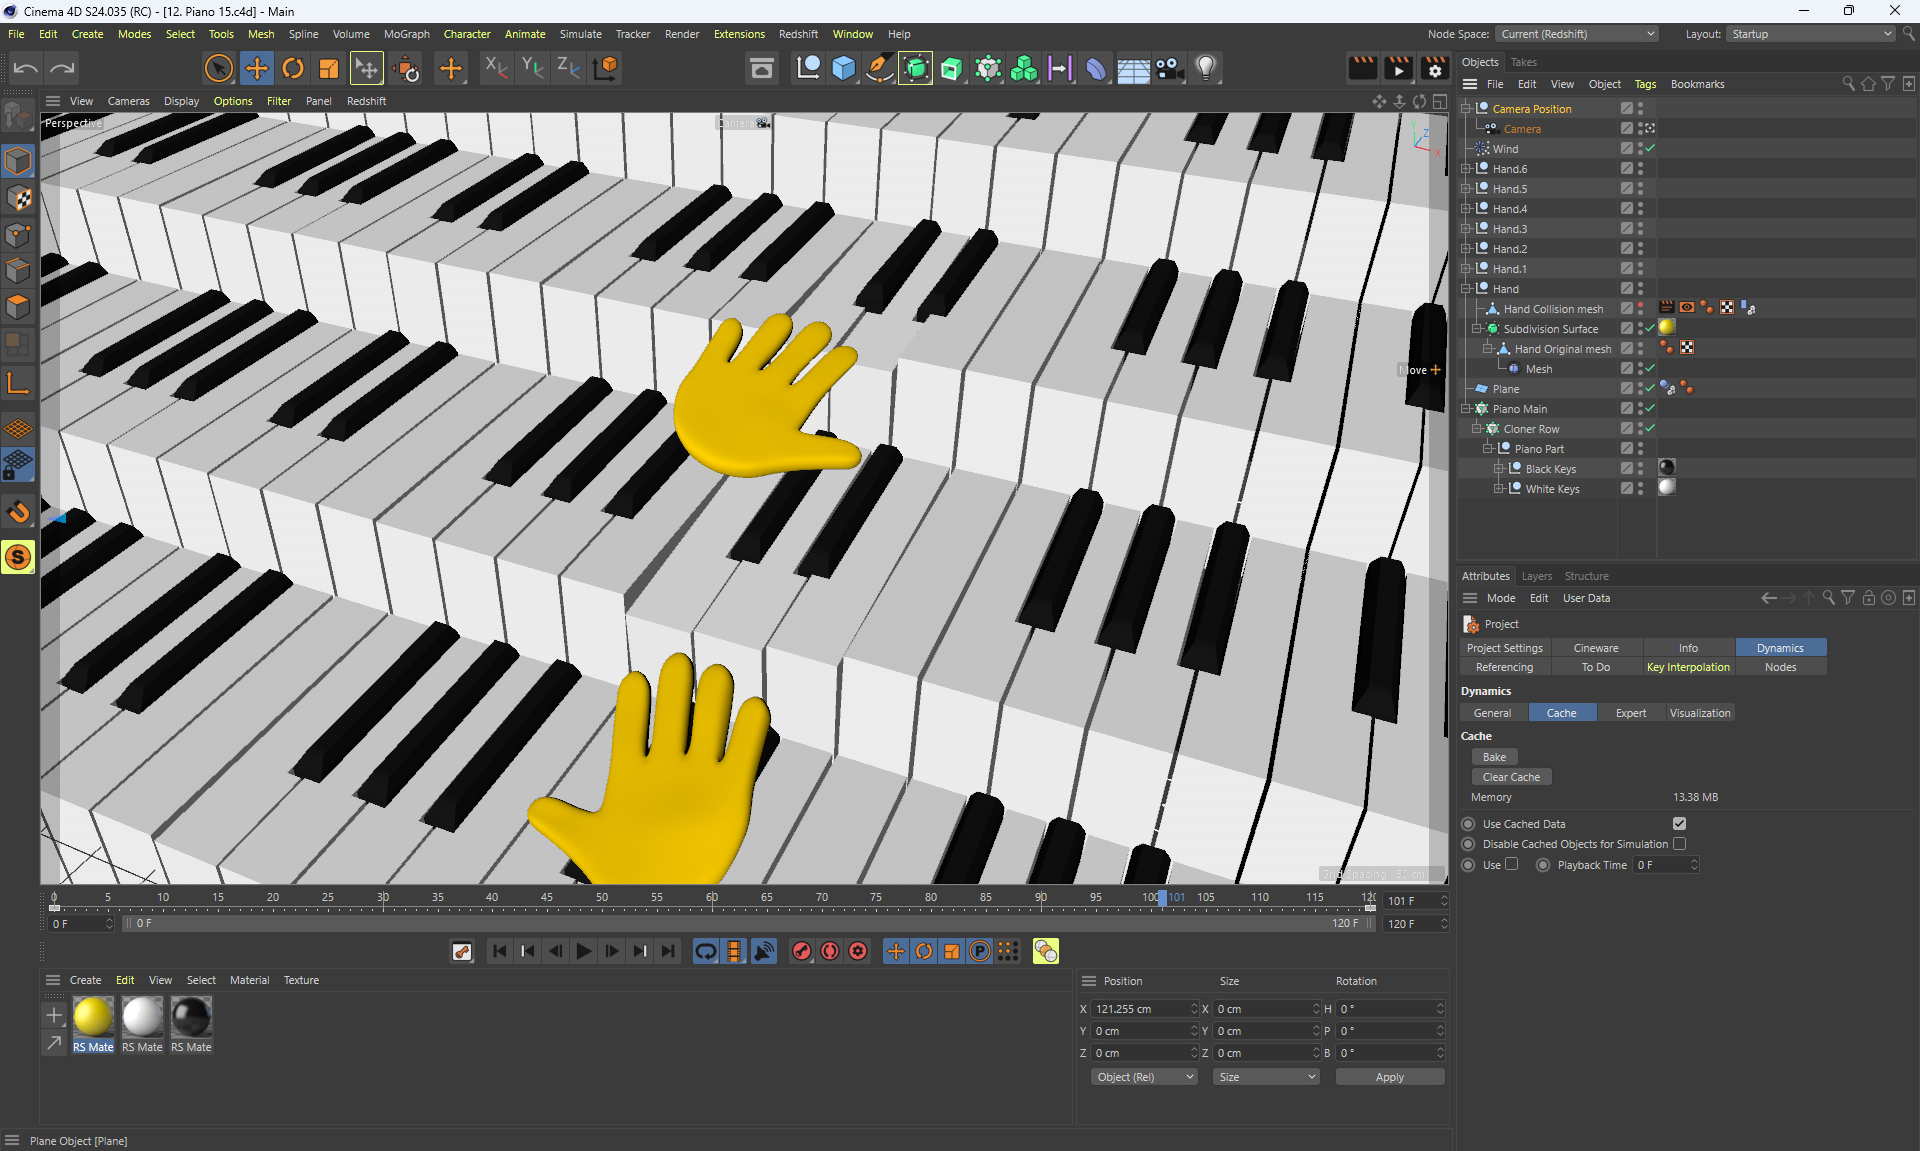
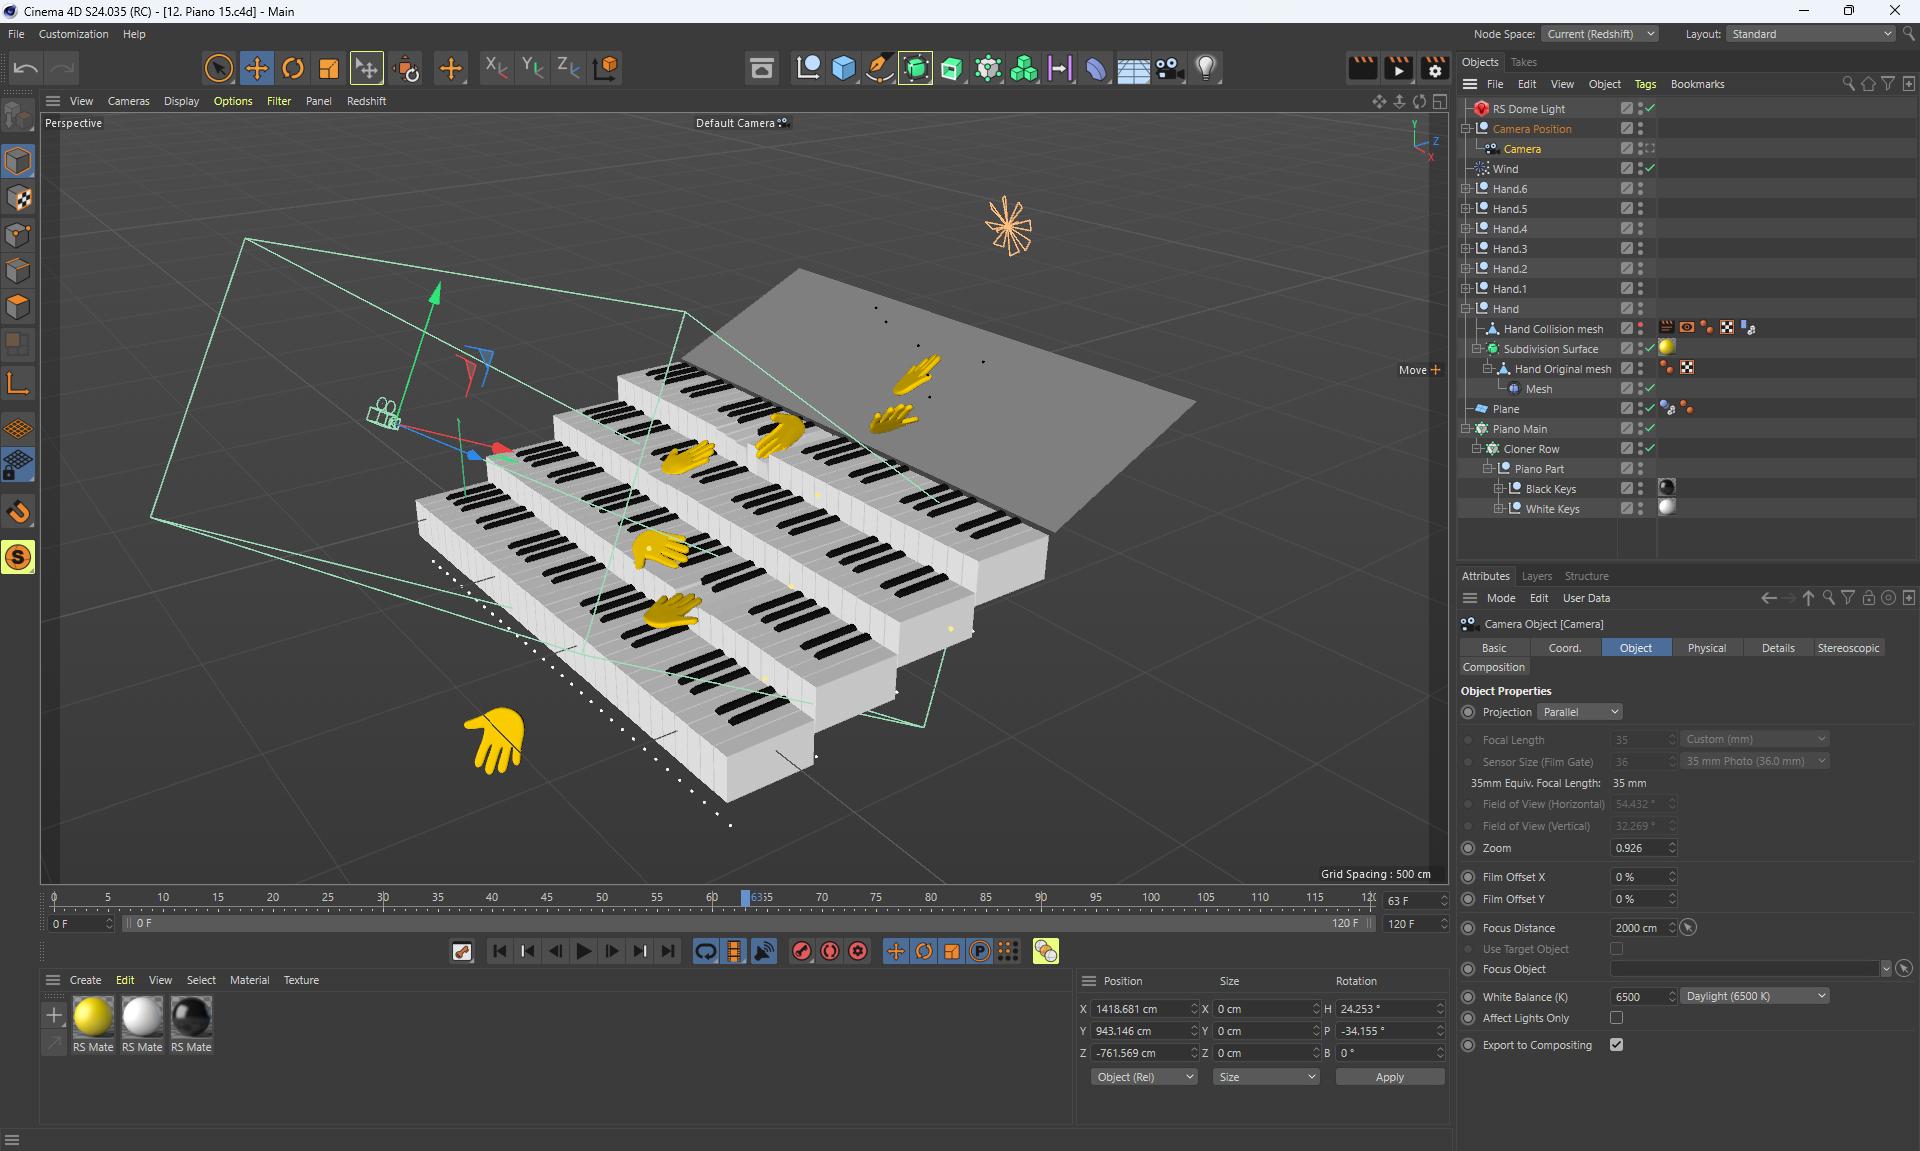
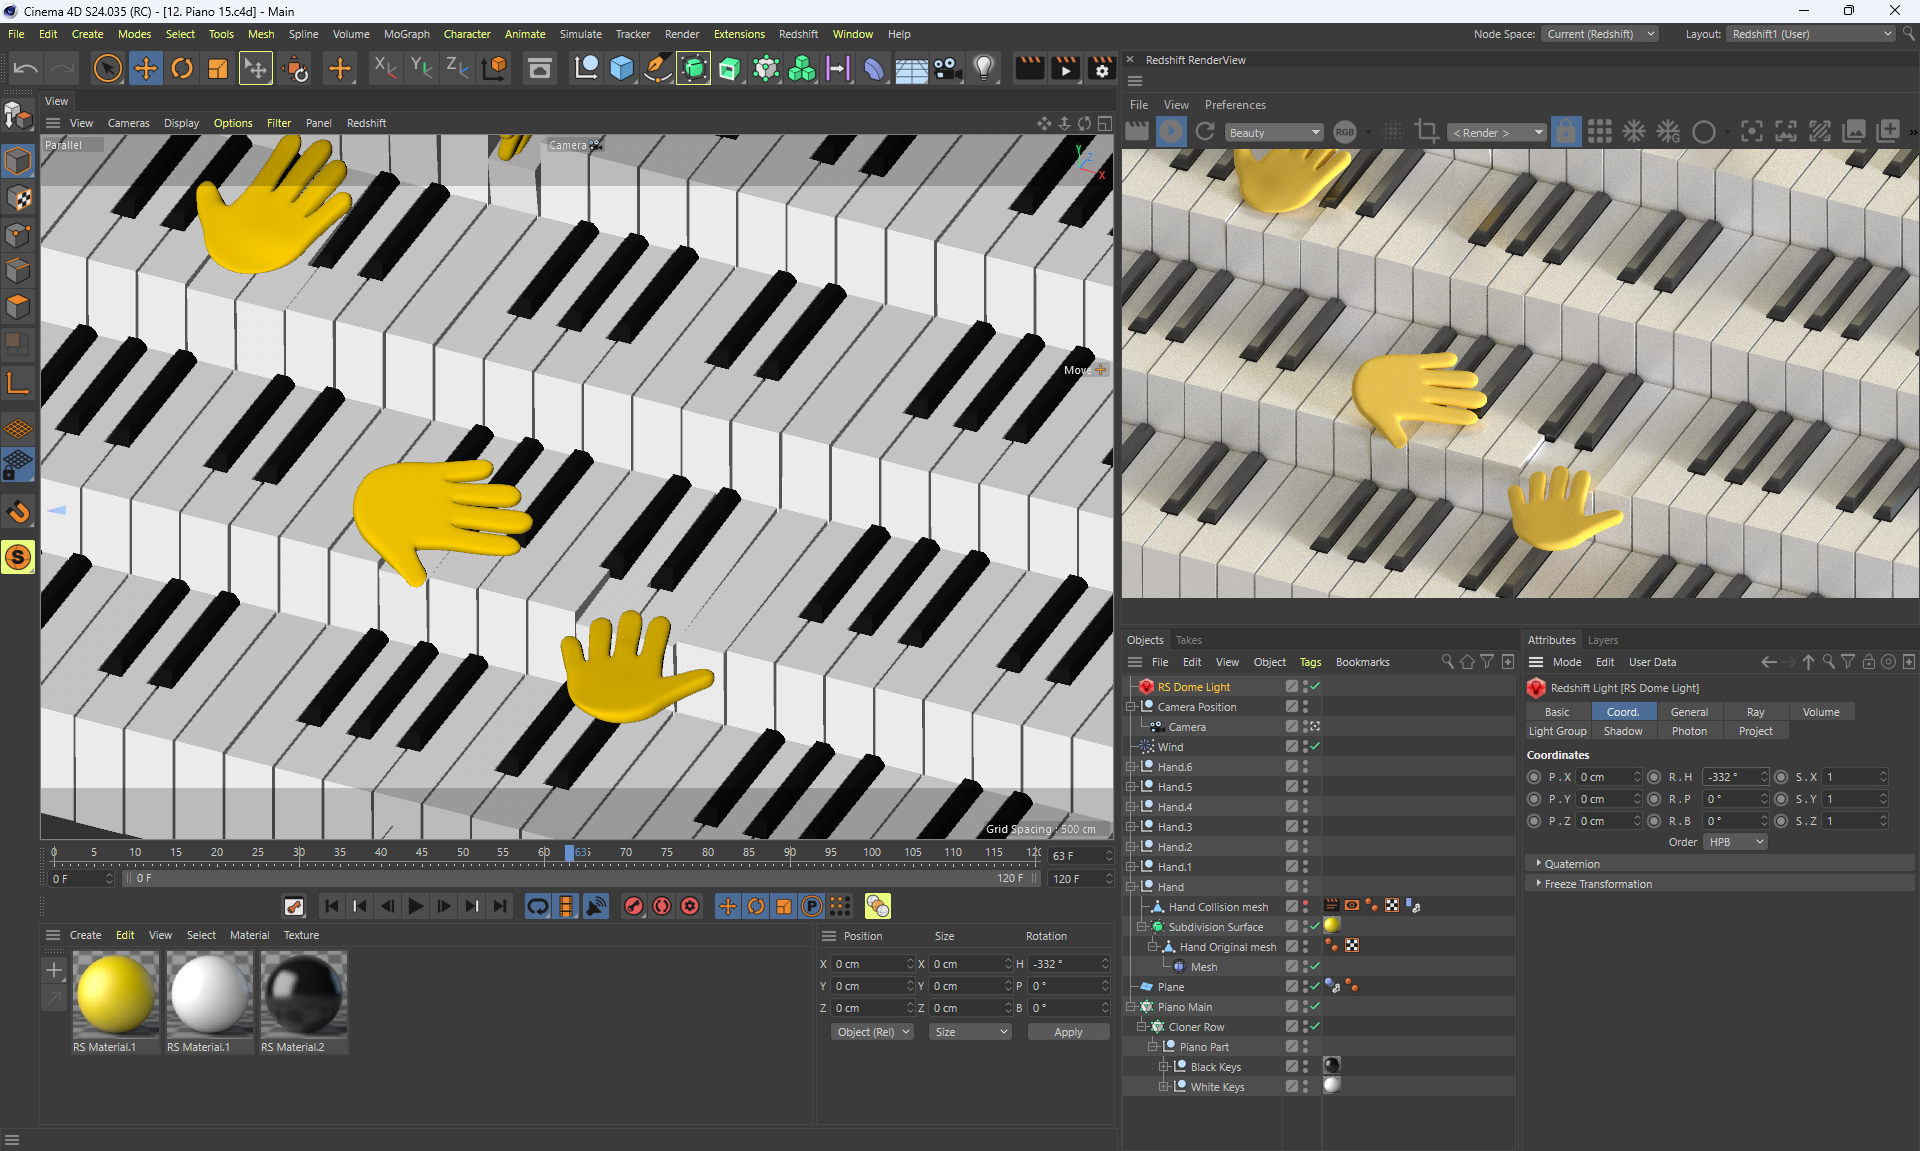
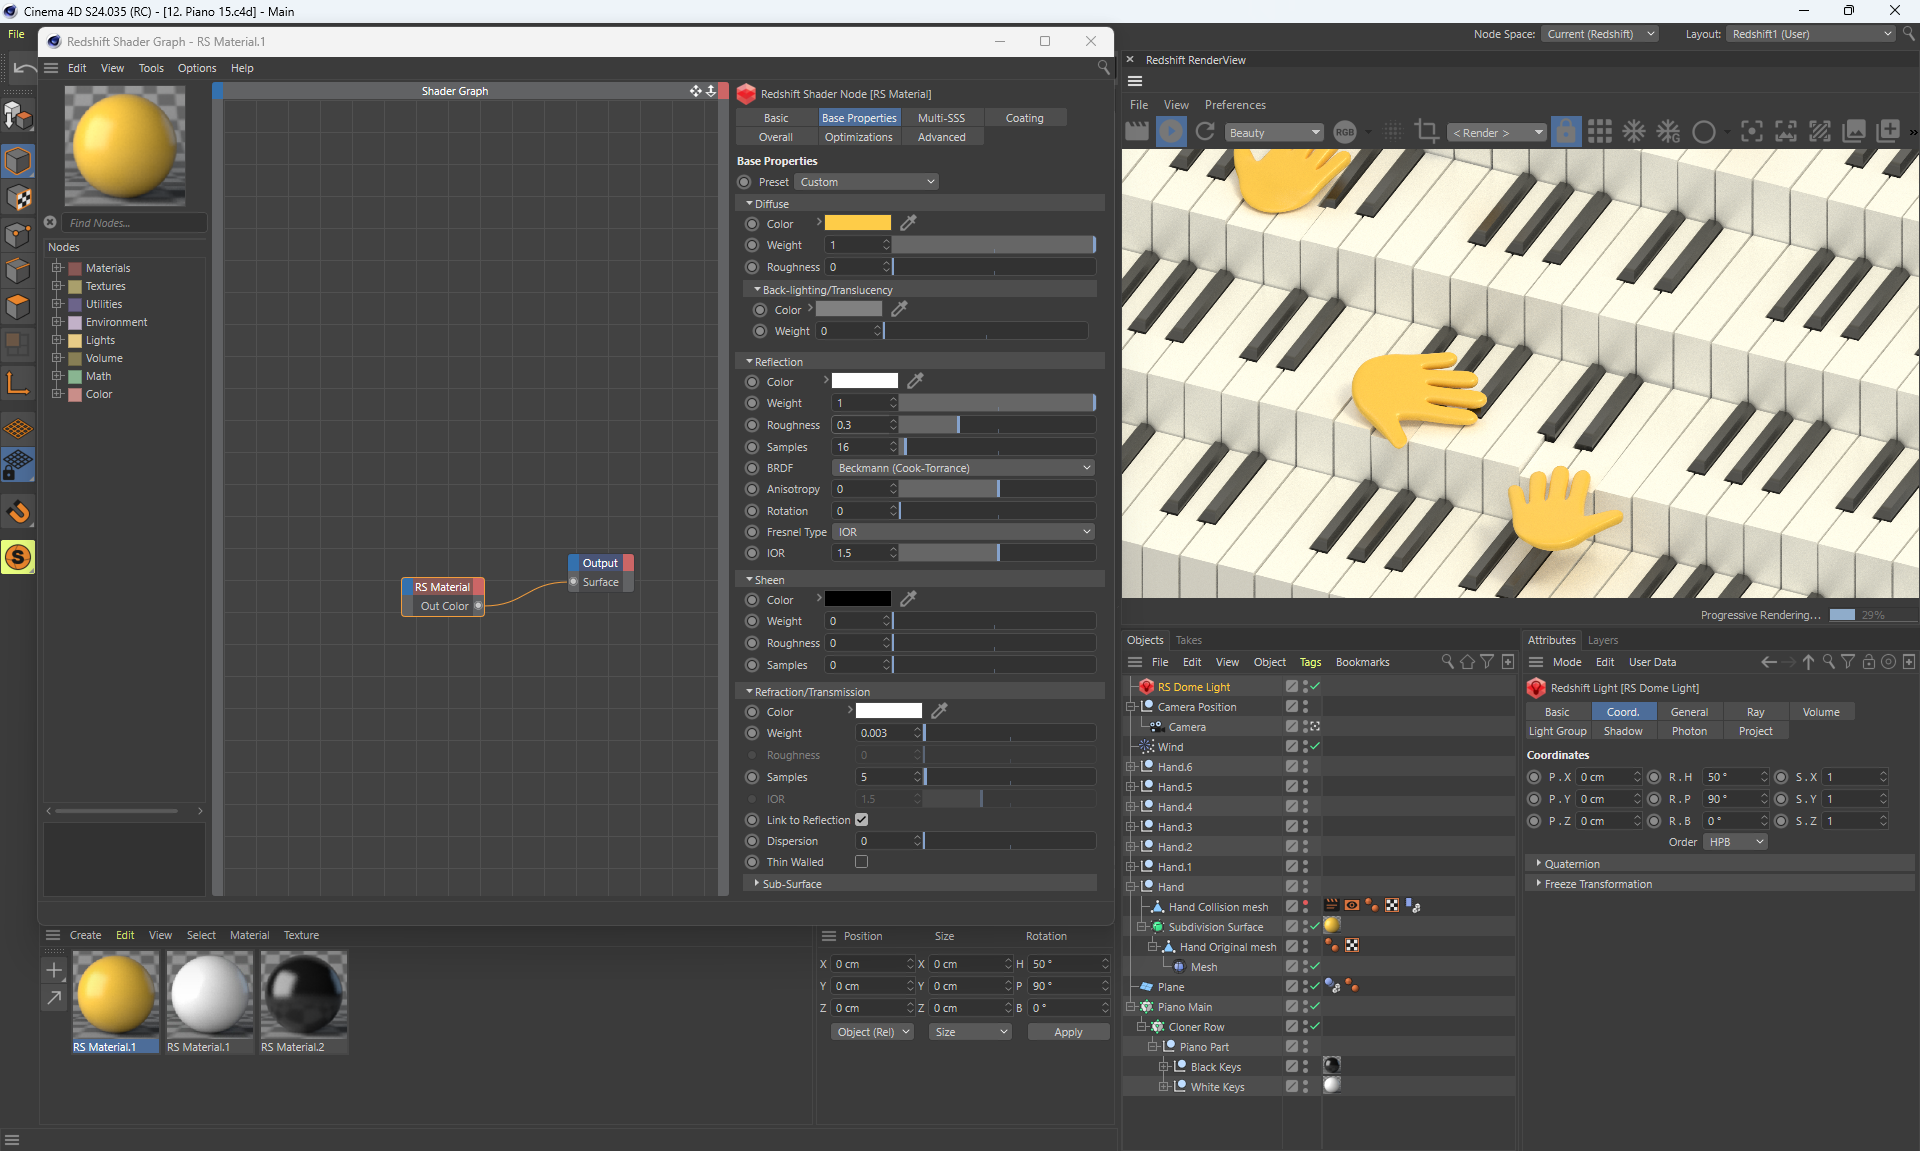
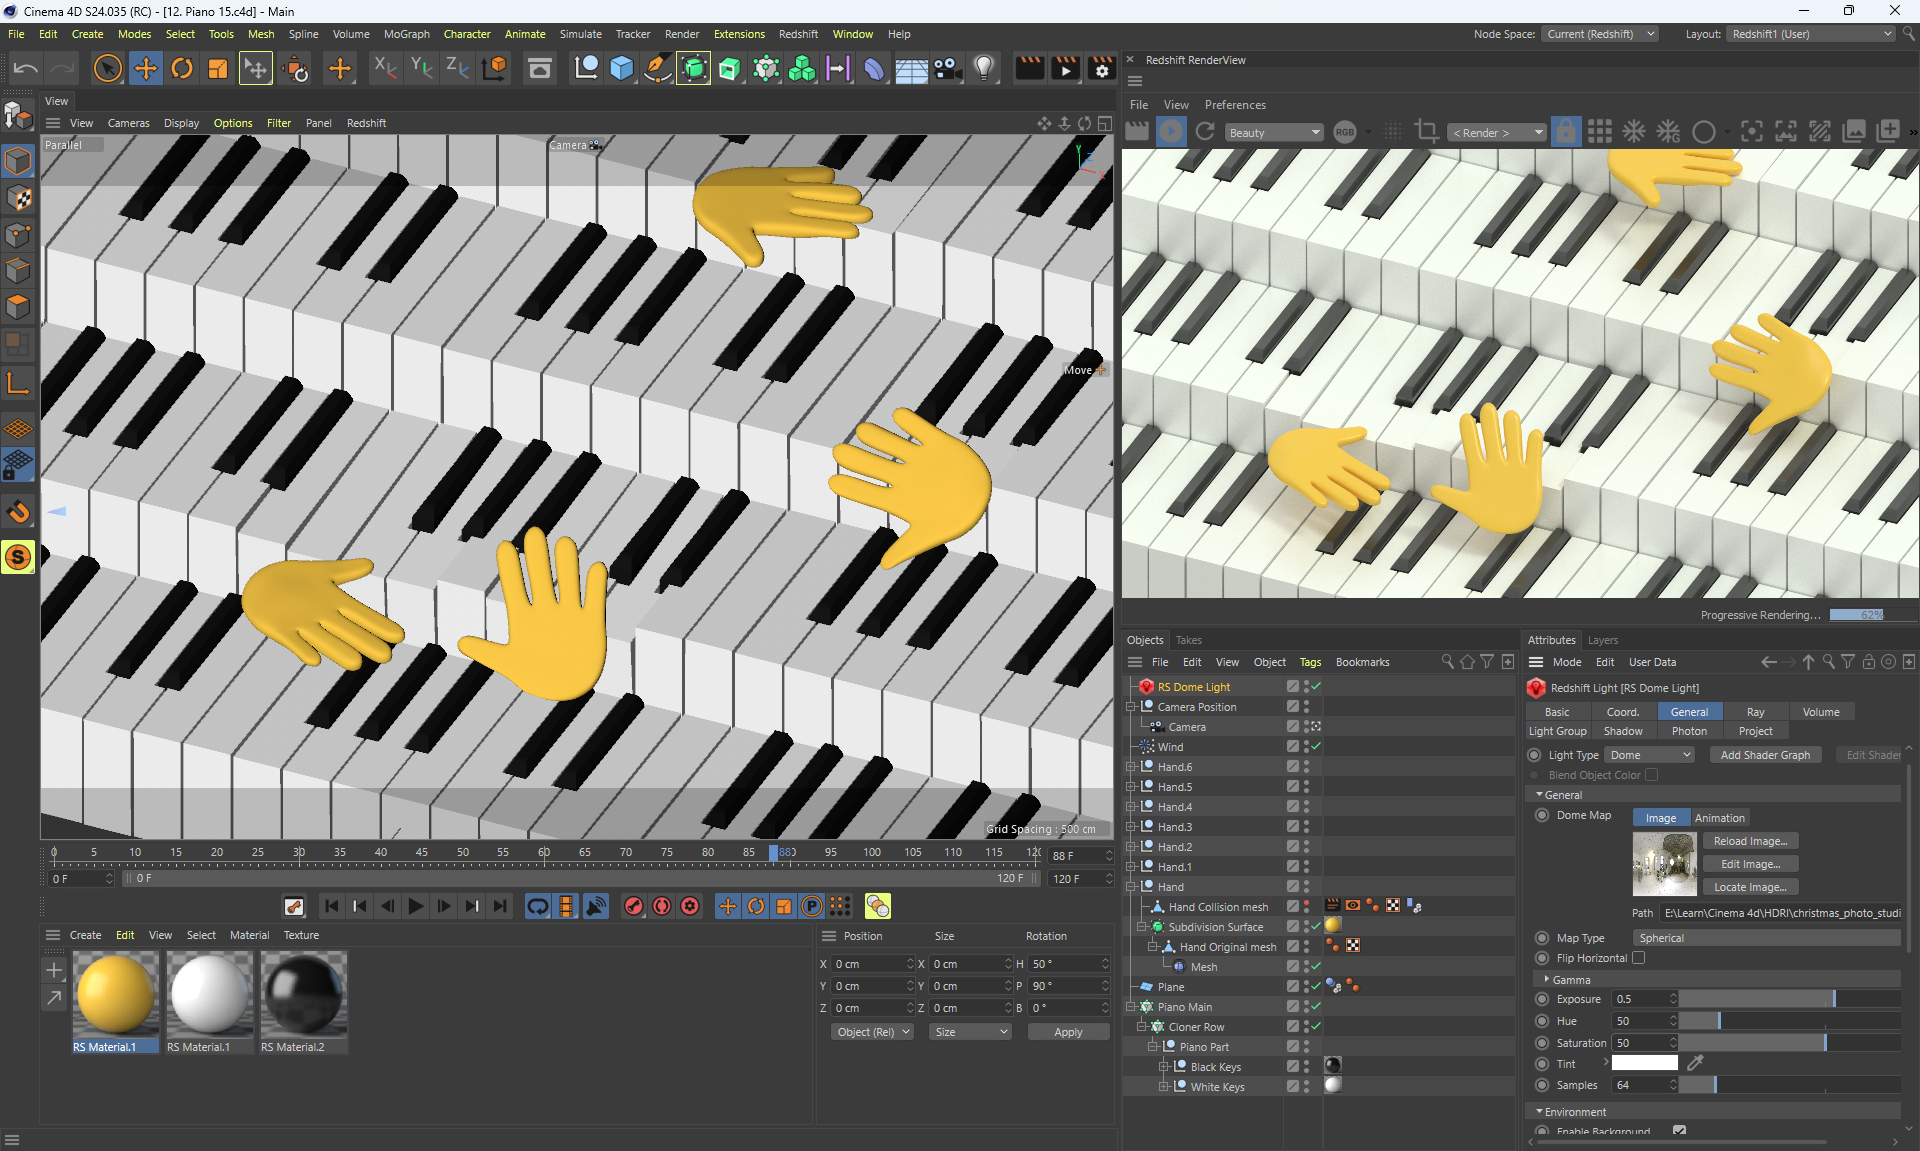
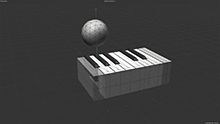
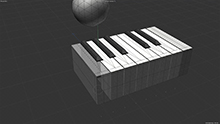
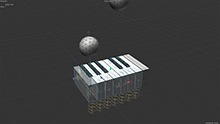
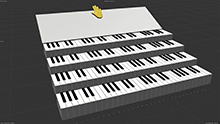
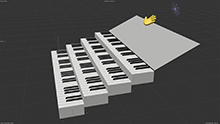
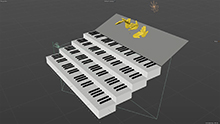
I modeled this scene from scratch, the author posted the source code with a piano only with buttons without any settings for animation.
Example, where the author got the hand design and animation of the handes falling on the piano.
Image hands, by which I created the model. The model has no detail in space, only in one plane as in the lesson.
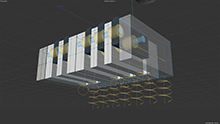
In different versions of Cinema 4D, the animation of soft bodies is adjusted, in older versions the objects did not inflate during the lesson the way they inflate in the new ones. The baked-in animation of the scene works amazingly well in different versions. In one version of Cinema 4D 2023, the animation freezes and does not play, in another latest version and in version 4D 2024, the animation will play.
I have clearly completed the lesson, adding wind with the same adjustments, and then interacting with the piano buttons and pressing on them, wanting to follow the lesson from the author, whom I do not study, and adjusting the stiffness of the springs at the piano buttons like at the lesson.
At the hour of the fall of handson the inode buttons, I found other secondary buttons in the cloner, wanting to be innocently awakened.
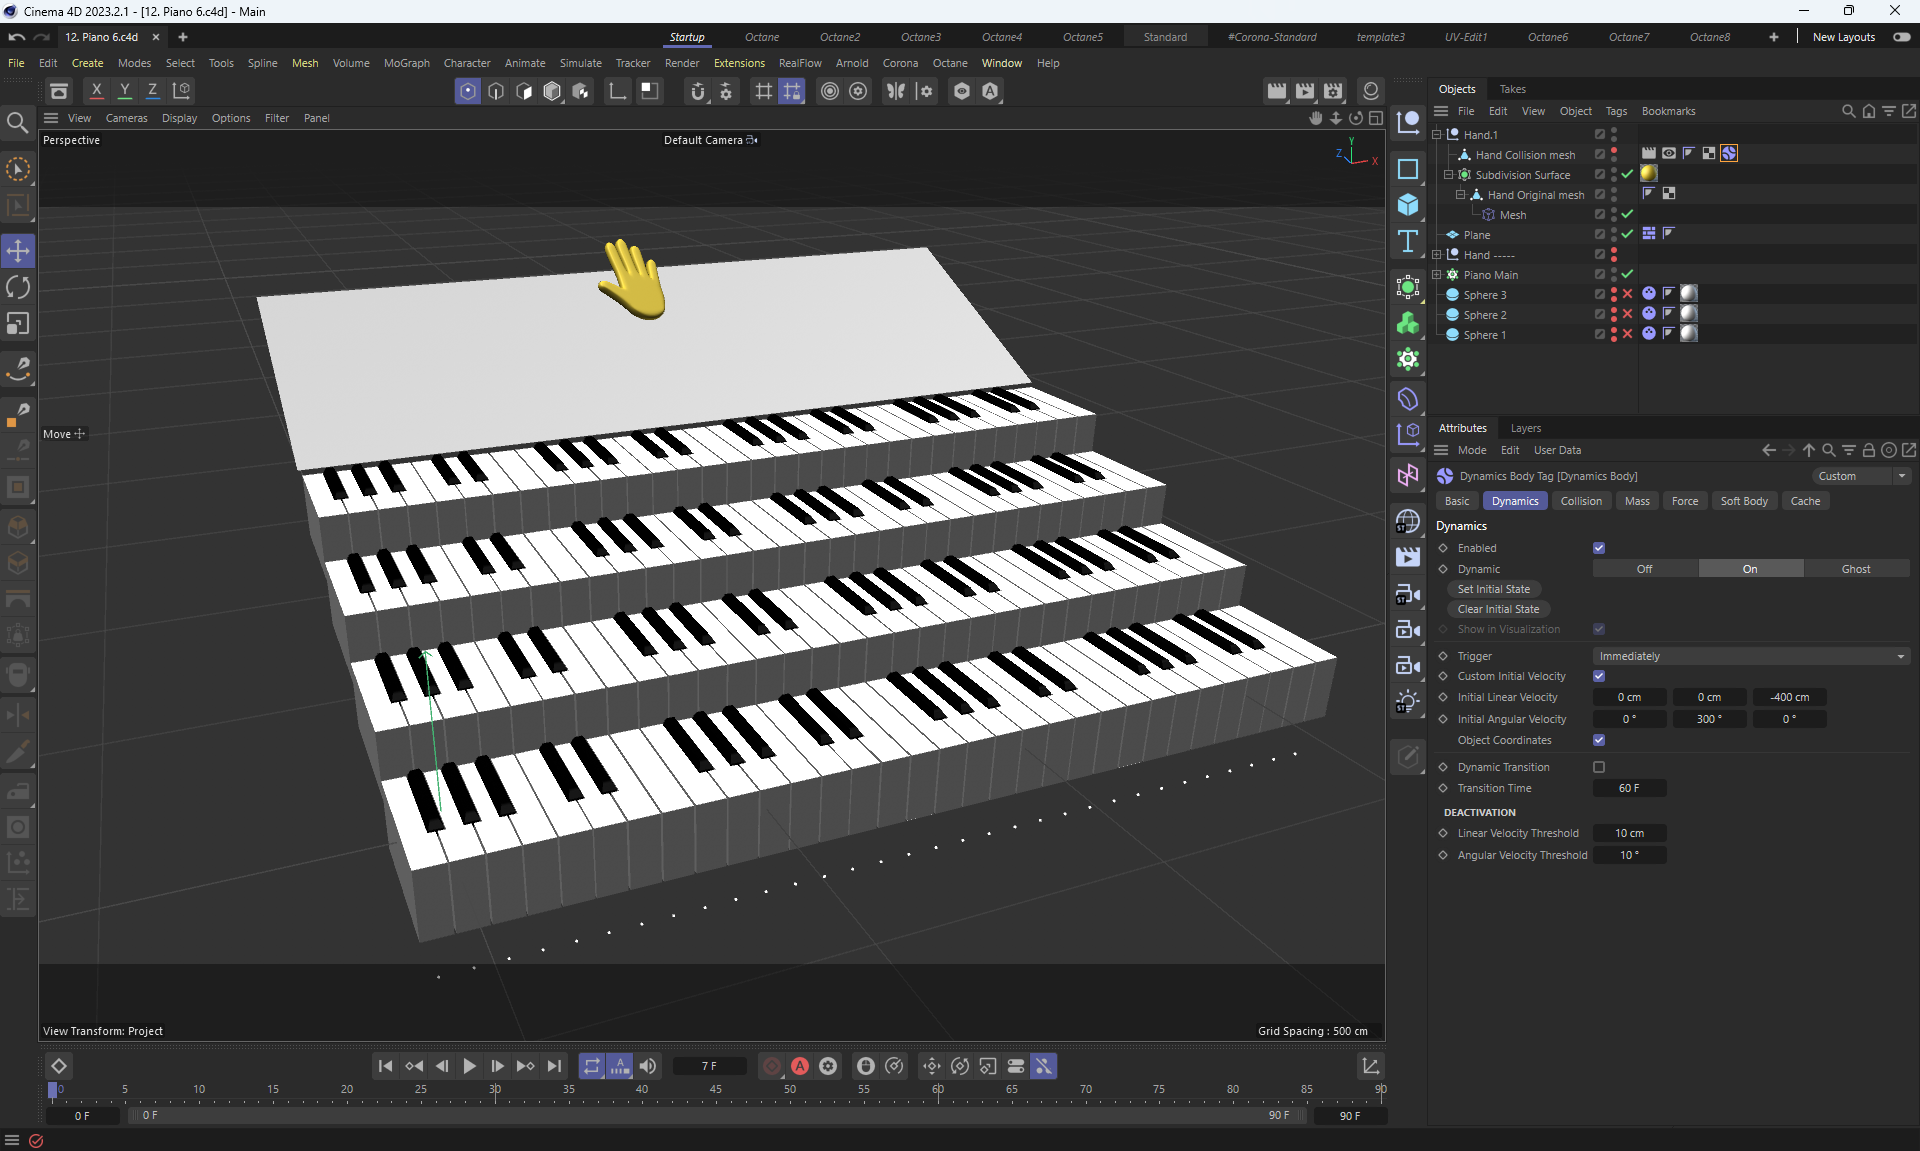
It’s amazing to see the adjustment of soft bodies, adjustment of the accuracy of the rendering in different versions of Cinema 4D, which is responsible for a lot of glitches. For example, the wind began to blow strongly on the buttons and the stinks sank, although the author had the wind without blowing the buttons with the same adjustments. Then, with a slight change, the settings started not interacting with the buttons.
The handsdo not spring like the author during a lesson, but fall like a bag of water.
If the hand starts to fall during the fall, there may be glitches in the scene, the animation may take a long time to bake and then there may be untransferable spills of parts of the penzl throughout the entire scene and animation may be wrong.
Also, in older versions of Cinema 4D 24, 26, when changing the accuracy adjustment in dynamics: Steps per Frame, Maximum Solver Iteration per Step and Error Threshold, the scene does not hang, while in the version of Cinema 4D 2023 the scene freezes.
I wonder if animation with baking dynamics works in Cinema 4D 24, works in Cinema 4D 26, but stops working in Cinema 4D 2023, but works correctly in Cinema 4D 2024.
I tried a lot of adjustments to make the handsmore tractable, but they didn’t work as well as the author in the lesson. It is necessary to extensively test and refine the animation of the skin pencils so that the stench falls more beautifully and to refine the animation of the skin penile under the correct cut, fluidity and cut of wrapping. It may be necessary to change gravity, balance and other adjustments to achieve better results.
Video1 (3mb)
Video2 (2.2mb)
Video3 (1mb)
Video4 (1.6mb)
Video5 (1.5mb)
Video6 (1mb)
Video7 (1.7mb)
Video8 (2.9mb)
Video9 (2.8mb)
Video10 (1mb)
Video11 (1.1mb)
Video12 (1.2mb)
Video13 (1.6mb)
Video14 (1.4mb)
Video15 (2.5mb)
Final Video (14mb)
Final image
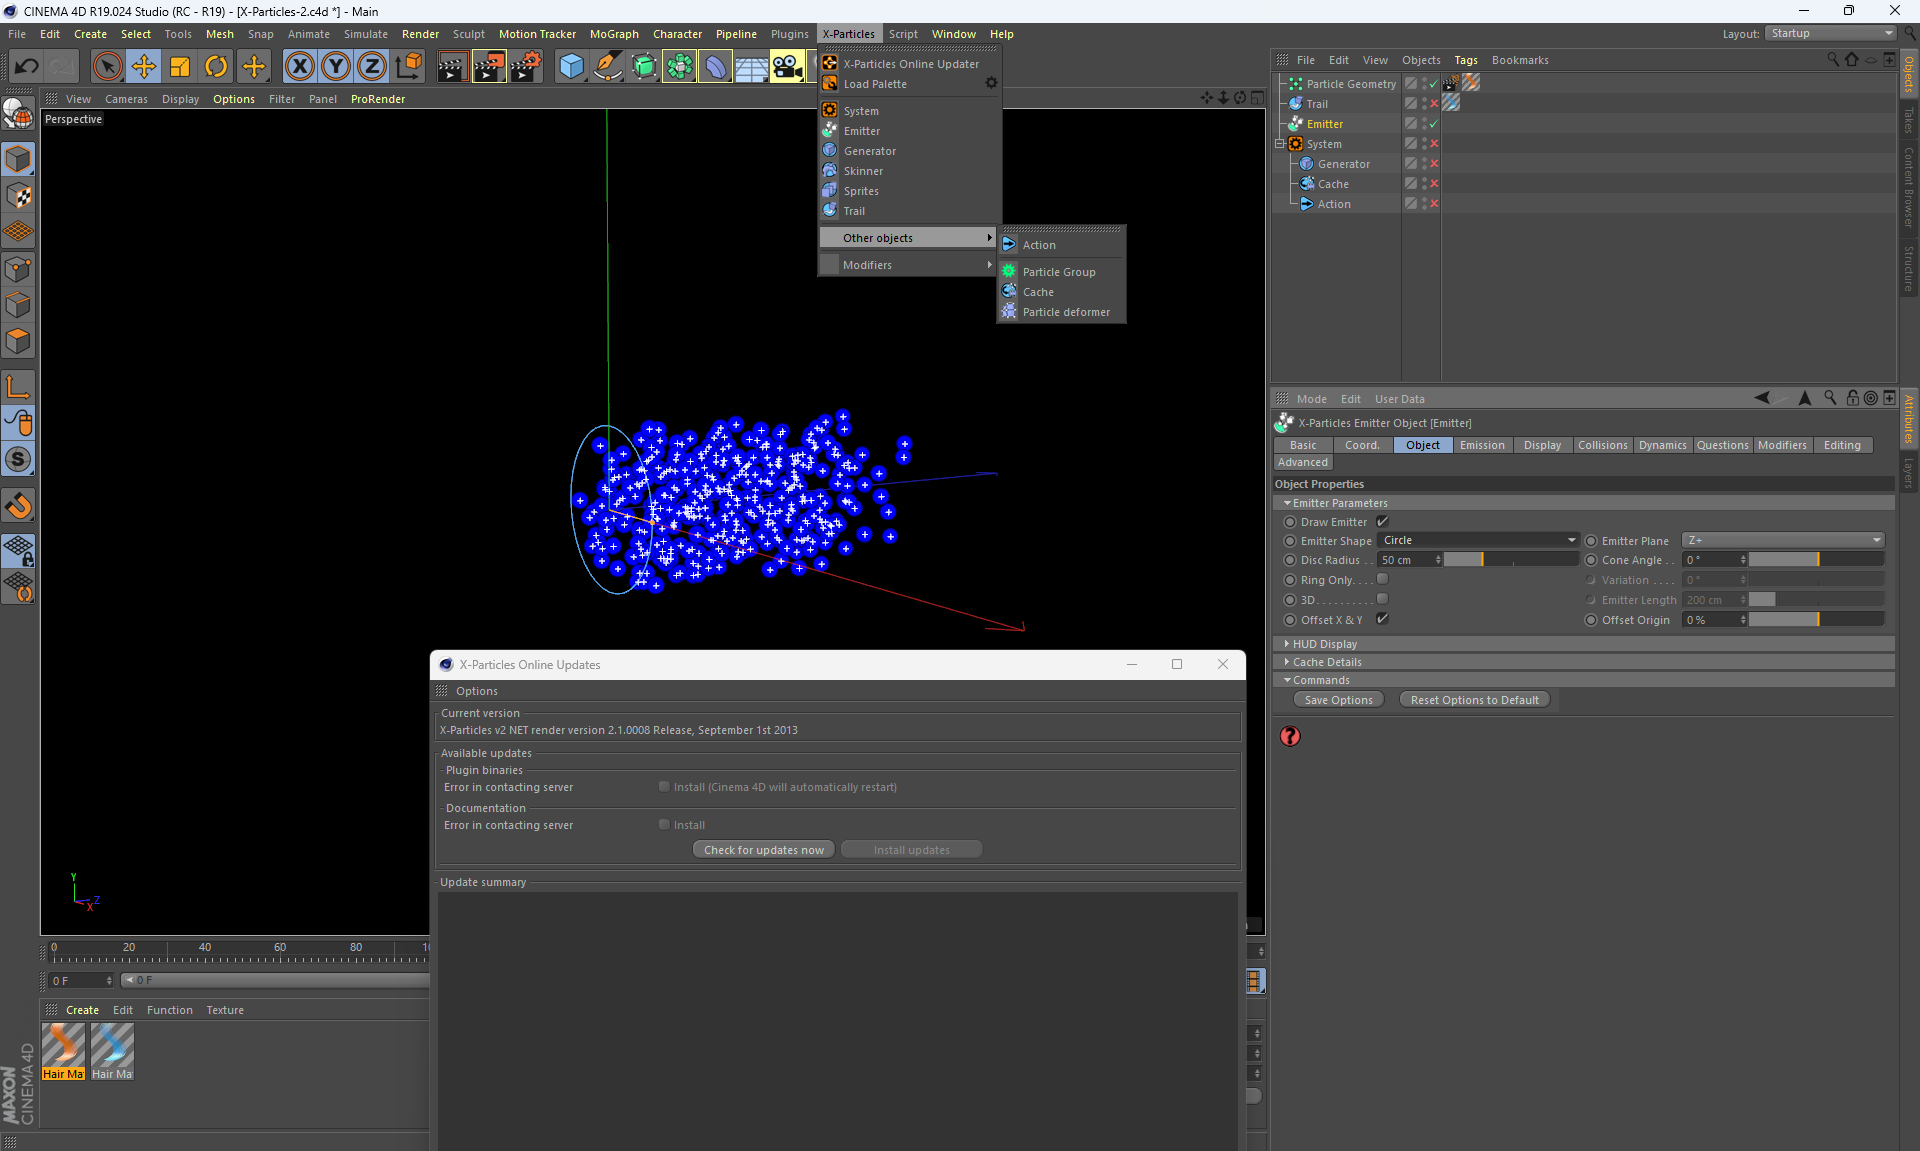
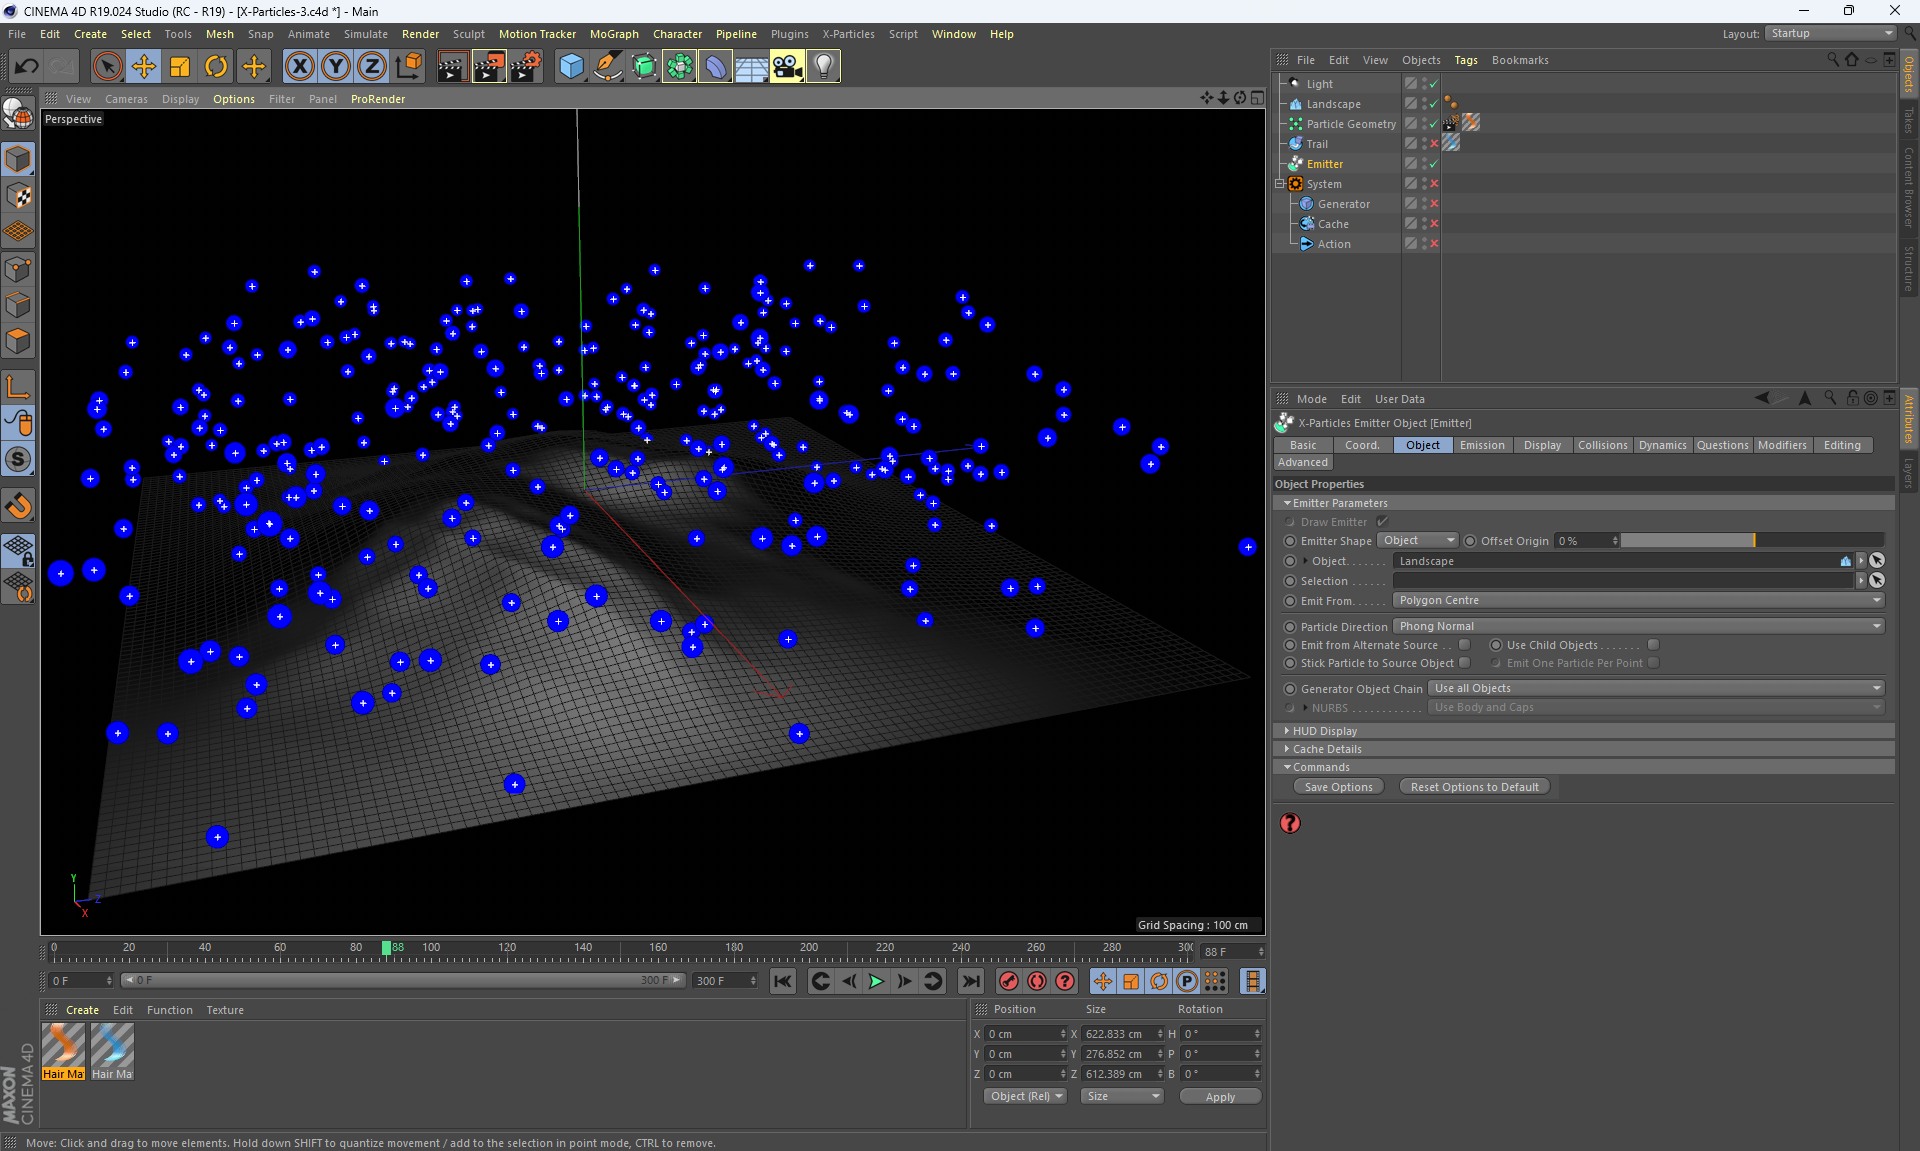
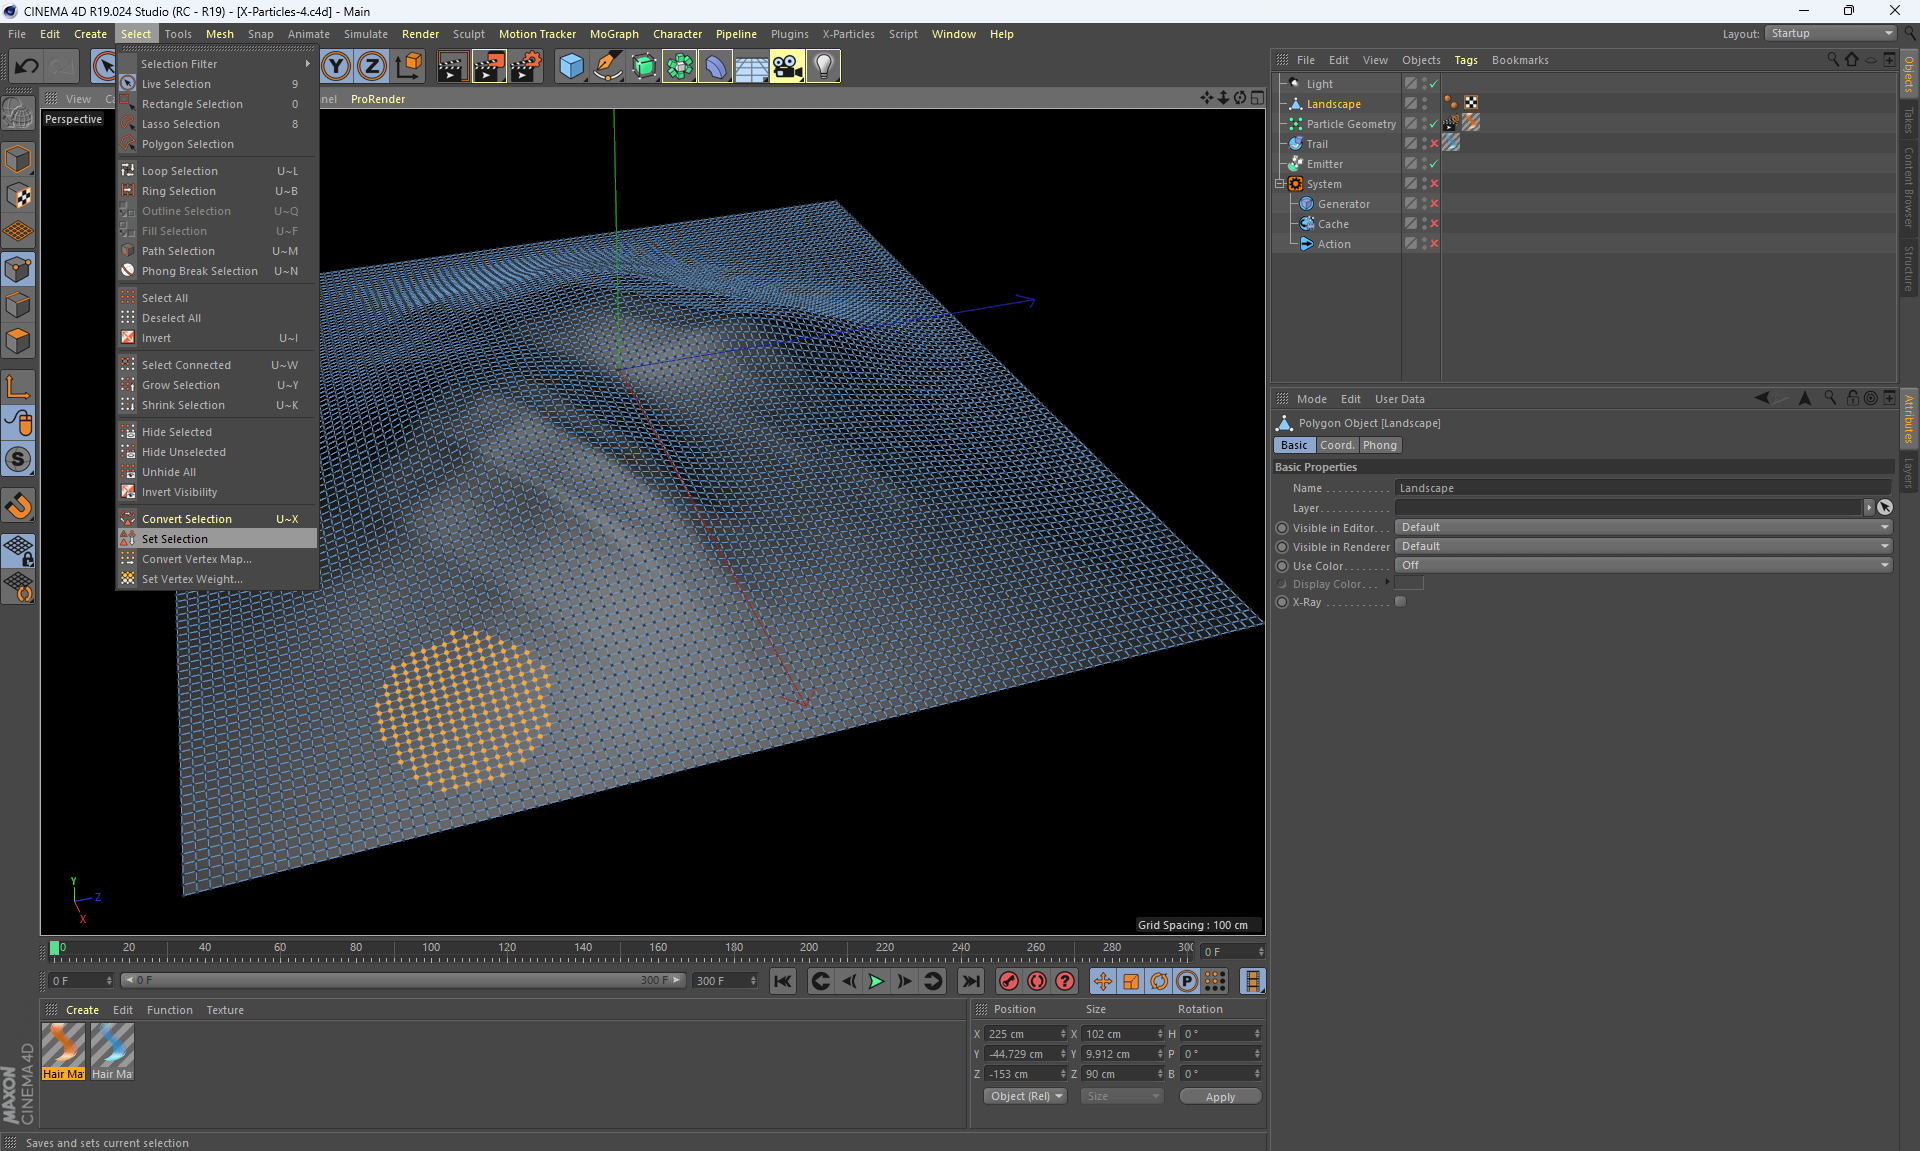
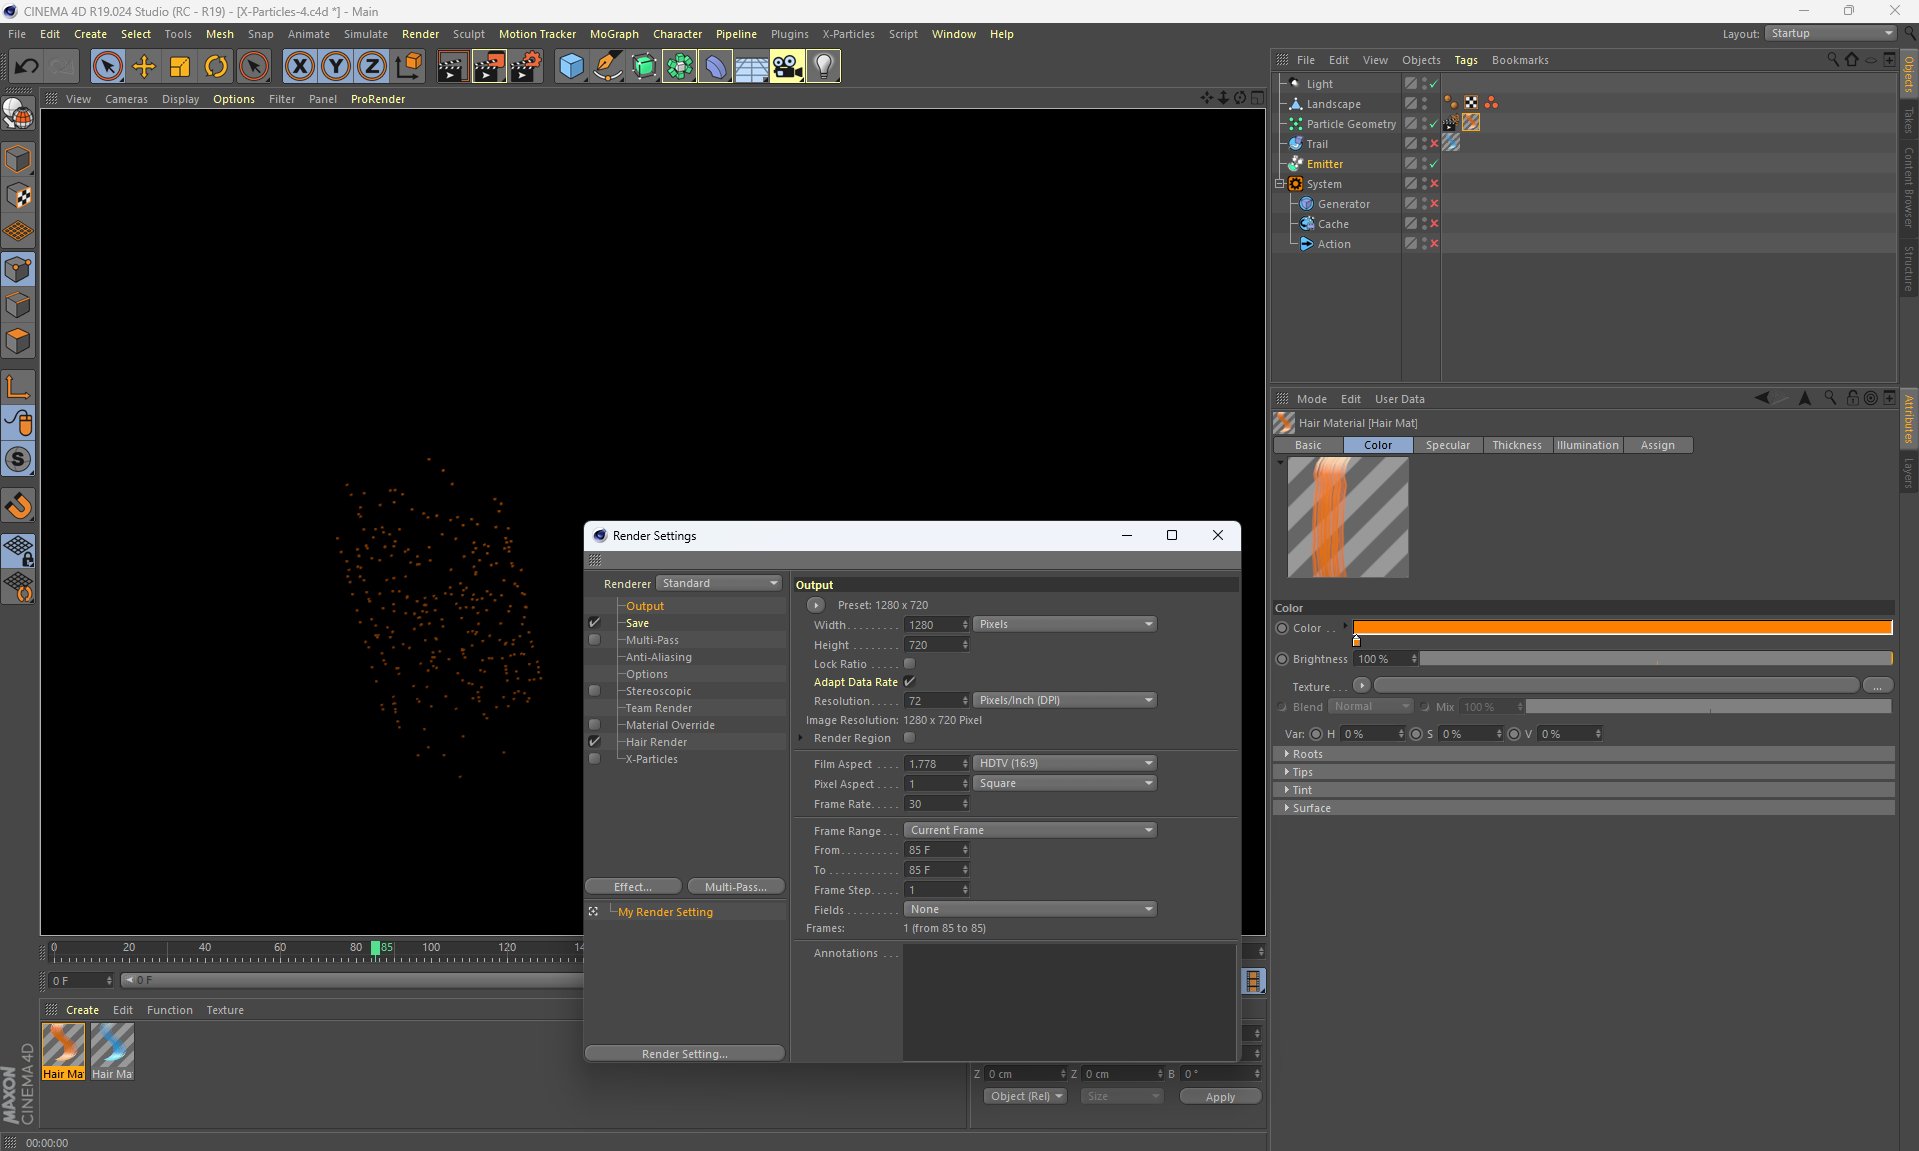
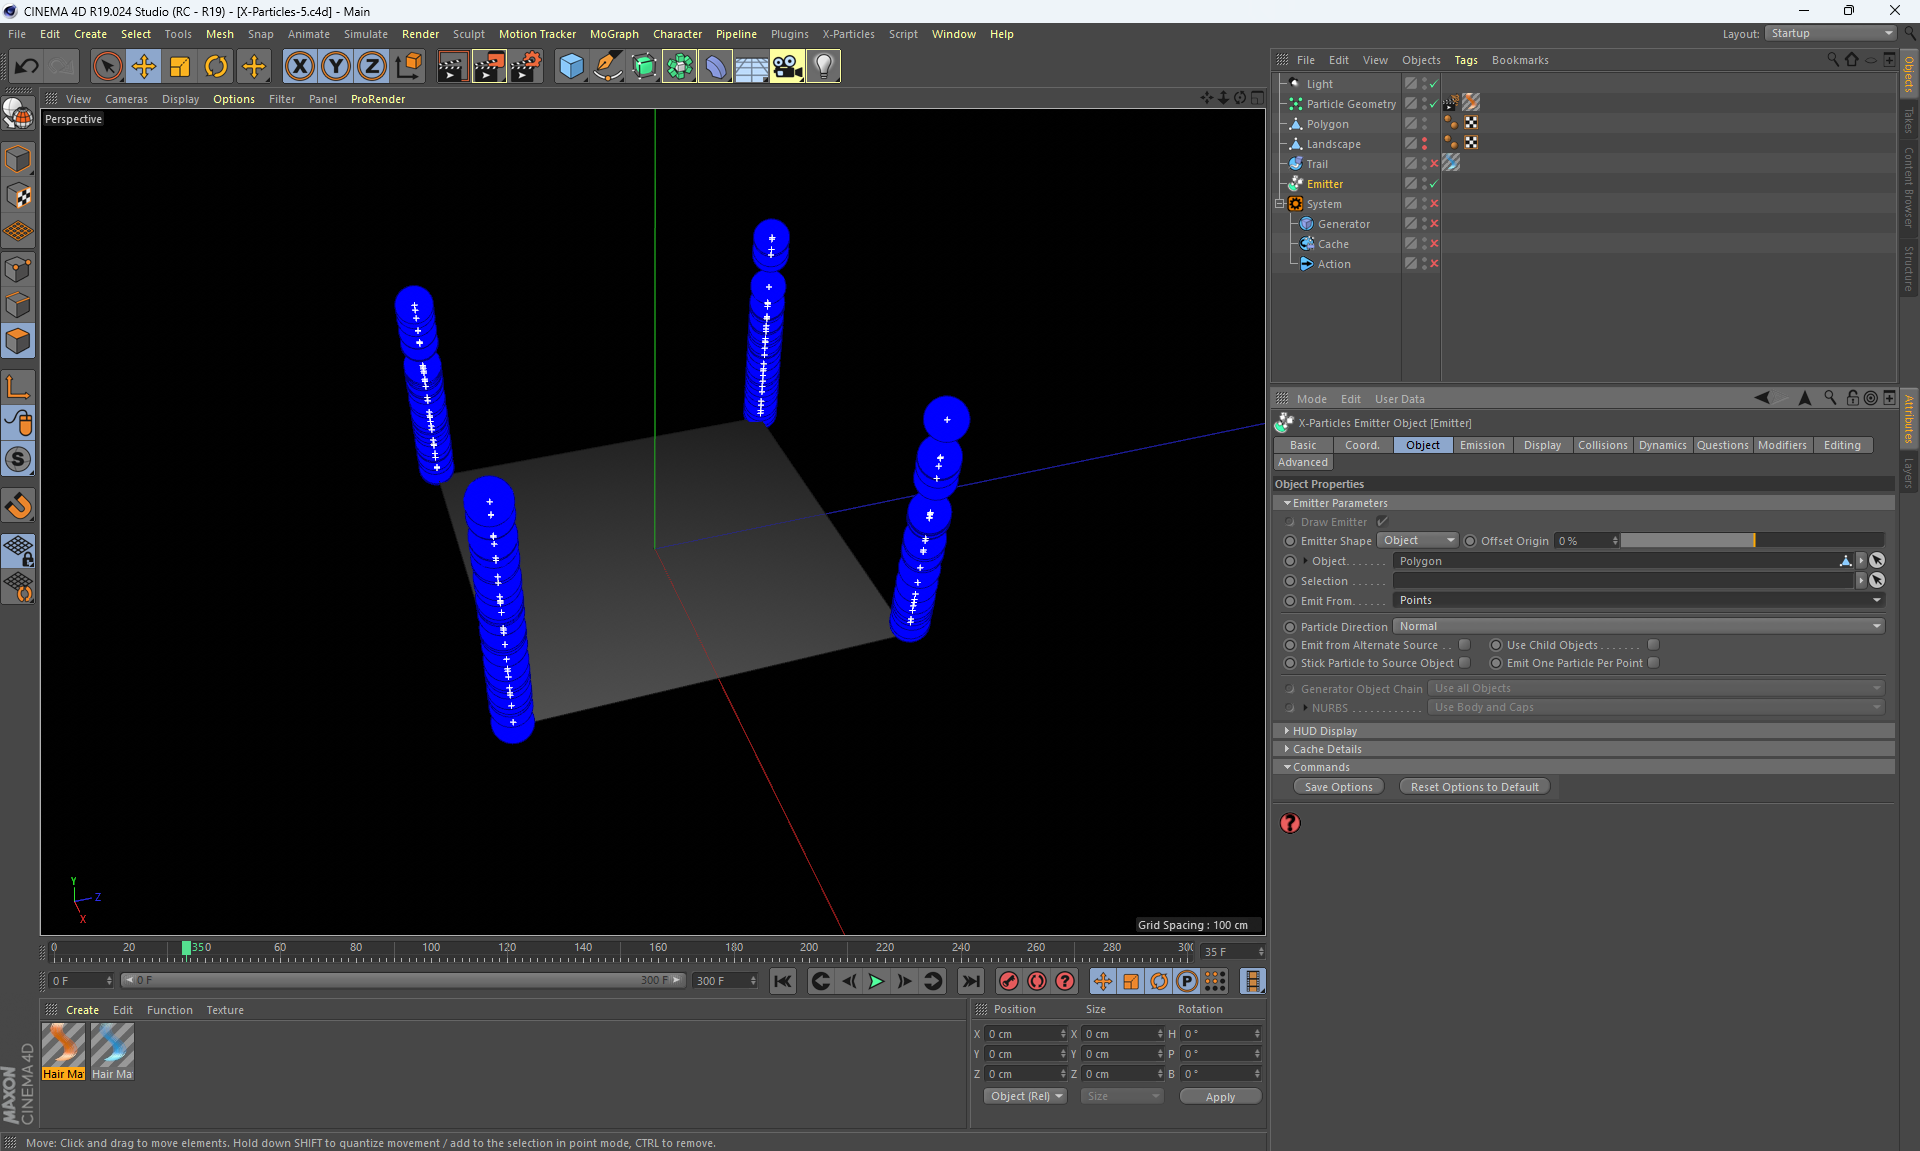
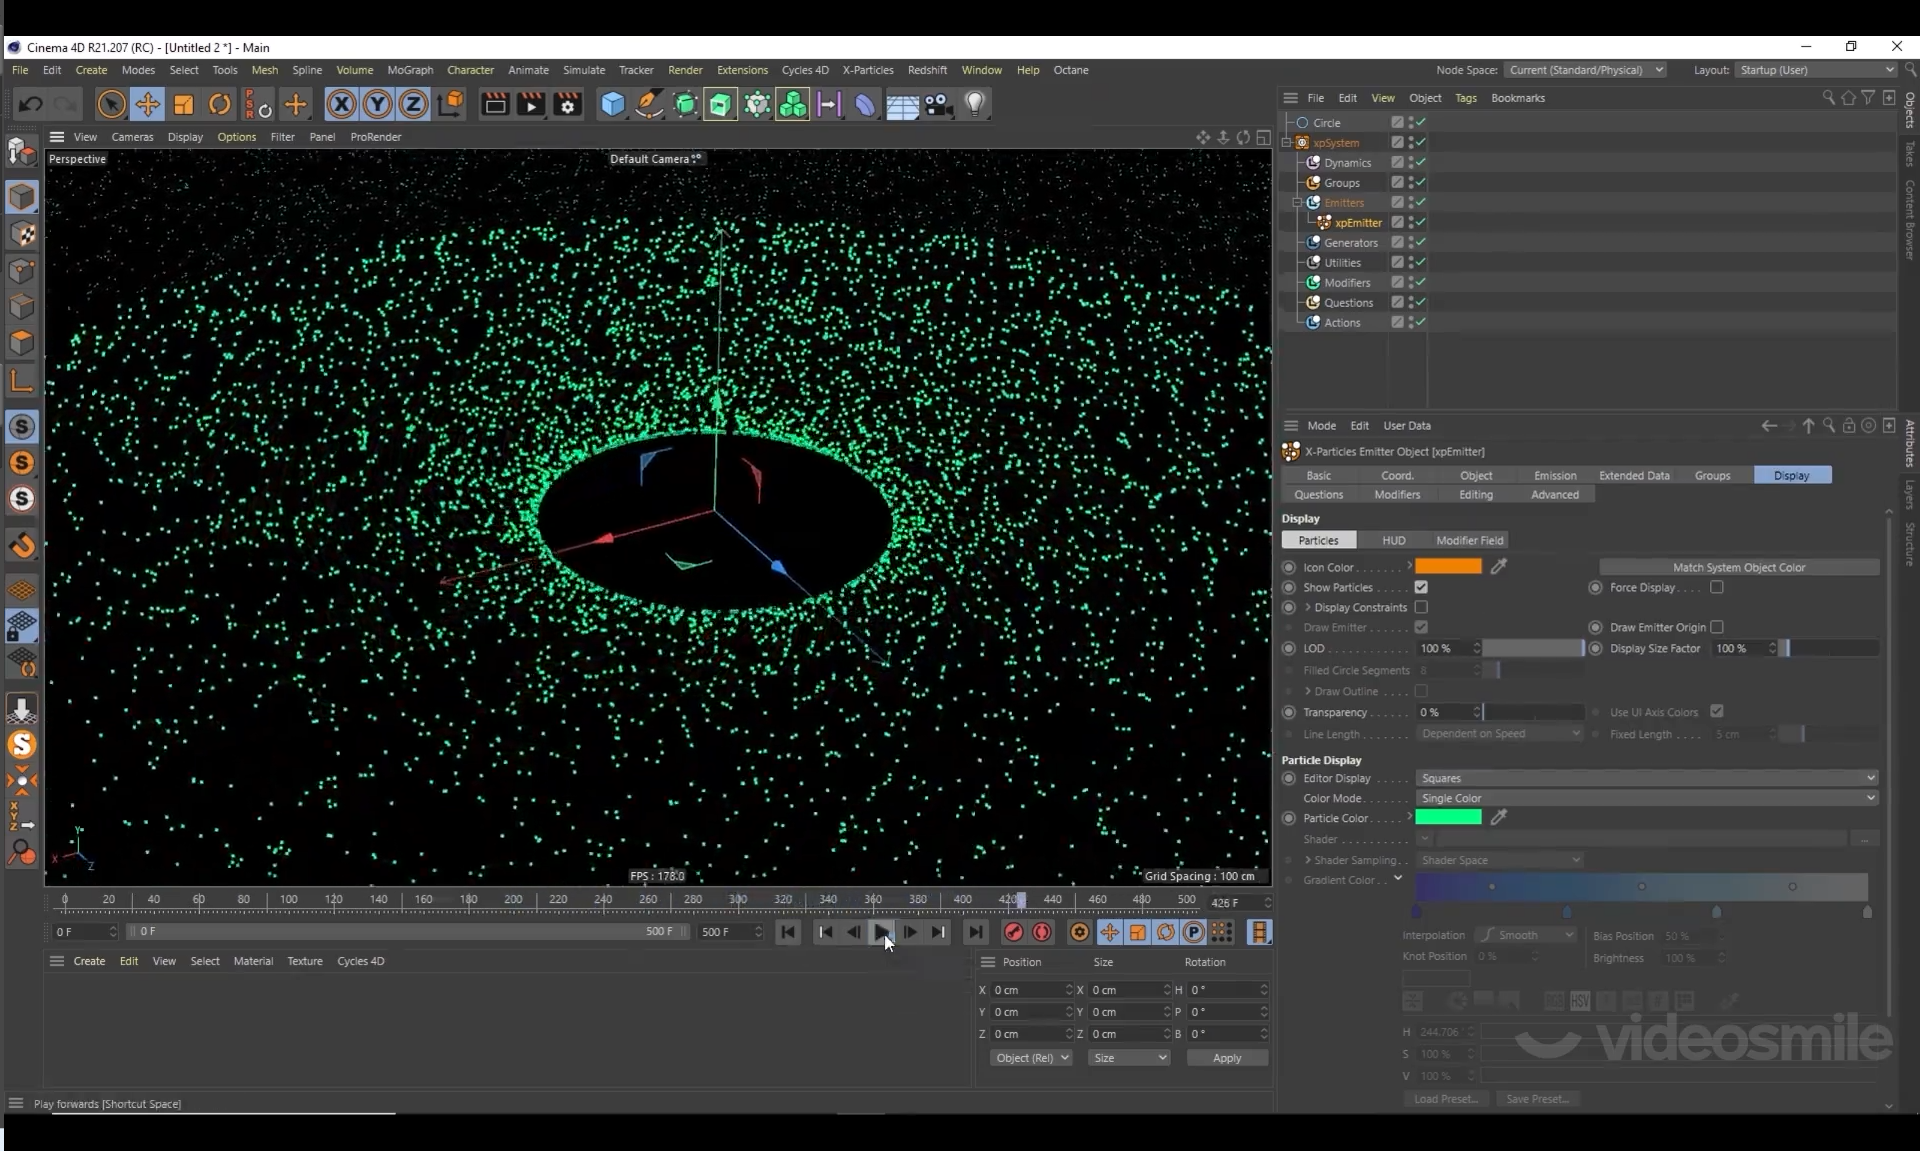
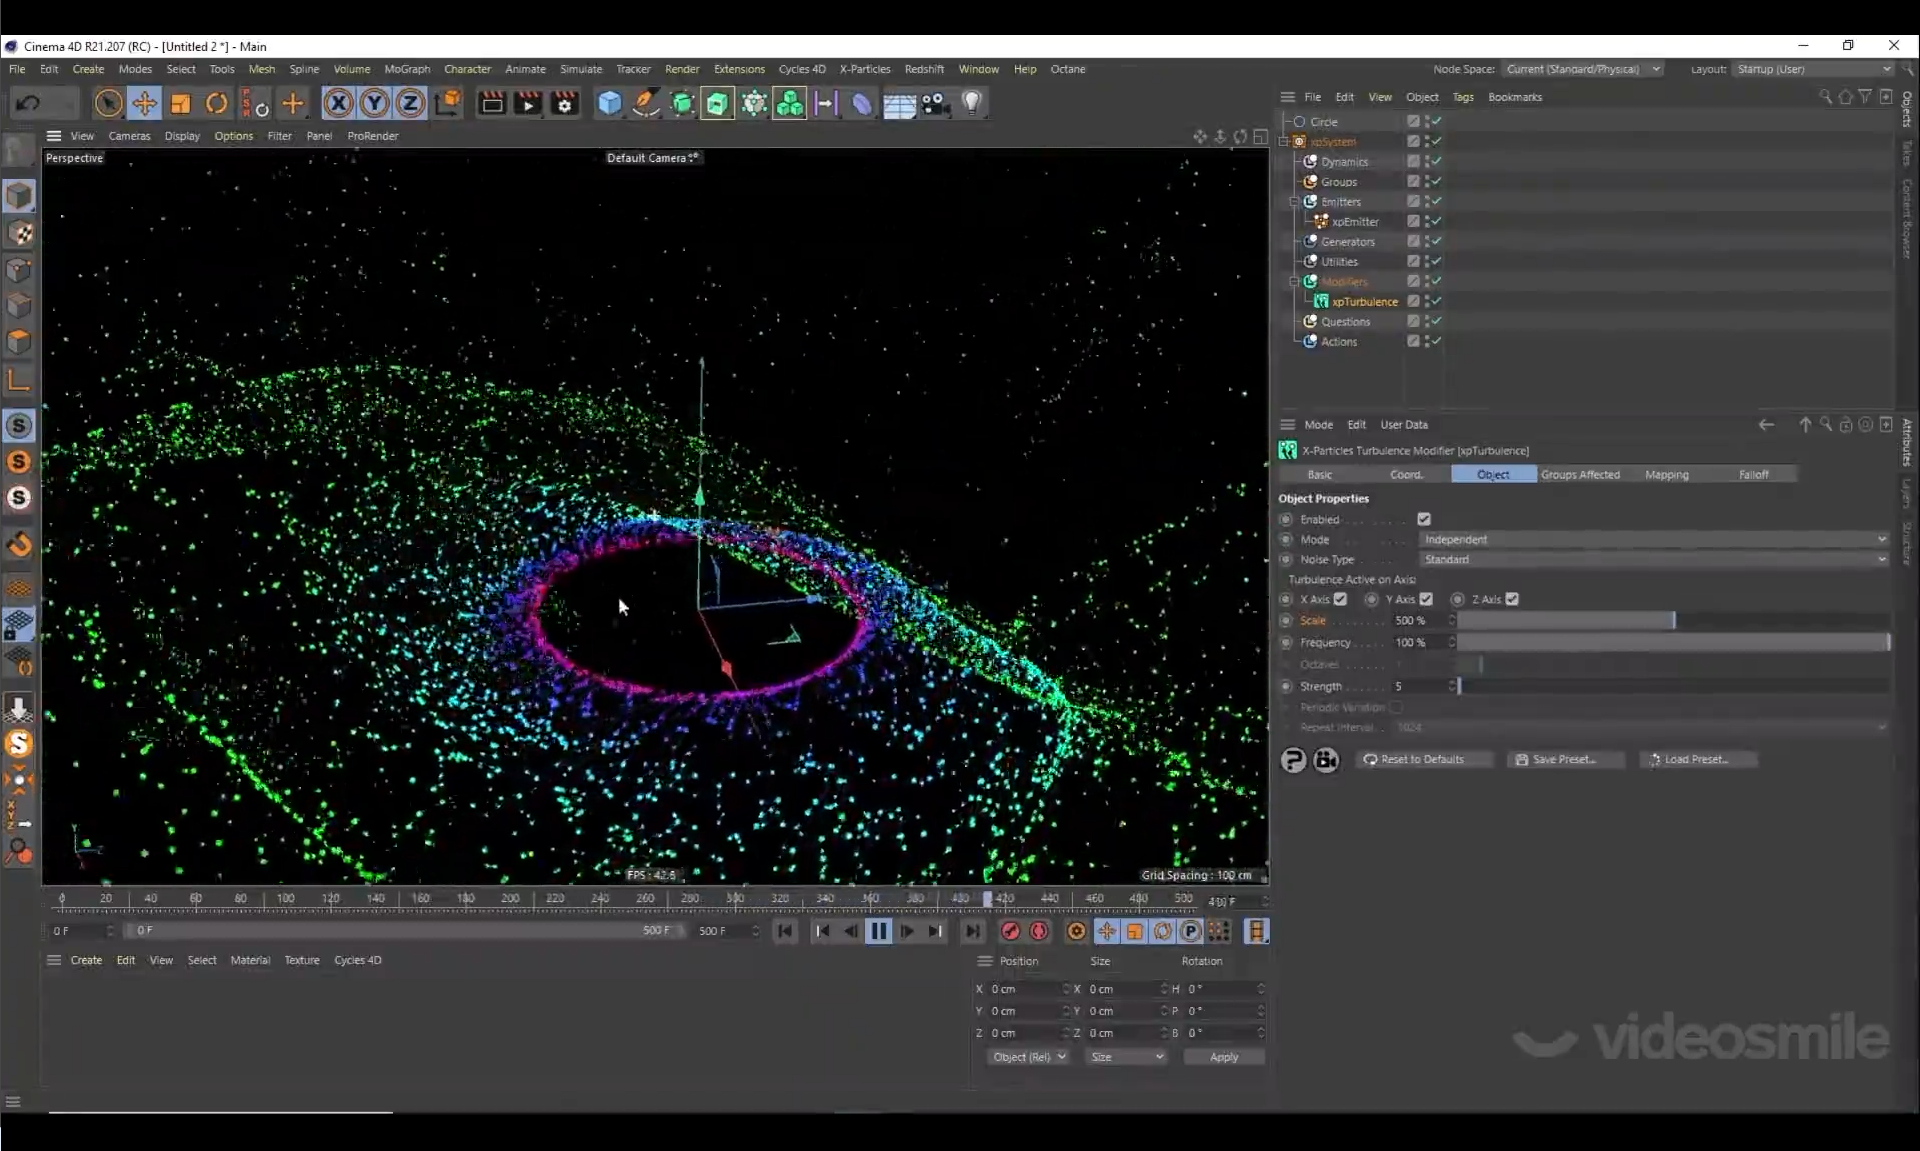
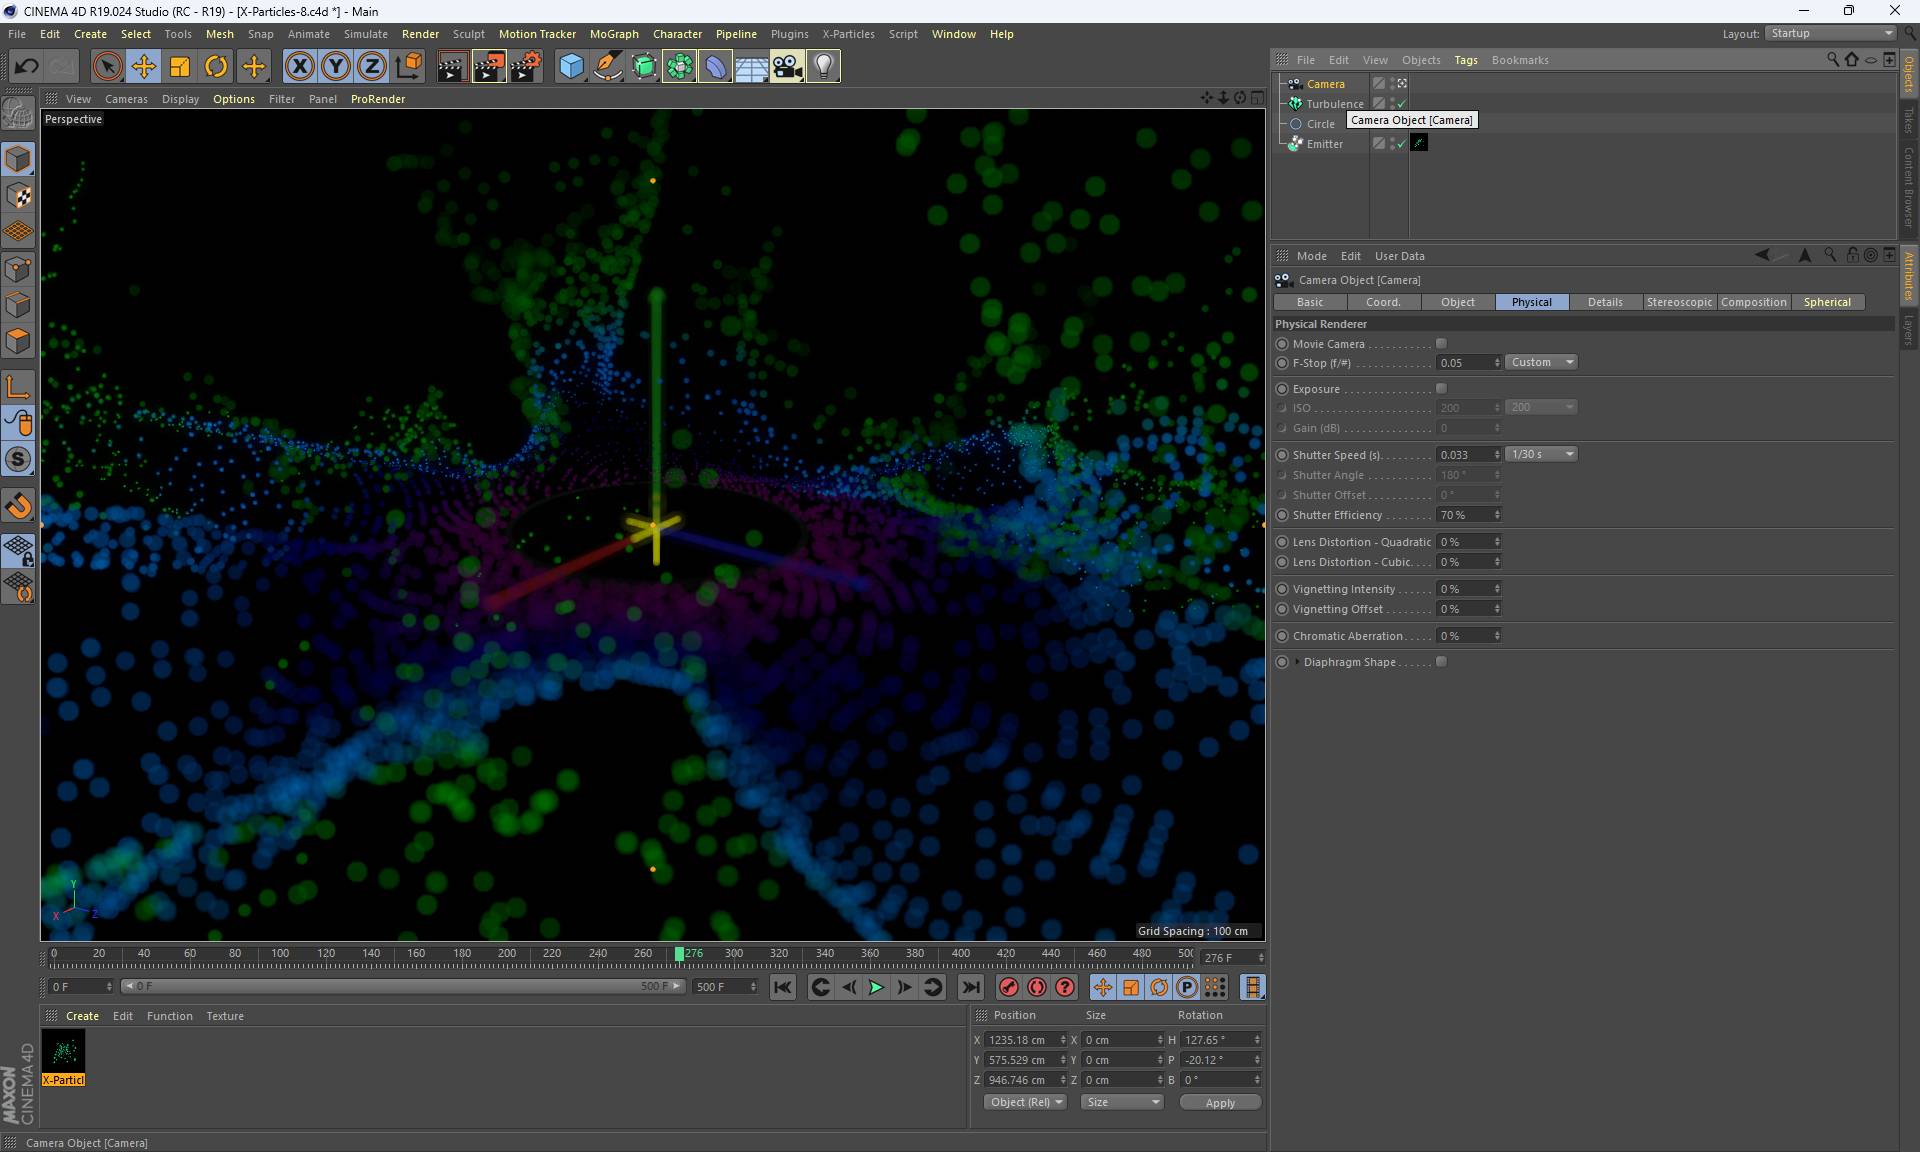
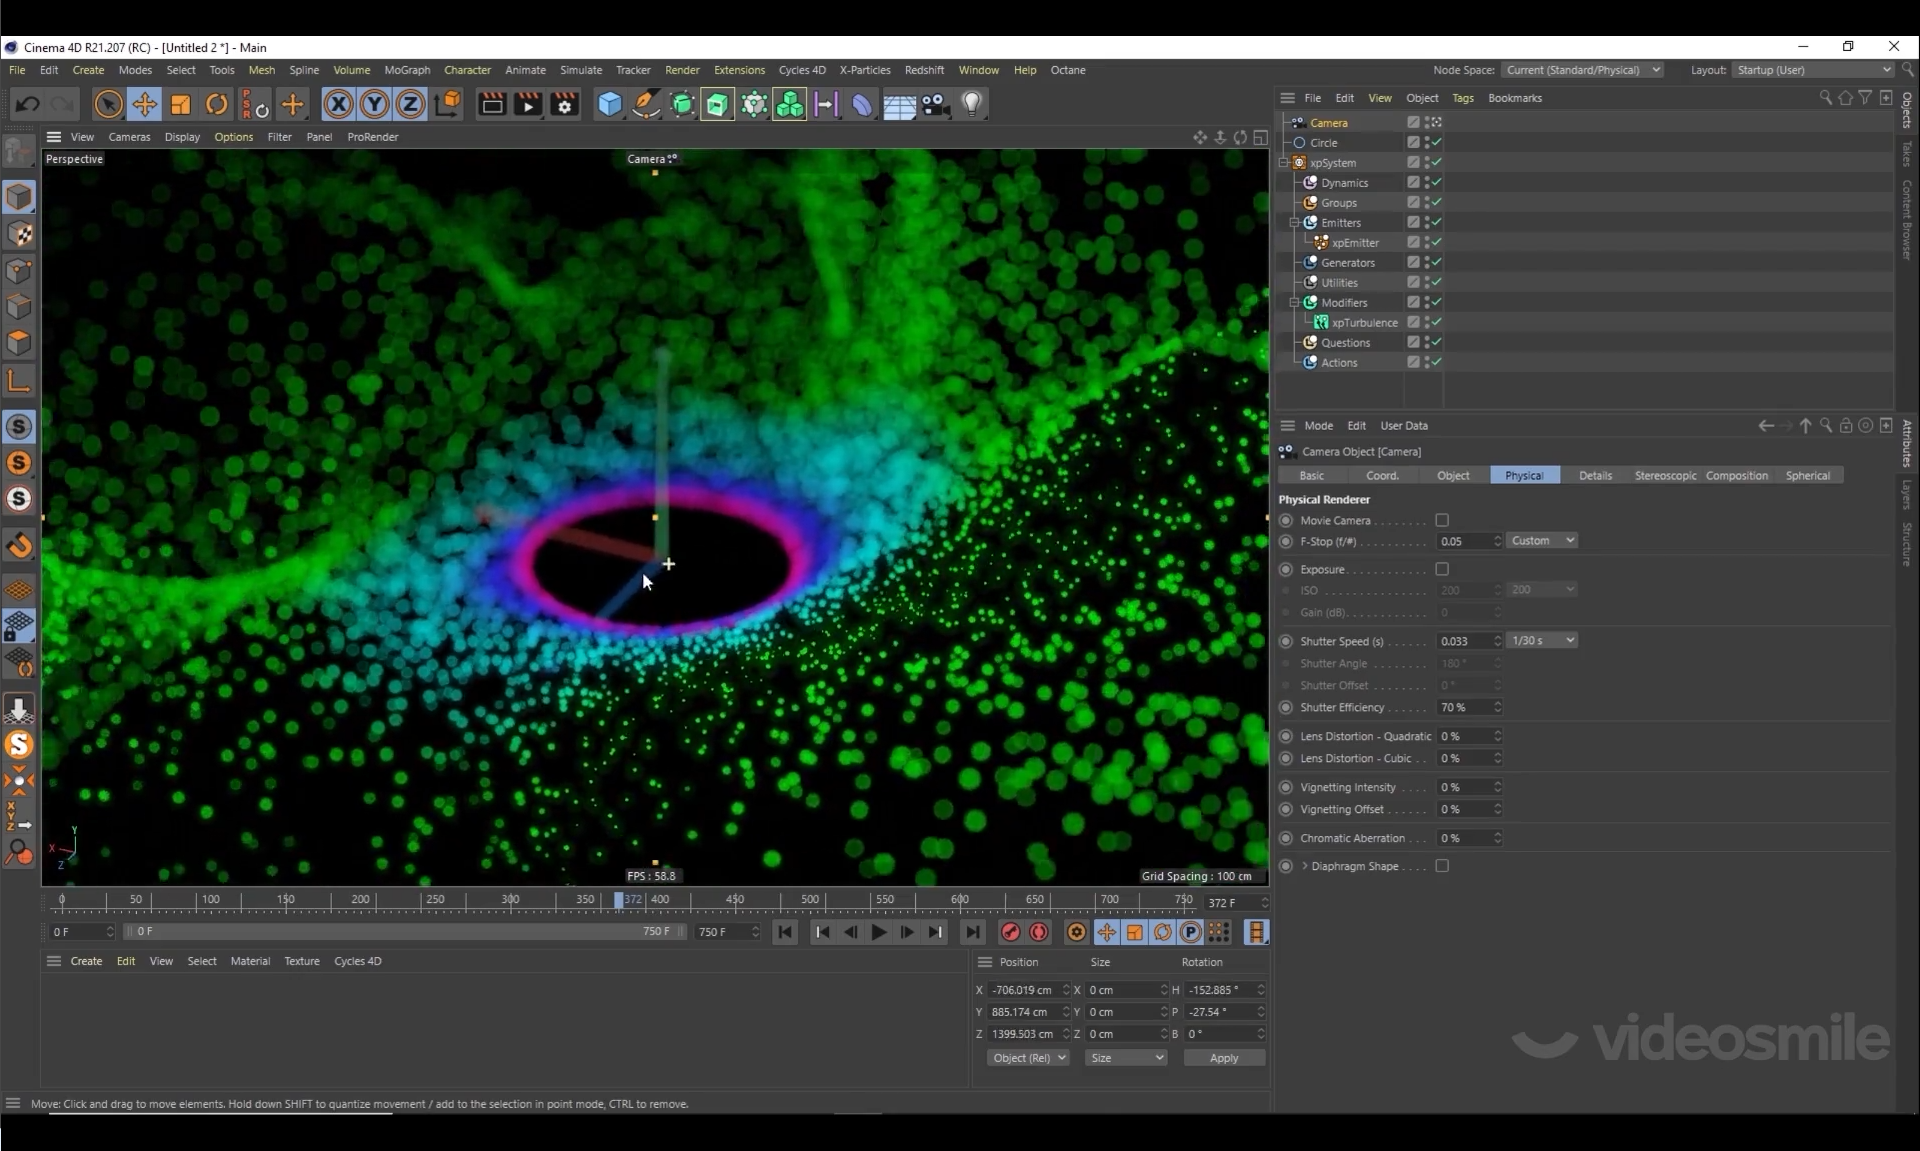
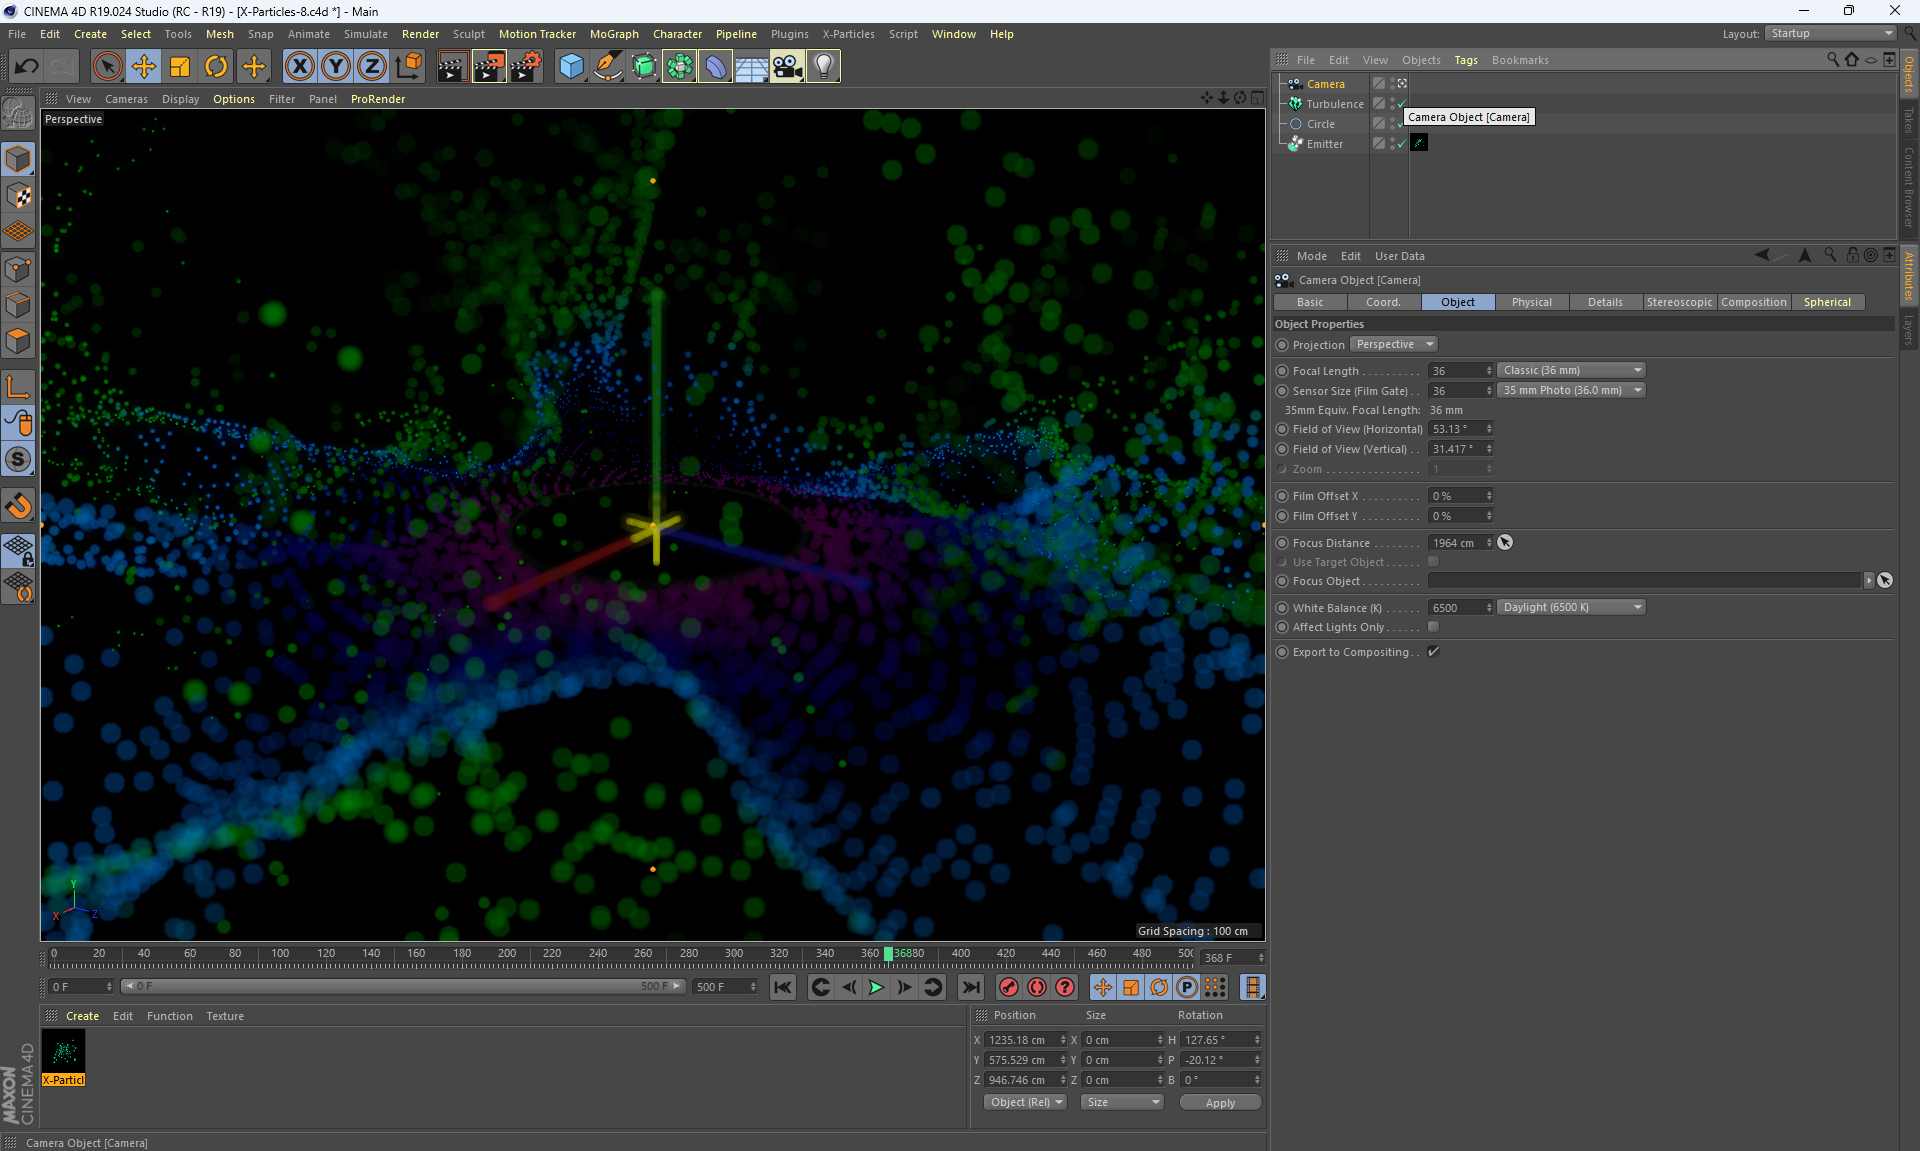
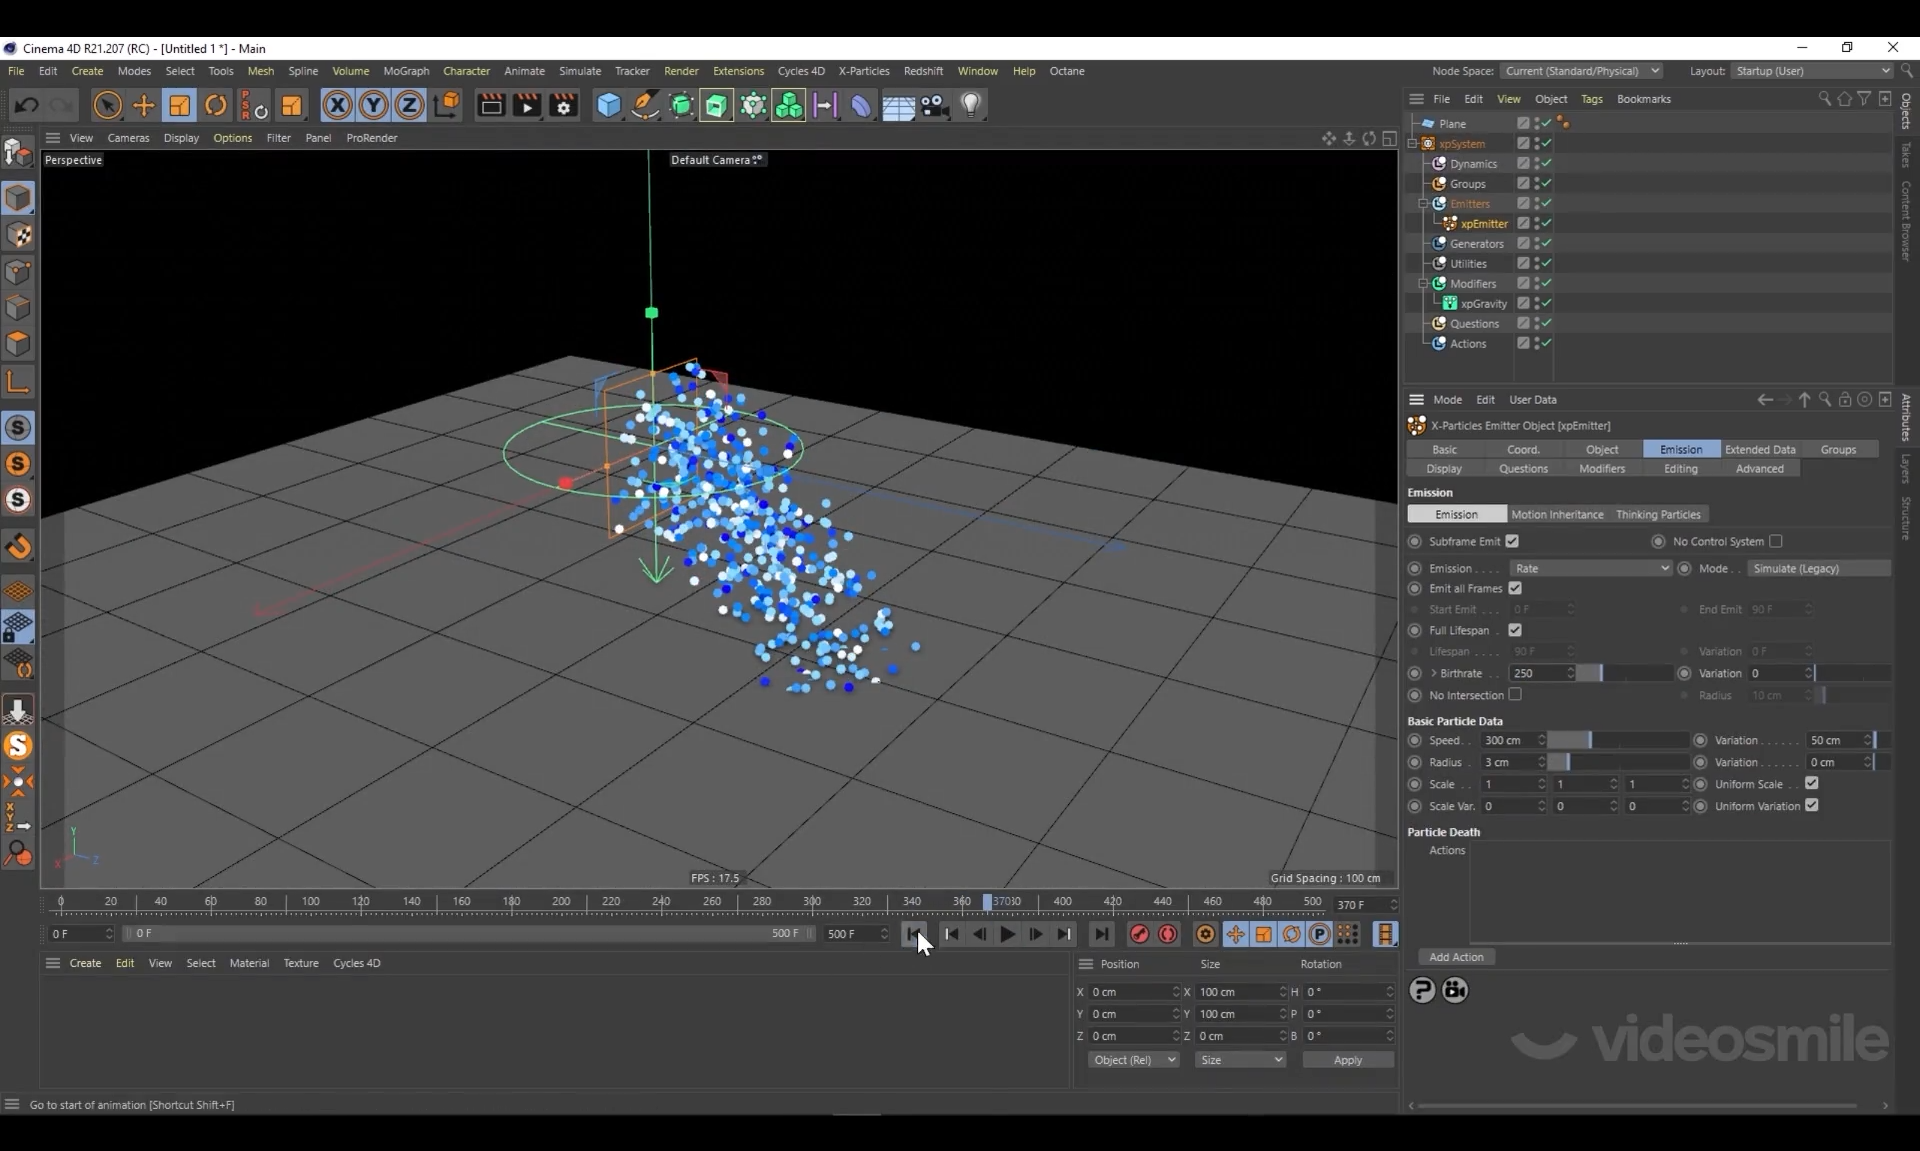
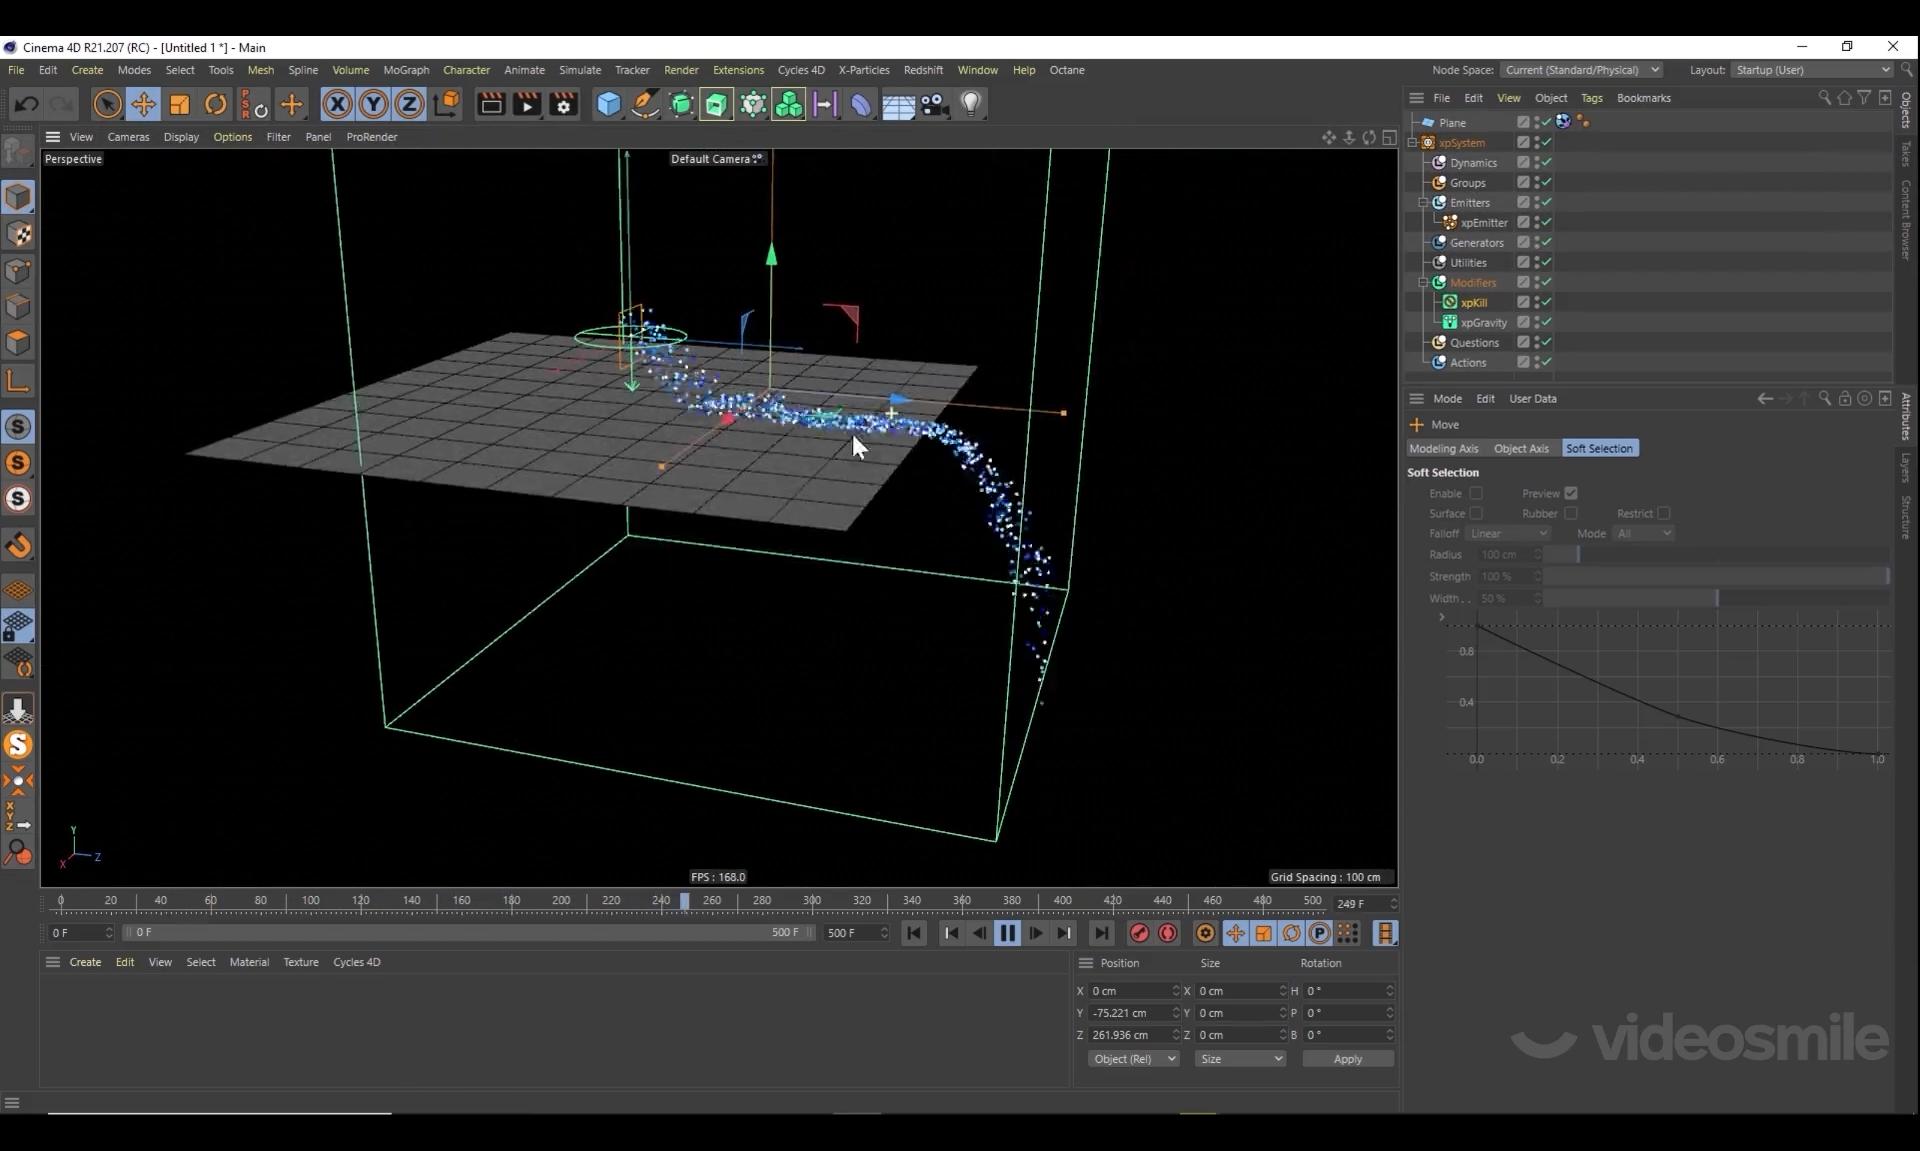
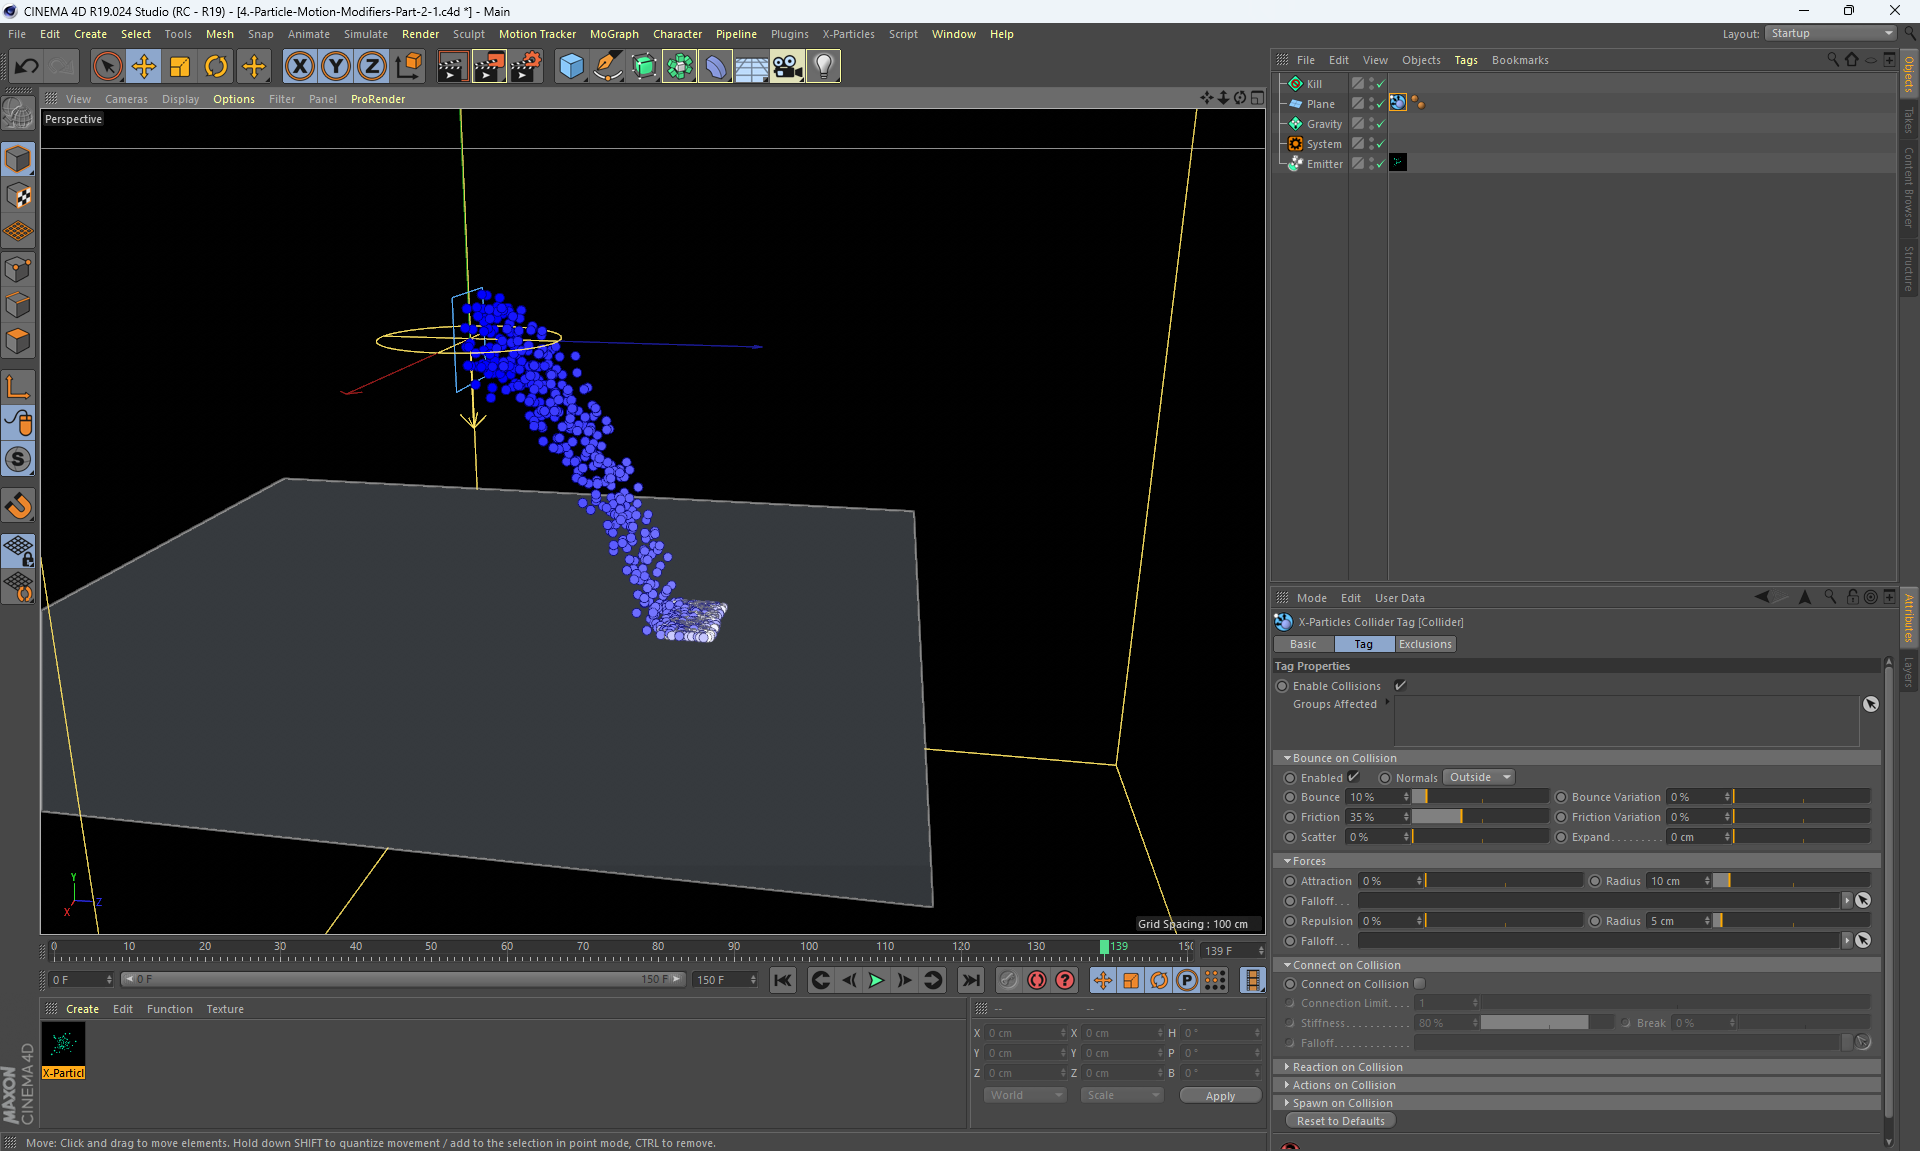
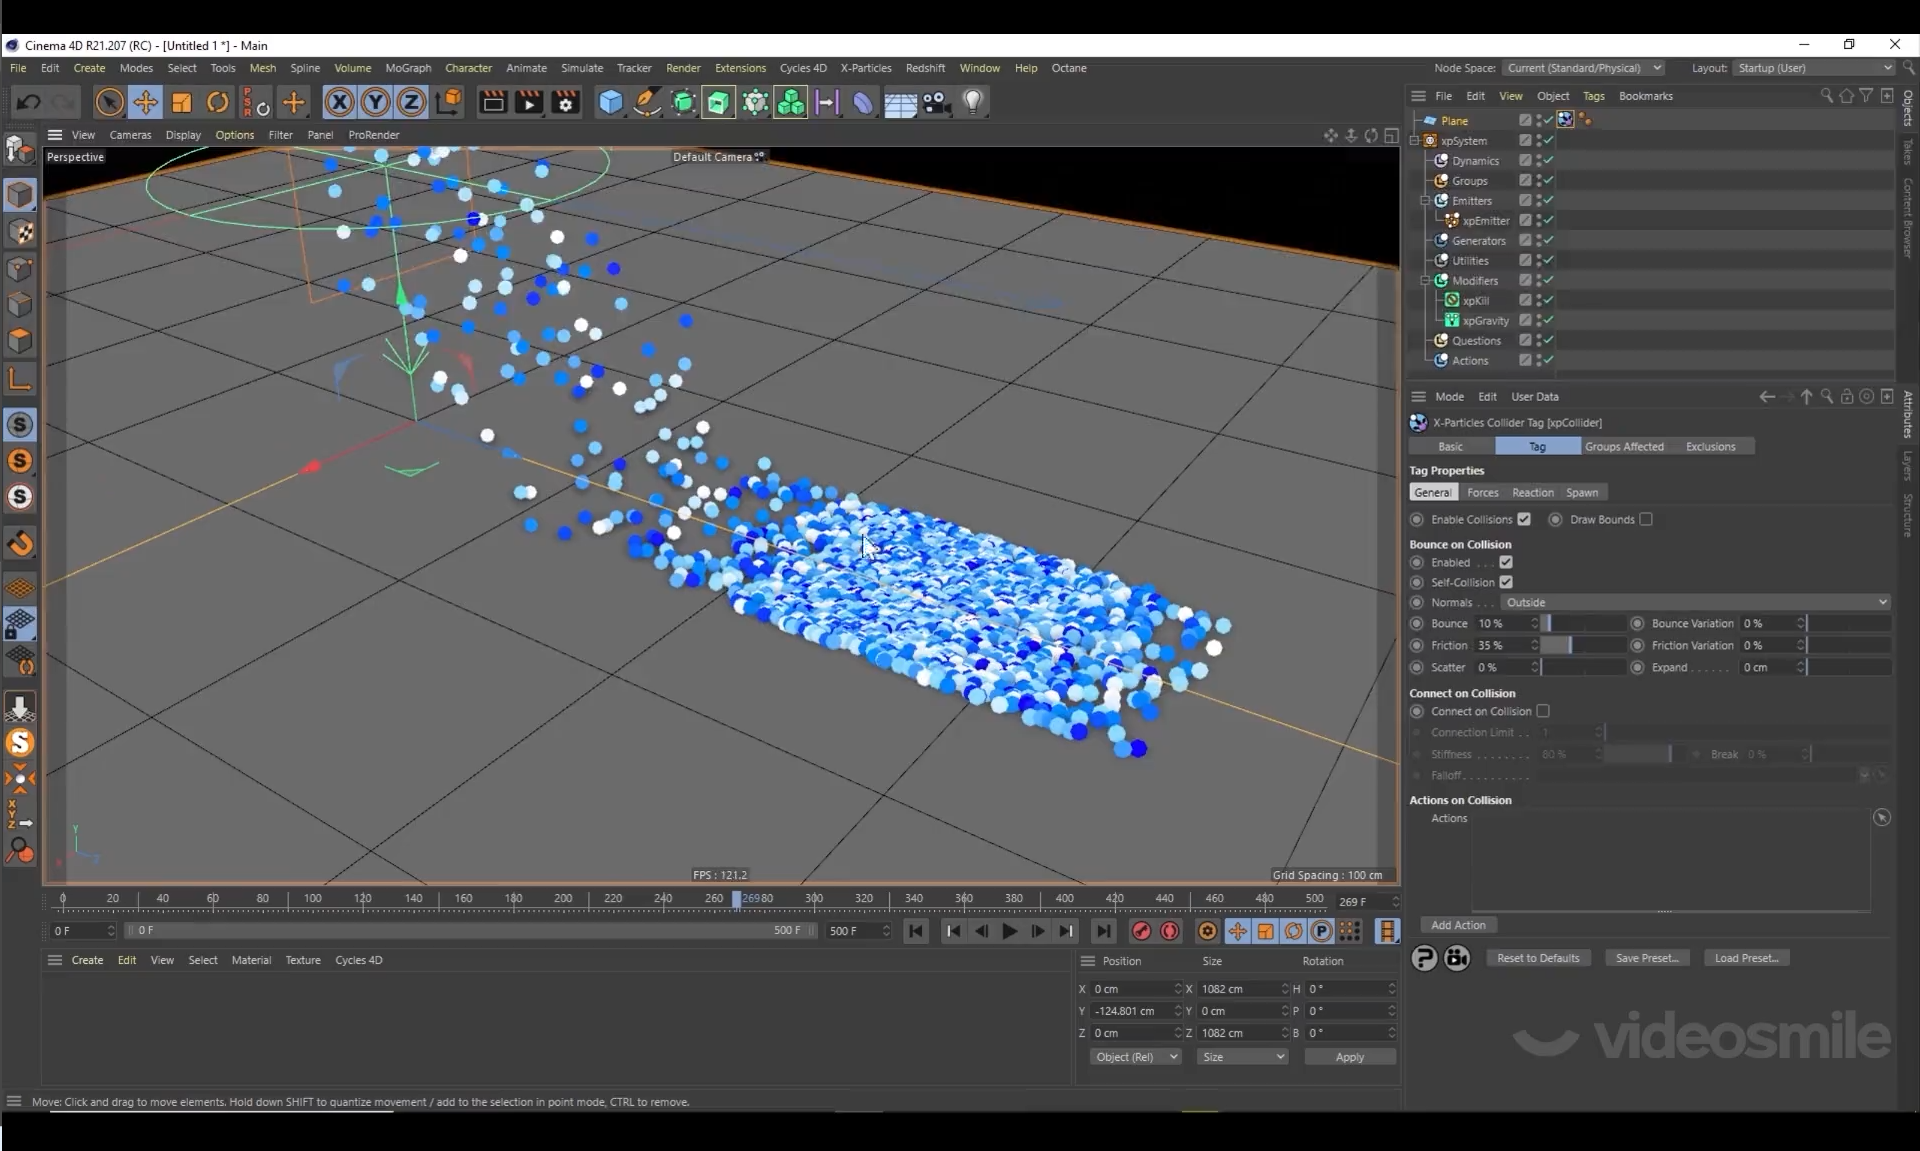
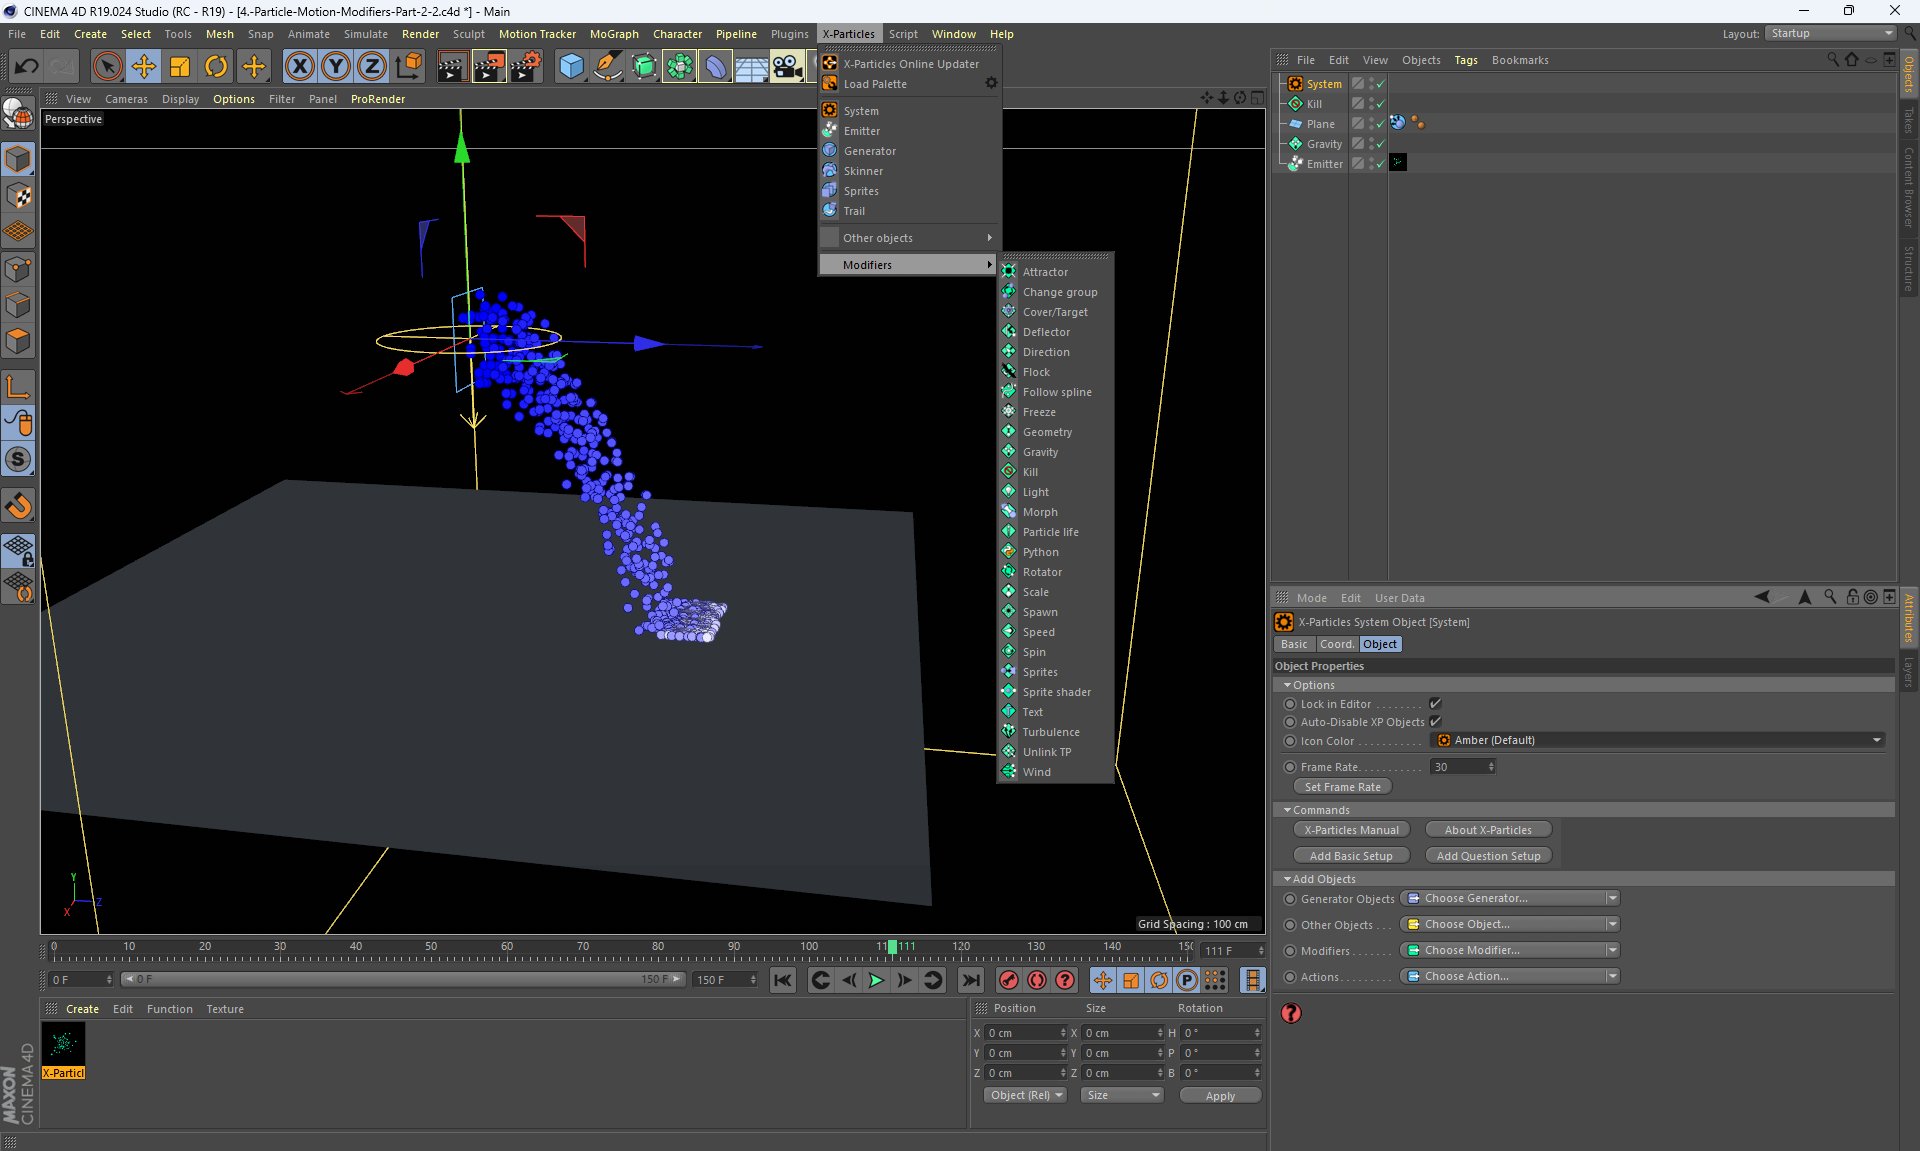
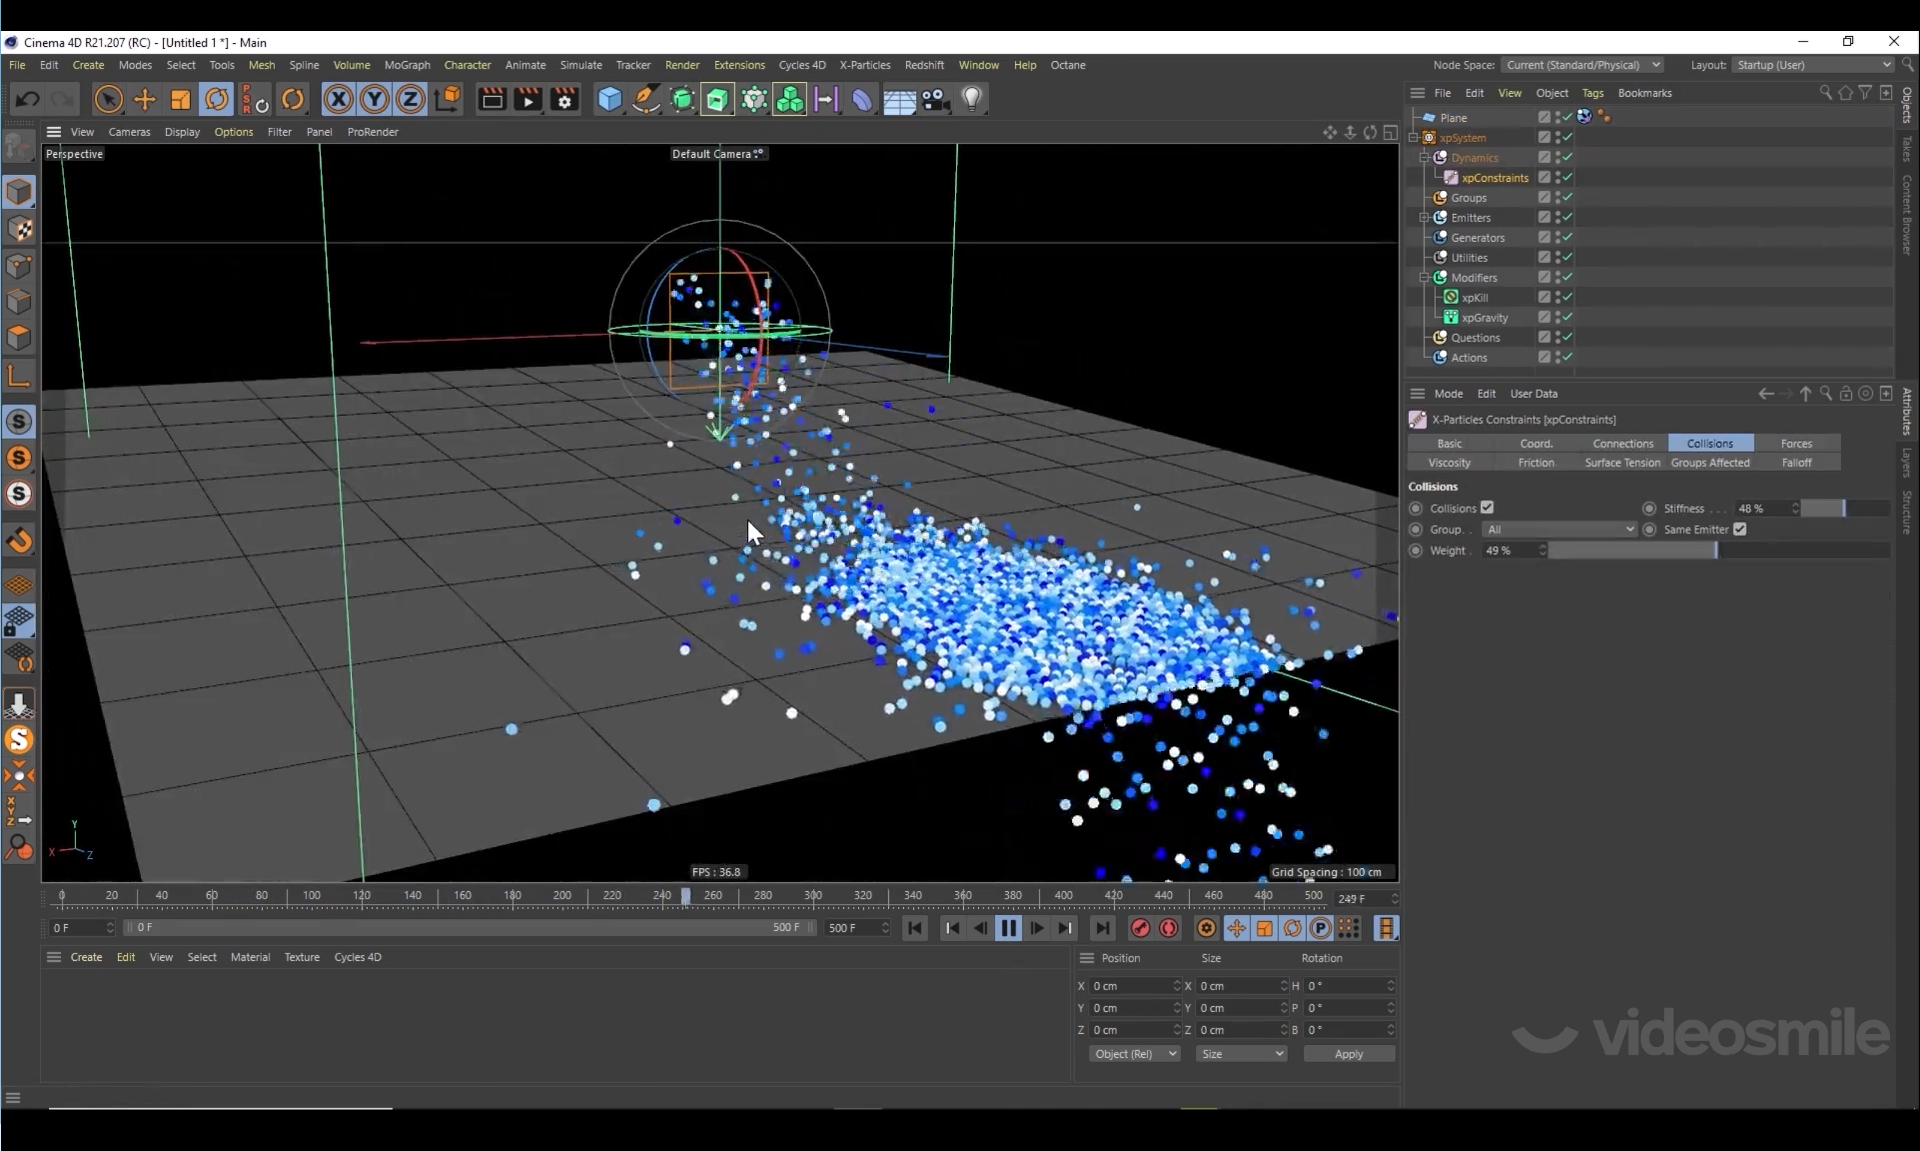
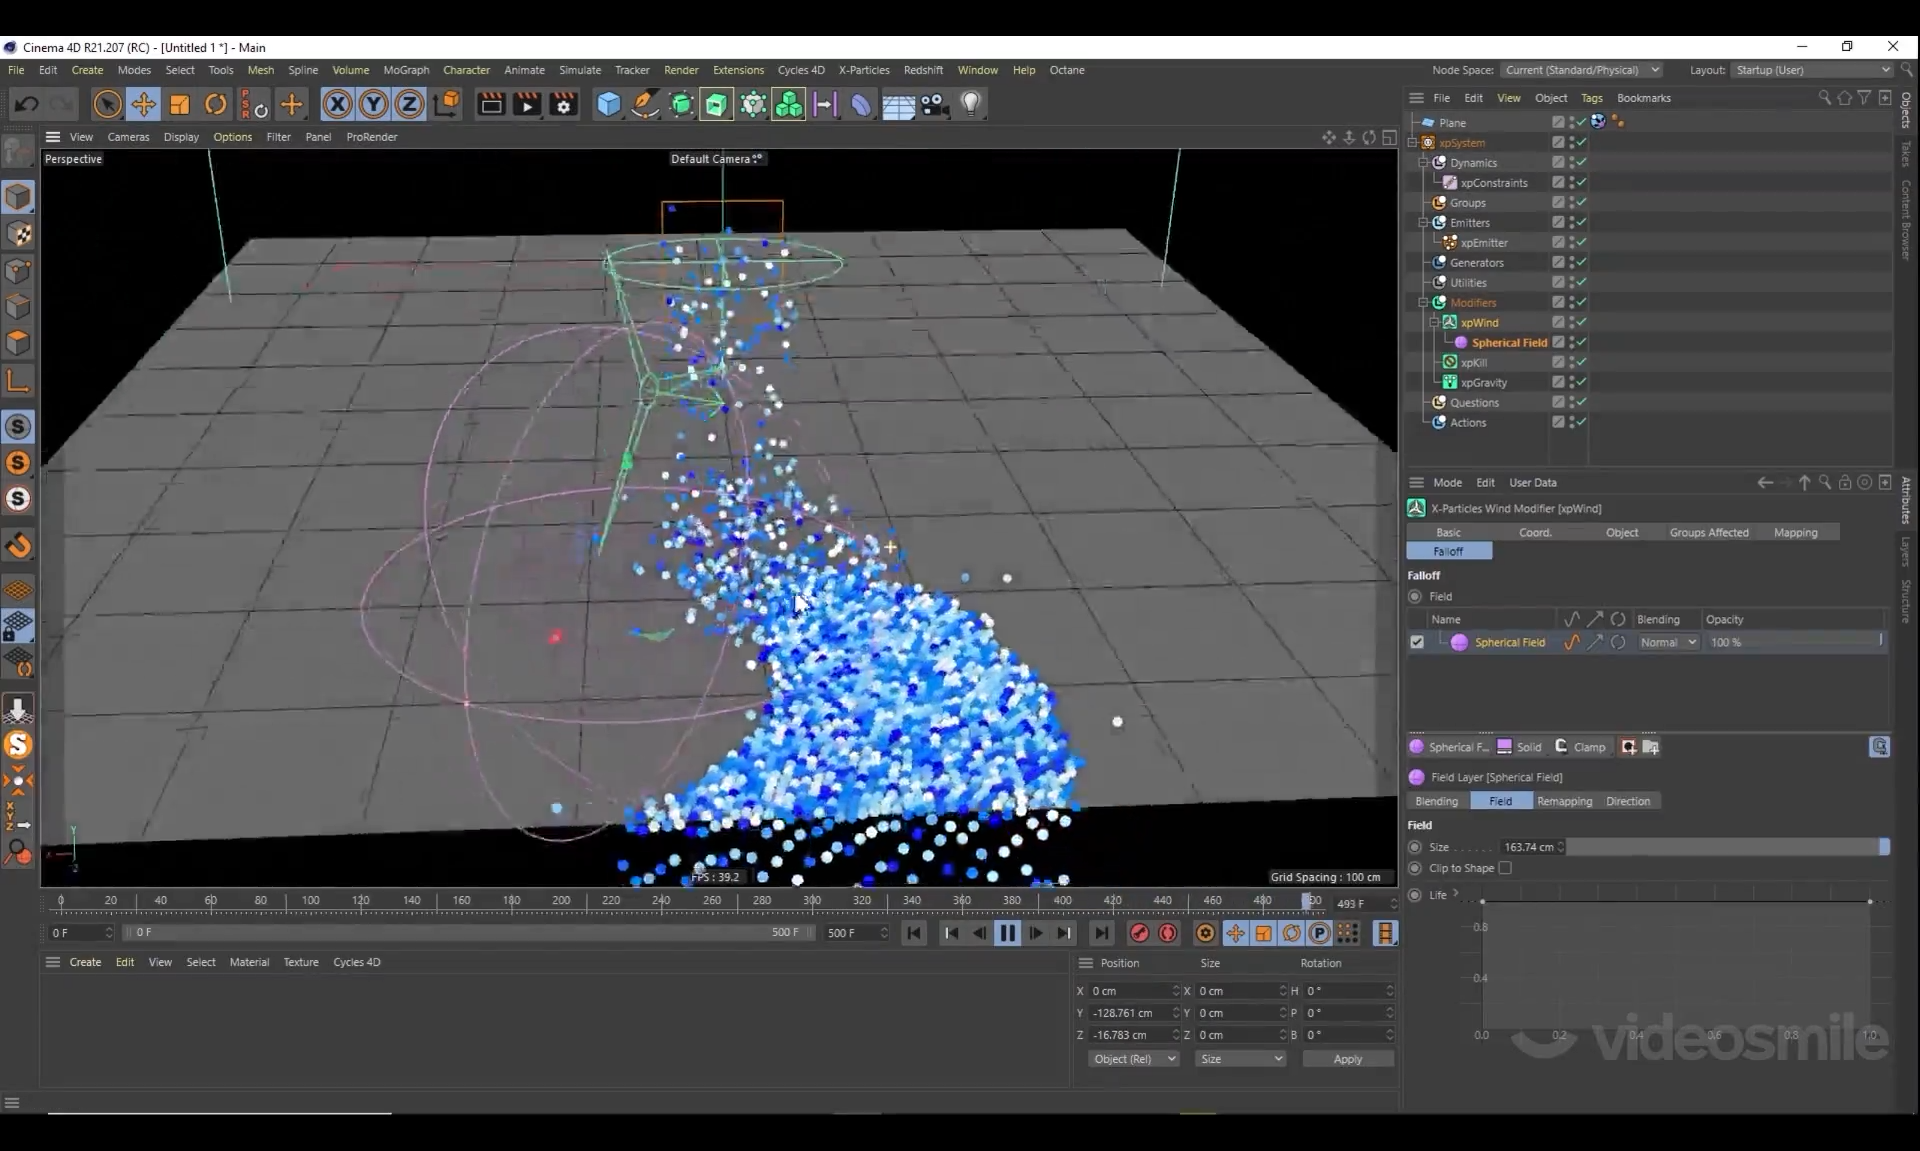
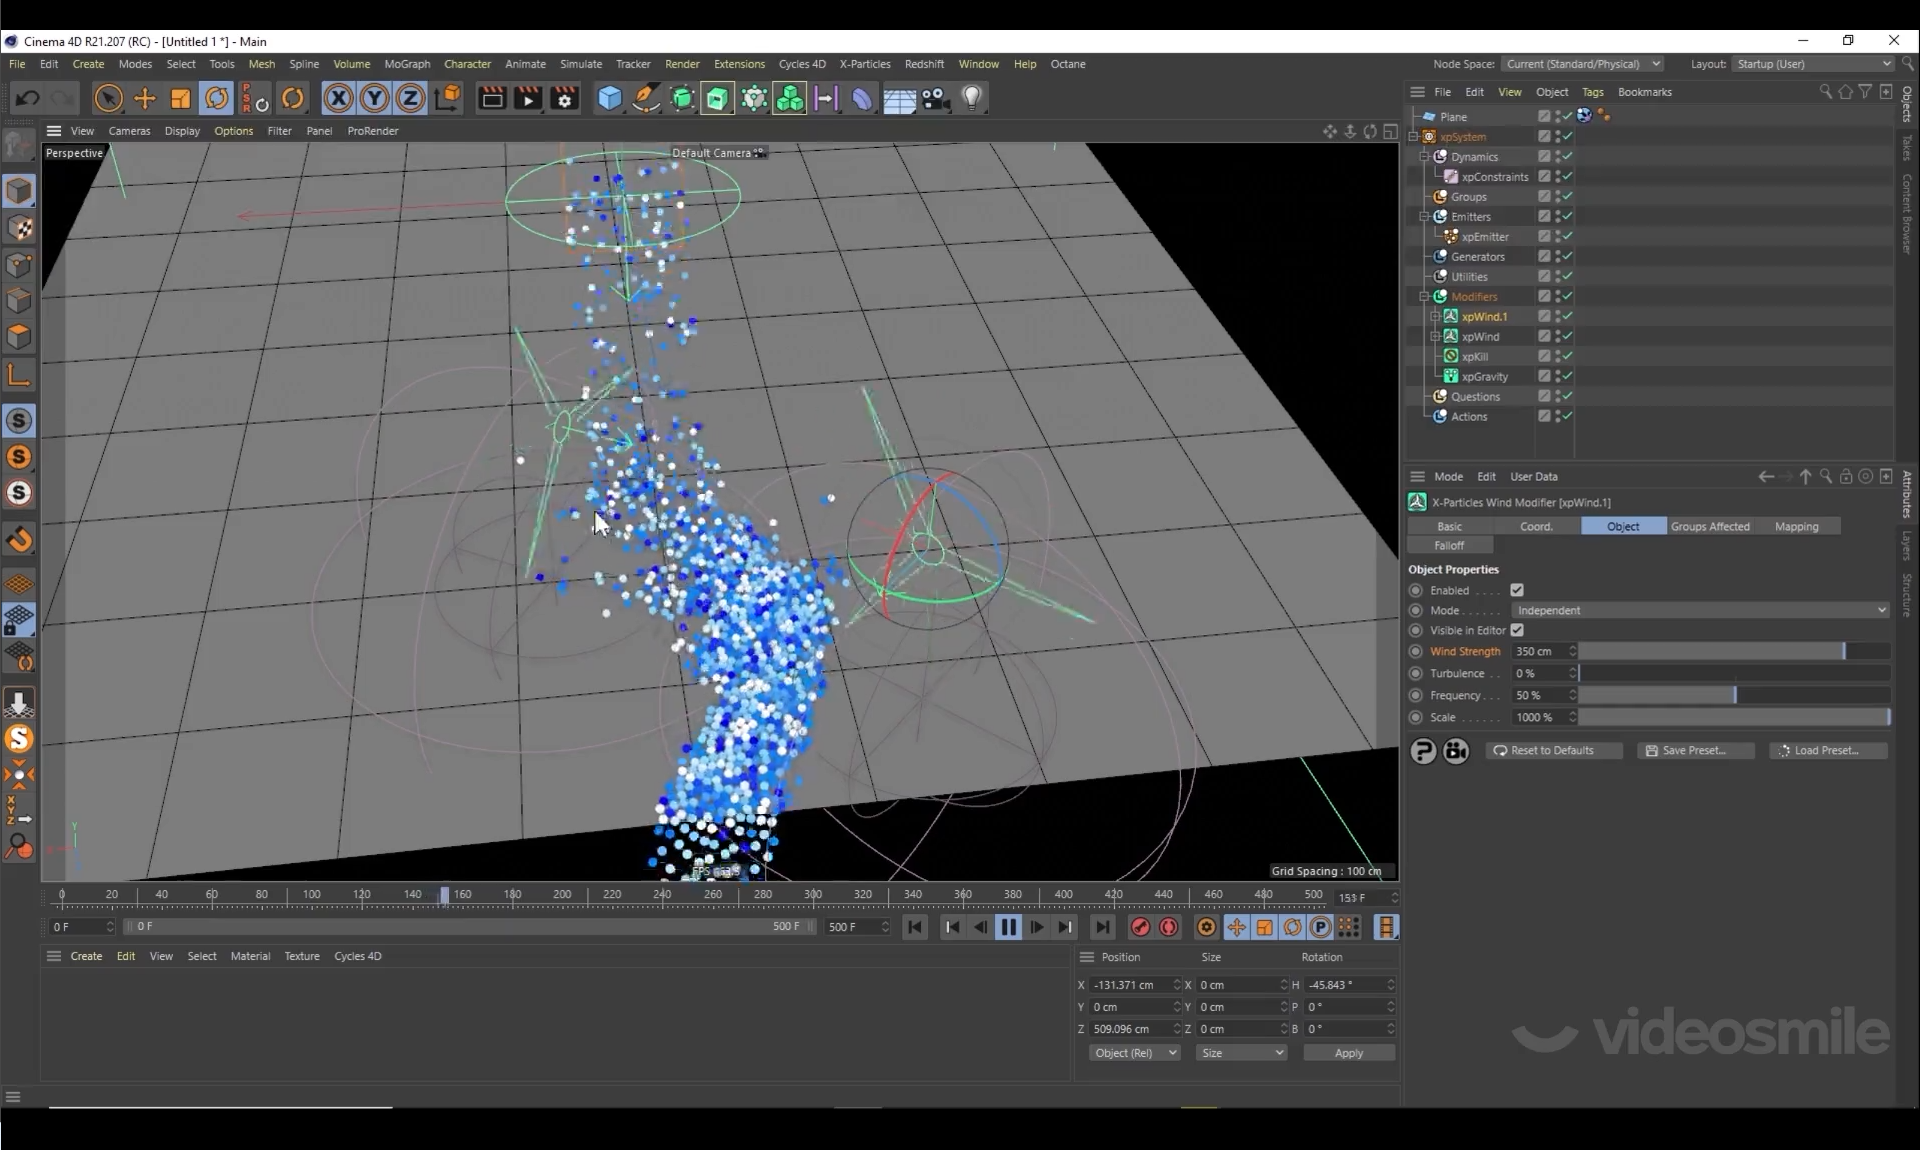
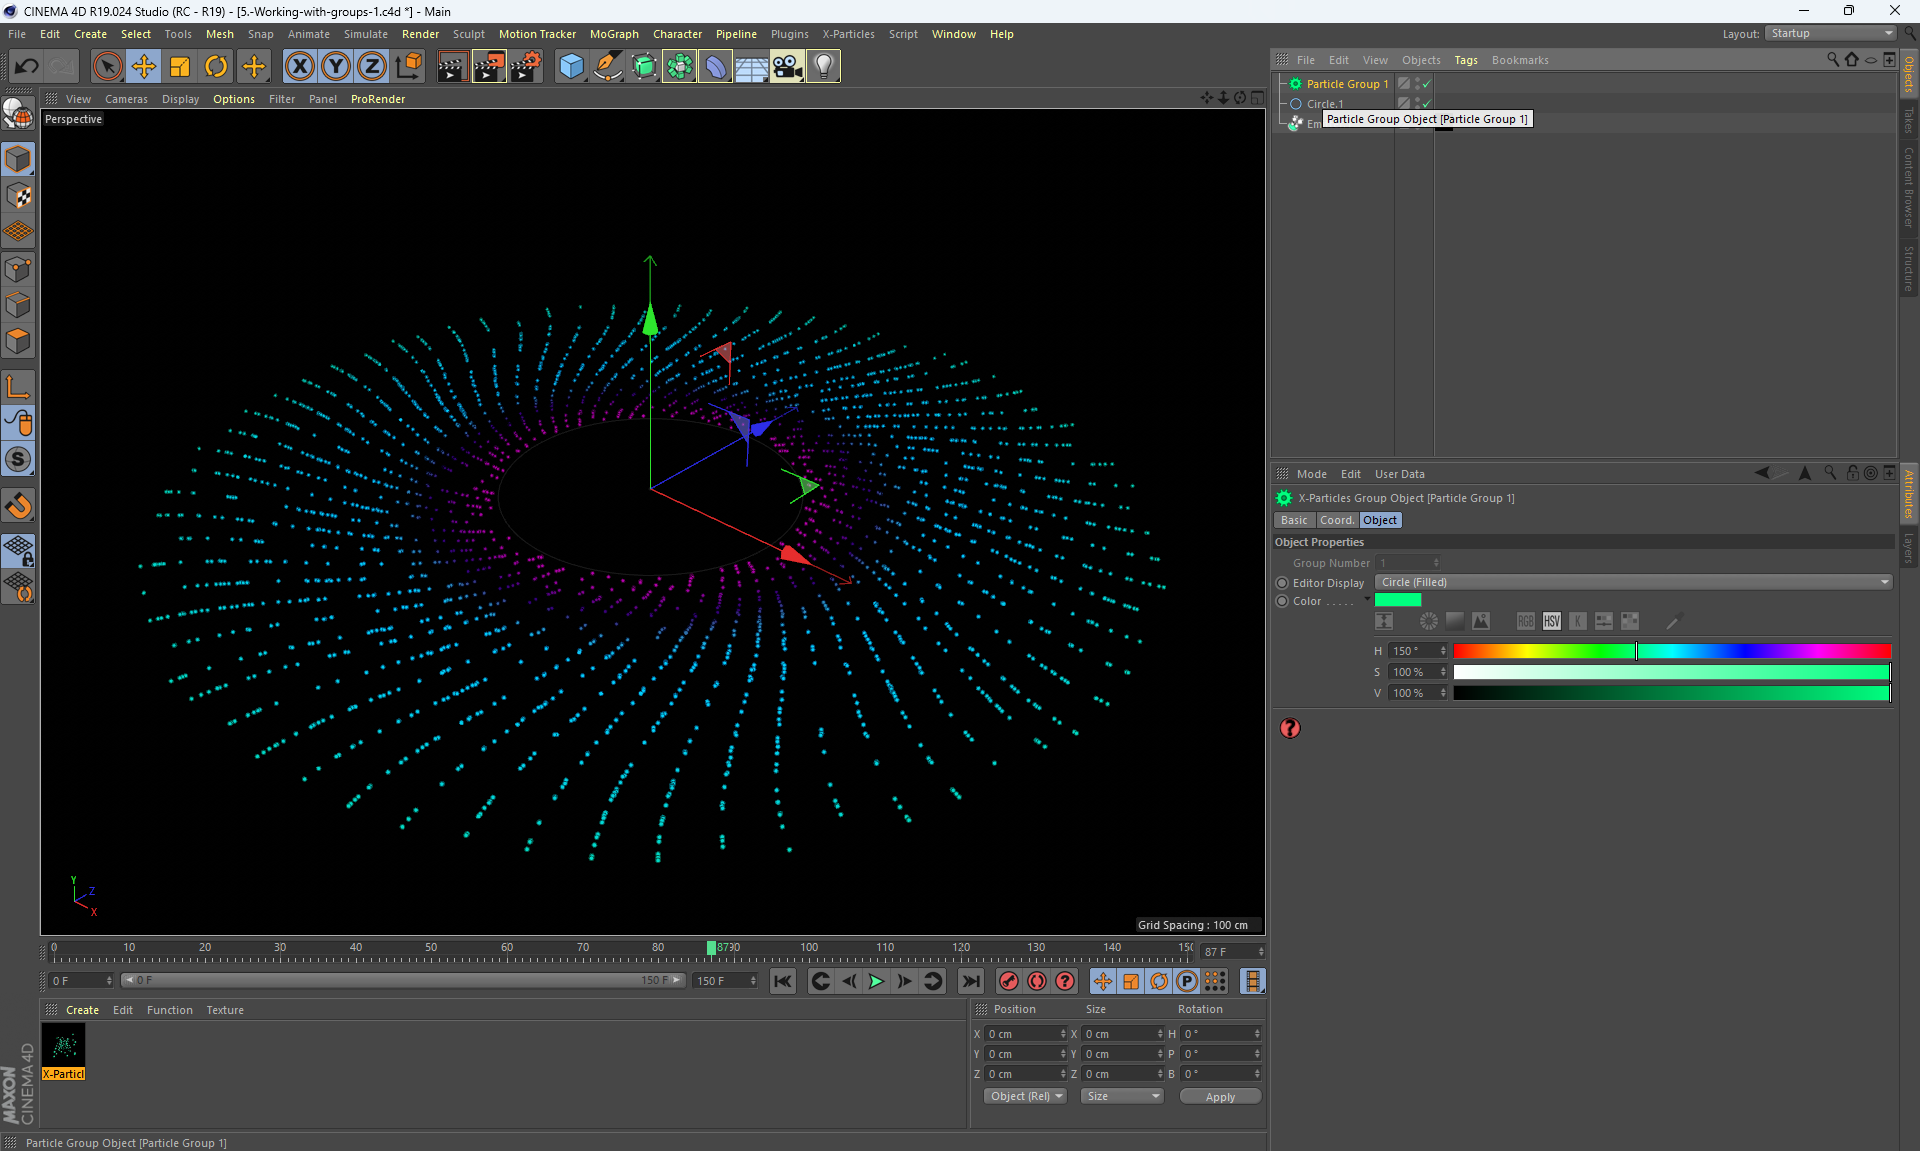
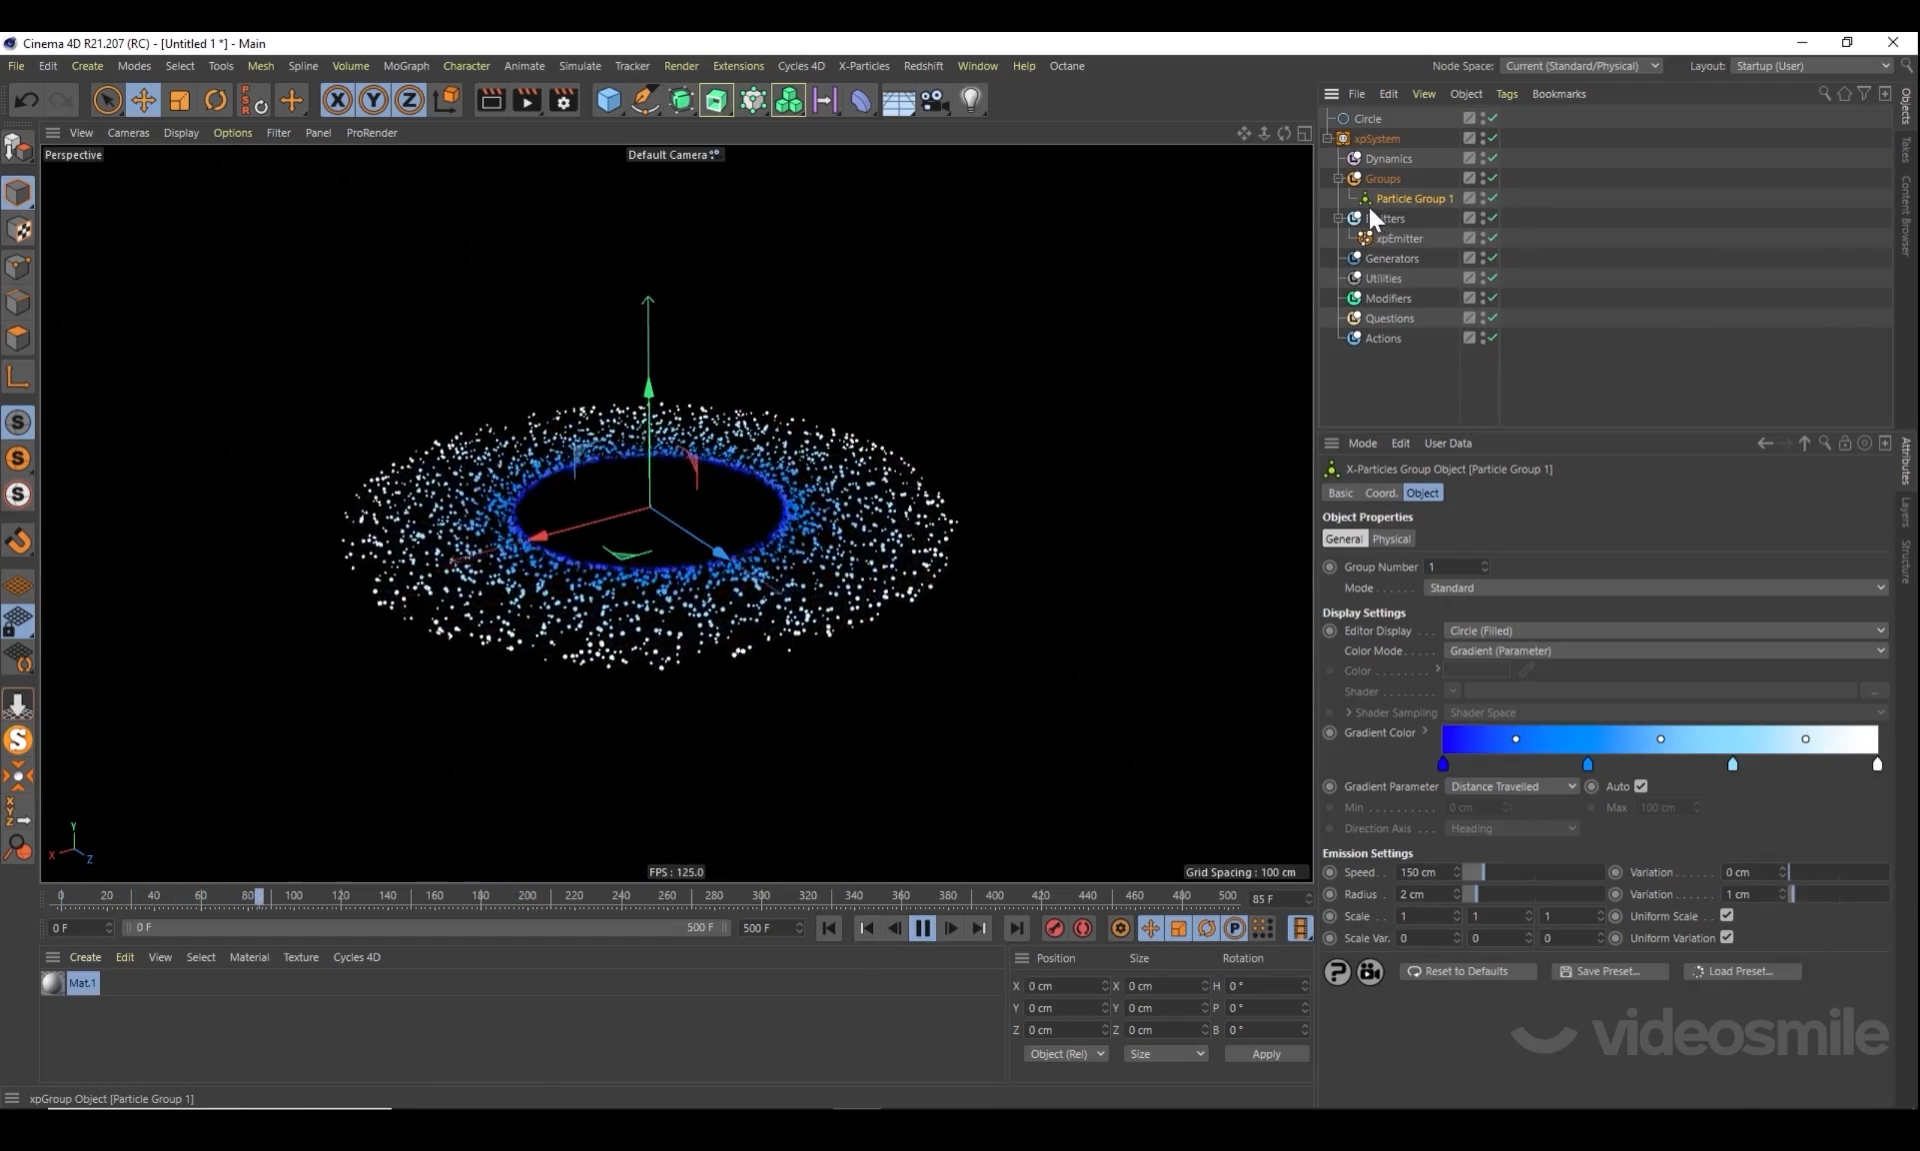
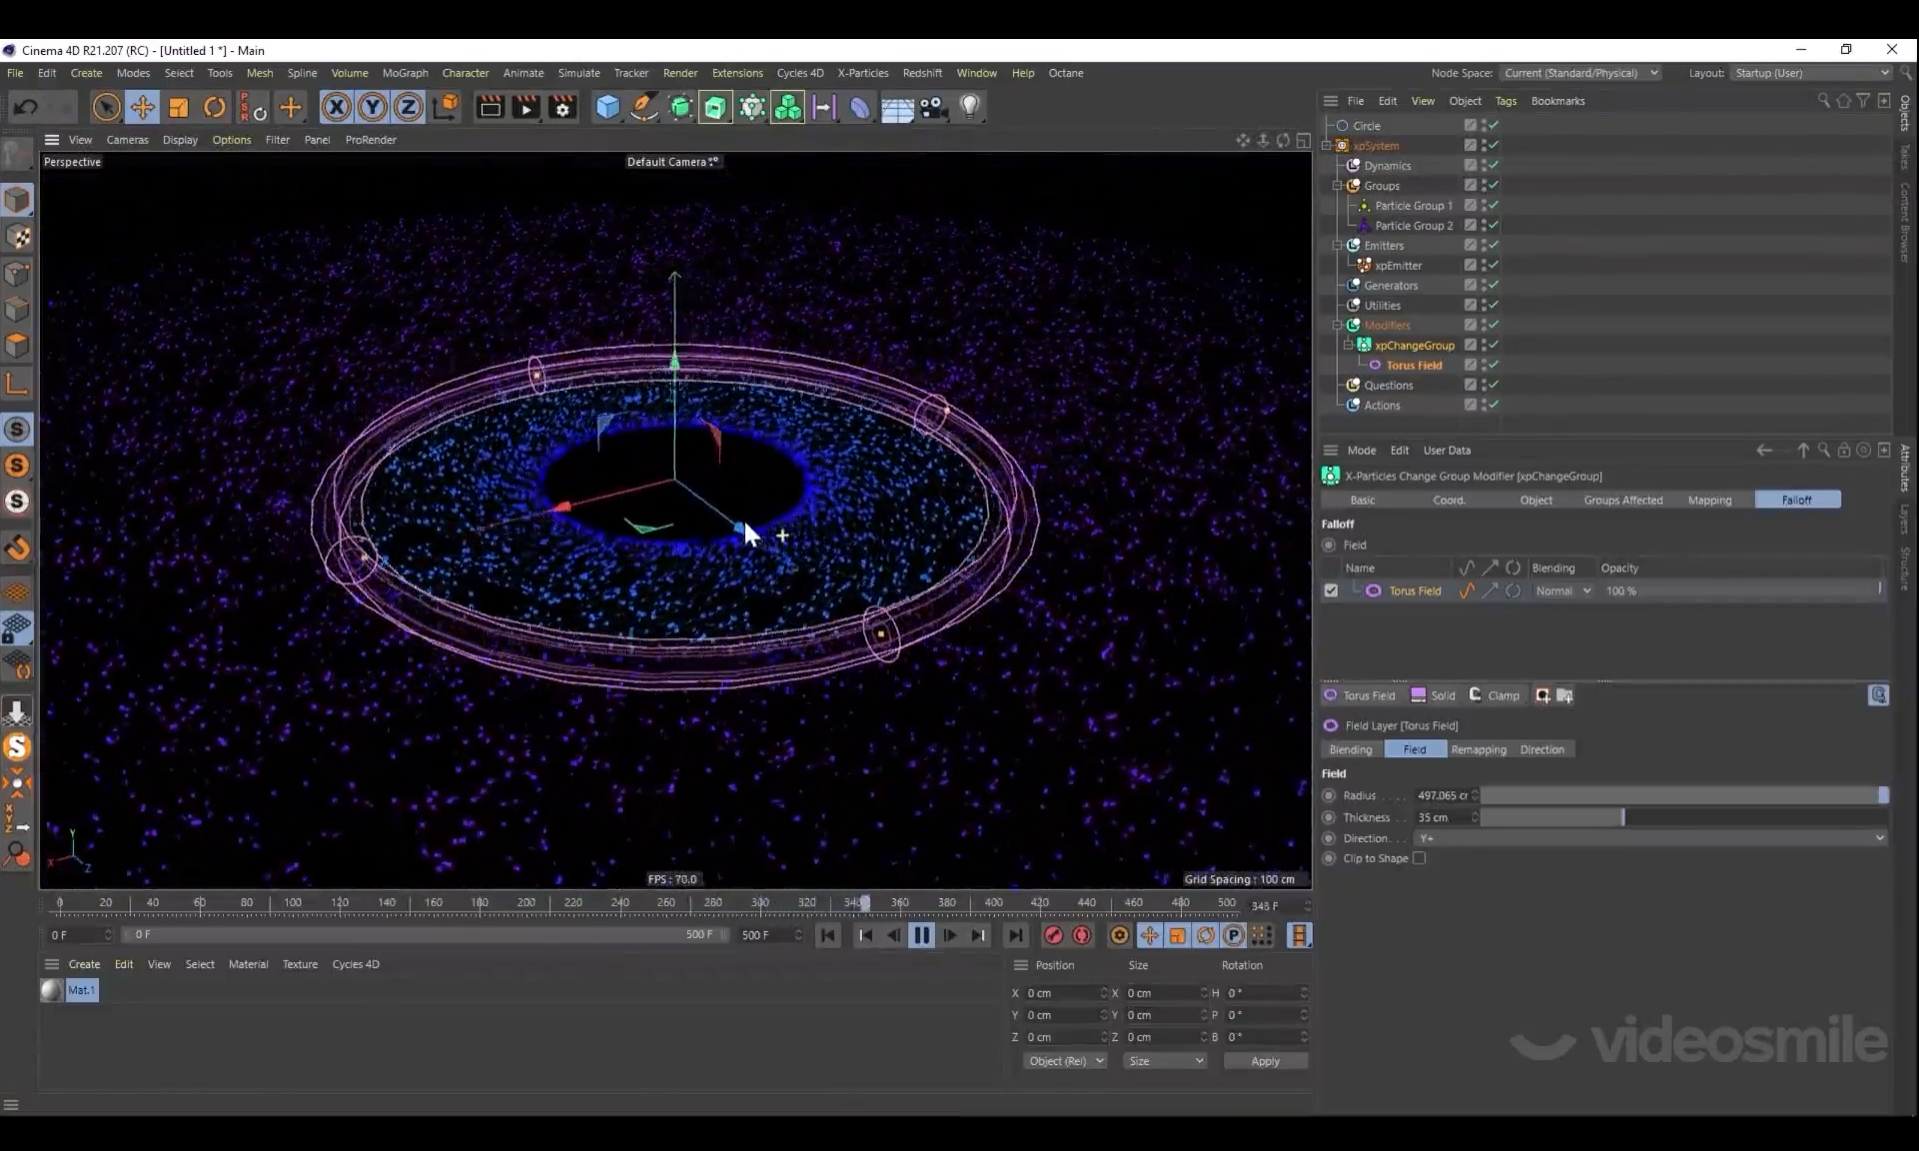
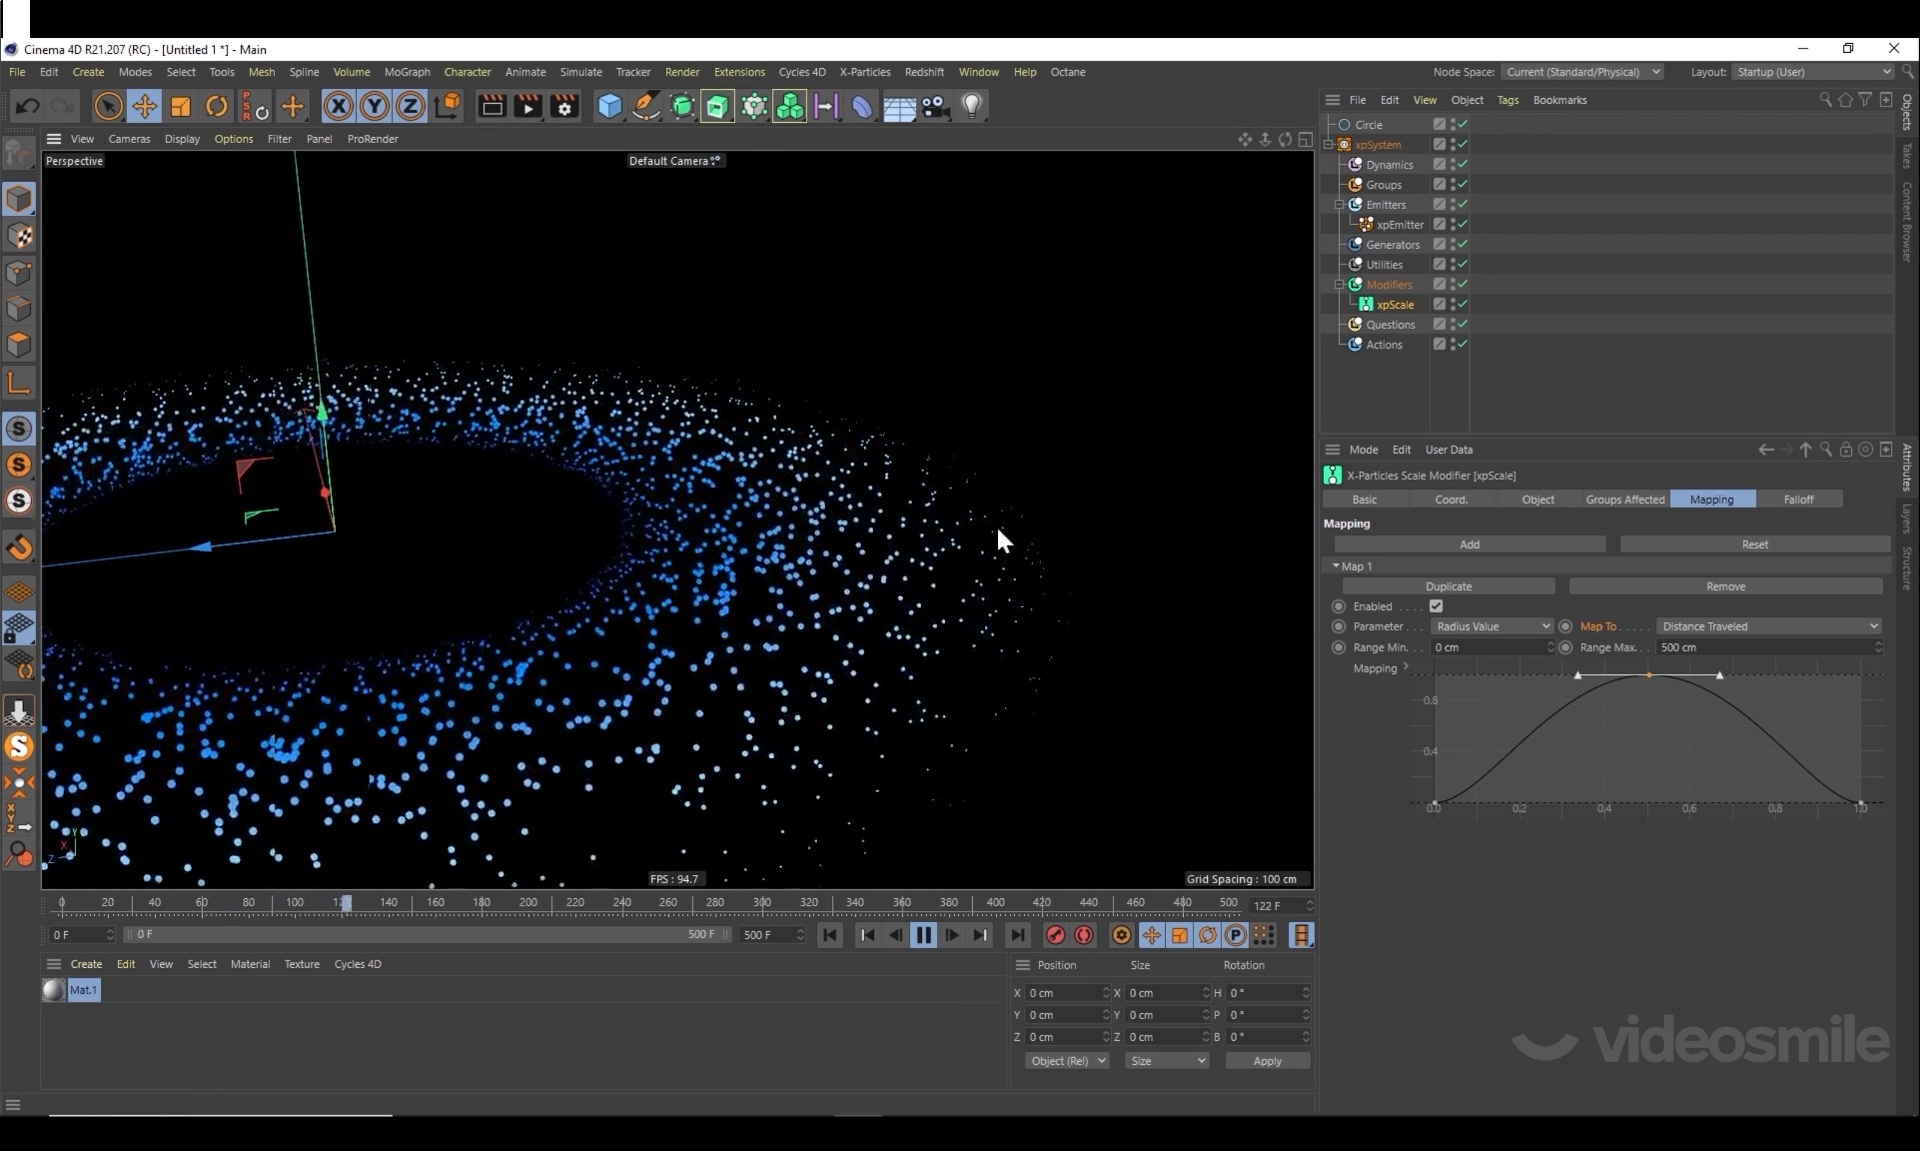
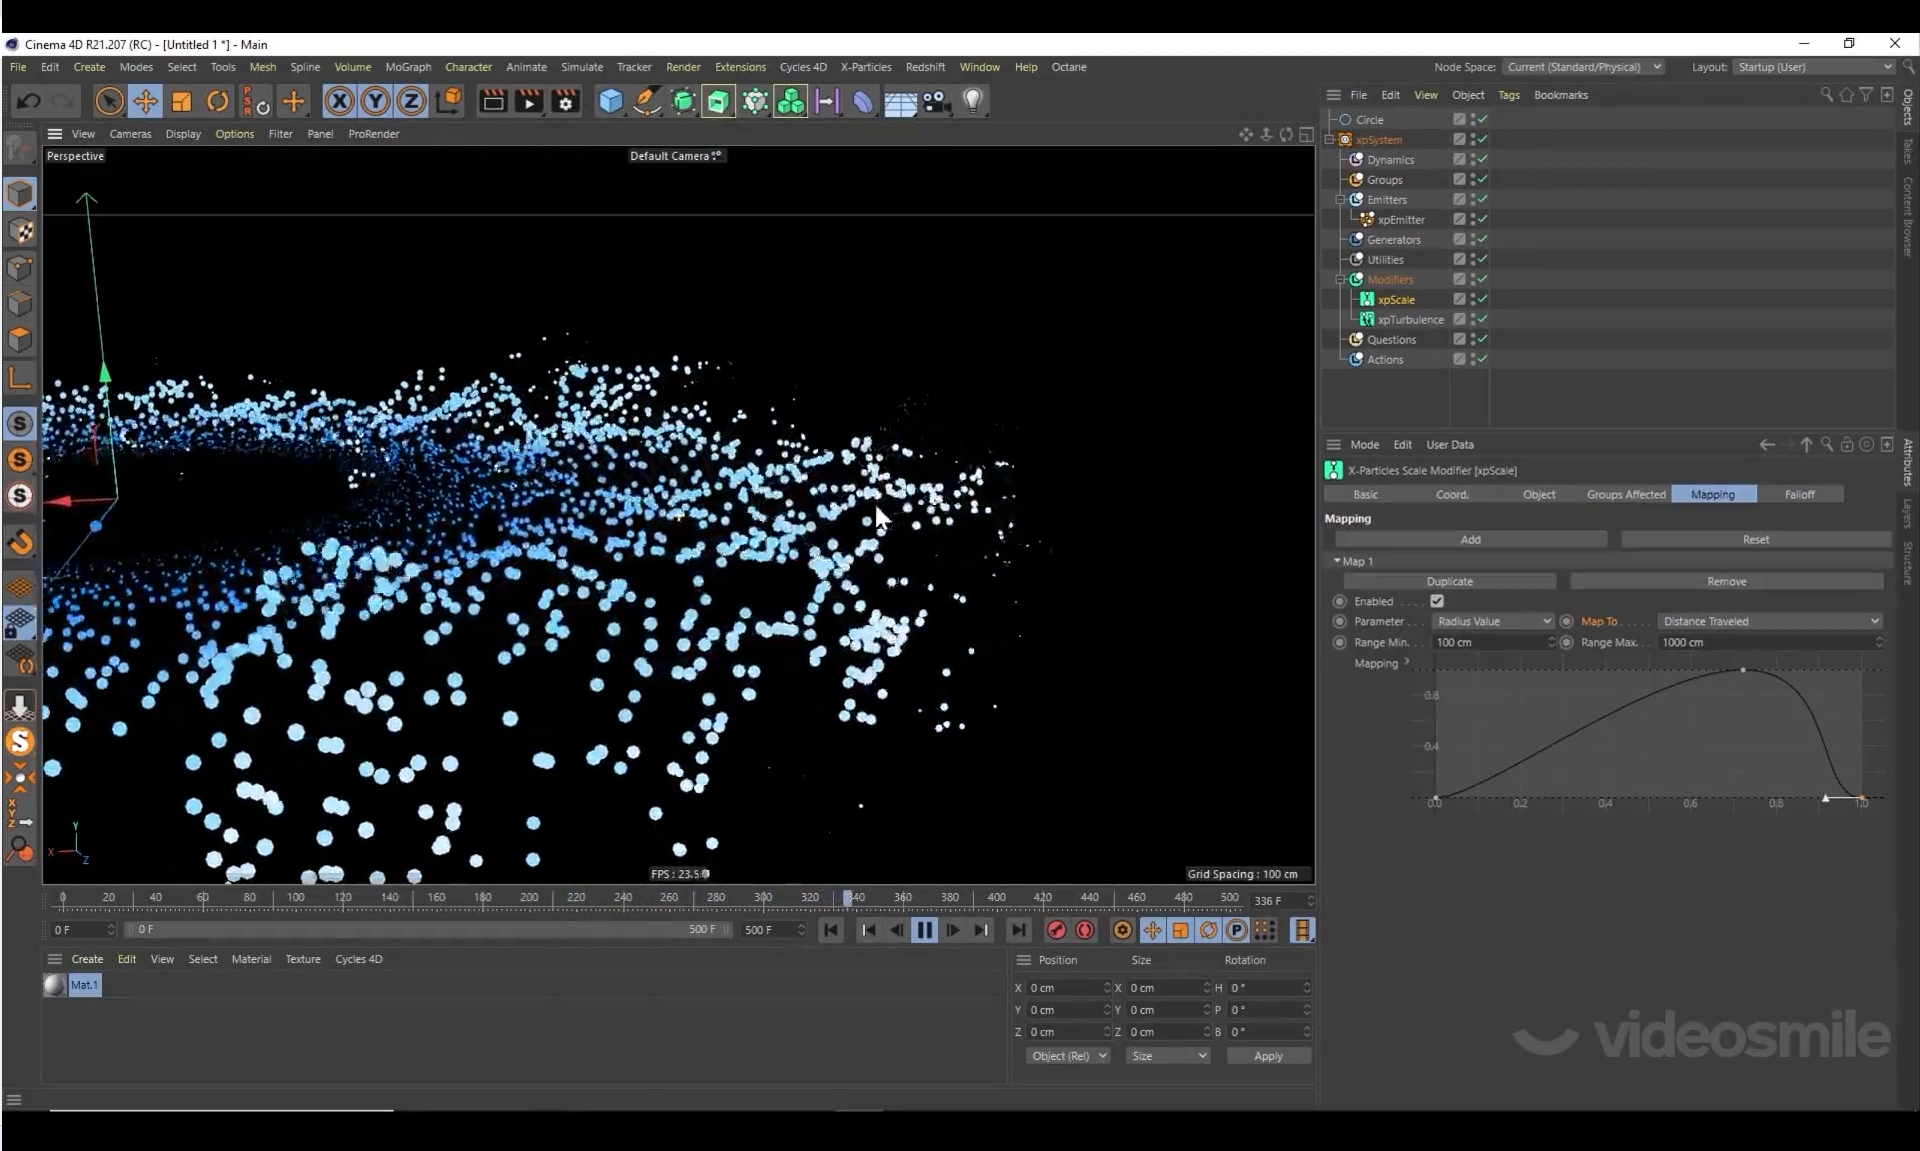
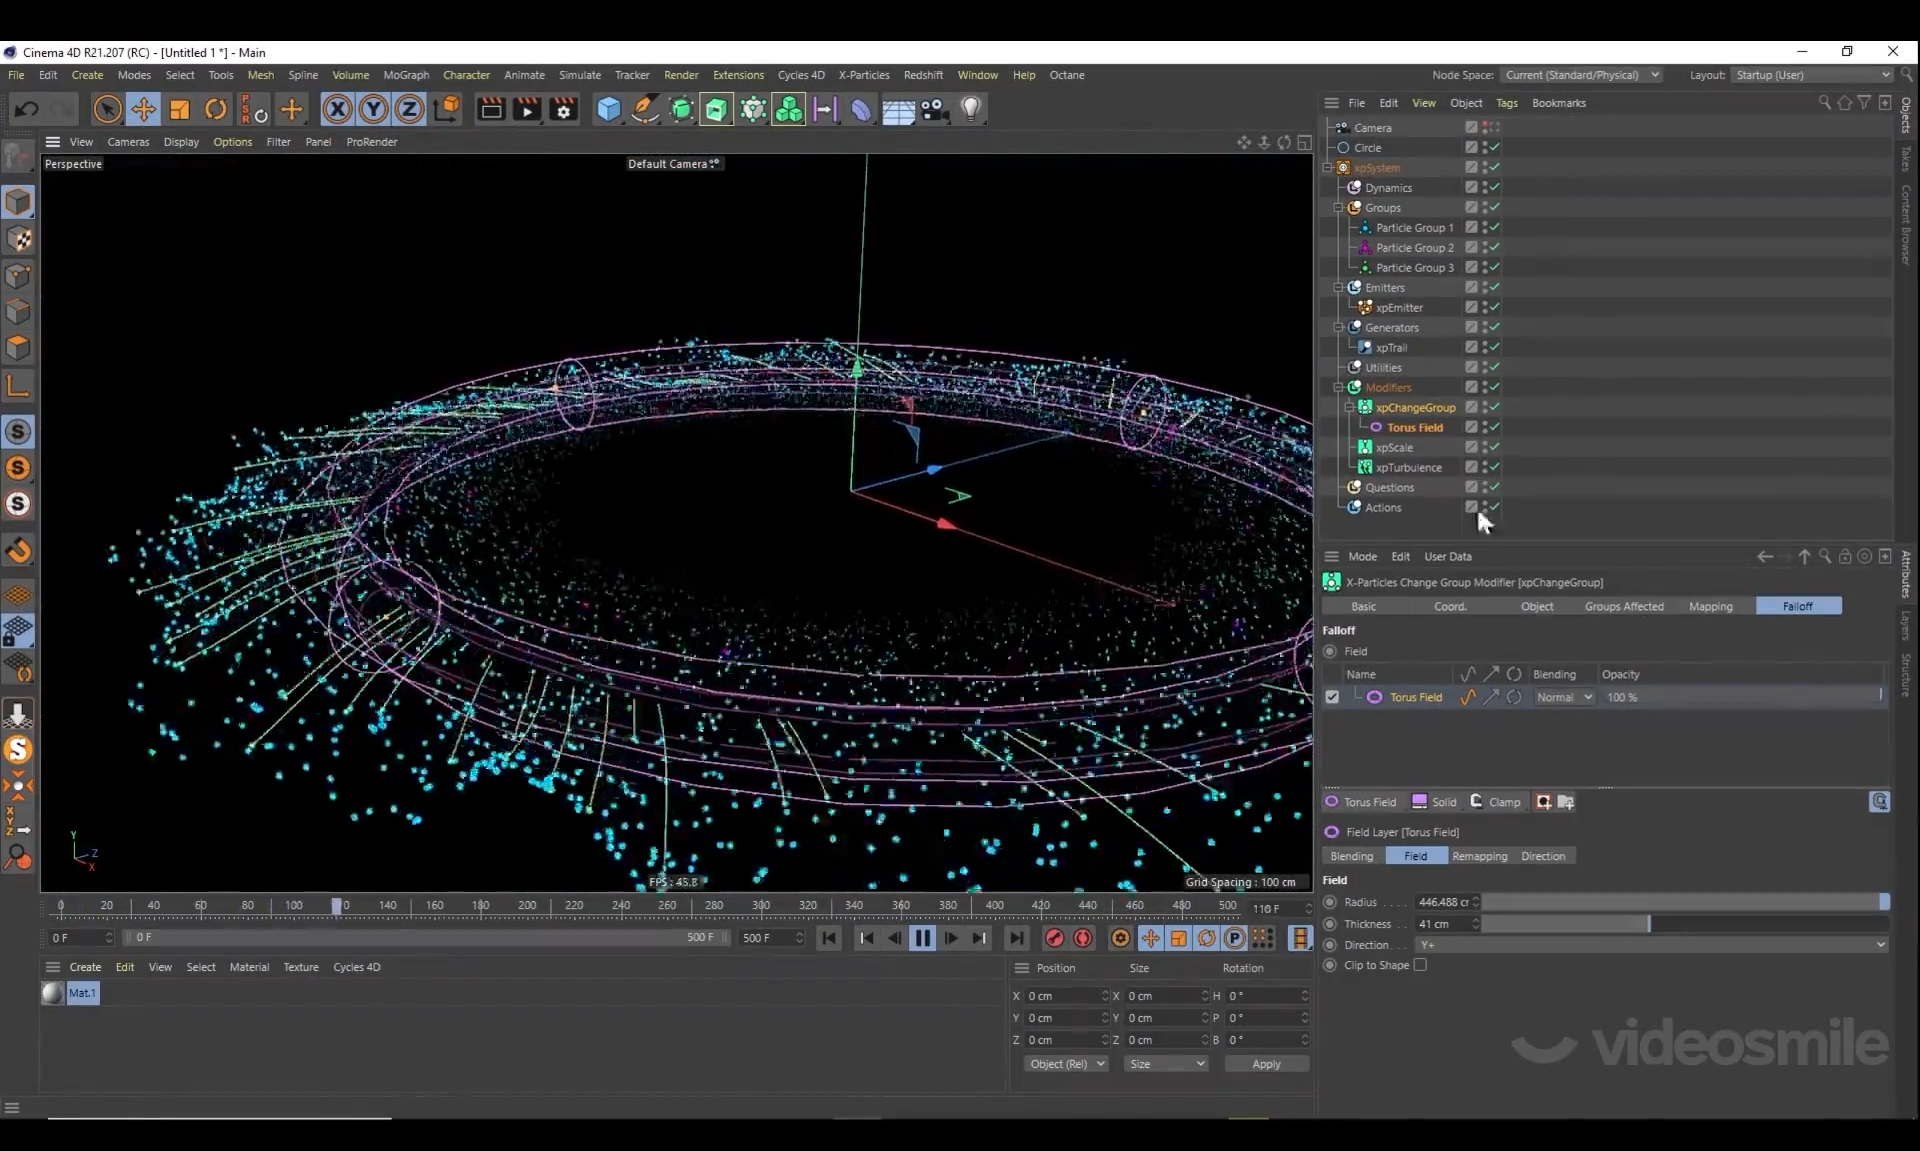
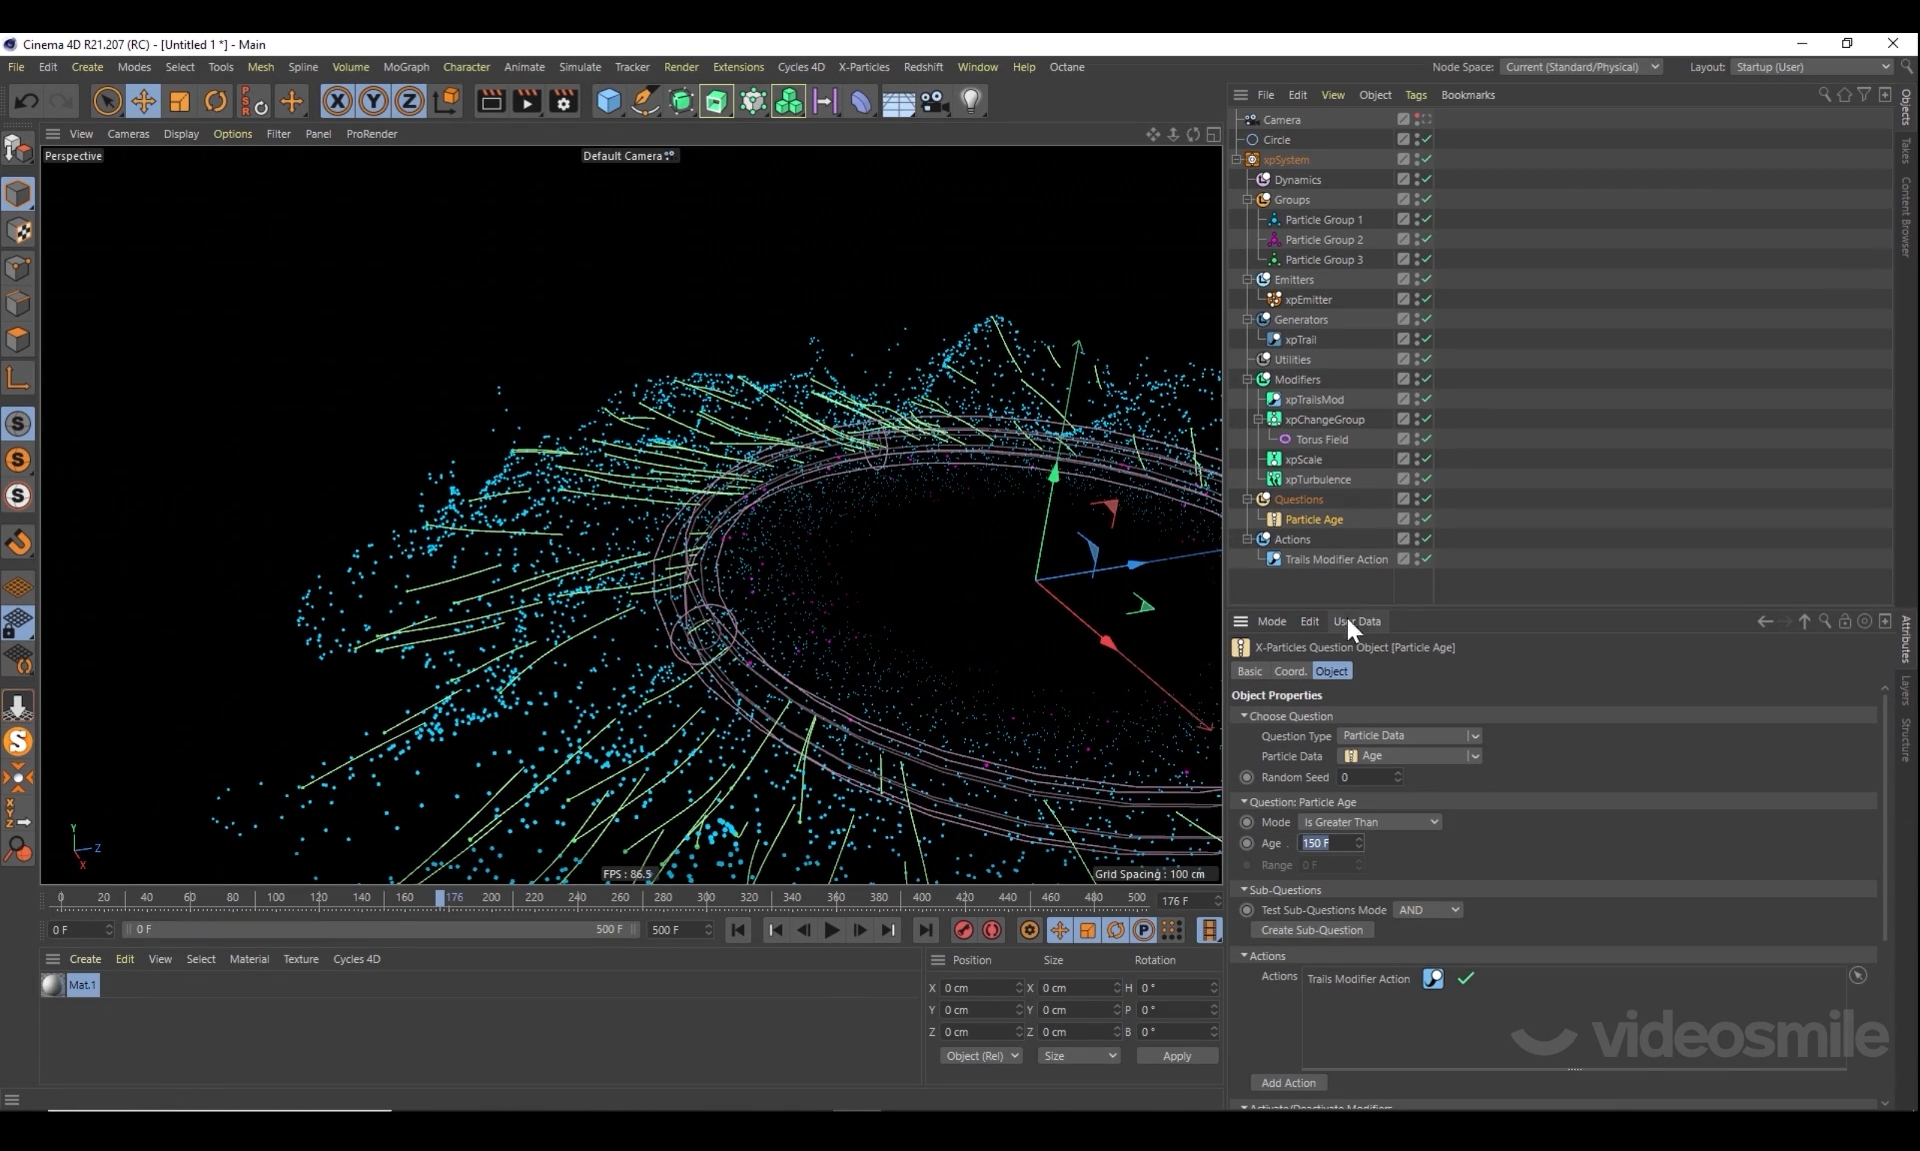
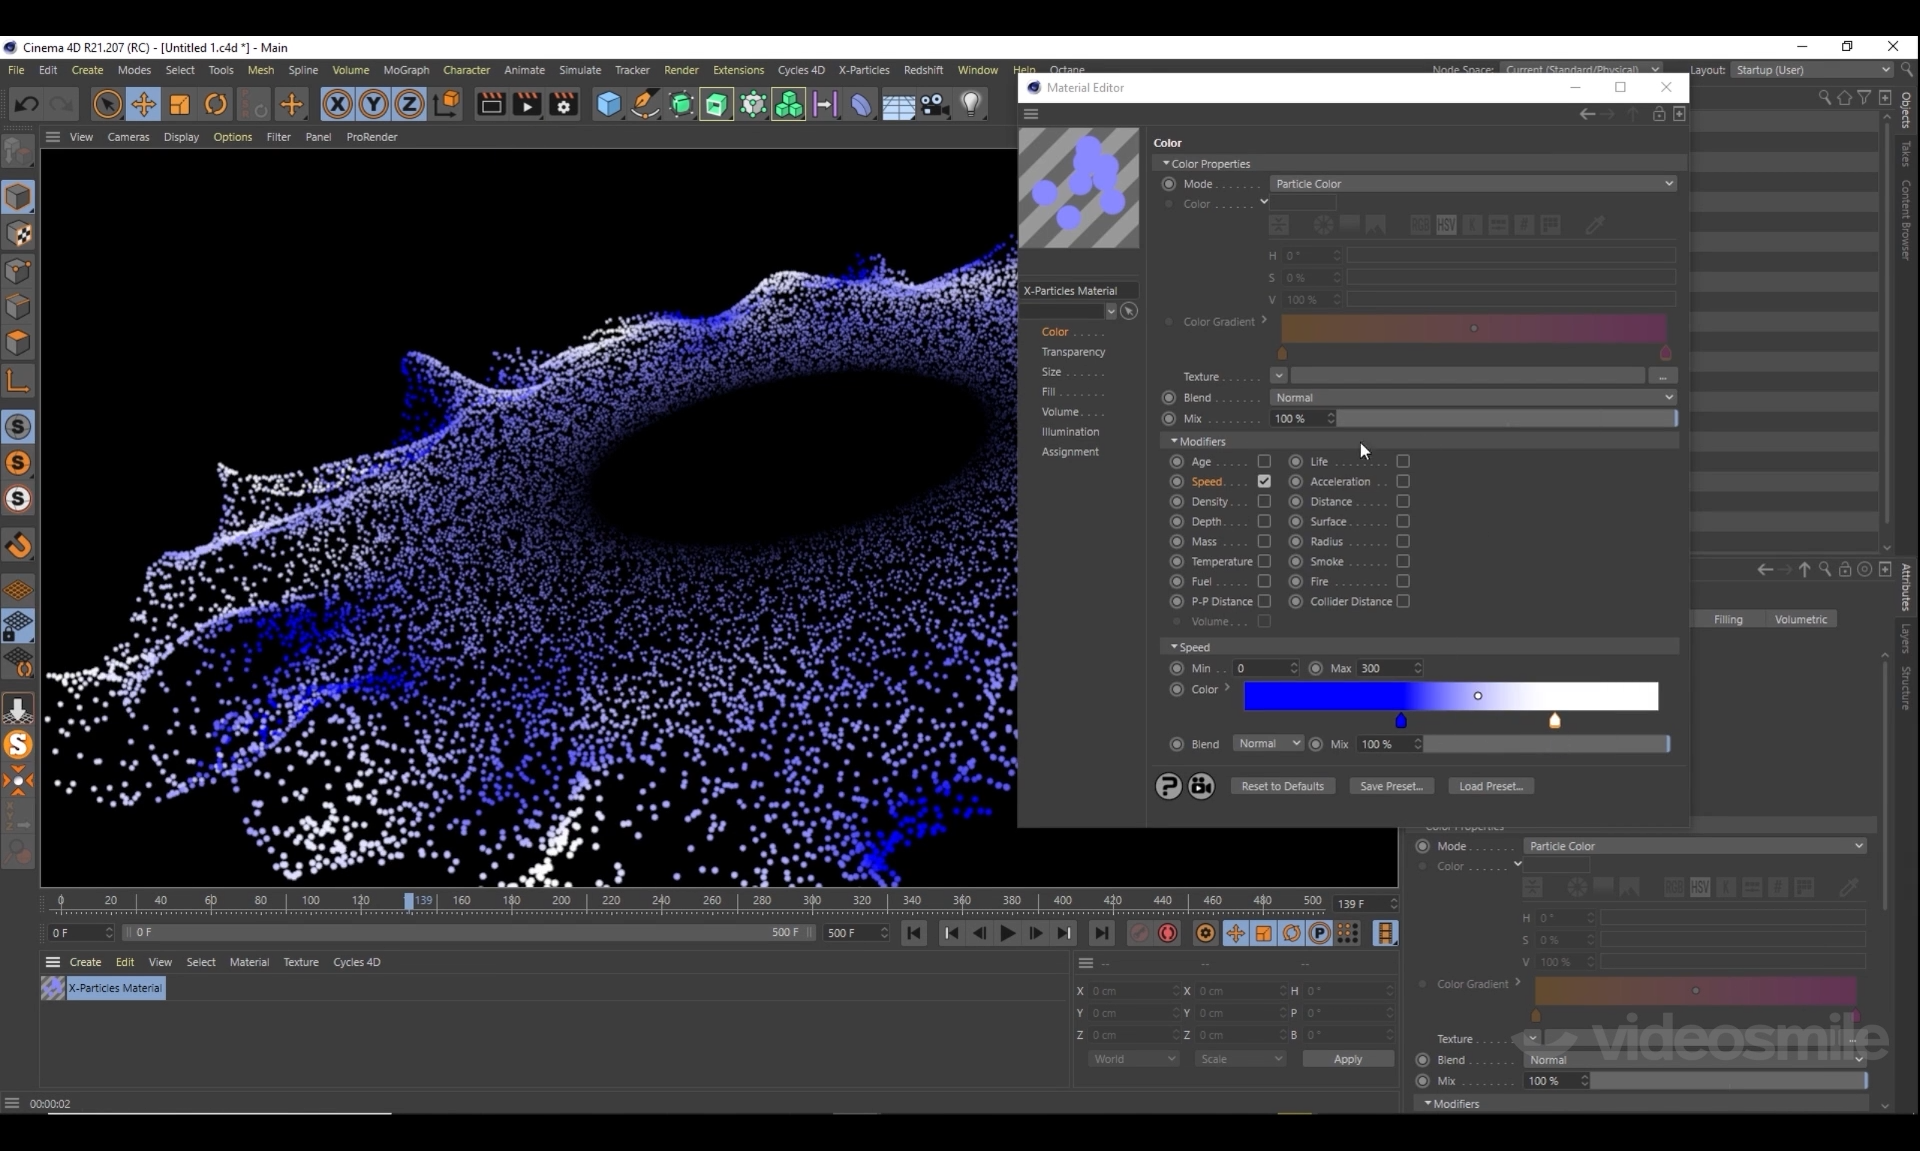
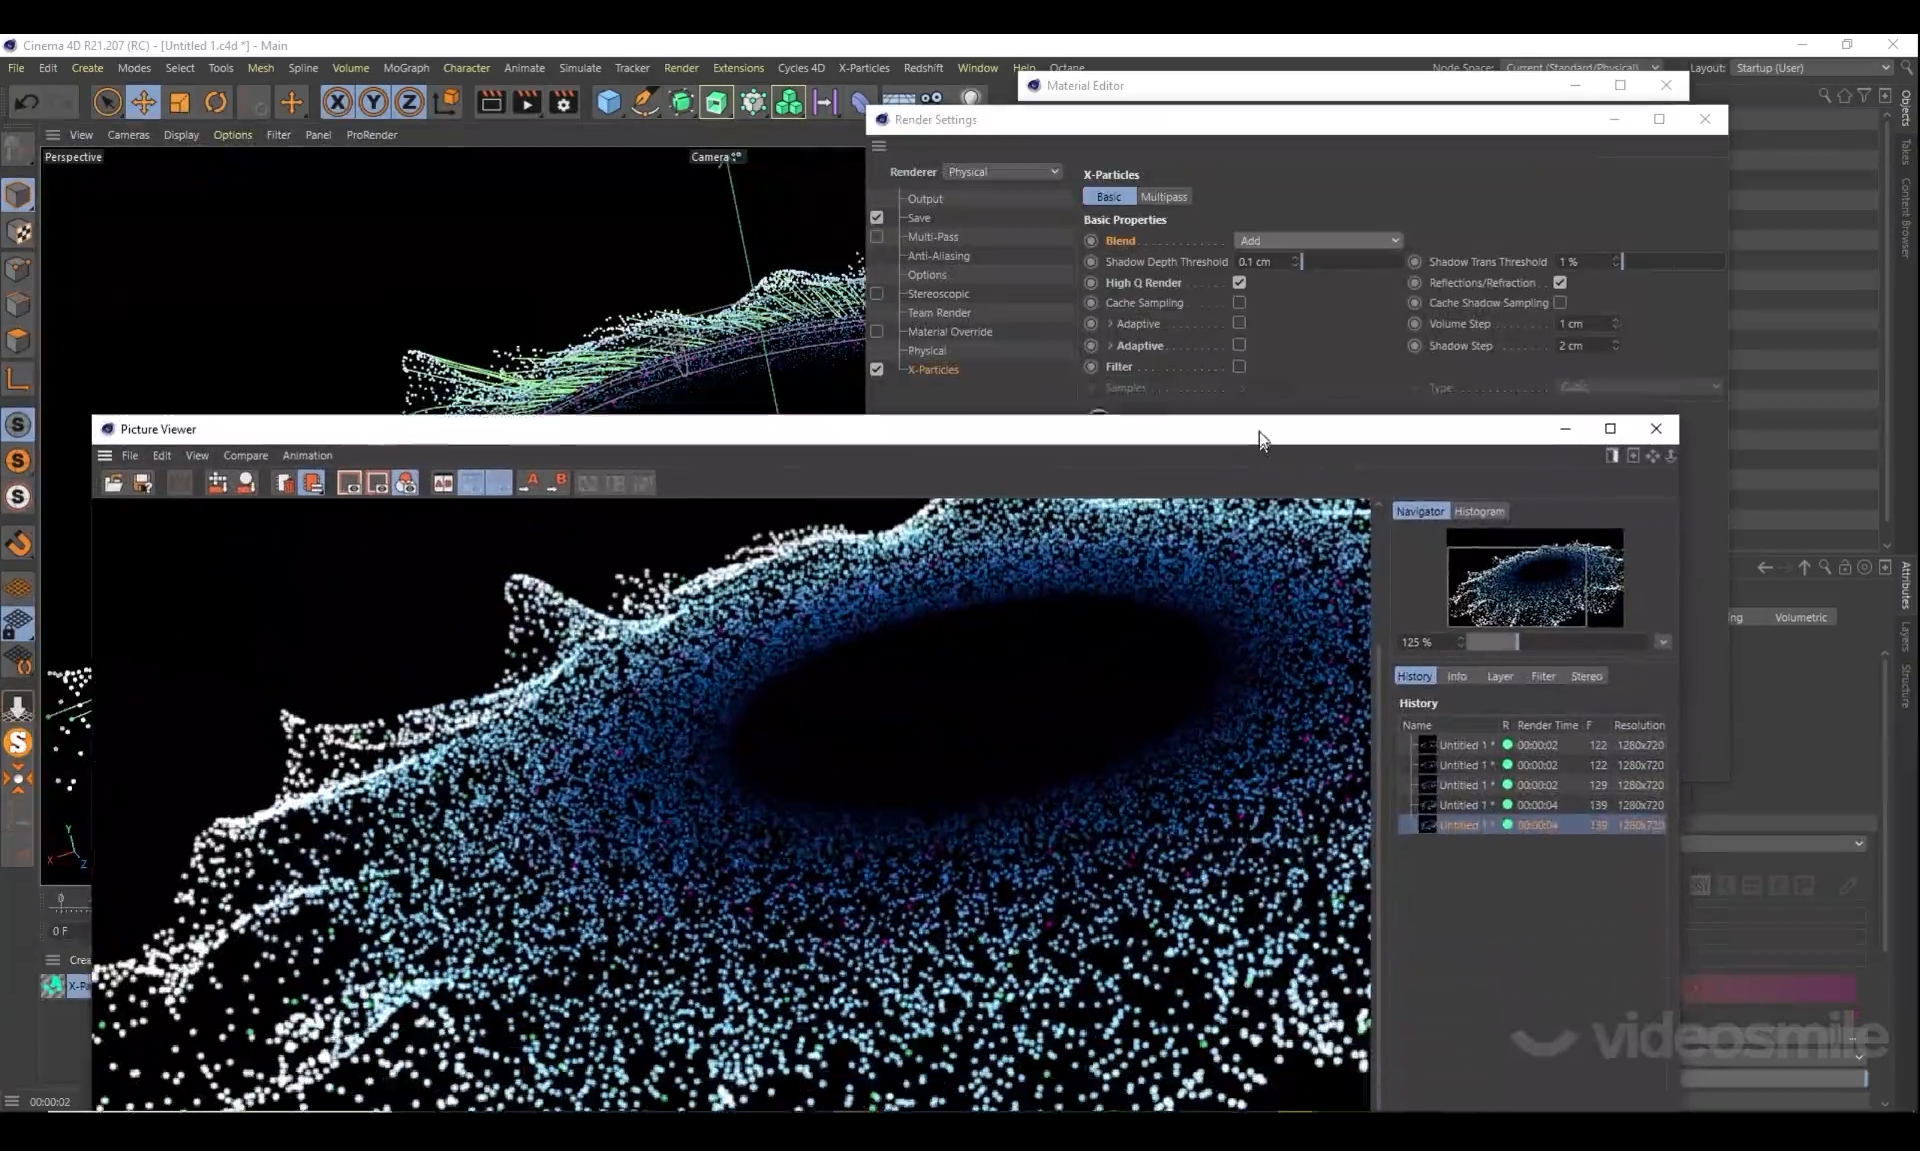
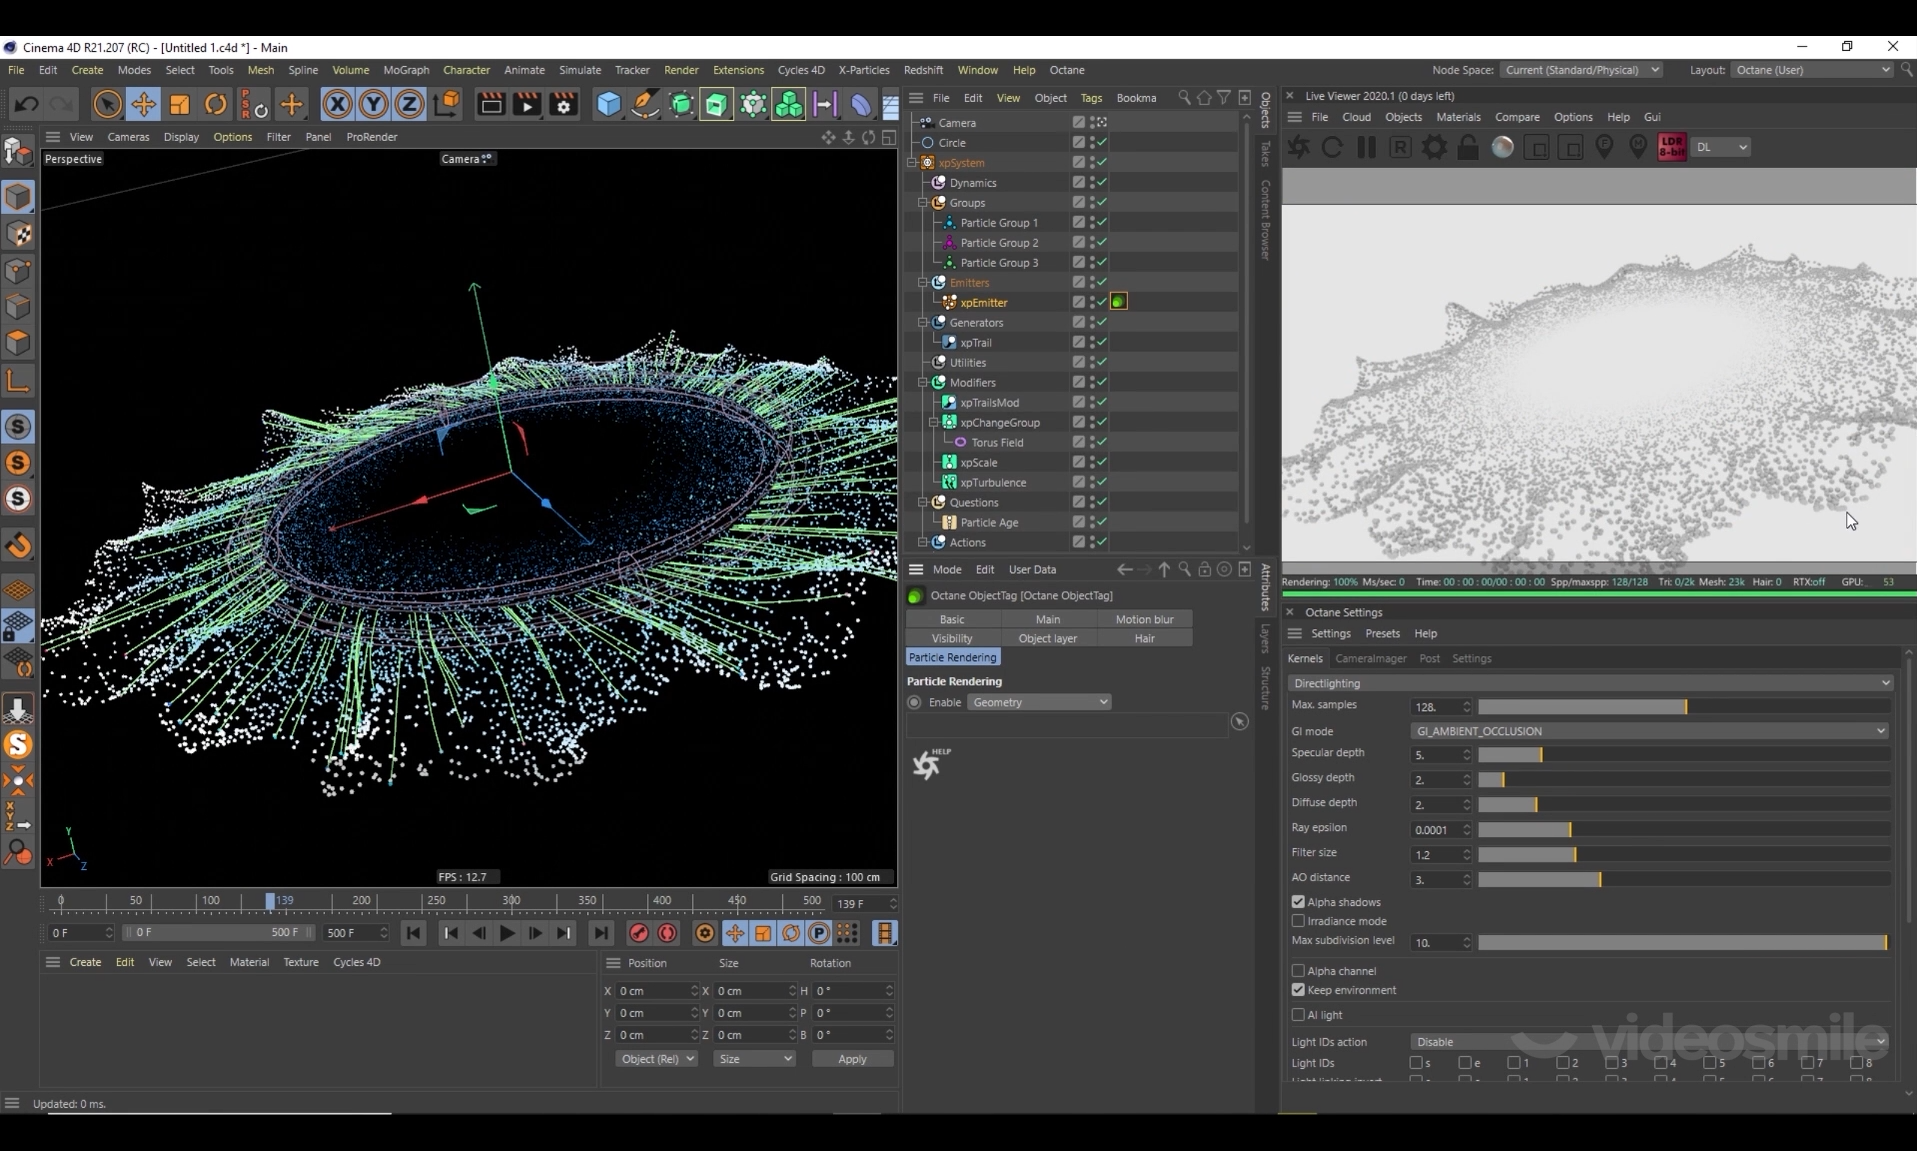
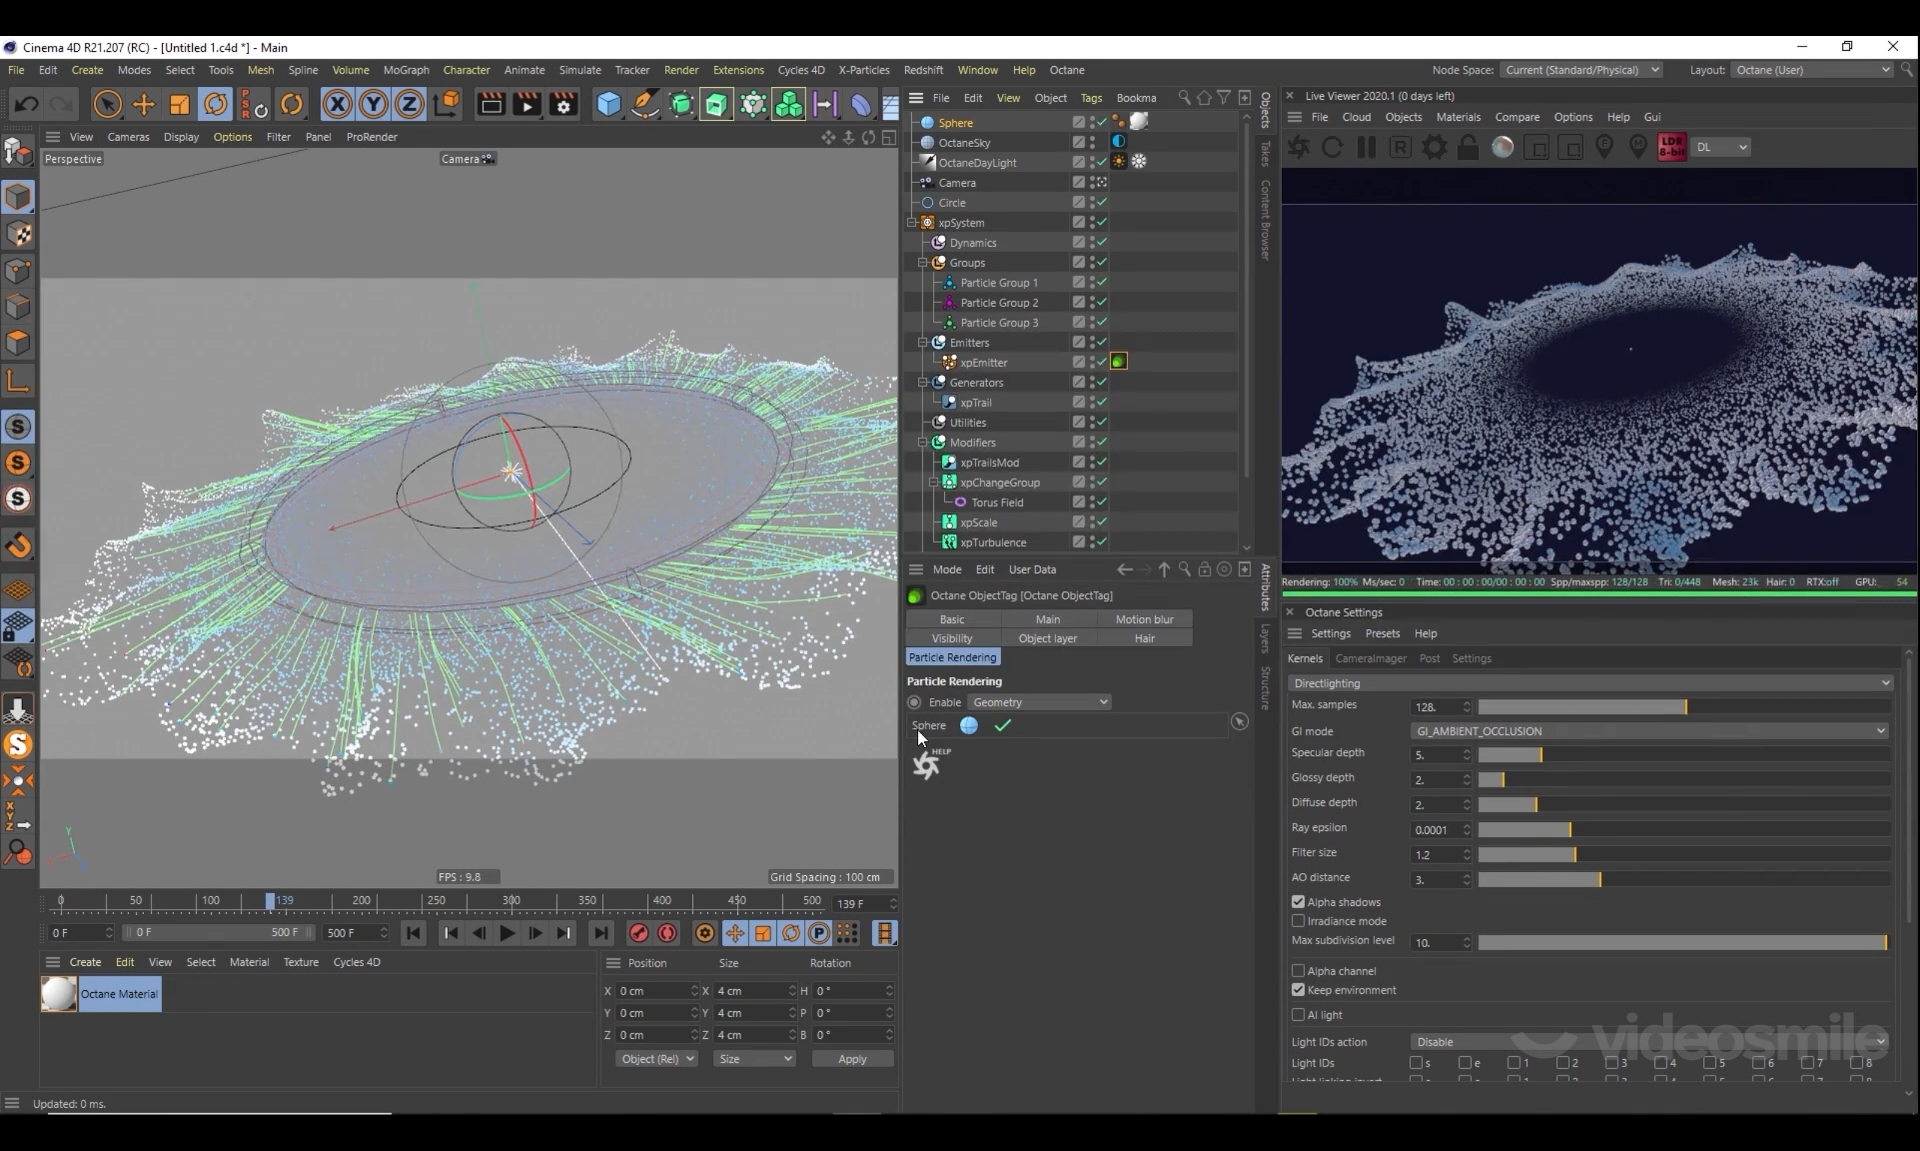
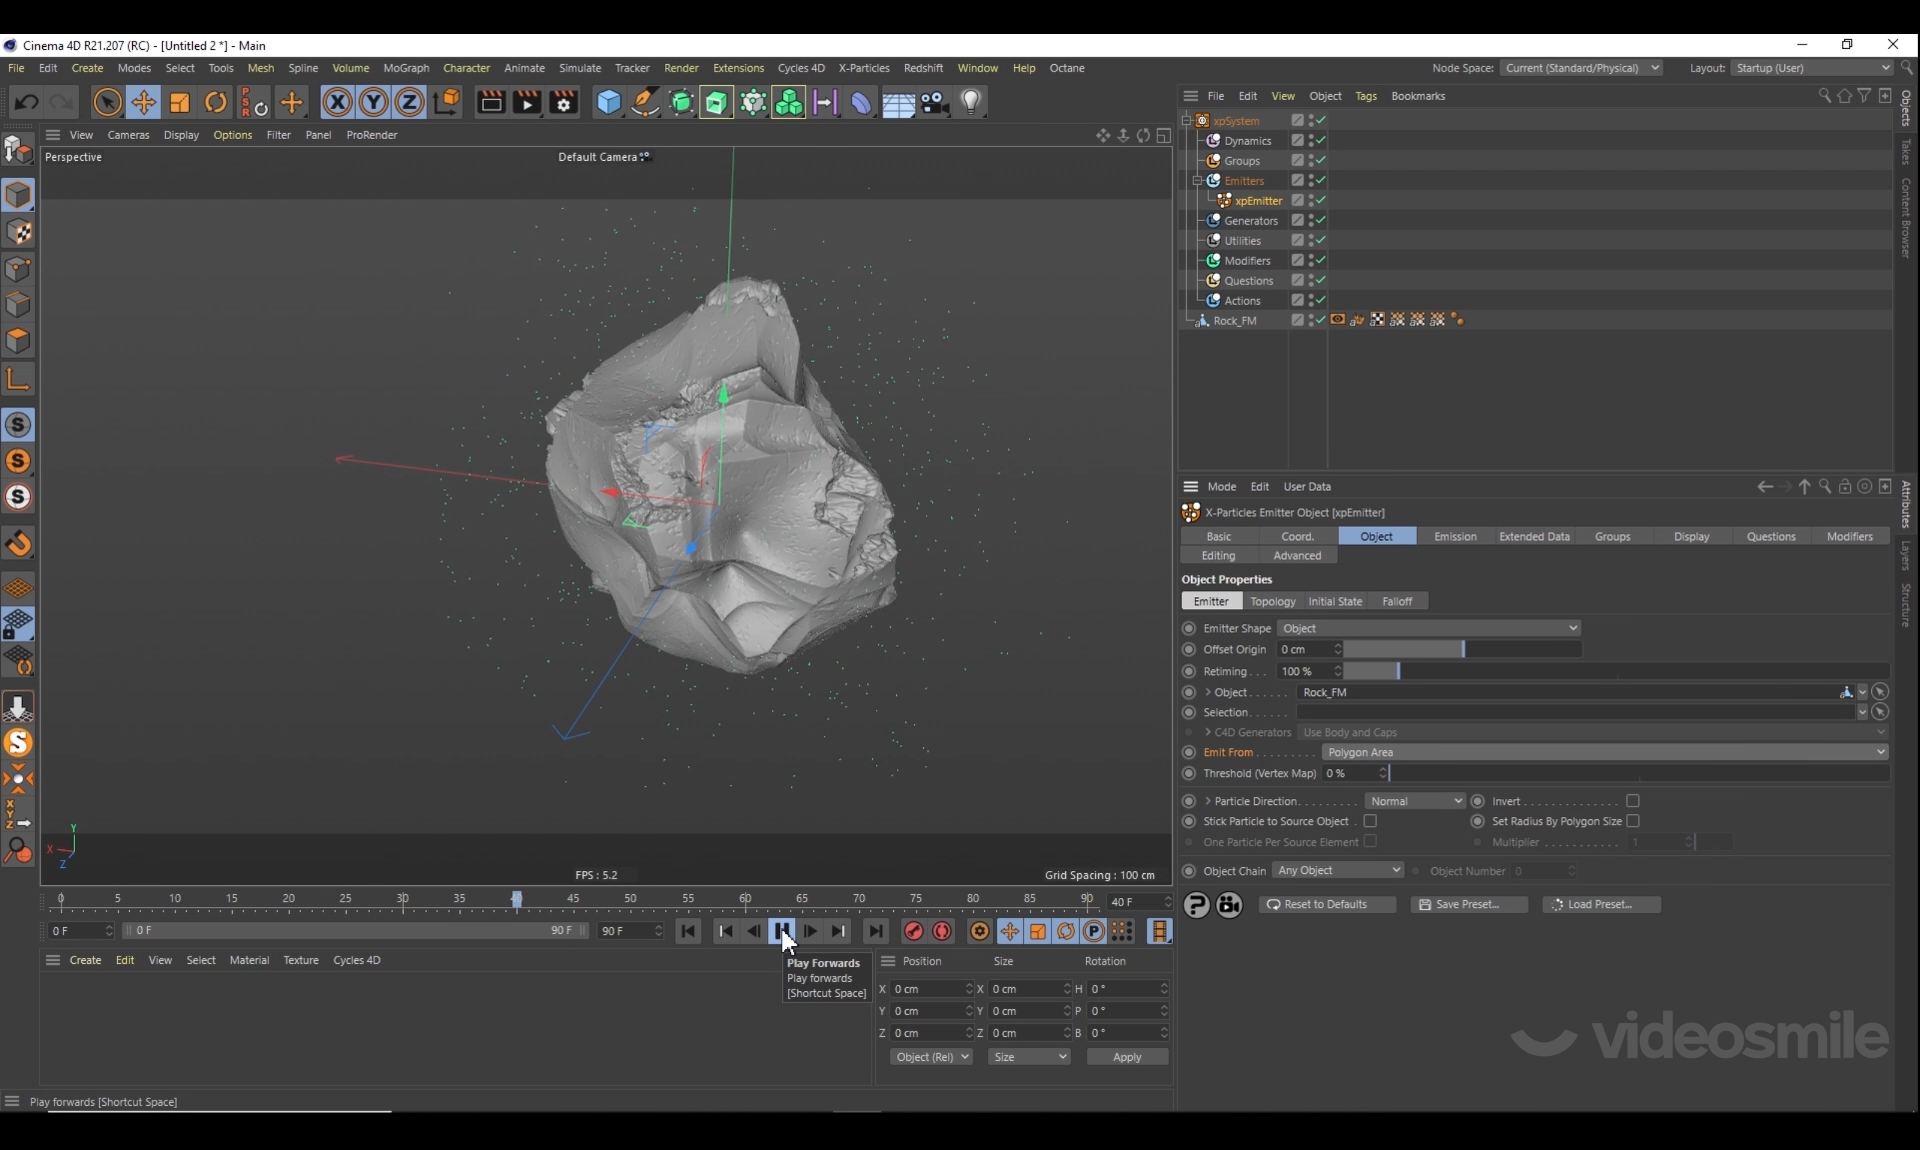
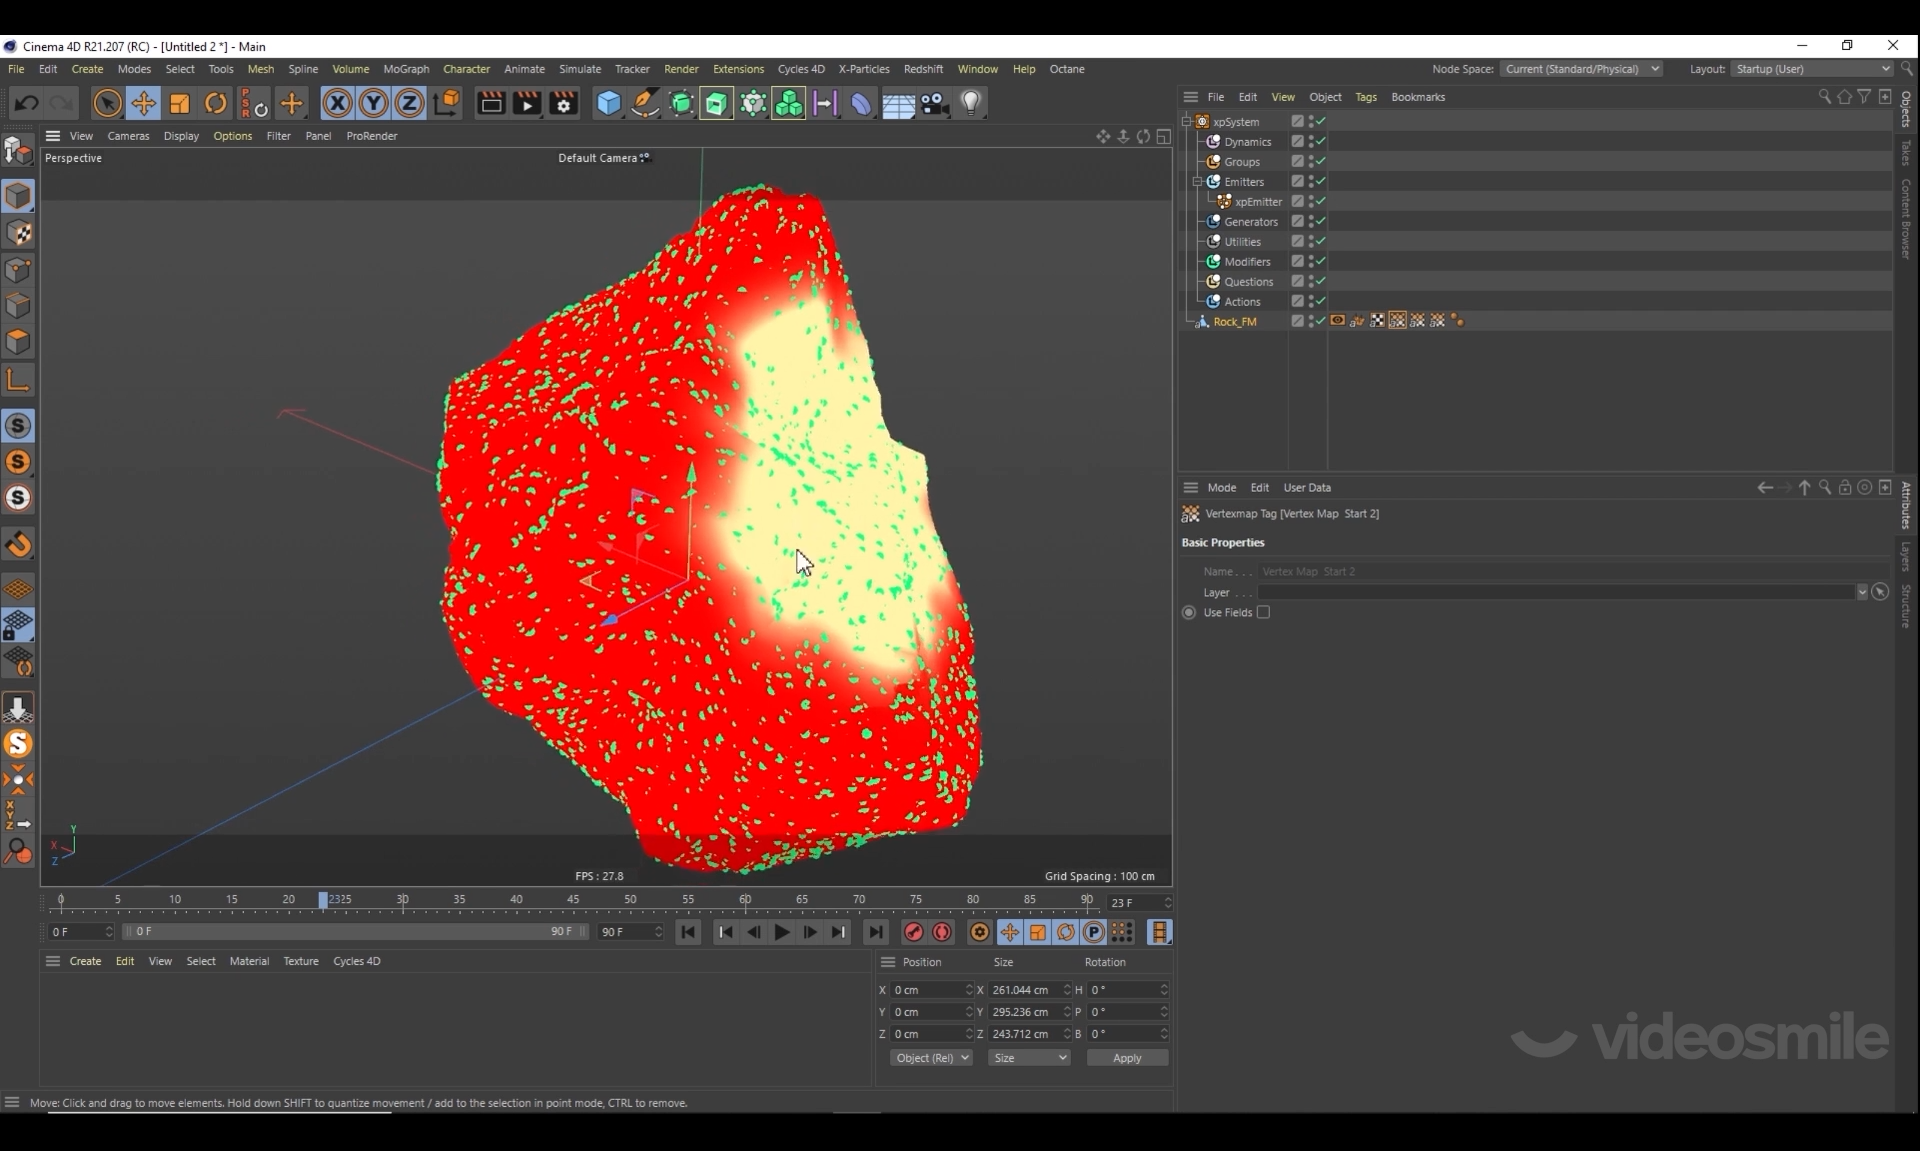
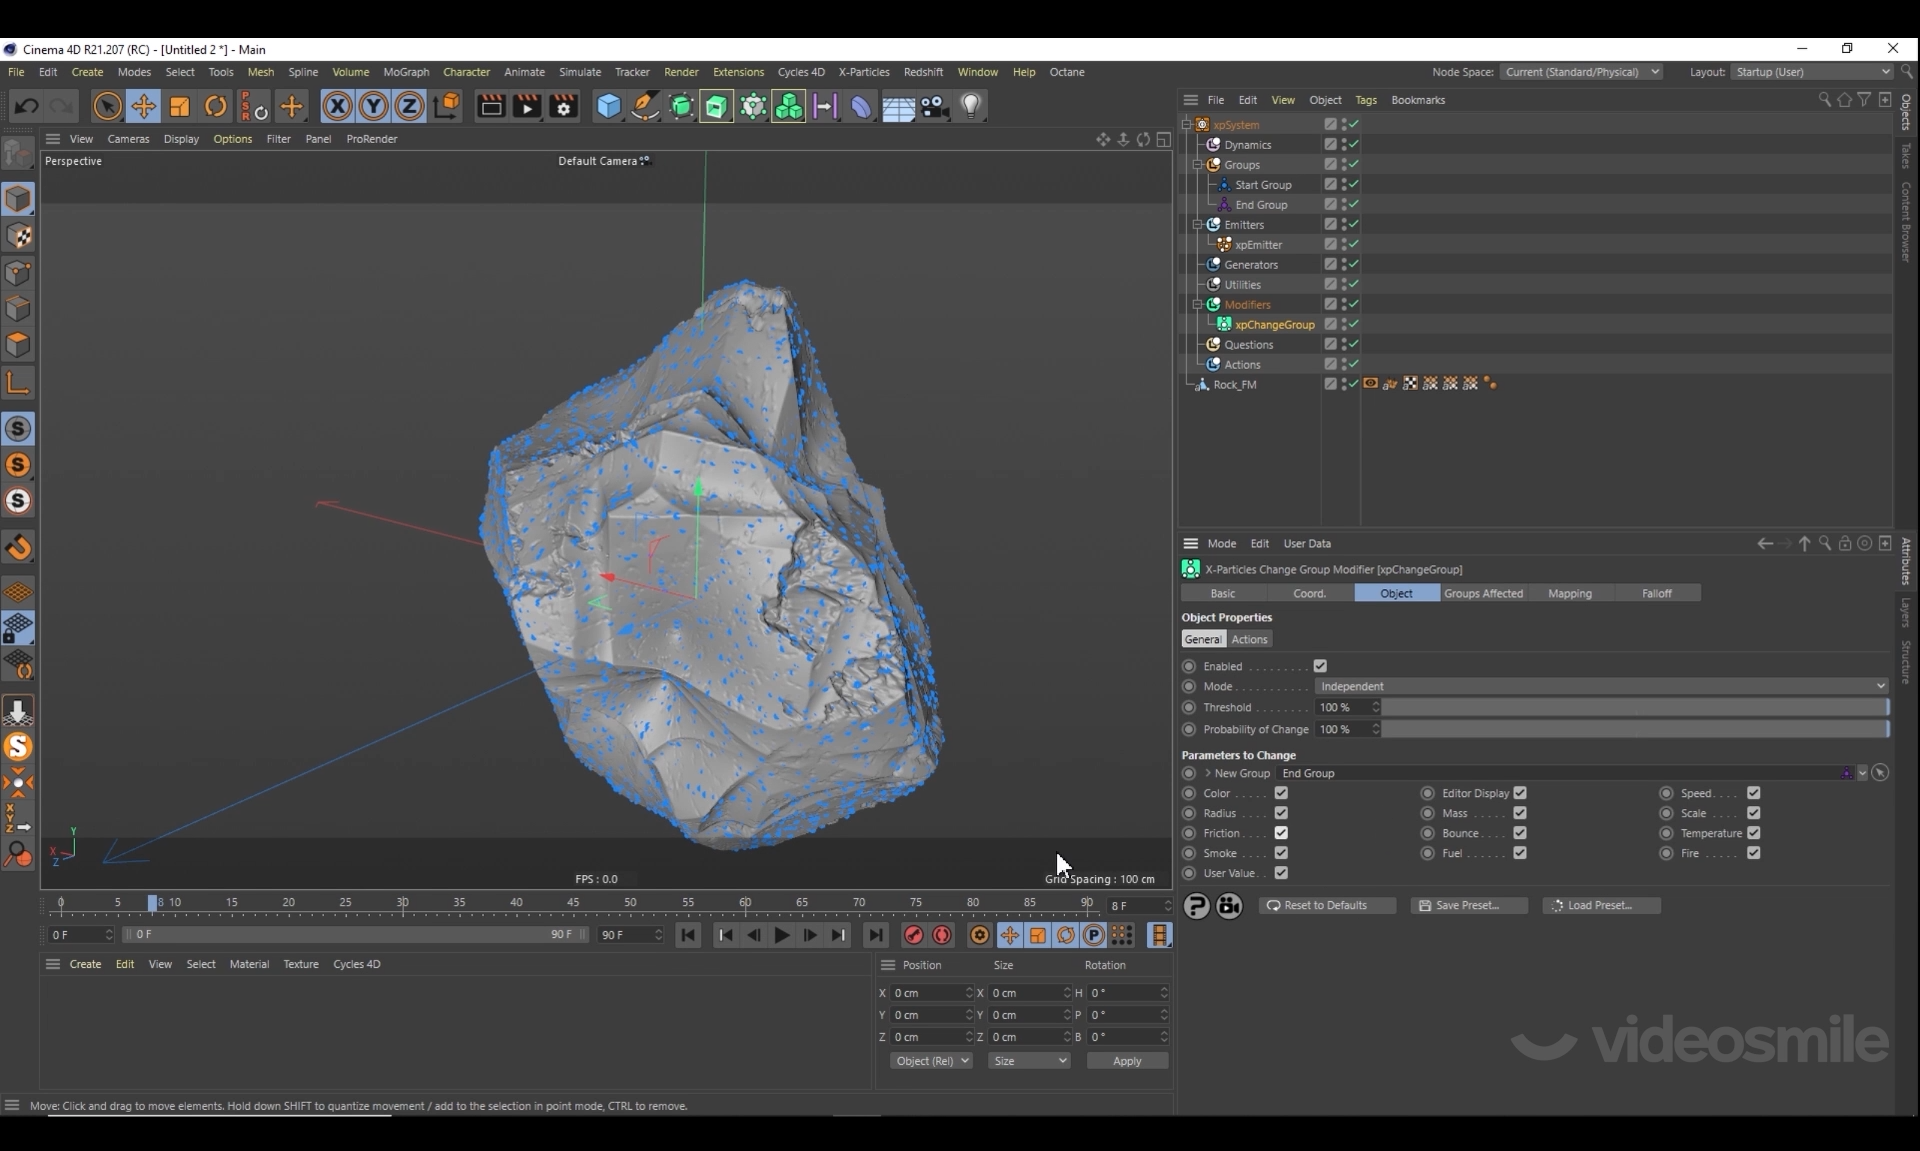
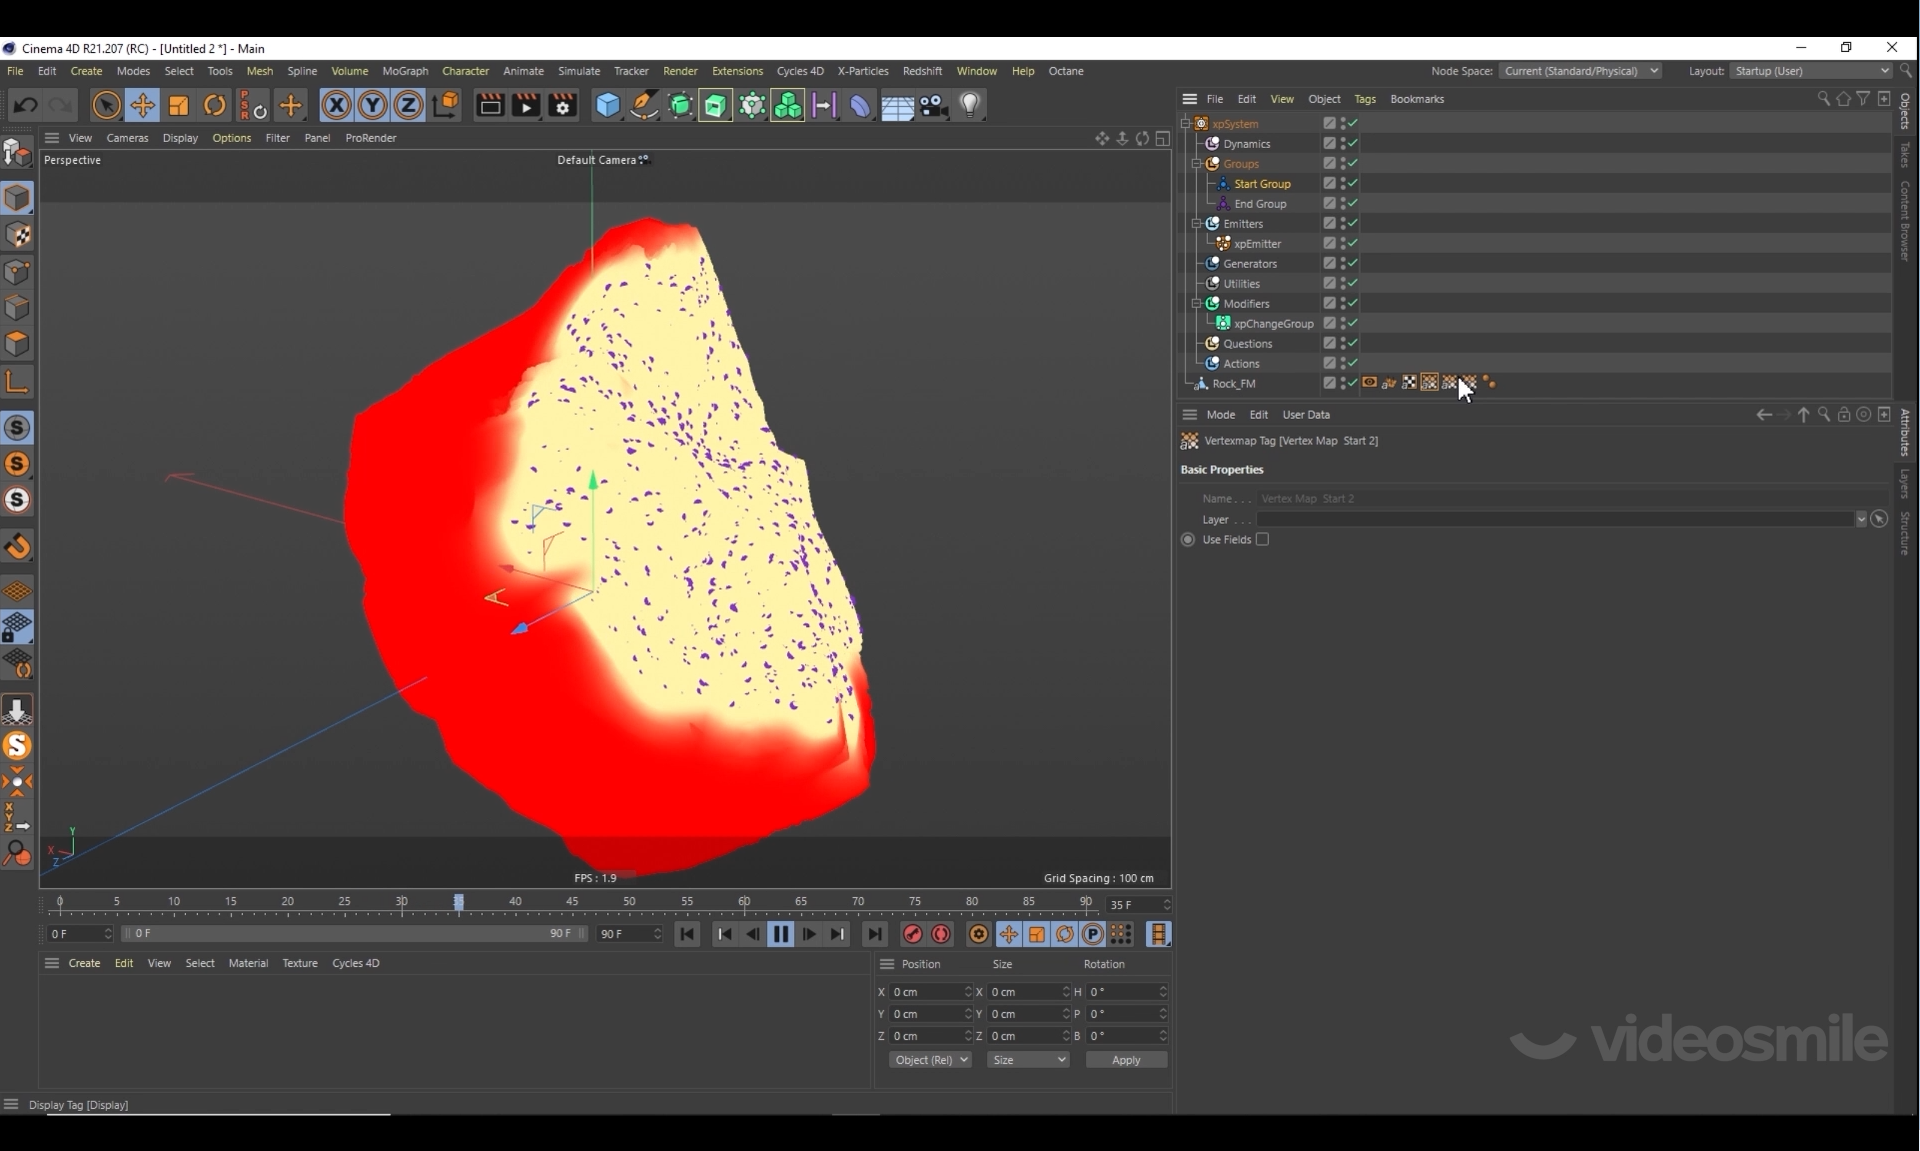
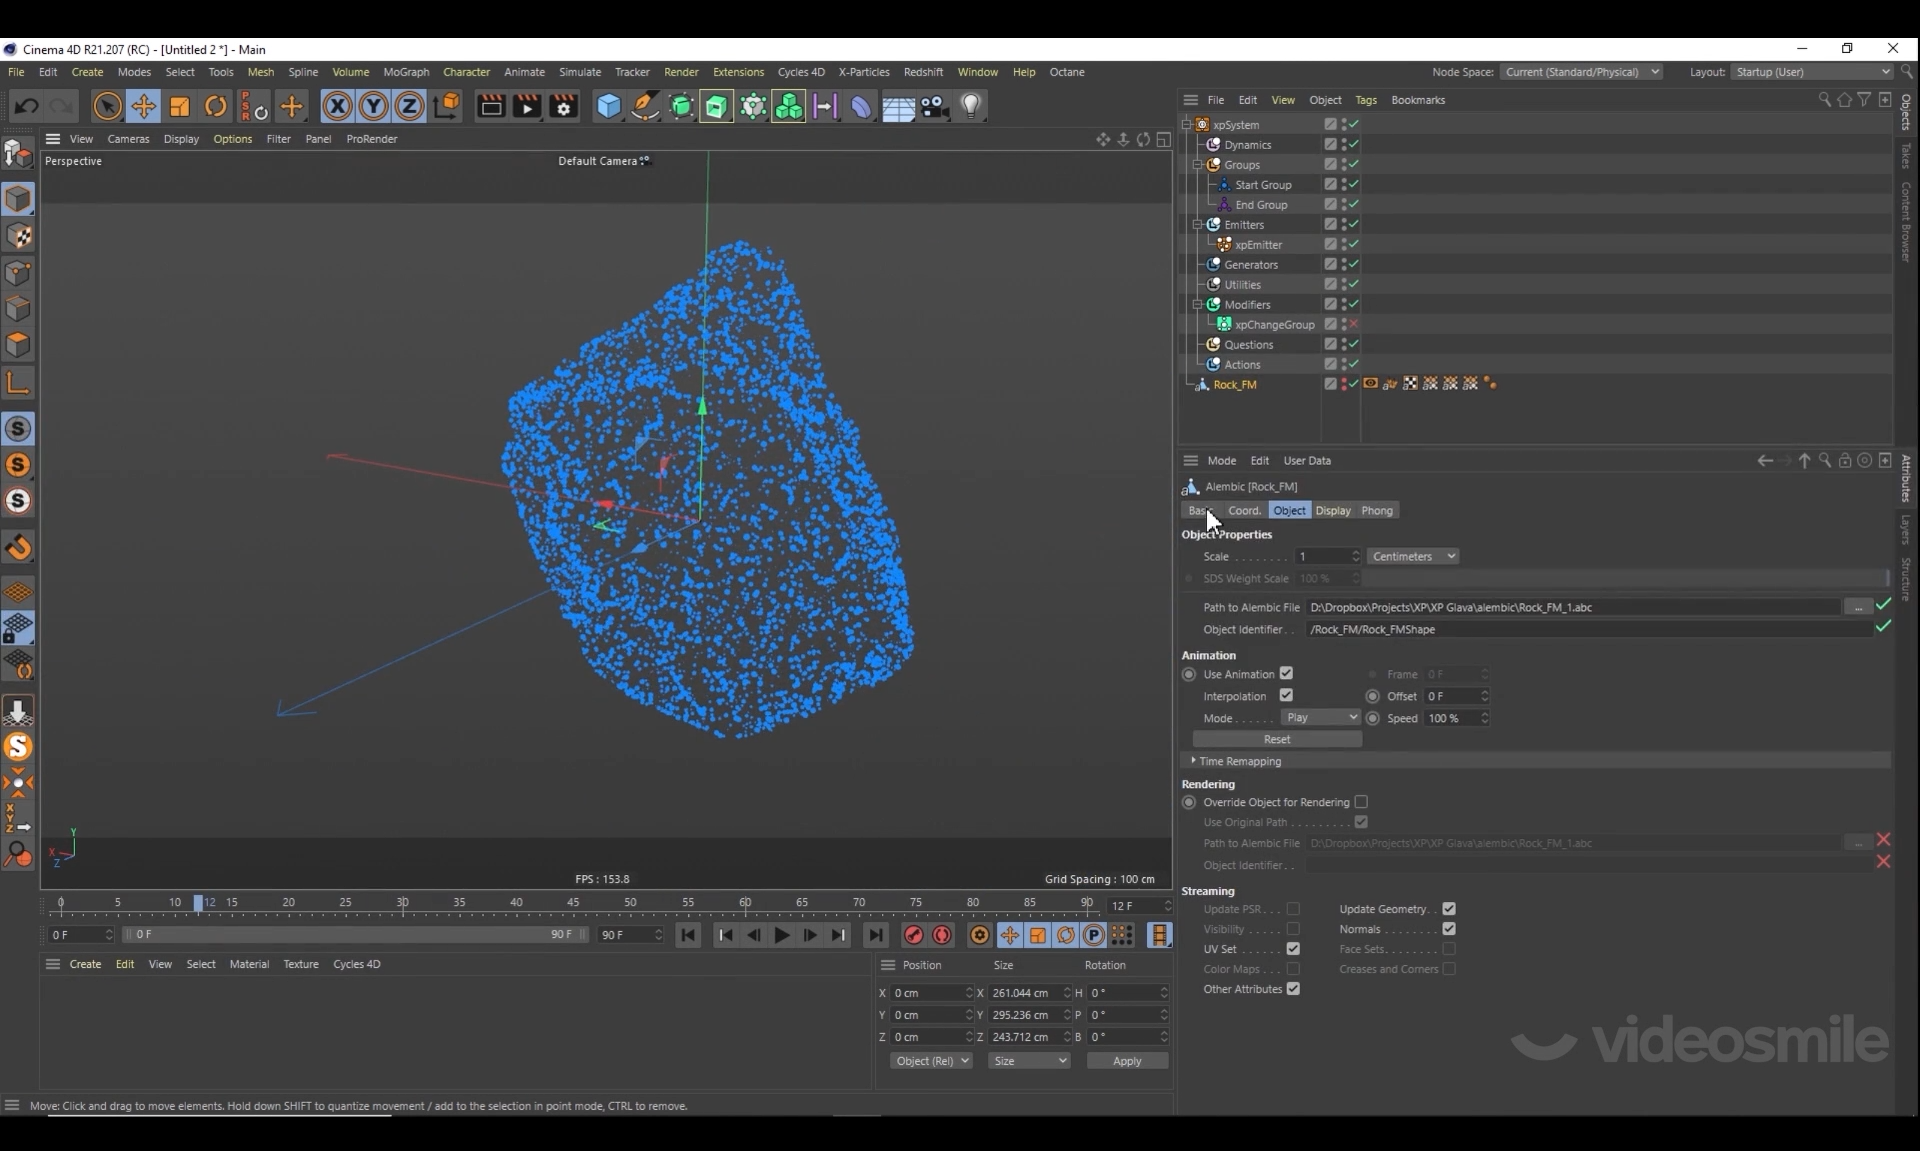
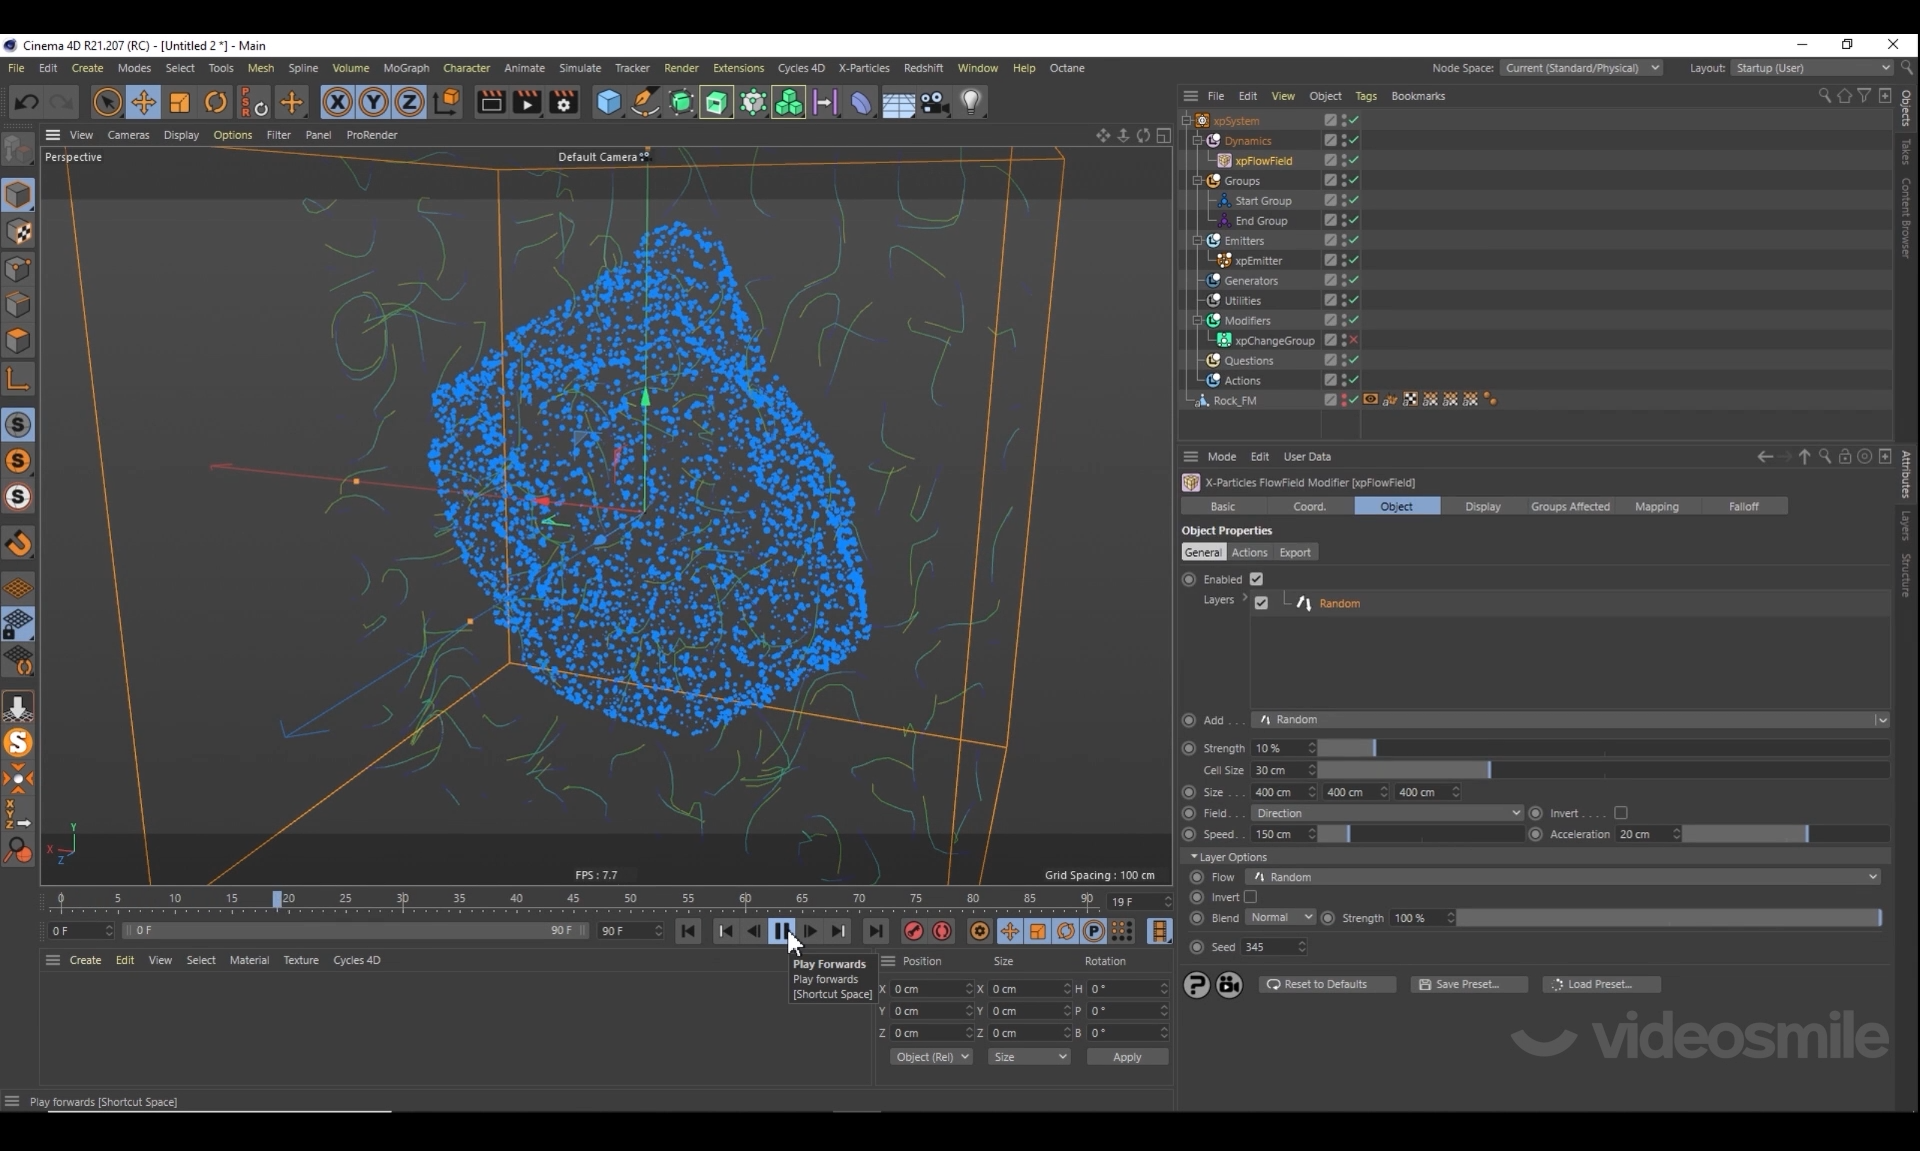
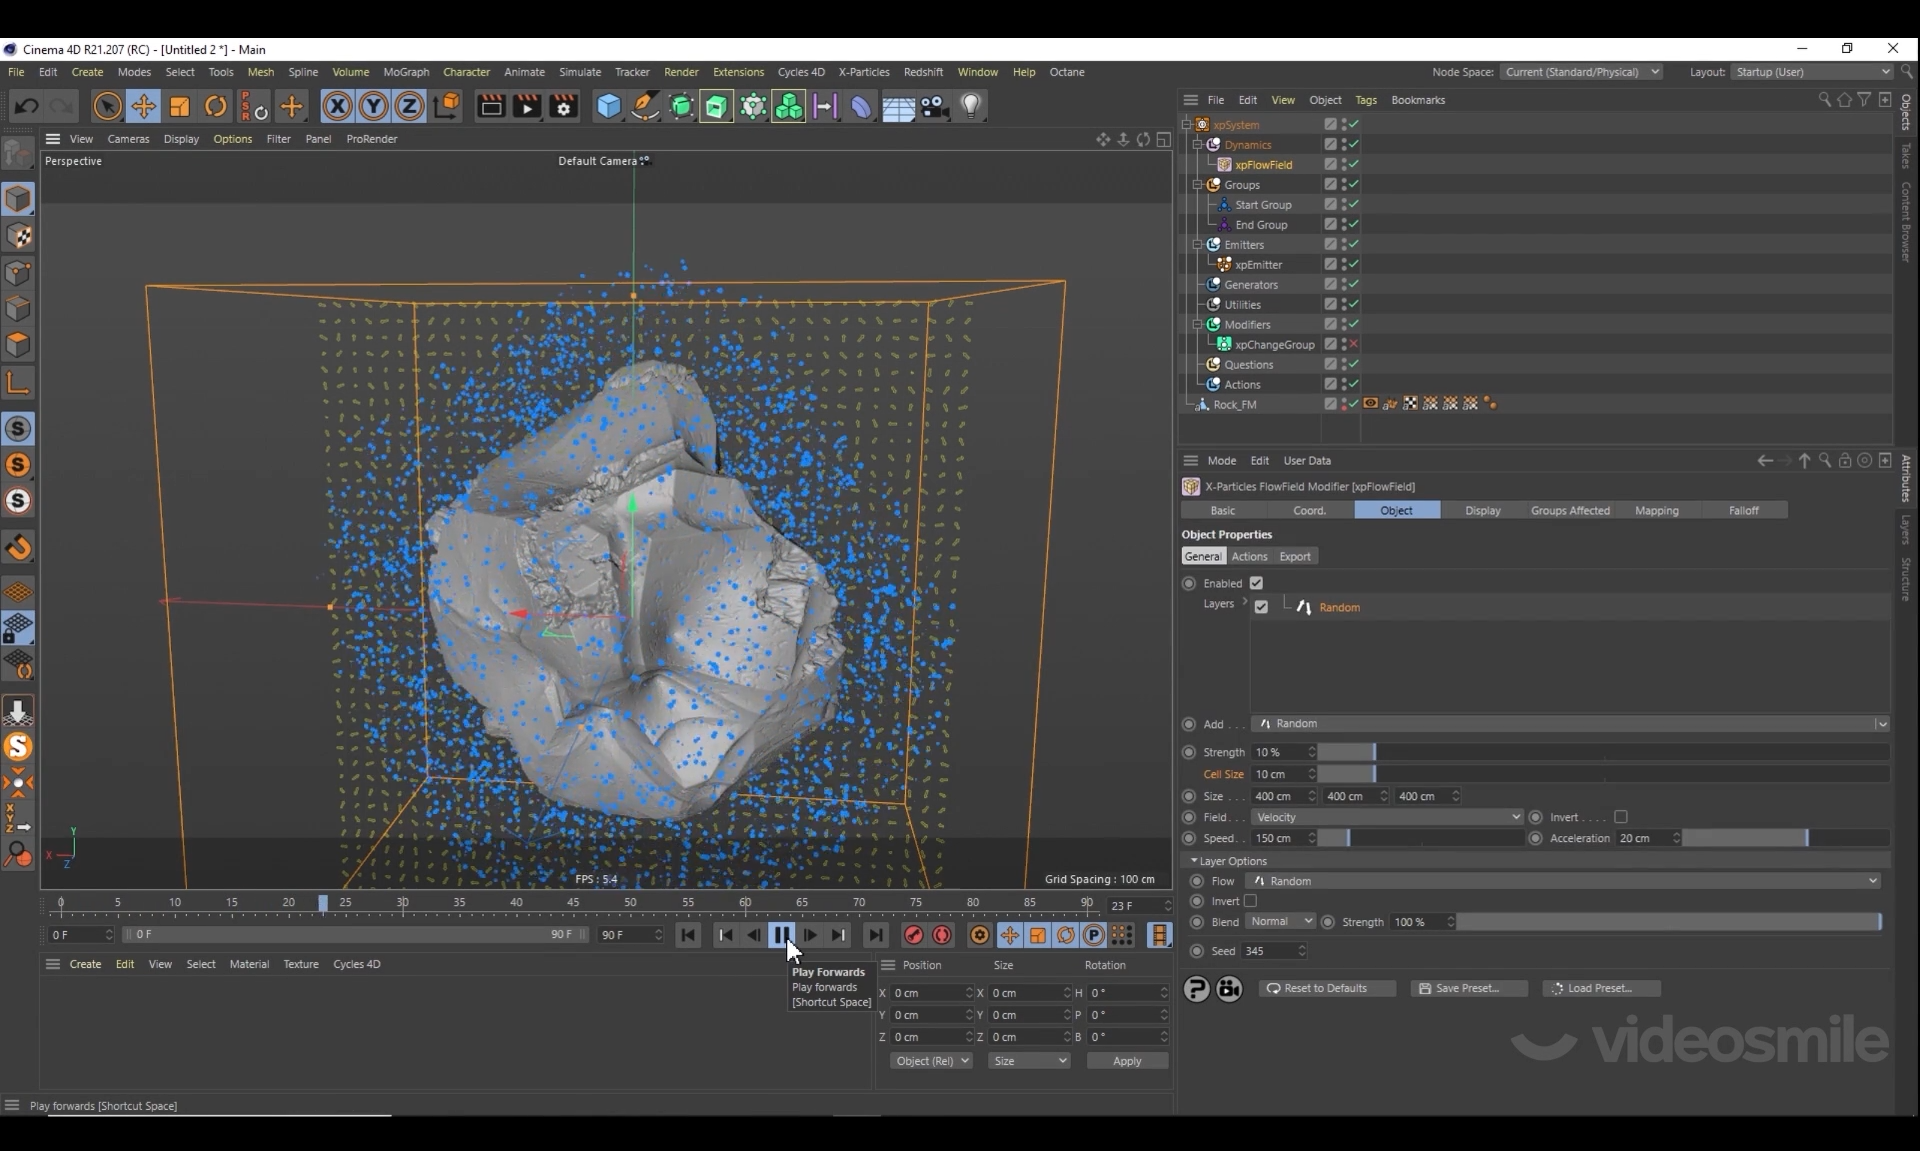
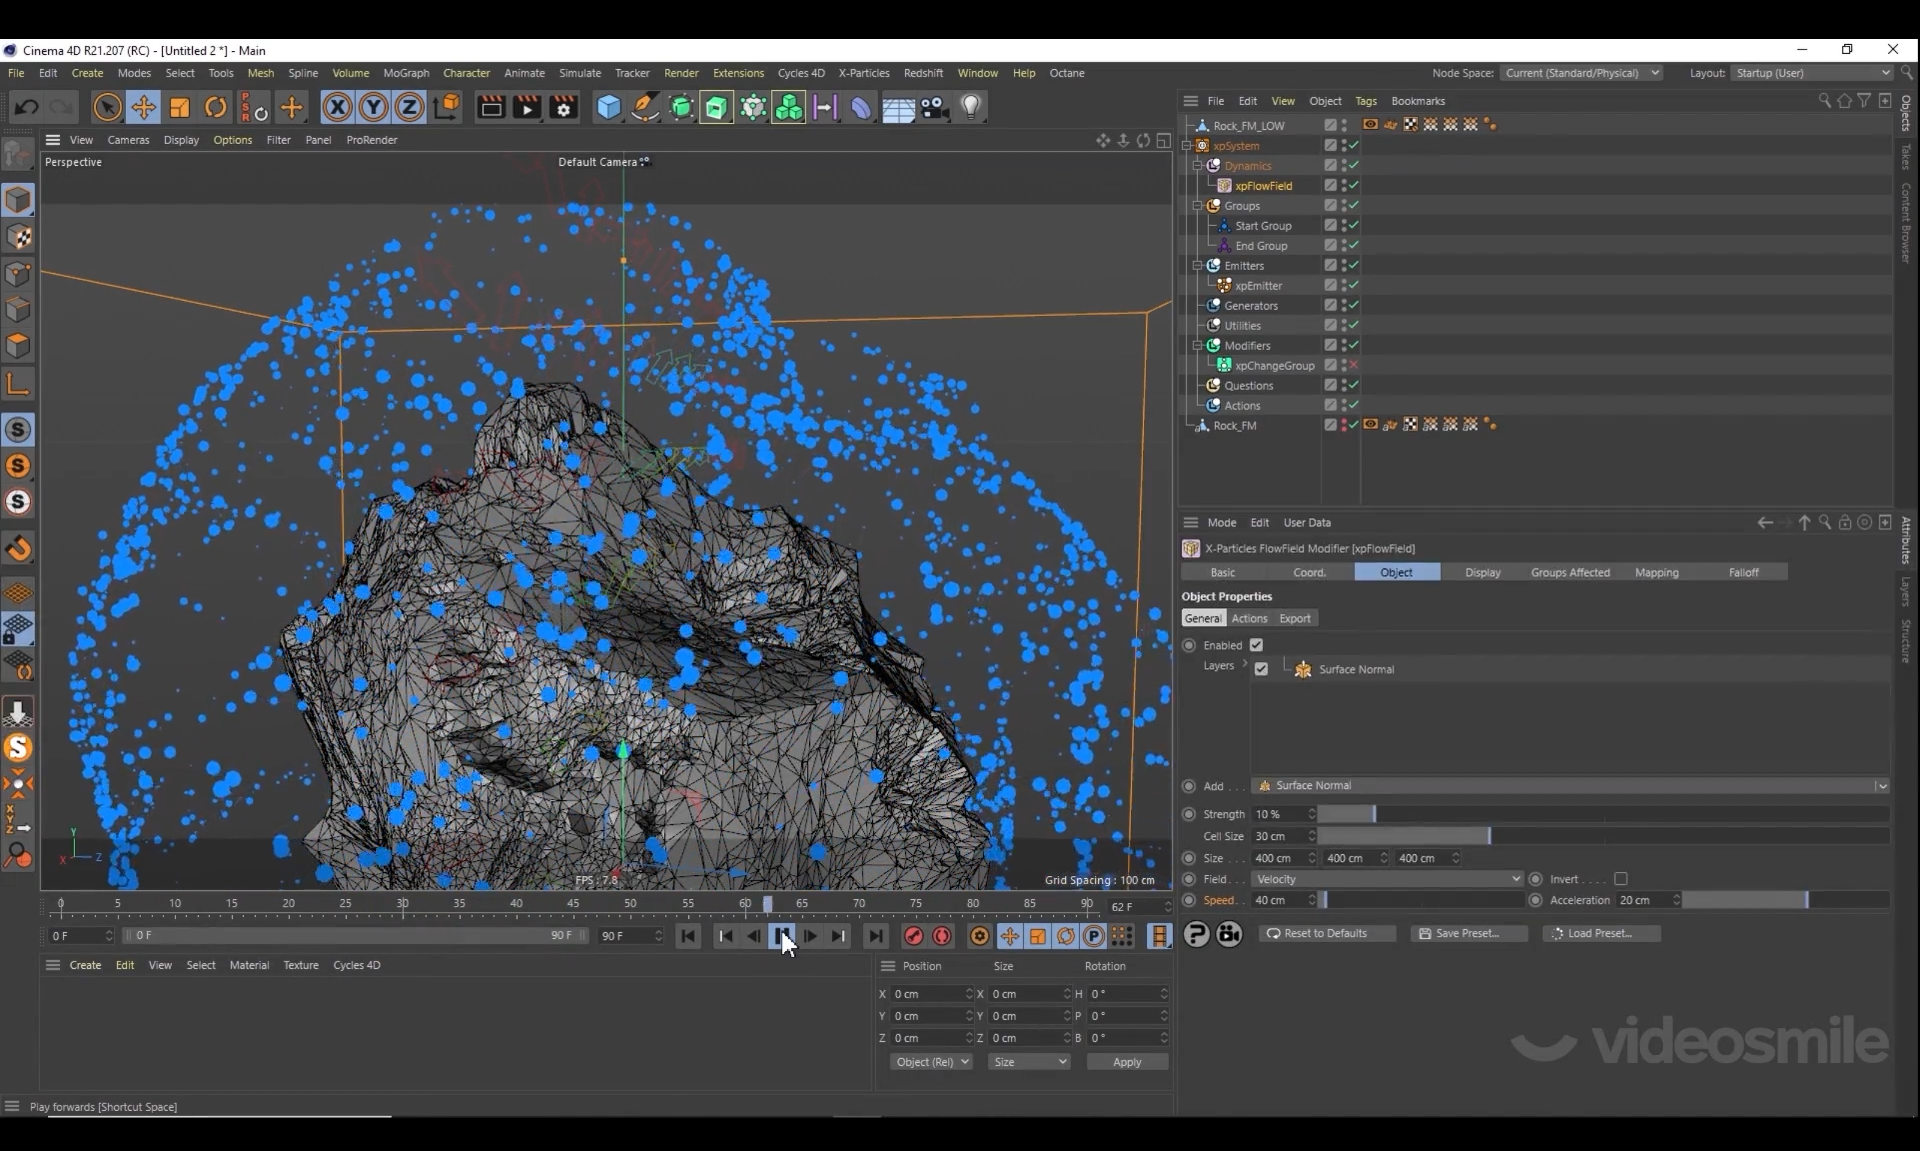
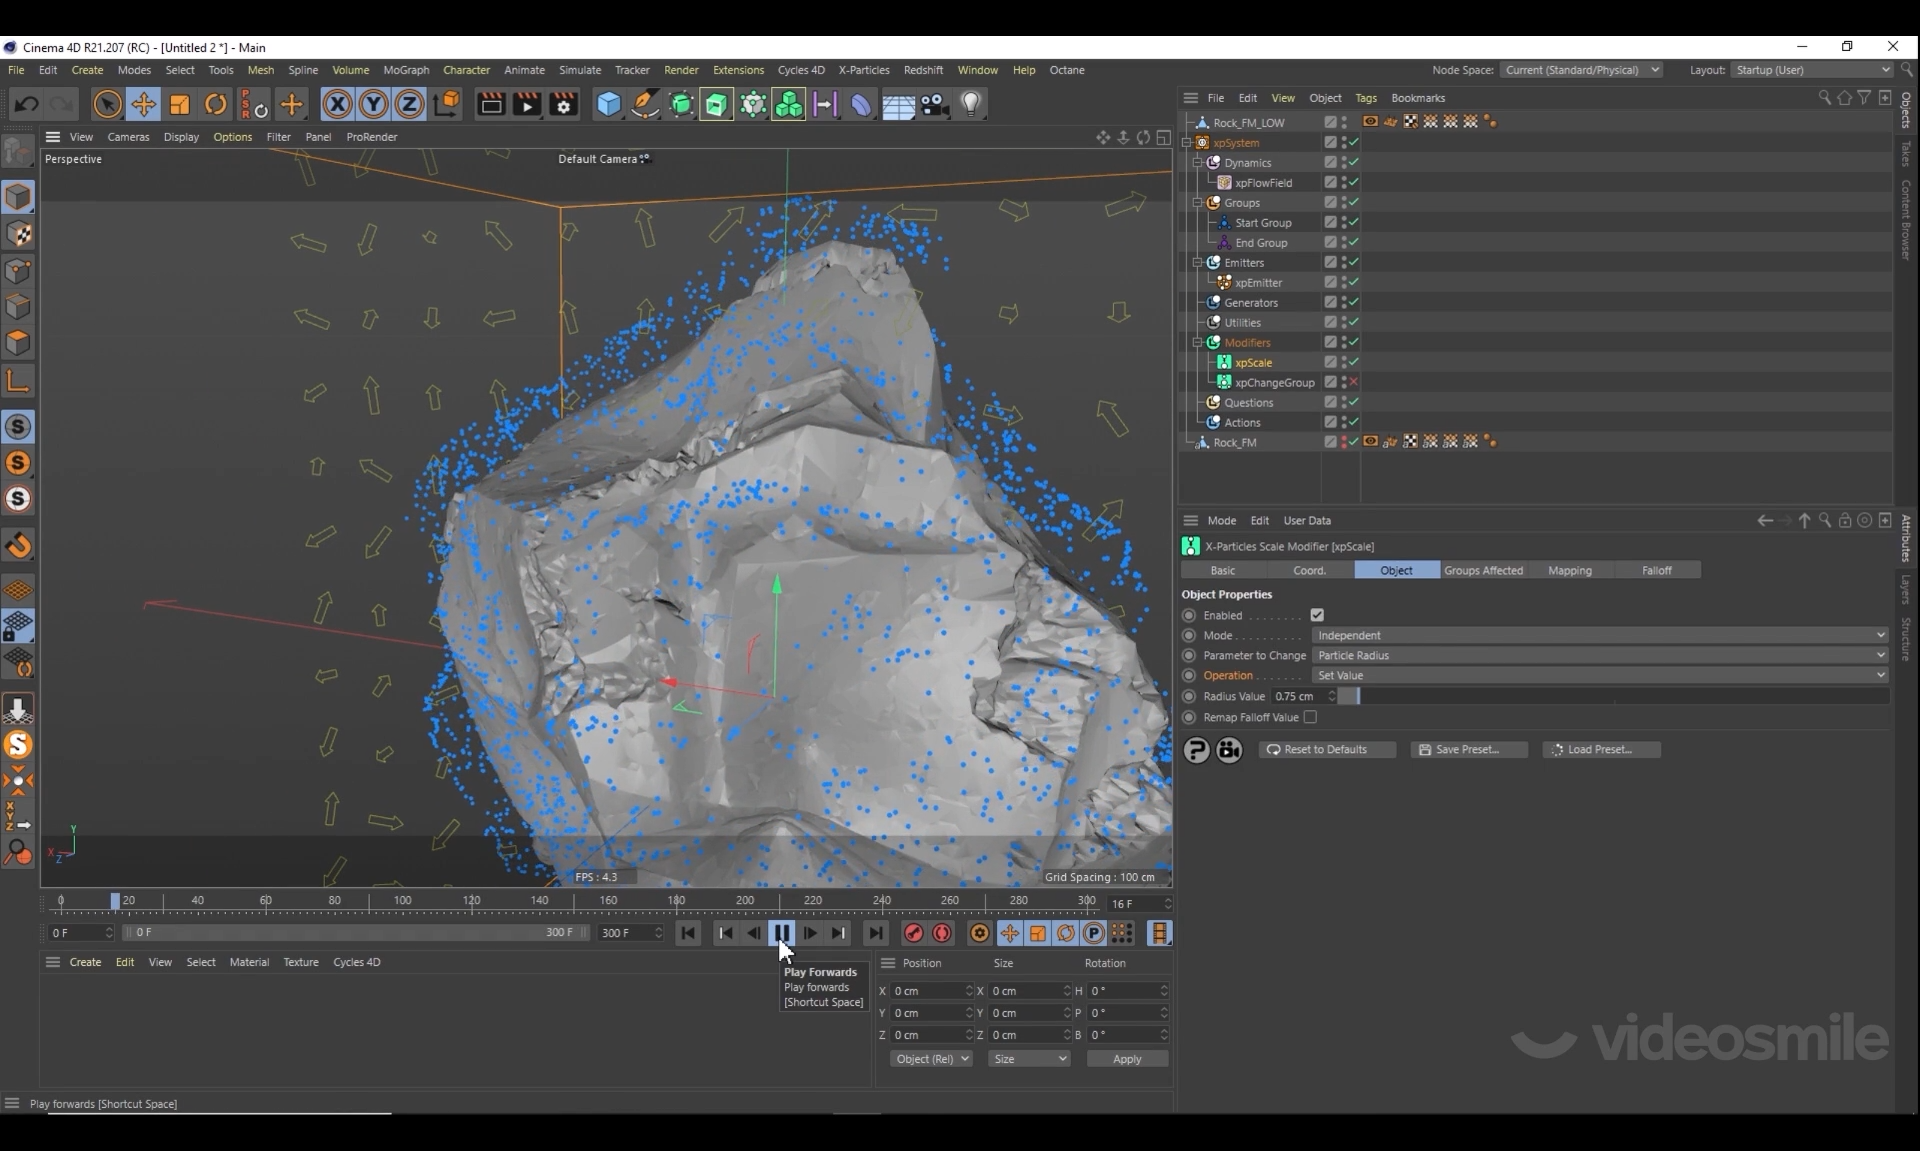
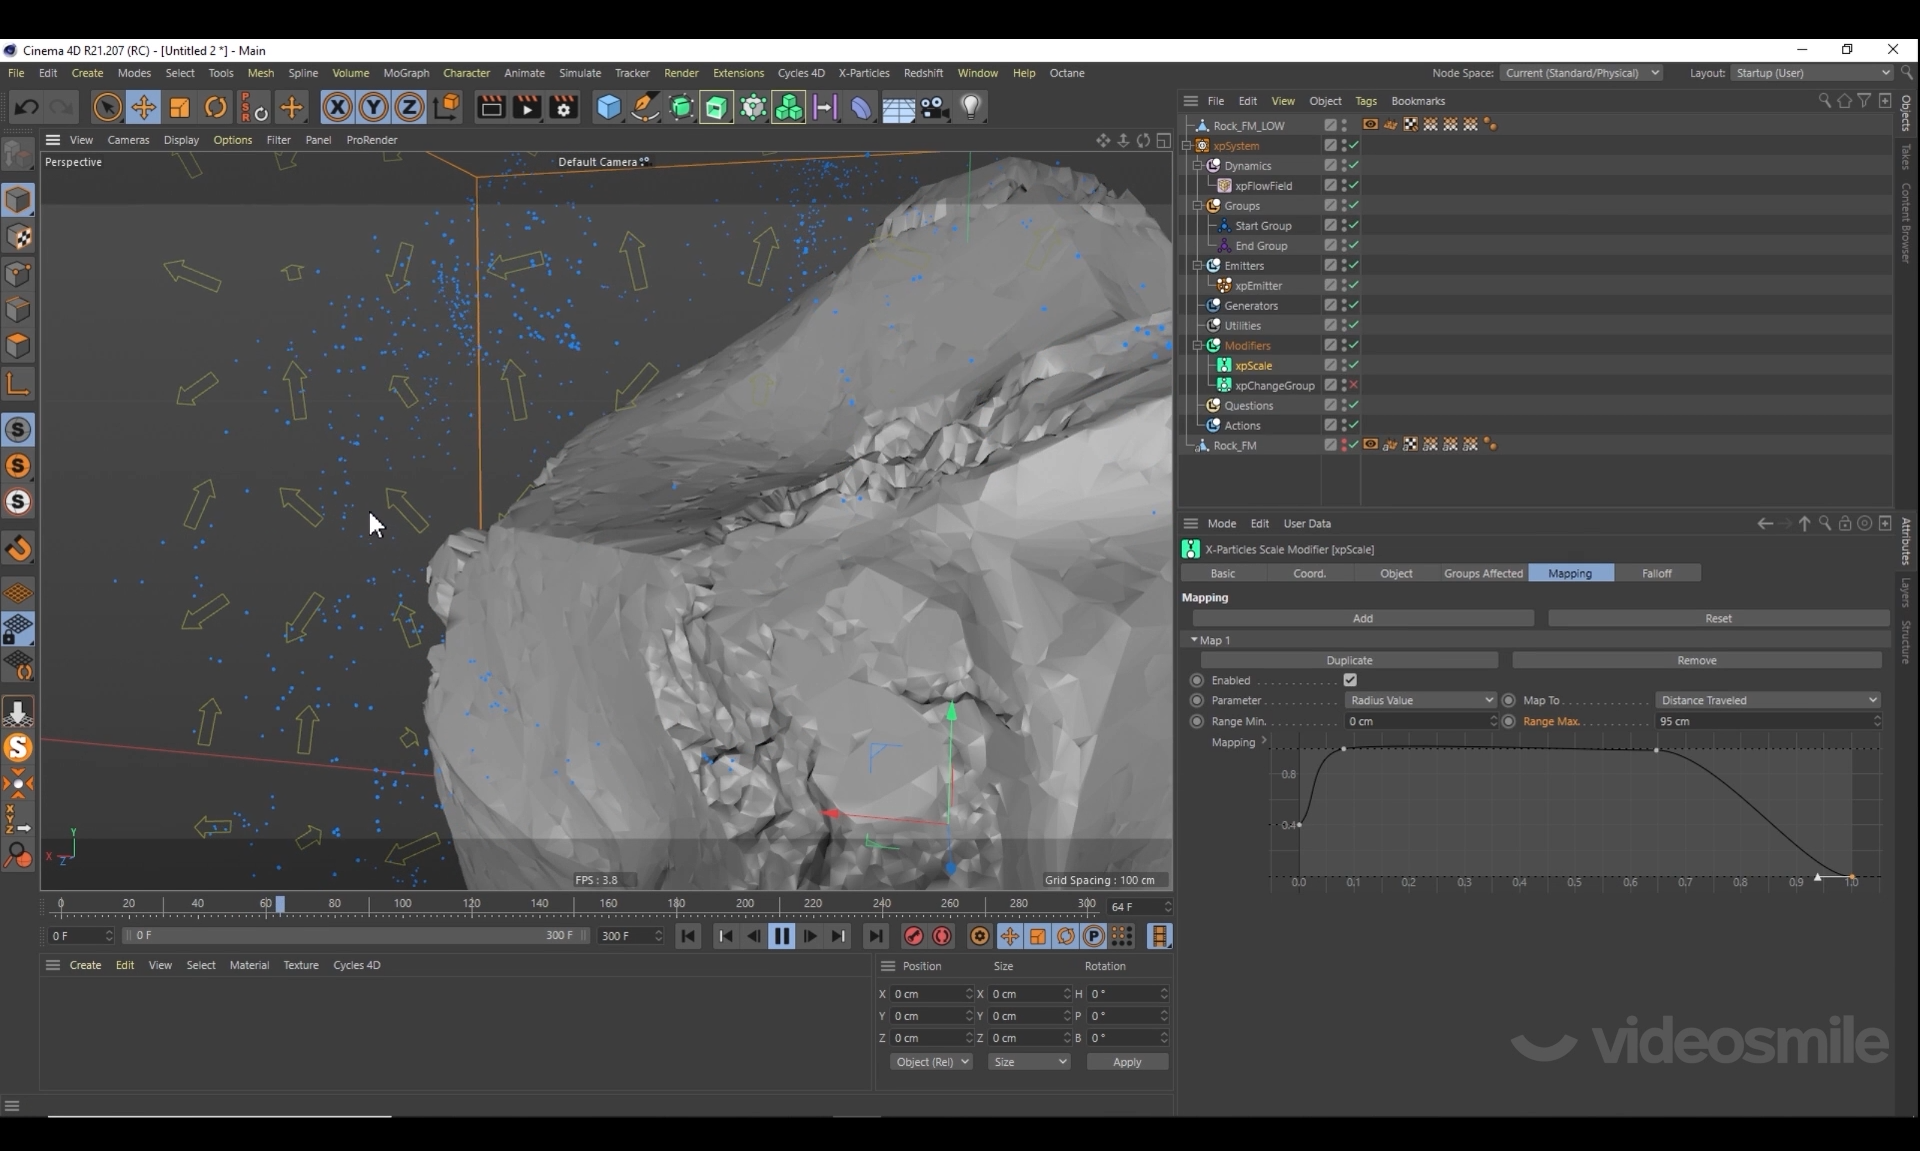
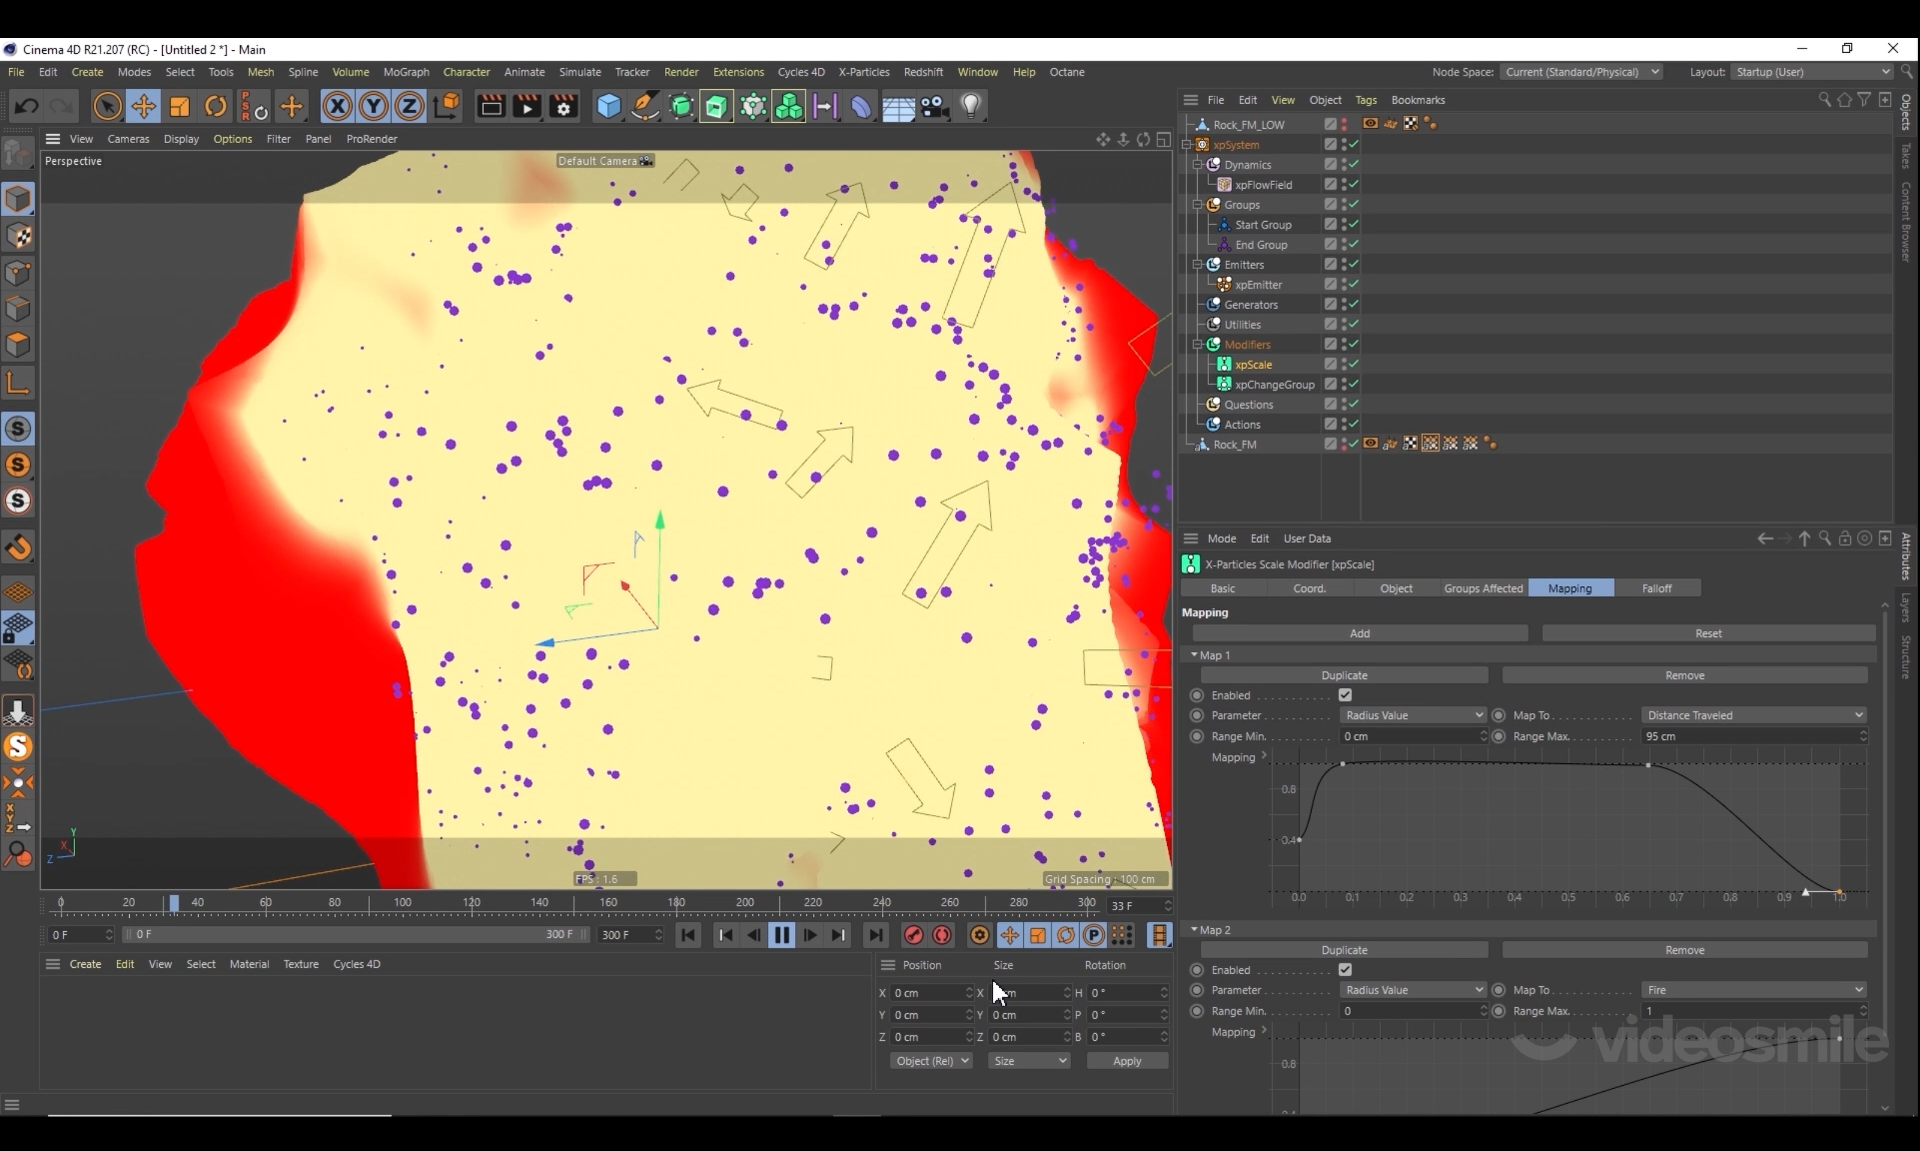
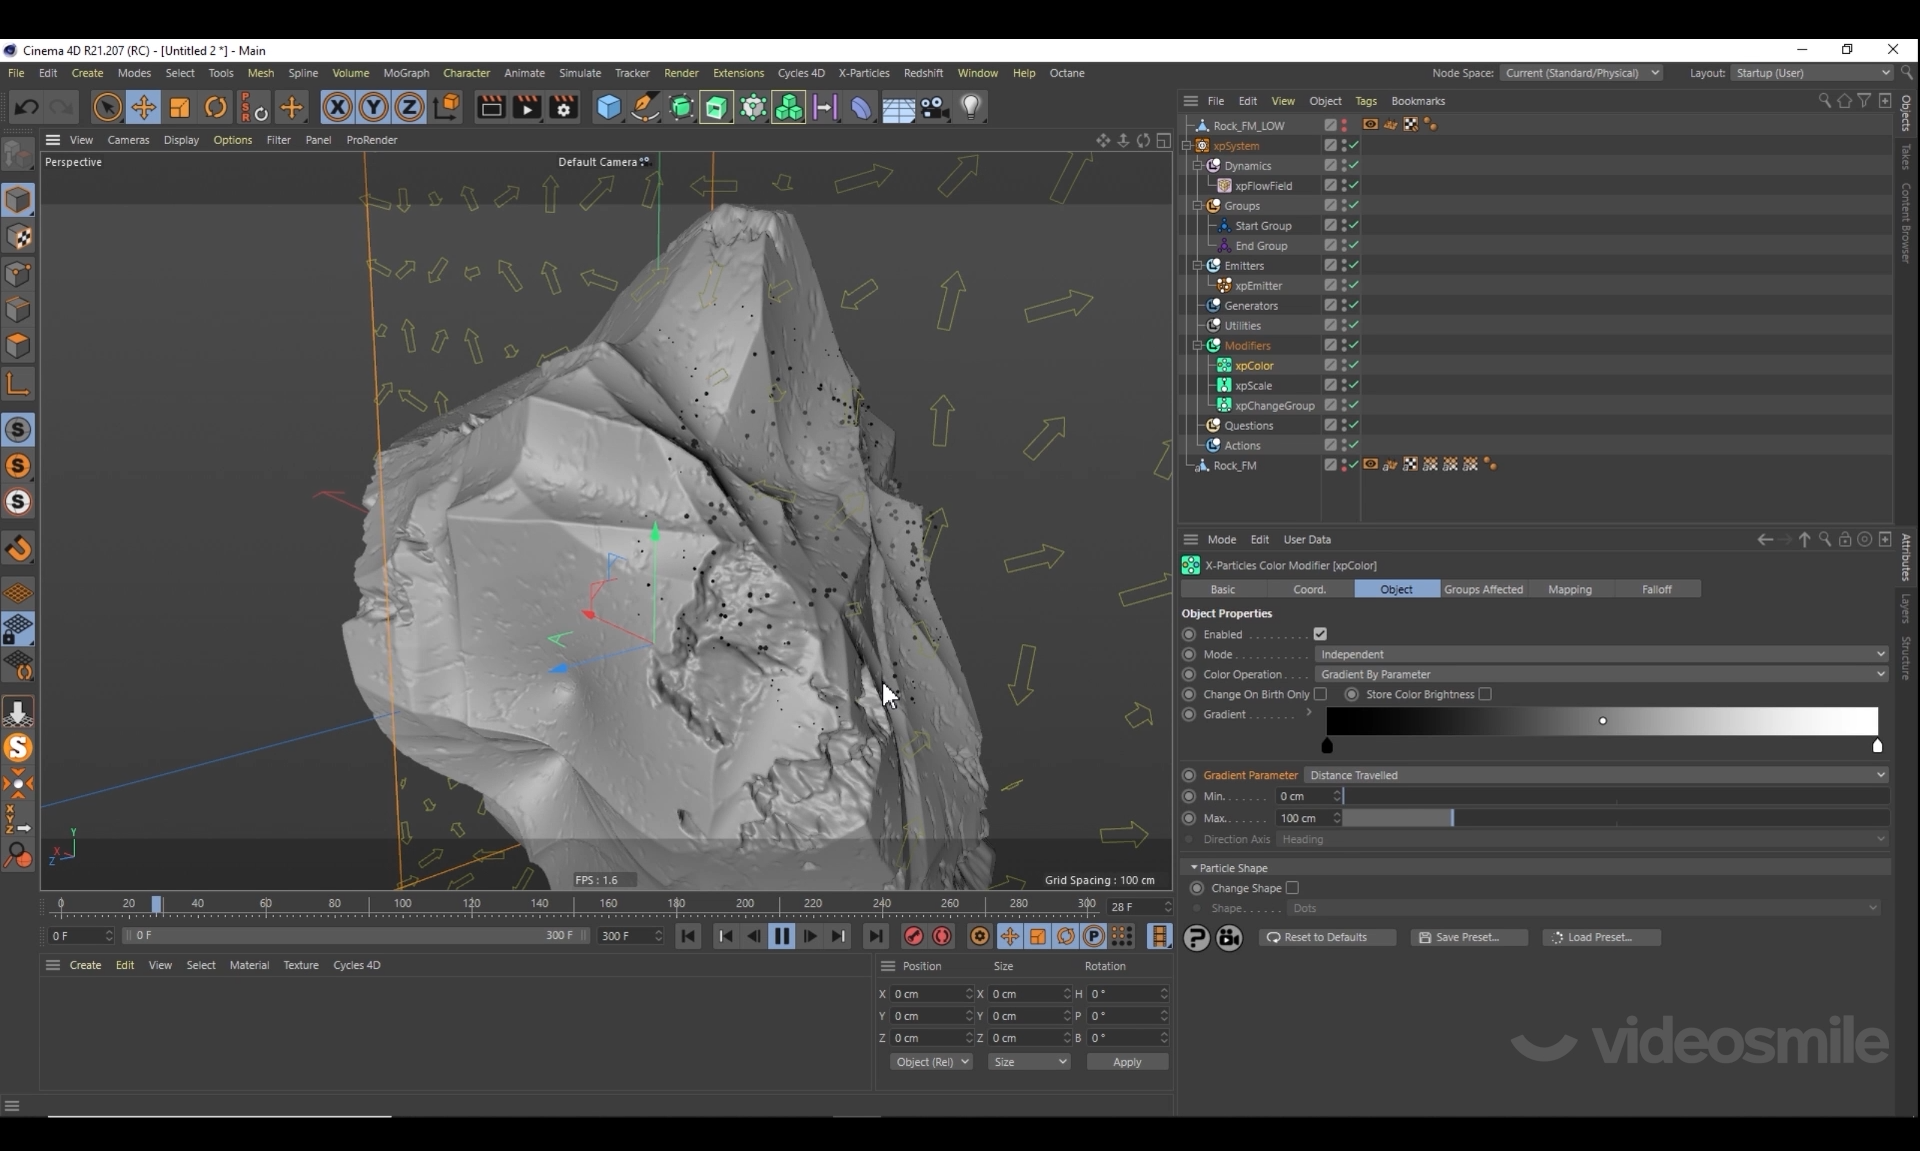
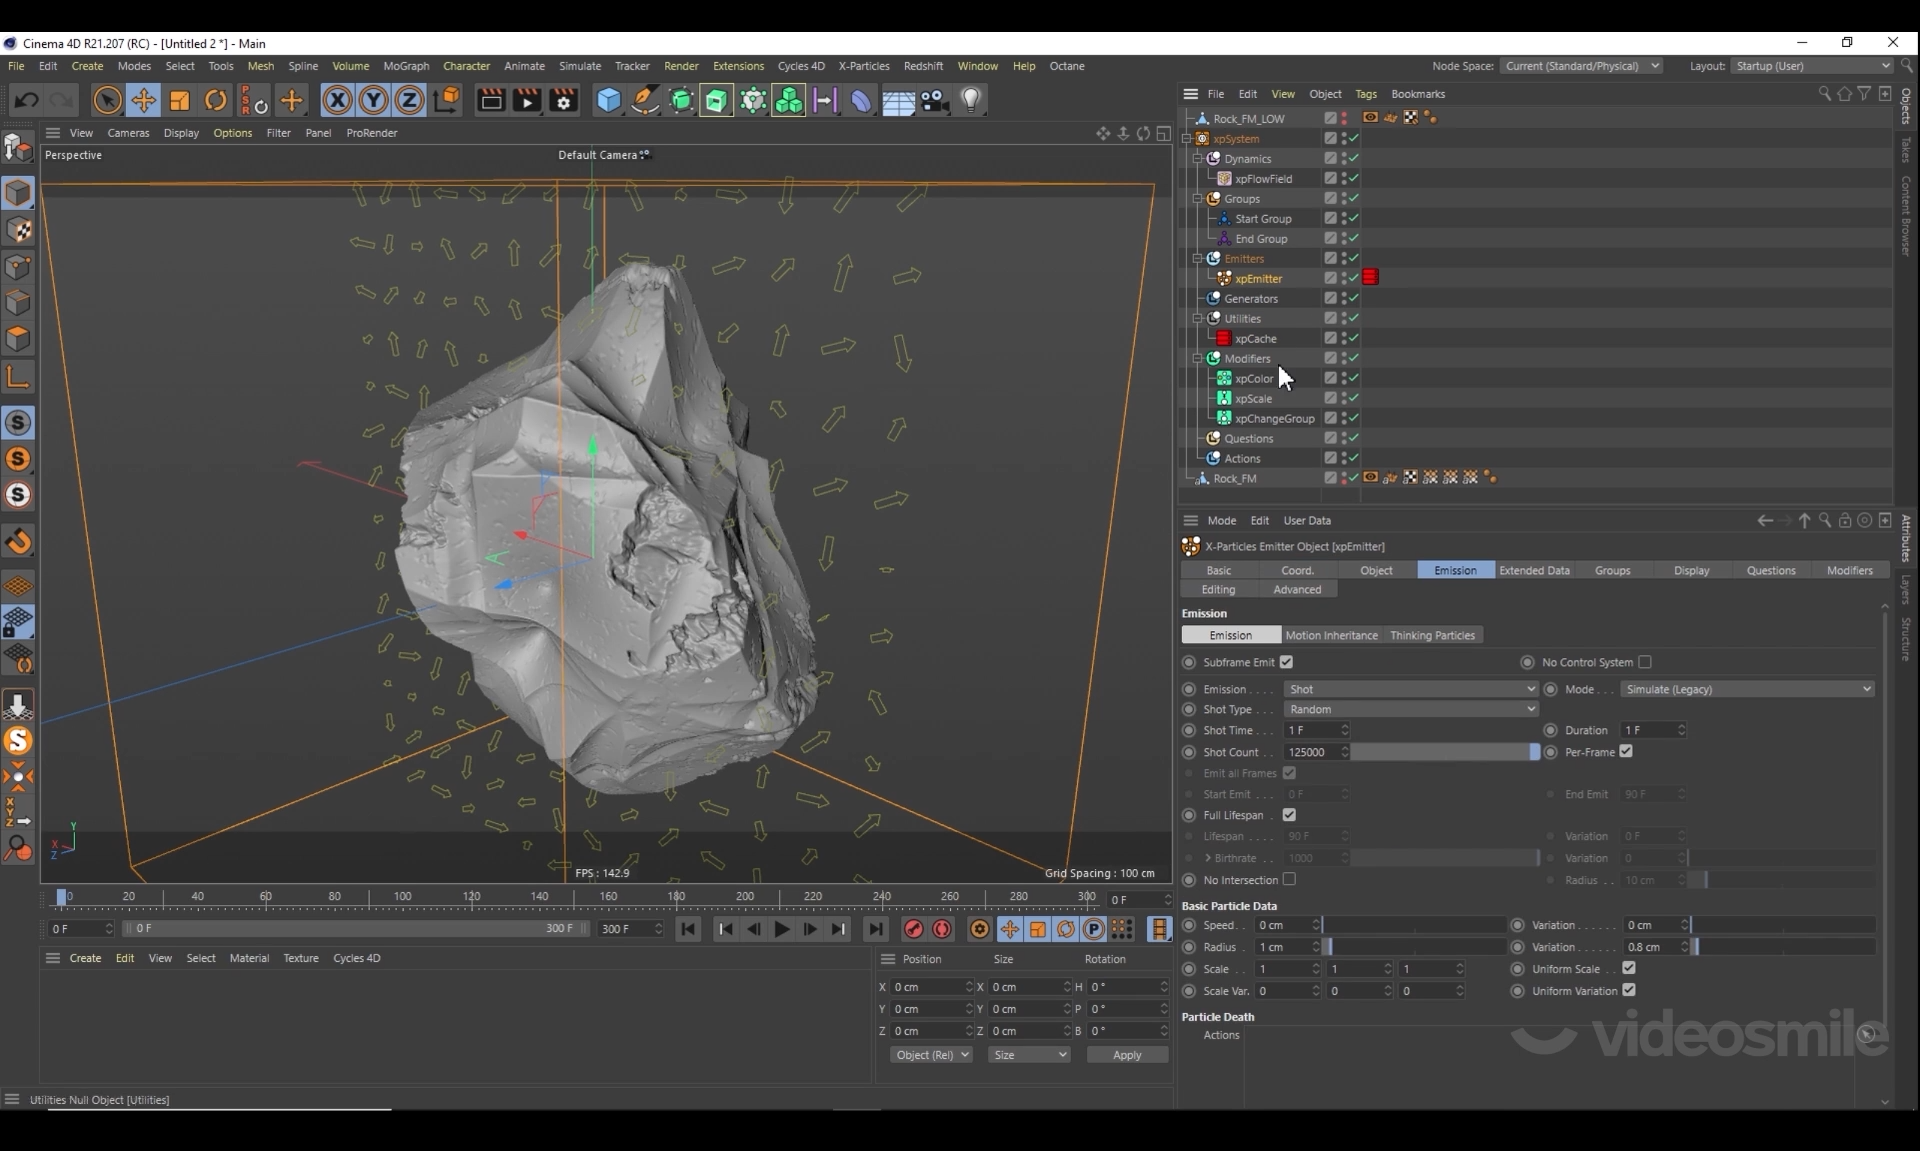
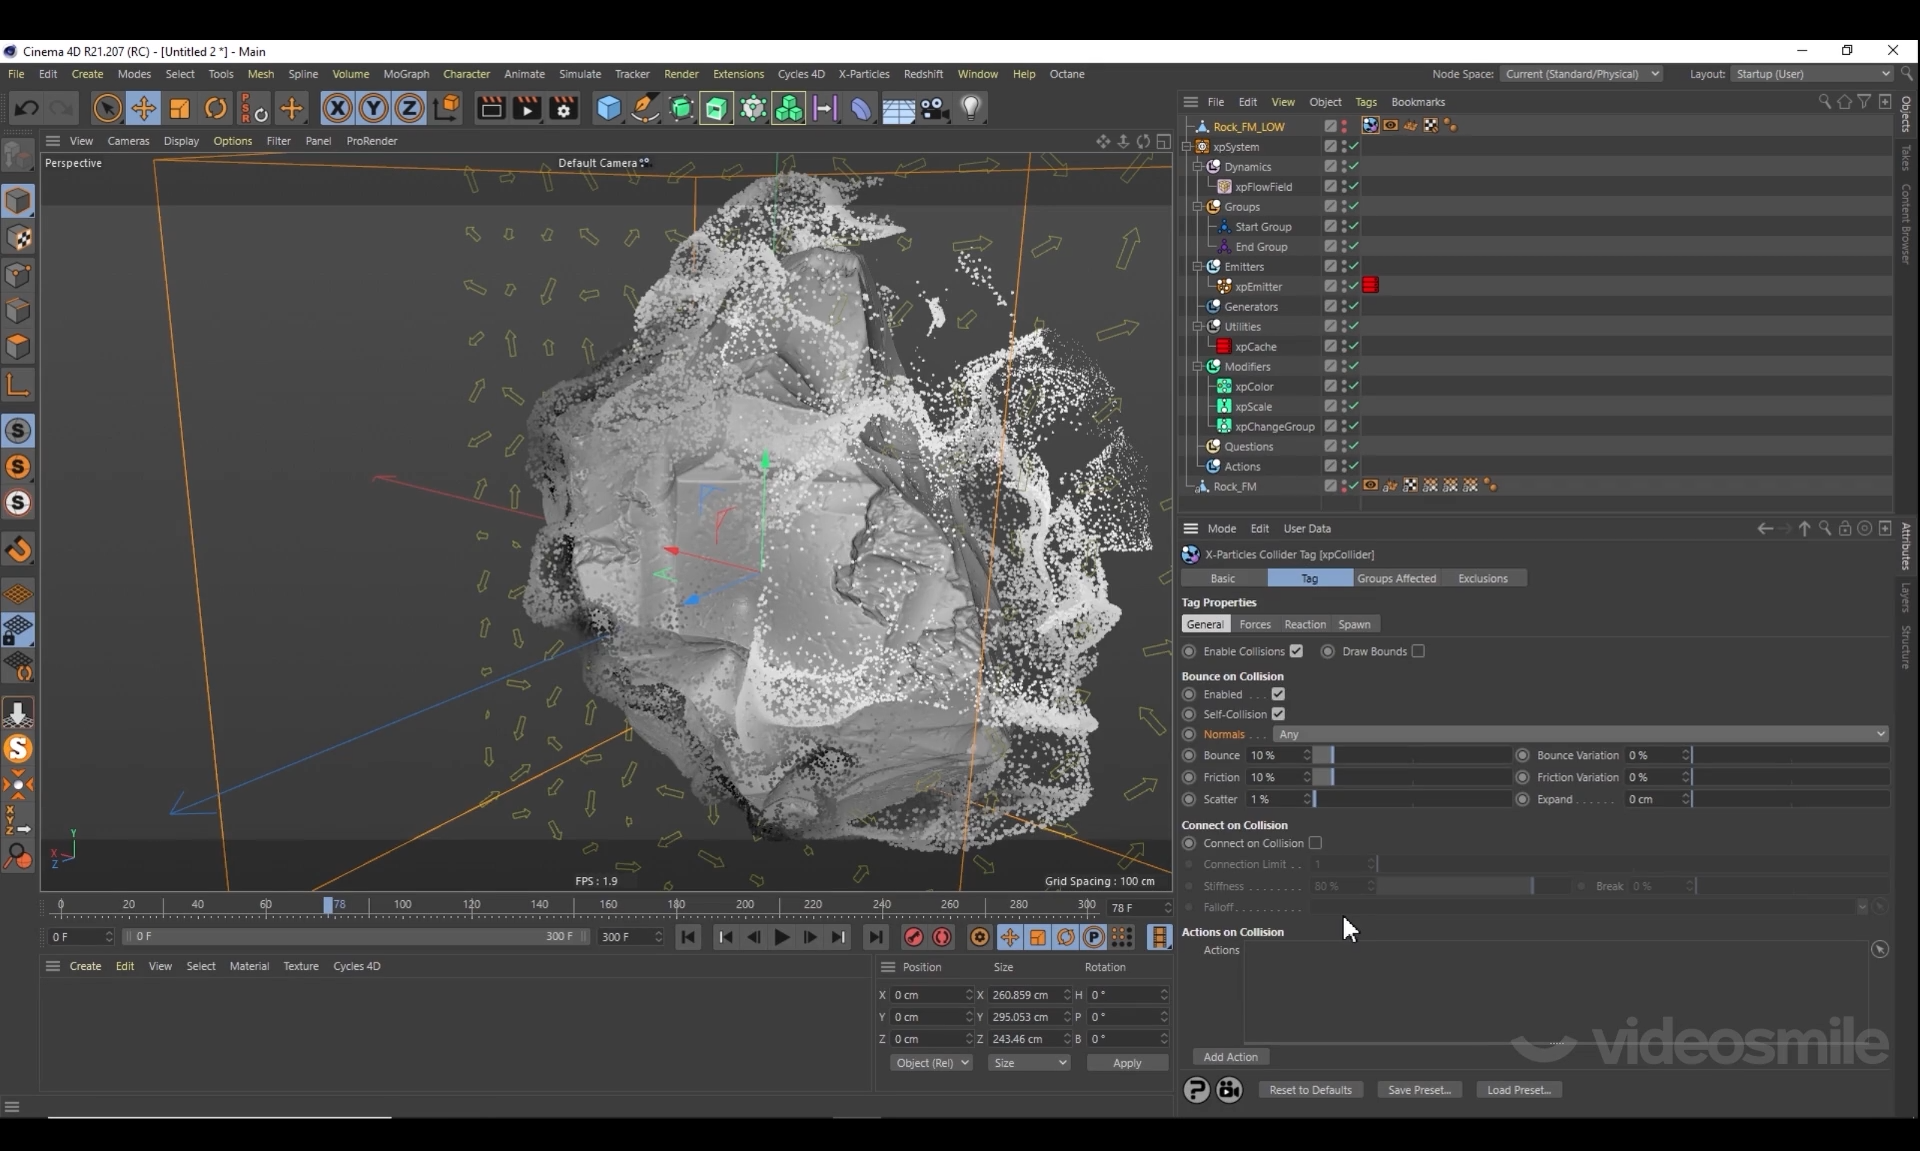
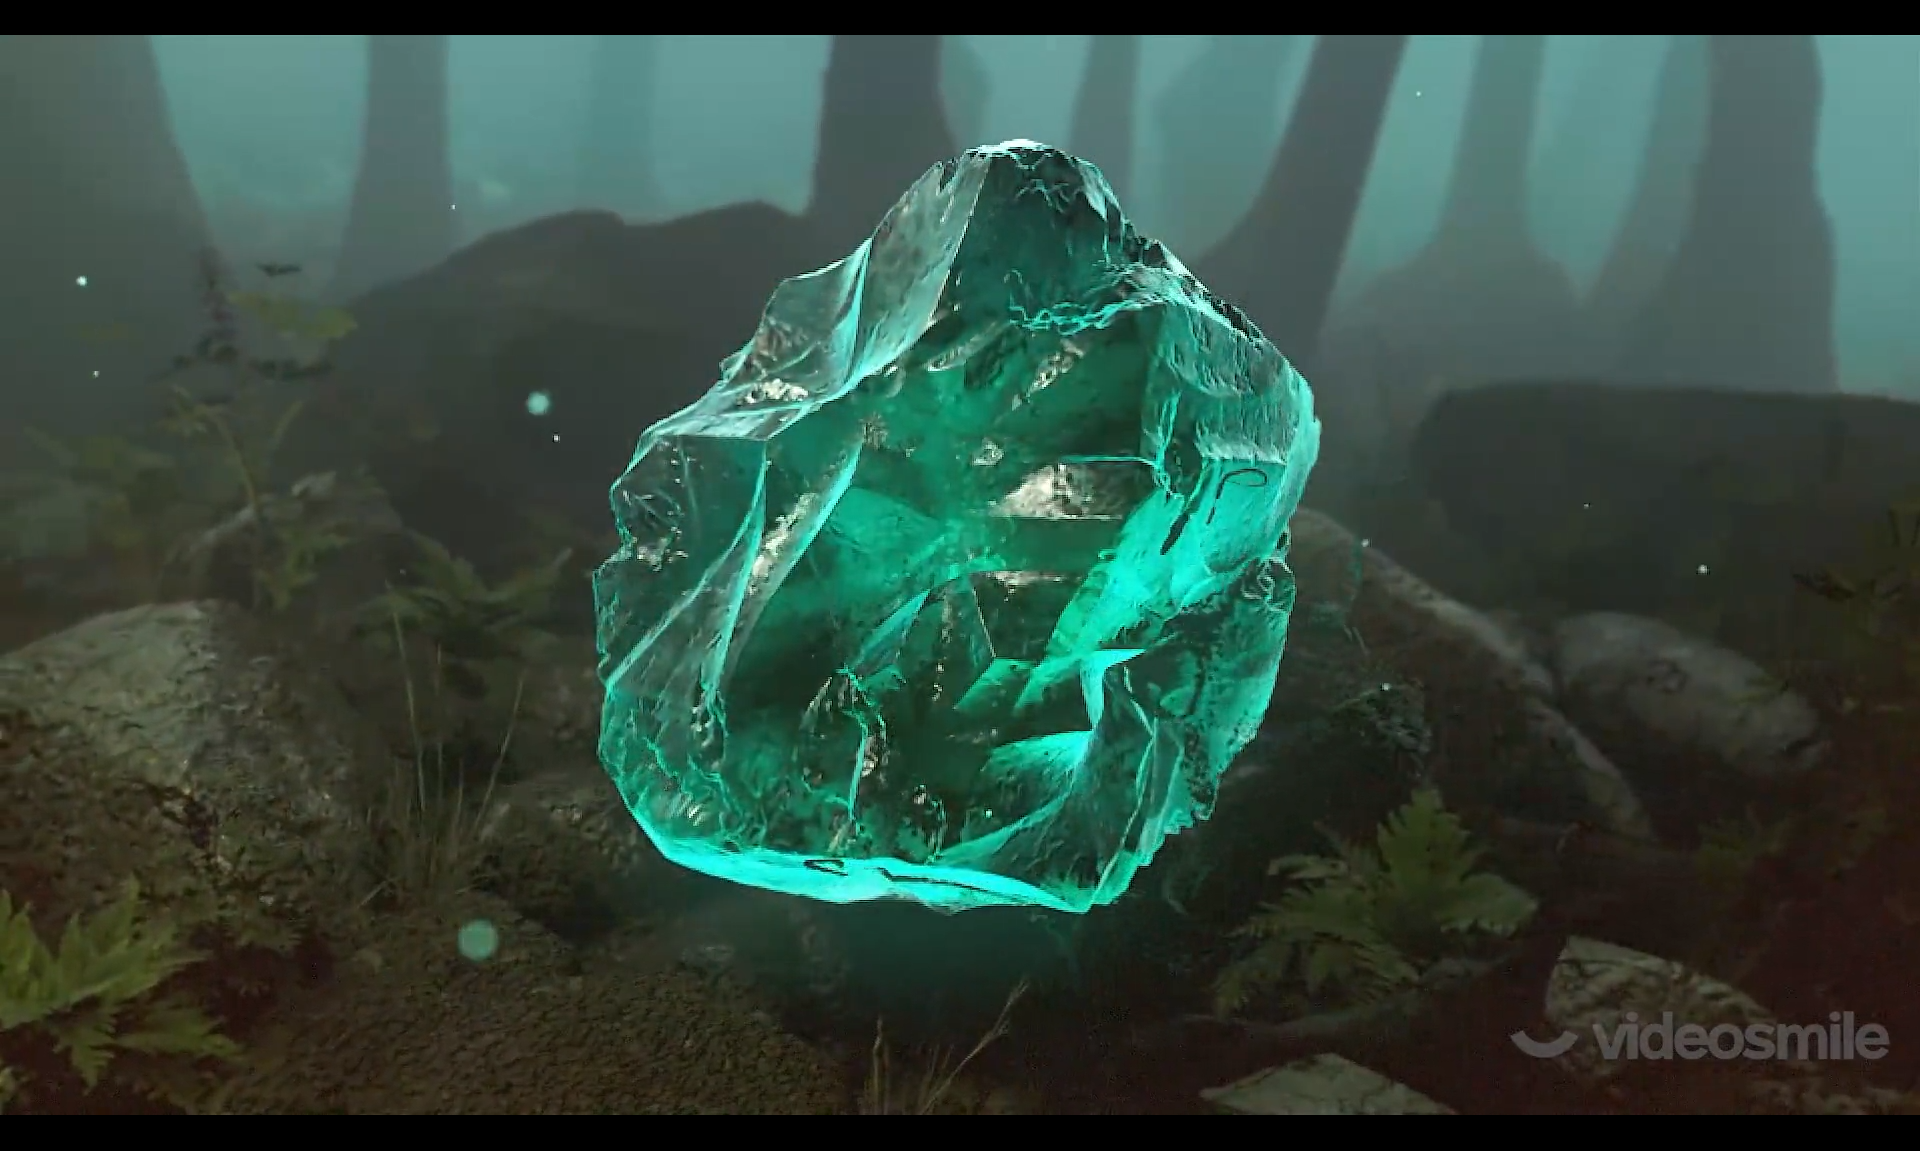
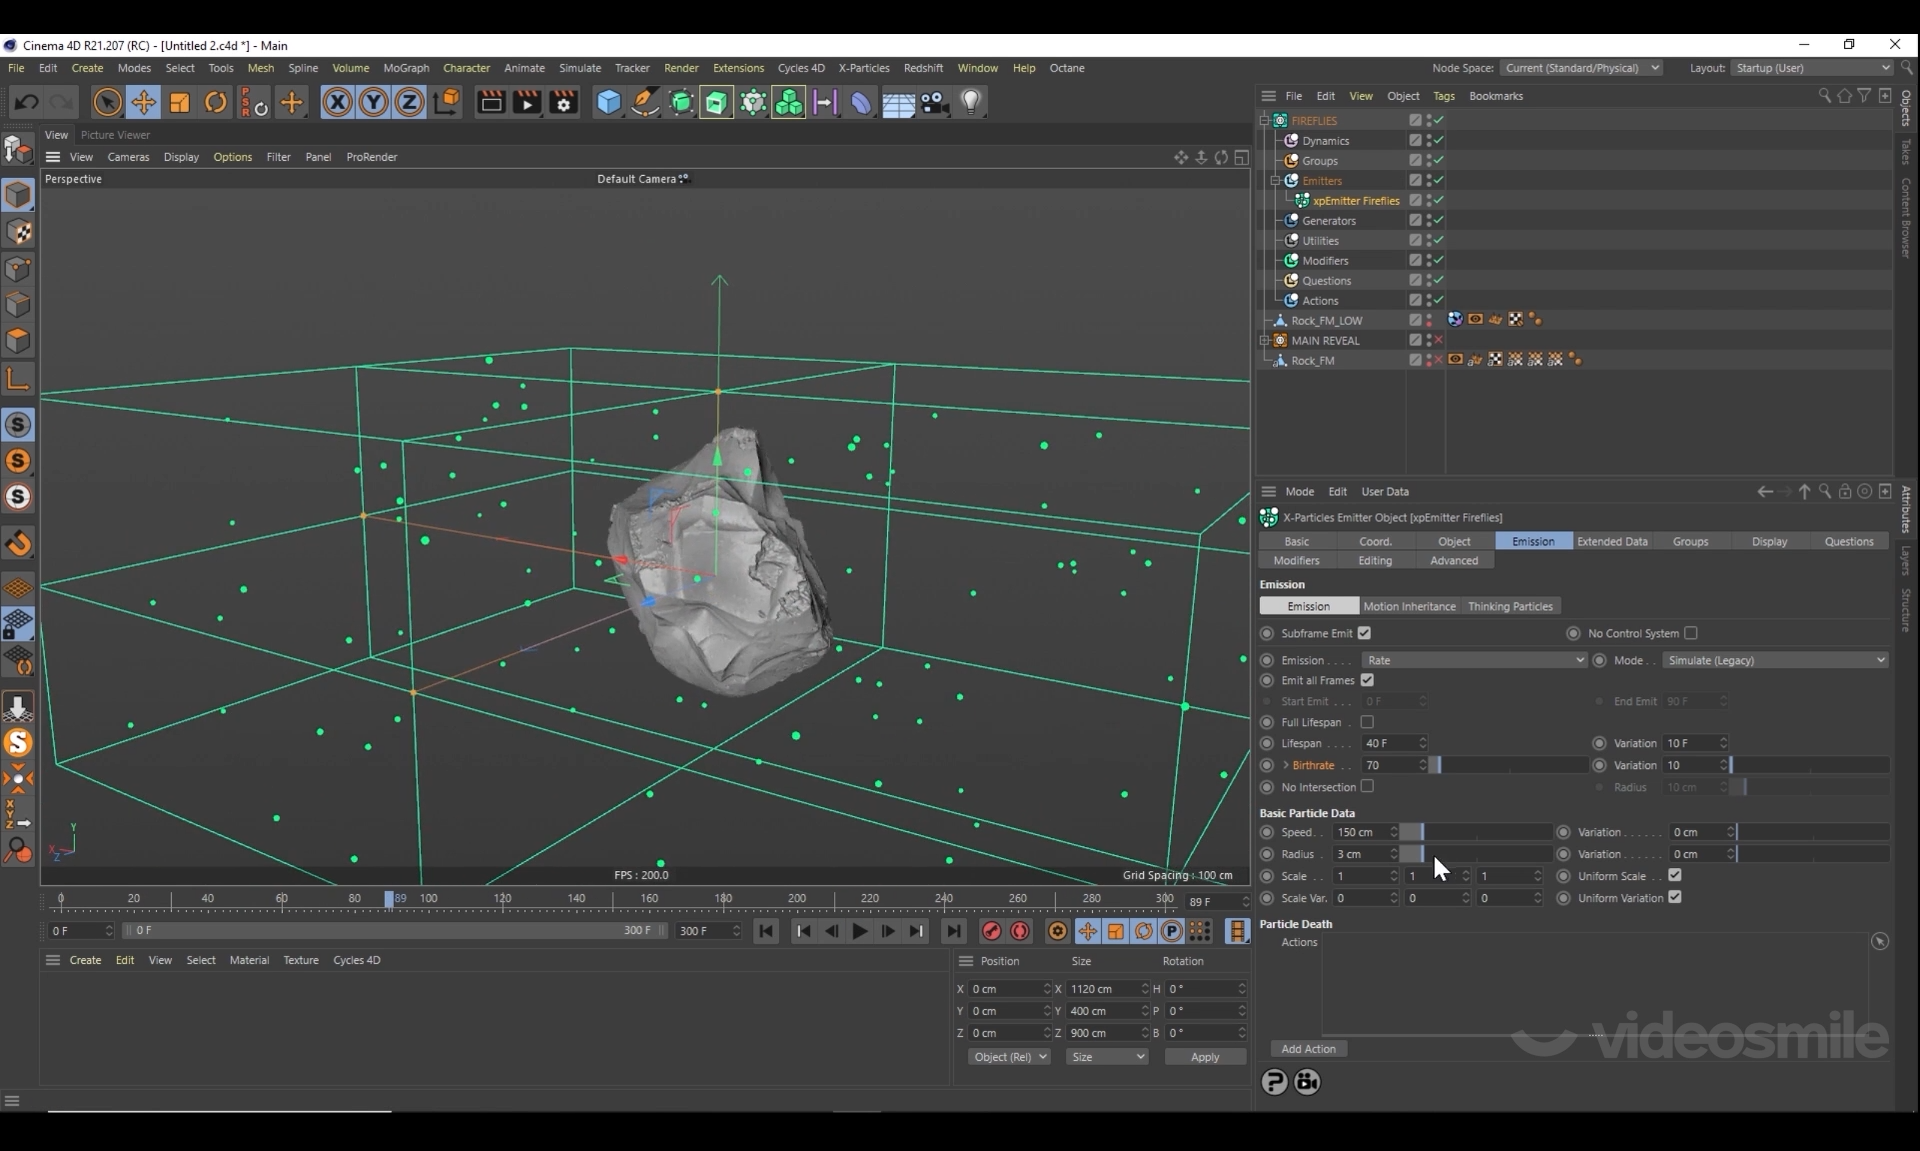
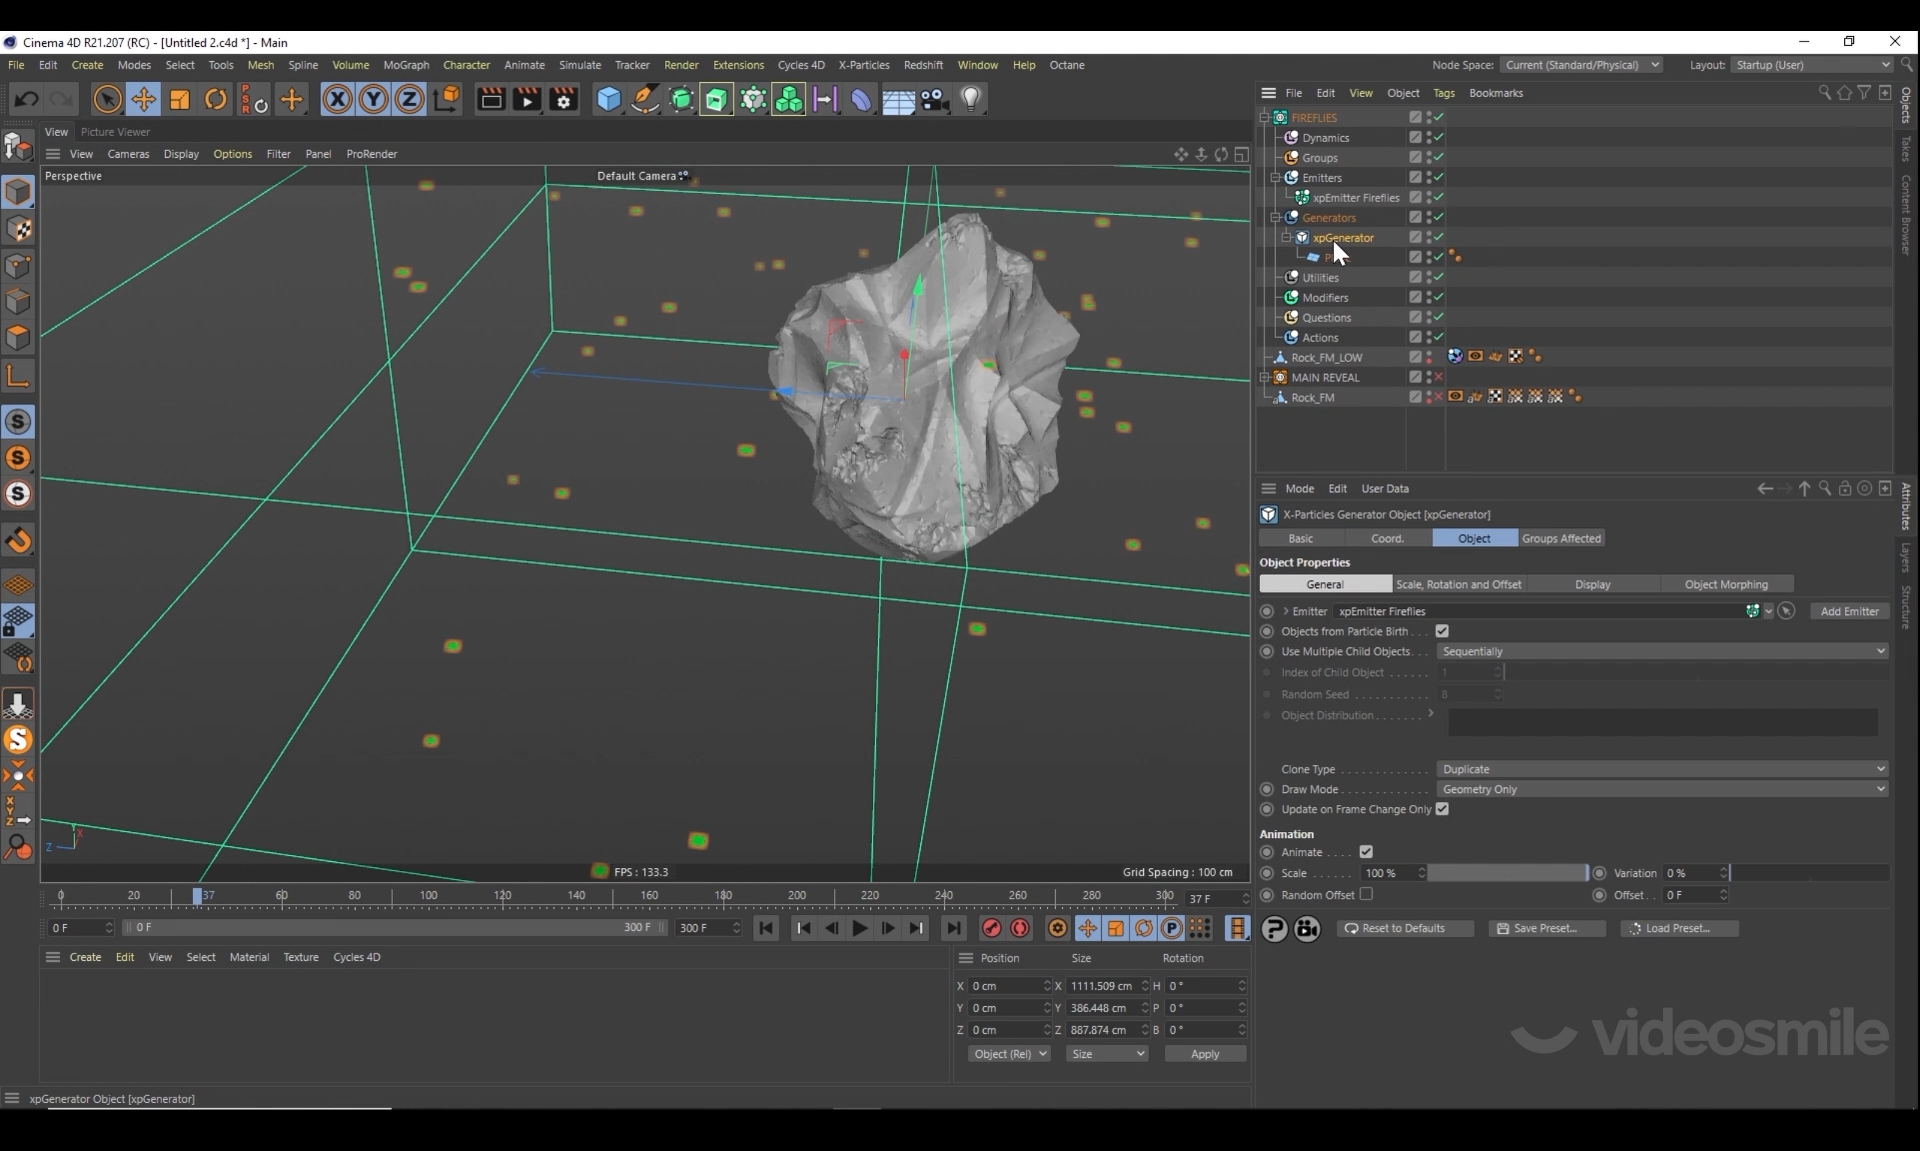
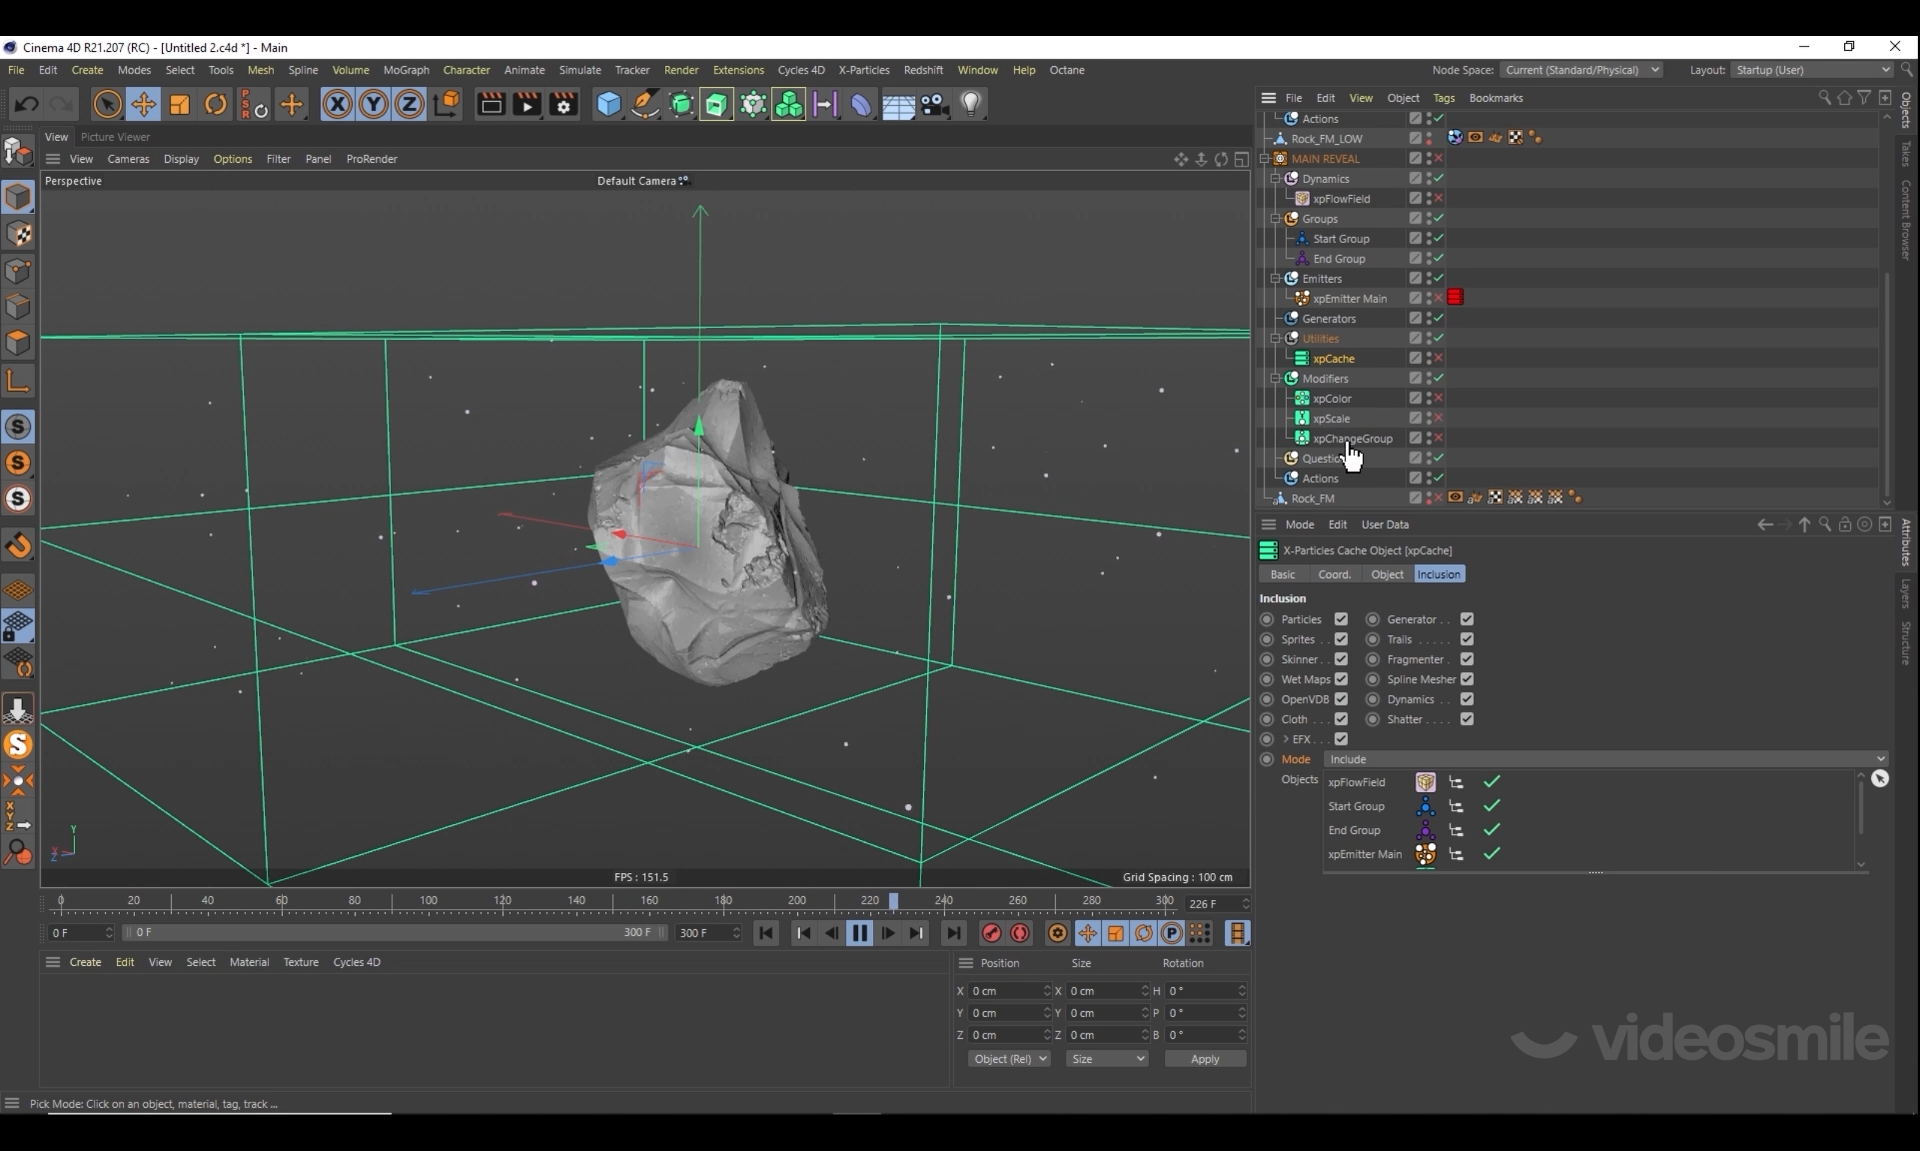
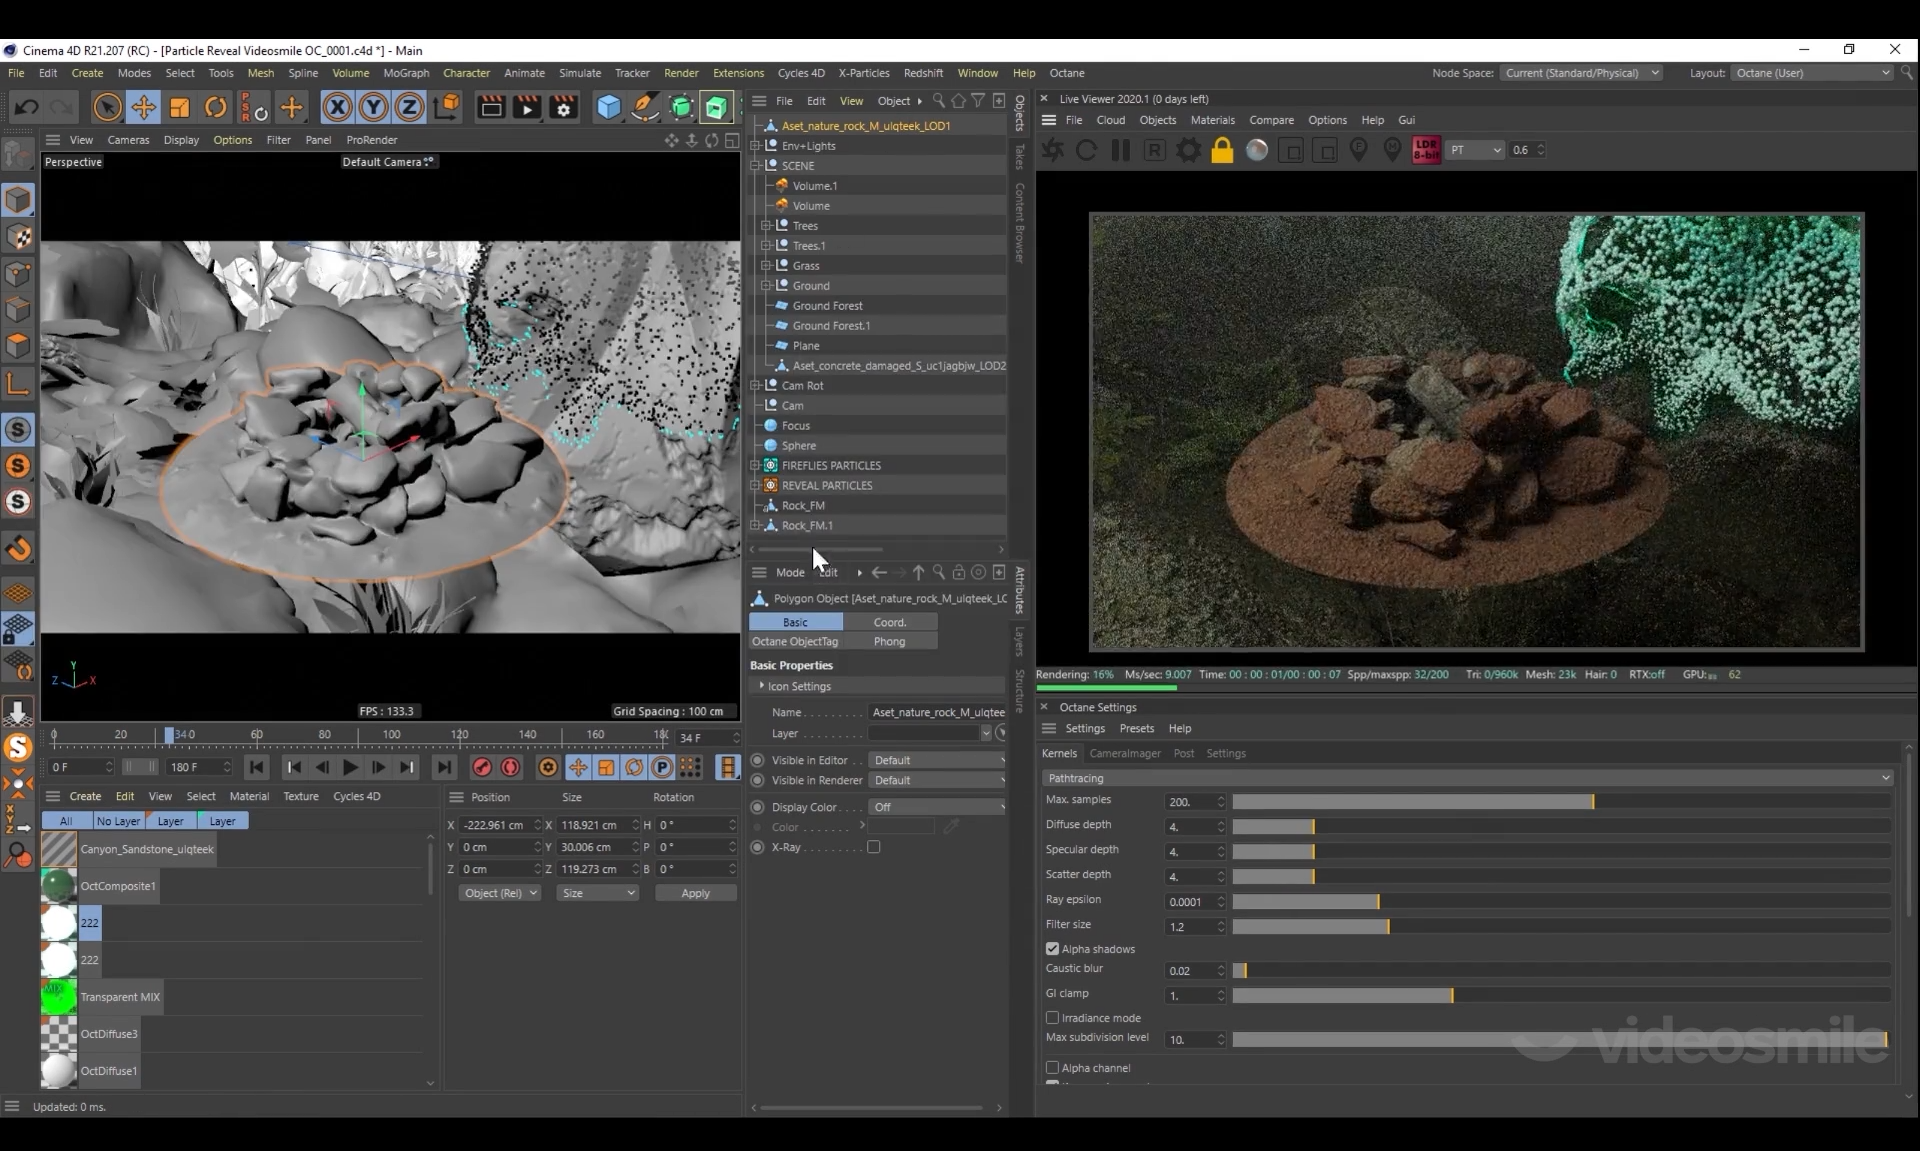
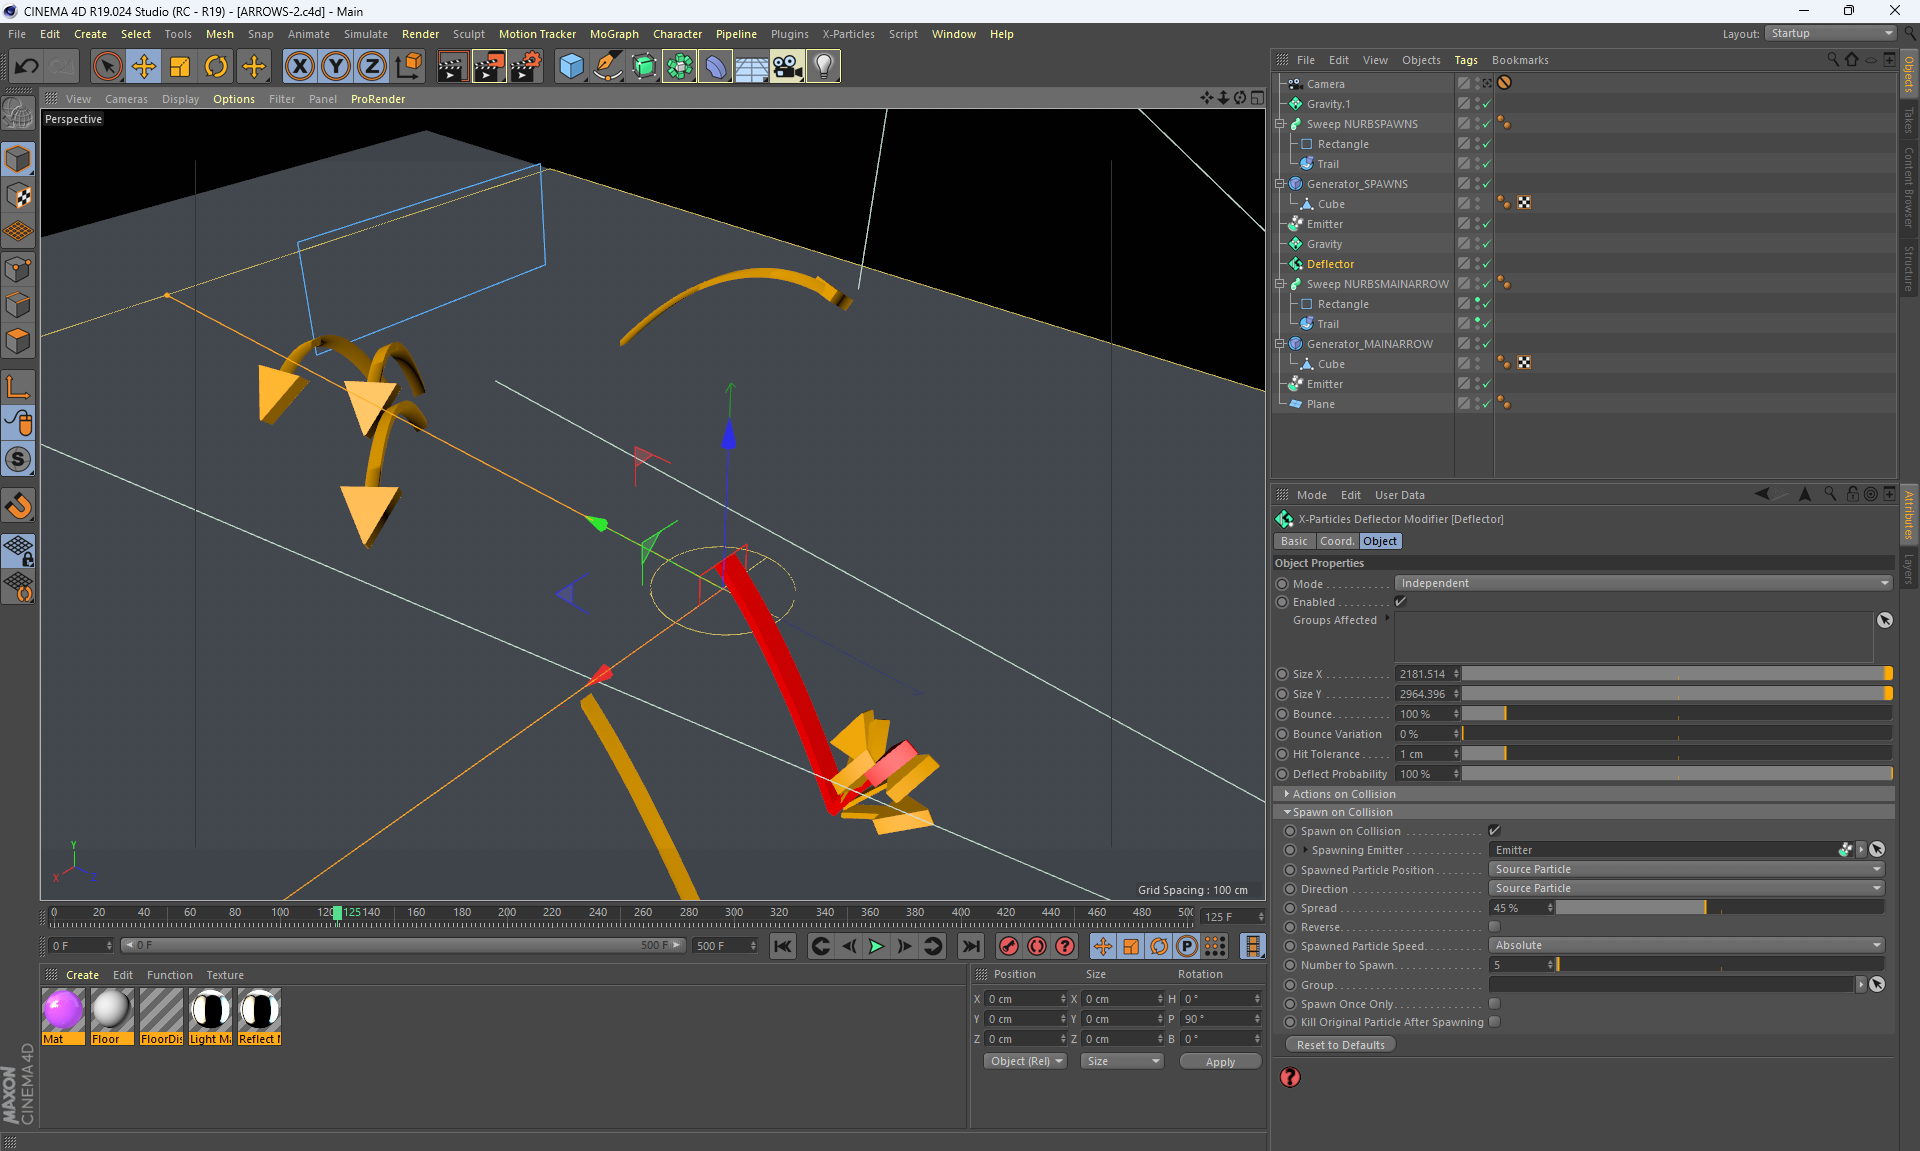
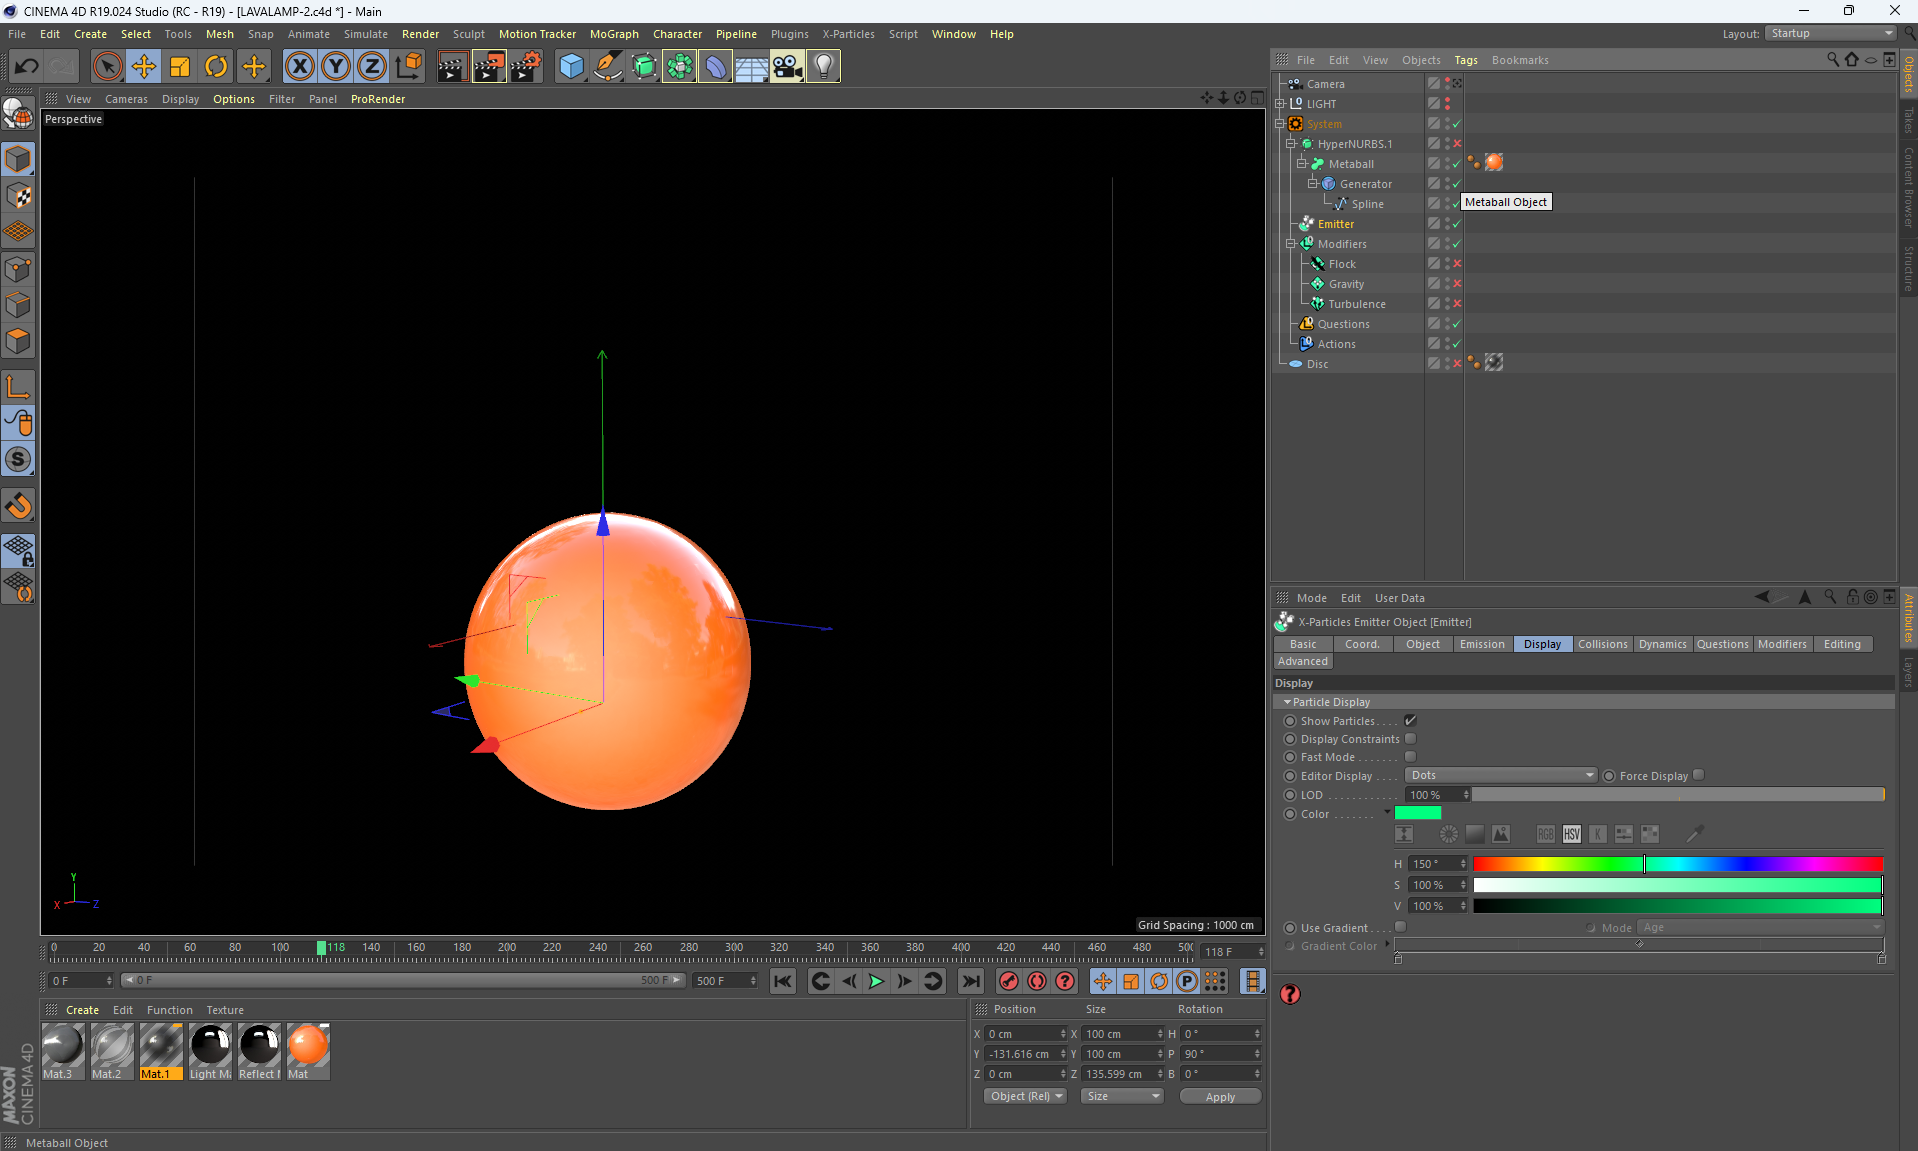
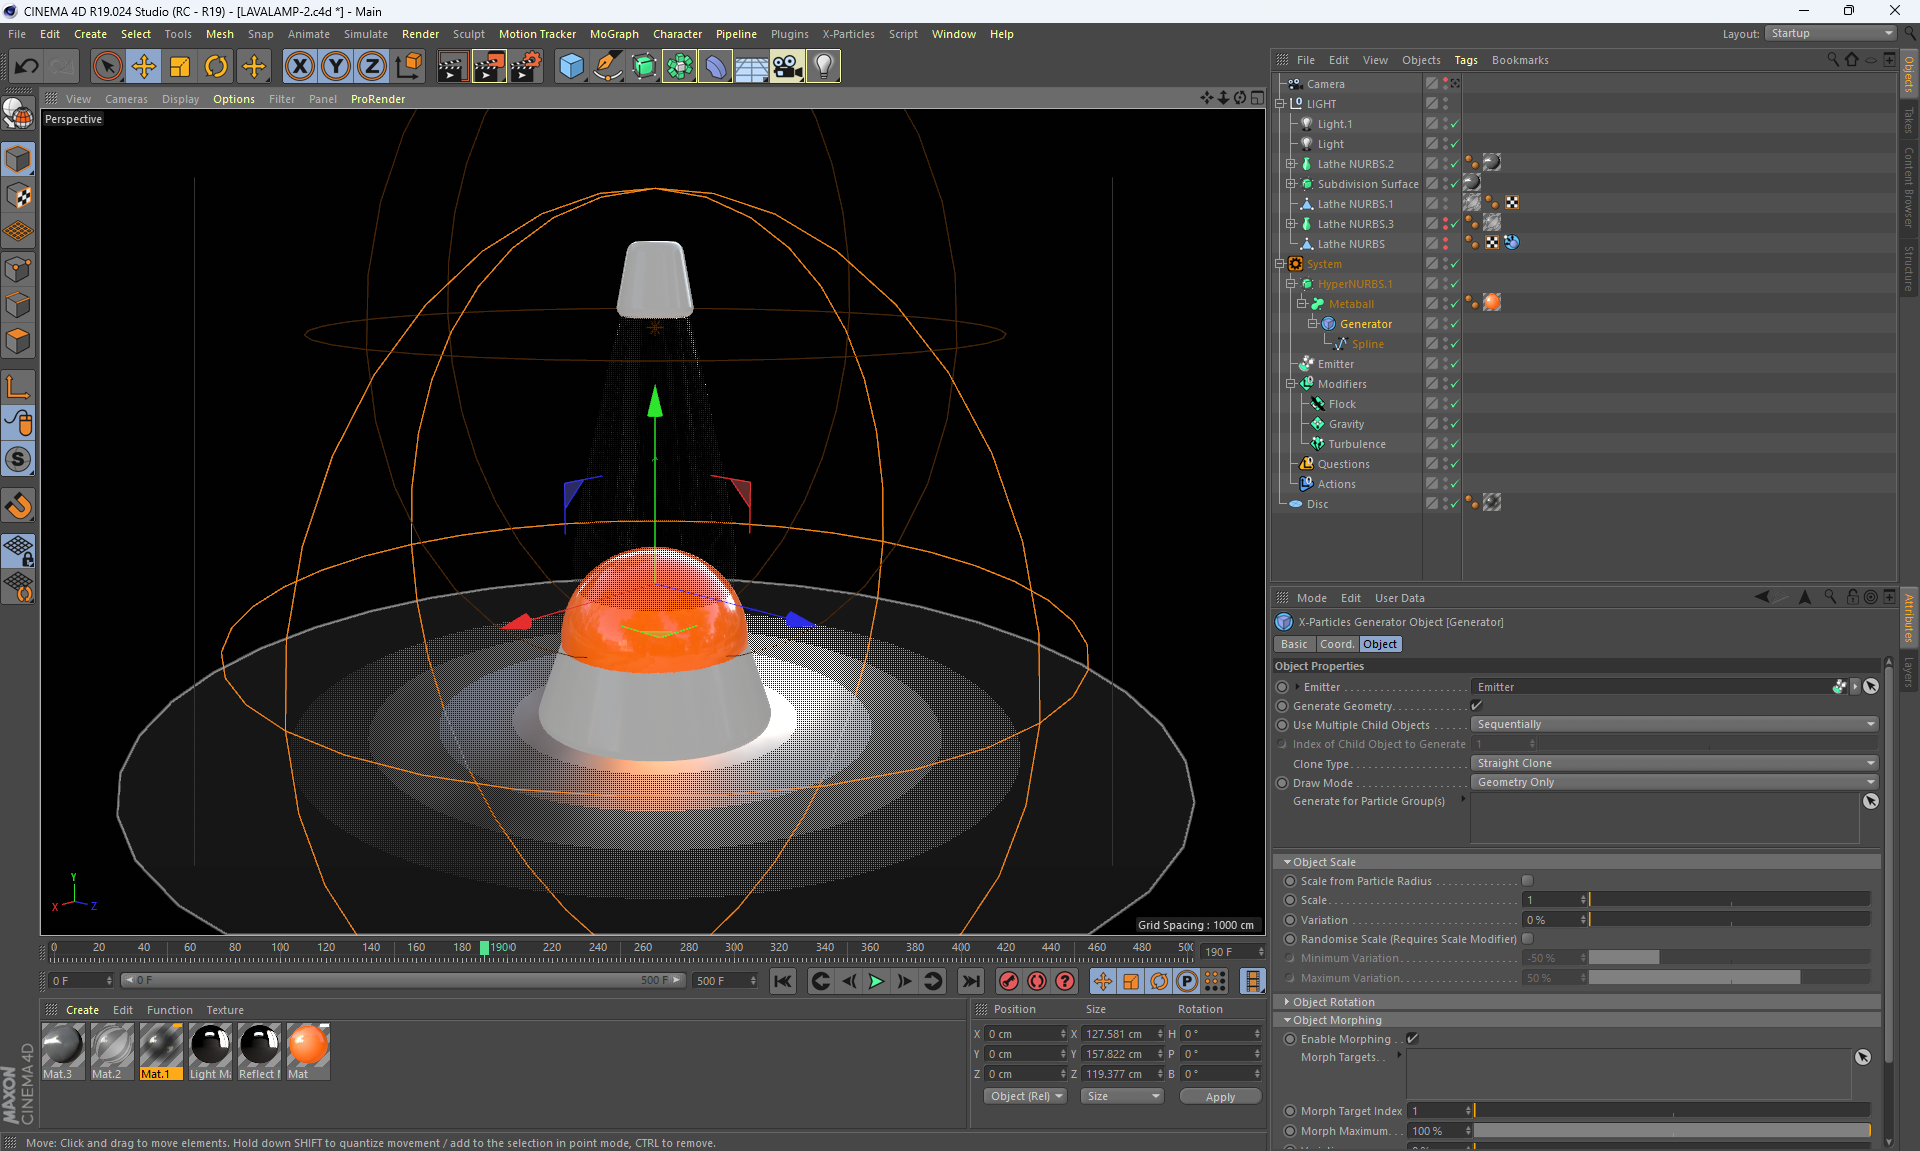
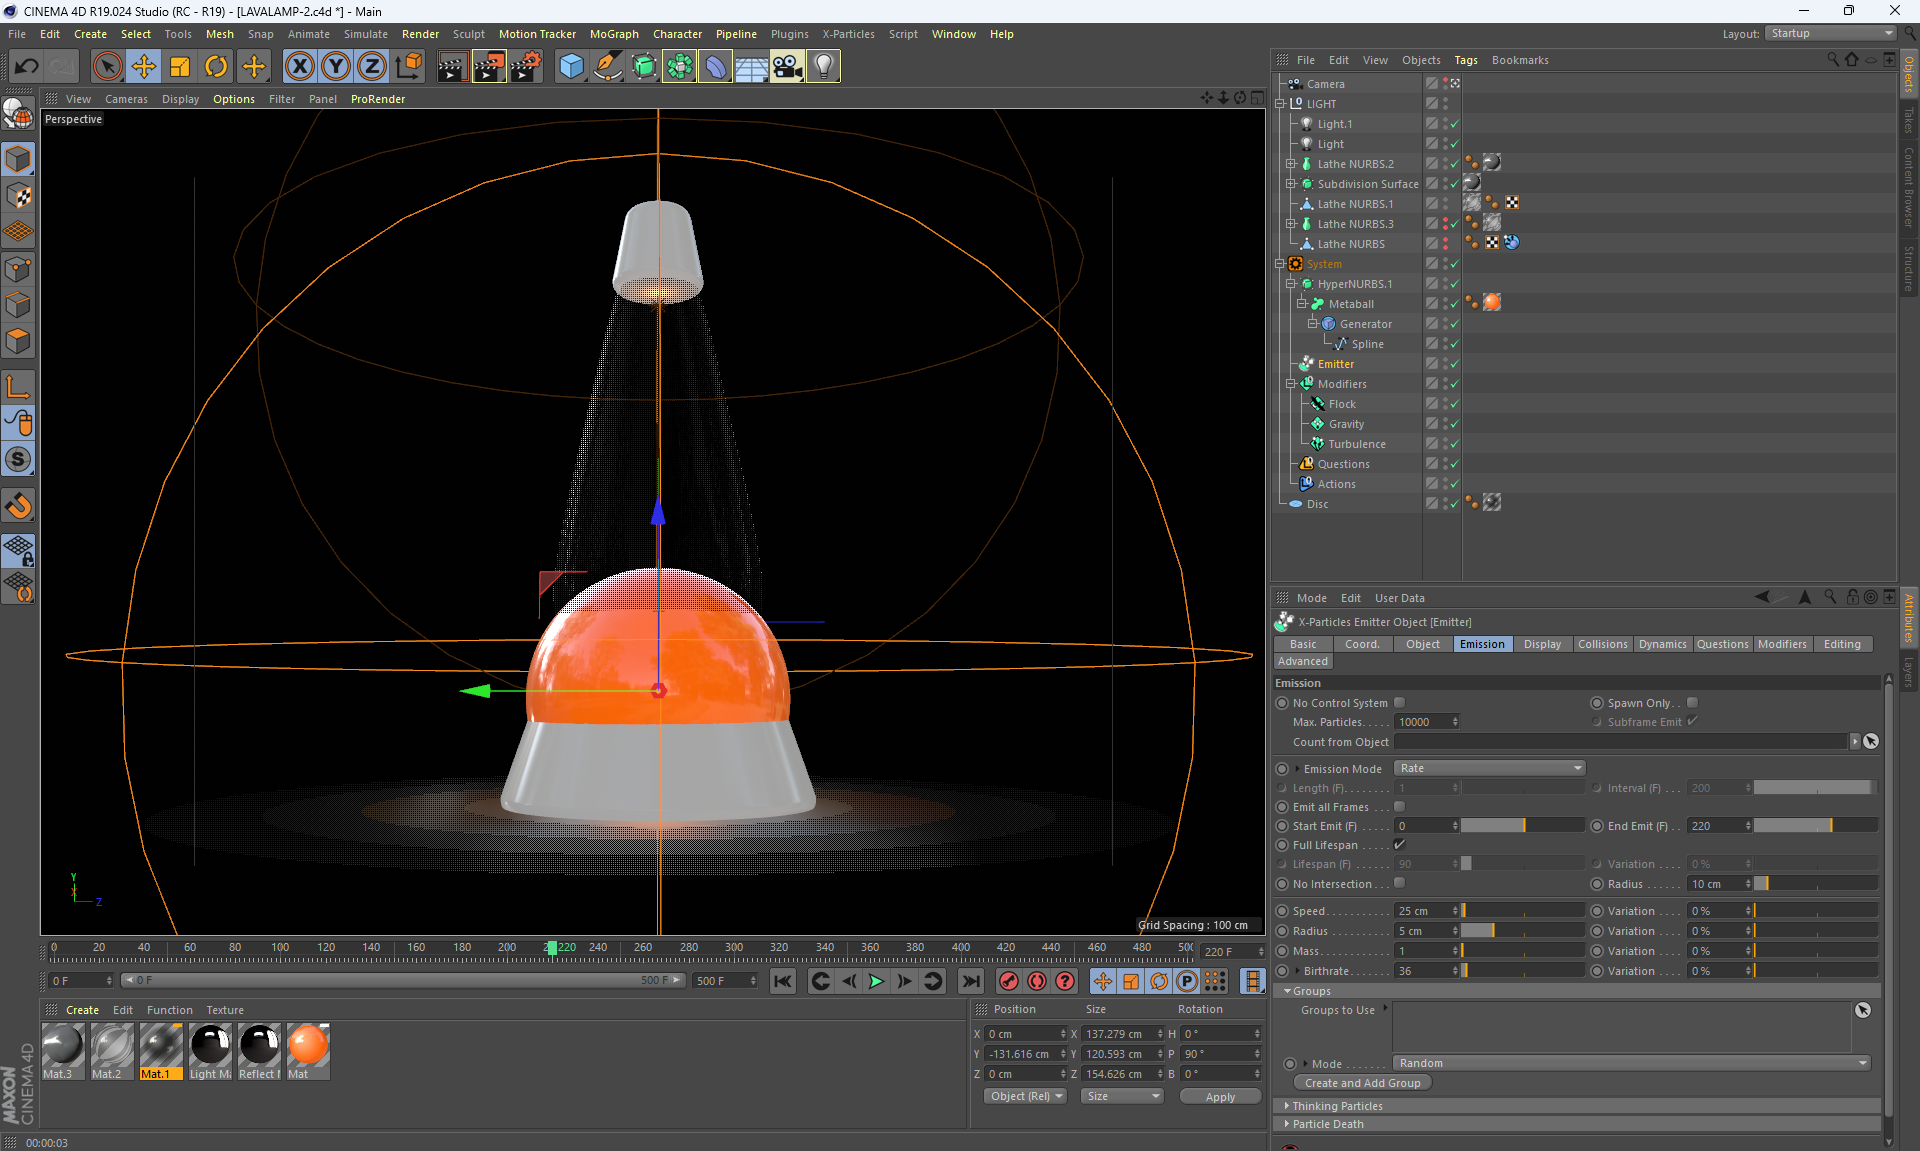
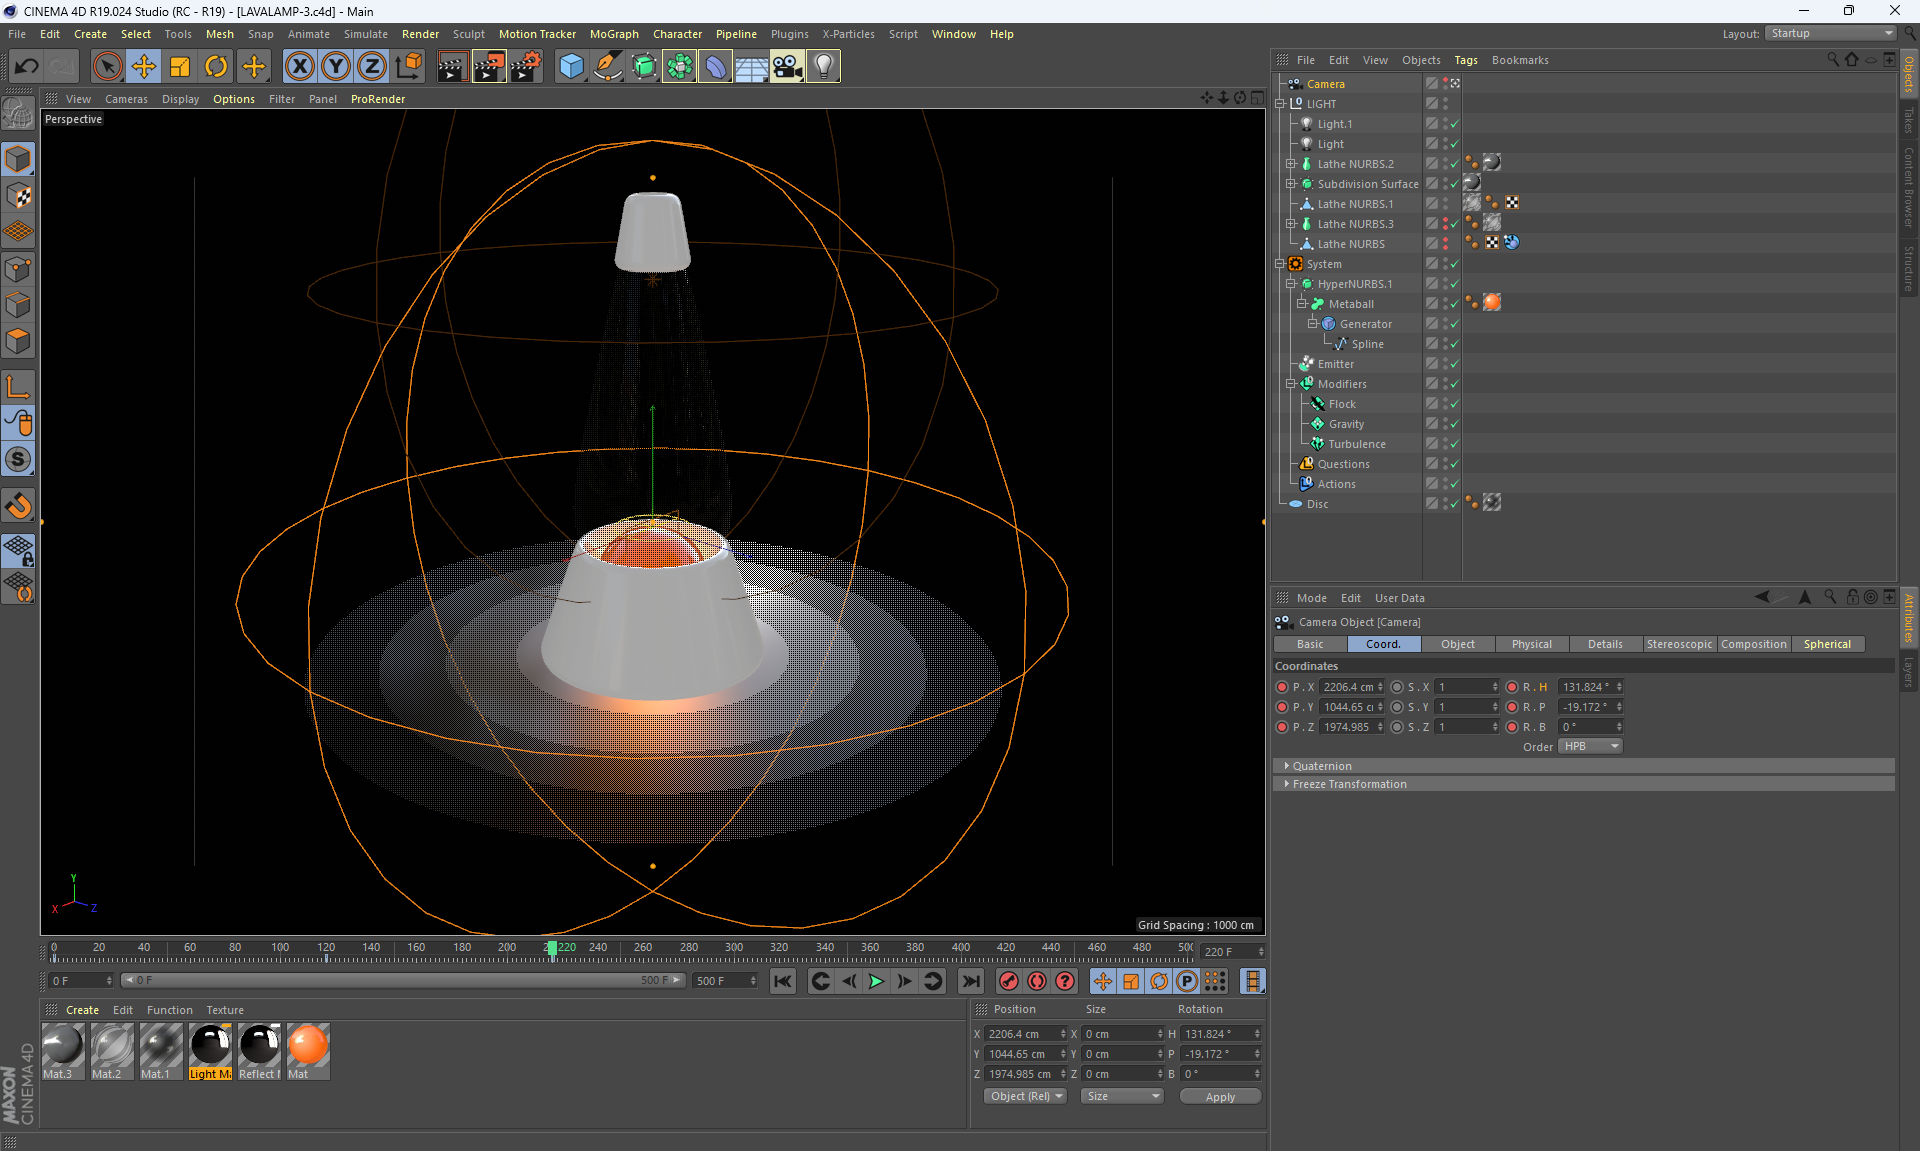
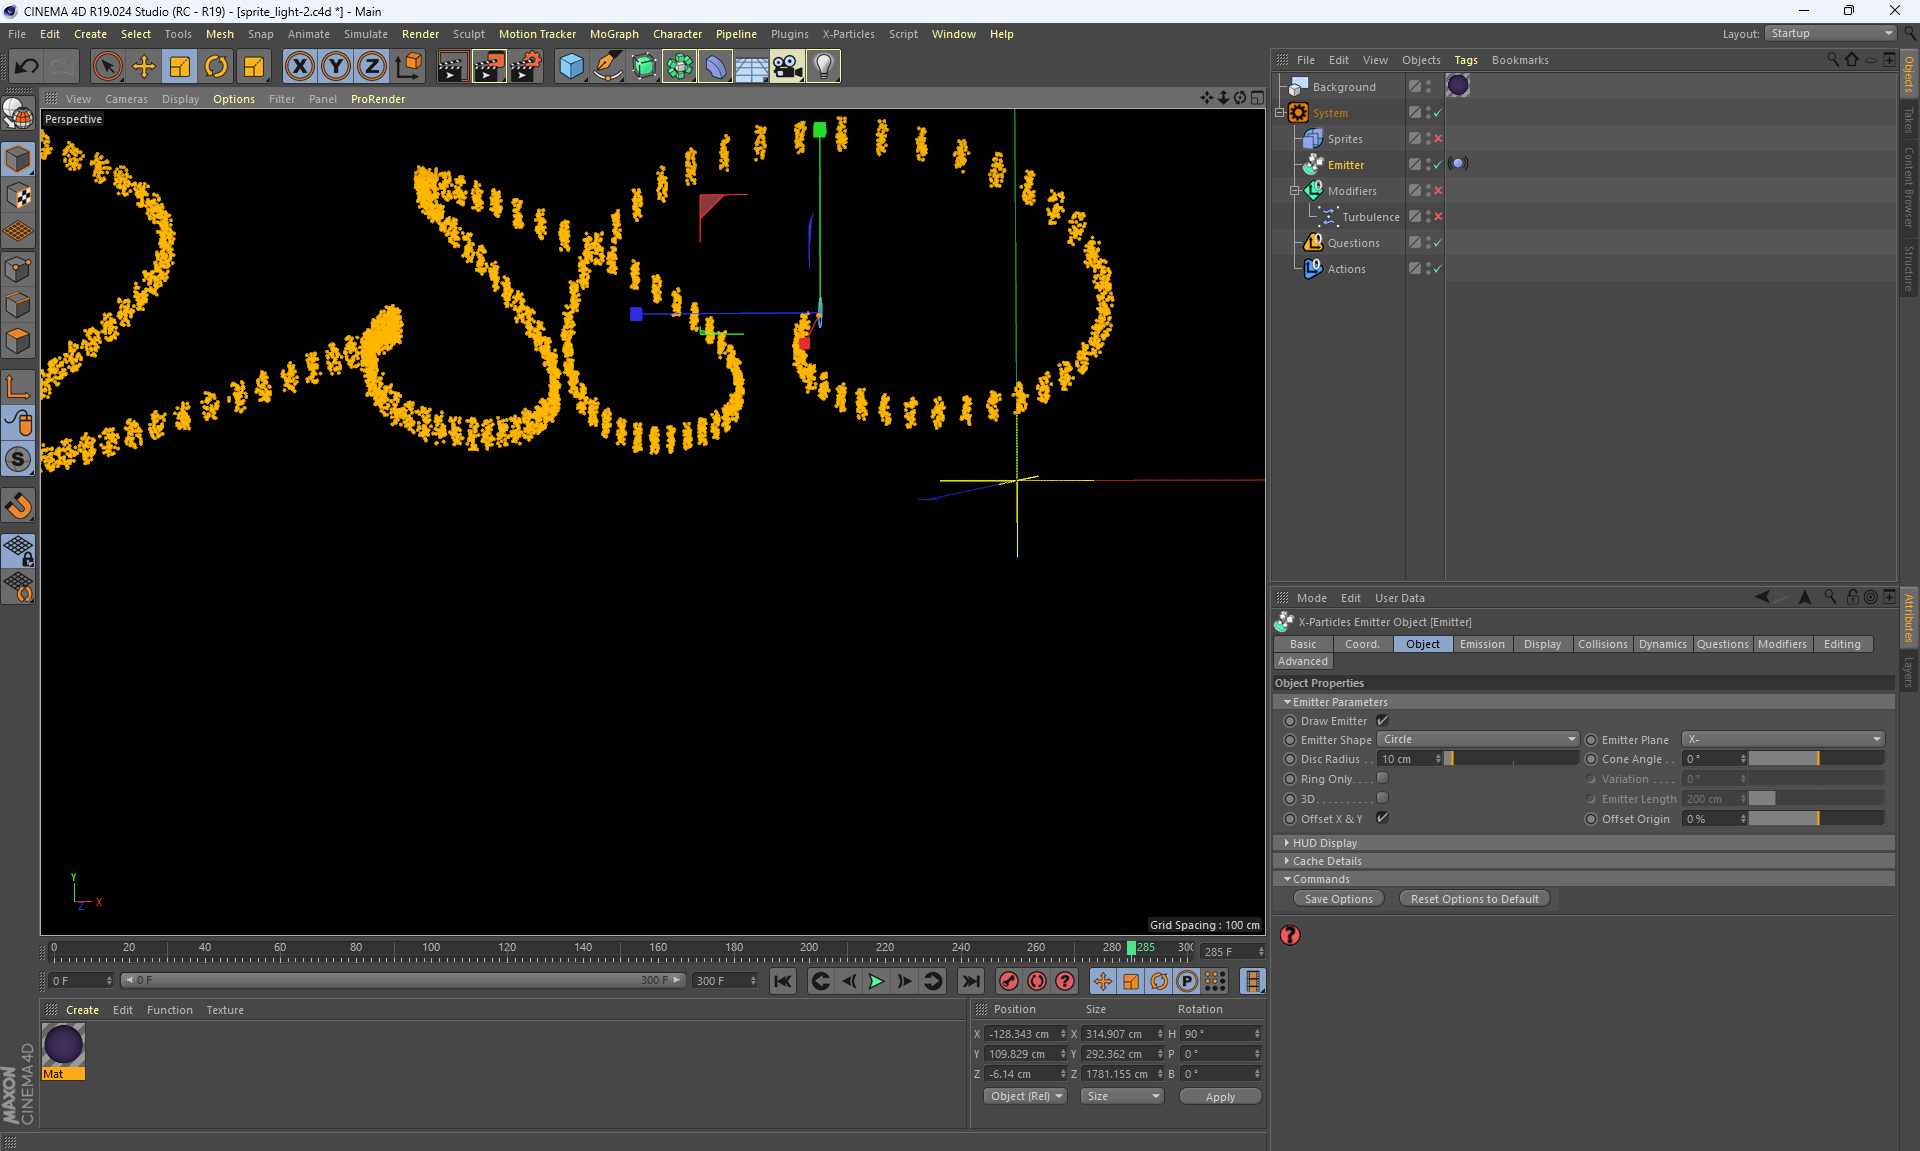
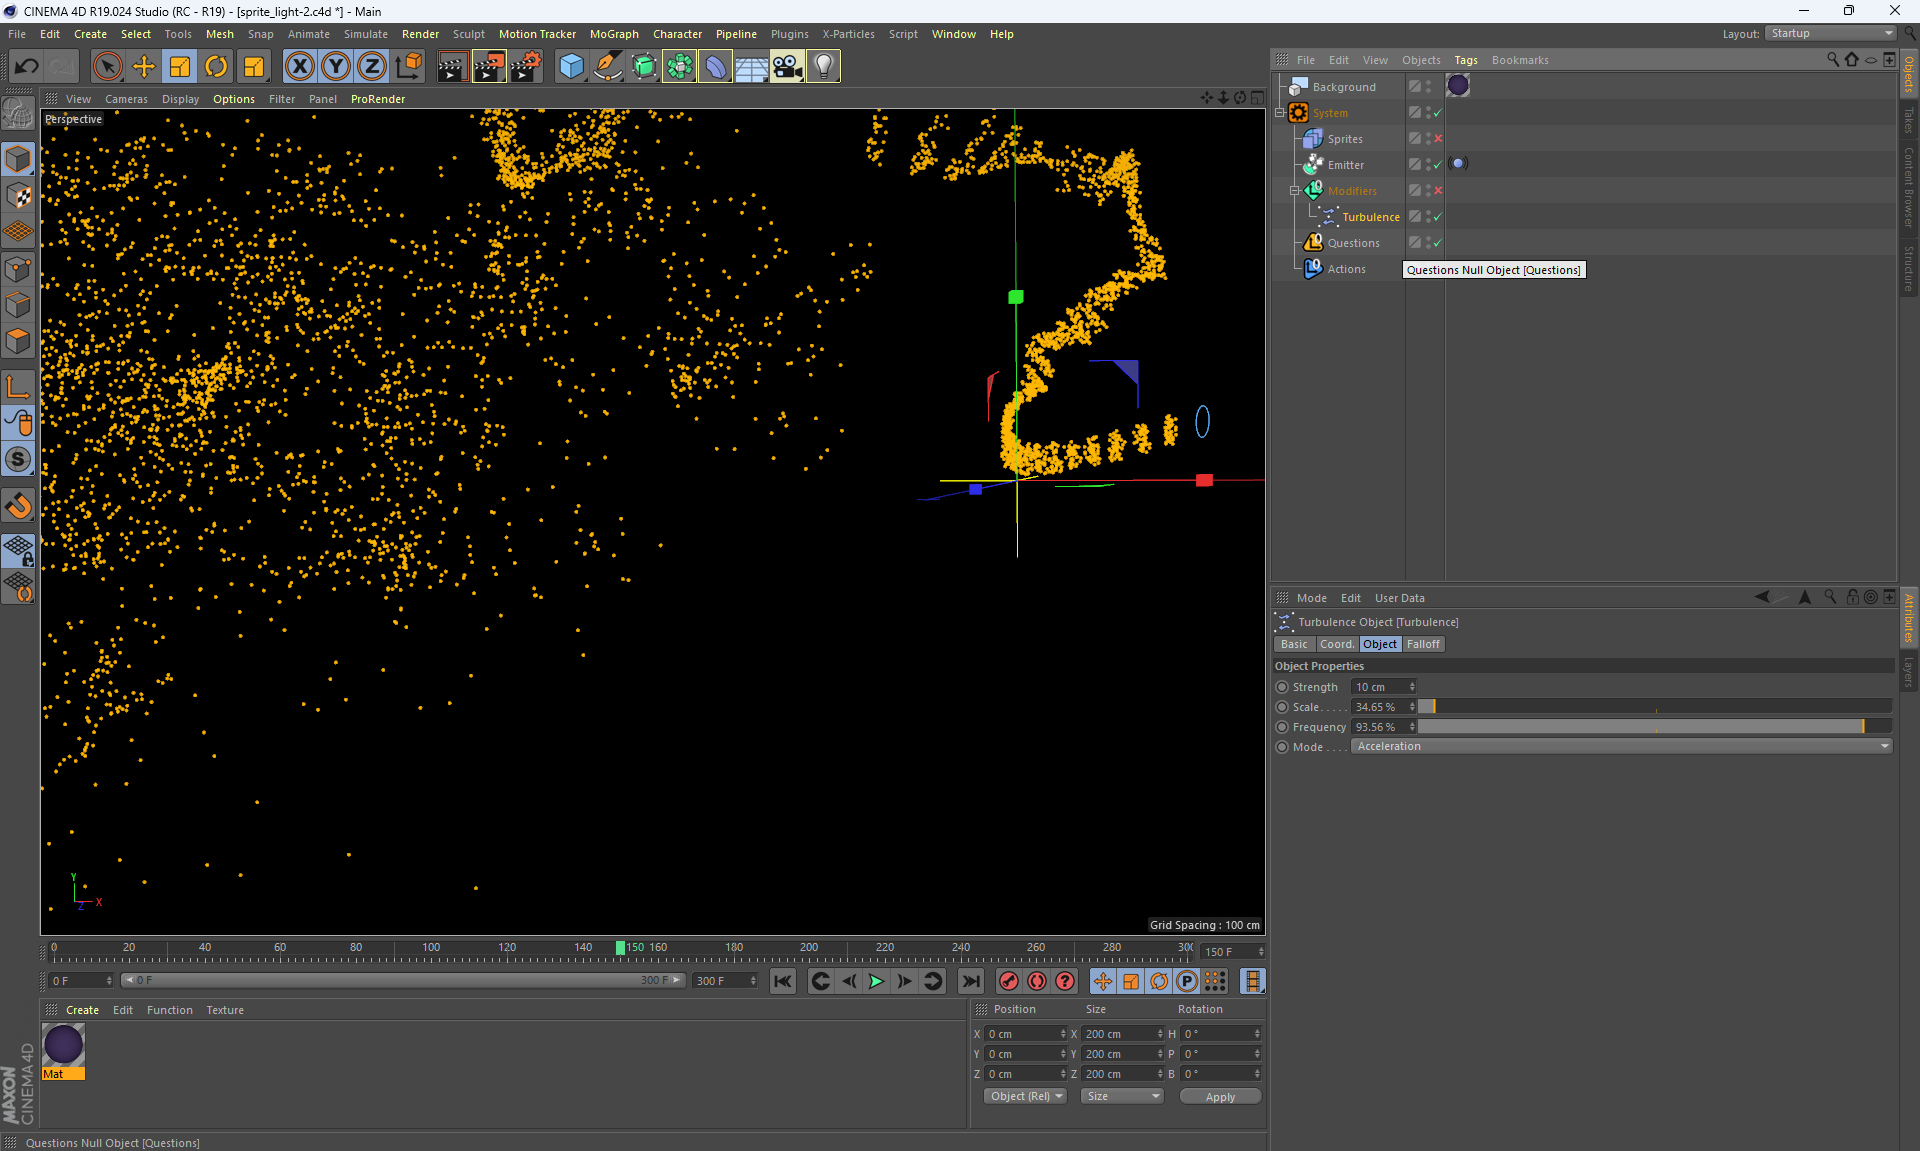
7. X-Particles
The X-Particles plugin for Cinema 4D is paid, installed from
official website.
Has many settings, designed for particle simulation, fabric, can also simulate fire, water, but not like other fluid simulation plugins do, for example,
RealFlow.
This X-Particles plugin is very voluminous, as a separate program for study.
Previously, there was a trial working version on the official website with a limited period, now without purchasing X-Particles you cannot test the new version.
I needed this plugin for teaching the course, I watched the training videos from this section and other videos.
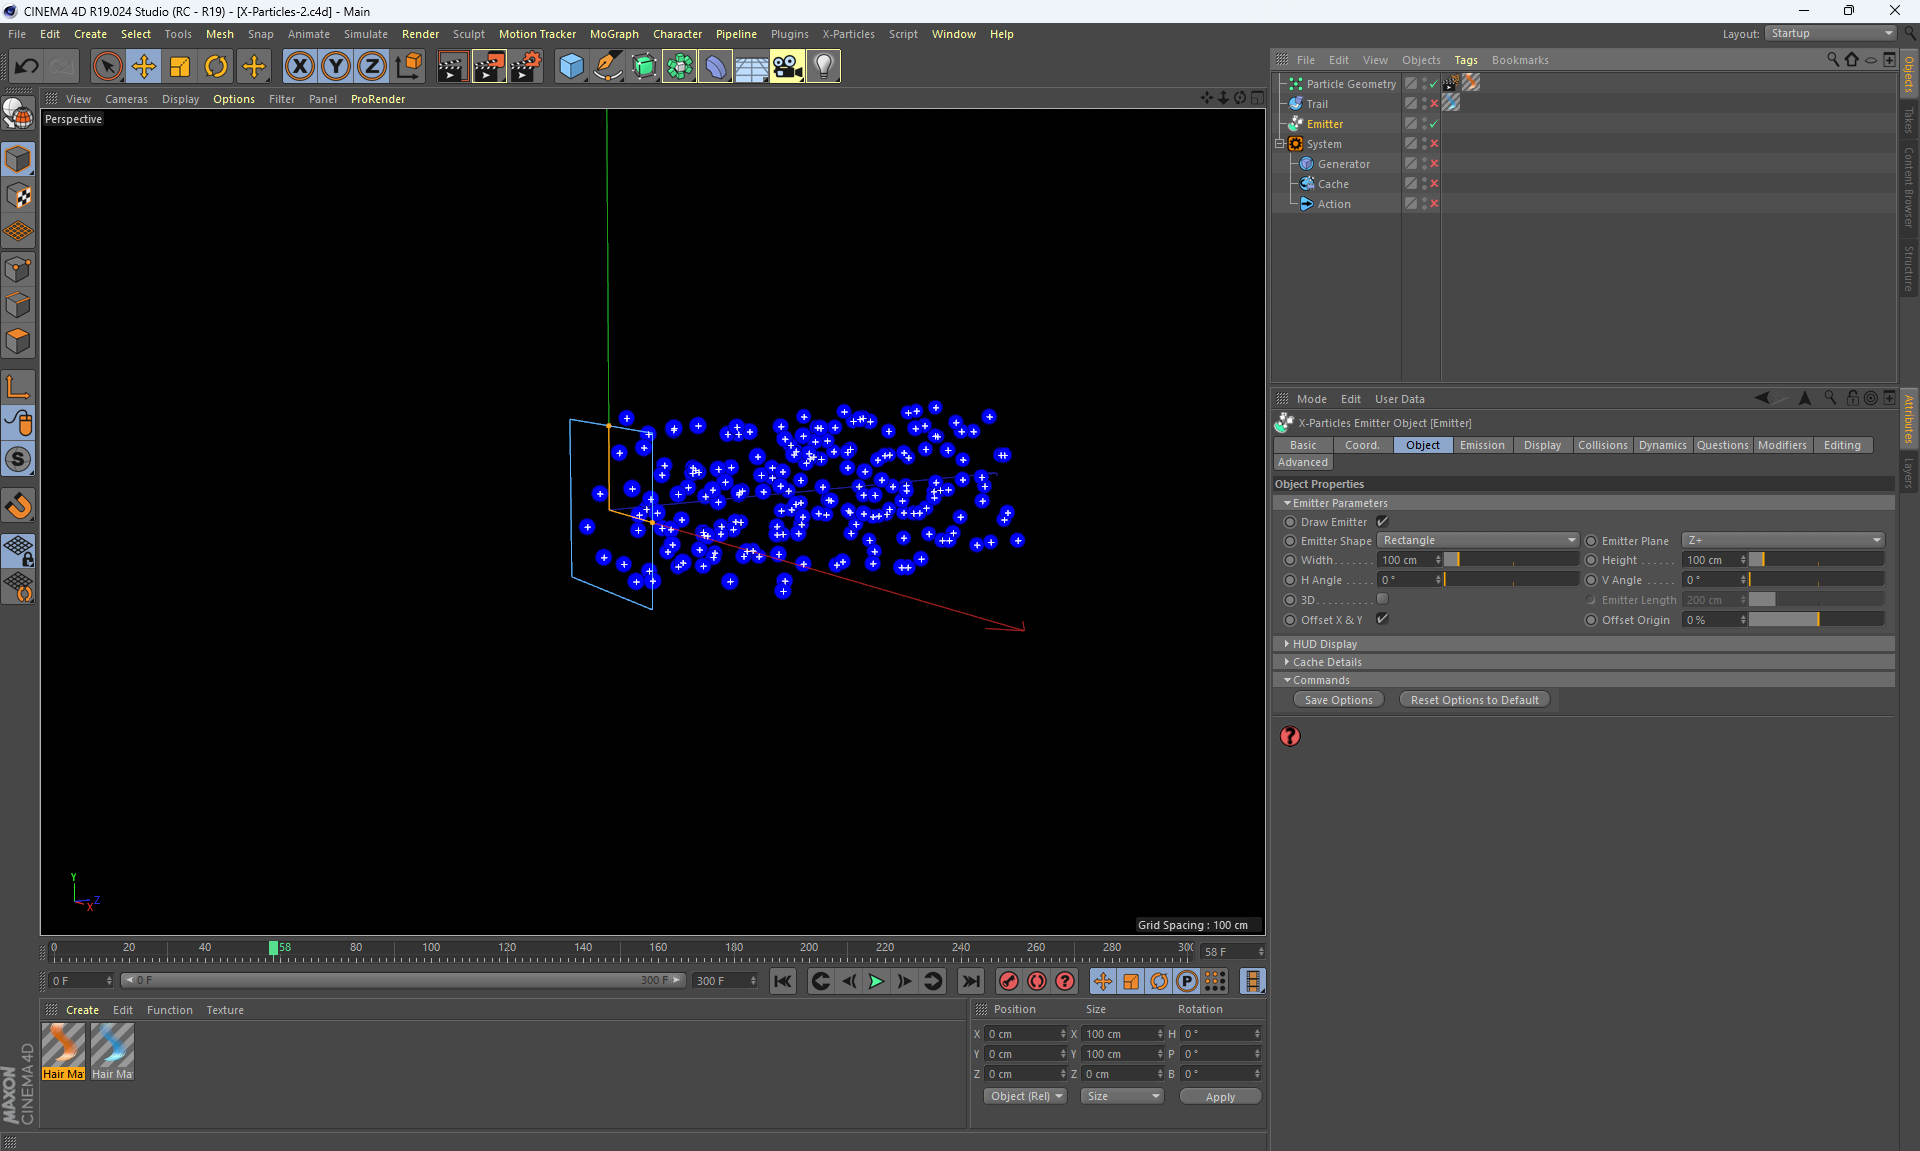
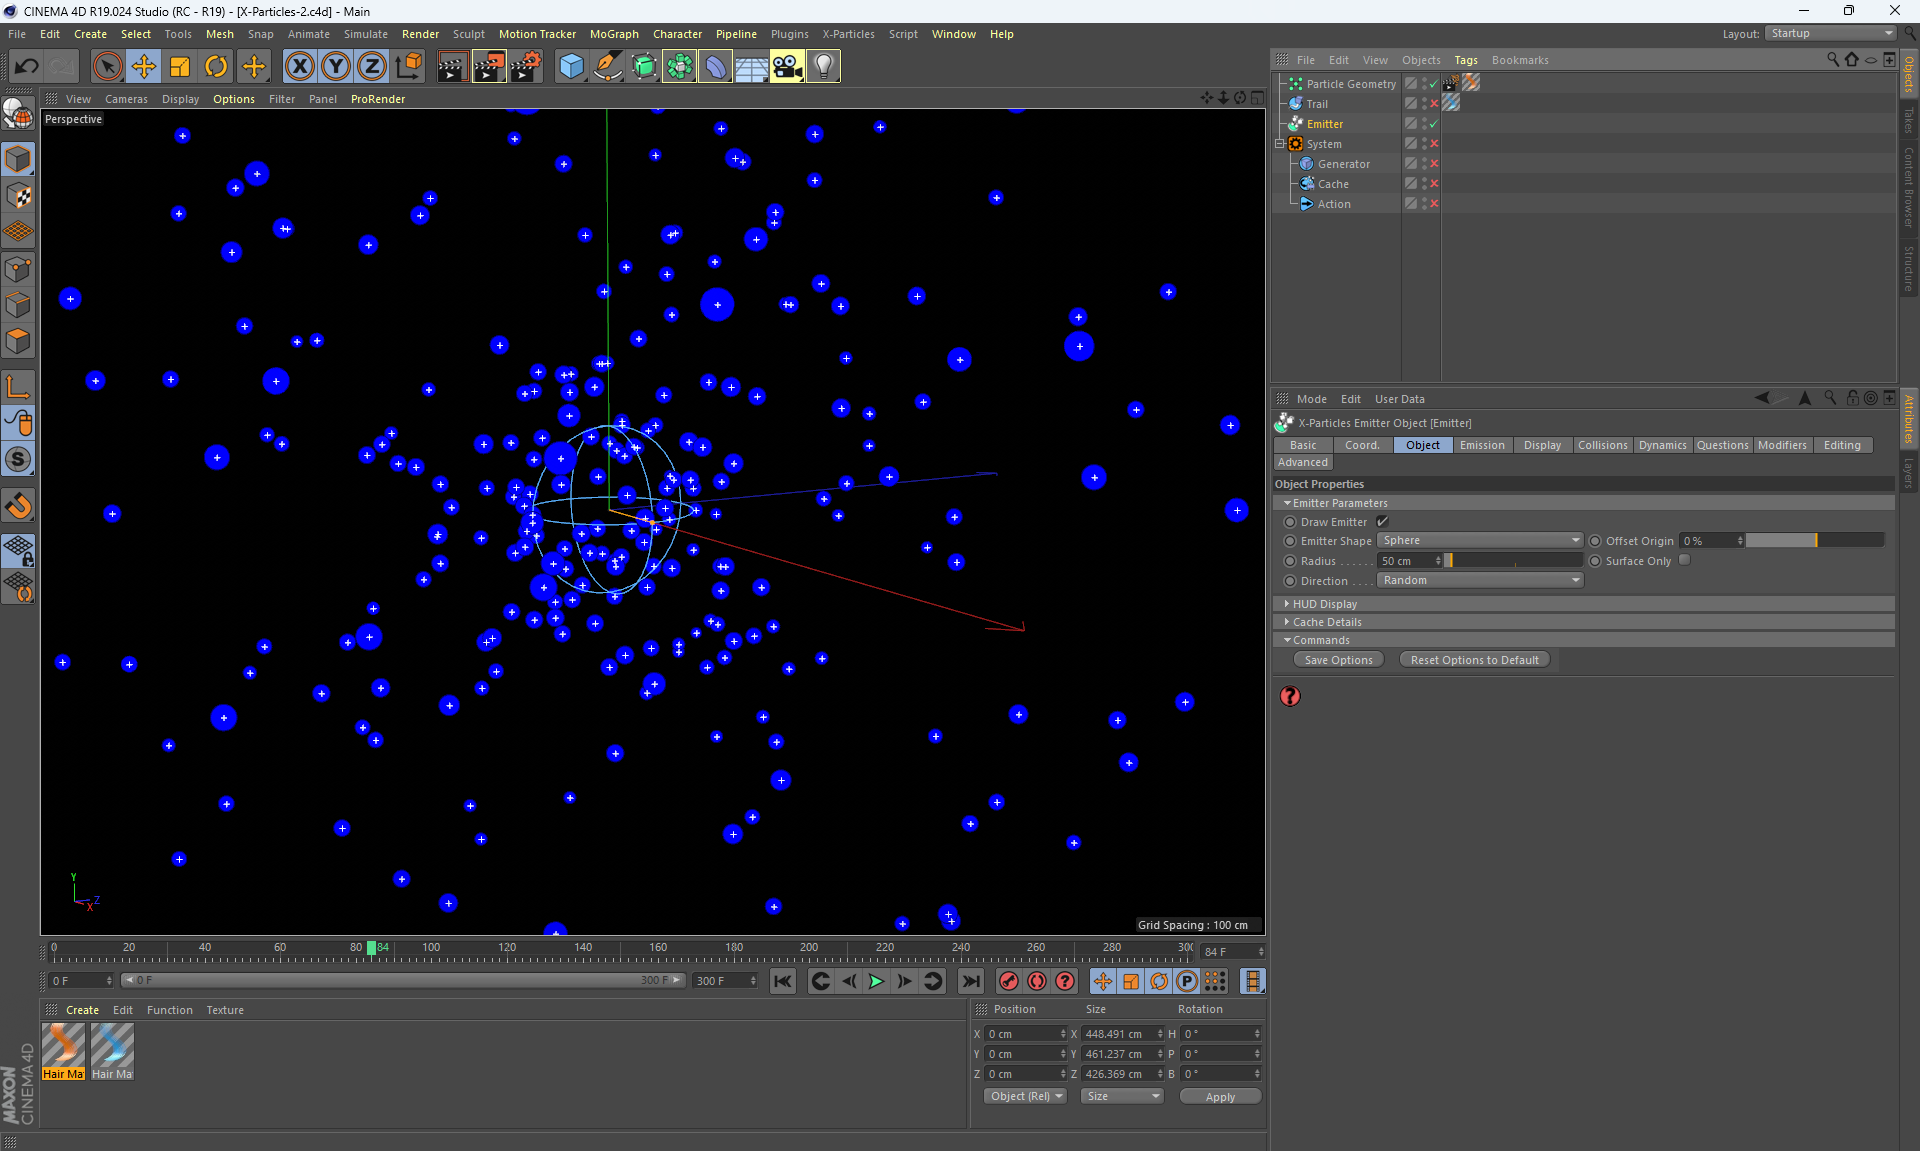
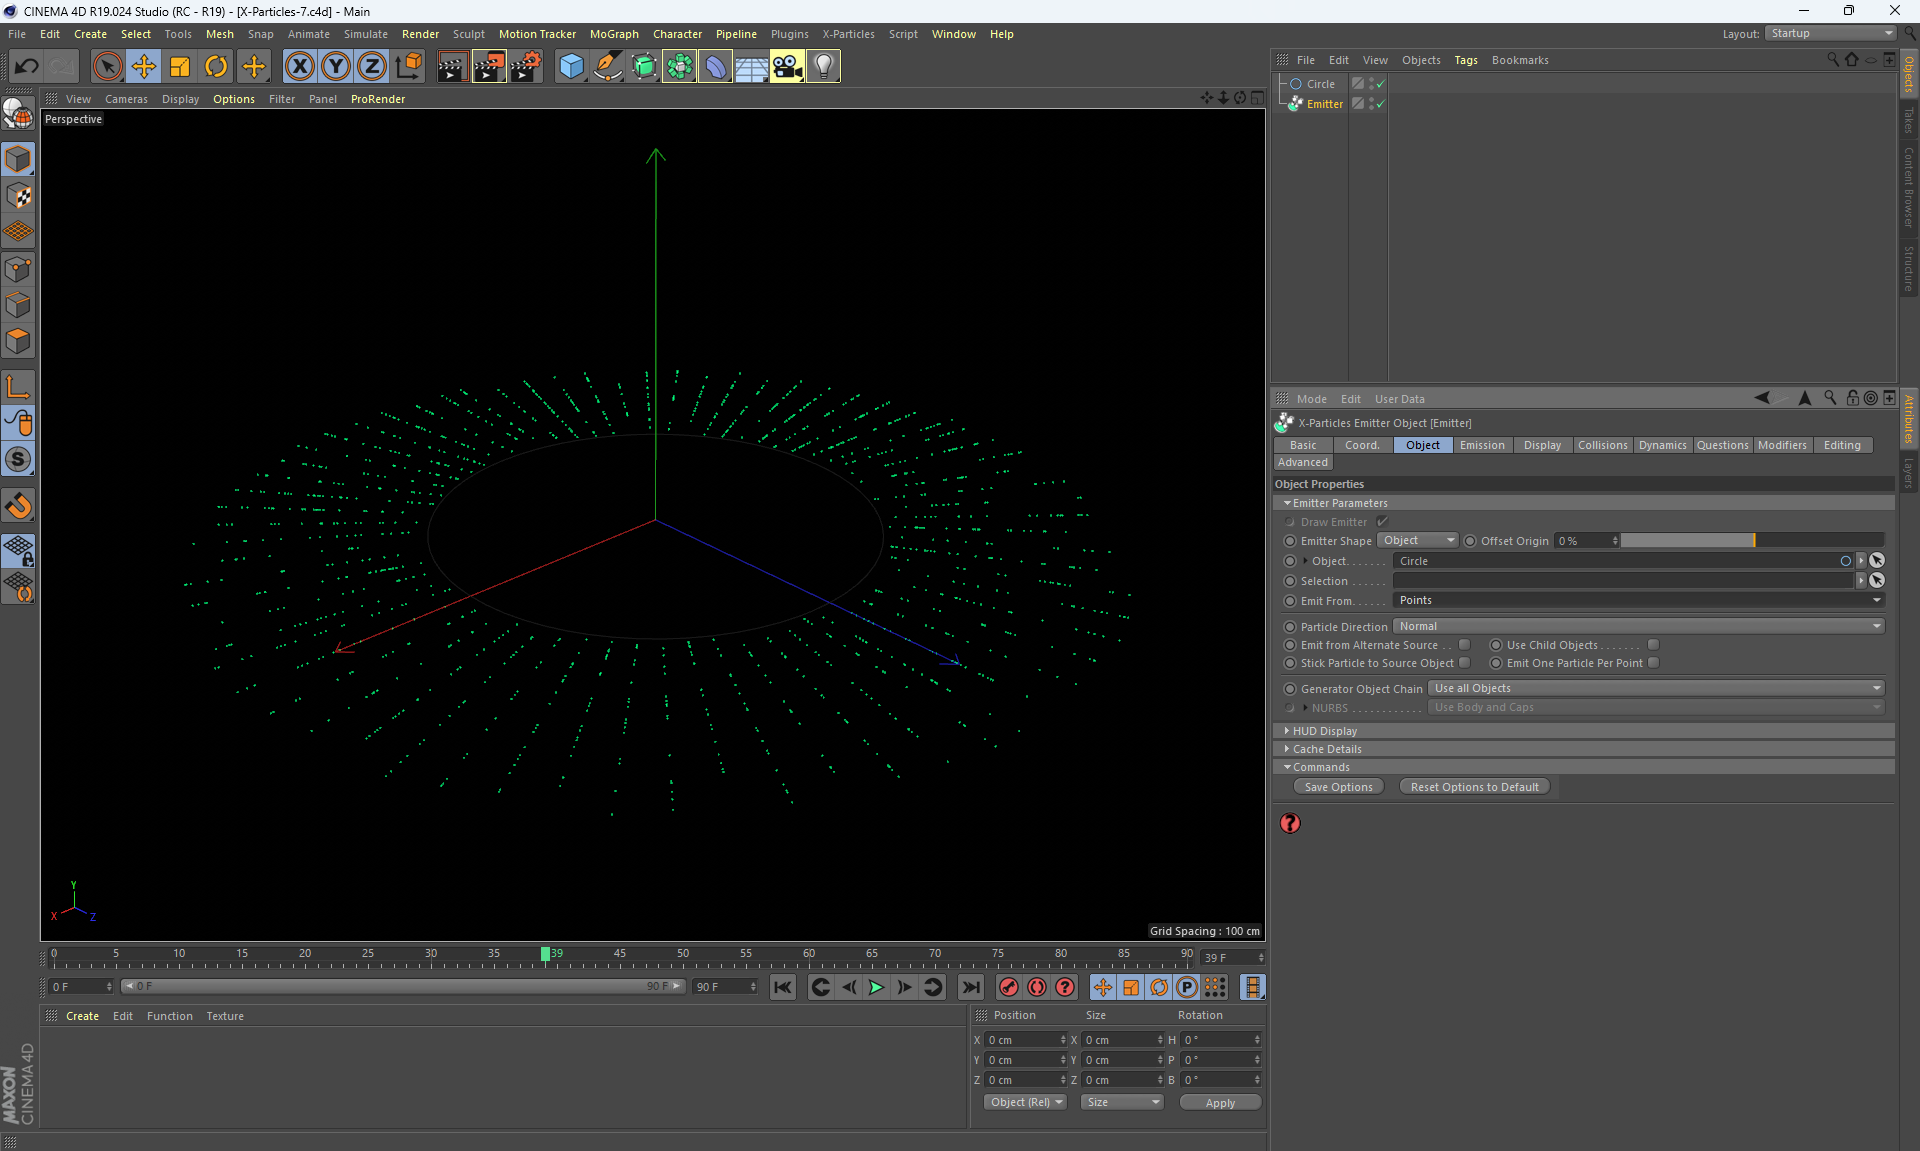
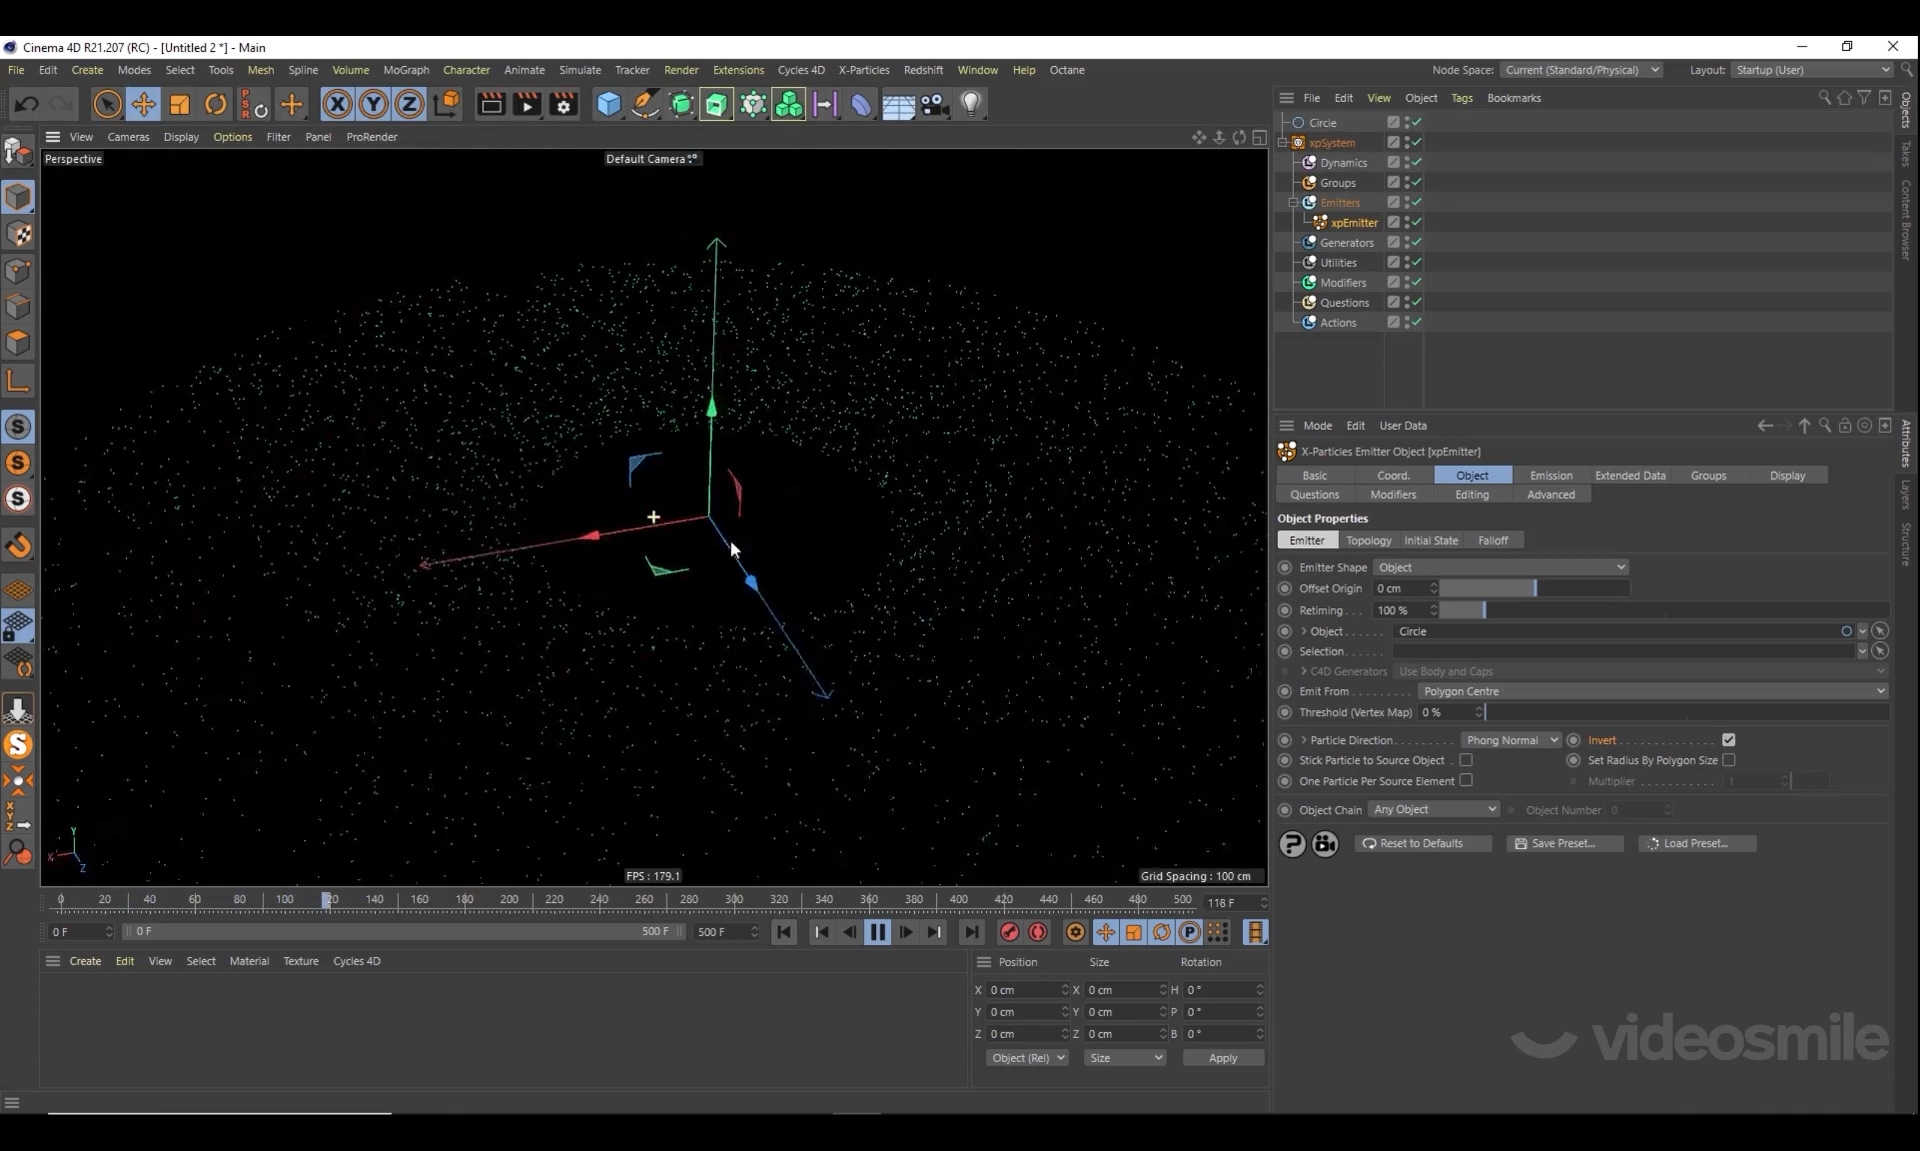
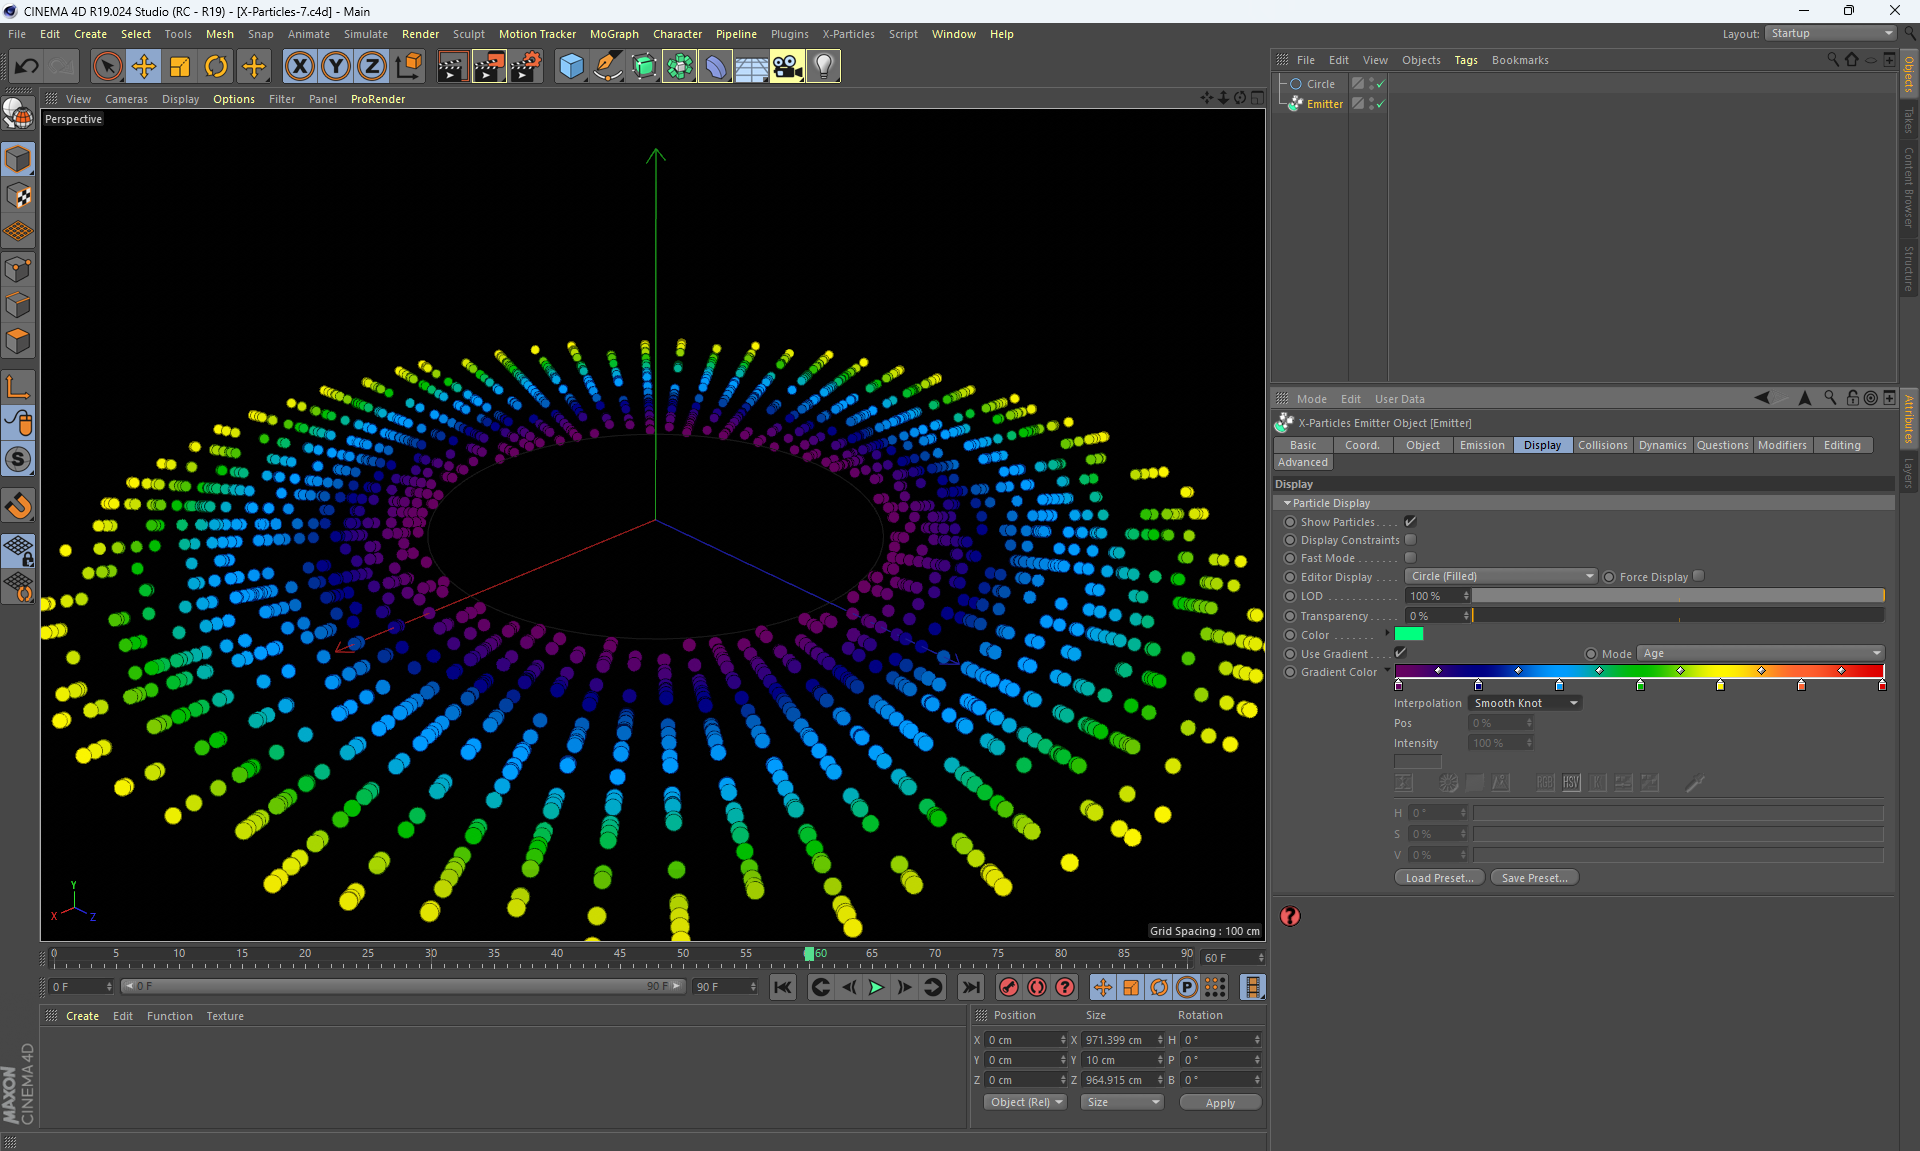
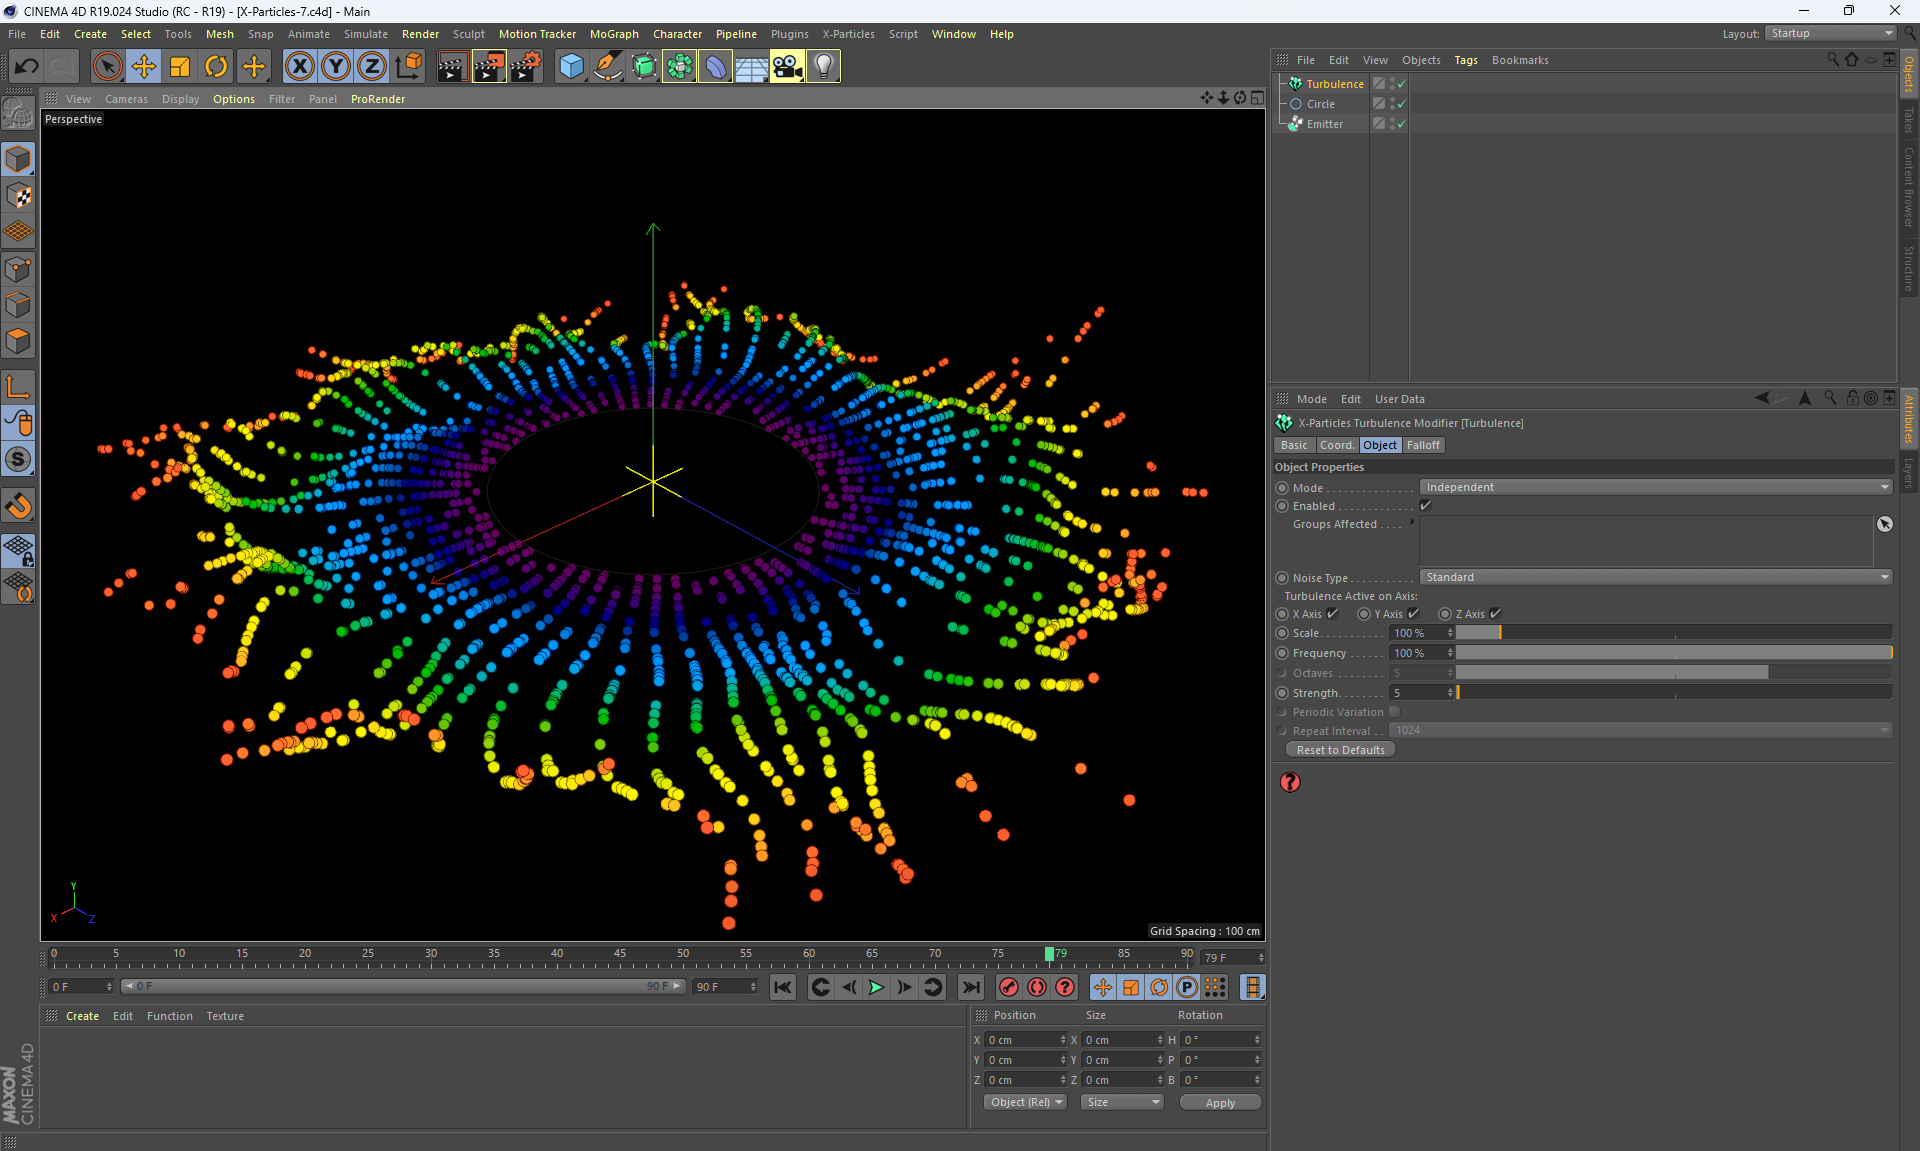
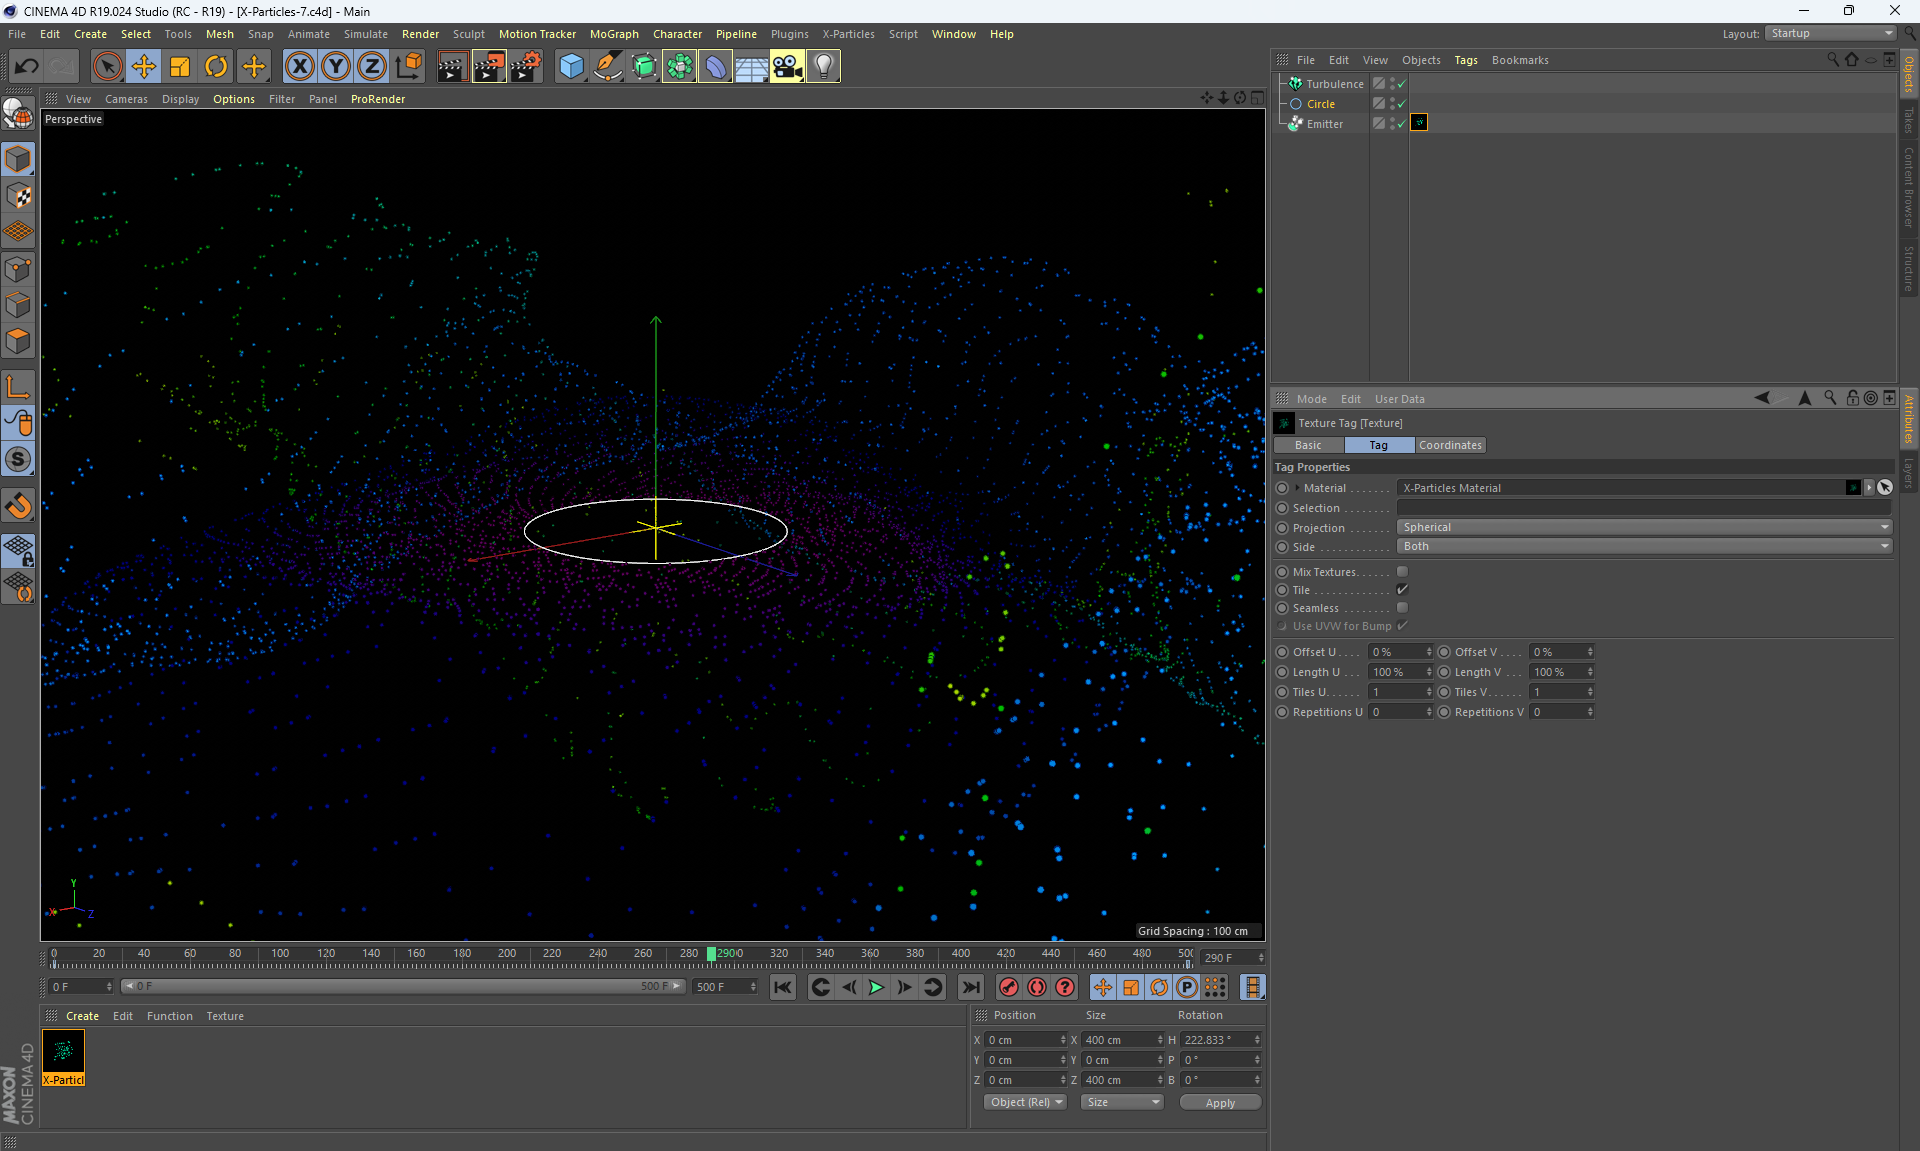
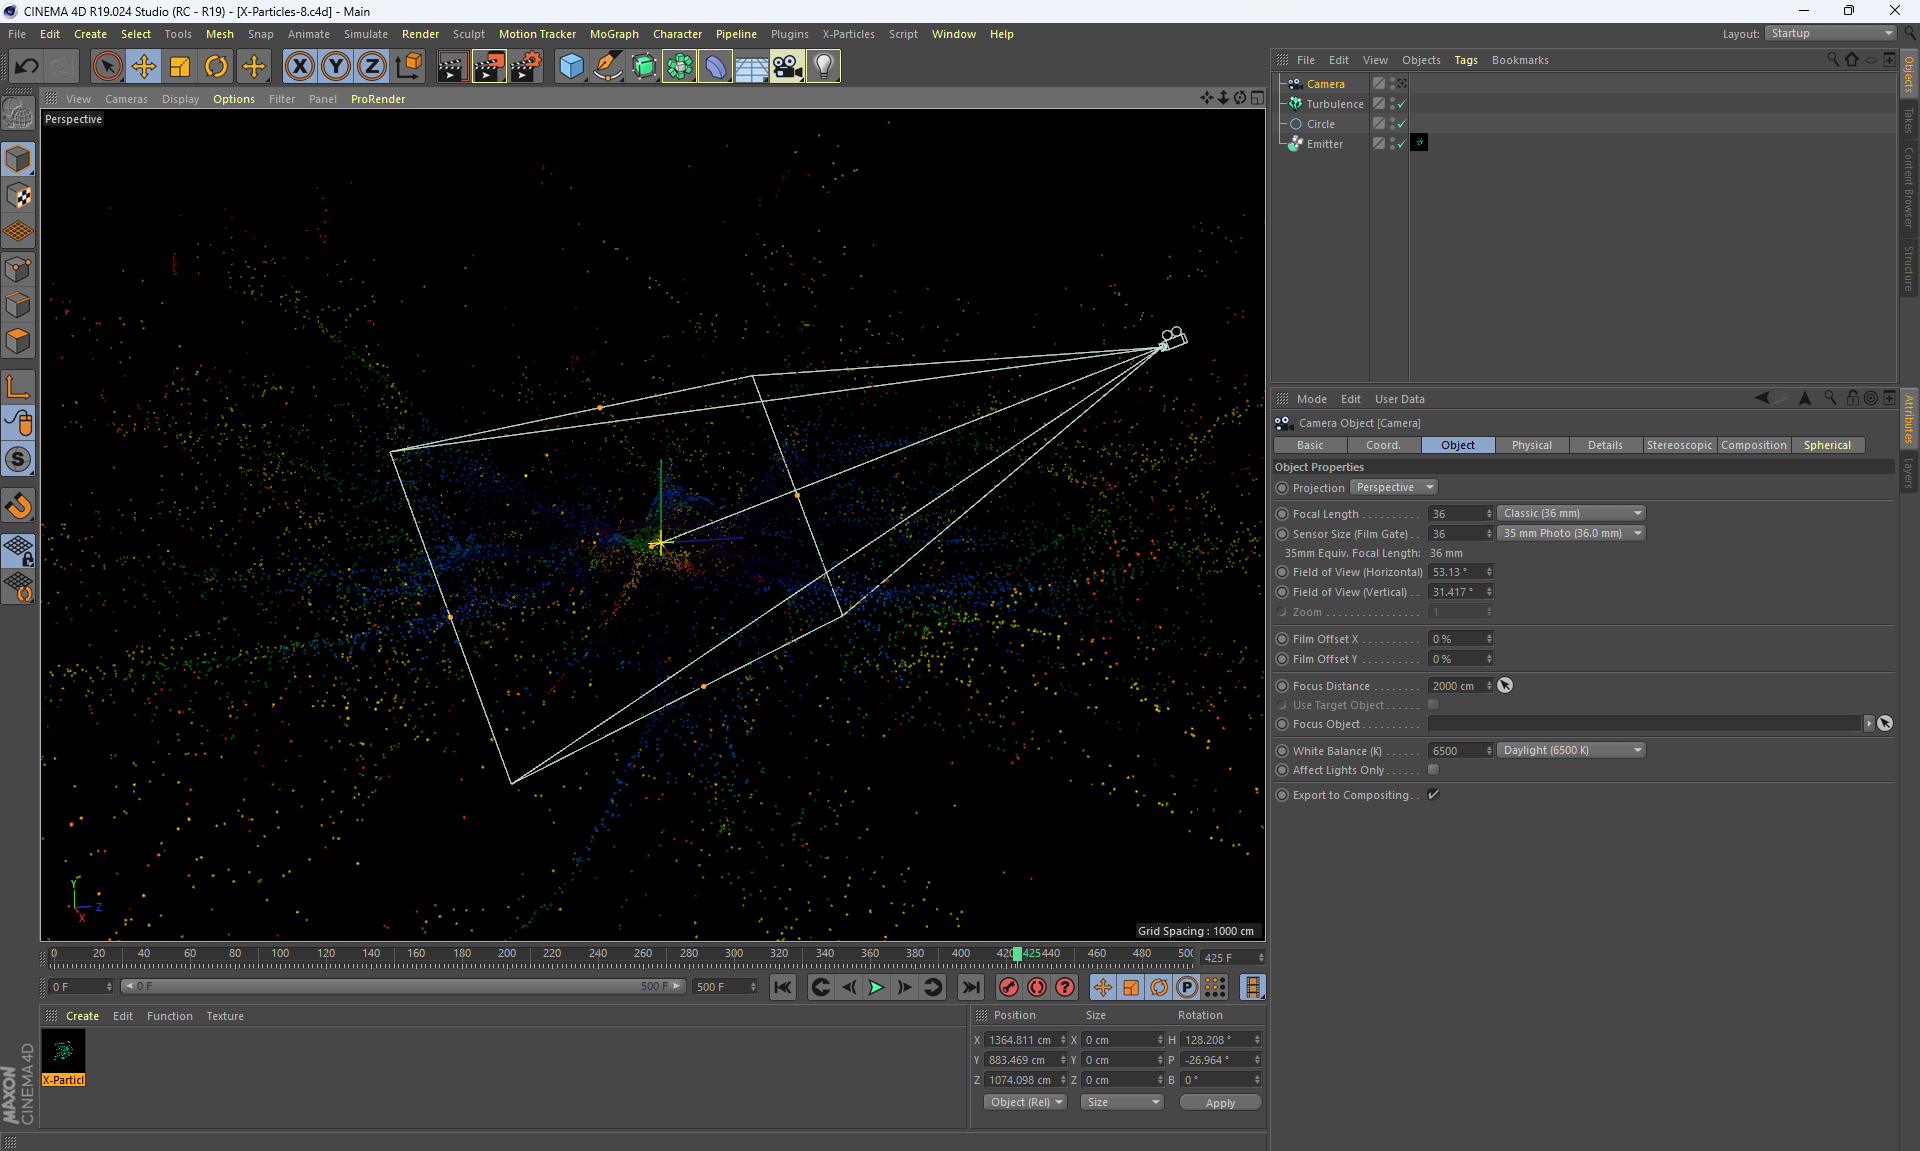
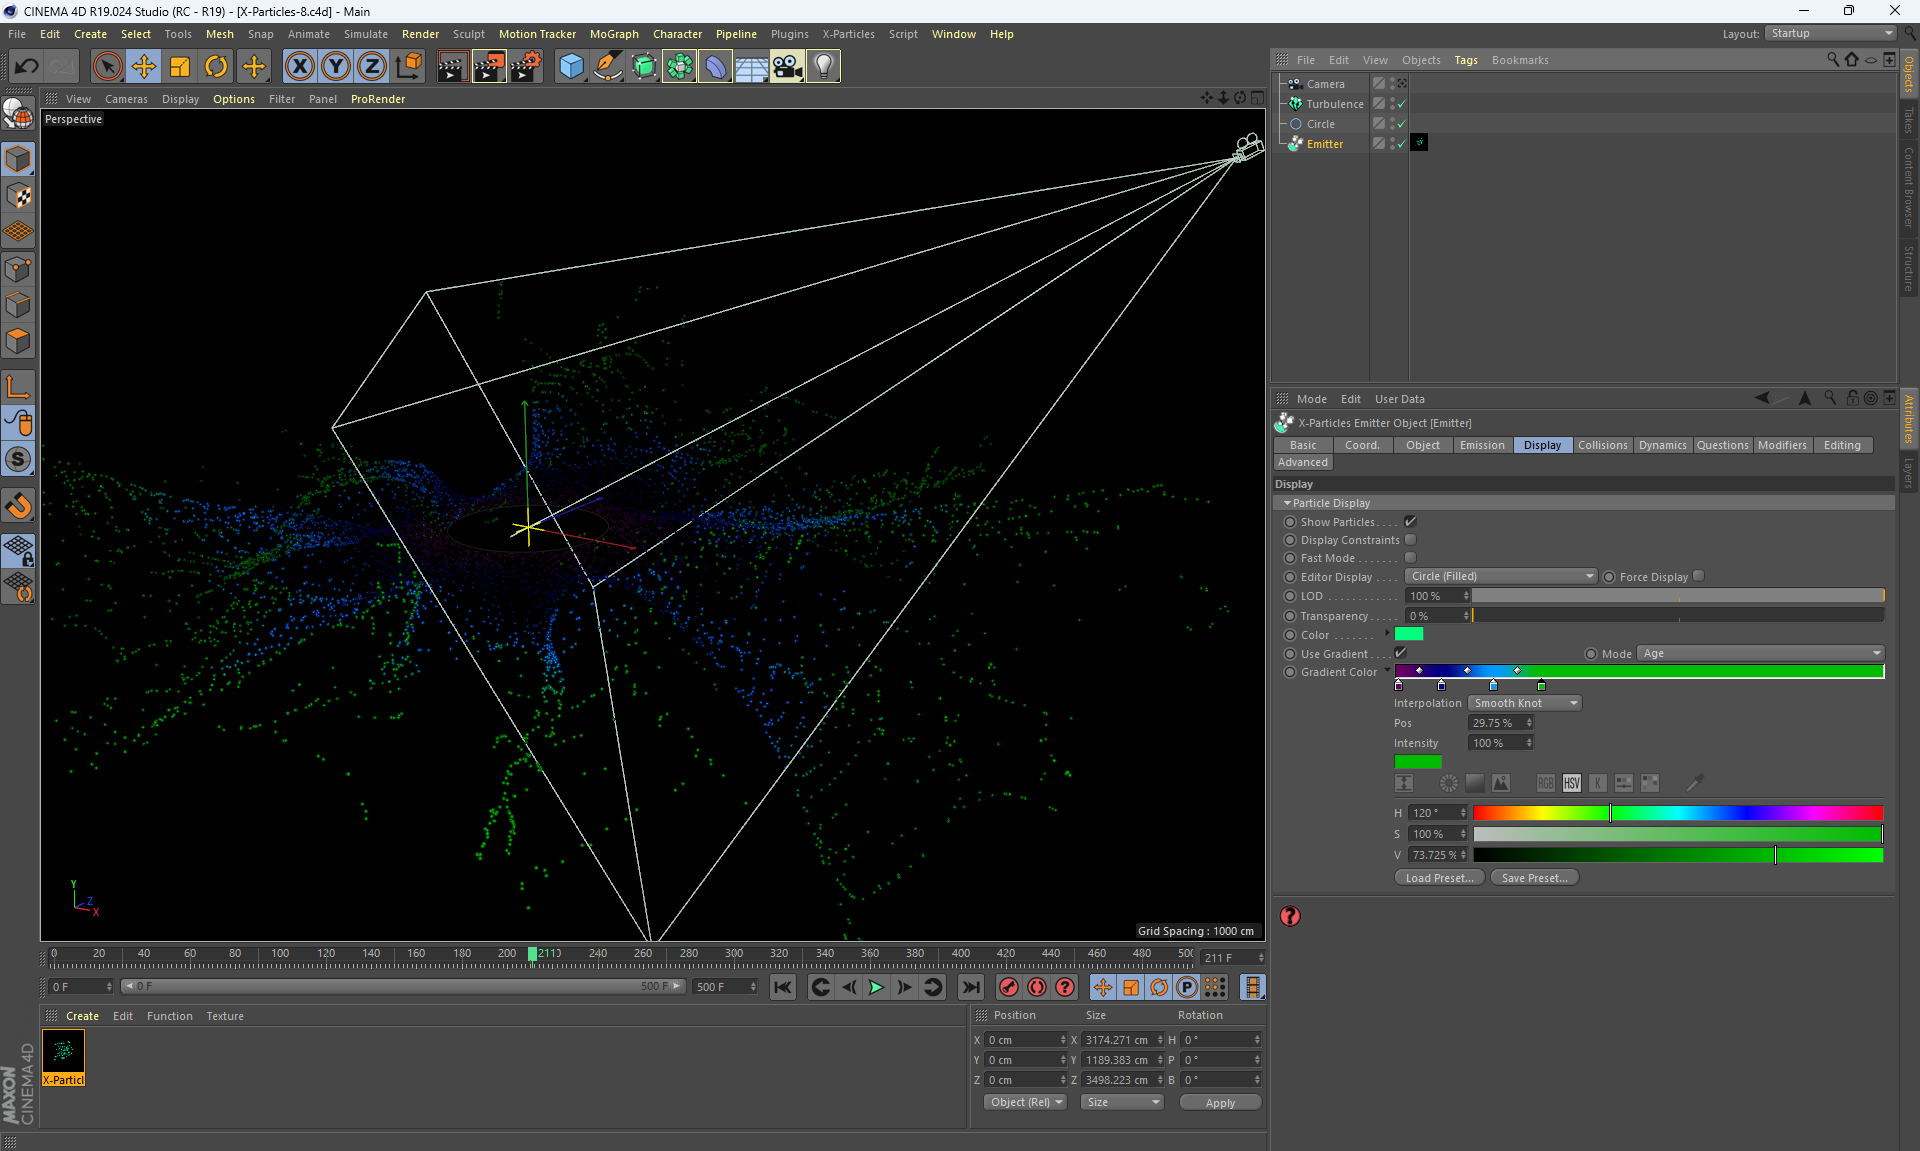
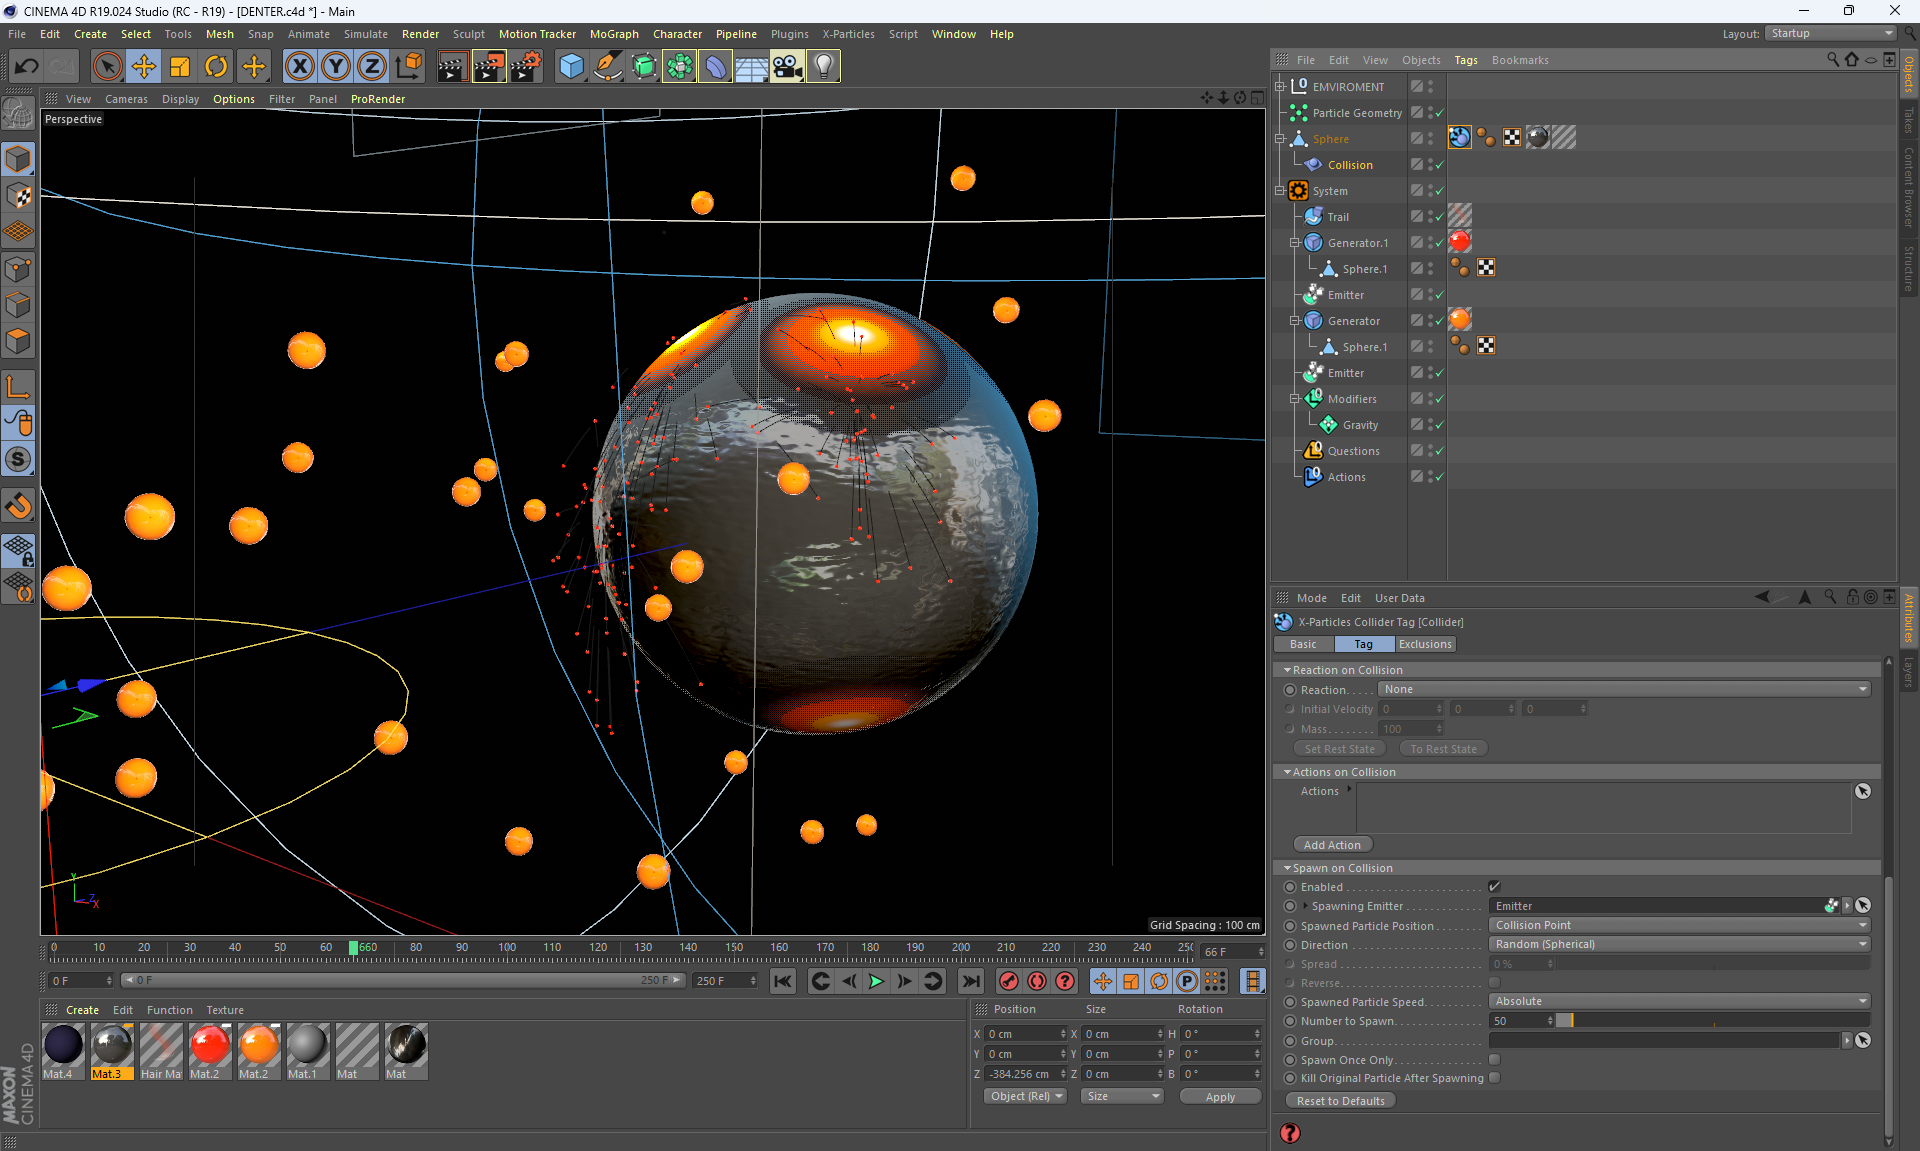
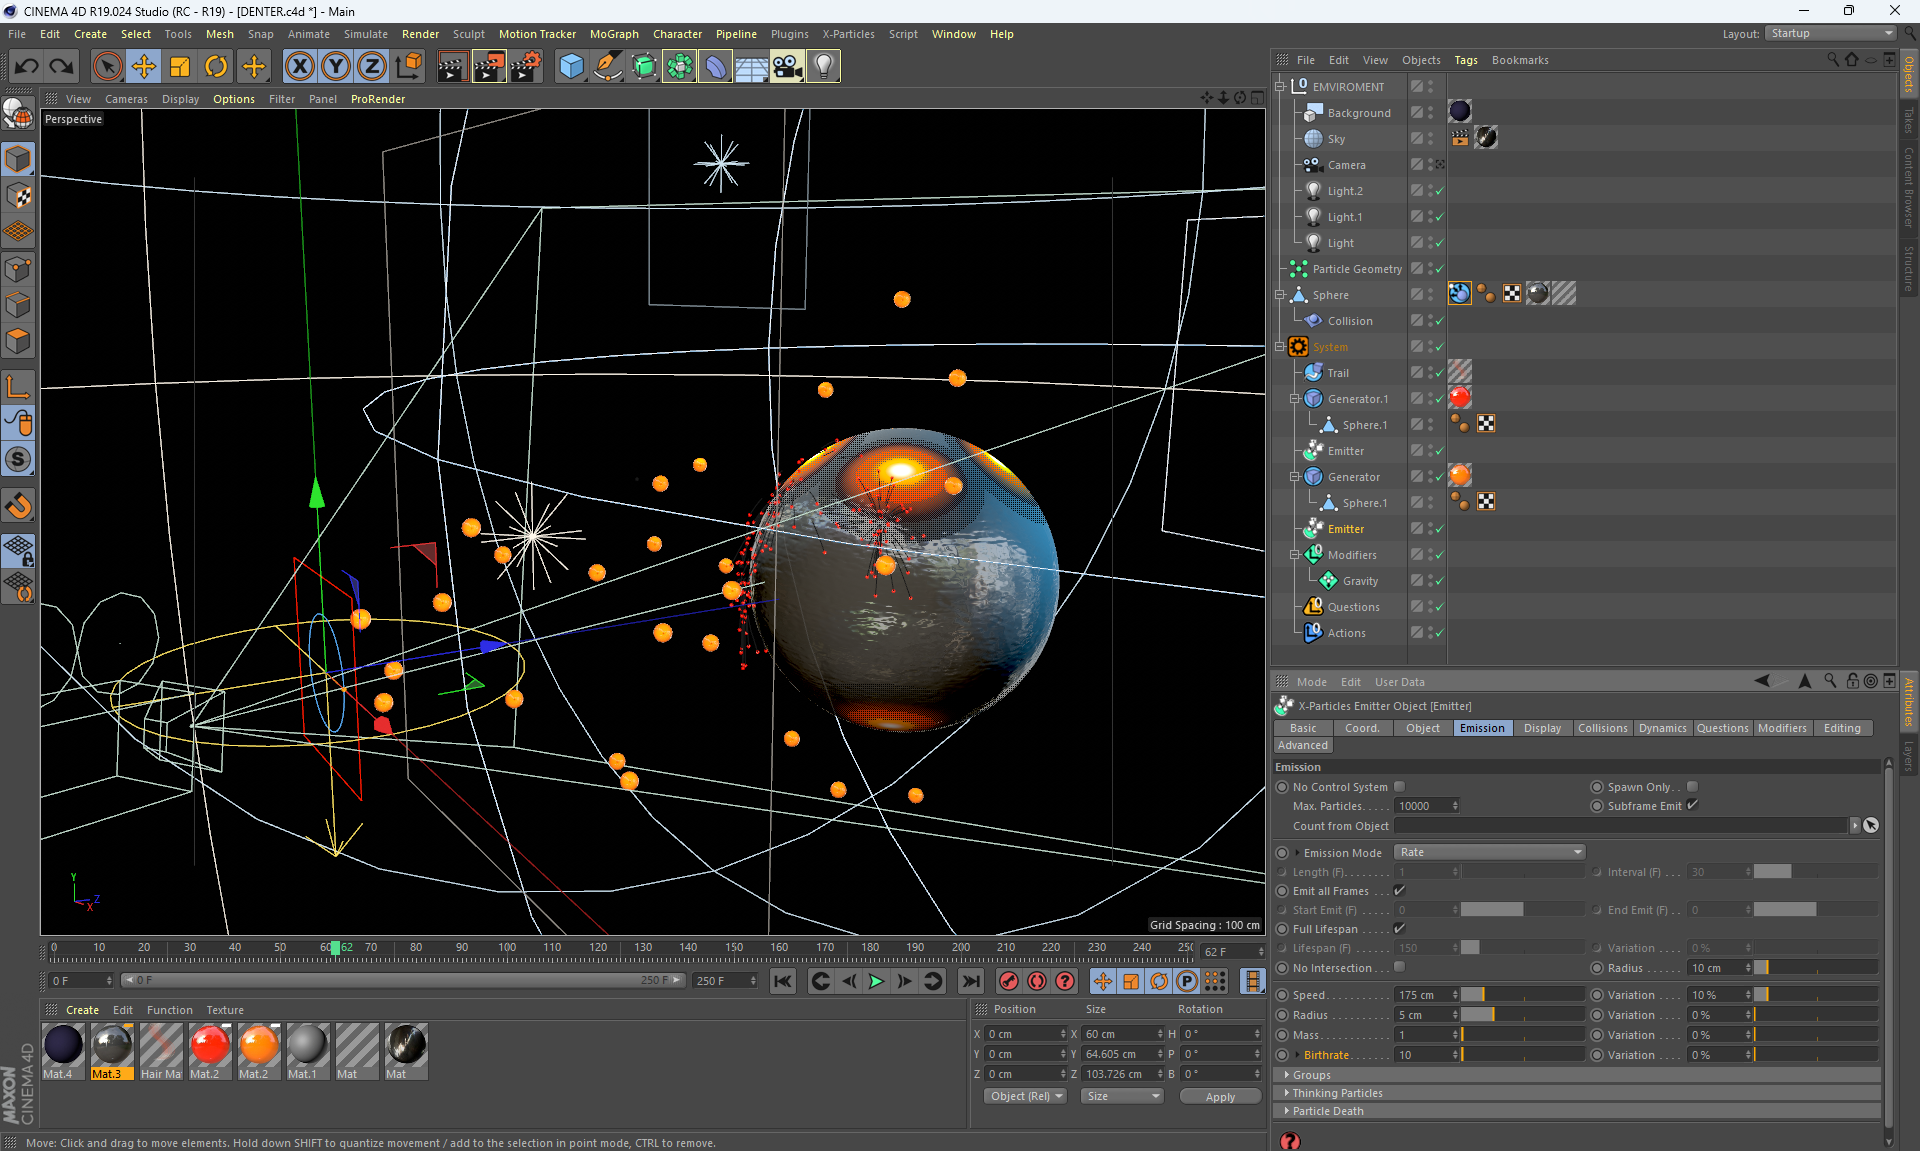
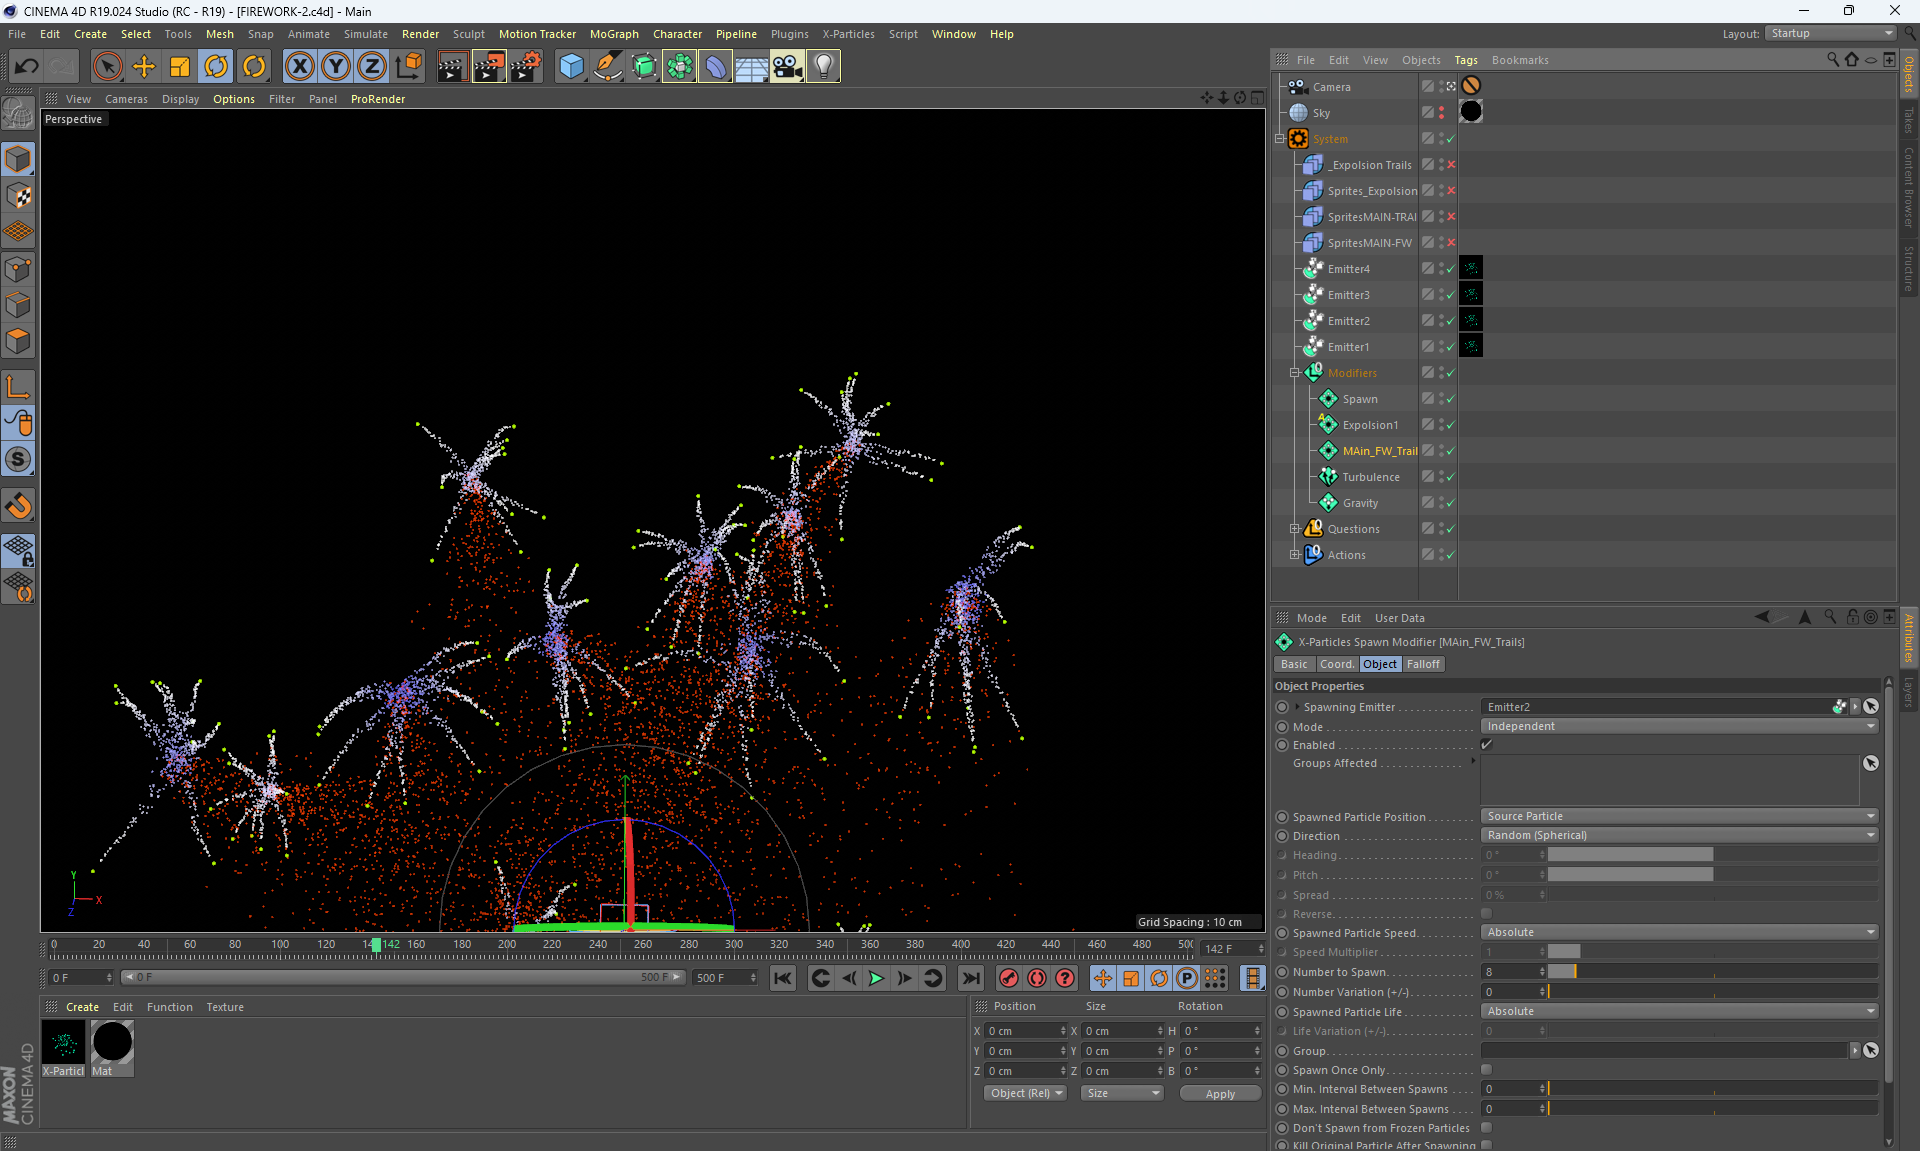
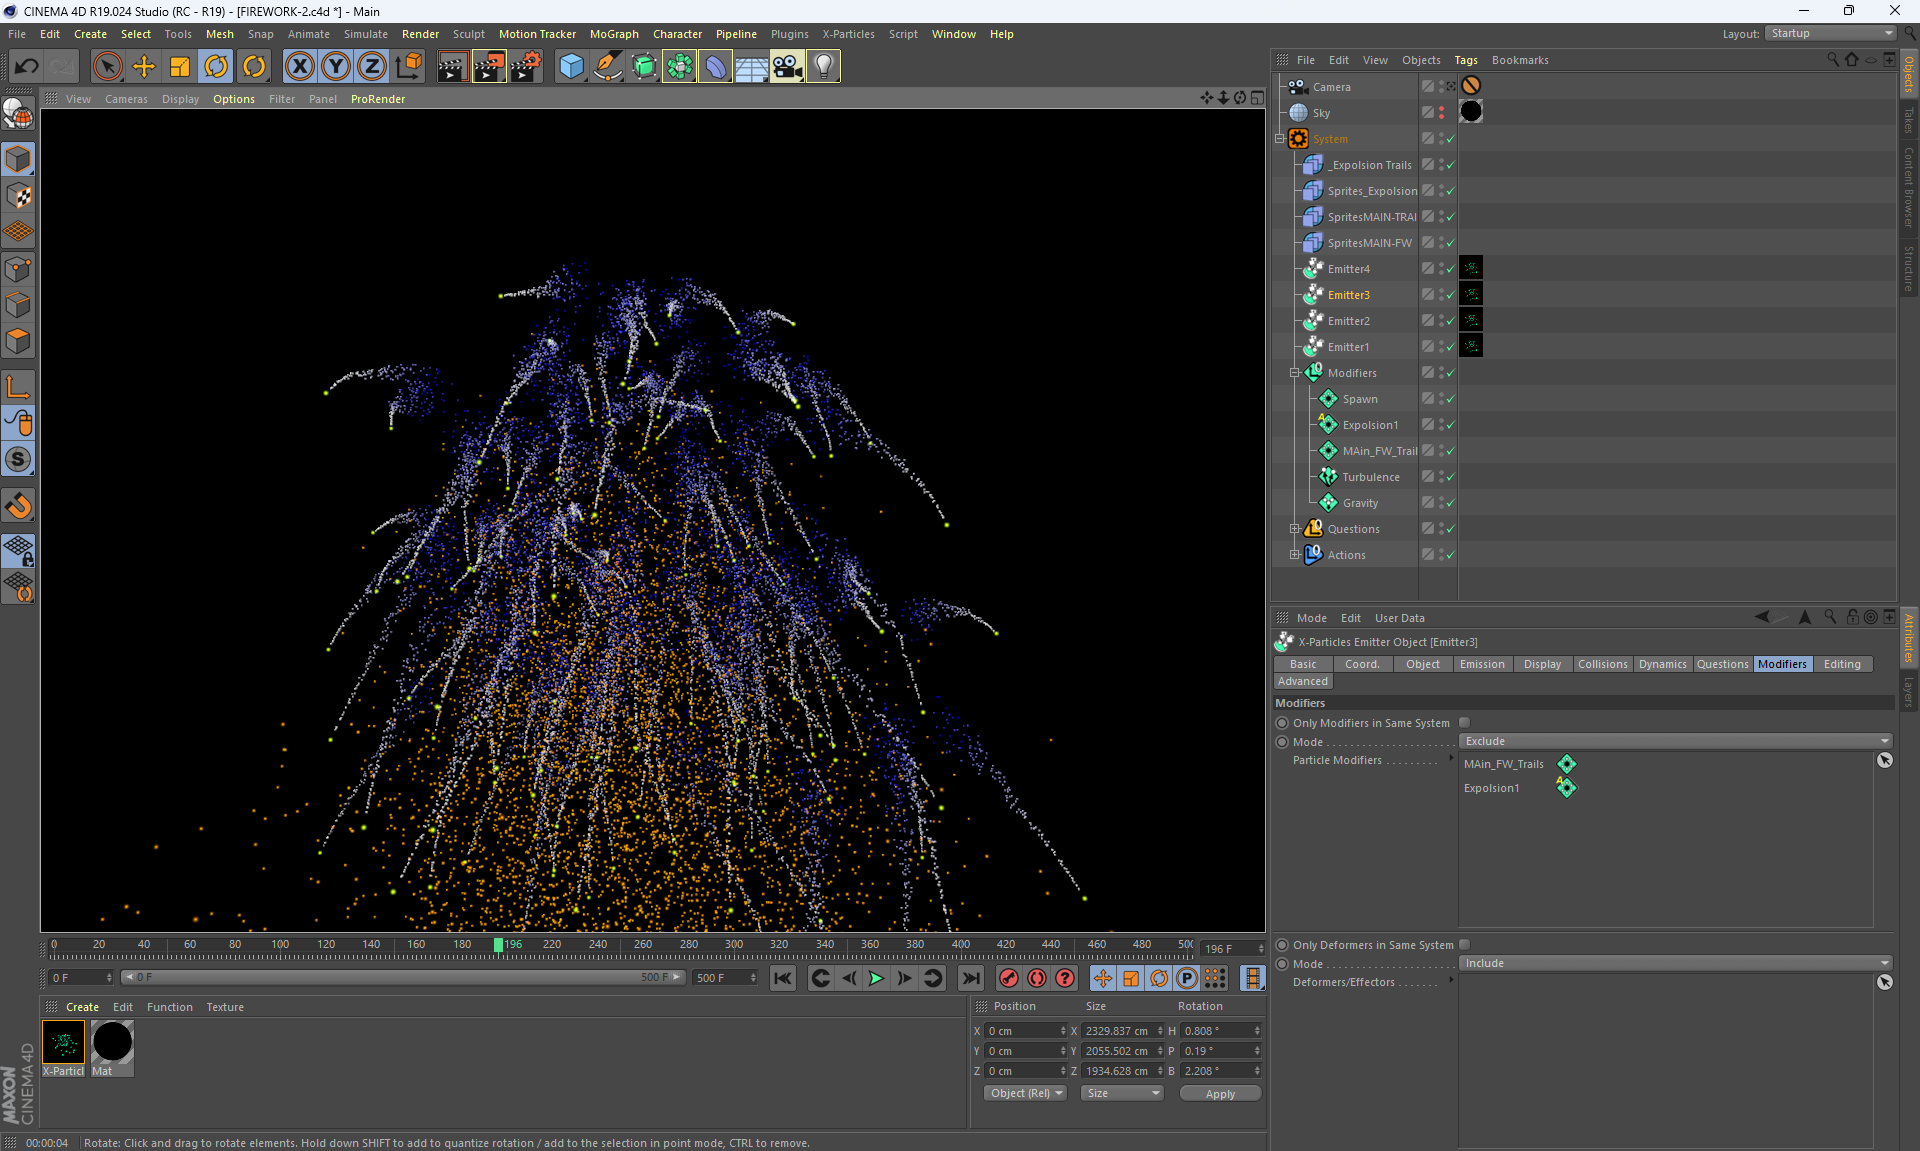
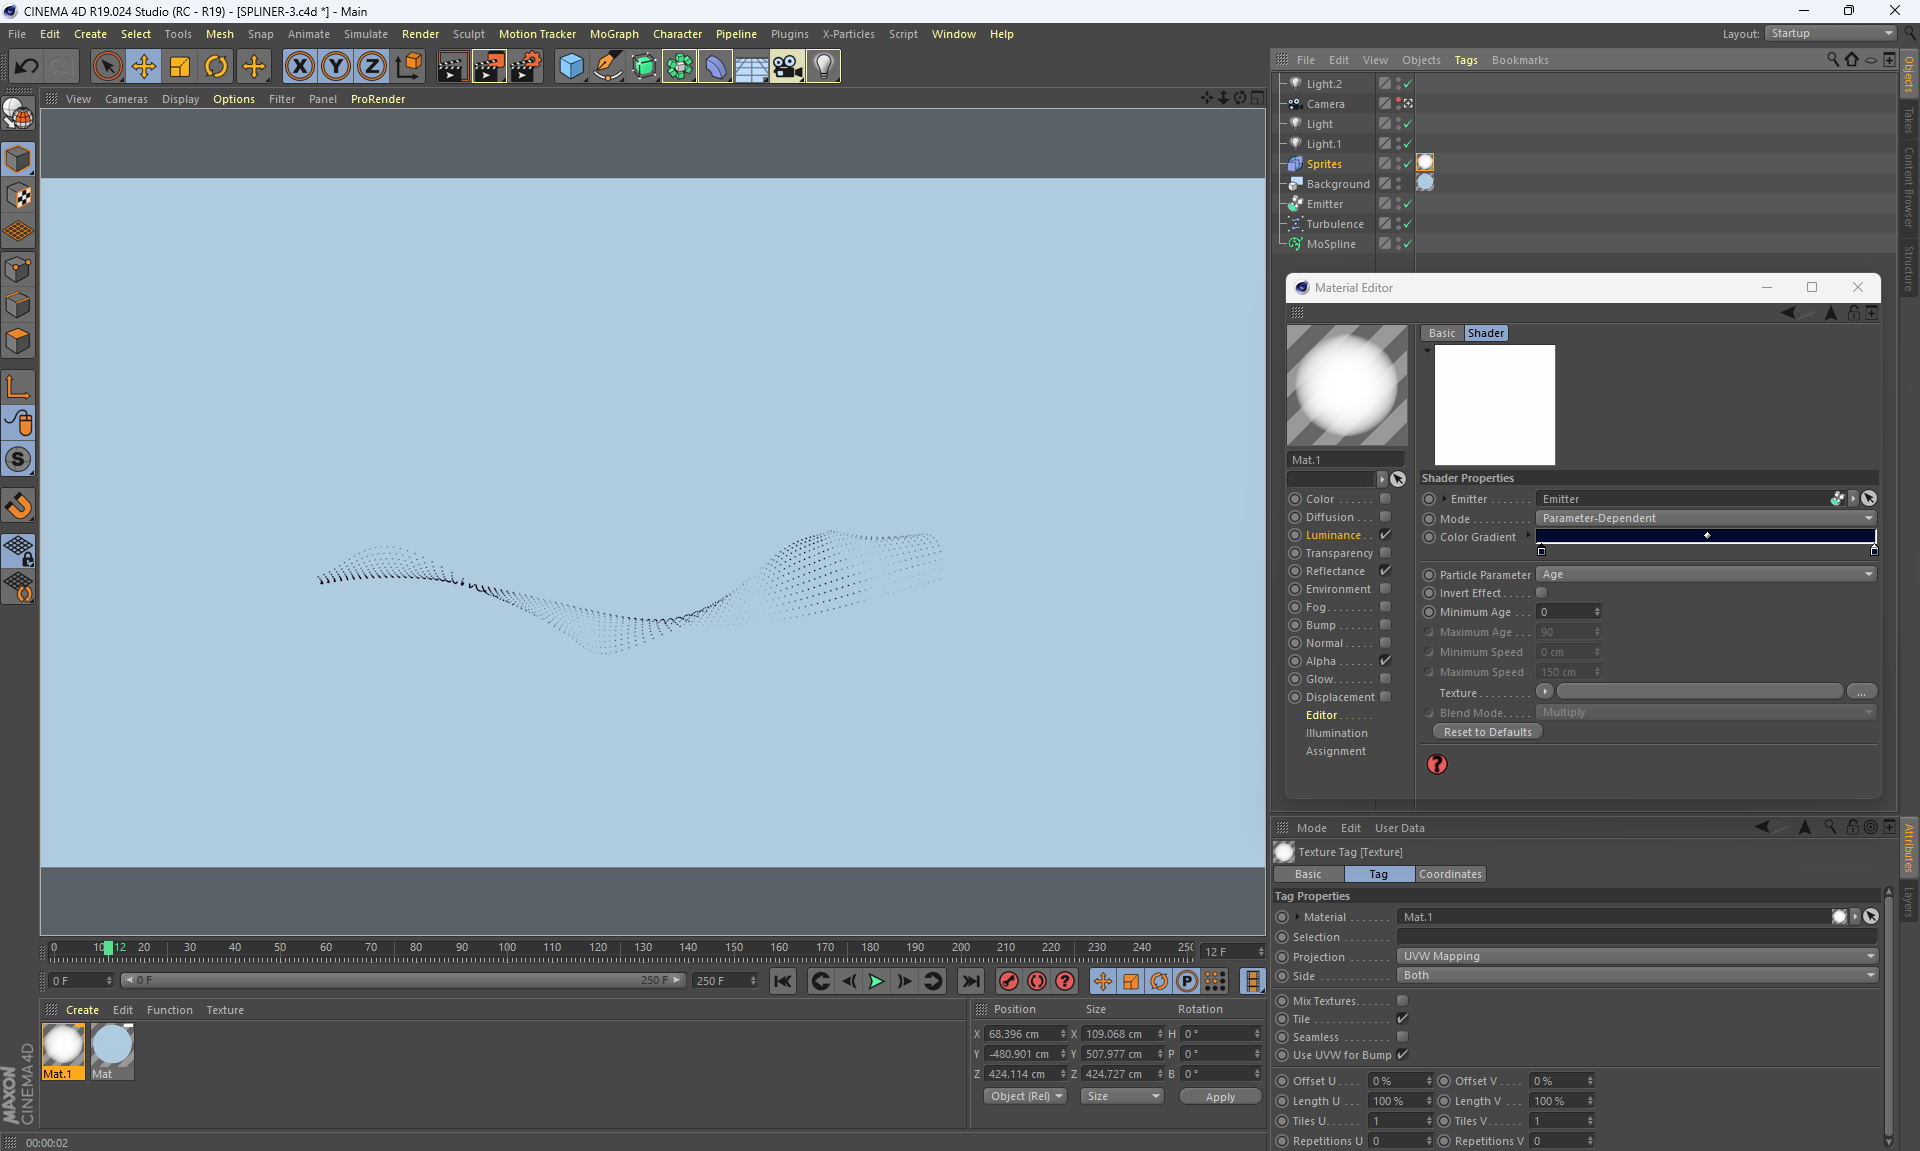
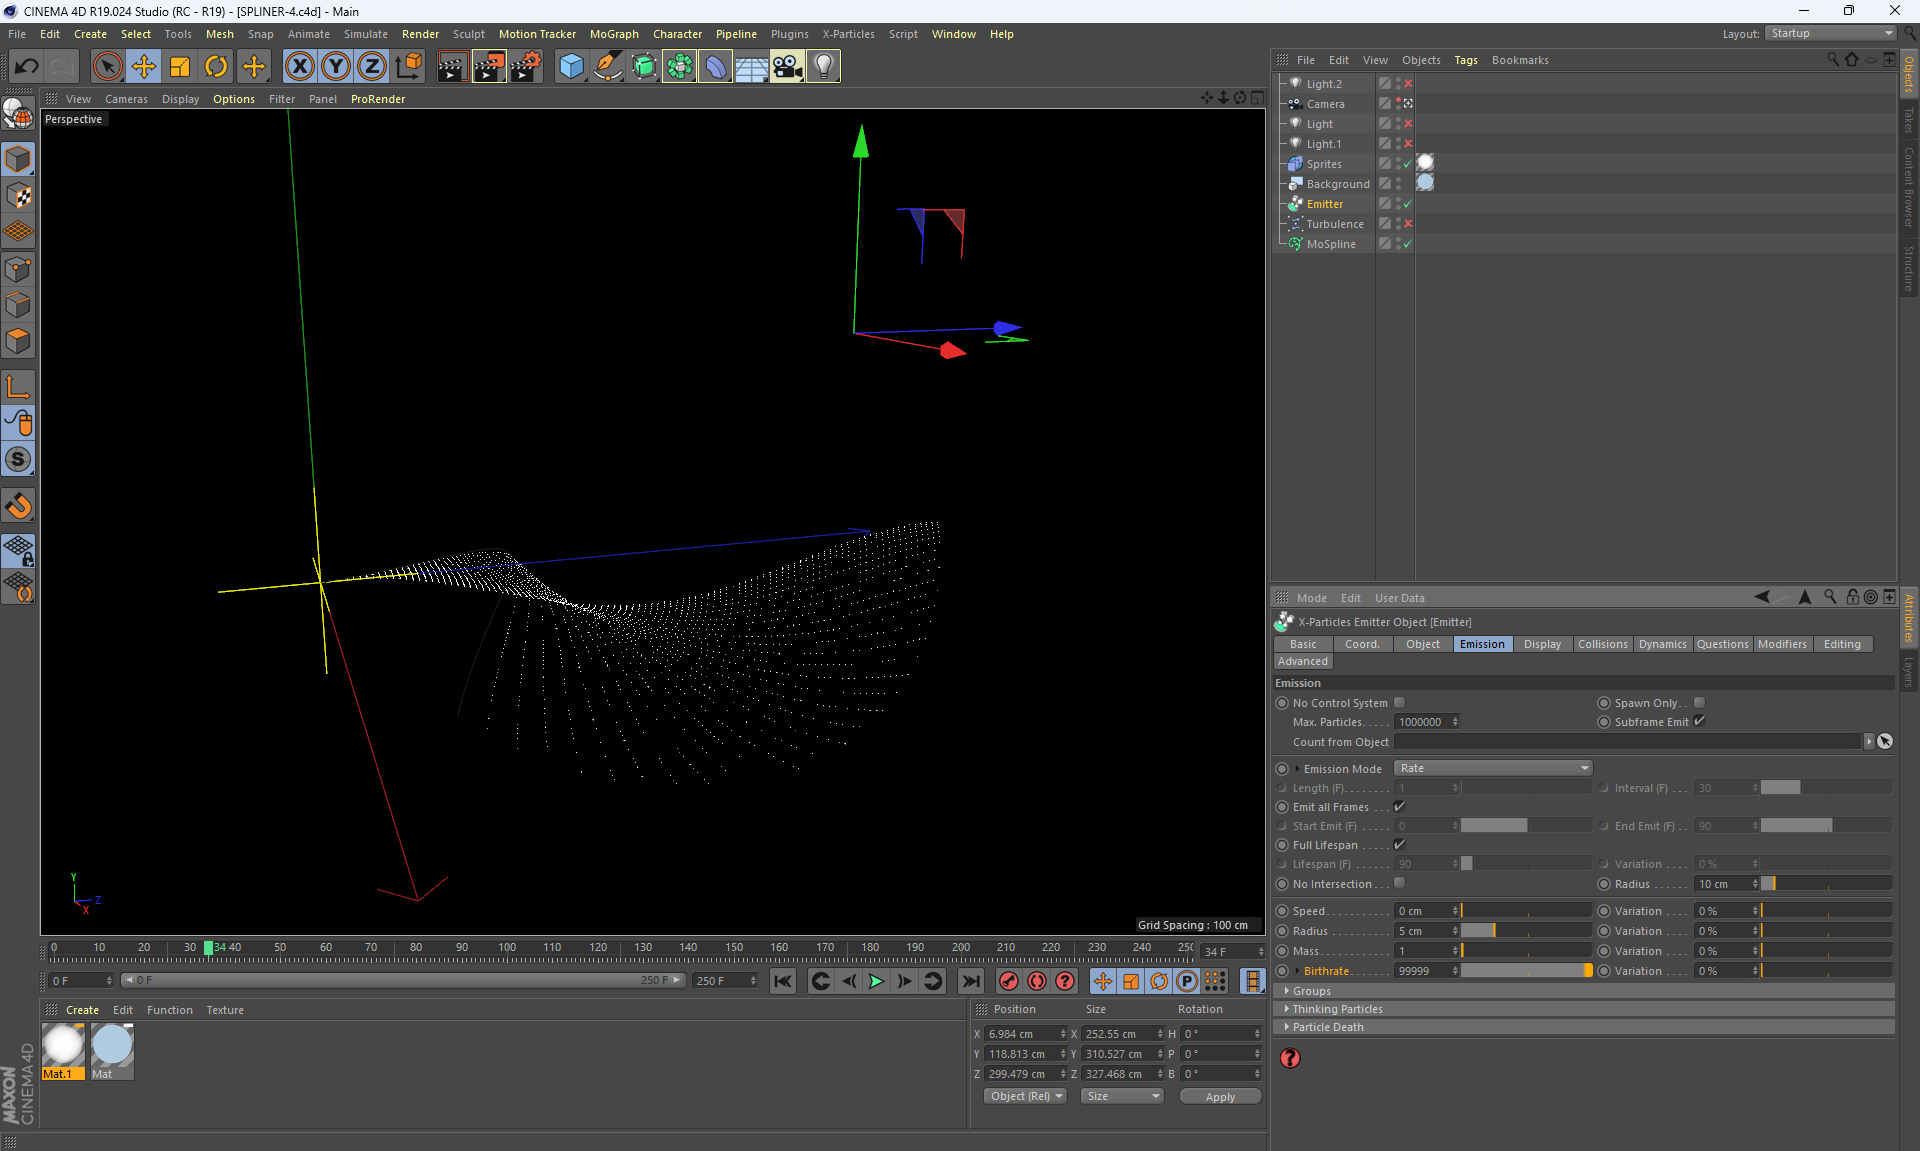
I installed the old version of Cinema R19, under which I installed the X-Particles 2.1 plugin, it is old from 2013. X-Particles 2.1 does not have the capabilities that are now in the new version of X-Particles, although there are many modifiers. I studied various examples, watched various videos with X-Particles and lessons from this section of the course, but without purchasing the new version of X-Particles, all the capabilities cannot be tested properly. The old version of Cinema 4D has reduced functionality and new versions of renderers do not work. There were no sources in this section.
The author of this course, Mikhail Bychkov, has also done other courses on motion design, and there he analyzed a similar program, Trapcode Form, for After Effects:
Example 1 in After Effects Trapcode Form
example 2 in After Effects Trapcode Form
>example 3 in After Effects Trapcode Form
I also studied the Stardust plugin a little in After Effects, which also works with particles. But all of these plugins are very different in their capabilities and purpose.
Example in After Effects Stardus
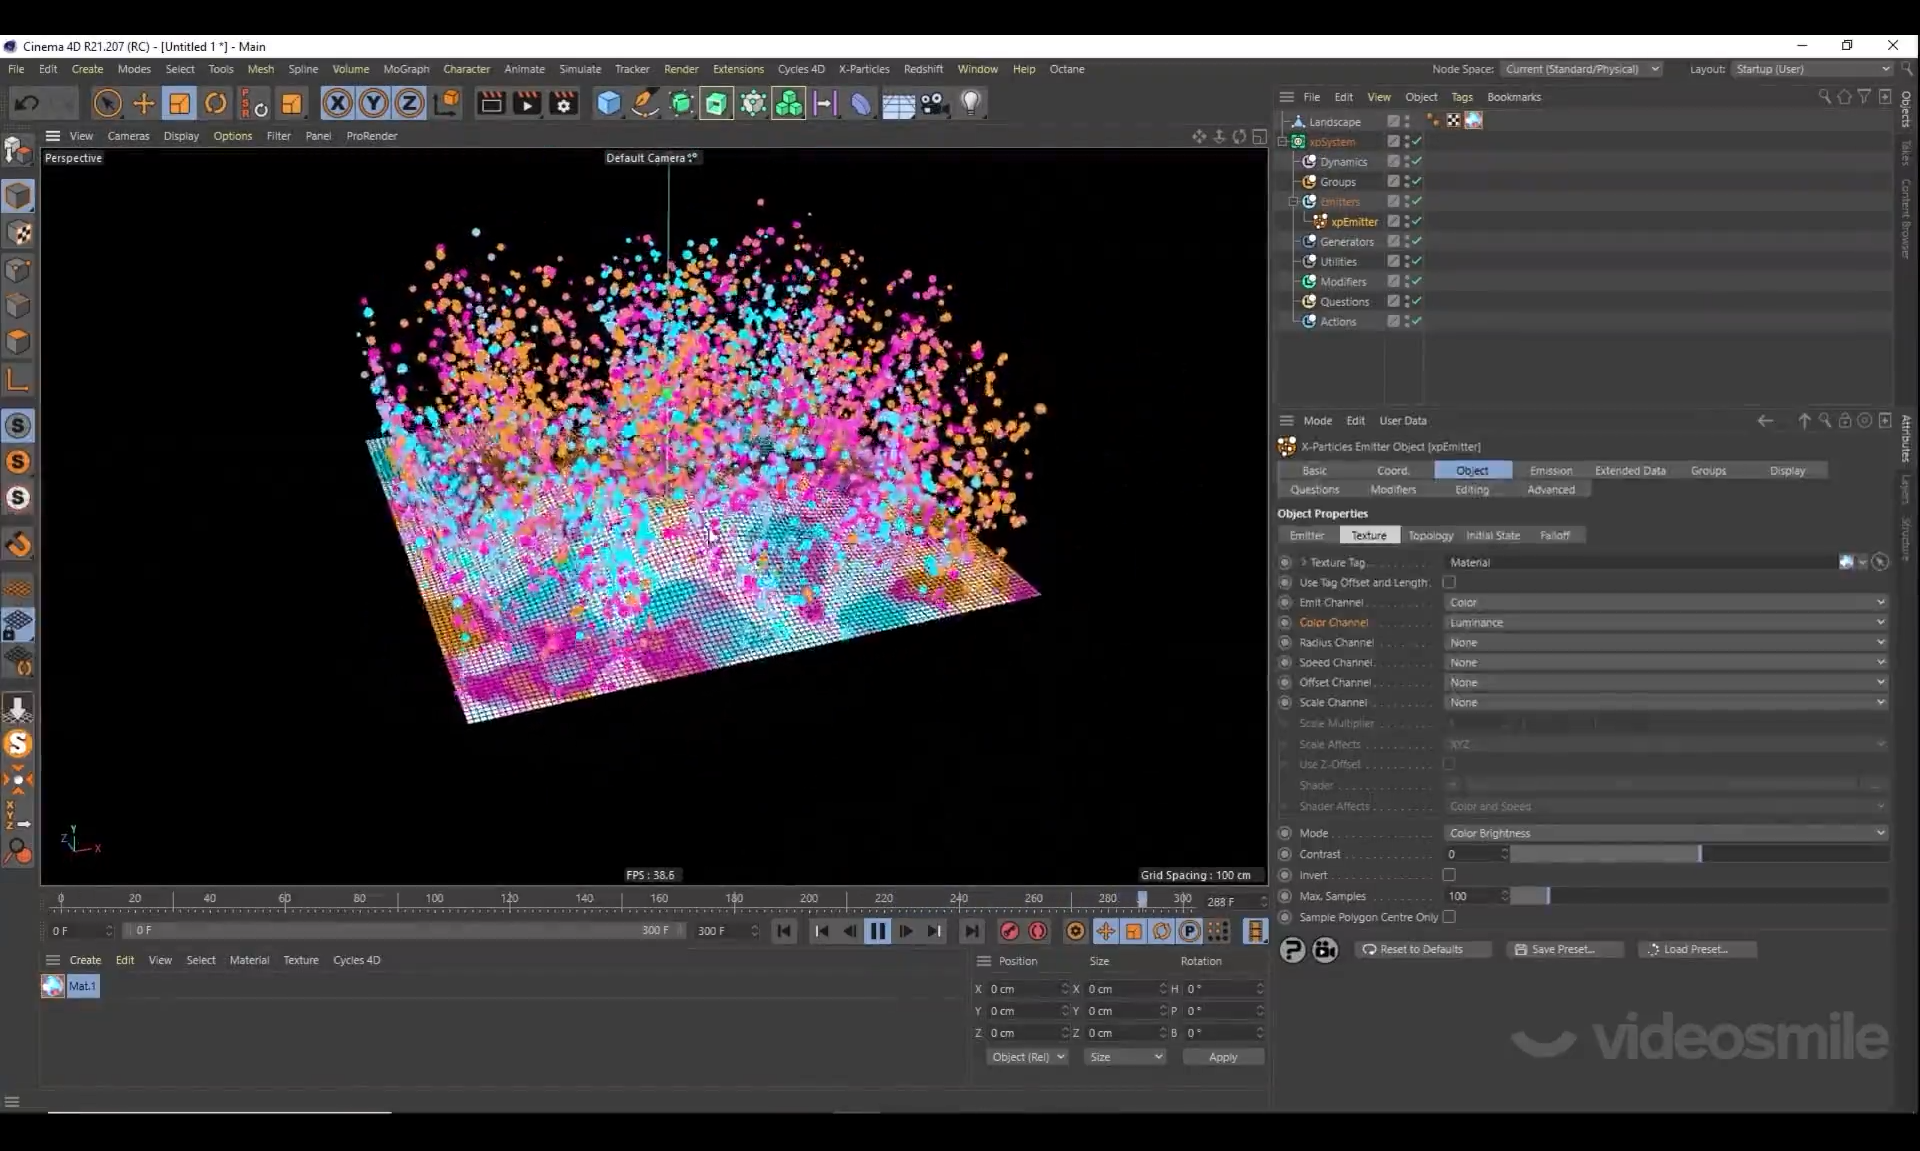
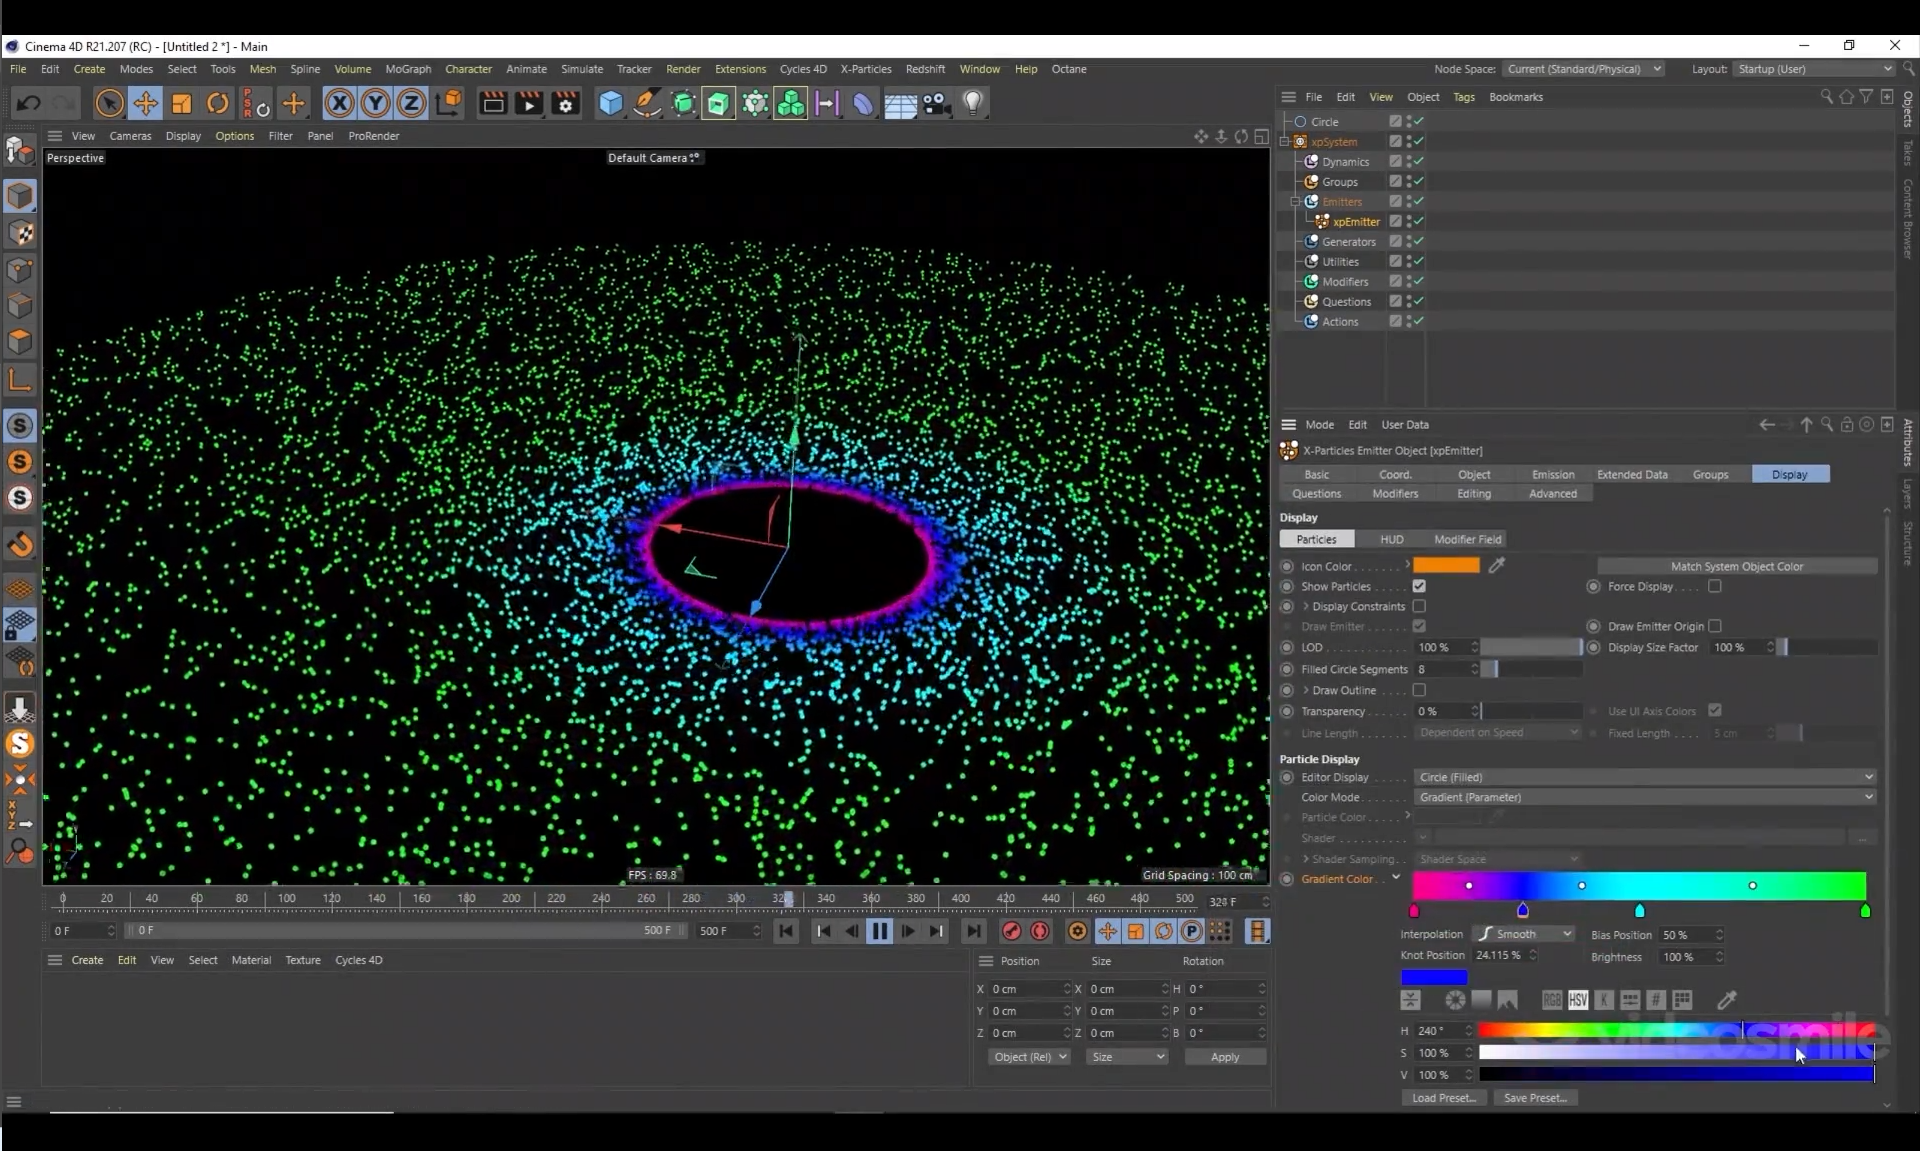
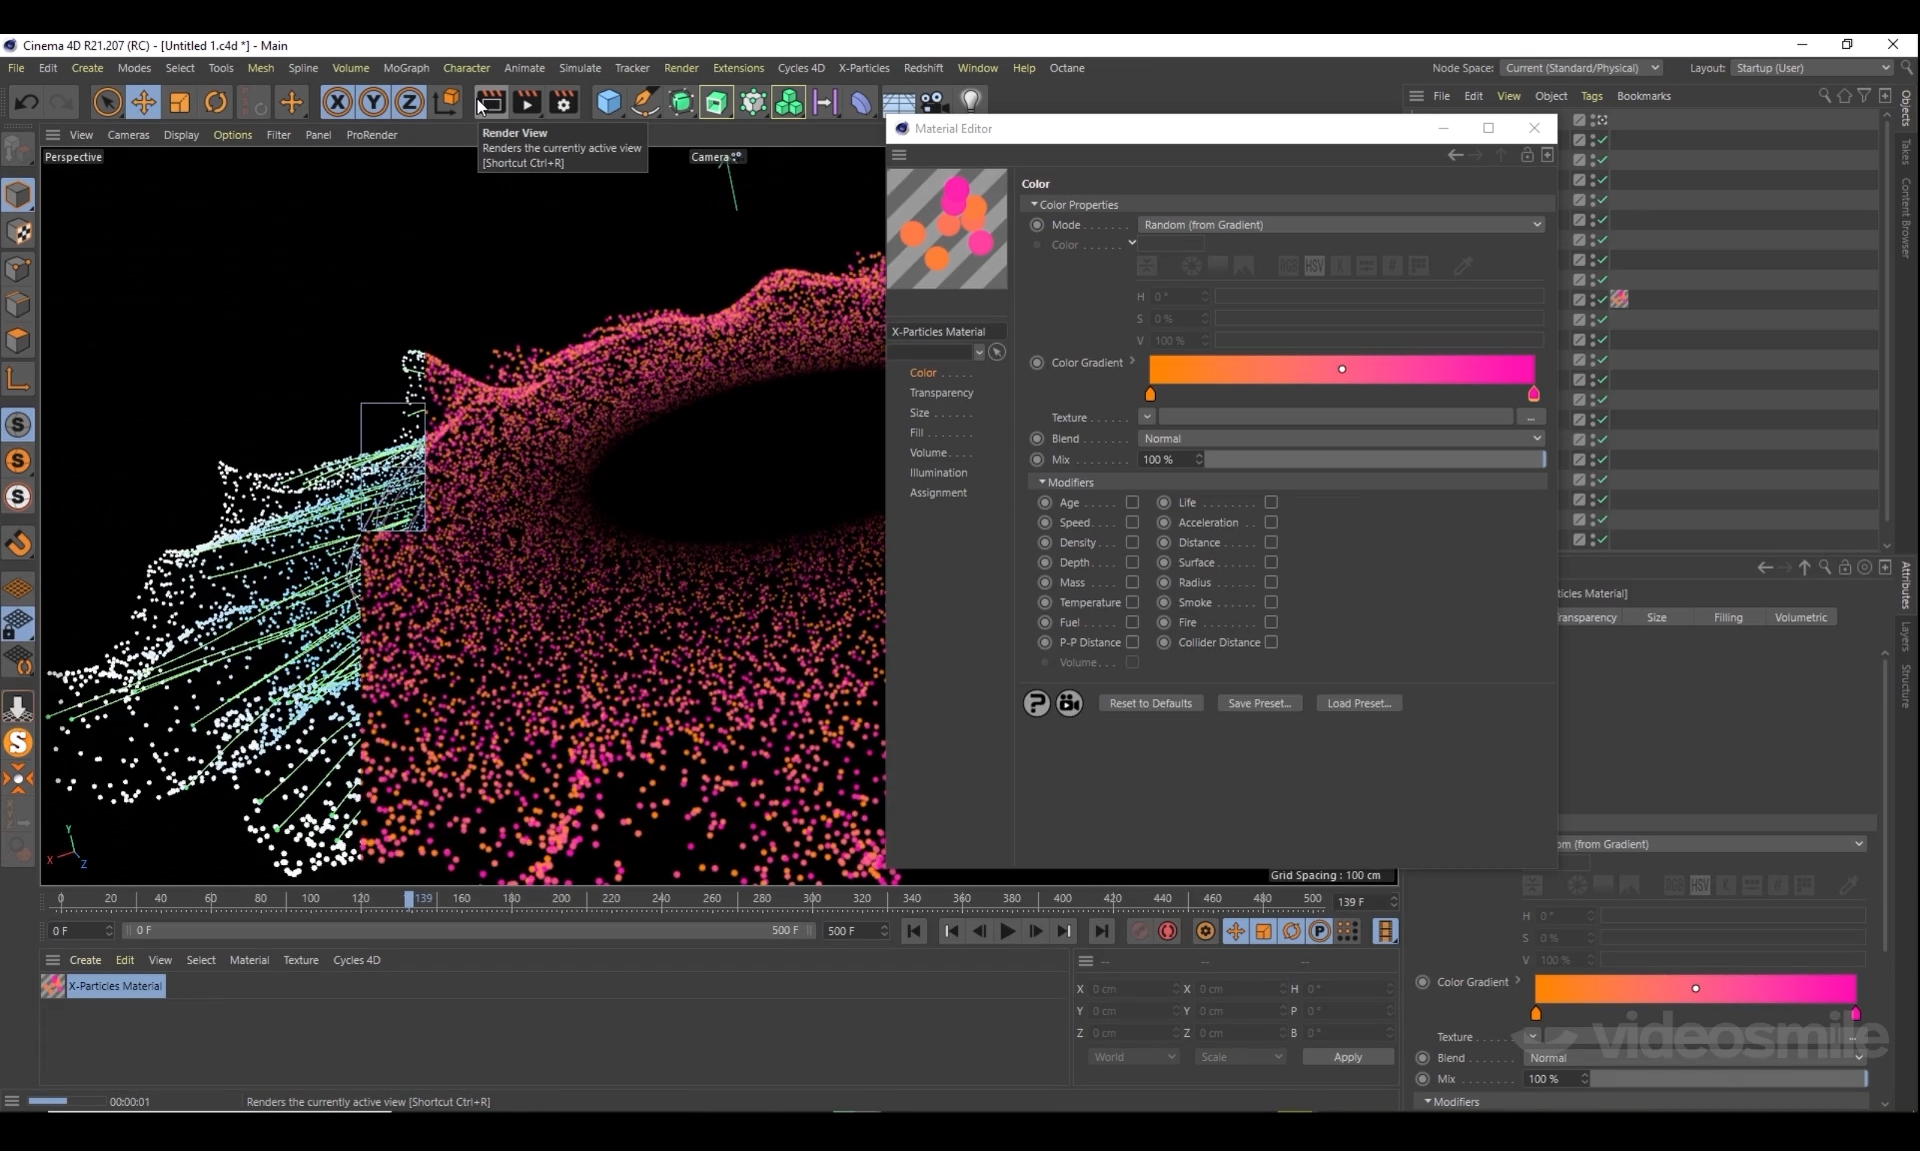
When performing the particle animation lesson in the old version of X-Particles 2.1, there are inconsistencies in the display, in the color contrast, the particles are for some reason not as bright as in the author's lesson, as if there is not enough light source, additional color correction settings are required, and many settings are missing.
I created examples of the first videos in the course in the old version of X-Particles 2.1 with the features that are there, made color correction of the video in After Effects. Then, many settings in X-Particles 2.1 are missing compared to the new version. I watched the other lessons from the author without testing.
X-Particles has many settings, it is a very deep topic to study.
Video1 (31mb)
image1
video2 (32mb)
image2
video3 (32mb)
image3
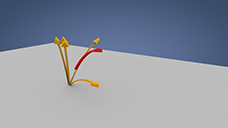
I analyzed the examples that were in X-Particles 2.1, they are not from the course. Below examples, I studied them and generated a video.
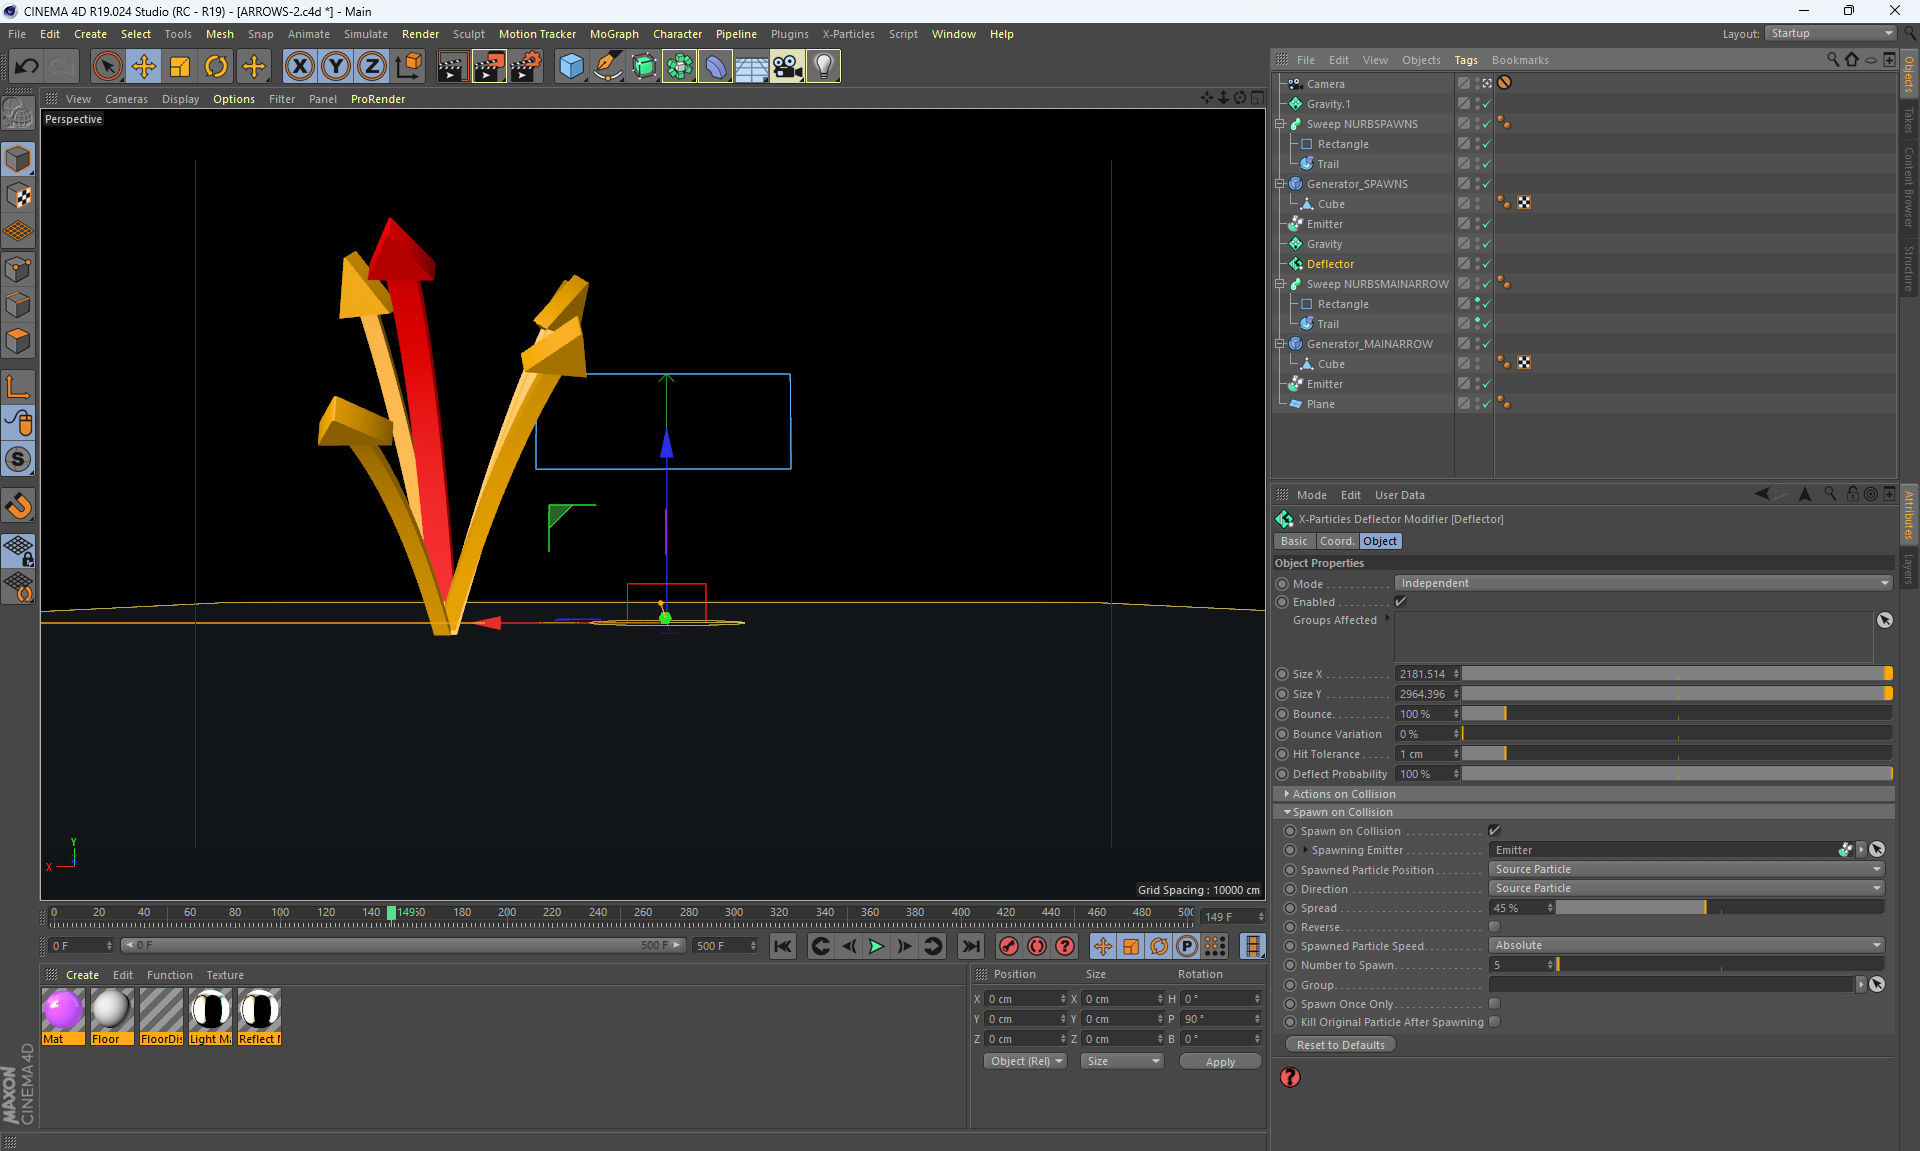
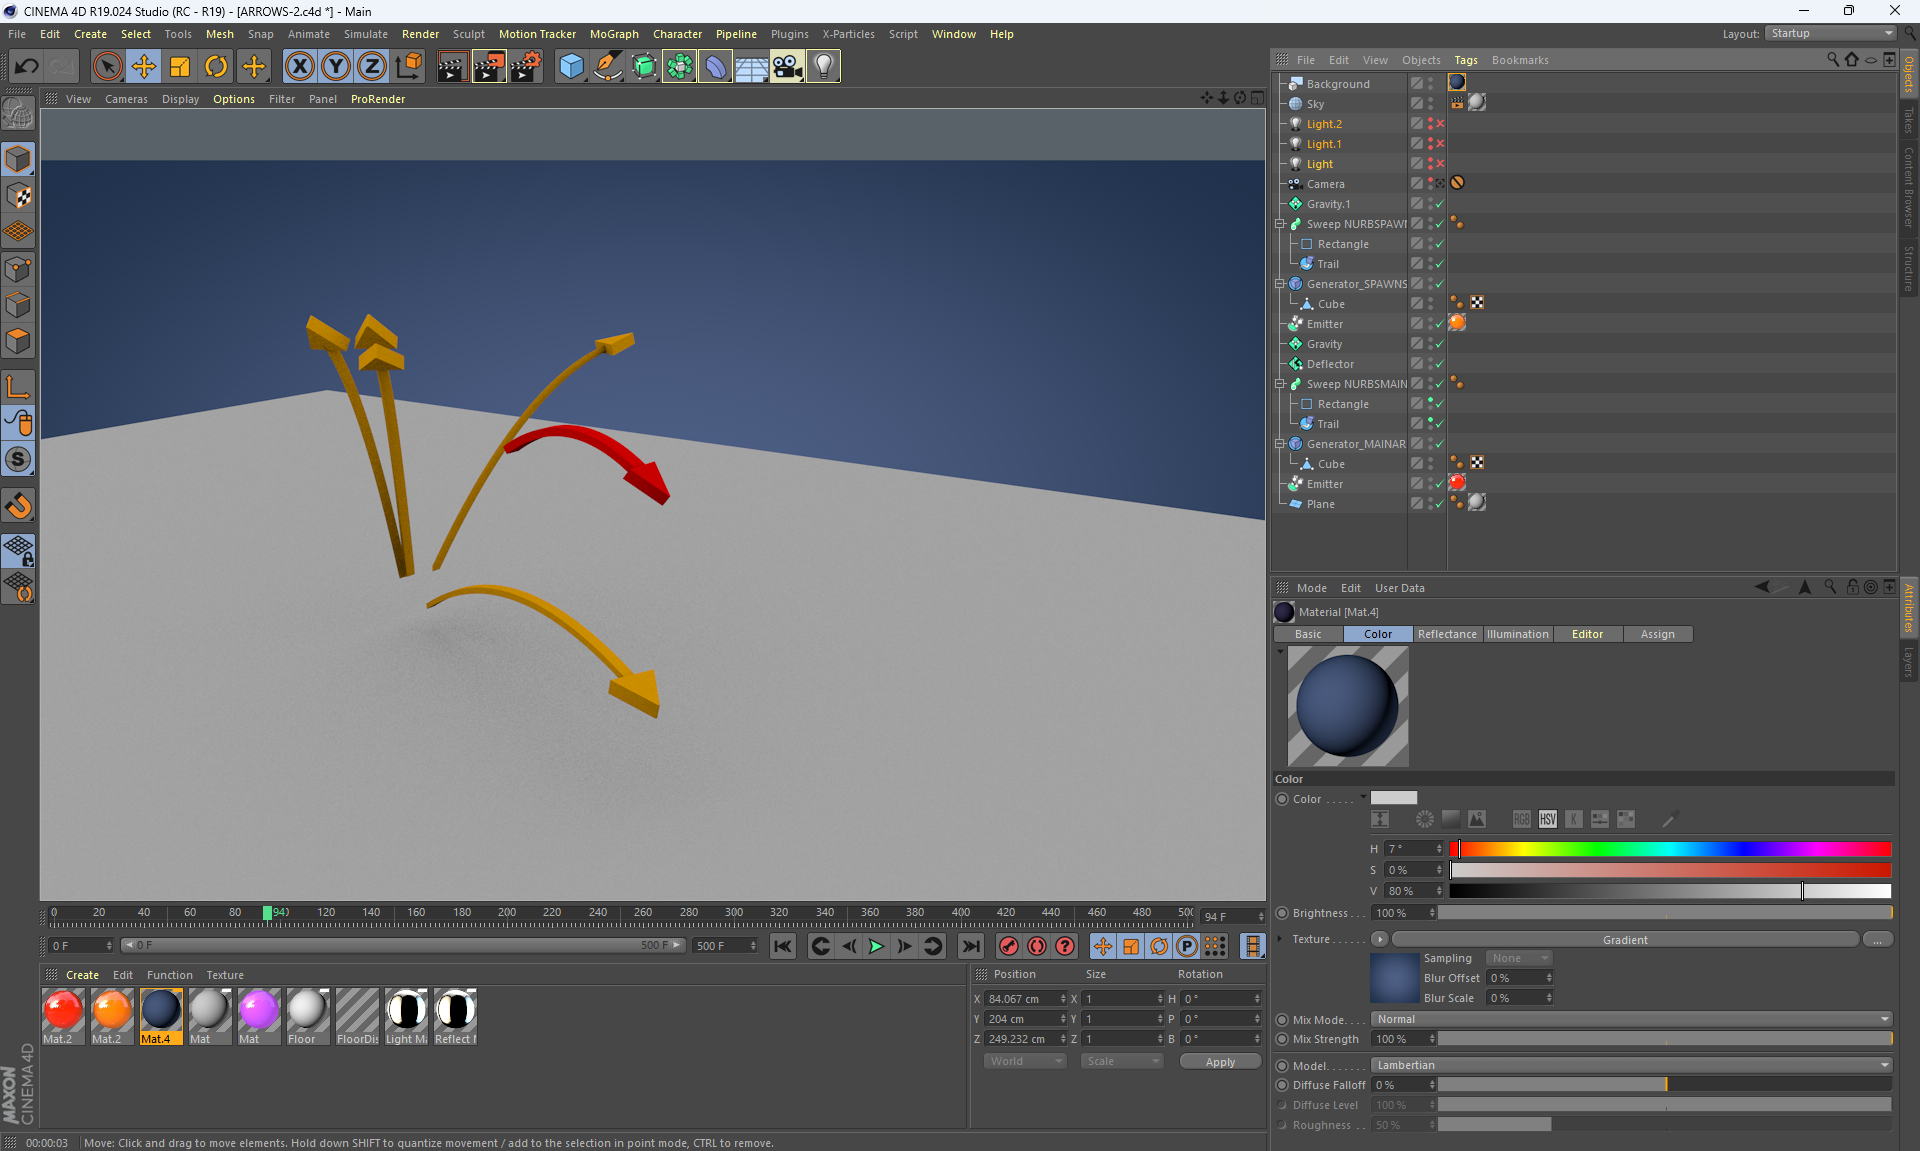
Arrows video (6.7mb)
arrows image
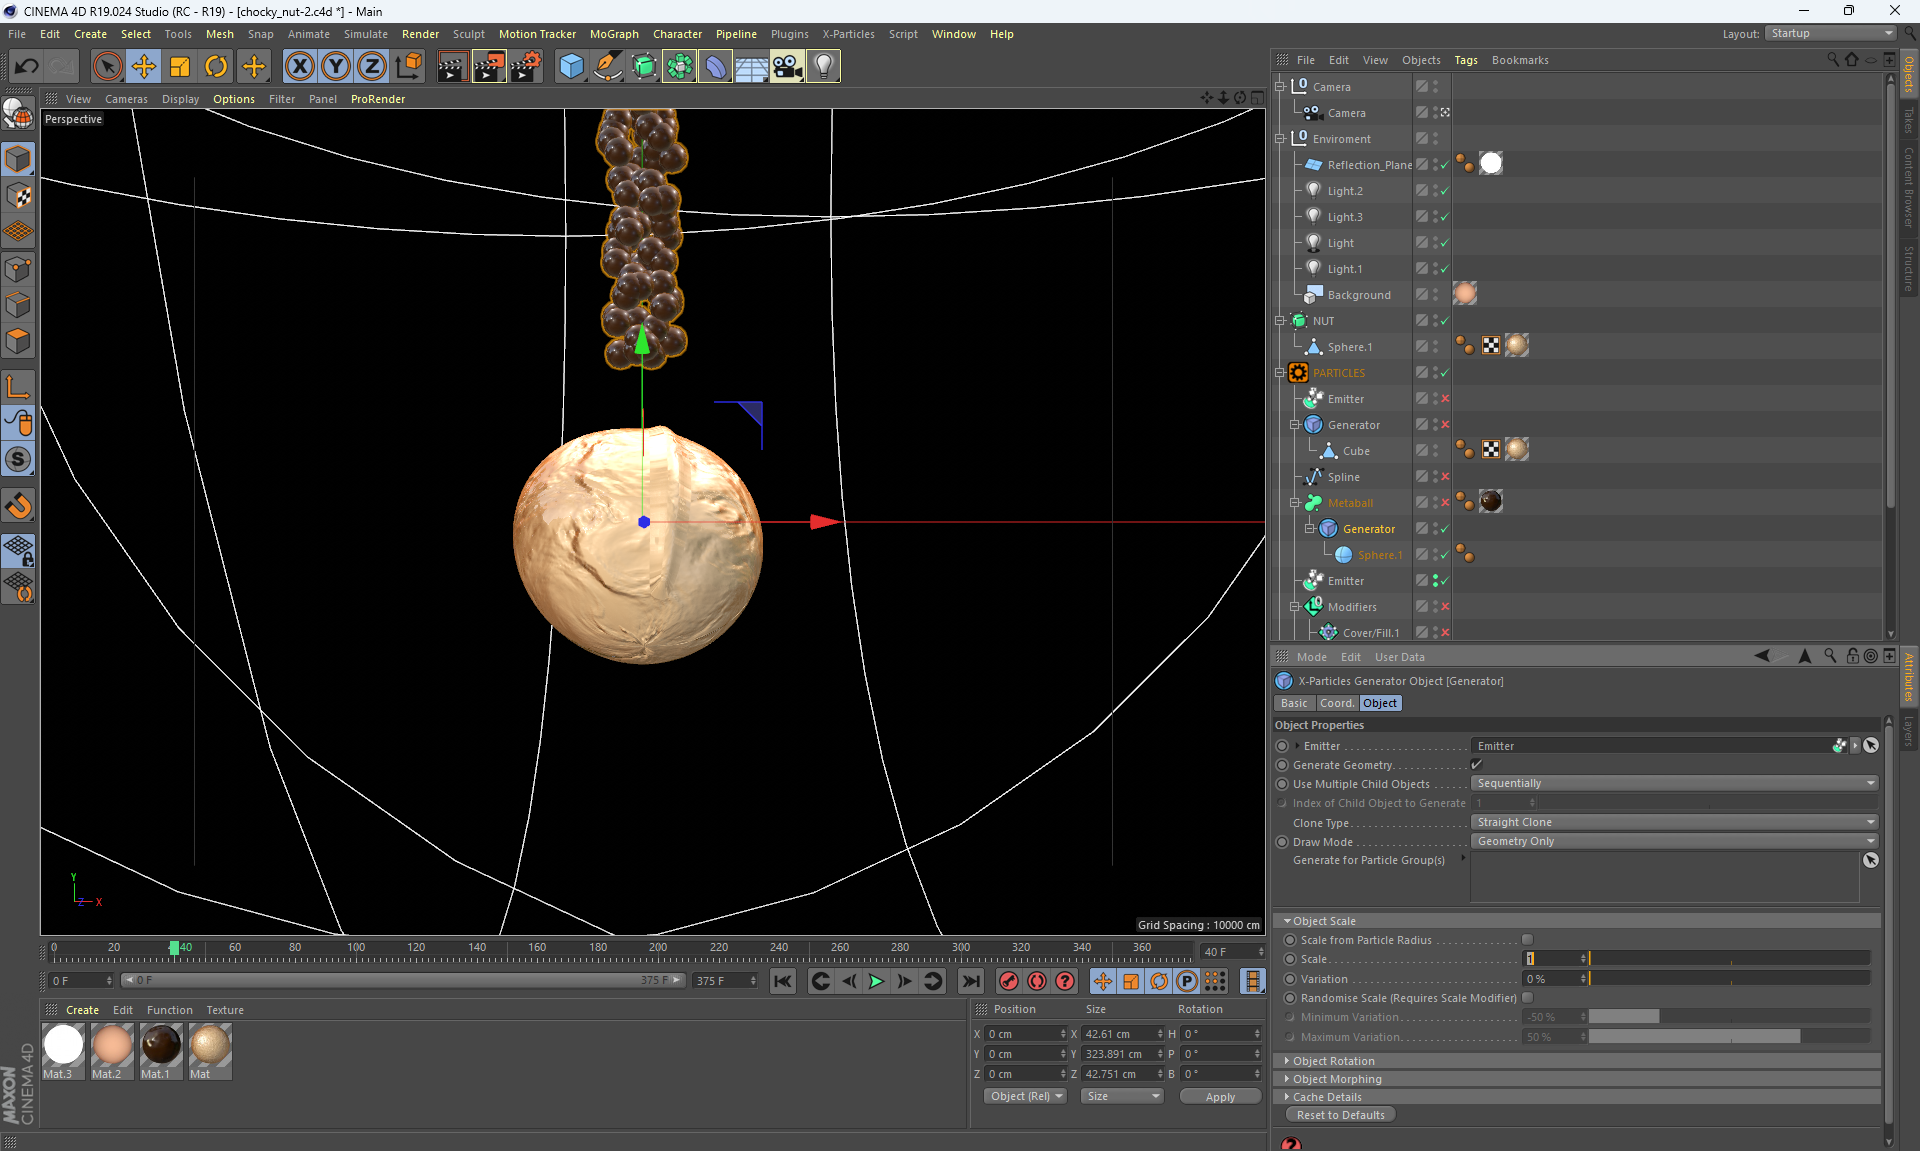
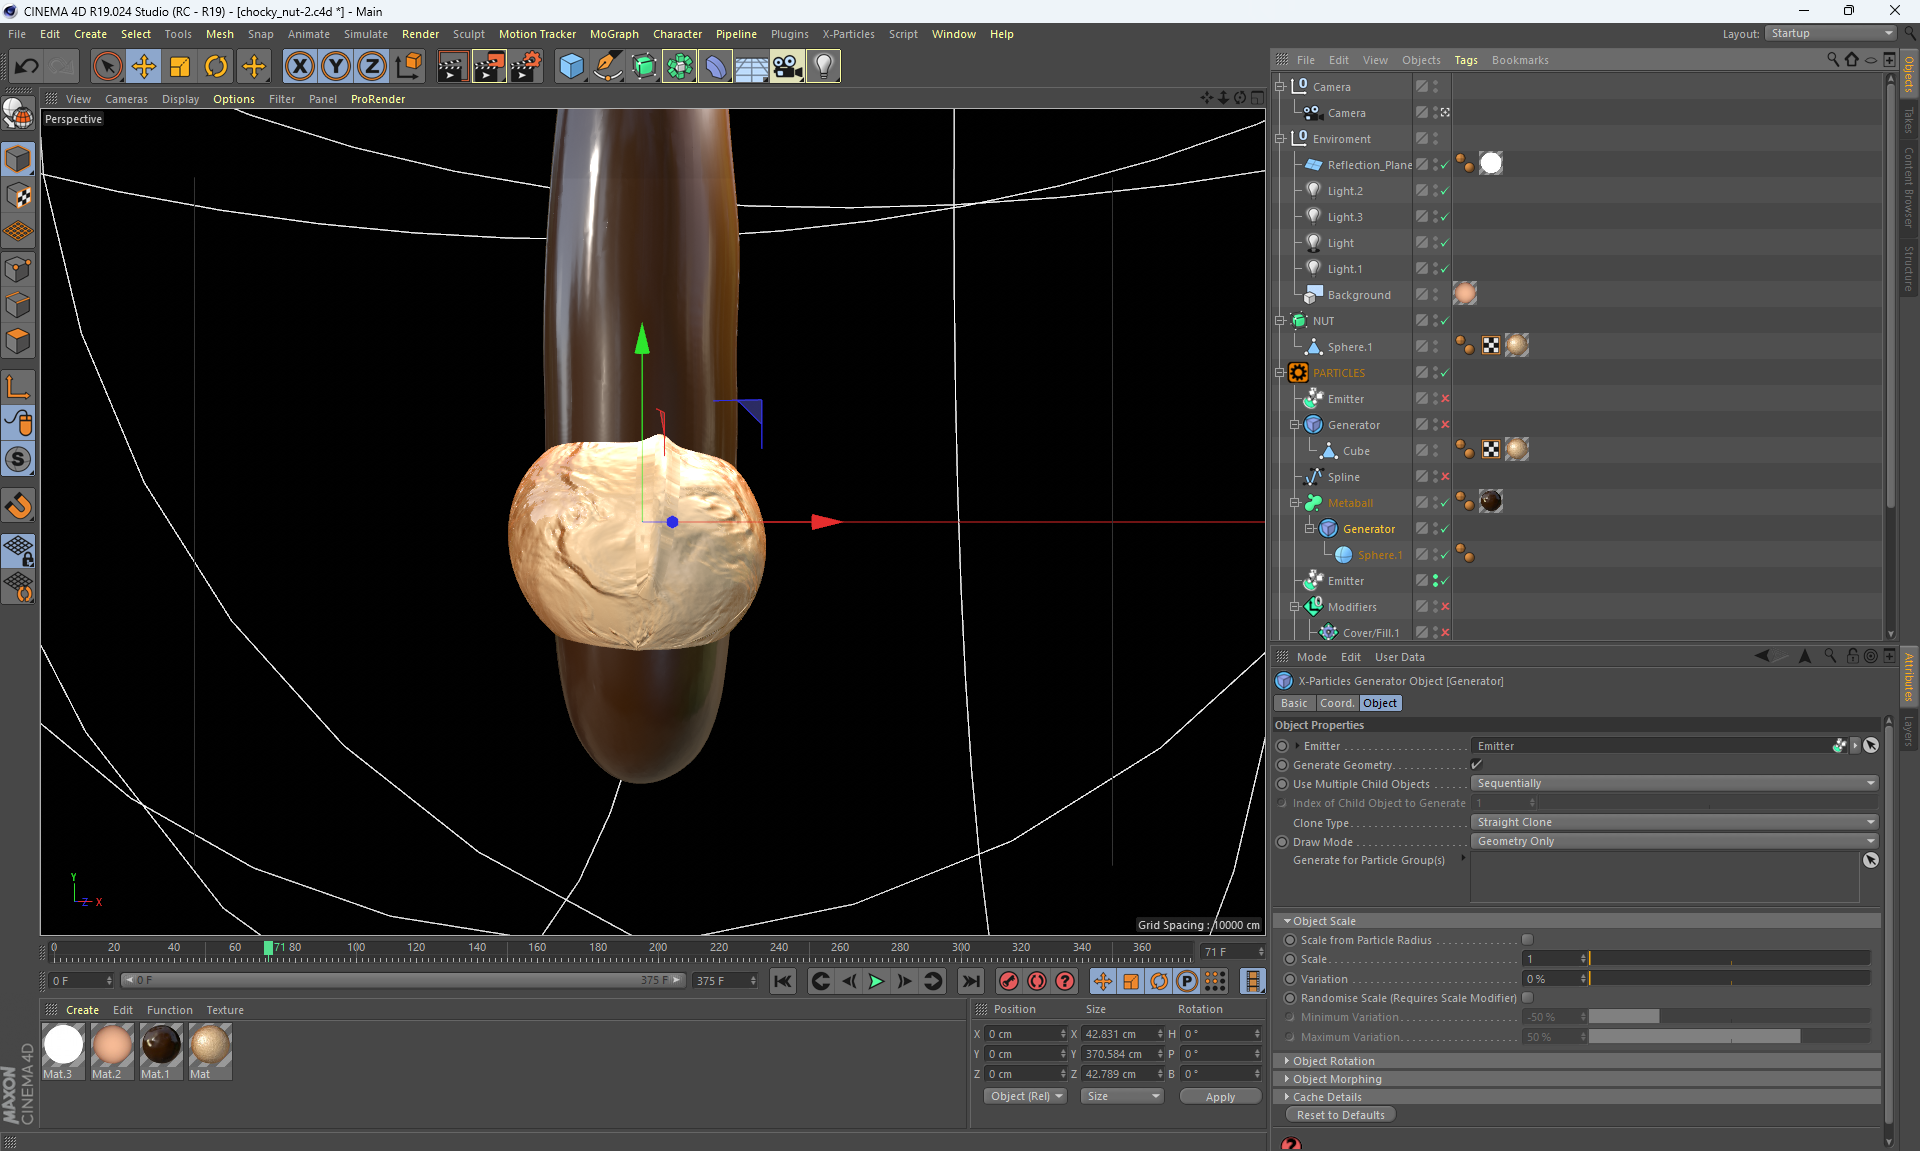
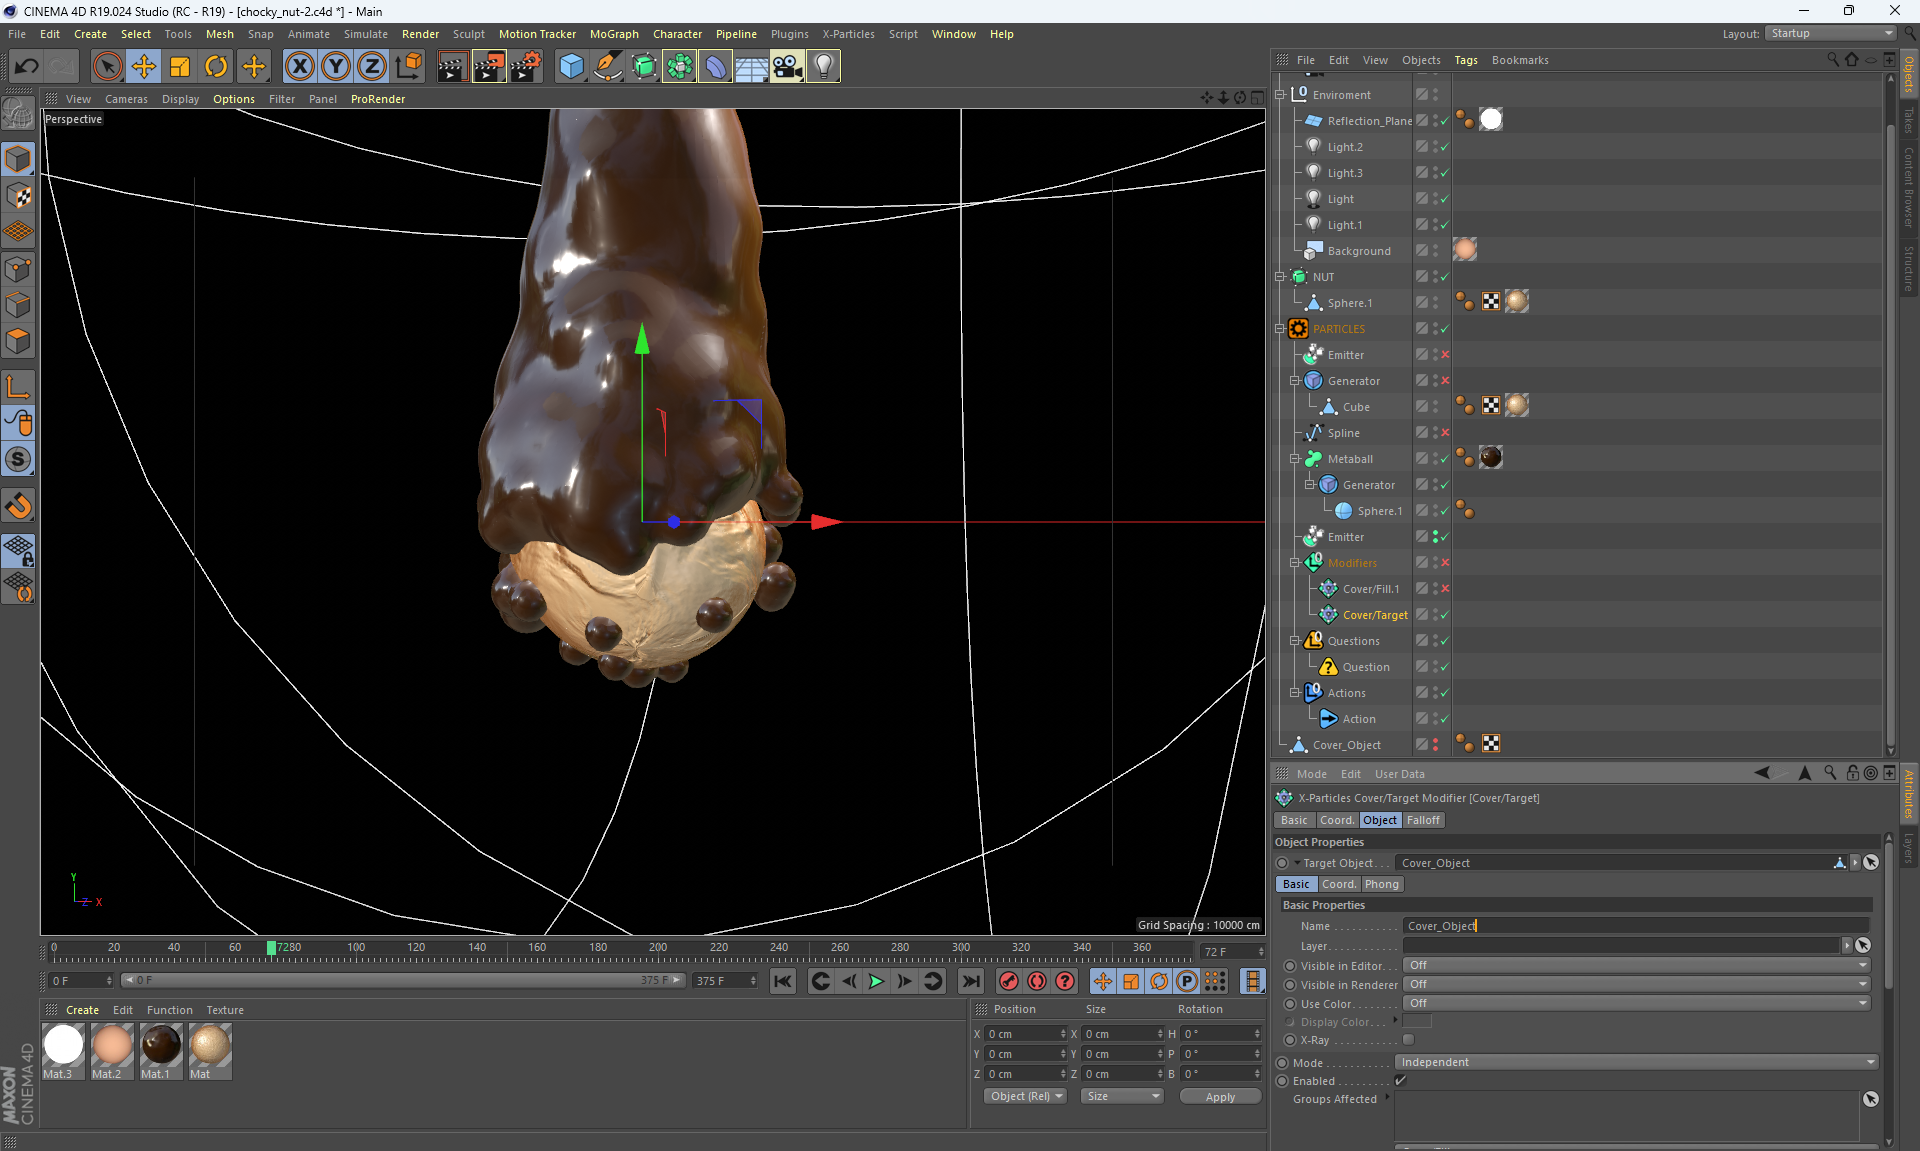
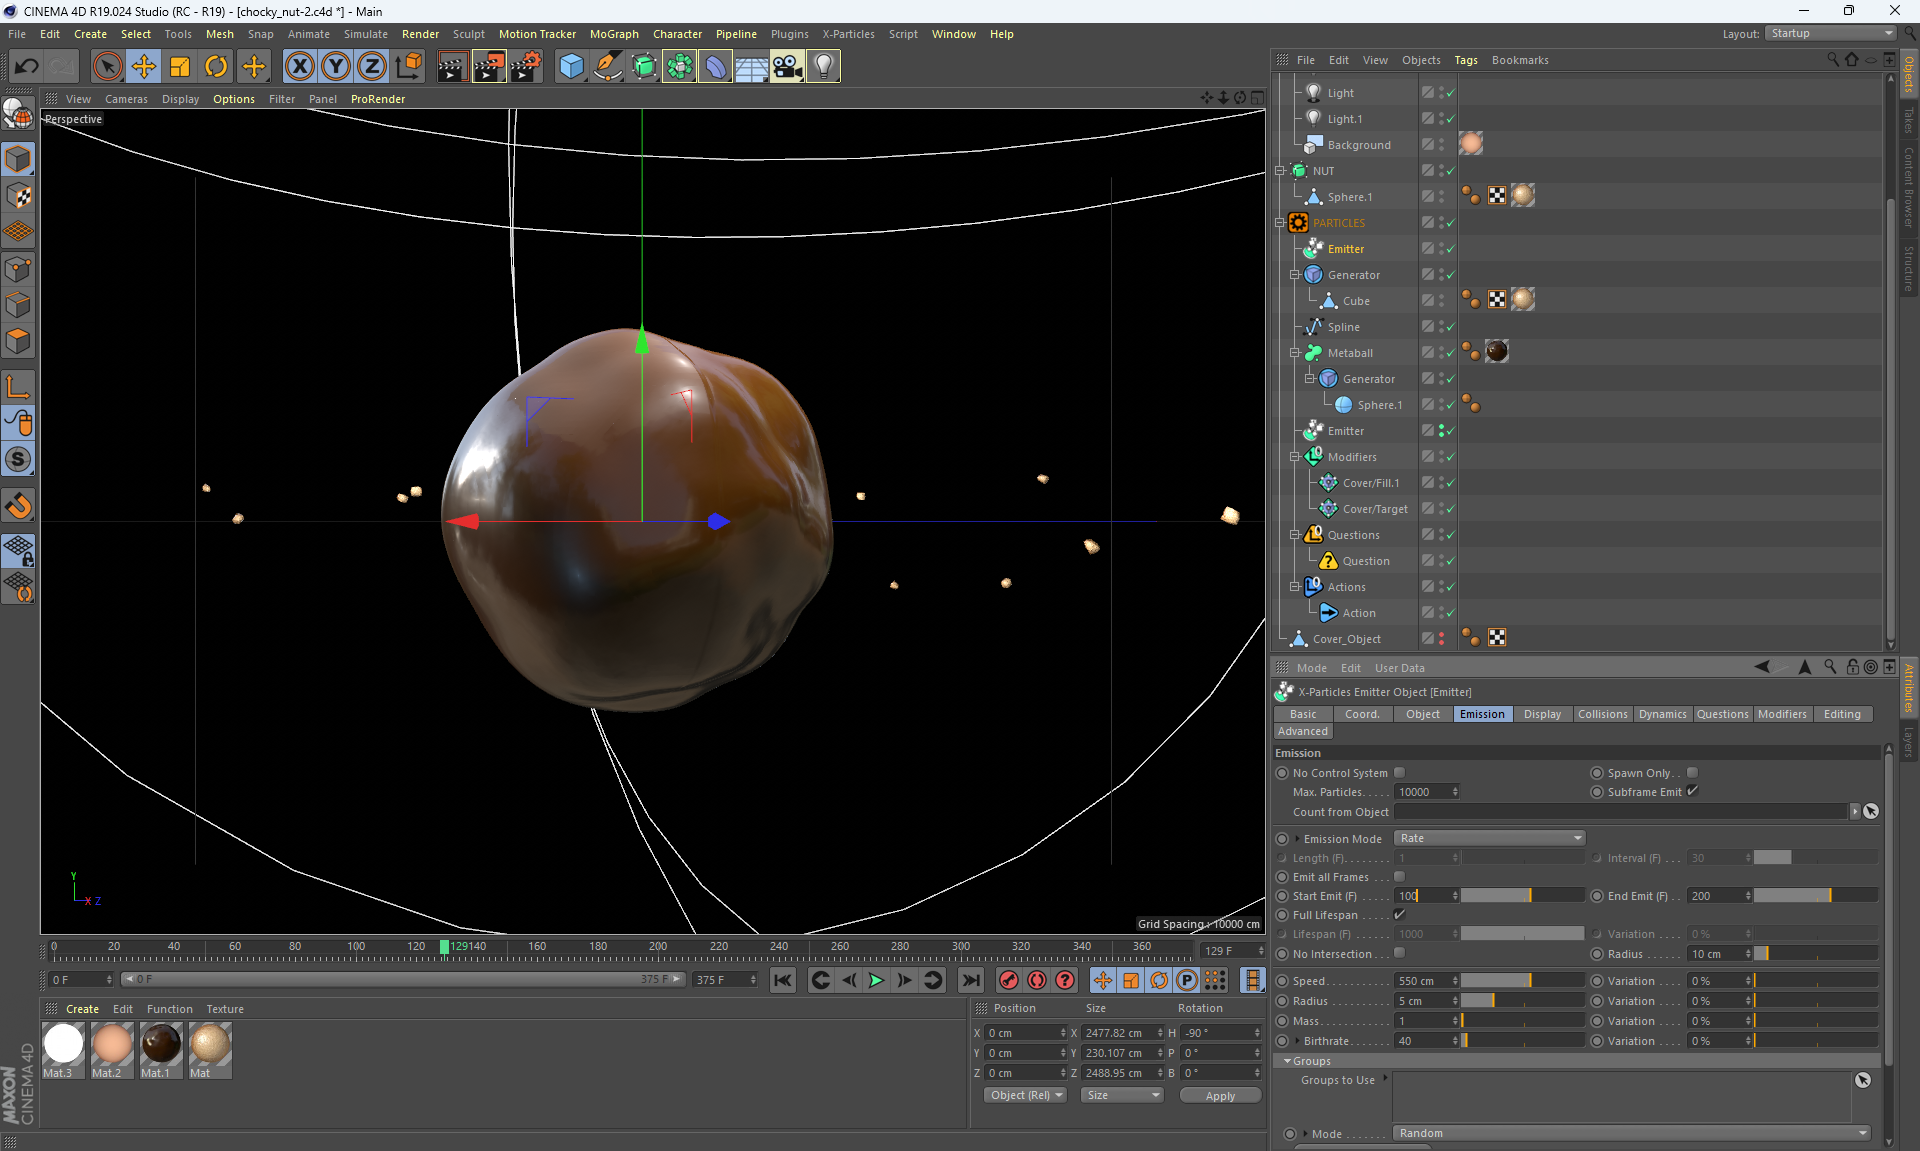
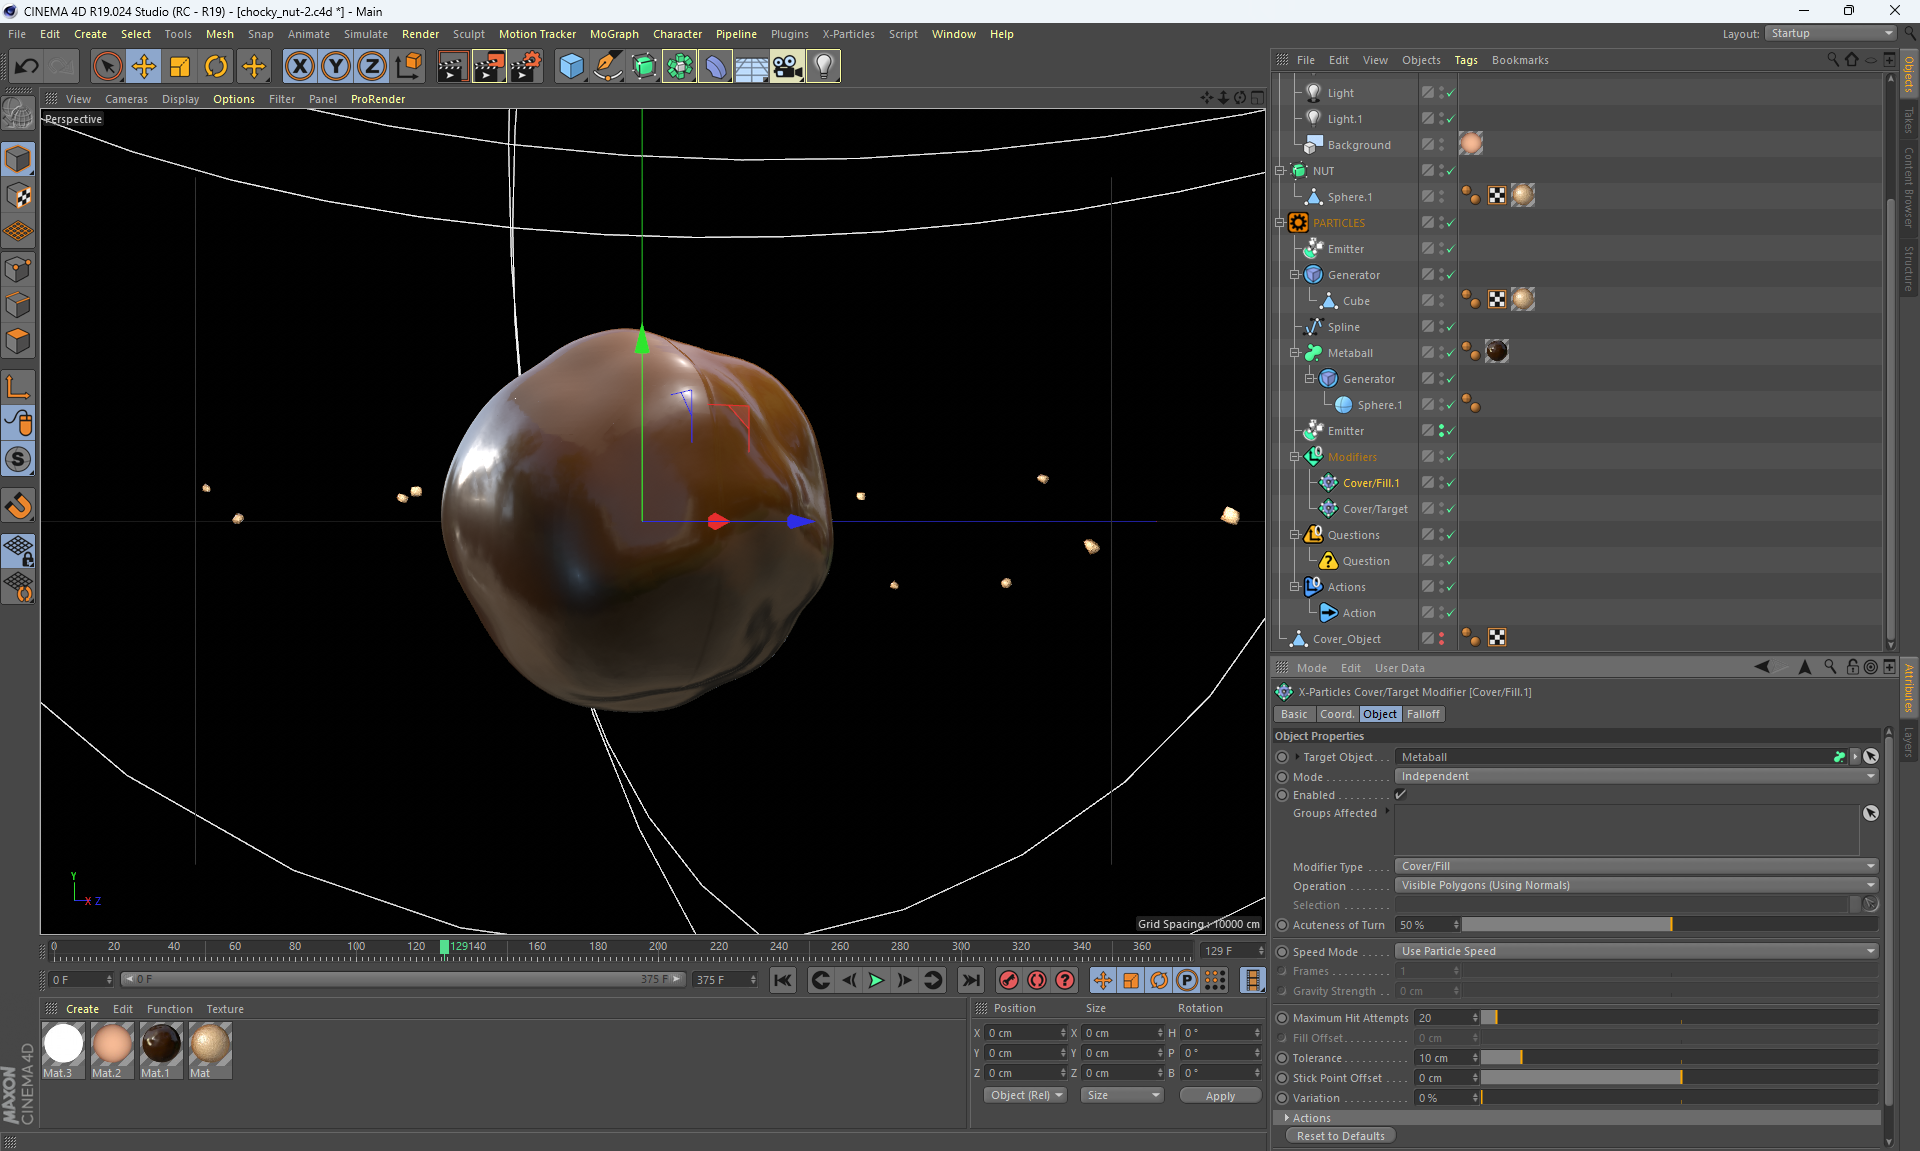
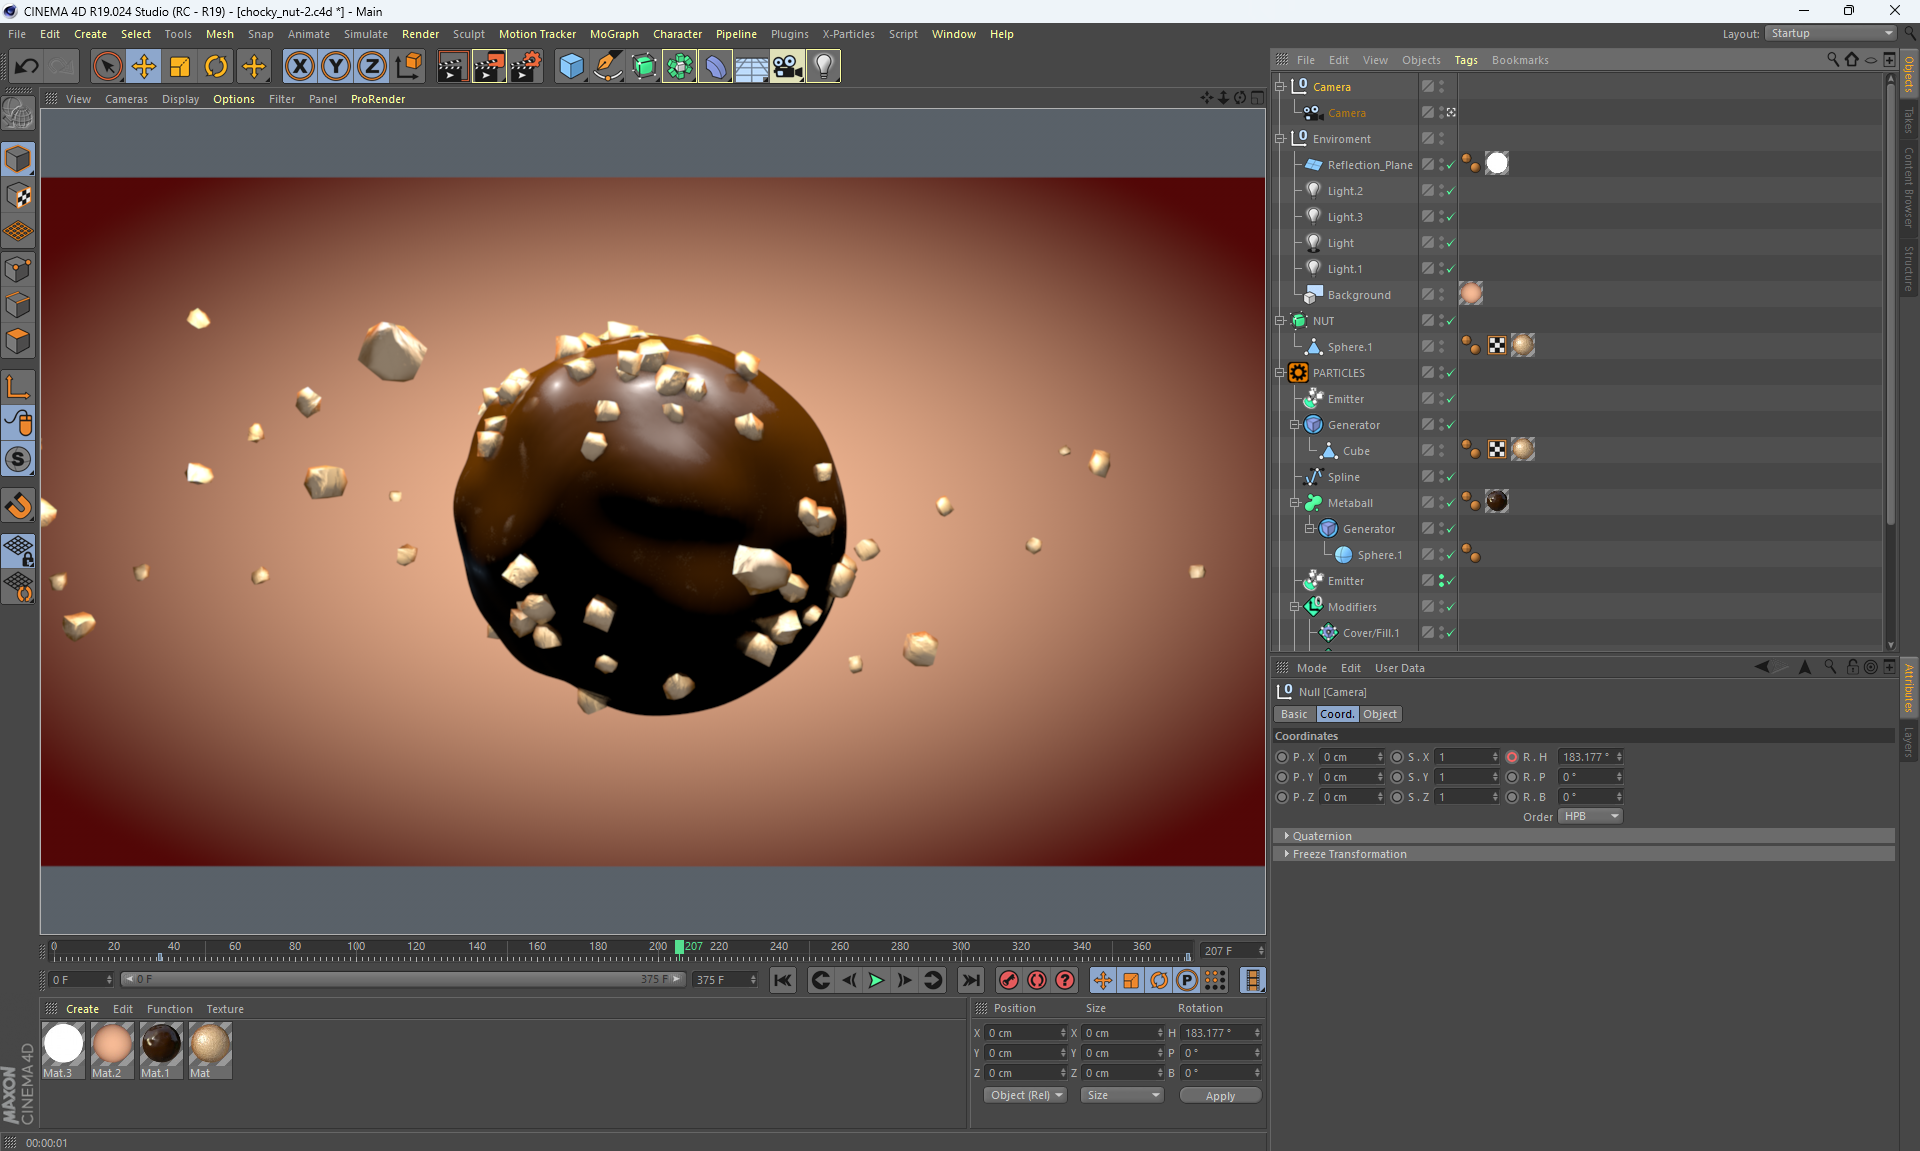
chocolate candy video (26.5mb)
chocolate candy image
denter video (7.4mb)
denter image
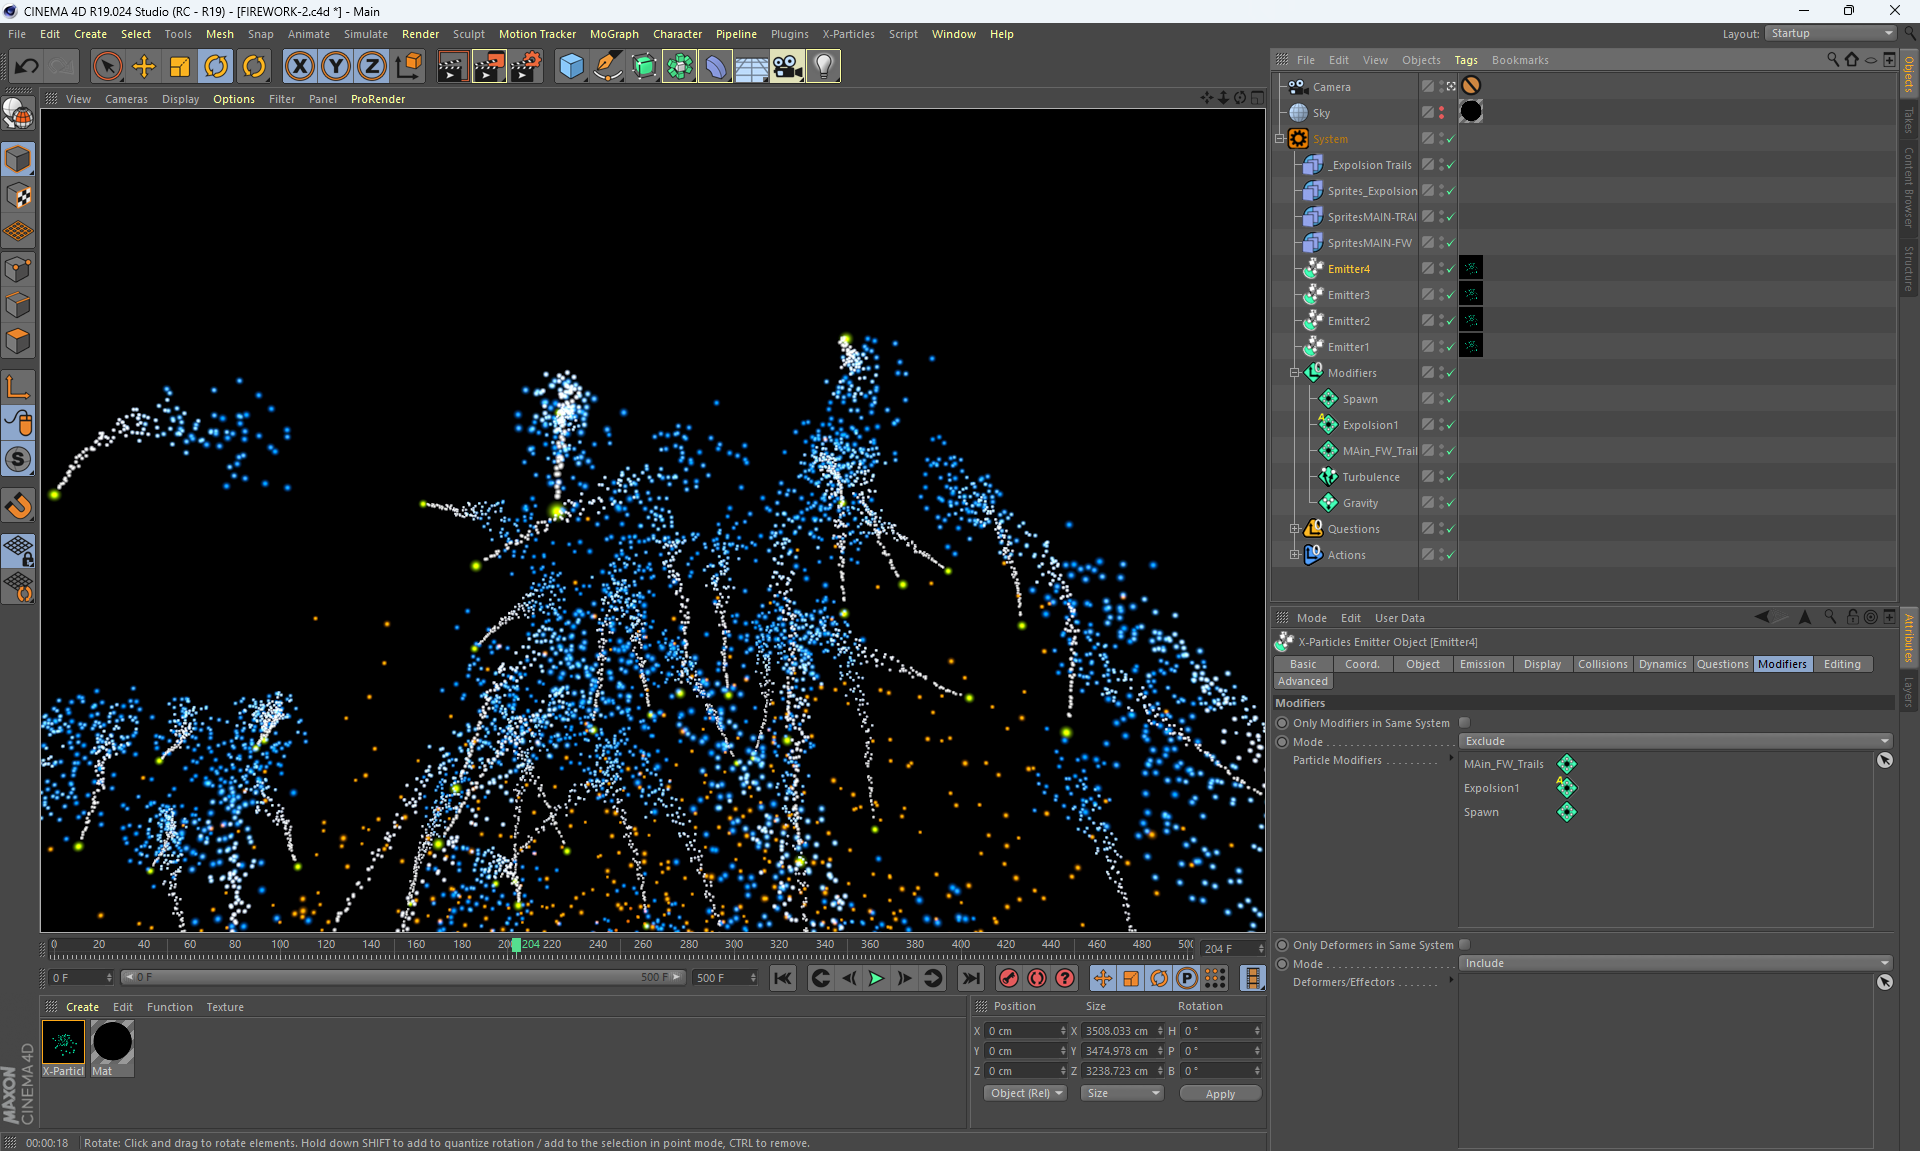
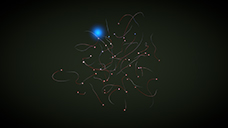
firework video (19.2mb)
firework image
In X-Particles 2.1, in the example where the animation of a chocolate candy is simulated, the second Emmiter with nuts renders incorrectly.
The correct animation was displayed in the editor window, but during the final render, the animation was distorted and generated completely differently.
I tried various ways to cache the entire animation, but caching did not work correctly and I could not render the second part of the animation with nuts correctly. I had to render half of the animation frame by frame, turning off the visibility of the second Emmiter with nuts during rendering.
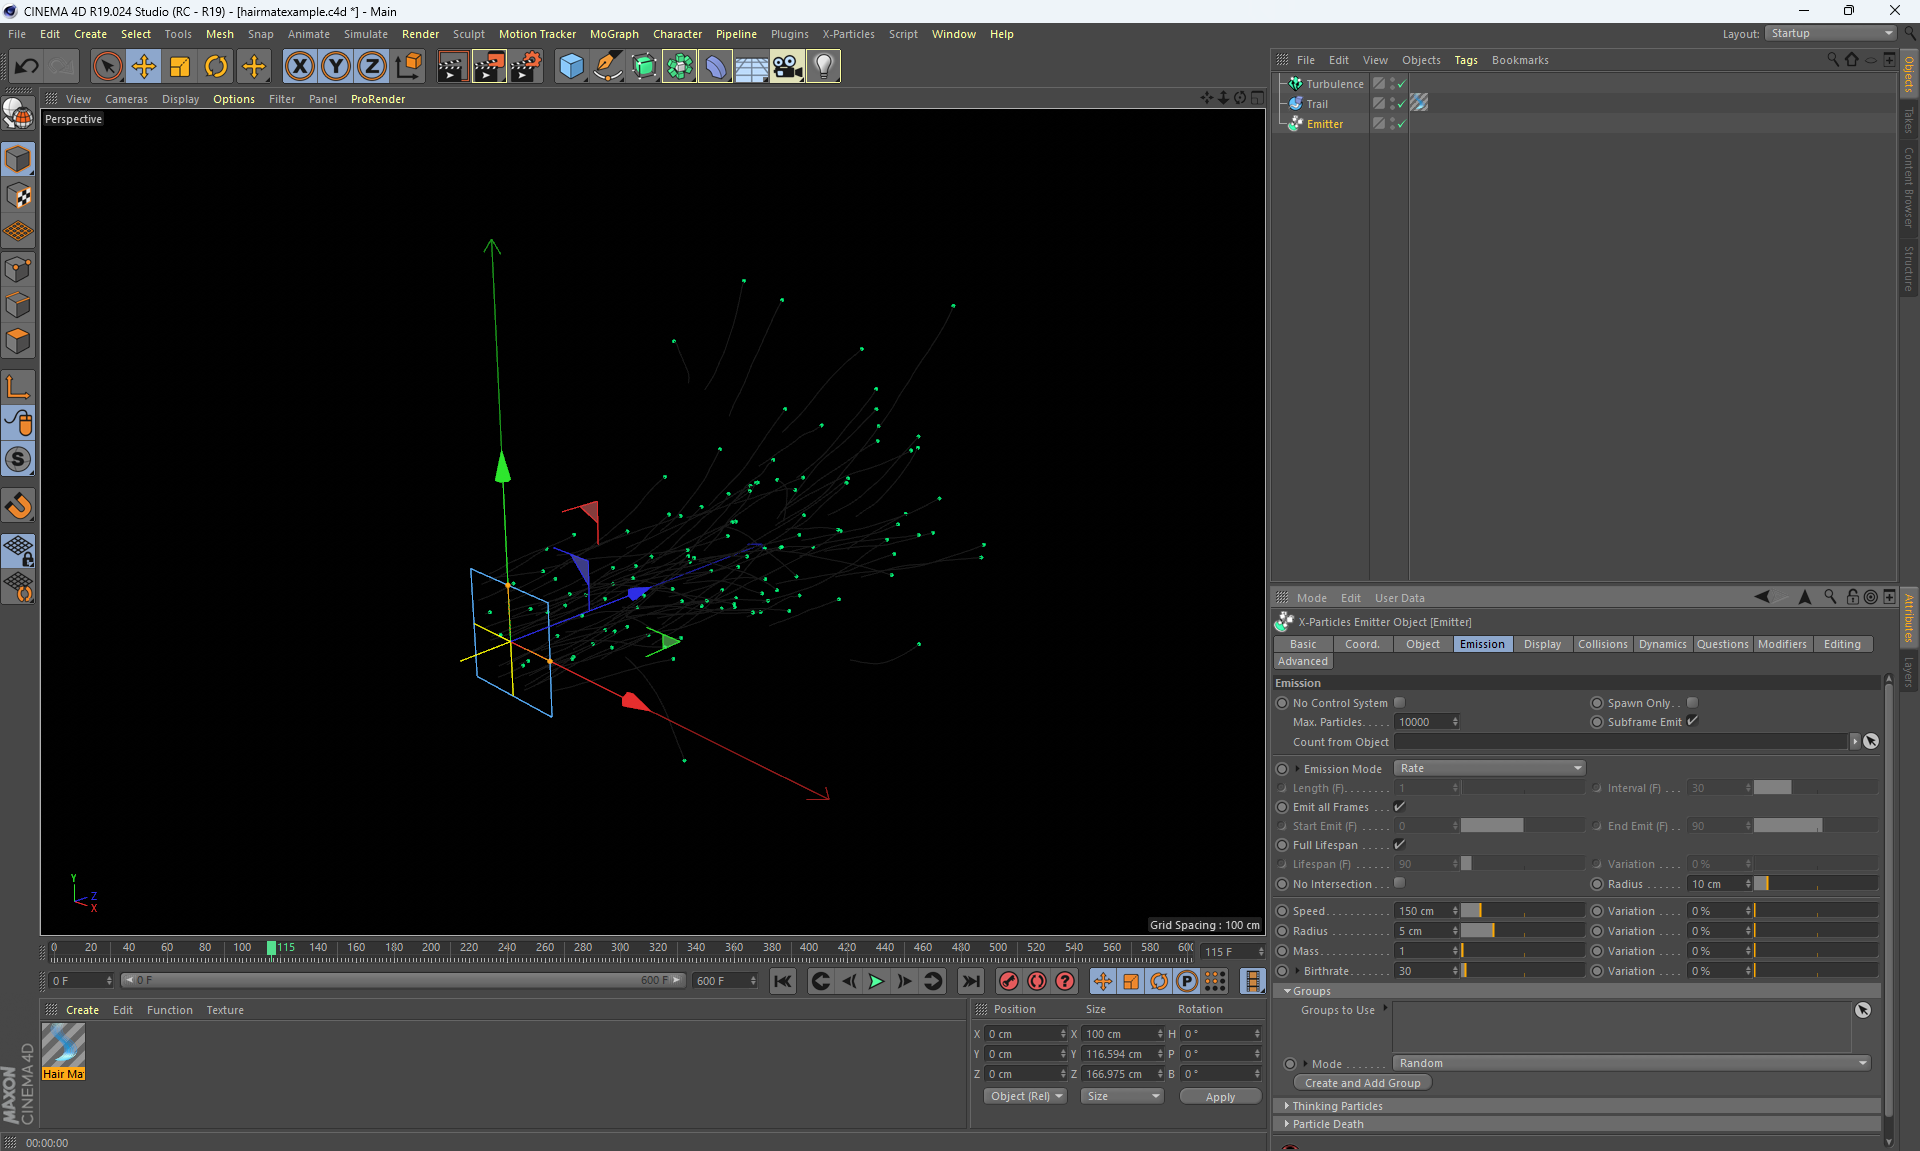
Hairmate video (42.7mb)
hairmate image
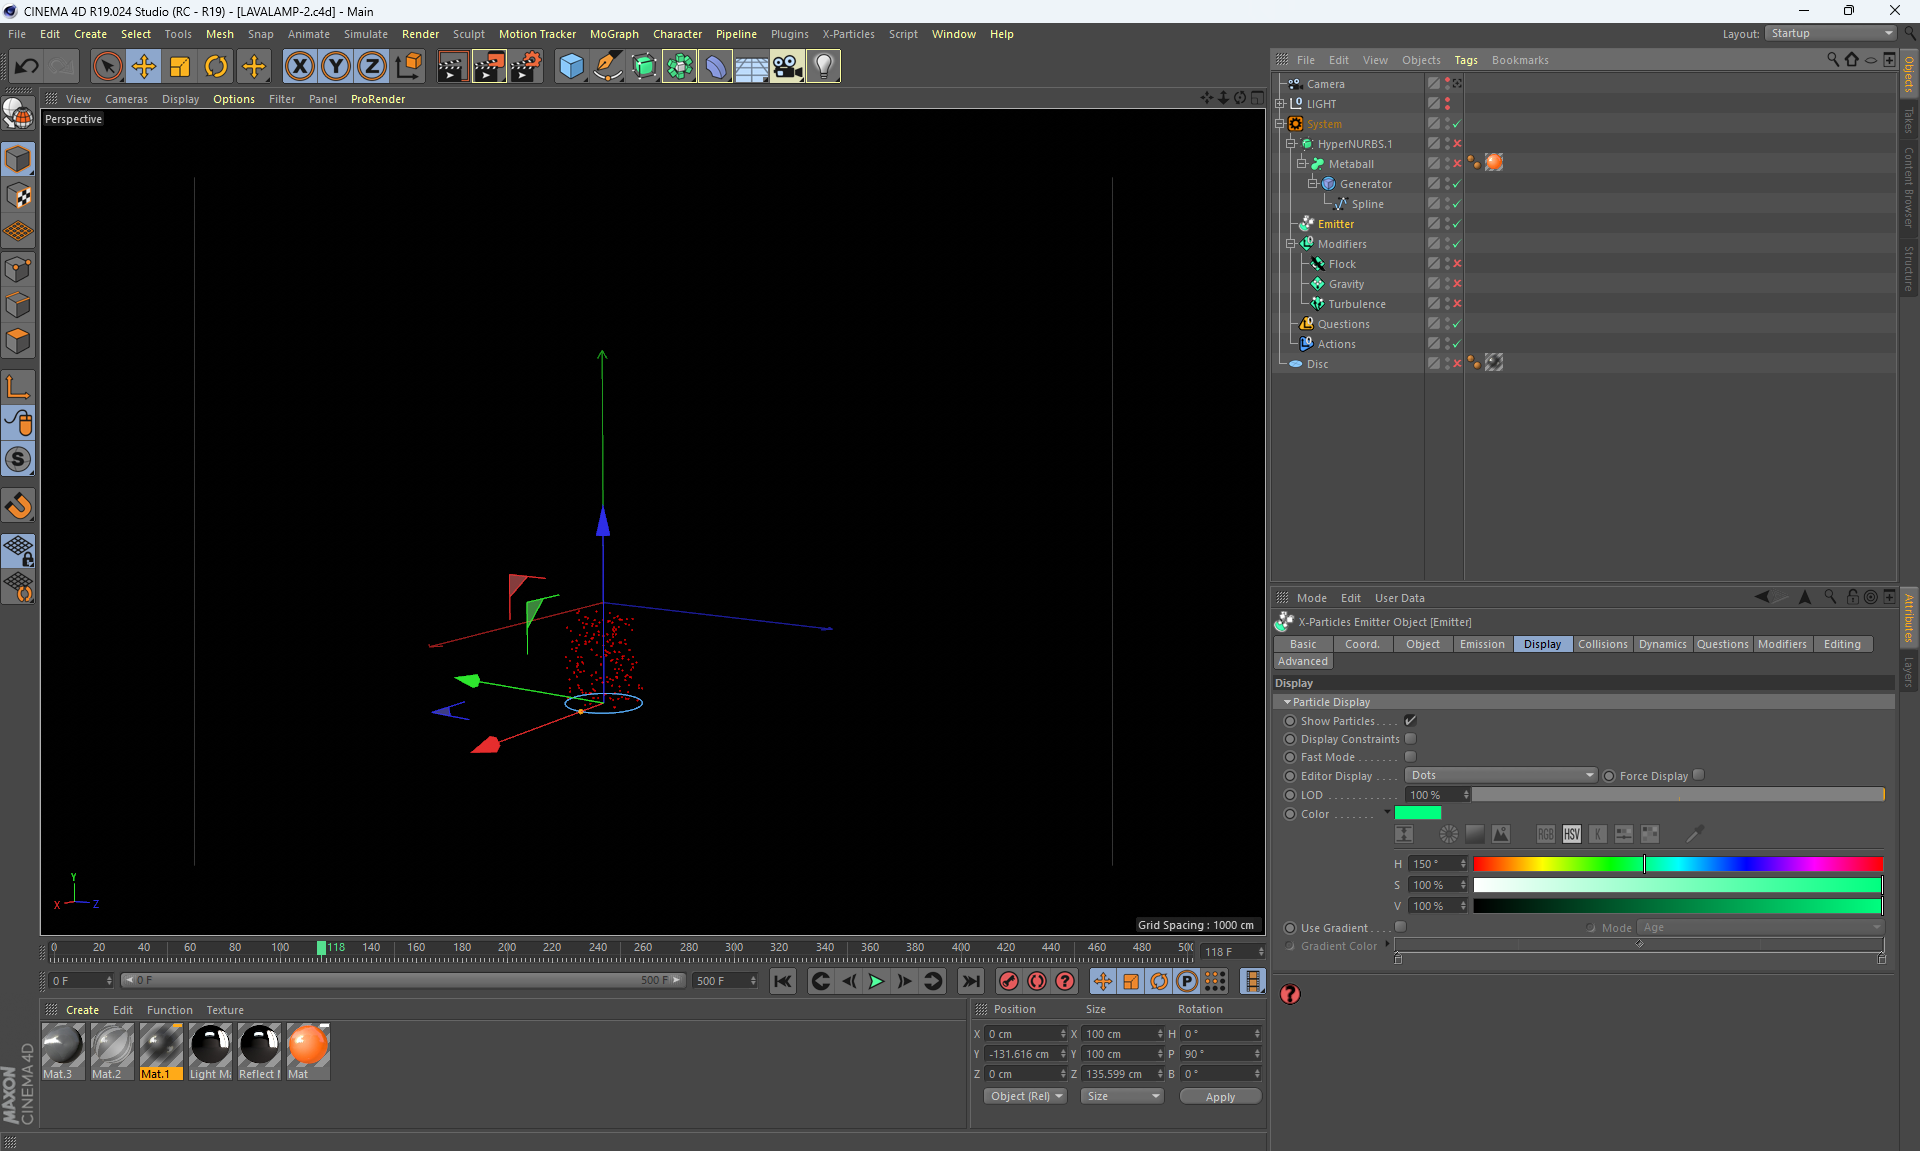
lava lamp video (7.2mb)
lava lamp image
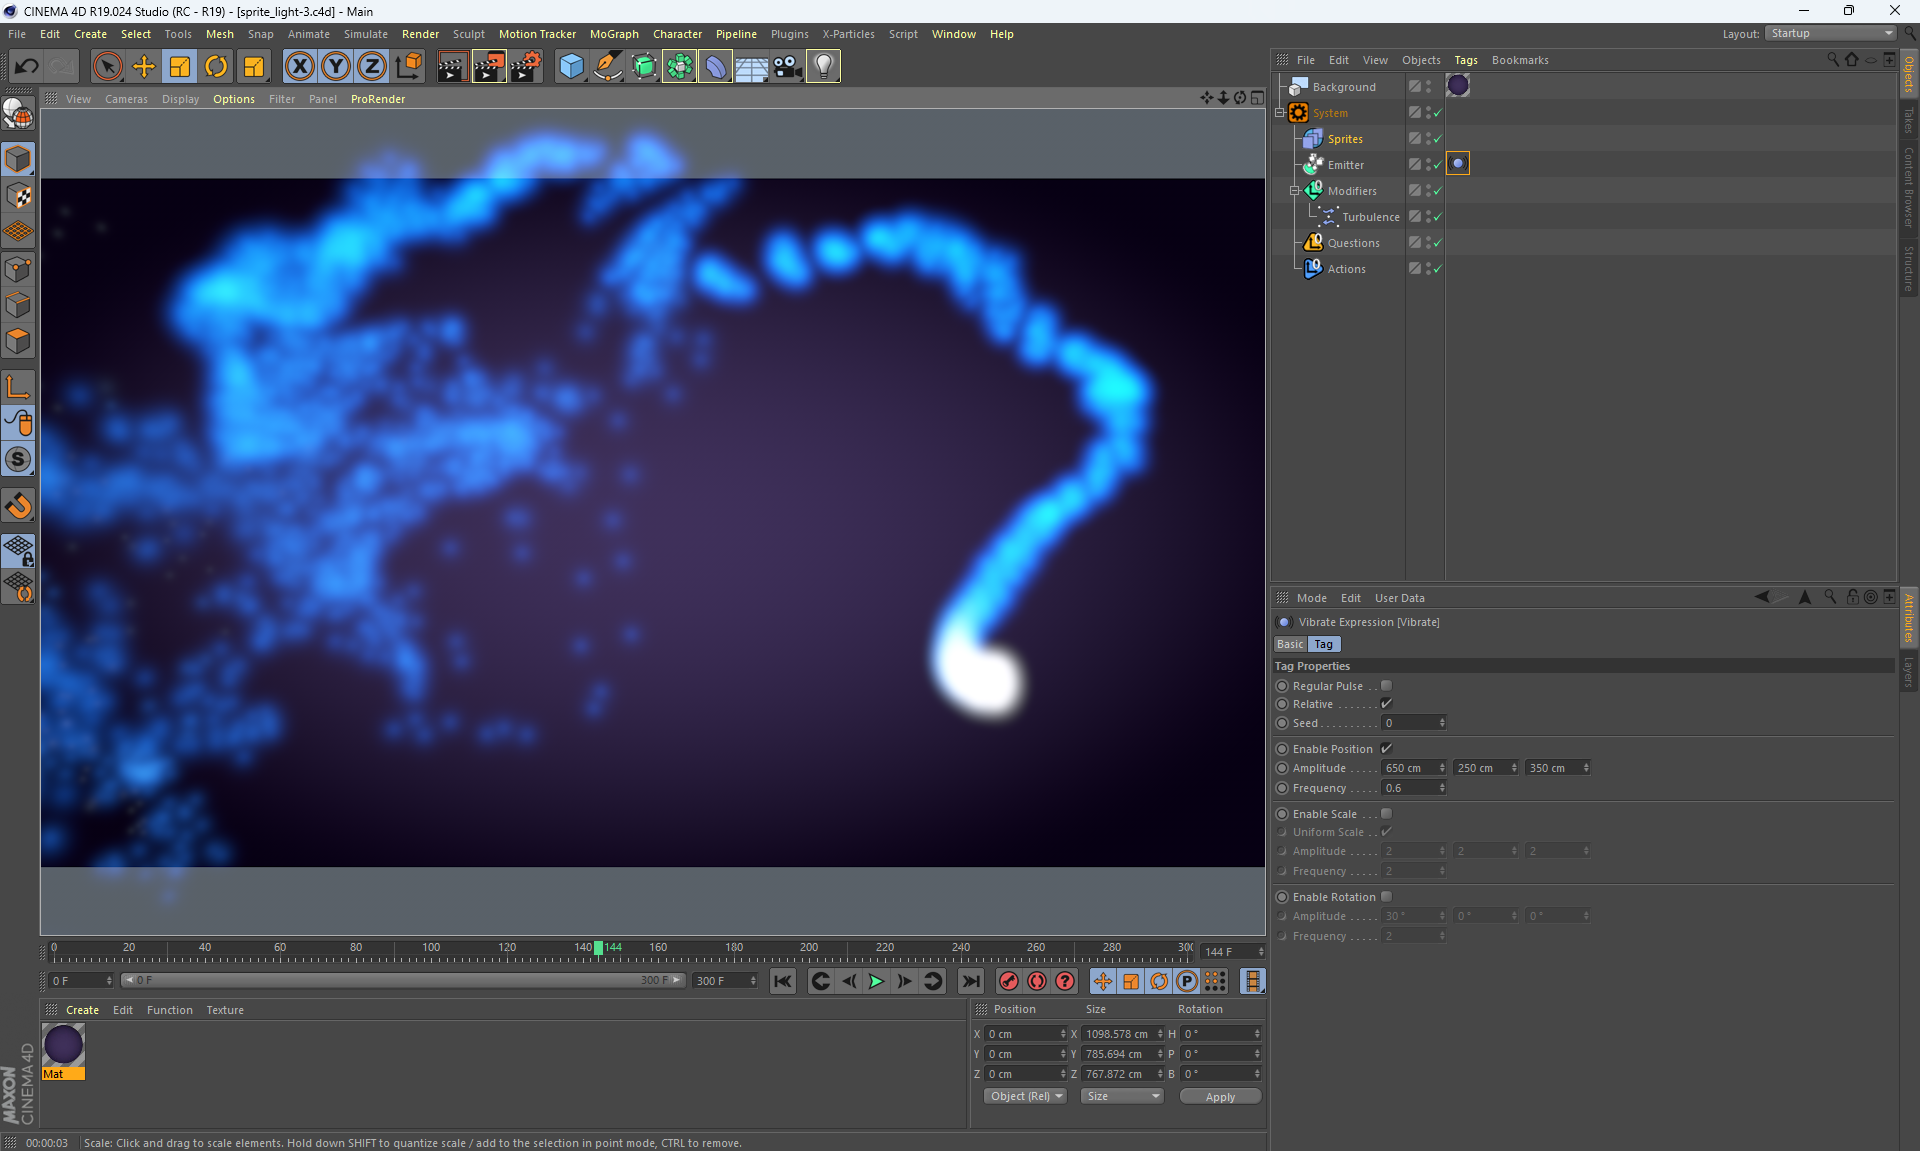
sprite light video (17.5mb)
sprite light image
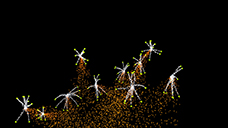
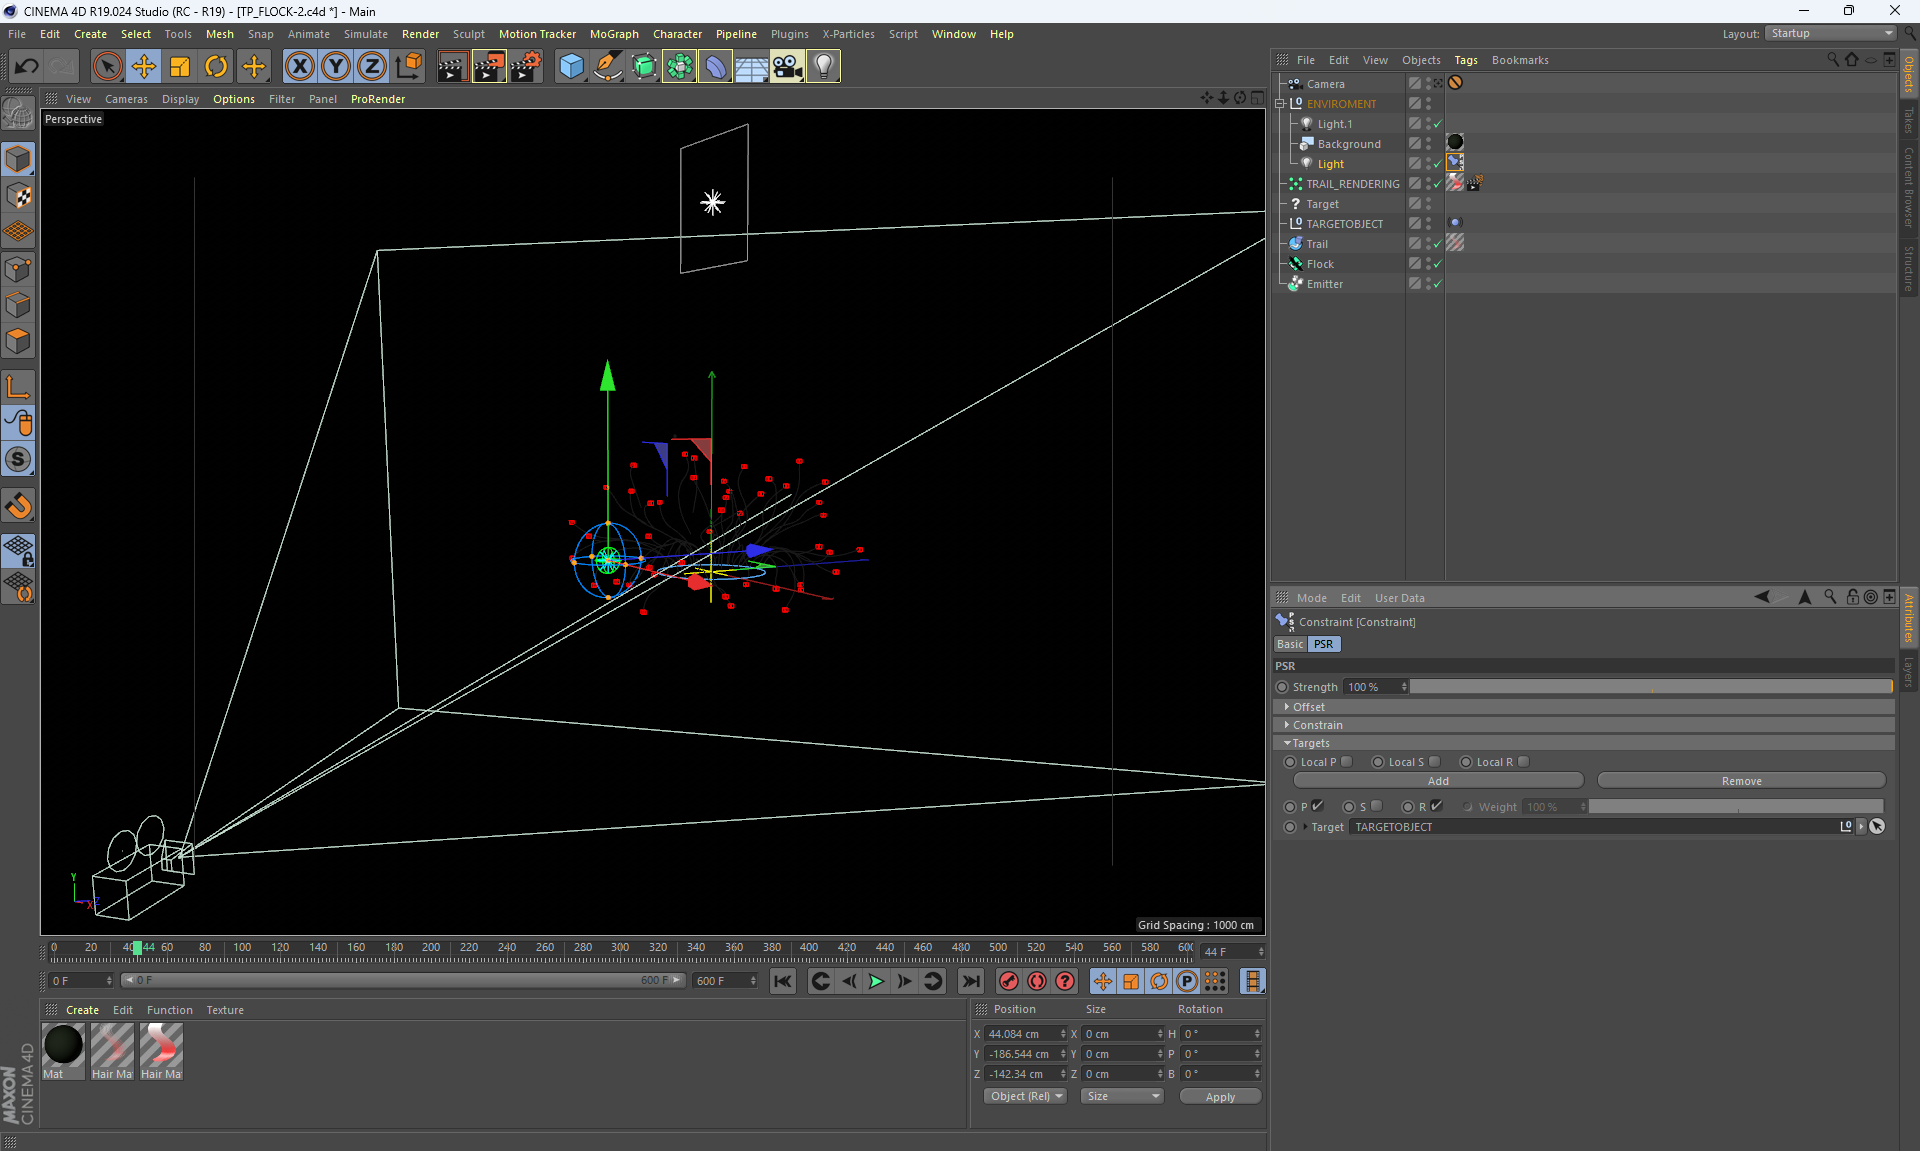
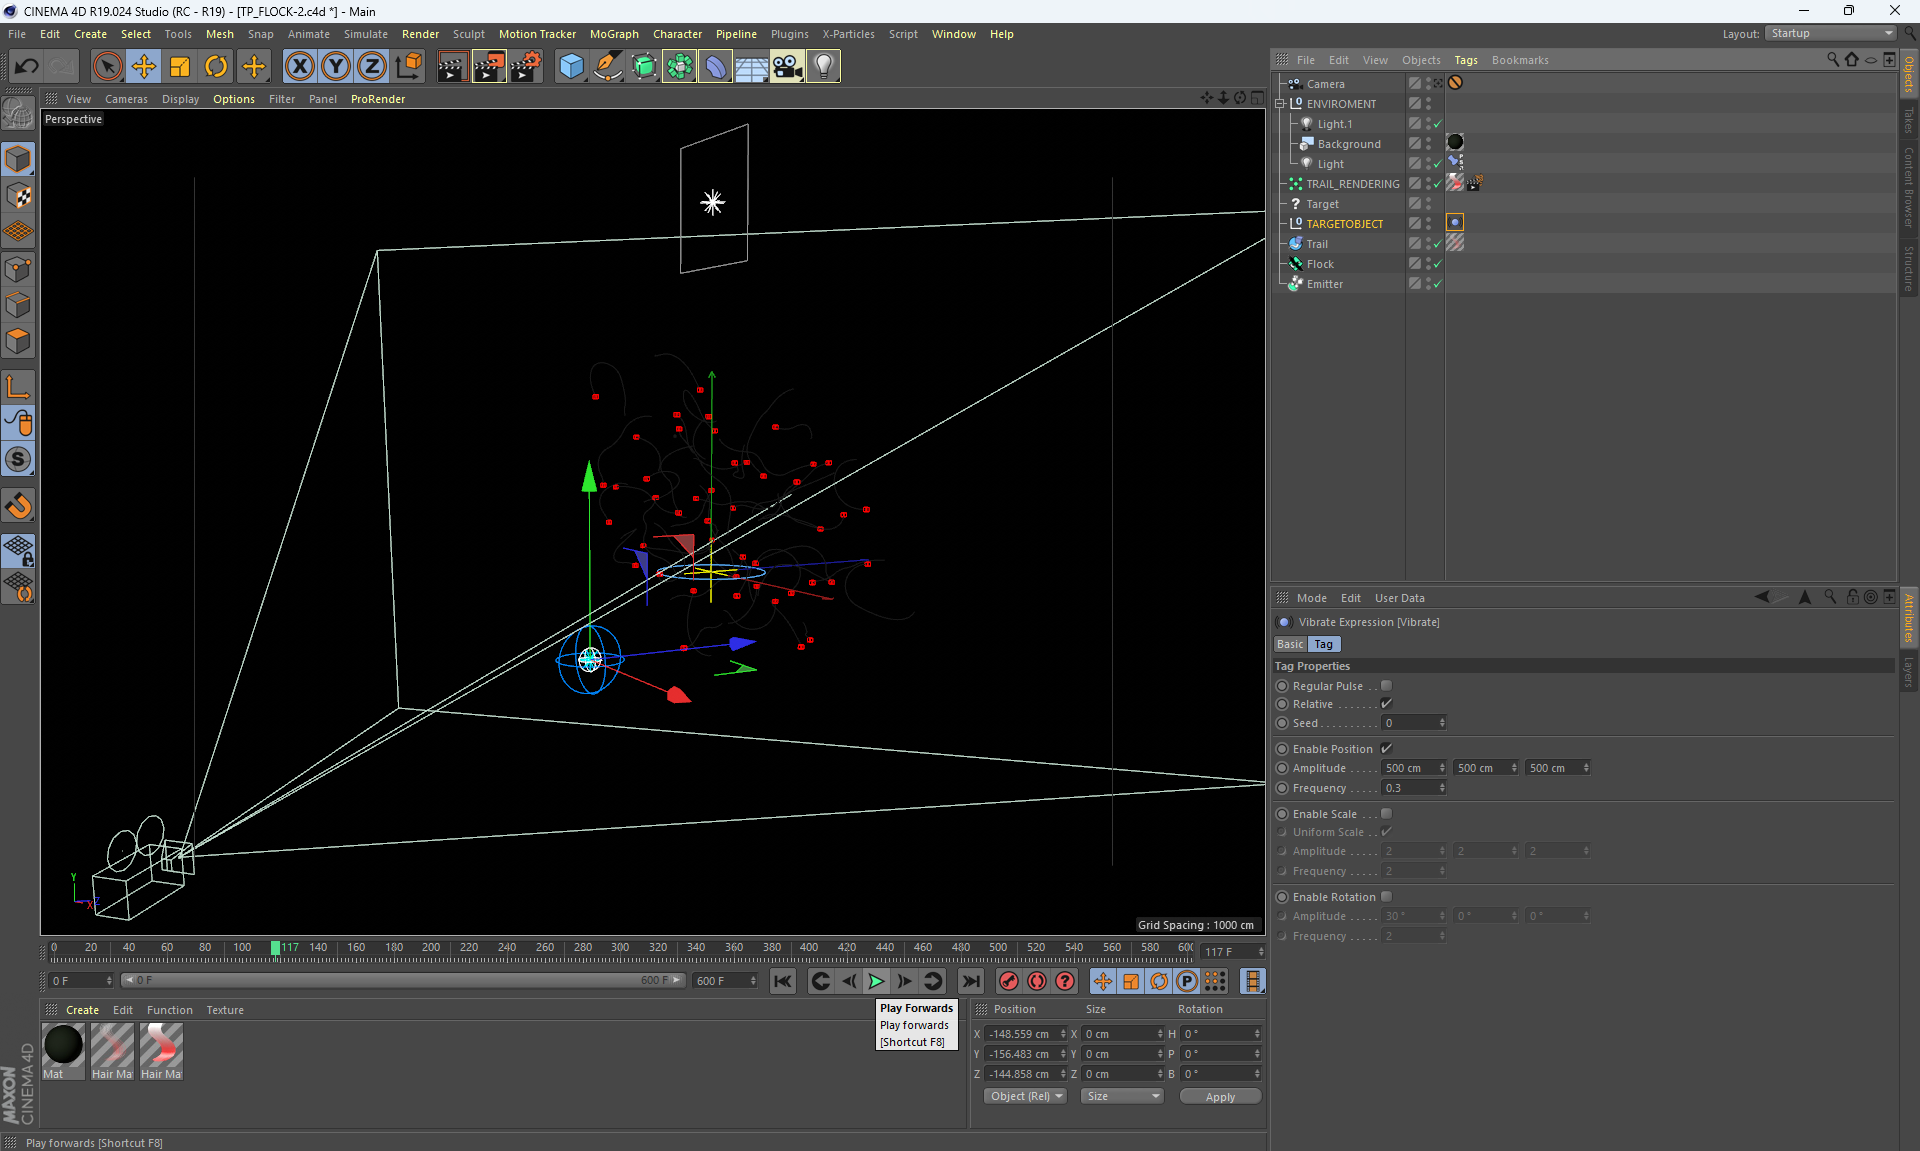
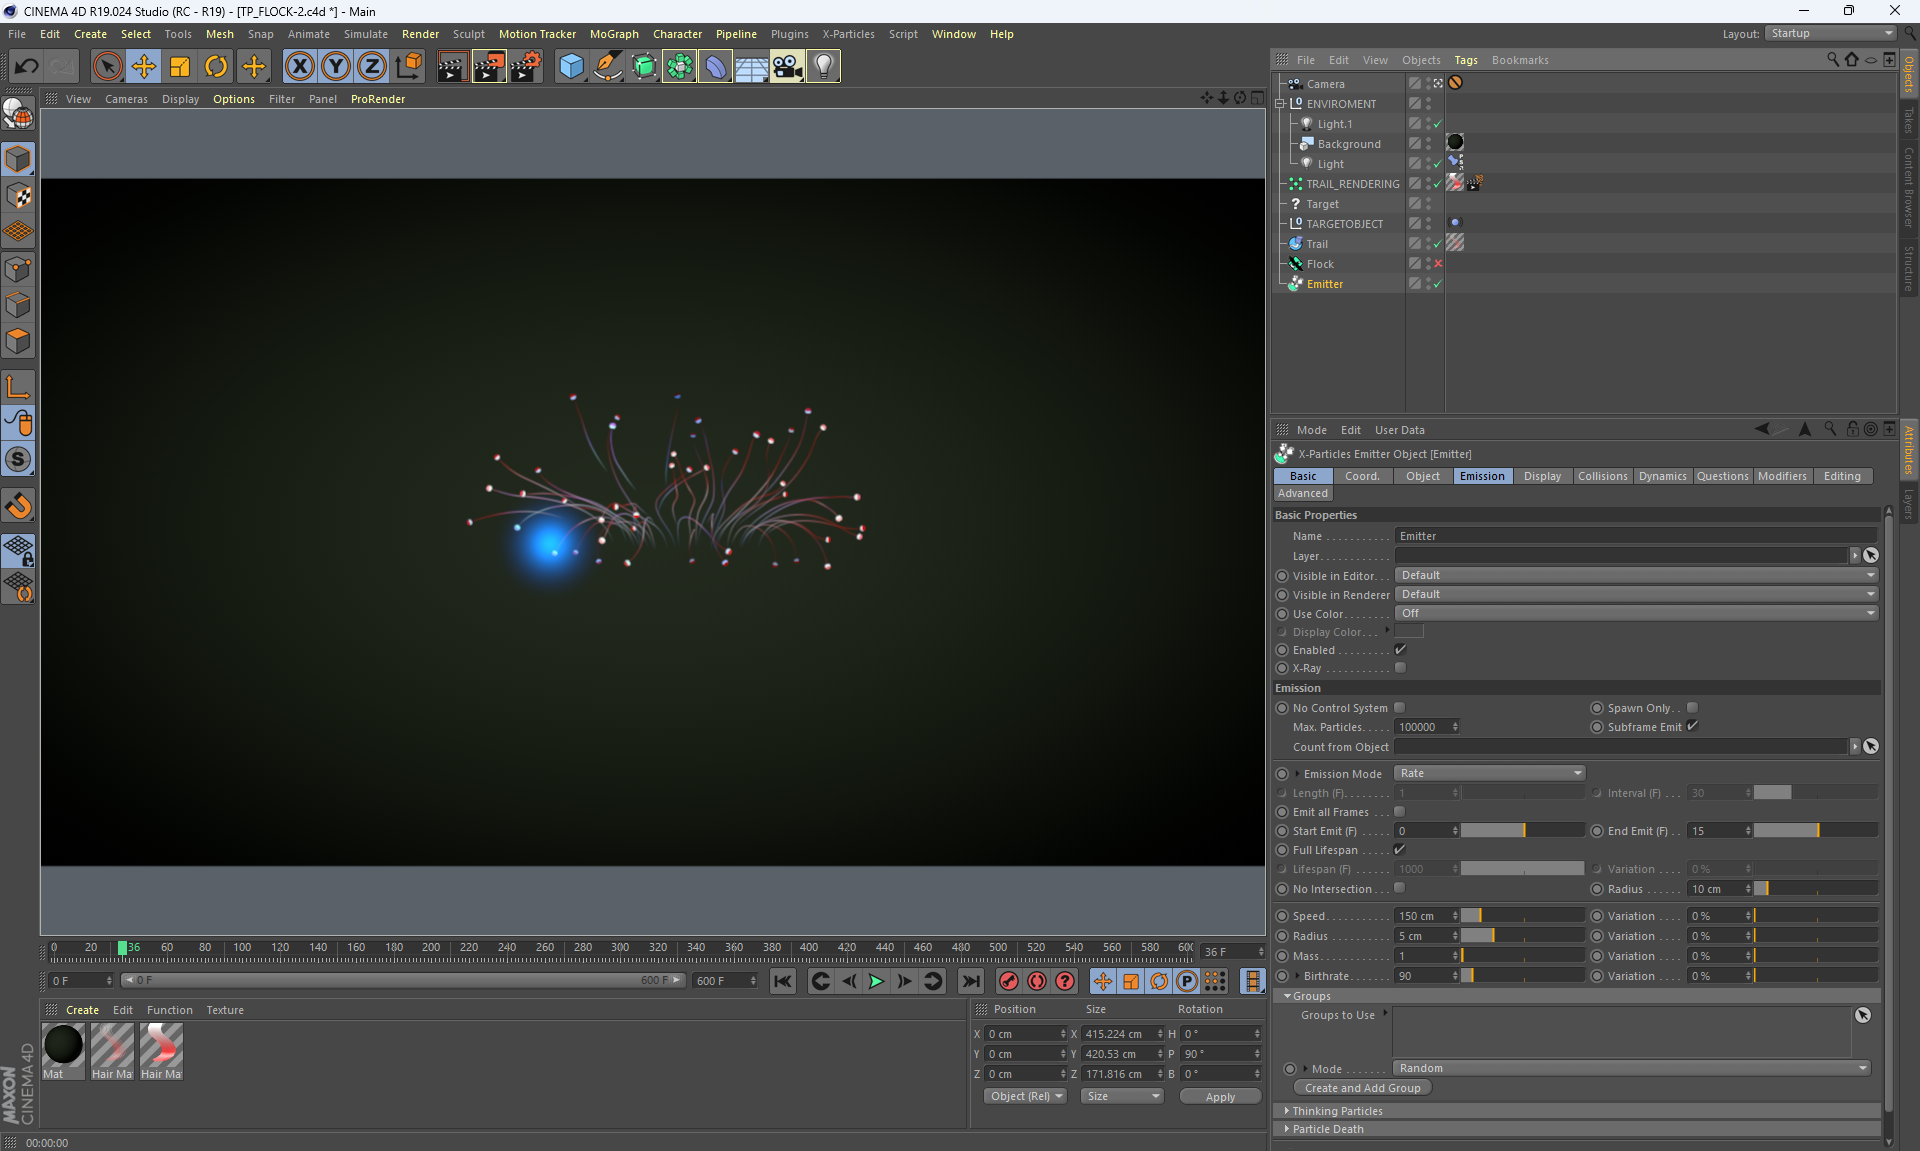
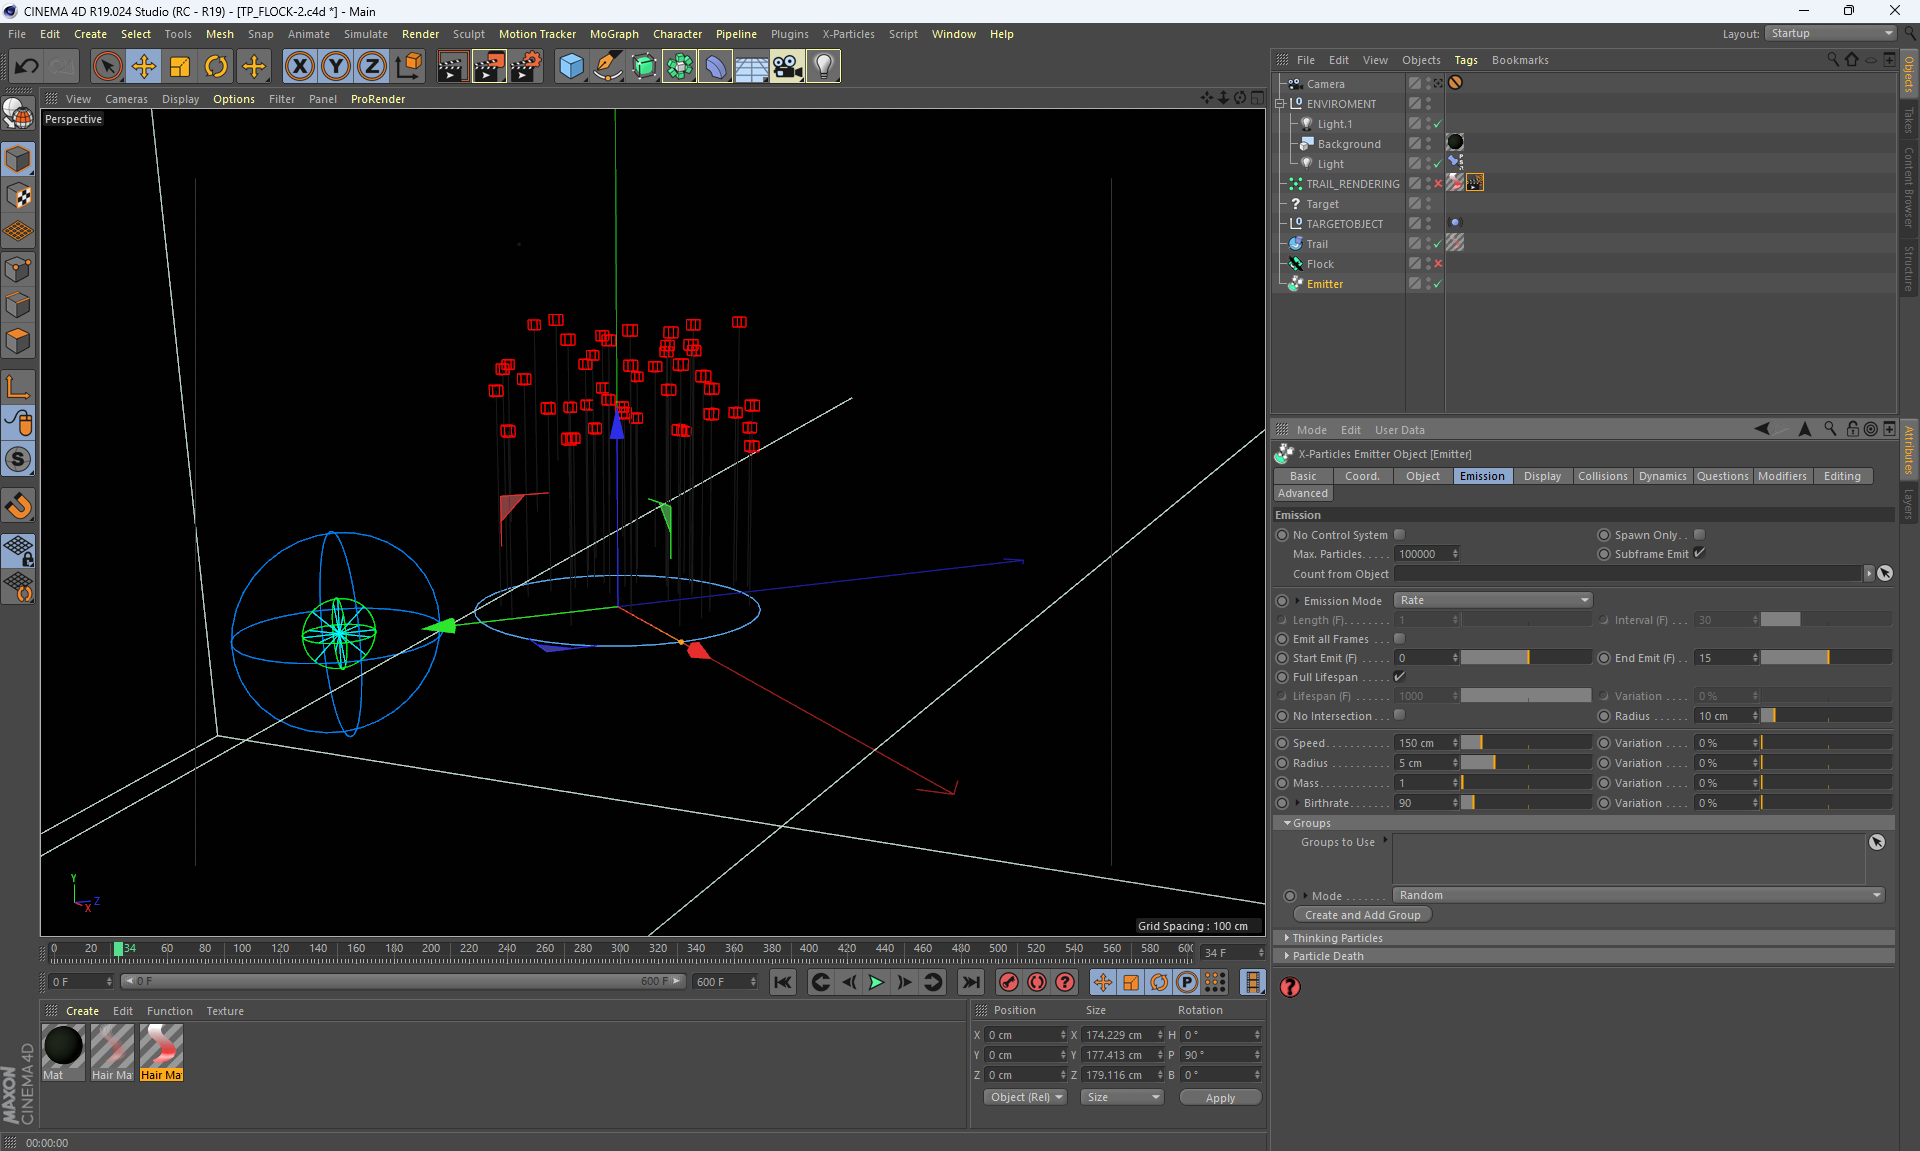
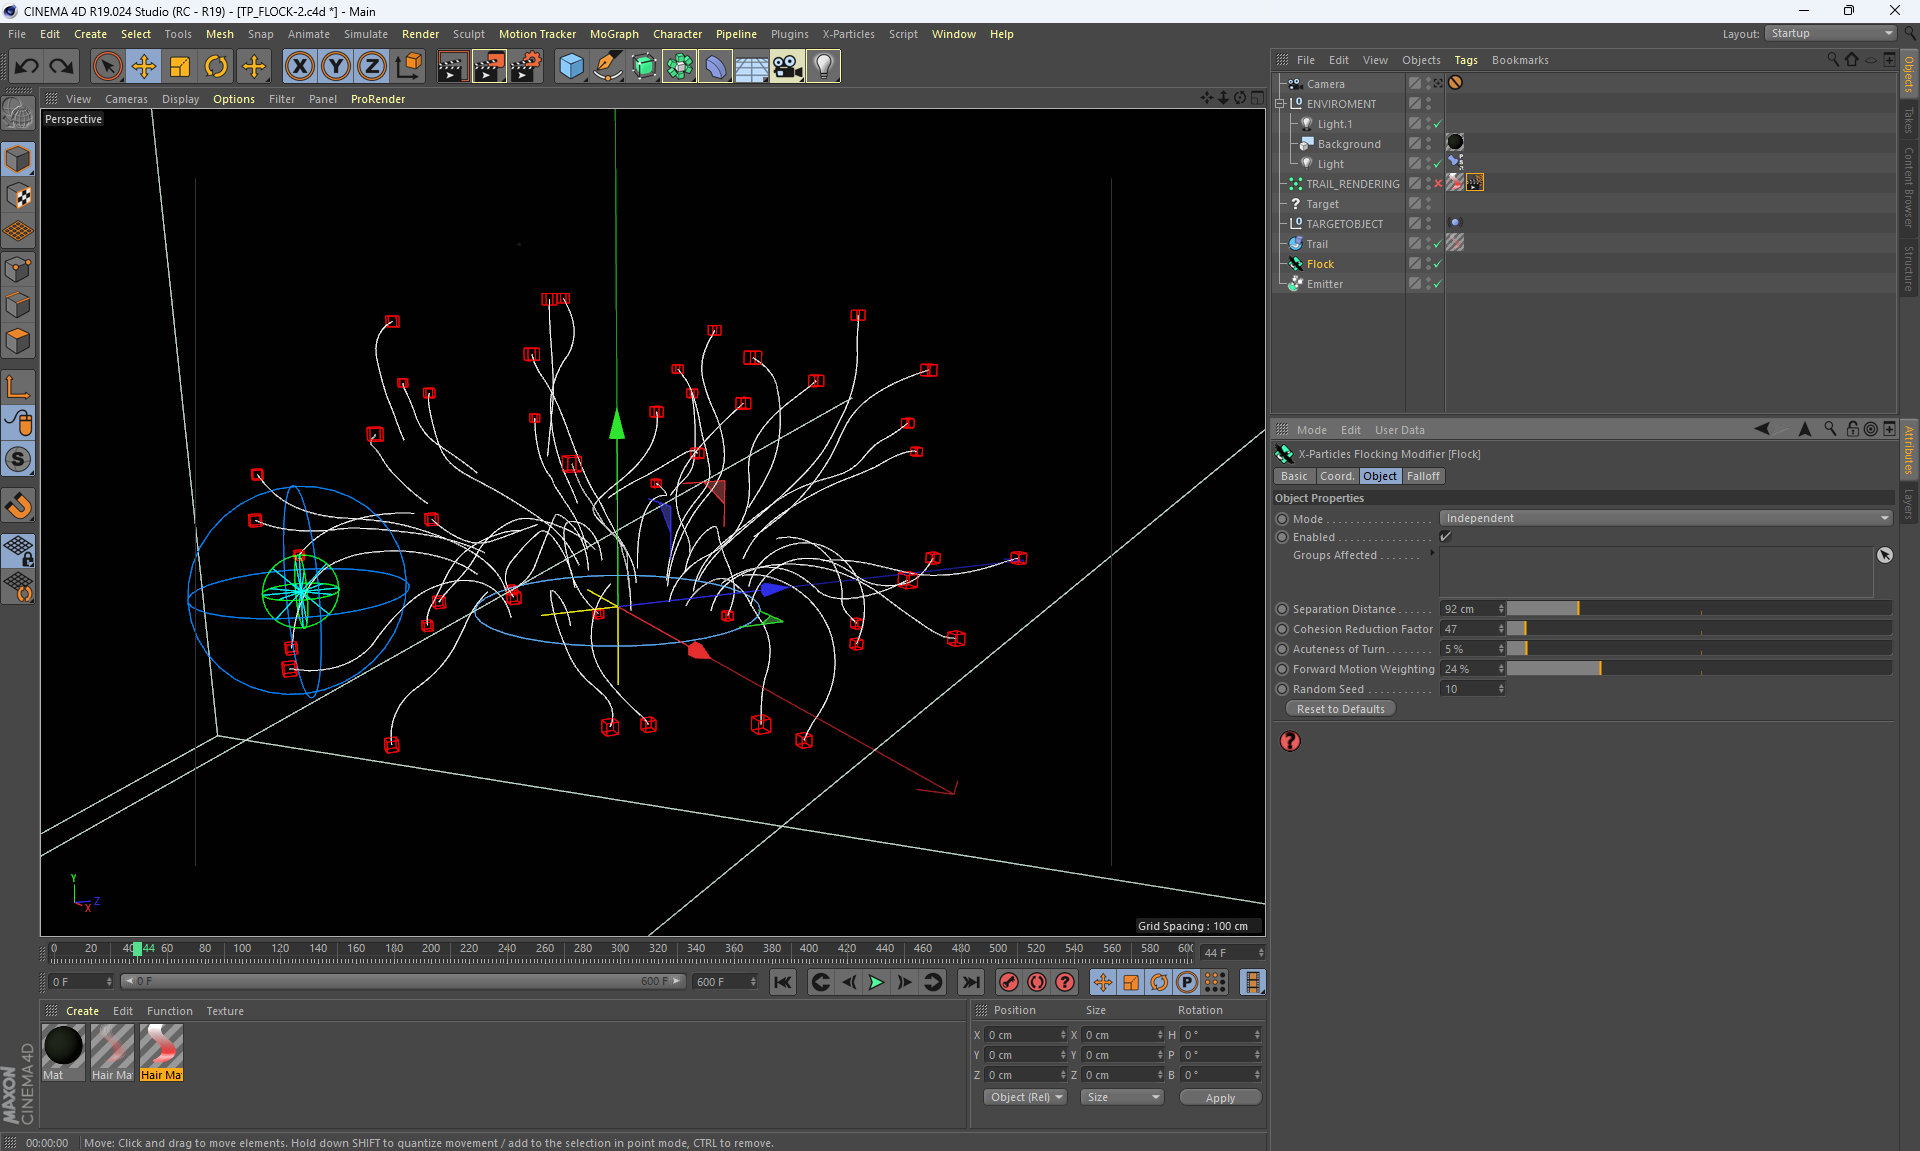
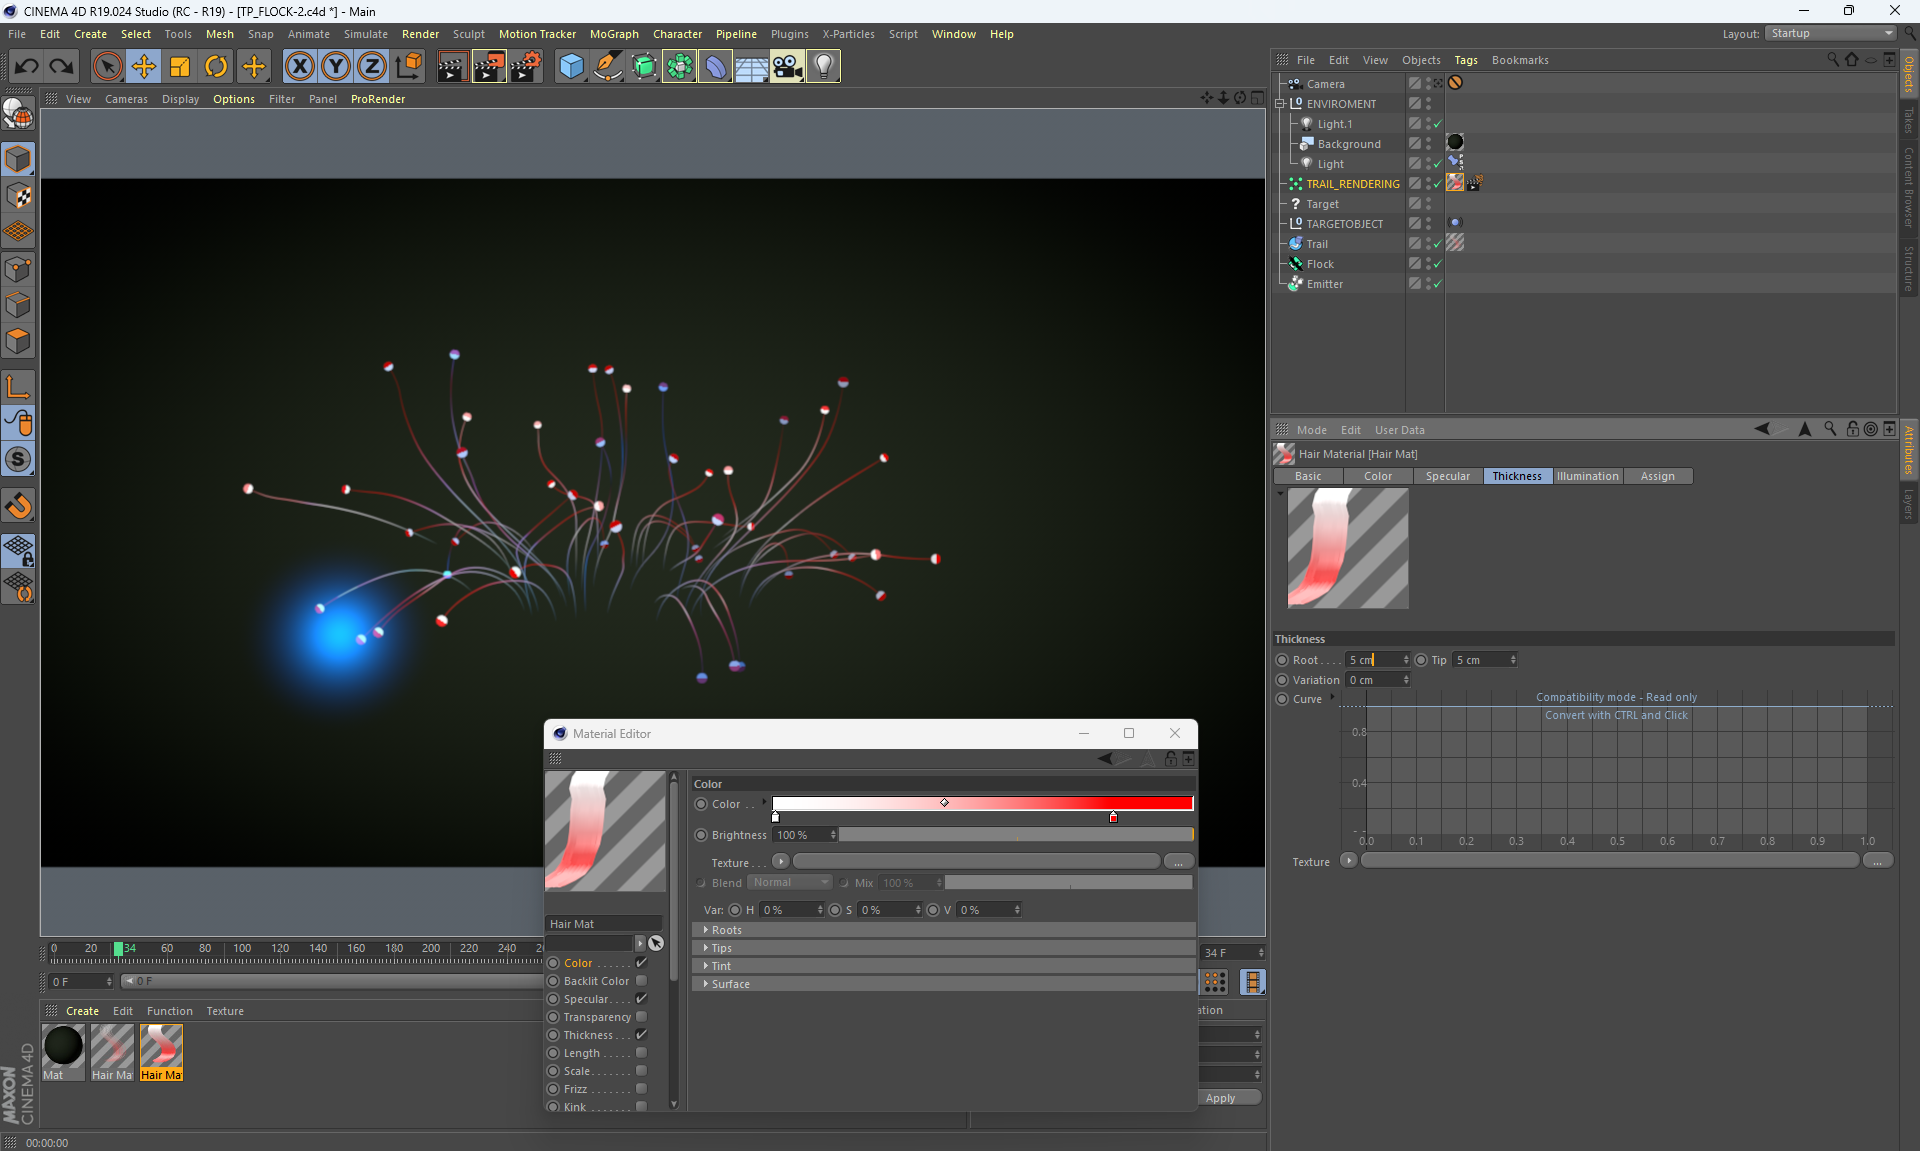
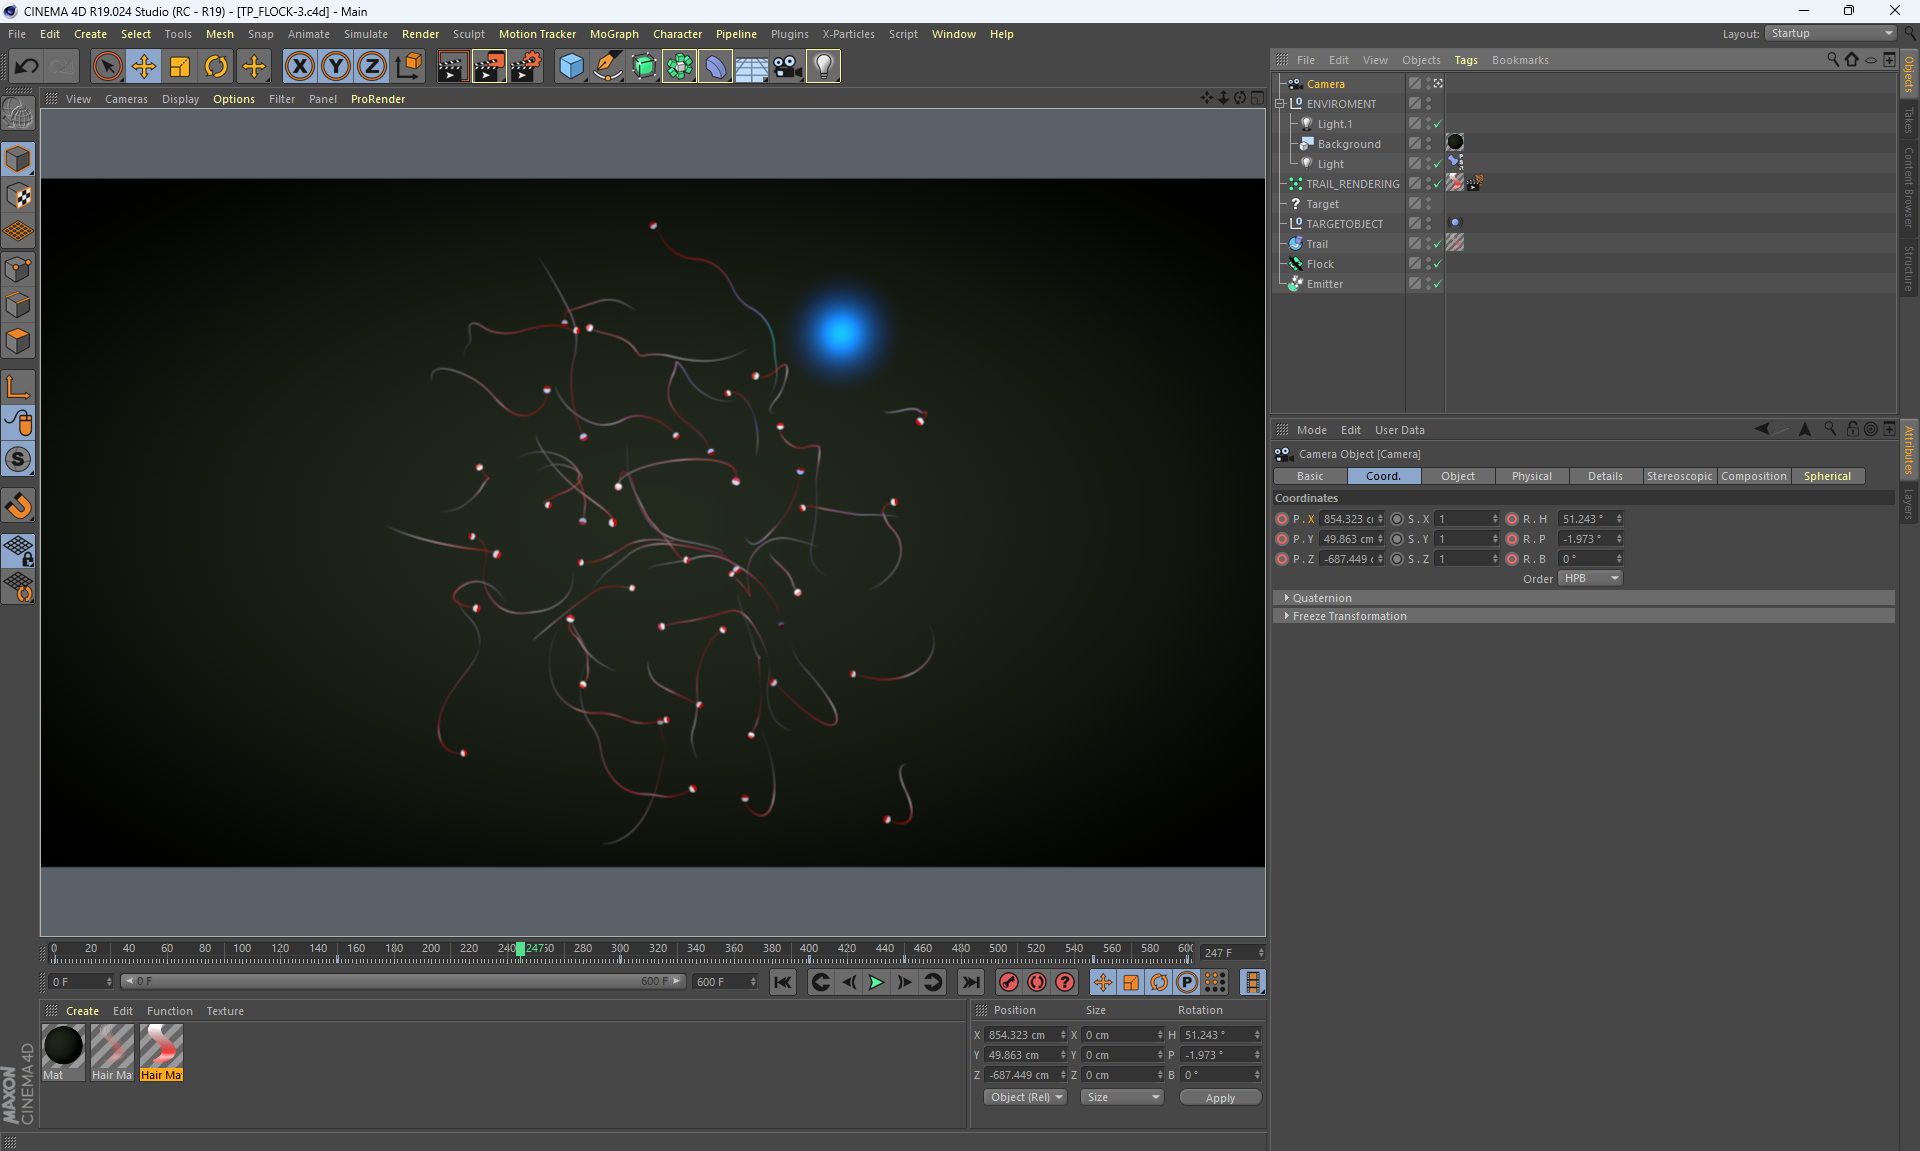
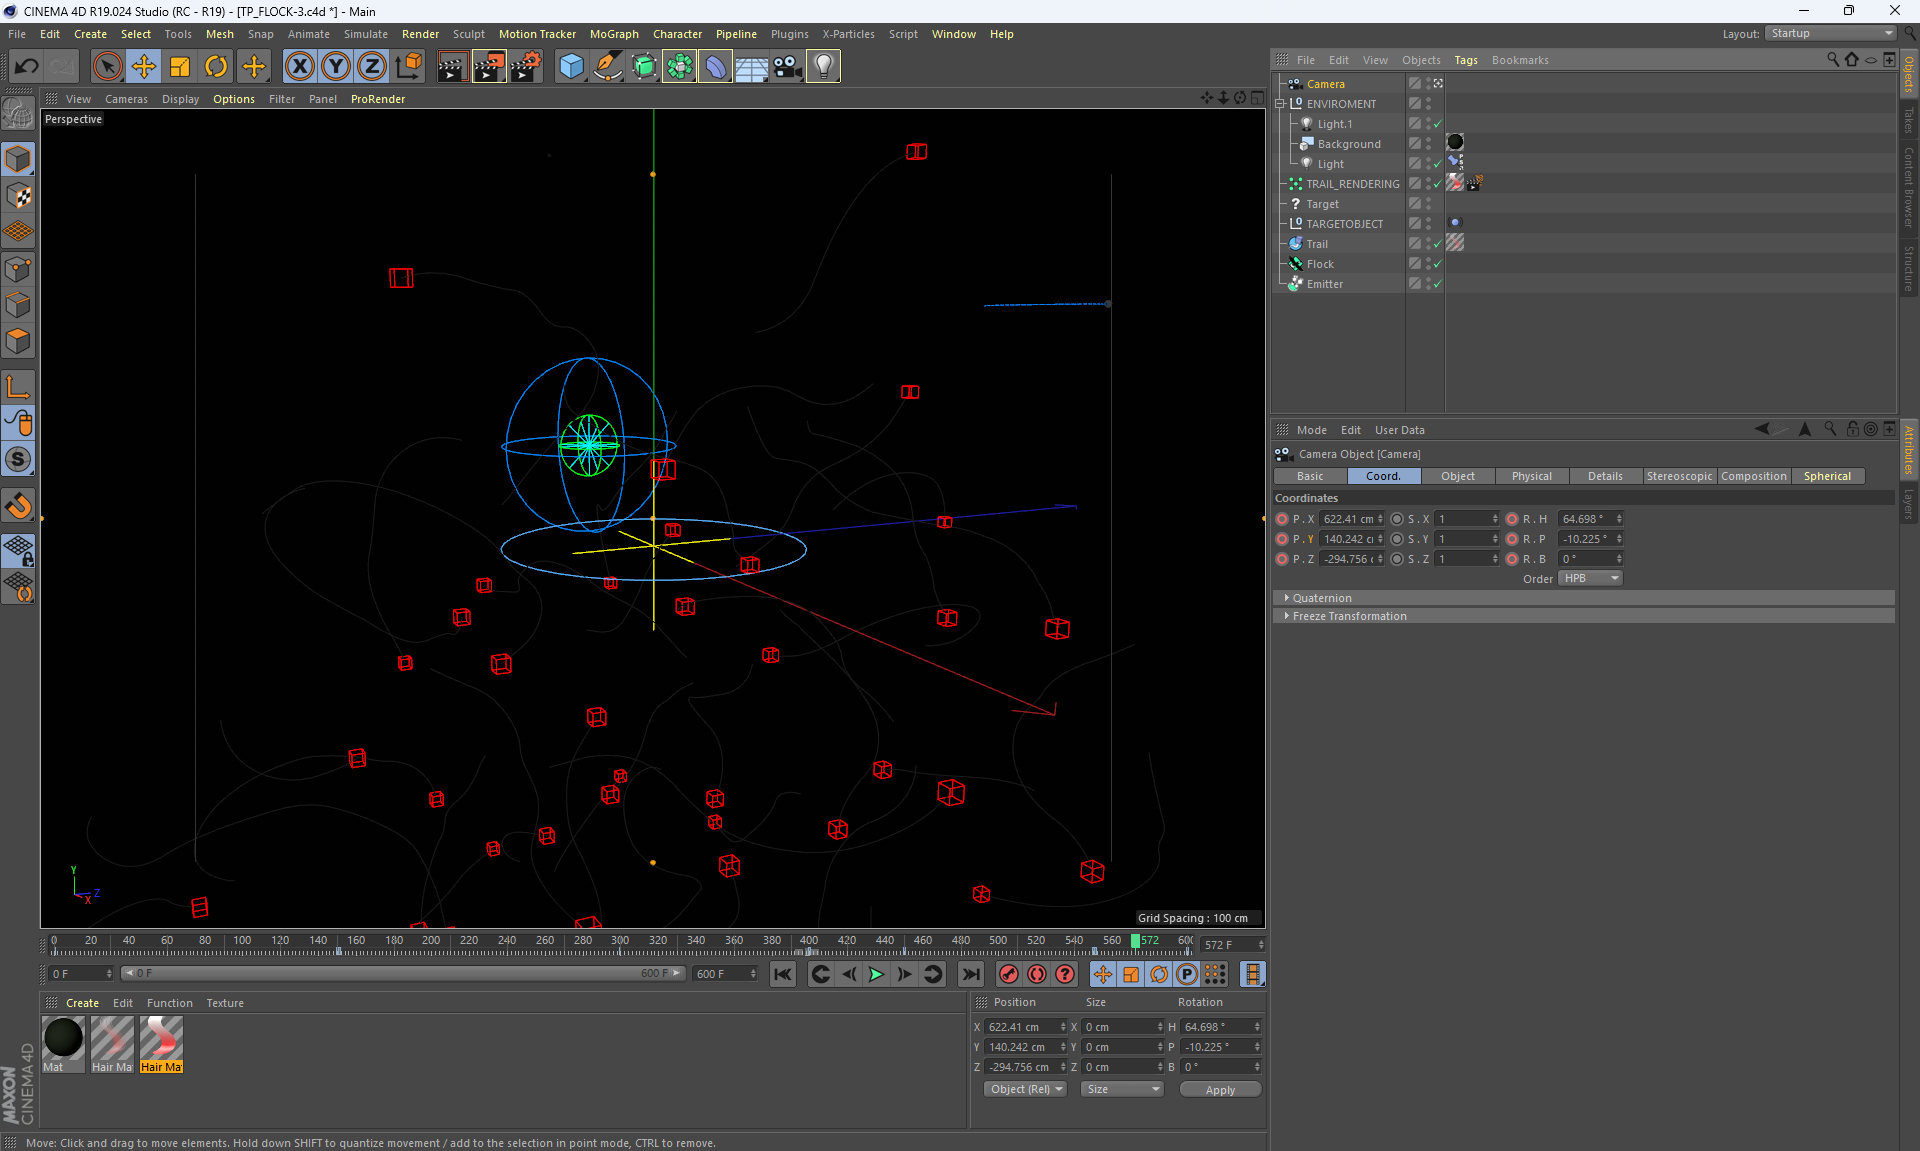
particles flock video (36.2mb)
particles flock image1
particles flock image2
In the video, where the blue ball and particles move chaotically, leaving a trail behind them, the X-Particles animation was also out of sync.
In Cinema 4D, the particle animation was different in the editing window and during rendering, caching did not work.
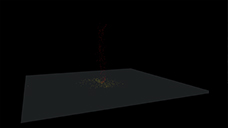
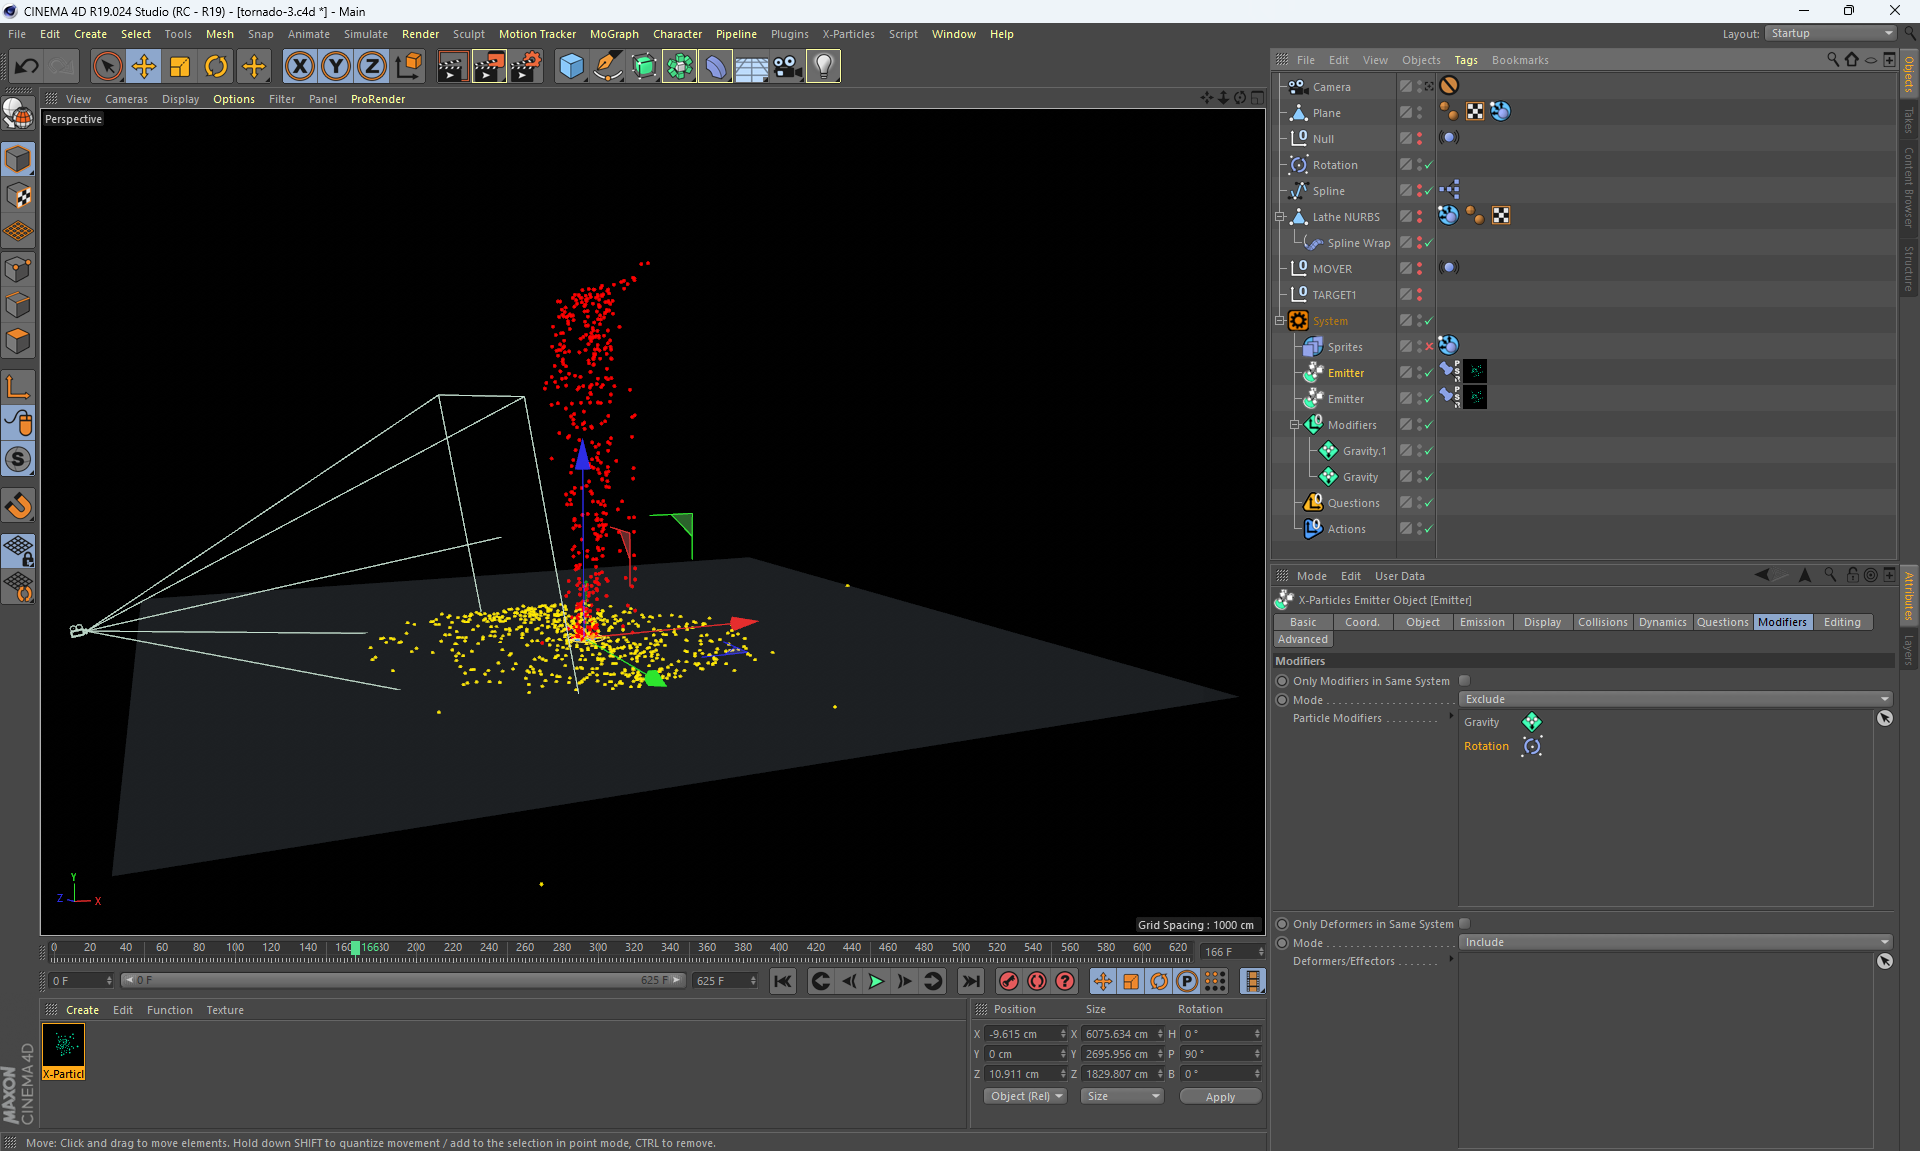
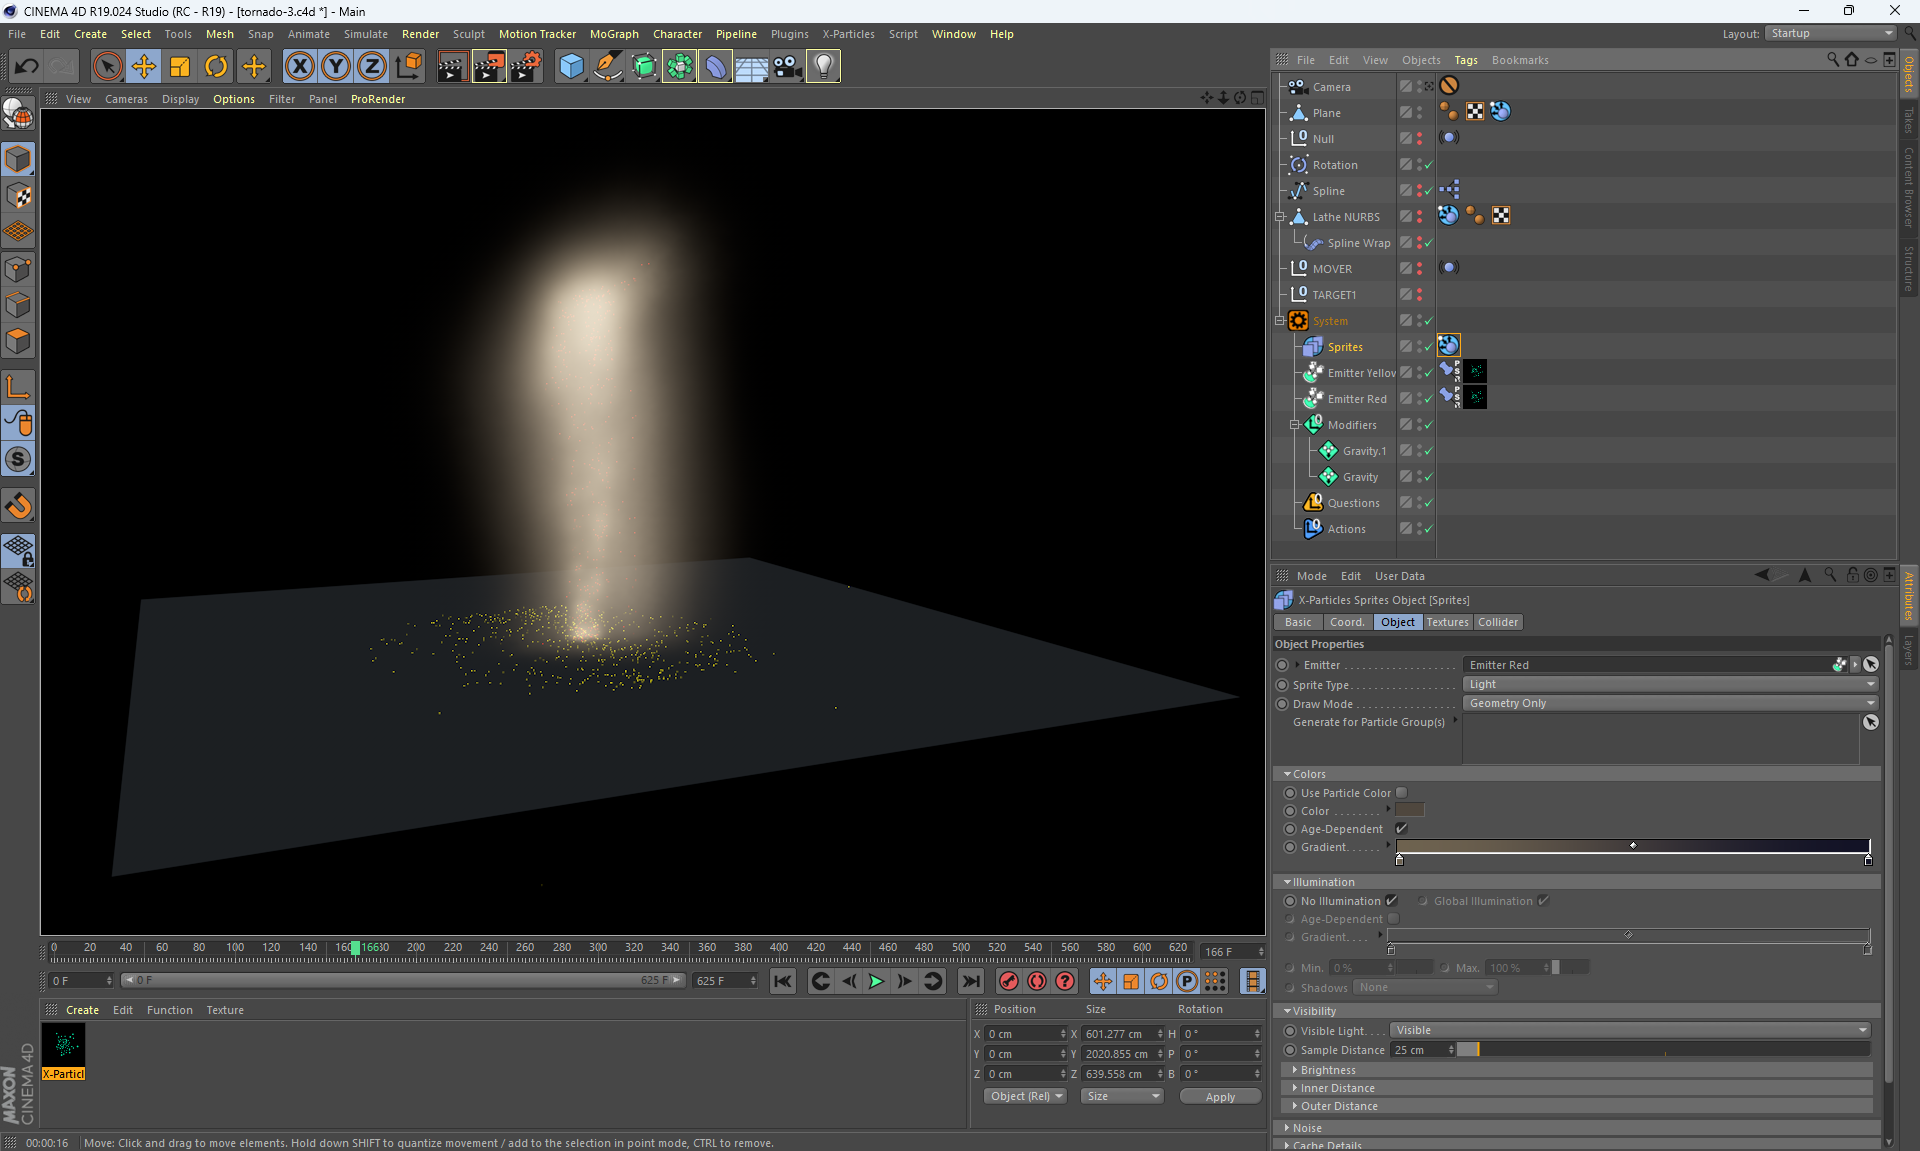
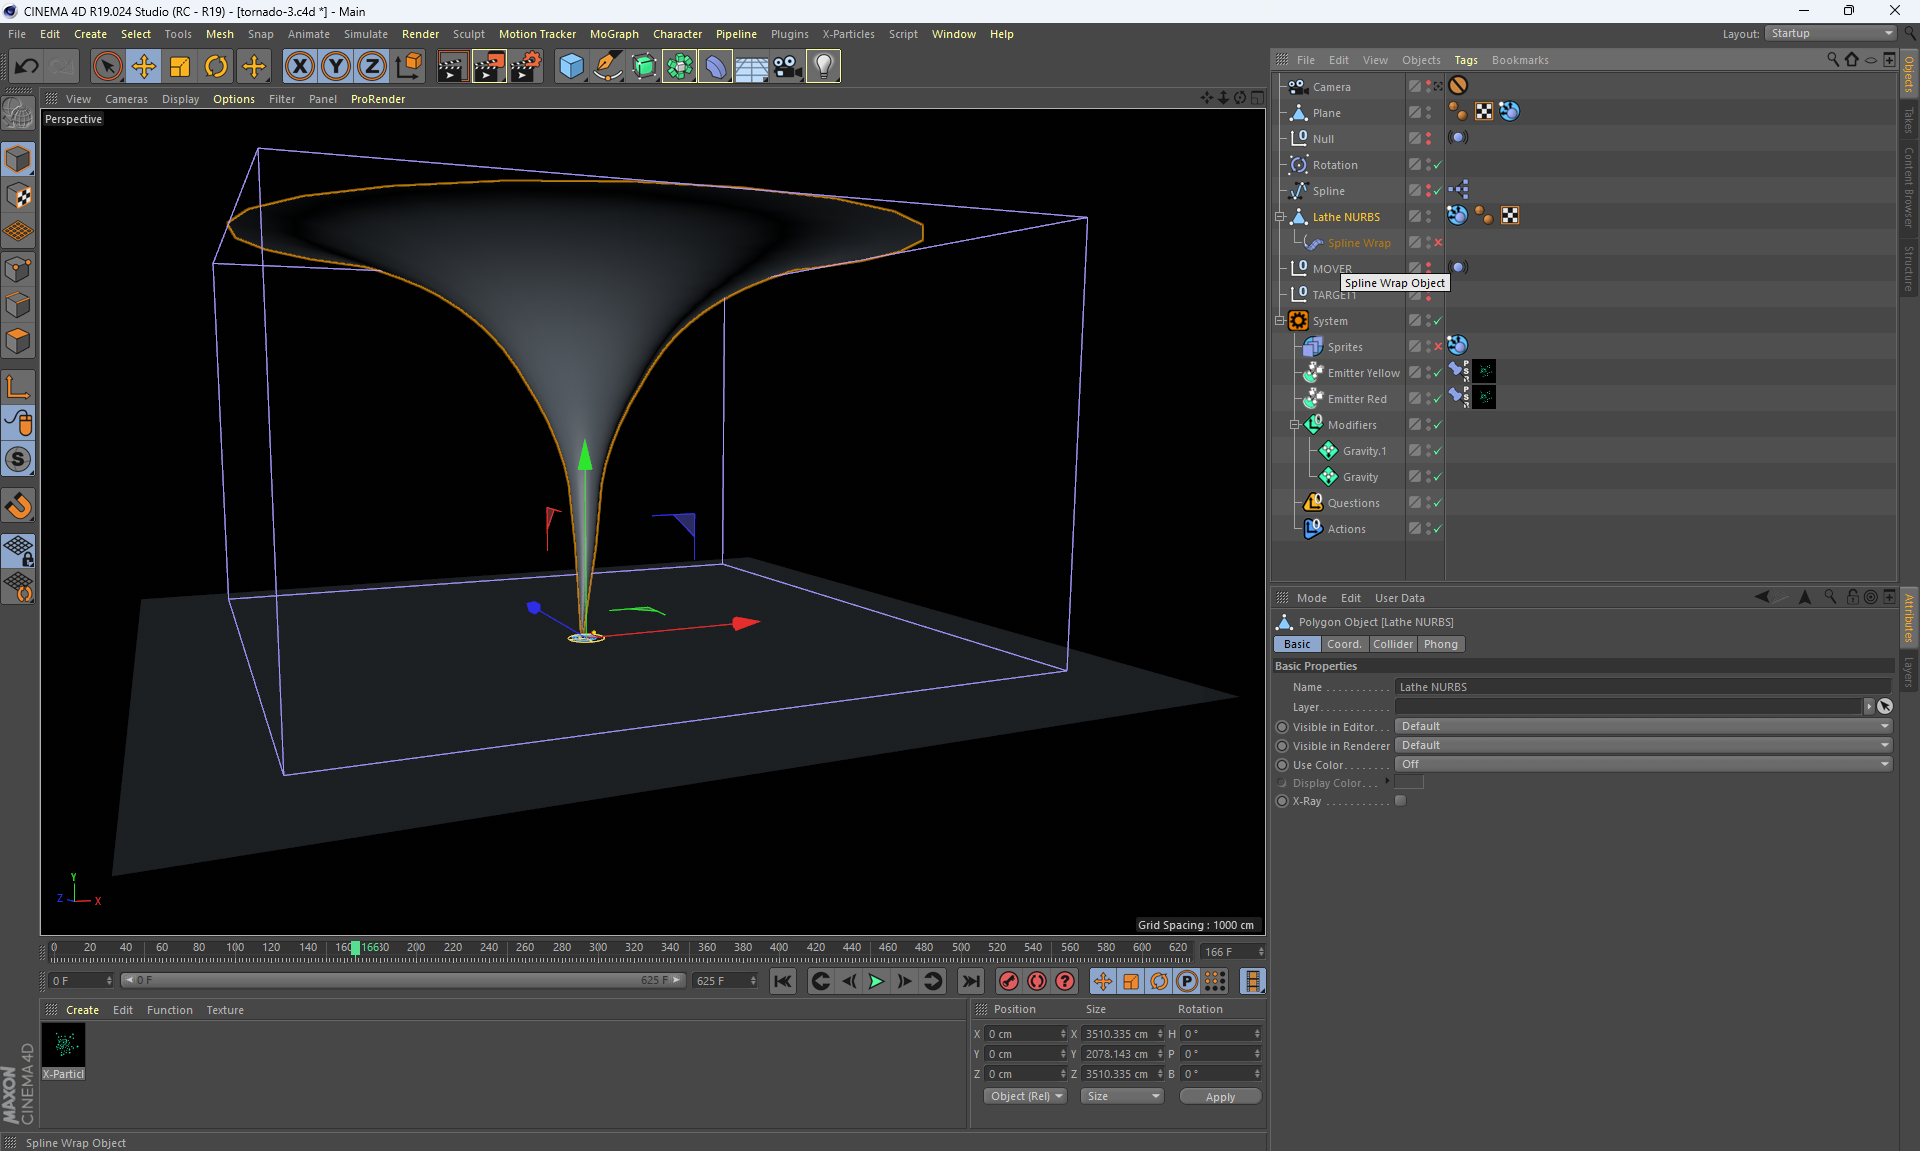
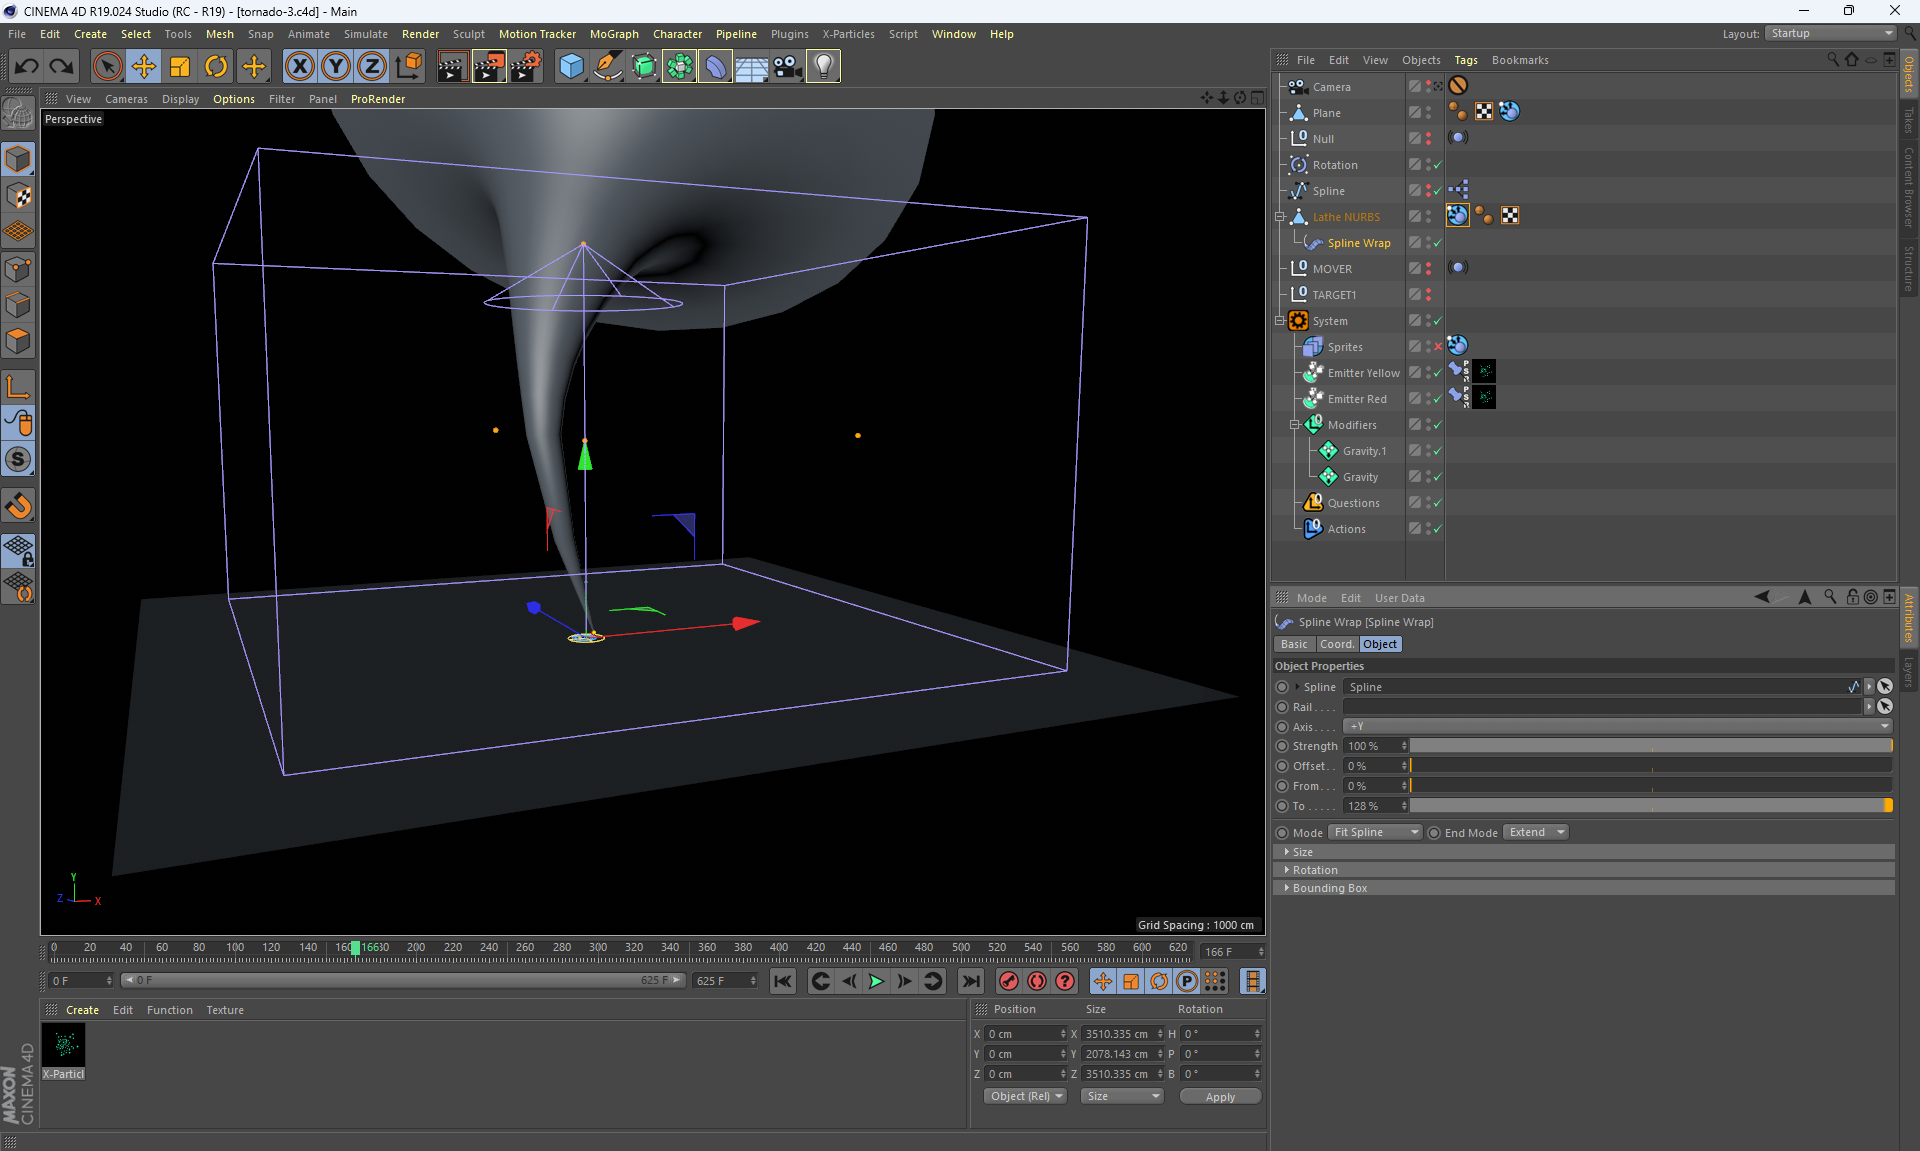
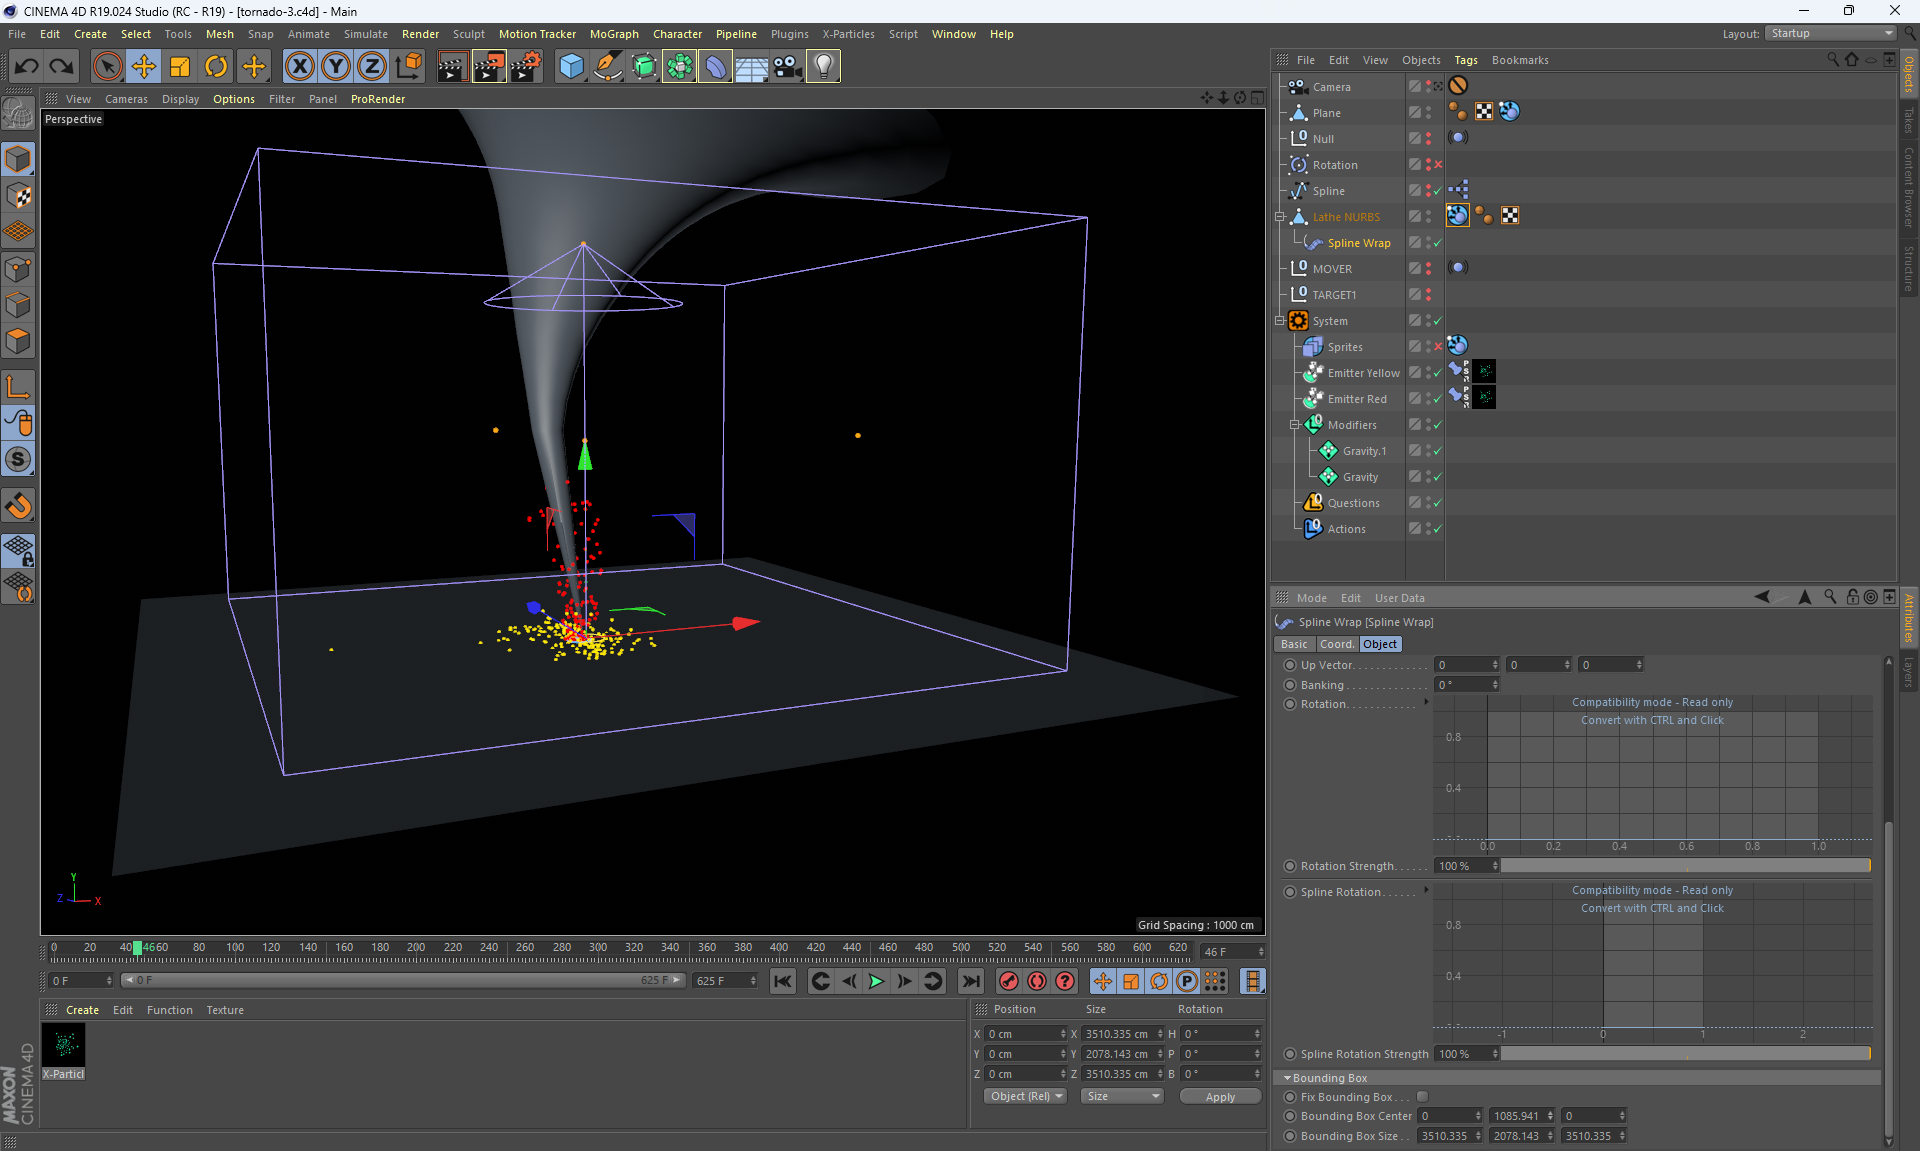
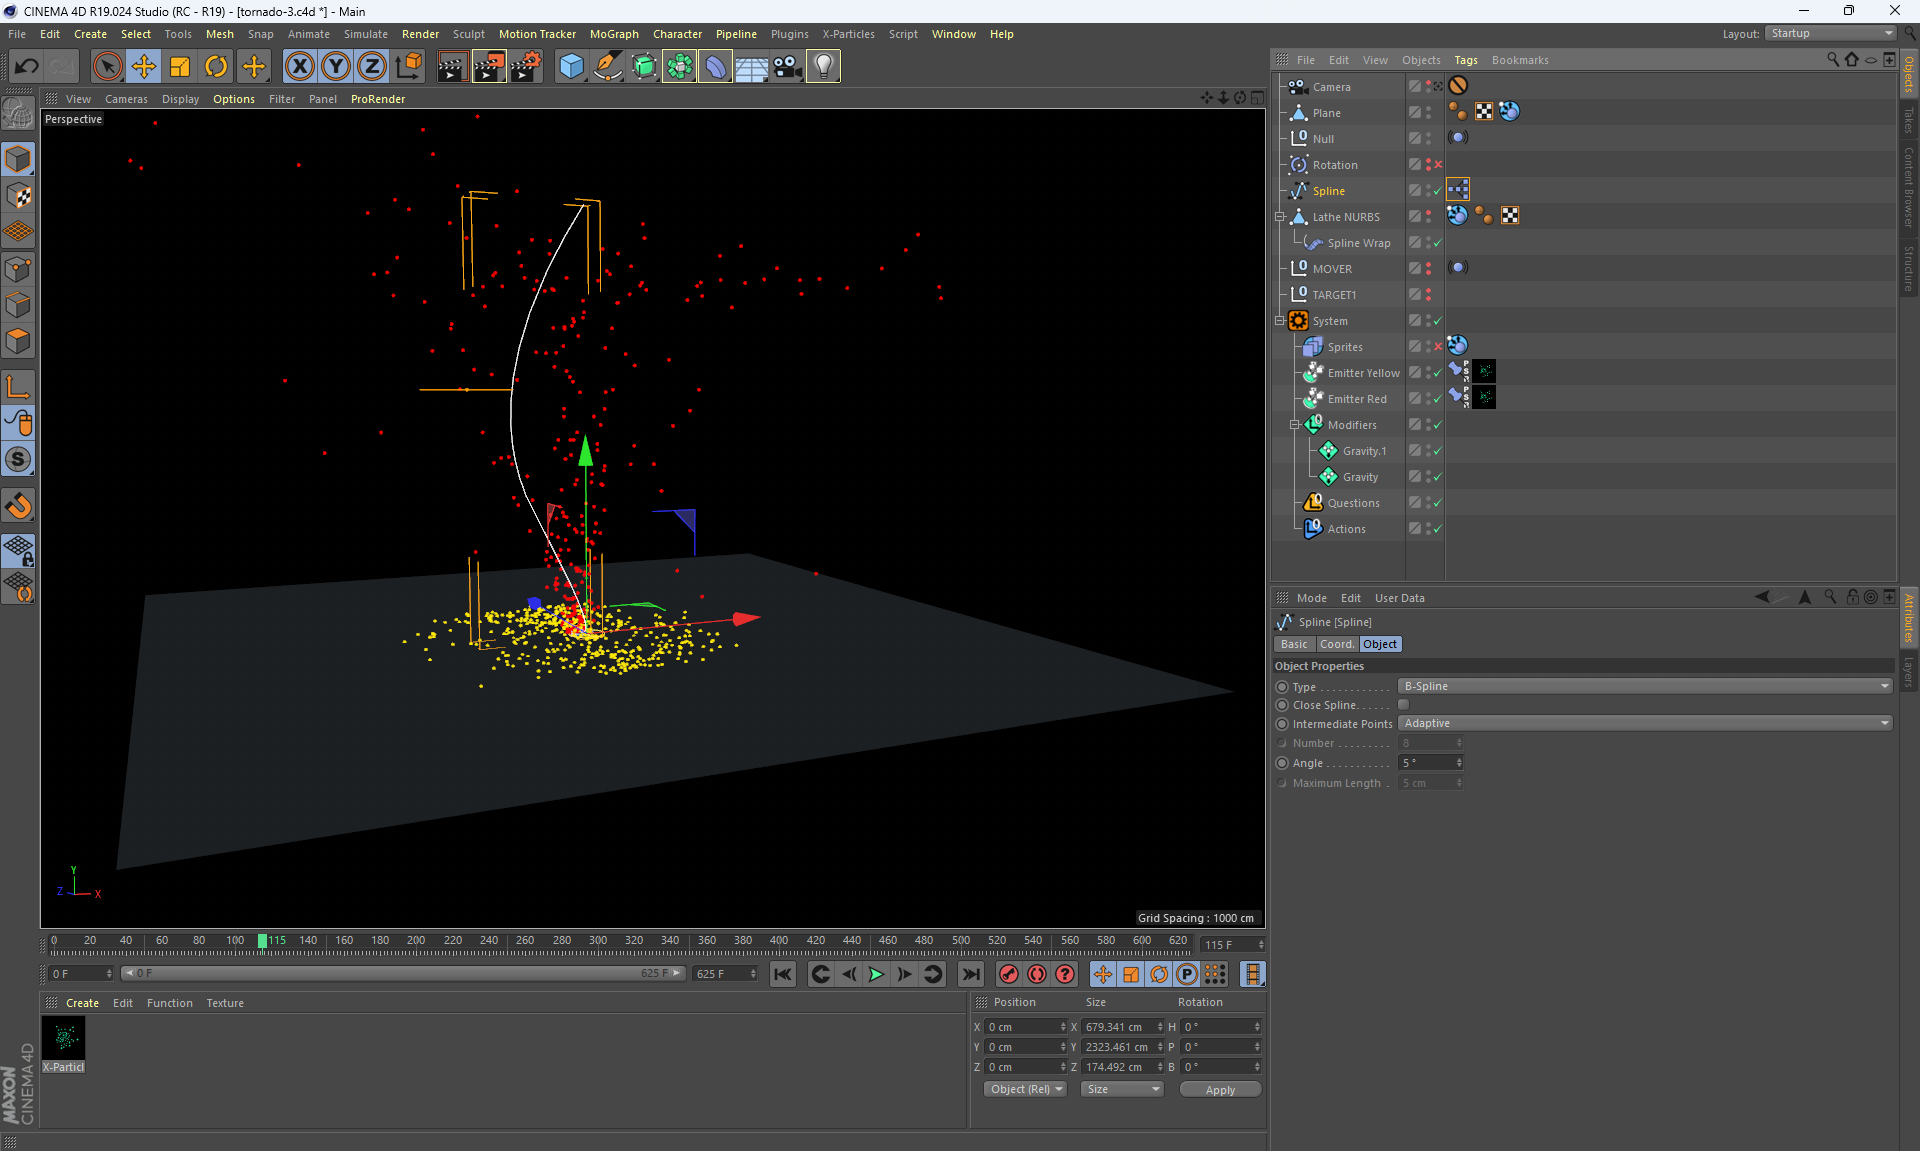
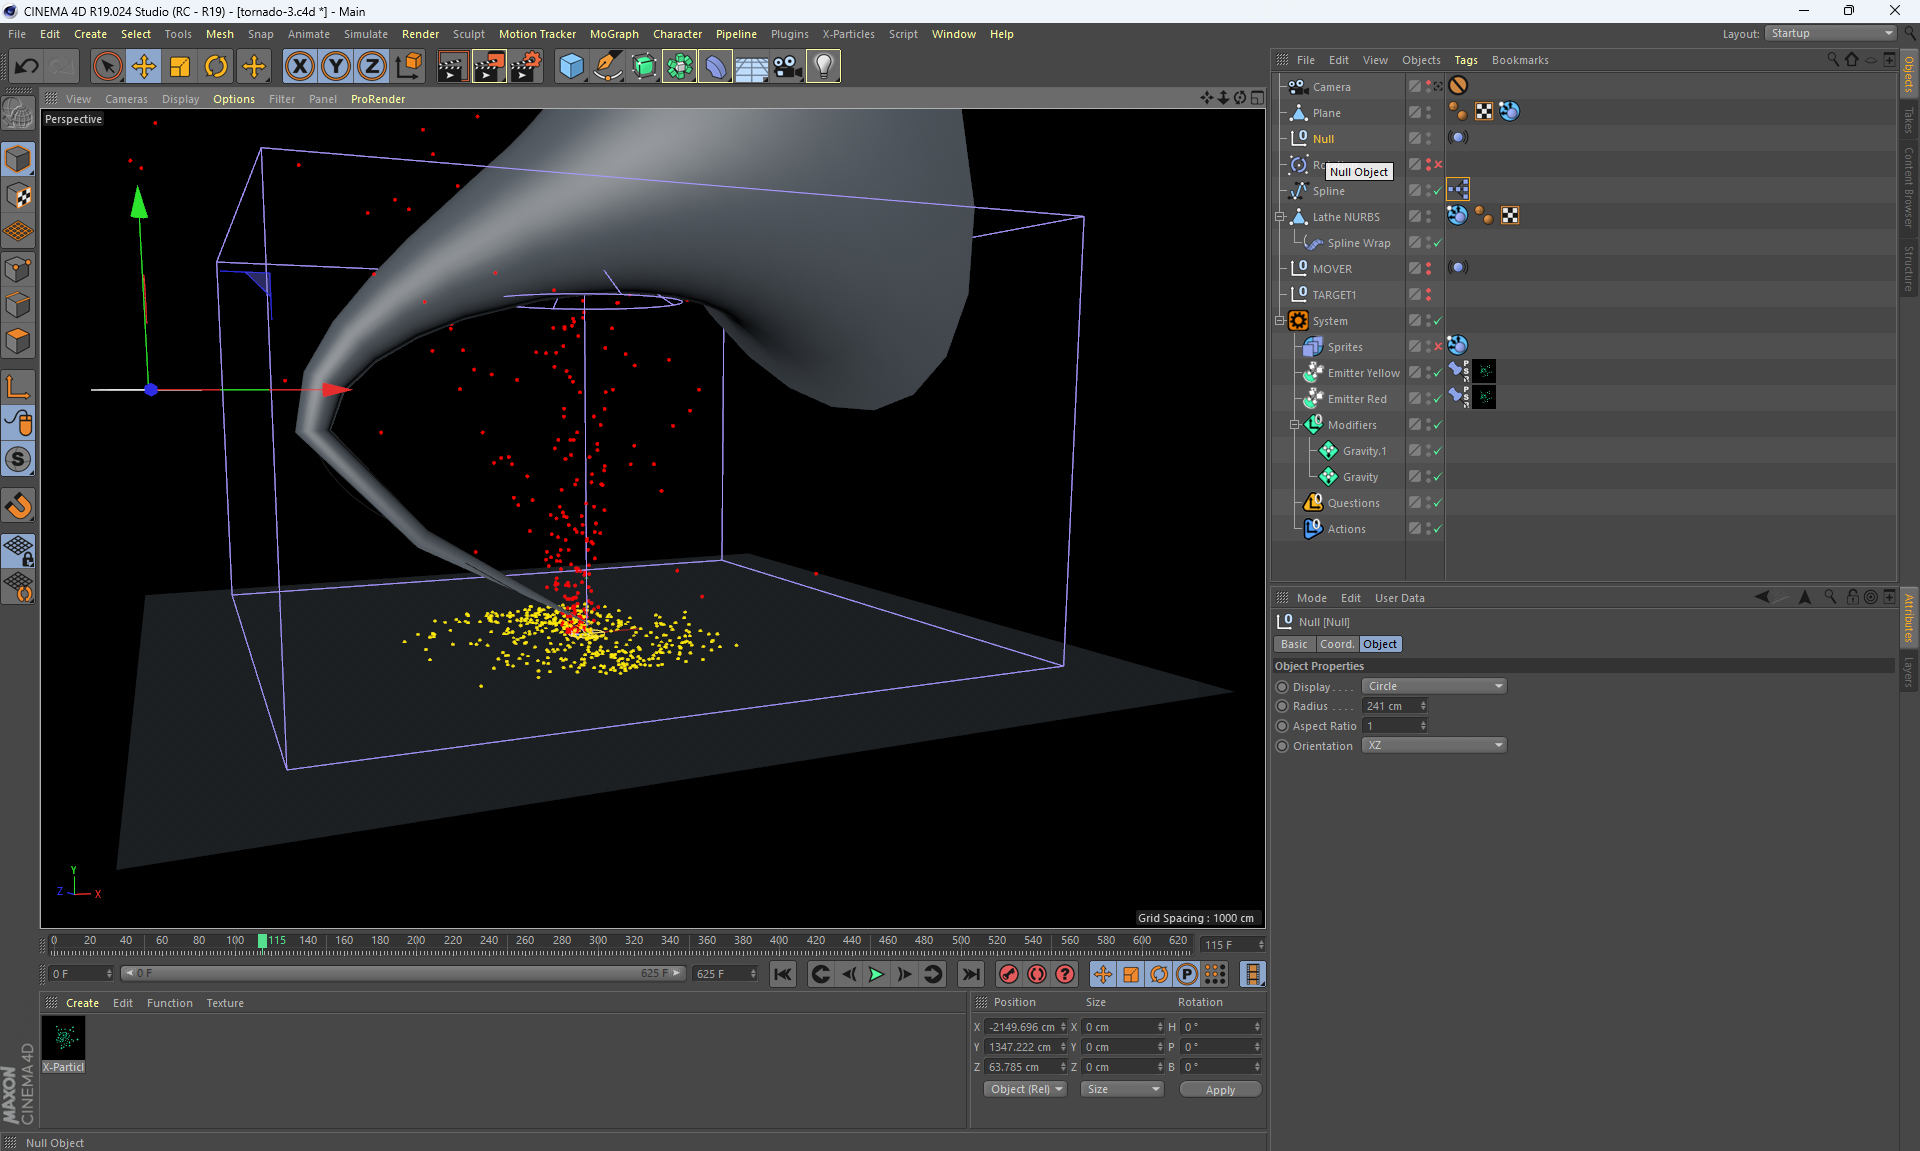
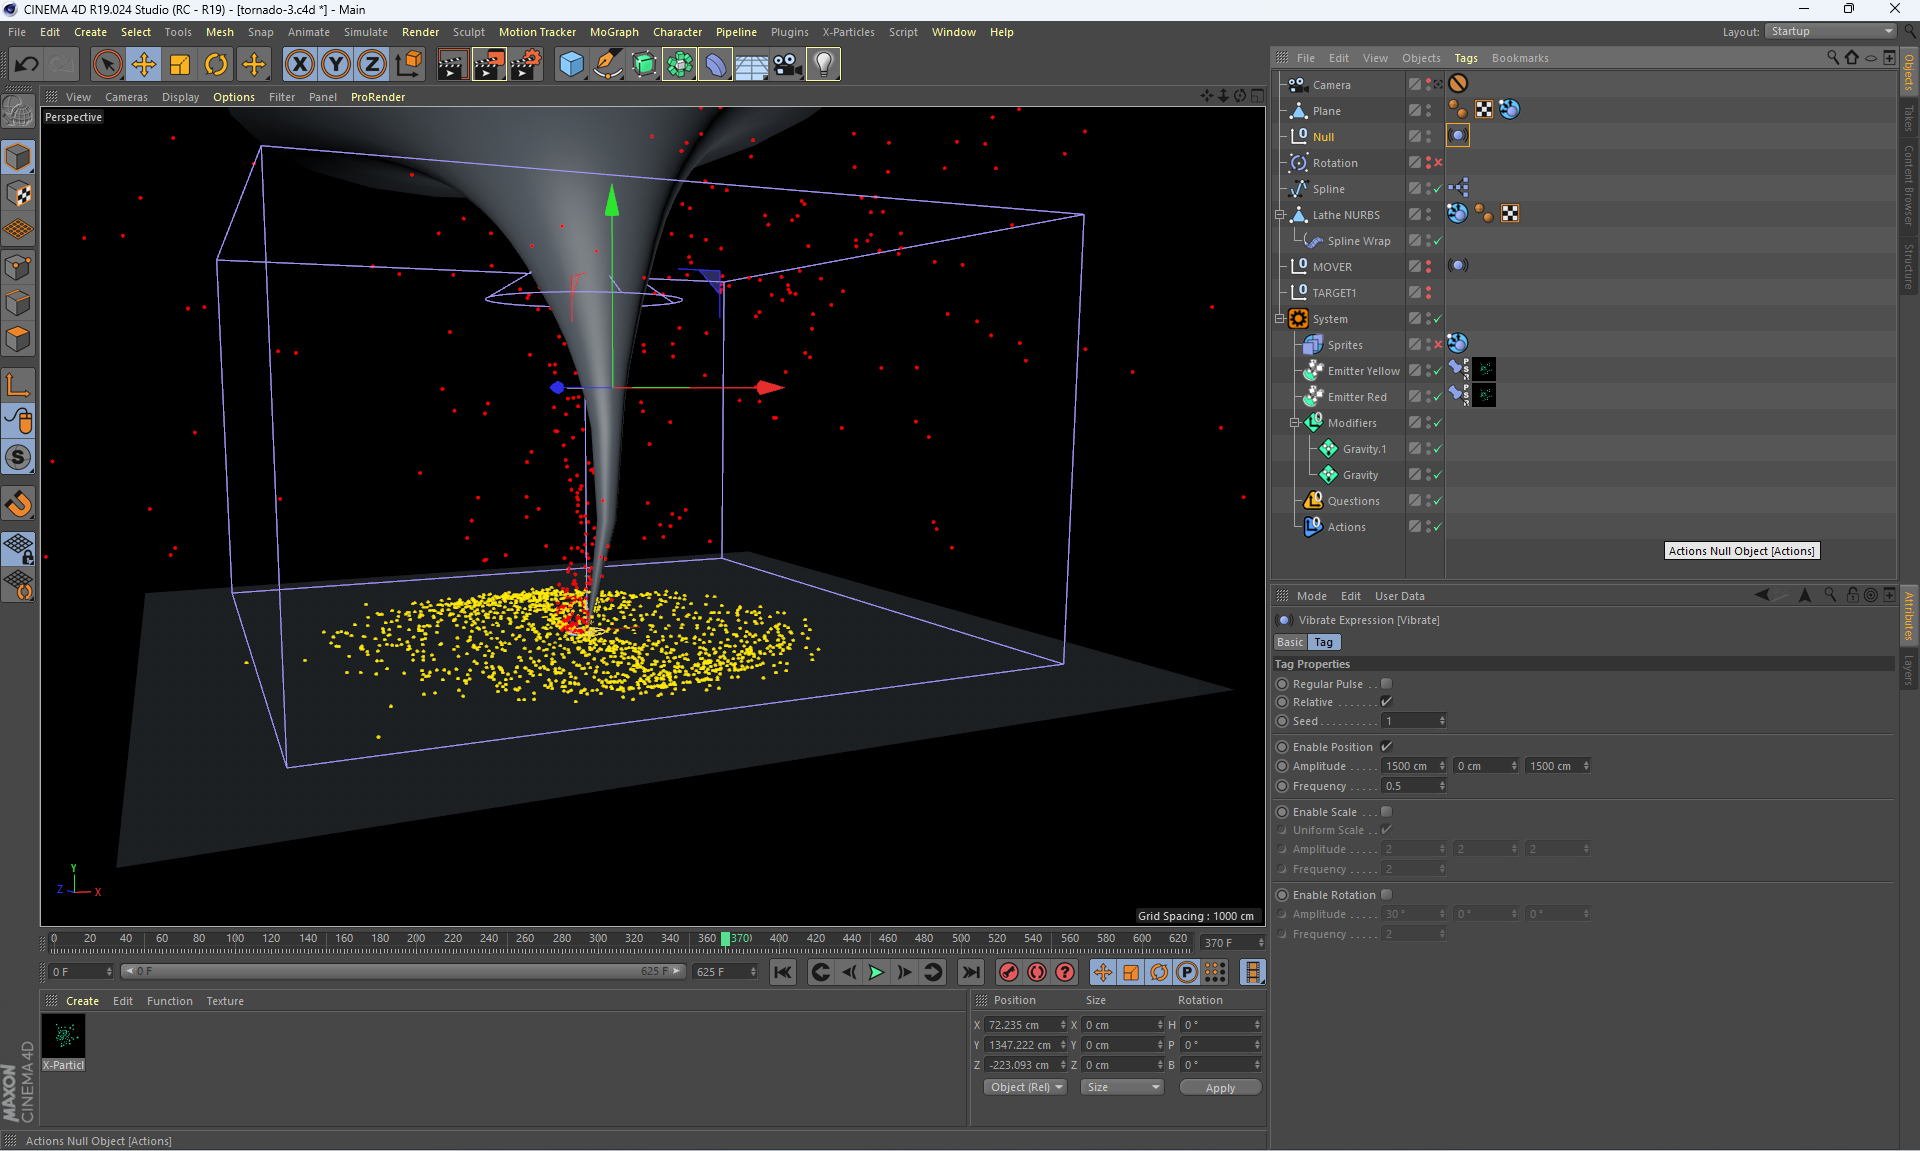
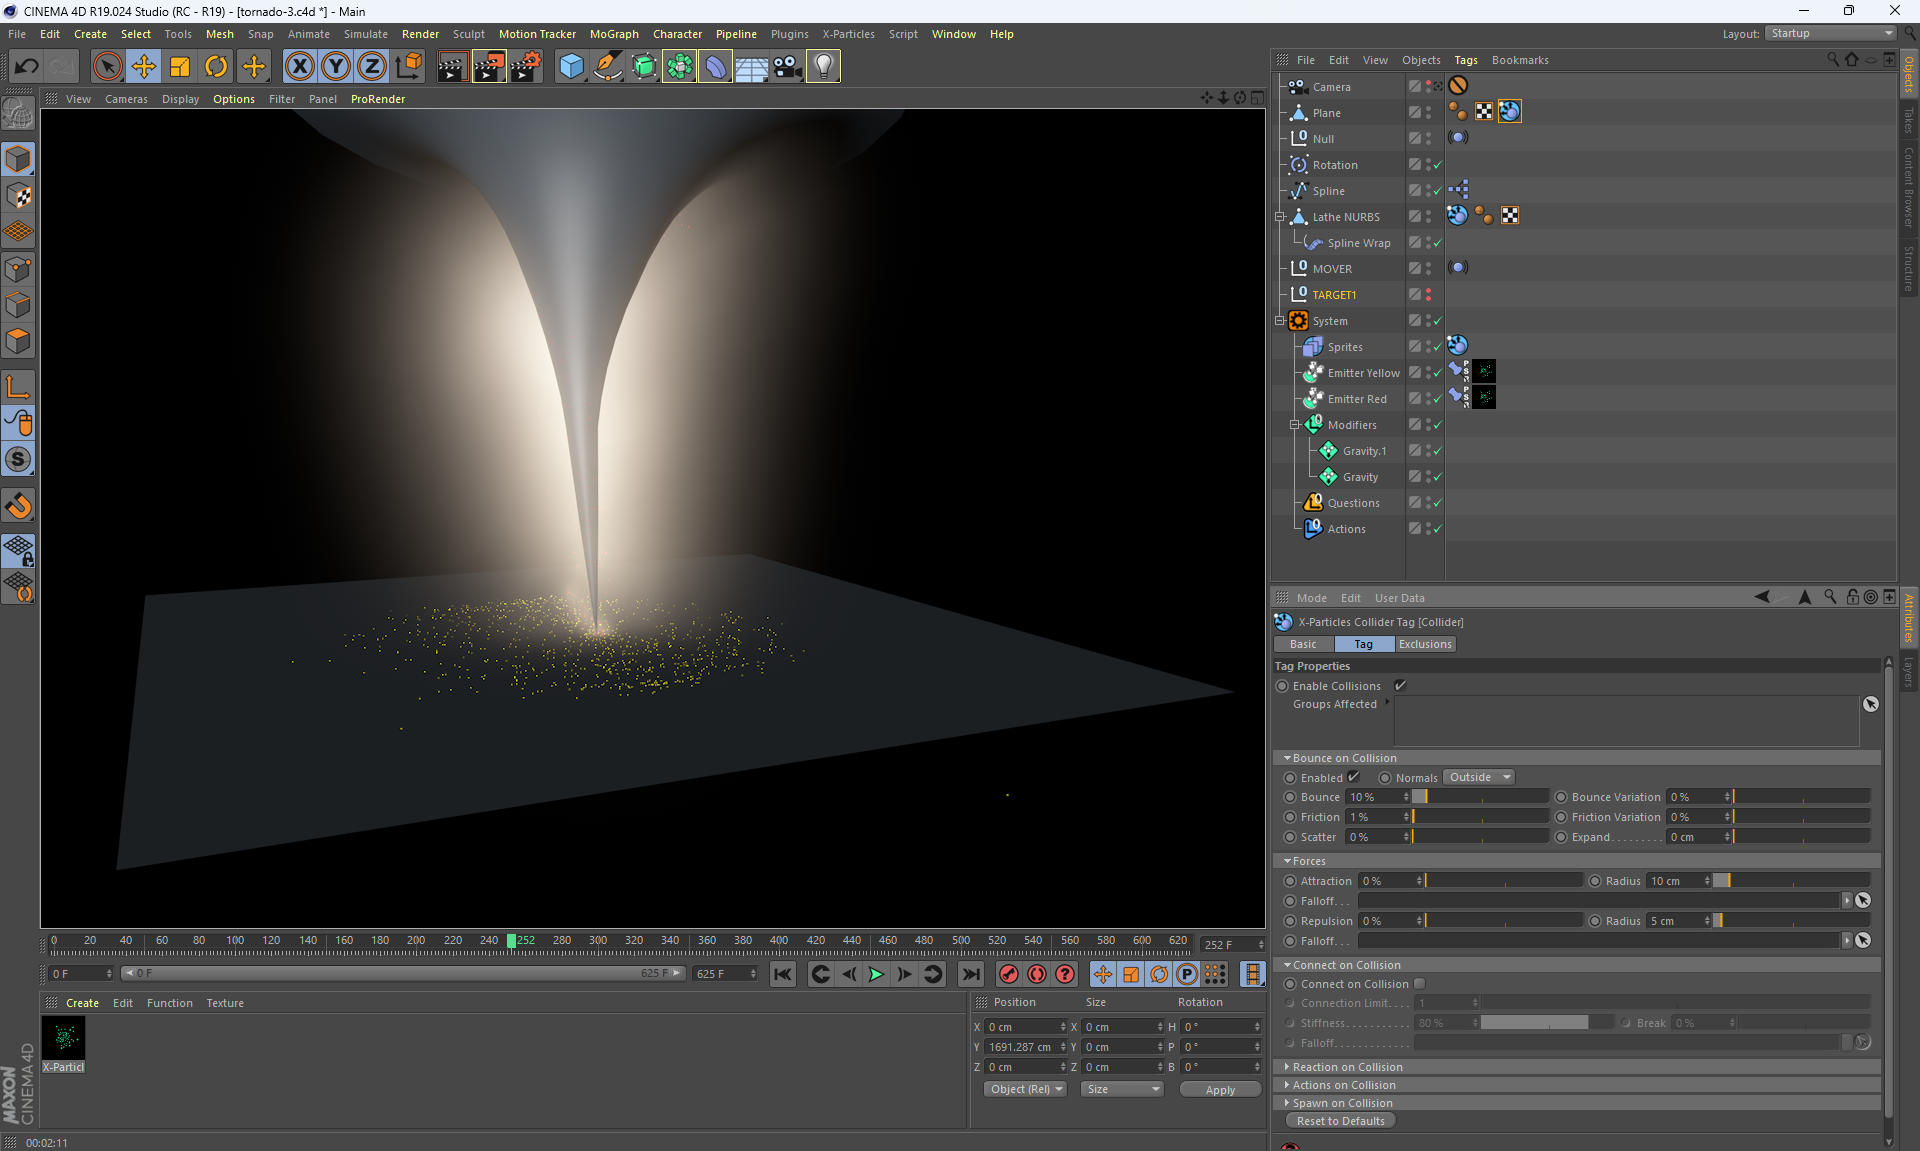
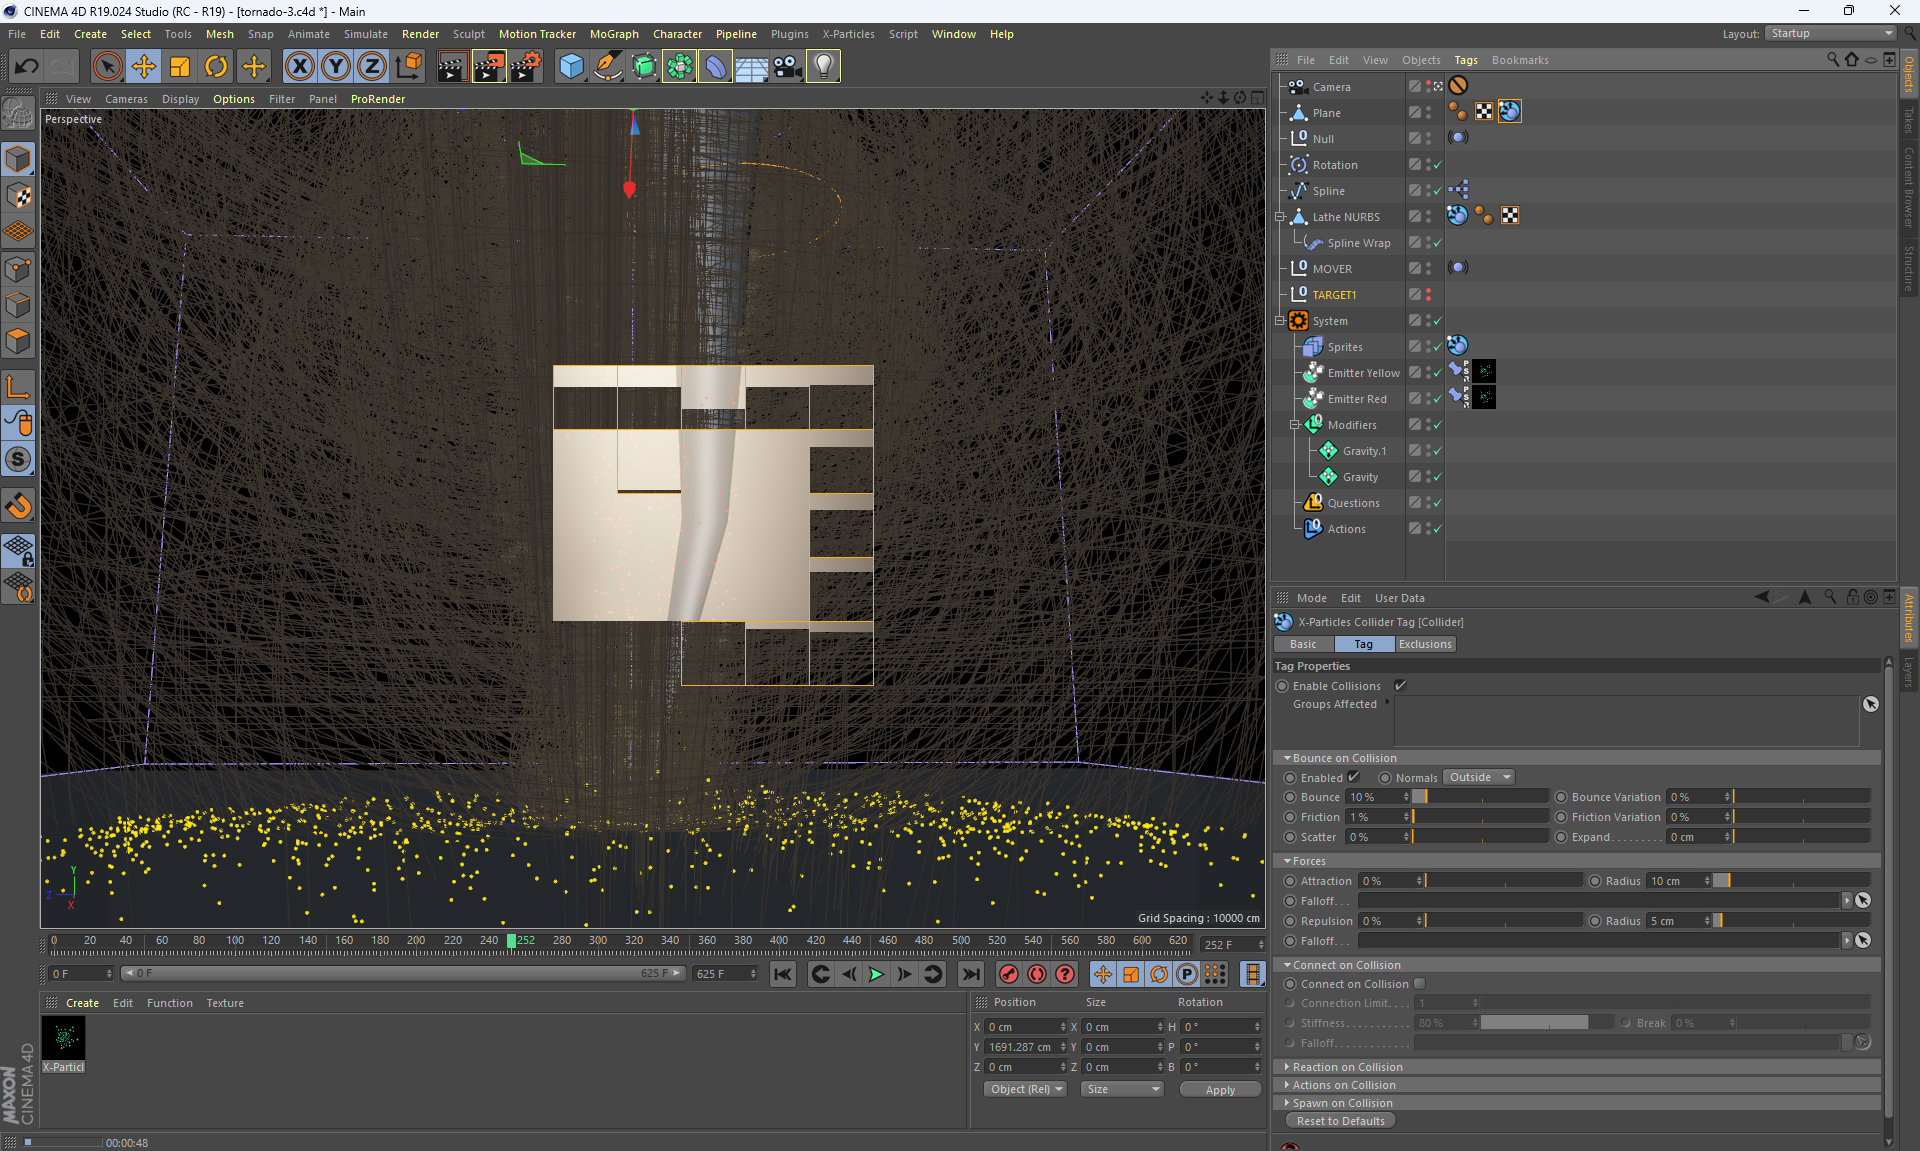
Tornado video1 (7.2mb)
tornado image
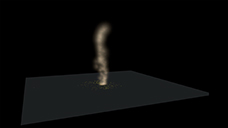
tornado video2 (19.1mb)
tornado image2
tornado video3 (2.8mb)
tornado image3
tornado video4 (19.6mb)
tornado image4
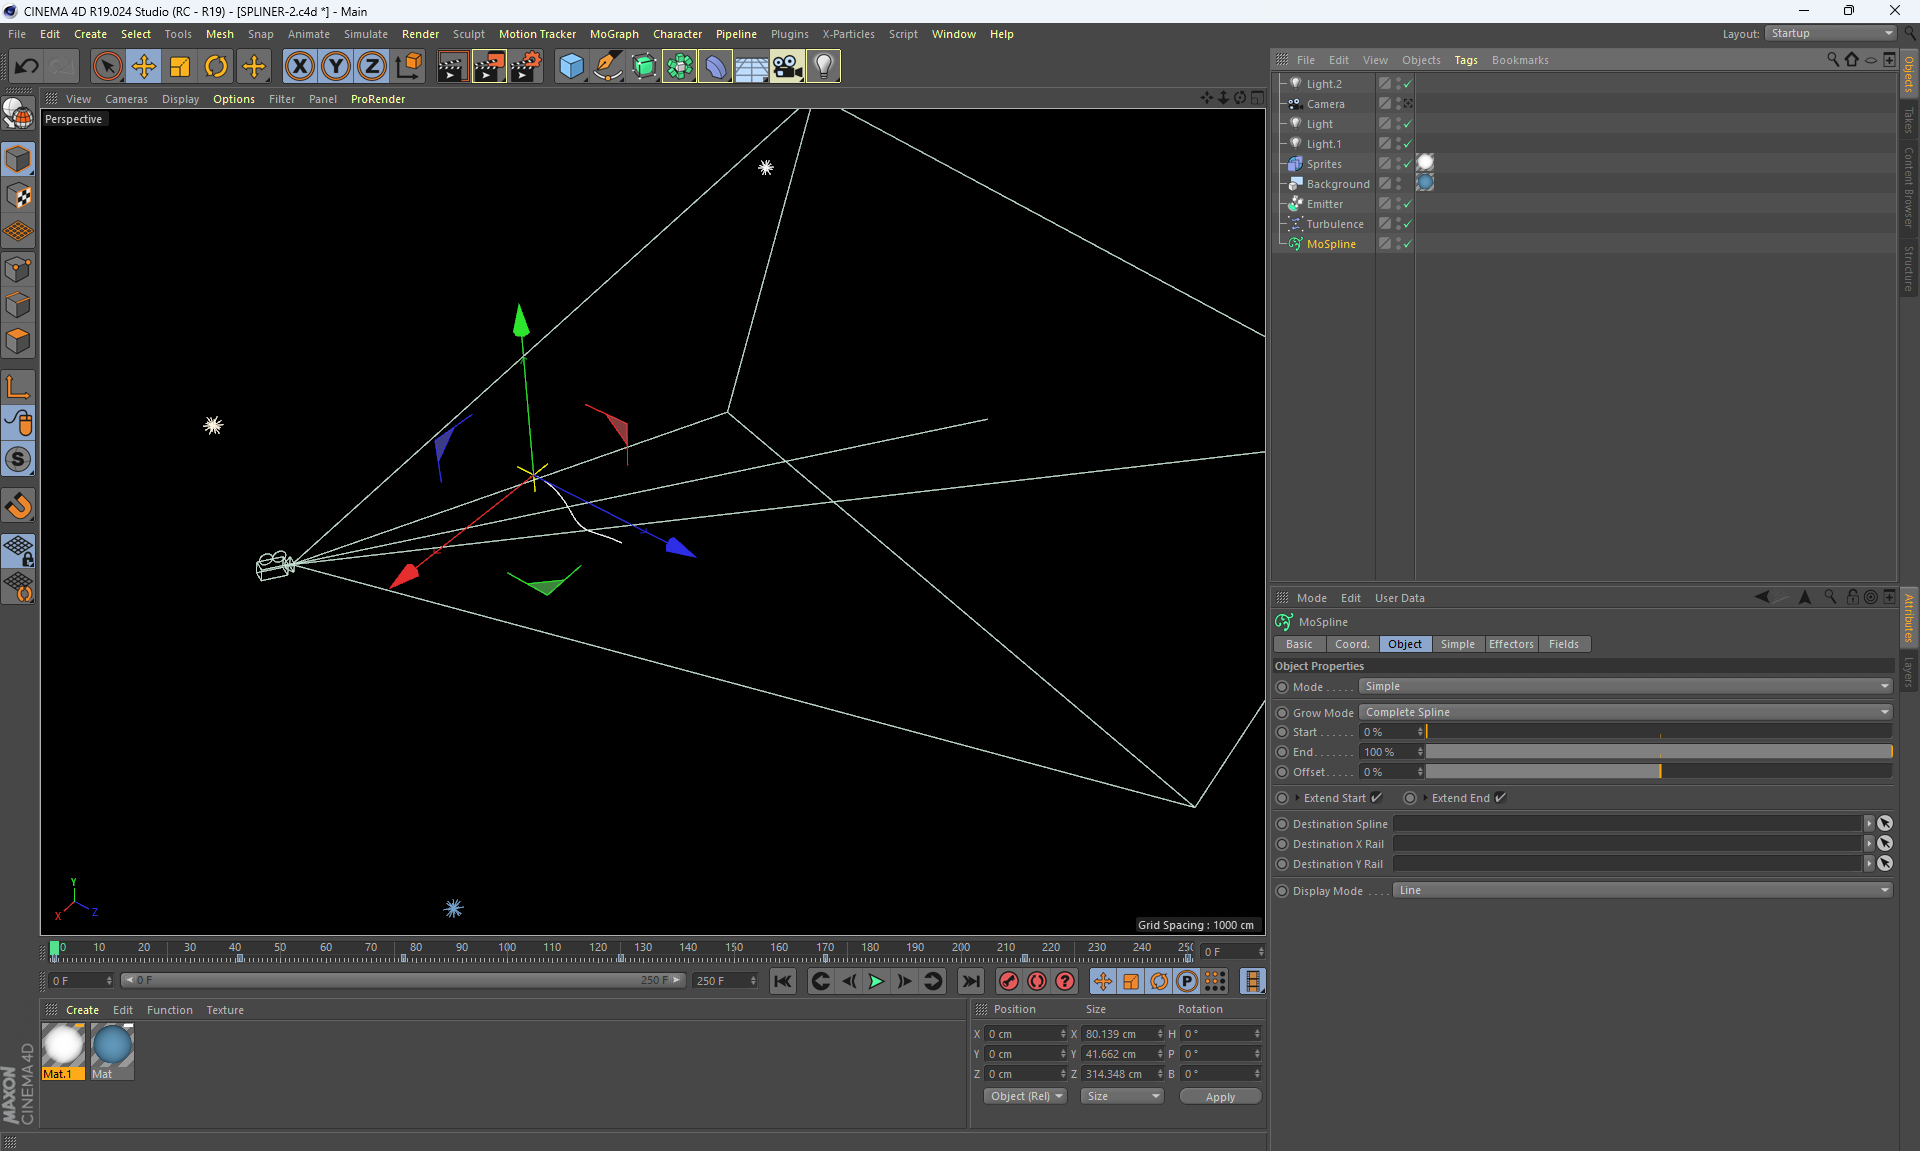
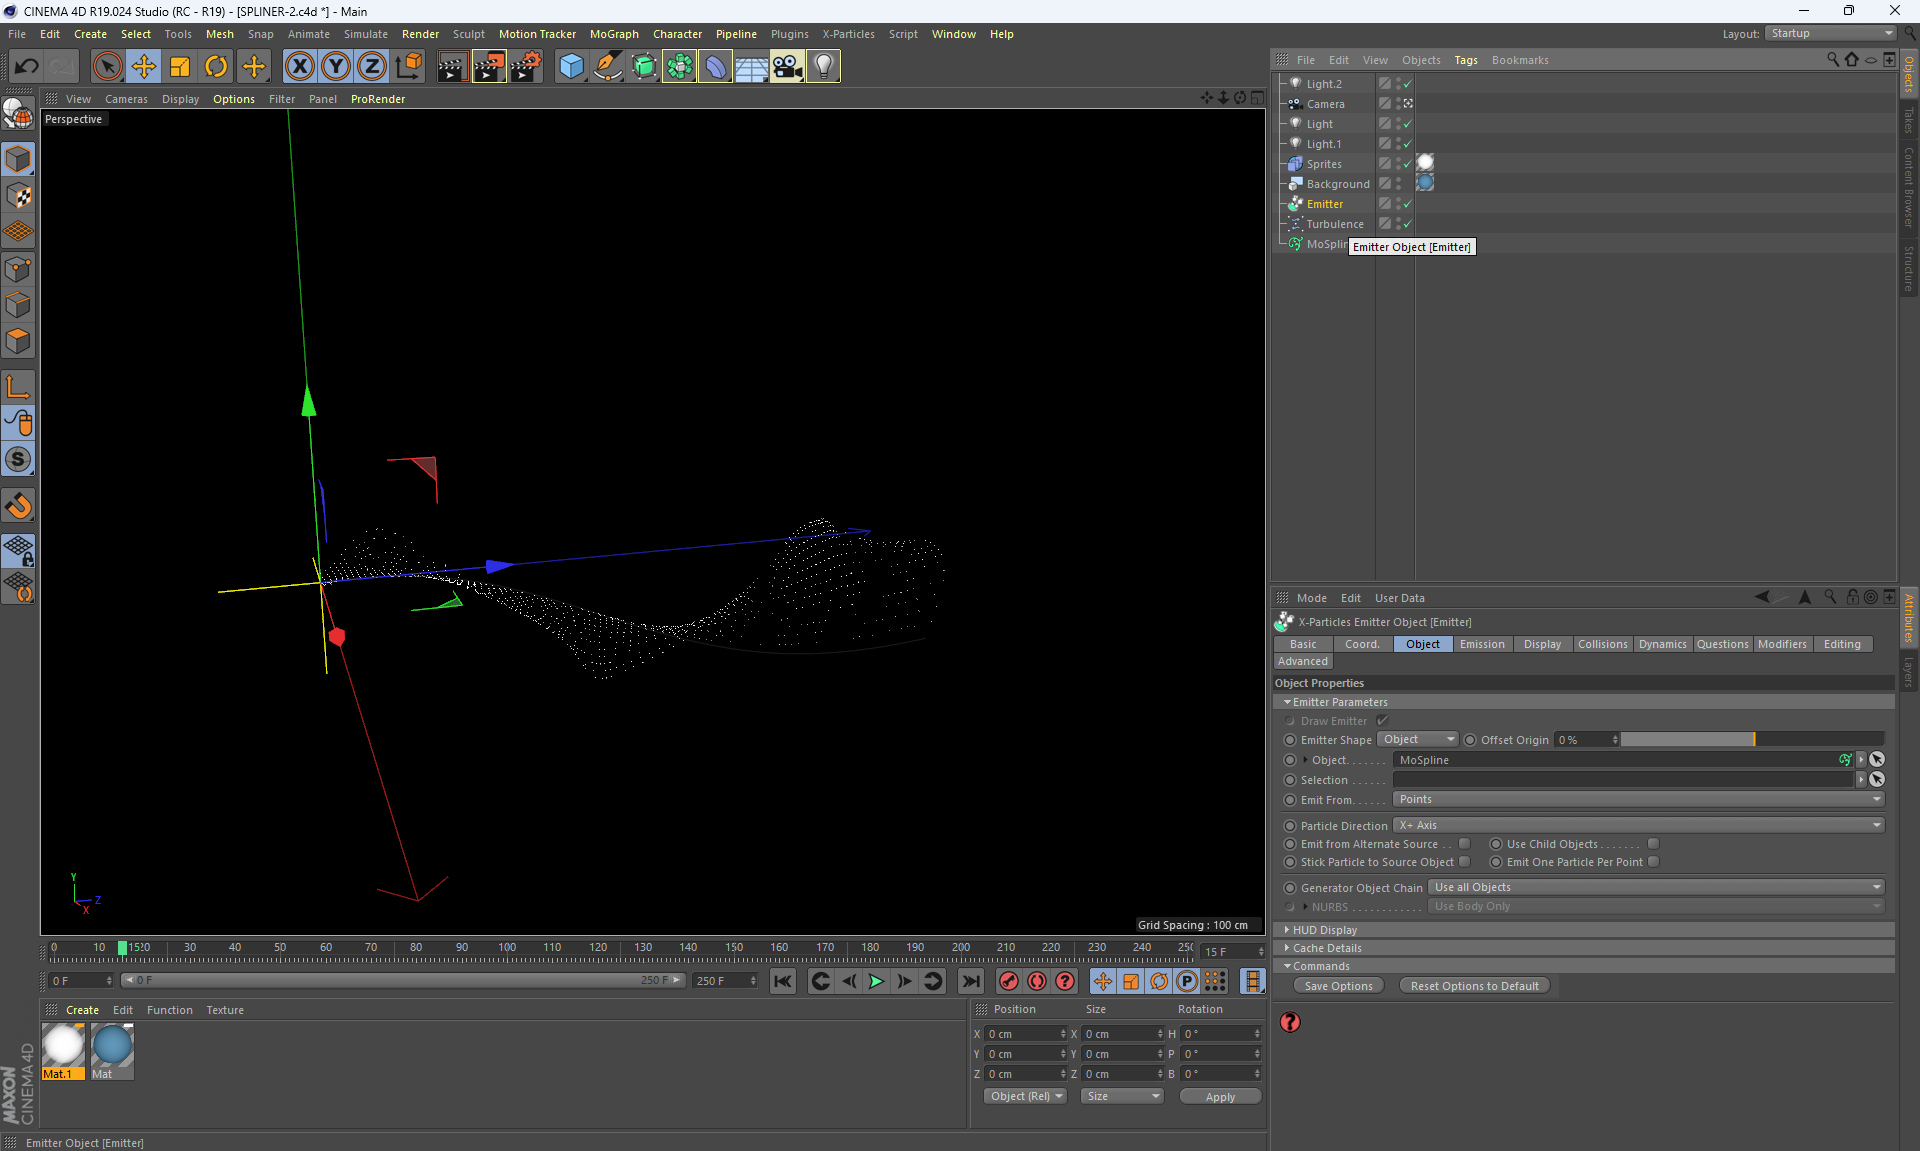
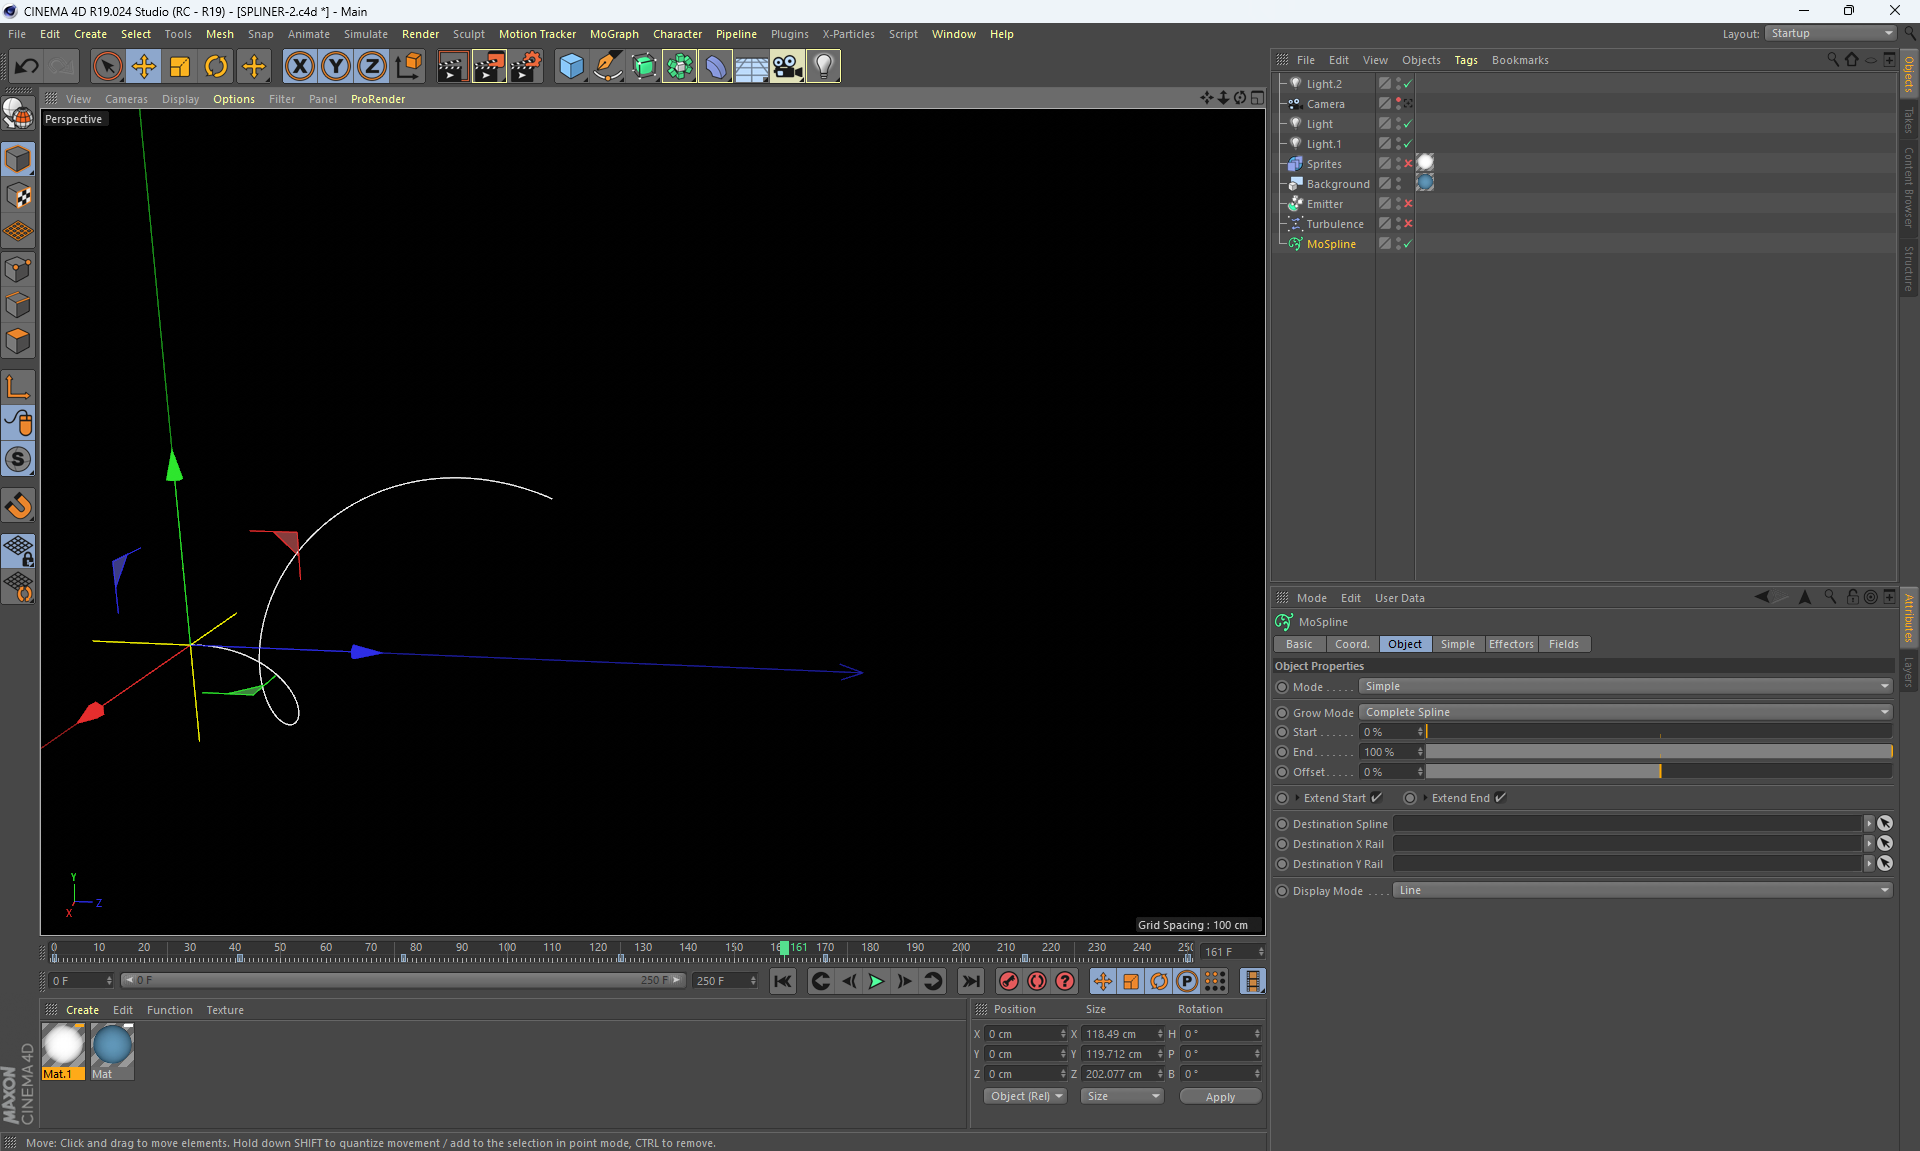
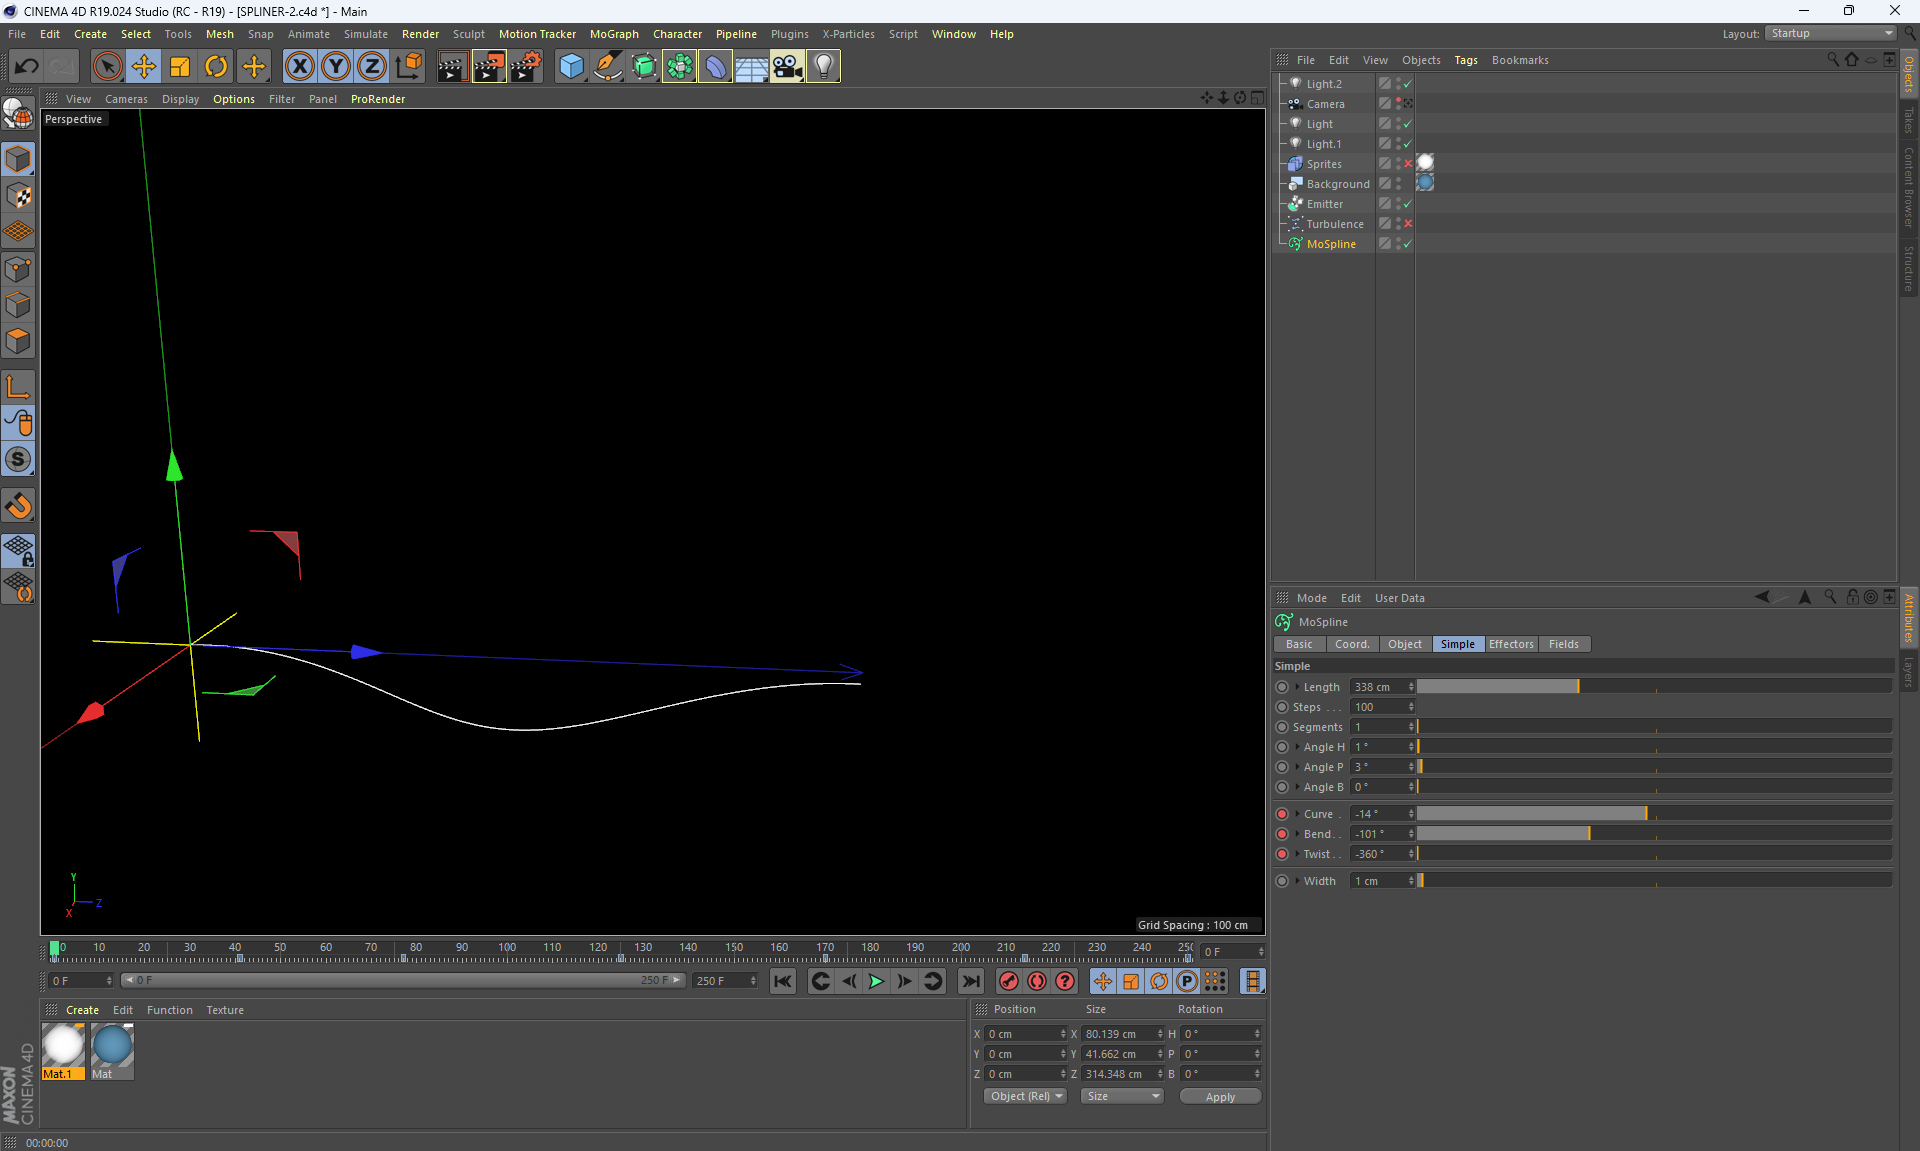
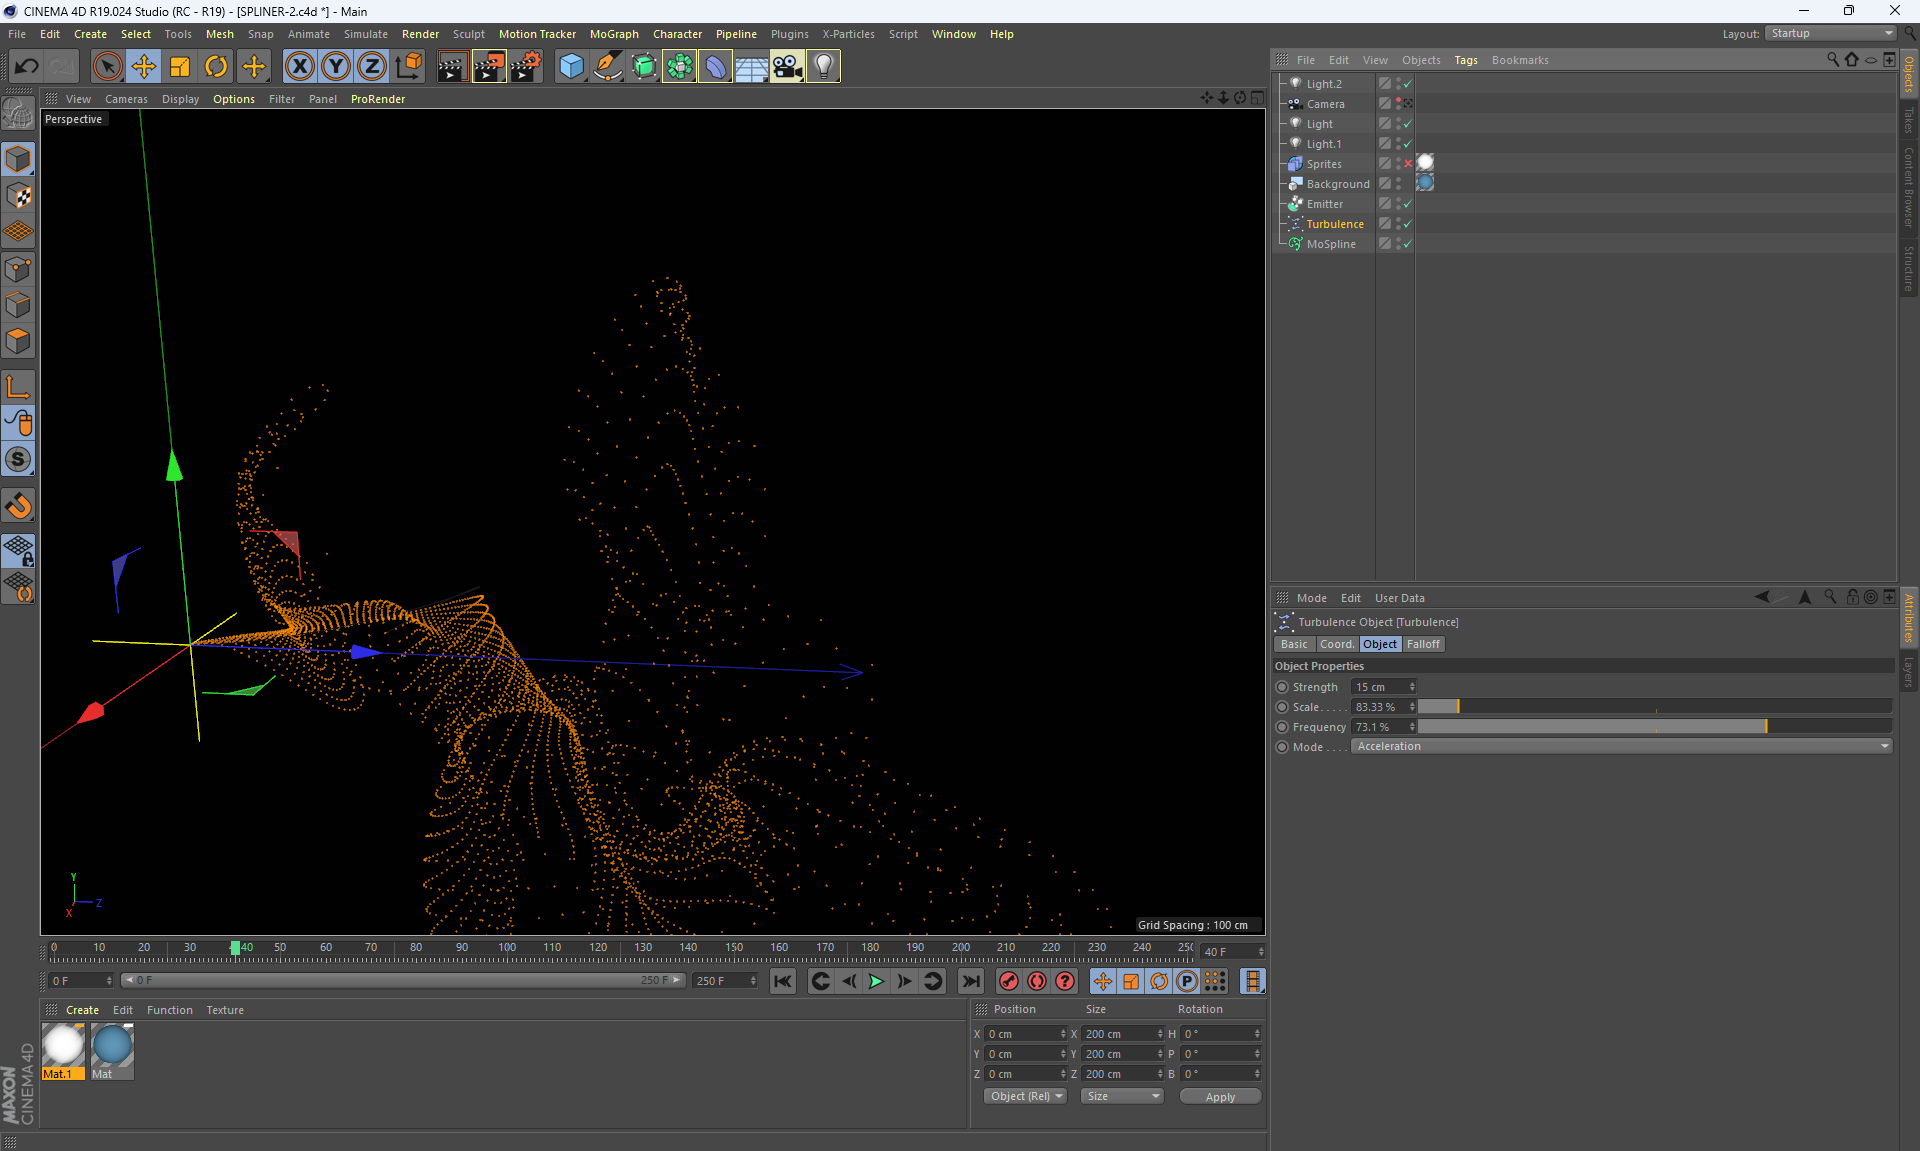
spliner video1 (10.8mb)
spliner image1
spliner video2 (11.6mb)
spliner image2
spliner video3 (14mb)
spliner image3
I watched a separate video by Mikhail Bychkov, the author of this course: X-Particles в Cinema 4D
Use X-Particles in C4D to simulate viscous liquid object fill (Density Sep) | xpOpenVDB Mesh

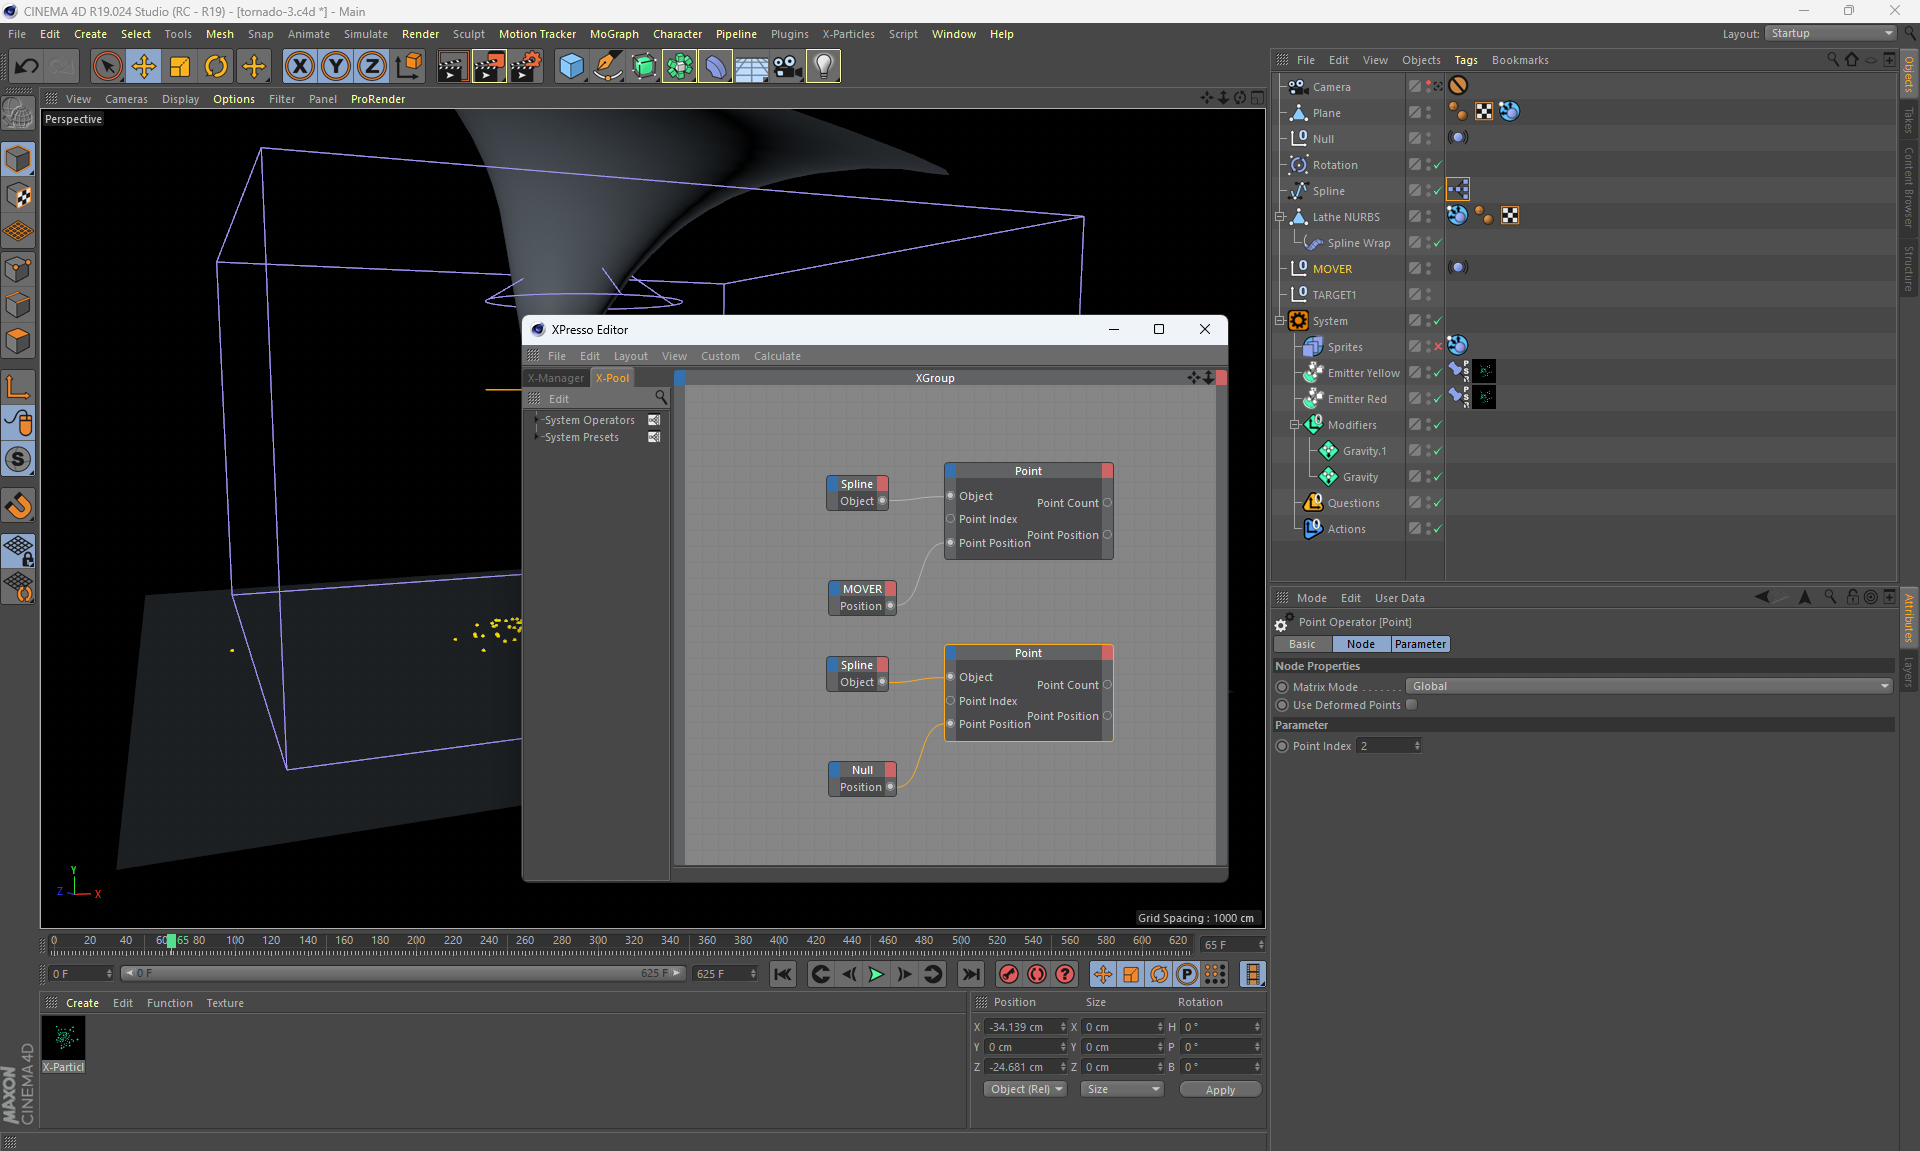
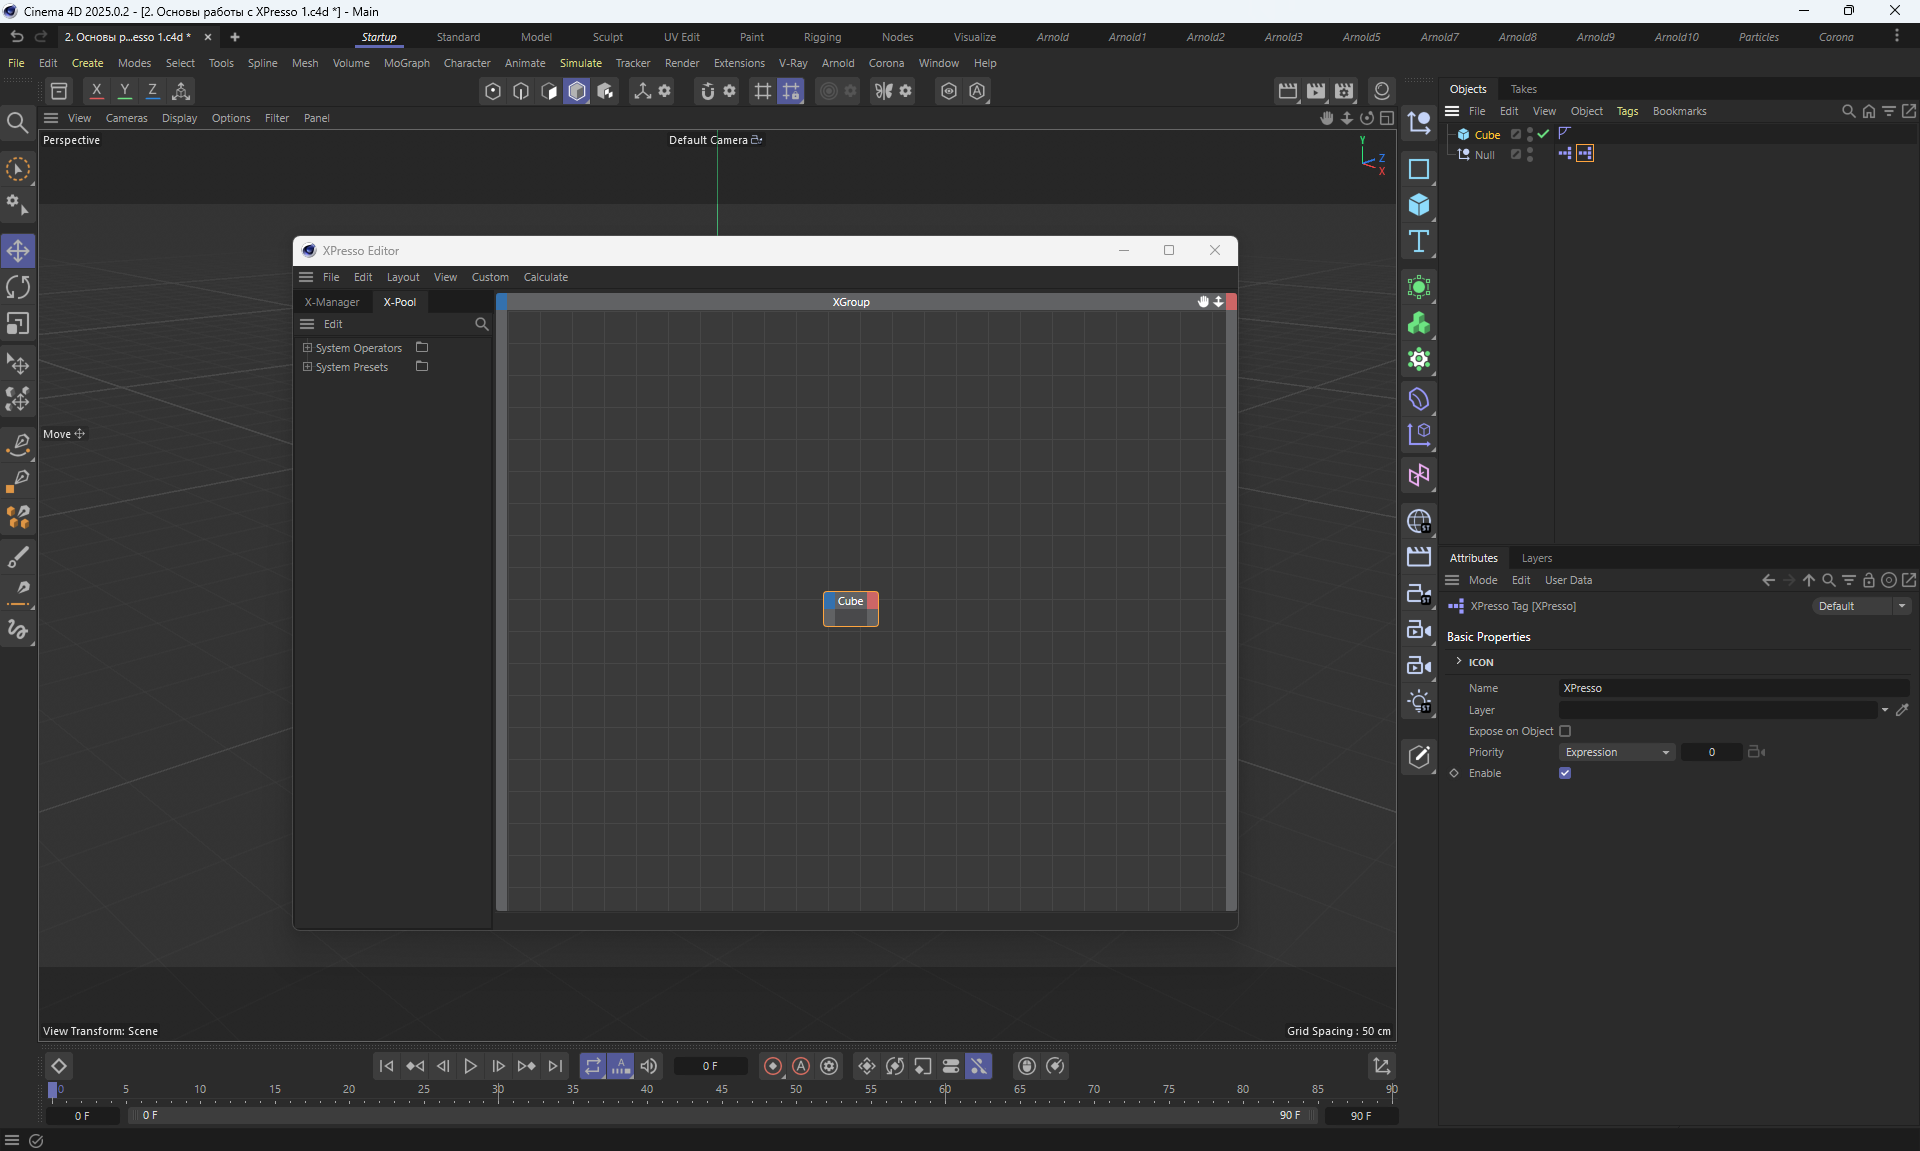
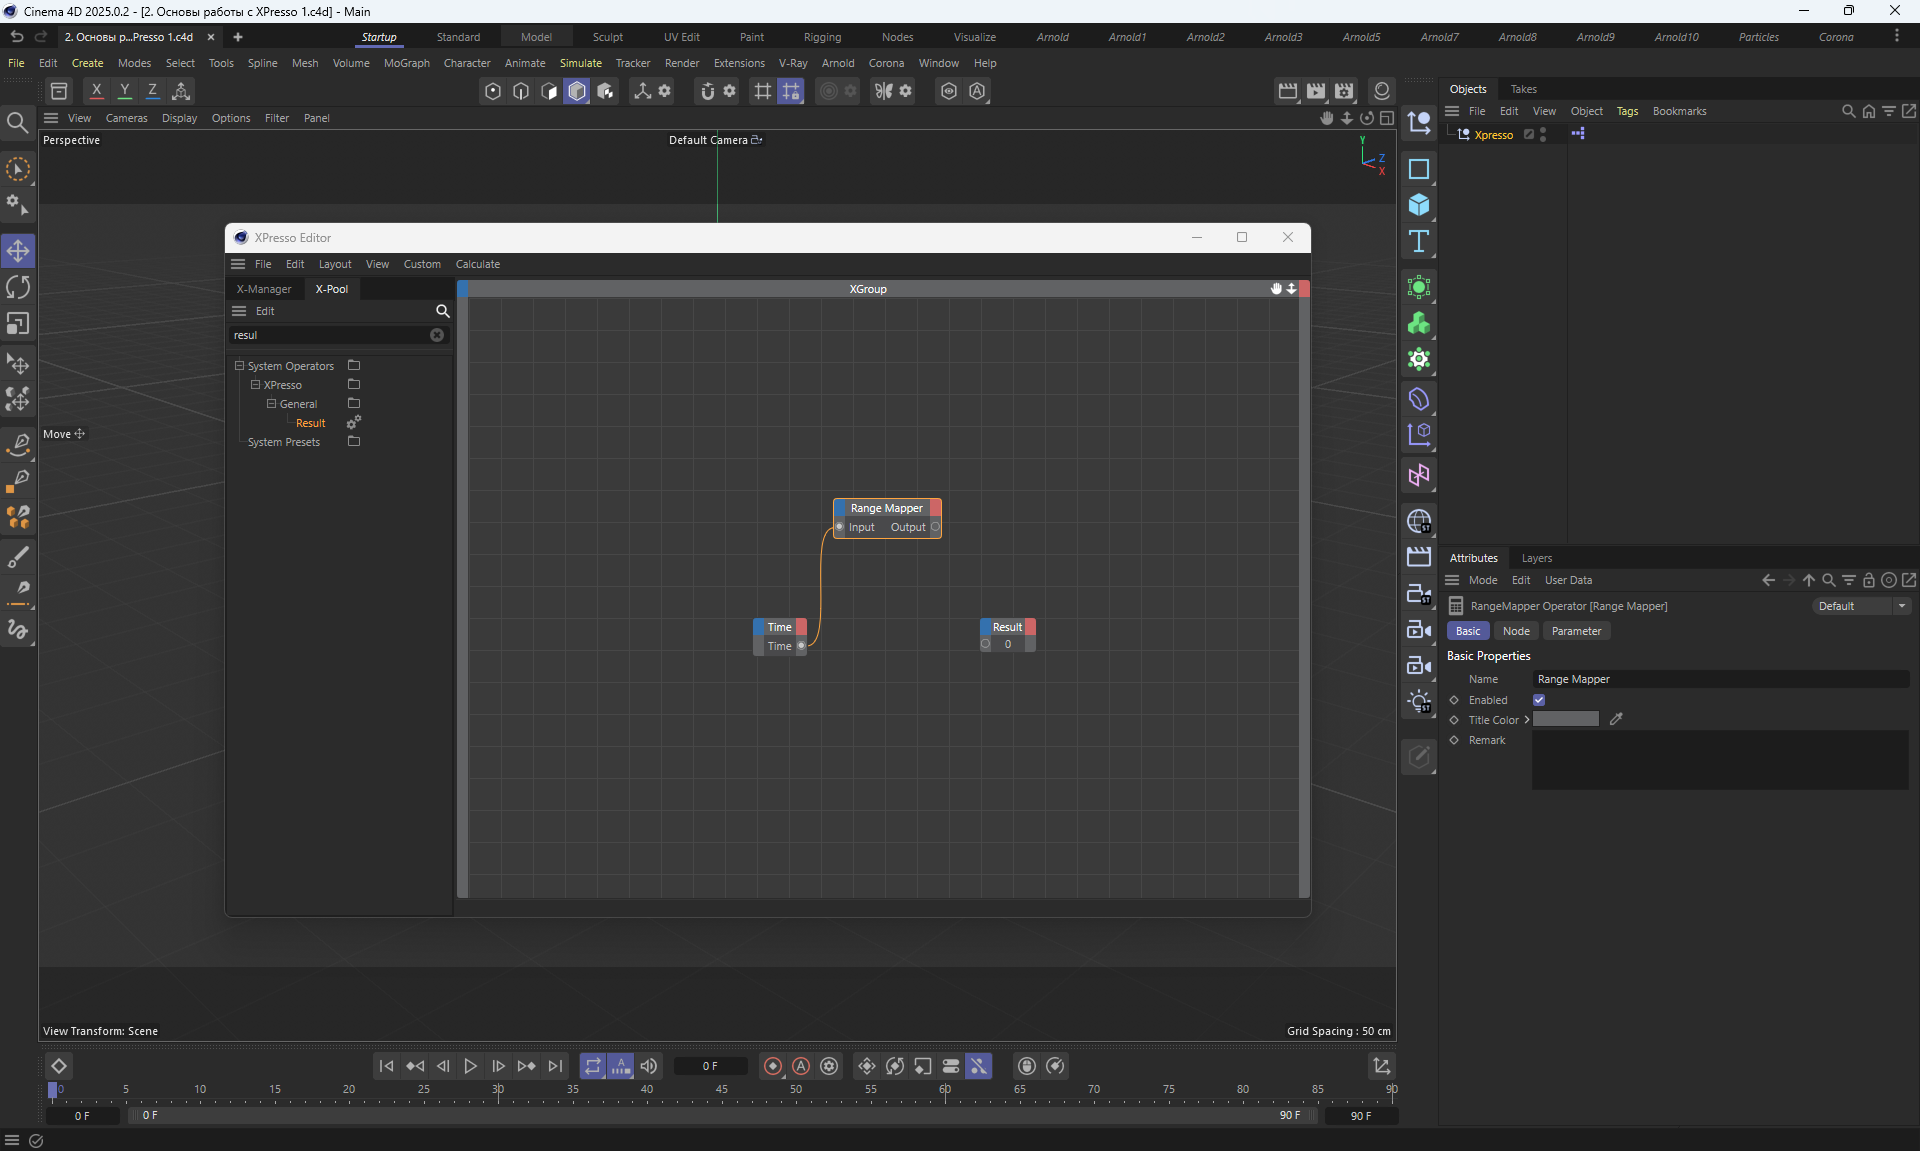
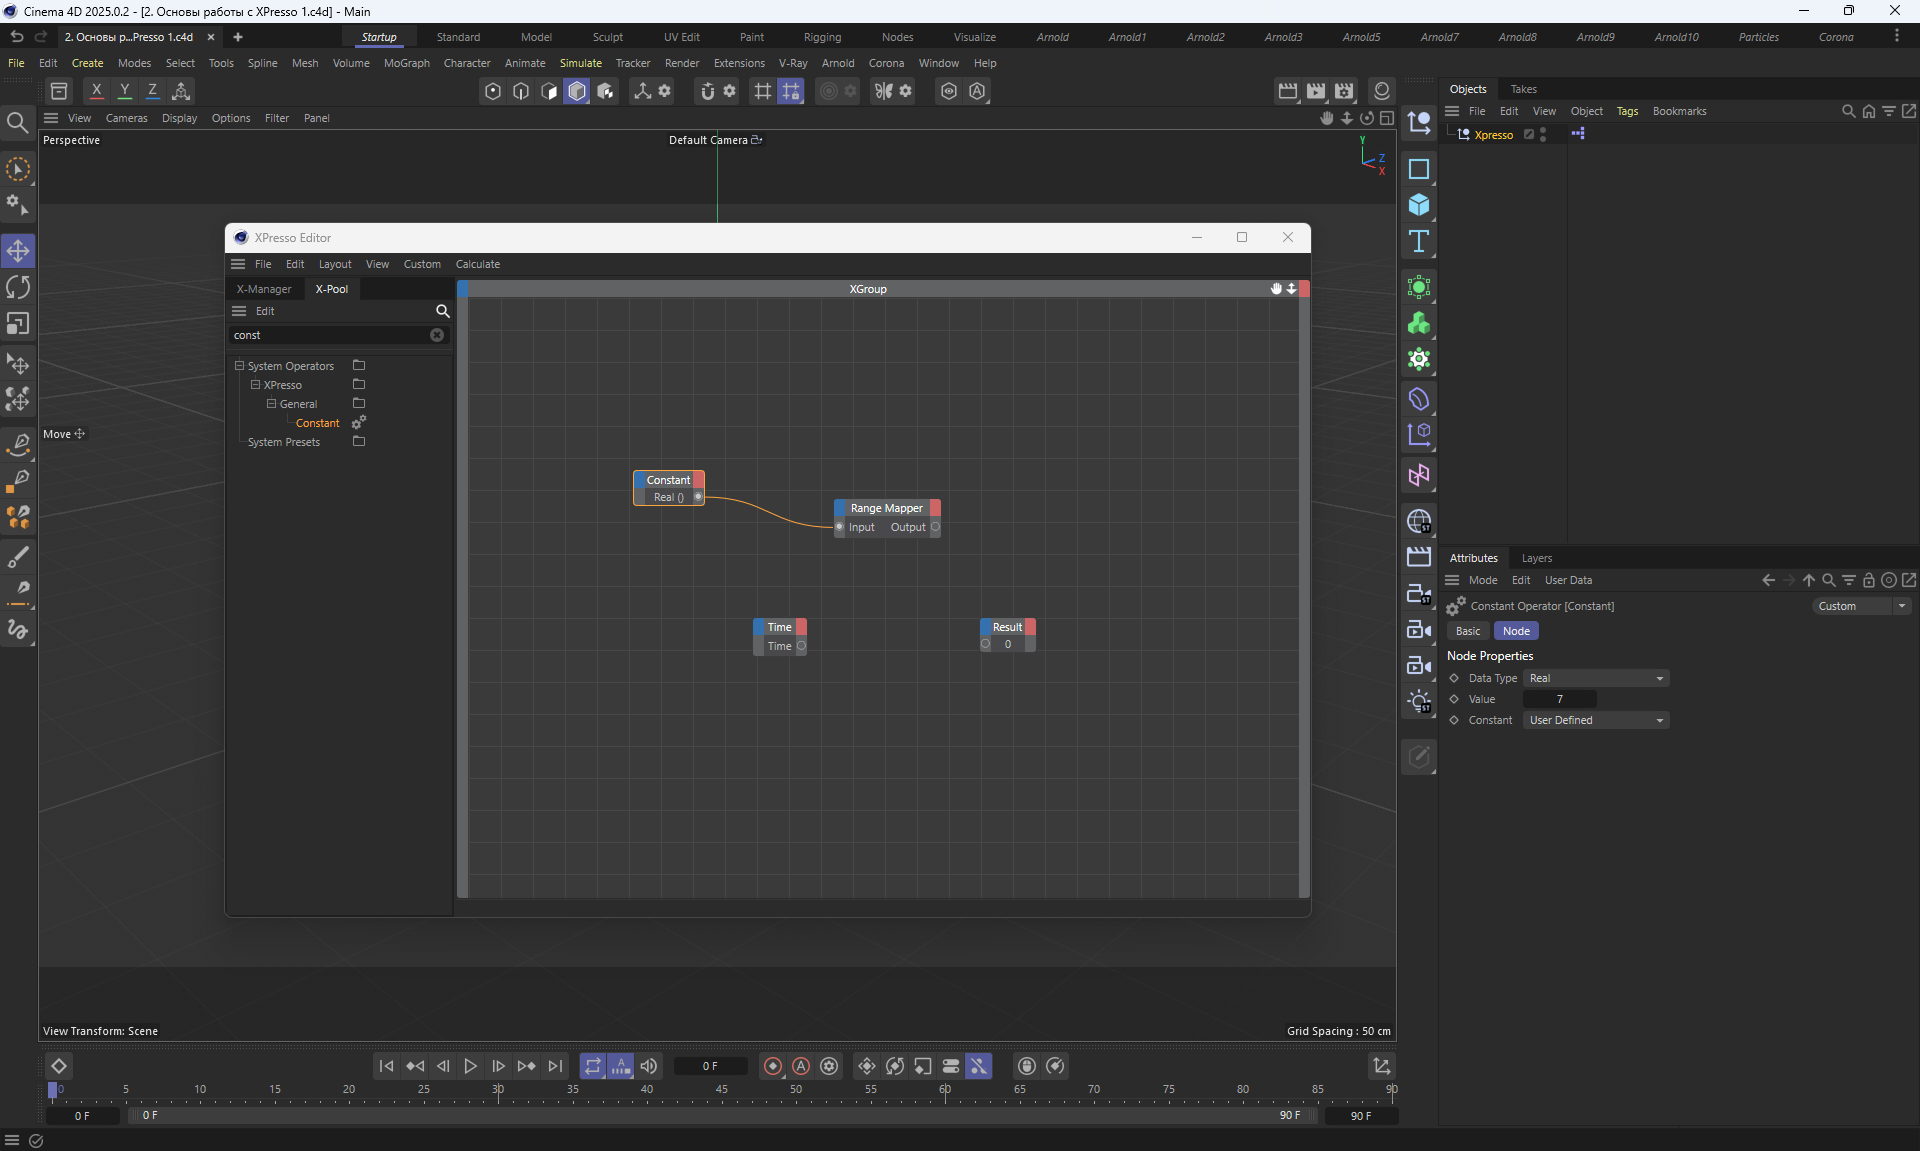
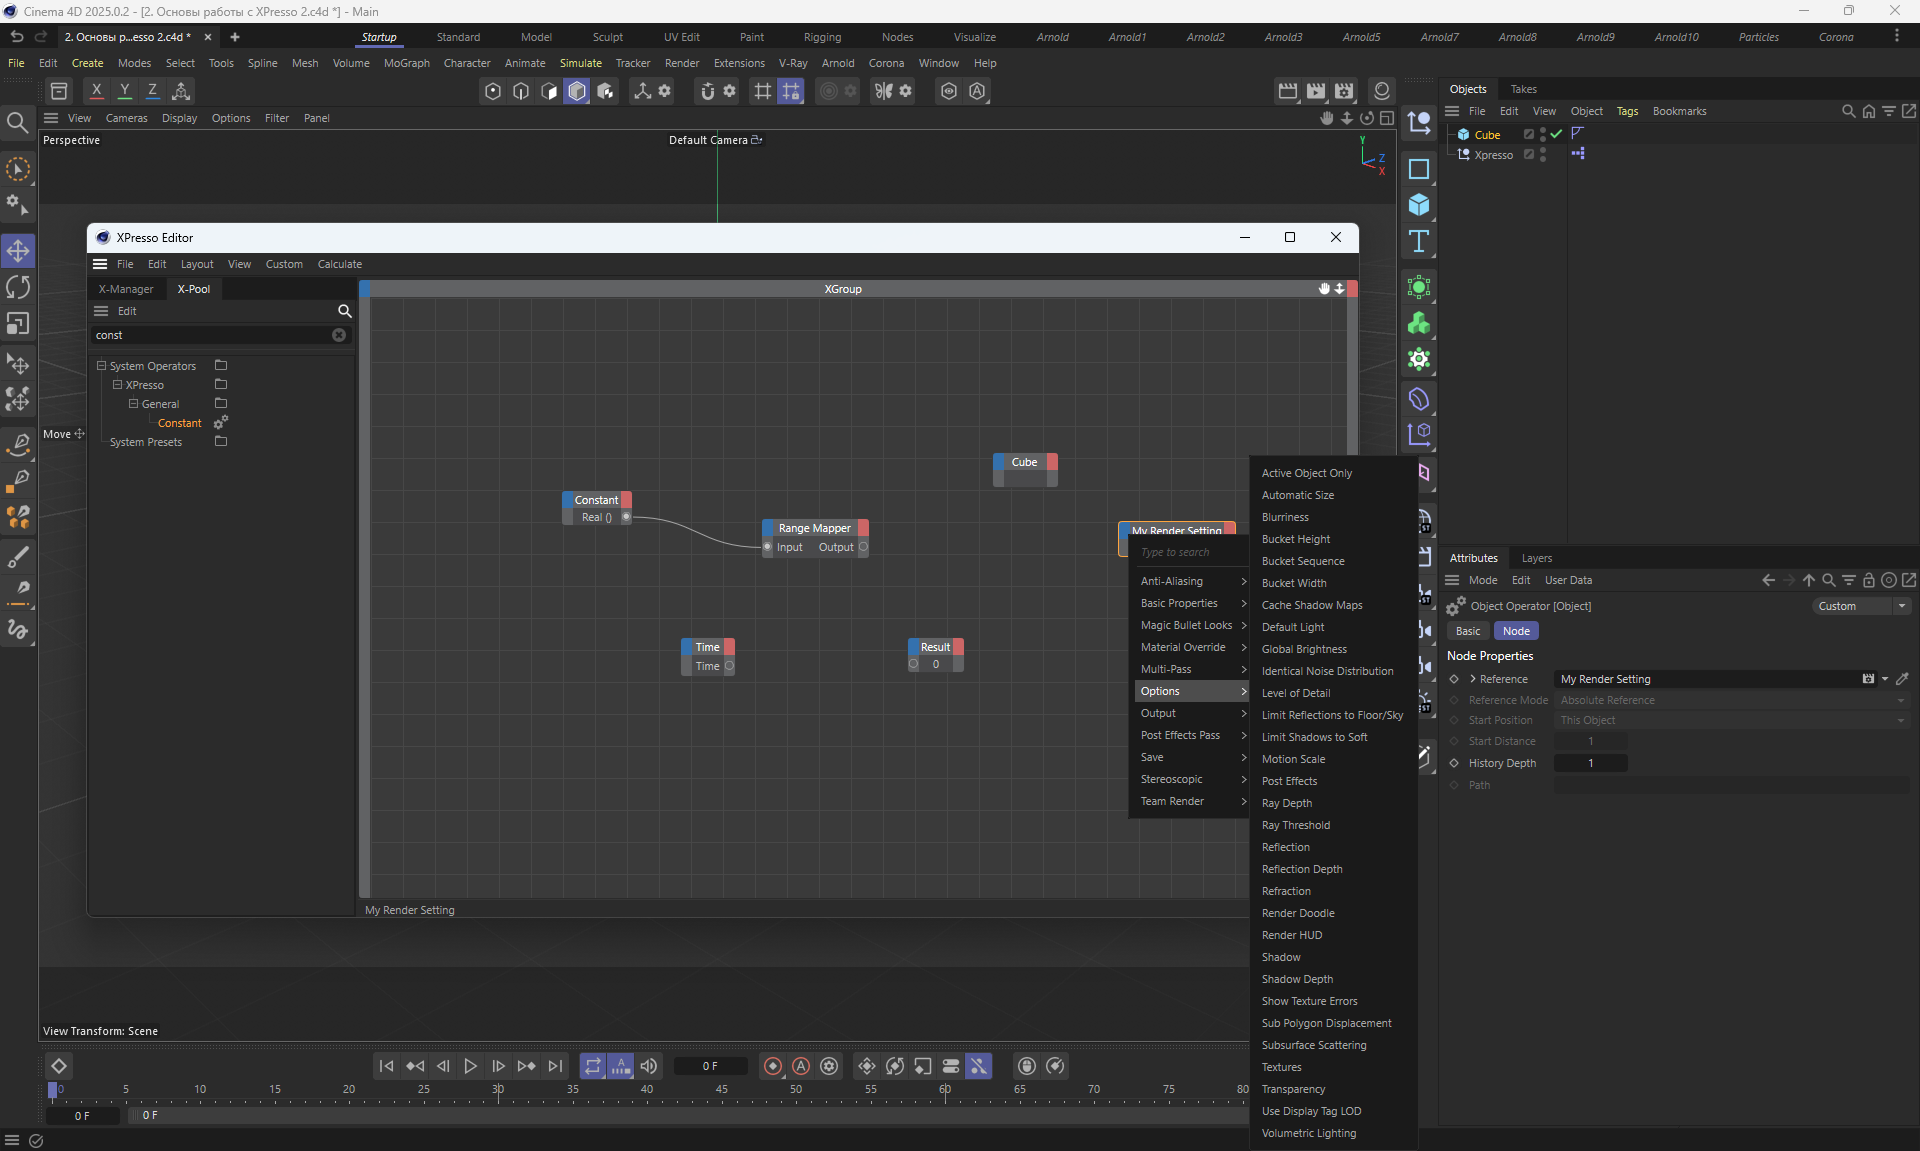
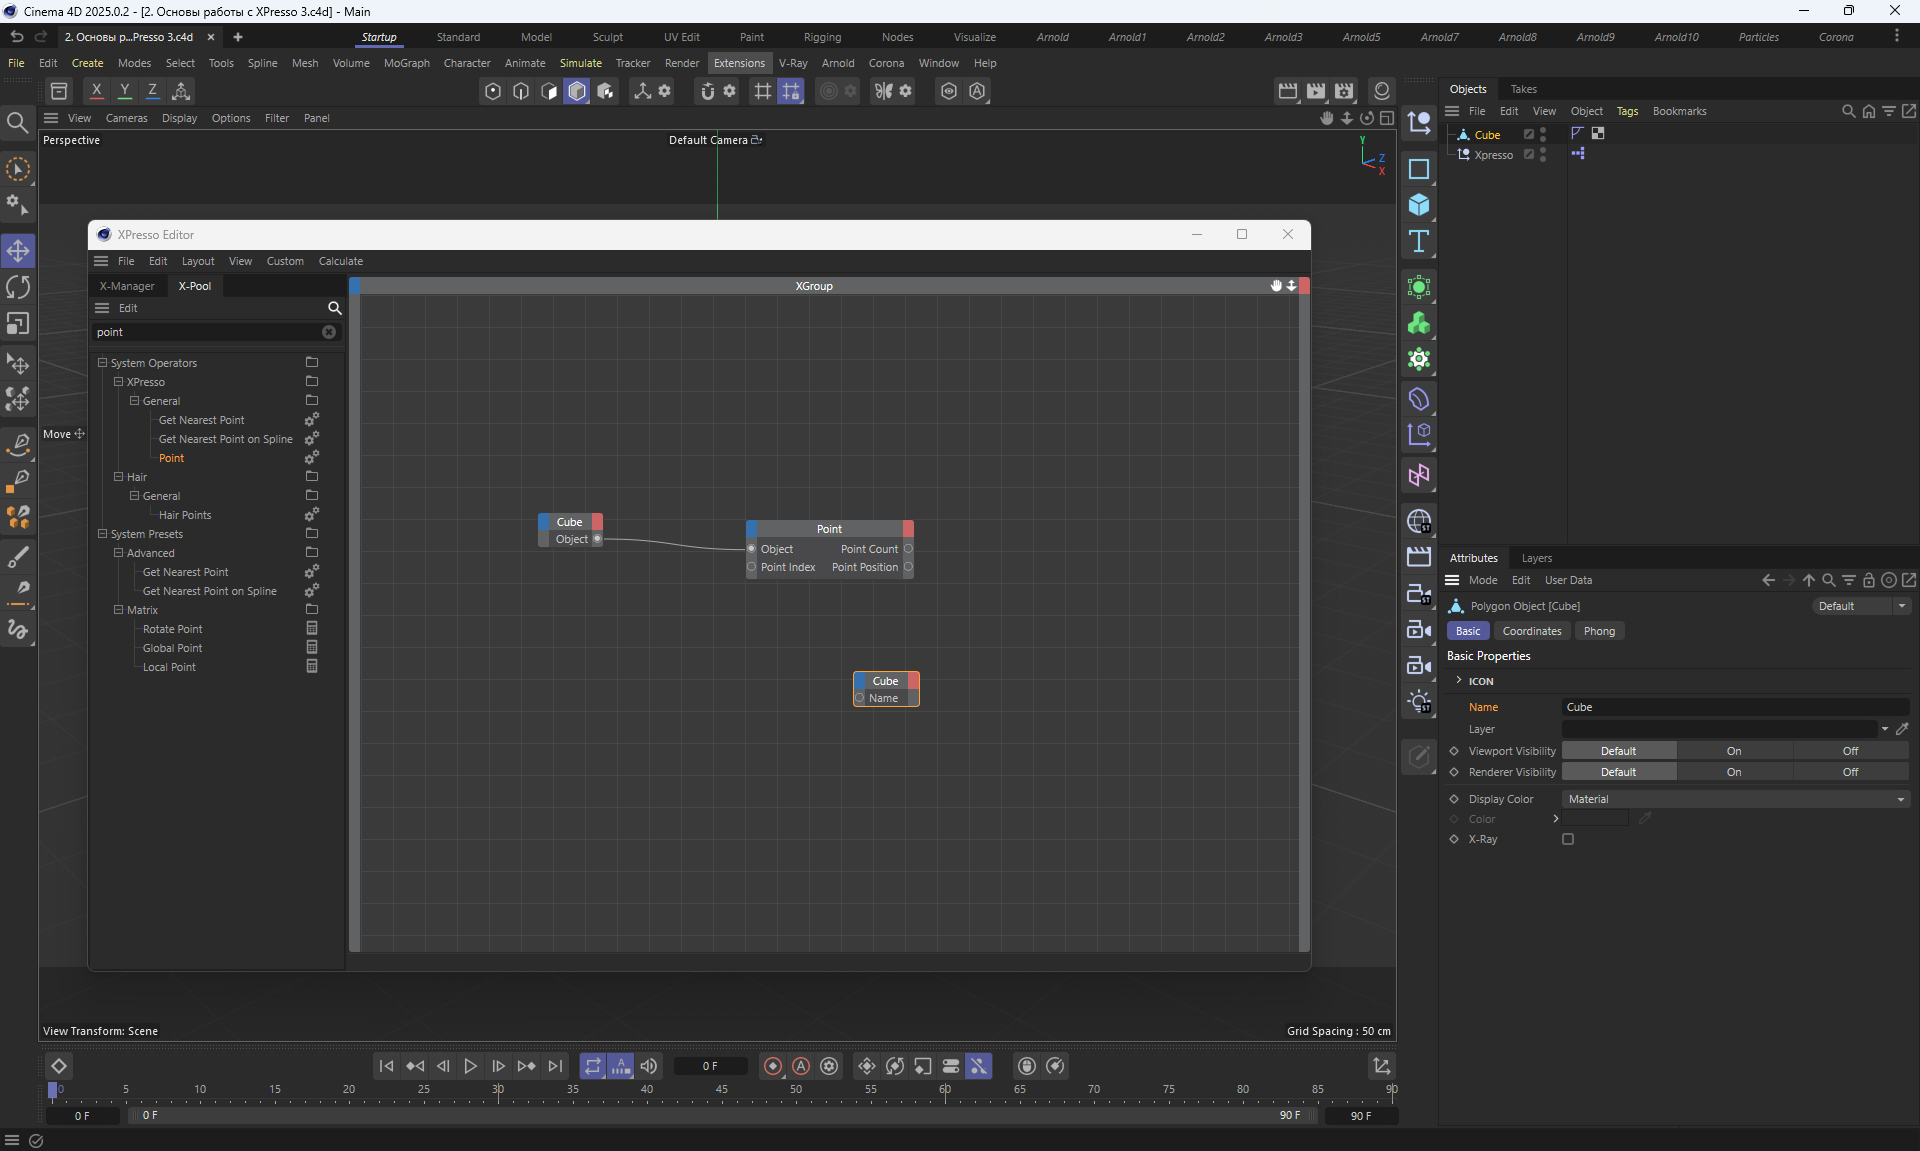
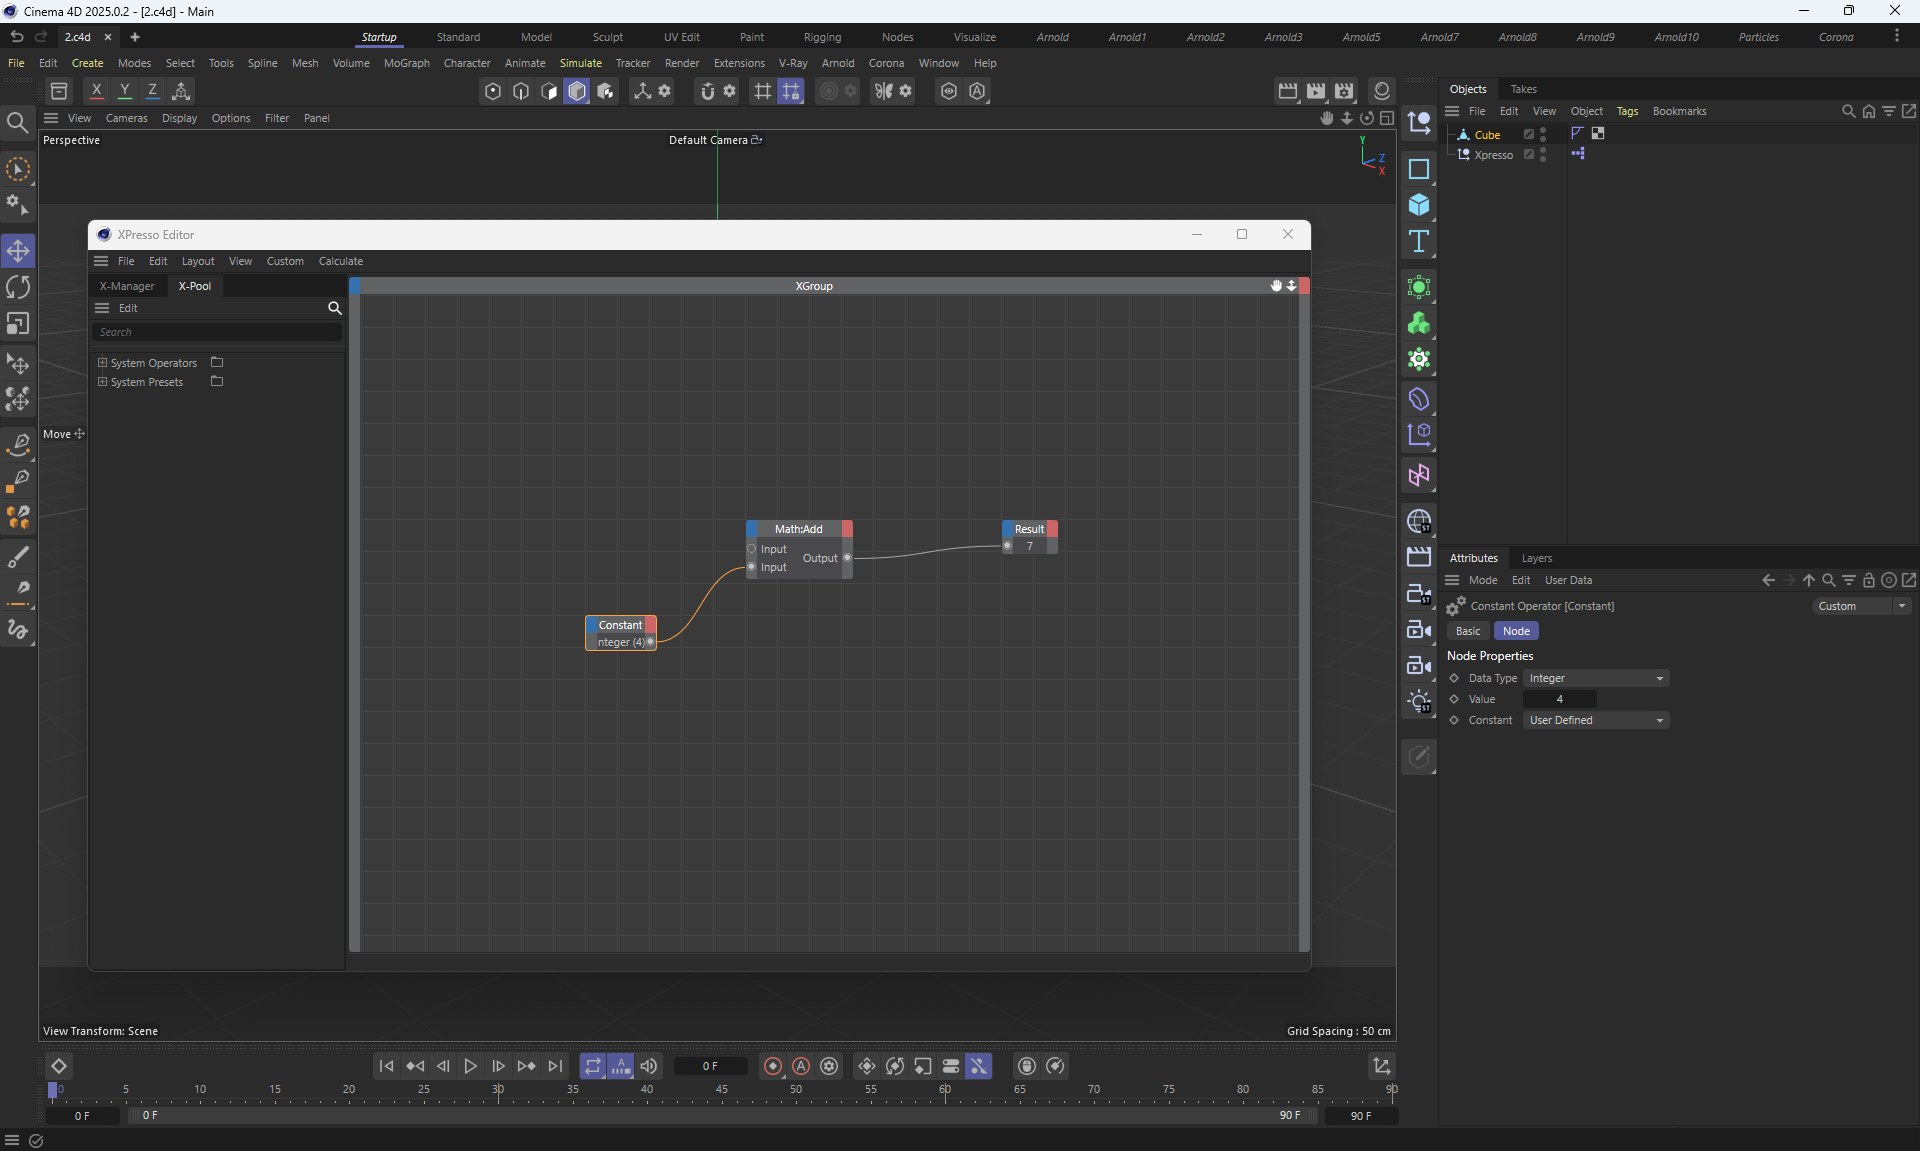
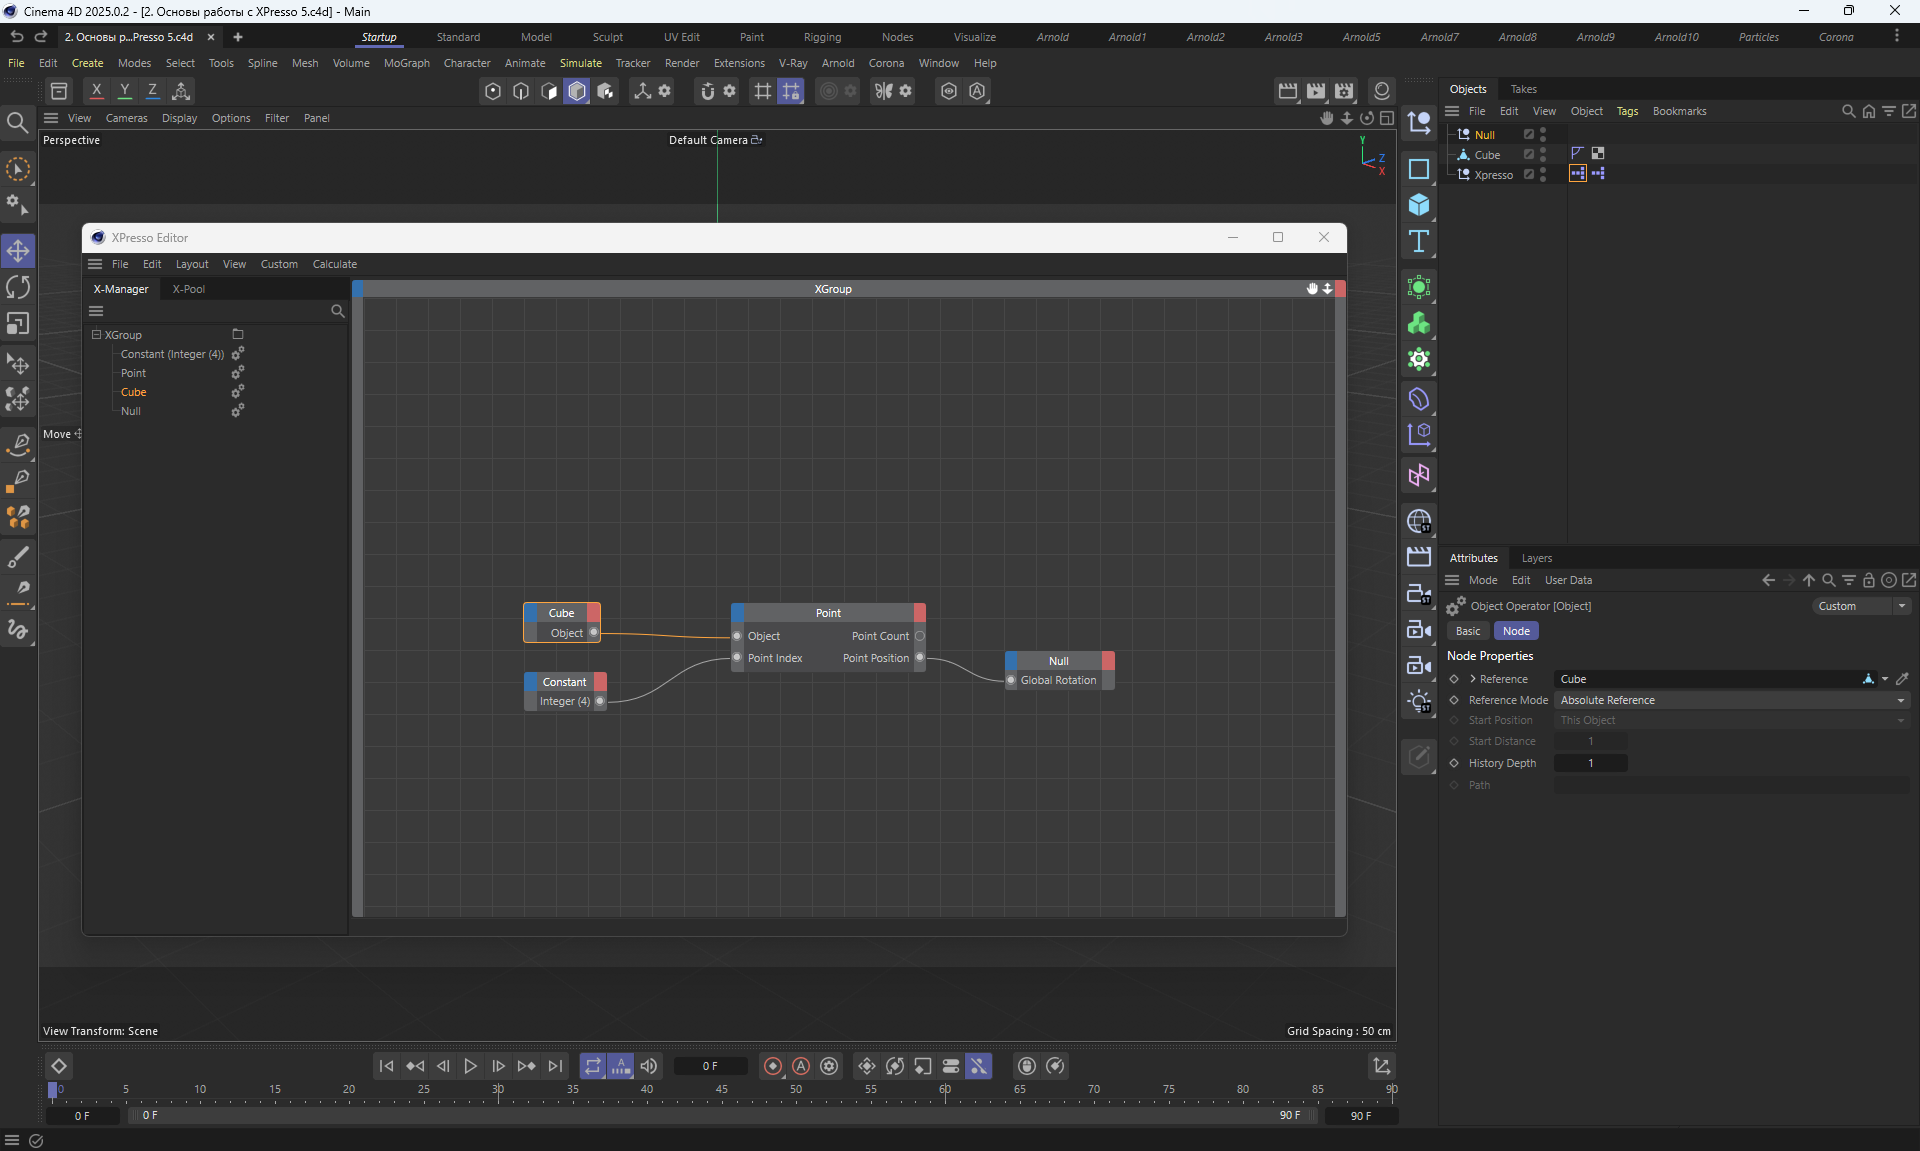
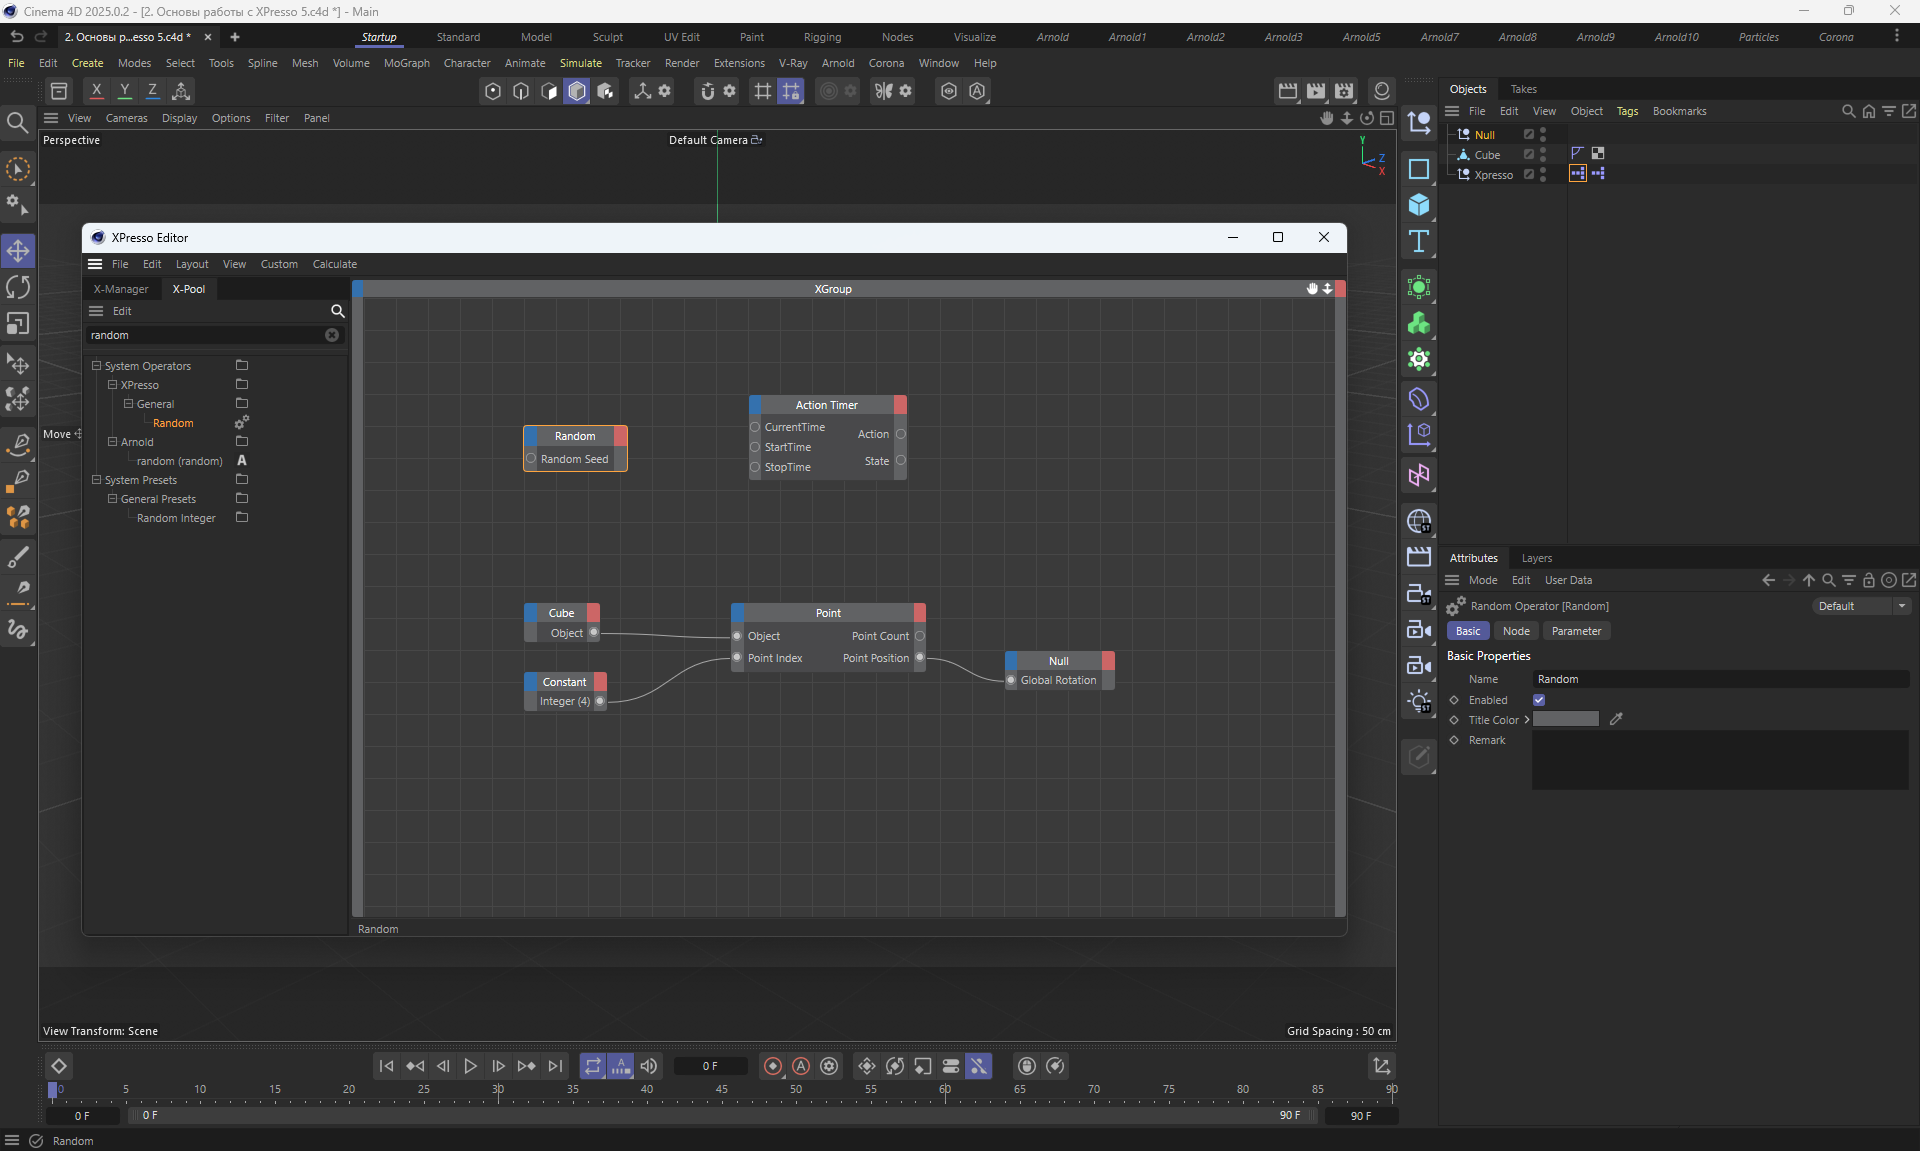
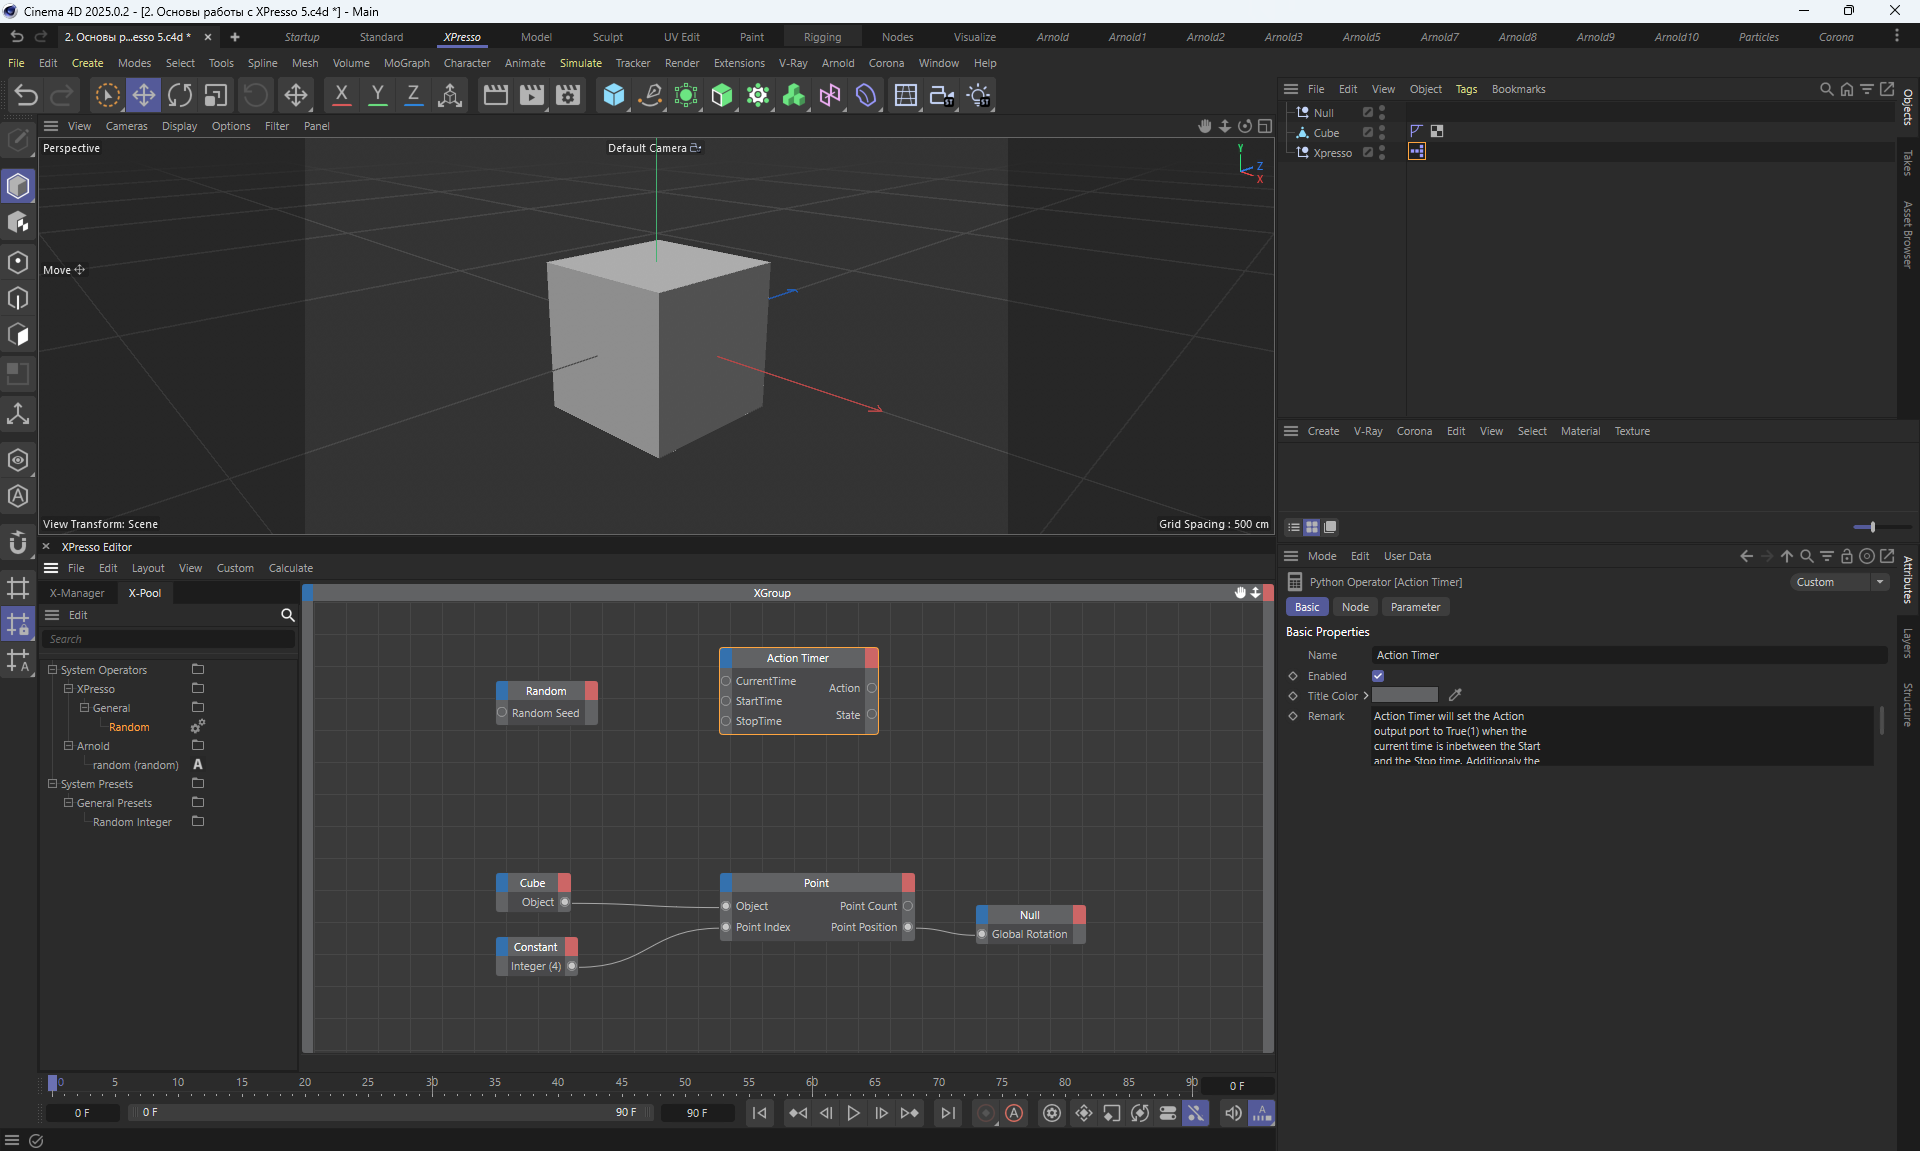
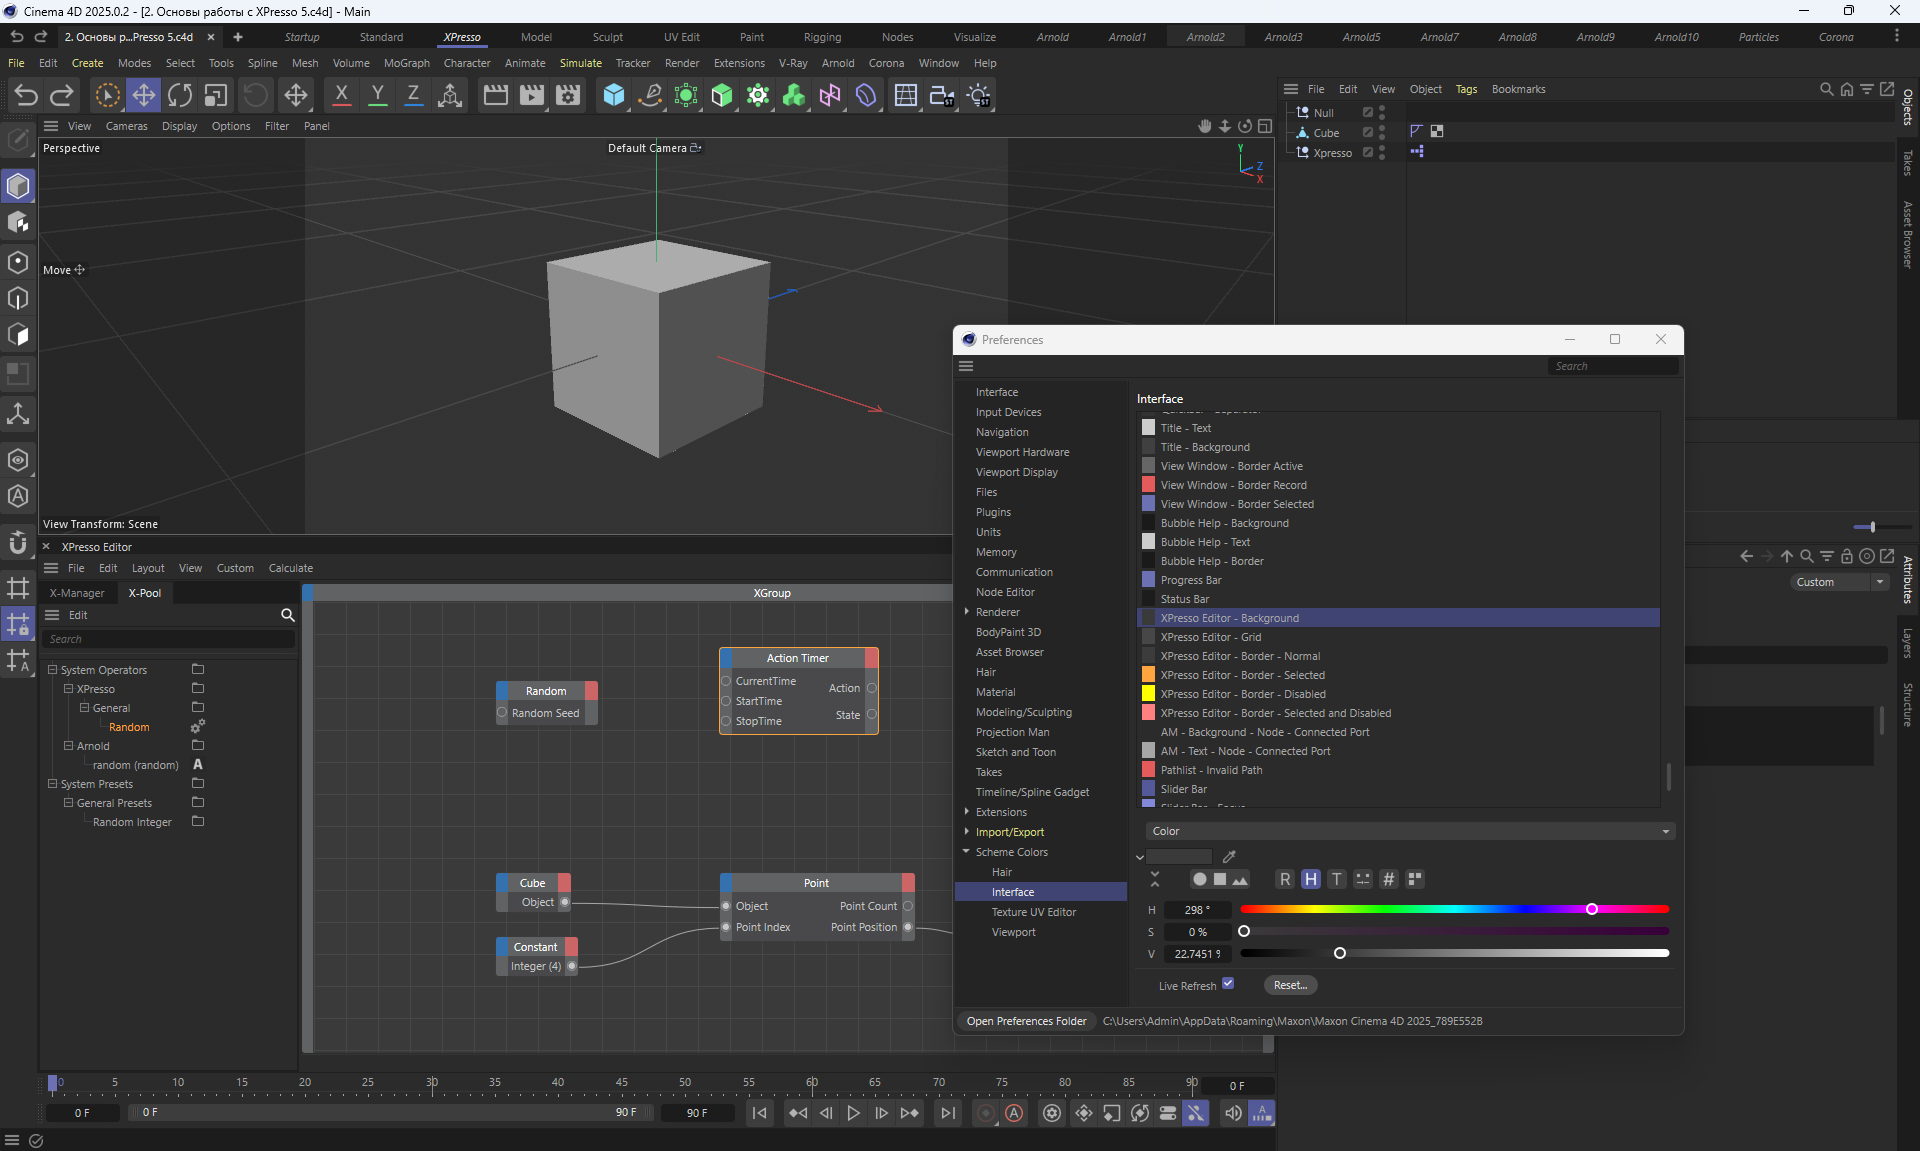
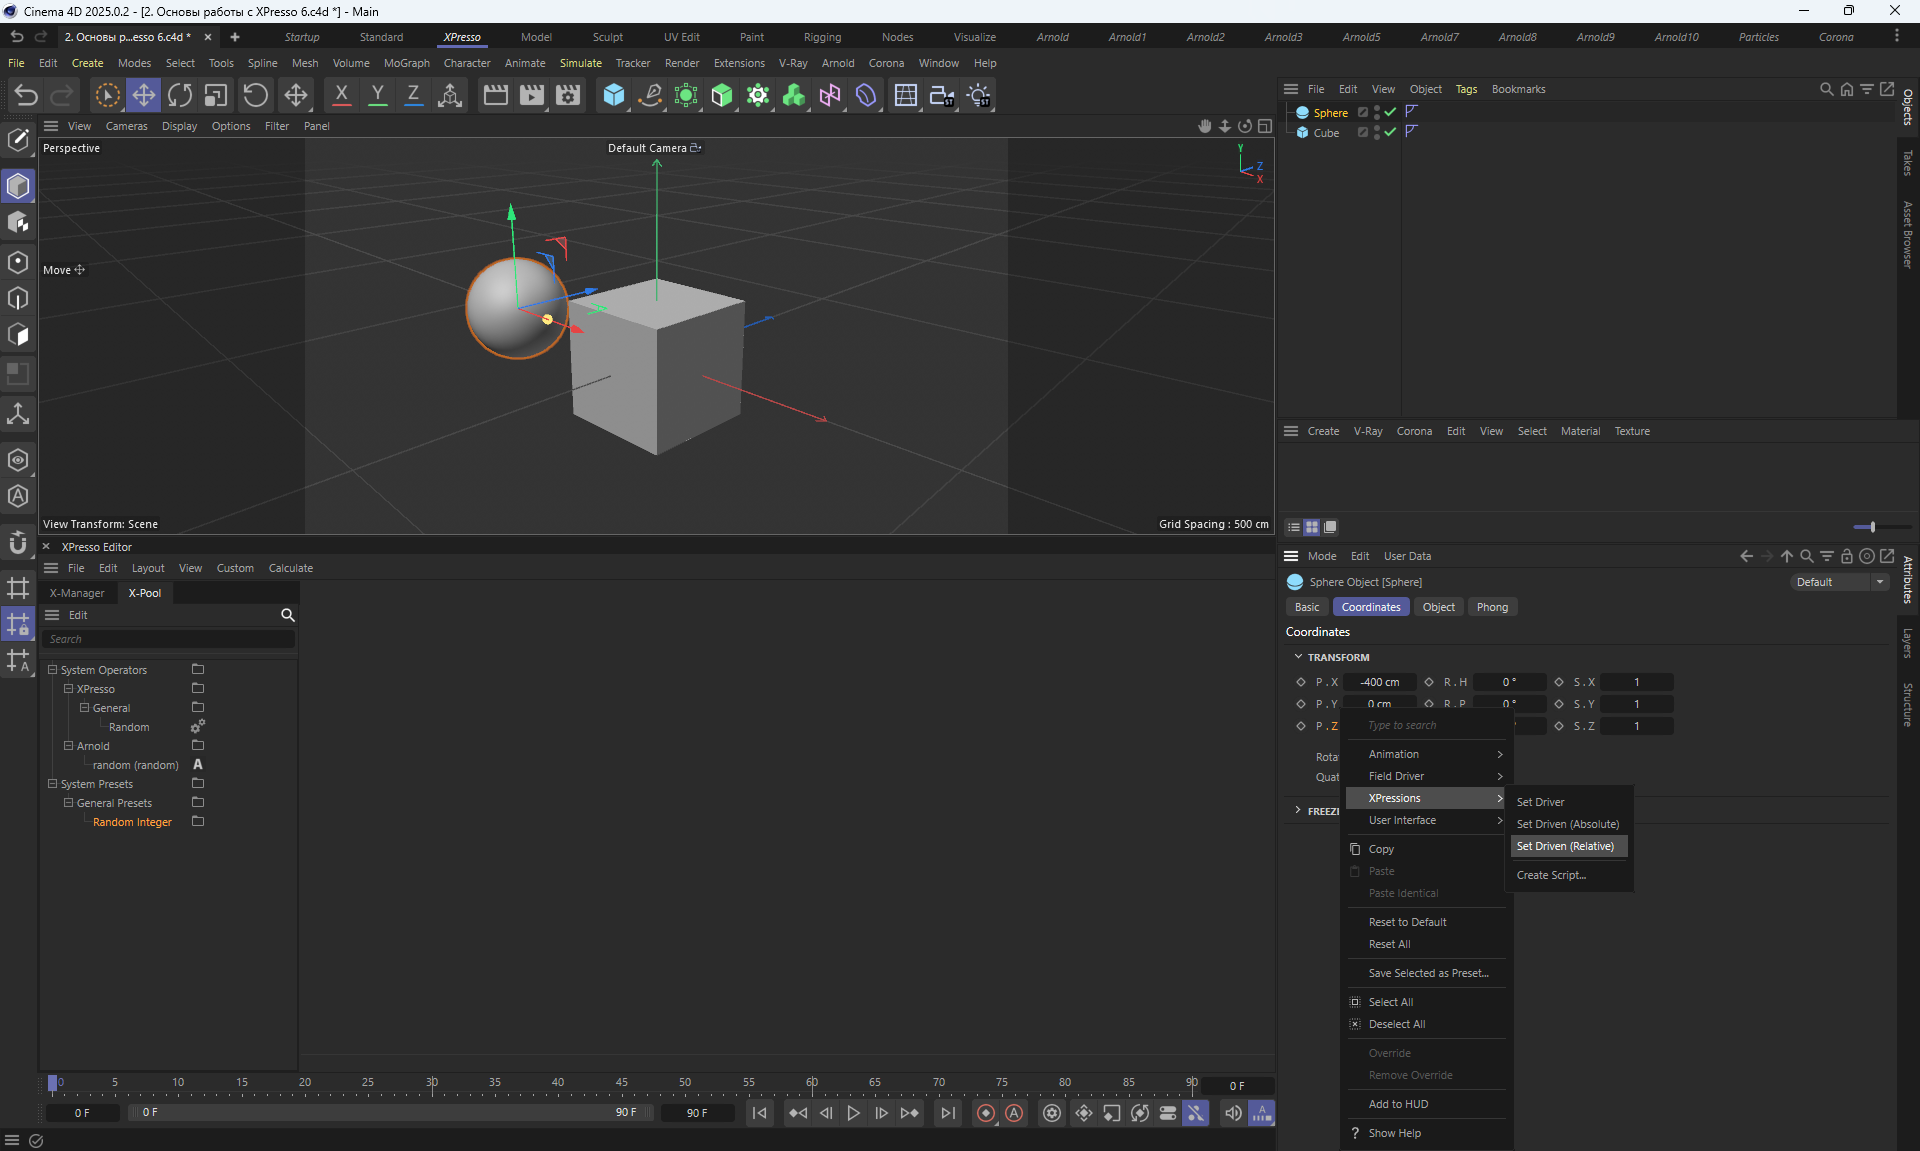
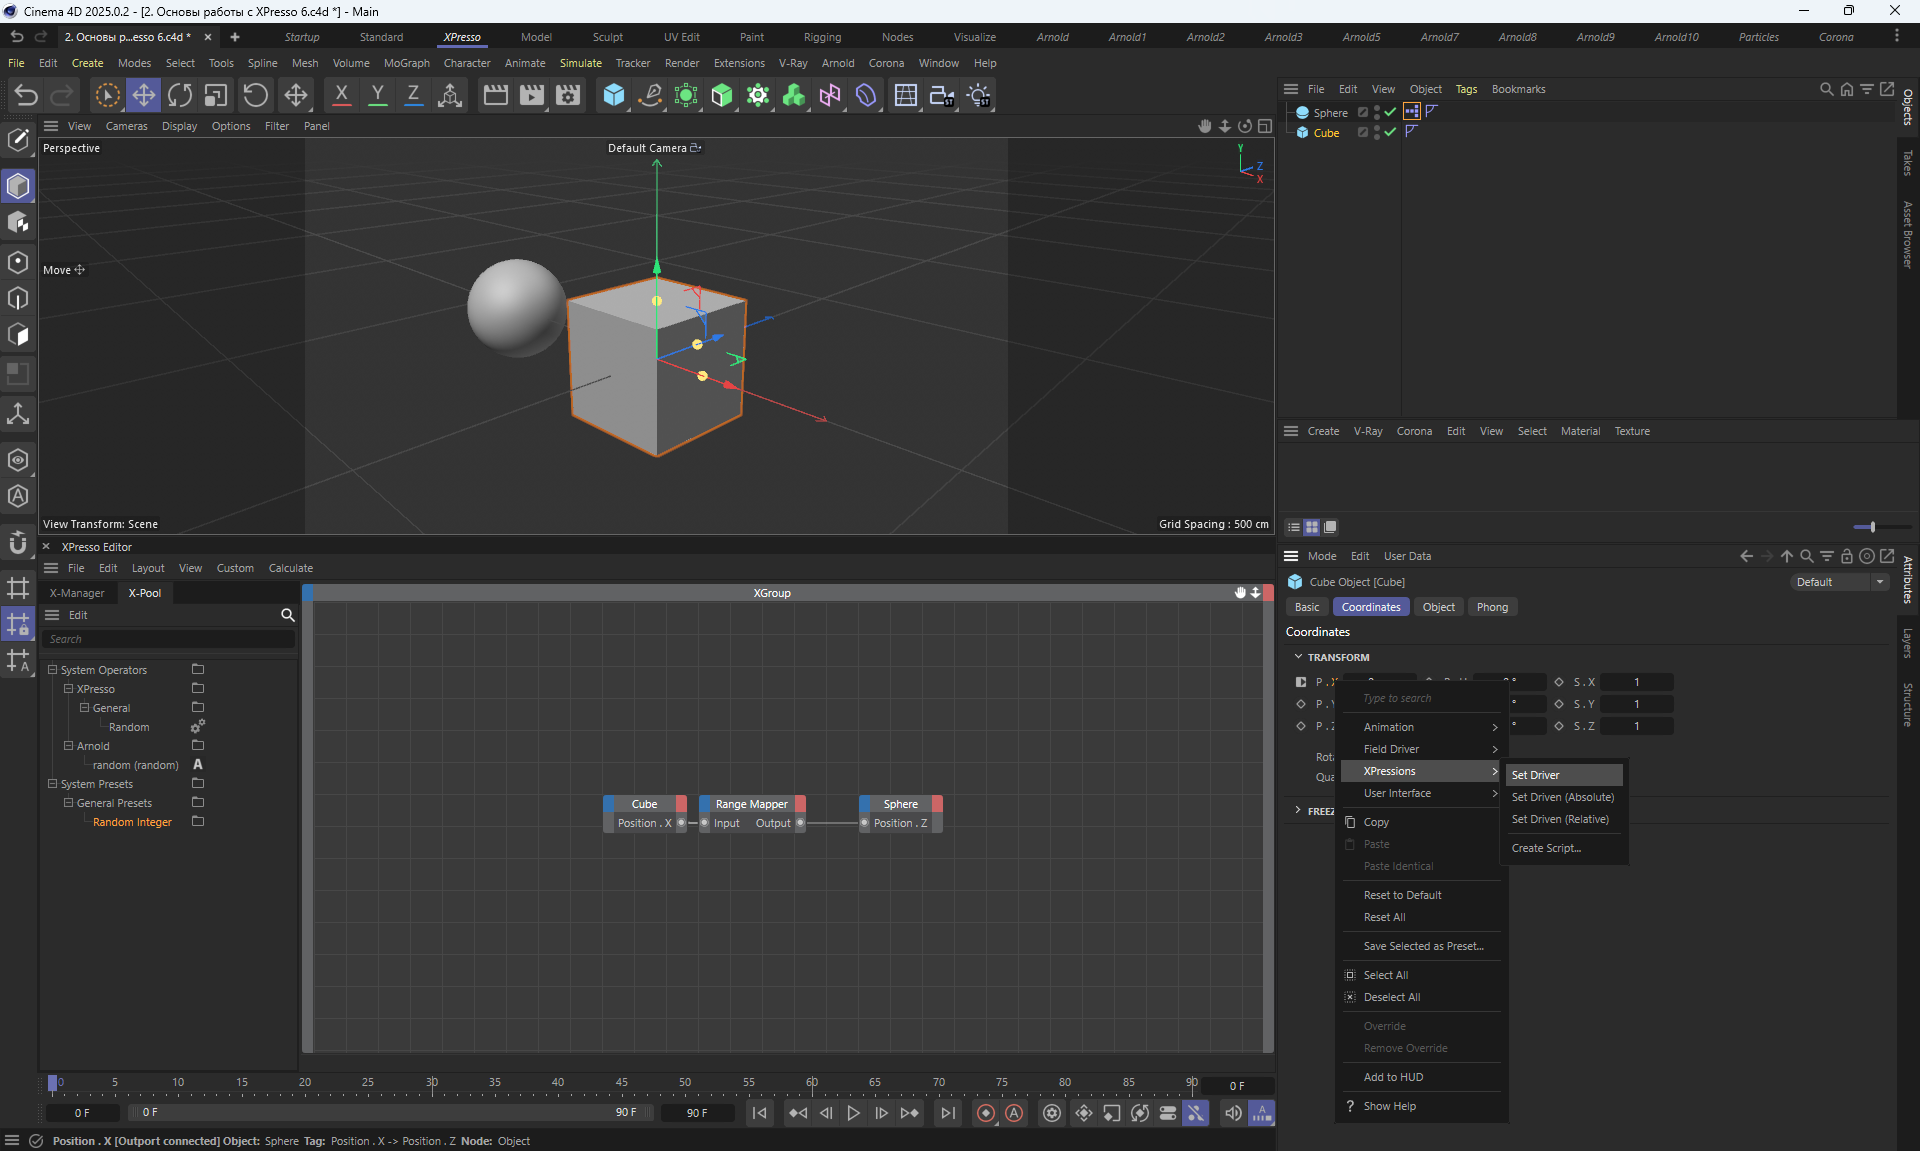
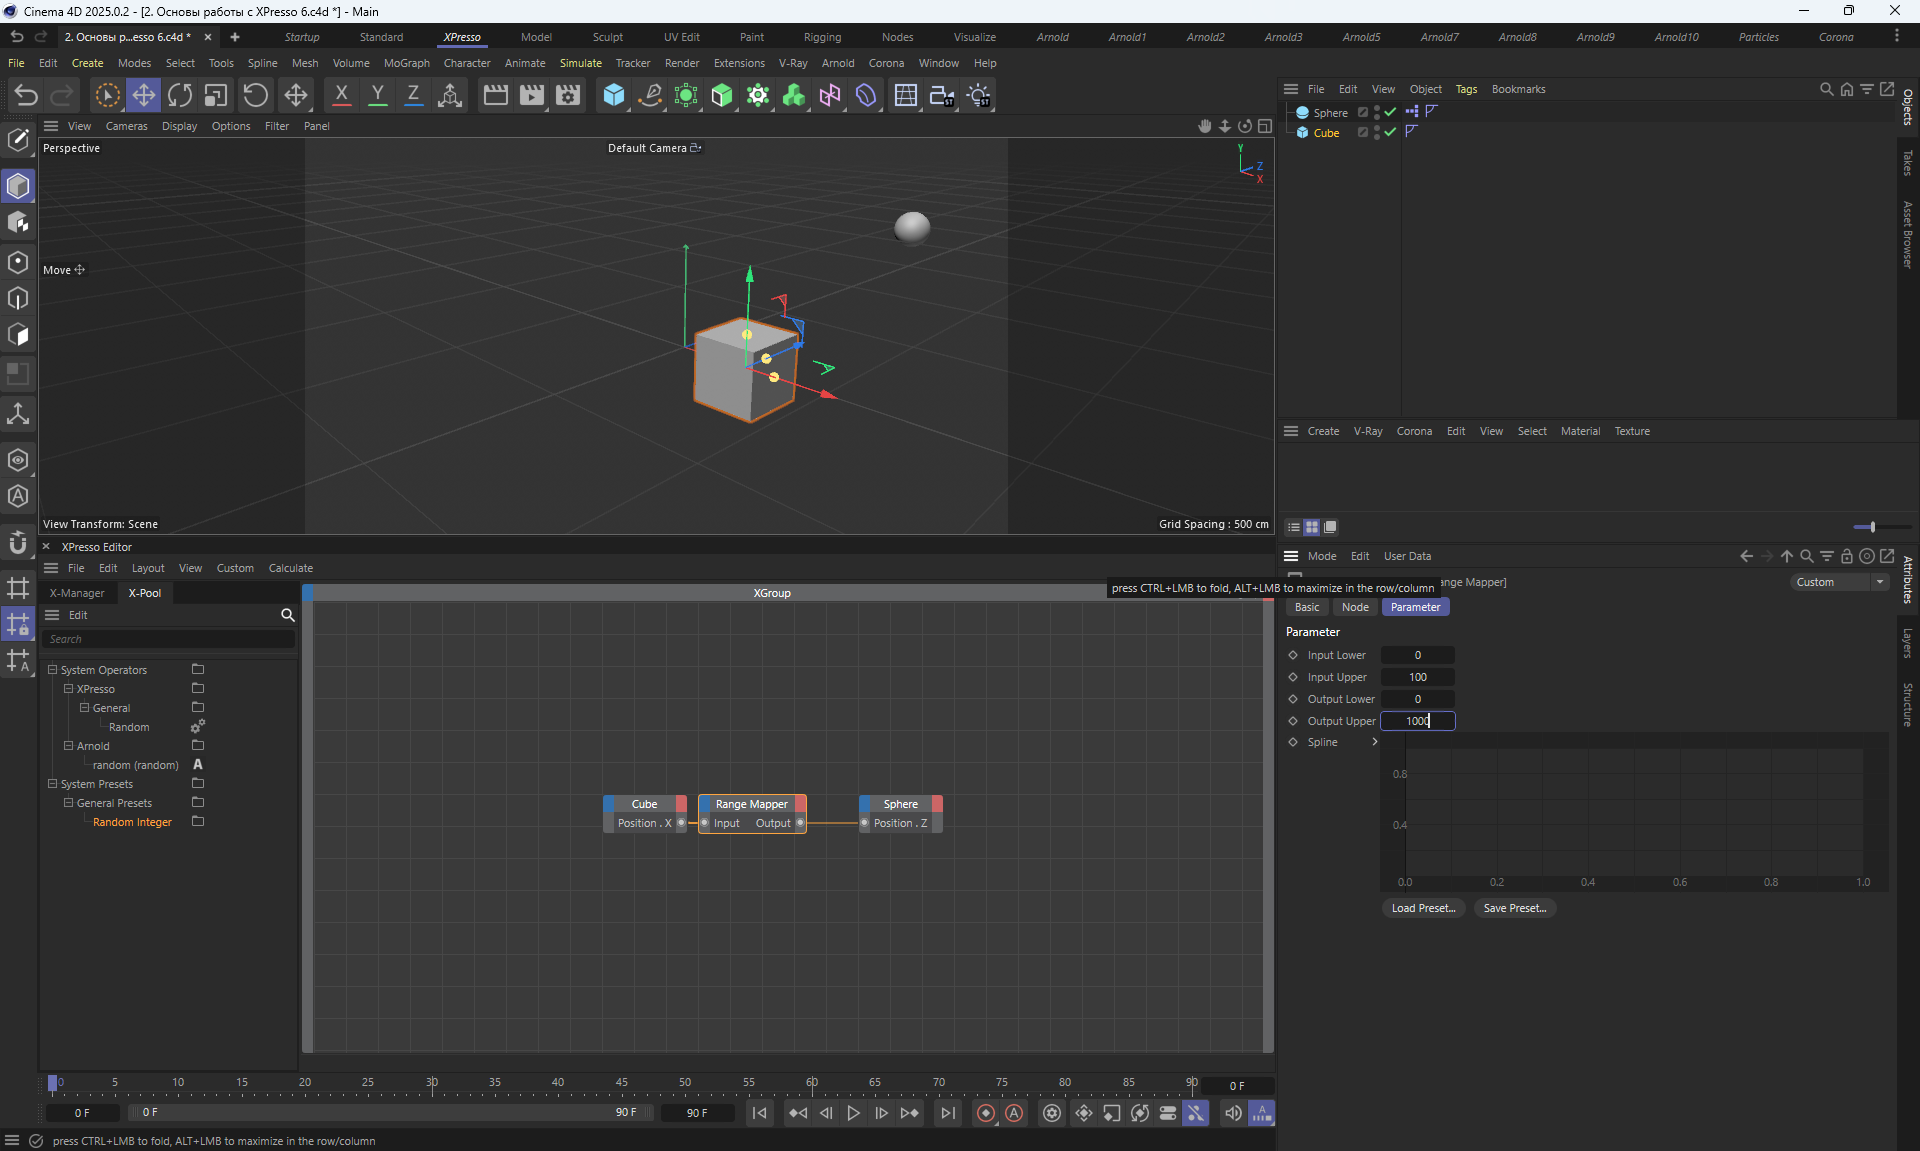
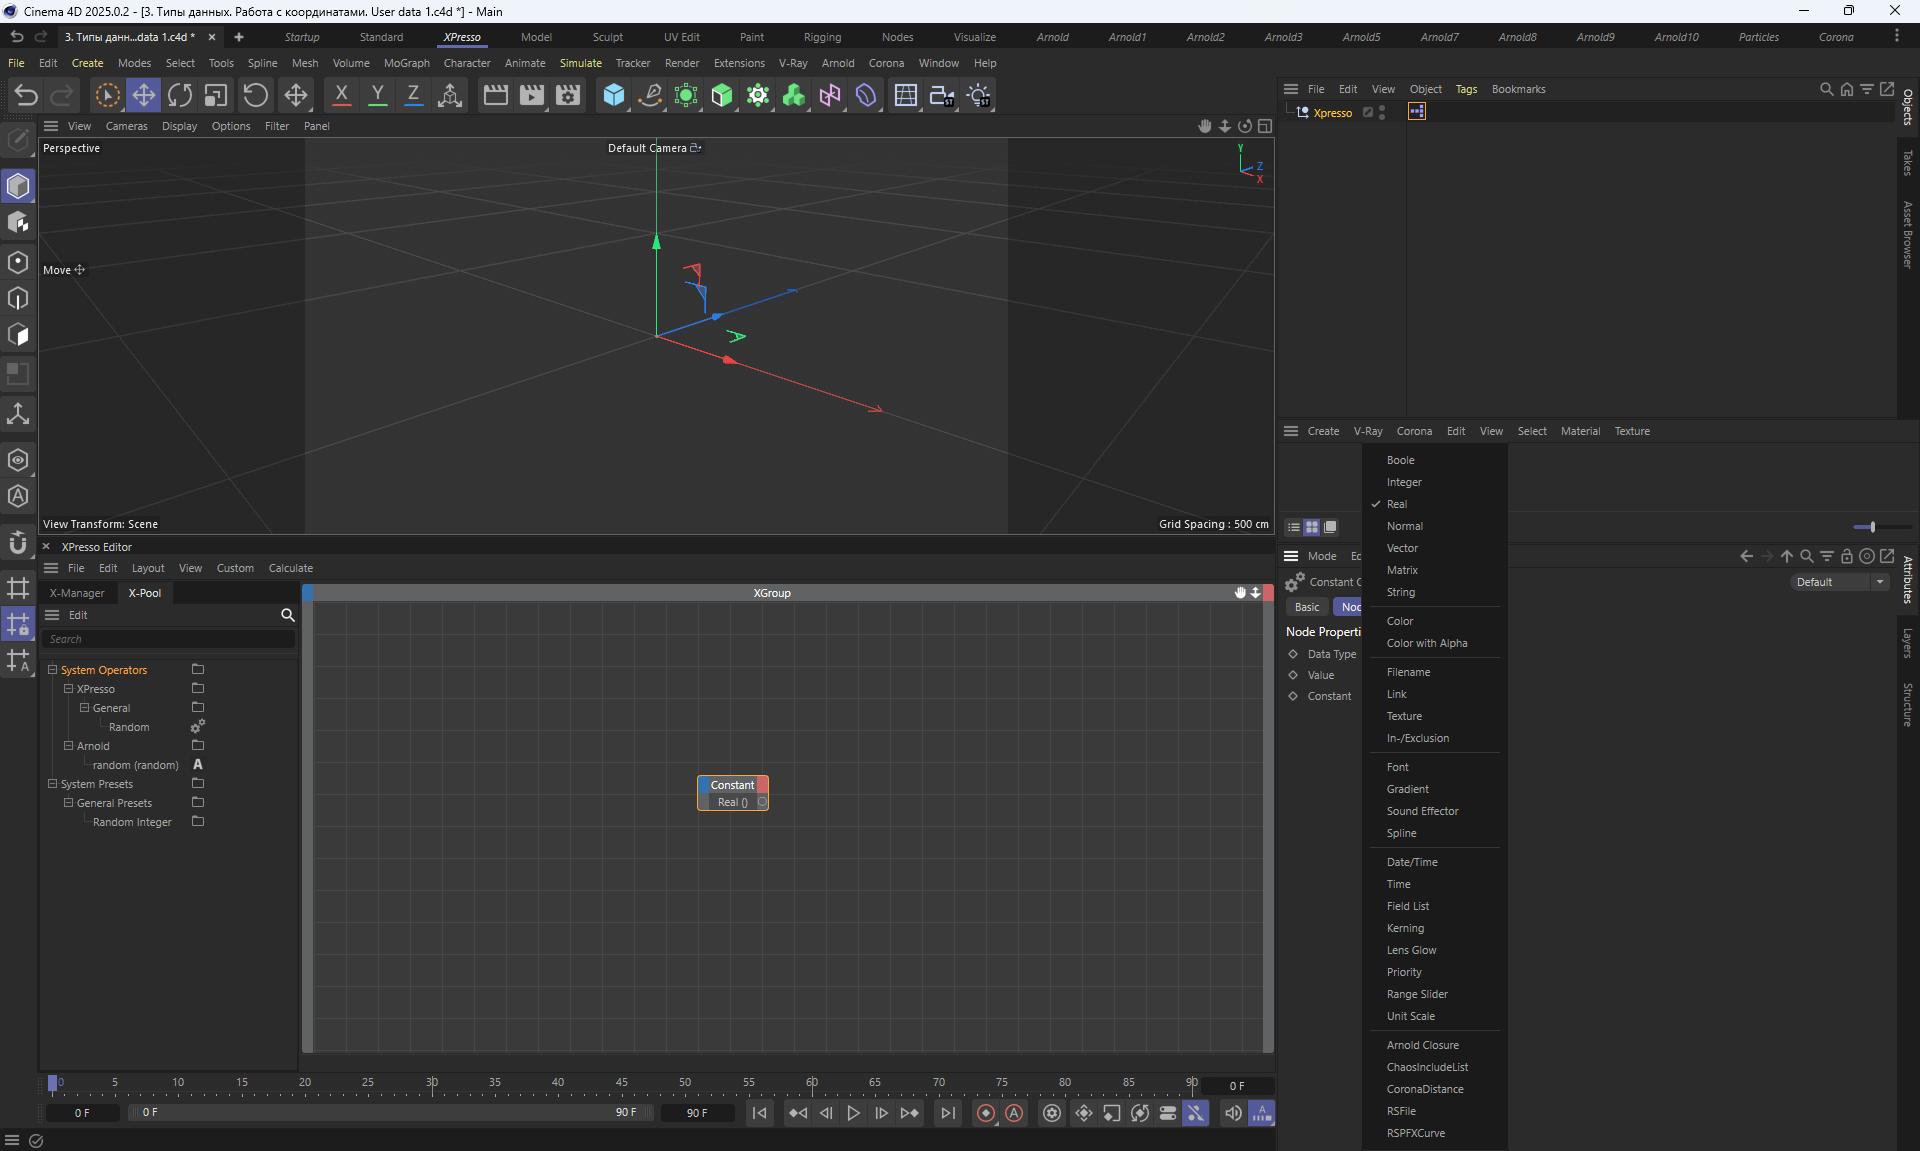
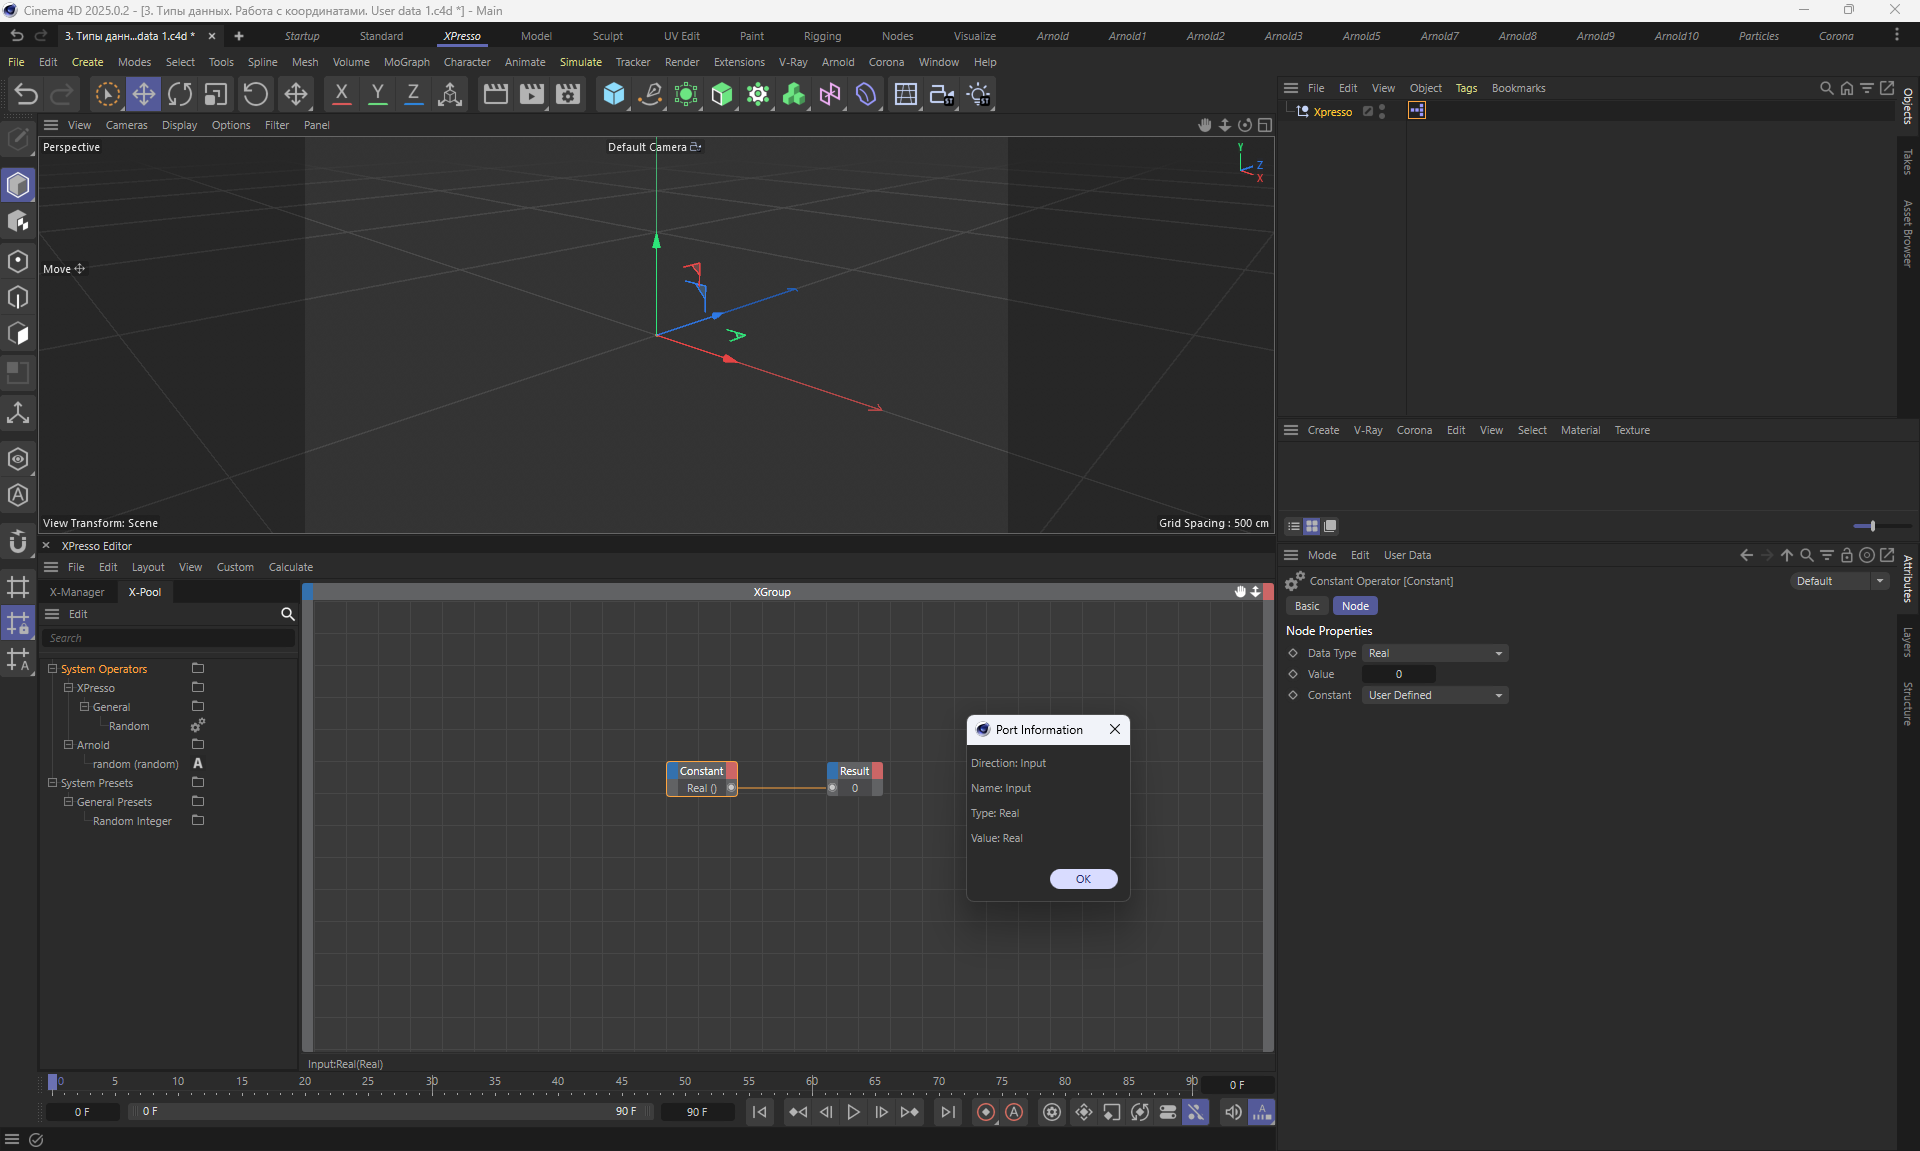
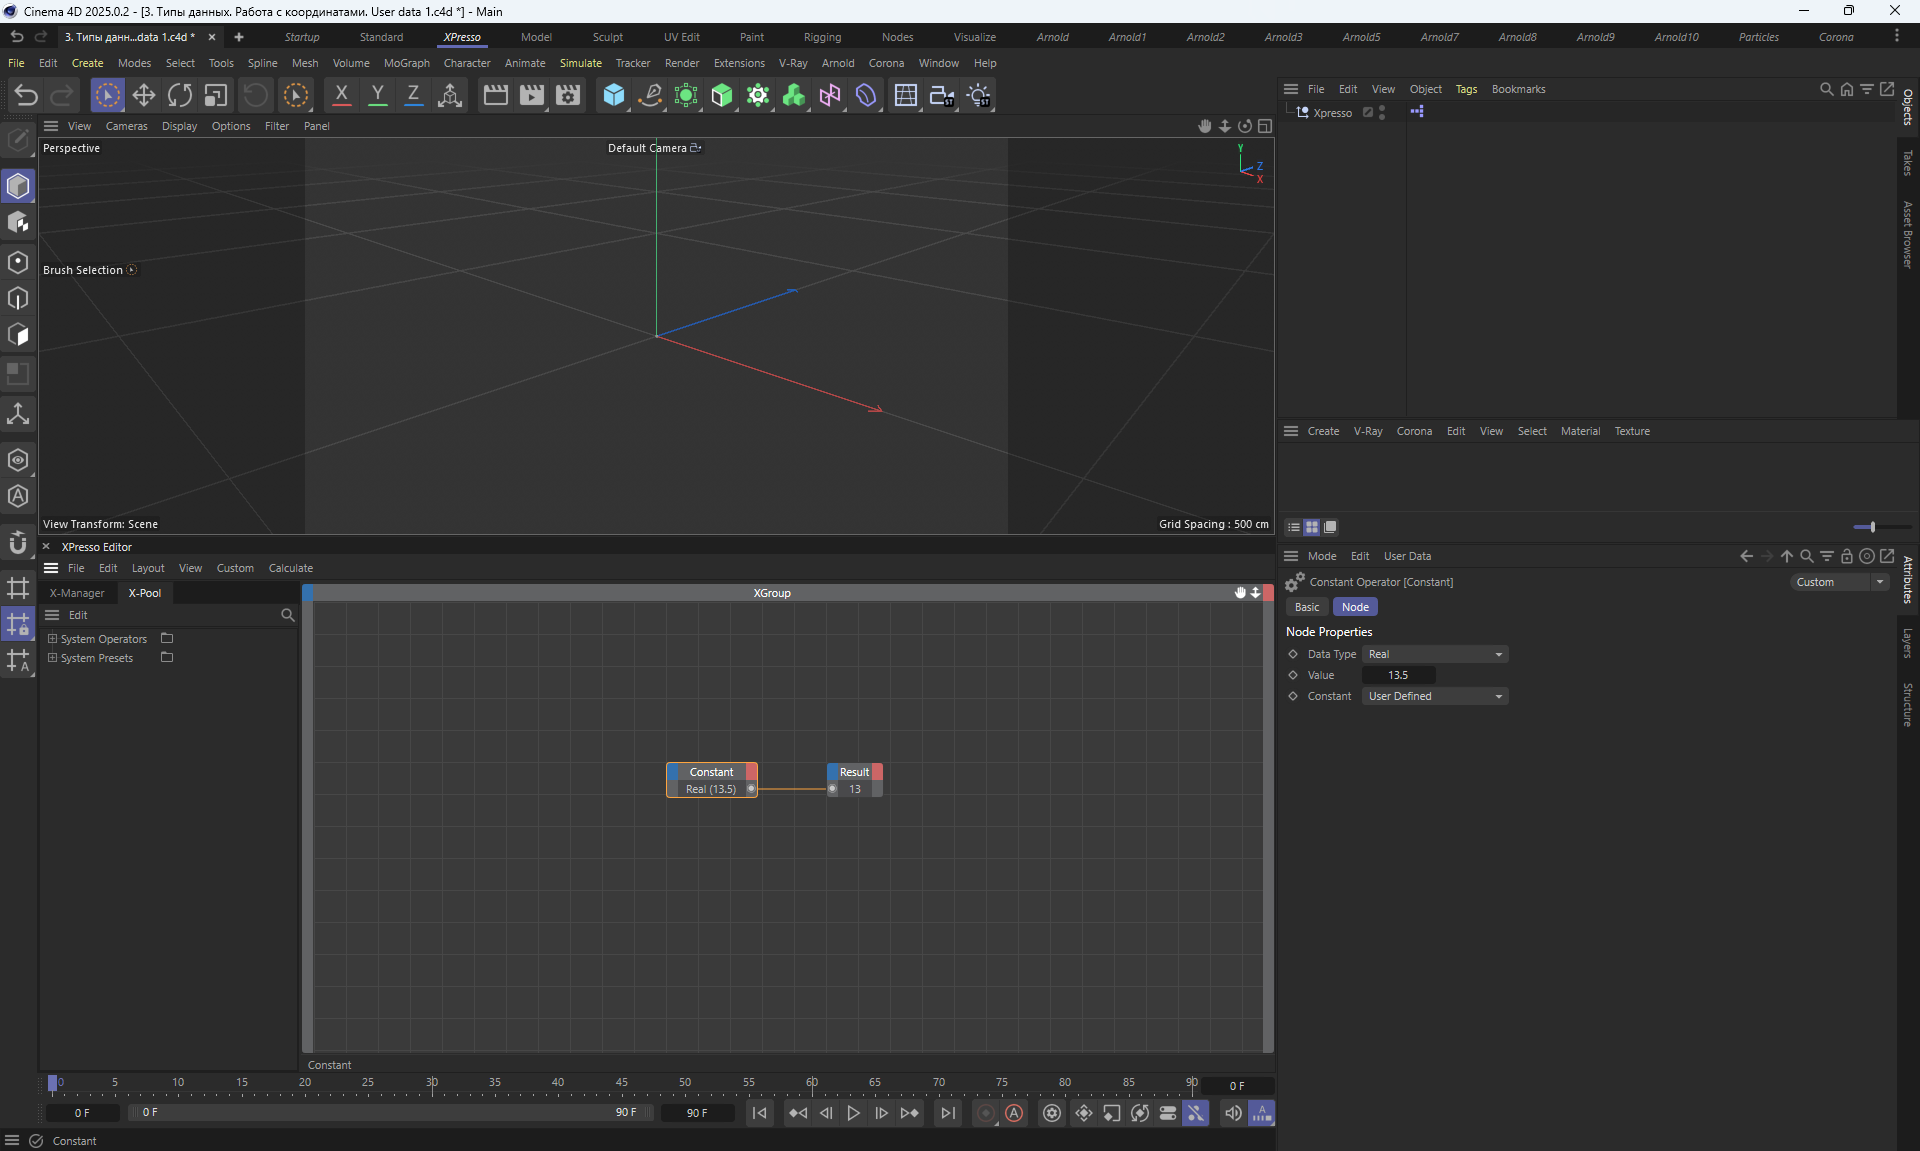
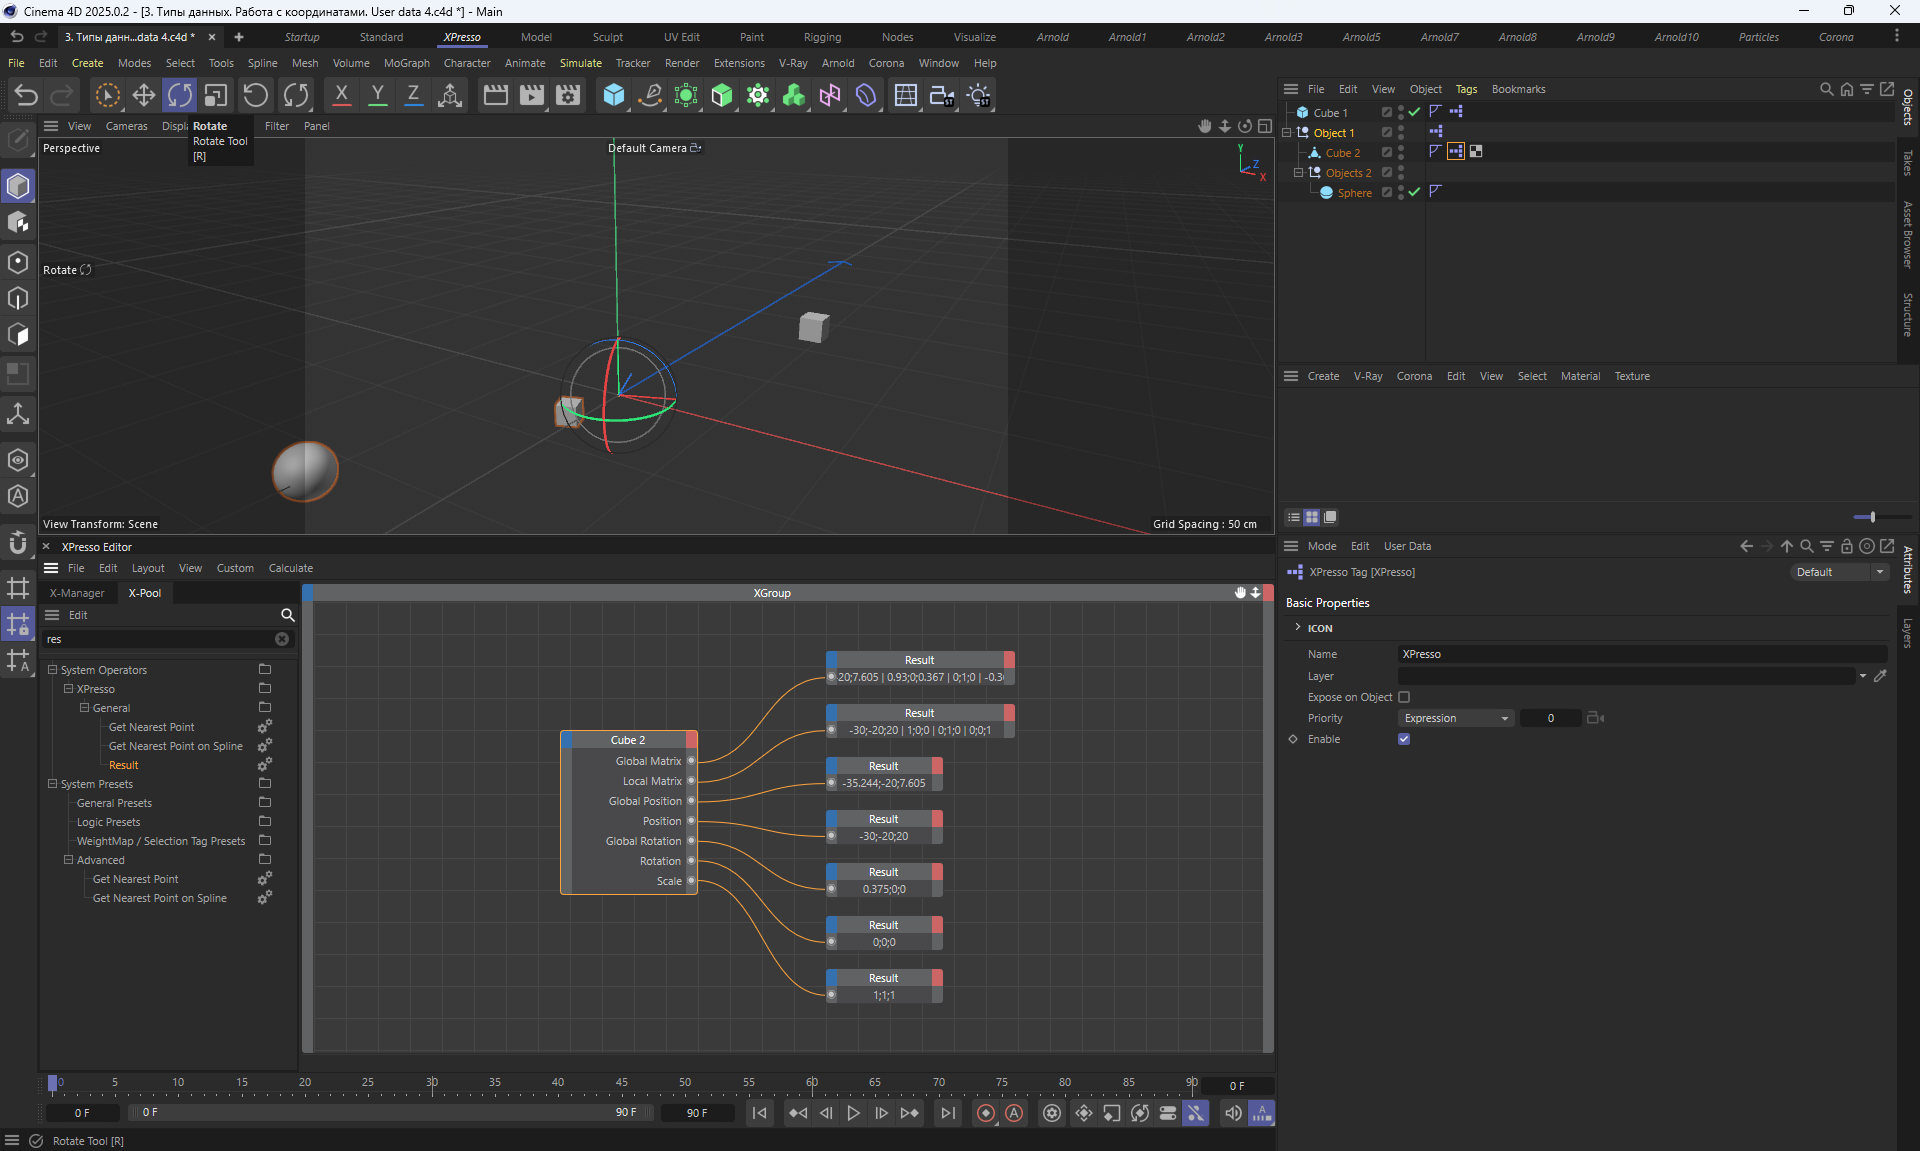
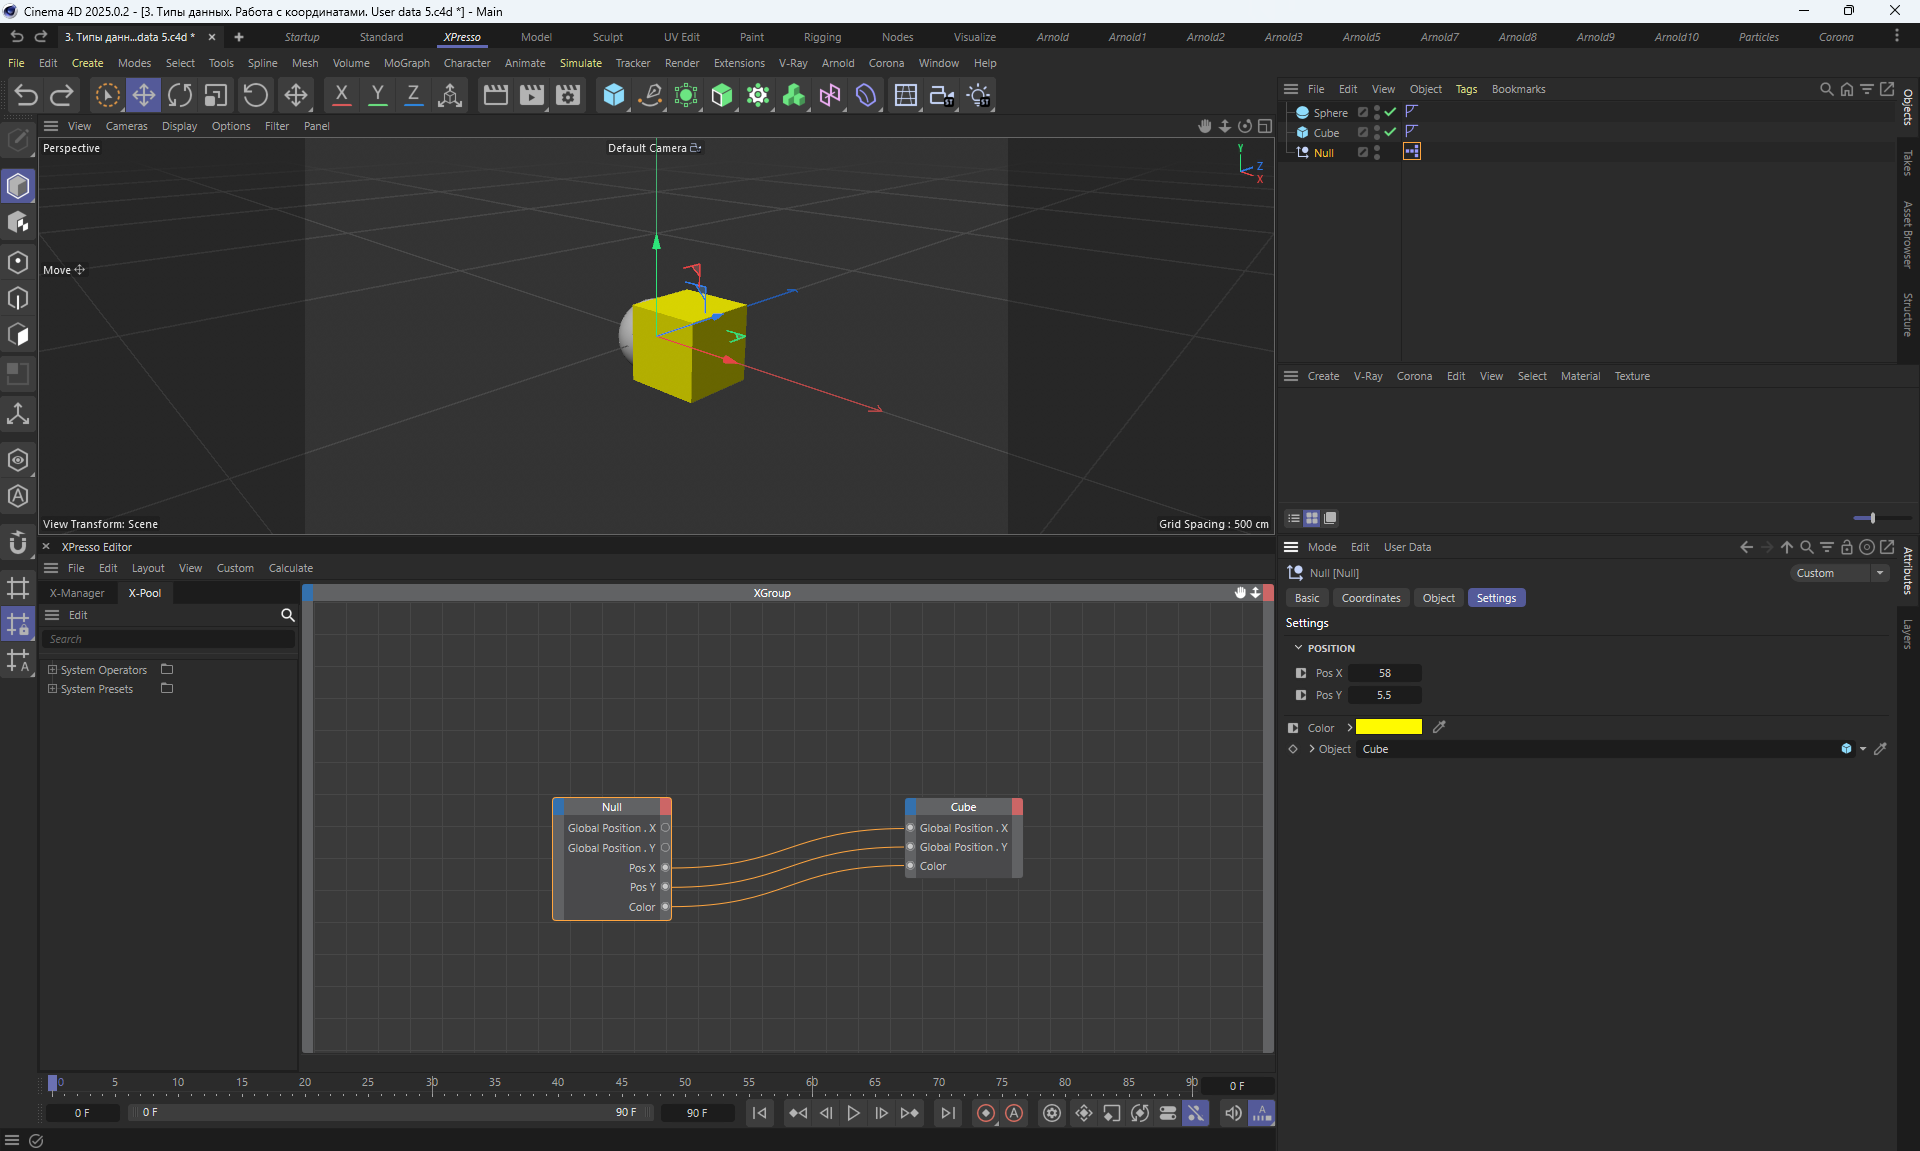
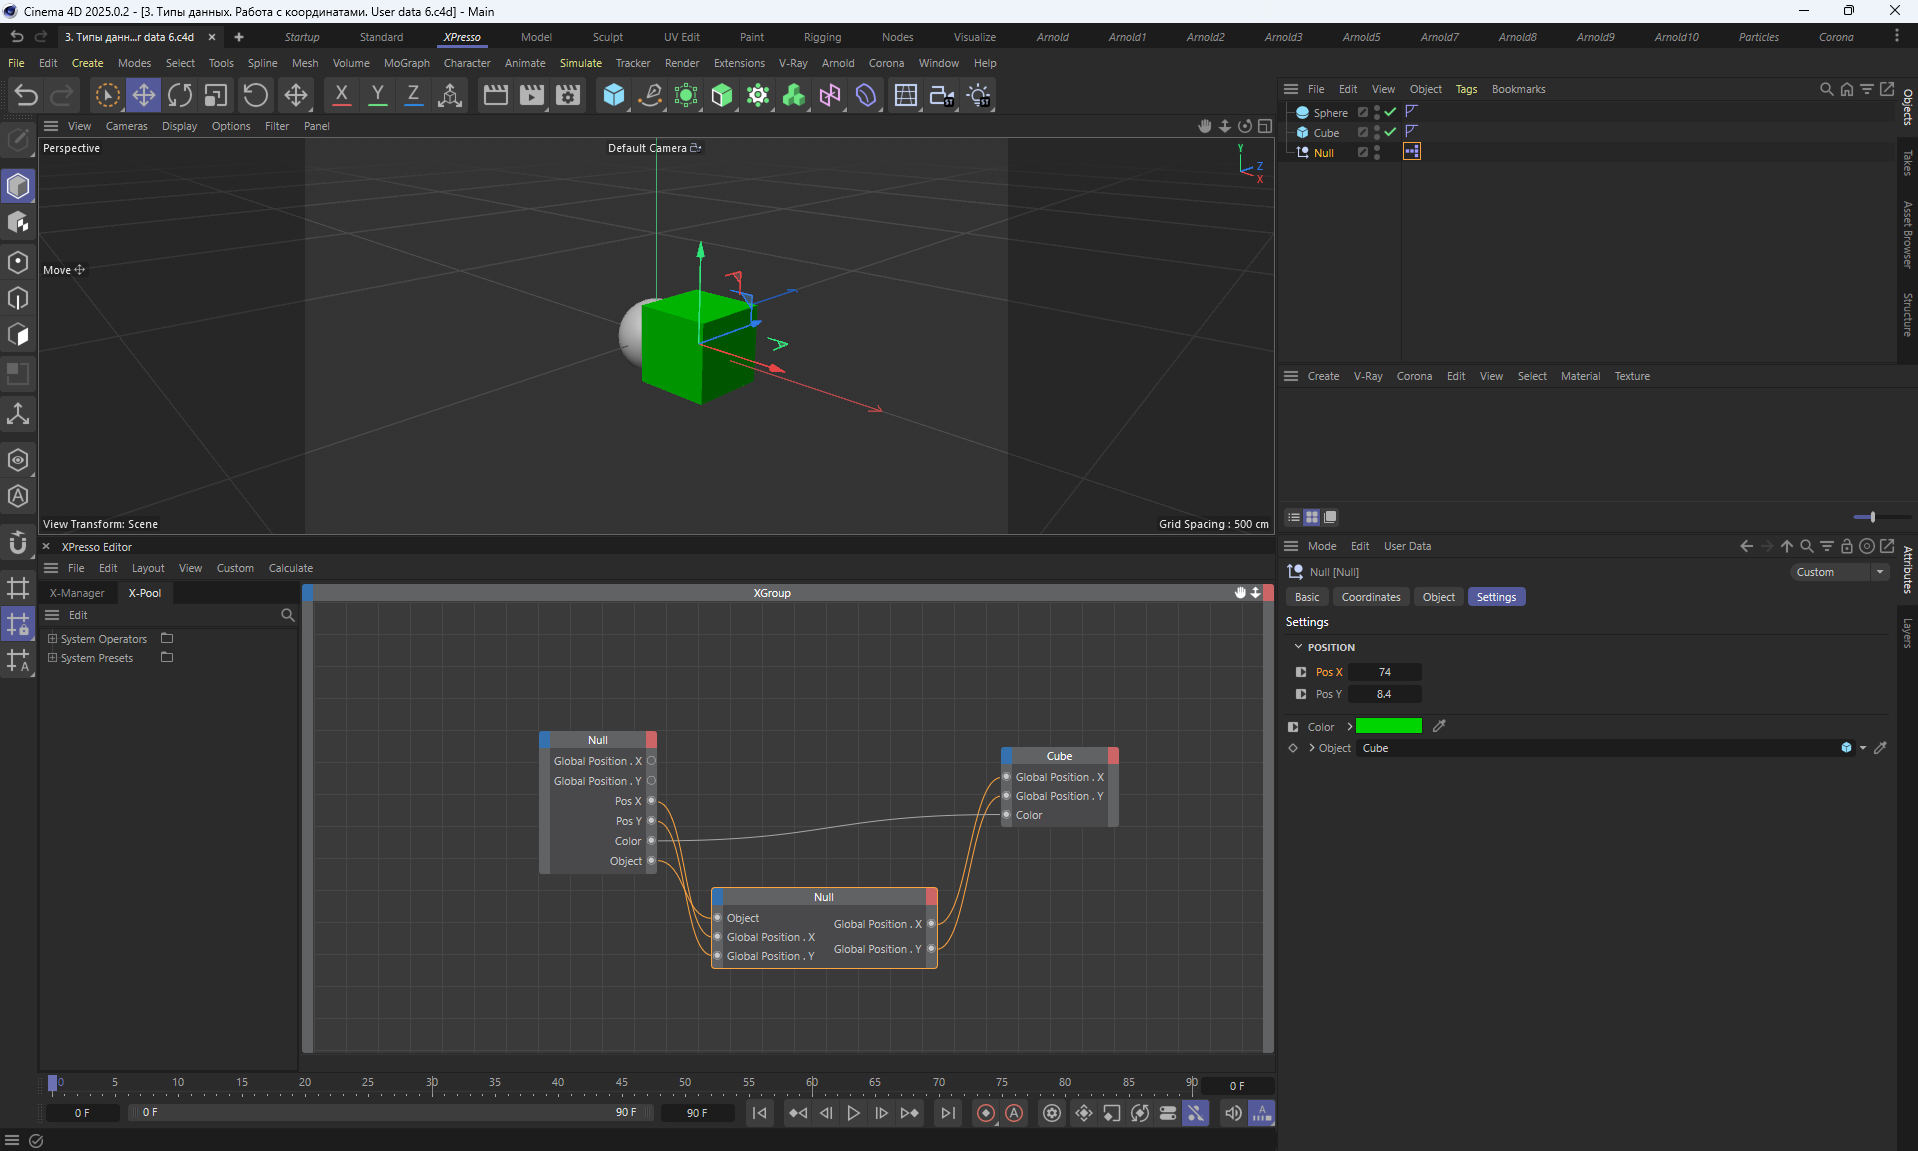
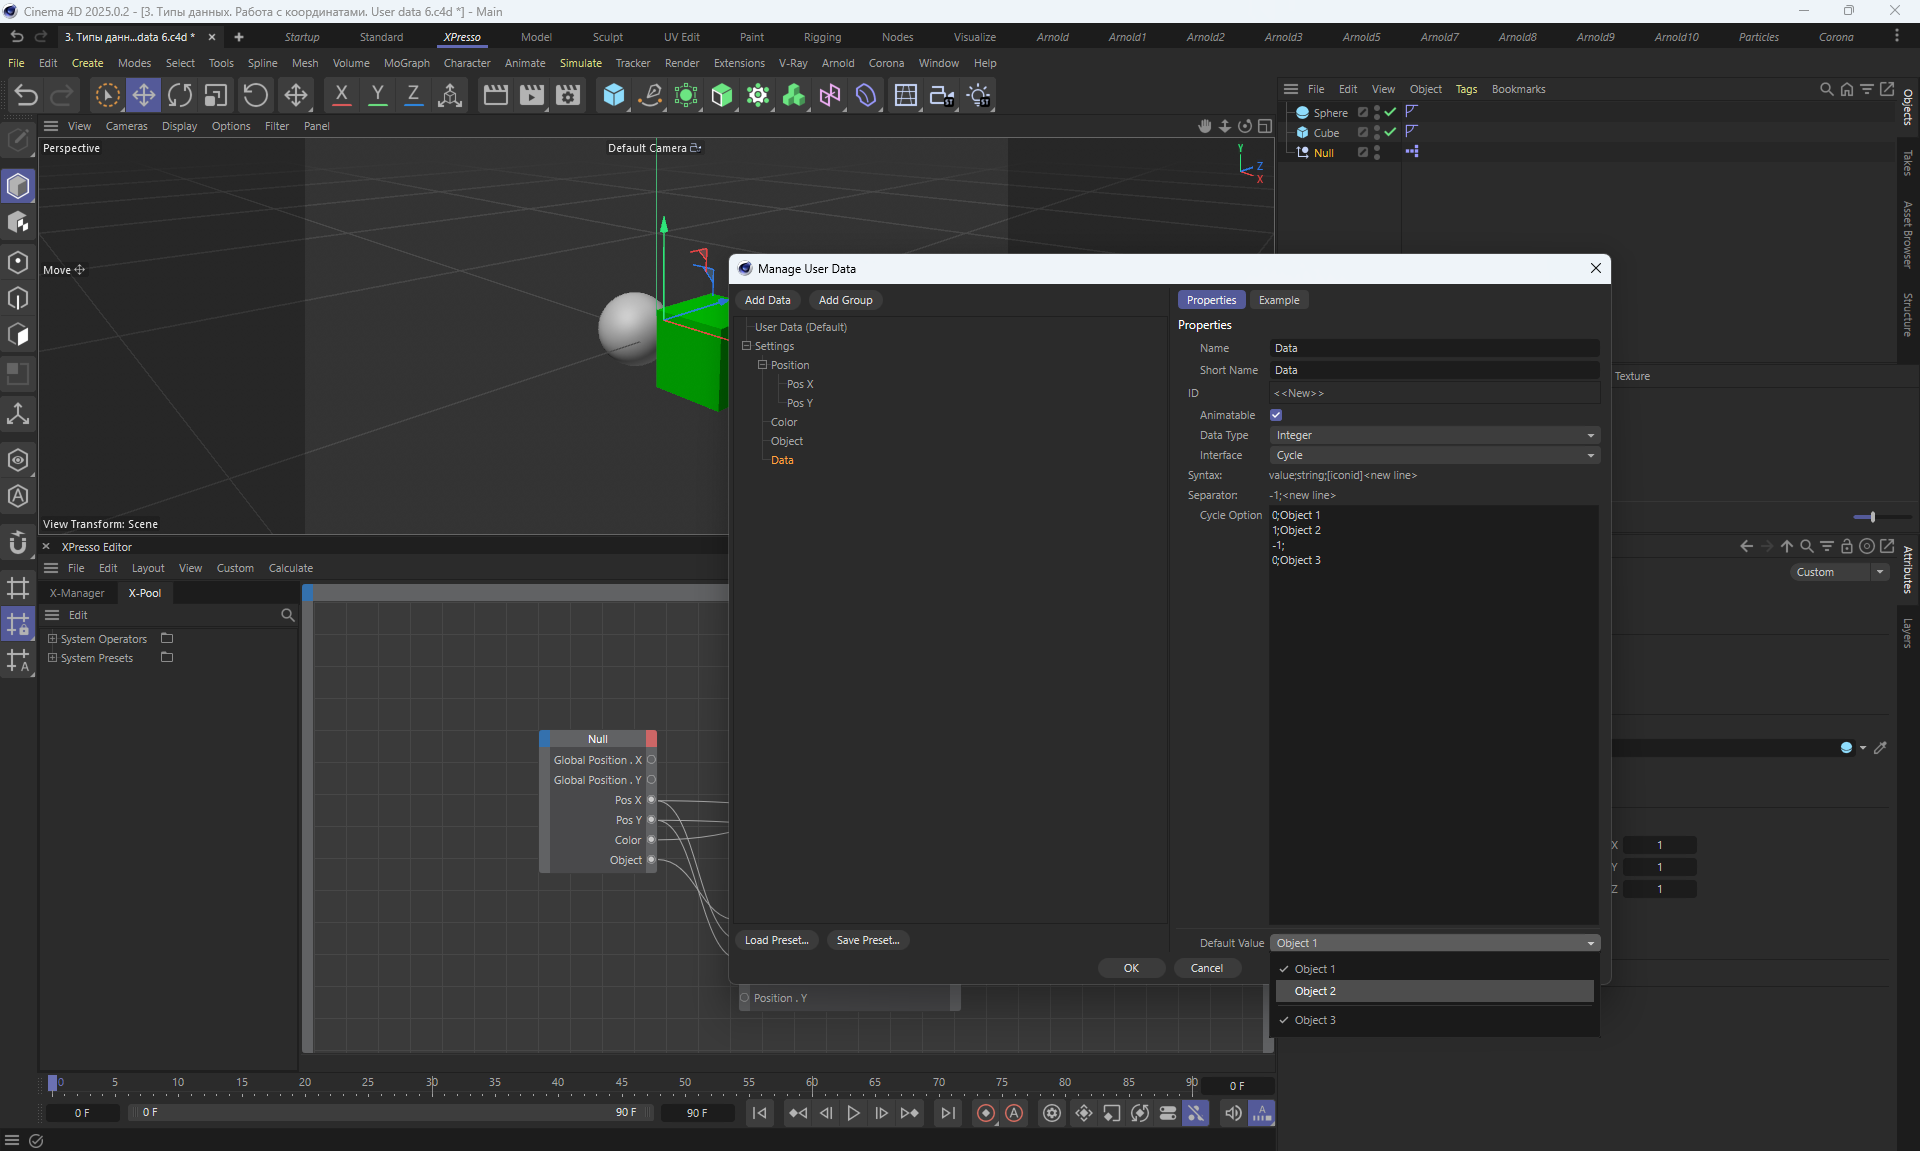
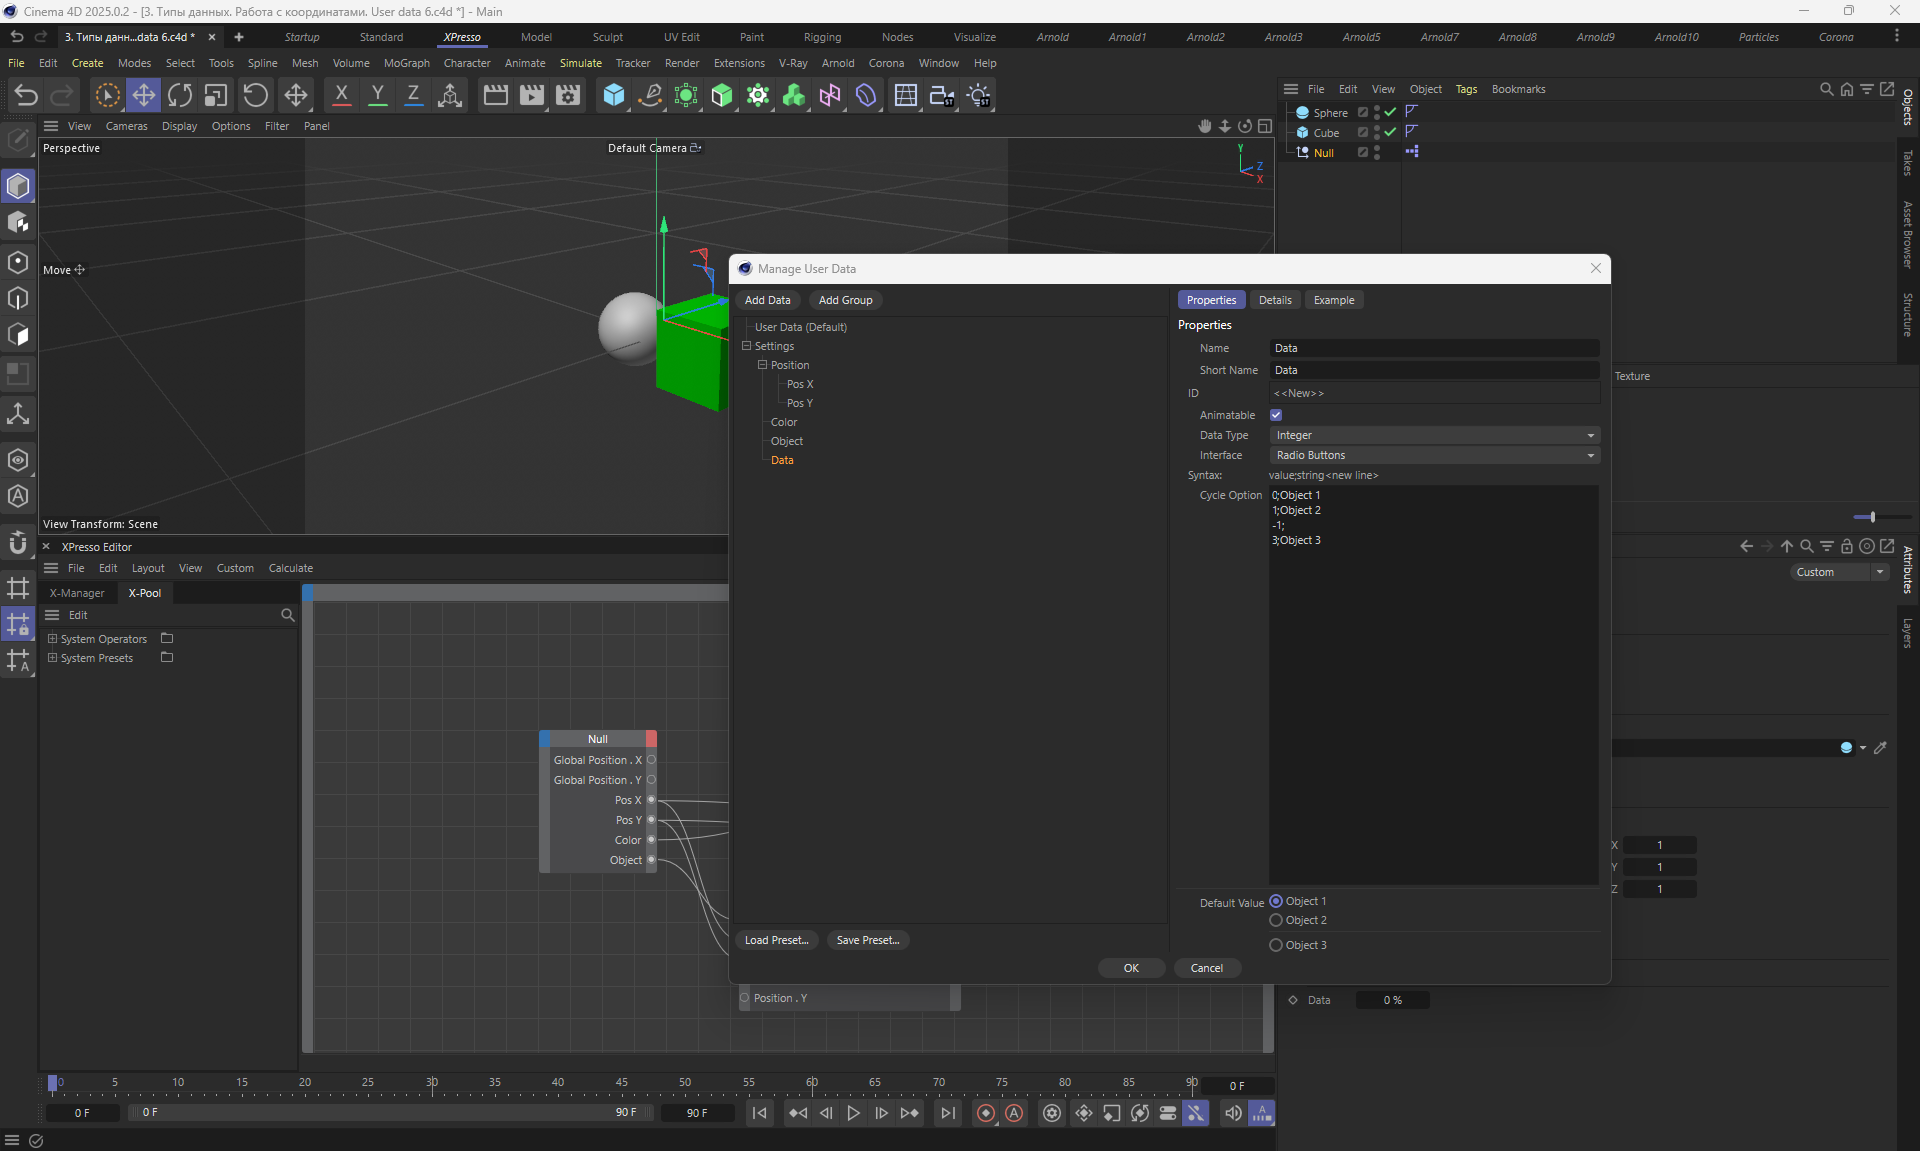
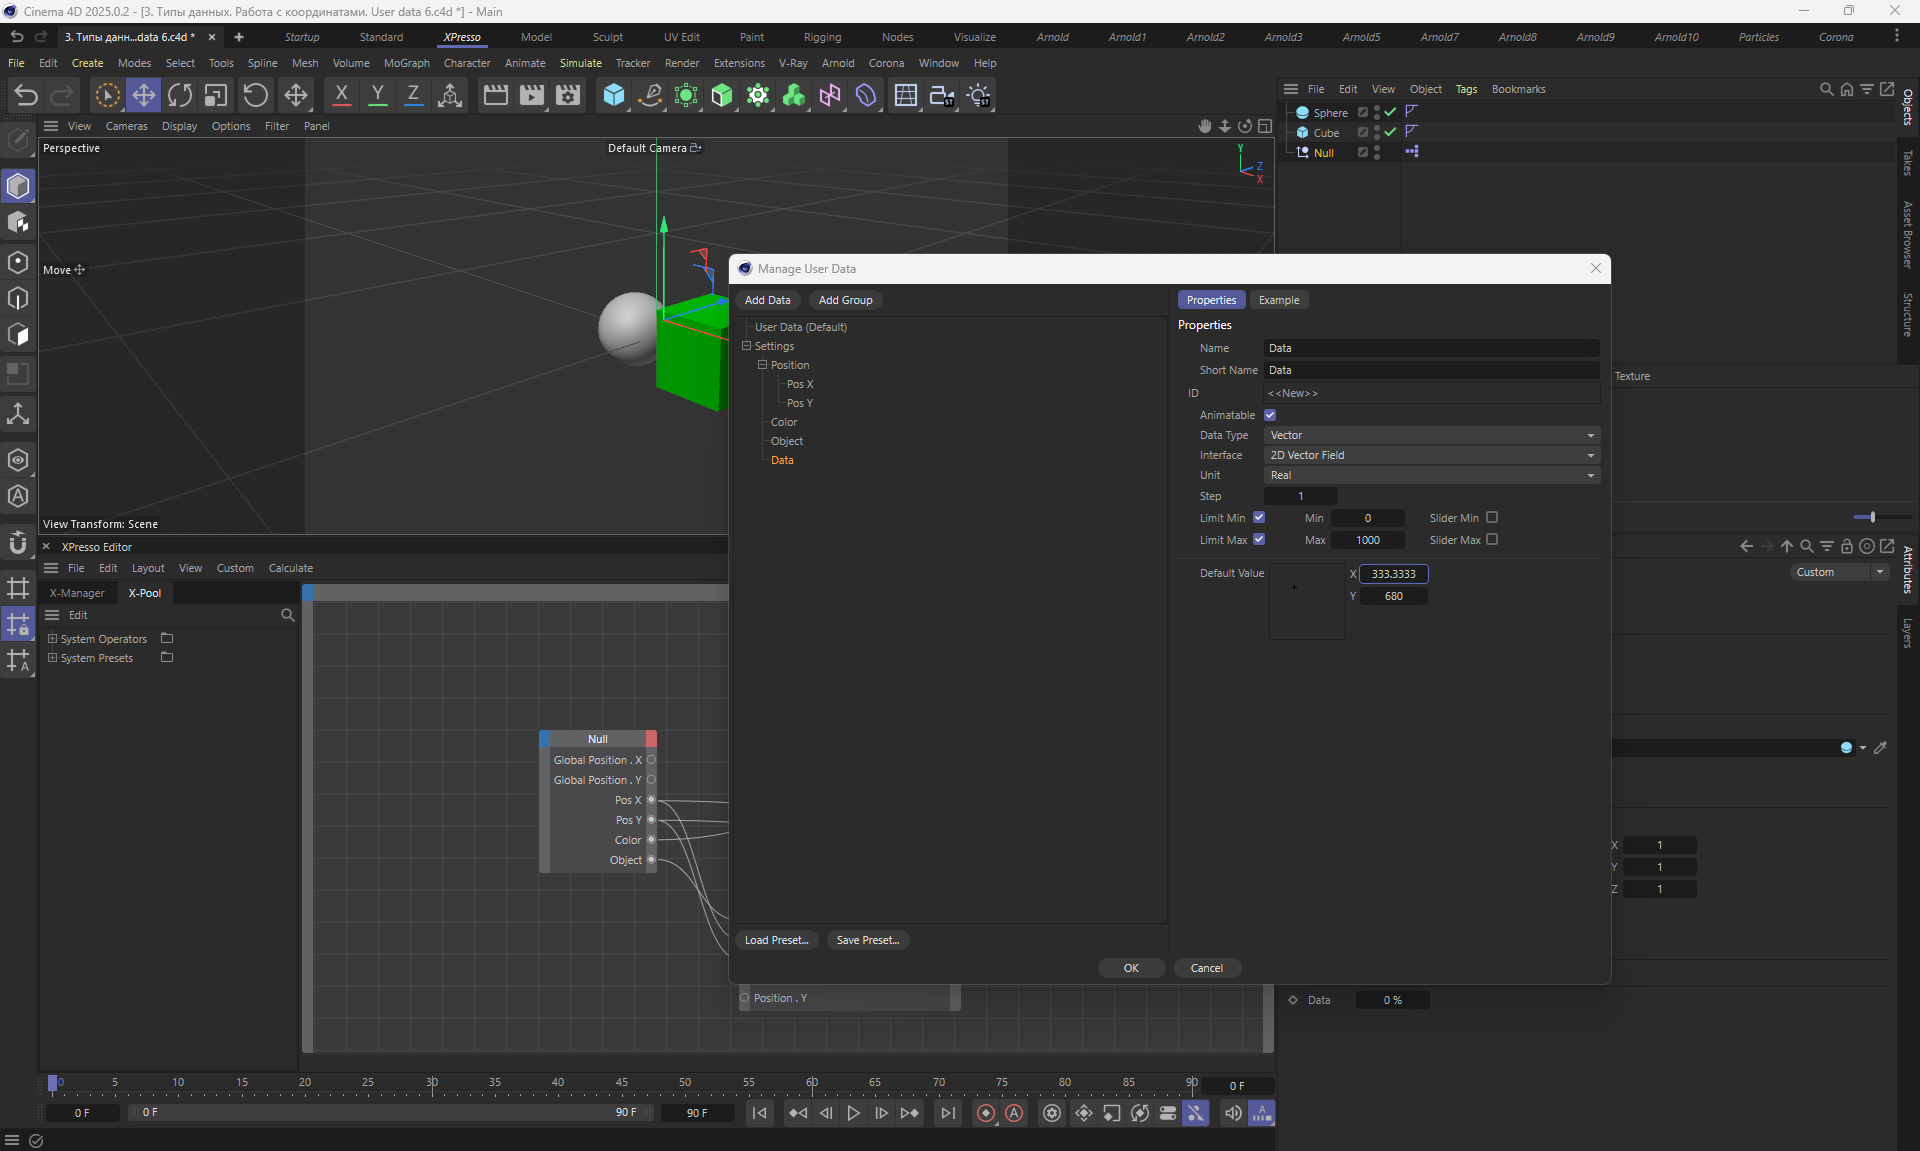
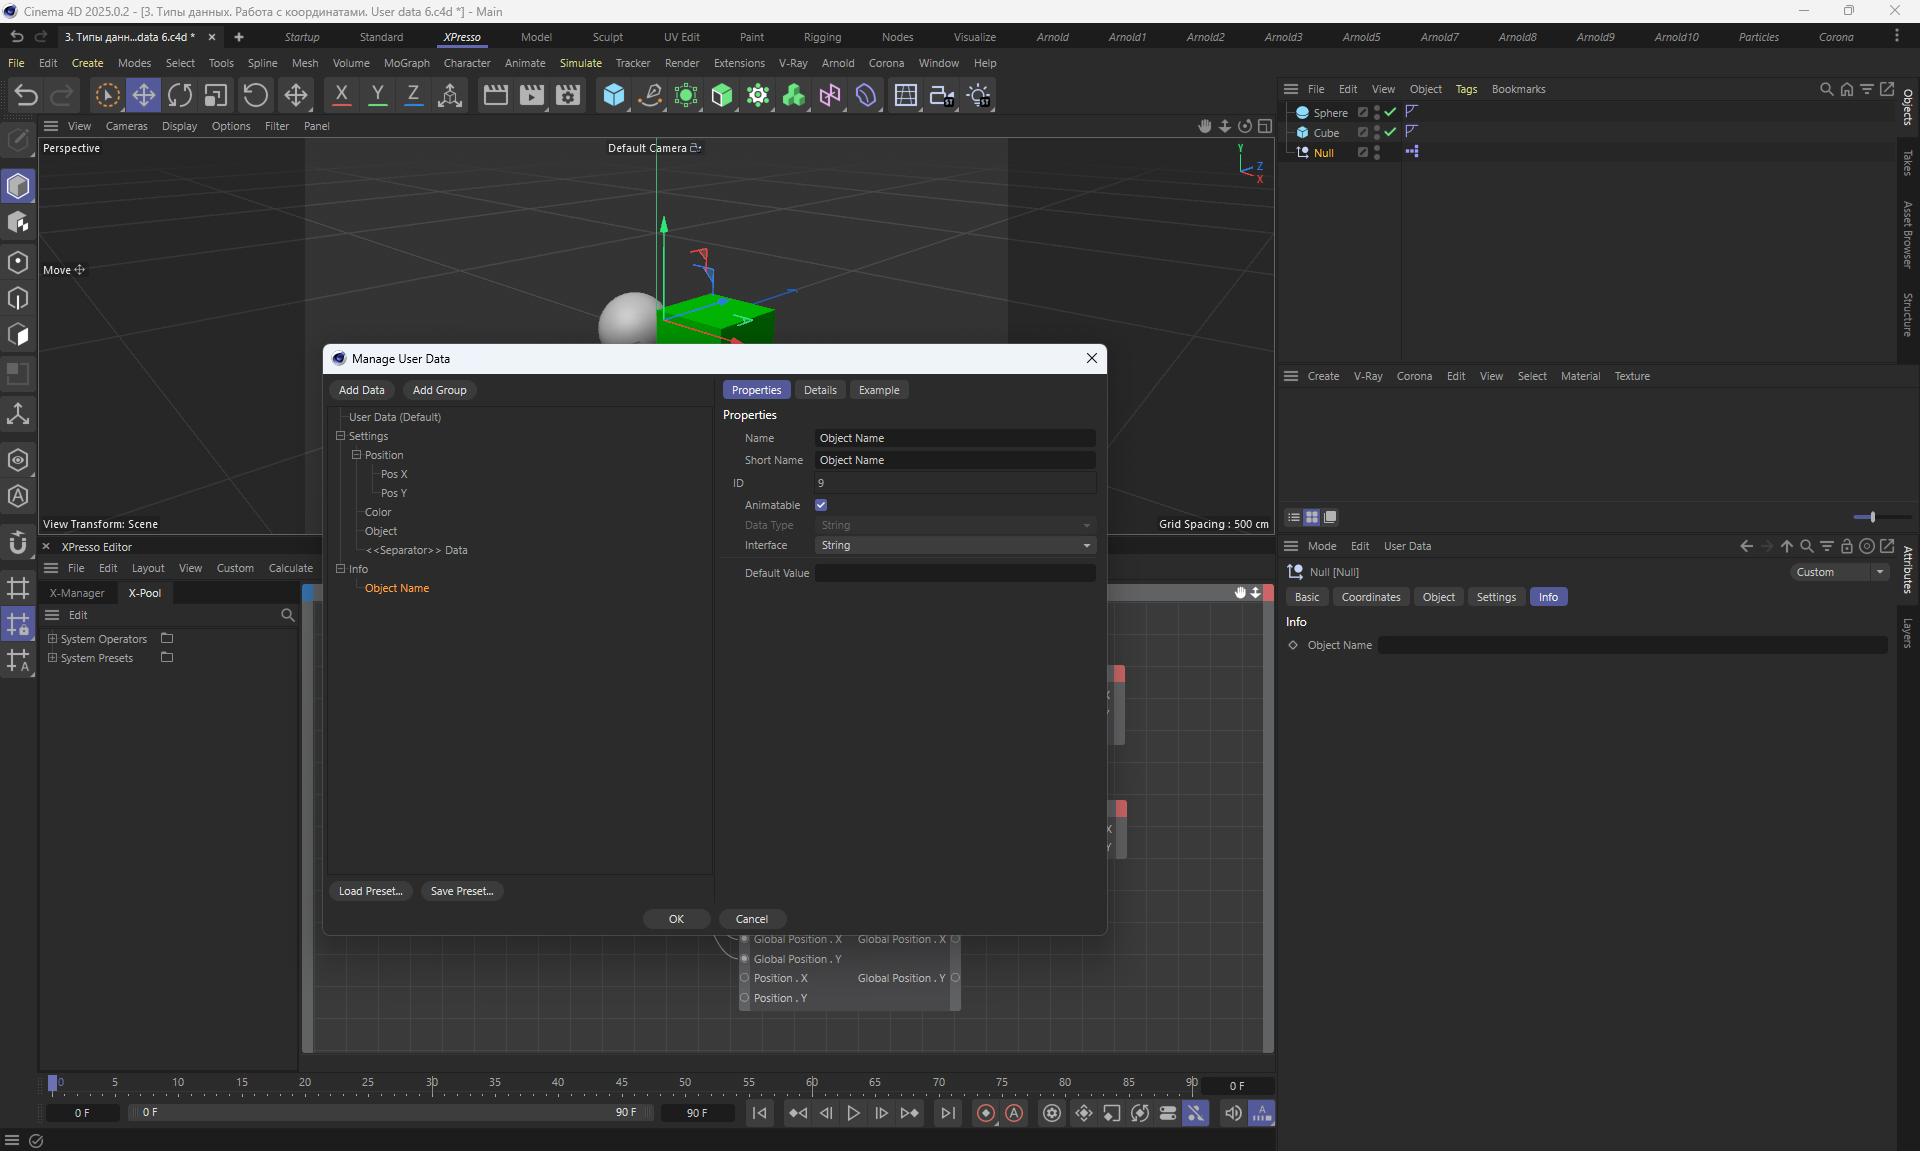
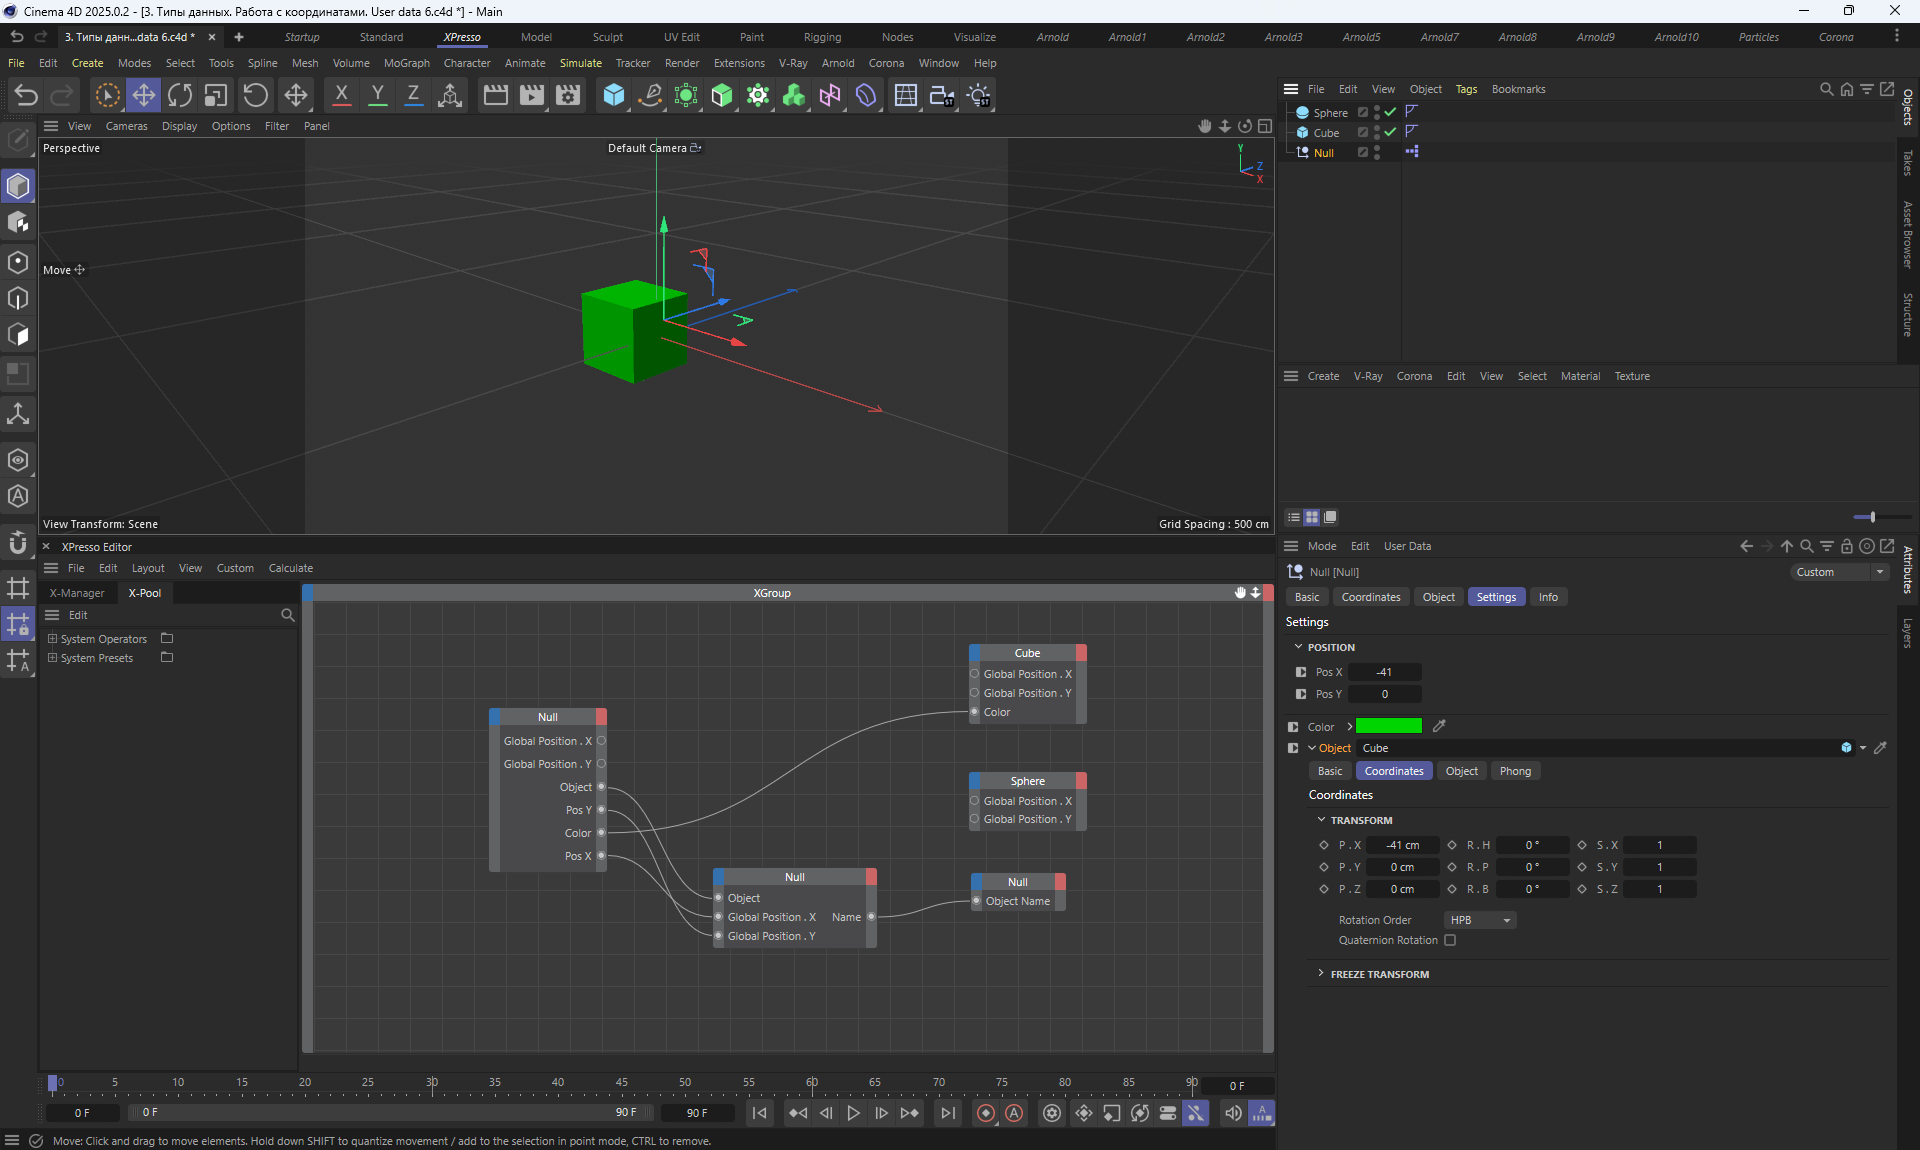
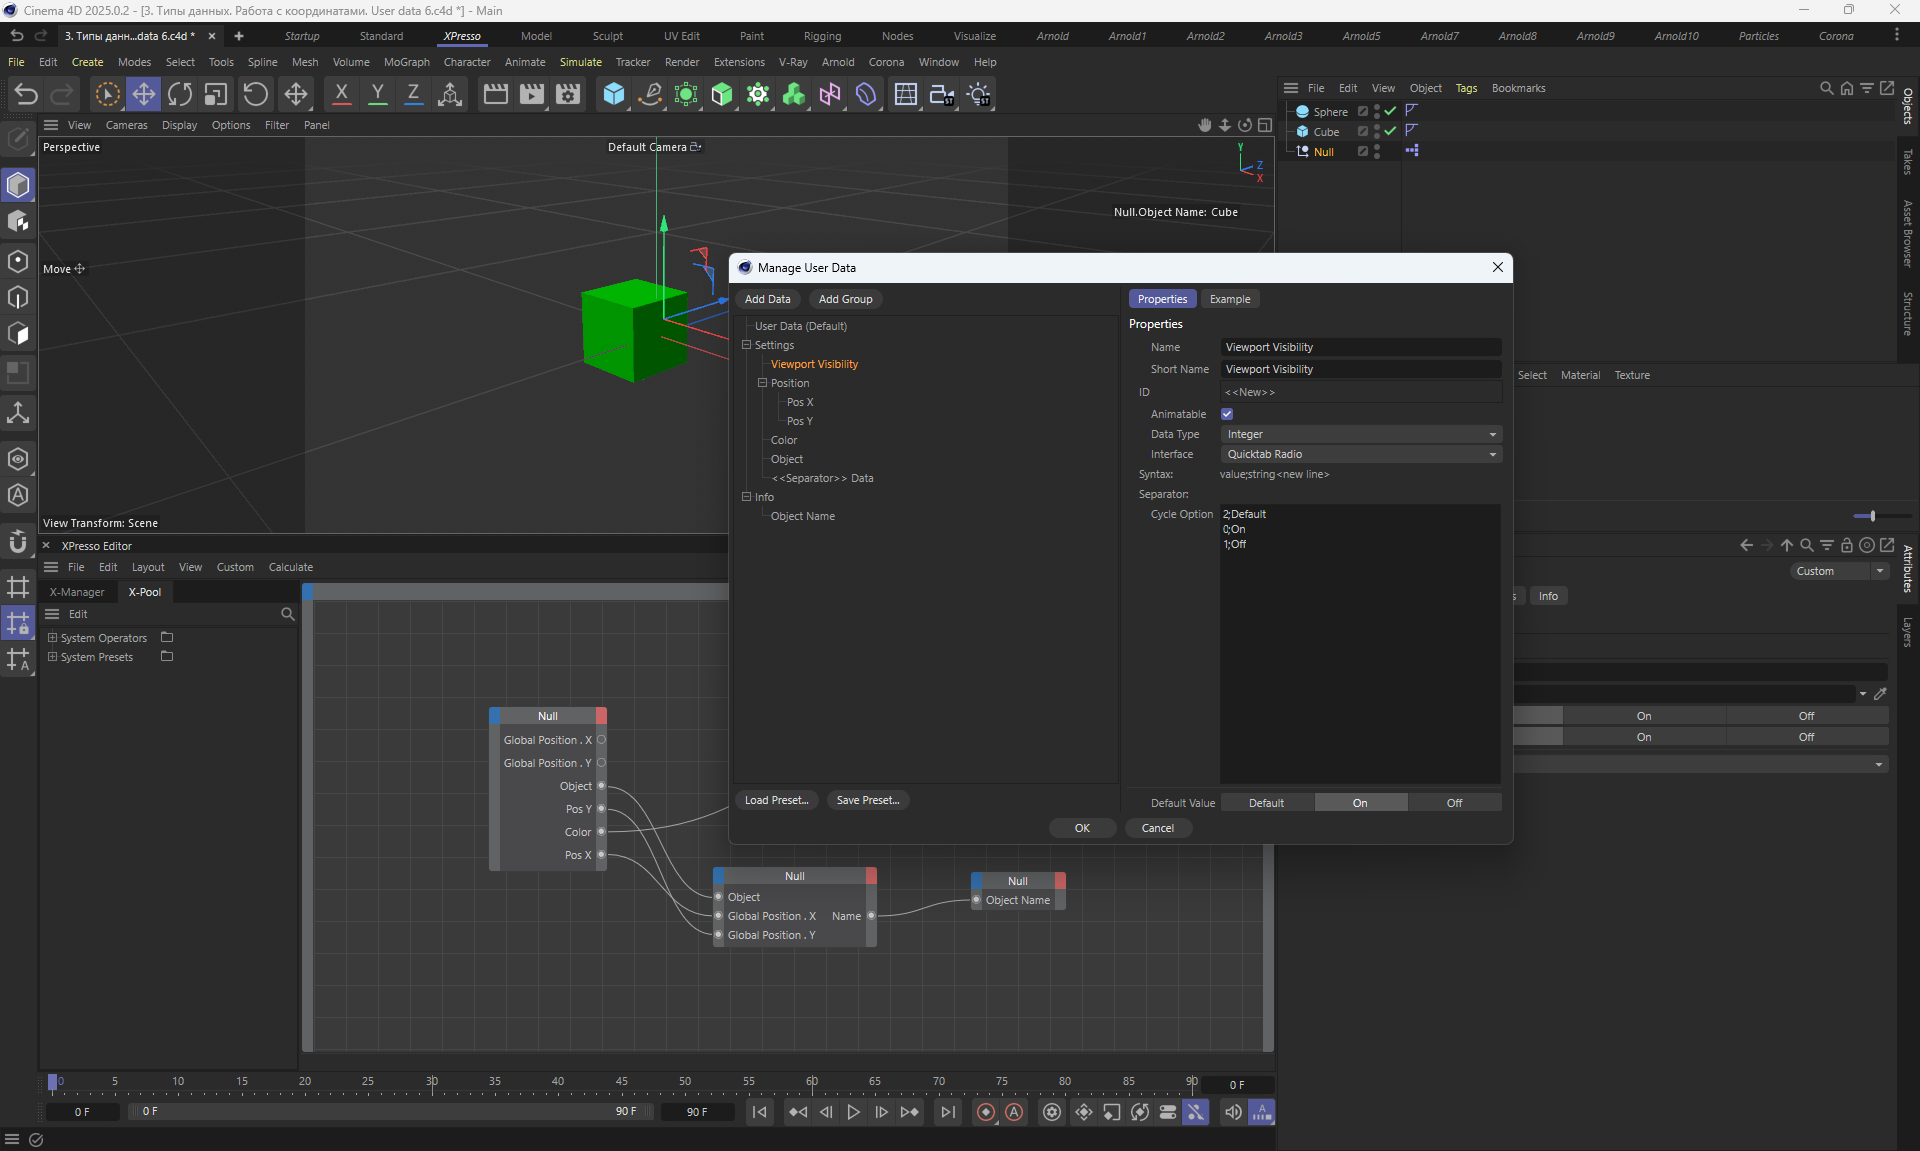
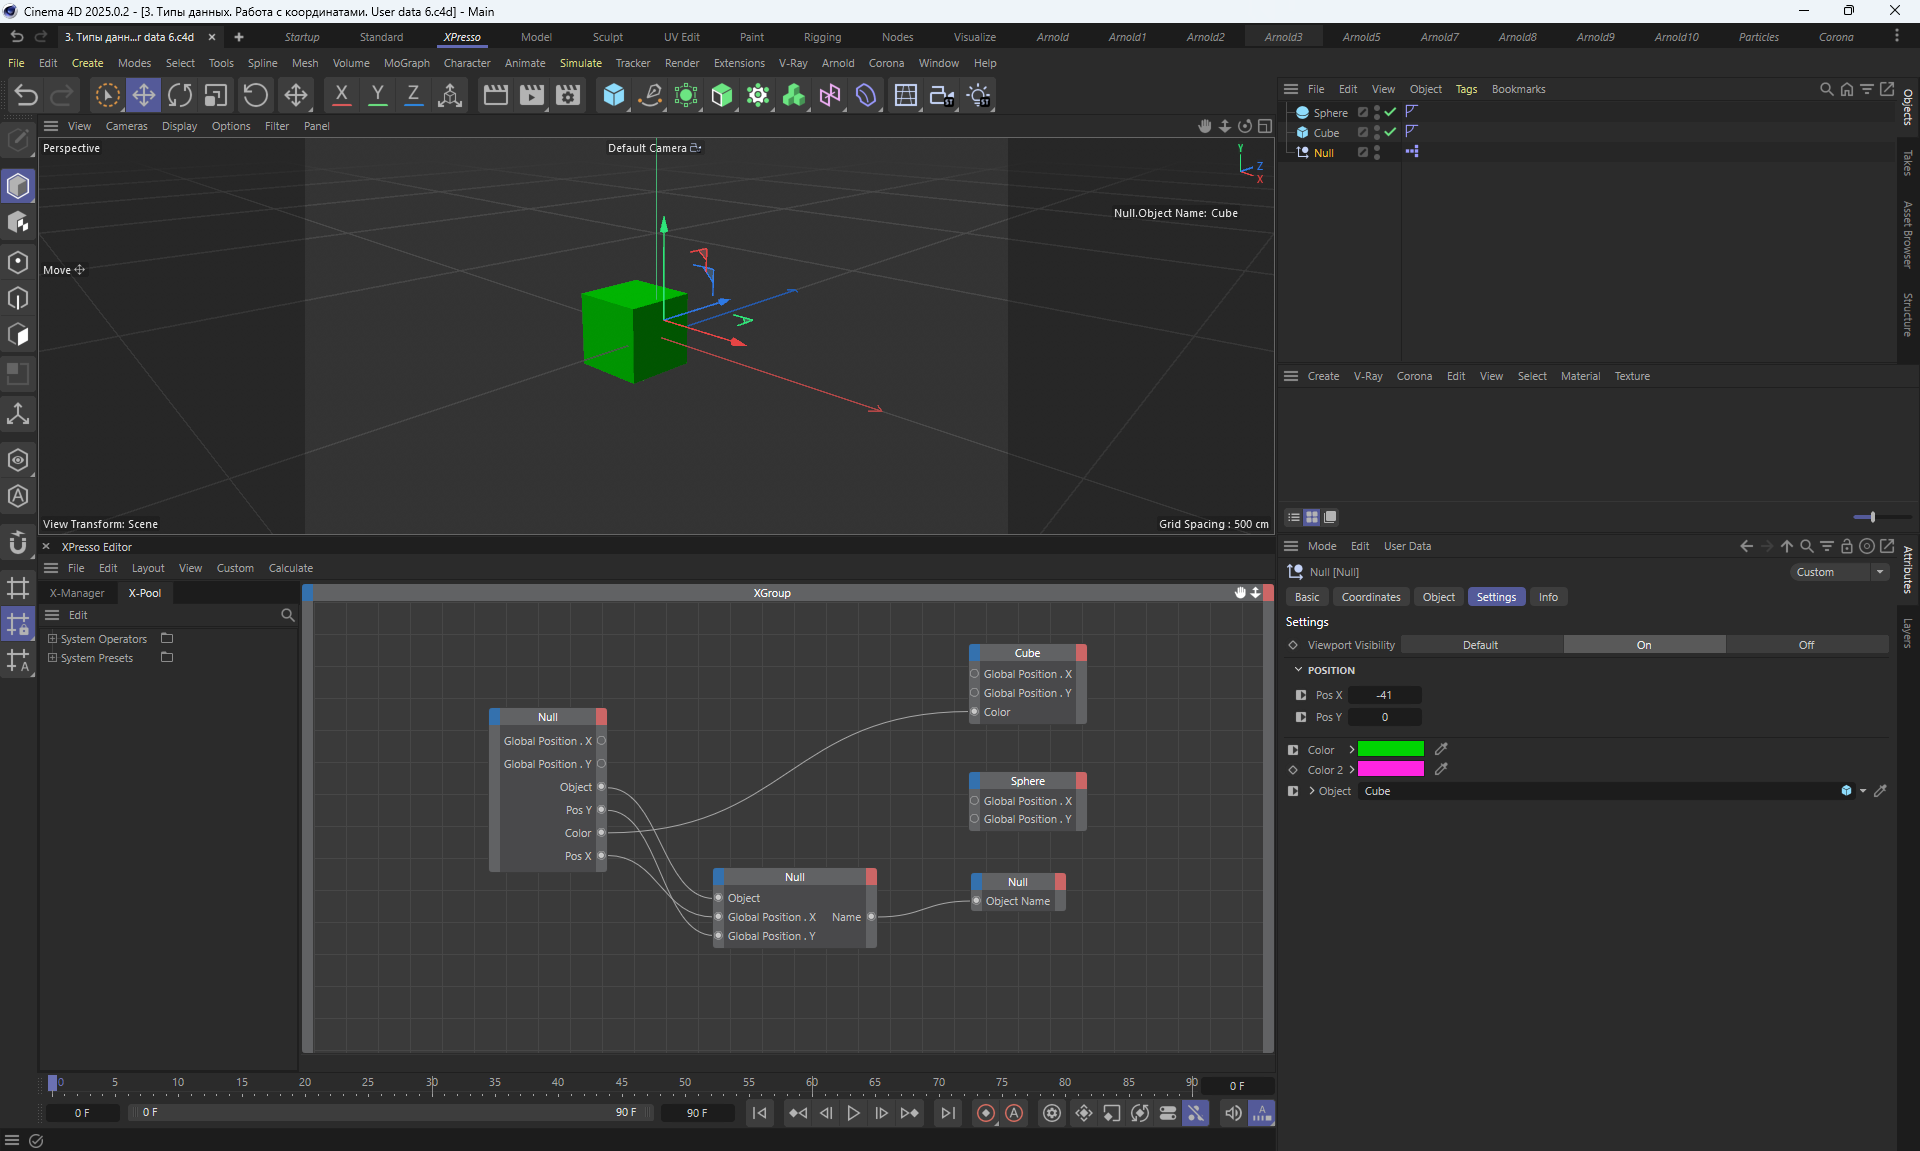
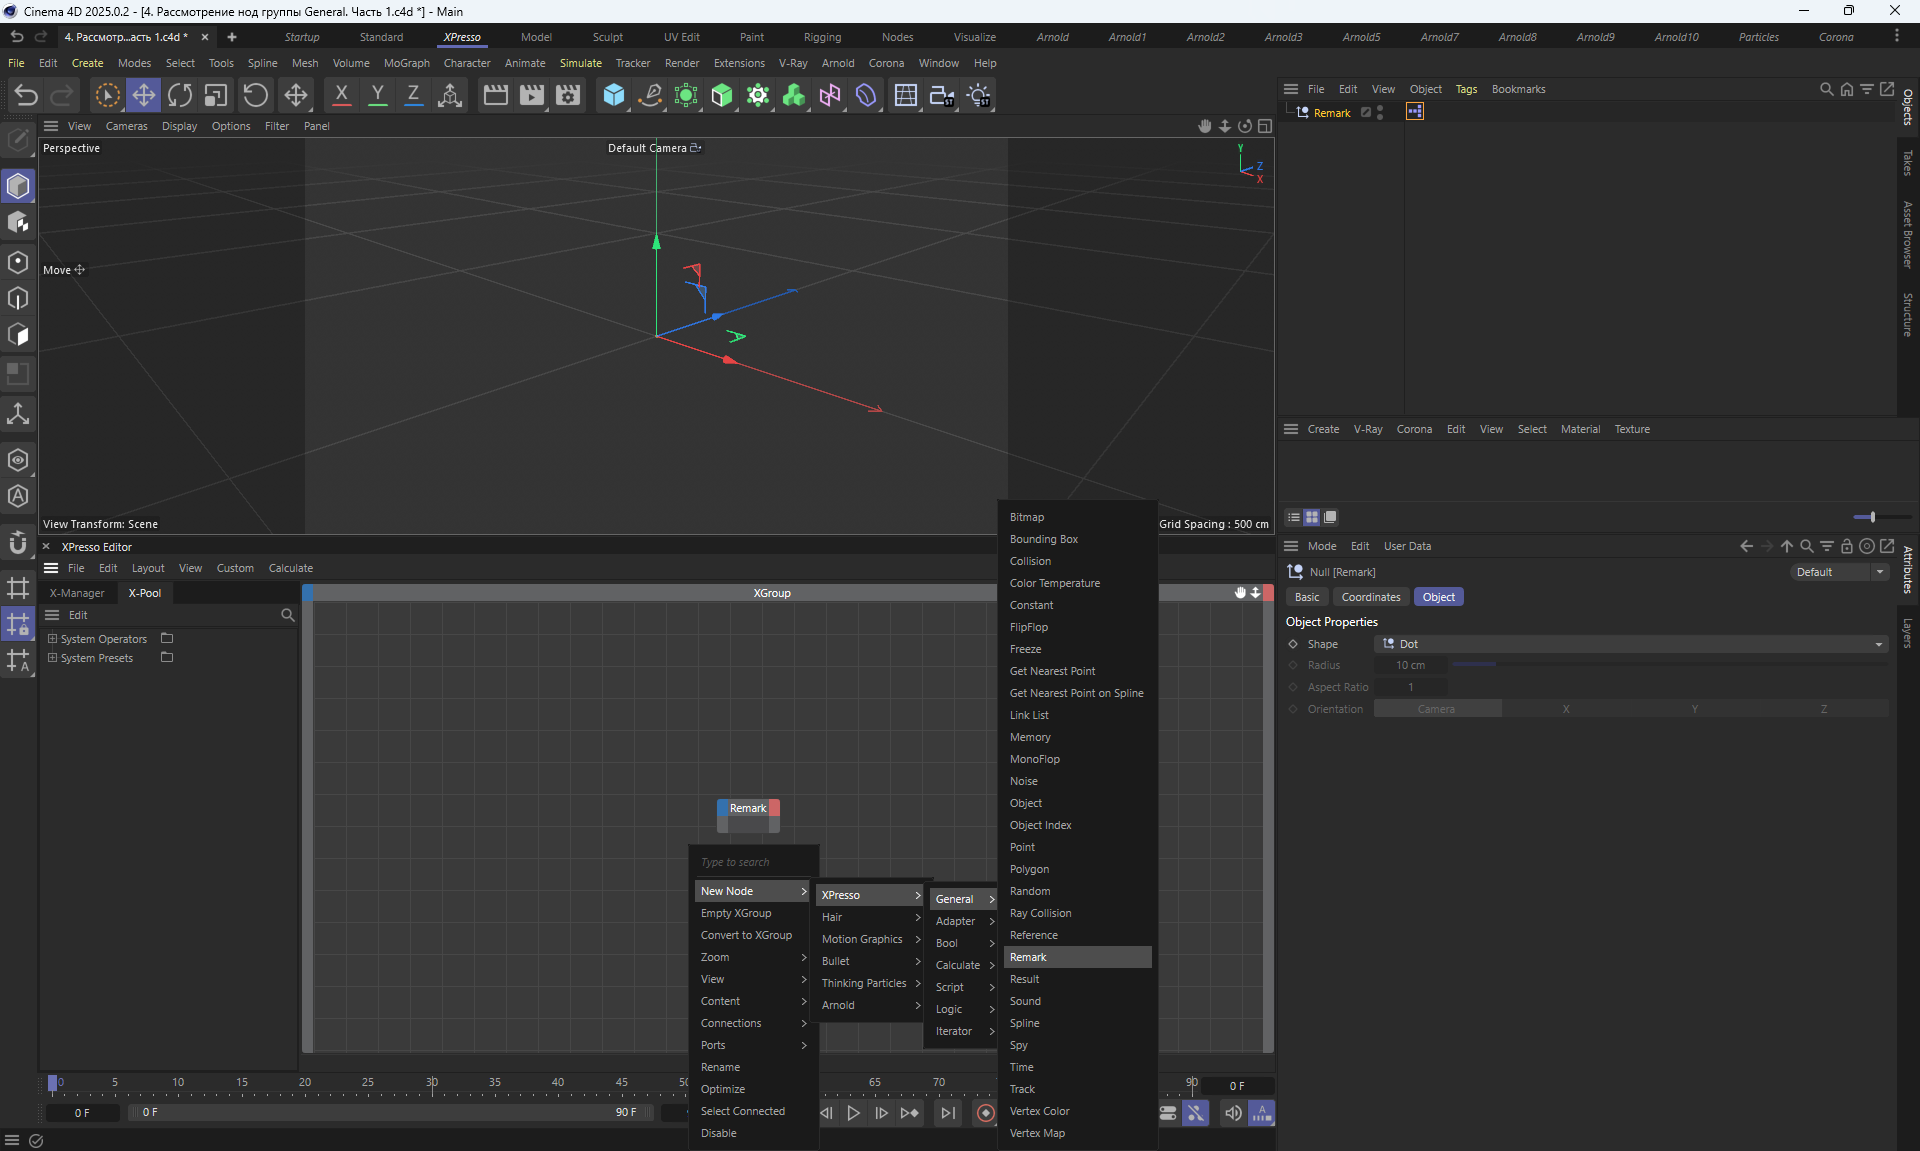
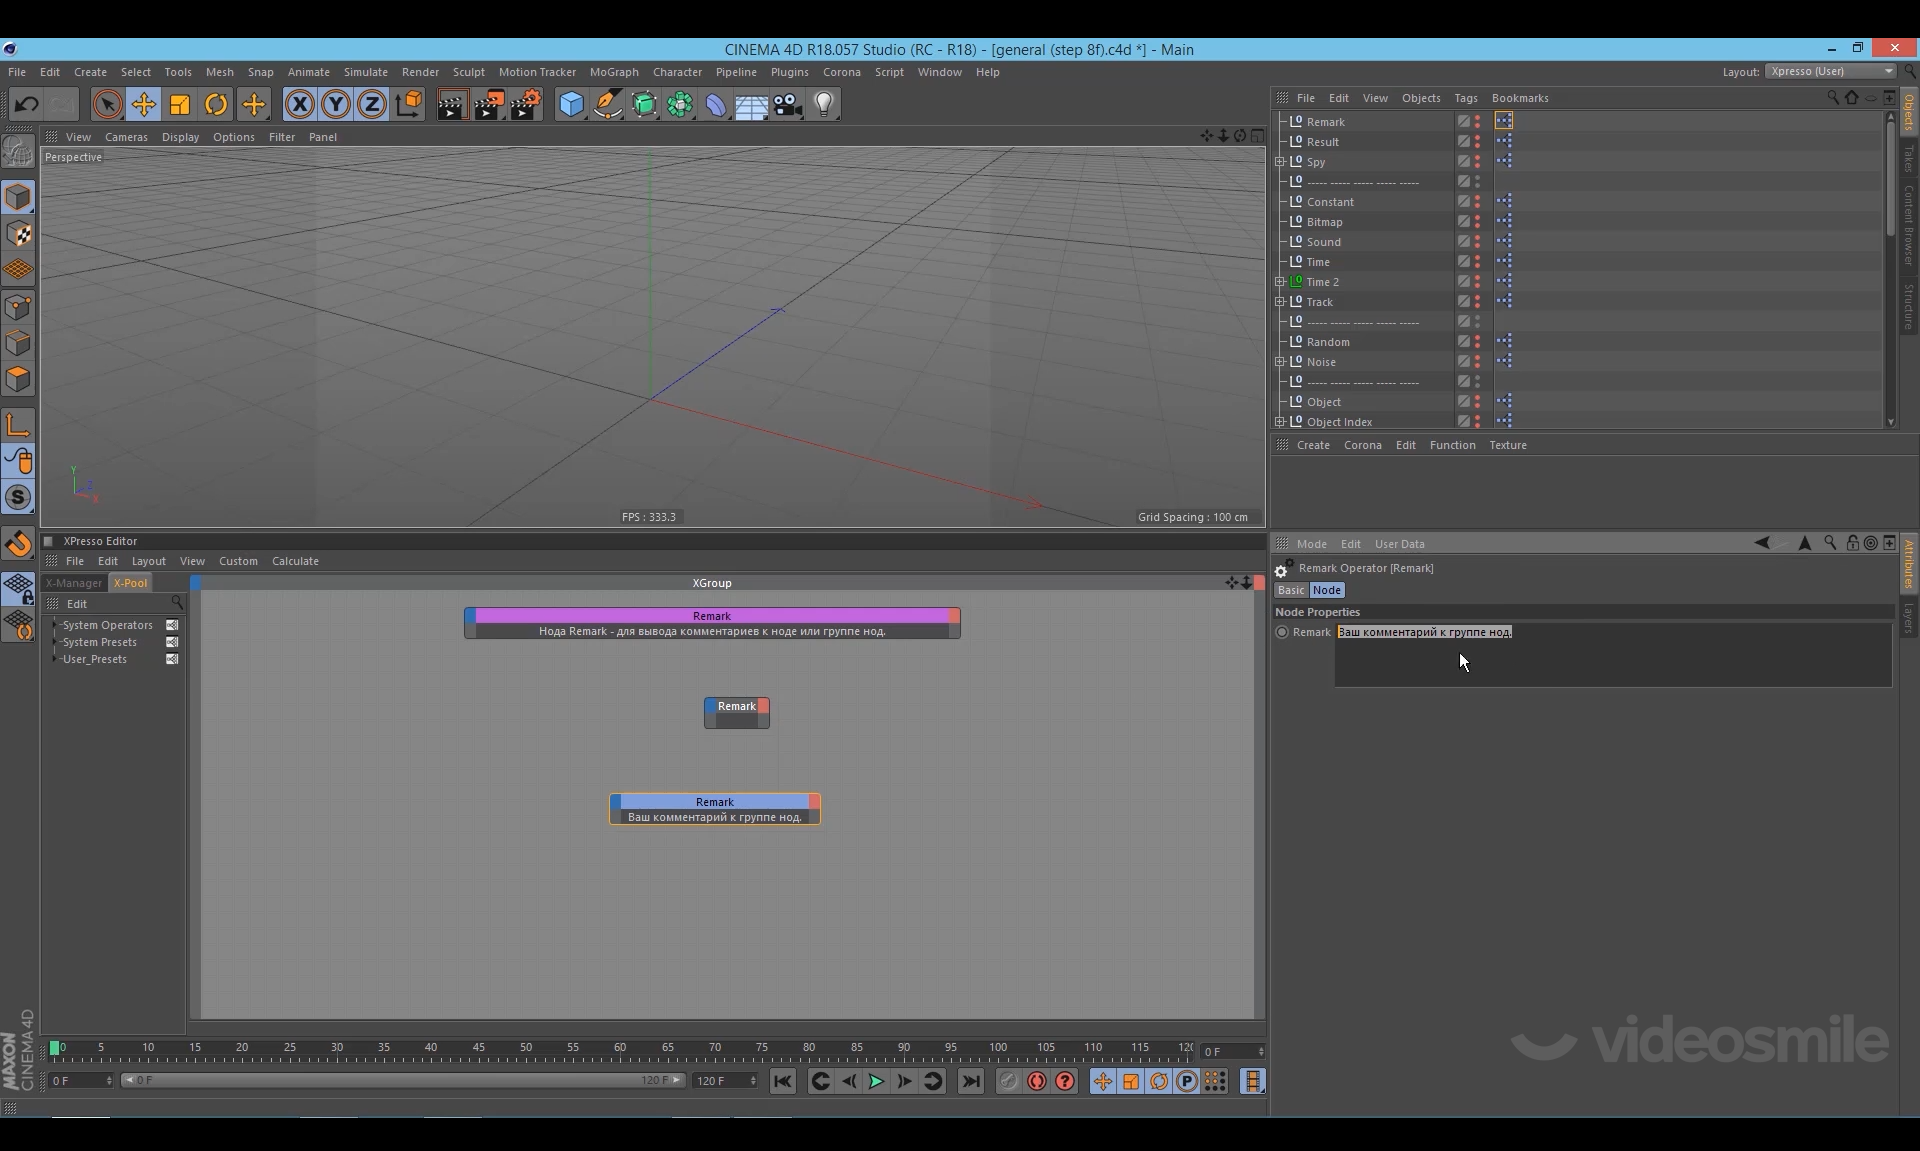
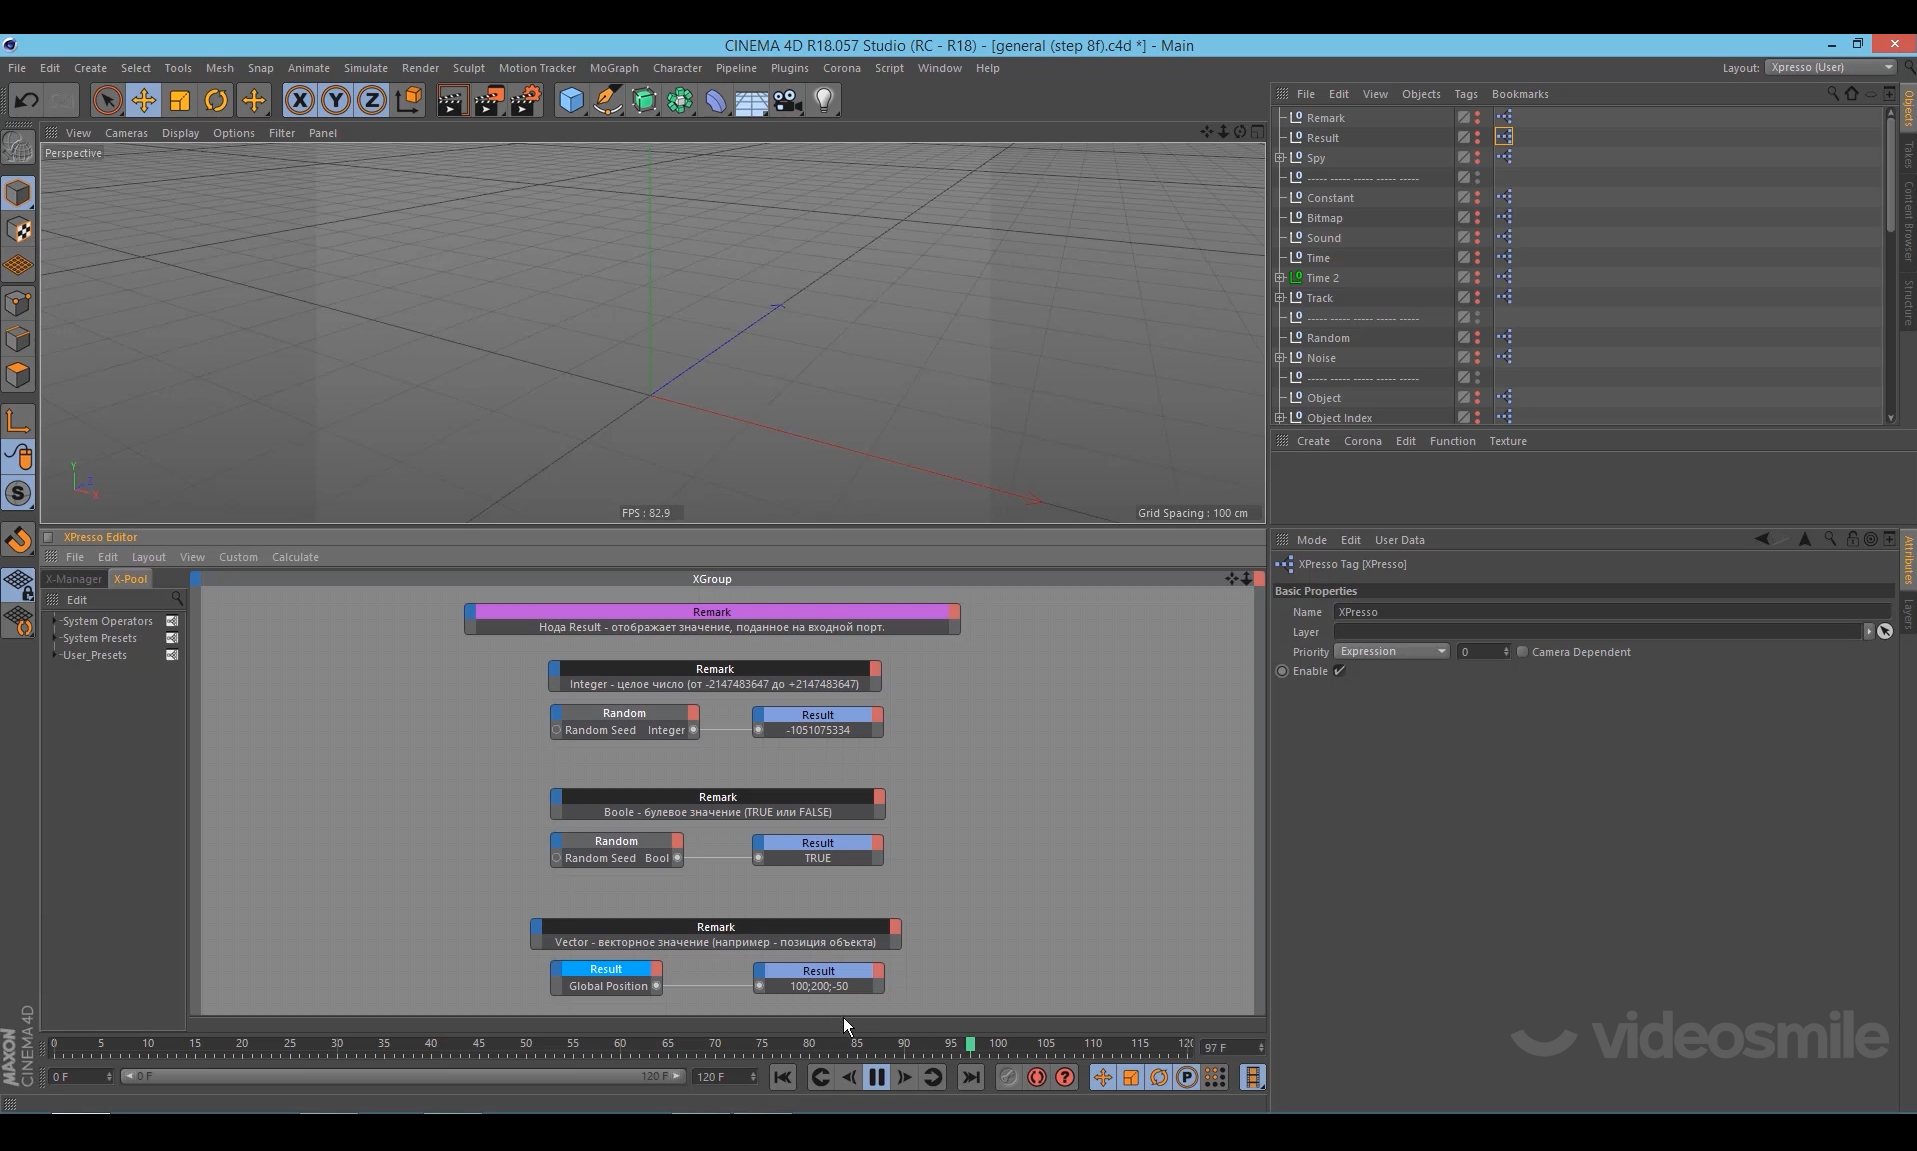
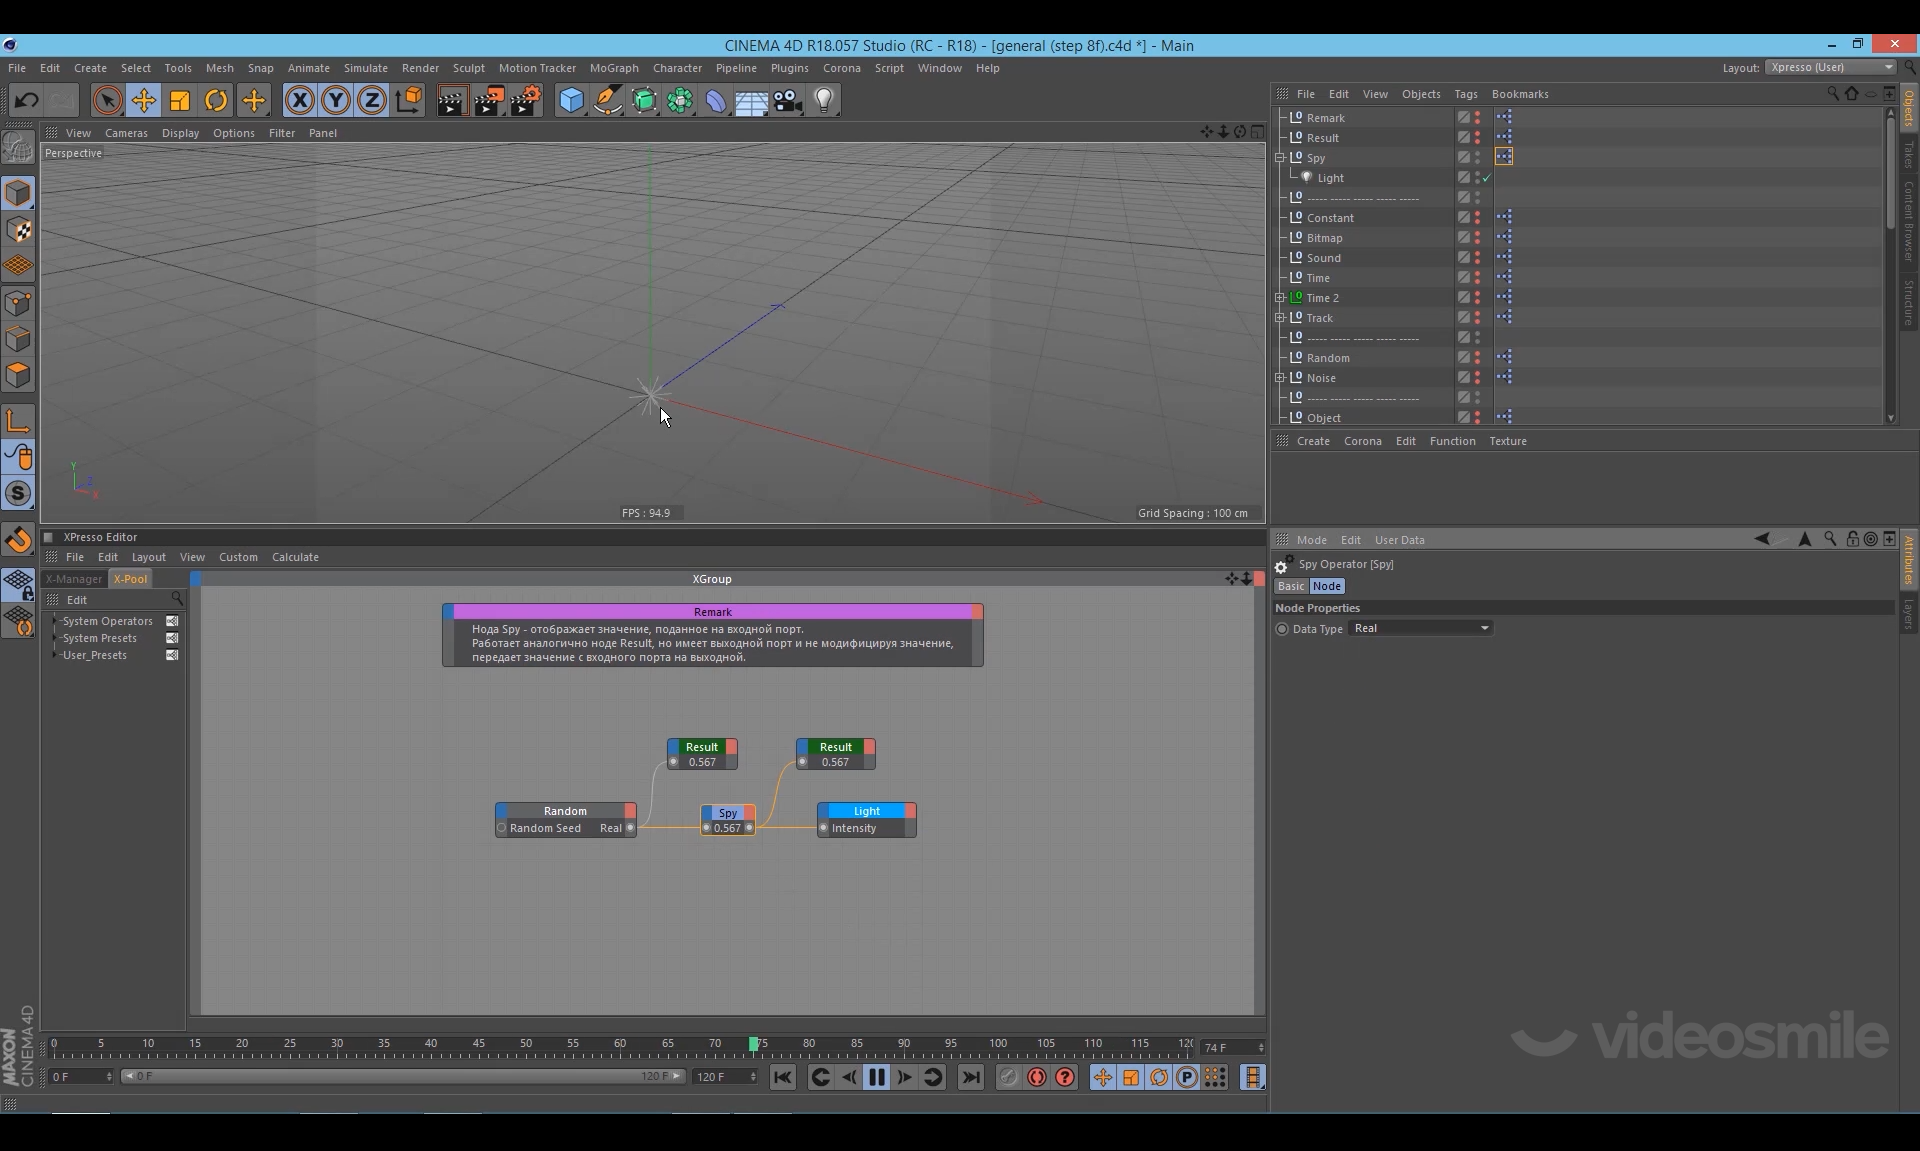
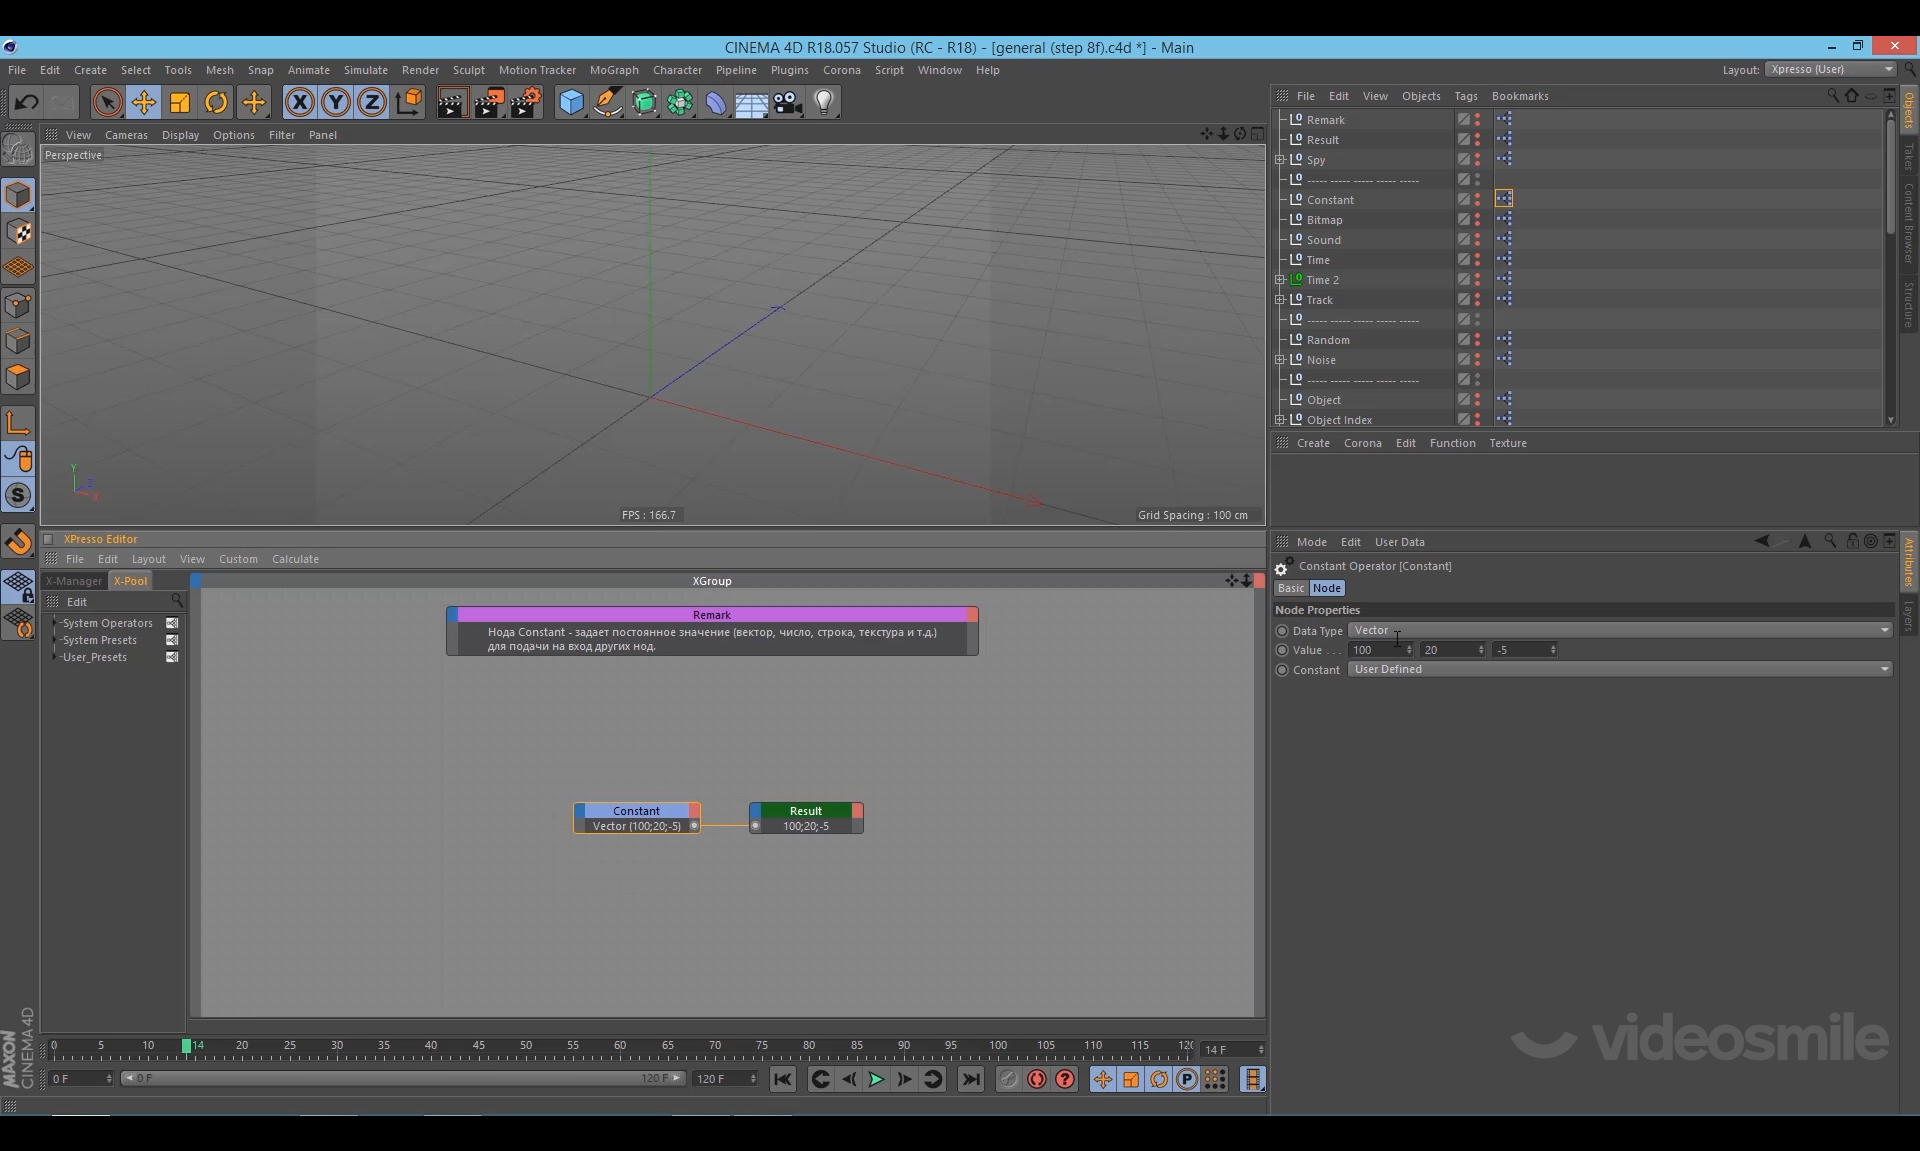
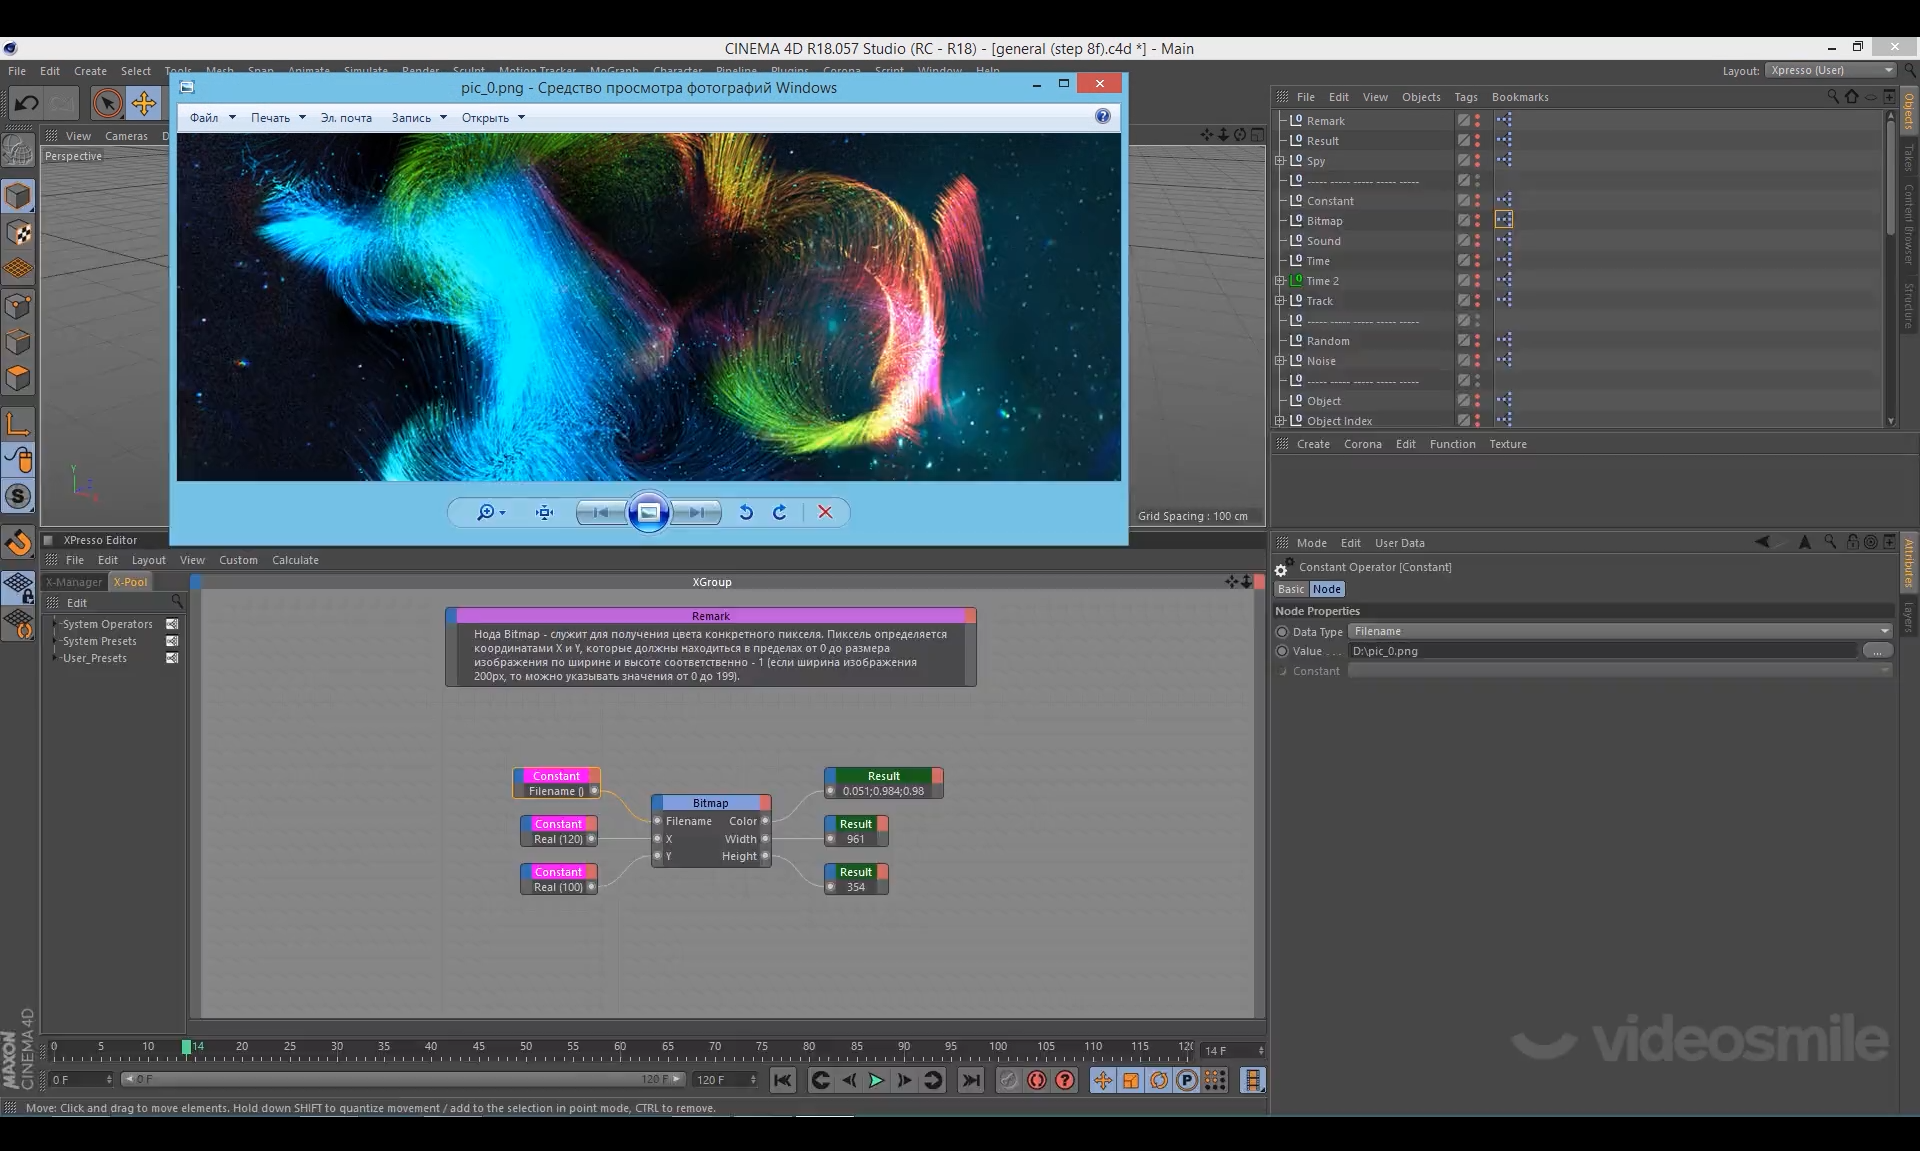
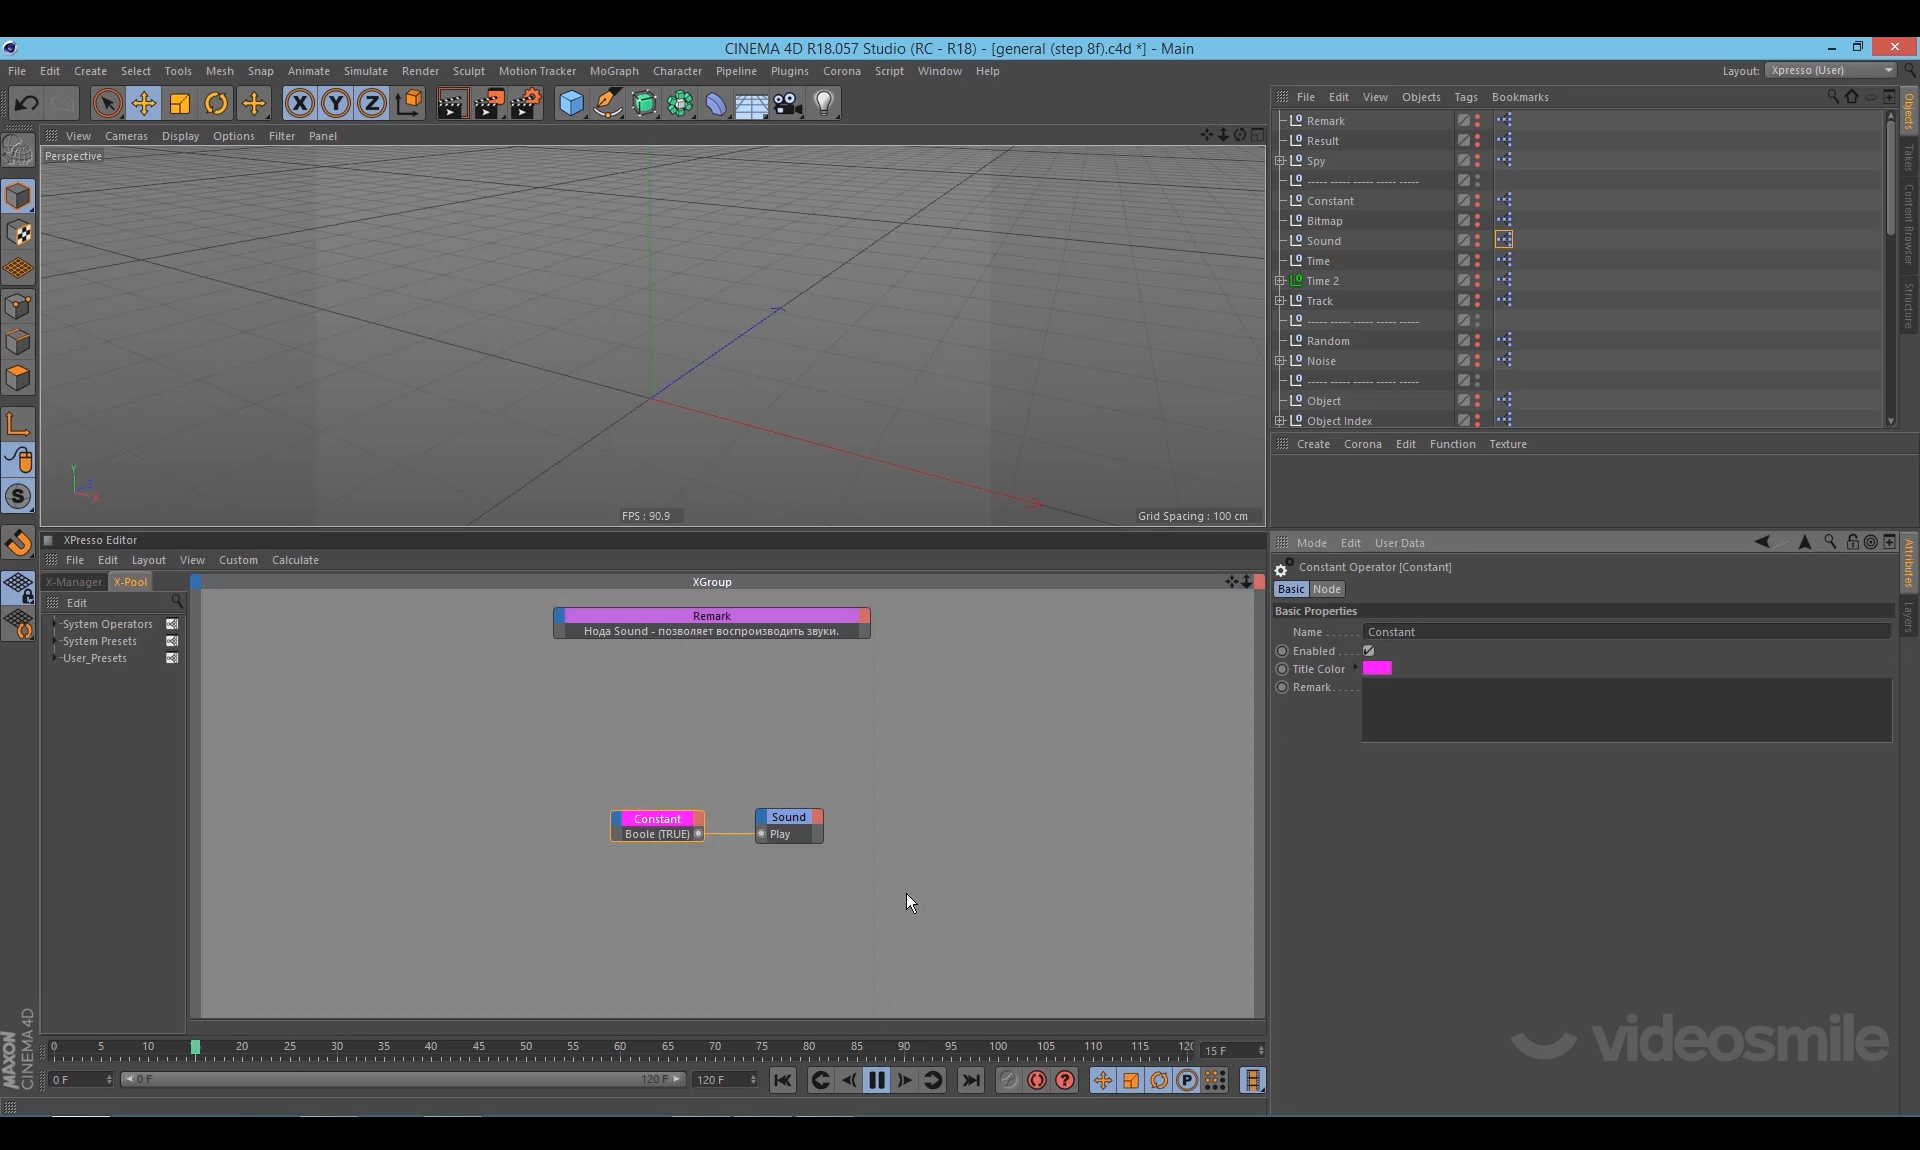
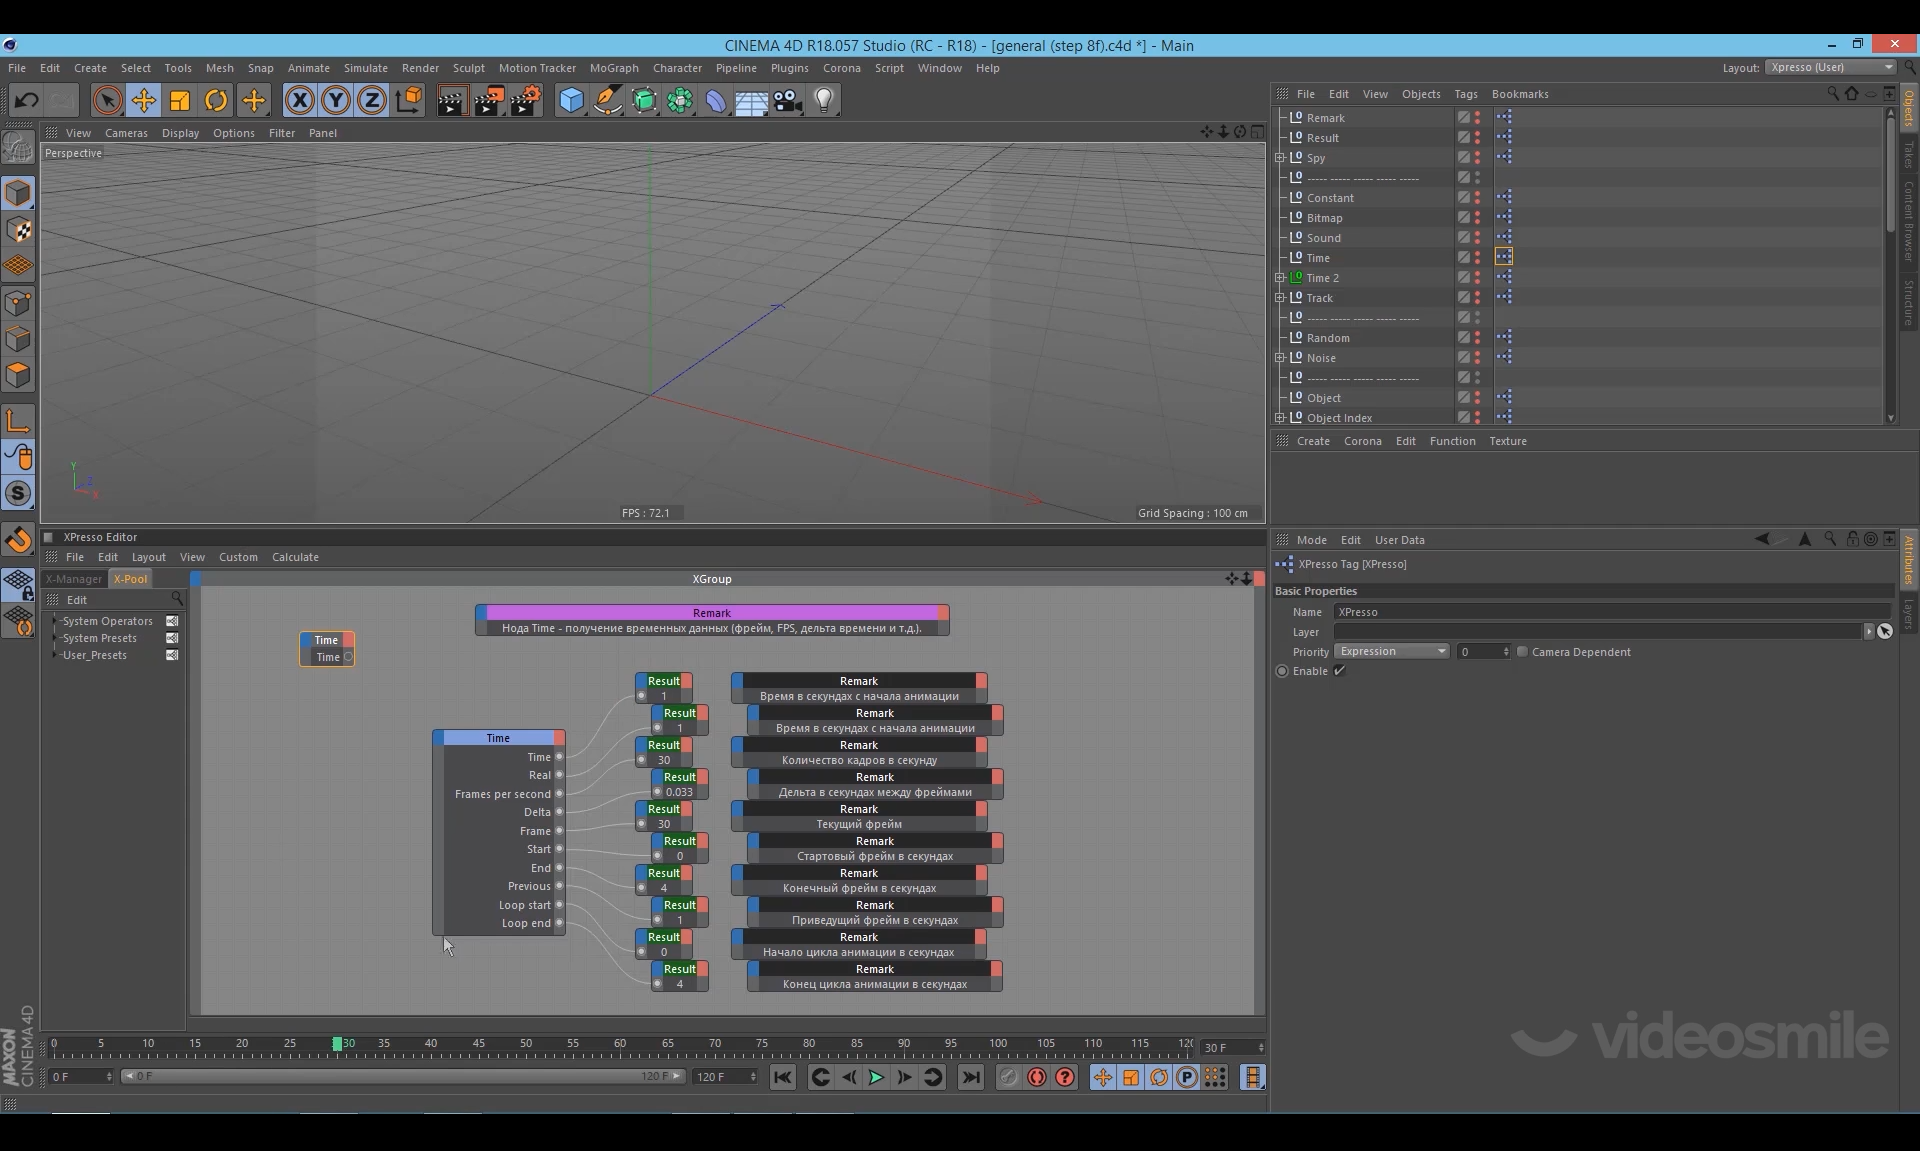
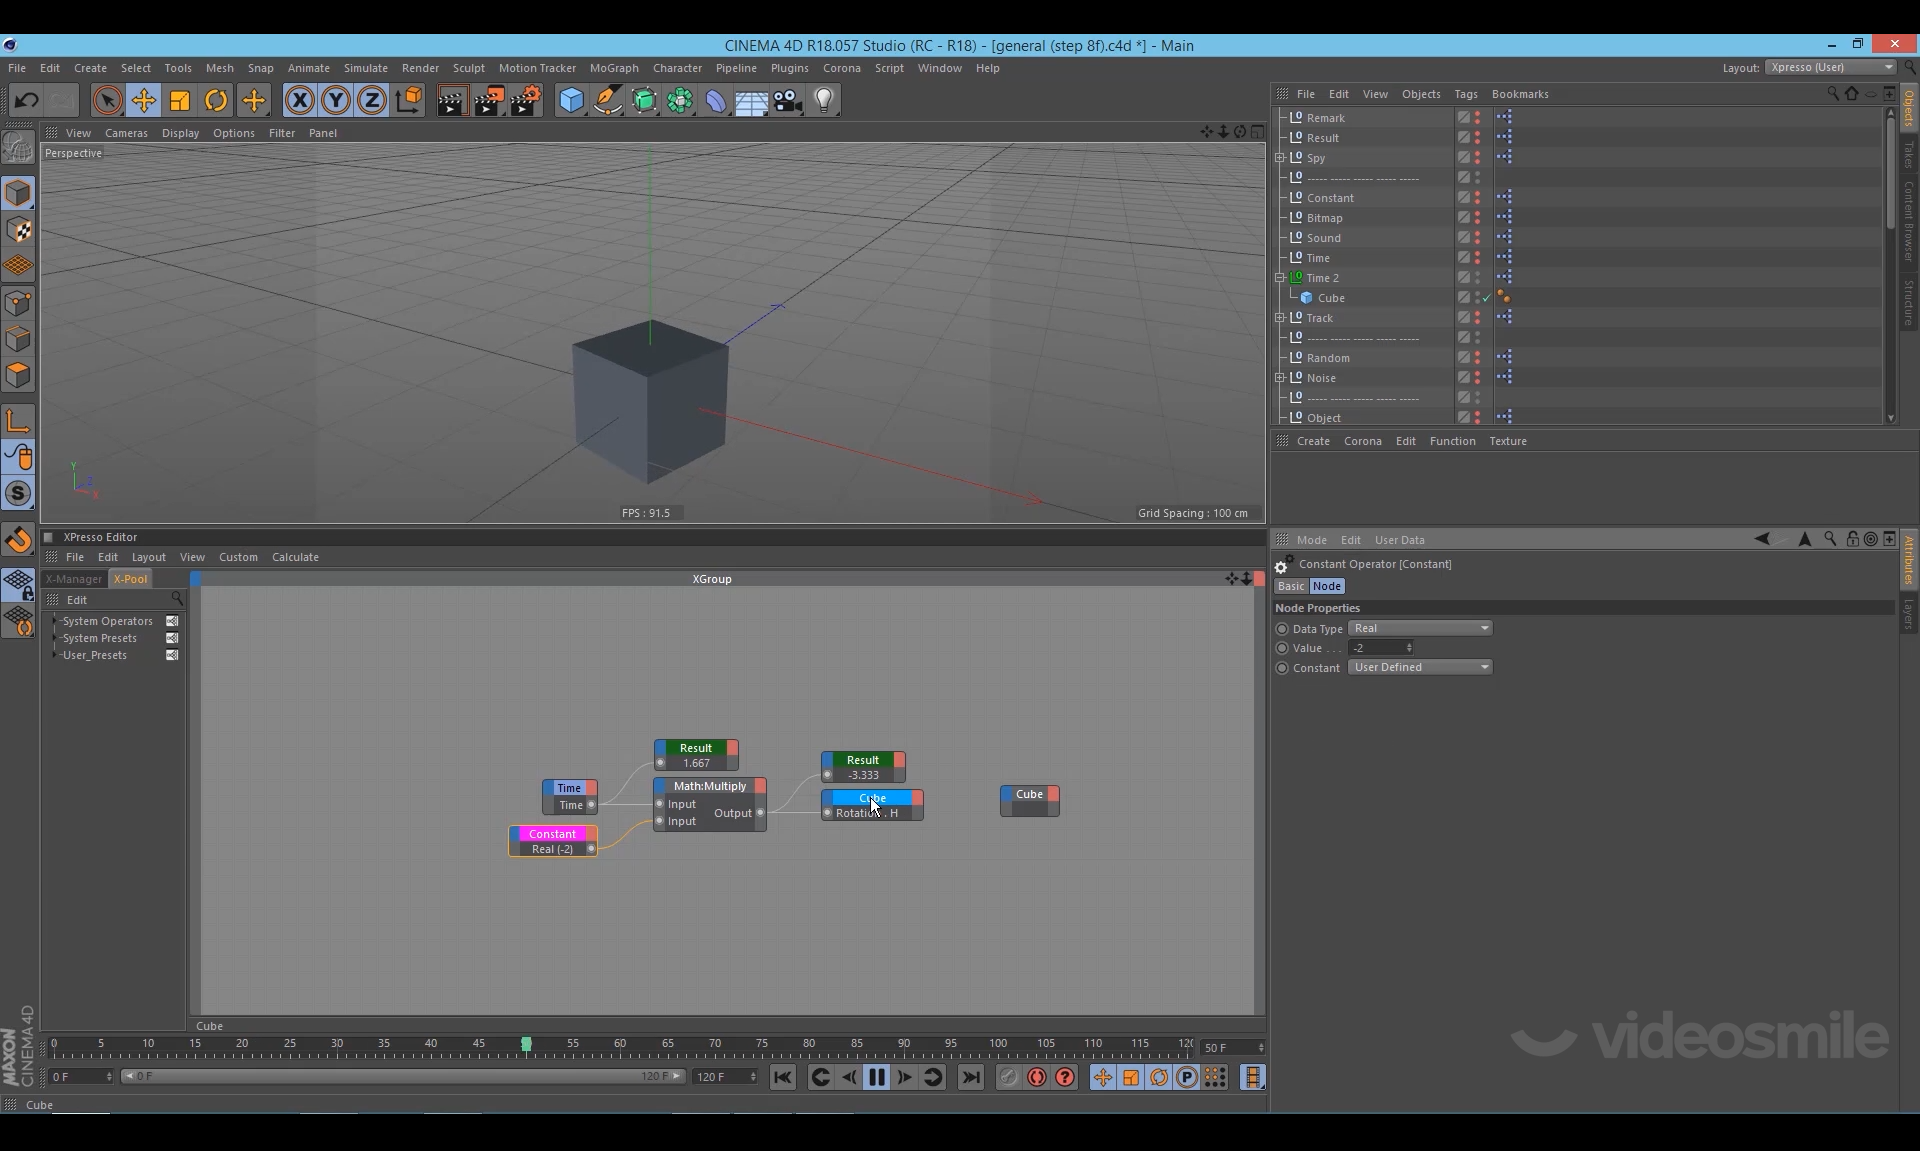
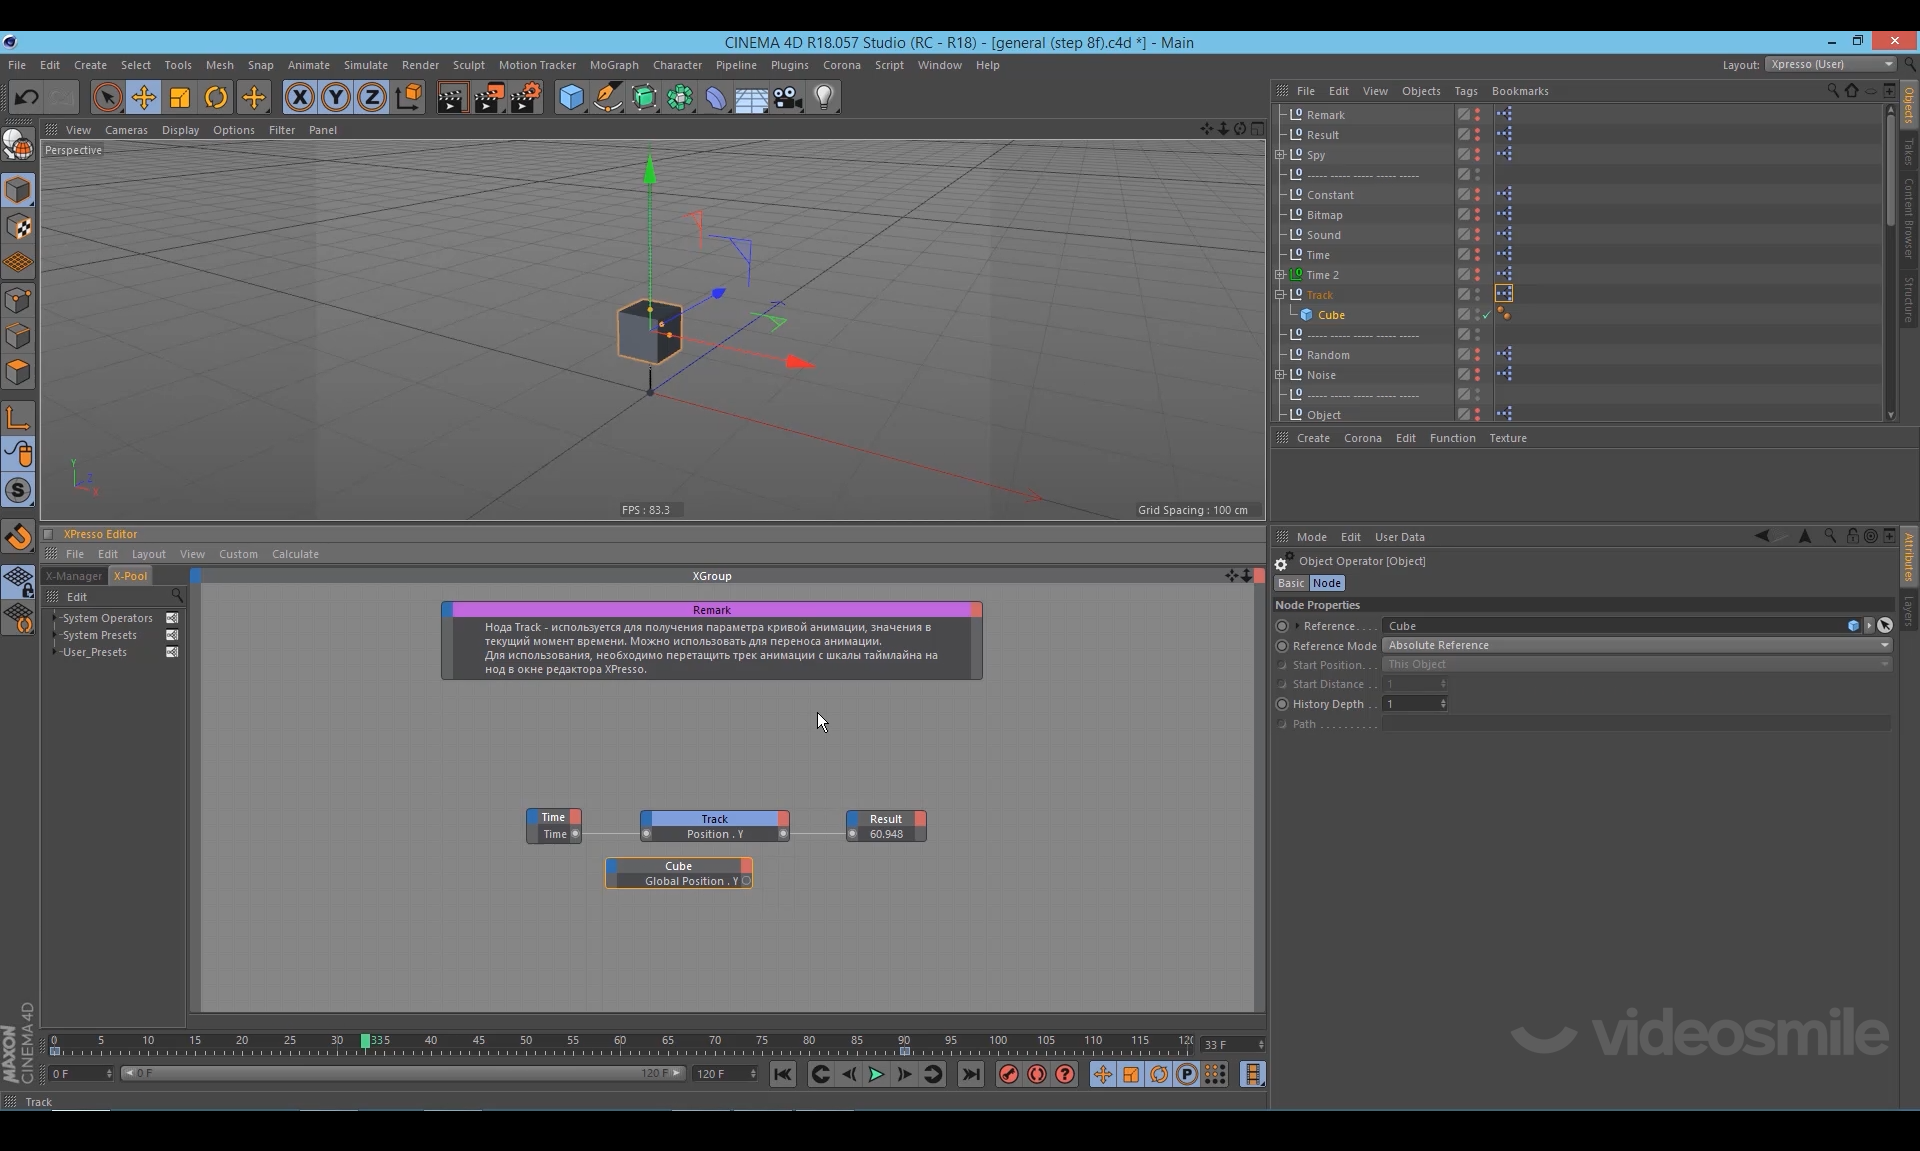
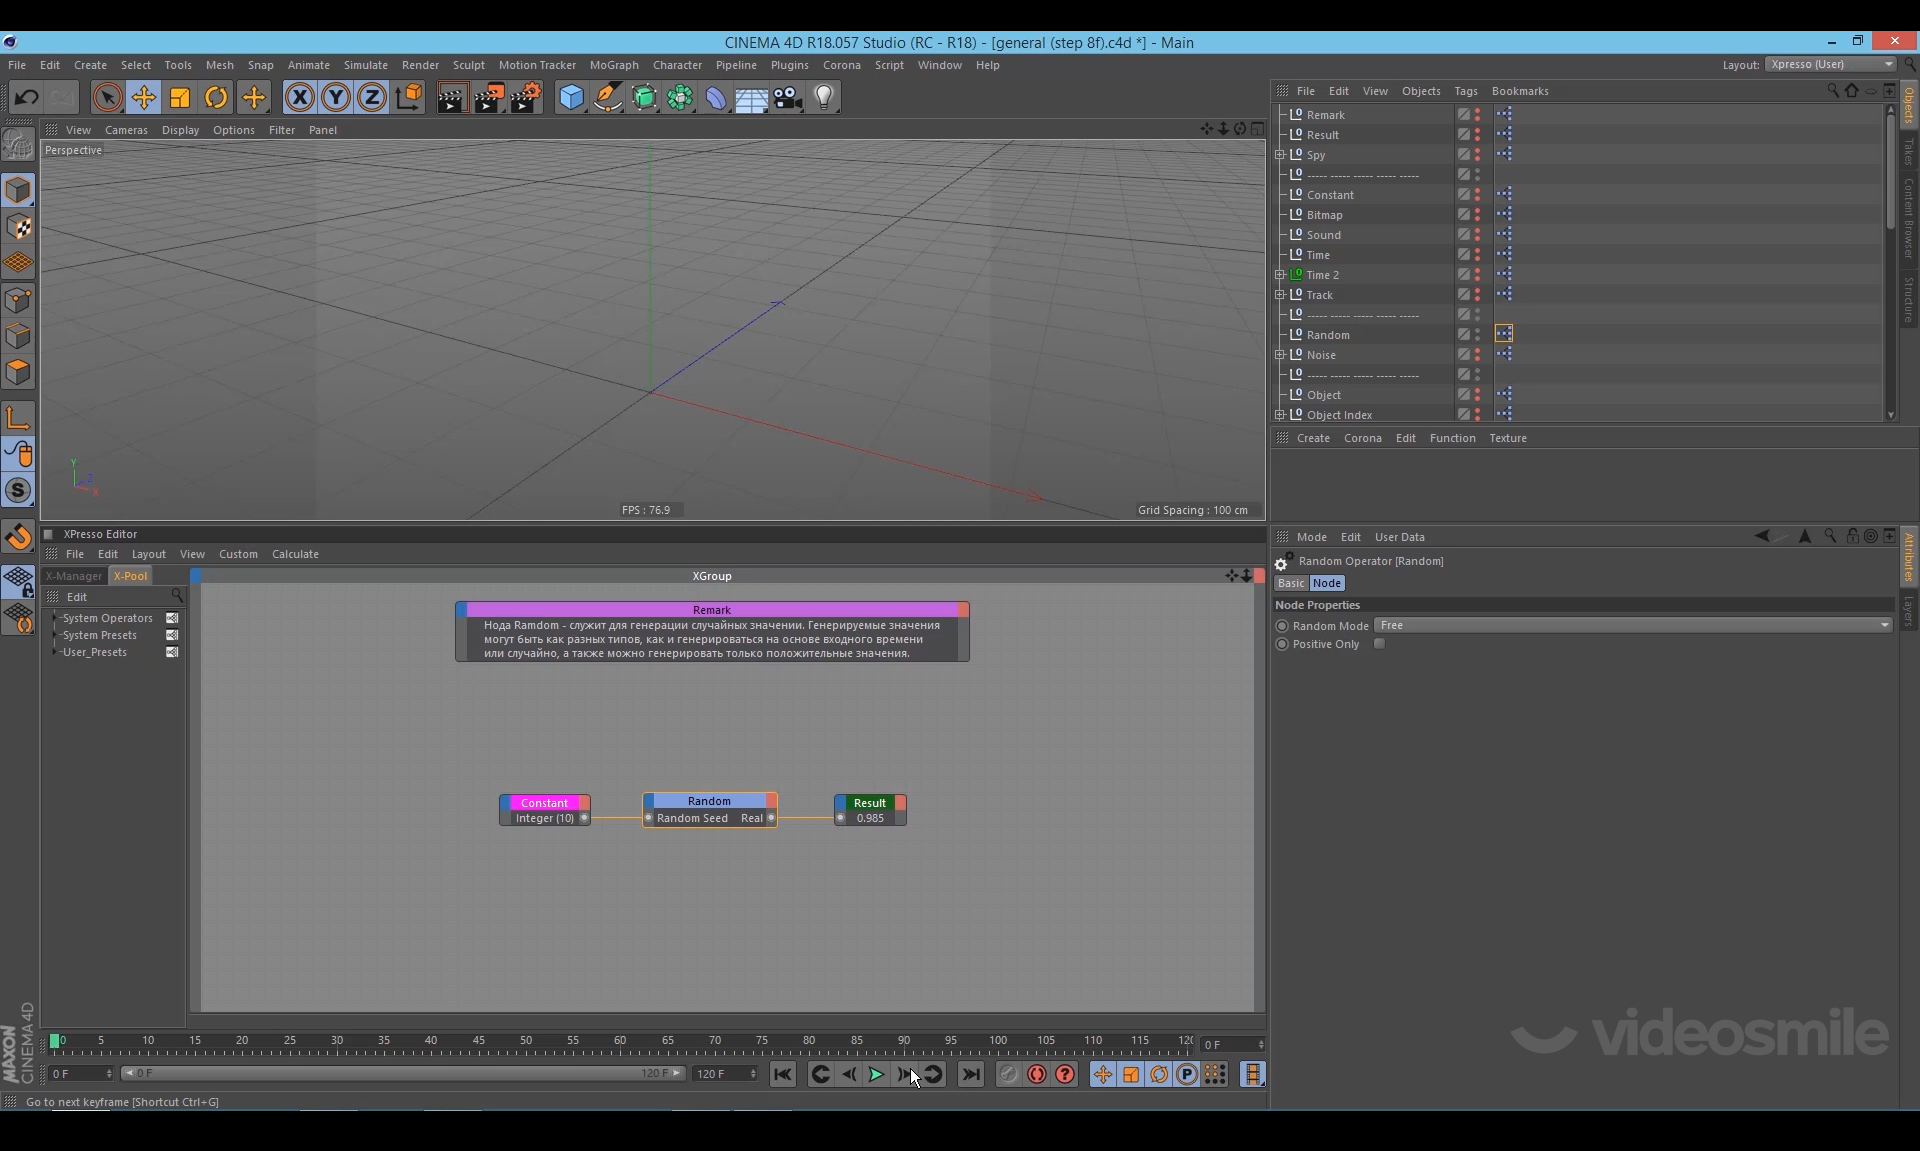
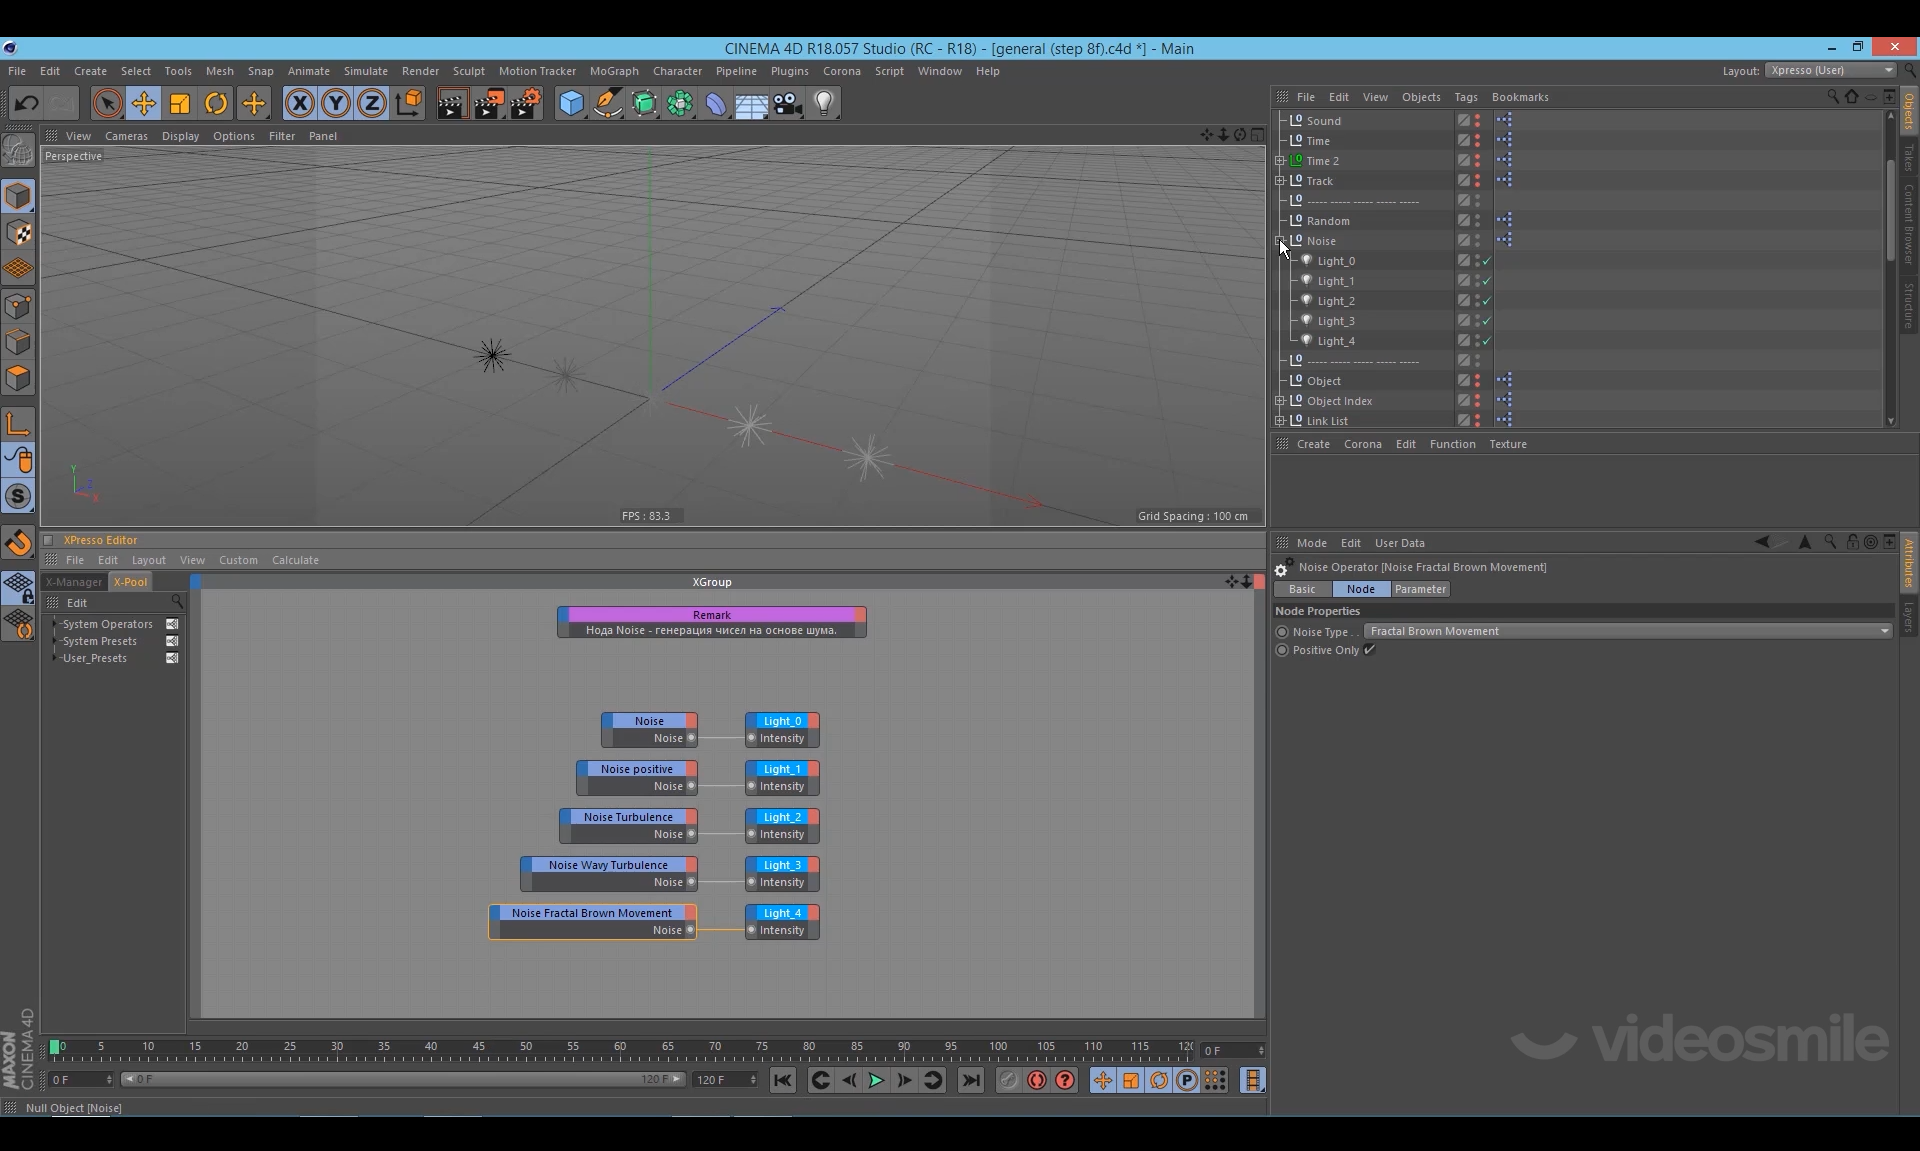
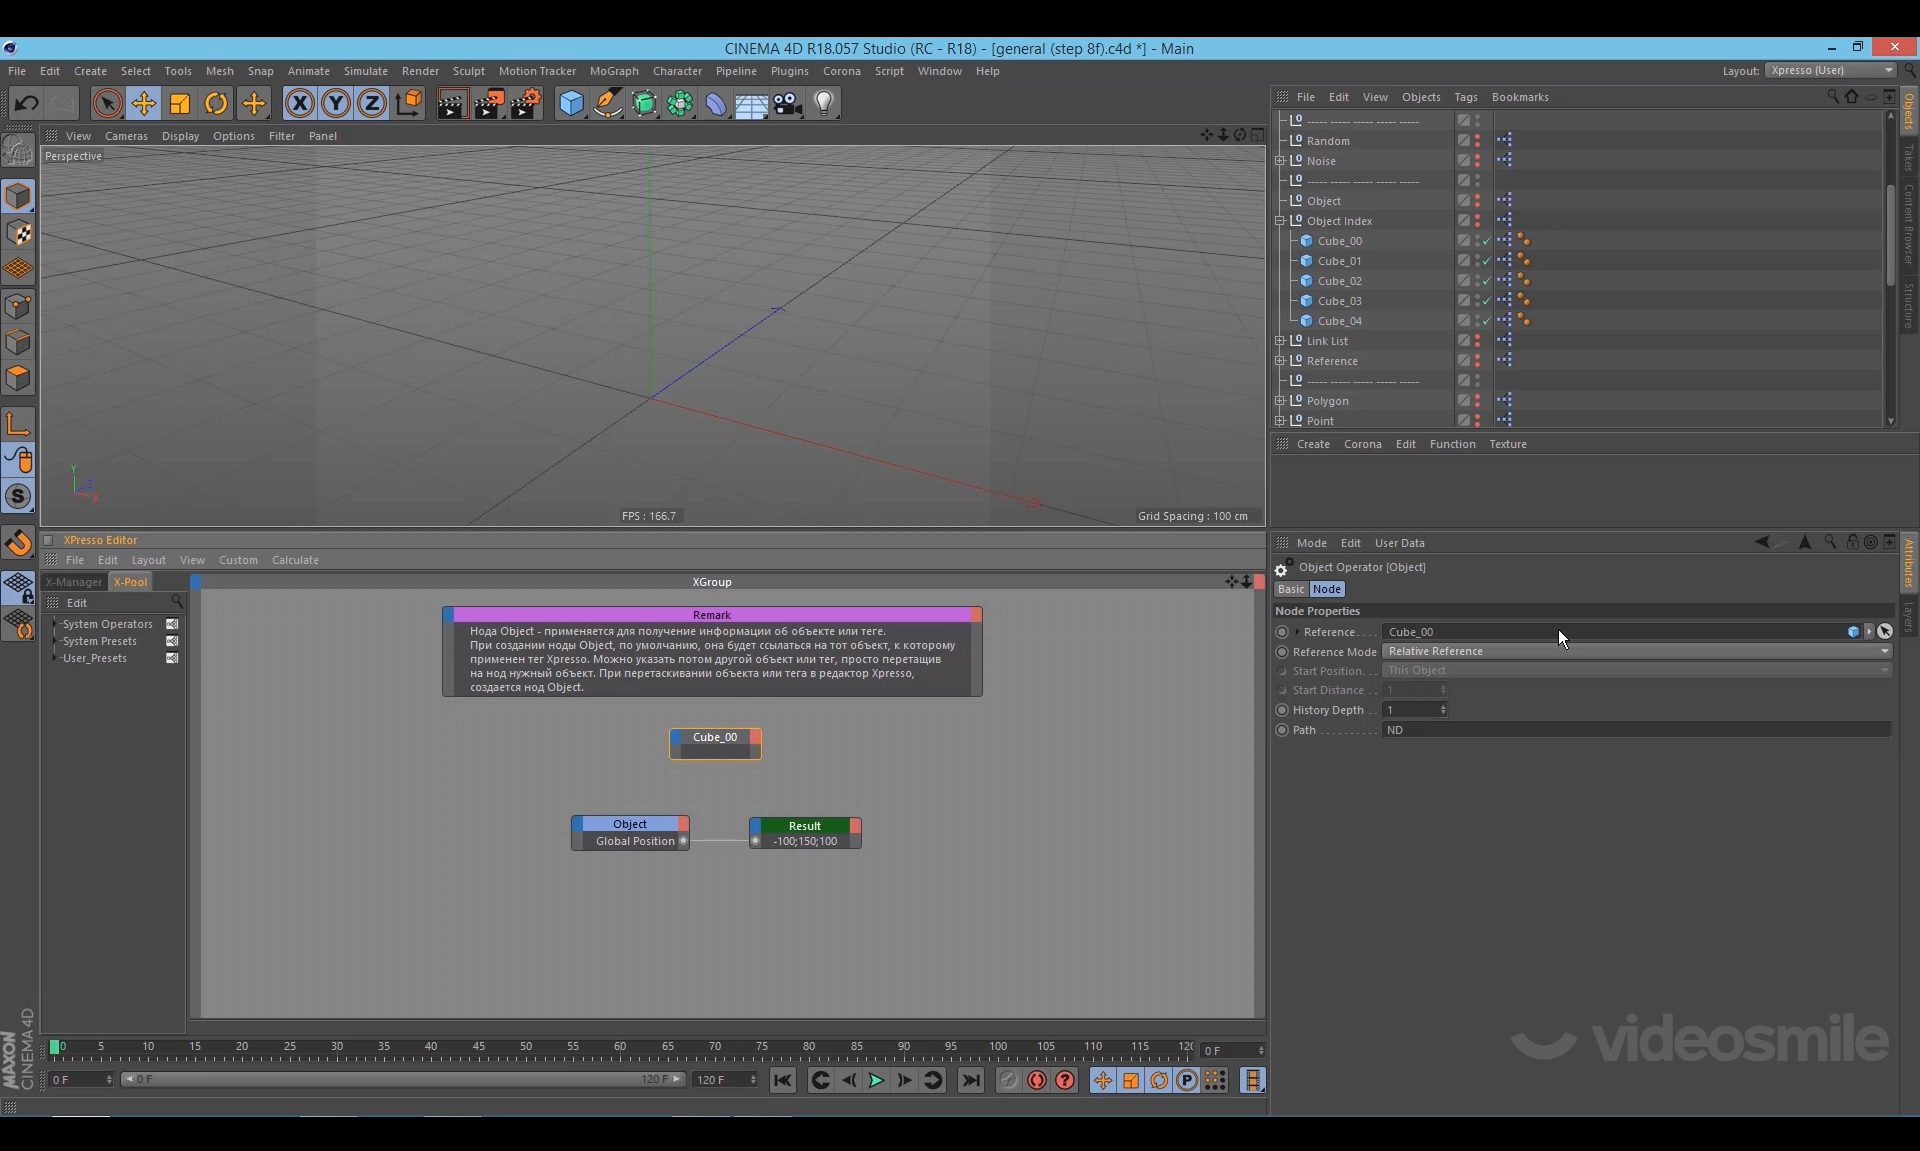
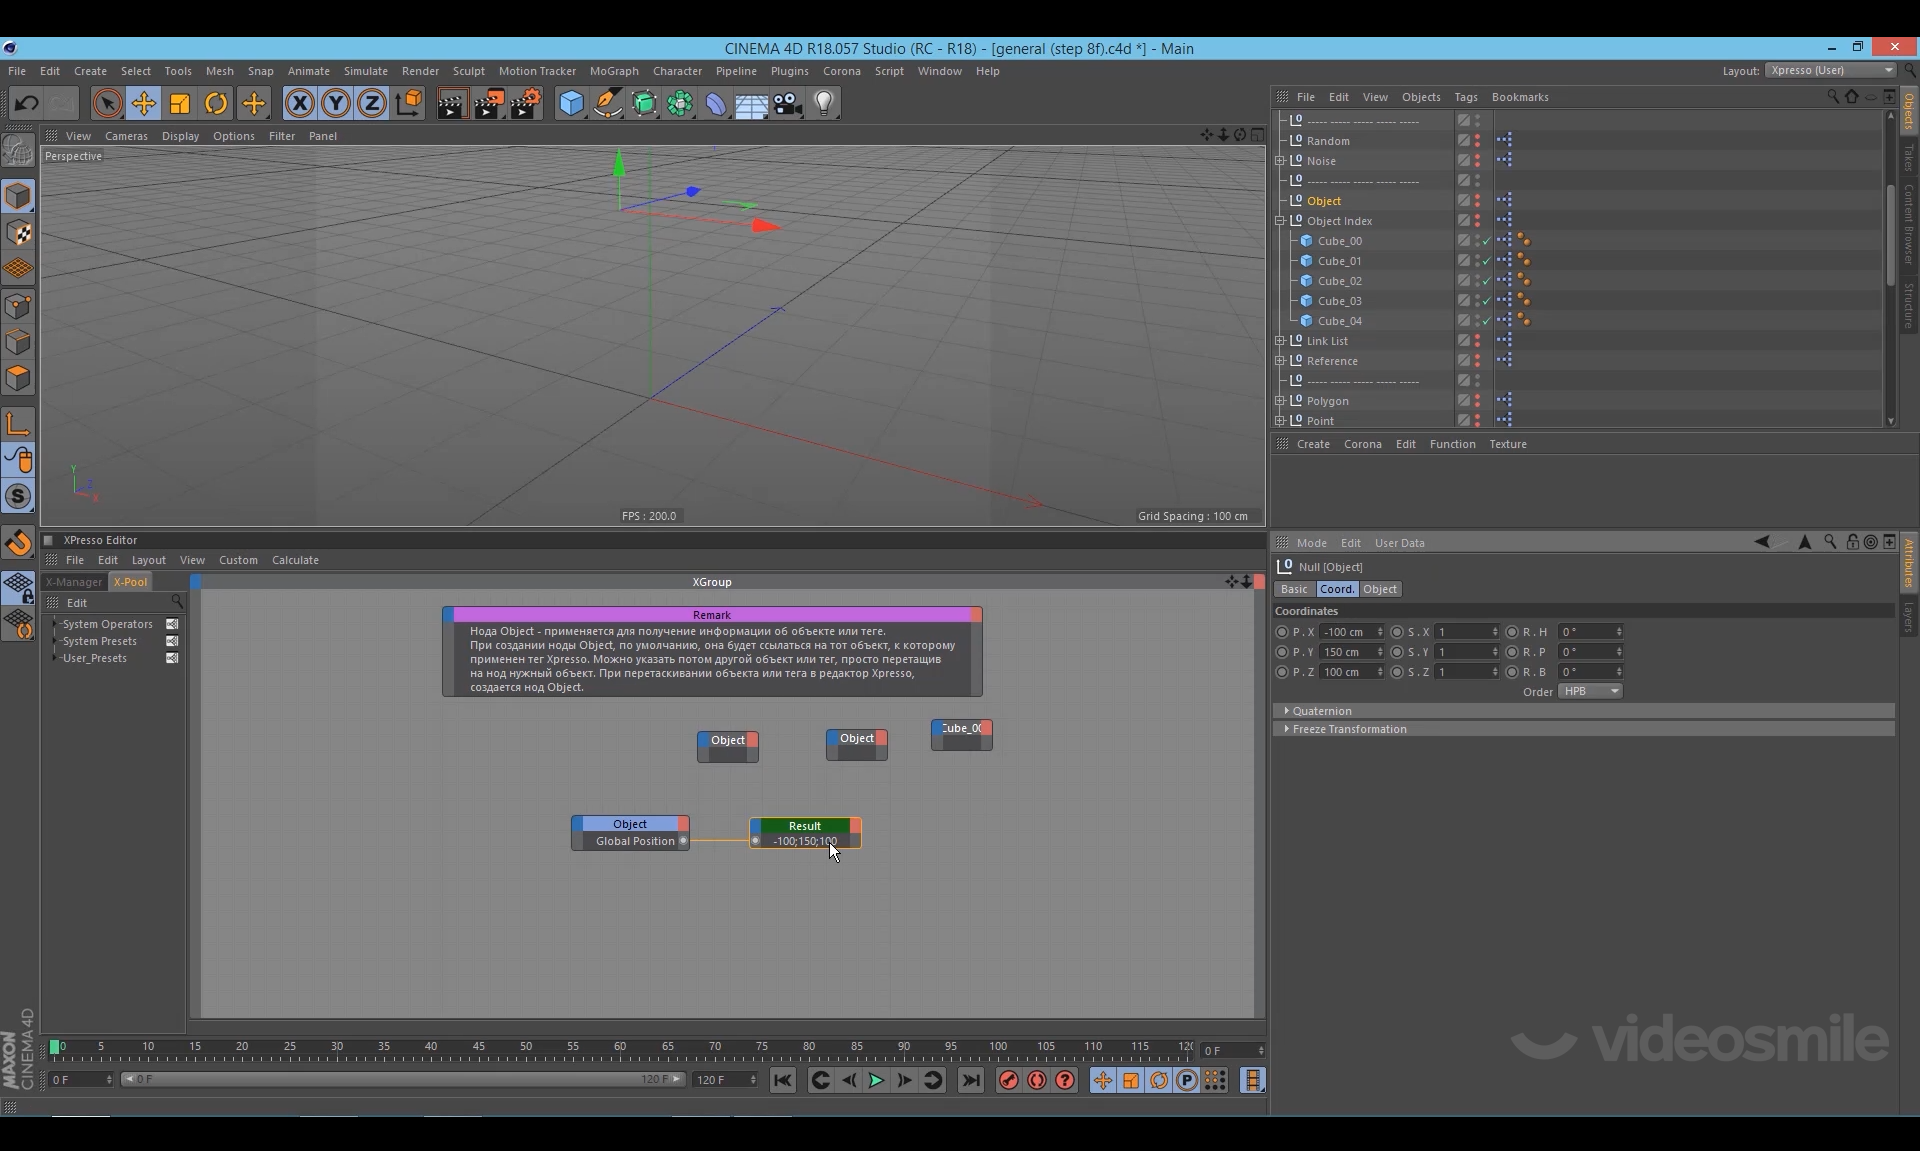
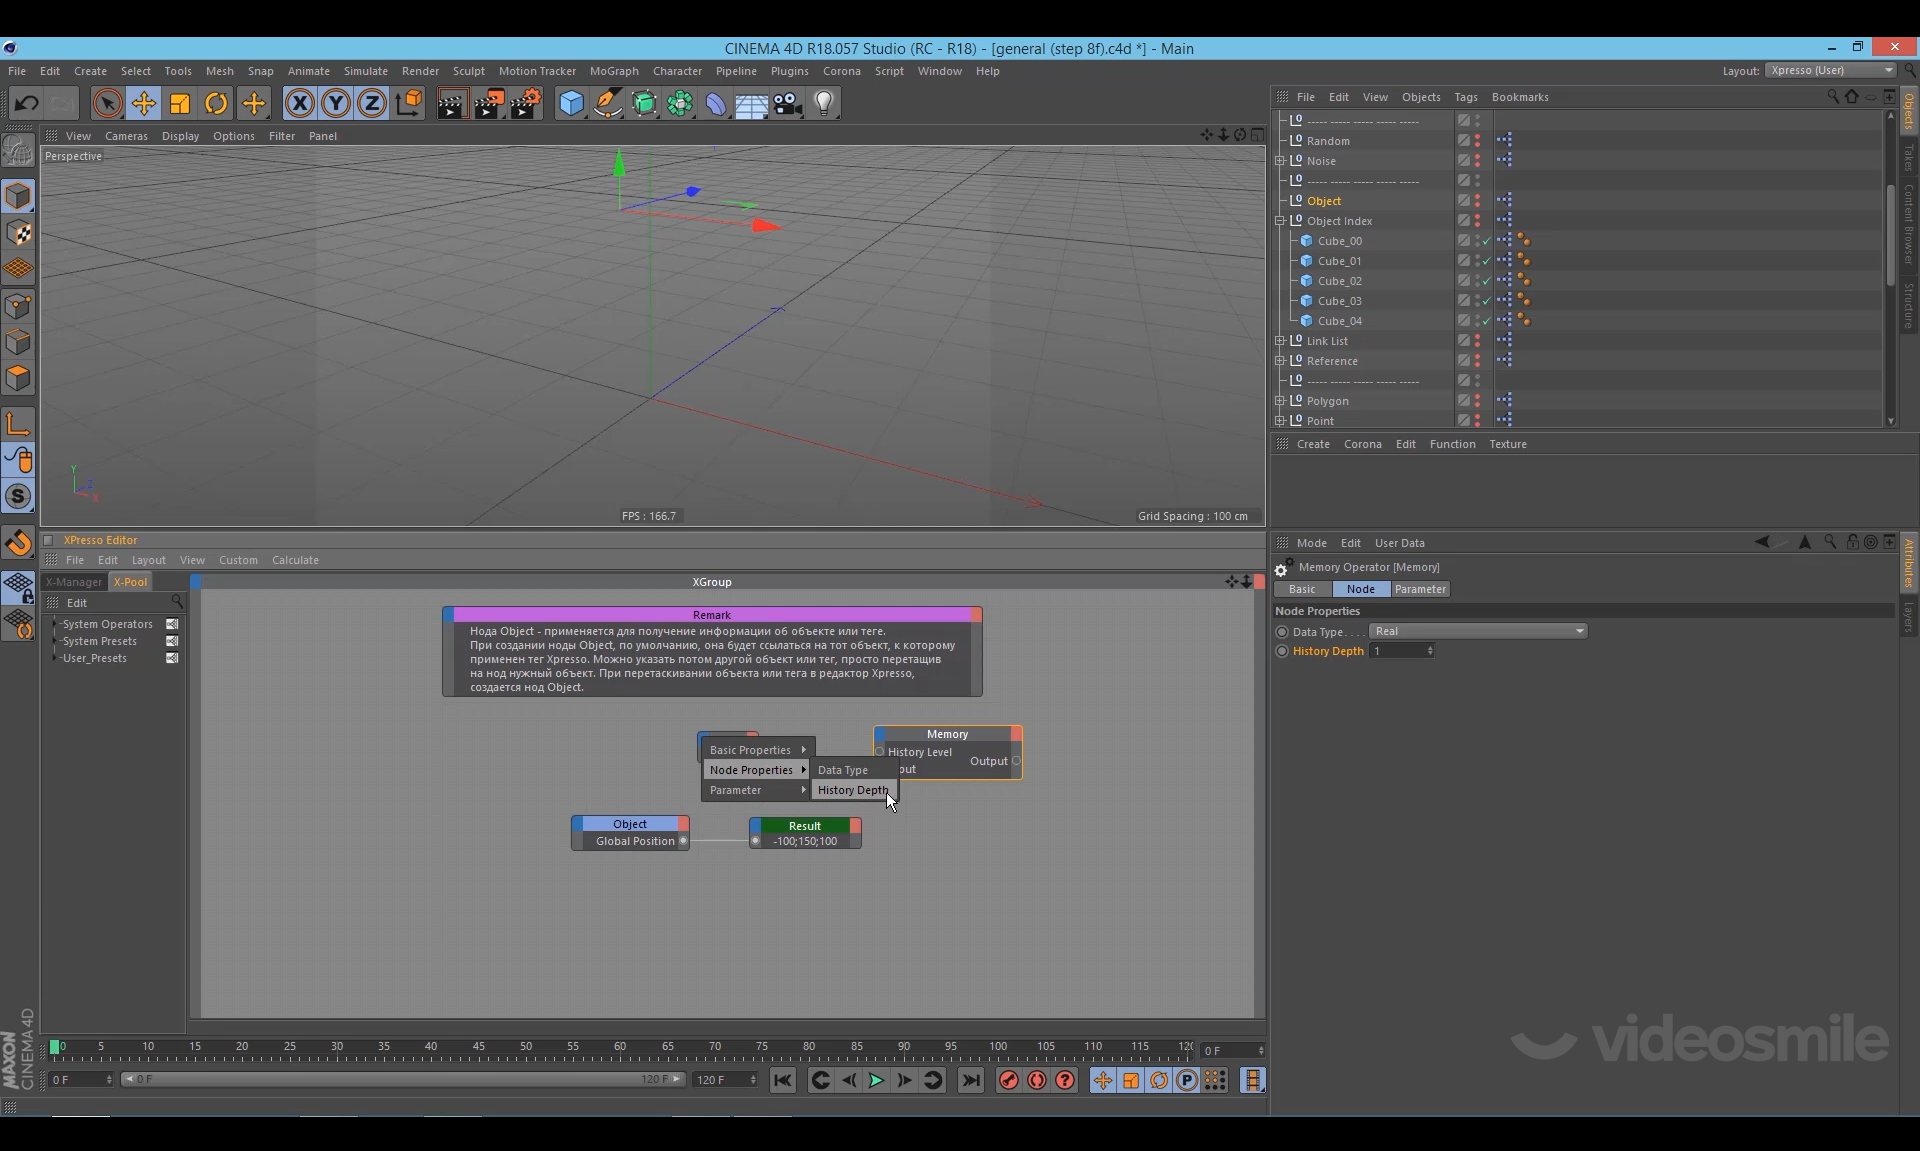
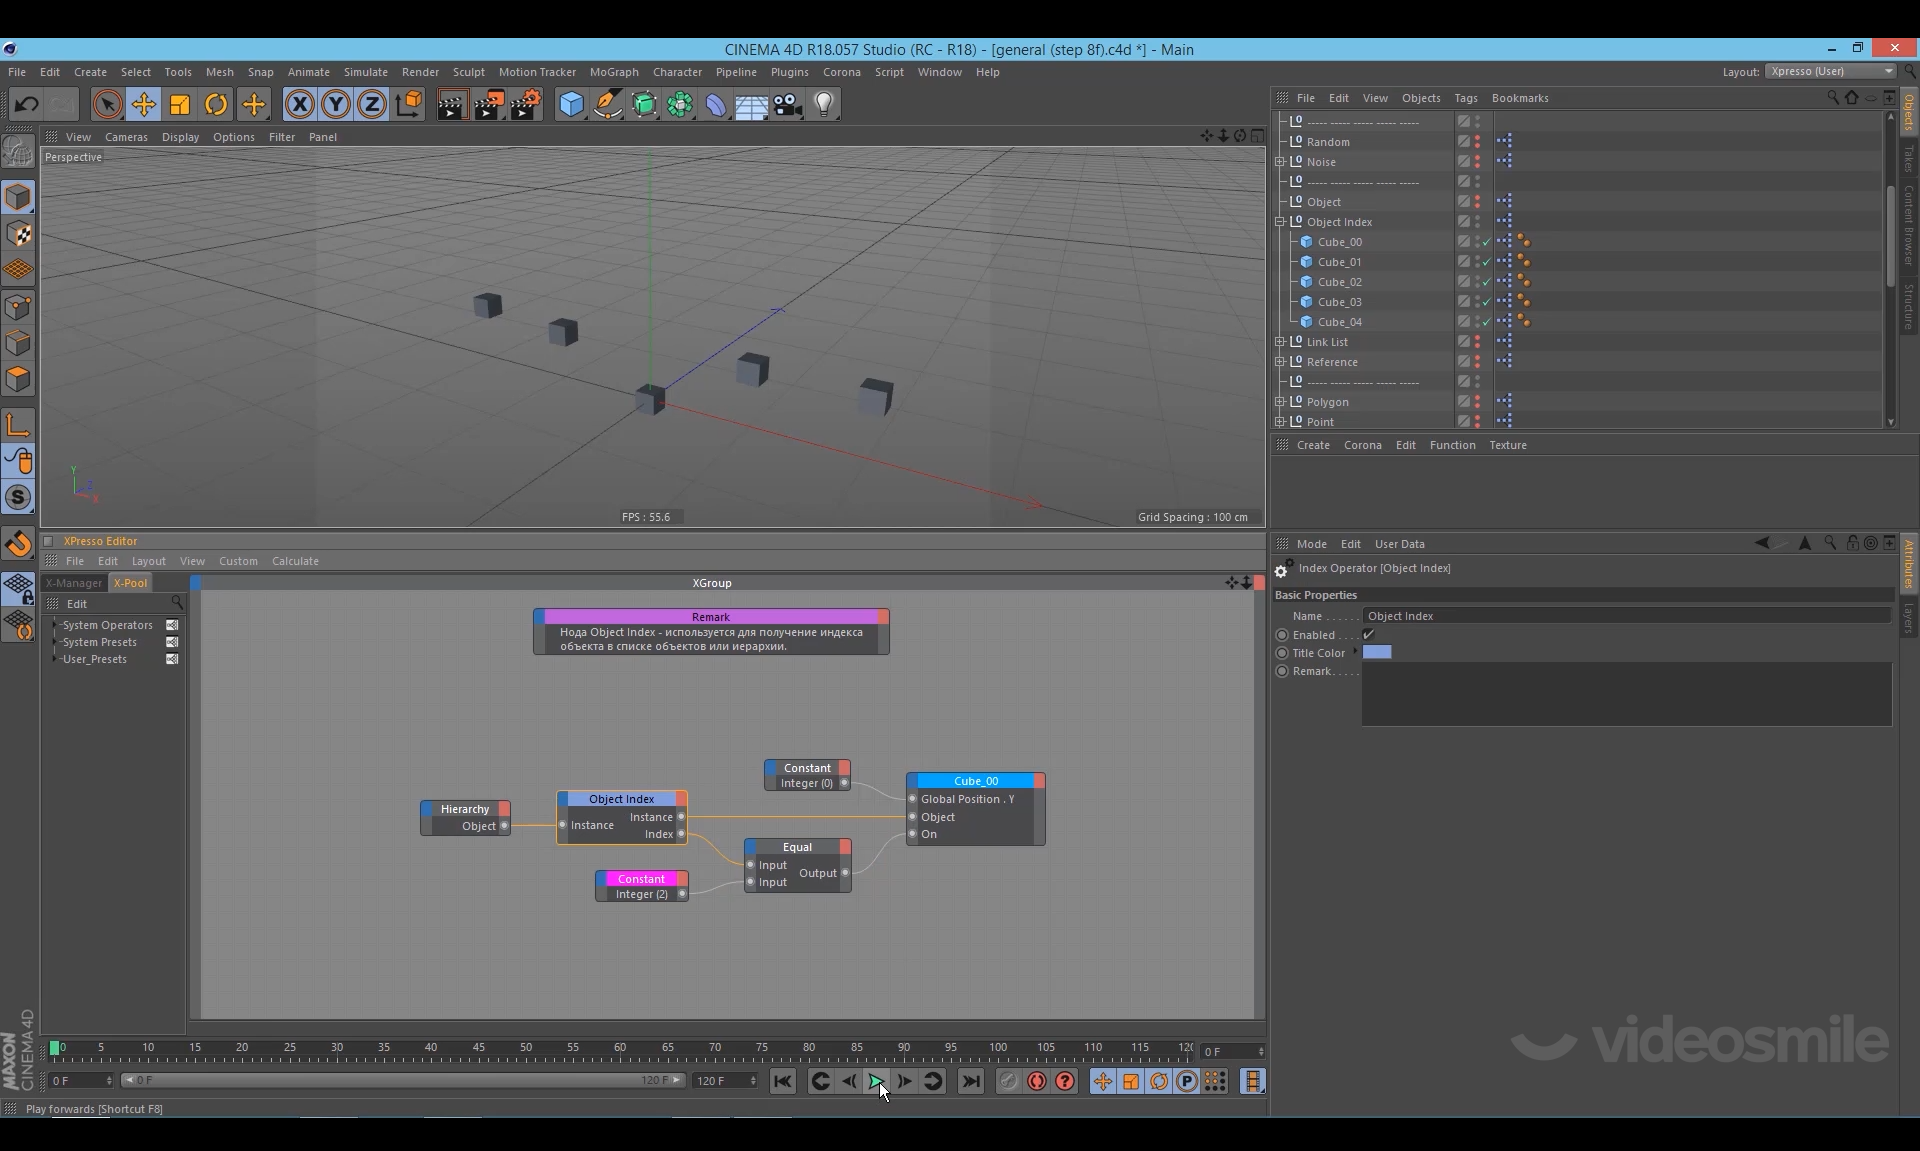
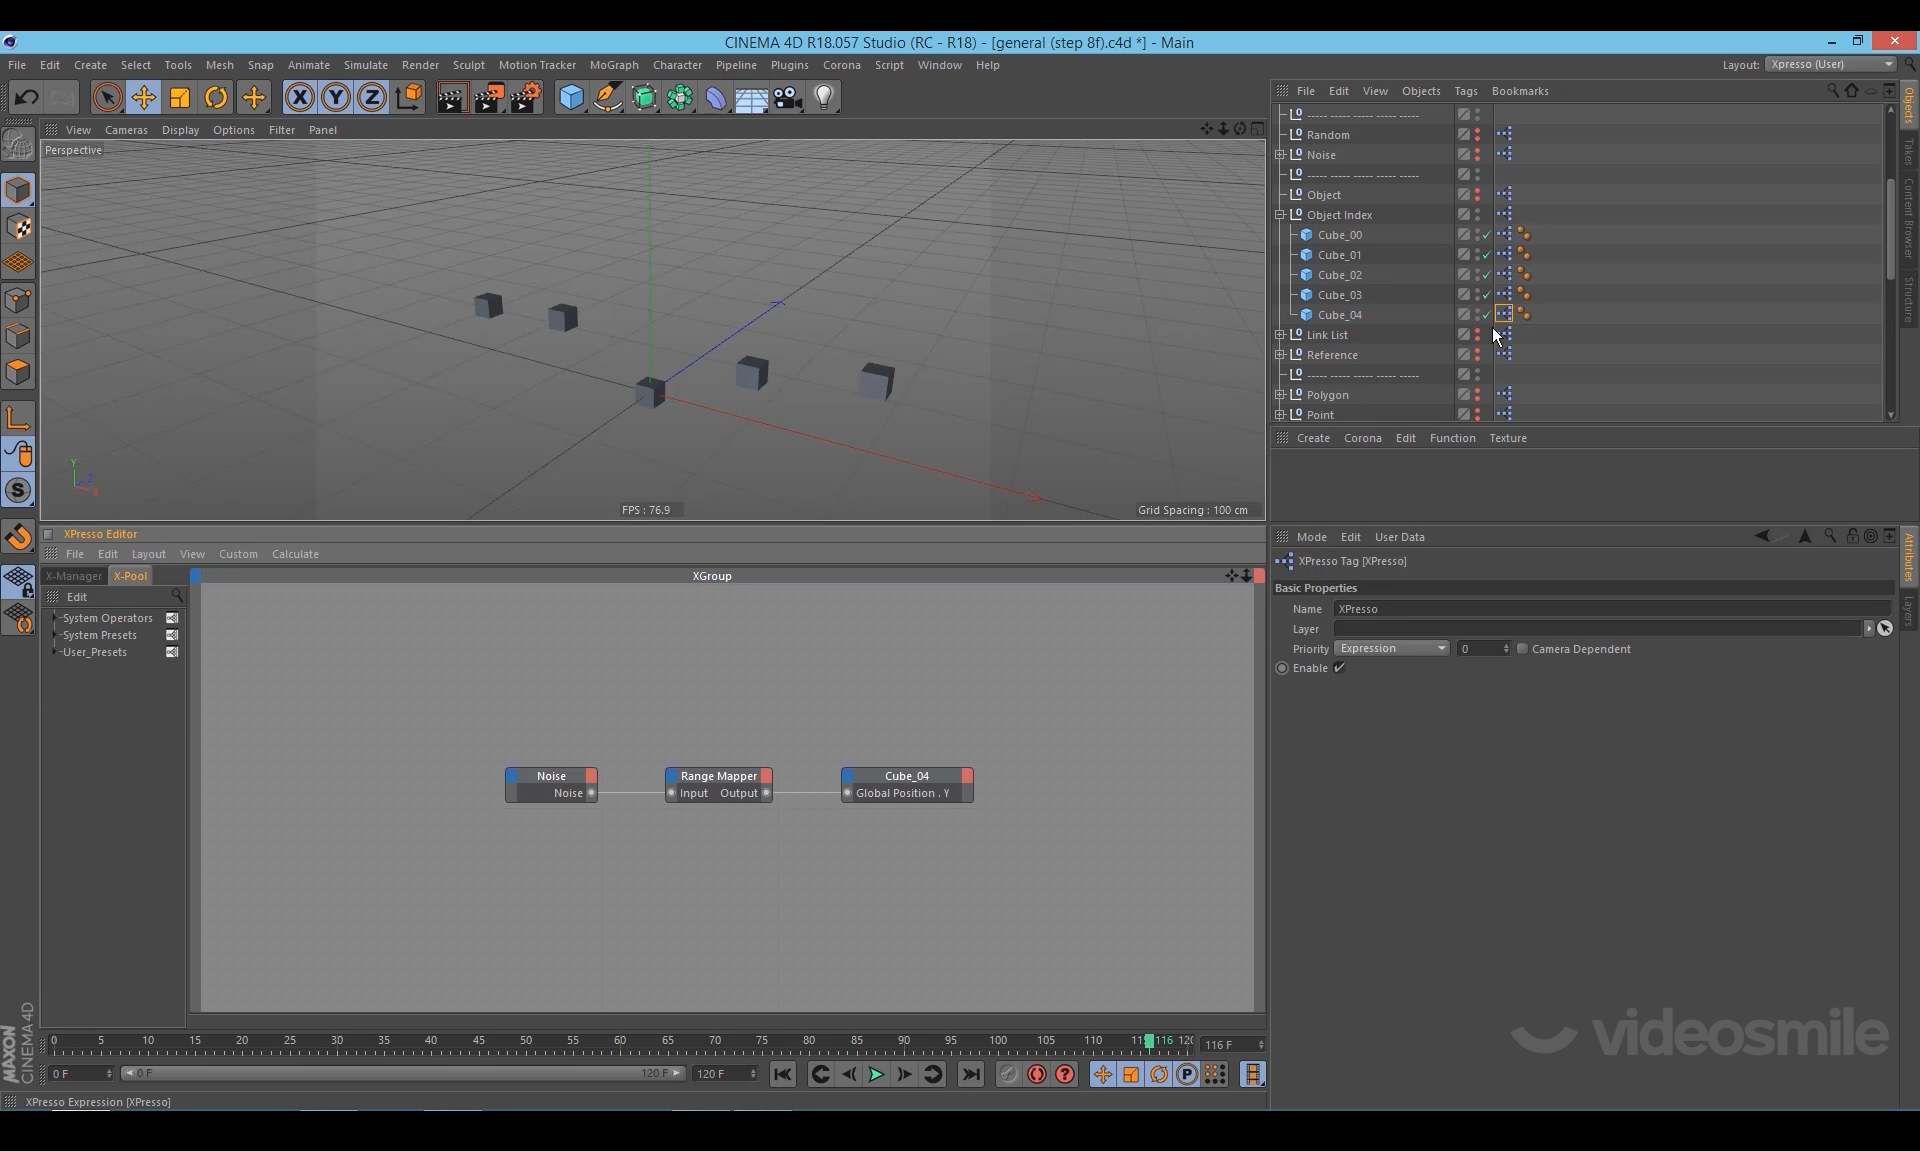
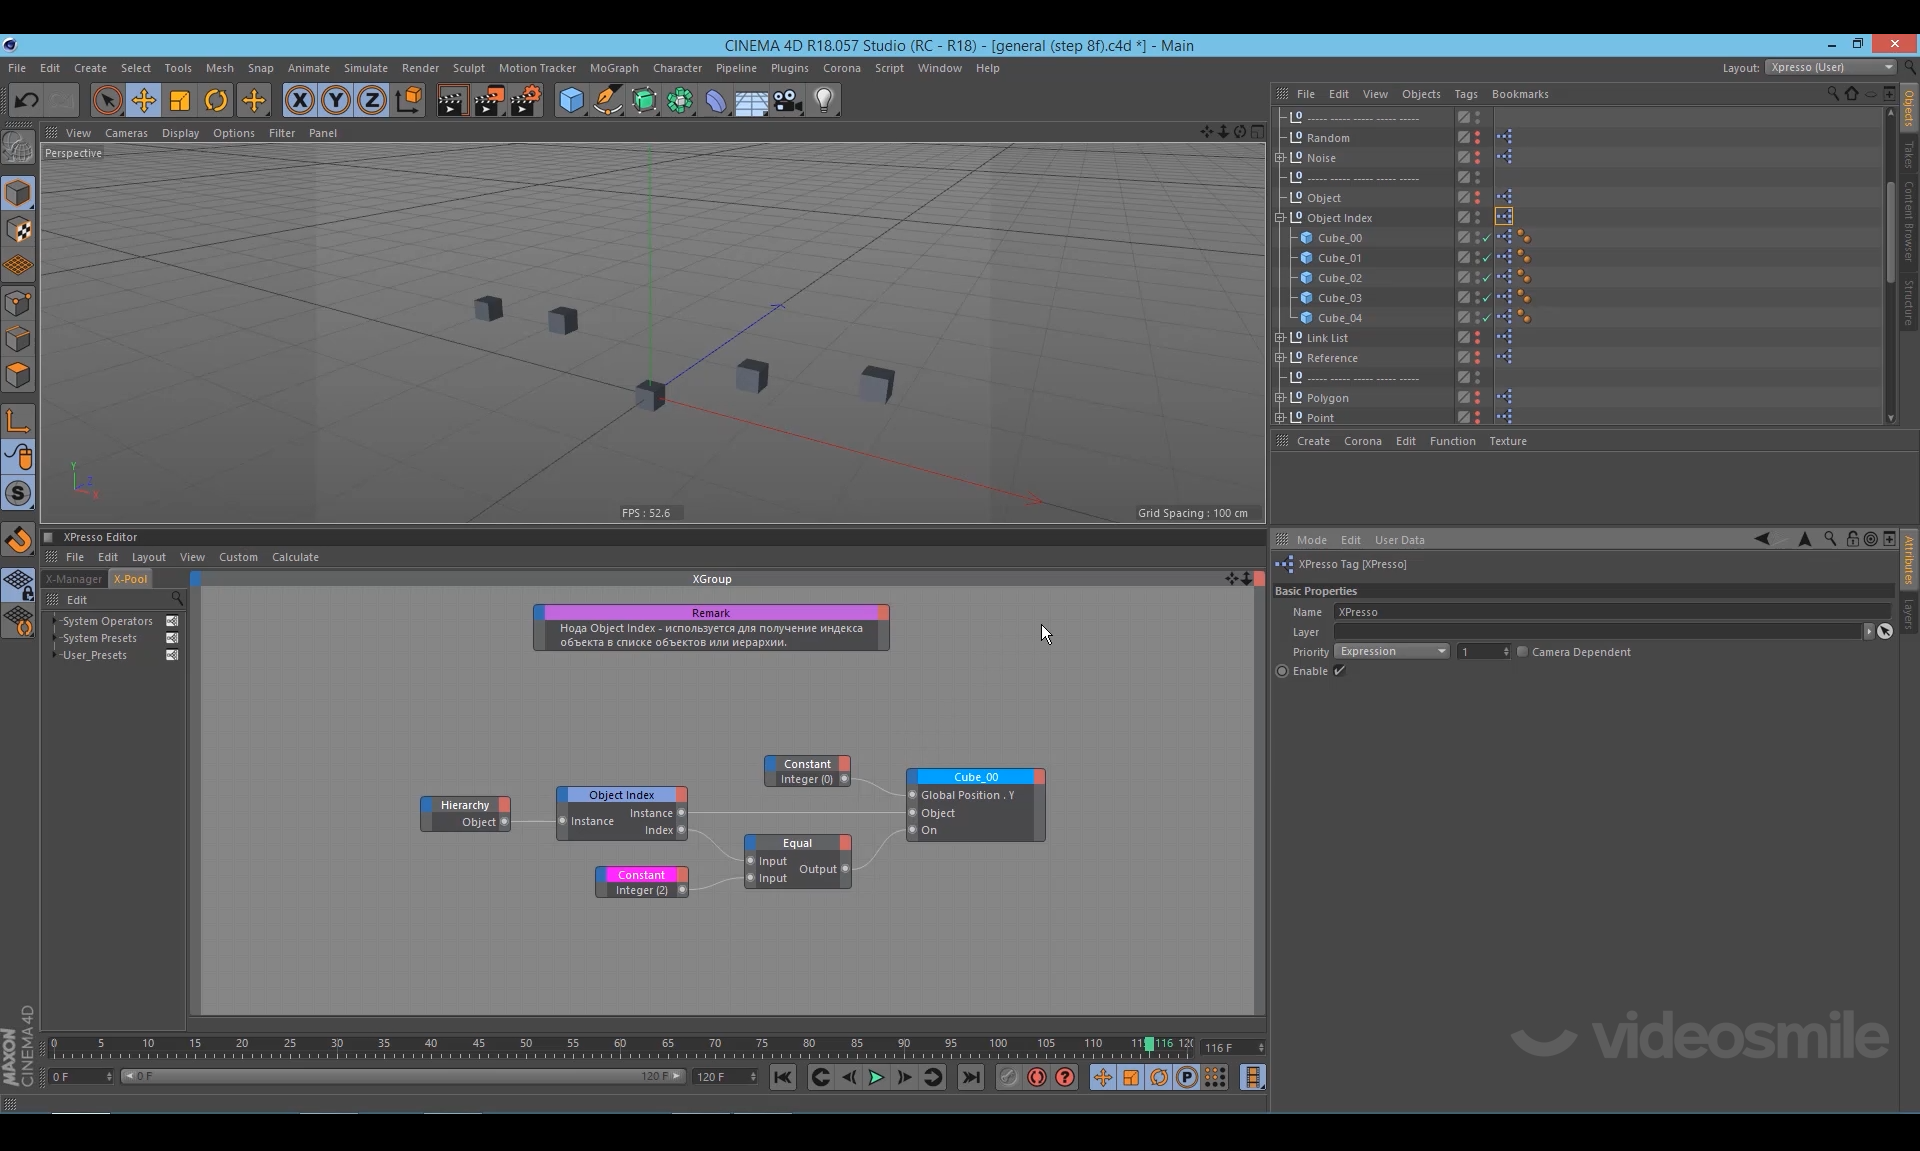
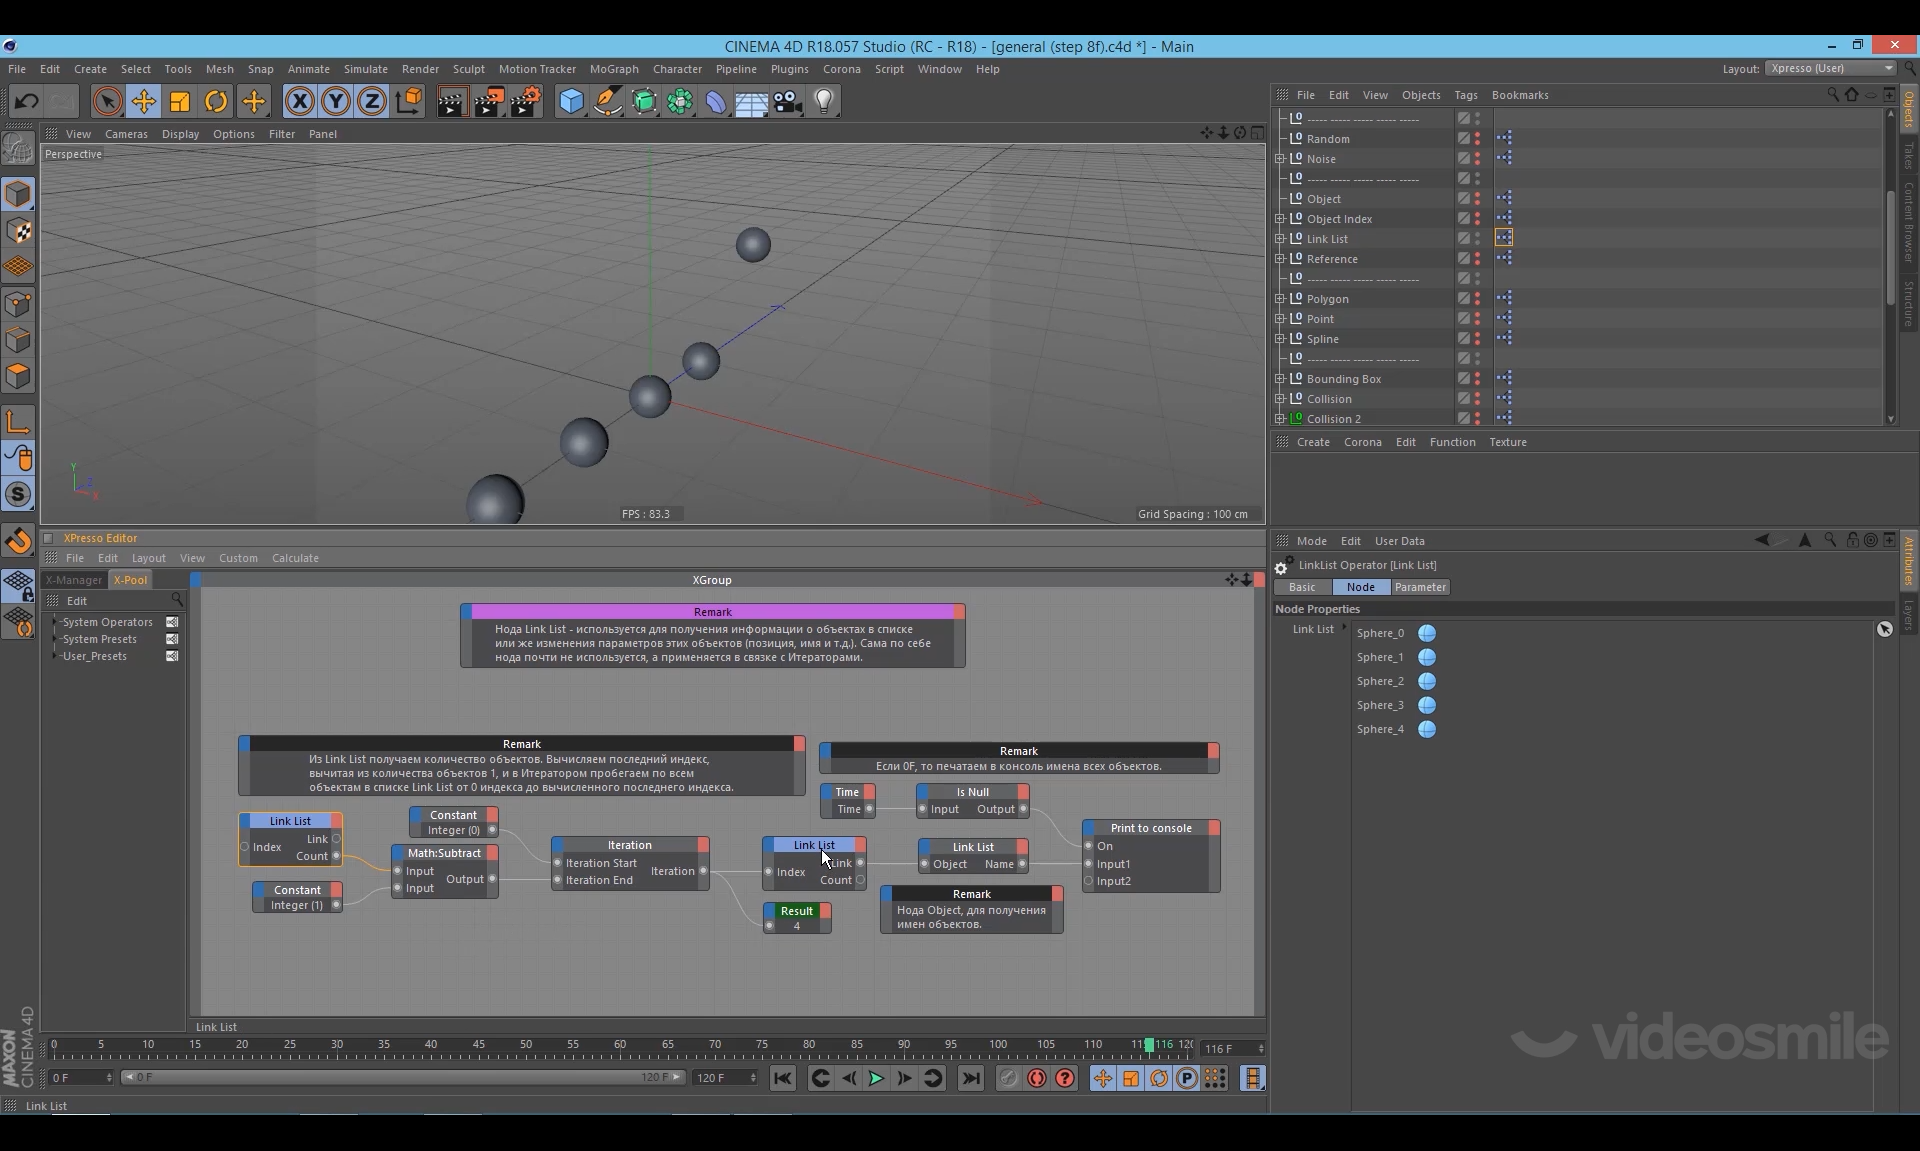
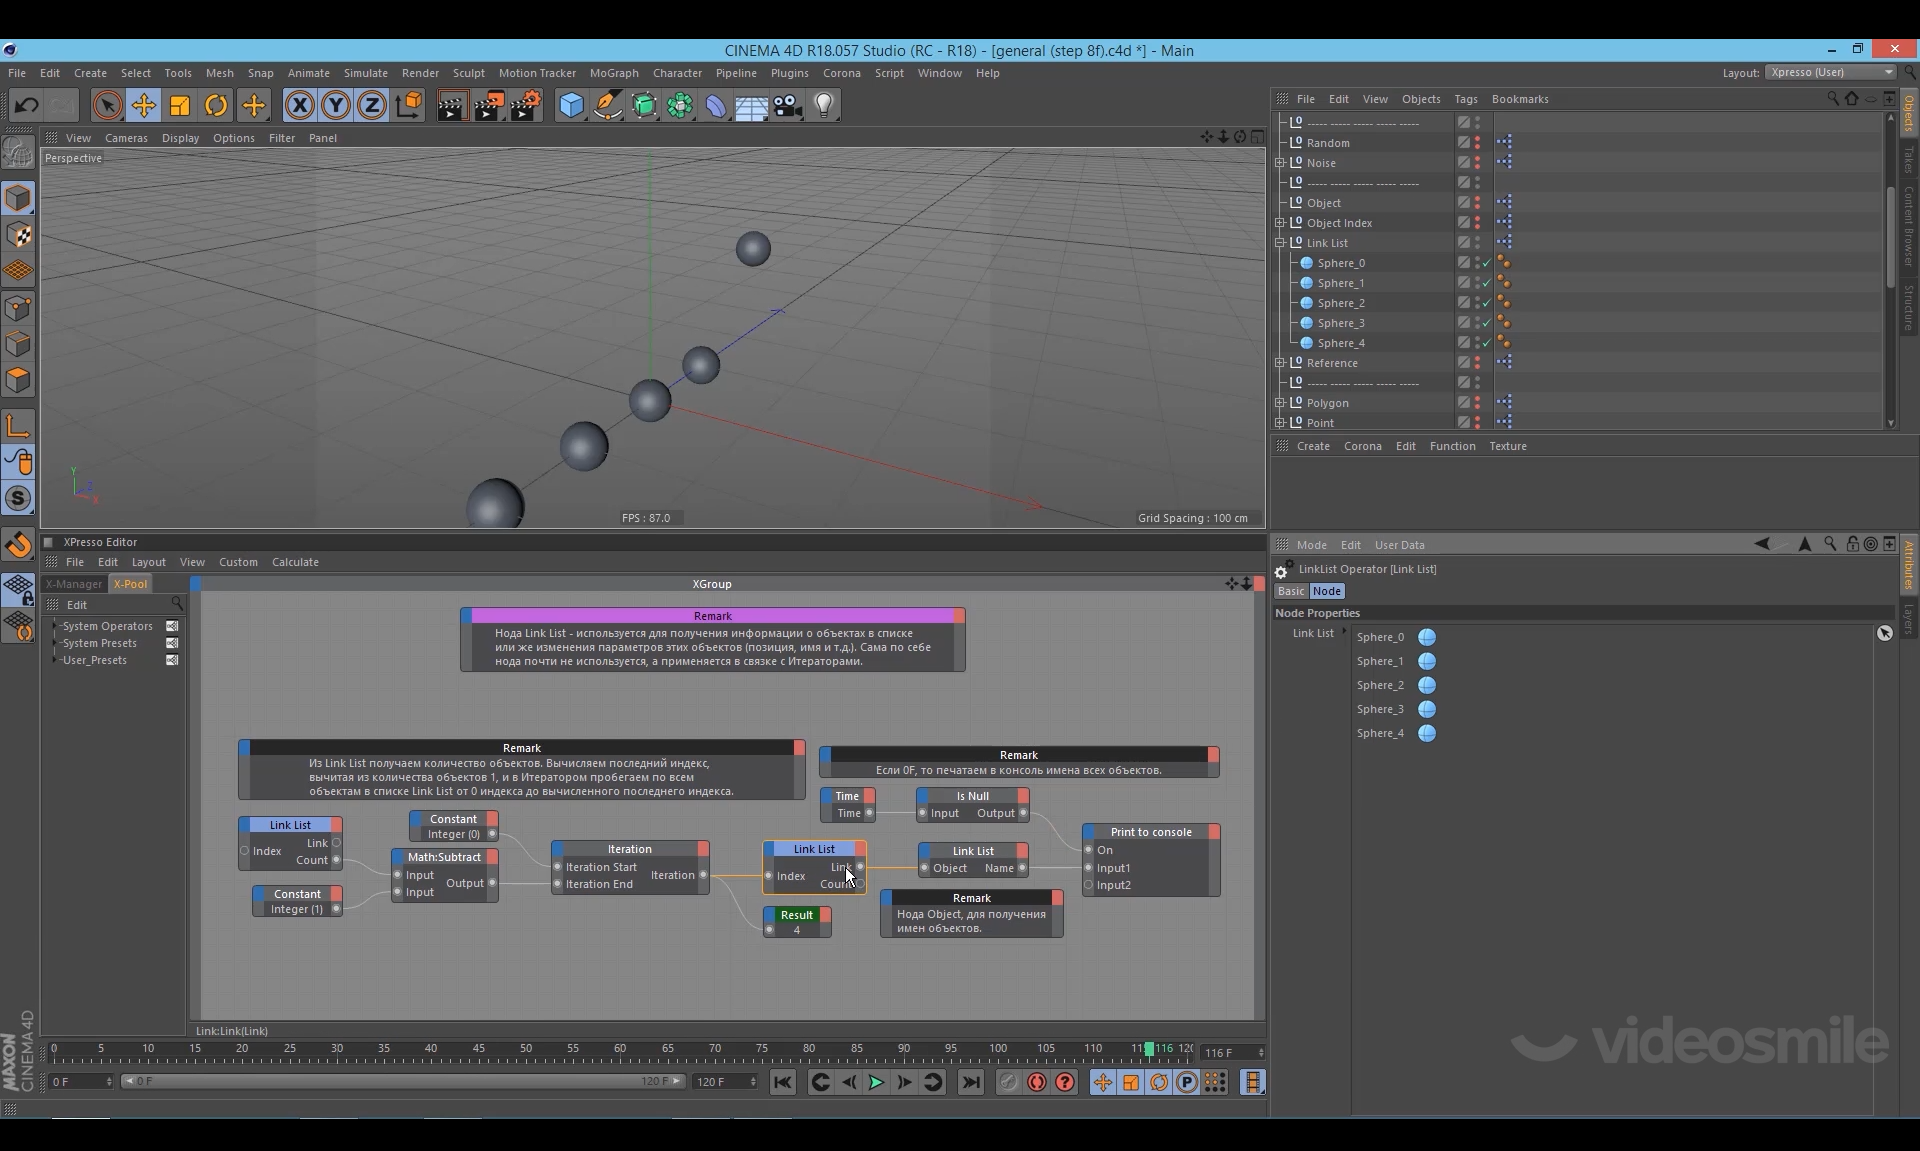
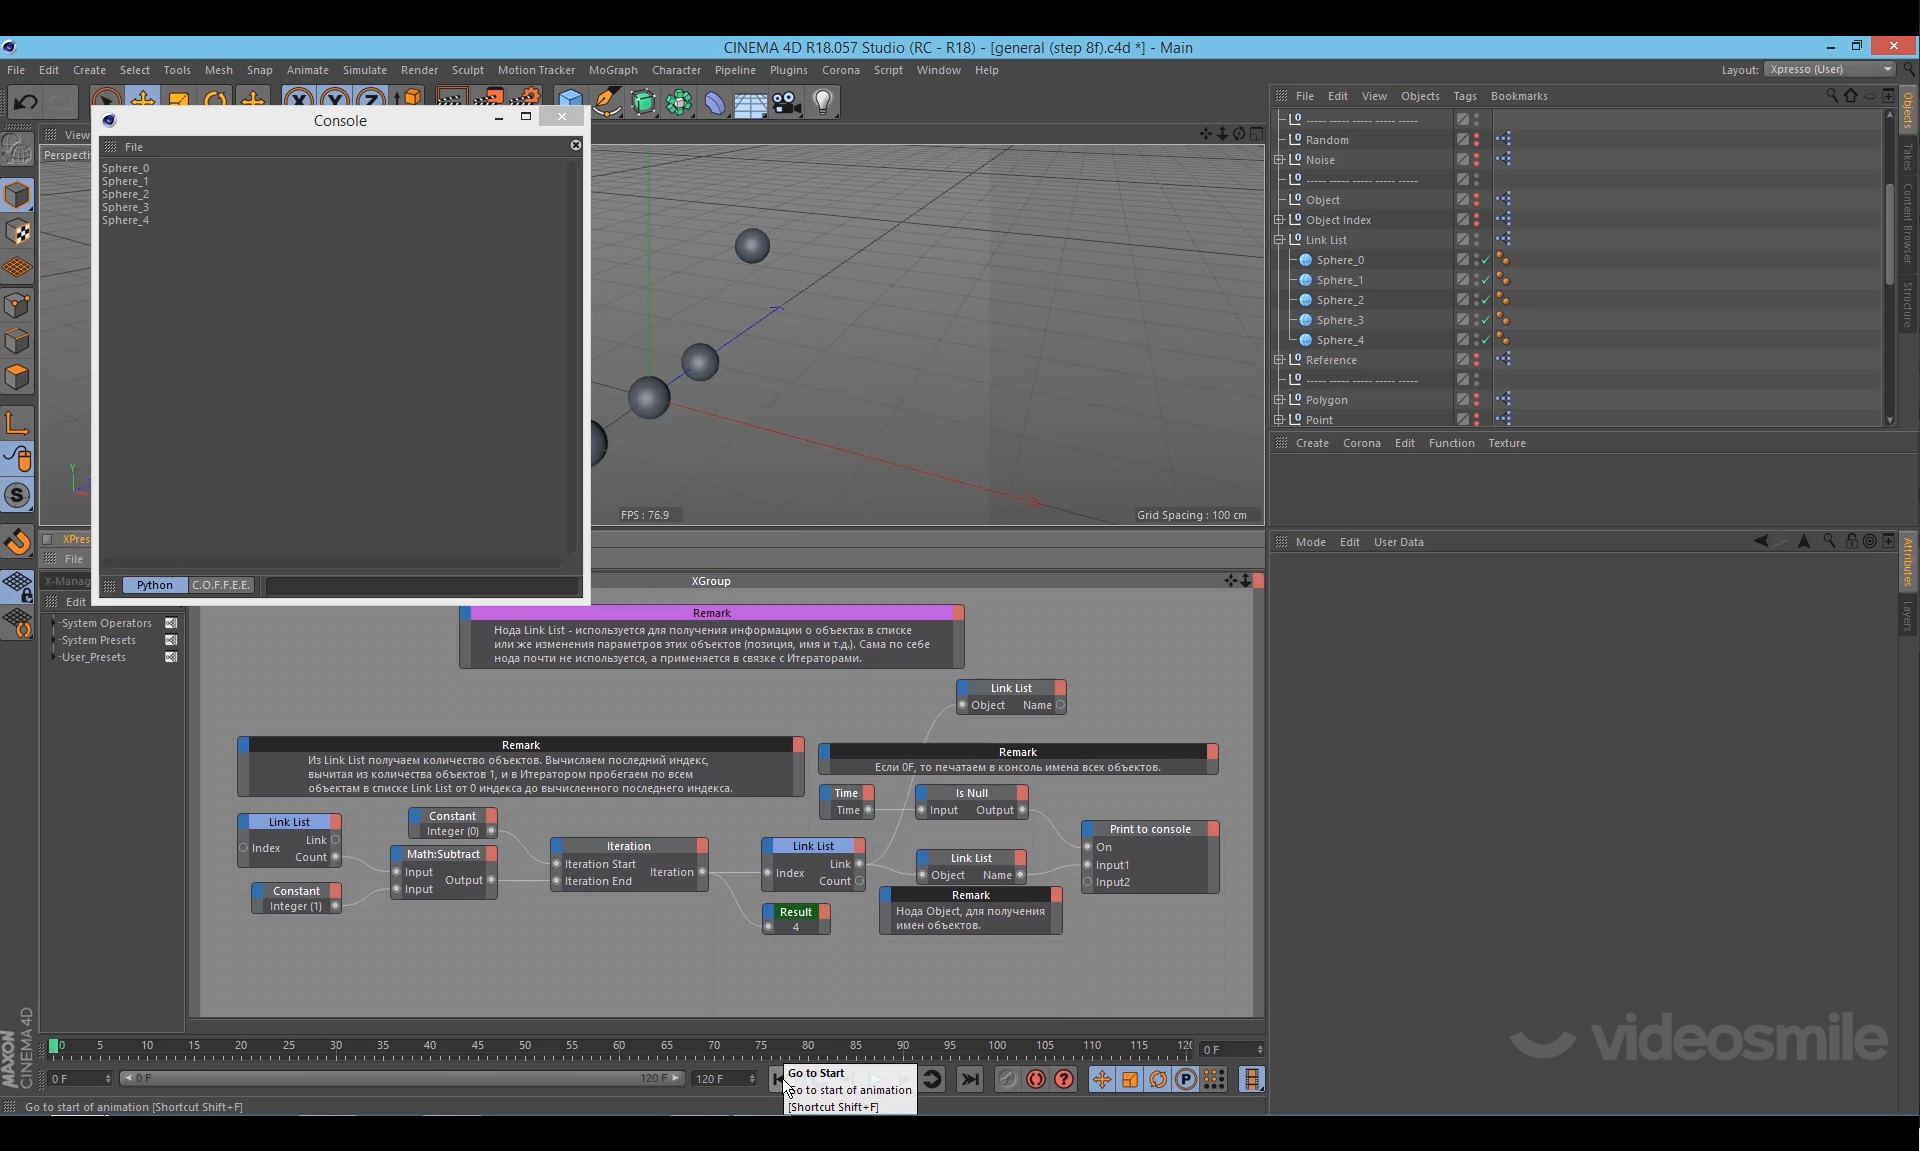
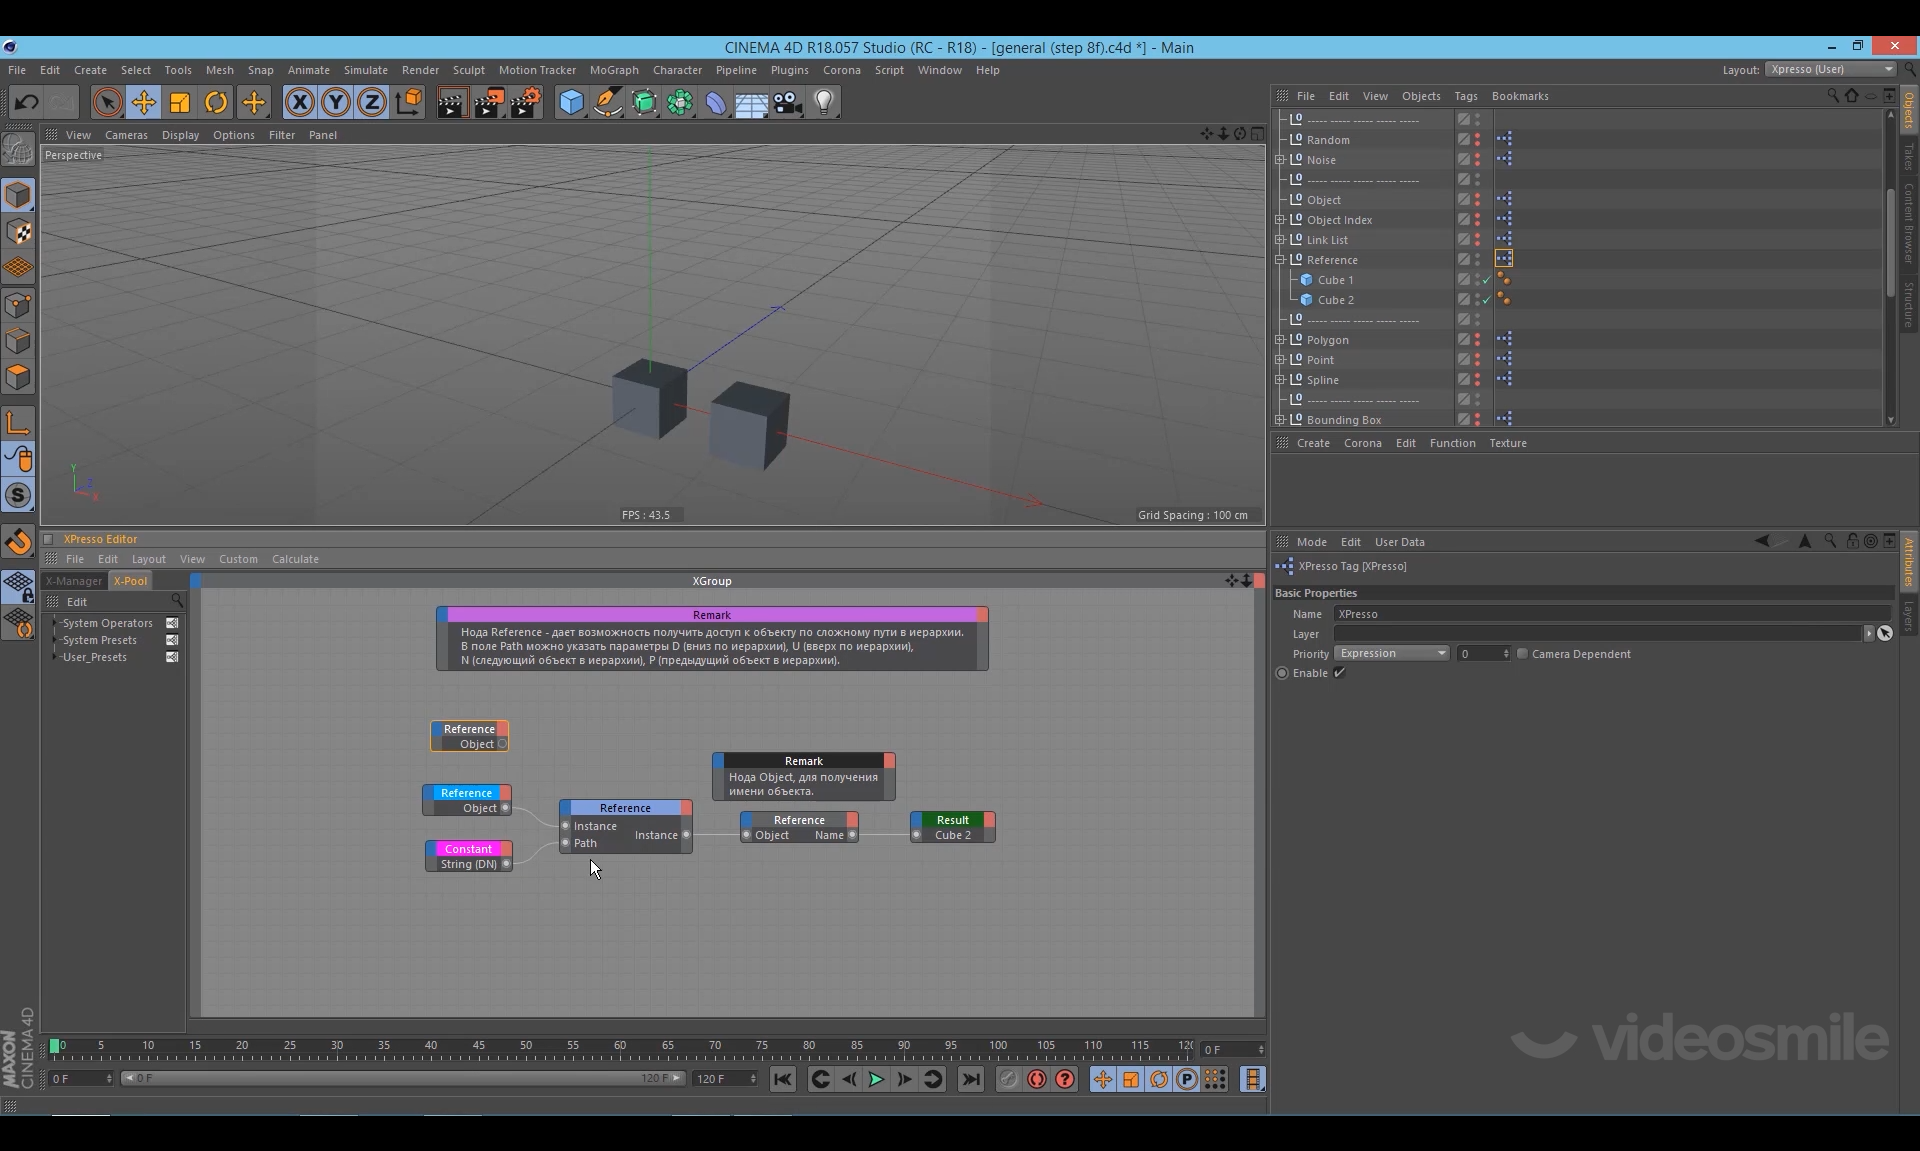
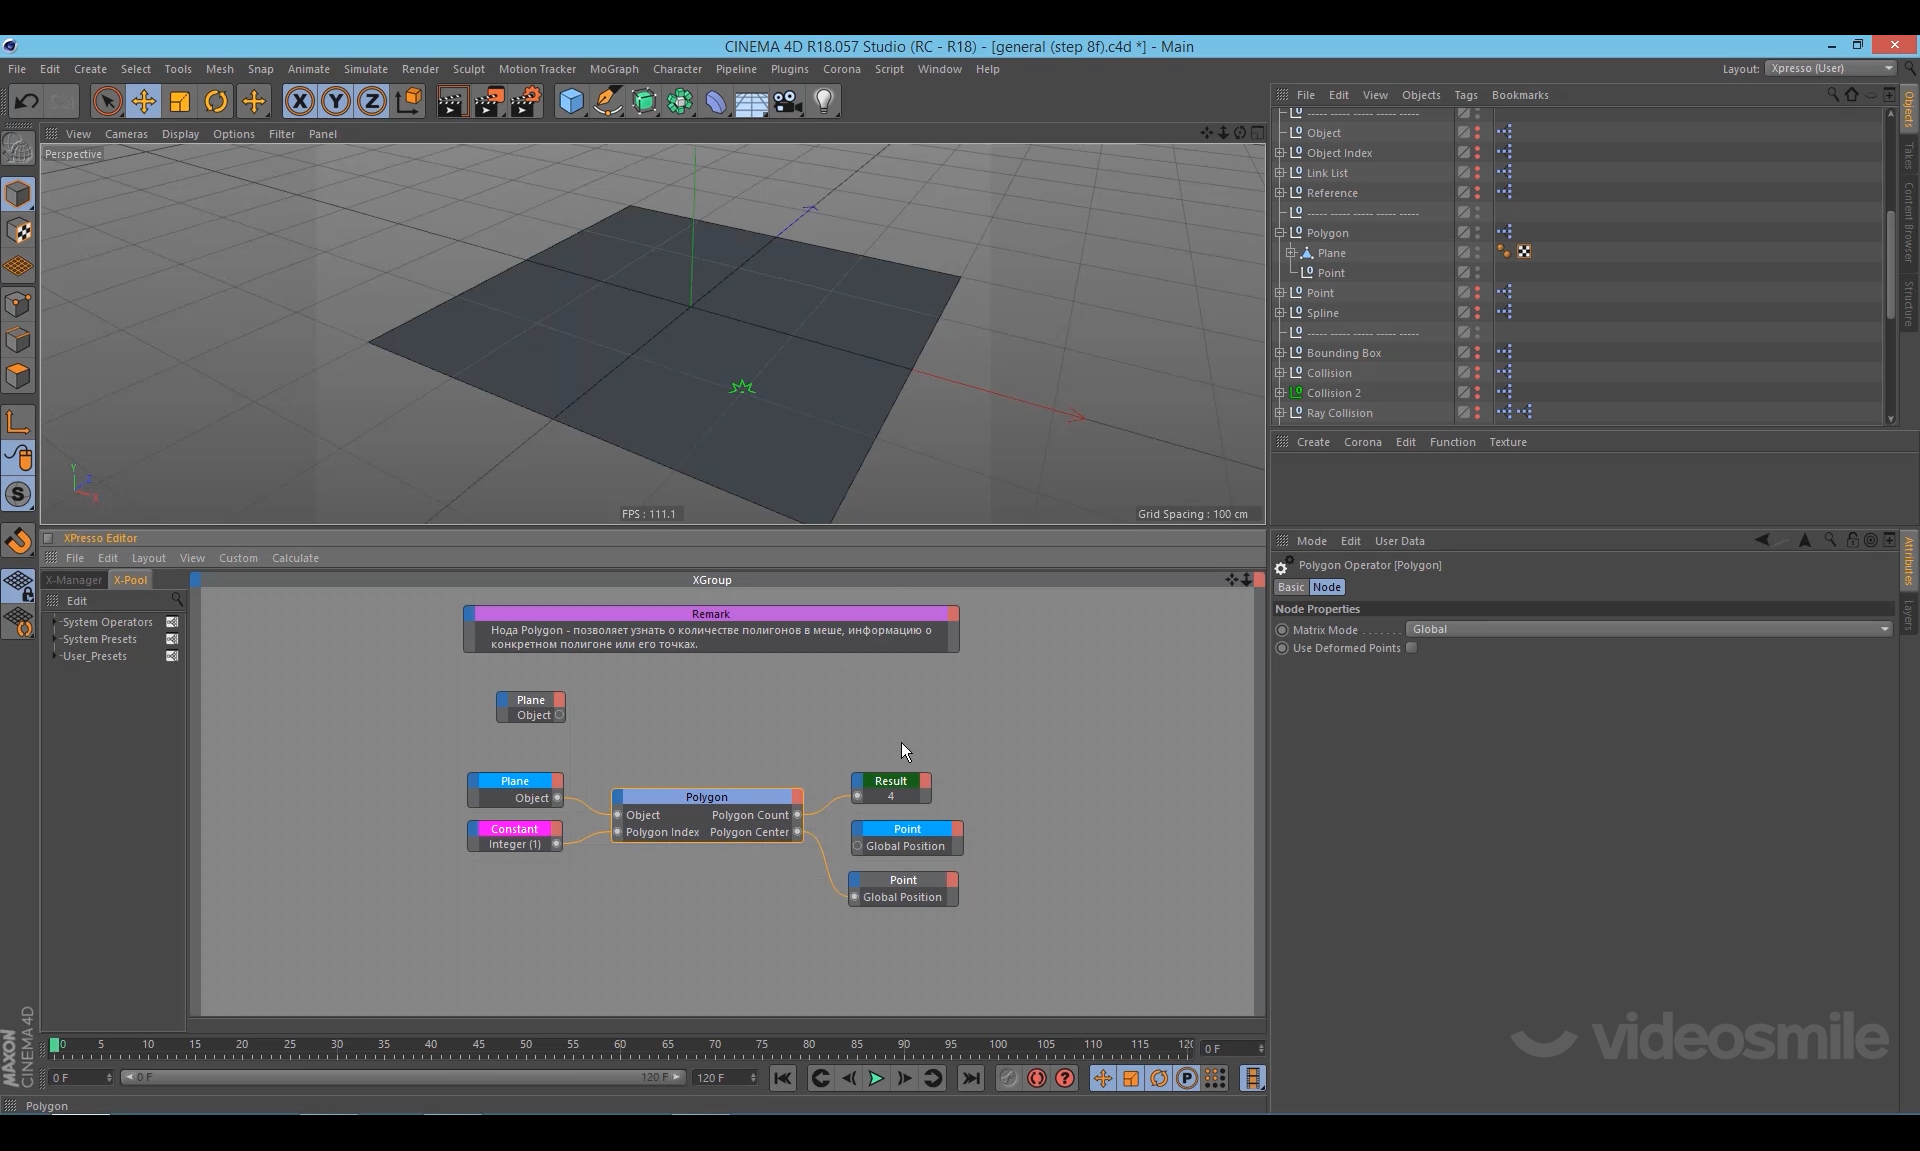
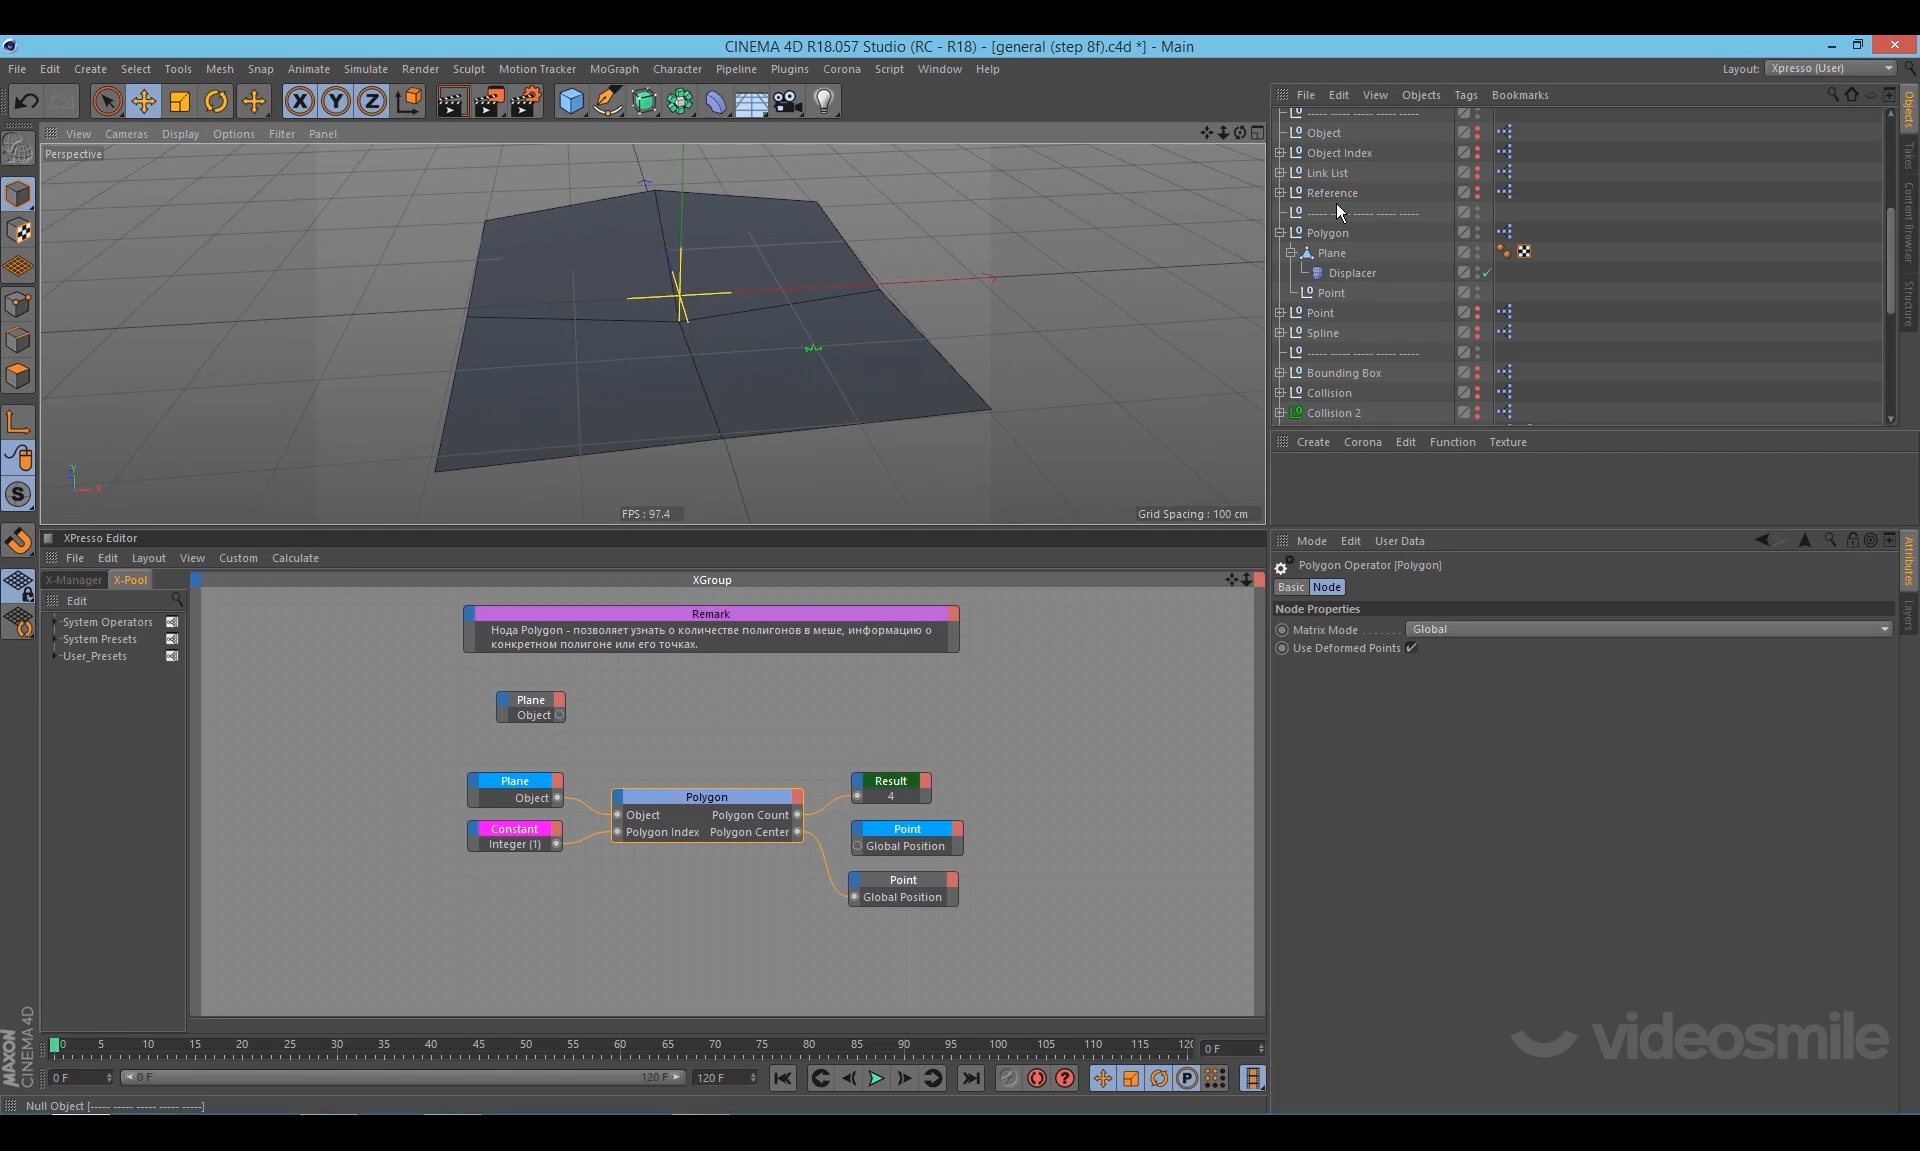
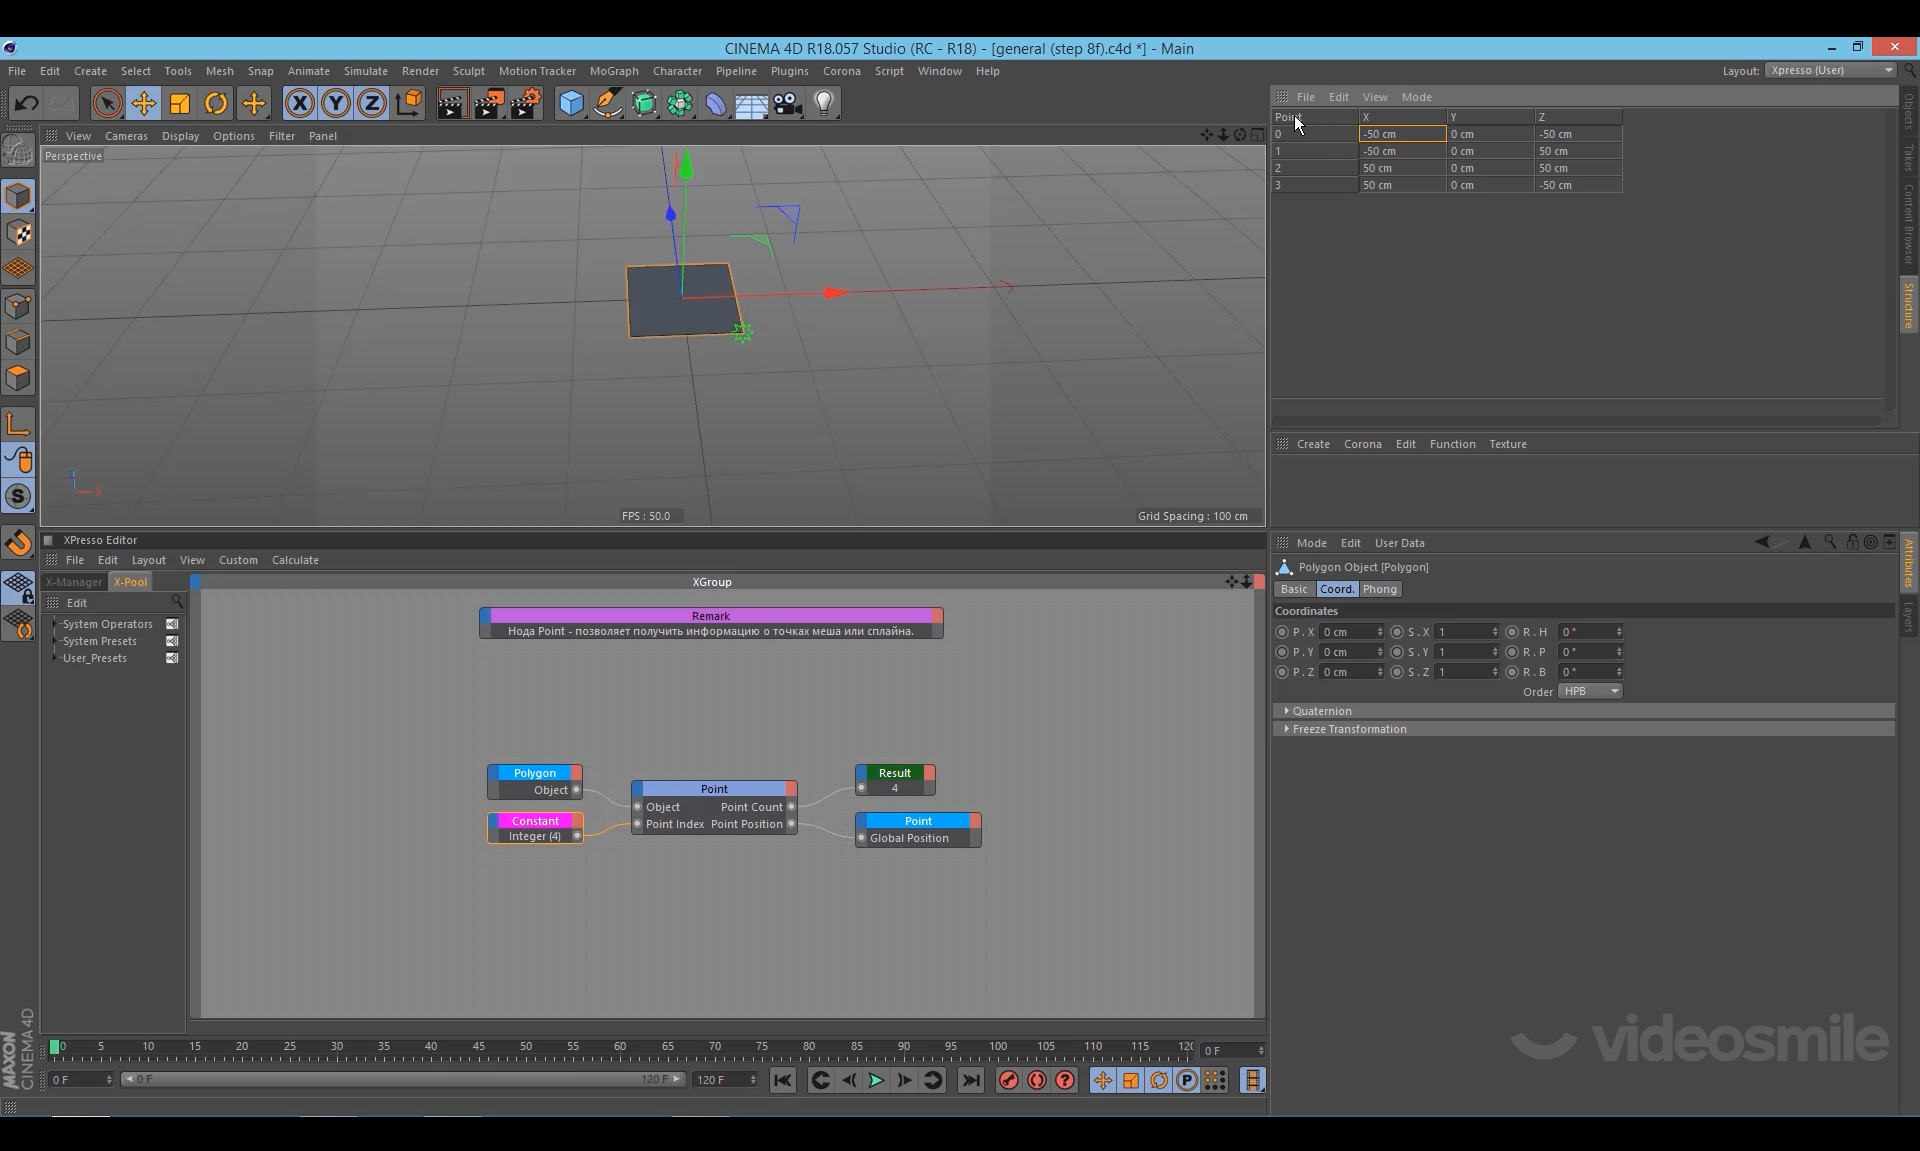
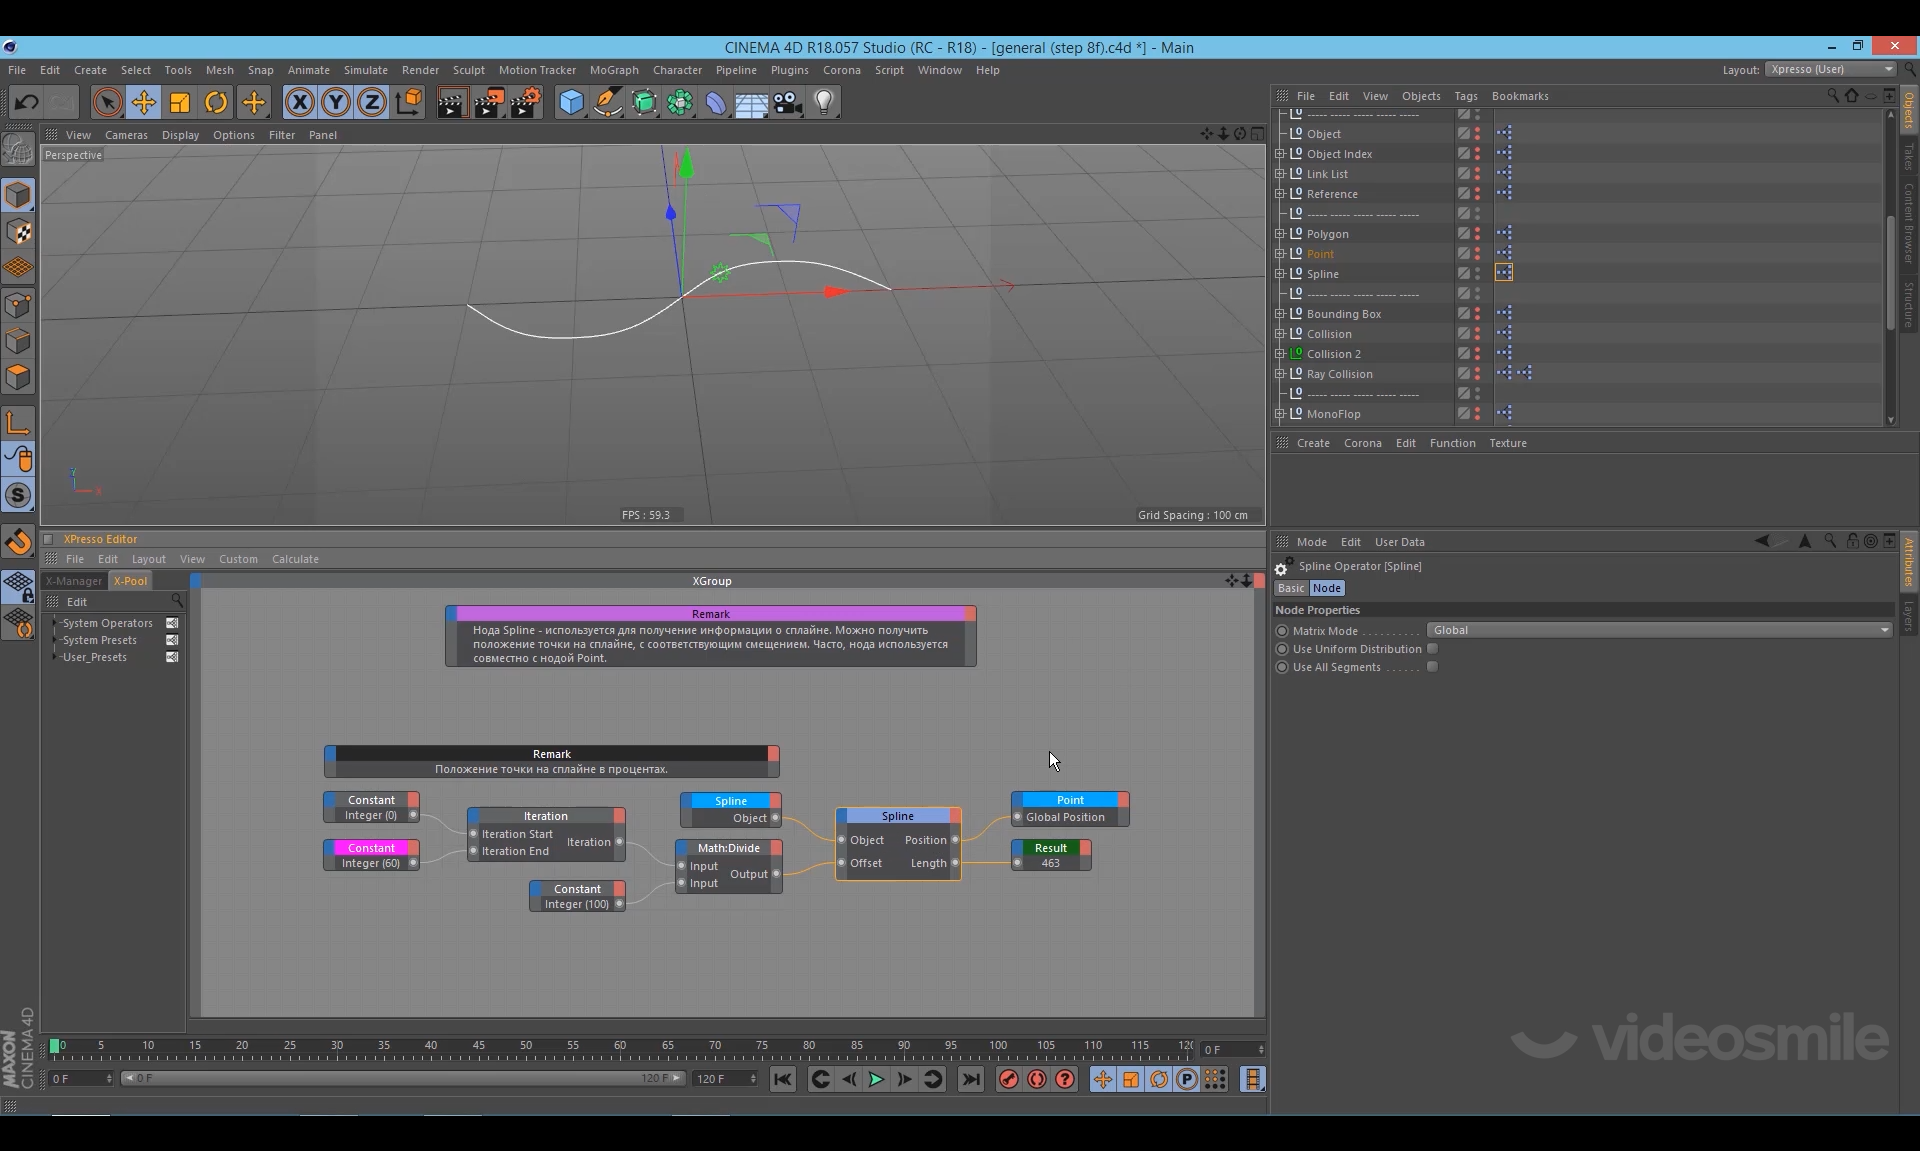
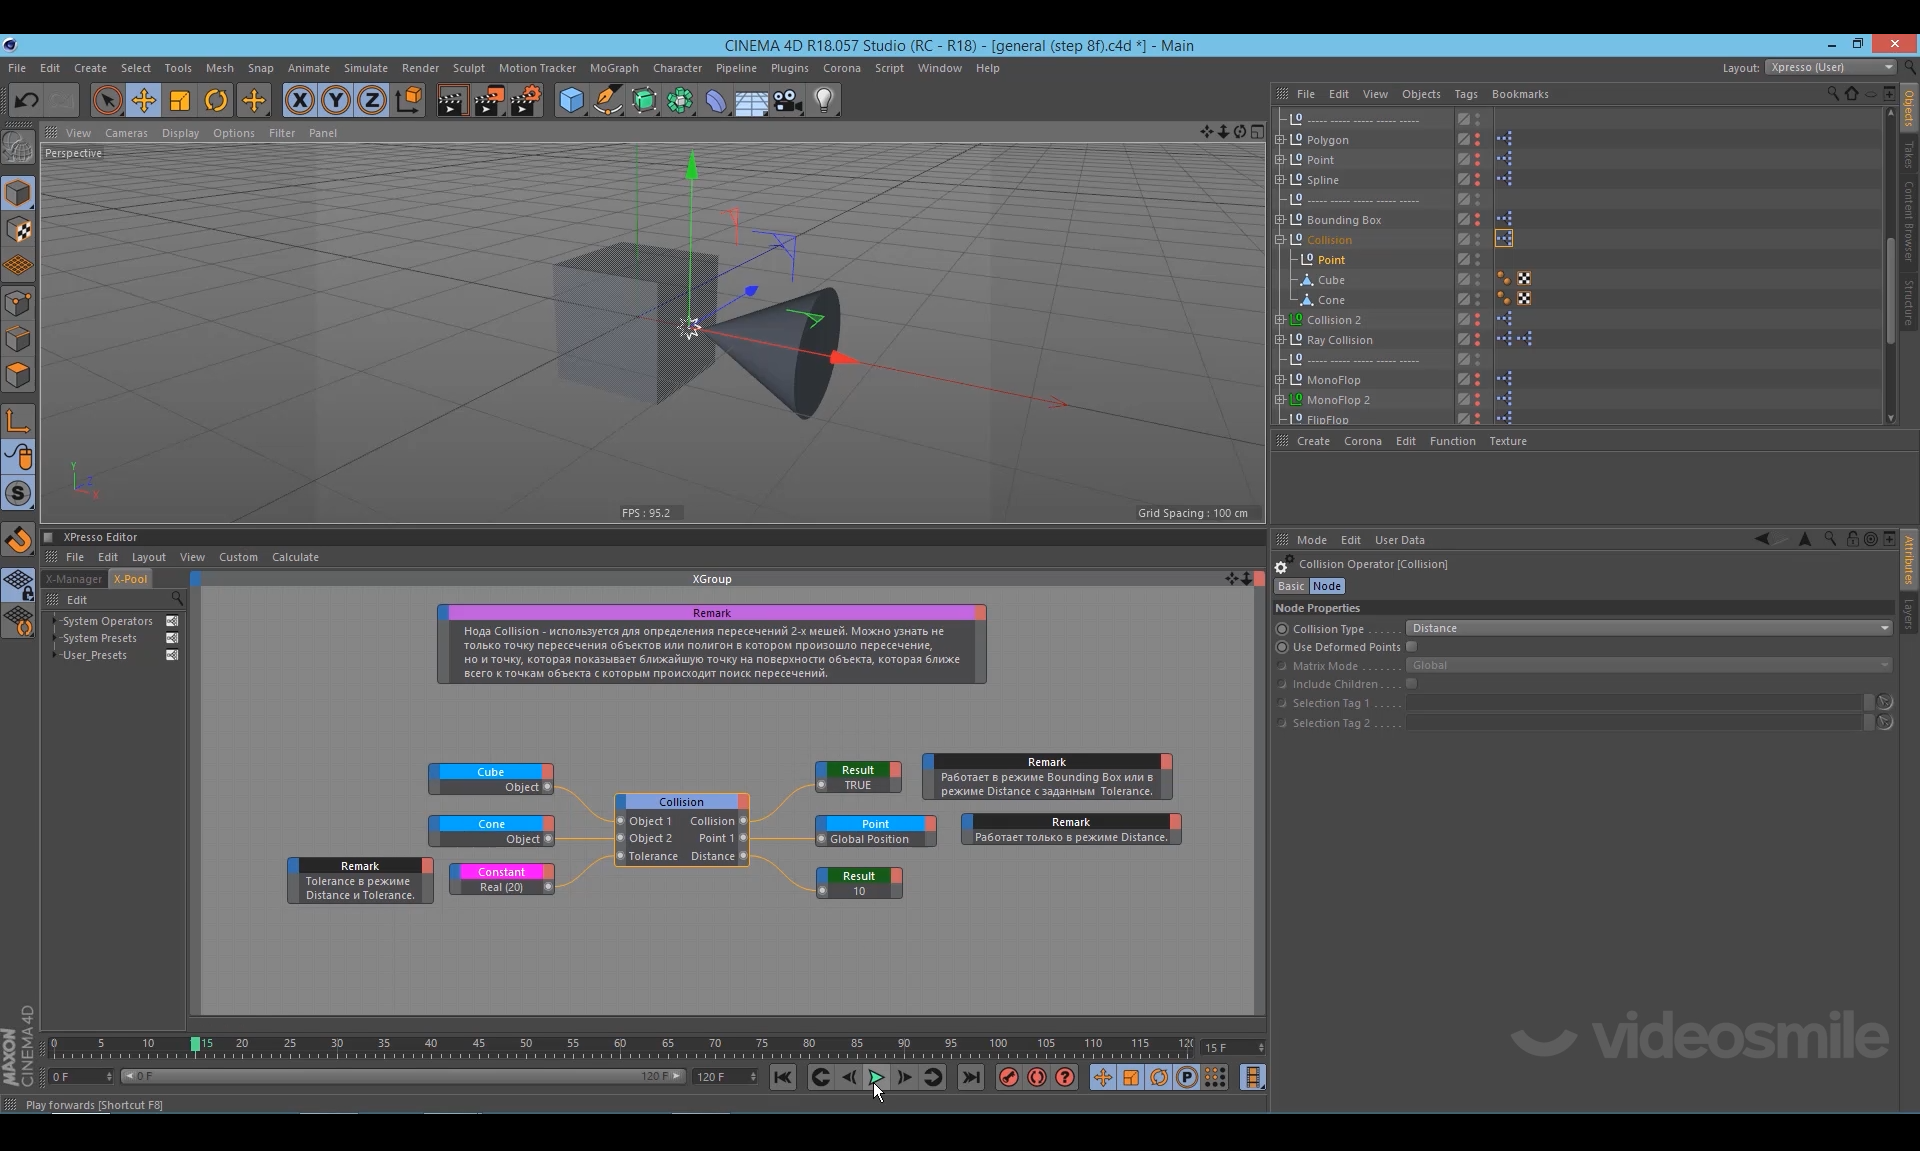
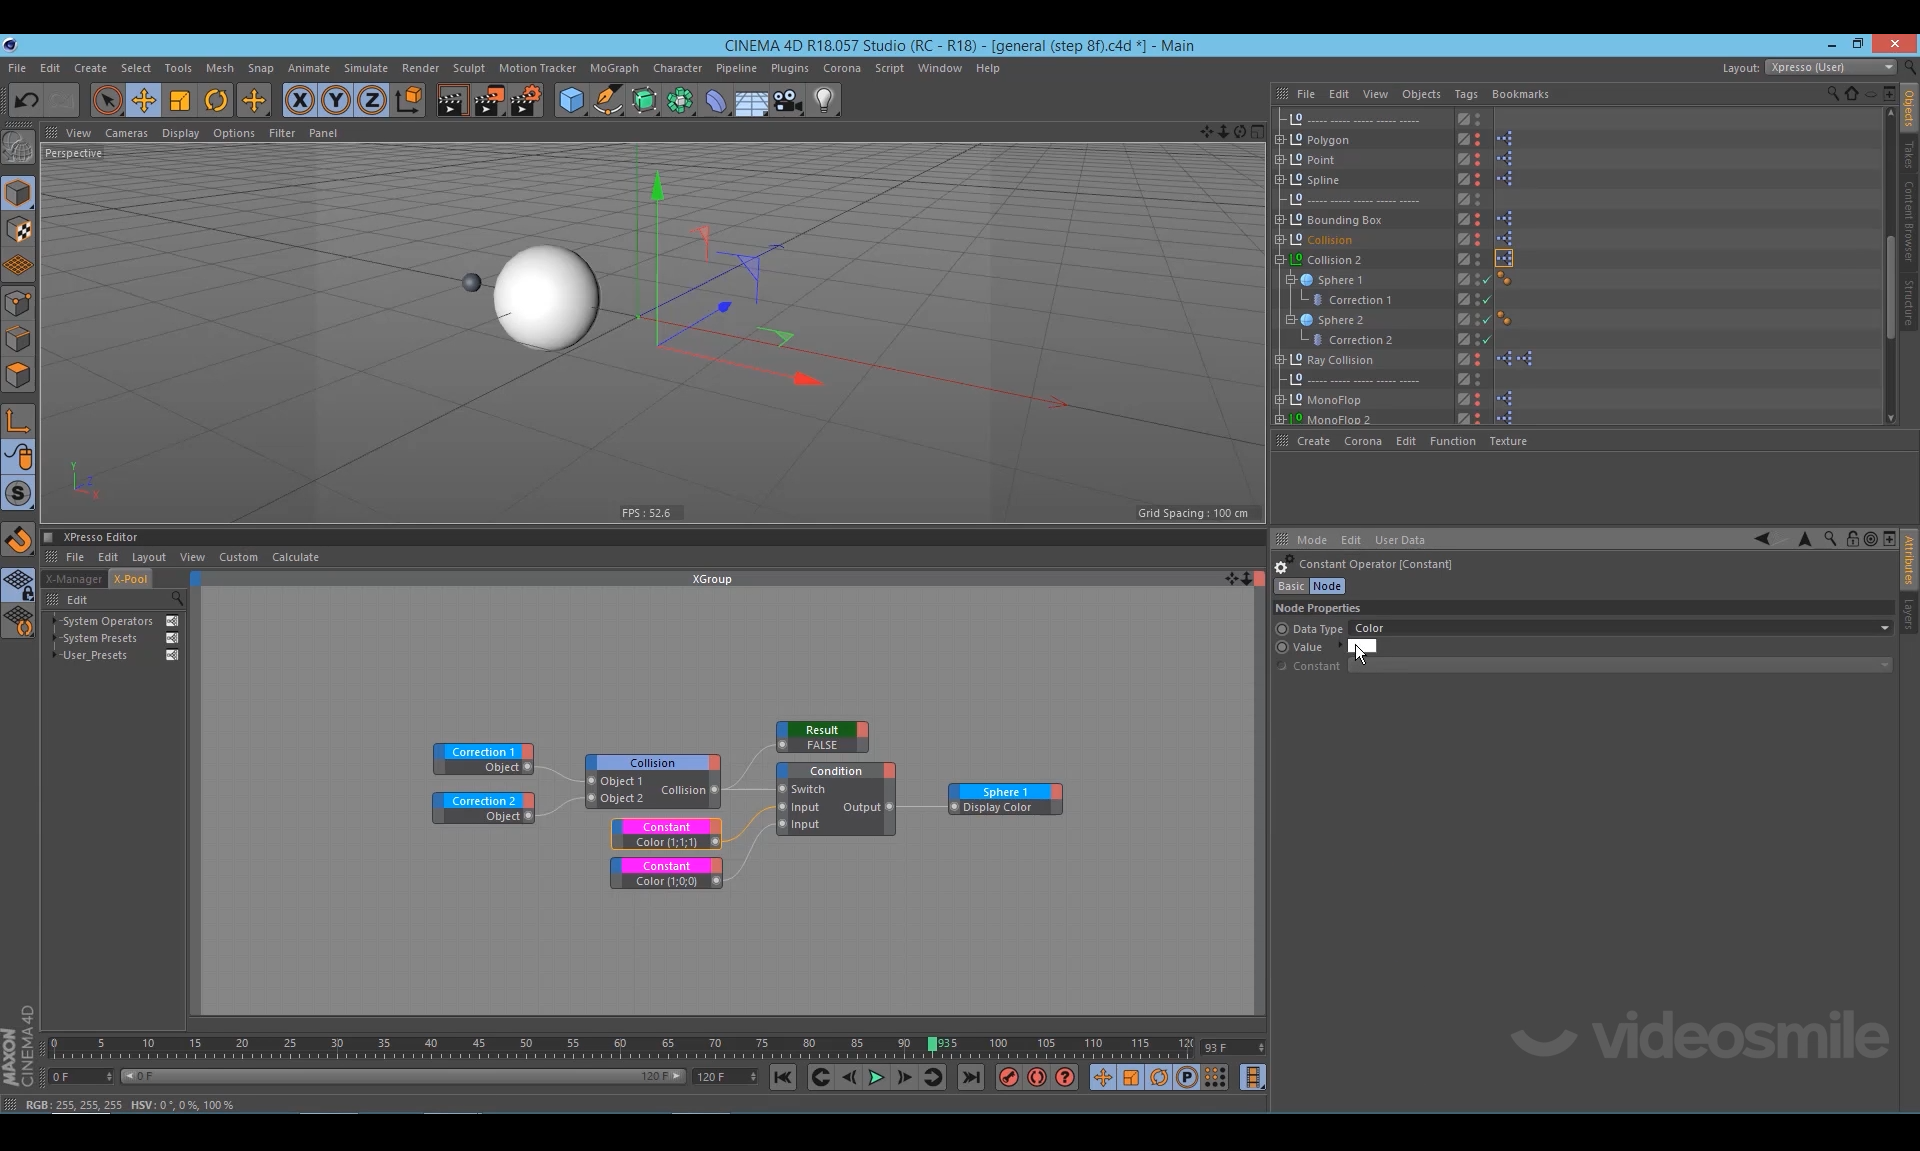
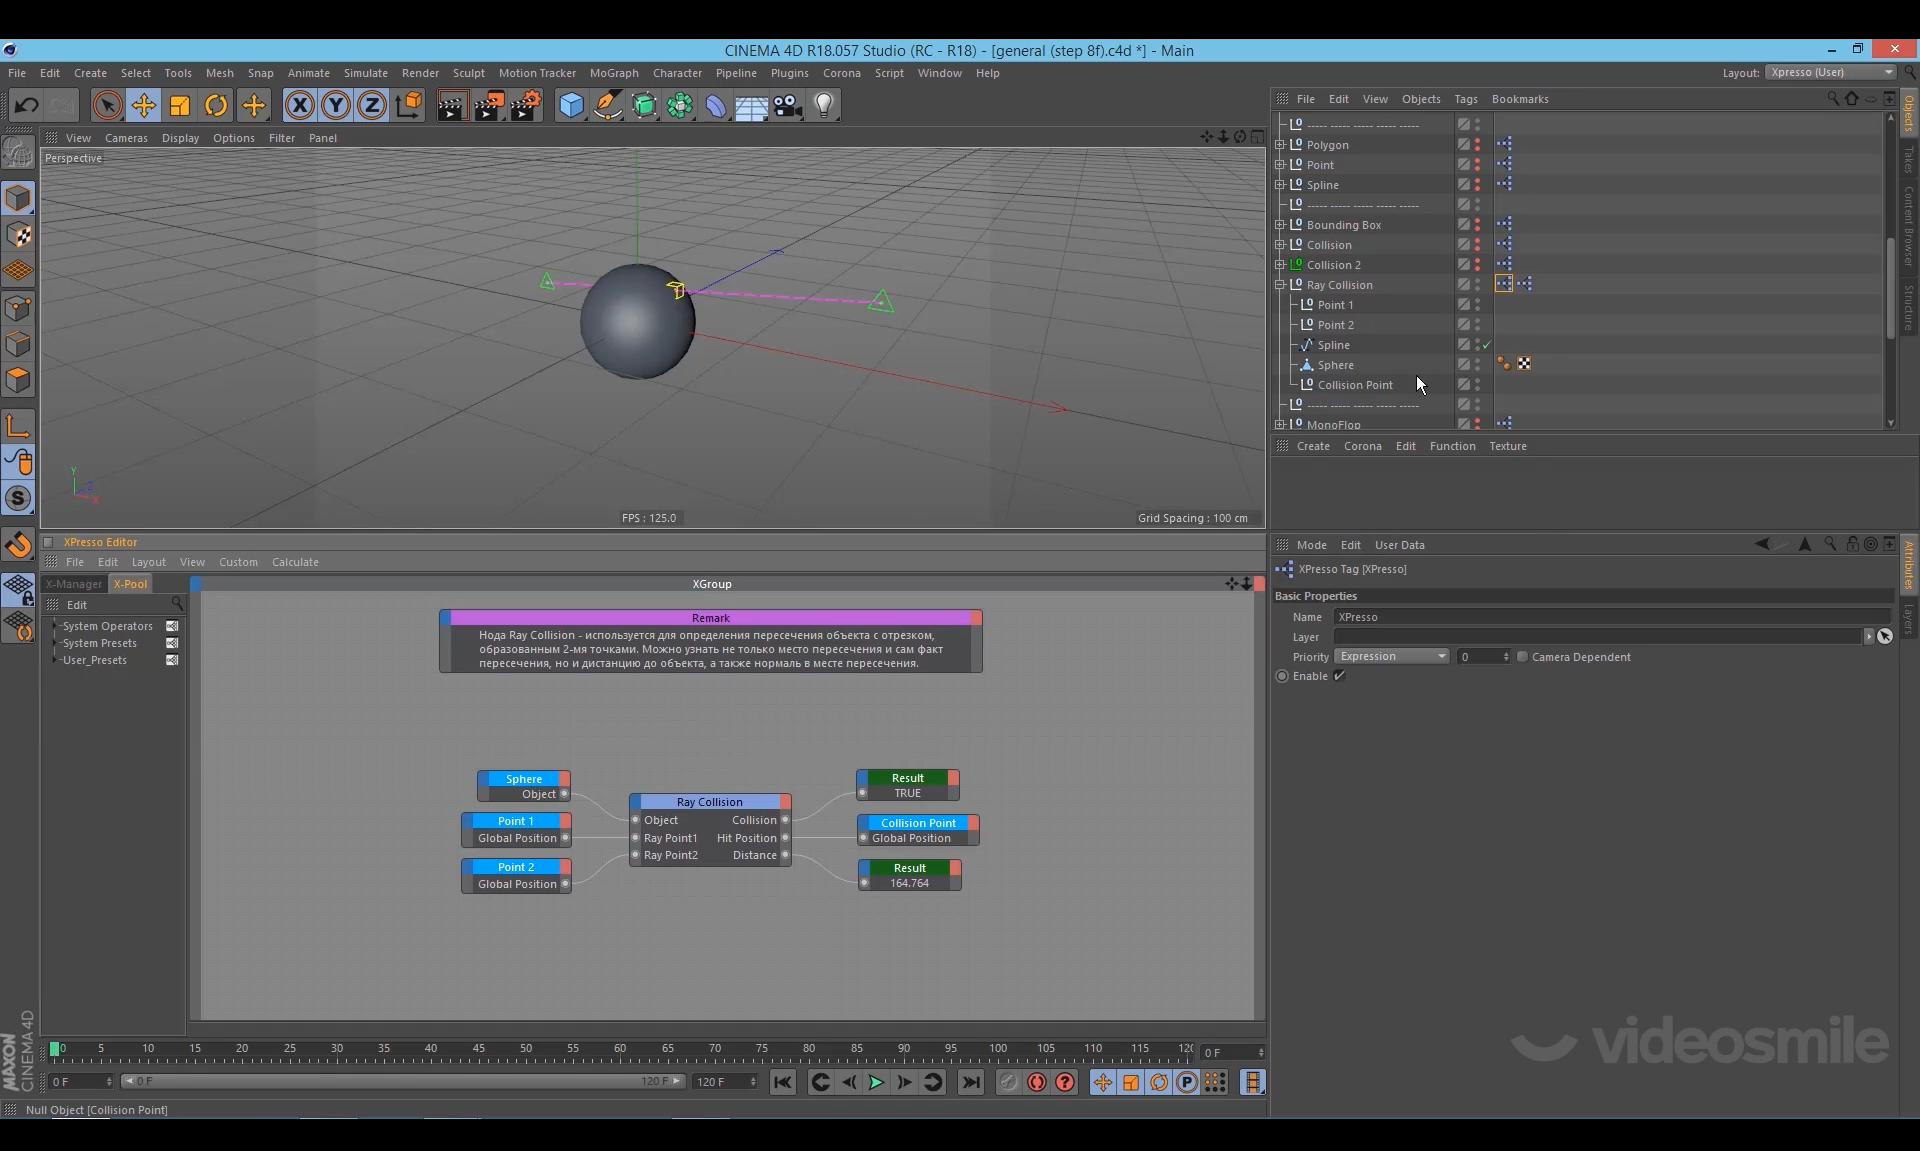
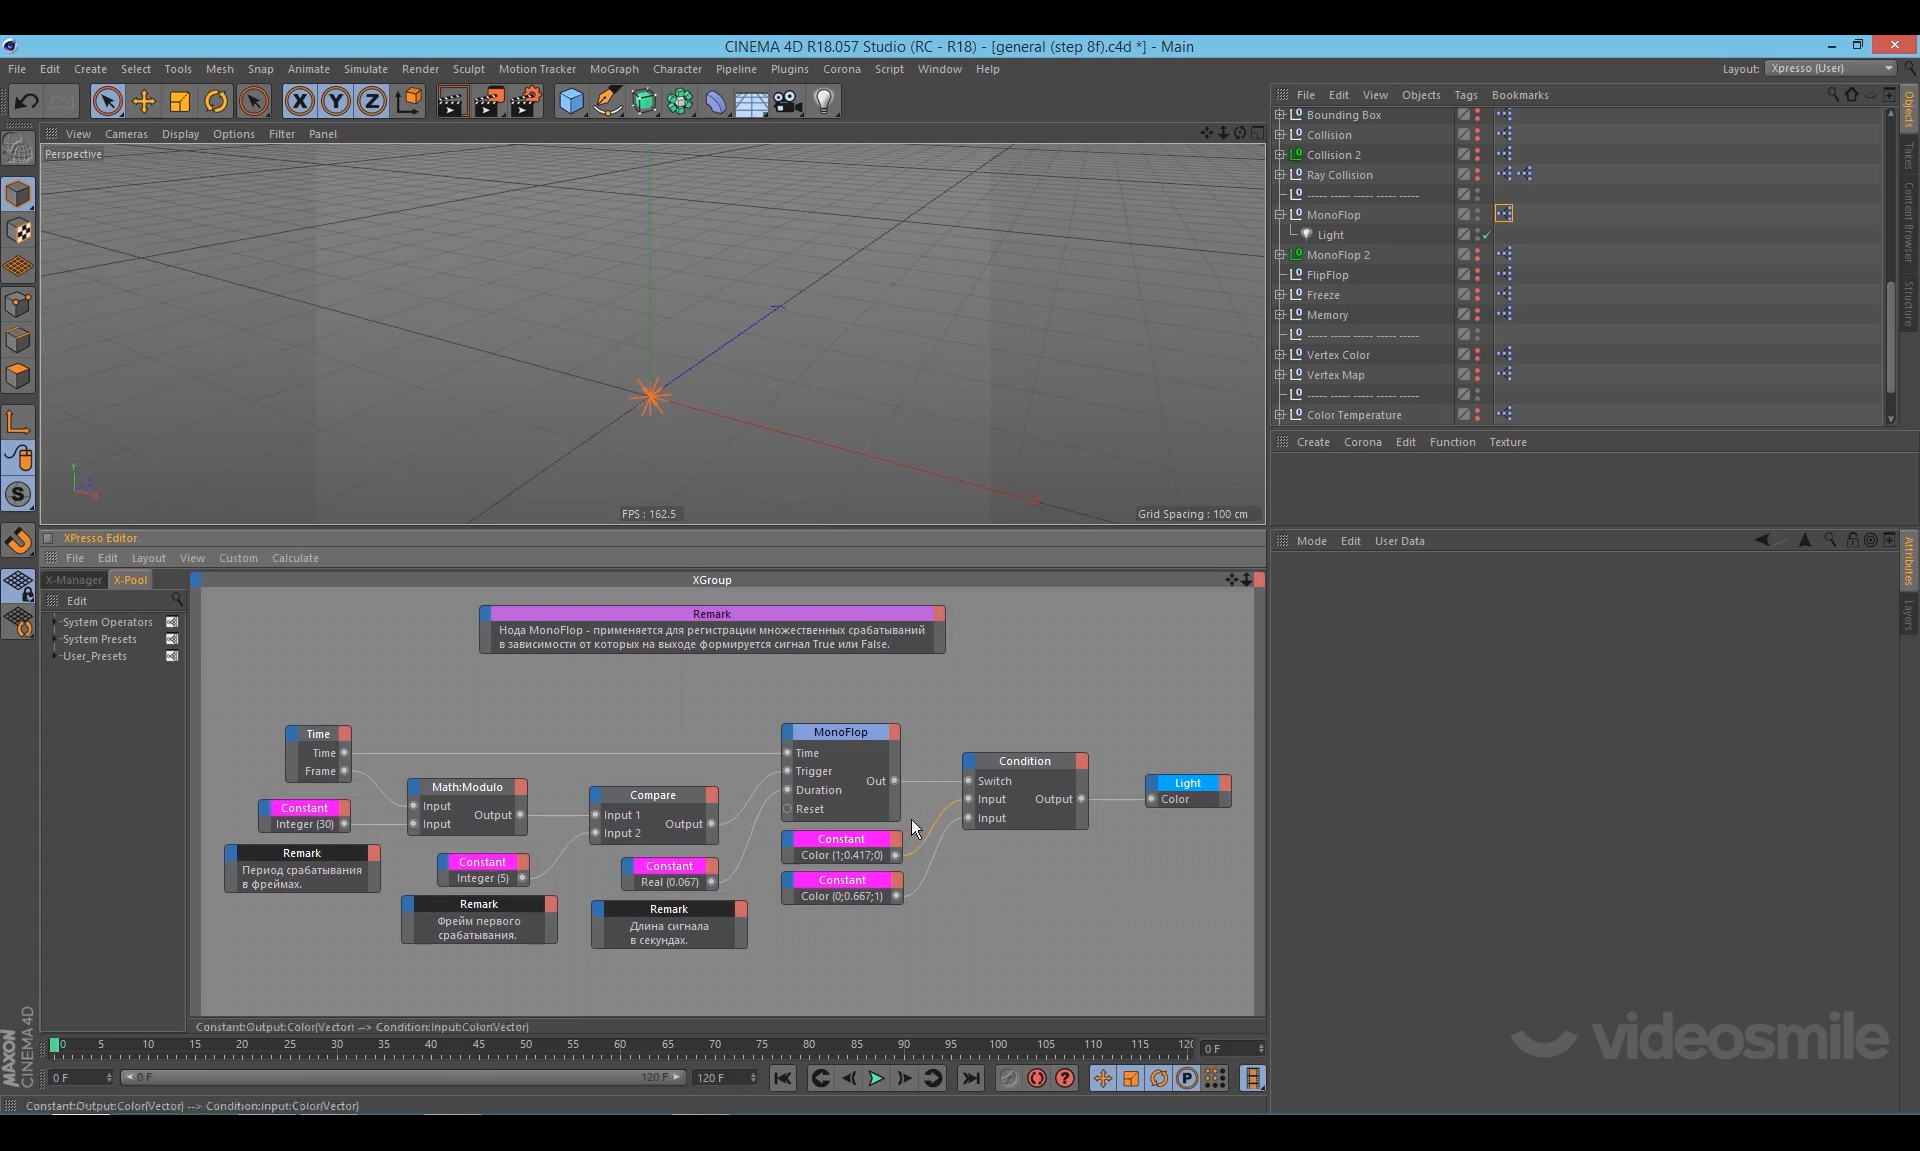
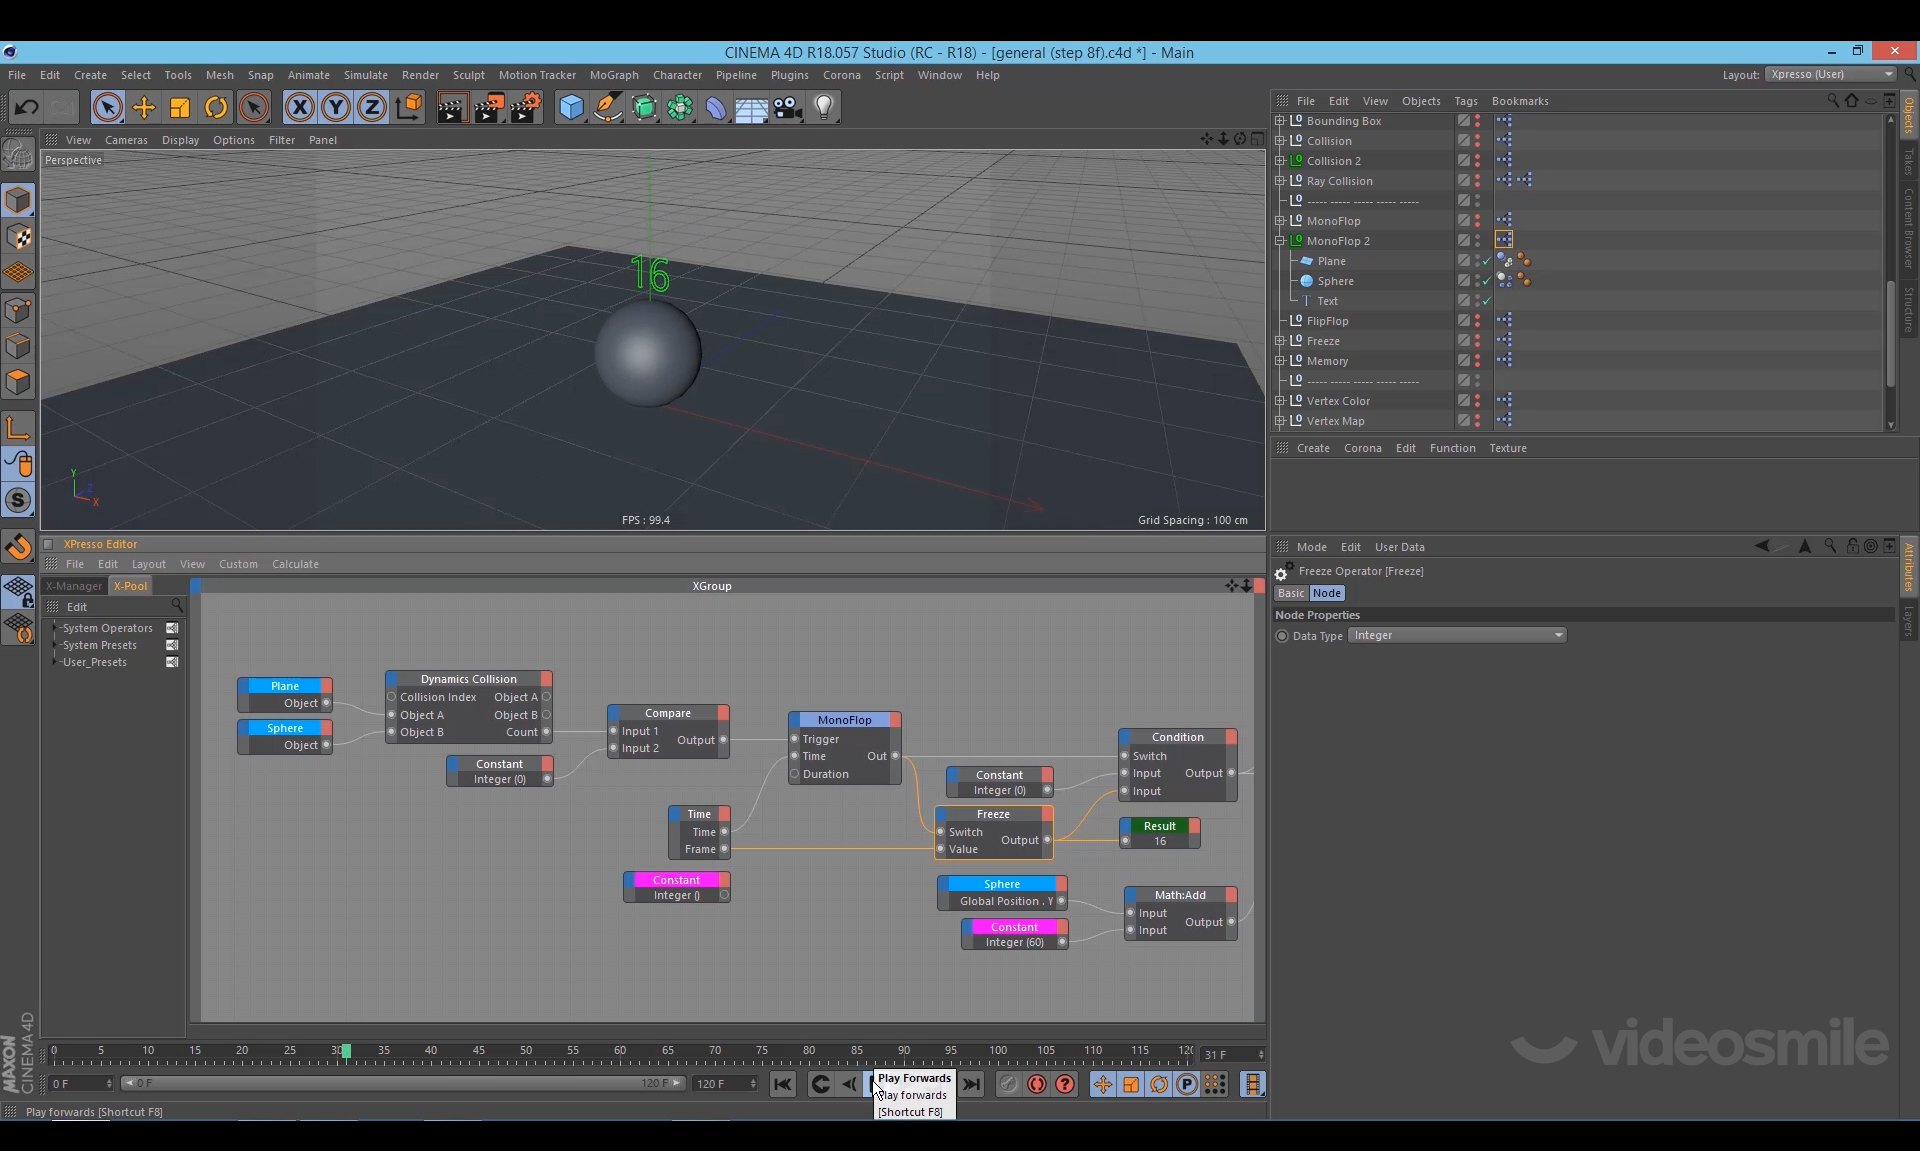
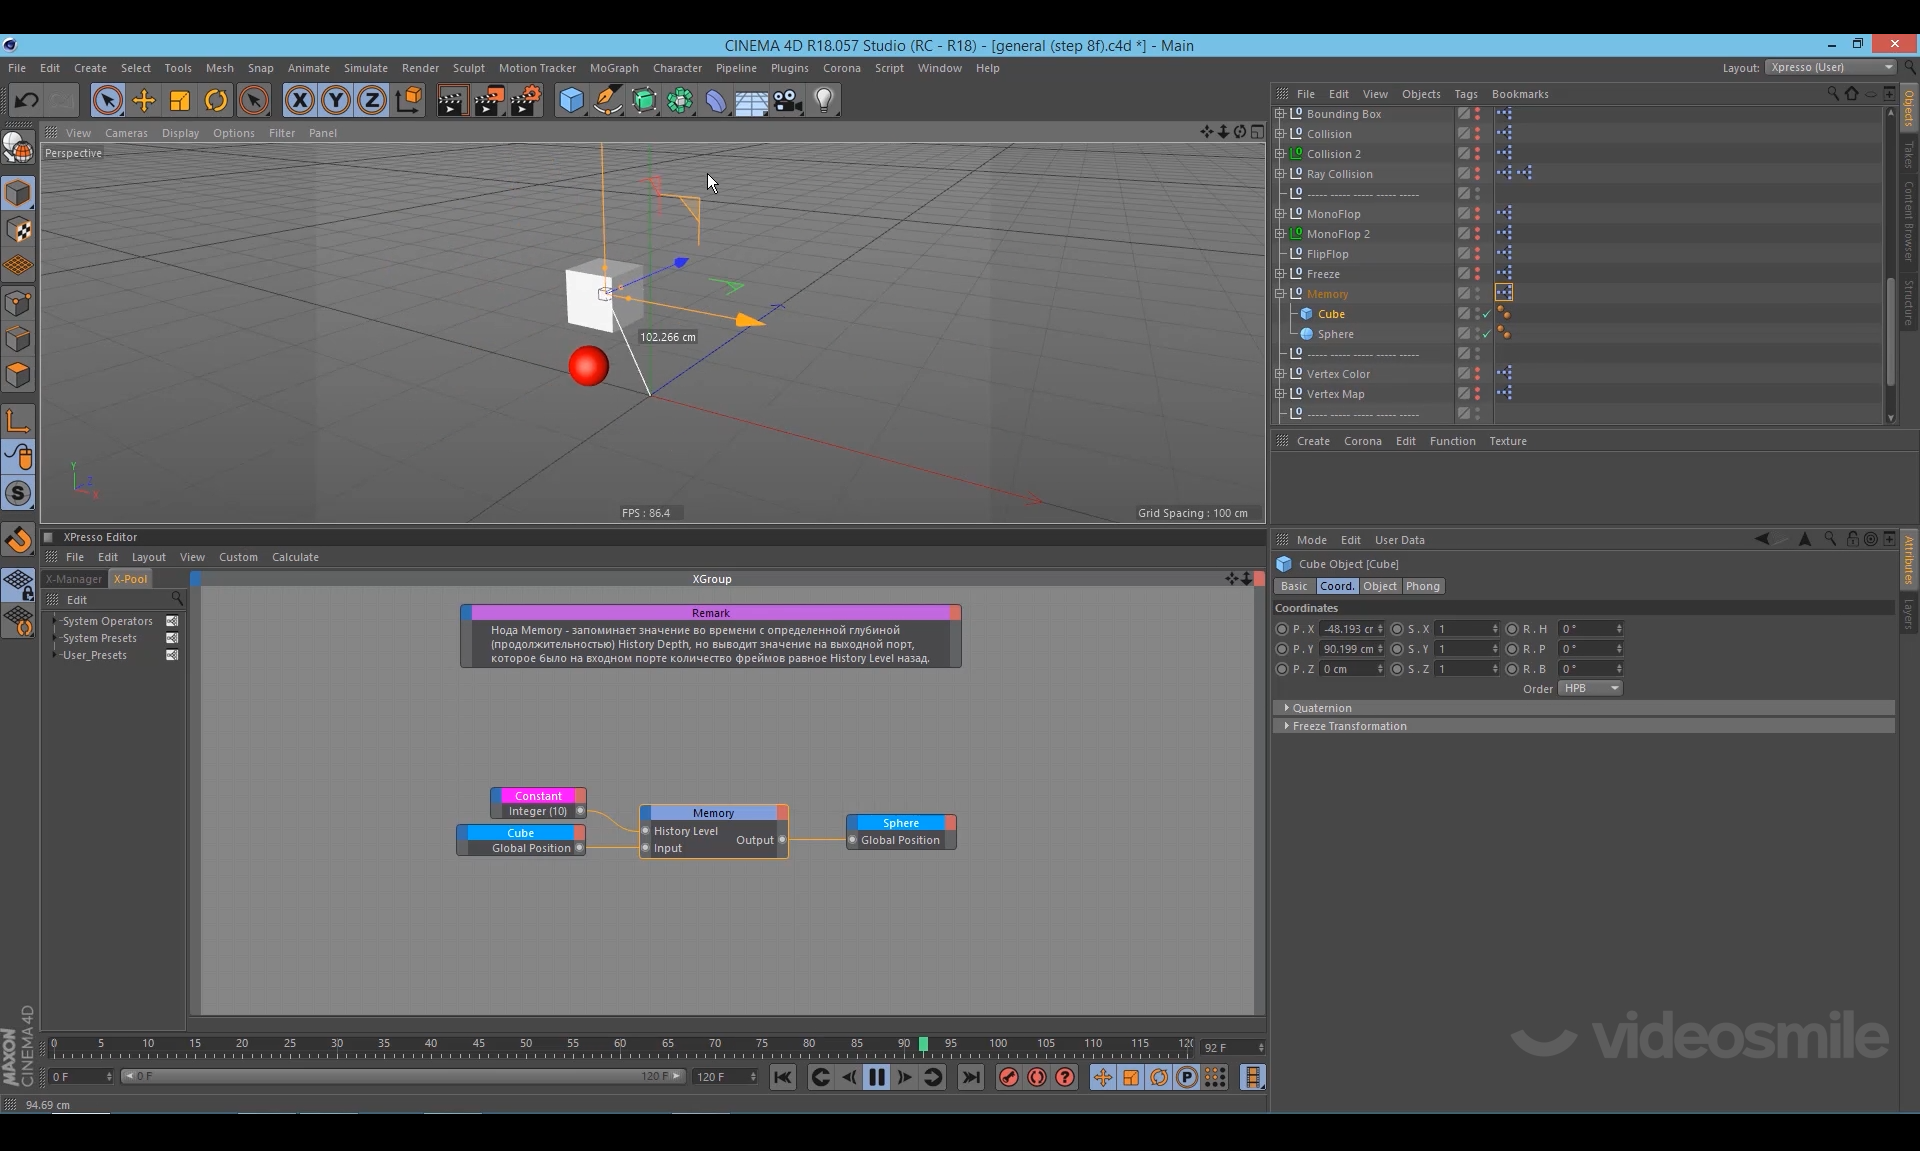
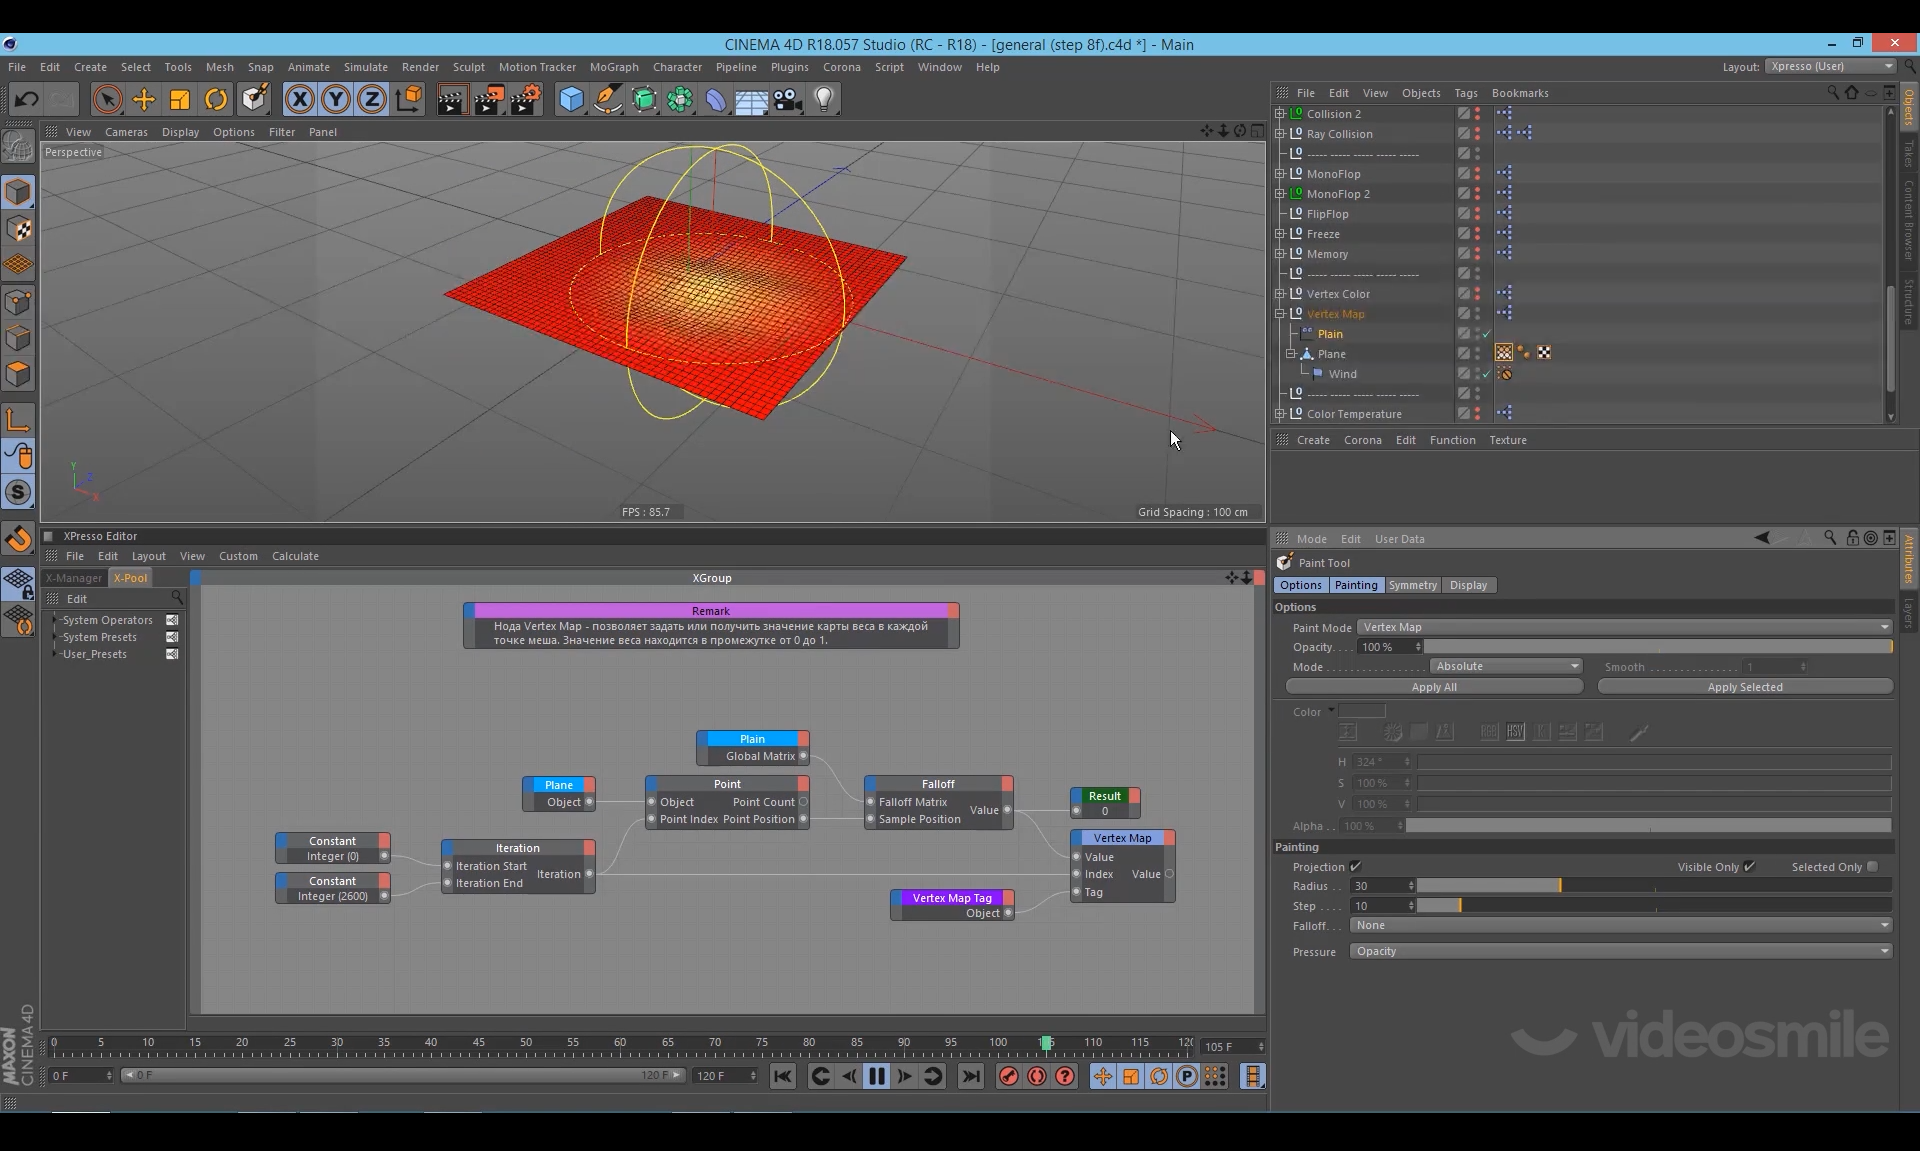
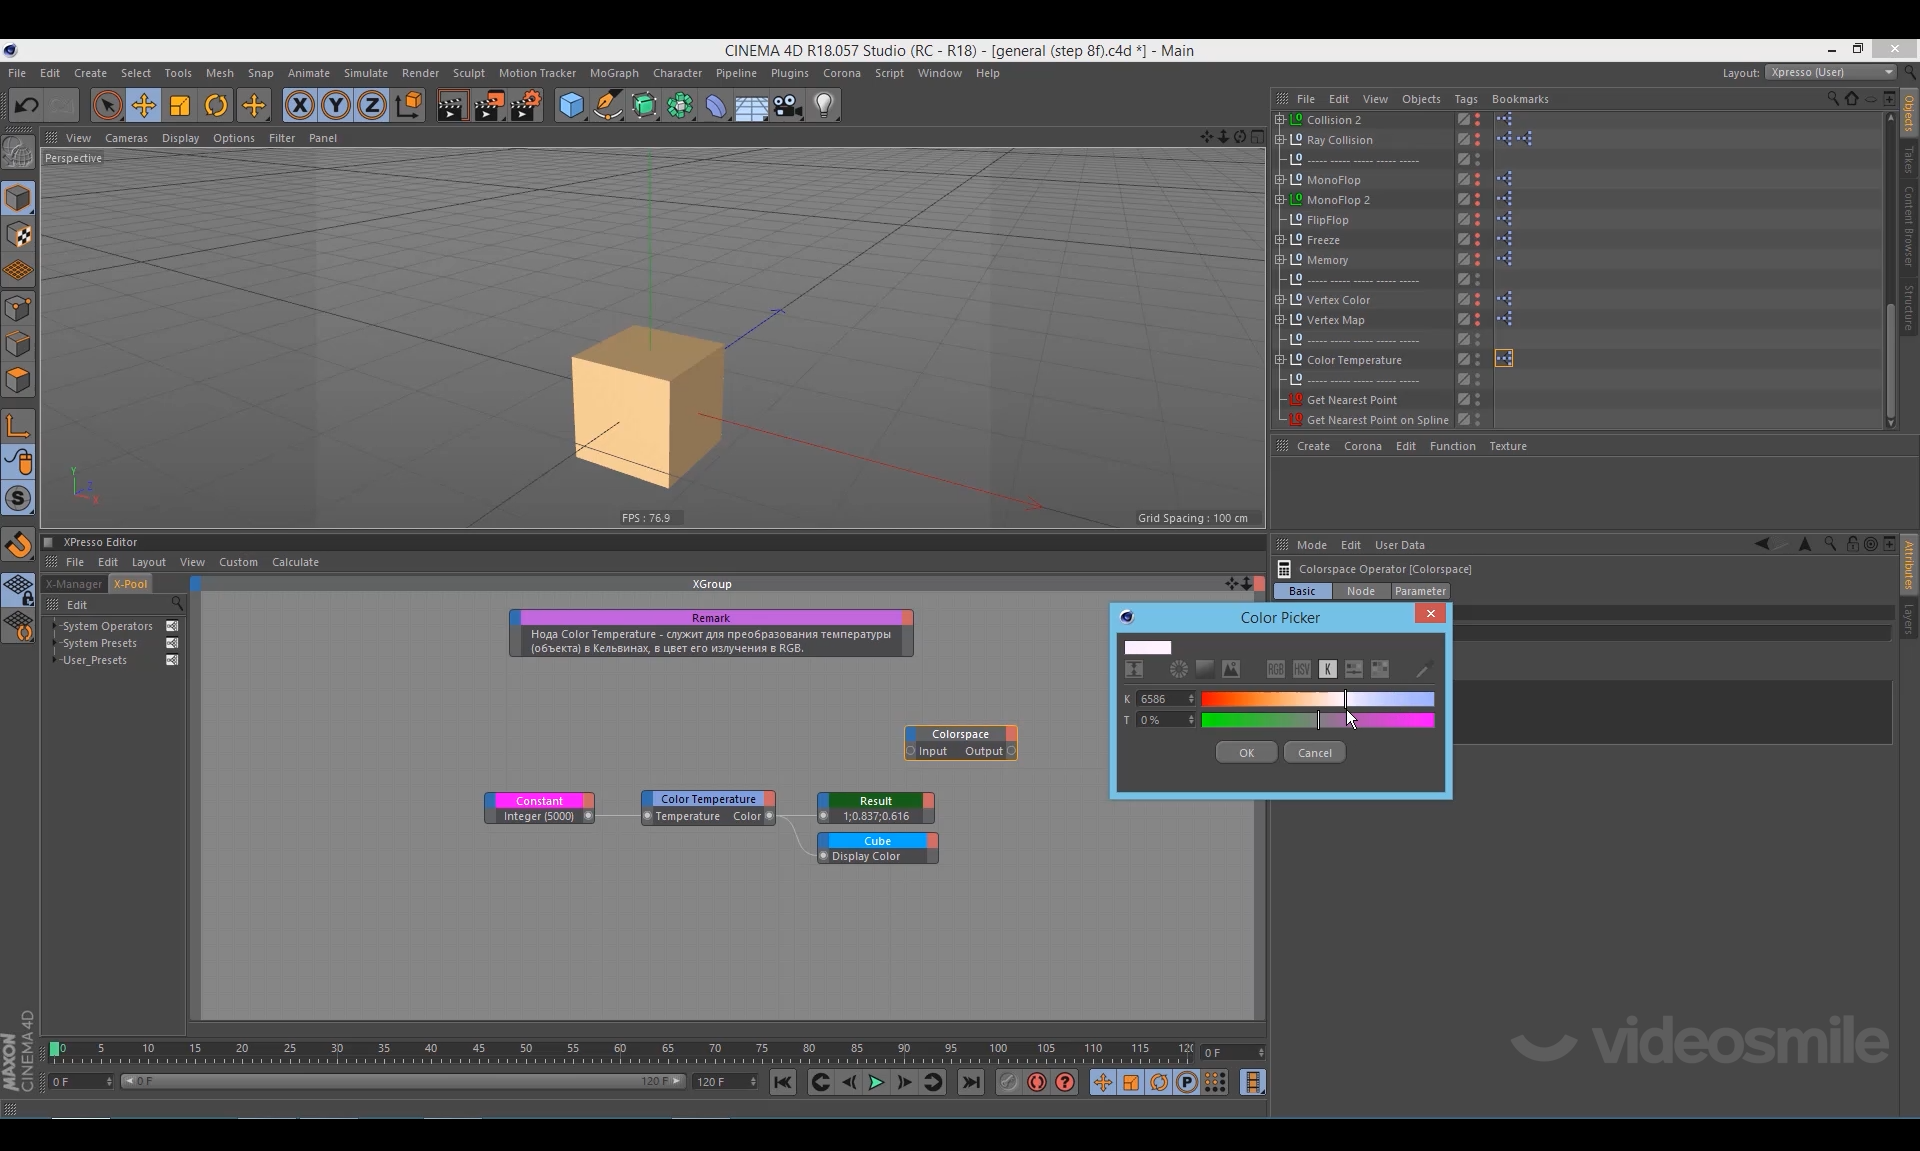
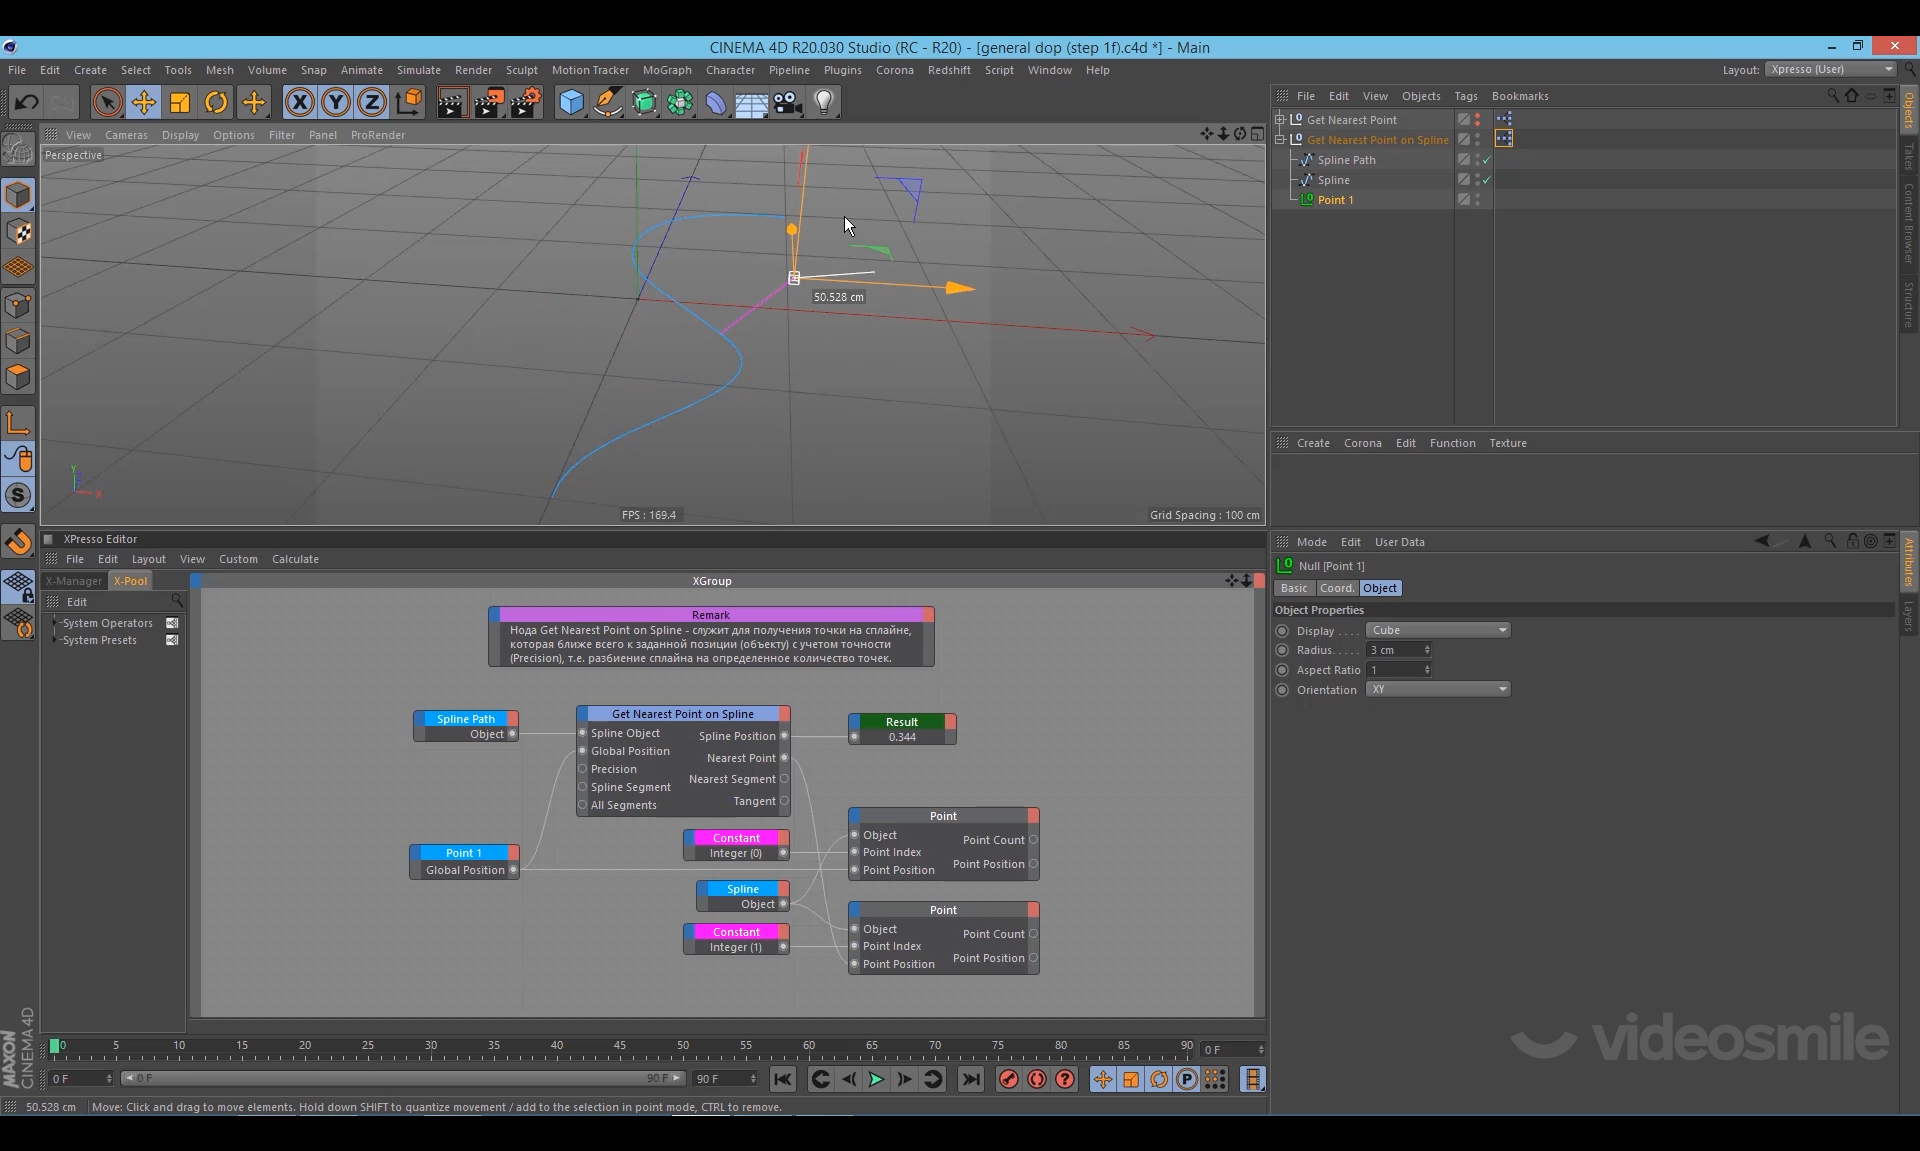
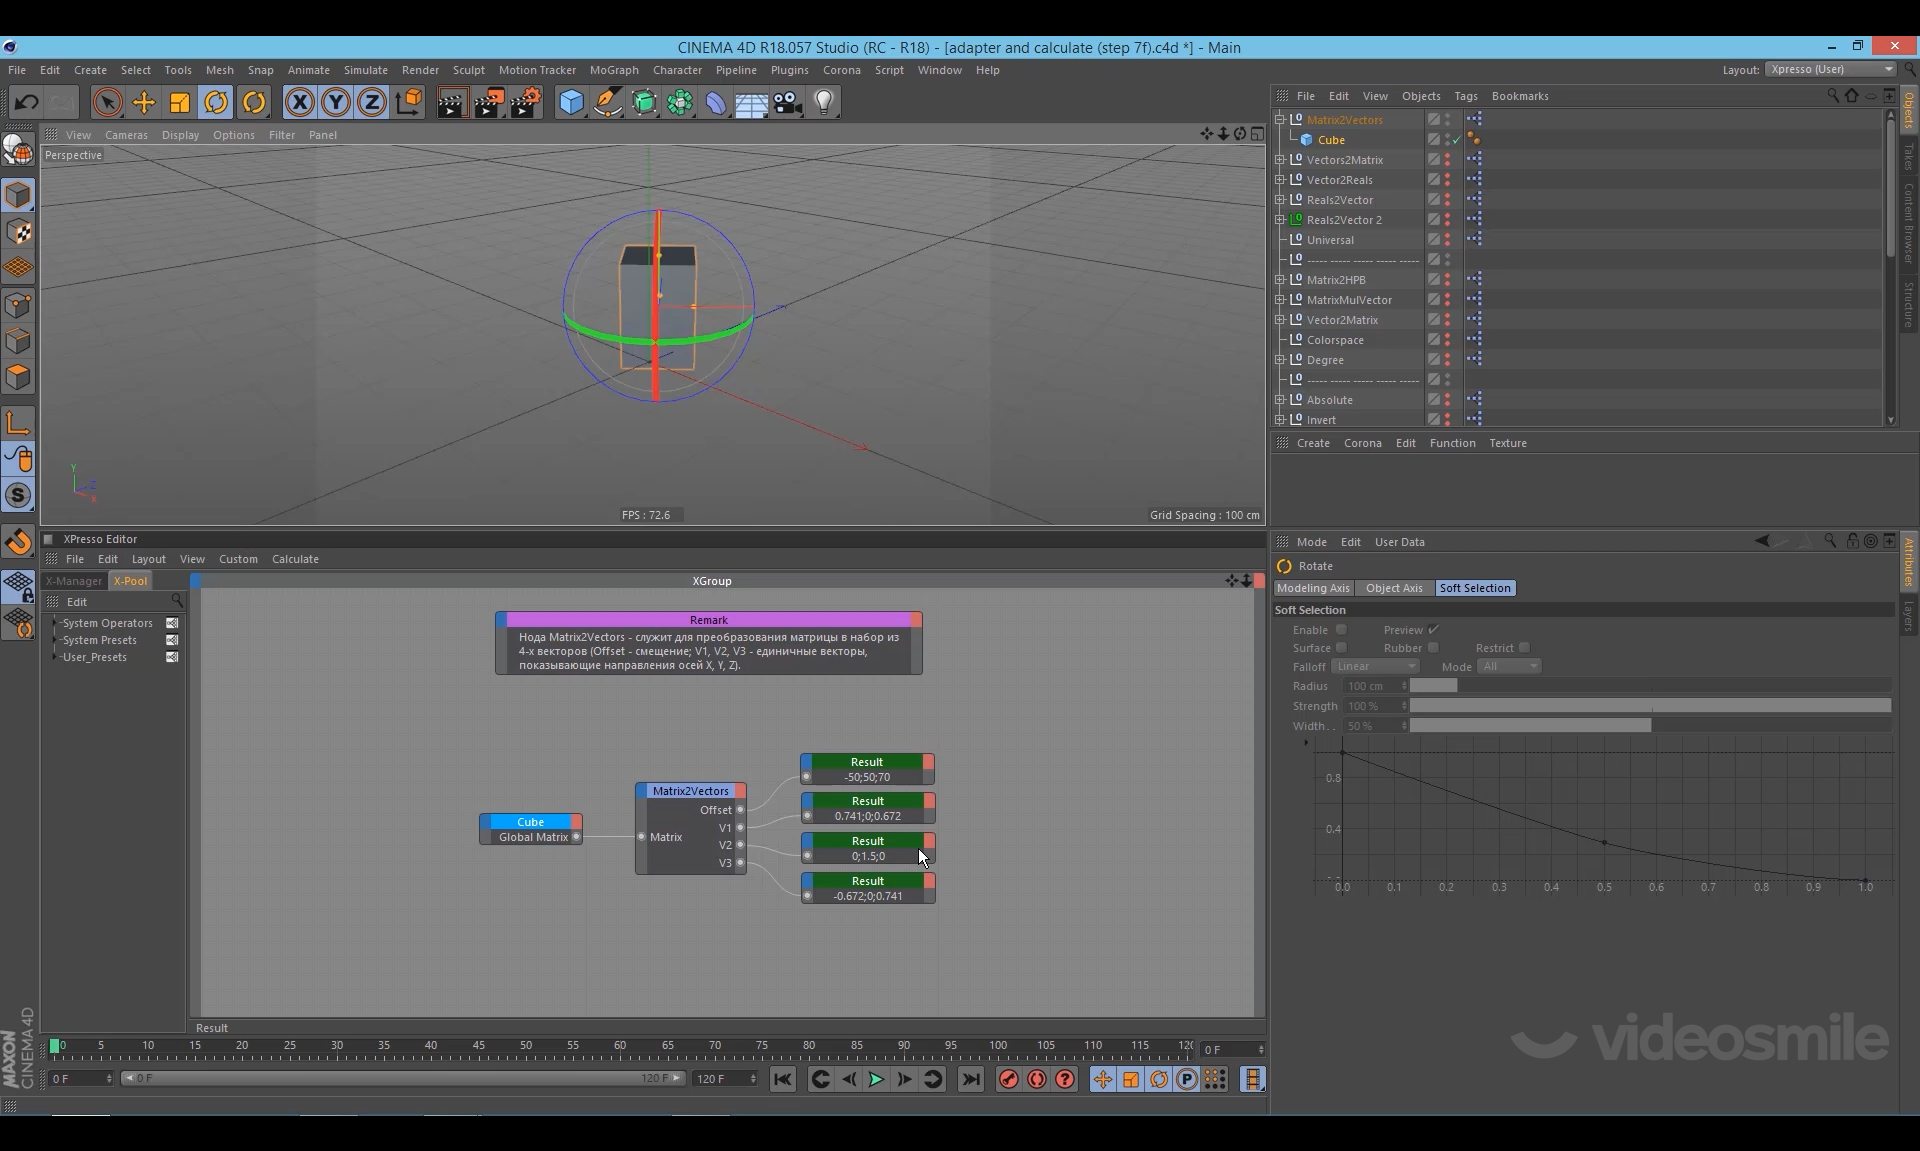
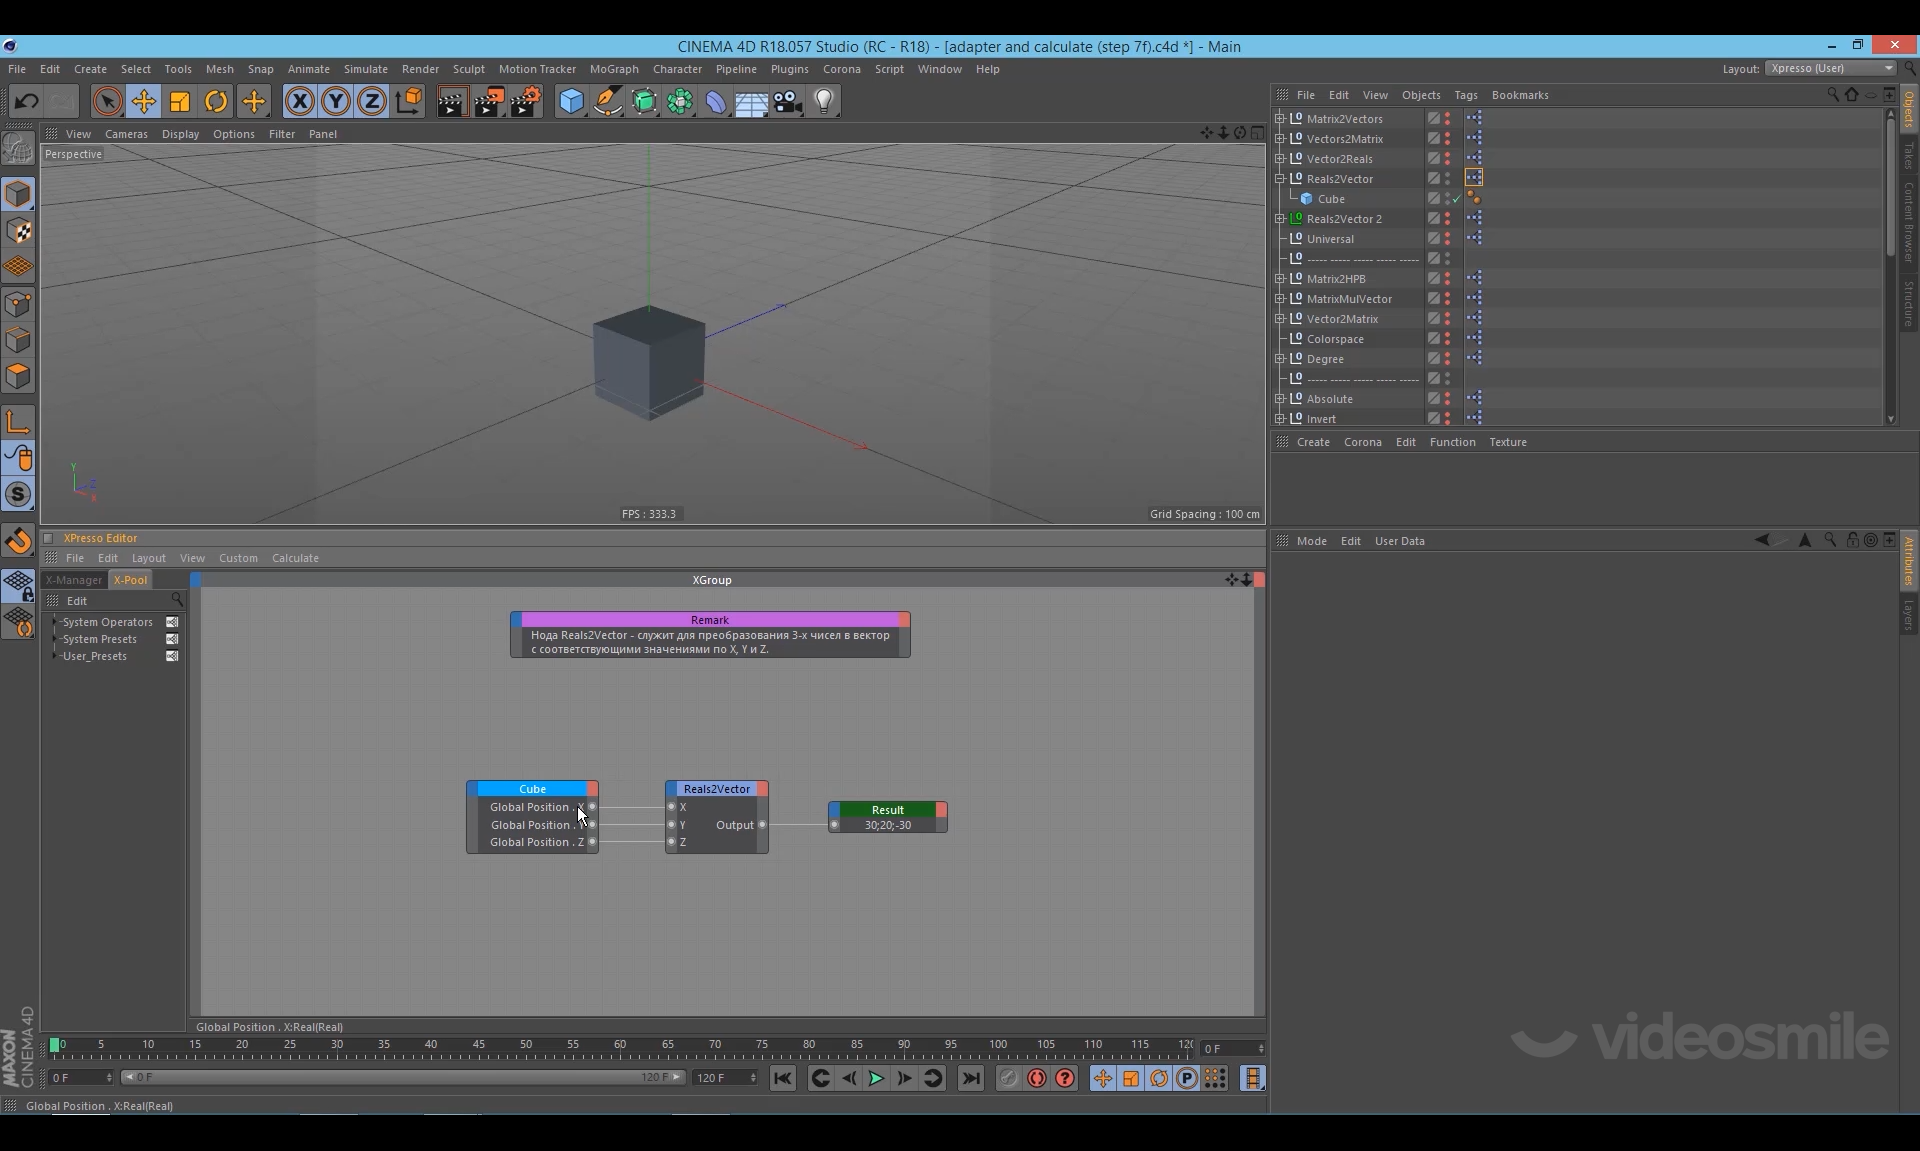
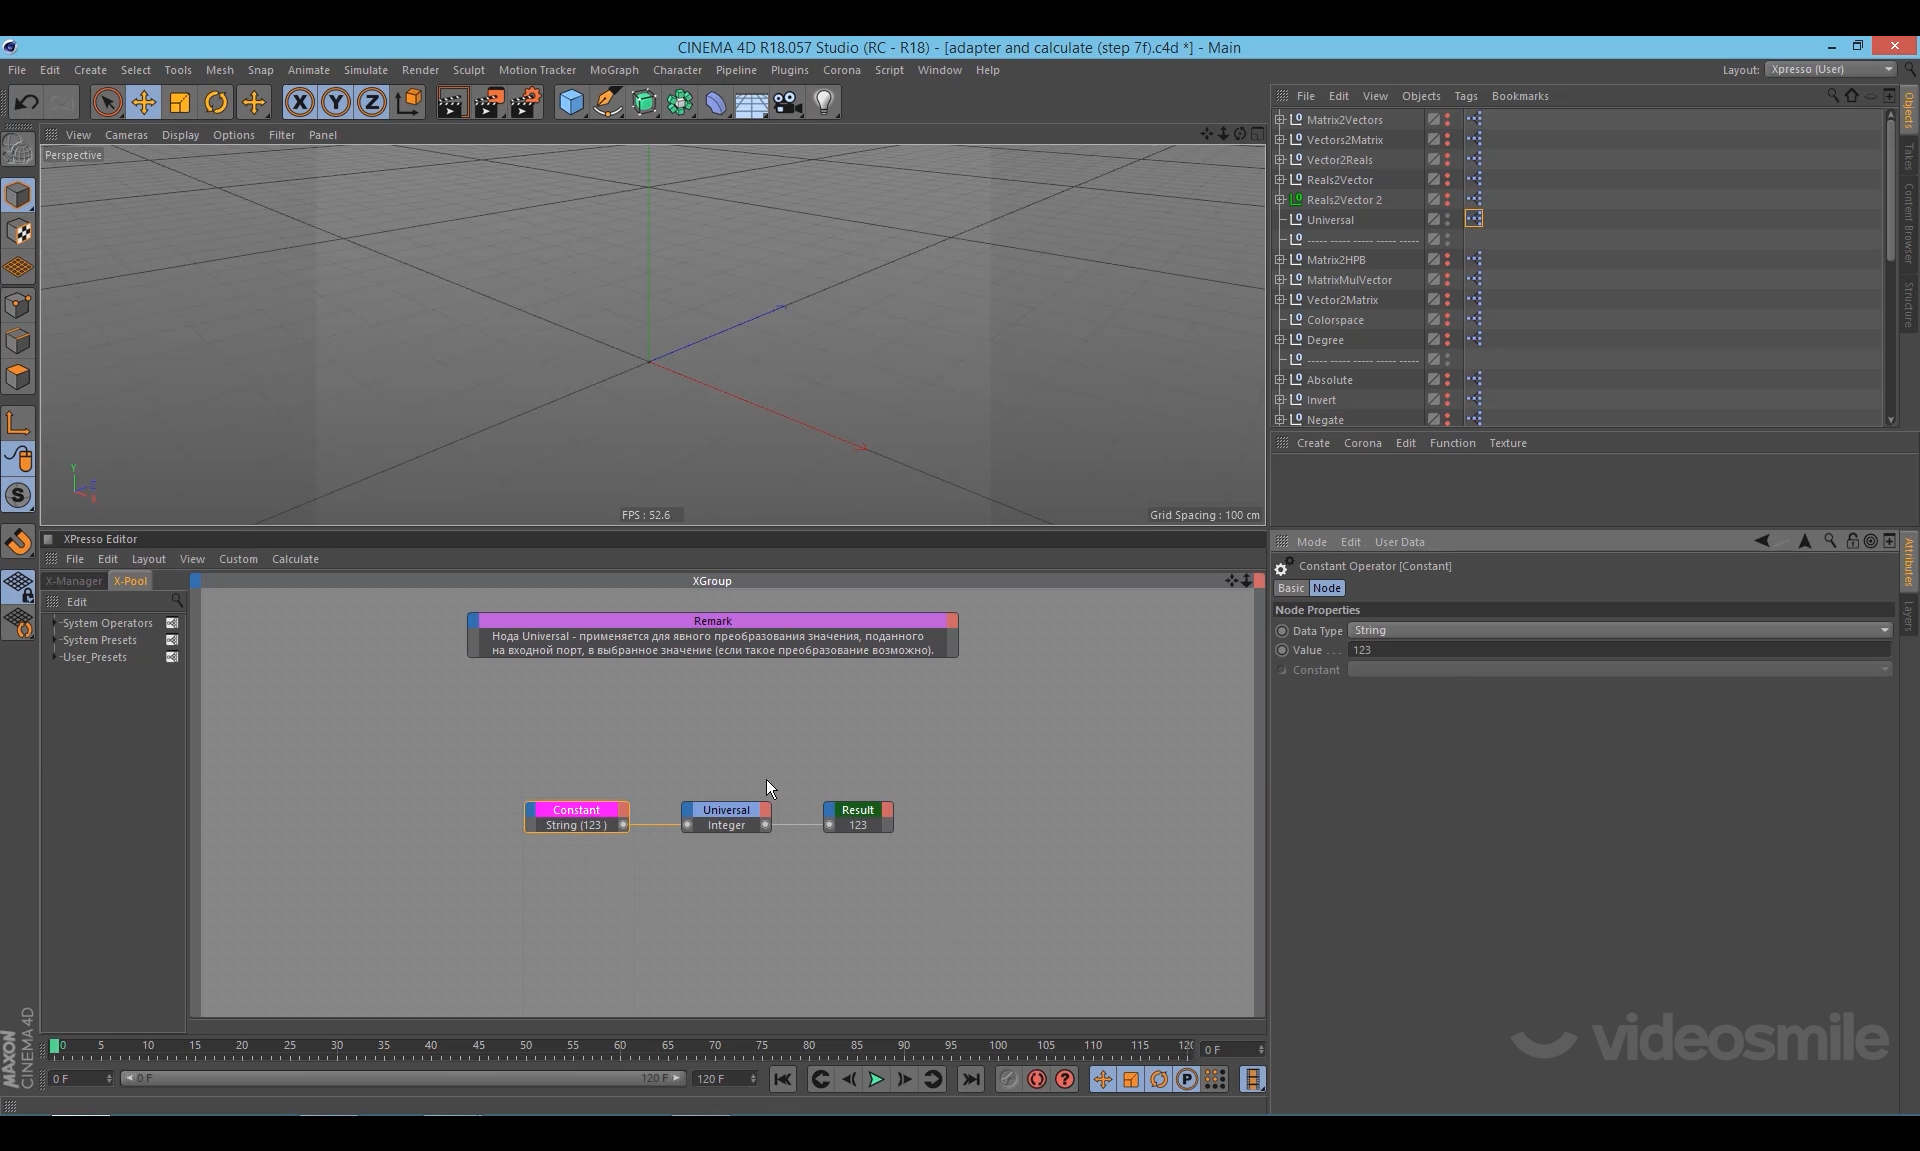
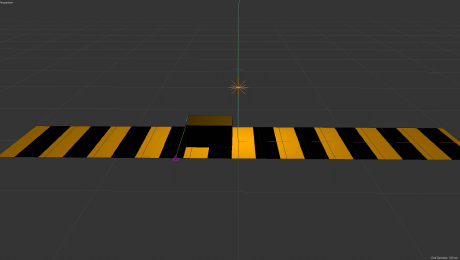
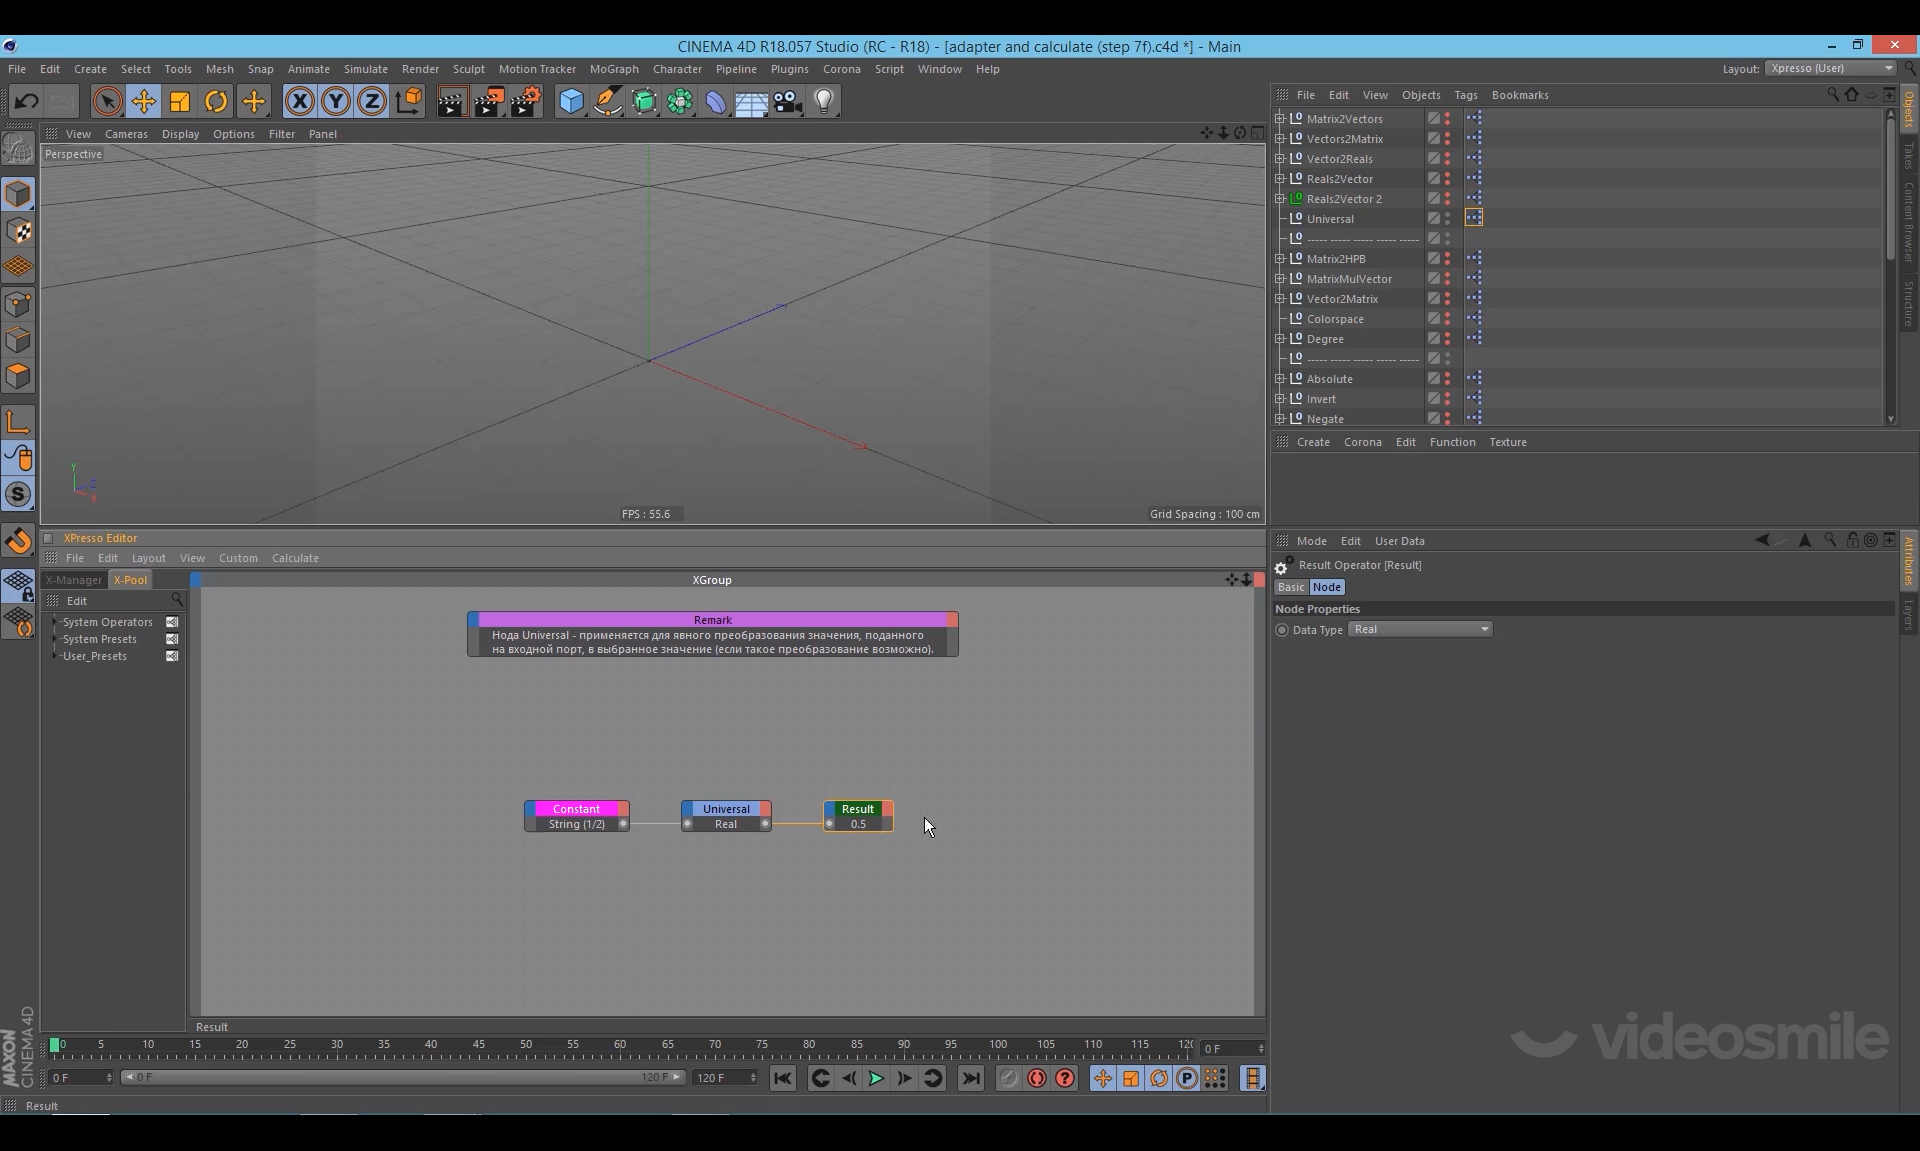
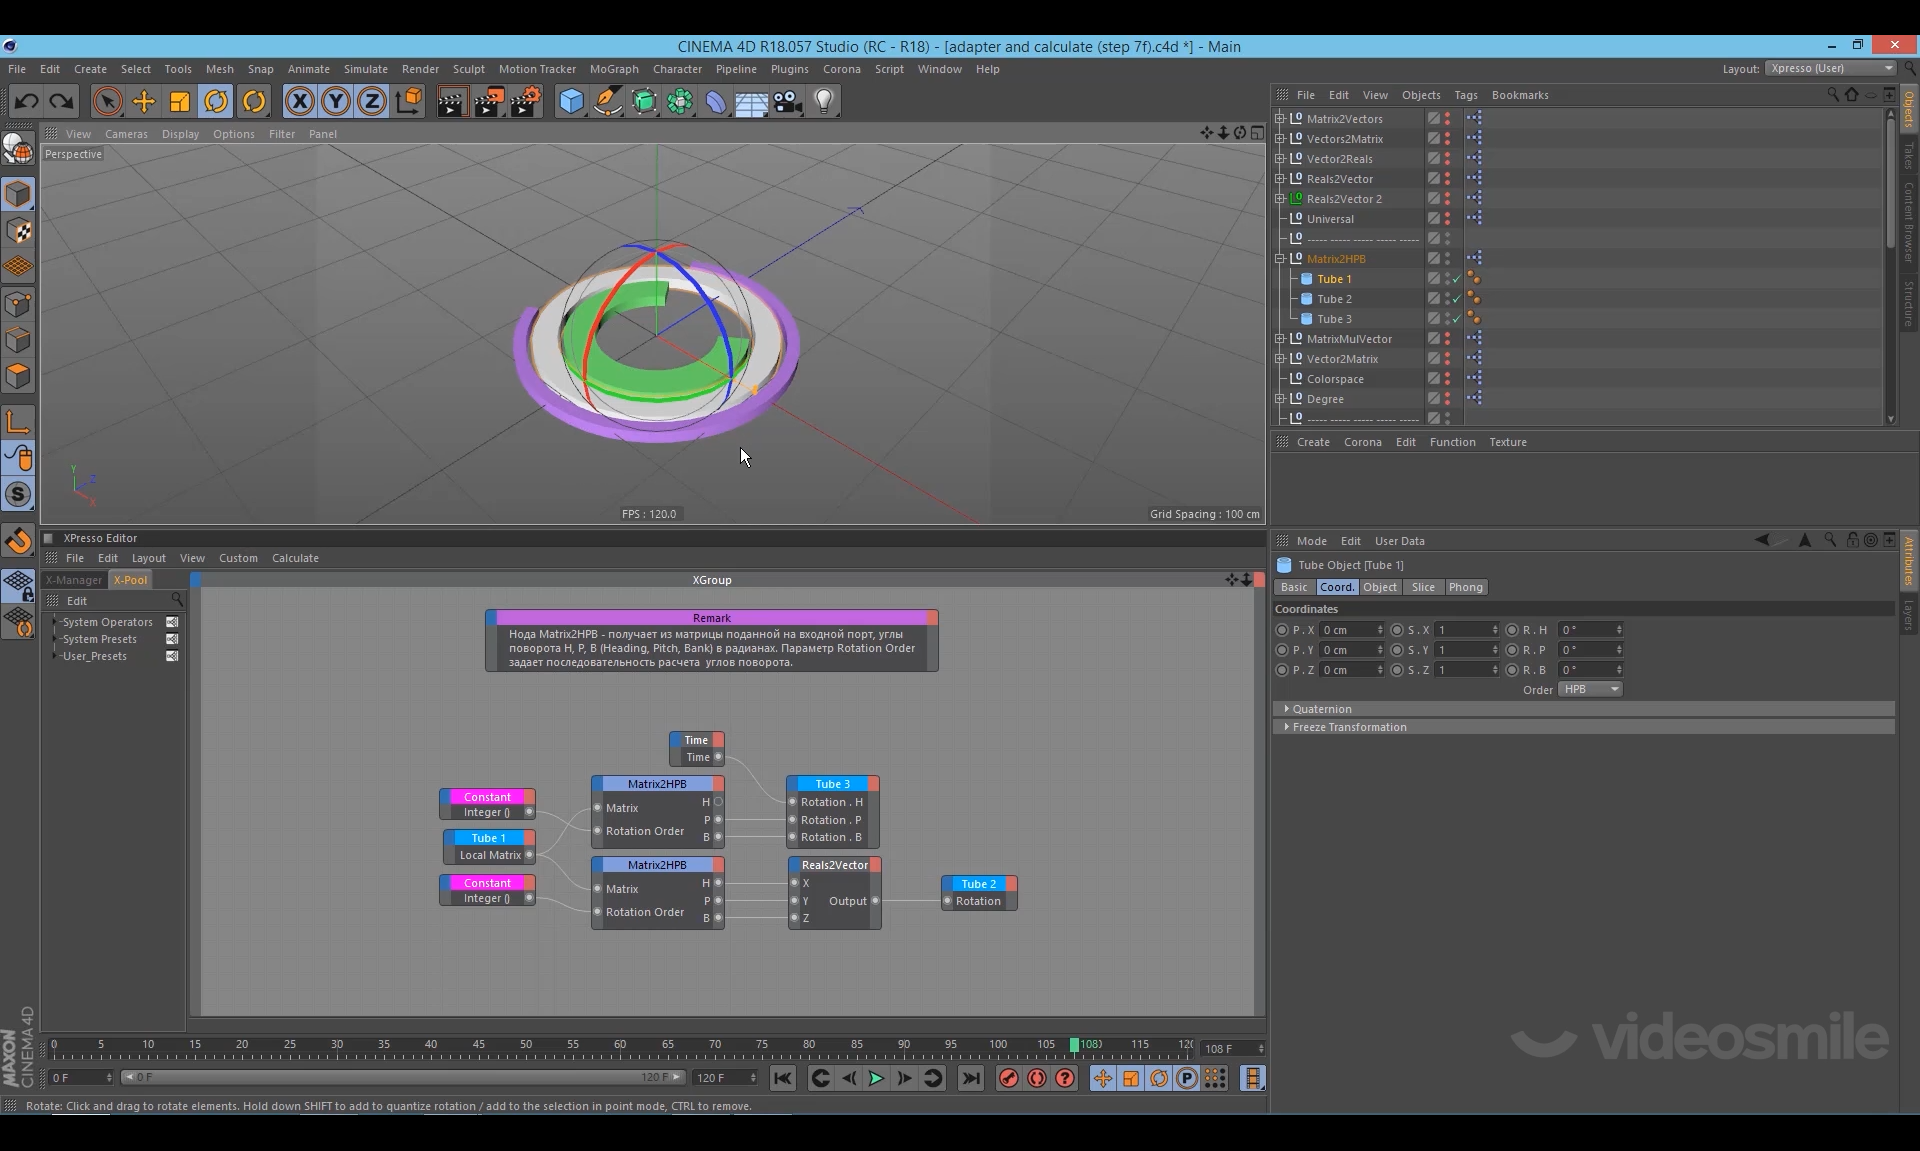
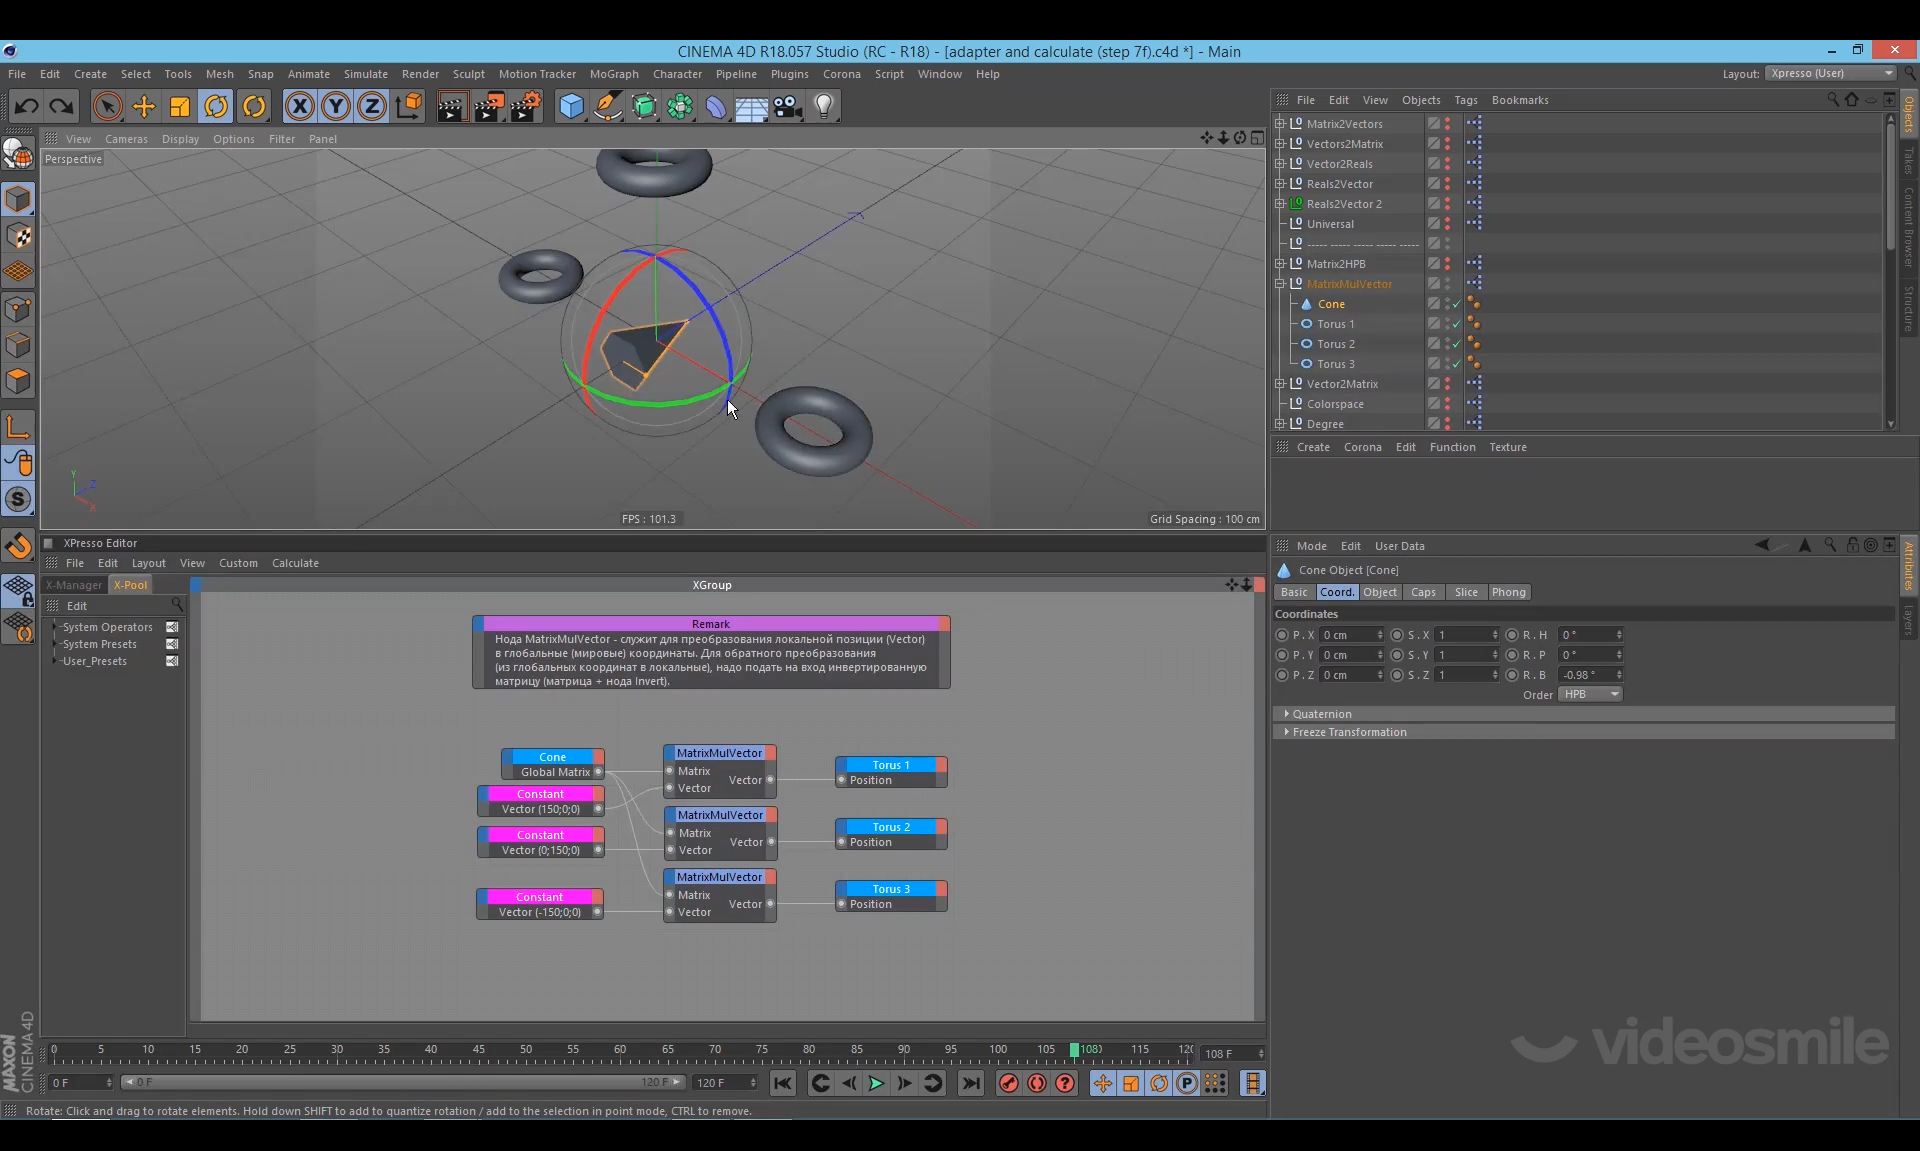
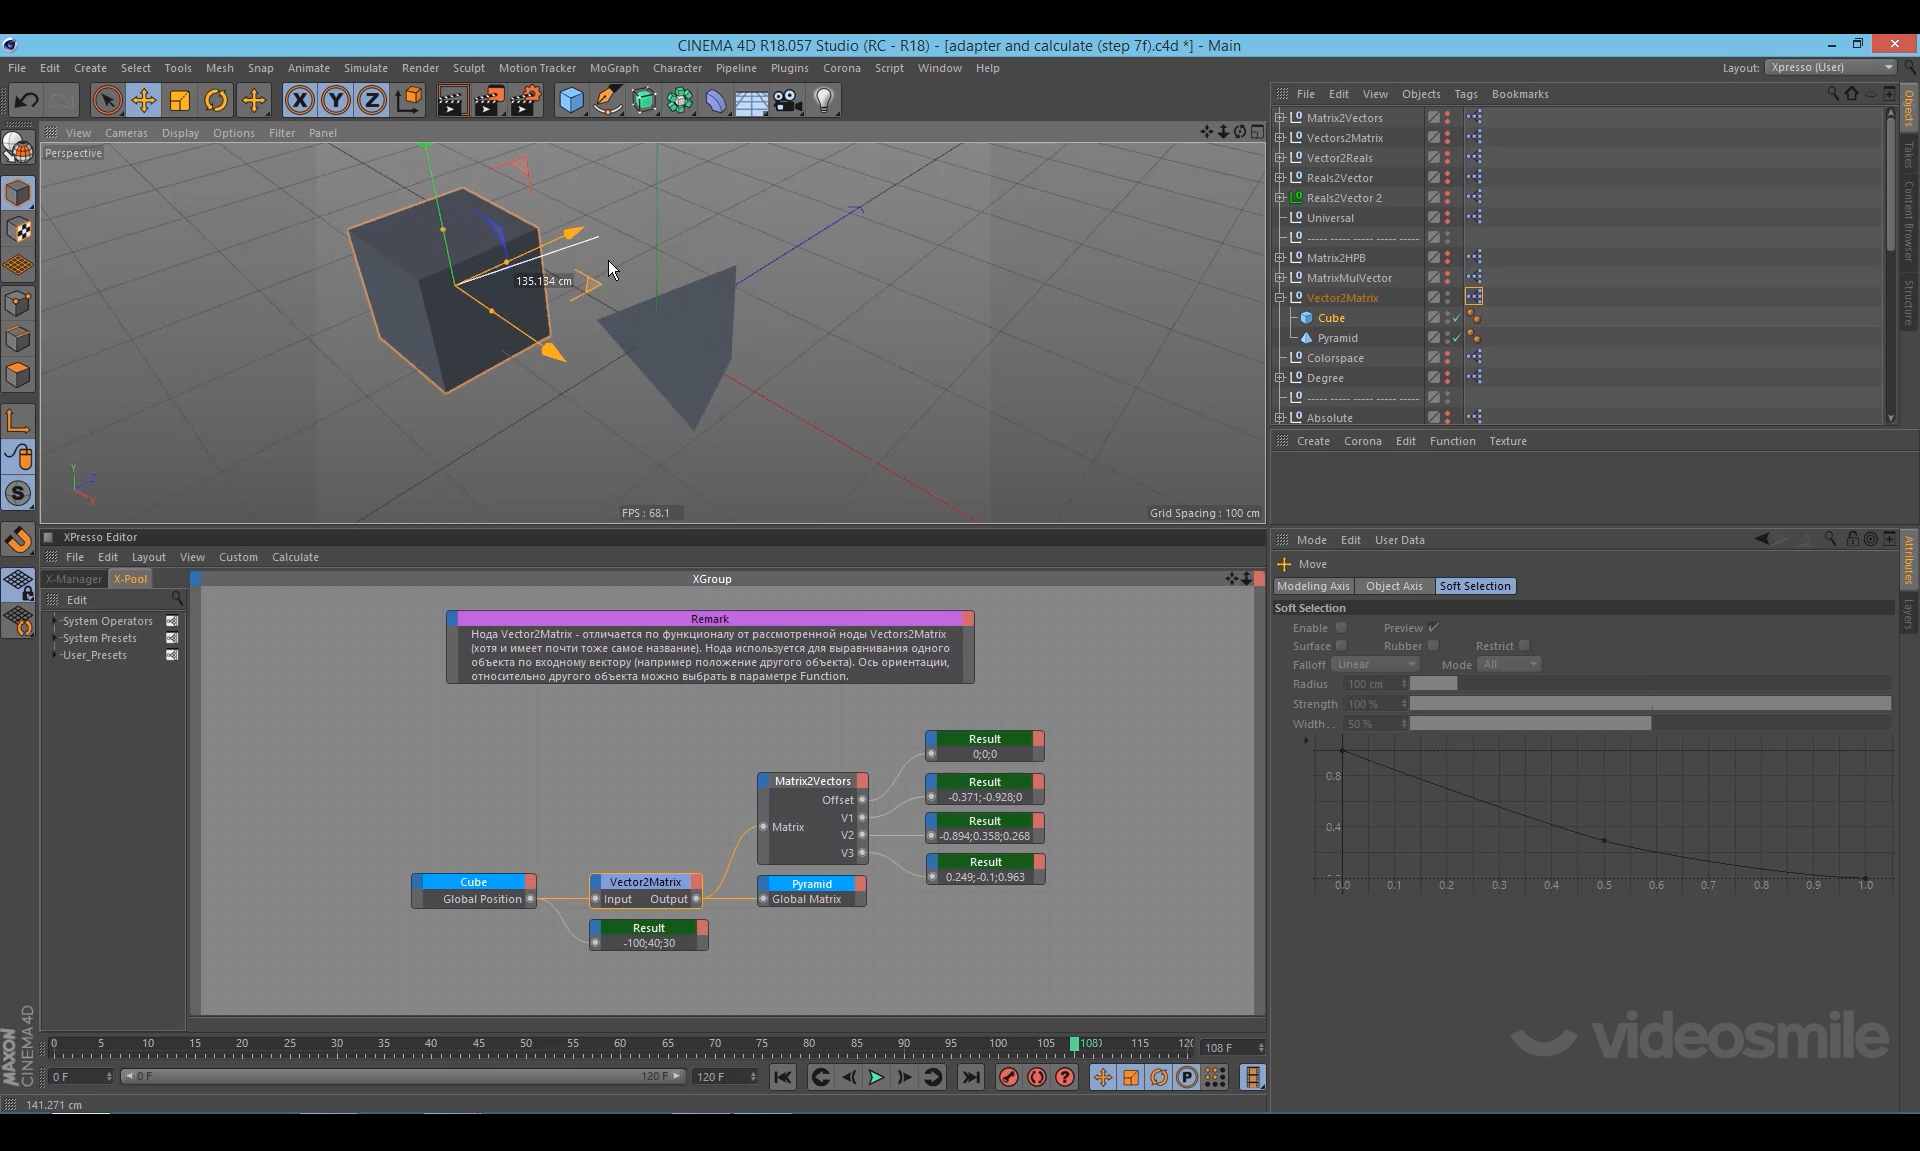
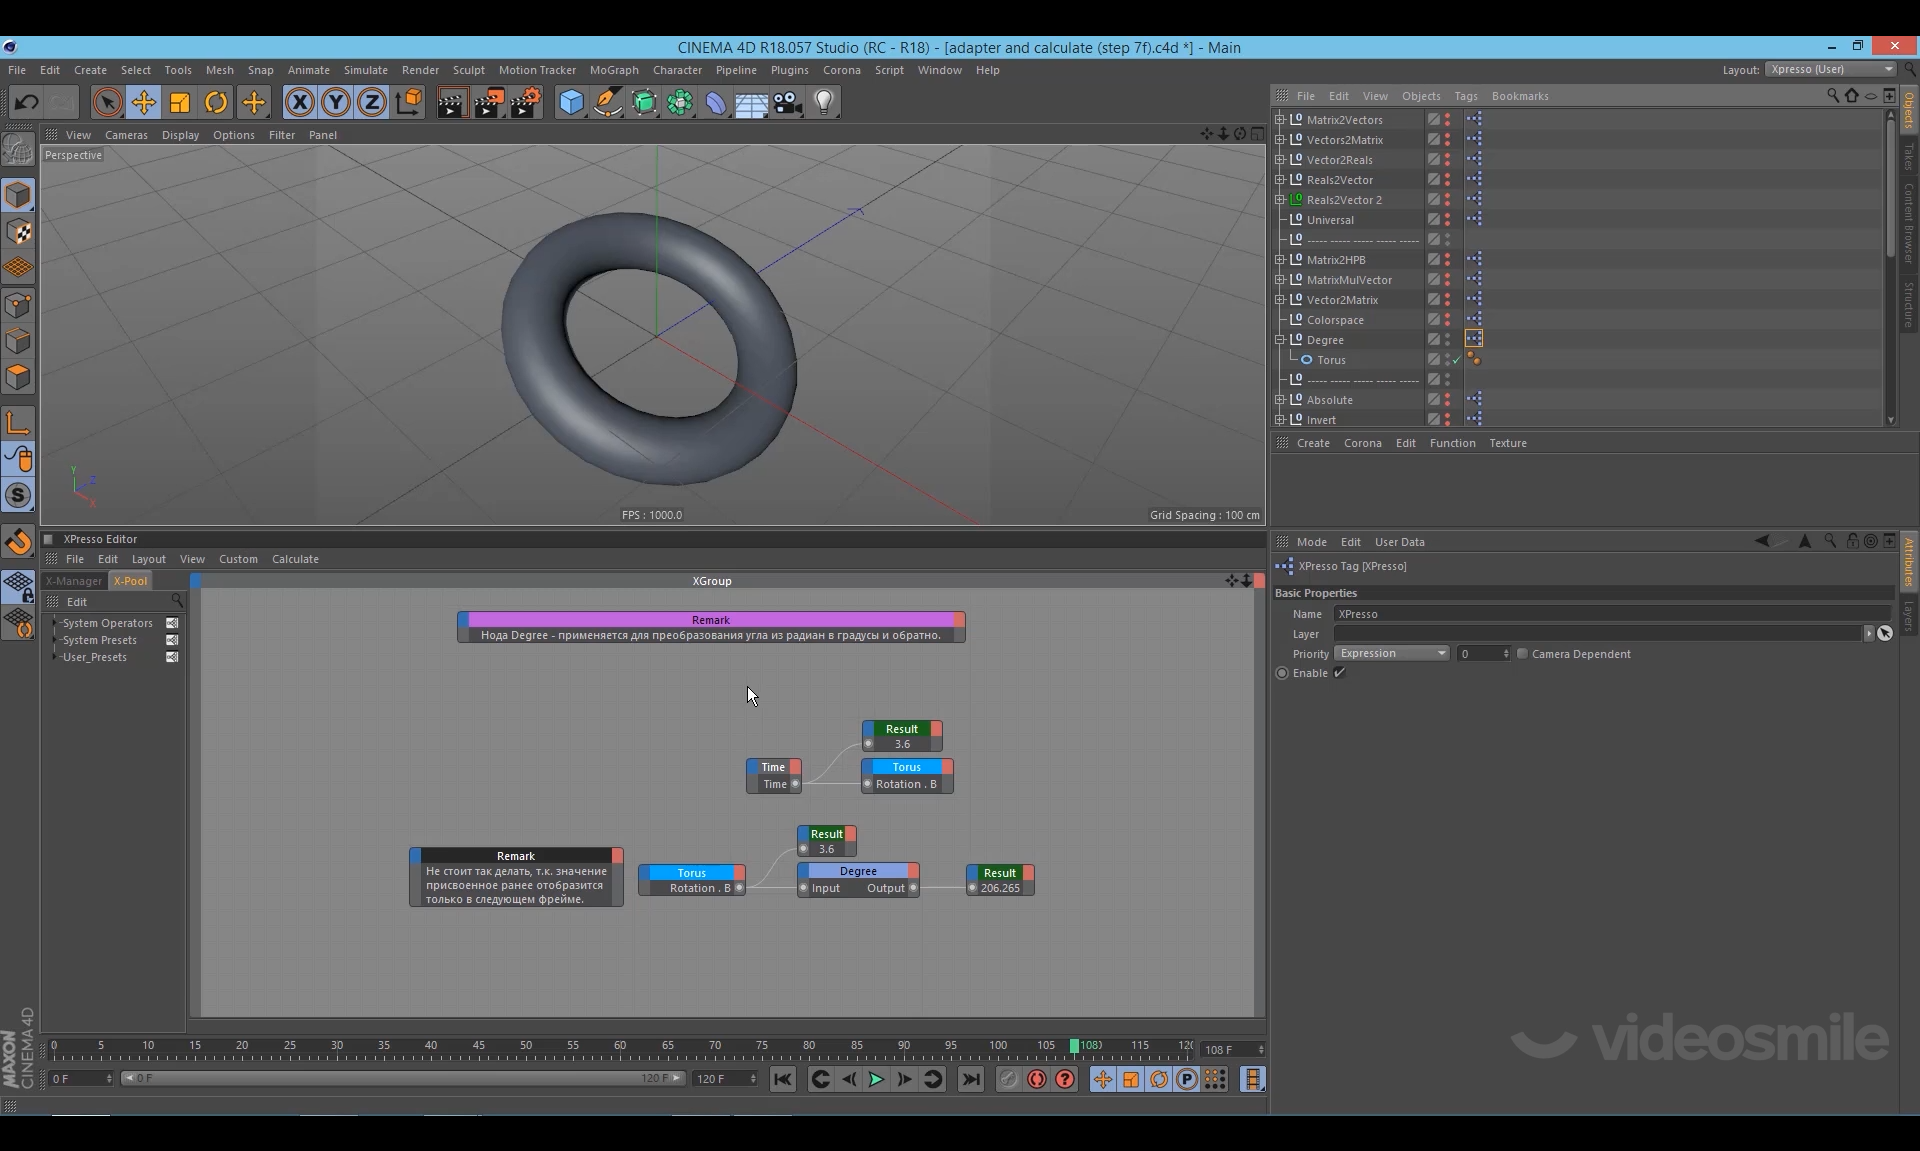
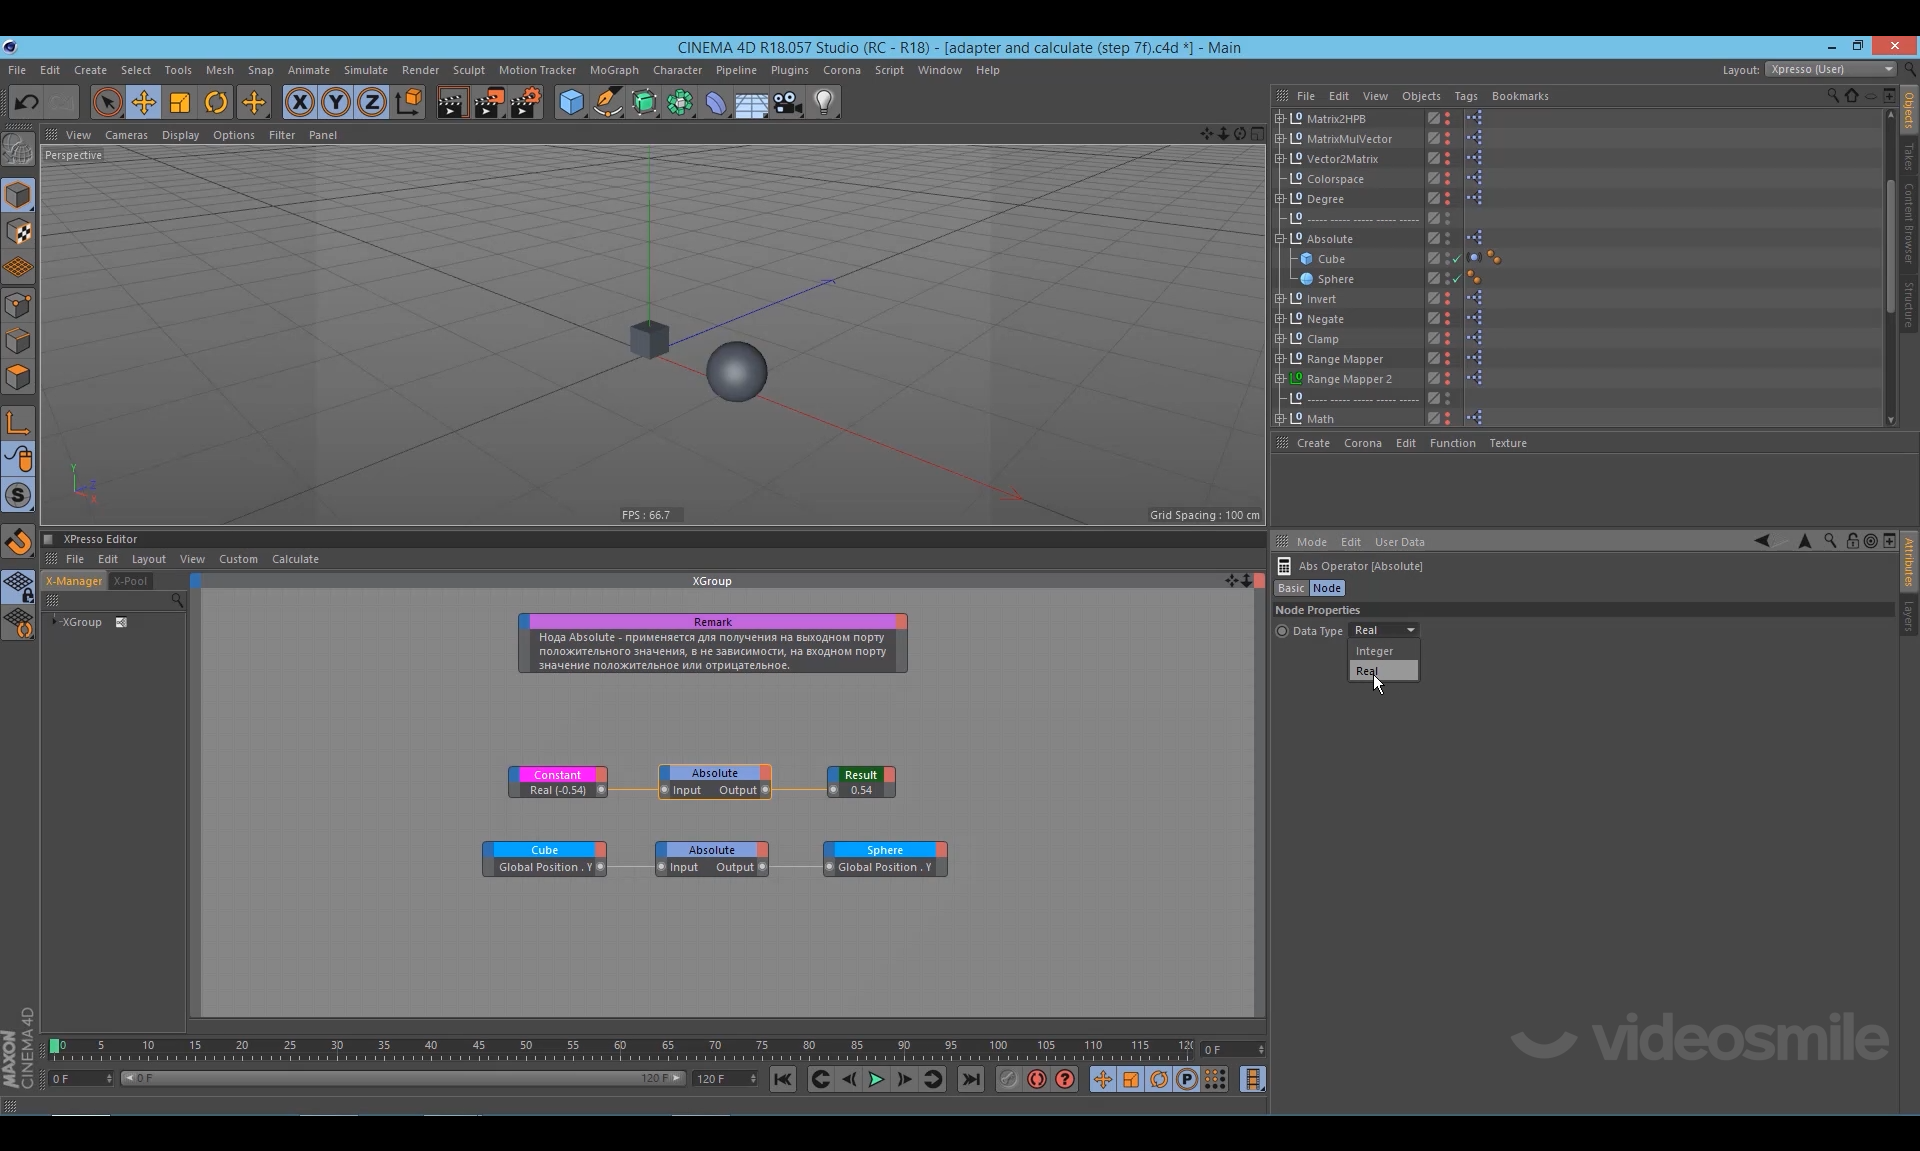
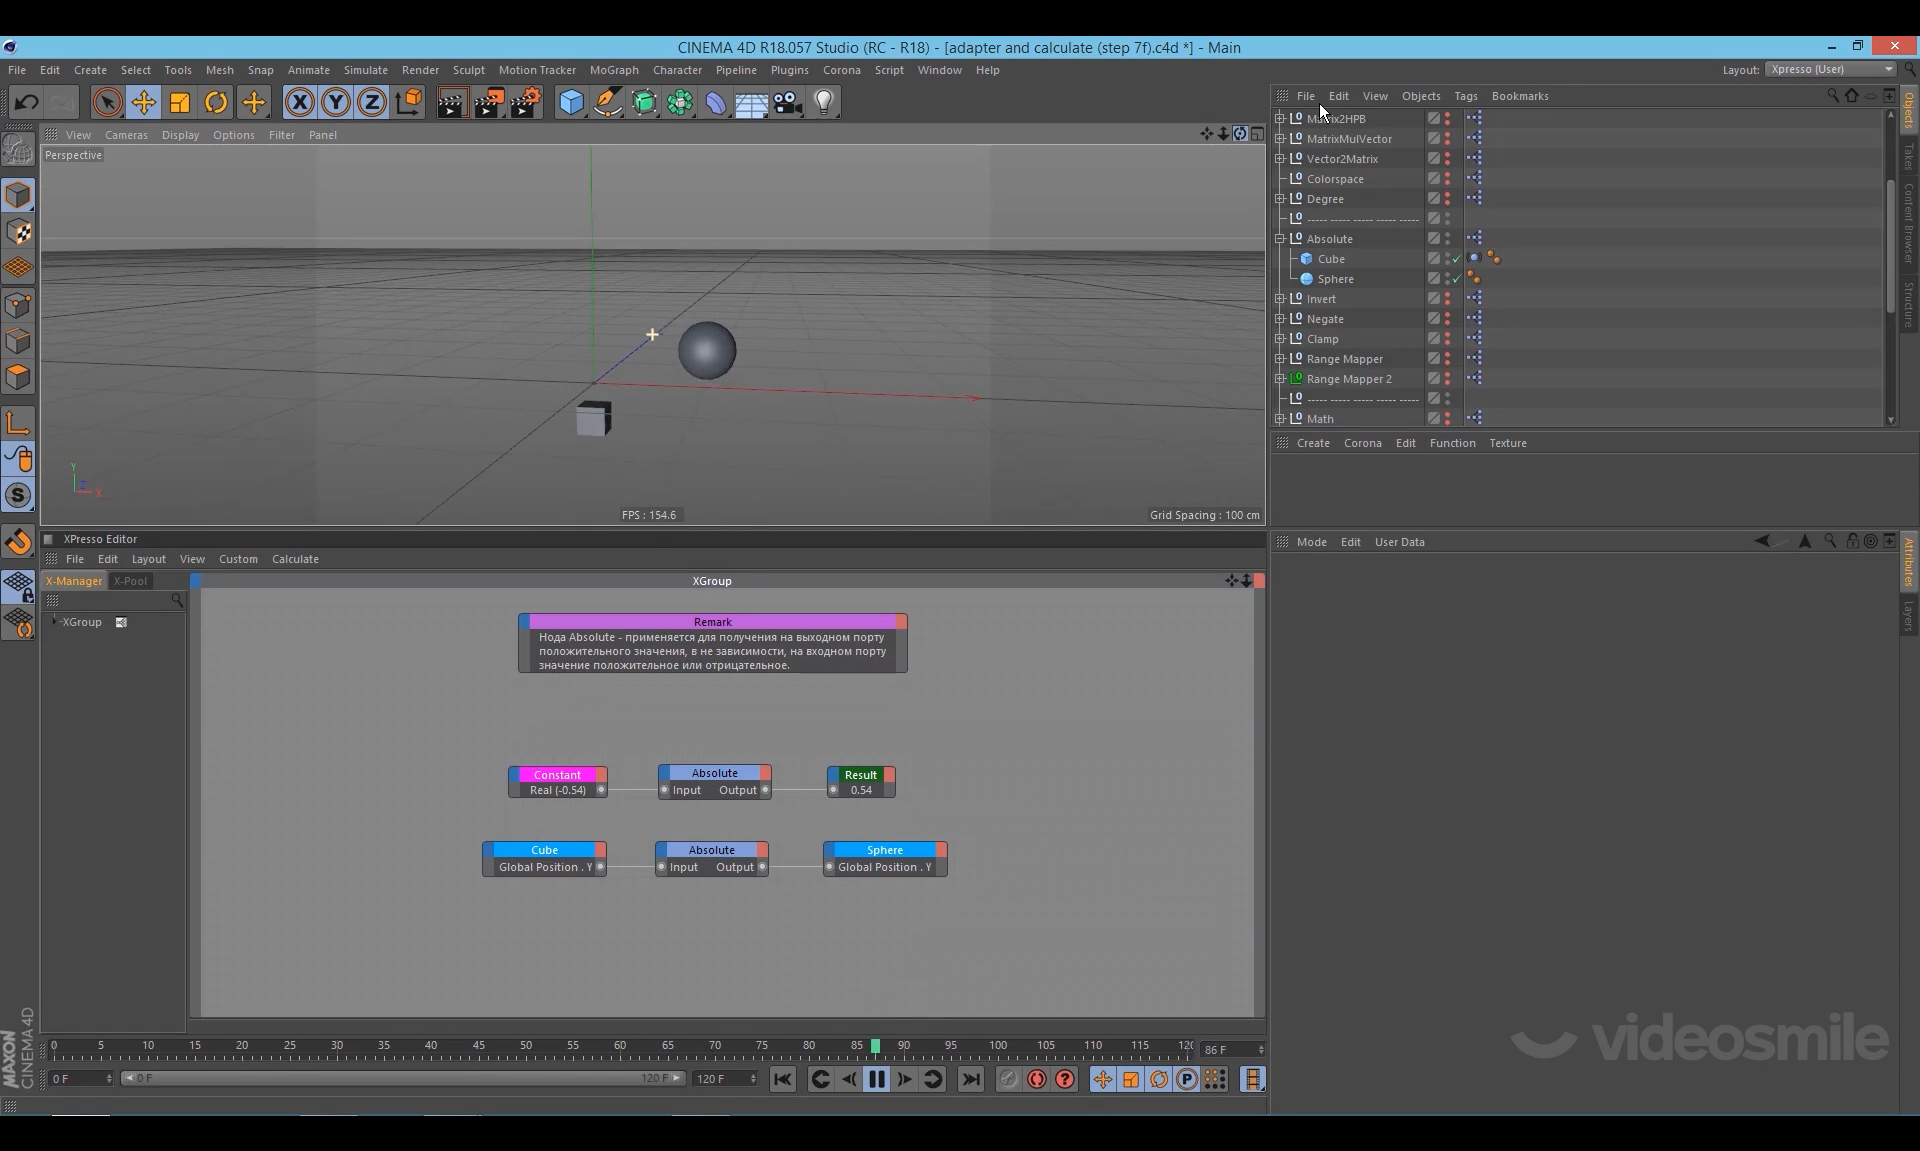
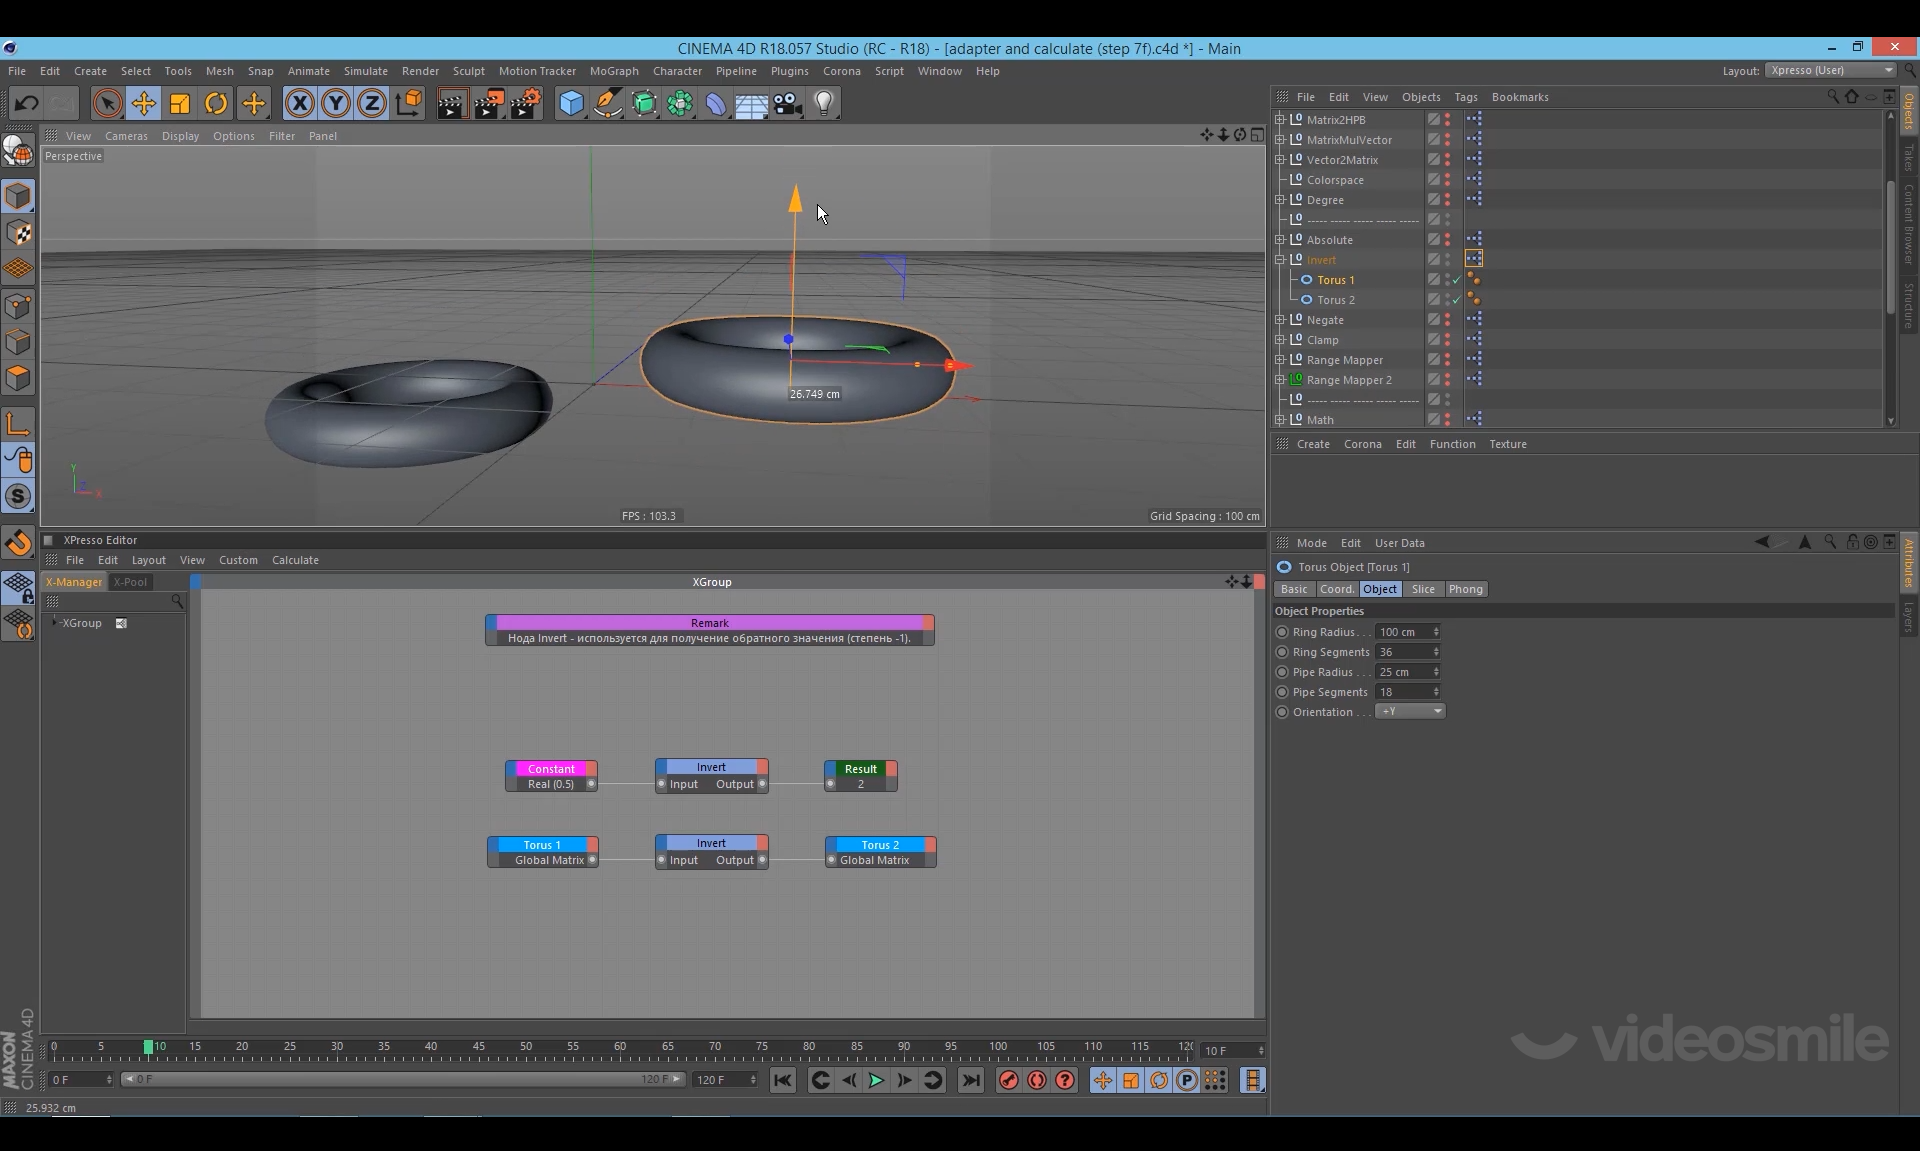
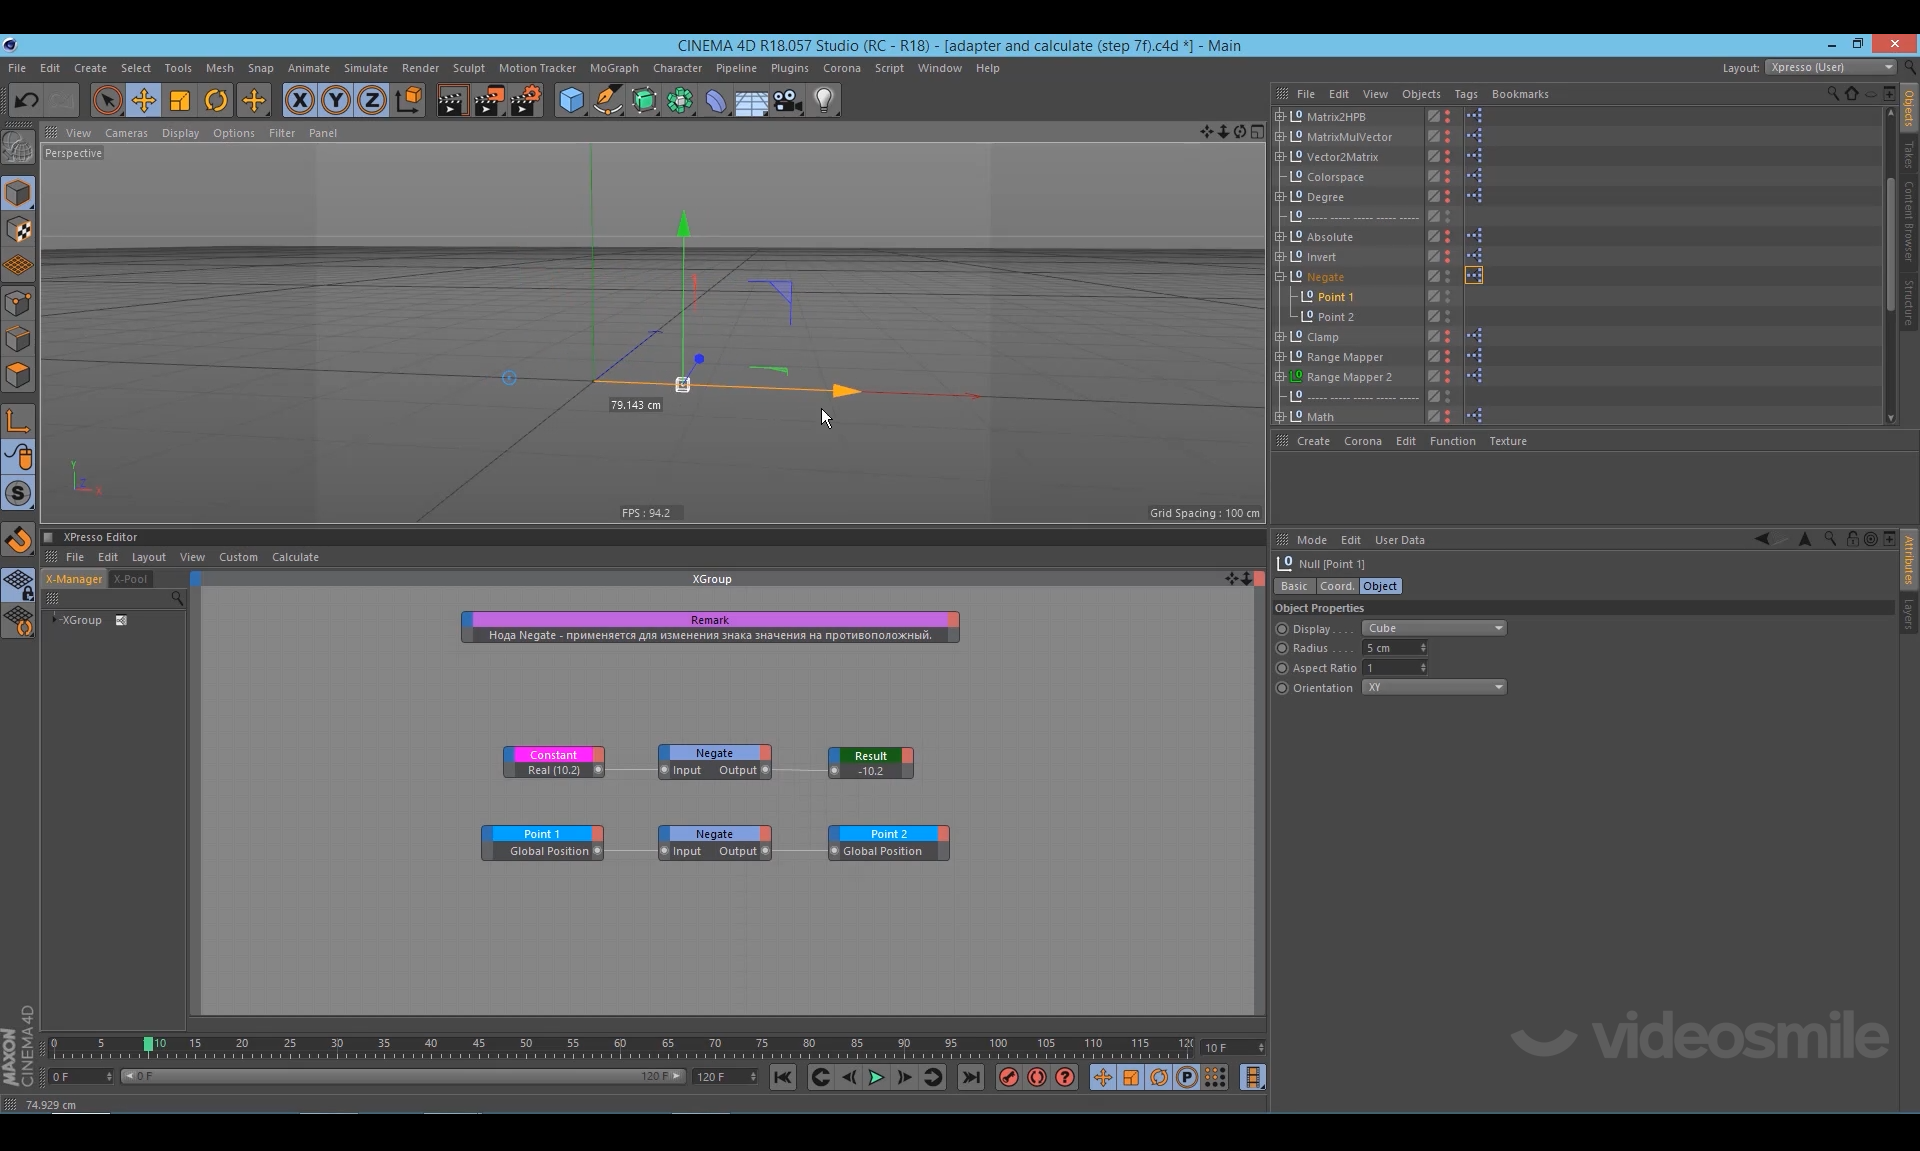
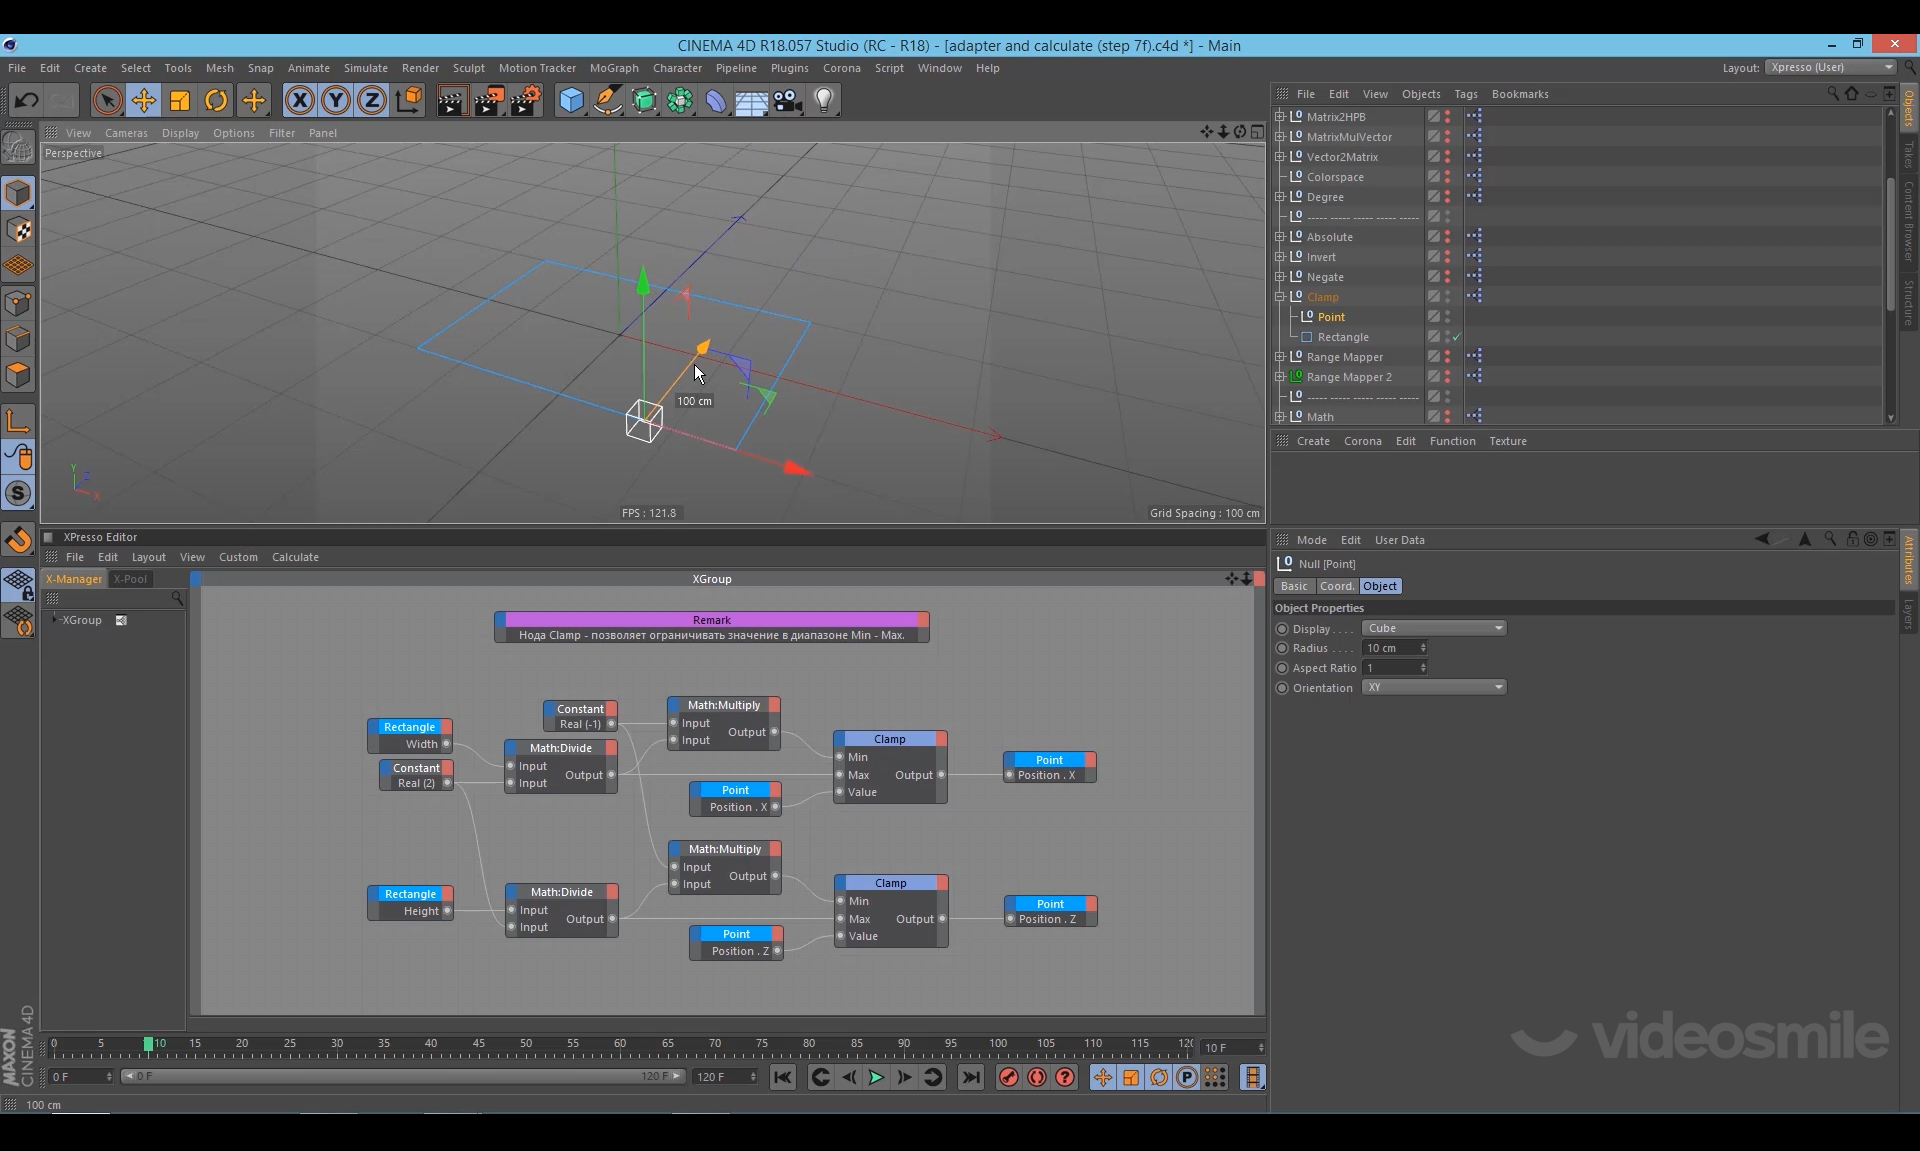
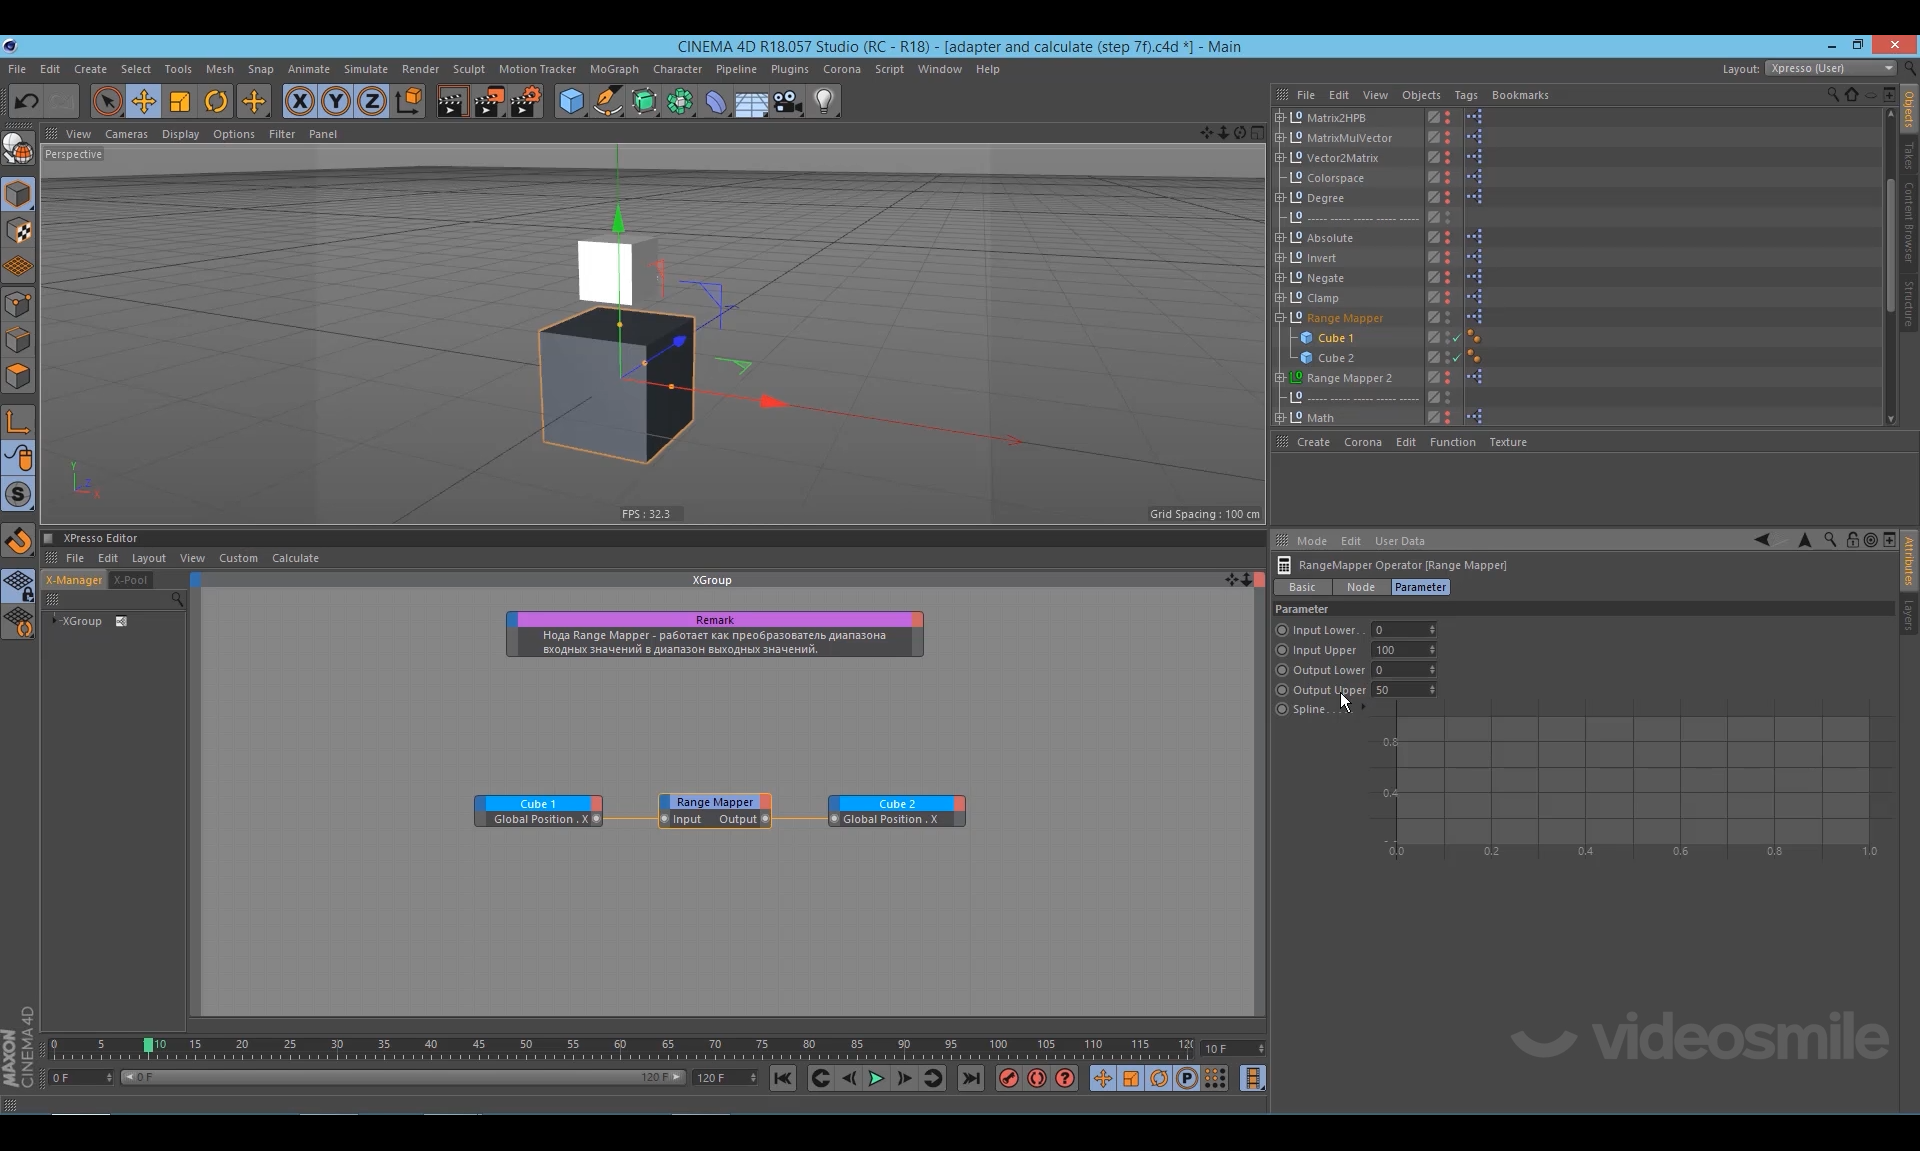
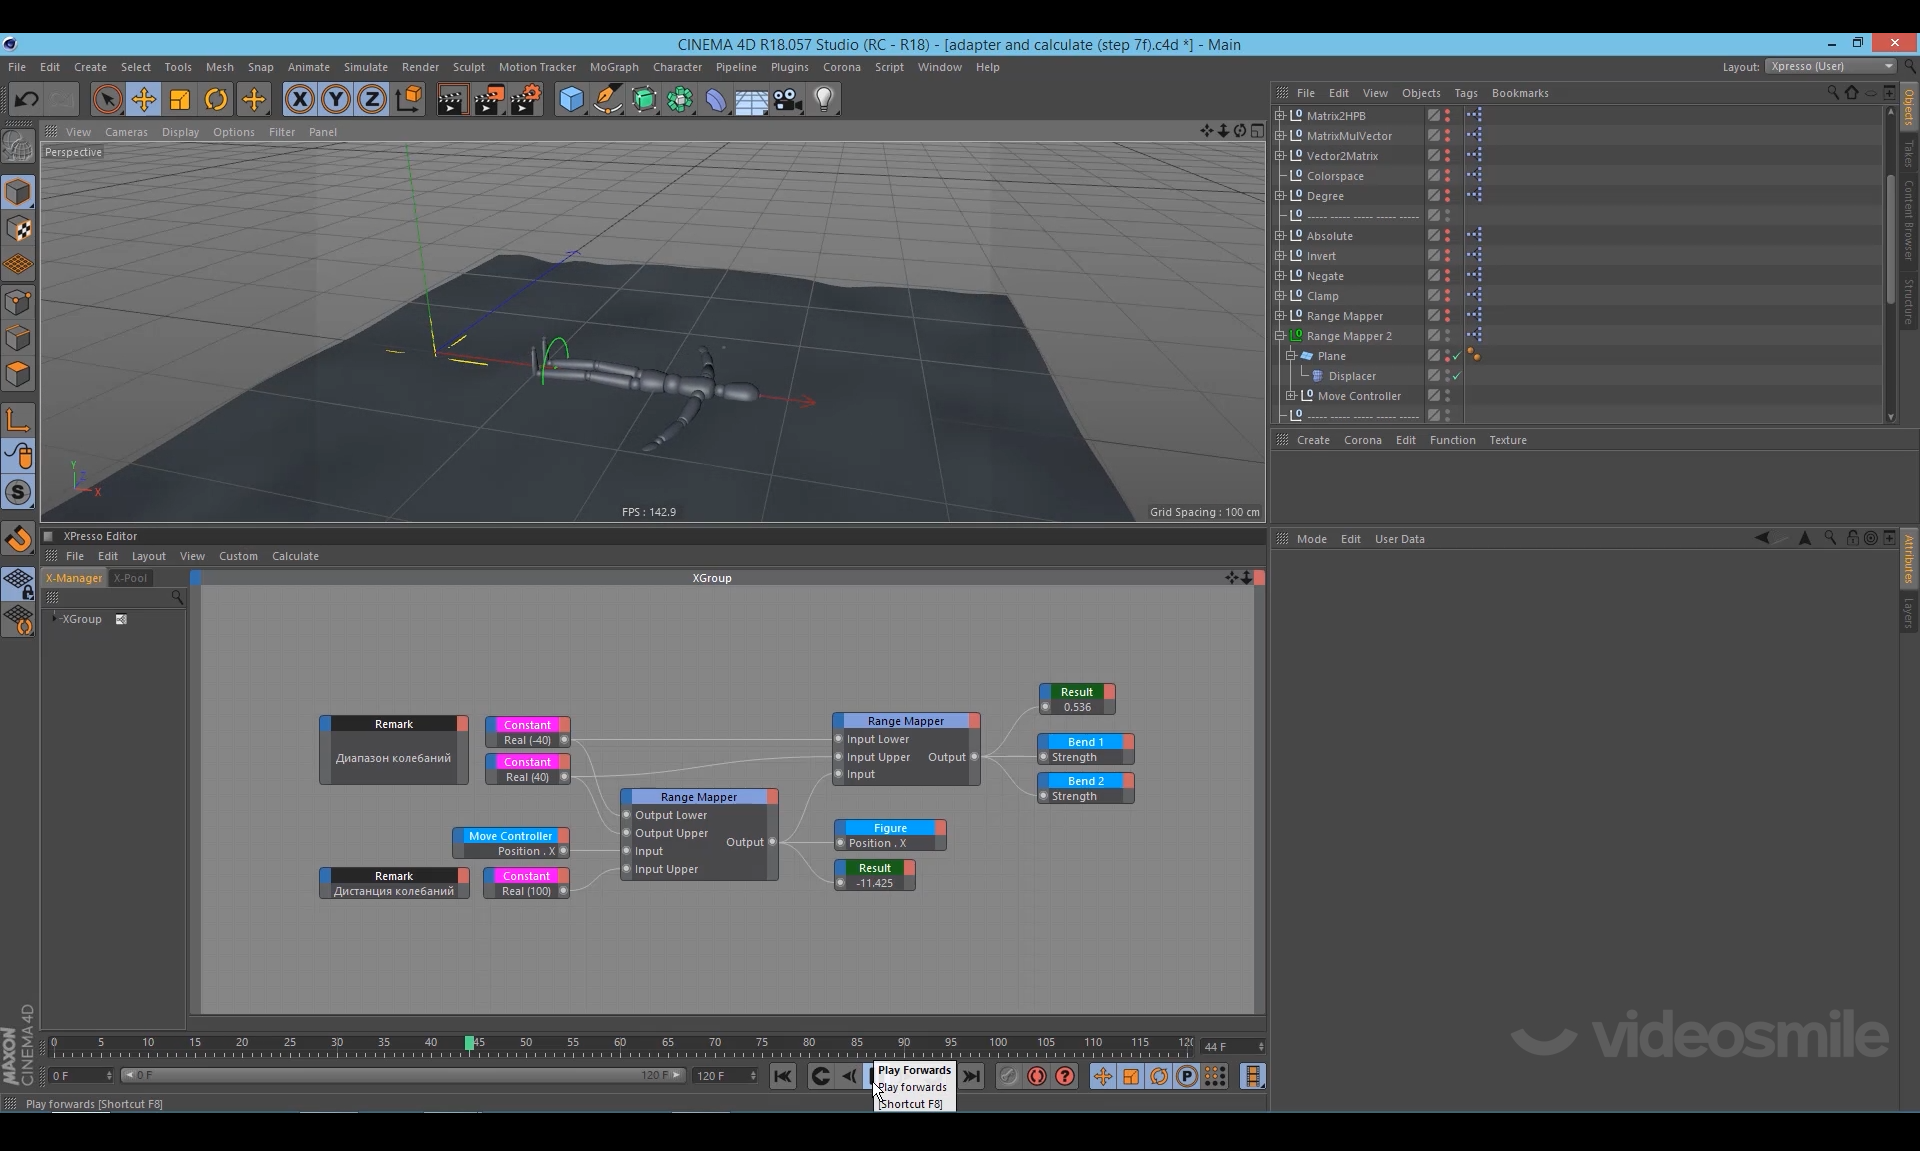
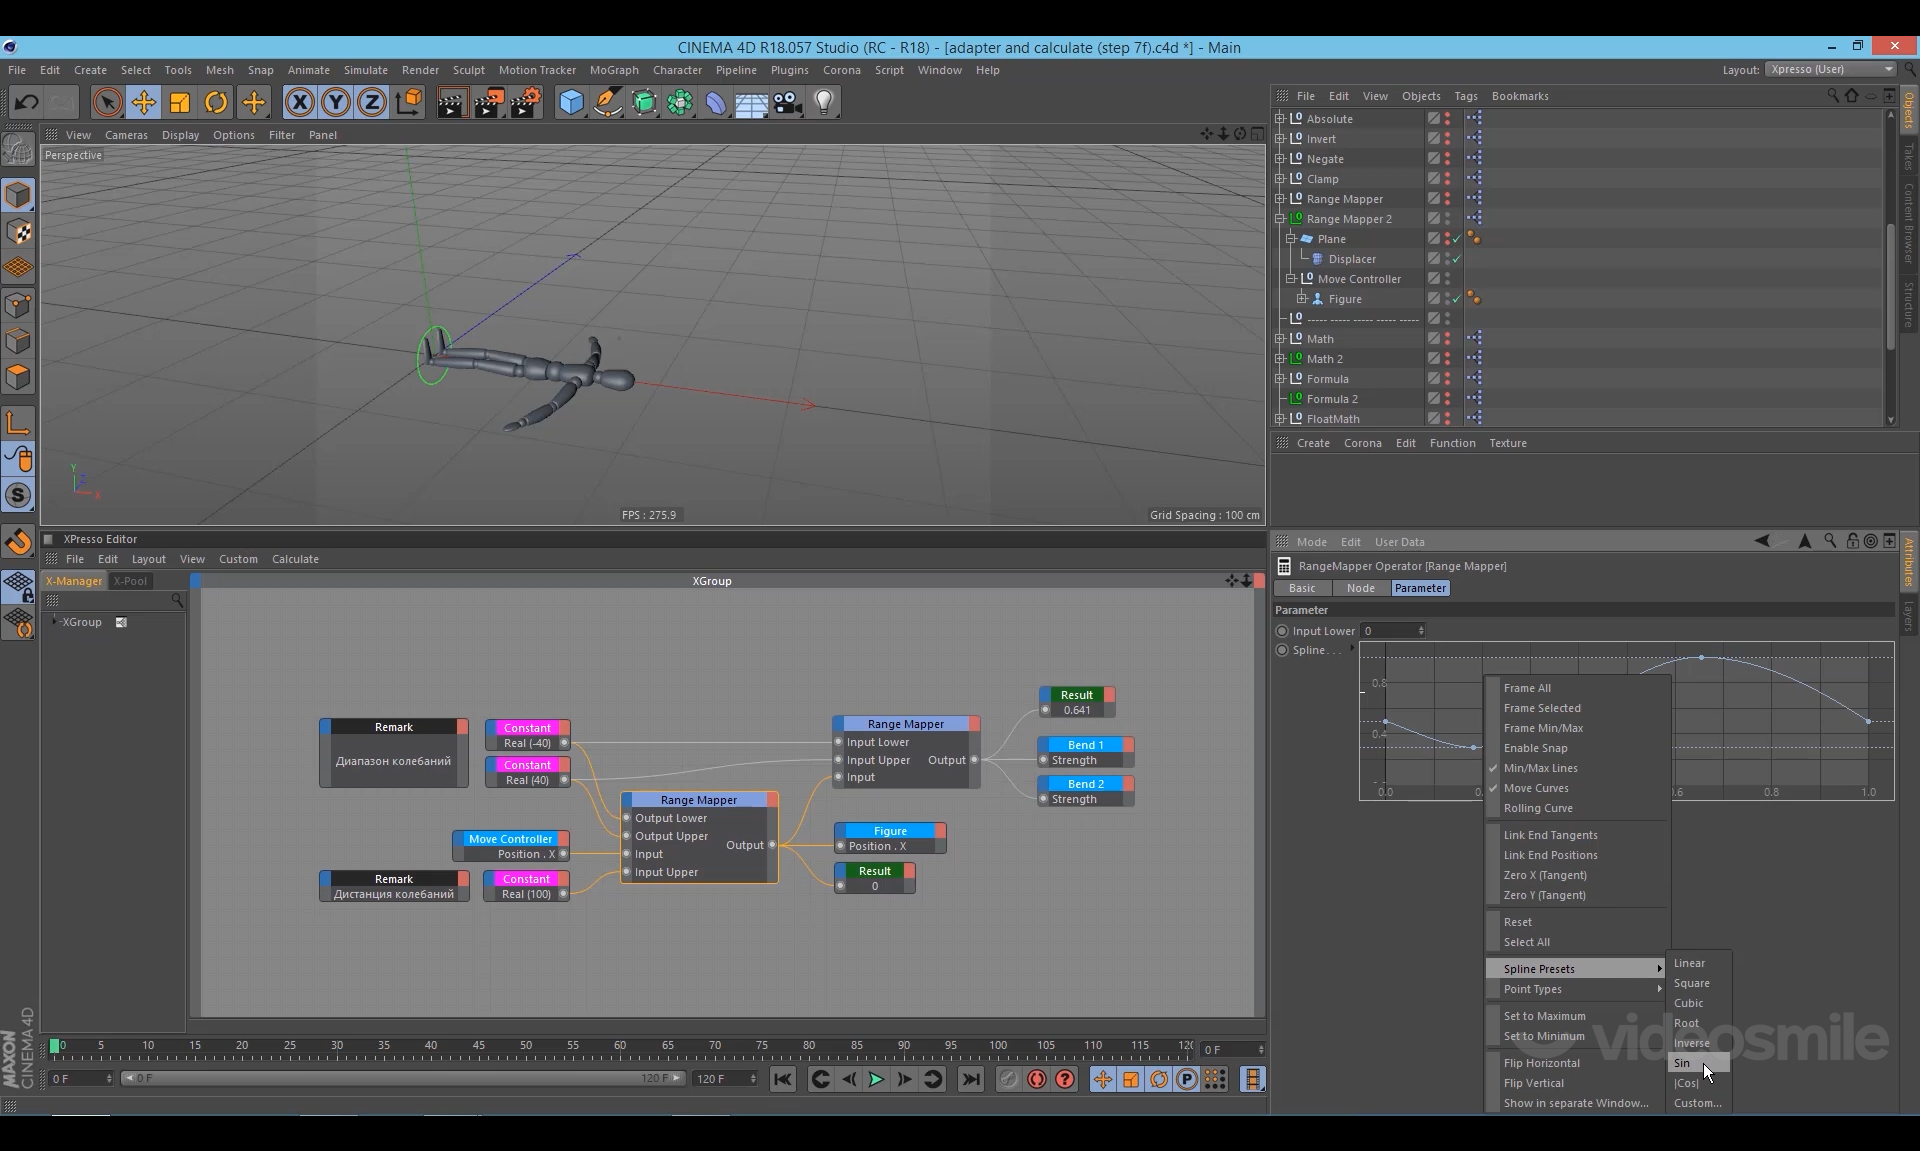
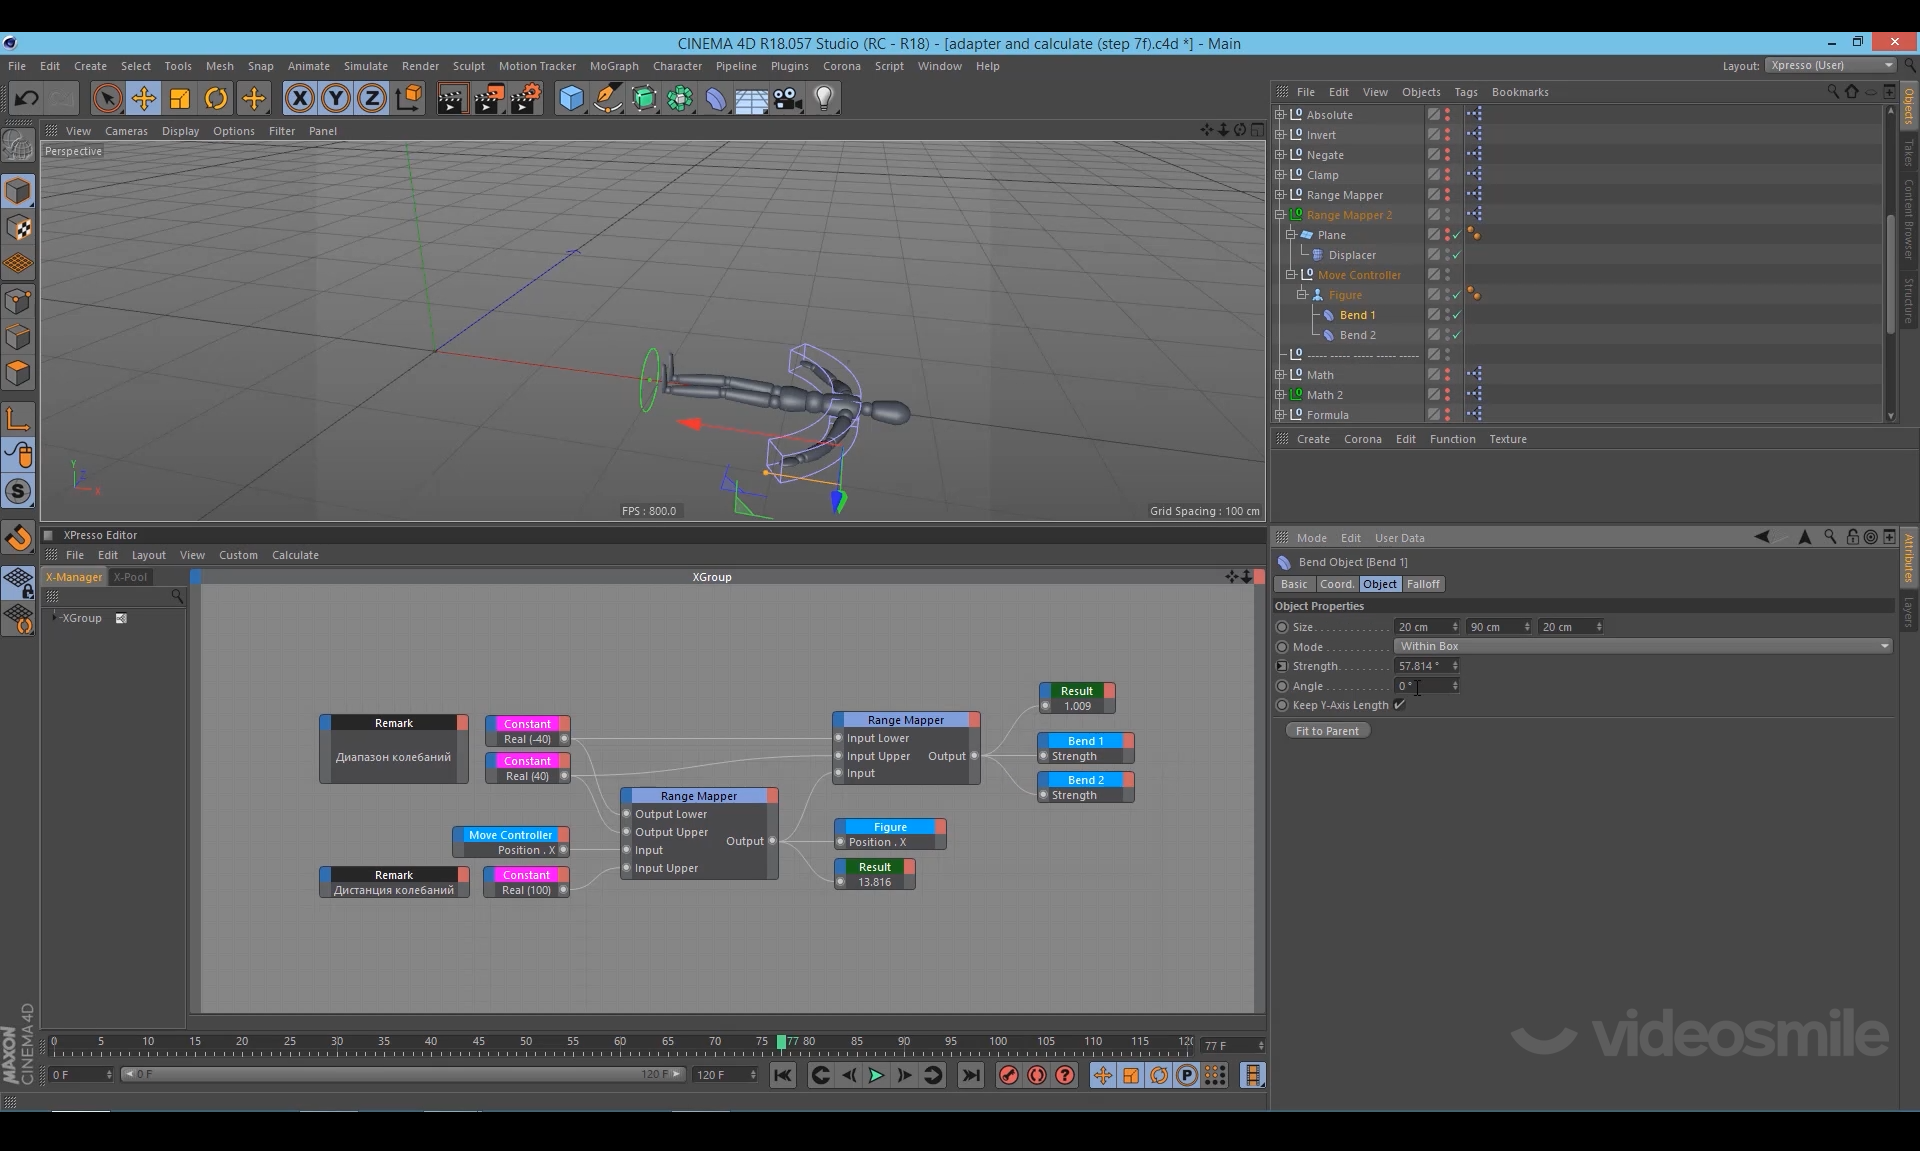
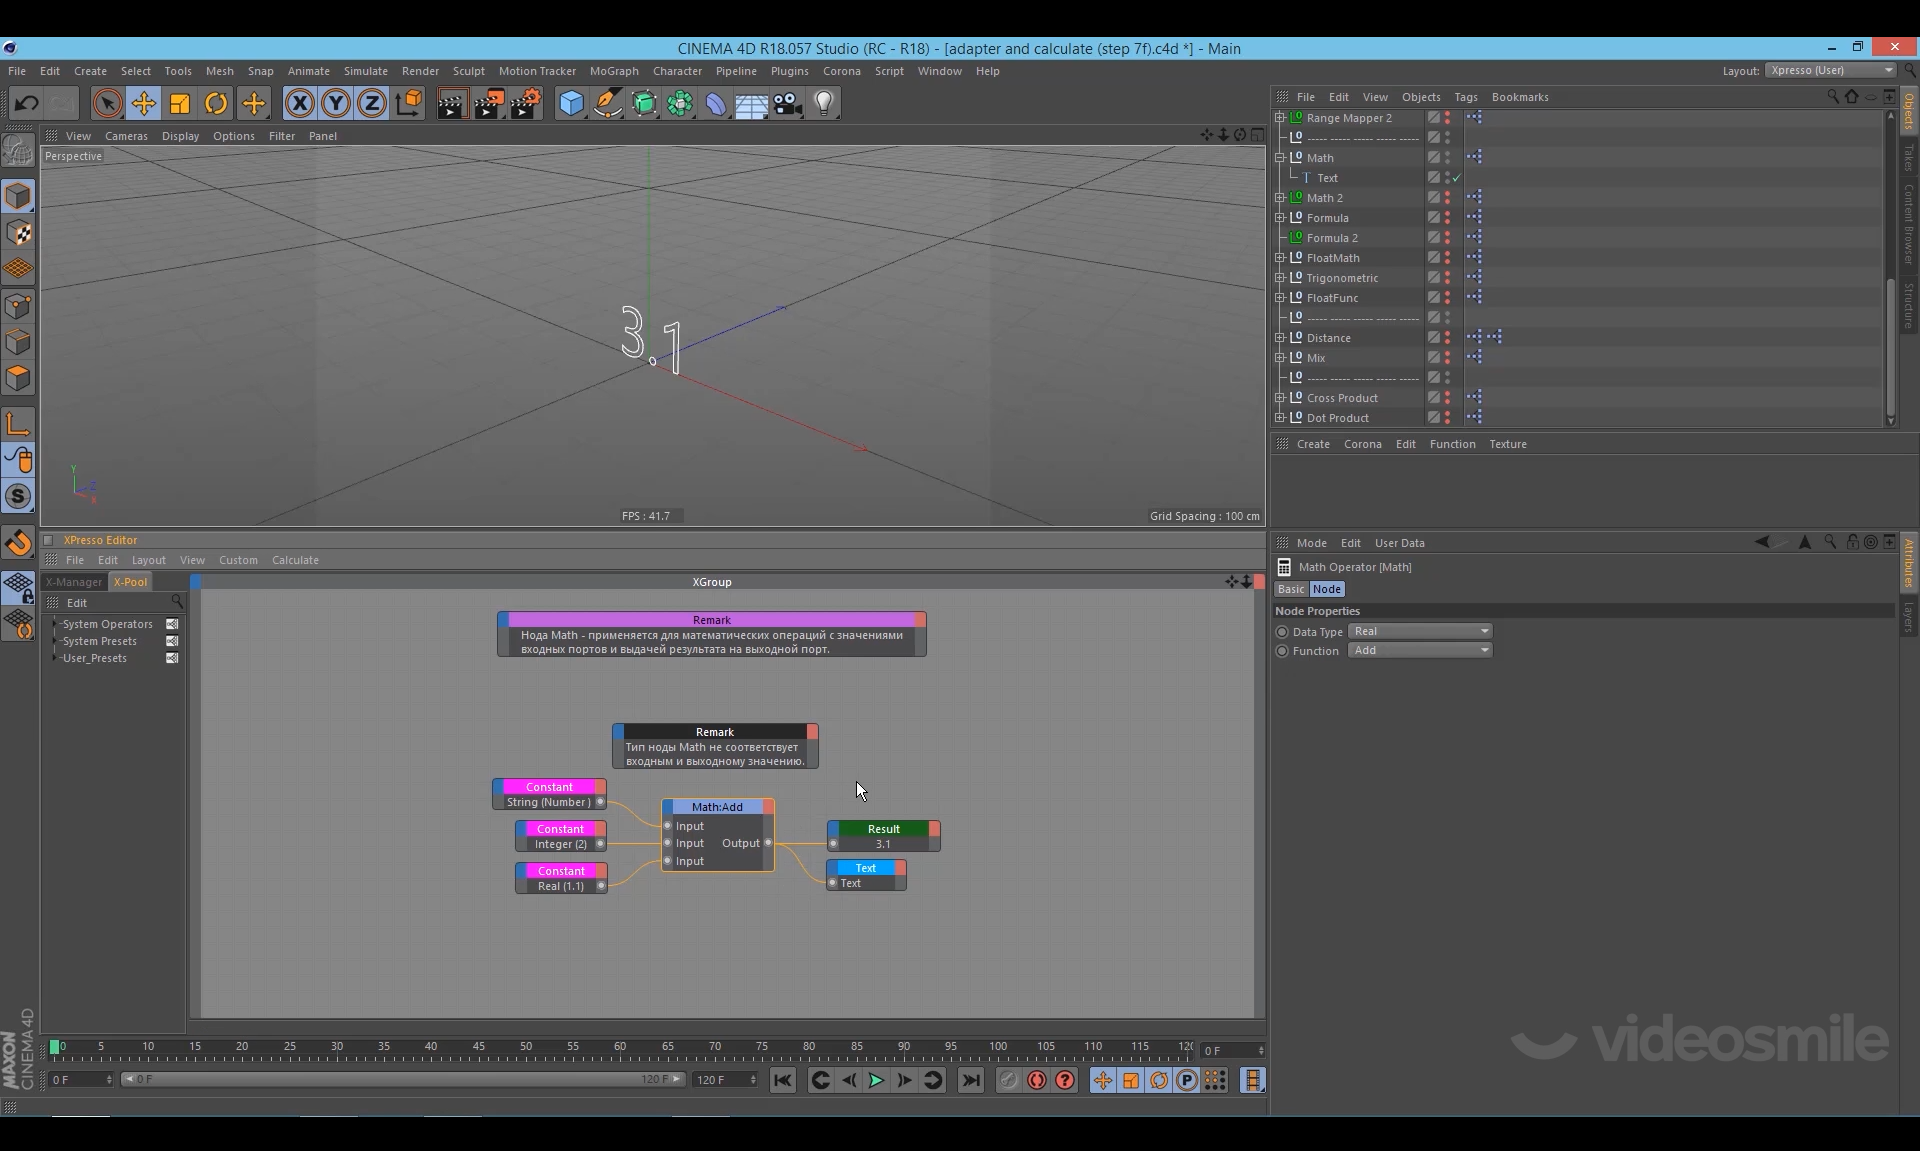
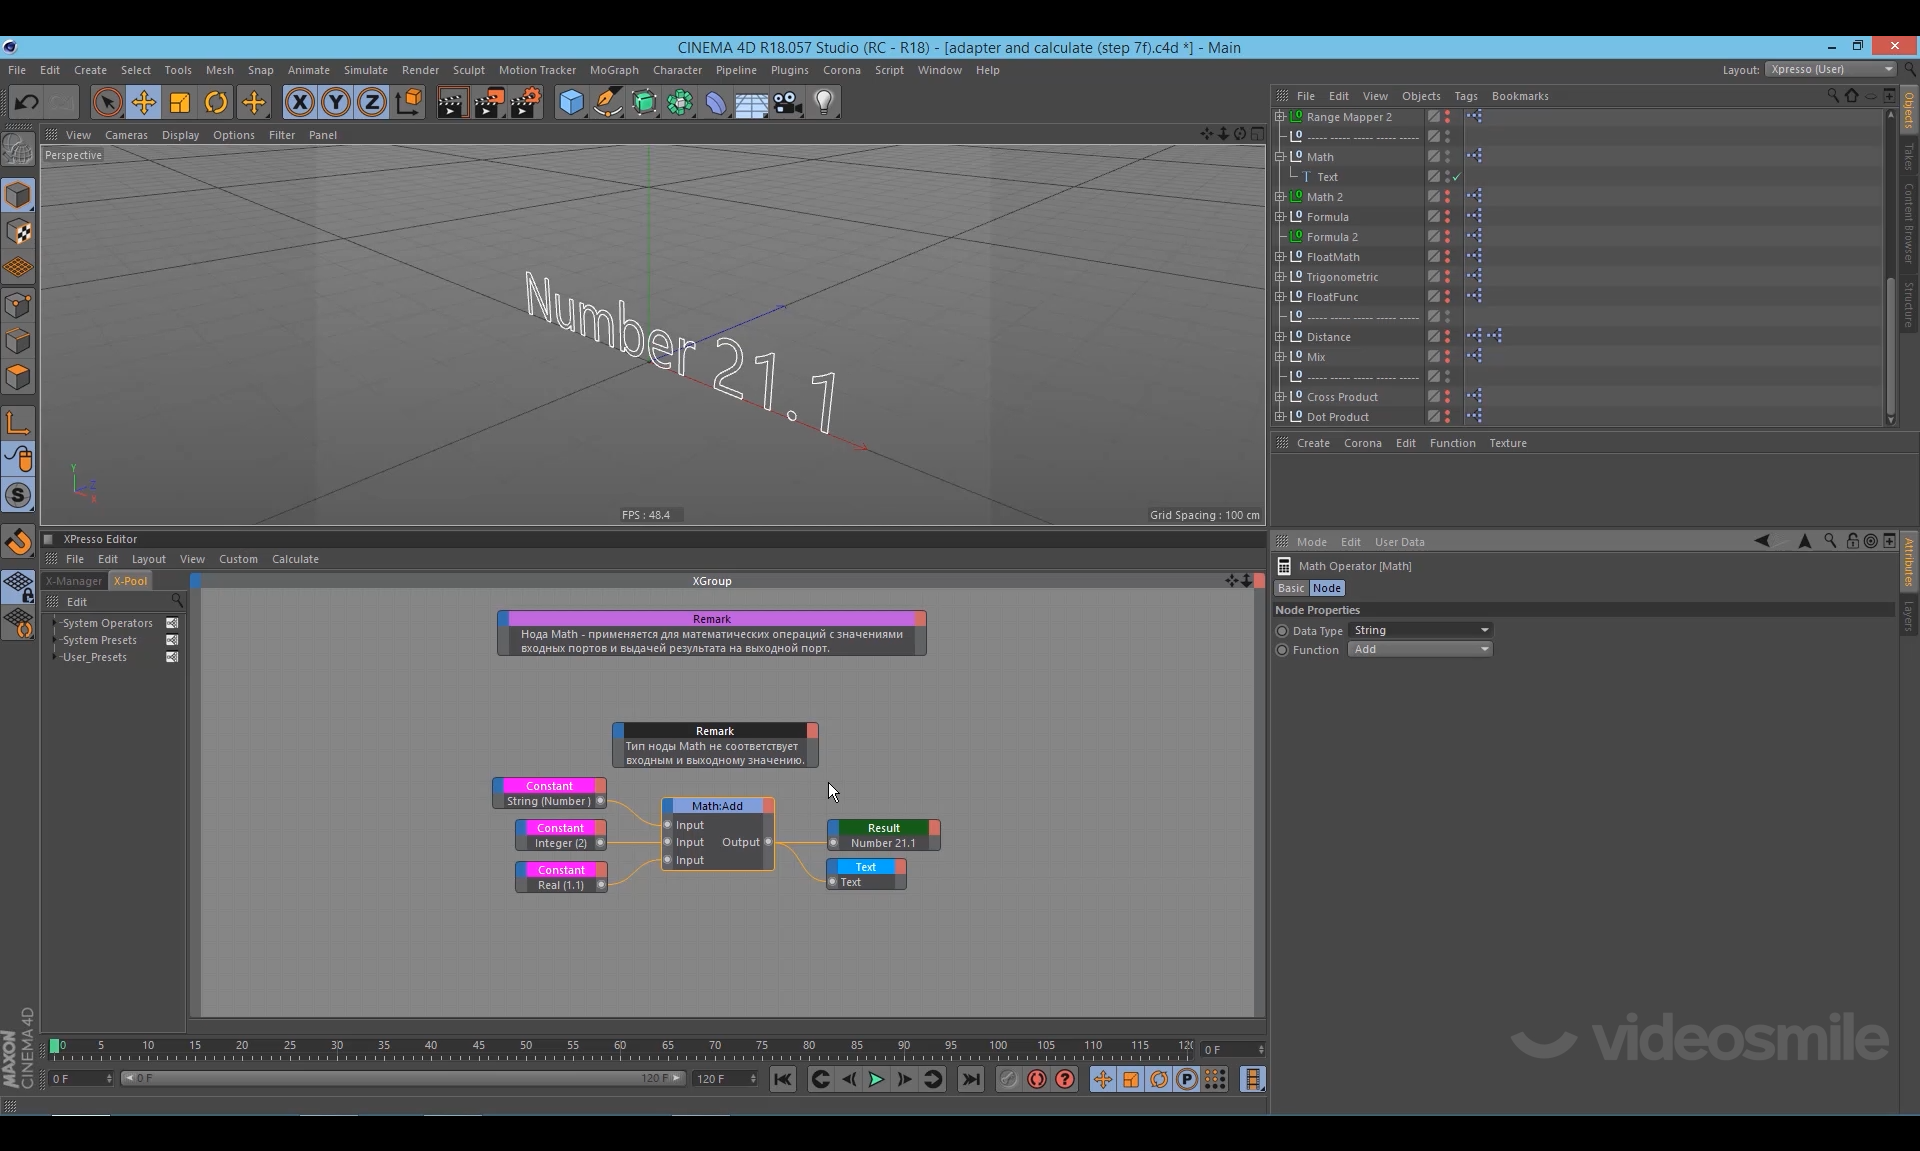
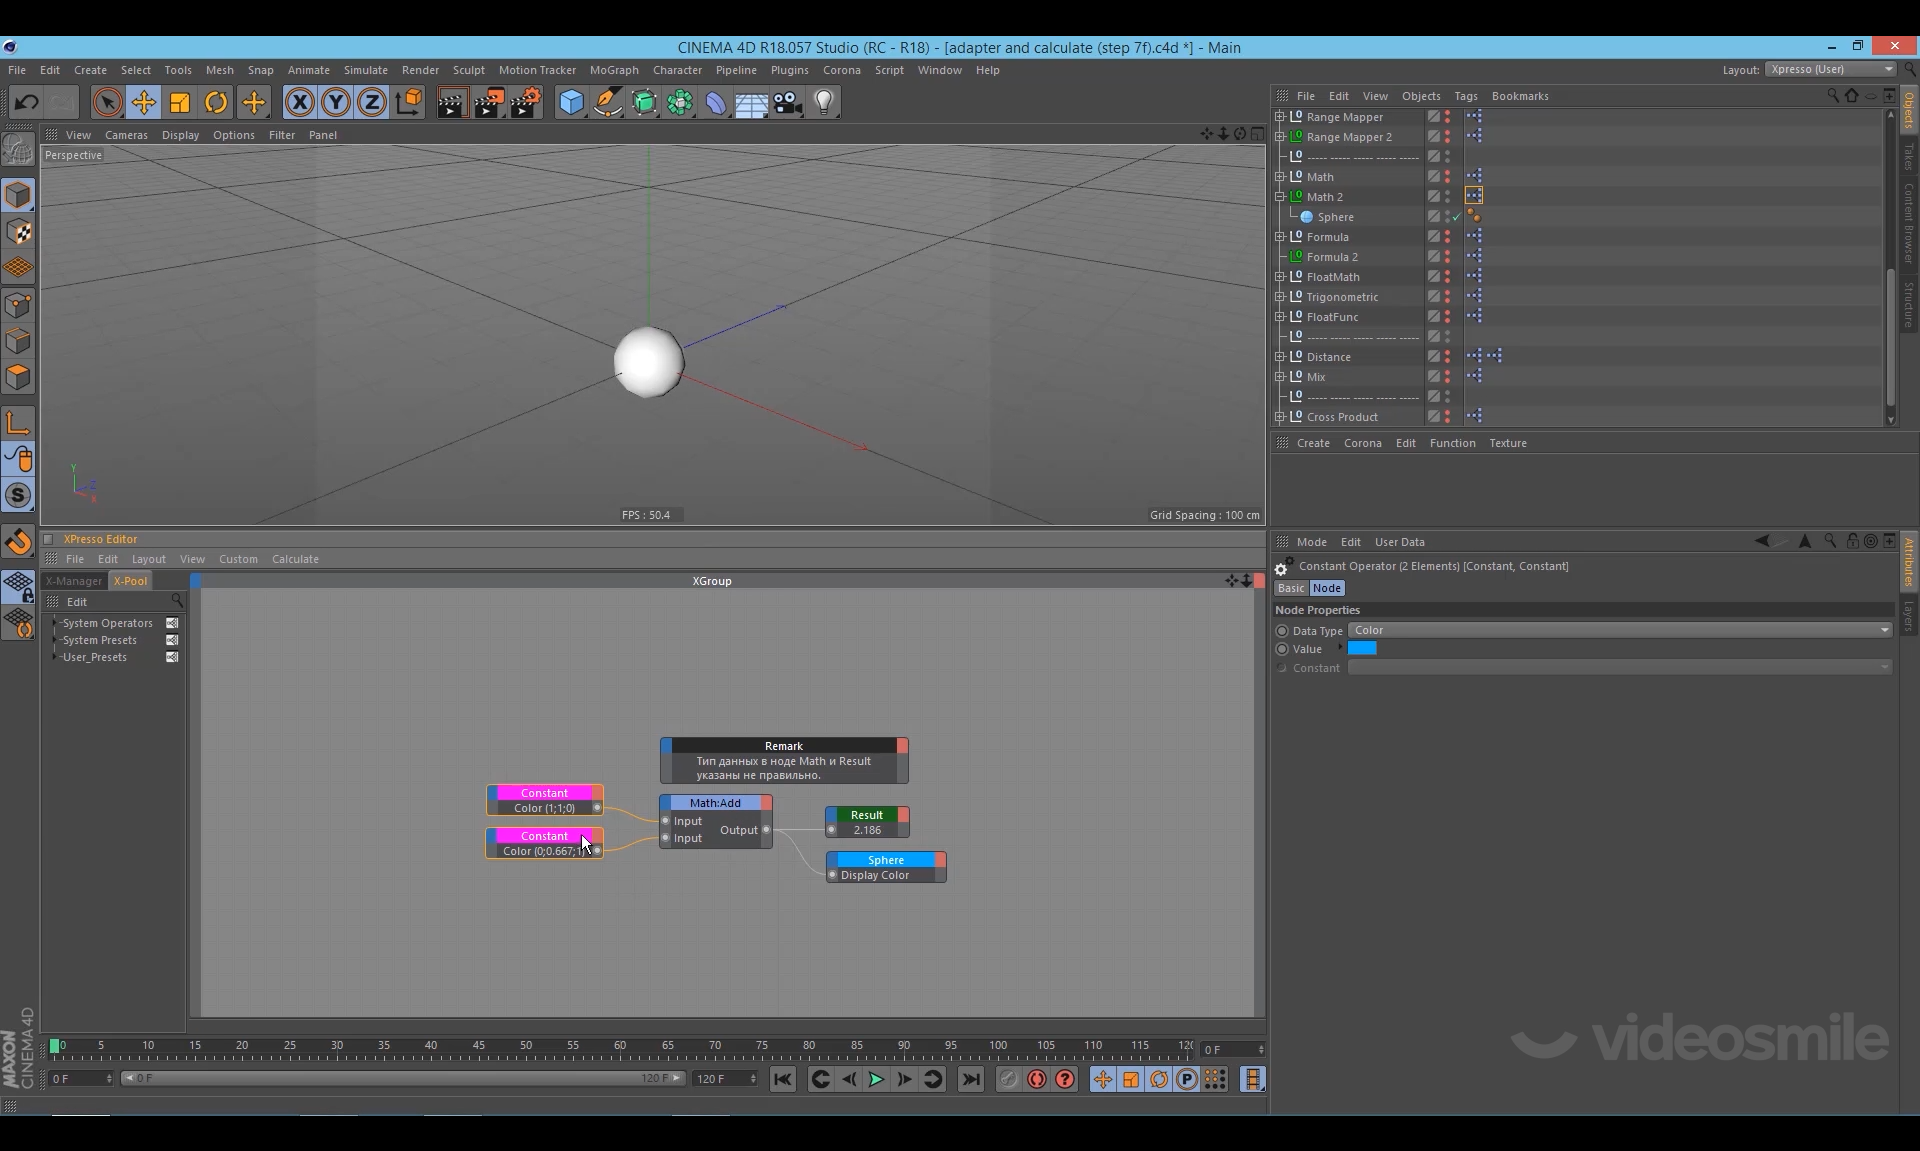
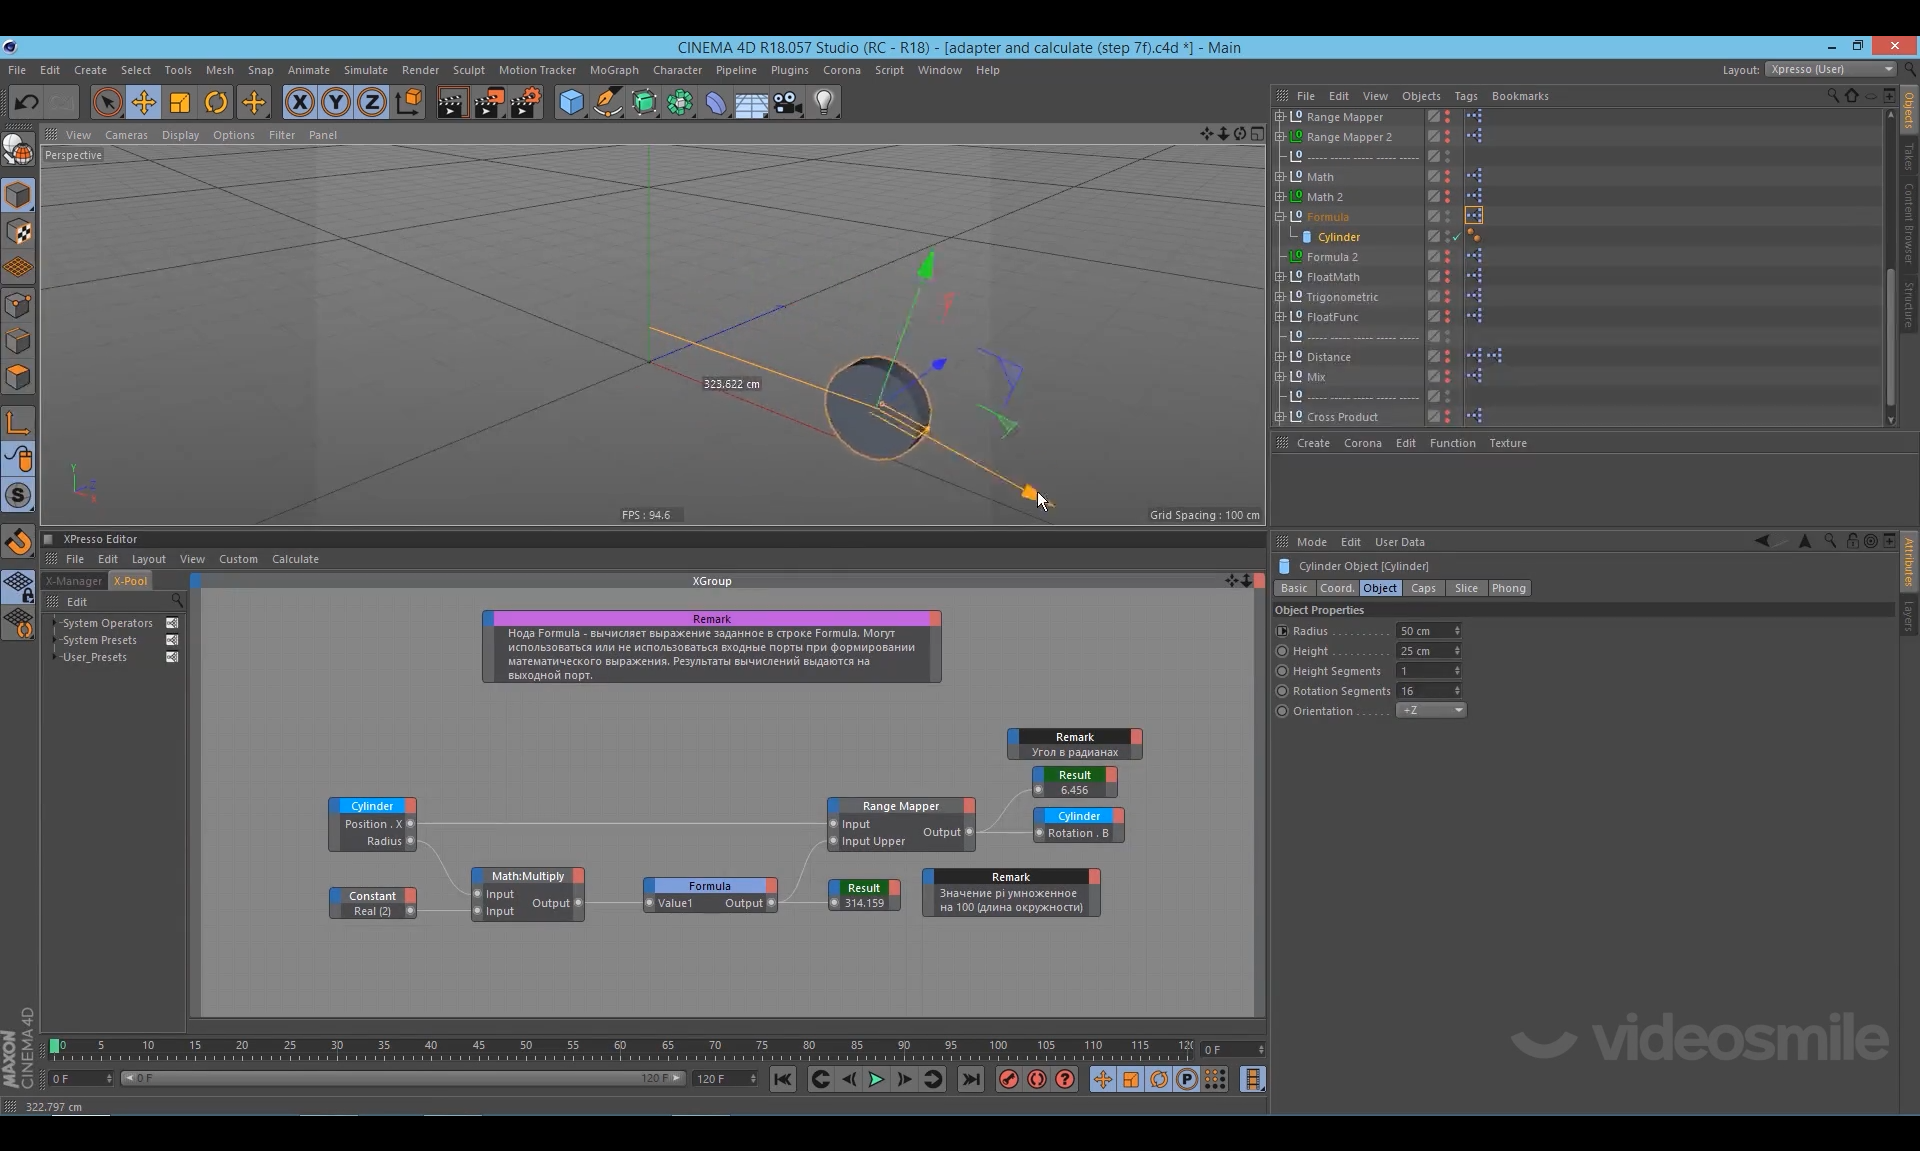
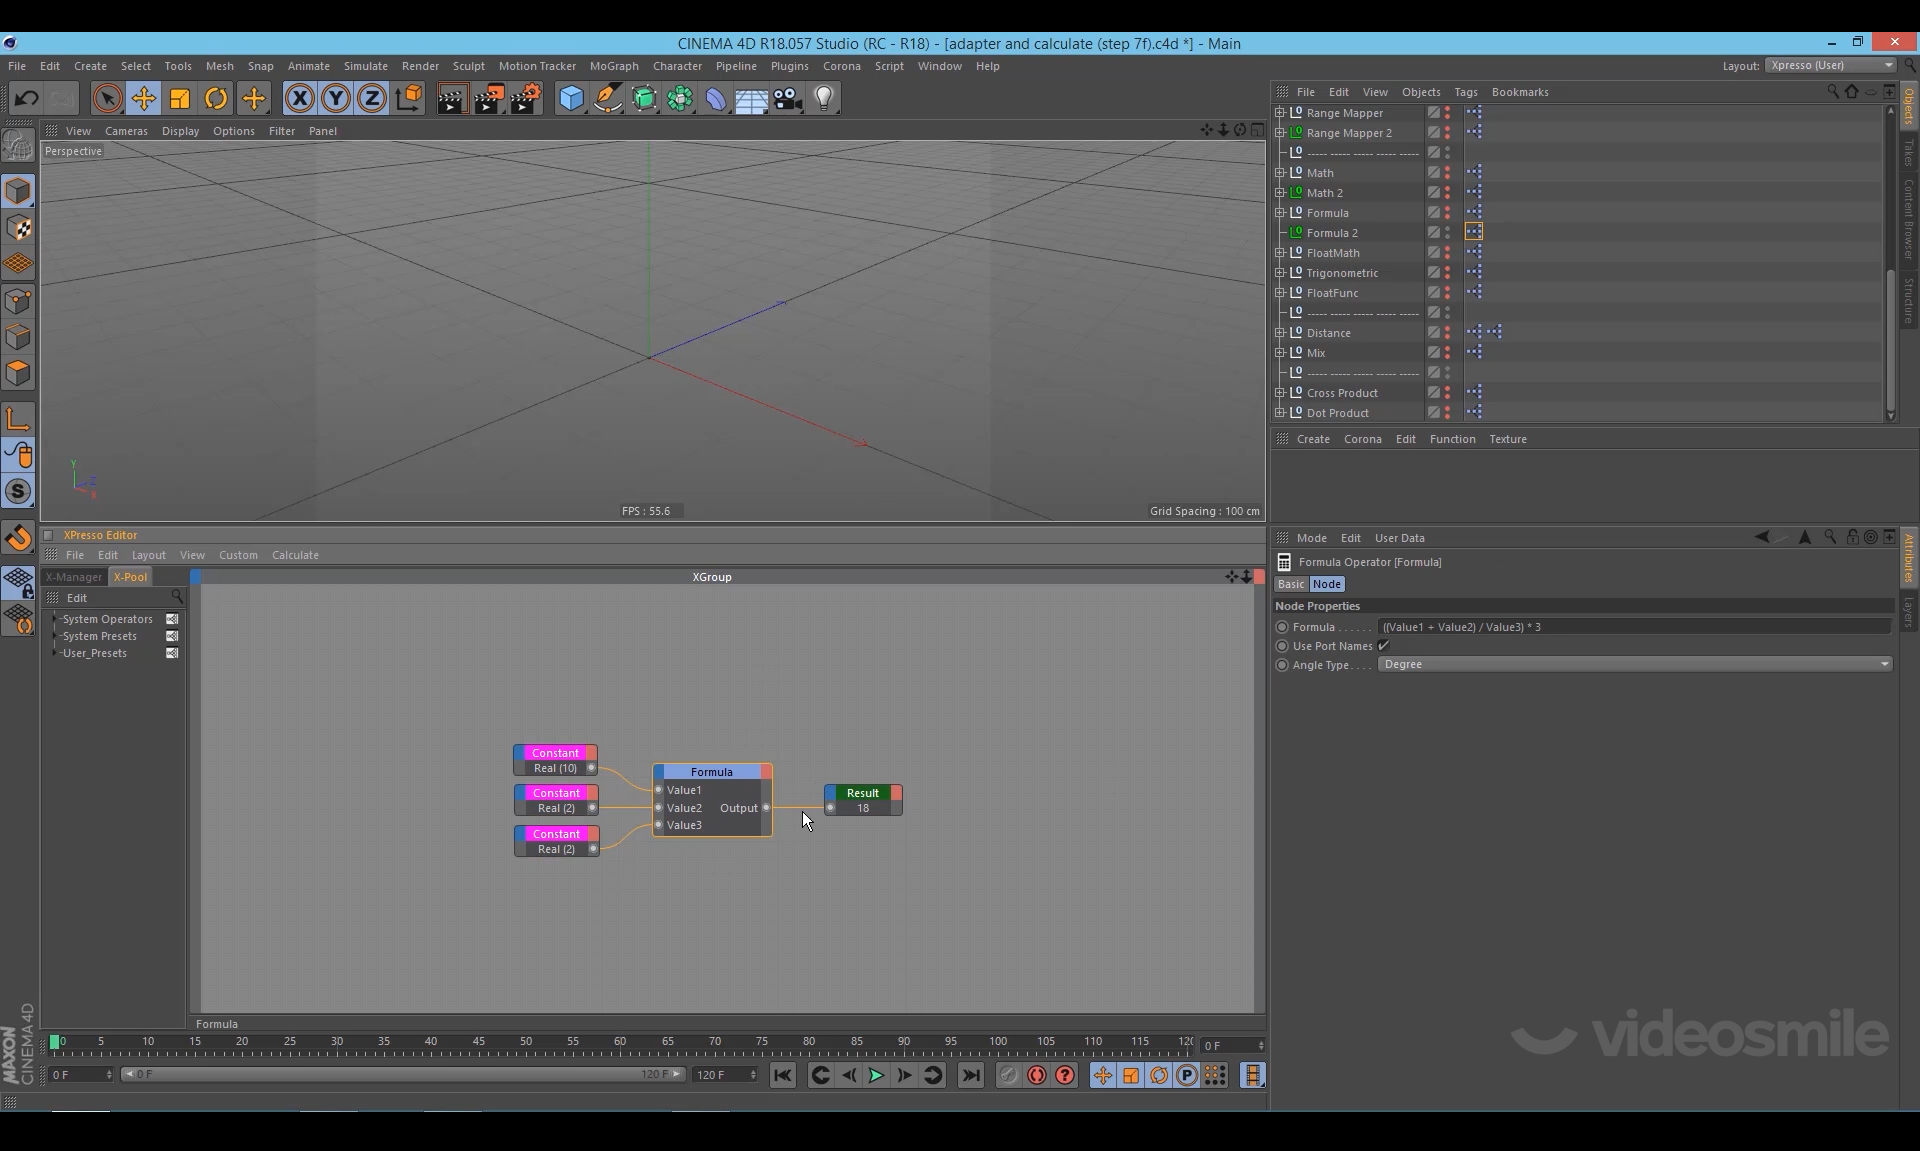
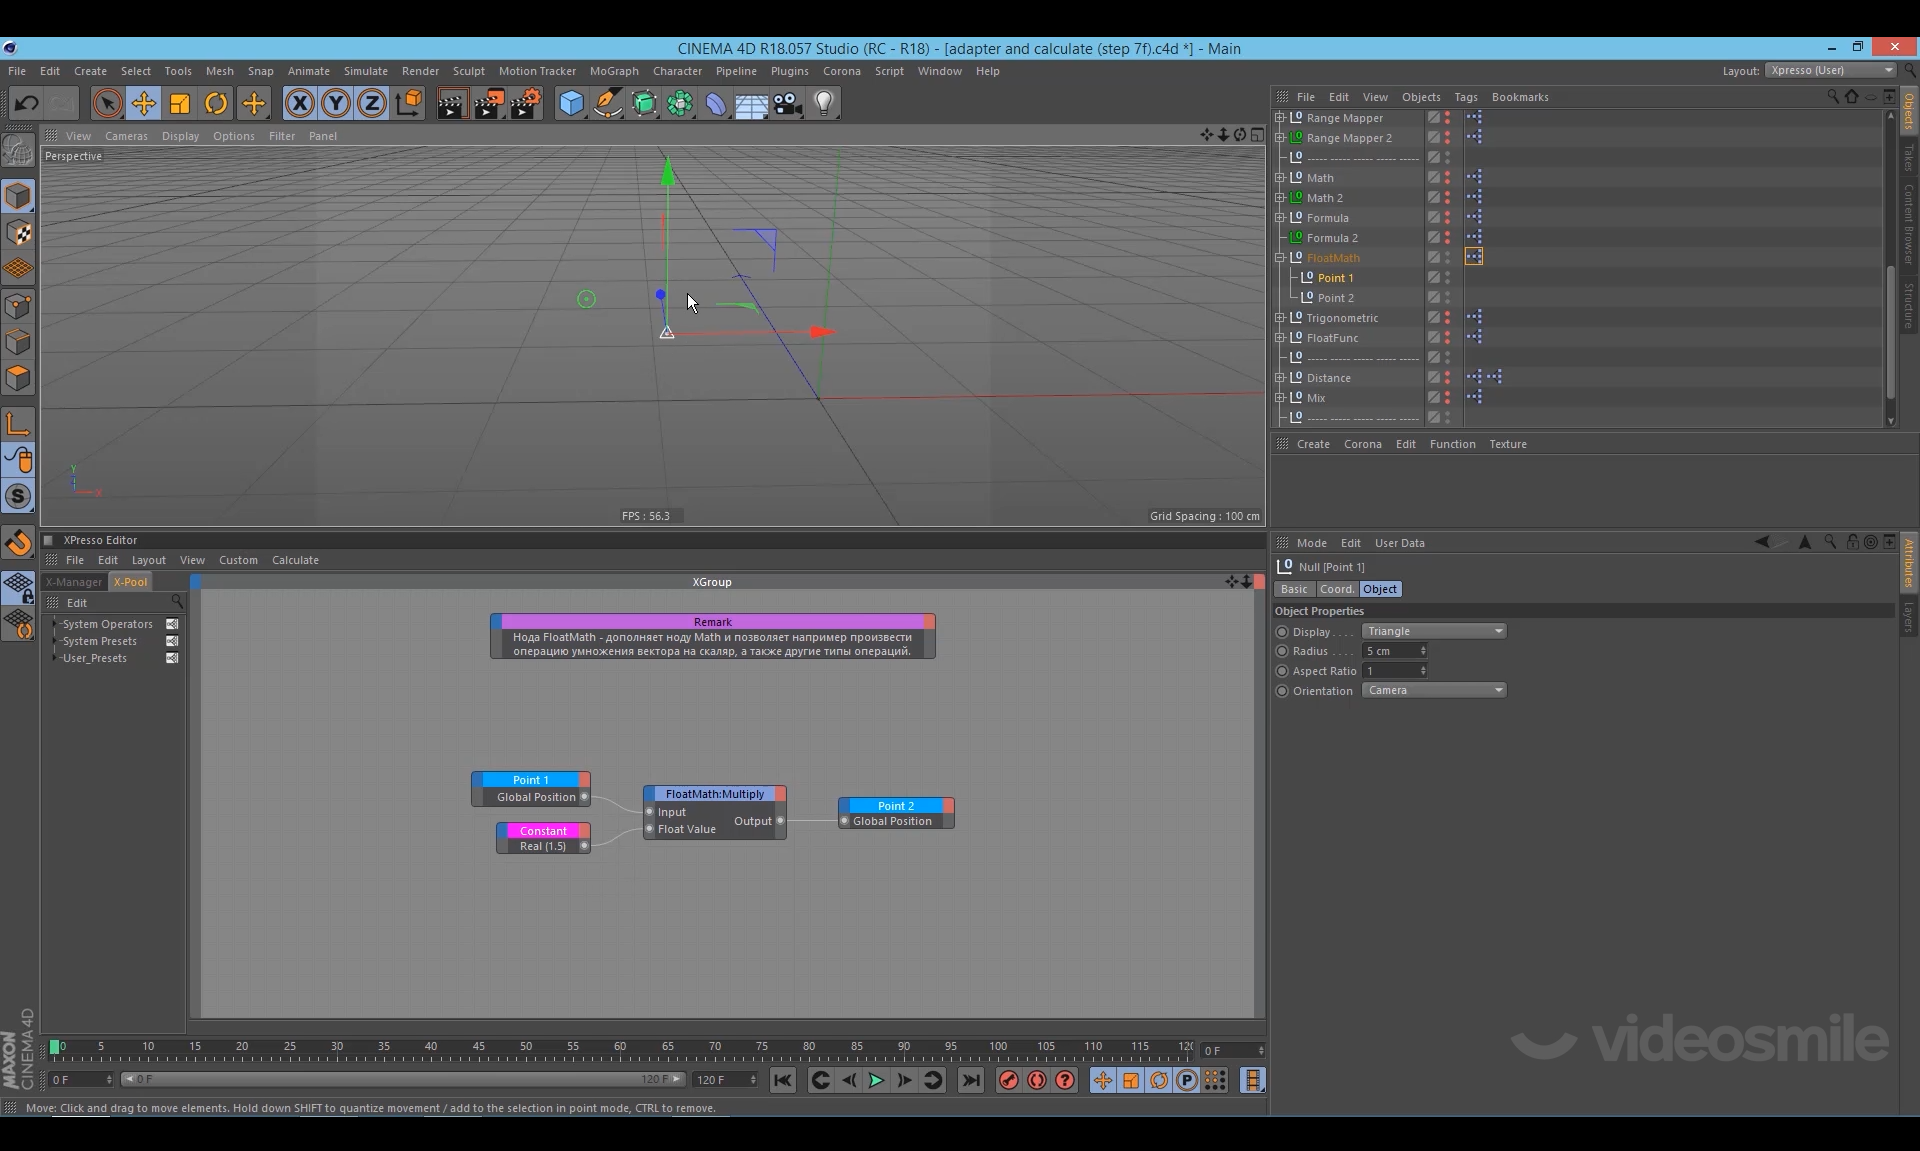
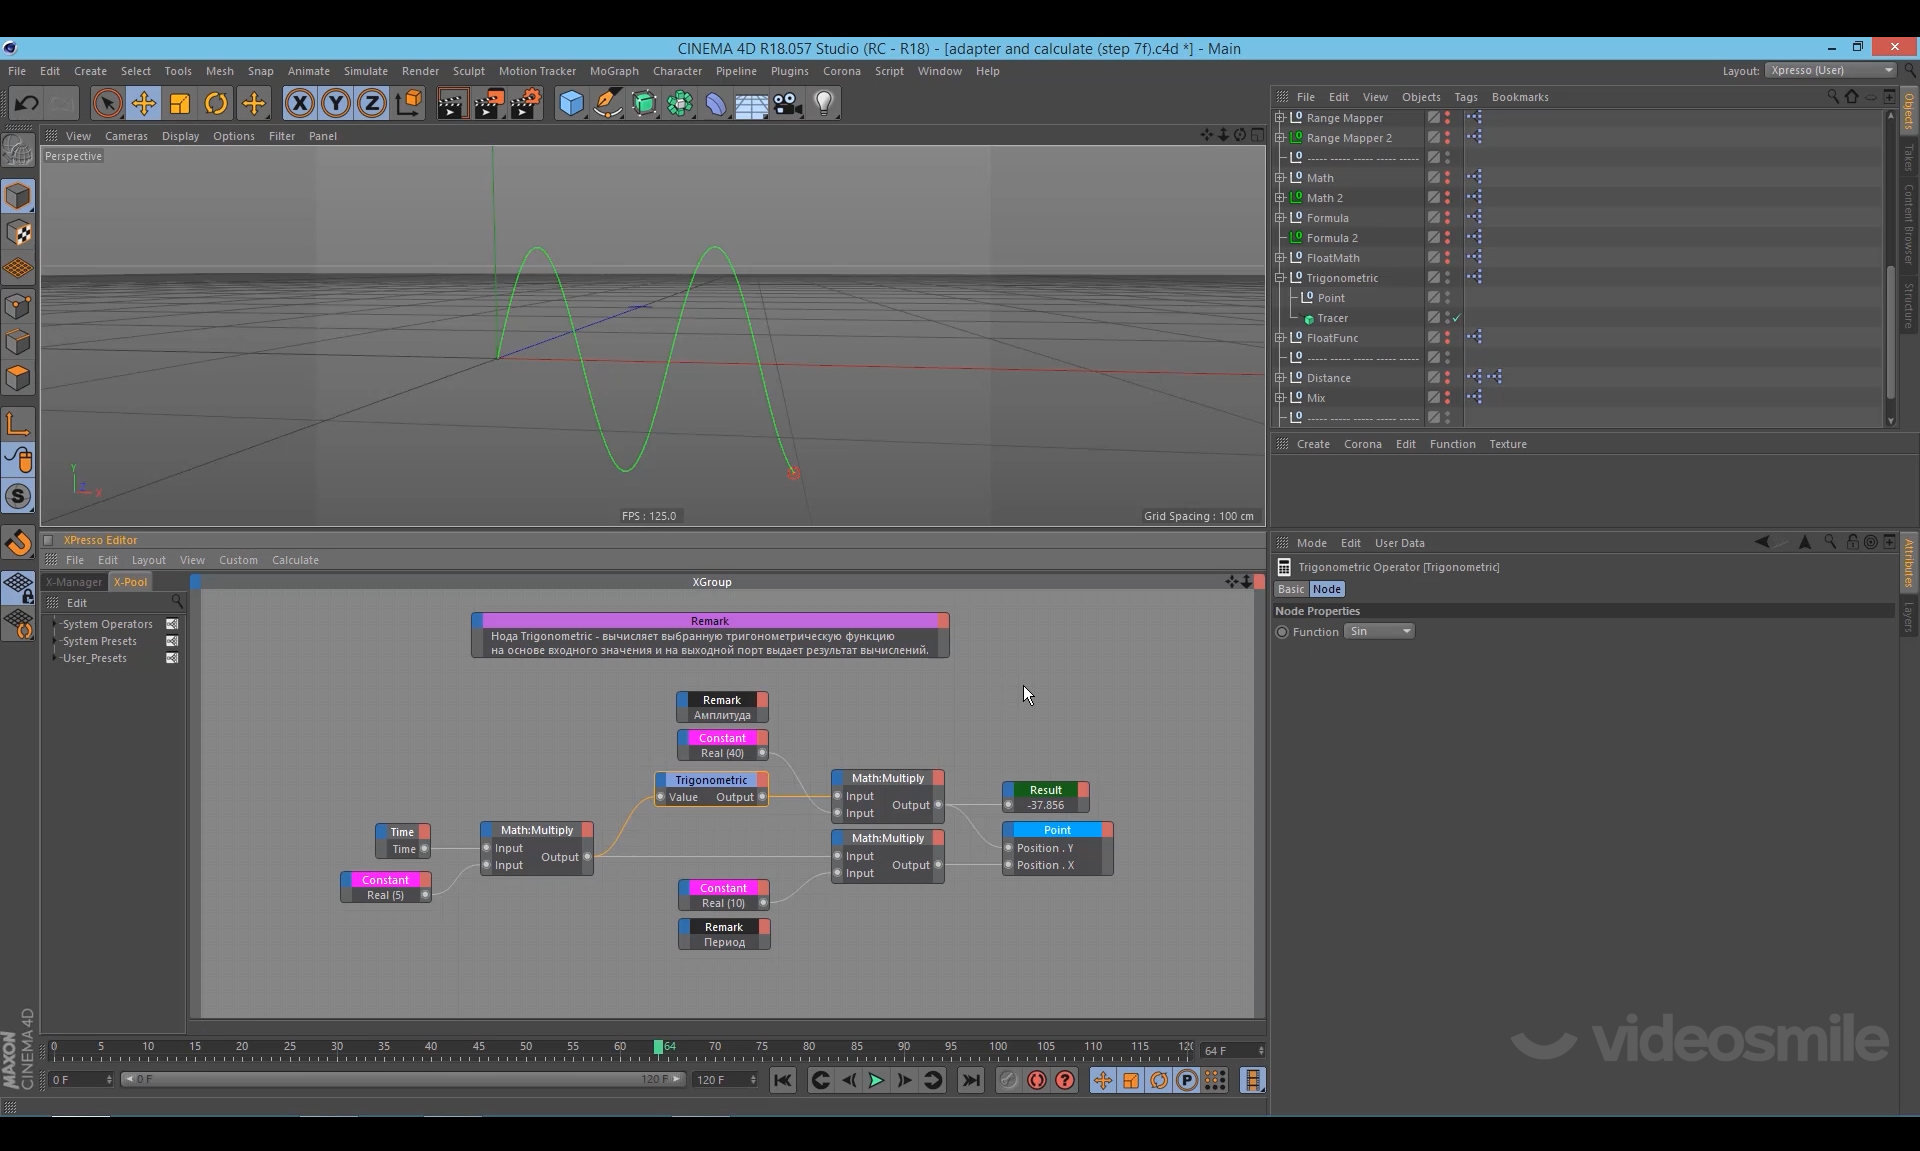
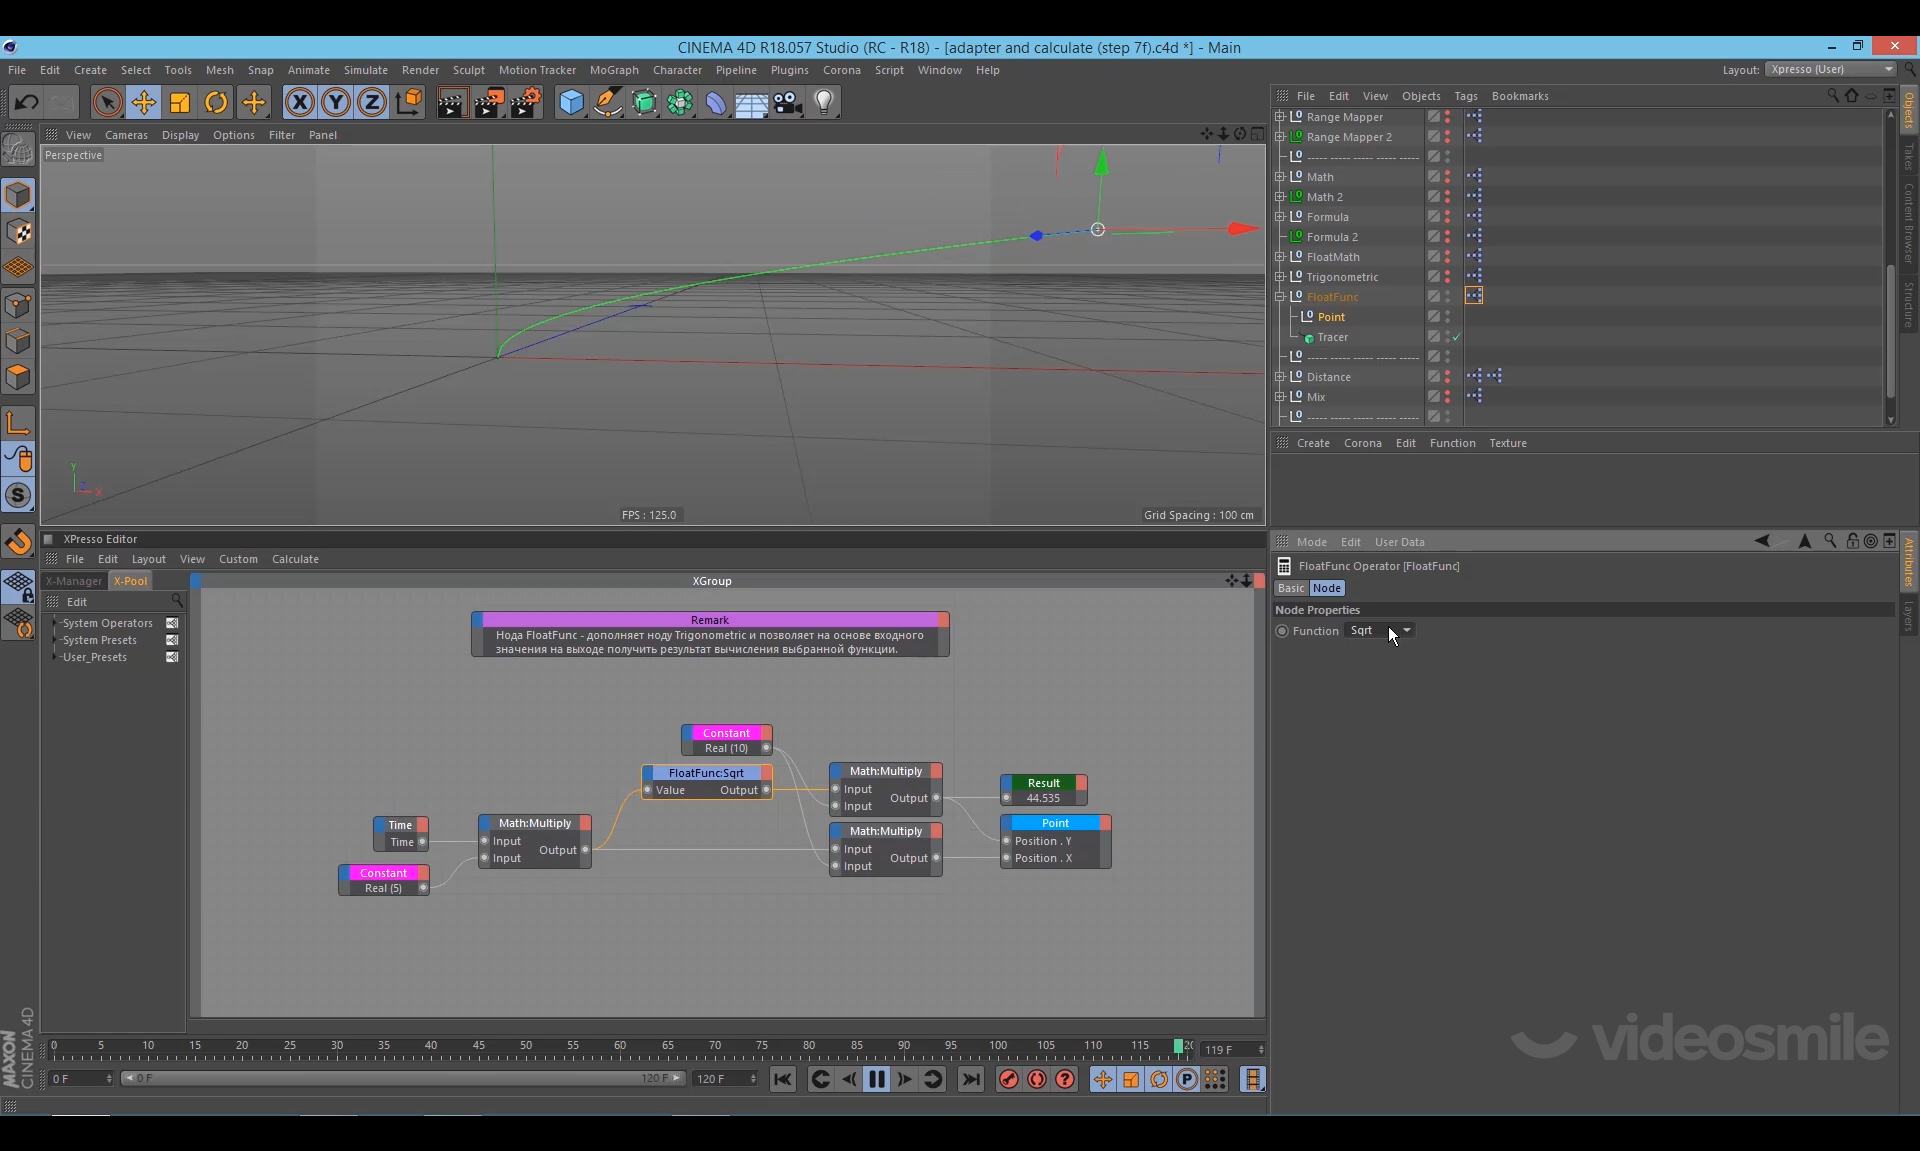
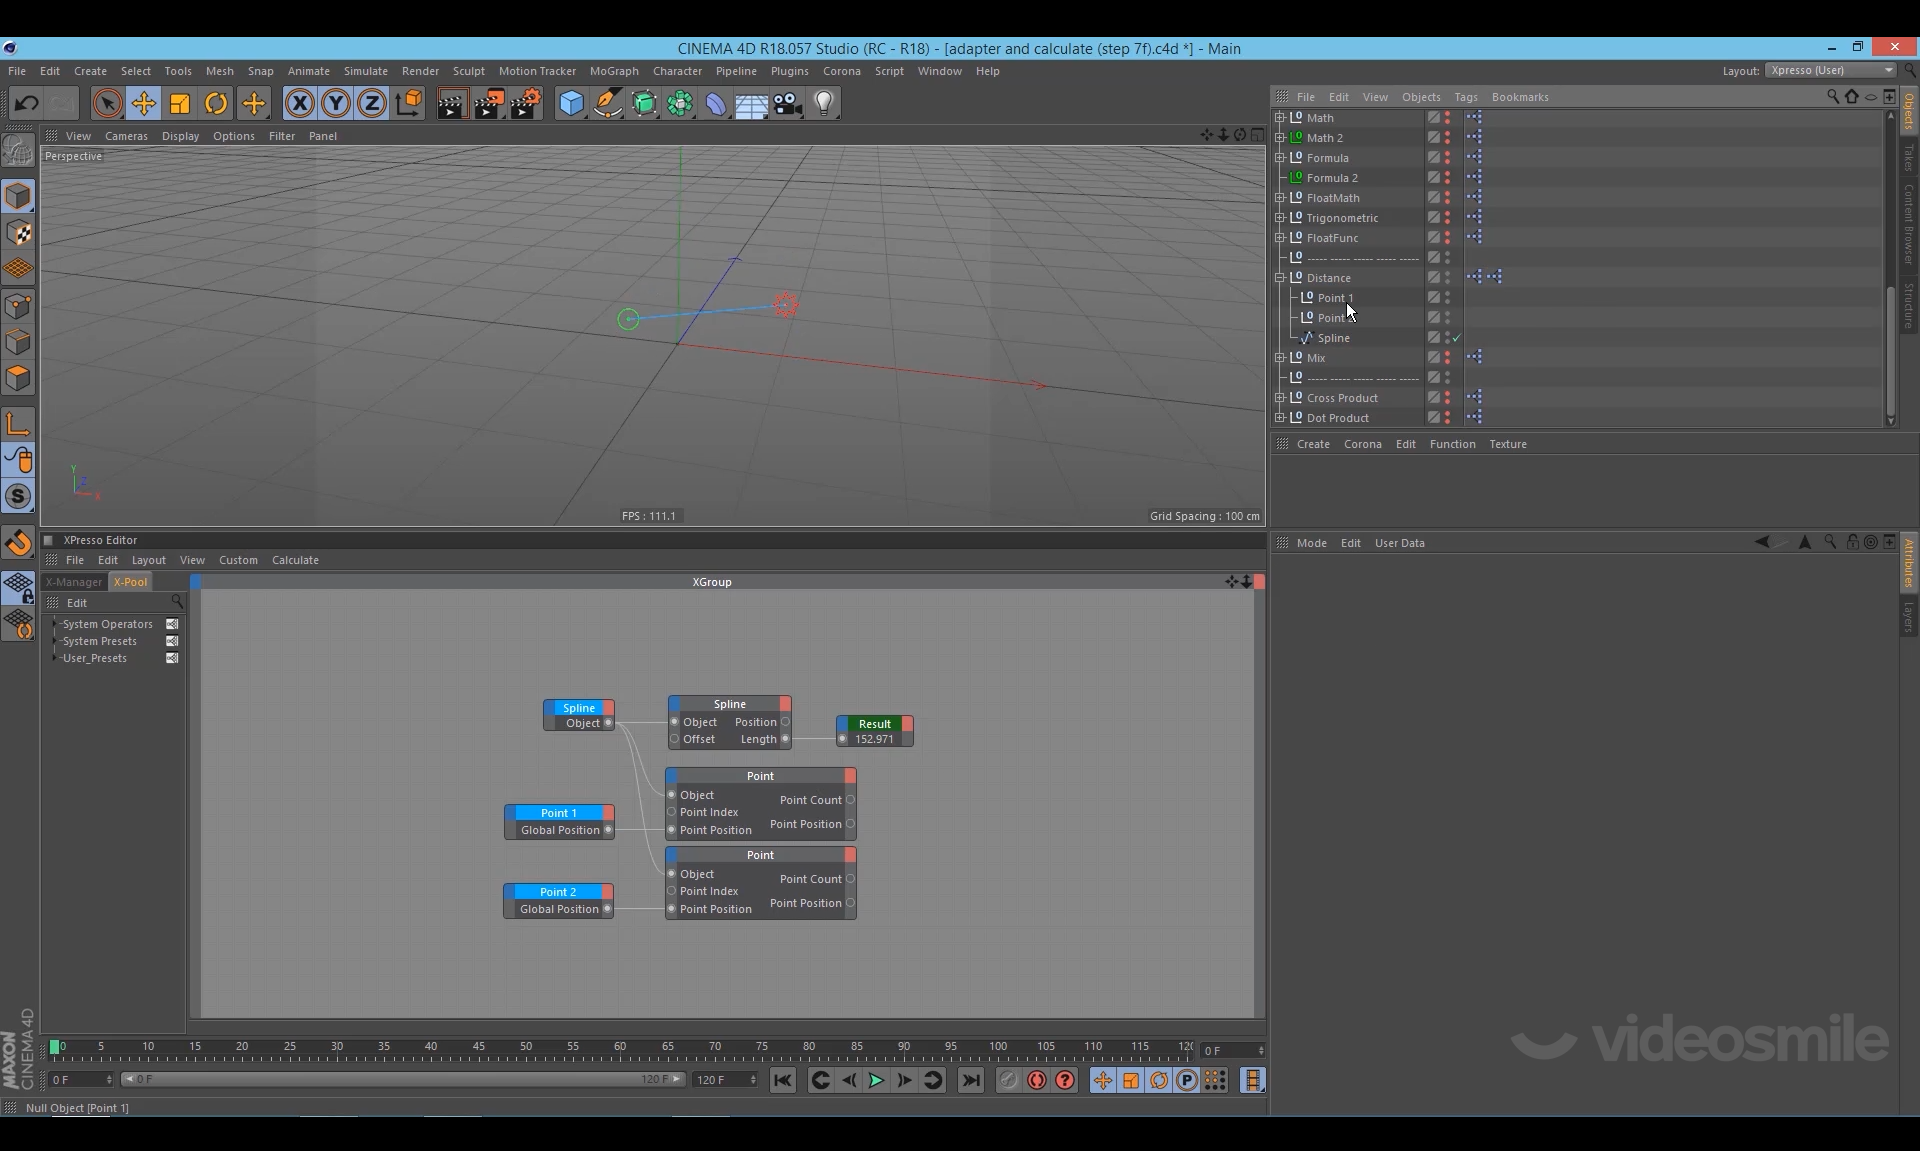
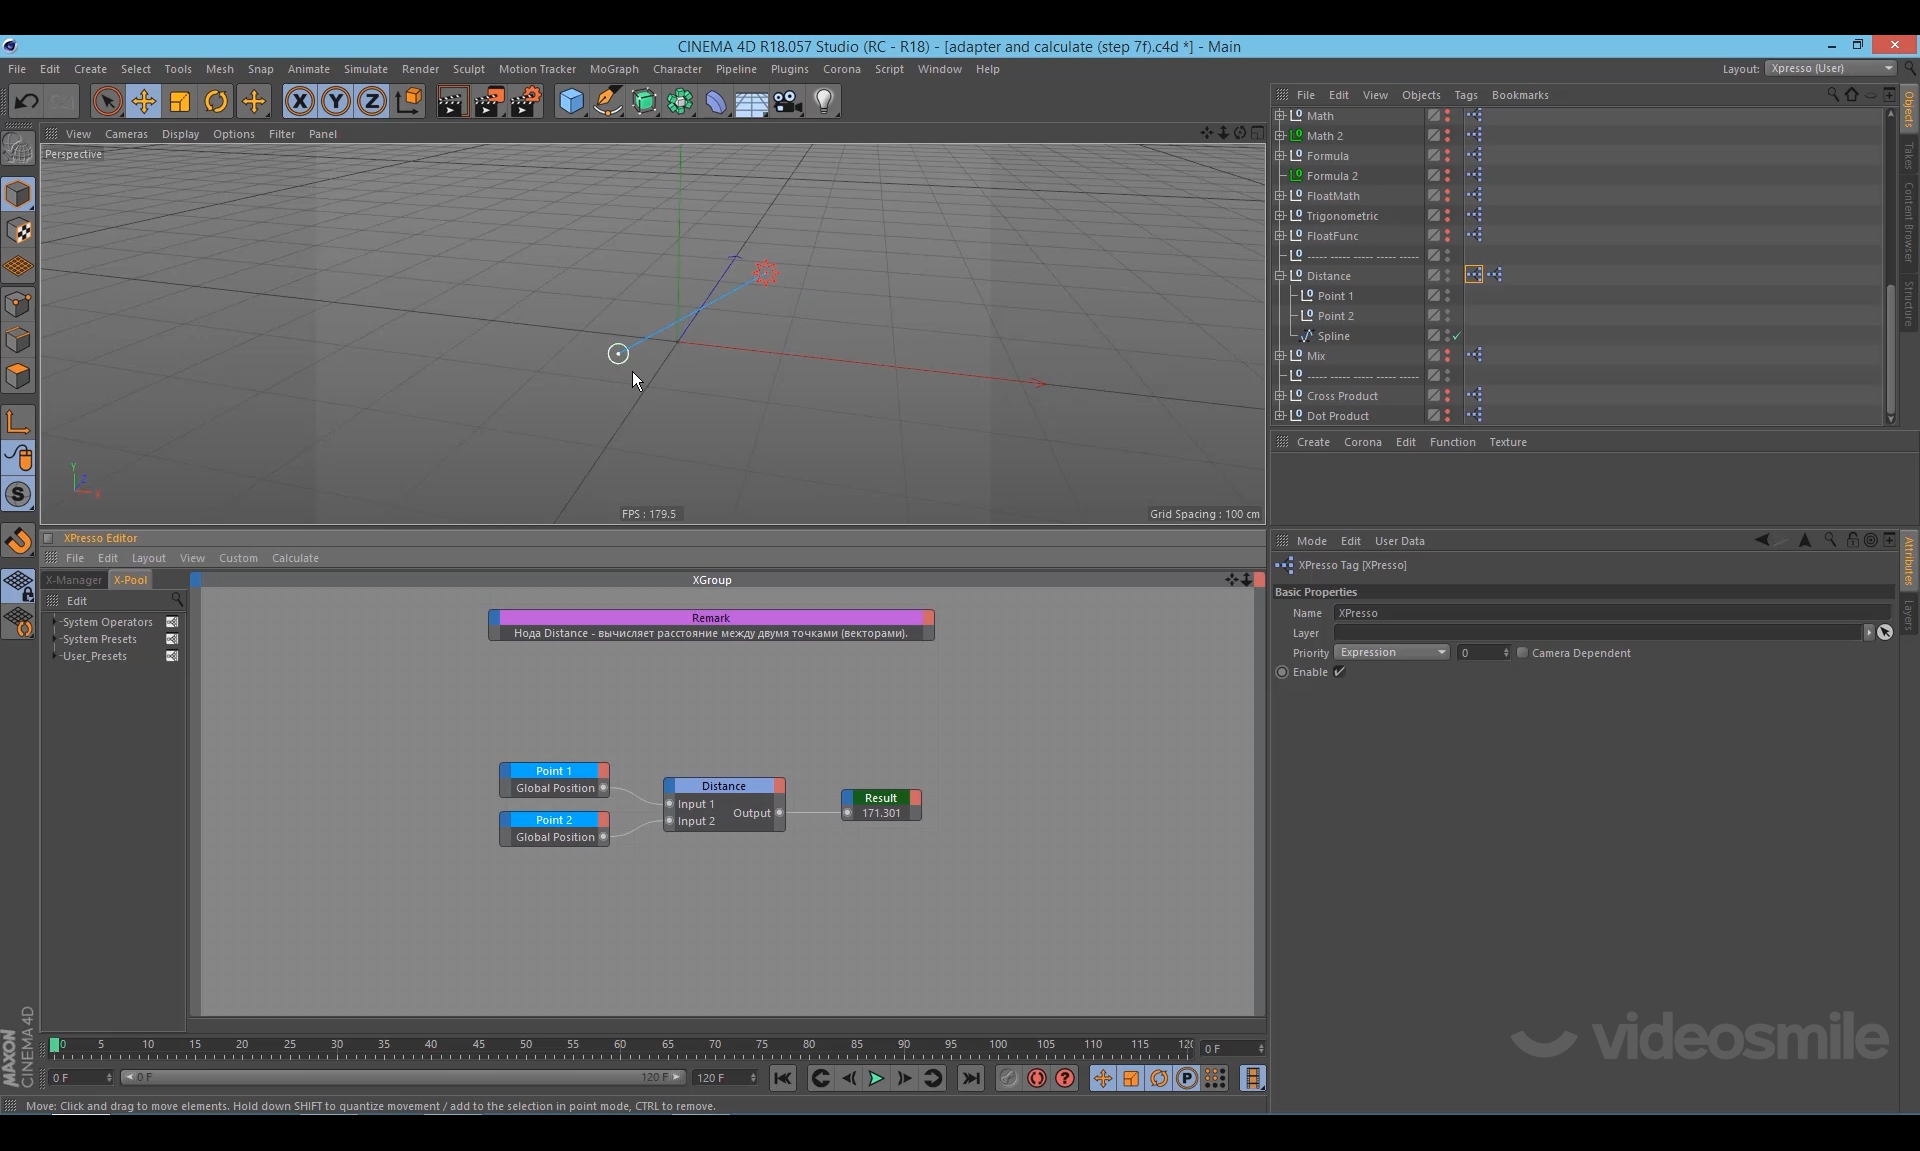
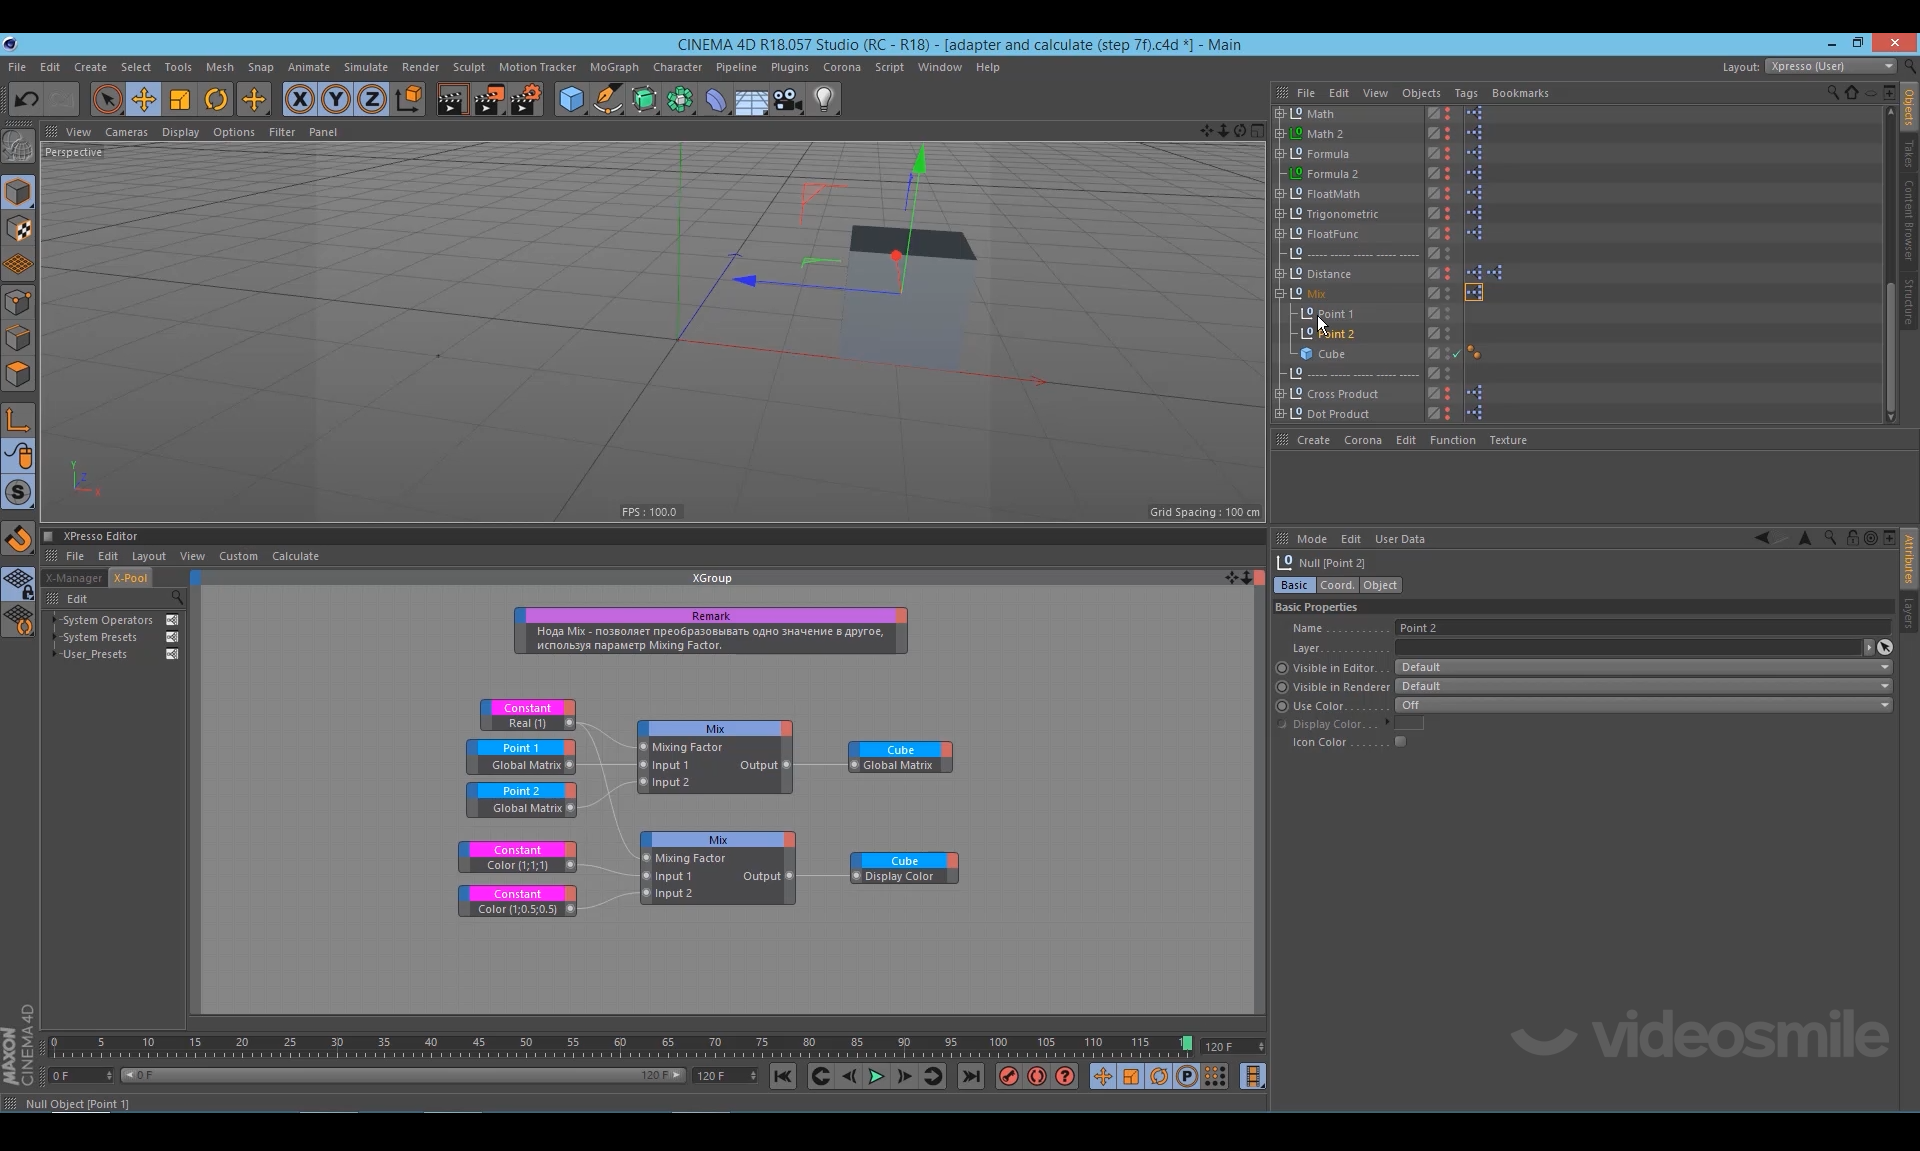
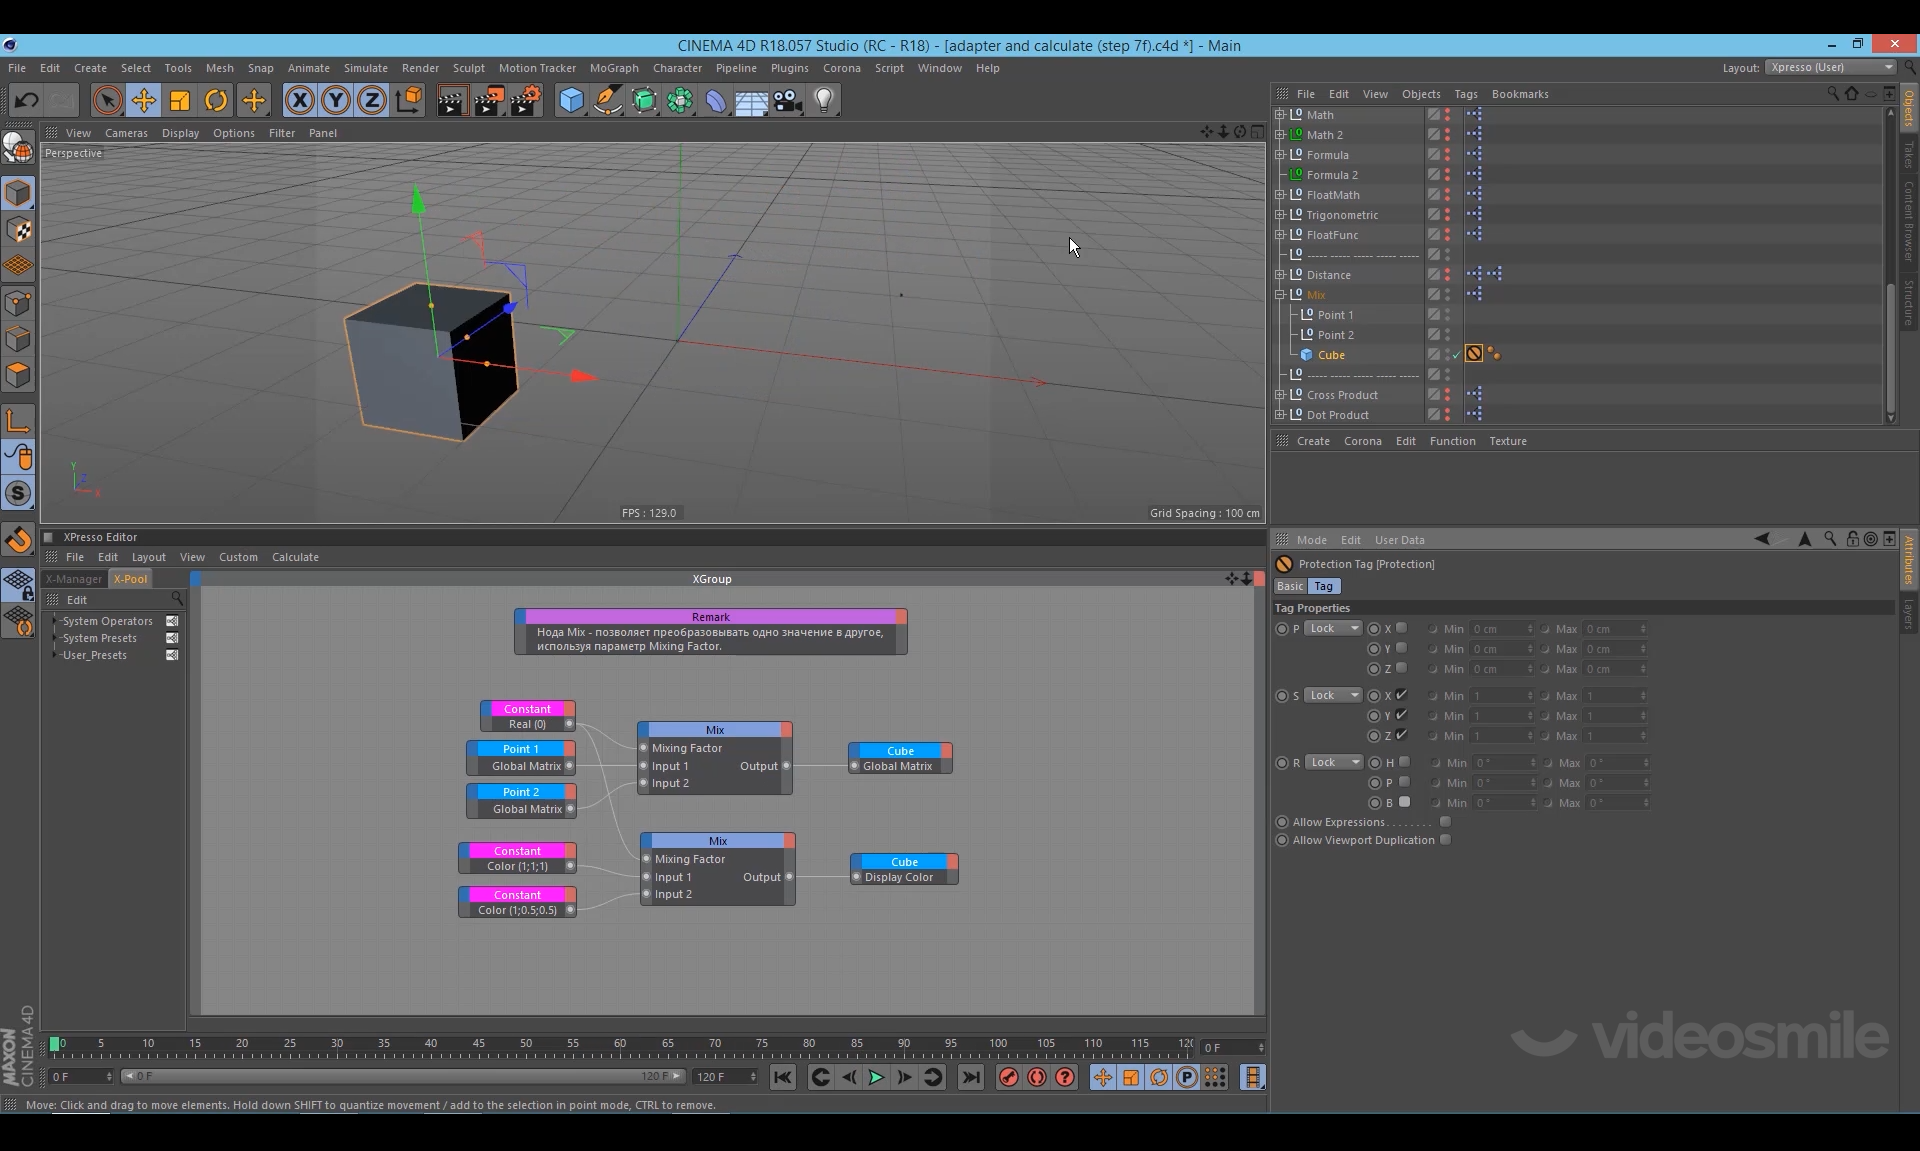
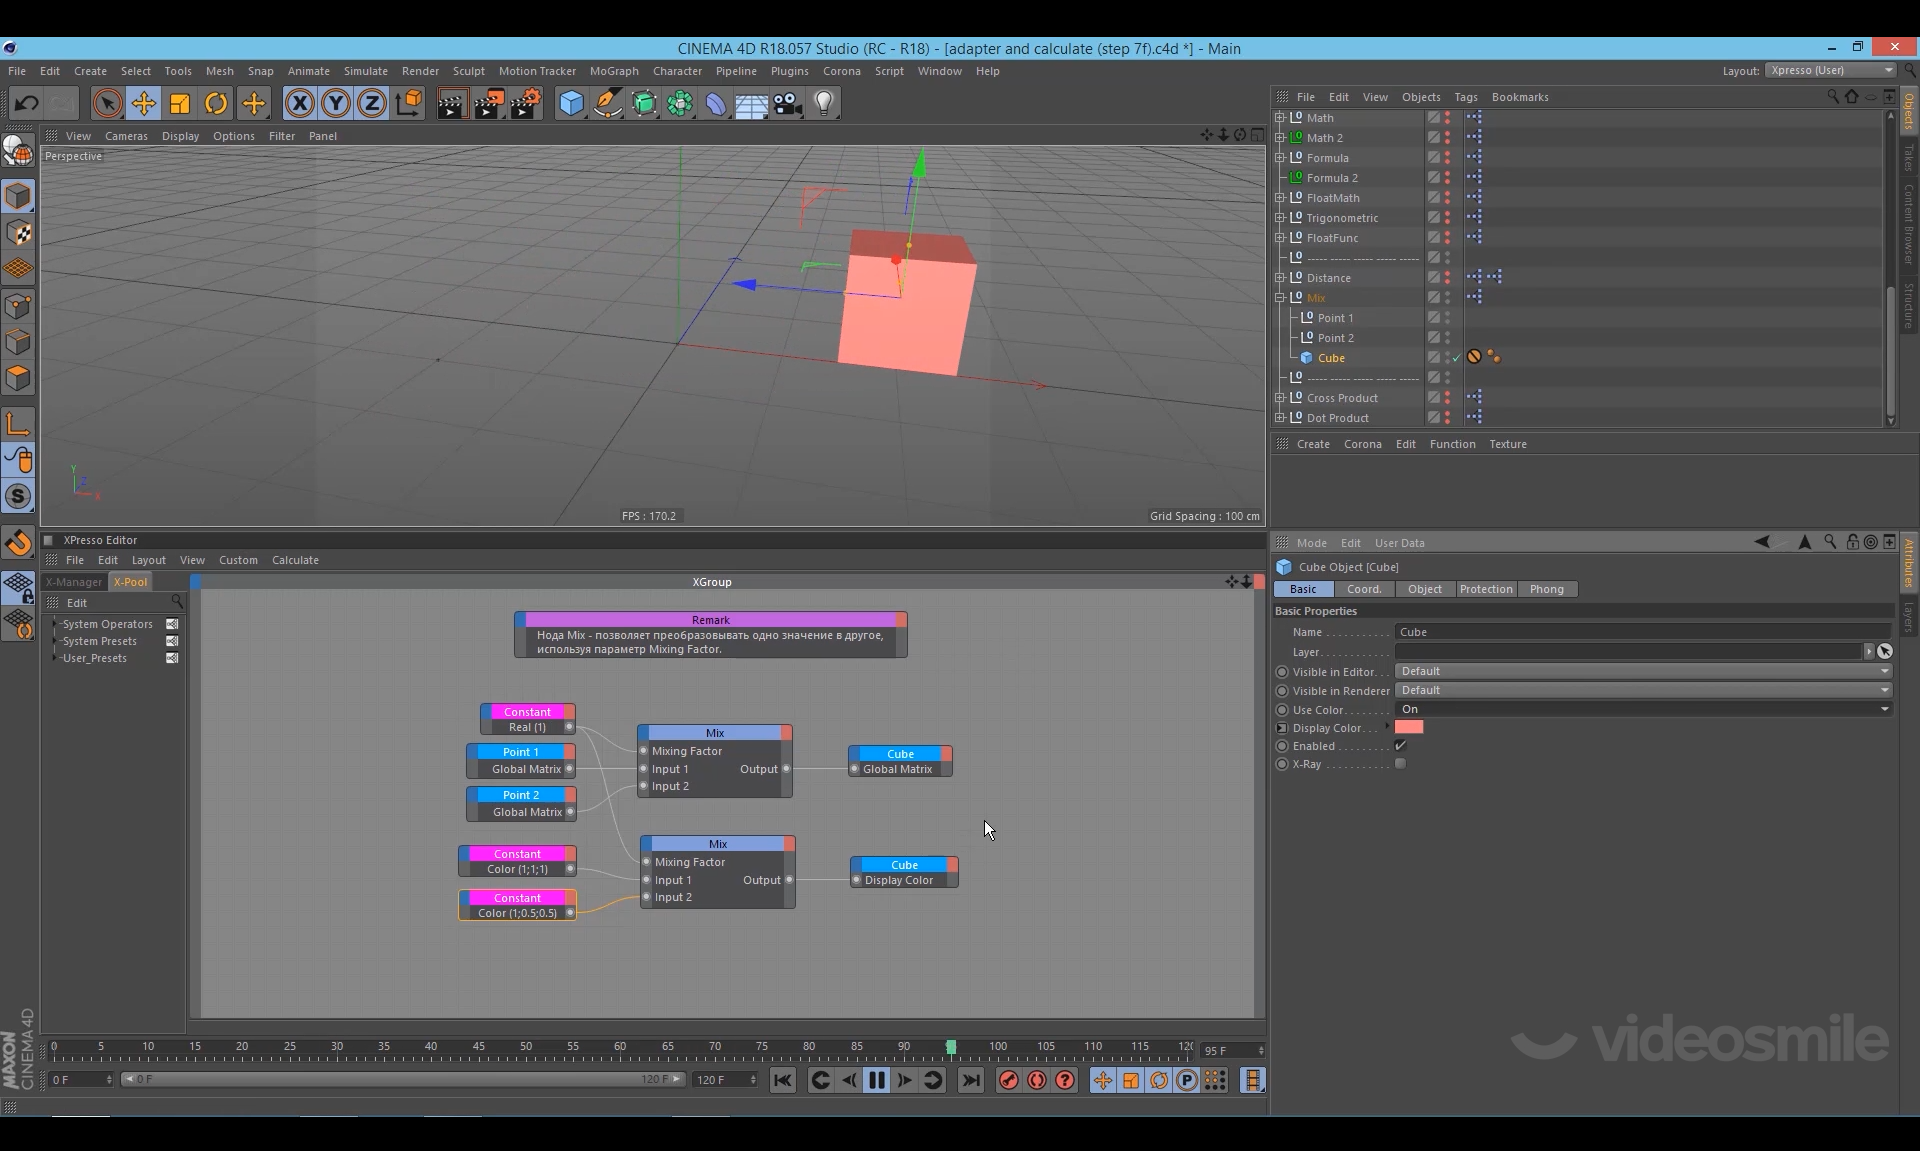
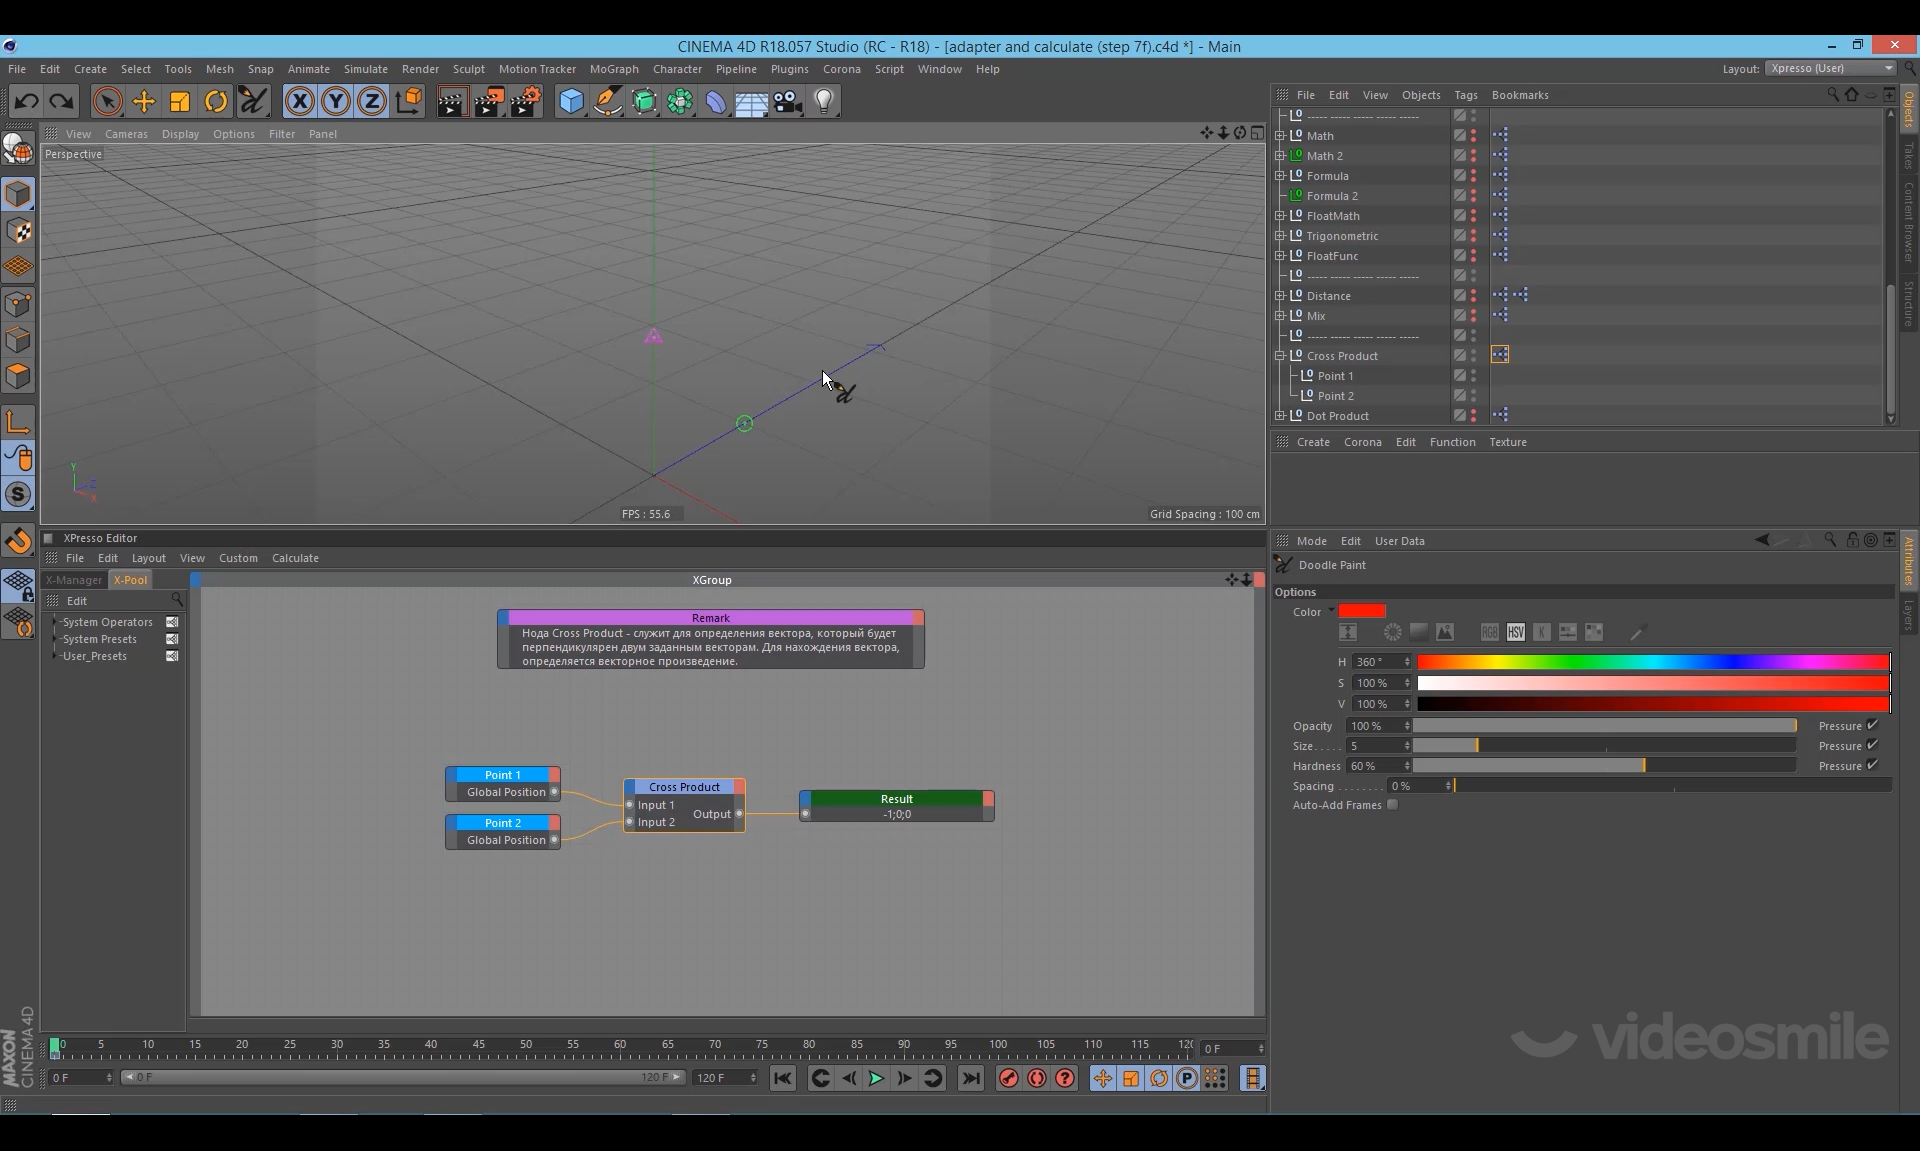
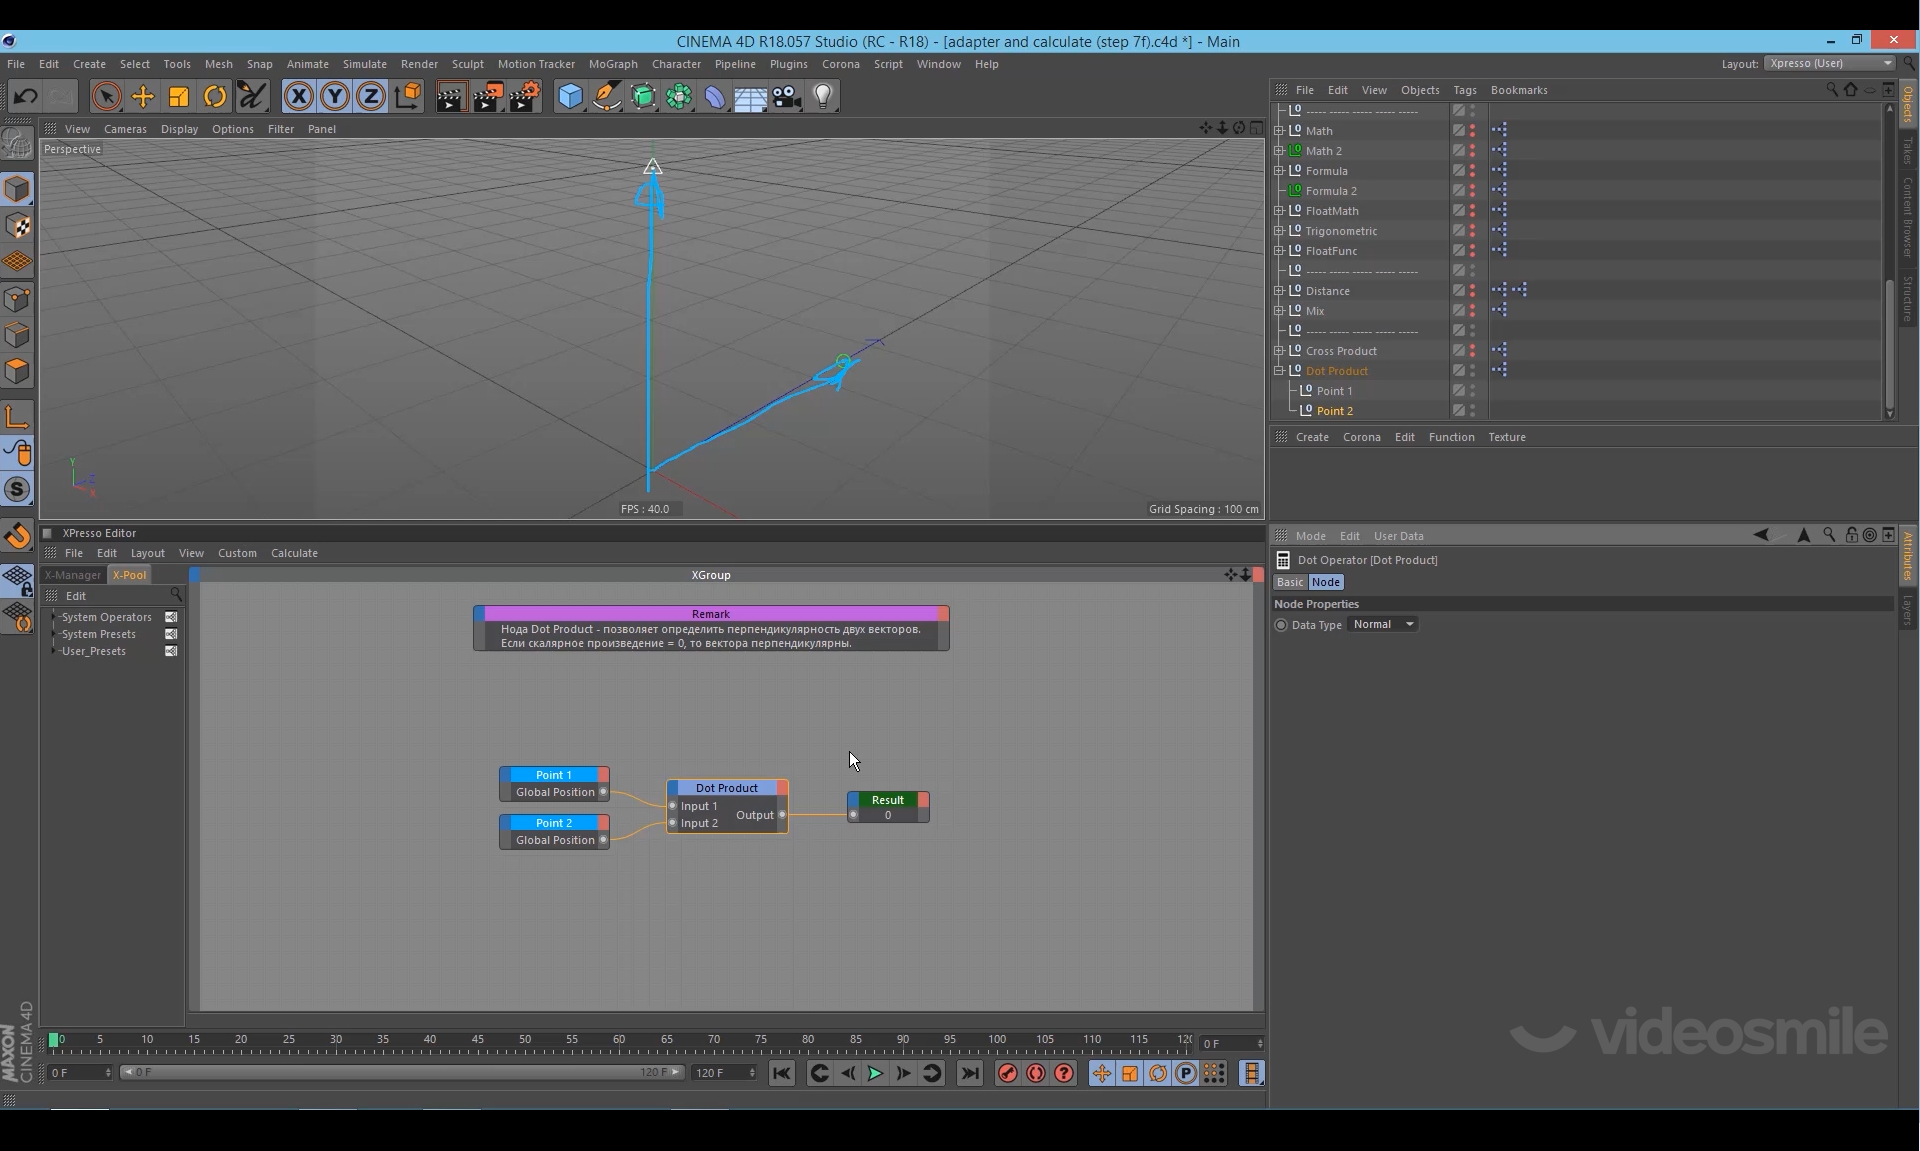
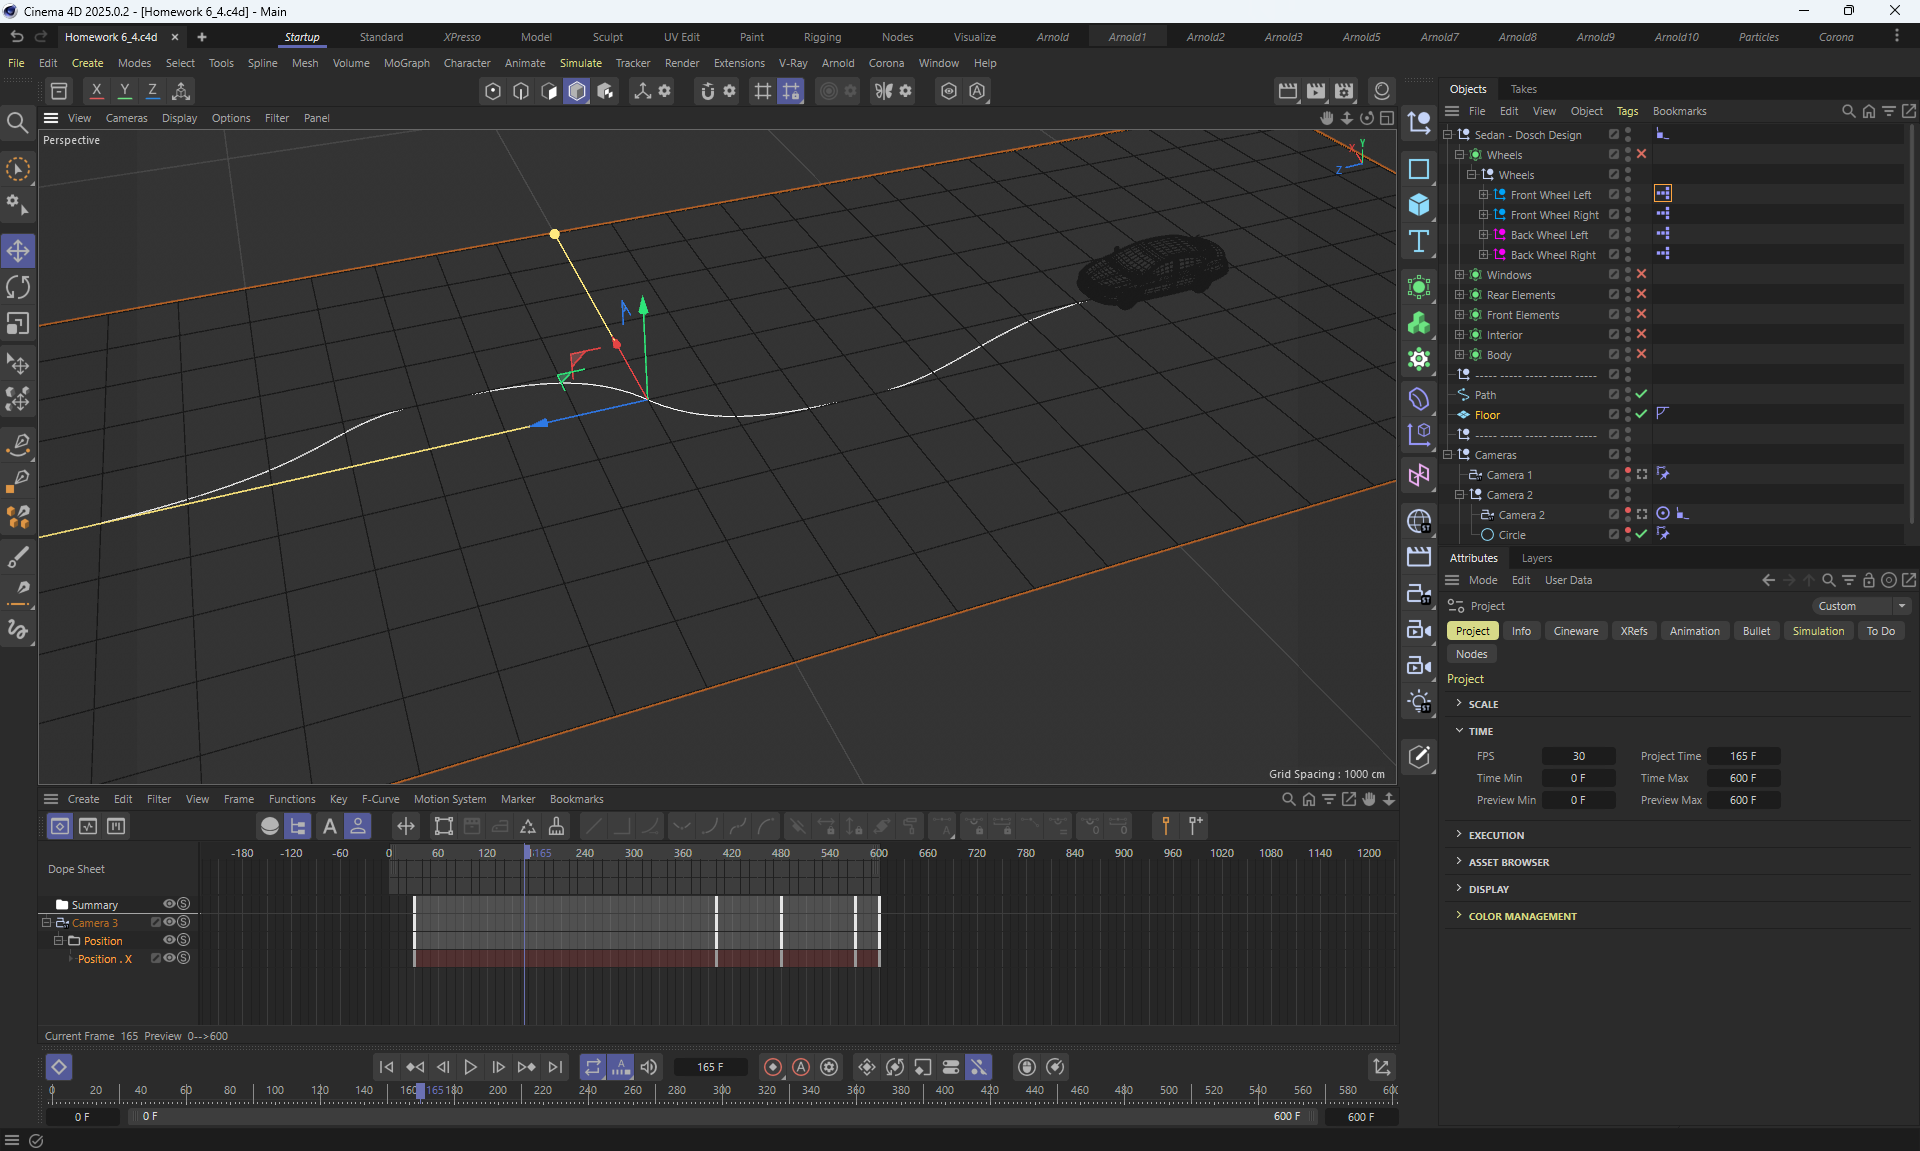
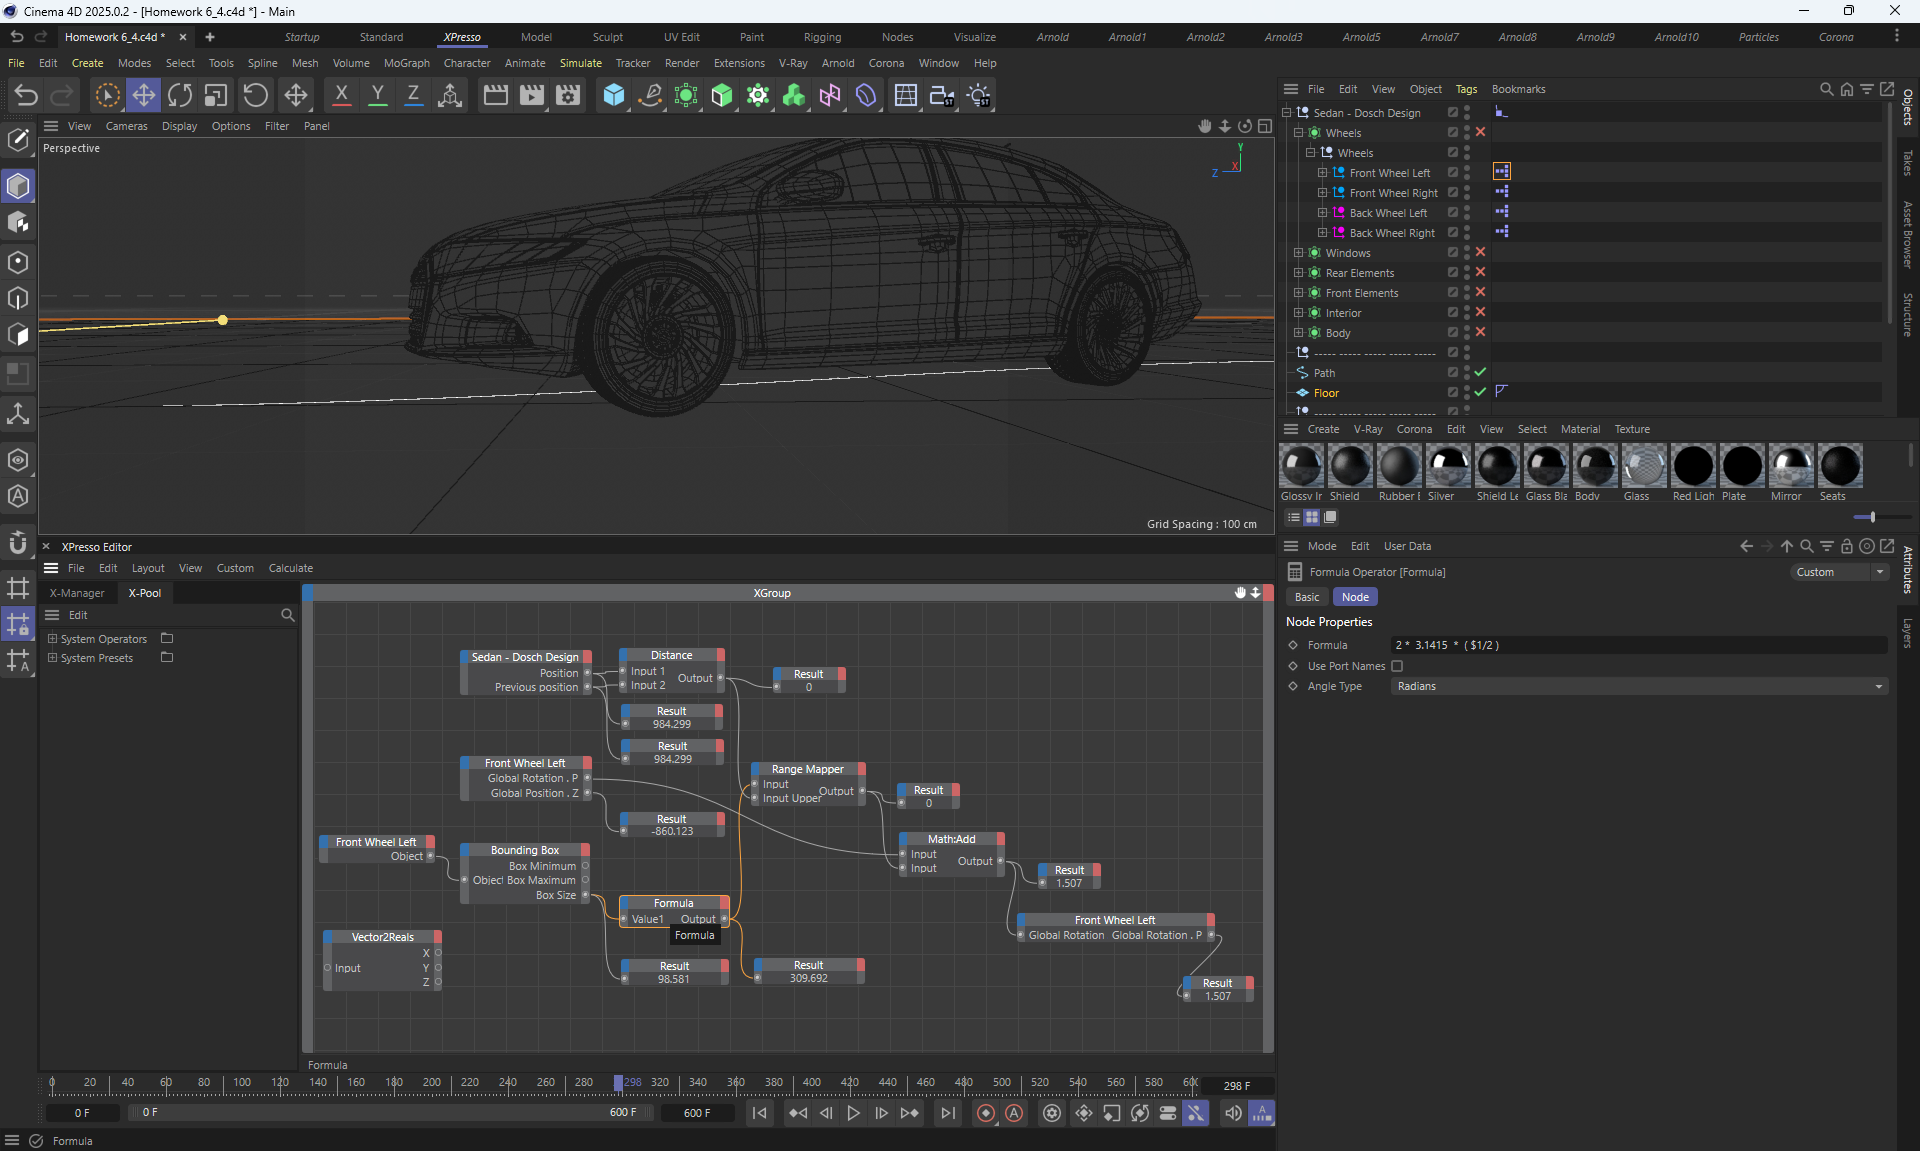
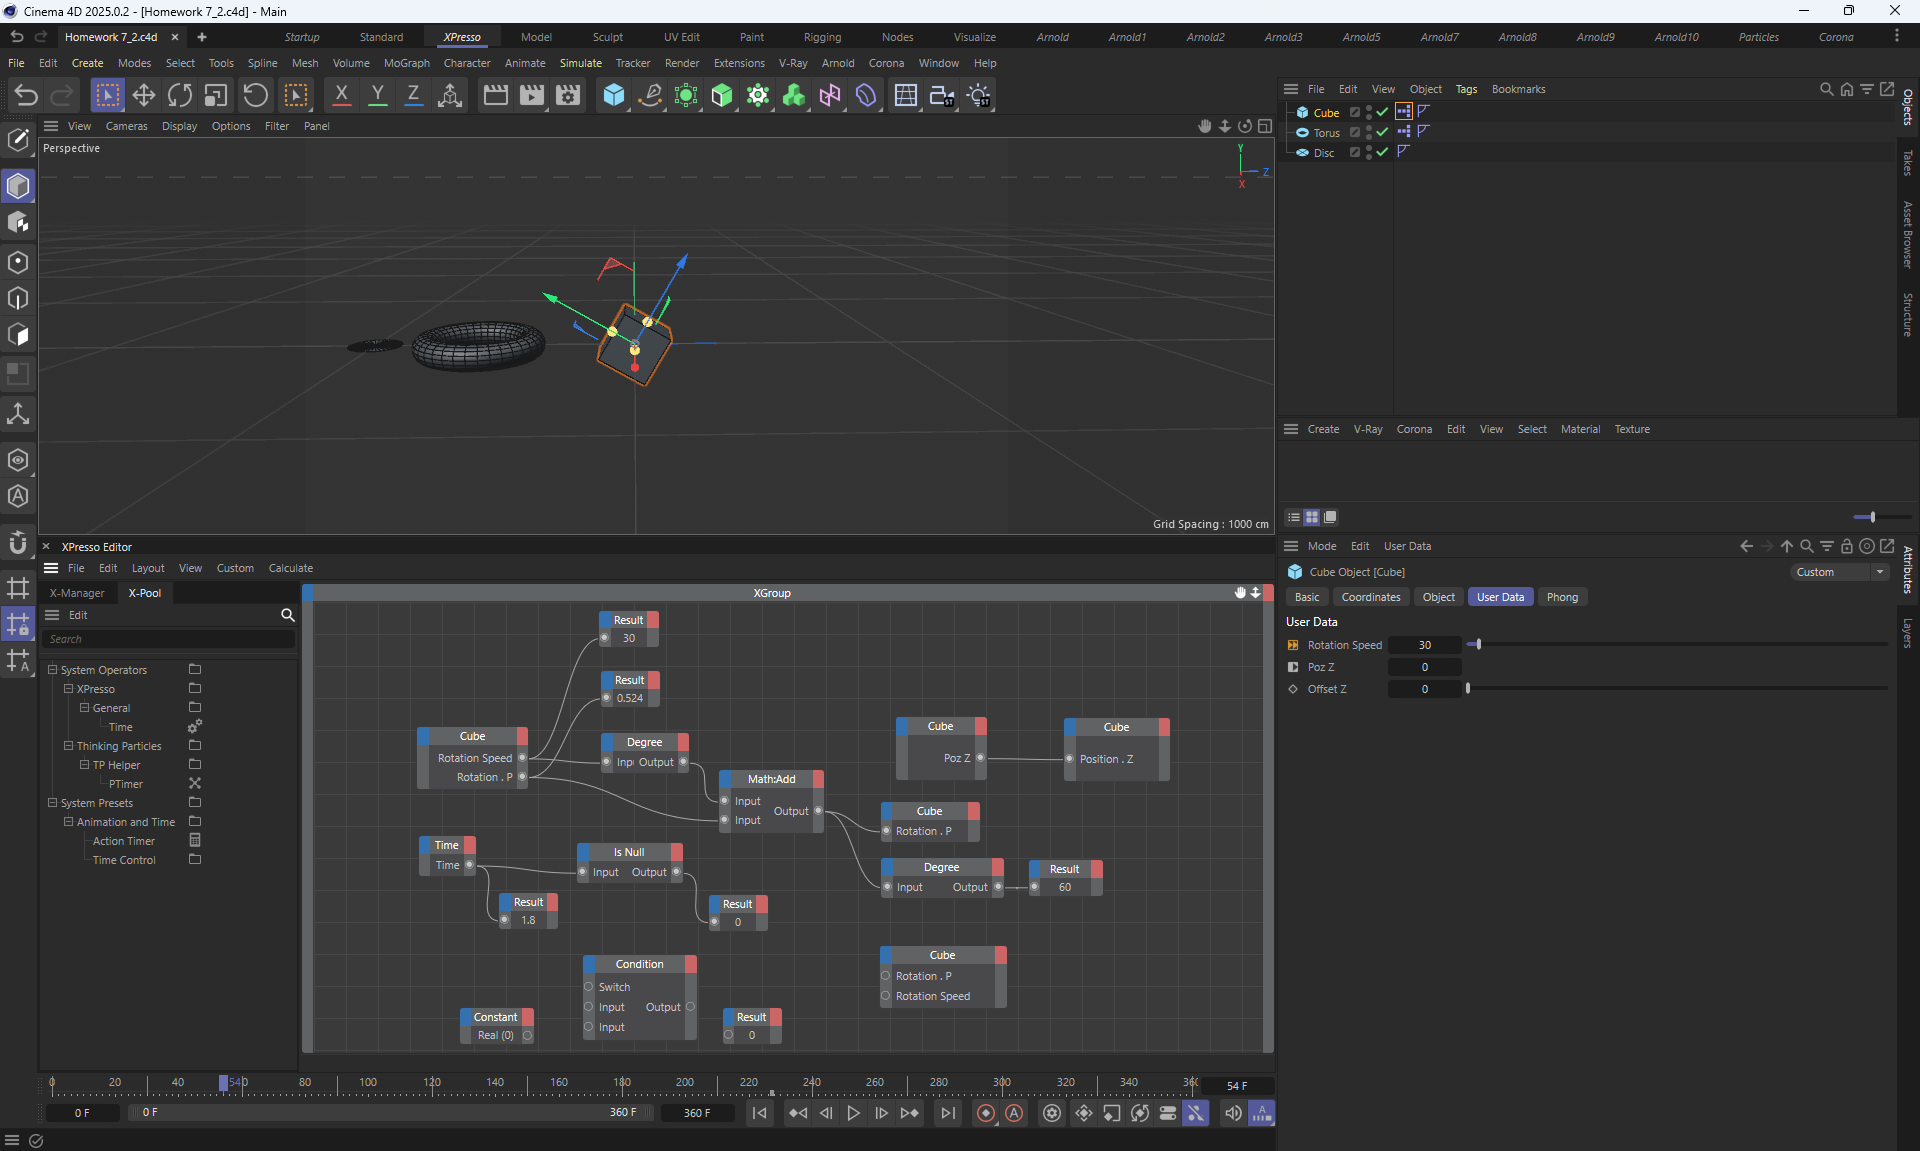
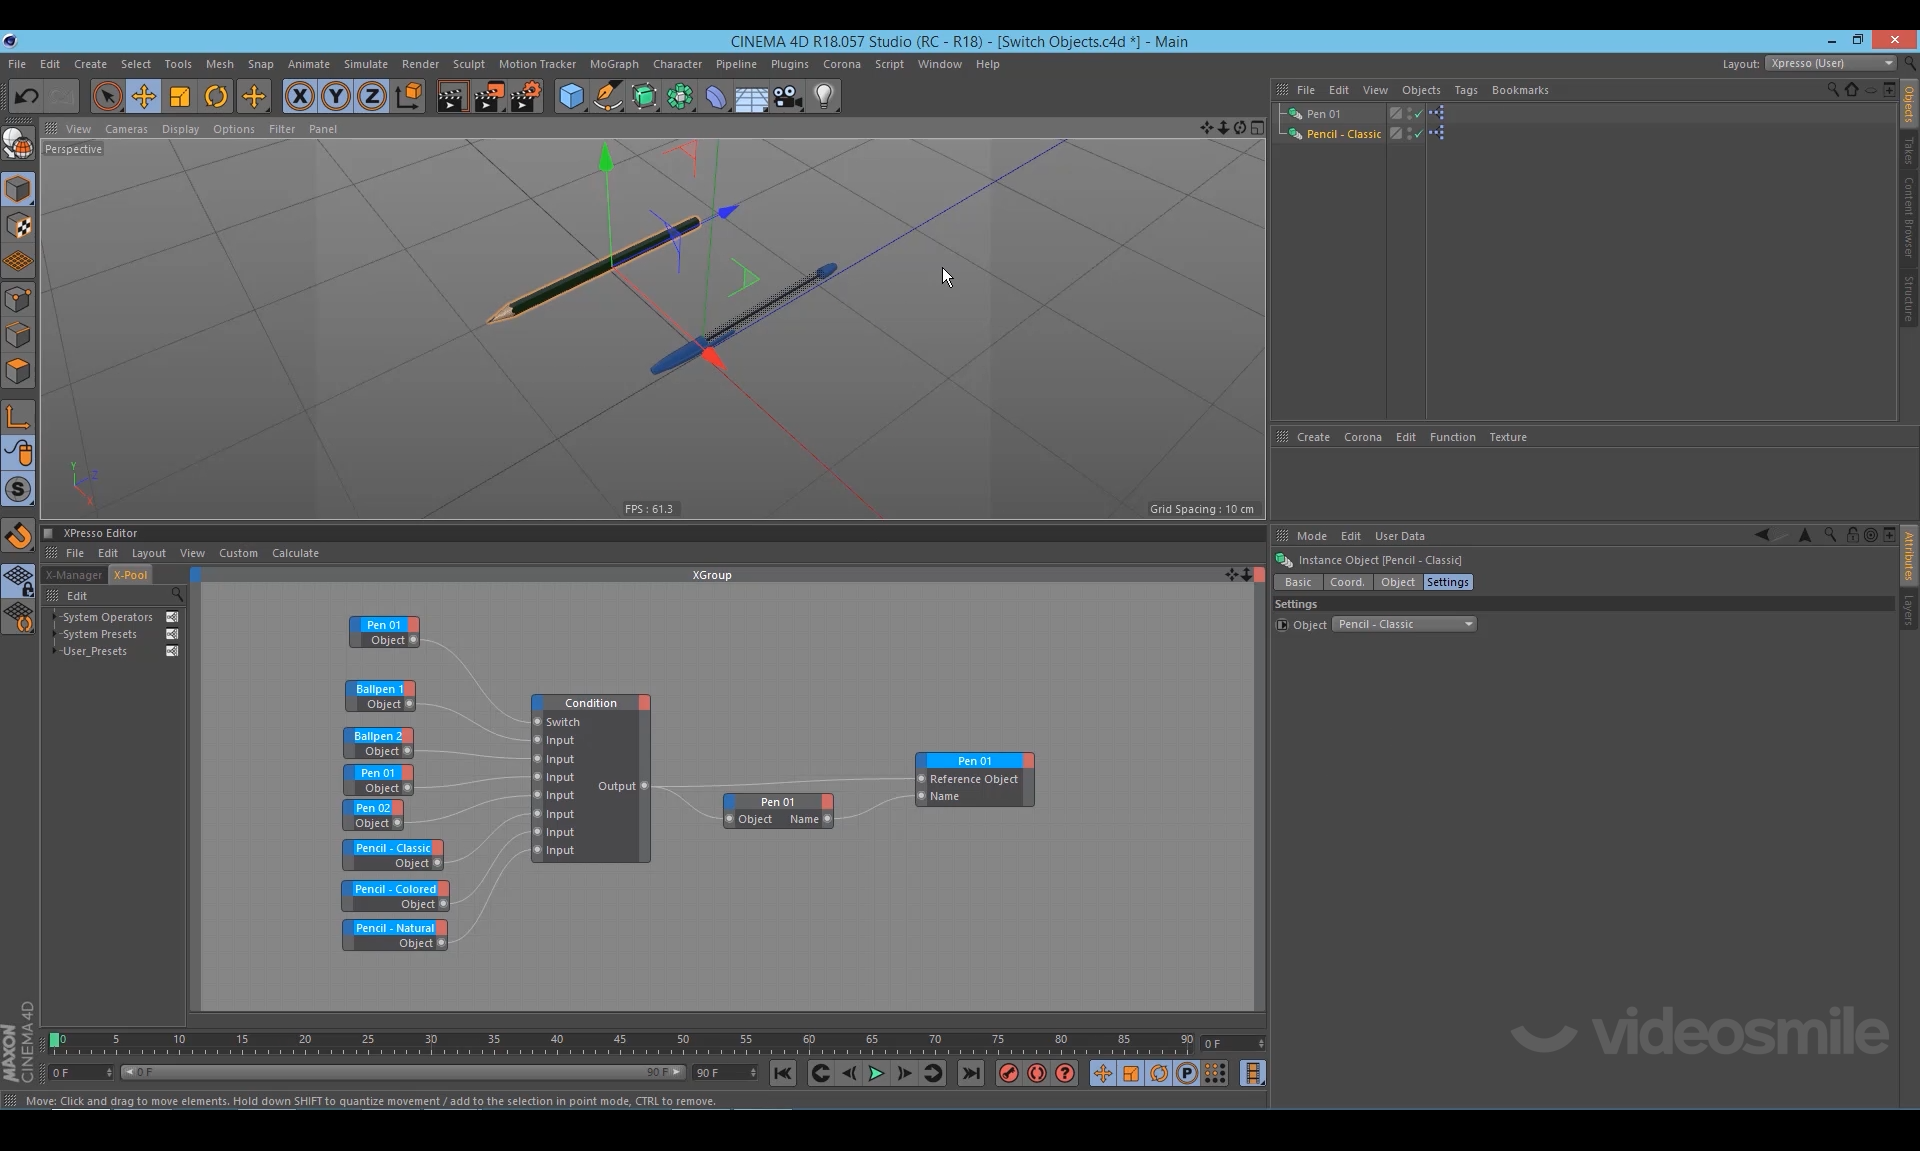
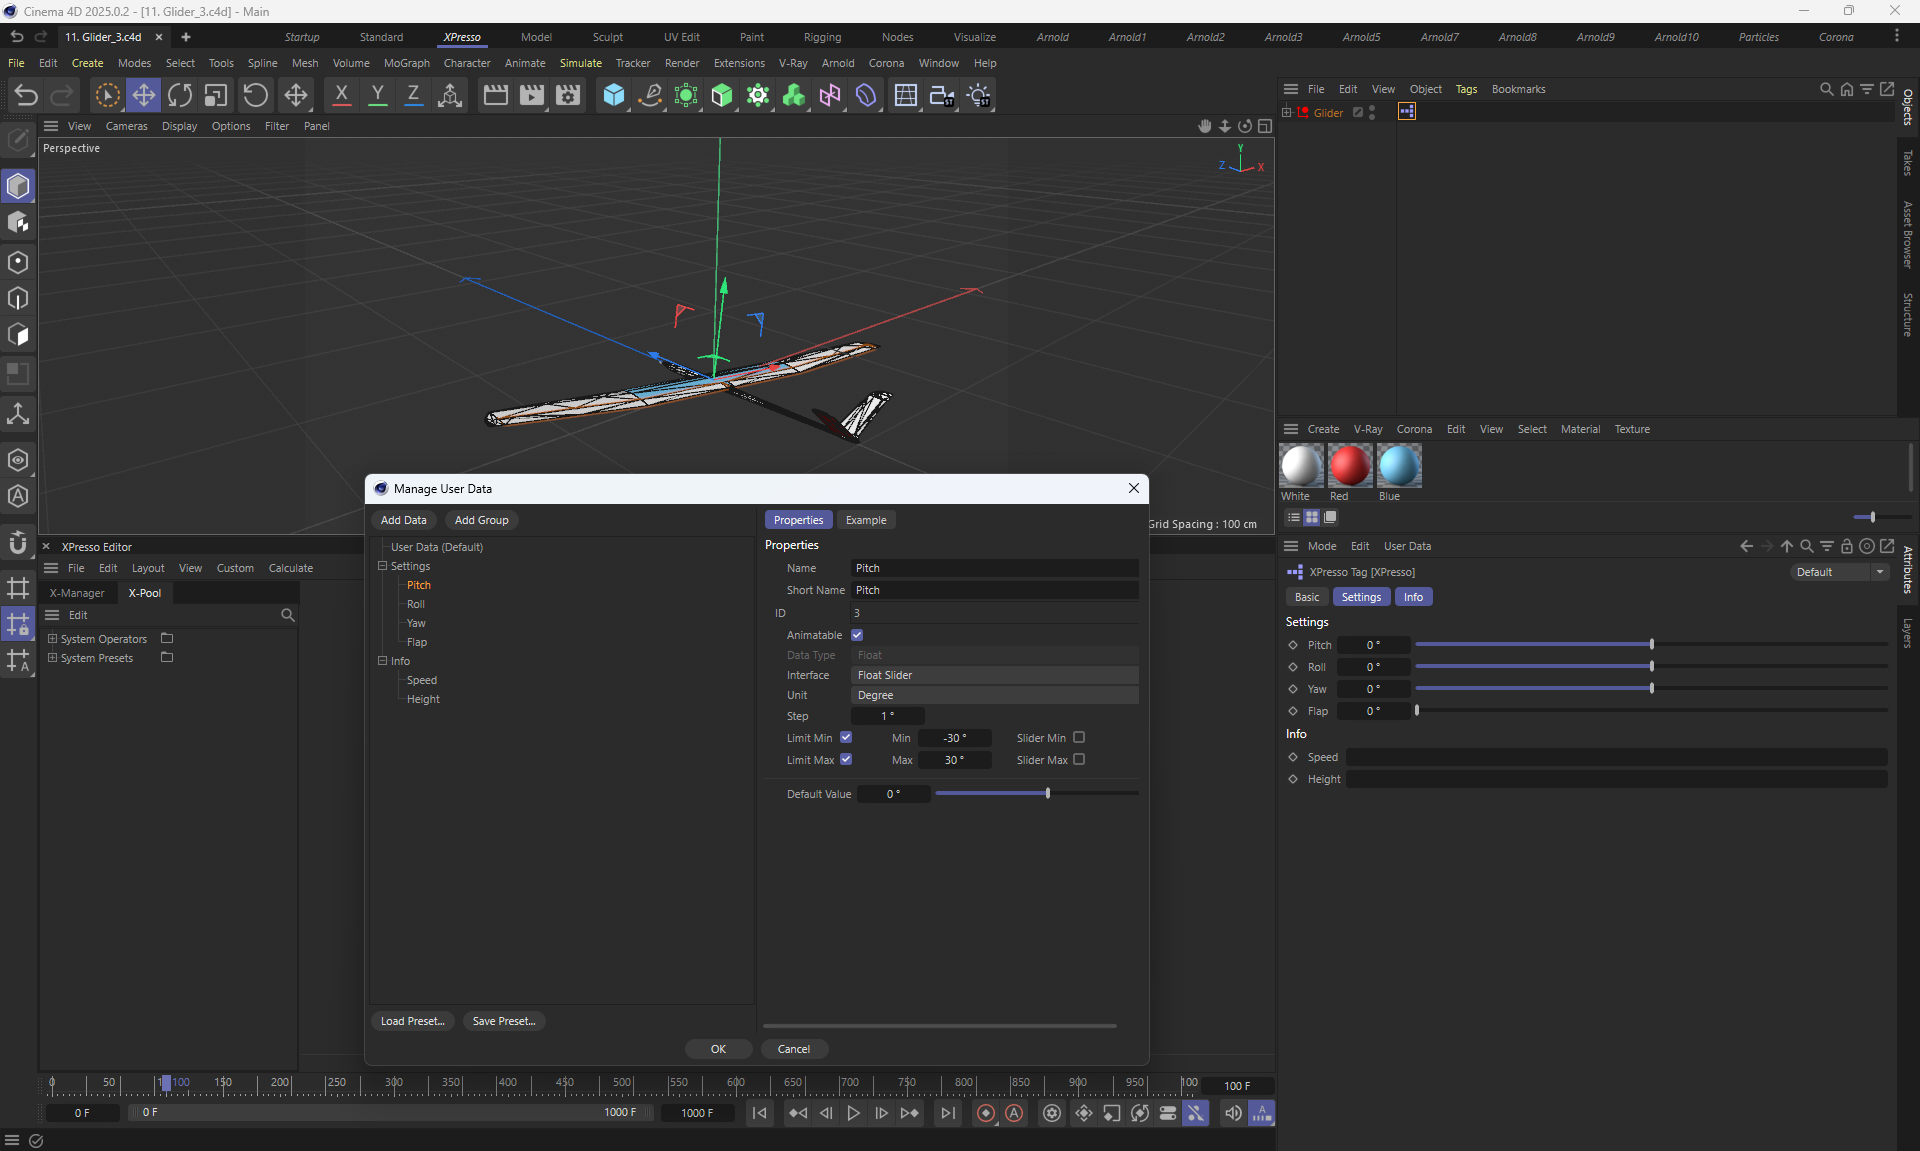
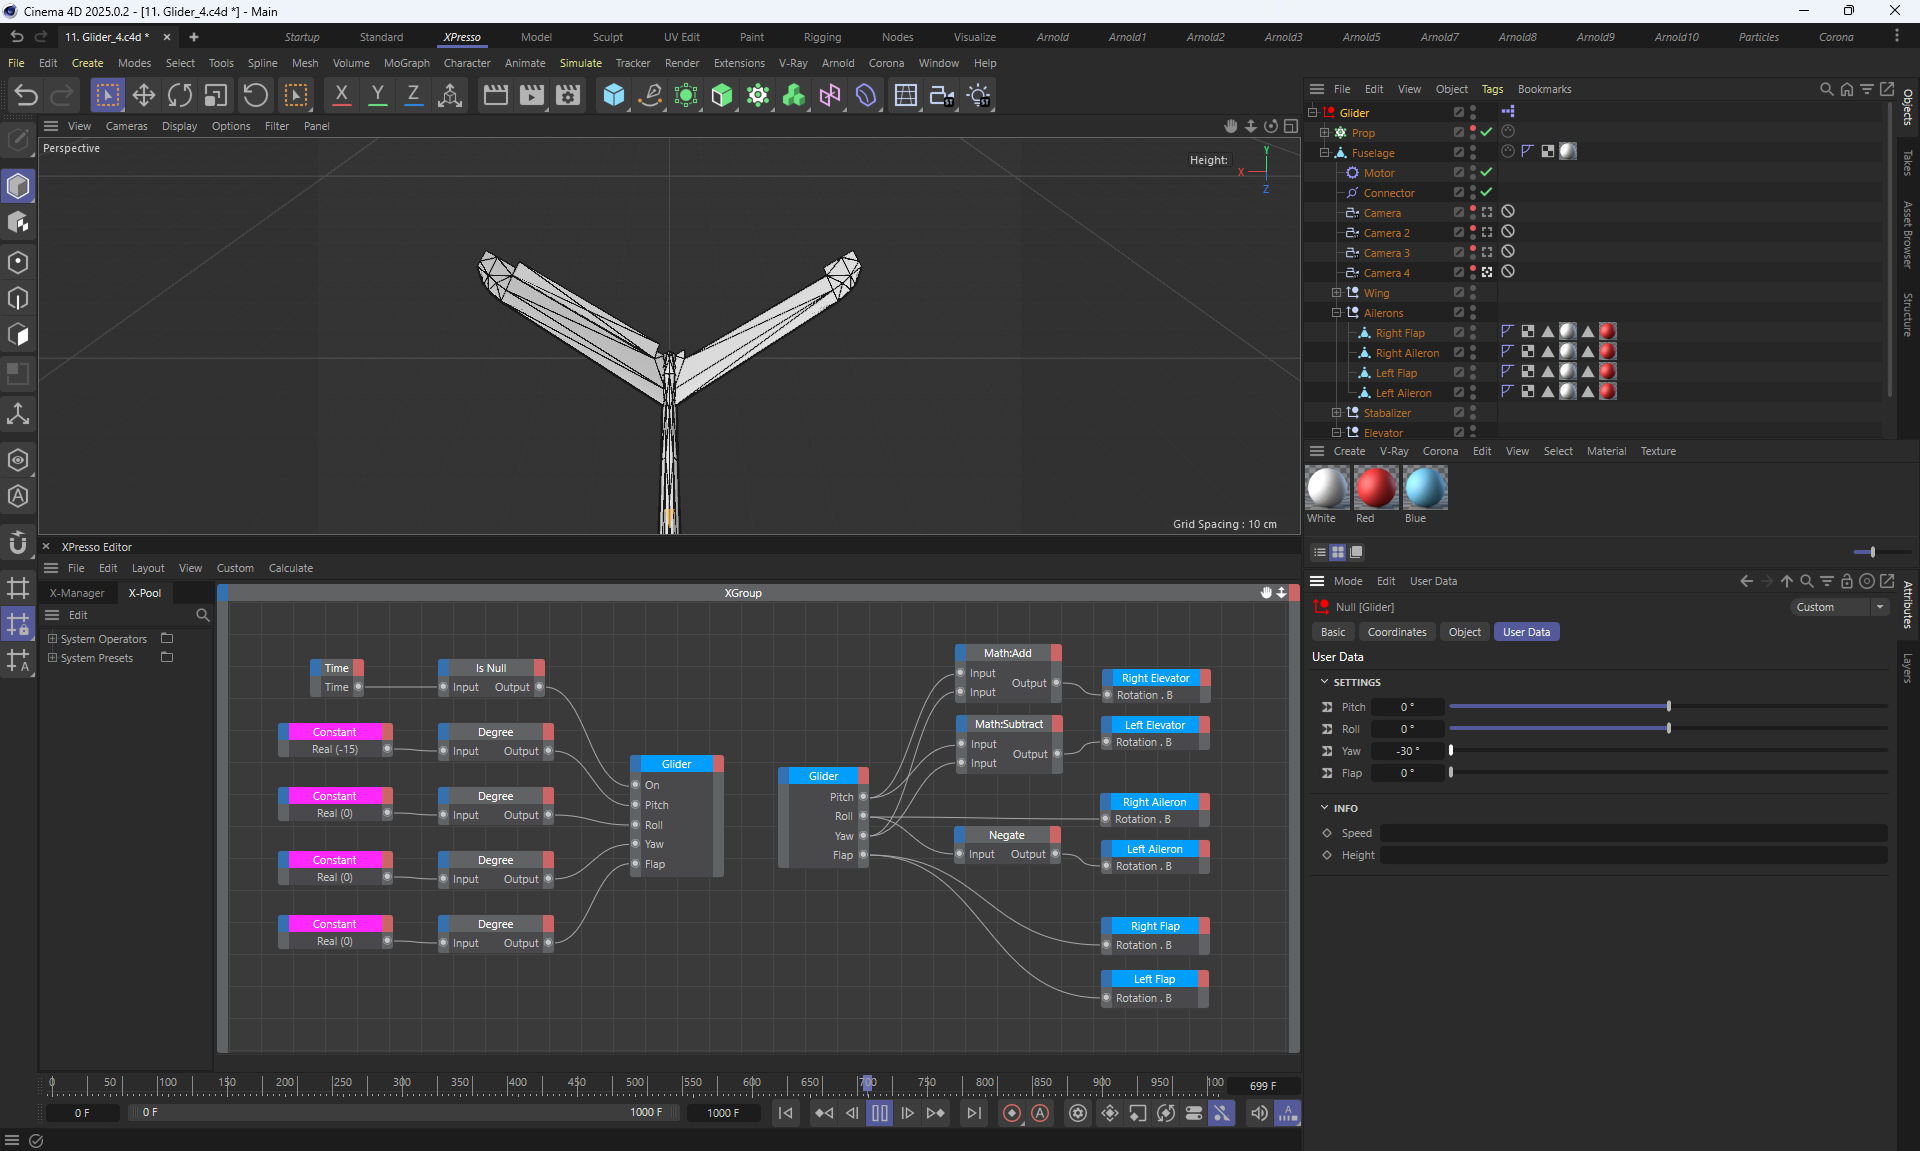
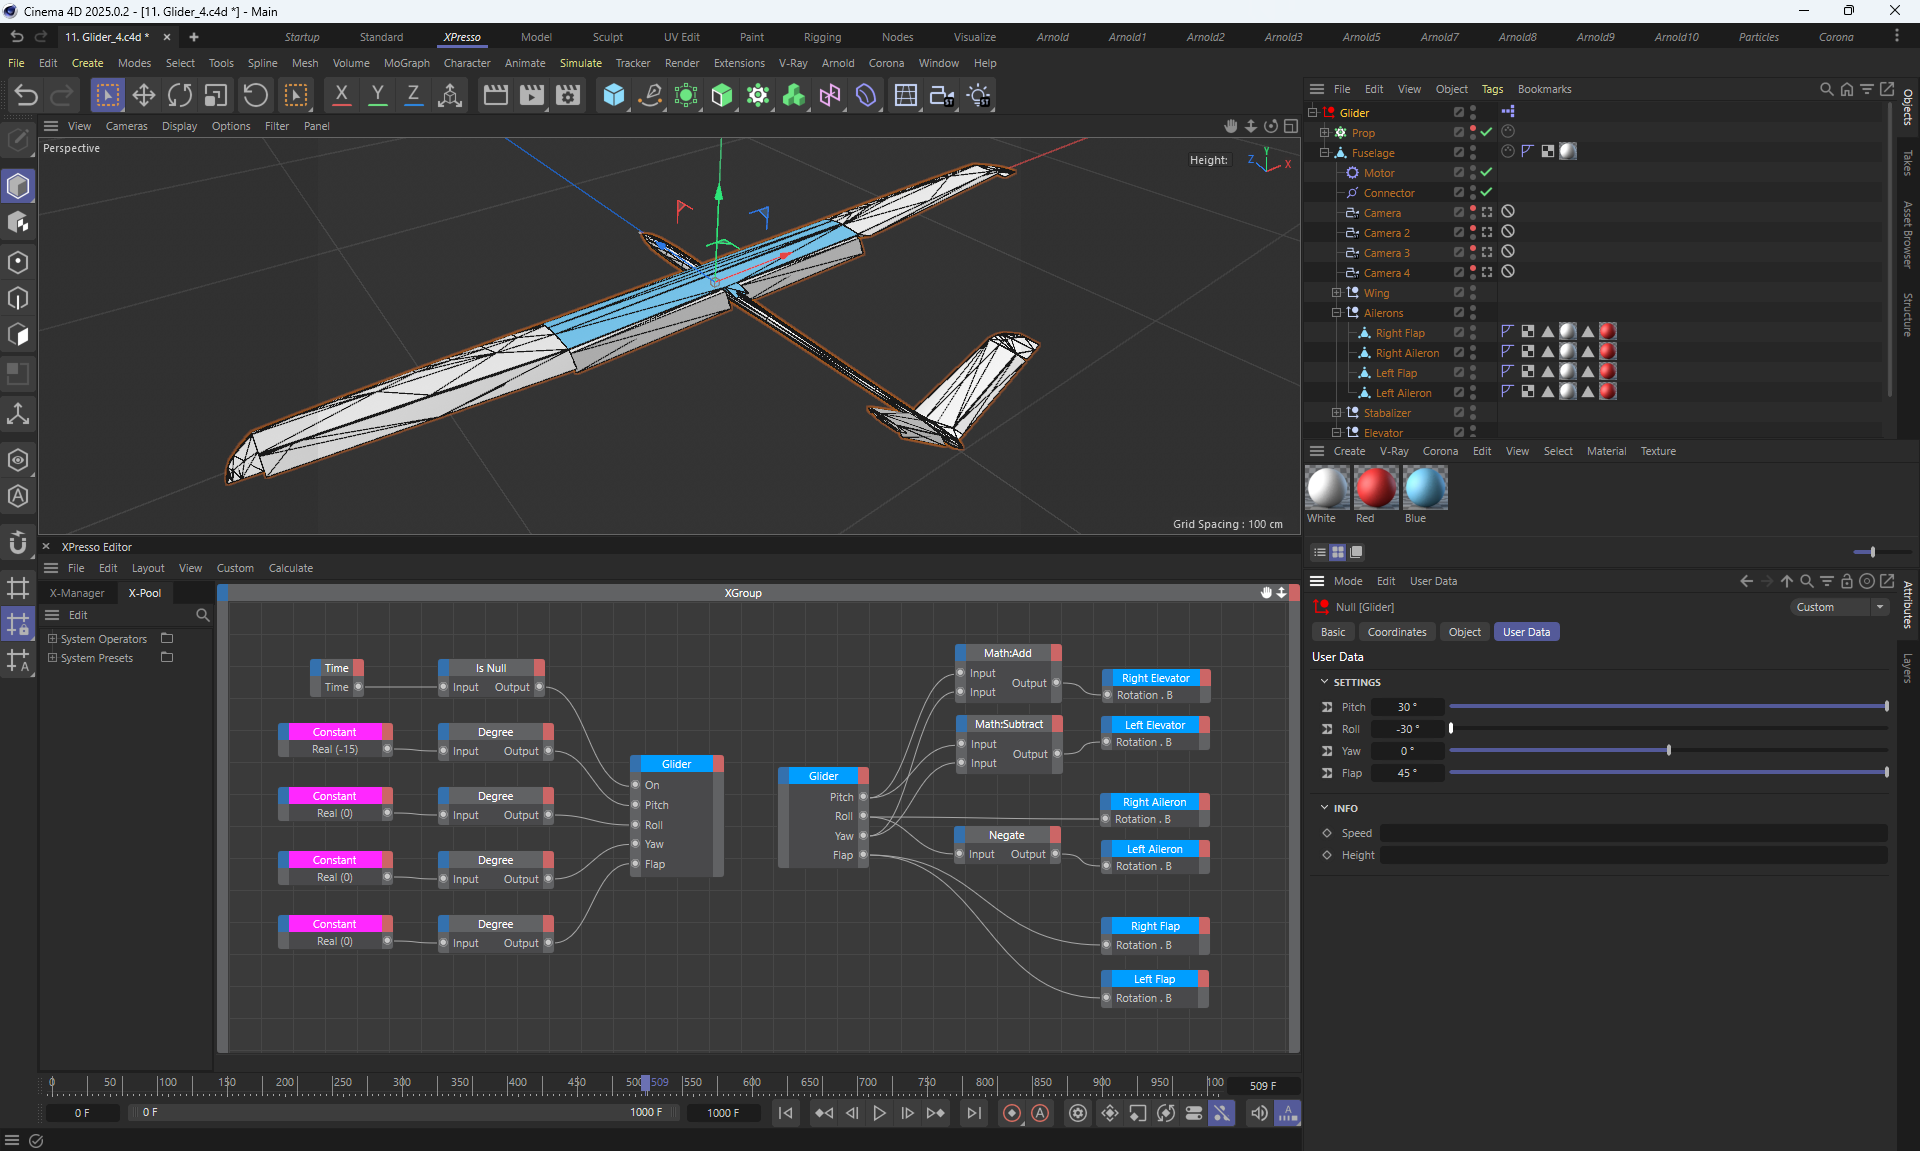
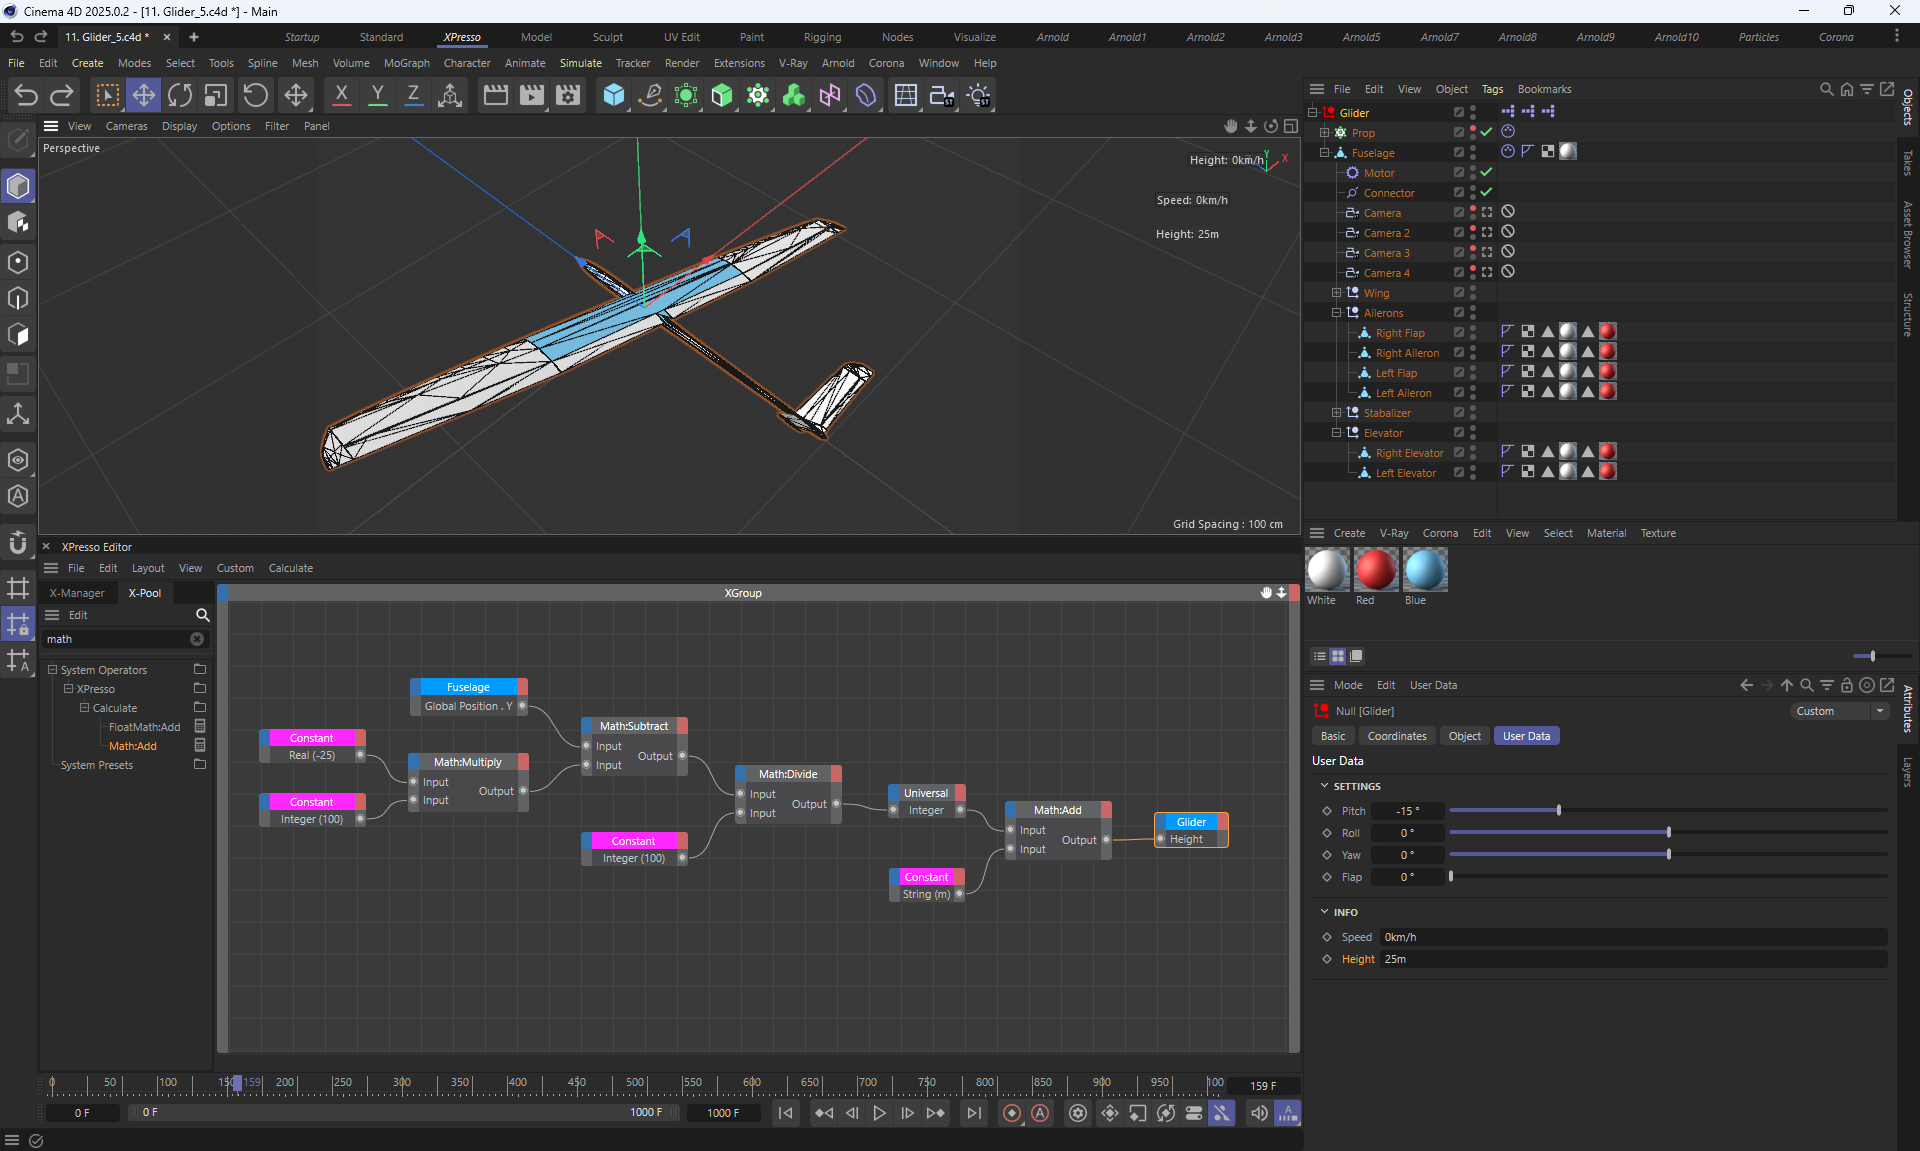
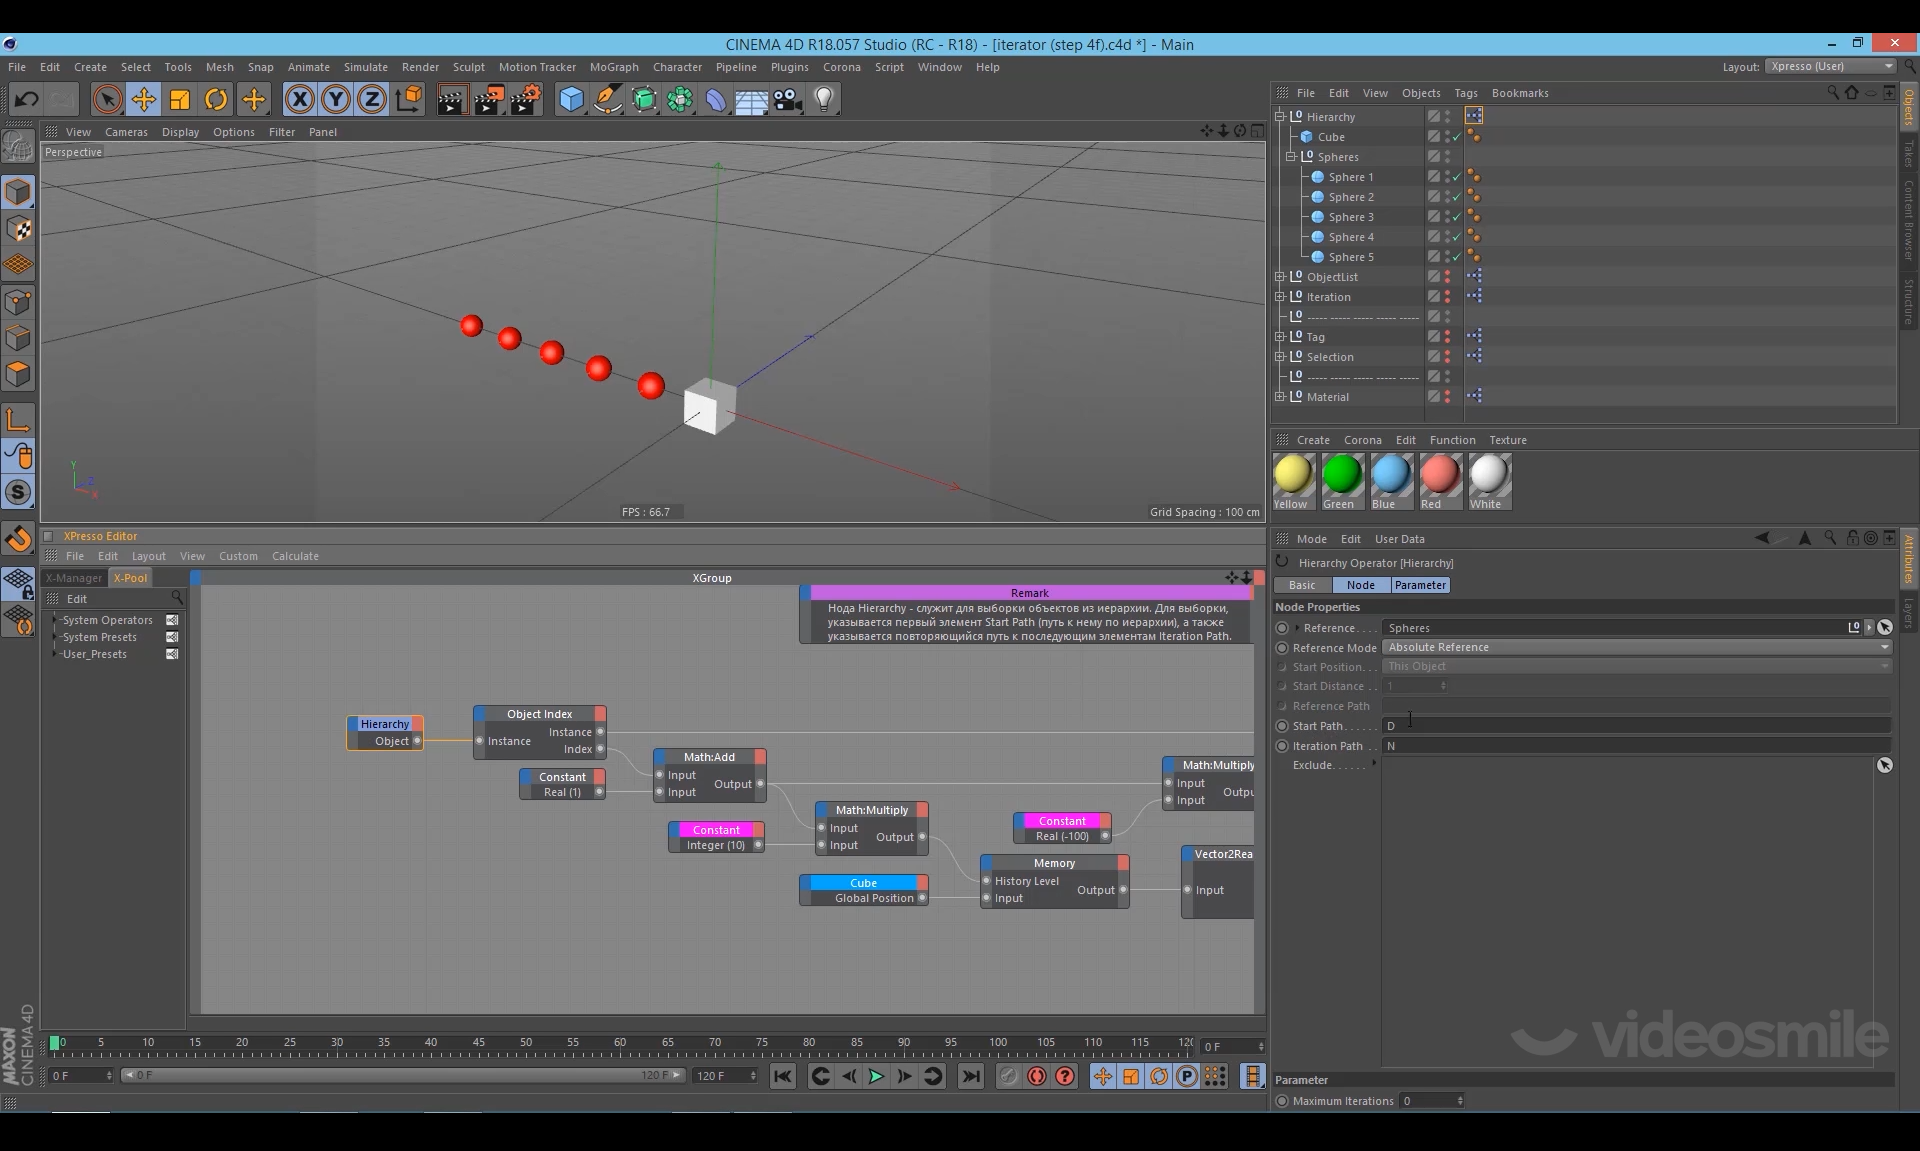
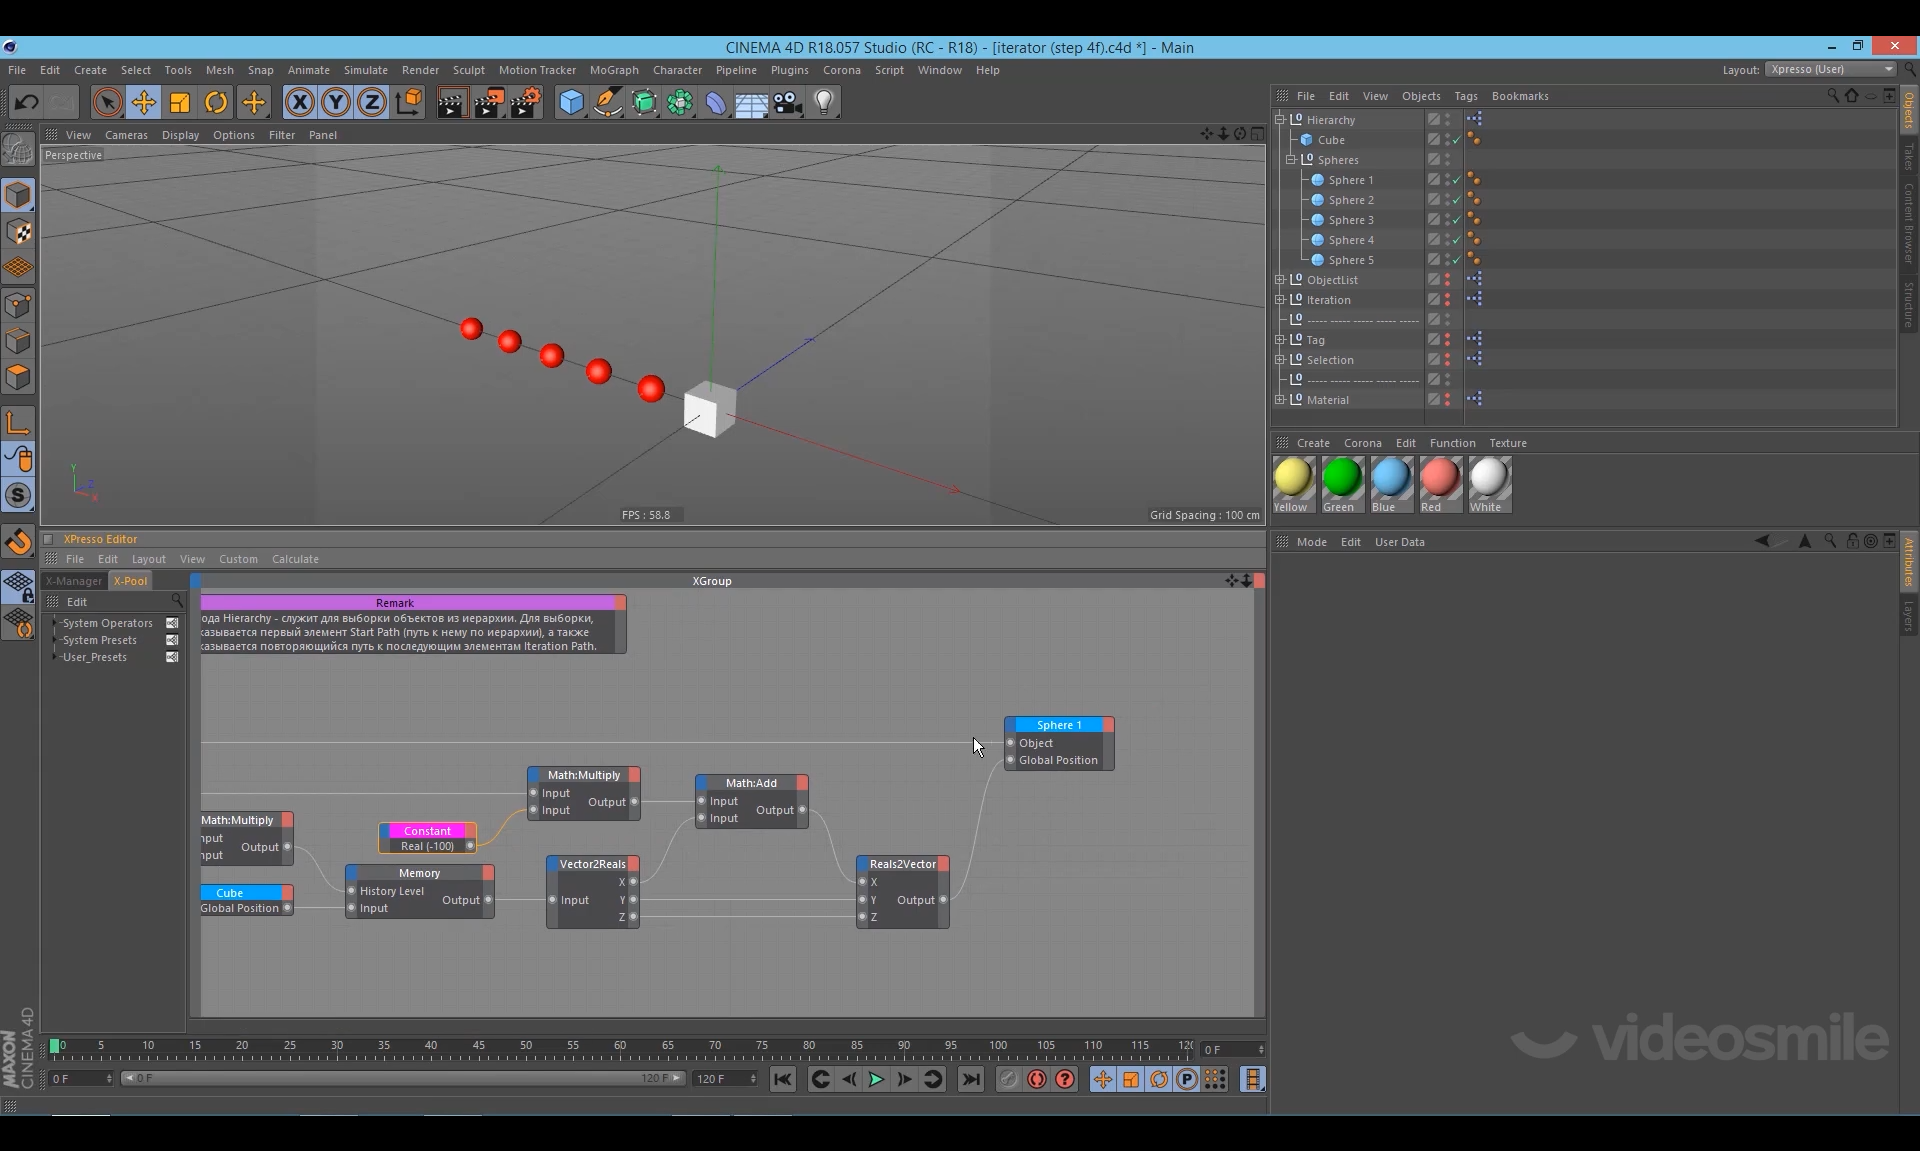
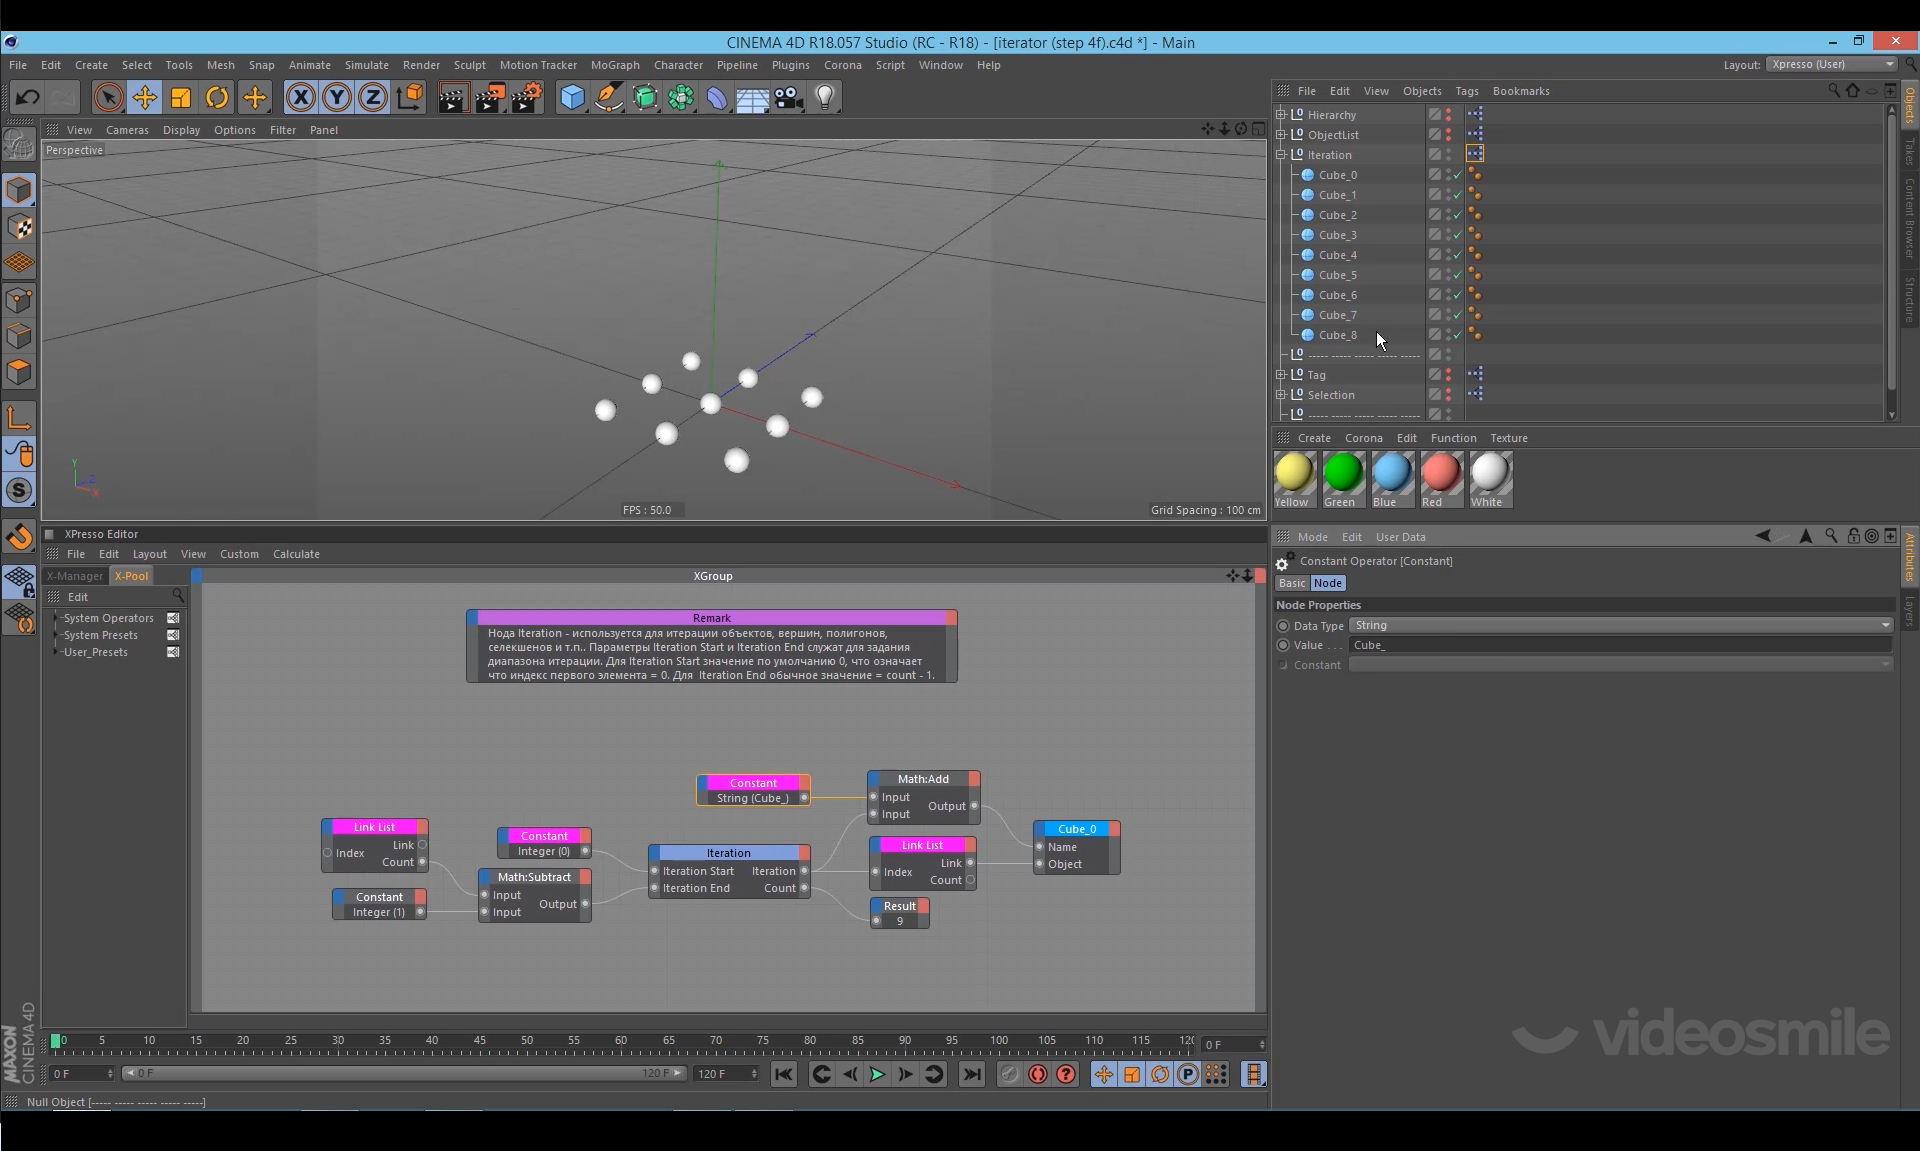
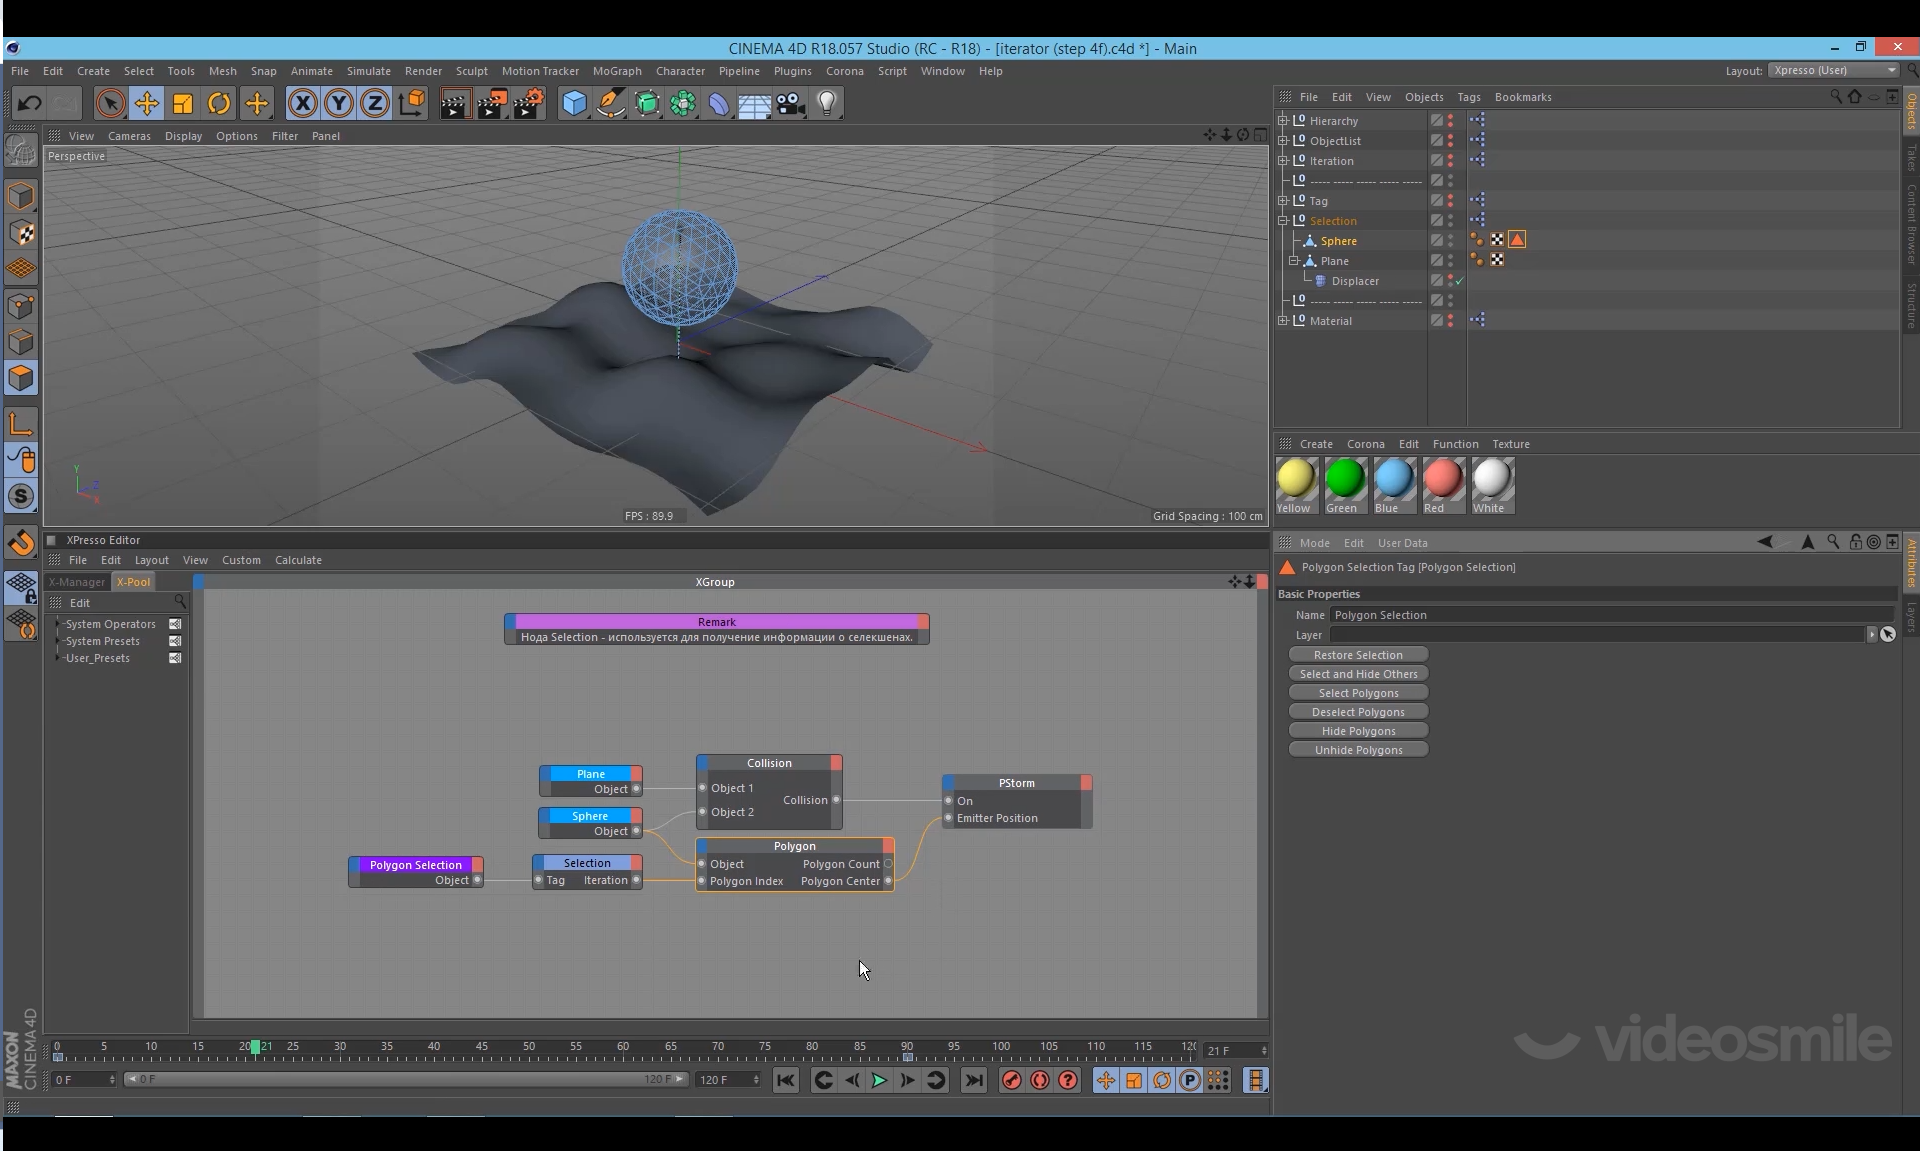
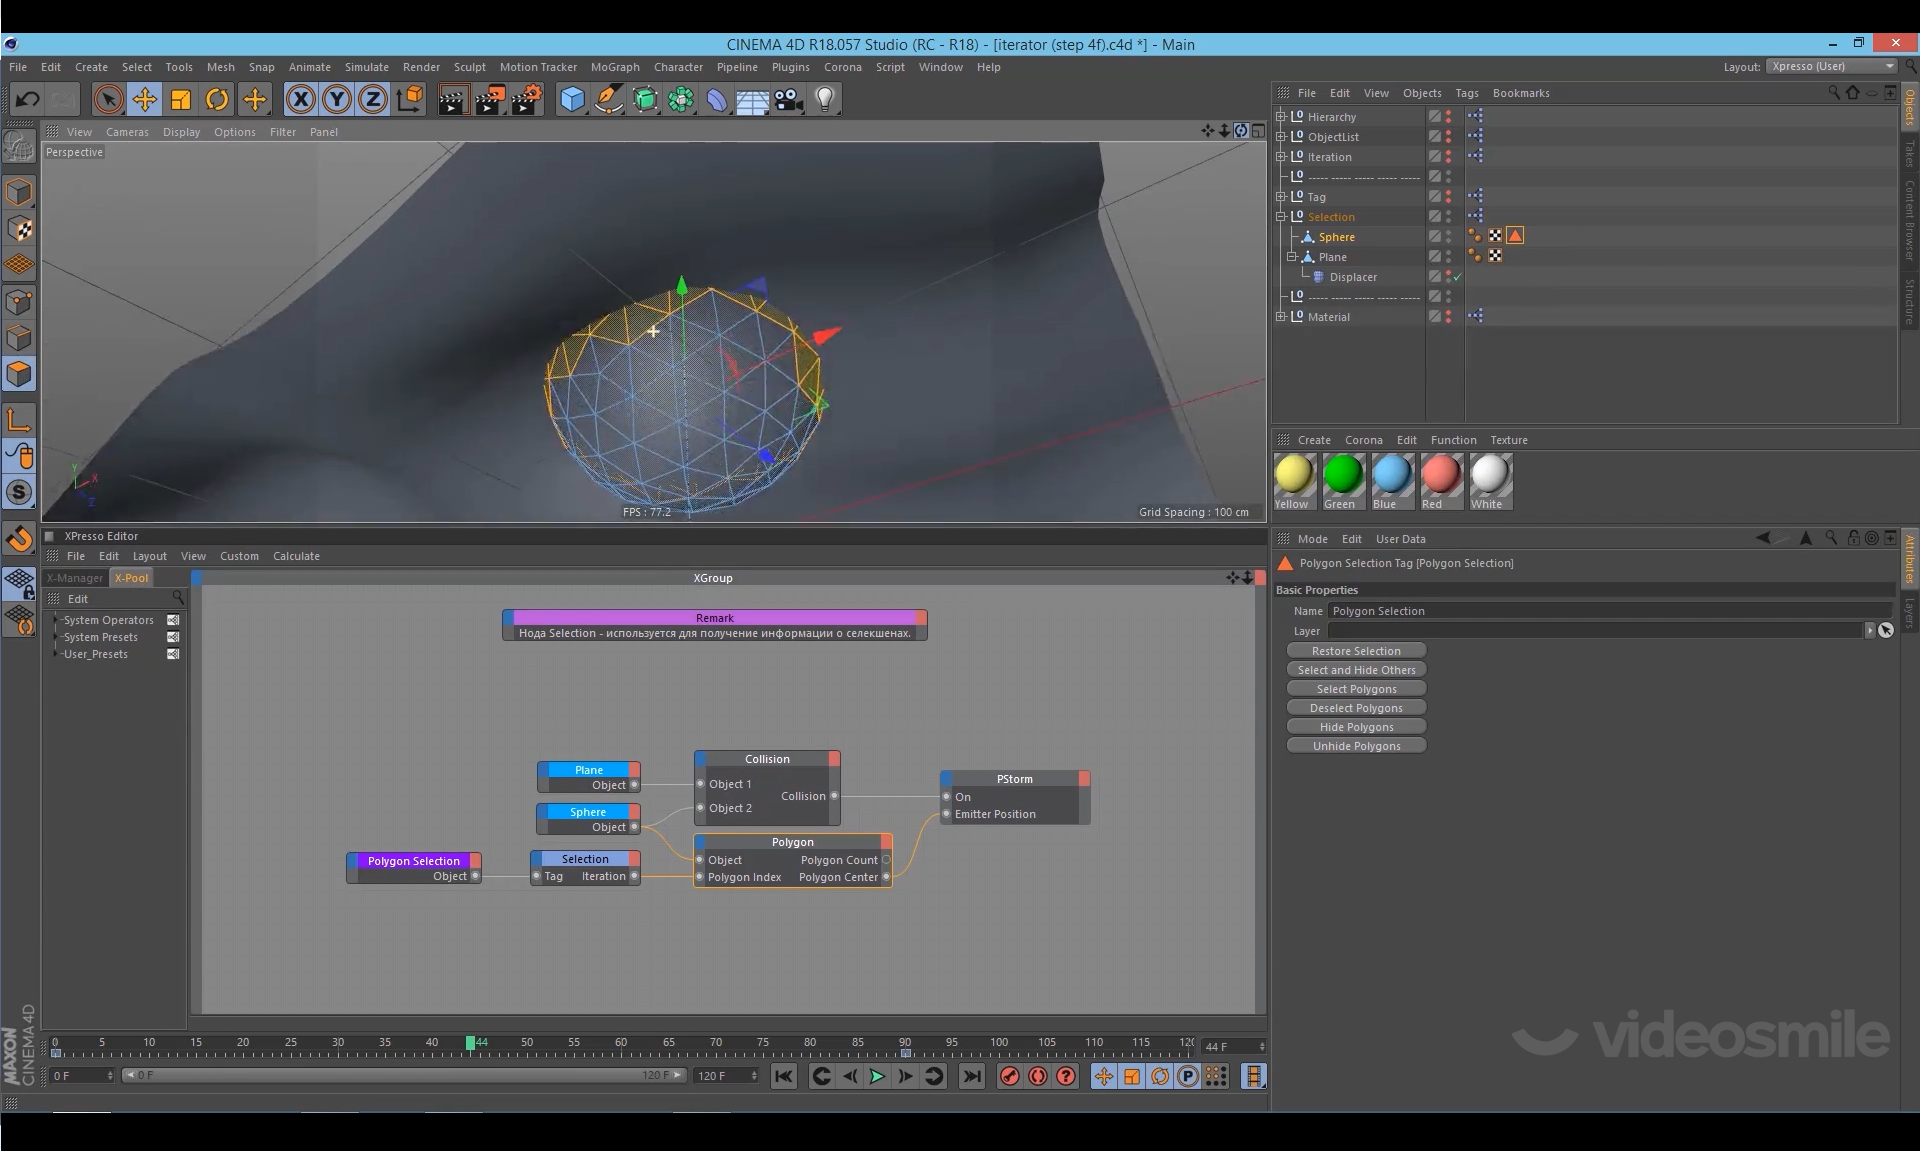
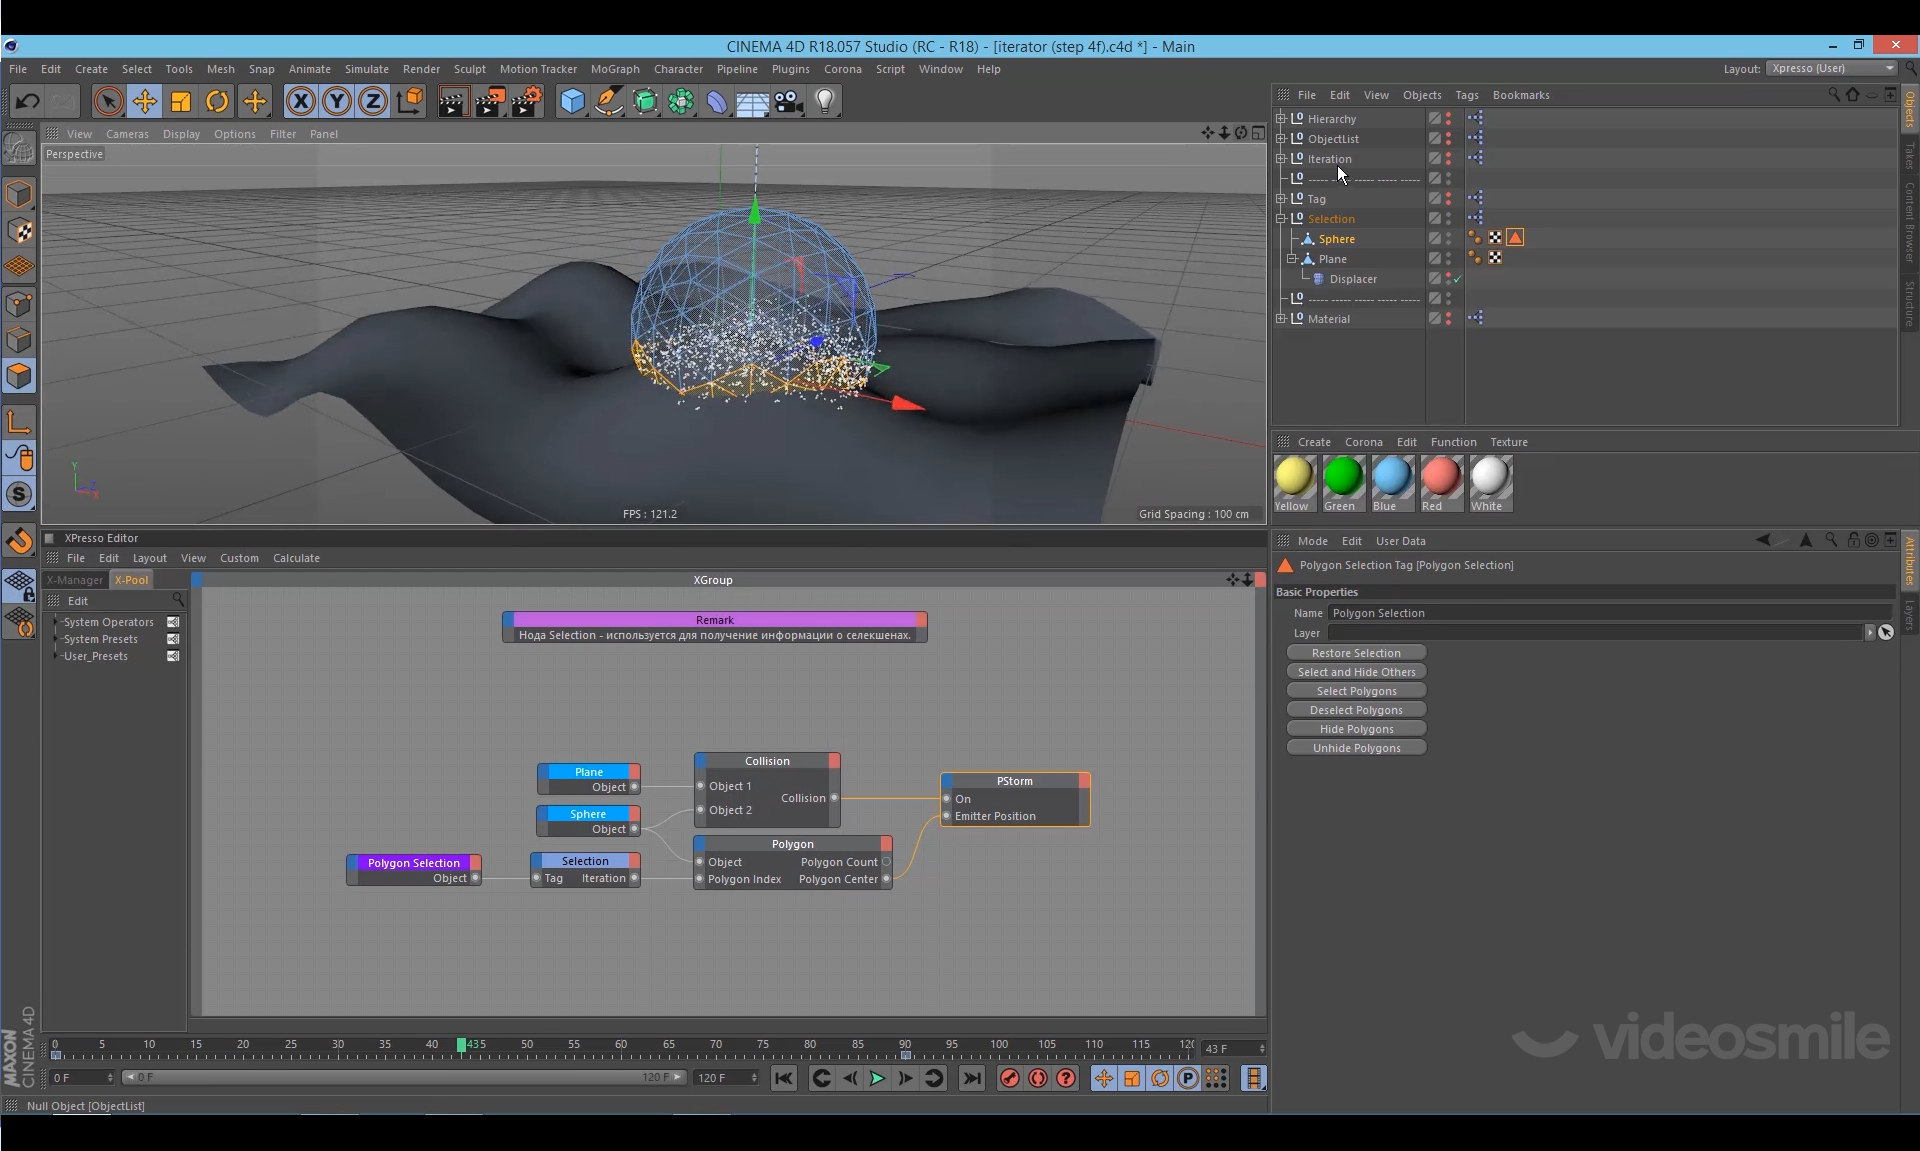
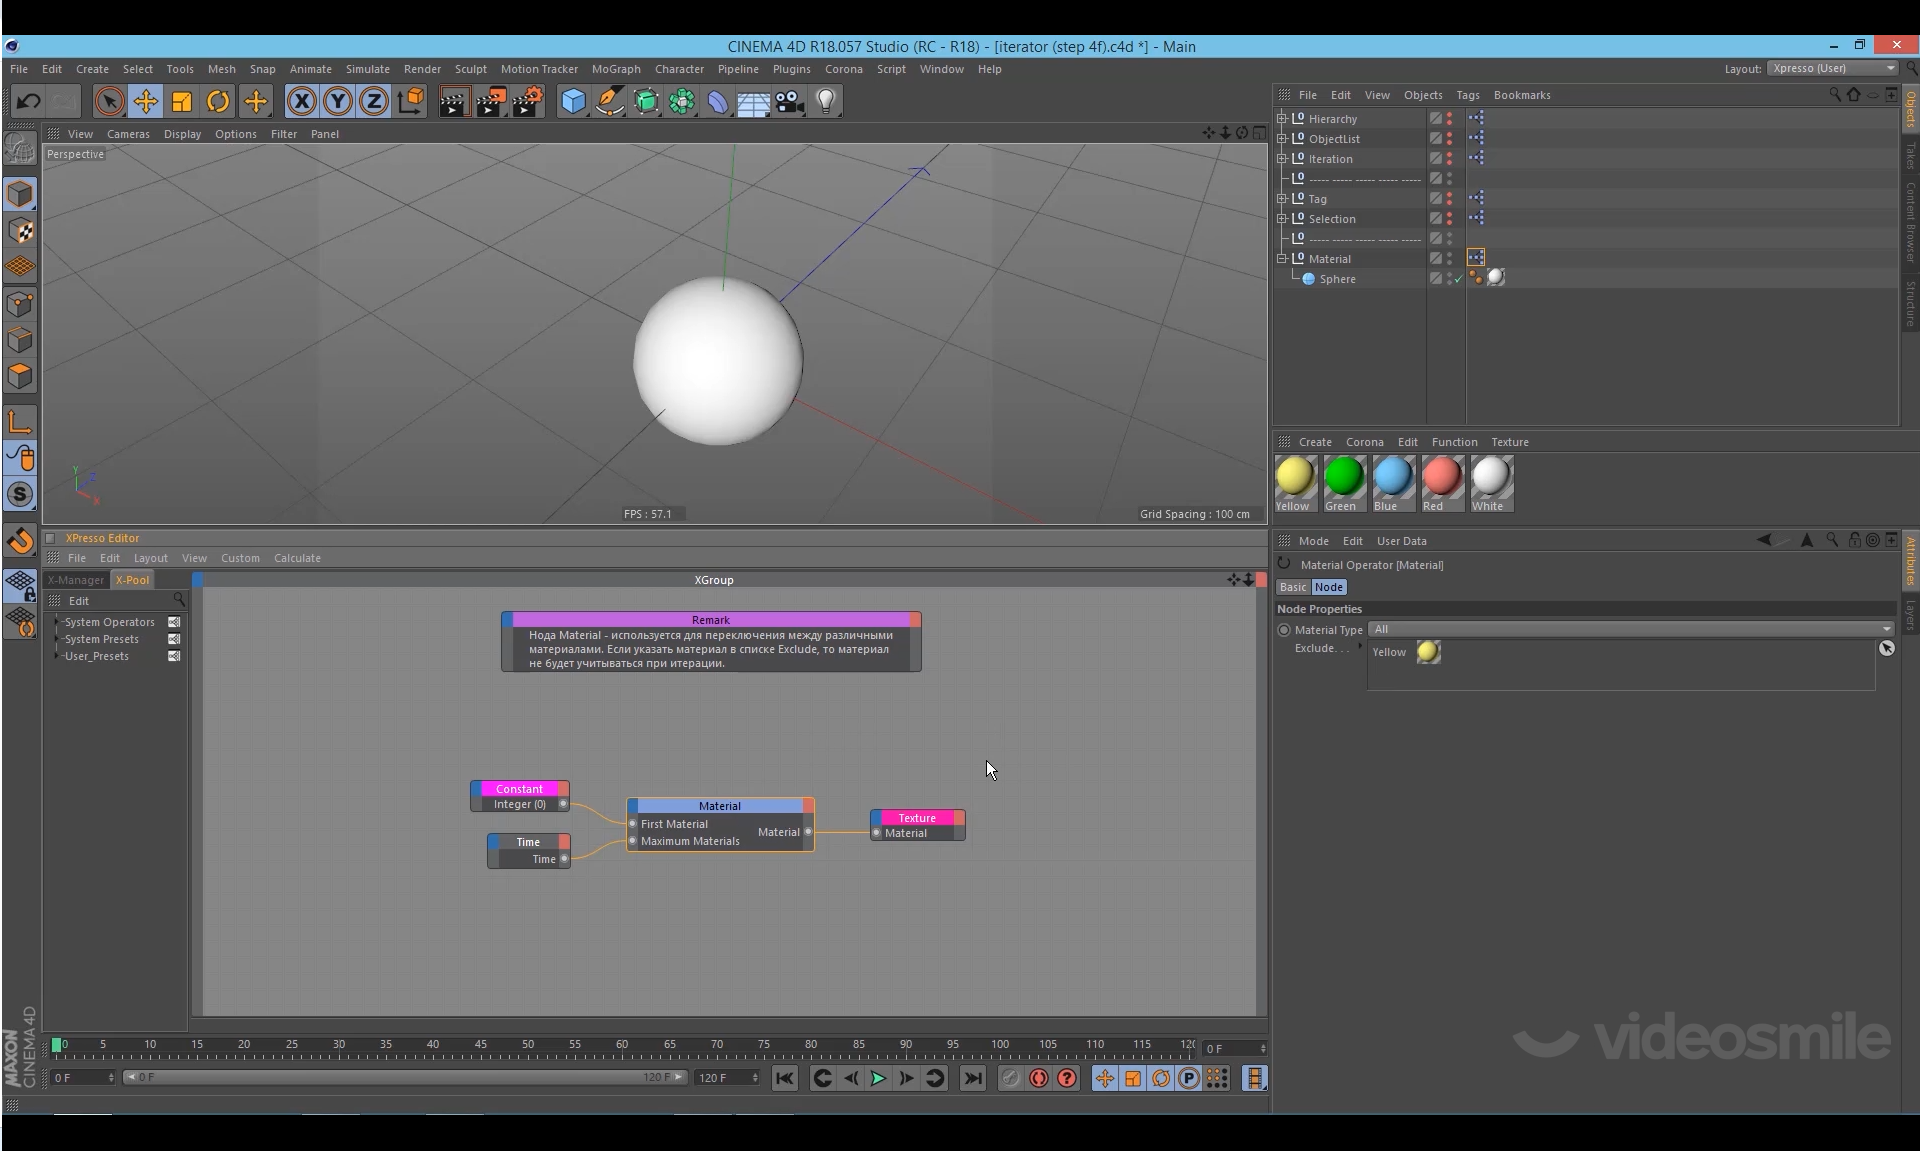
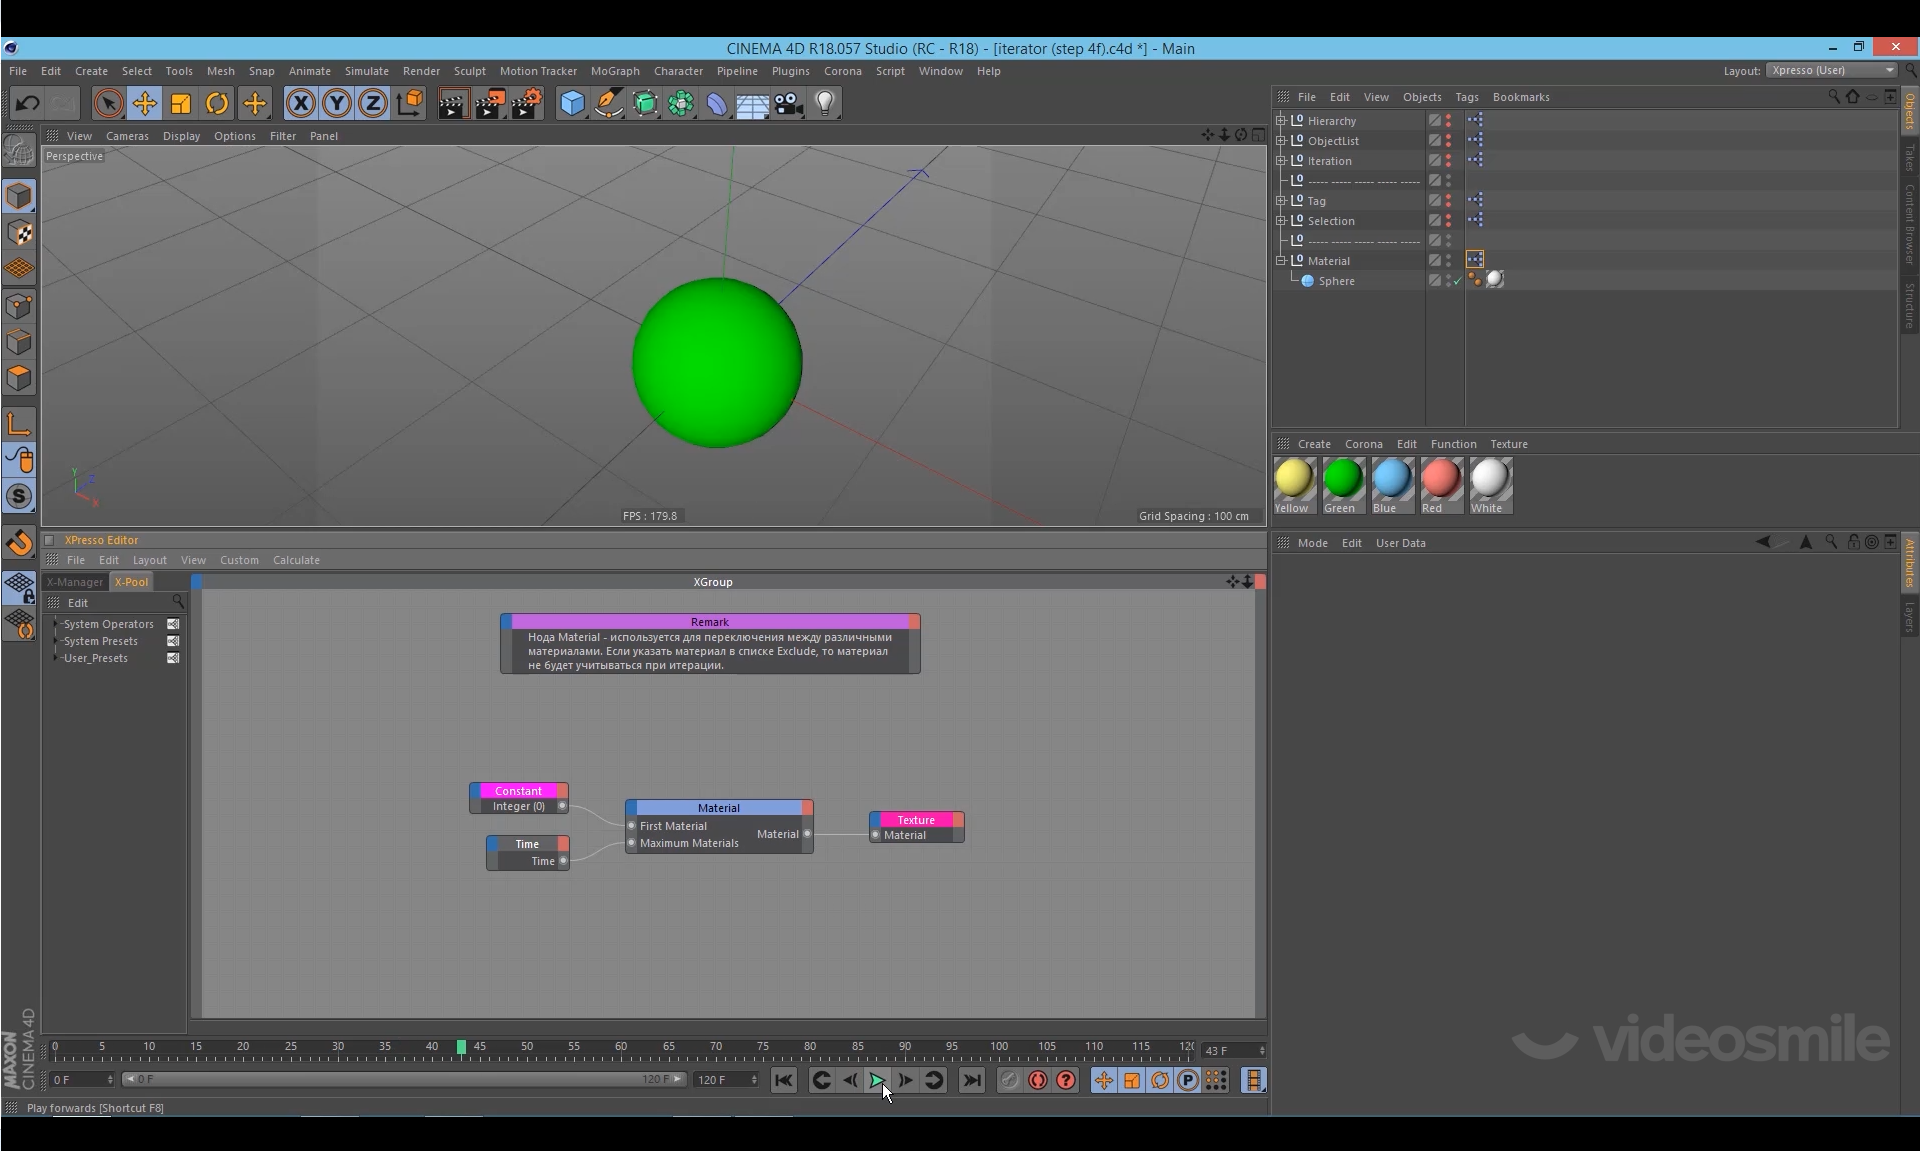
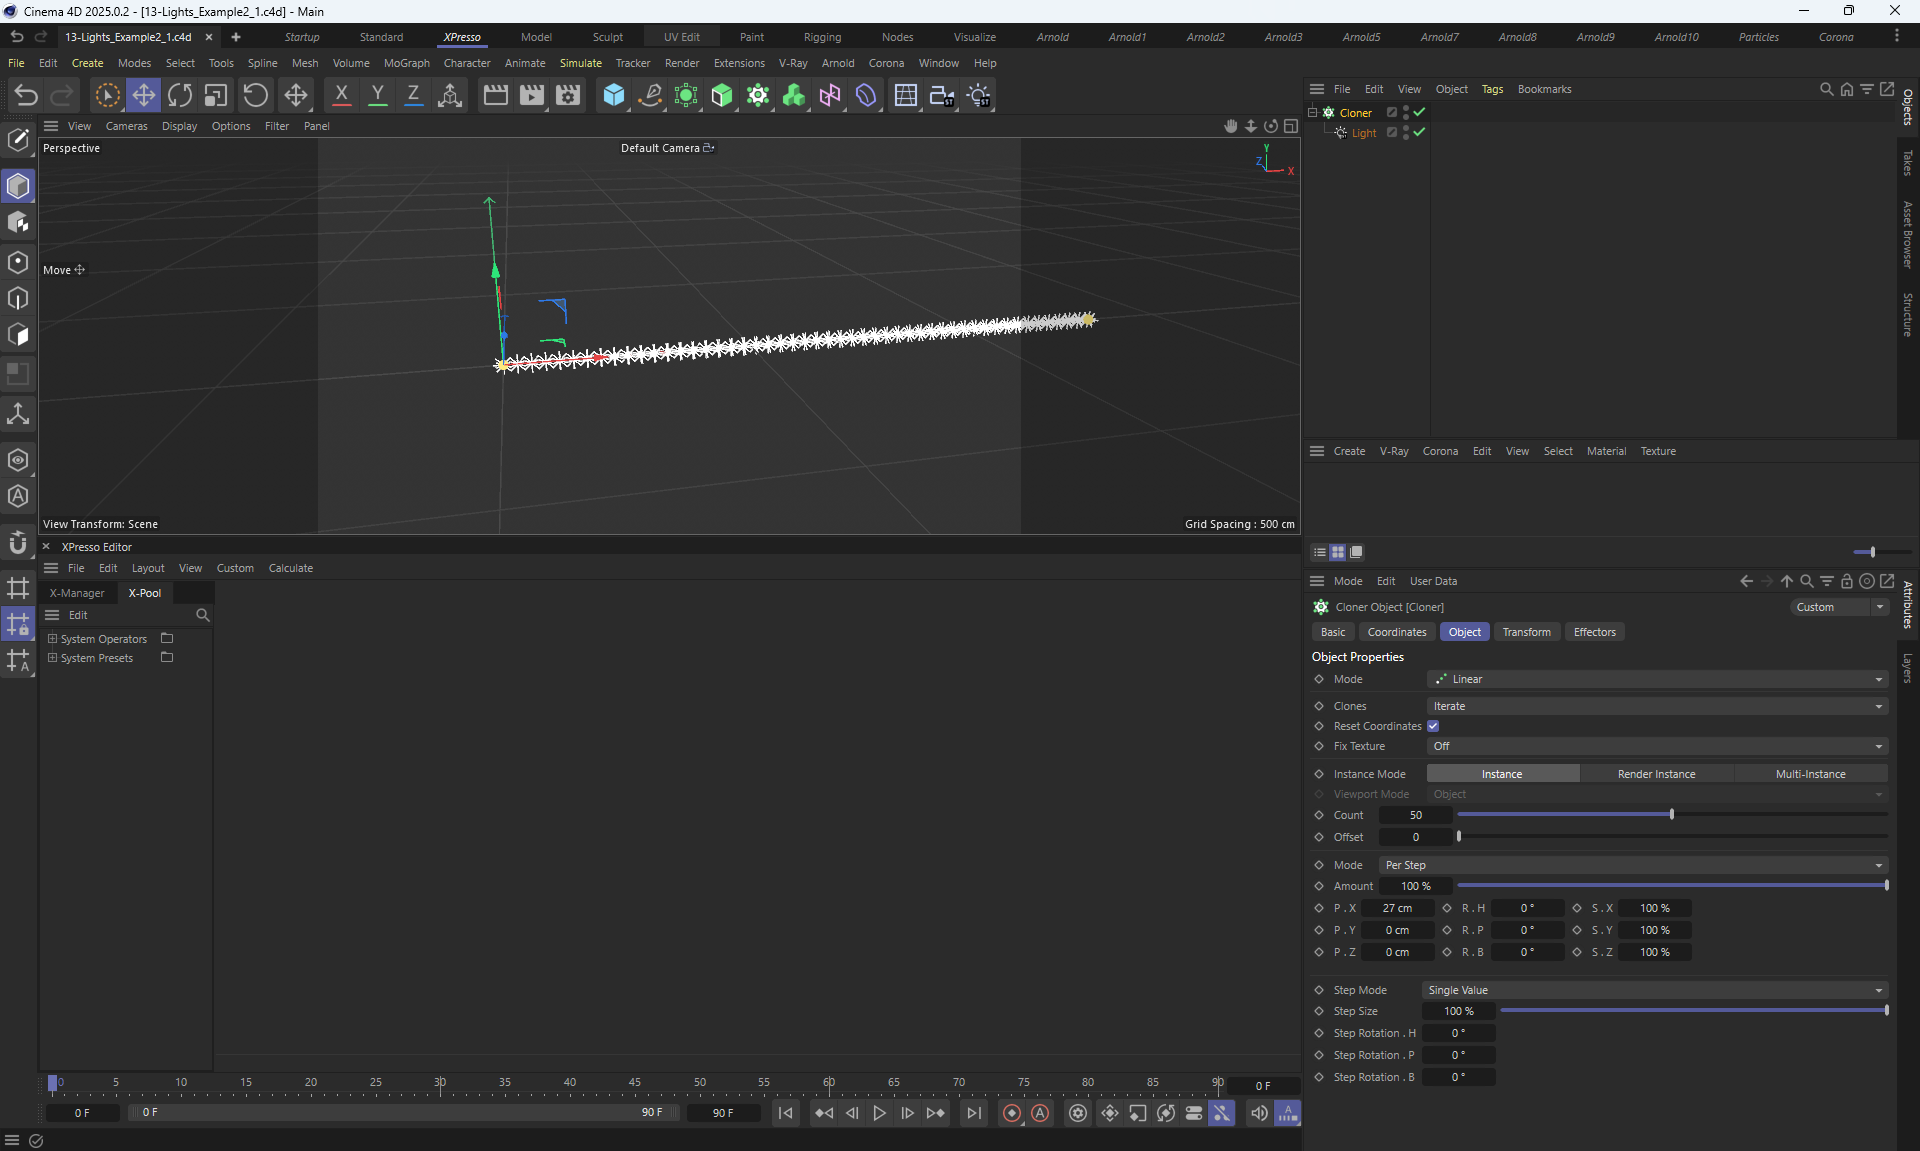
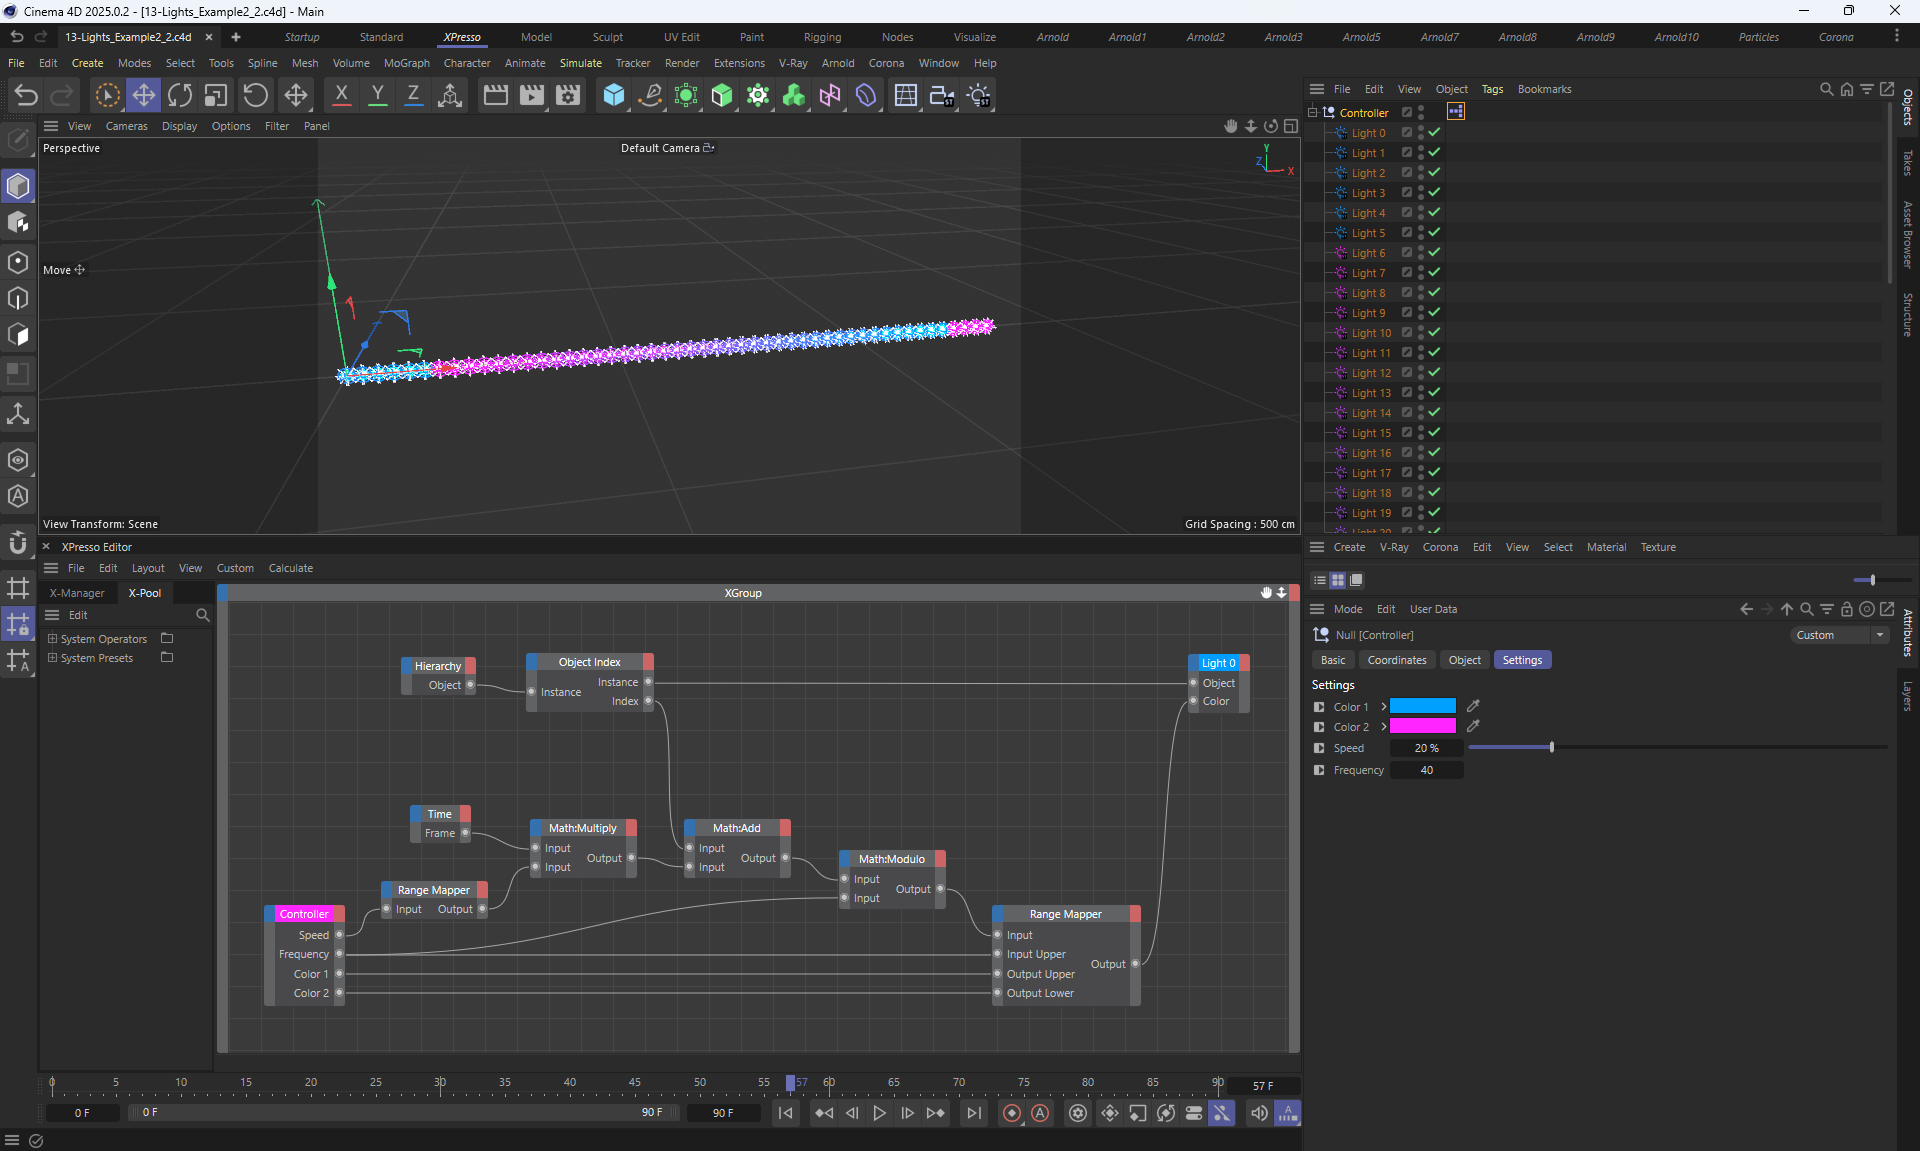
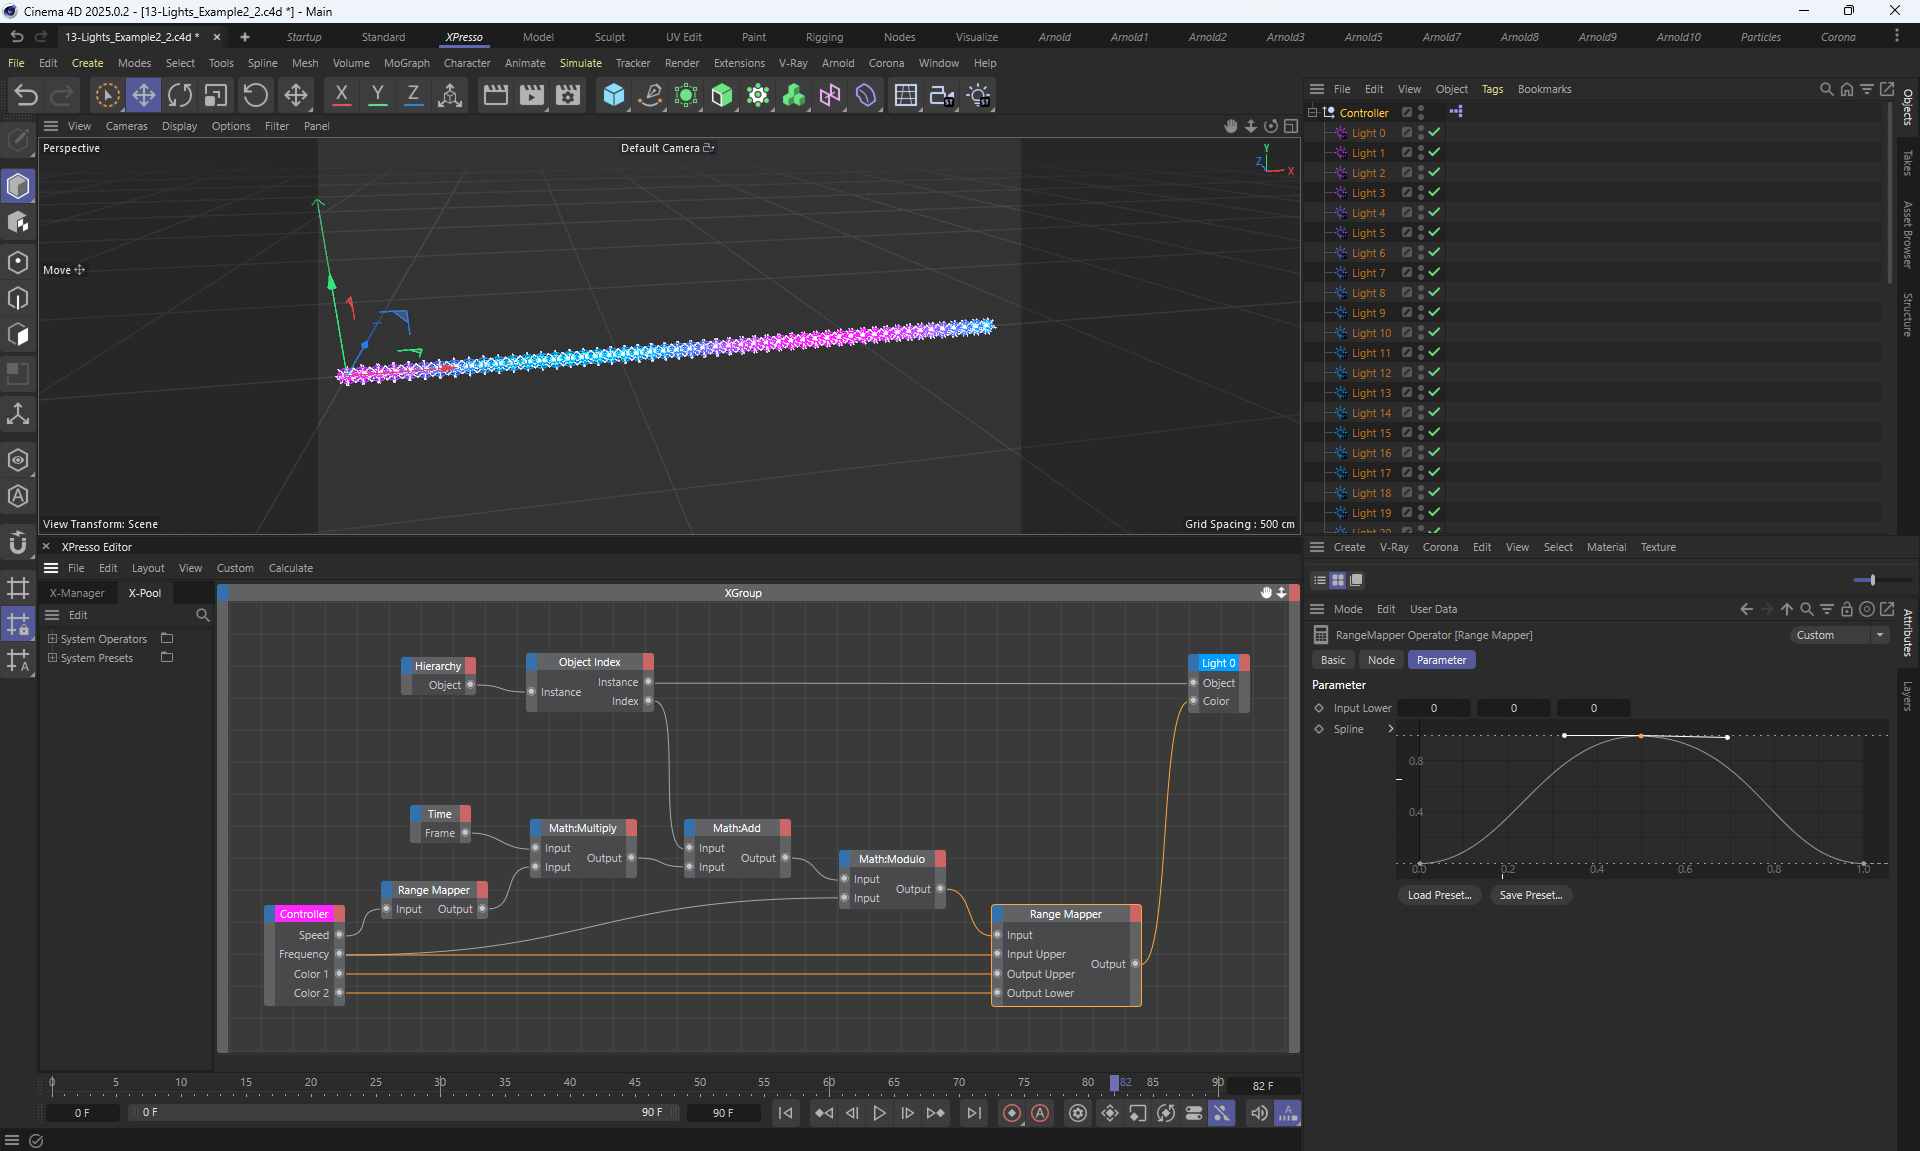
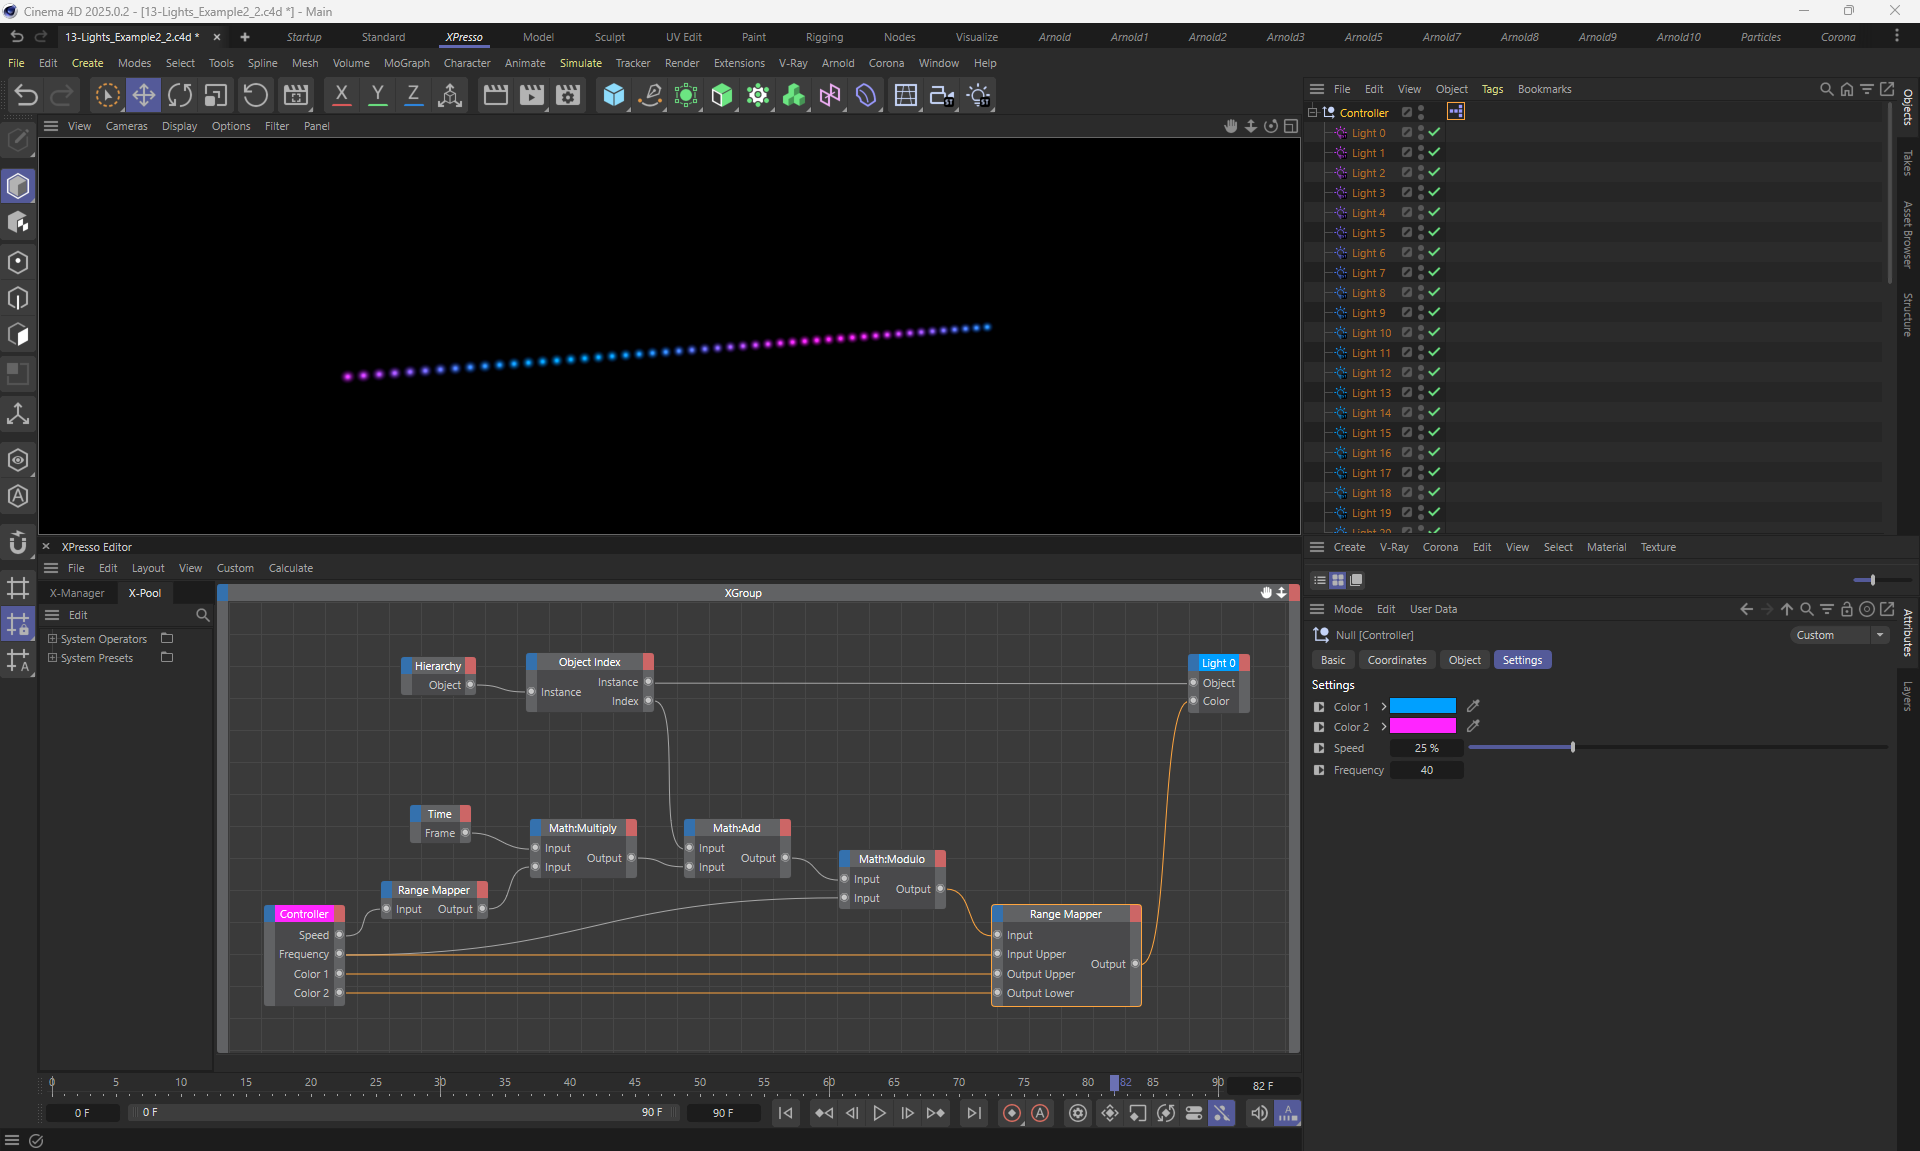
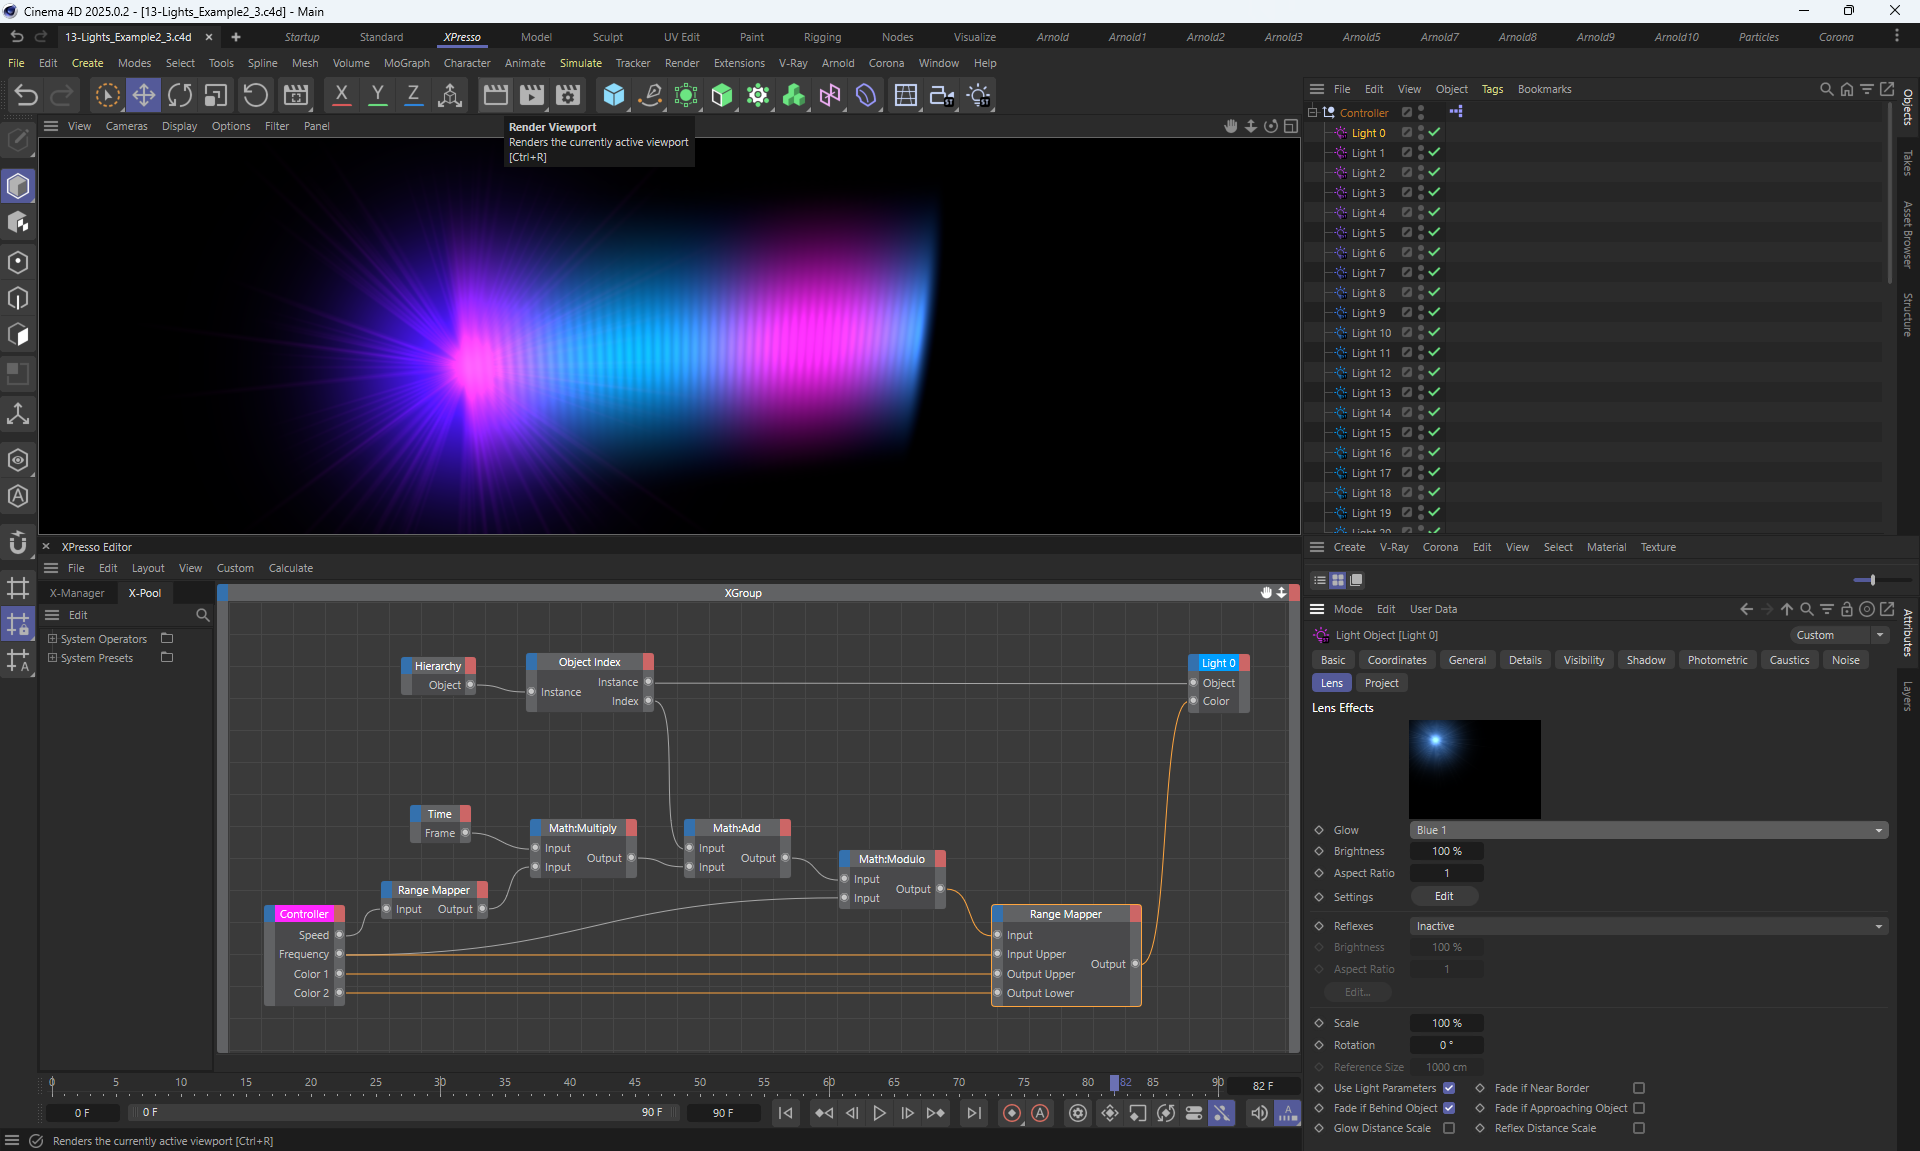
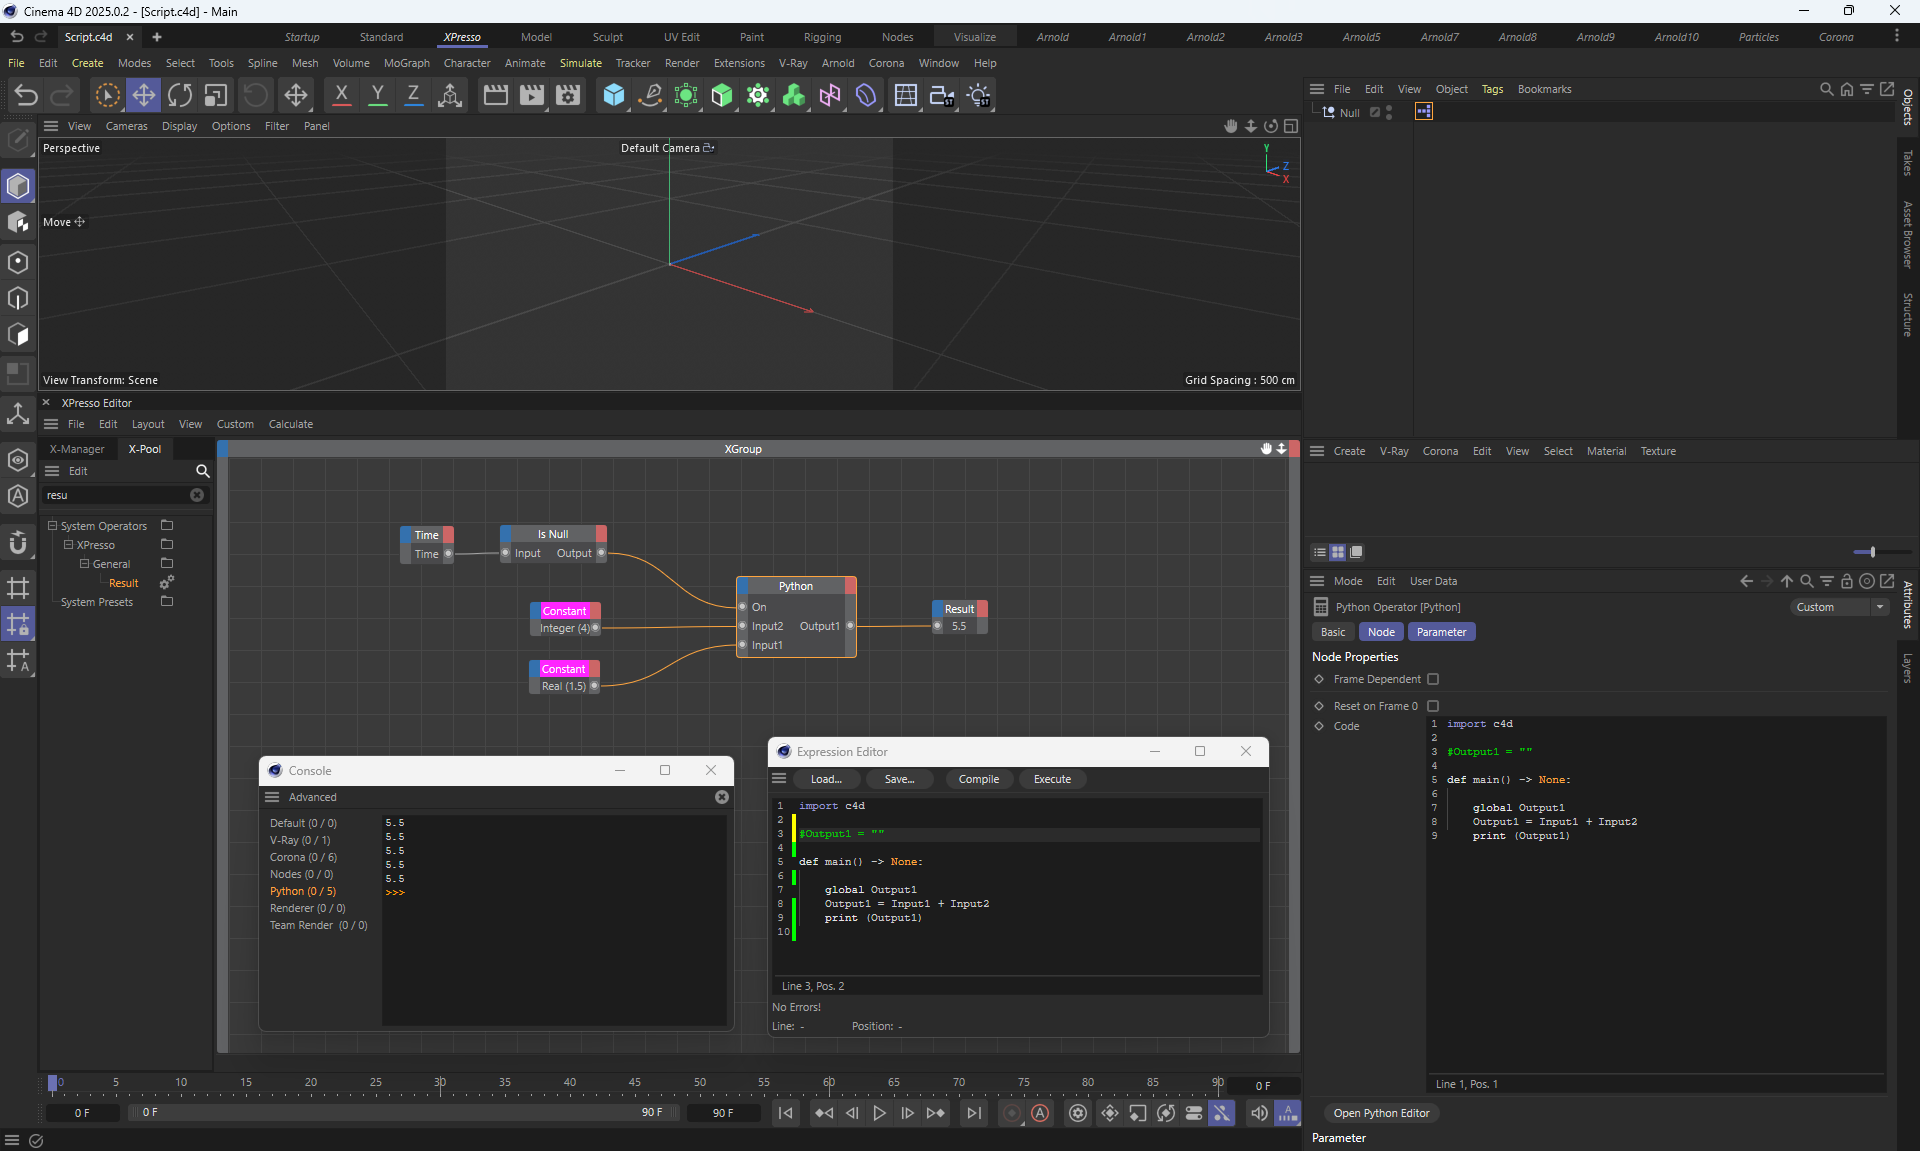
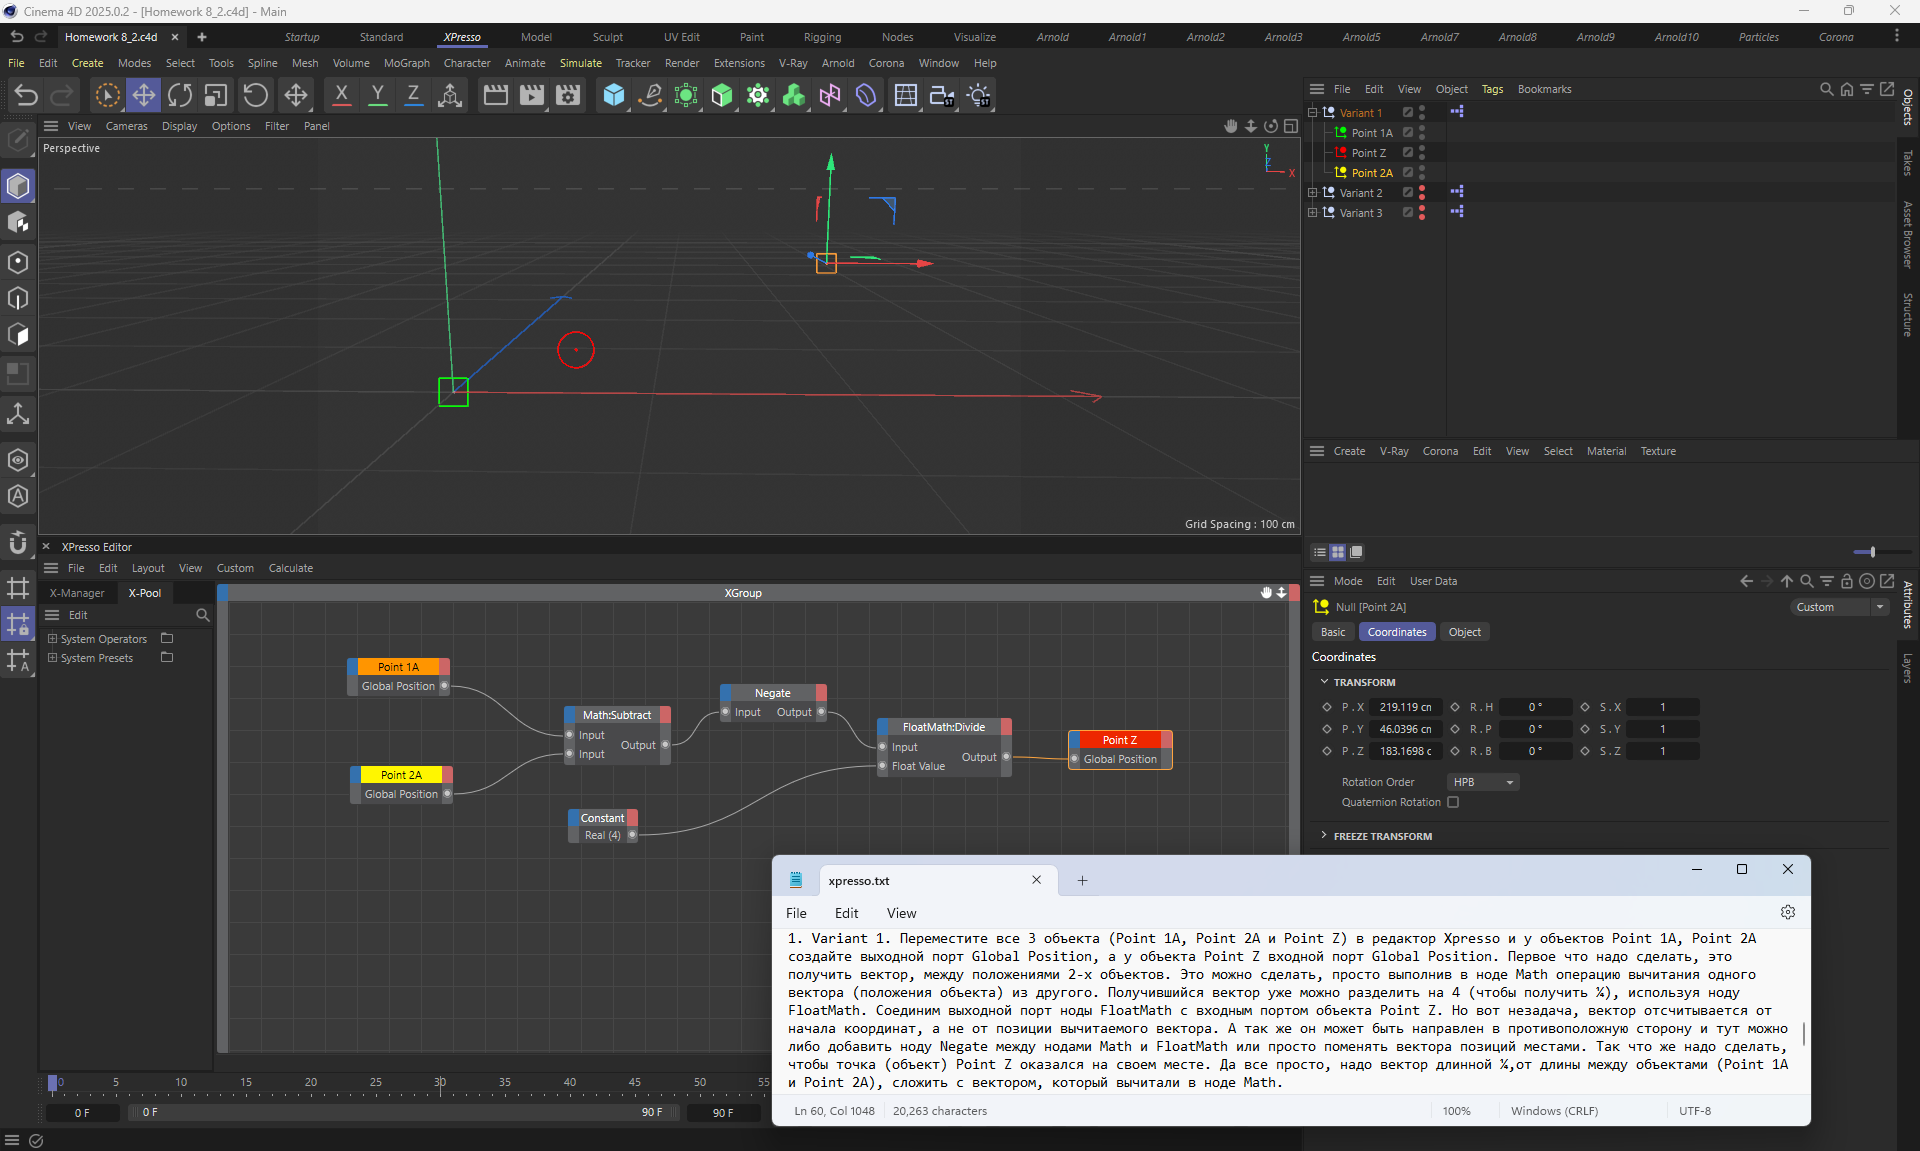
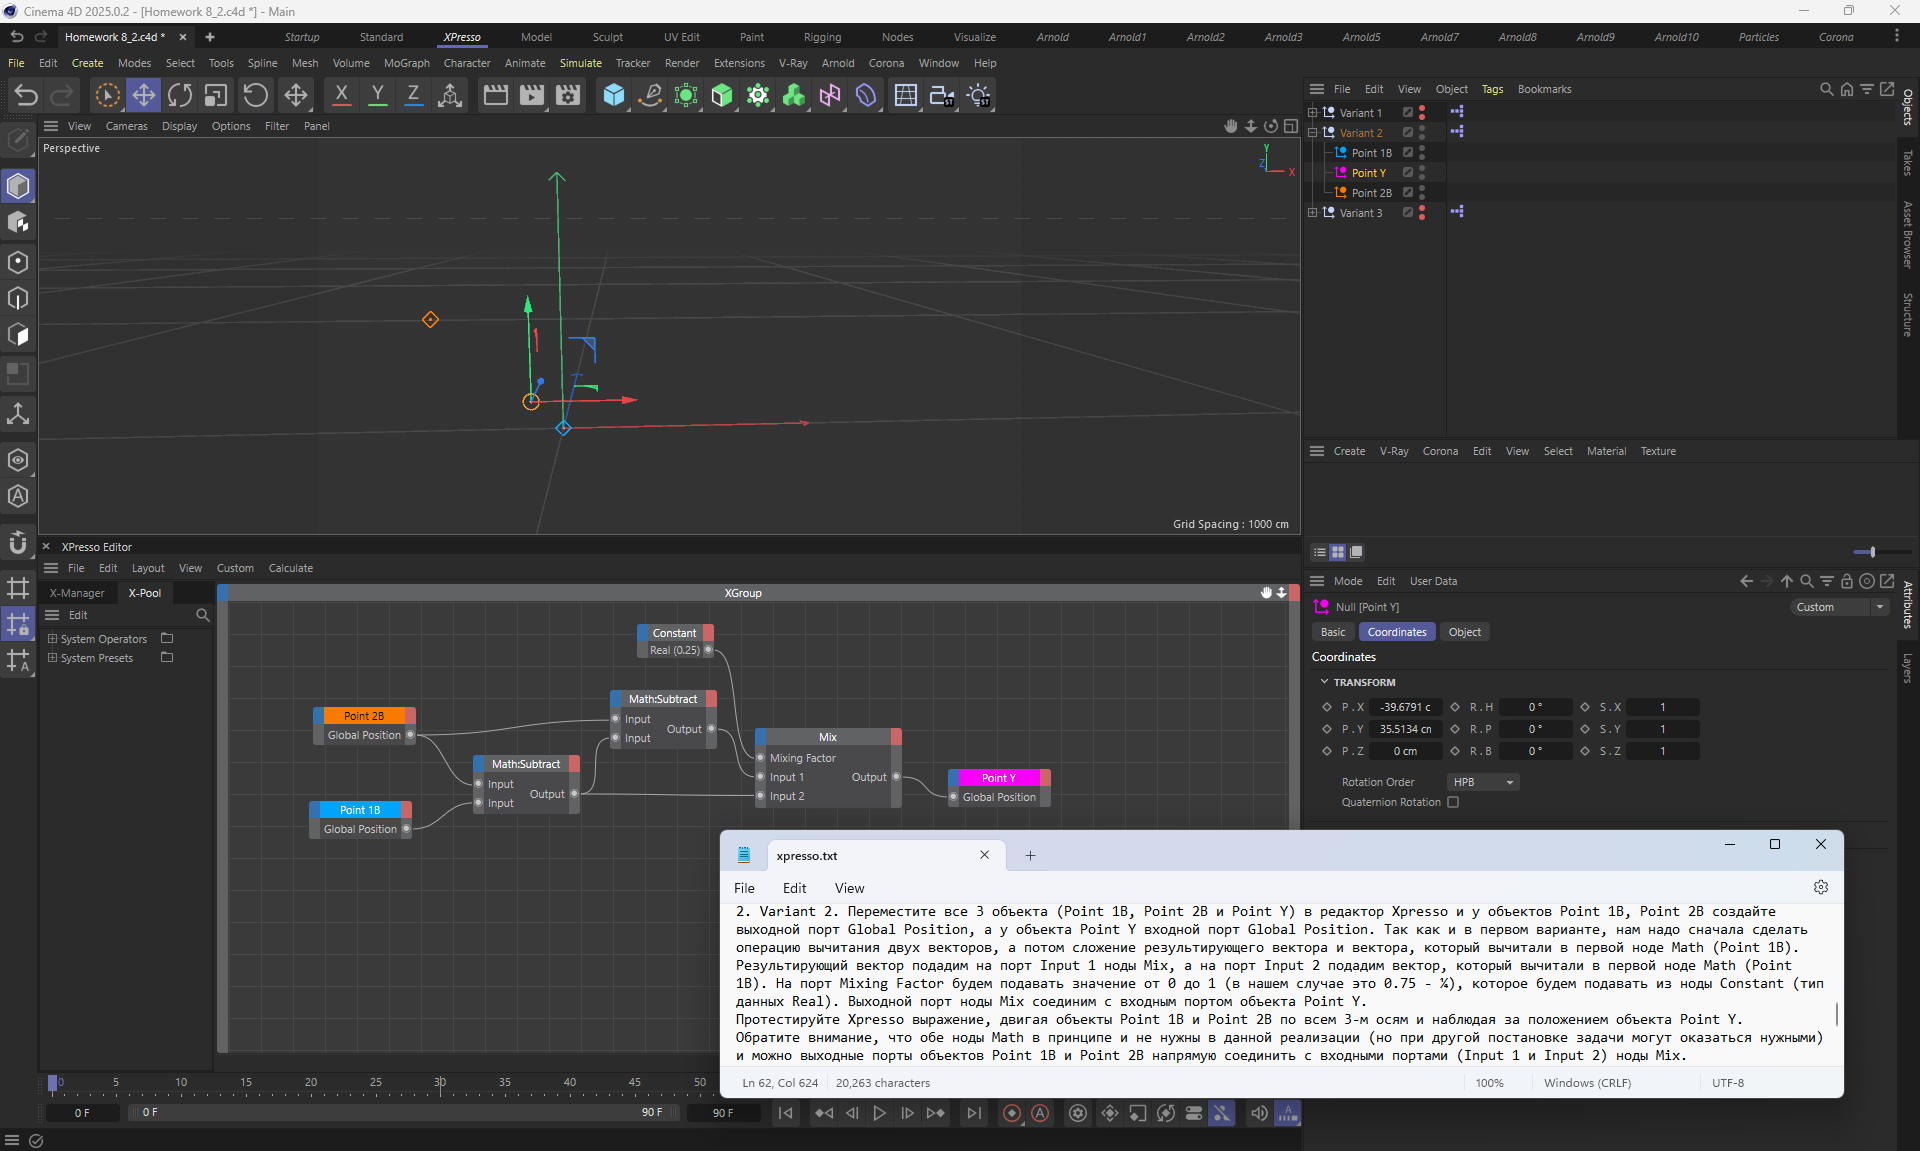
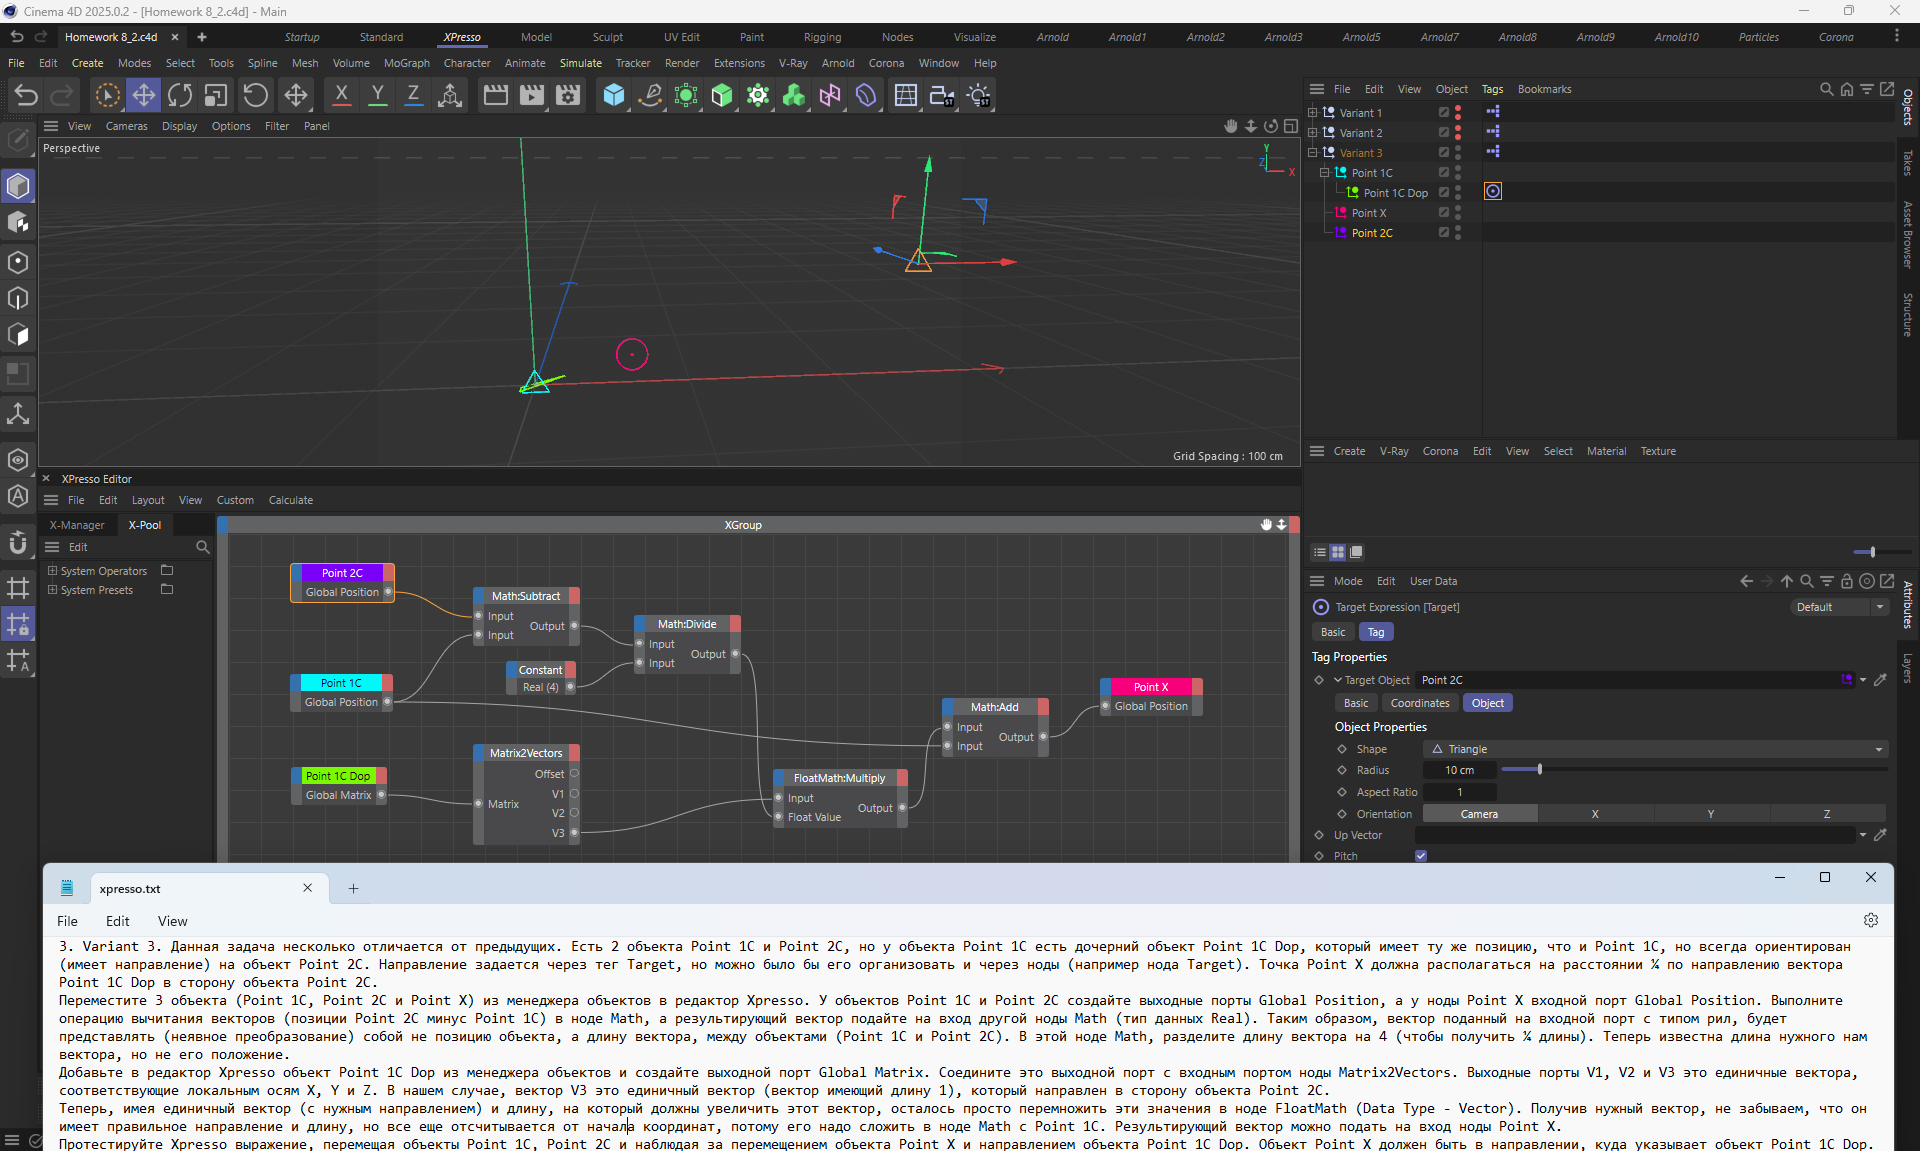
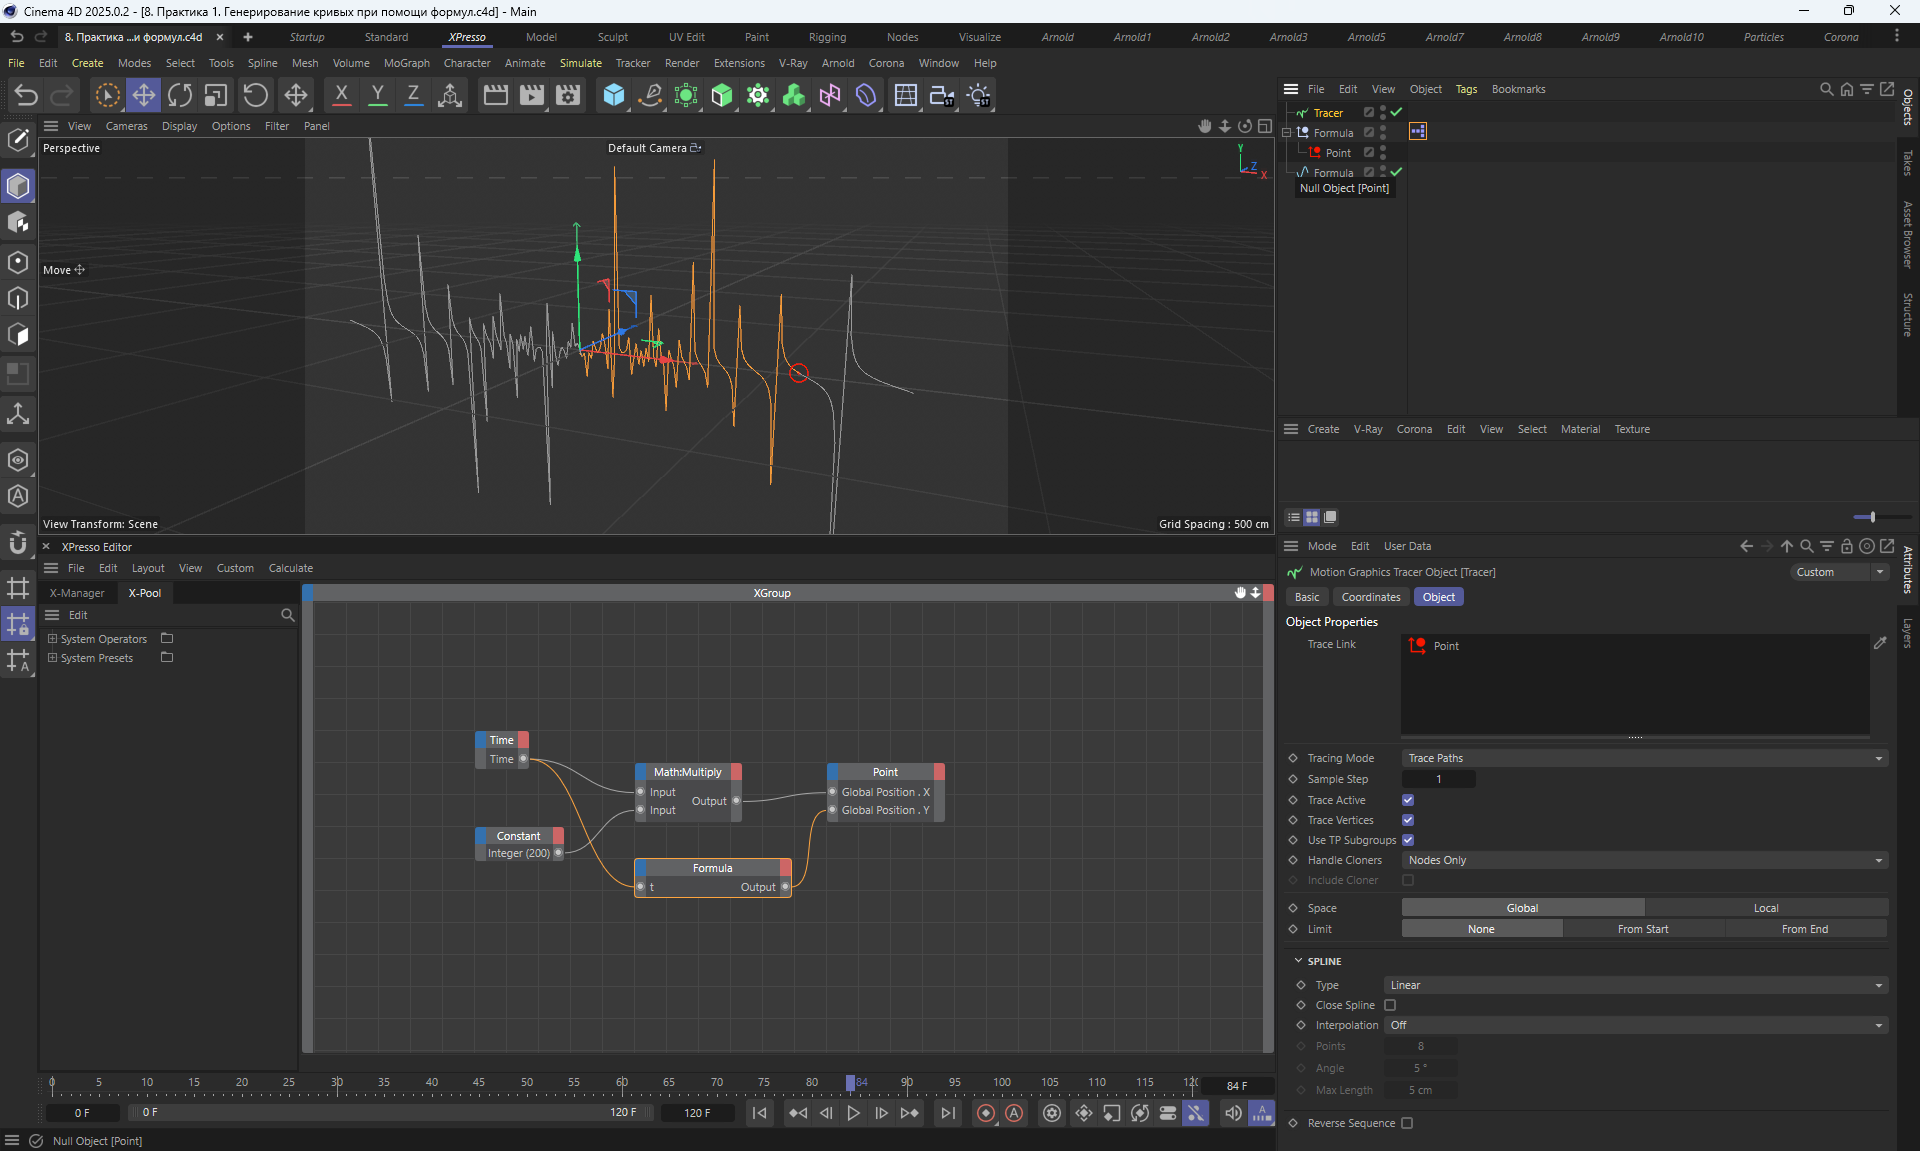
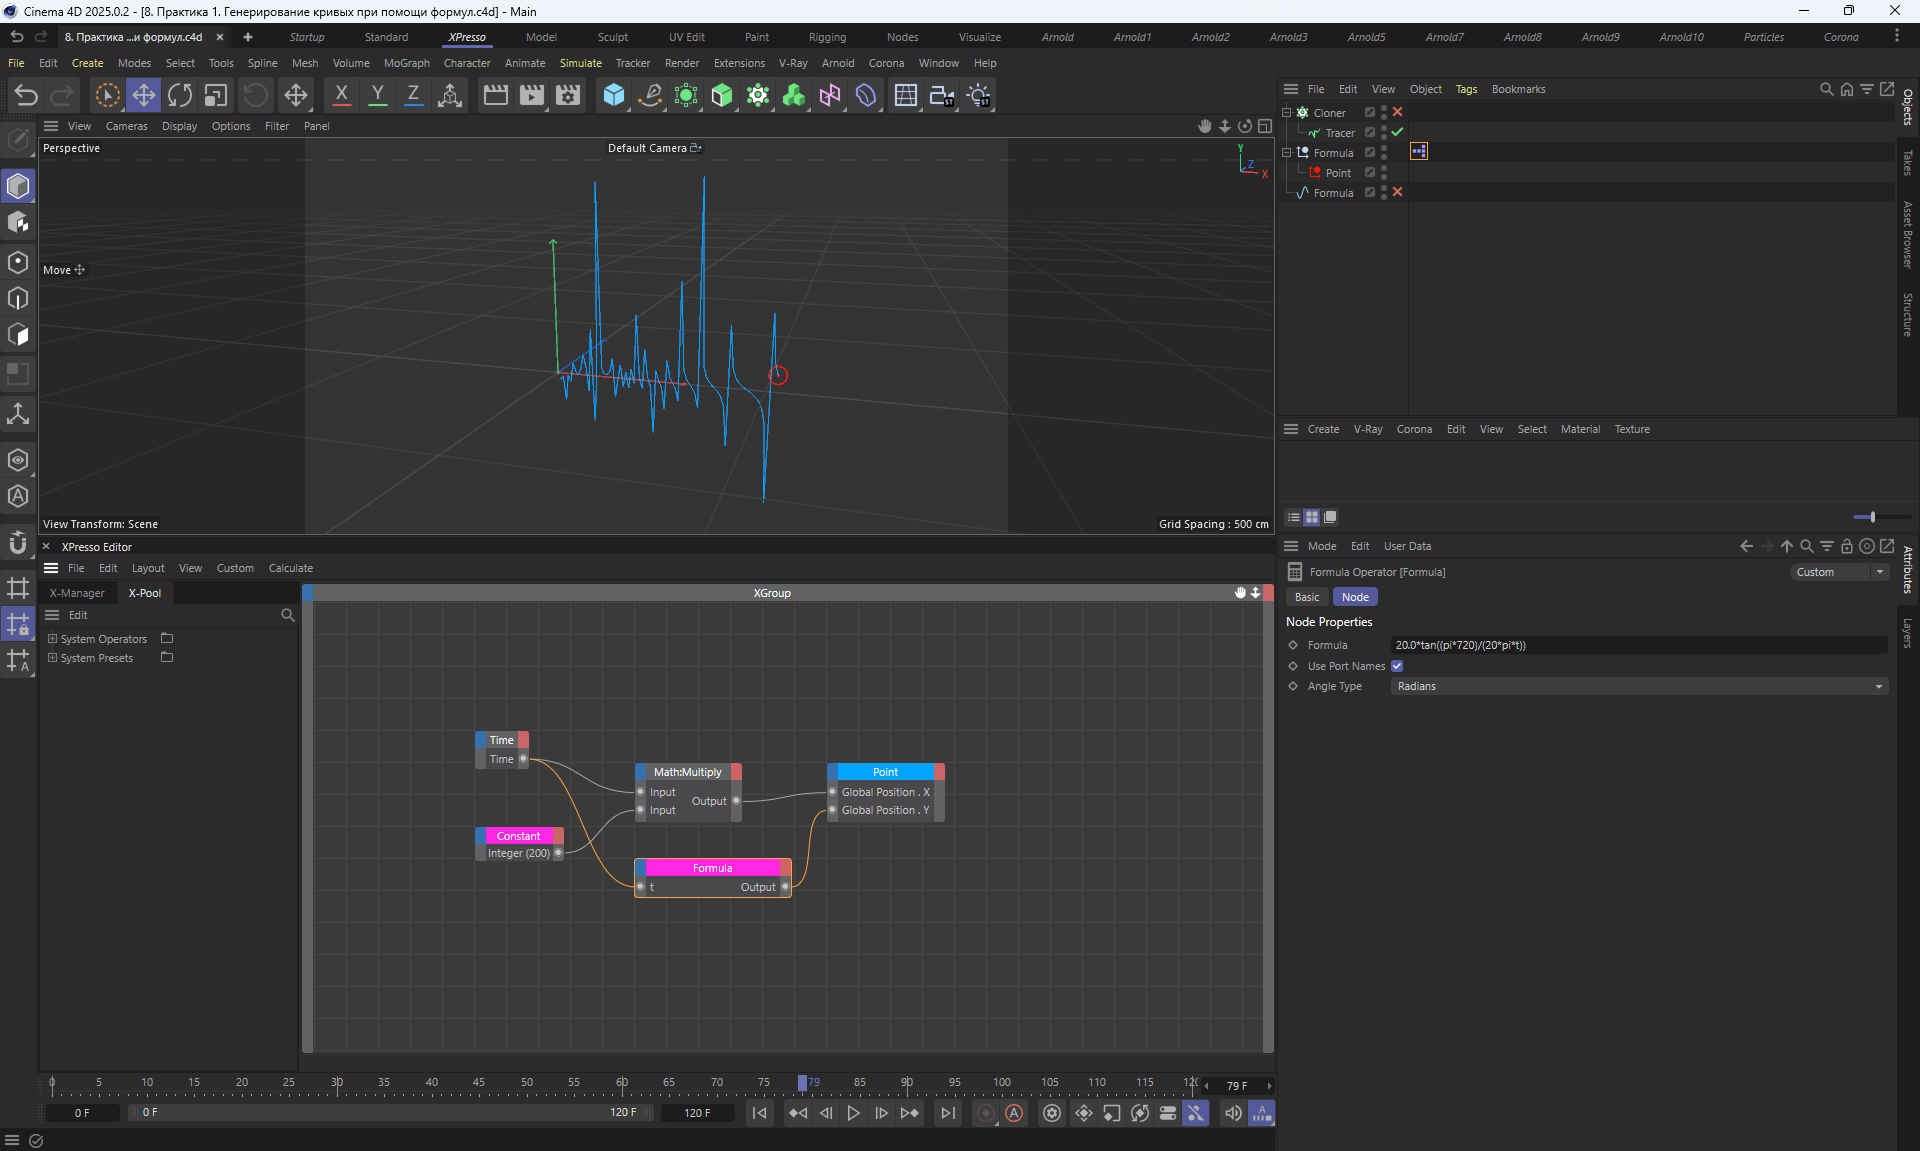
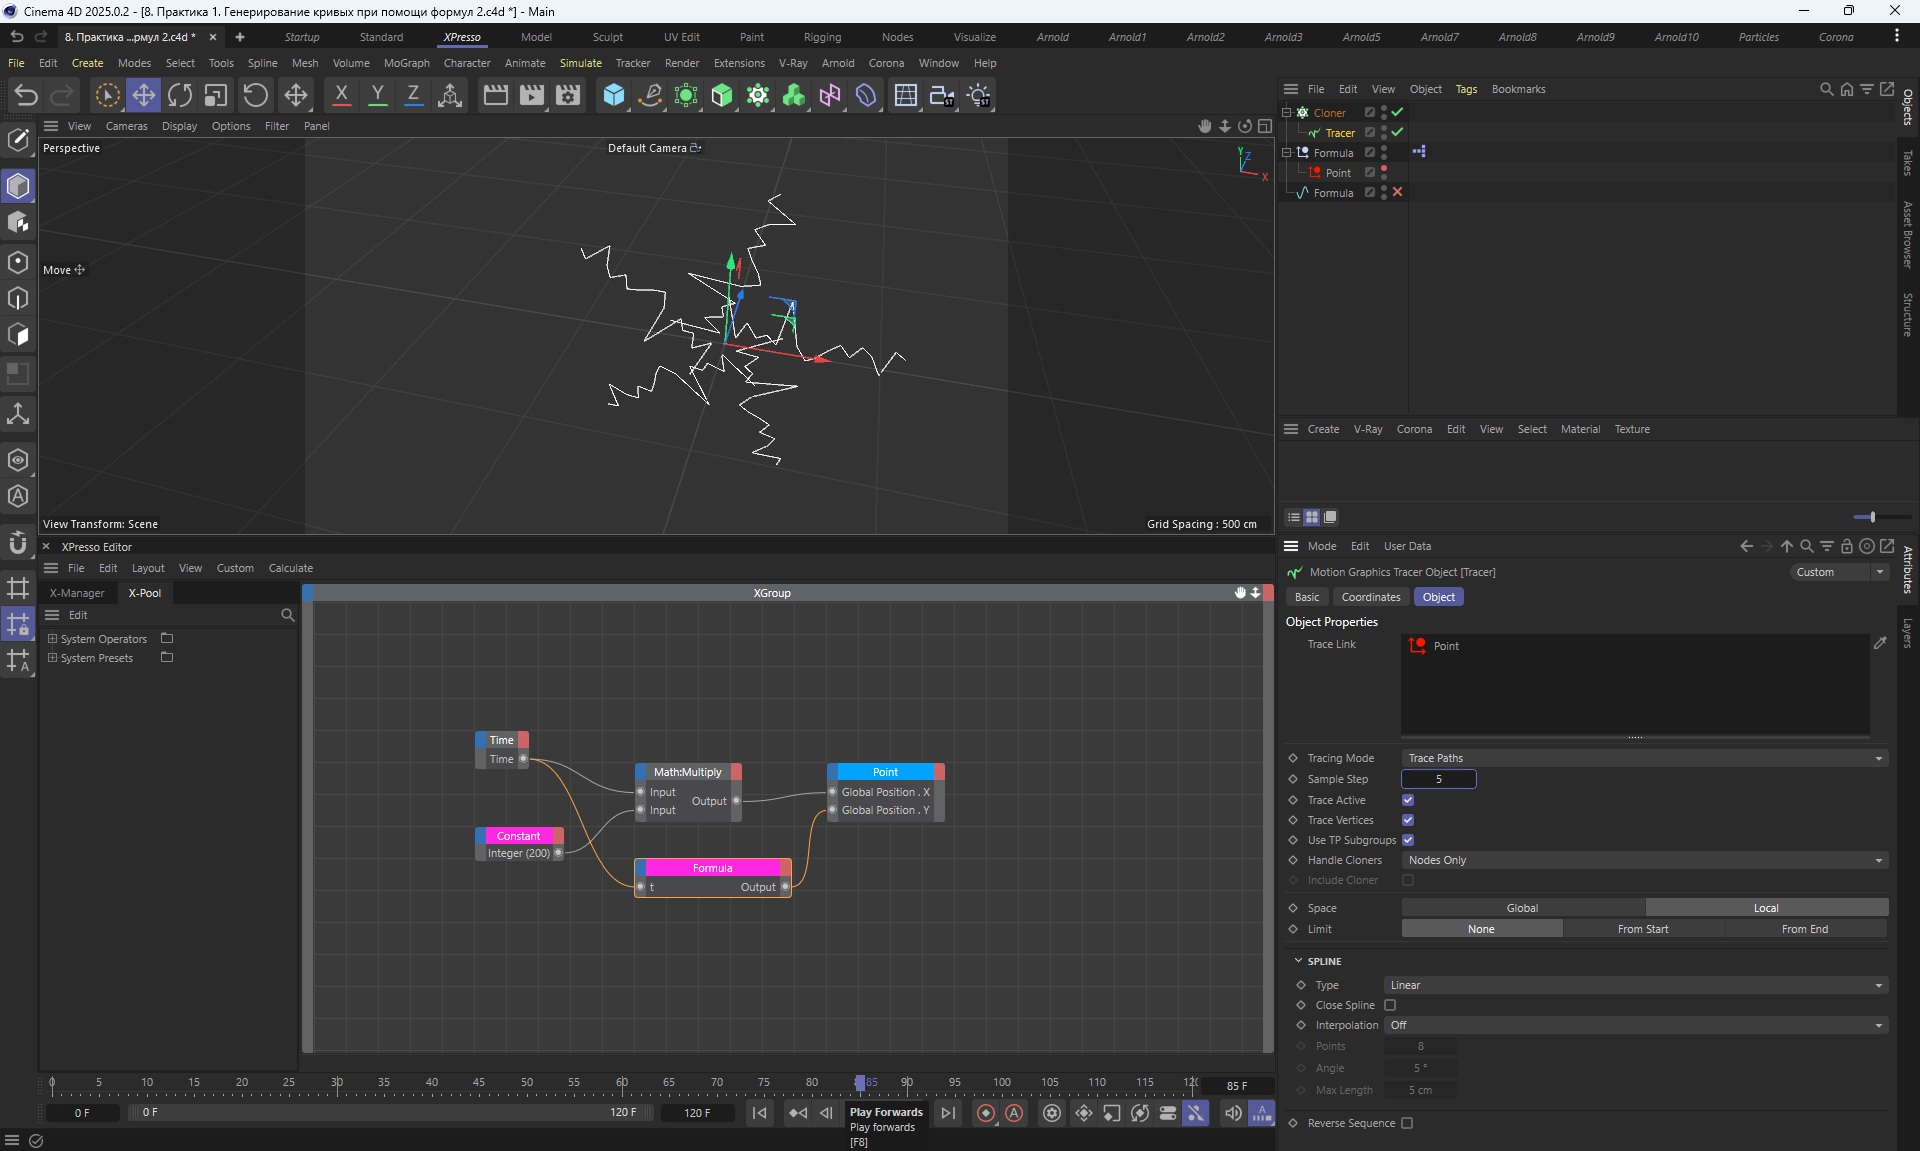
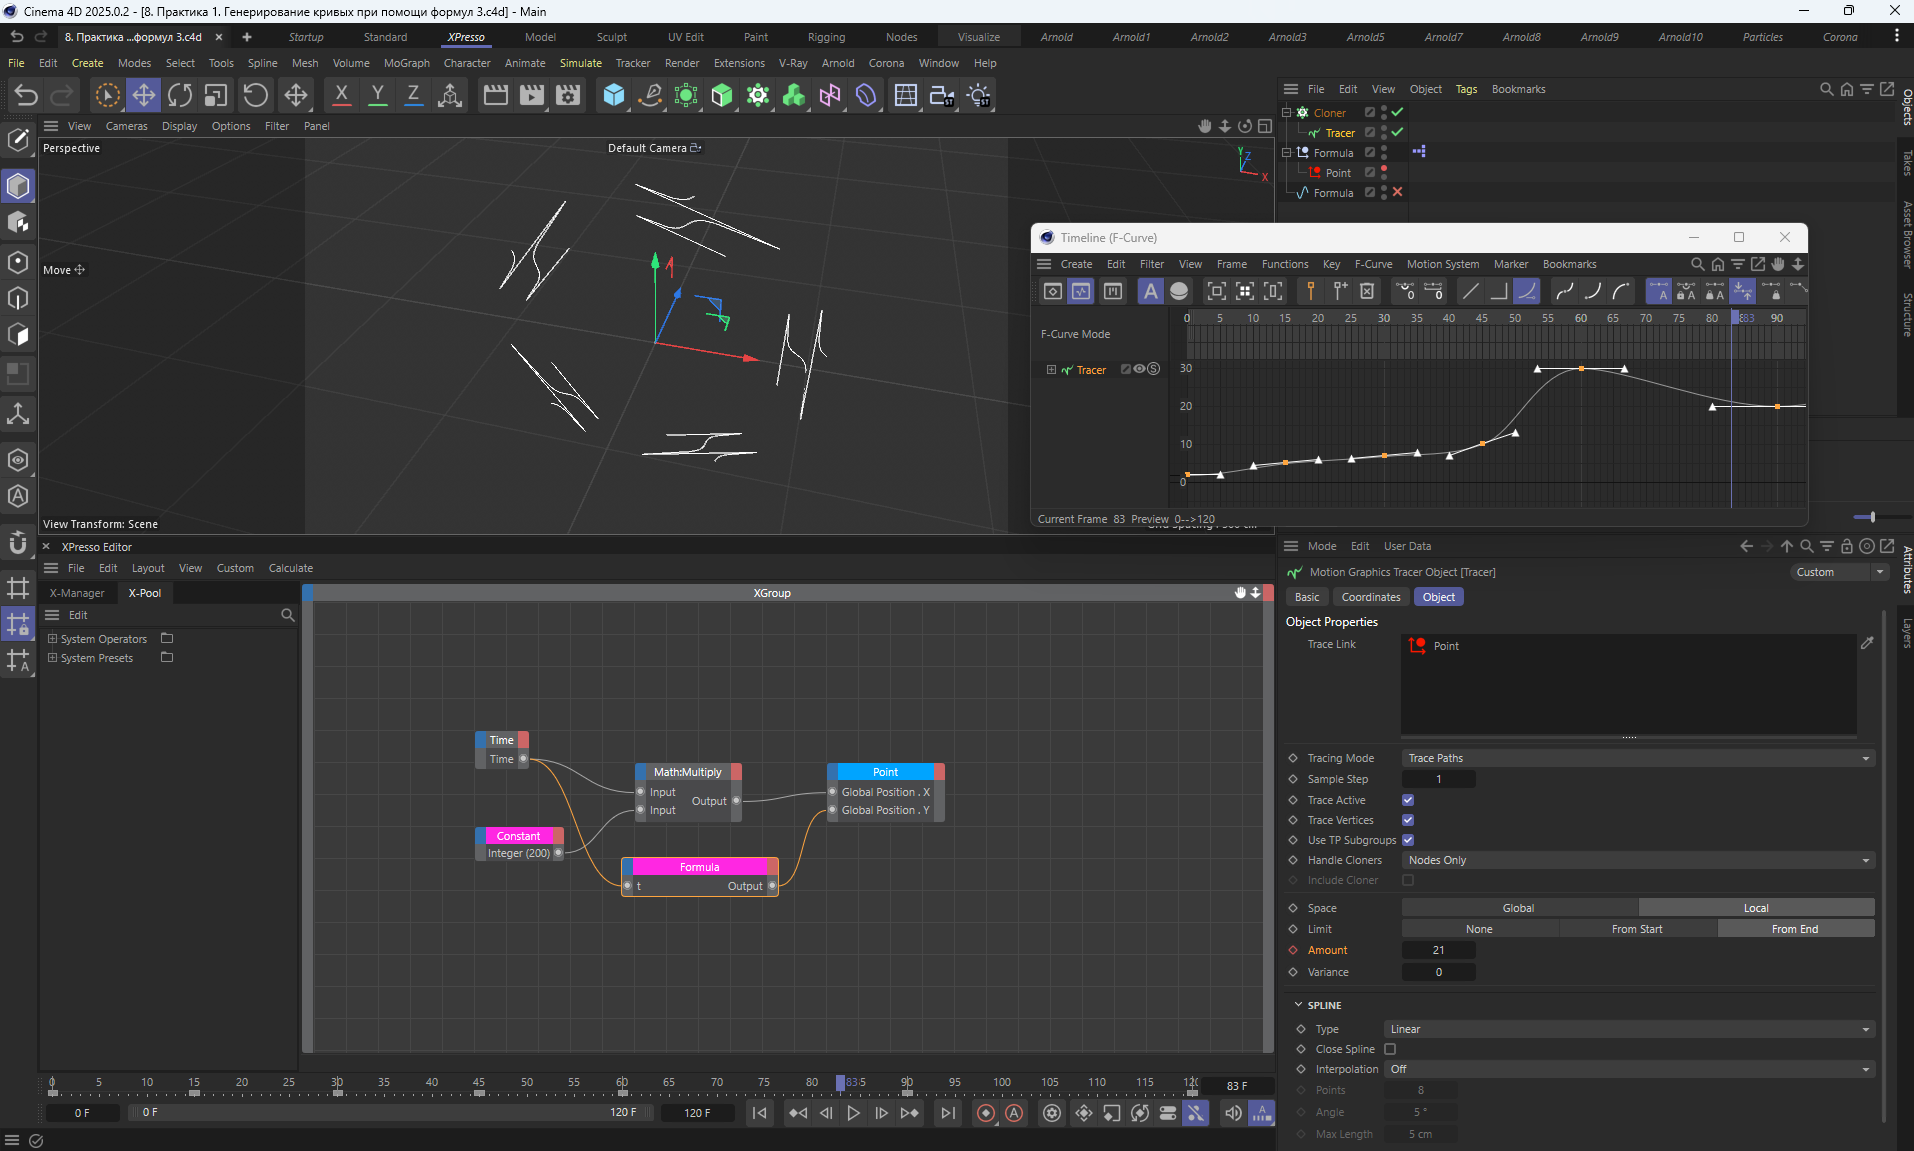
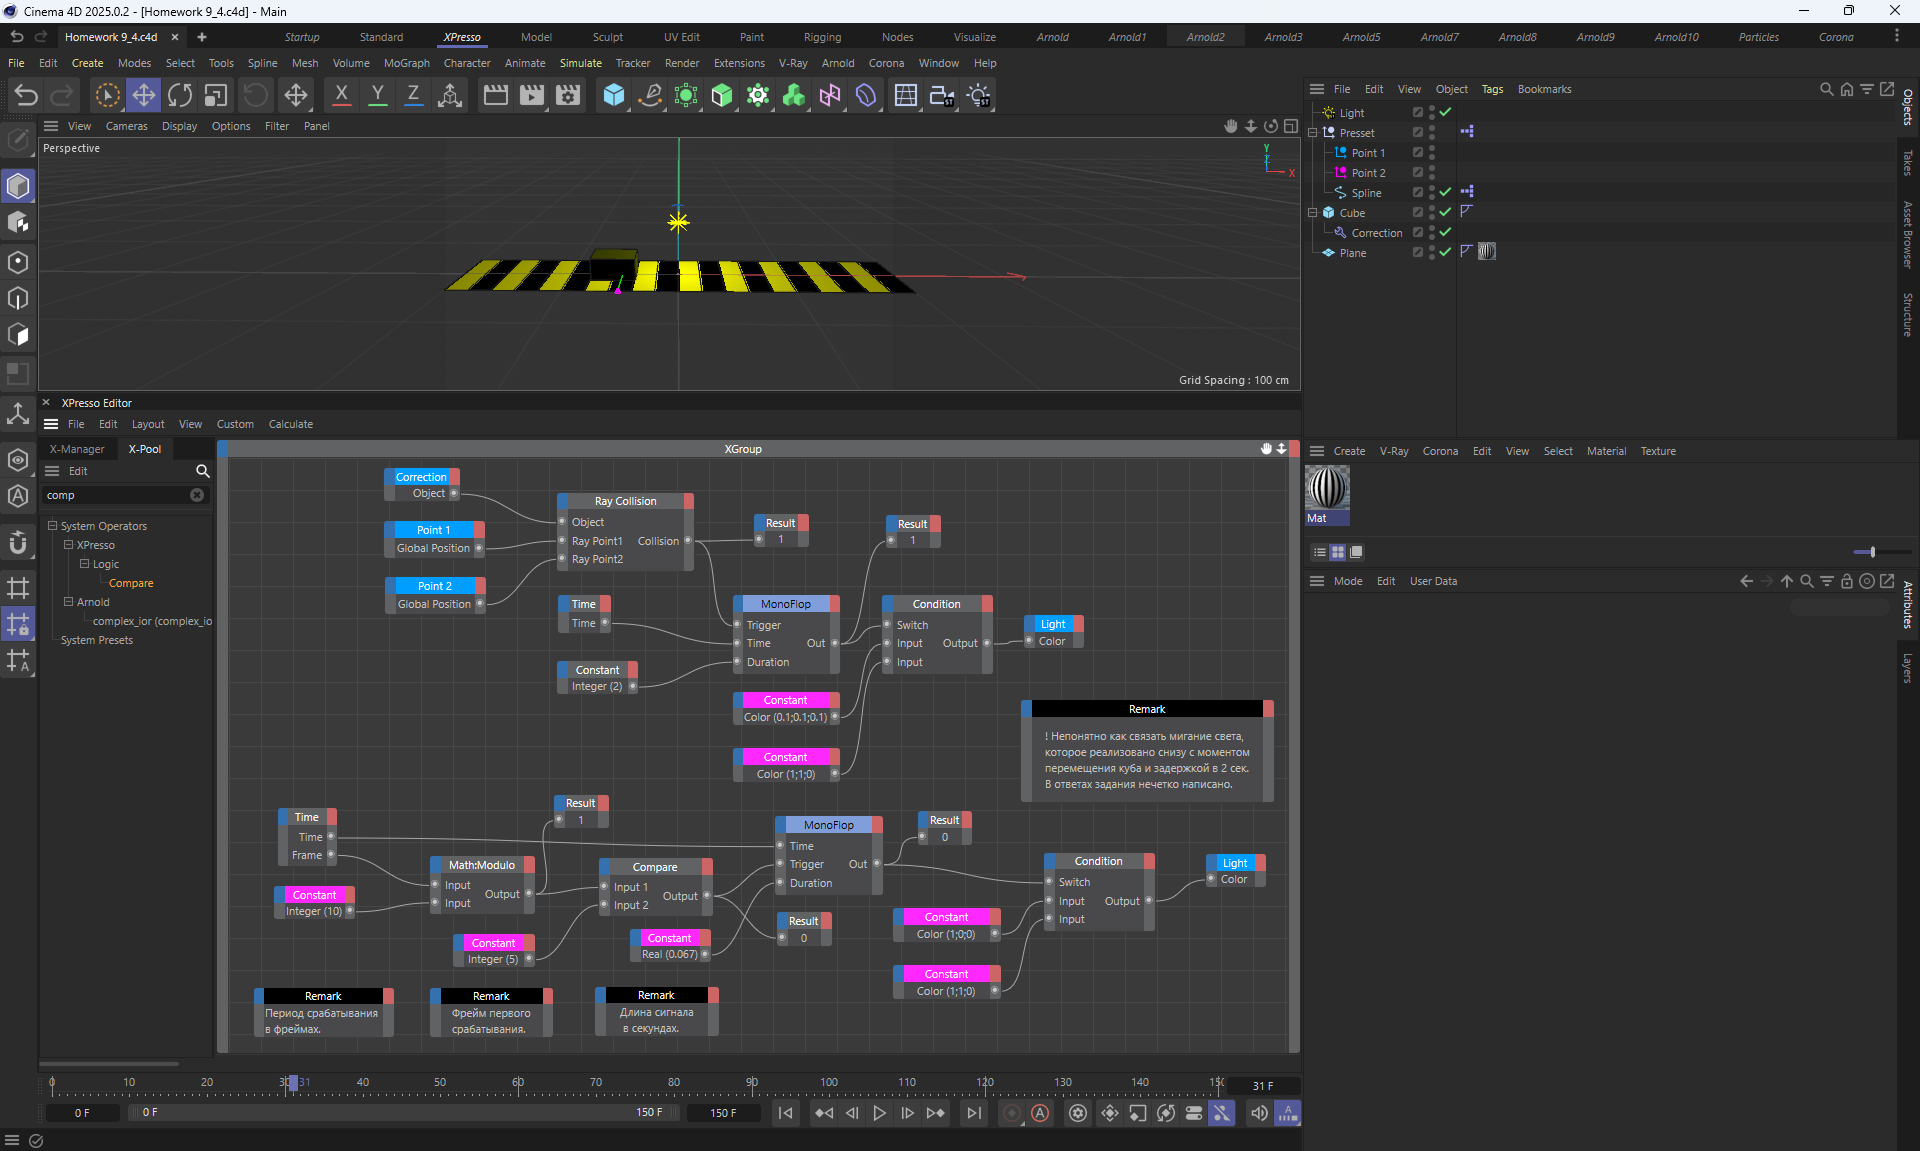
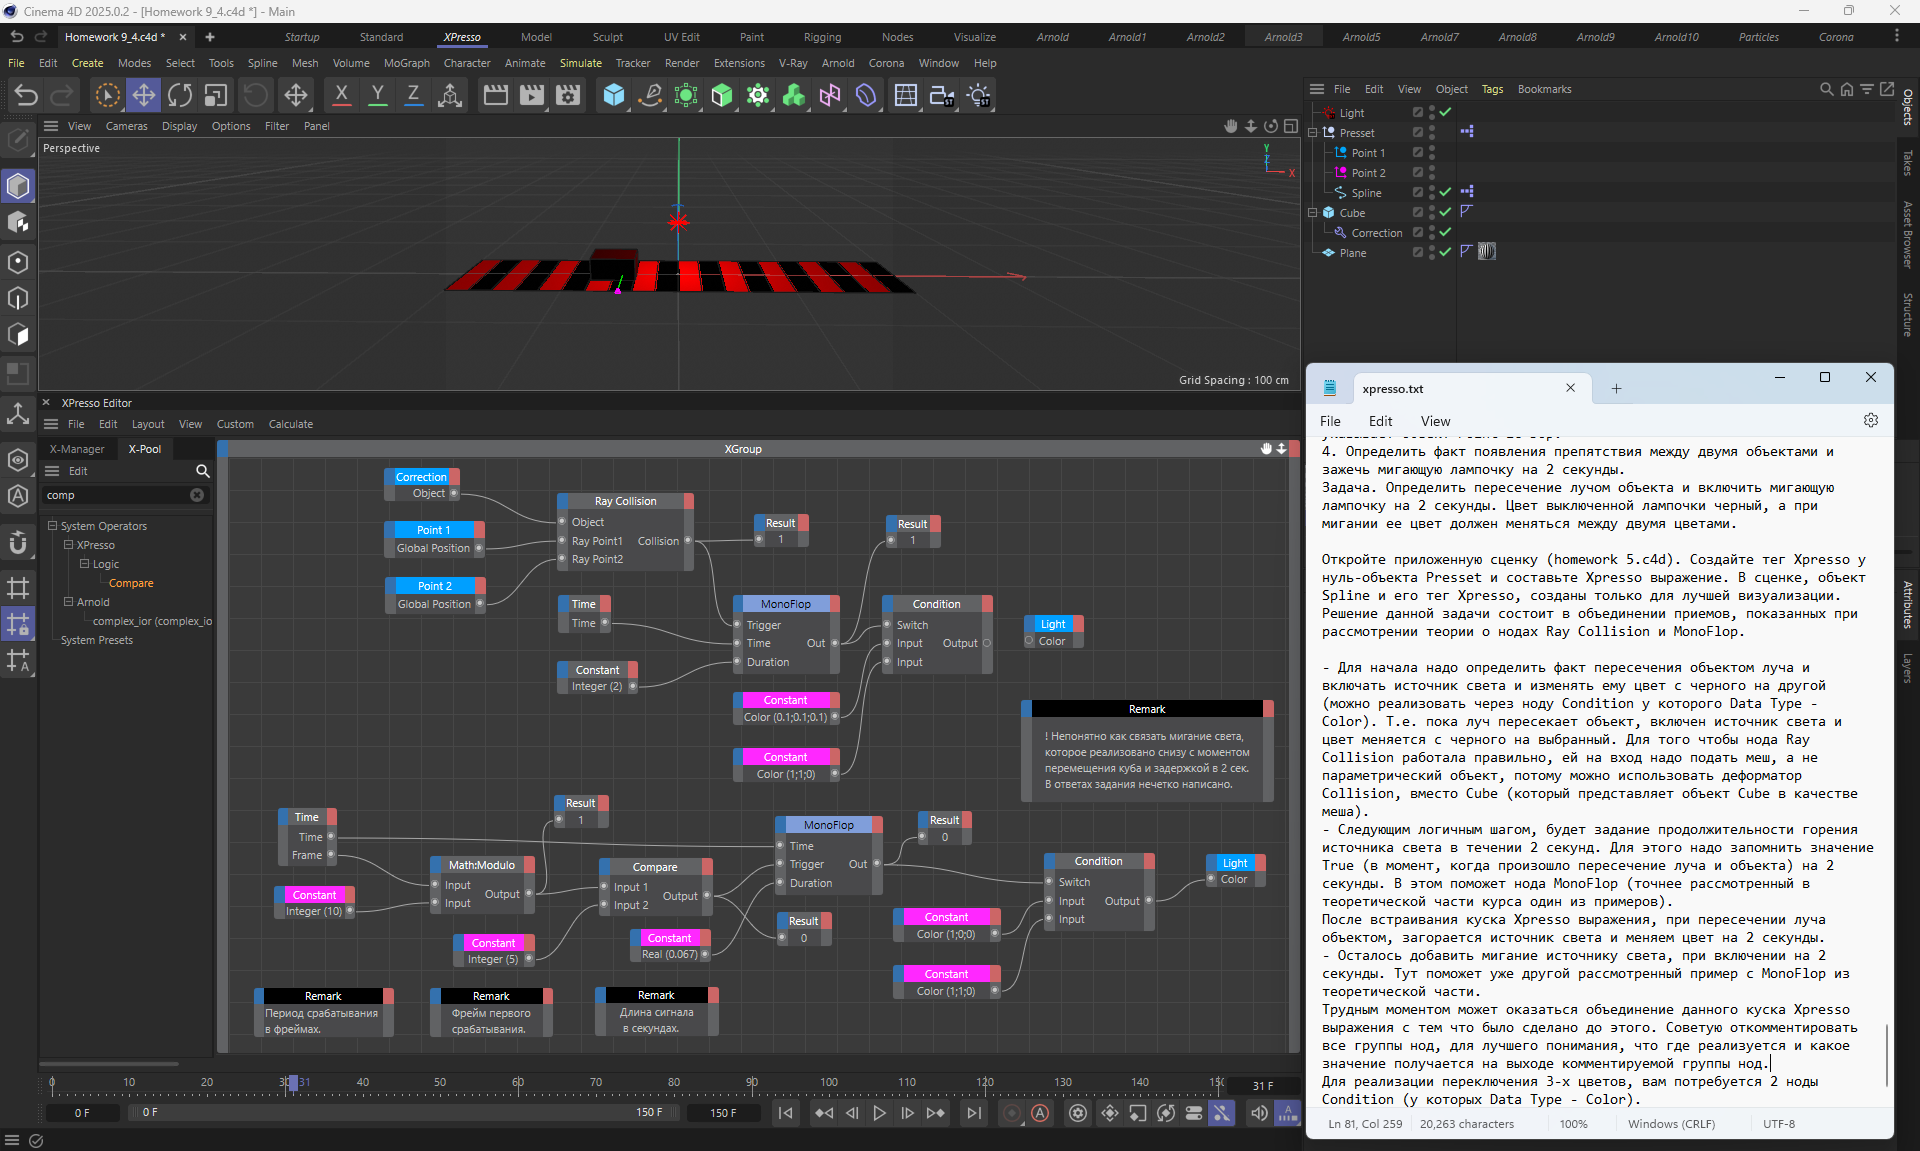
8. Xpresso
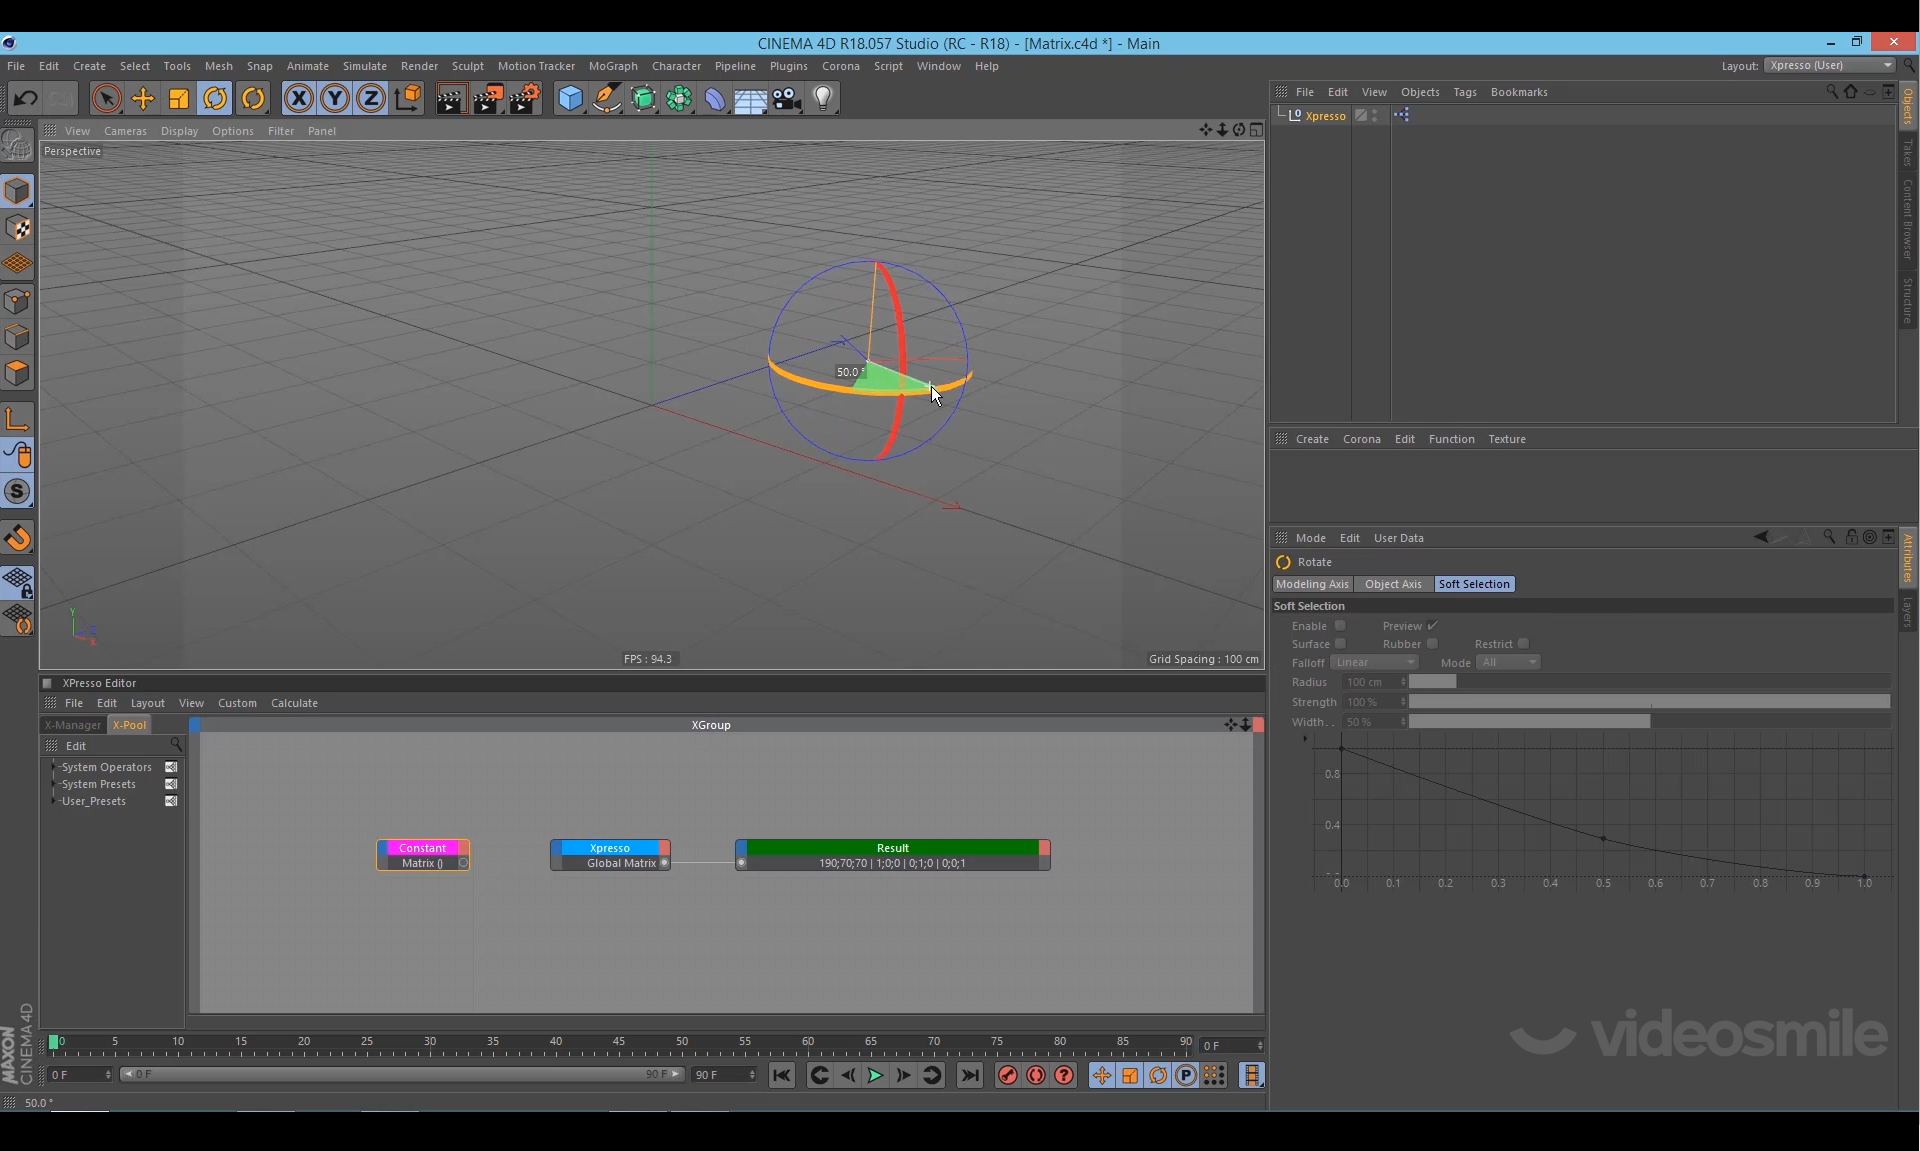
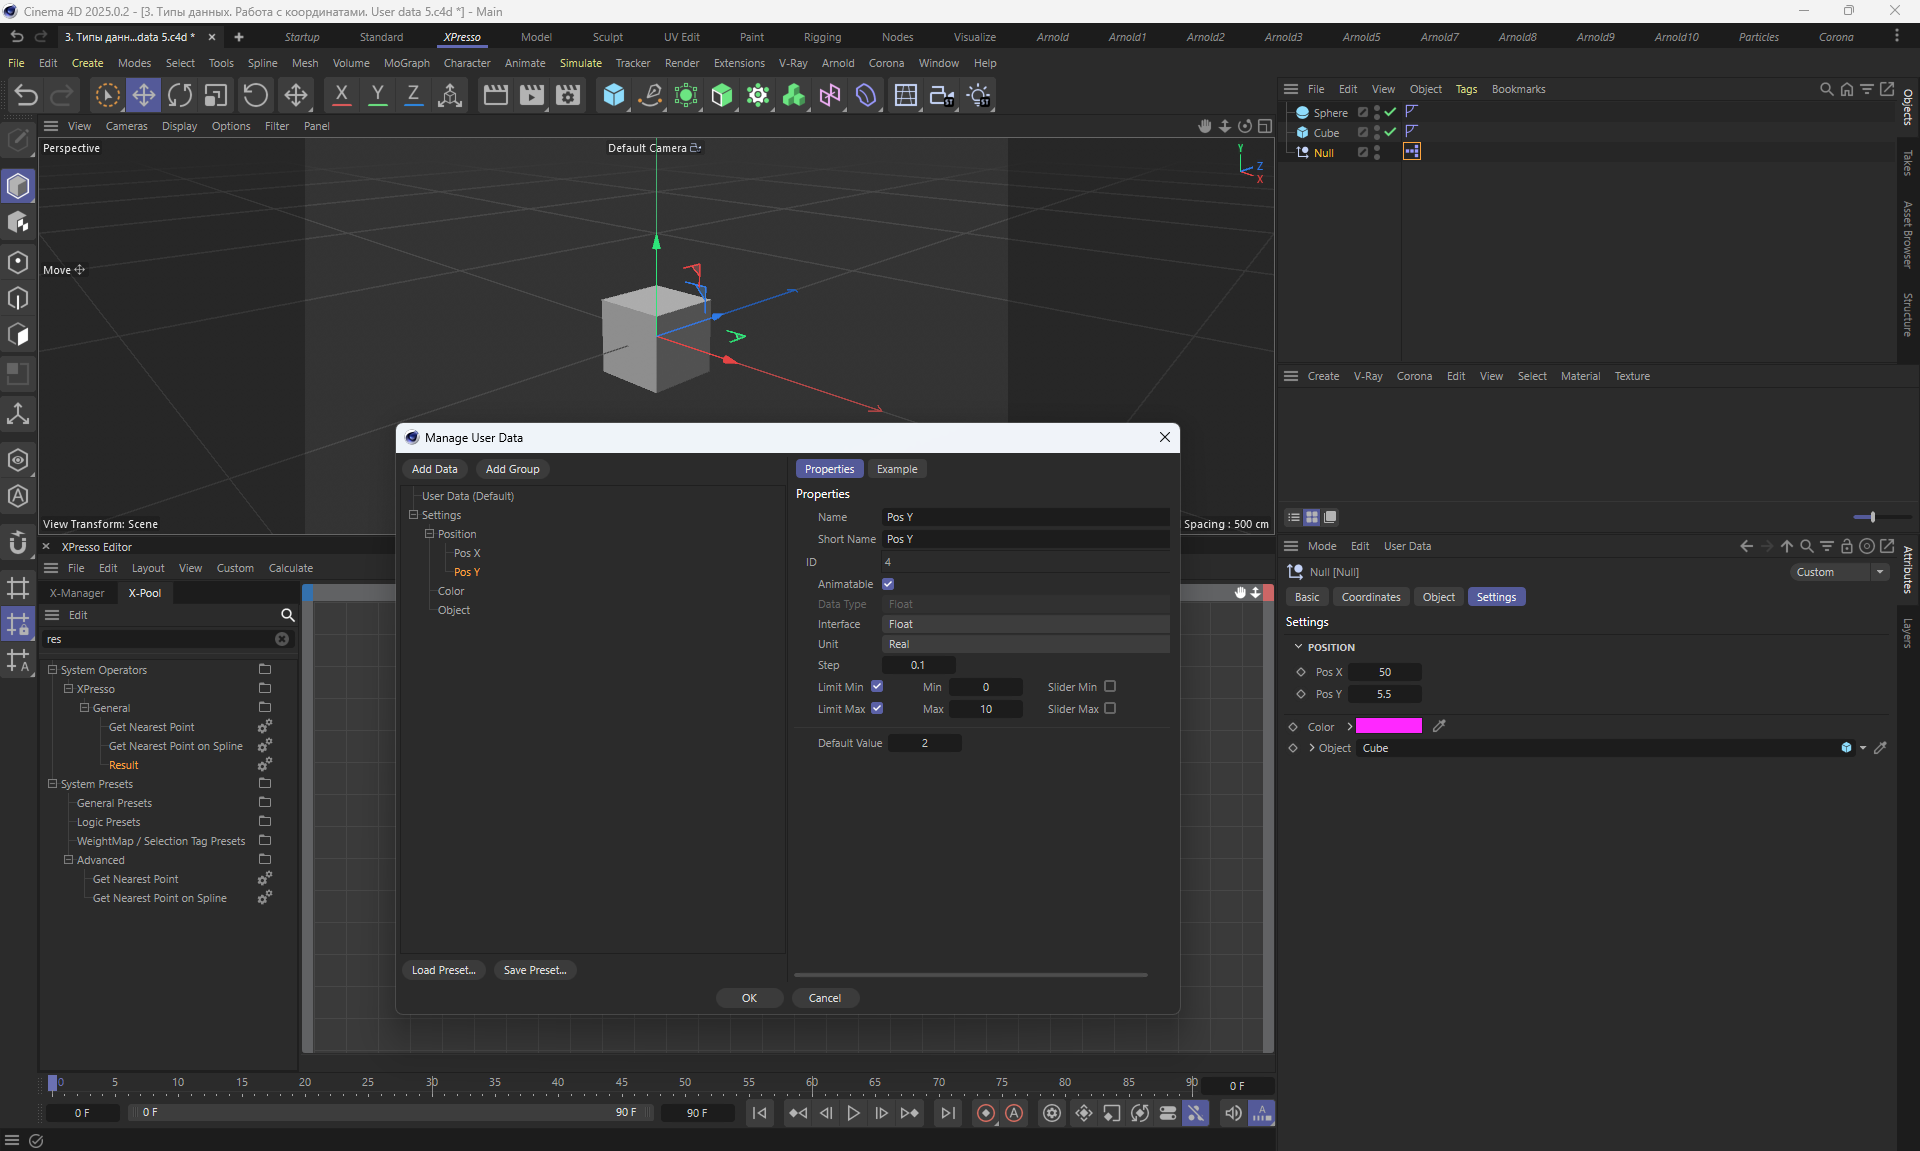
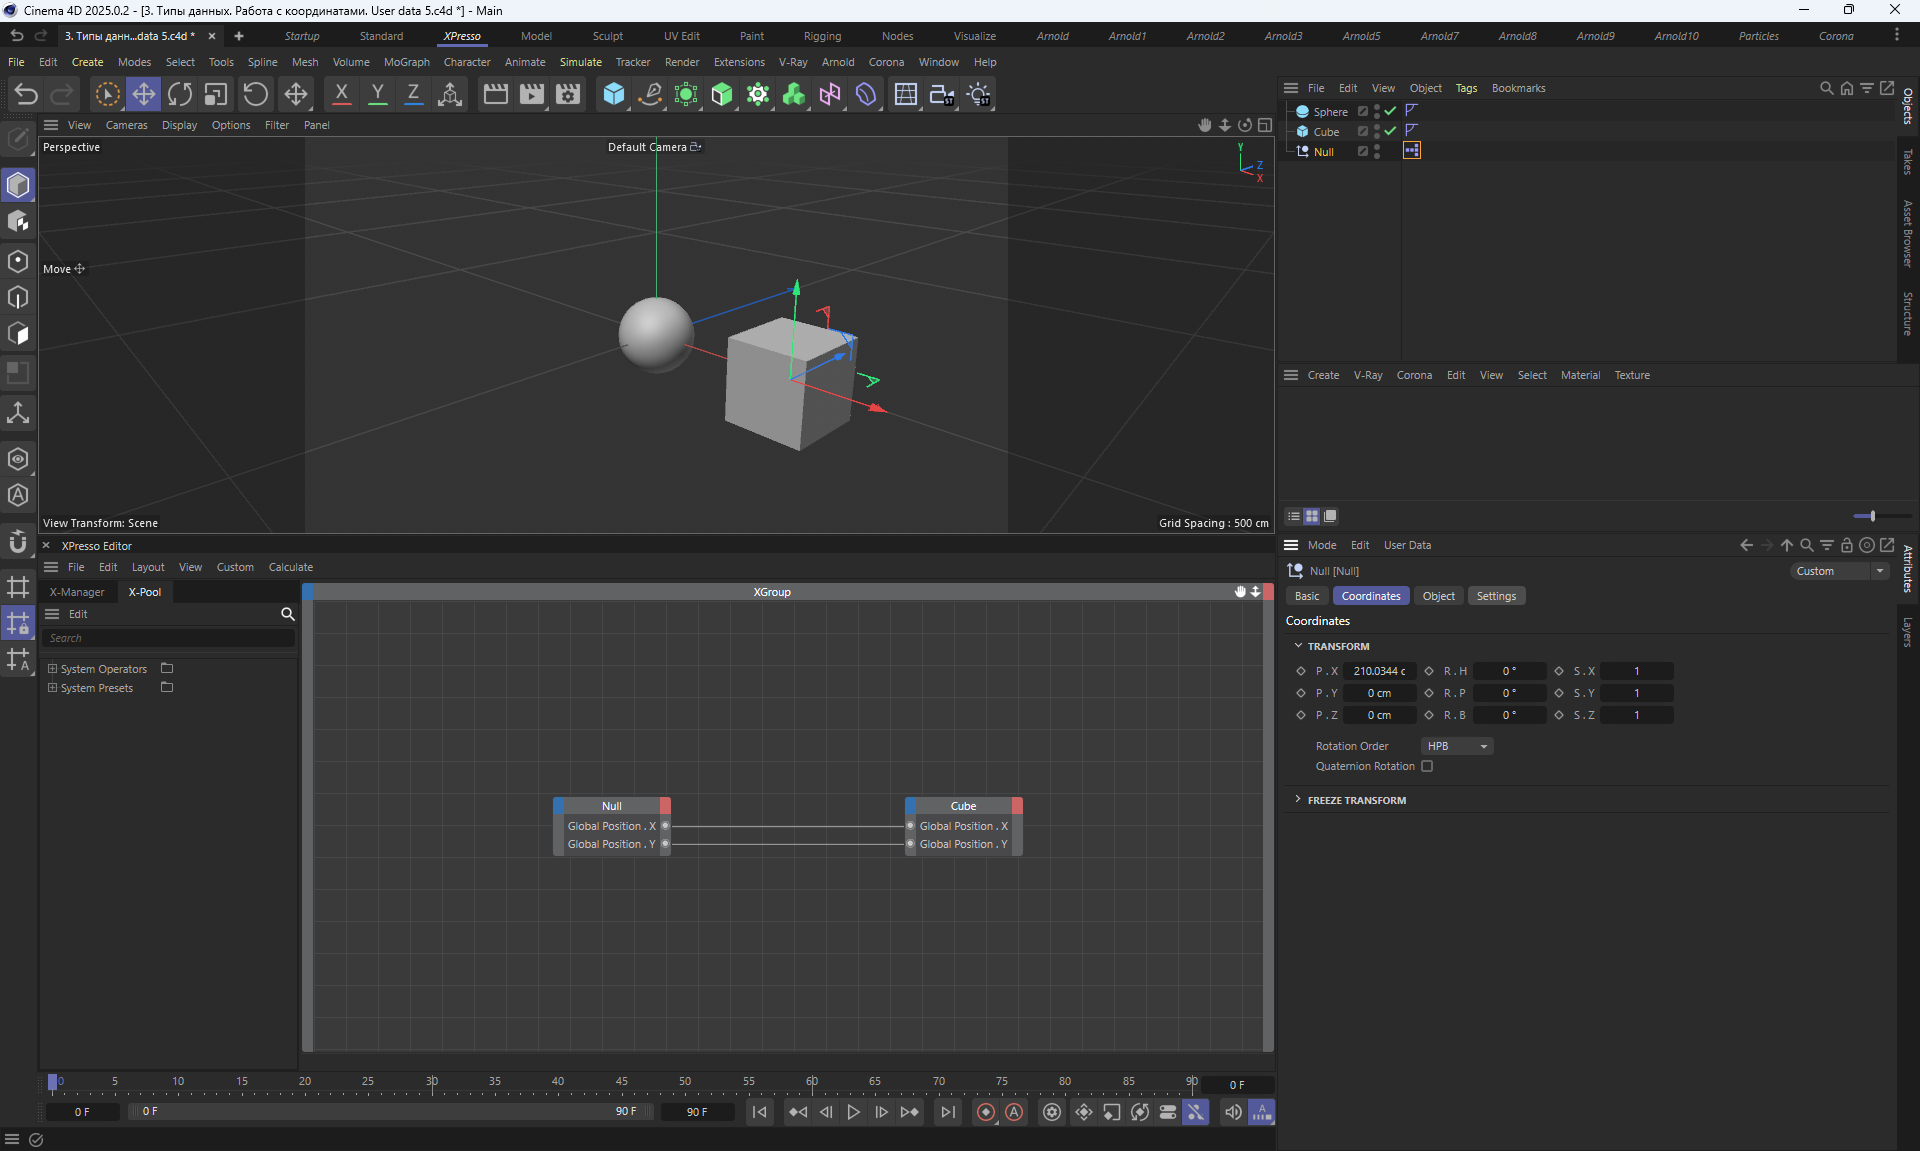
I studied the Xpresso section, tested the video tasks, and completed the lessons.
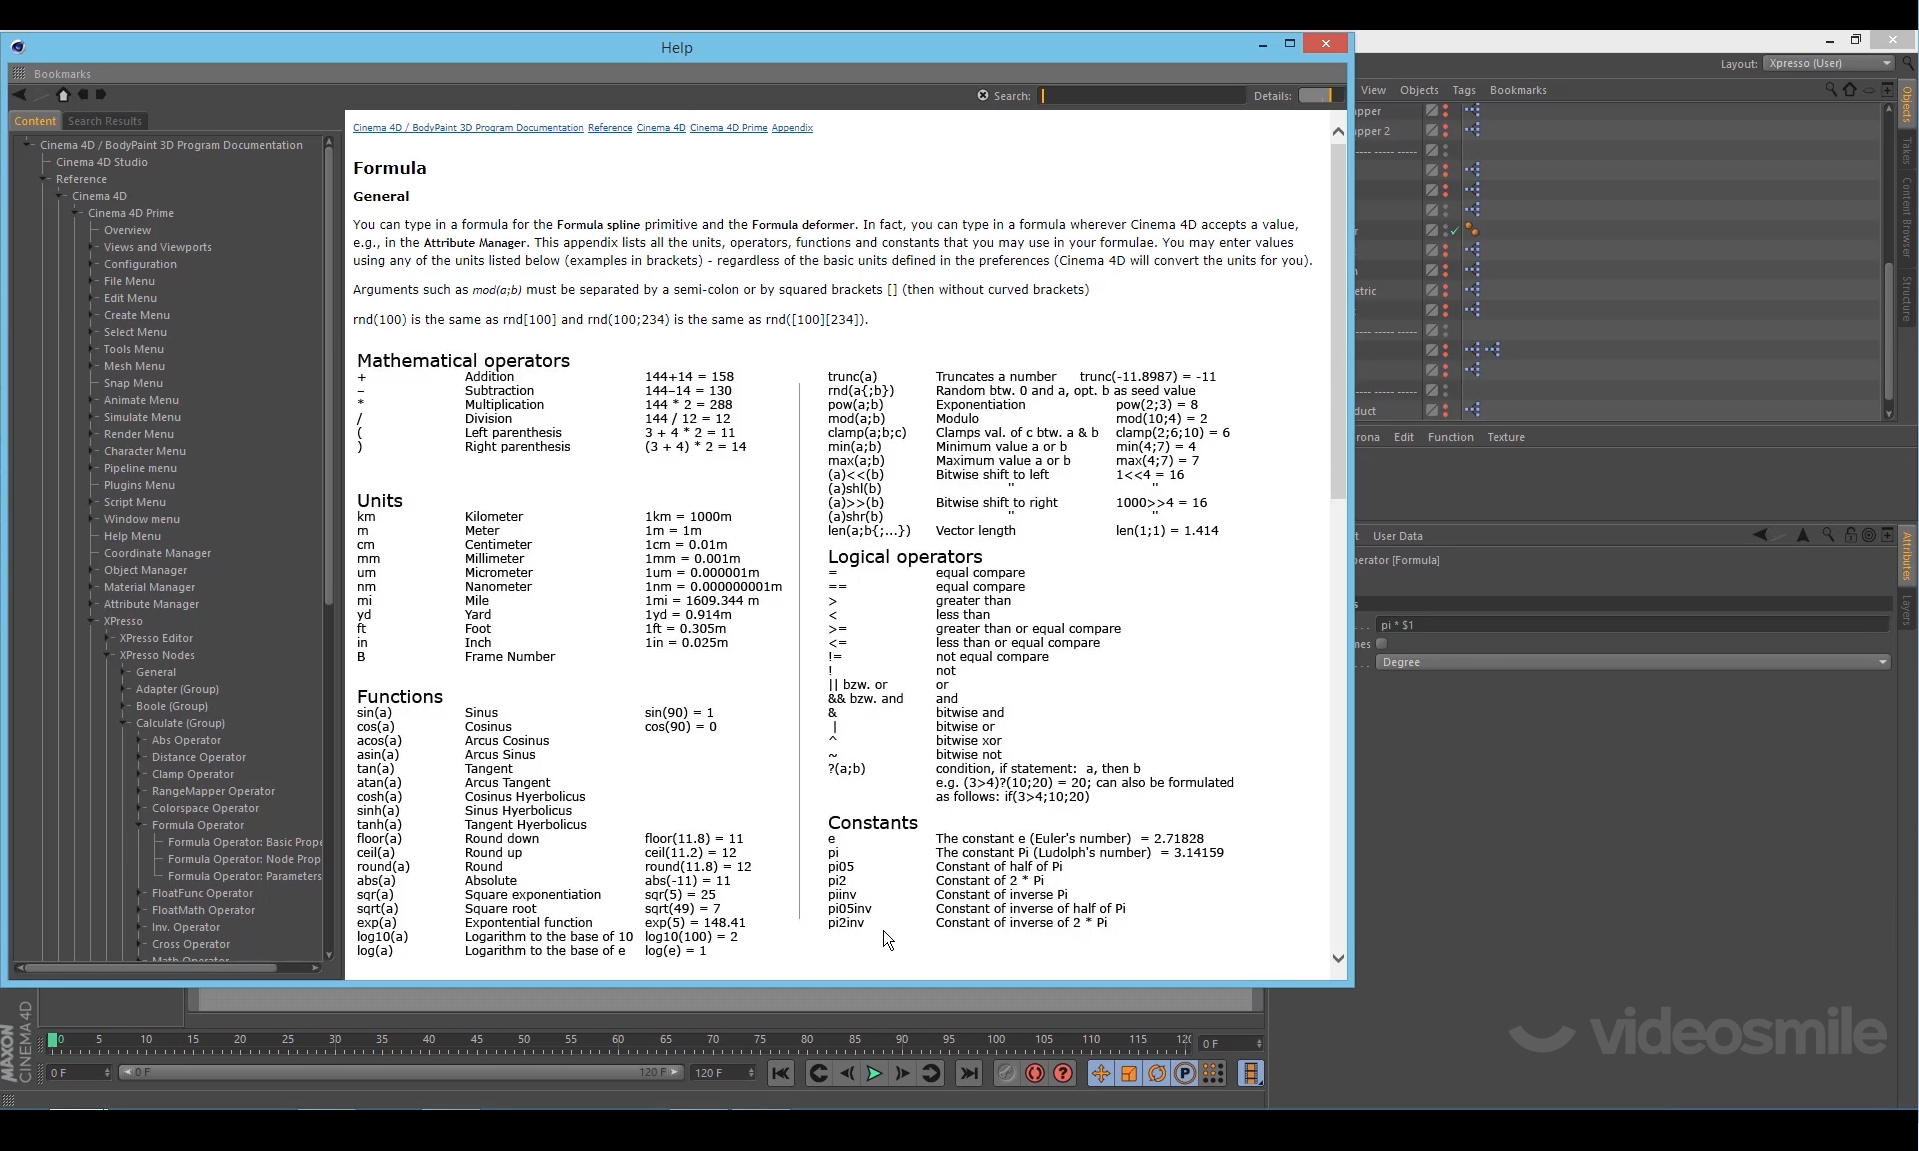
The Xpresso section consists of 5 hours and 40 minutes of video lessons, a small number of sources and homework without solutions, but with text prompts.
The Xpresso topic is very voluminous, but after studying the course videos and examples, a lot became clear.
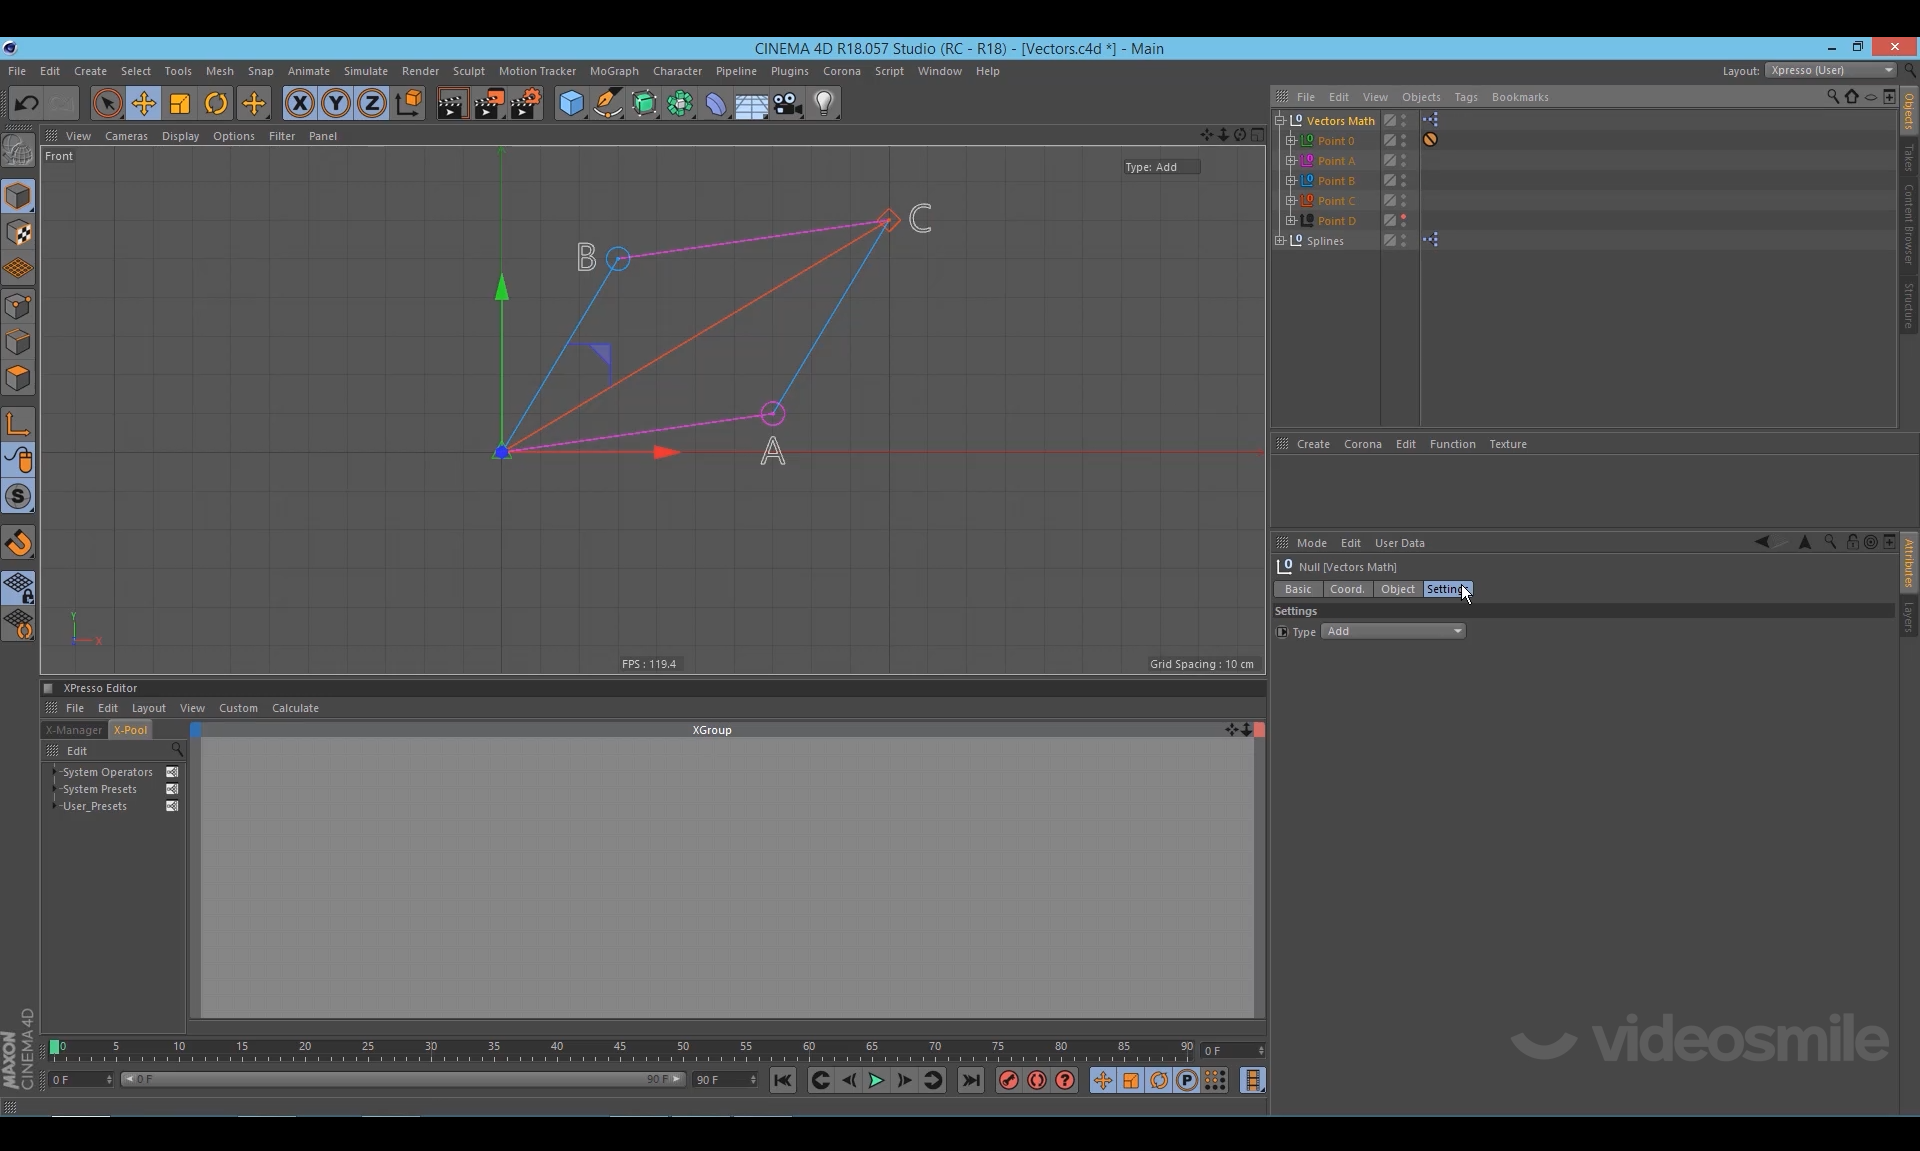
In one of the tasks with vectors , I completed them according to the author's prompts. They required placing one point at a certain distance between two, so that when changing the positions of the points, the coordinates of the middle point changed and this point was always located on the line between them at one-third the distance. Here, the task is related to knowledge of geometry, adding vectors. The homework assignments had text answers from the author. There is a lot of information on Xpresso by nodes.
Other videos on Xpresso:
Вводный урок. XPresso в Cinema 4D
Нода Time, Math:Add I XPresso Cinema 4D I Урок 2
Video1 (1.8mb)
video2 (0.4mb)
video3 (0.5mb)
video4 (1mb)
video5 (2.1mb)
video6 (1mb)
video7 (2.4mb)
video8 (0.5mb)
video9 (1.6mb)
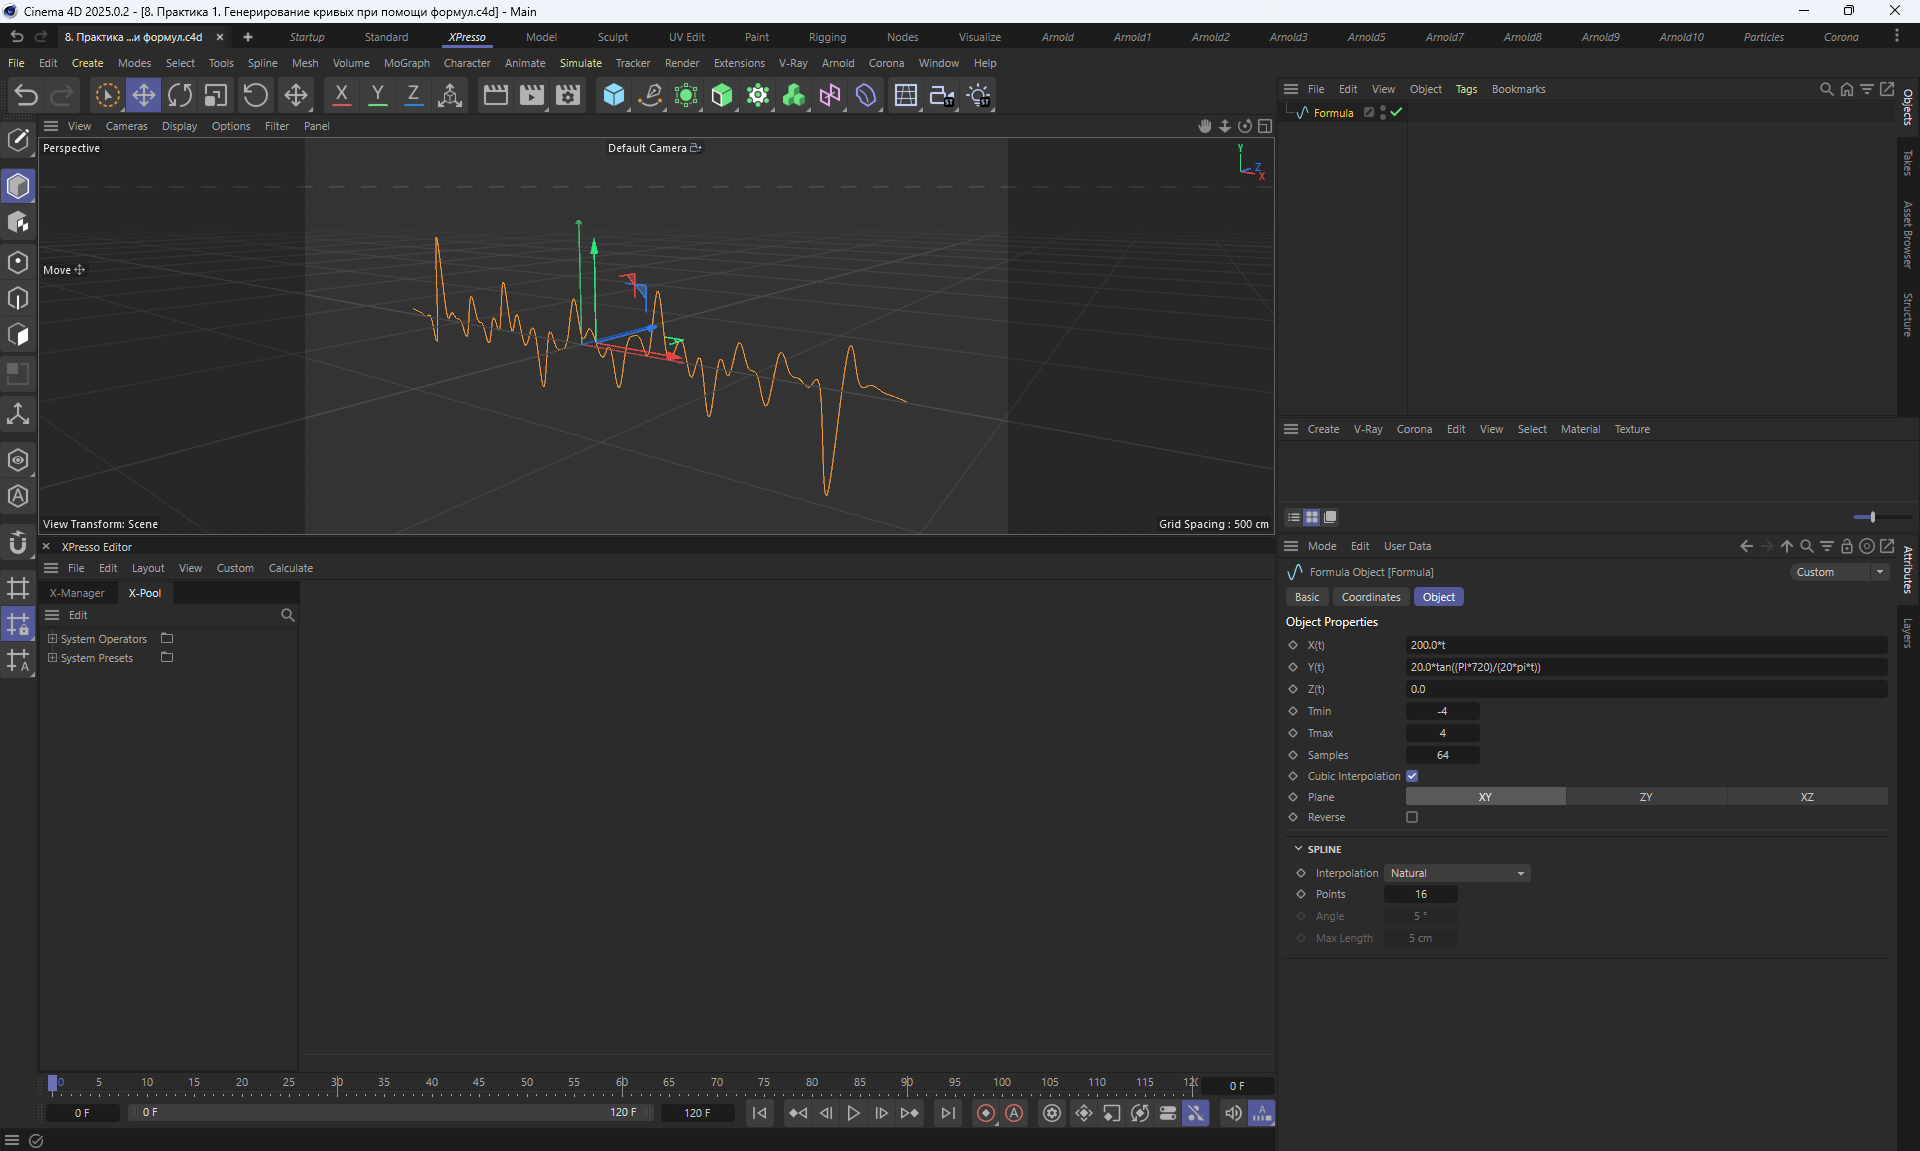
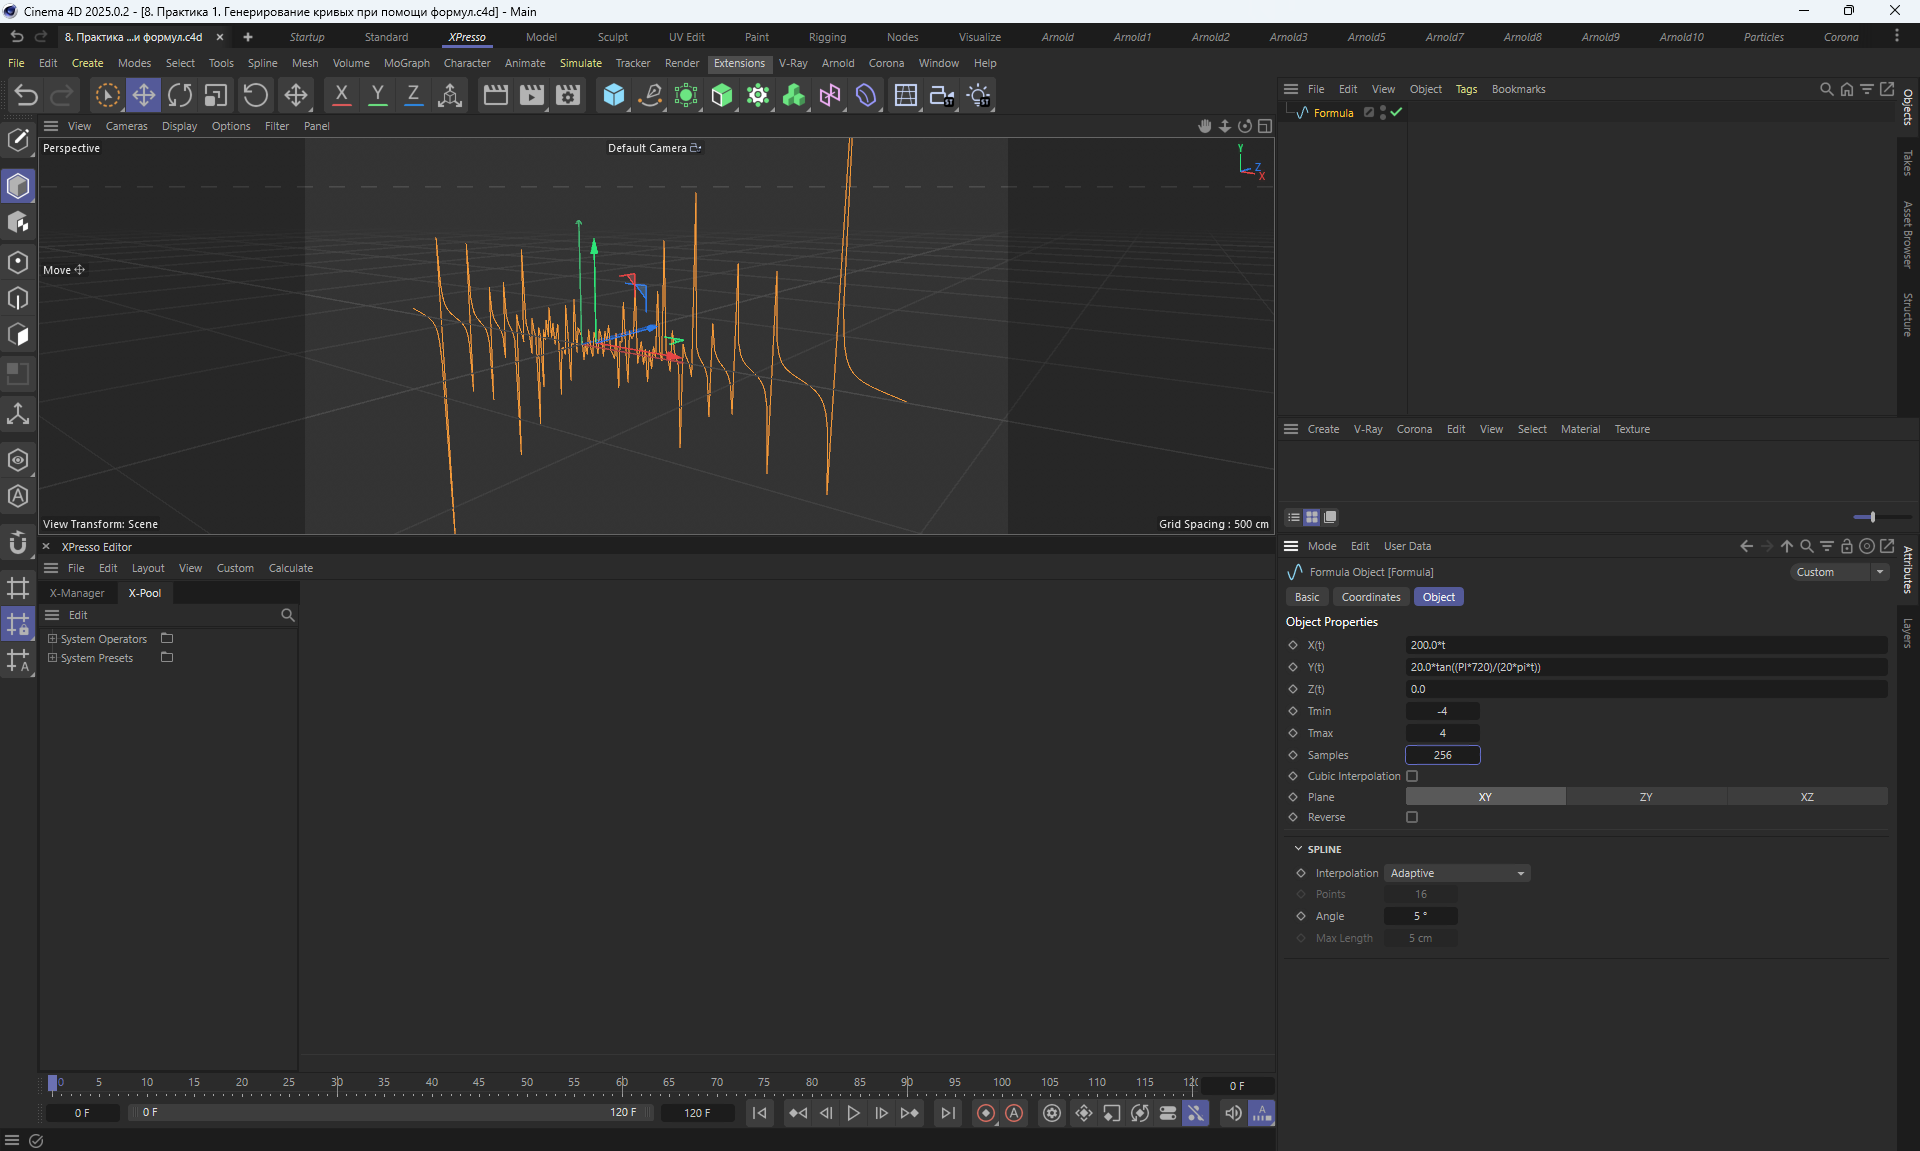
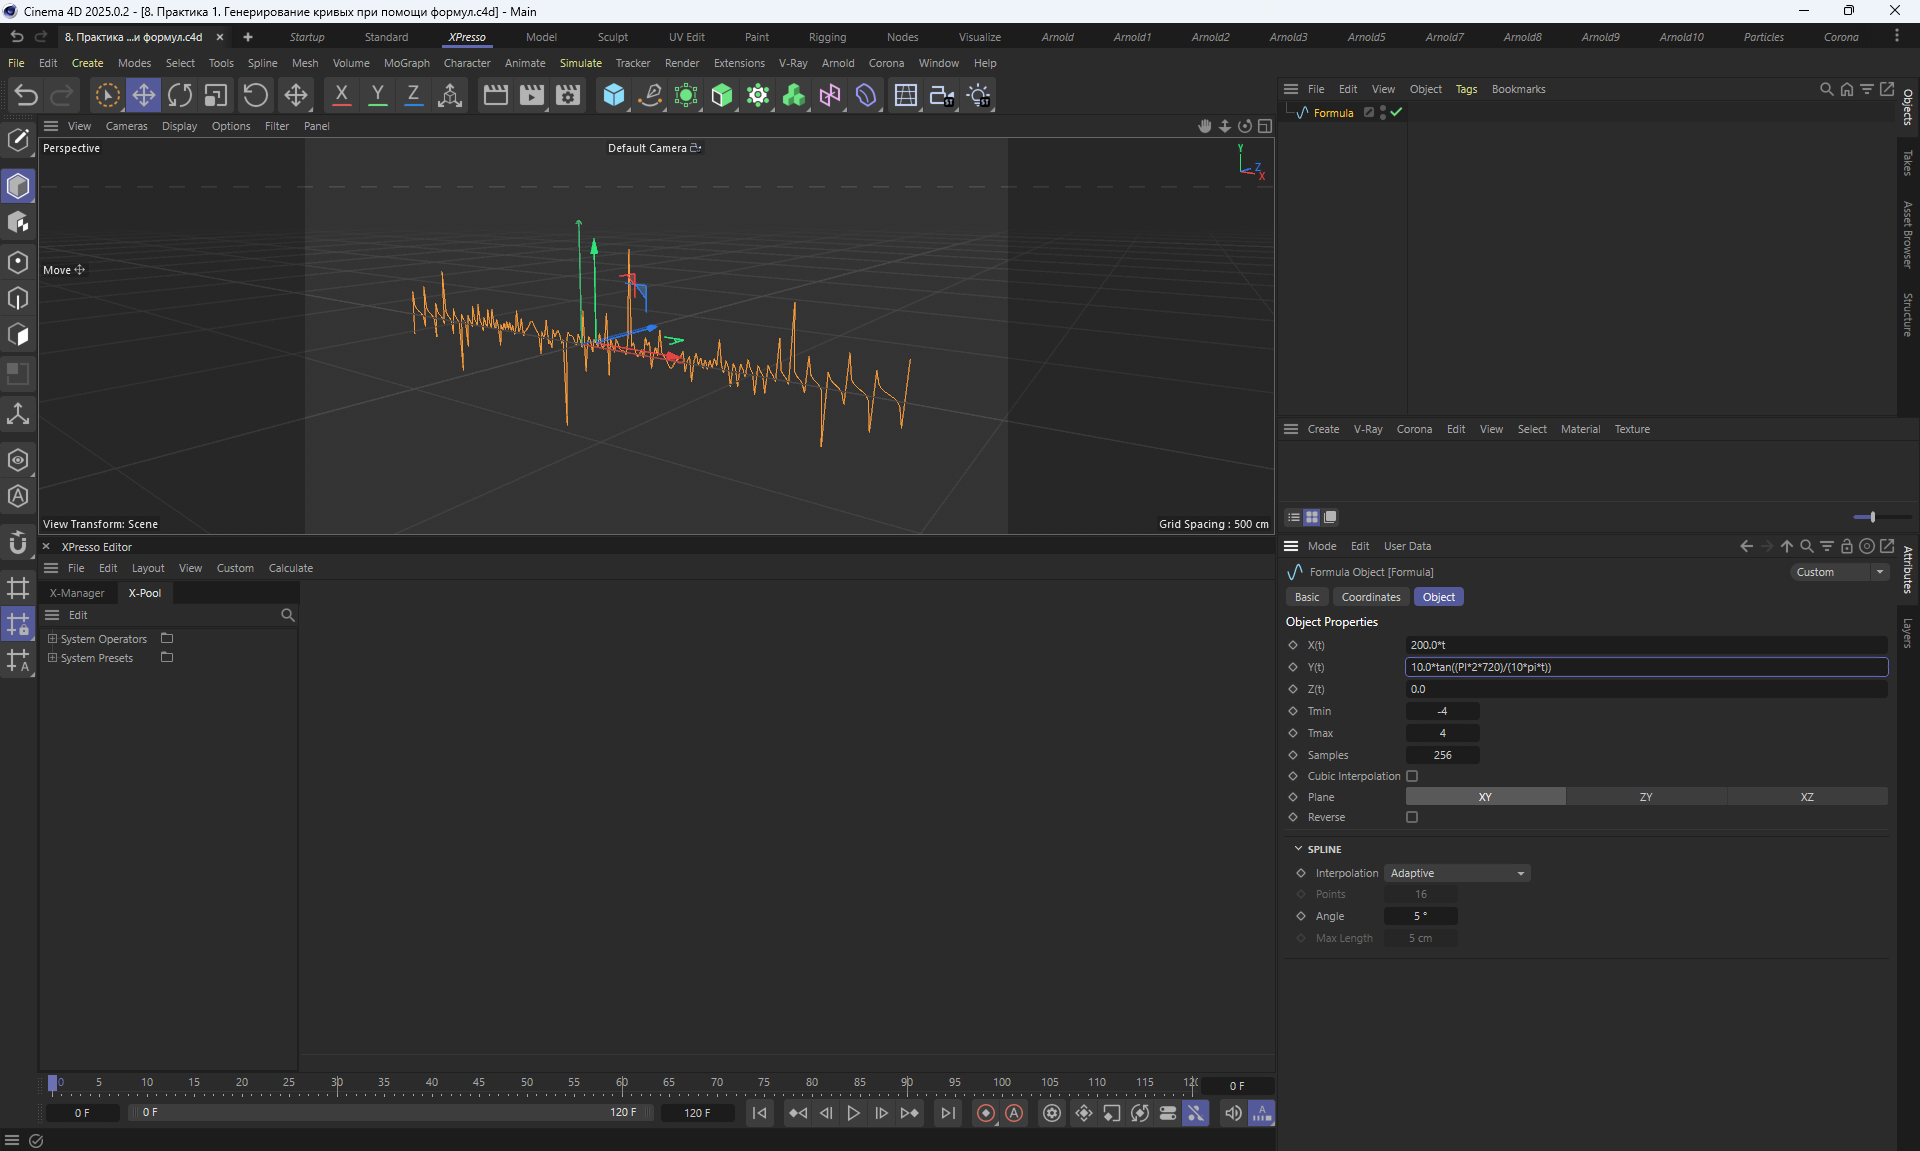
 Spline